Oversized Tic-tac-toe is a great way for the family to play games together and enjoy the outdoors.
Tic-tac-toe, also known as Naughts and Crosses, has entertained people for centuries. It’s been found everywhere from the temples of ancient Egypt to the medieval cathedrals of England, according to UC Berkeley GamesCrafters.
Read on to learn how to make concrete Tic-tac-toe pieces.
5 spray-paint can lids or another cylindrical object
Fast-drying caulk
Melamine shelf boards
Miter saw
Wood screws
Drill & Drill bits
Tape measure
Wood pencil
Trowel
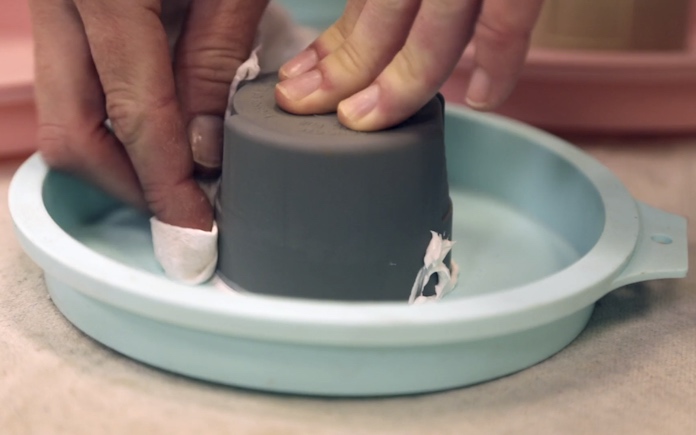
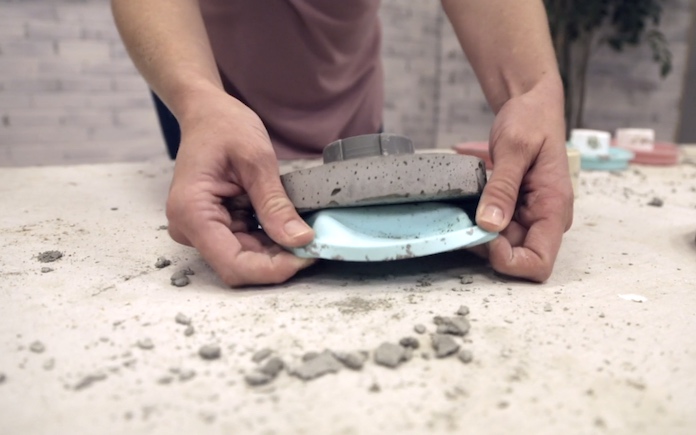
Silicone cake pans allow for easy removal once the concrete pieces are cured. (3 Echoes Content Studio)
Create Forms
To create forms for o’s, use 6-inch silicone cake pans and lids from spray-paint cans. Glue the lids to the centers of the cake pans with fast-drying caulk. Wipe off the excess caulk.
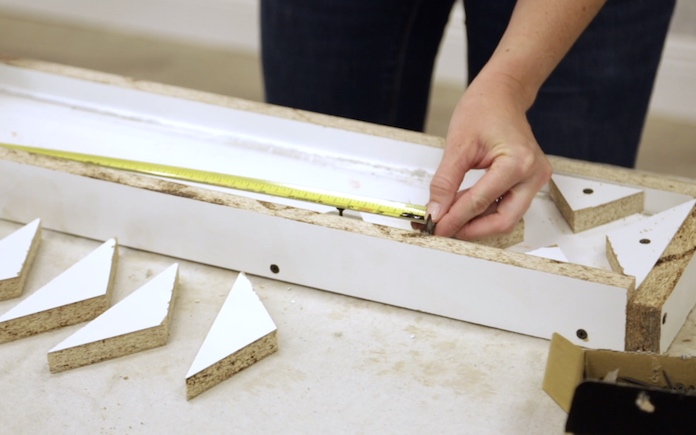
Melamine has a hydrophobic (water-resistant) coating that allows concrete to cure at the surface. This makes it easier to remove when the concrete is cured. (3 Echoes Content Studio)
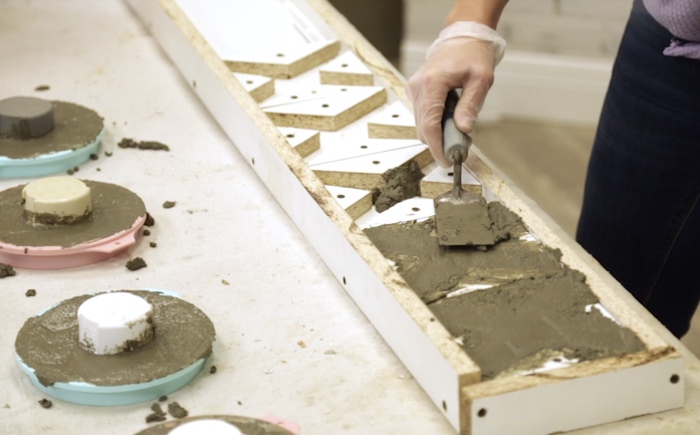
To make the x’s, cut a melamine shelf board to build a 30-inch by 6-inch open tray.
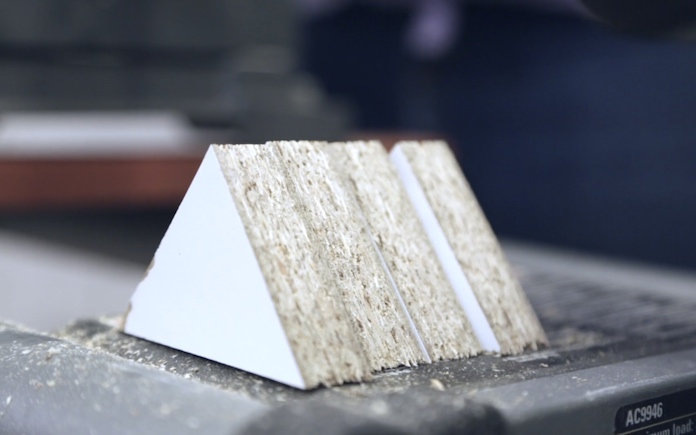
A miter saw makes it easy to cut the triangles at a perfect angle. (3 Echoes Content Studio)
You need two triangle sizes to create the x’s:
Cut 10 triangles at a 38-degree angle from a 2-inch piece of melamine board.
Cut 10 triangles at a 59-degree angle from a 1-⅞-inch piece of melamine board.
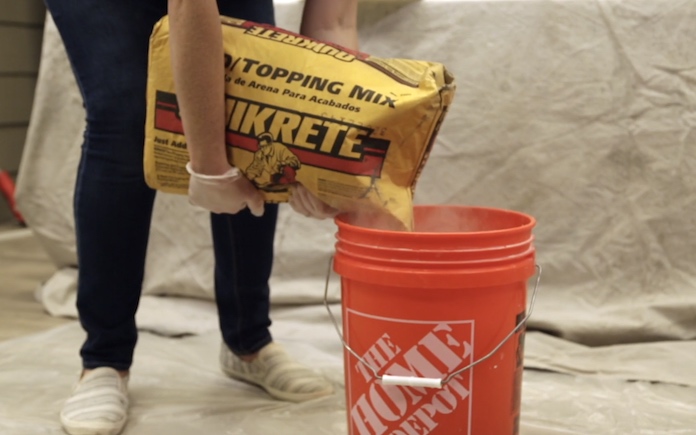
Once the concrete is thoroughly mixed, scoop it into the forms and use the trowel to level the mix with the top of each form. Cover the molds with plastic to help curing.
Let the tic-tac-toe pieces cure for five days in warm weather (at 70 degrees Fahrenheit or higher) or for seven days in colder weather (50-70 degrees Fahrenheit).
Once the pieces have cured, remove them from the forms. Rough edges can be easily removed by sanding.
Now, all you need is a little sidewalk chalk to draw your game grid — then the fun can begin!
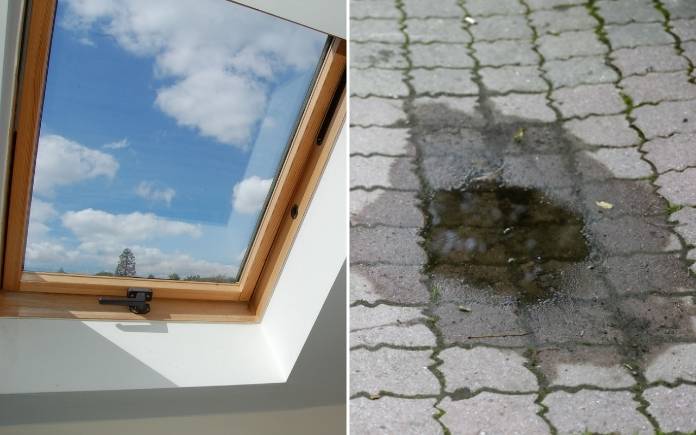
This week, hear our thoughts on the best spot for a skylight, plus how to fix puddling on a concrete patio. (KM6064/temmuzcan, Getty Images Signature)
Hour 1
In Hour 1, hear how to prevent wasps from swarming around fruit trees, tips for cooling off a hot attic and more.
Controlling Wasps Around Fruit Trees
Wasps are attracted to the sugar in ripe fruit. (TAs3, Getty Images)
Wasps are swarming around the apple and pear trees in Valerie’s front yard.
“Each fallen fruit attracts about five or more wasps, such that I can’t (well, I don’t WANT to) touch the fruit to move it away to cut my grass,” she says.
Valerie wants to know: “What time of day should I pick up the fruit?”
Wasps, as well as bees, are attracted to the sugar in rotten fruit.
Don’t spray any poison around the trees because it won’t just kill the wasps —it will also kill honey bees, precious pollinators that are dying at an alarming rate.
Unfortunately, there’s not much you can do, other than:
Pick the fruit as soon as it’s ripe.
Don’t let it fall to the ground. We know it’s impossible to prevent every fruit from landing in the dirt but check on the trees frequently.
Rake up the fruit on the ground with a long-handled rake to avoid any stings.
Bees and wasps aren’t as active at night or very early in the morning, so pick up the fallen fruit then.
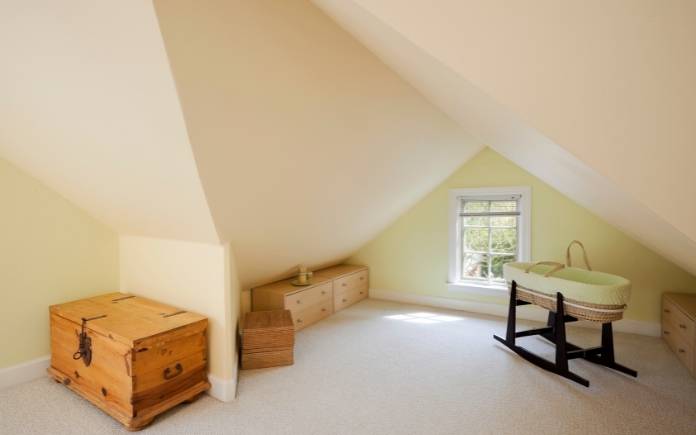
A renovated attic like this one can be hard to insulate because there’s not much space between the walls and the roof. (chuckcollier, Getty Images Signature)
Leslie Trippe’s 1953 home in Huntsville, Ala., has a finished attic space with two bedrooms and a bathroom.
The ceilings are only seven feet tall and angled in the bedrooms, plus there’s no extra space in between the drywall and the roof.
“When the wall or ceiling is touched the heat can be felt coming through the drywall. We currently use portable air conditioners to keep the space cooler. Is there a way to cool off this space?” she asks.
This is a very common problem in attics that have been converted into living spaces. When people are slowly renovating their home, they forget to take into consideration how hot the attic can get.
Most of the time, it’s almost impossible to add insulation without doing some demolition. Any added insulation in the space between the drywall and the roof will help.
See if any contractors in your area do blow-in cellulose insulation. It’s a mix of wood or paper-based products and glue that’s pumped into the cavities behind walls and ceilings. The contractor would need to cut a small area of drywall to pump it into the small space, but this can easily be repaired.
Besides adding insulation, call an HVAC professional and see if they can set up some zoning for your air conditioning system. This allows you to pump more air conditioning into certain areas.
You can also invest in a ductless air conditioner. This has its own separate system that attaches to the wall.
Hour 2
In Hour 2, hear our thoughts on the best spot for a skylight, keeping water from pooling on a patio, and more.
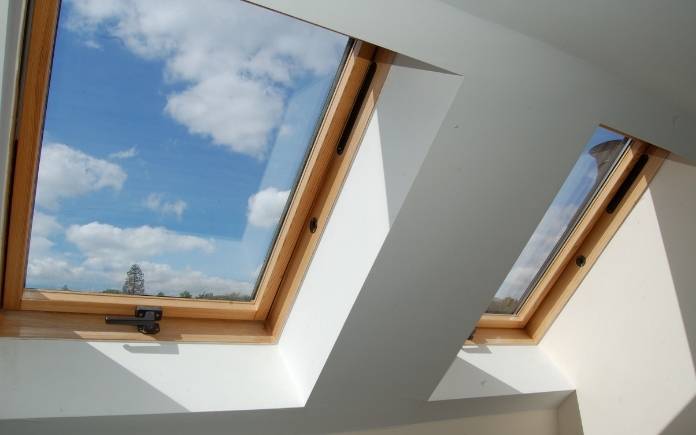
The Best Spot for a Skylight
Consider two things when installing a skylight: What room that you want it in, and how much sun do you want shining through. (KM6064, Getty Images Signature)
A hotline caller wants to use skylights for ventilation more so than sunlight.
He wants to know: What direction should the skylights face: north, south, east or west?
There’s a lot to consider when placing skylights. Start by asking where do you want the light on the inside.
Then run a plumb line up along the ceiling in the attic and see if you run into any valleys or if the light tunnel will be exceptionally long.
In terms of directional exposure, I don’t think that’s a big deal to worry about if you have a quality skylight with shade capabilities. Just make sure it looks good from the inside and doesn’t affect your home’s structure.
In often cases, people don’t put it on the front of the house for aesthetic purposes. They’re often placed on the north-facing roof plane because it provides the most indirect light, so you won’t get a lot of glare or heat build-up.
If you live in a northern climate, you might want to place them on the south-facing side for some extra heating.
Buy a glass skylight, not an acrylic one. Those can lead to water damage and intense heat if they don’t have the proper curving or seamless flashing.
Stopping Pooling Water on a Patio
Pooling water on an uneven patio can weaken the concrete’s structure. (temmuzcan, Getty Images Signature)
Fifteen years ago, Jane Pierce’s husband used a concrete leveler to correct a low spot on her patio that was collecting water.
“It’s held up very well until now. It is cracking and chipping off. How can I fix this?” she asks.
Here’s how to fix this:
Chip away as much from the surface as you possibly can. You don’t have to be too aggressive with it — just get all of the material that’s separated from the original patio.
Next, get some Quikrete ReCap Concrete Resurfacer. Use Quikrete’s Concrete Calculator to determine how many bags you’ll need.
Then, mix it according to the directions on the package and pour it onto your patio.
Use a large rubber squeegee (about a foot to 16 inches wide) to spread the mix. Cover the entire patio to ensure it’s level.
Before it dries, drag a broom across it to add some texture for a slip-resistant surface
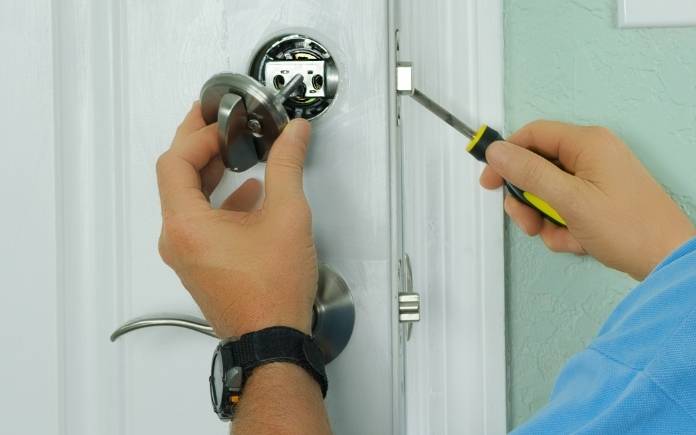
A regular screwdriver can loosen any stuck parts inside a deadbolt. (mokee81, Getty Images)
How do you fix a deadbolt that’s stuck in the locked position? That’s what Marlene Lauer in Neenah, Wisconsin, wants to know.
She says, “We removed the doorknob, but couldn’t move any of the parts to slide the bolt. We tried to take the door off and that did not work. My son wants to saw through the bolt. Is that our only option?”
Usually, a small piece inside the doorknob has broken and is lodged inside, keeping it locked.
Use a hammer to tap a screwdriver or nail punch to the right and left inside the keyhole to loosen the jammed part. Then, try tapping the screwdriver a bit with a hammer to loosen what’s stuck inside.
If this doesn’t fix it, call a locksmith.
Best New Products
Lutron’s Dimmer Switch Starter Kit gives your home lighting a smart upgrade, without competing for a signal with other devices. Learn more >>
Simple Solutions
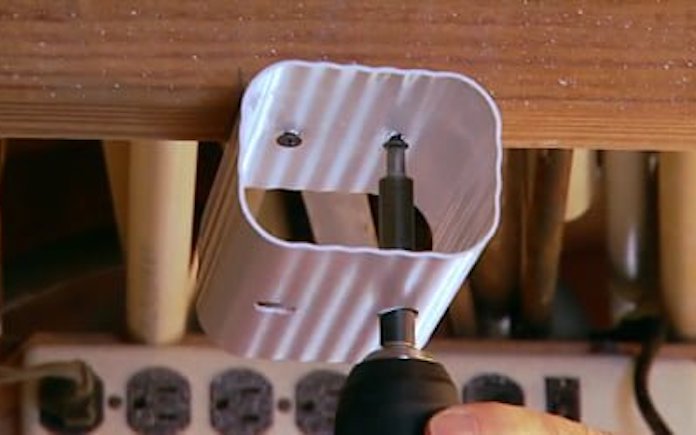
Attaching a section of downspout to a ceiling joist creates easy storage for long and narrow items. (3 Echoes Content Studio)
Easy Overhead Storage — Here’s how to make an overhead rack in your garage workshop, or shed for storing small-diameter pipe, narrow moldings, and even fishing rods.
Cut two 5-in.-long pieces from a length of vinyl downspout.
Then screw the downspout pieces to an overhead ceiling joist, spacing them about 4 feet apart.
Now, simply slide moldings and pipes into the short downspout sections. The parts will be up and out of the way, but easily accessible when you need them.
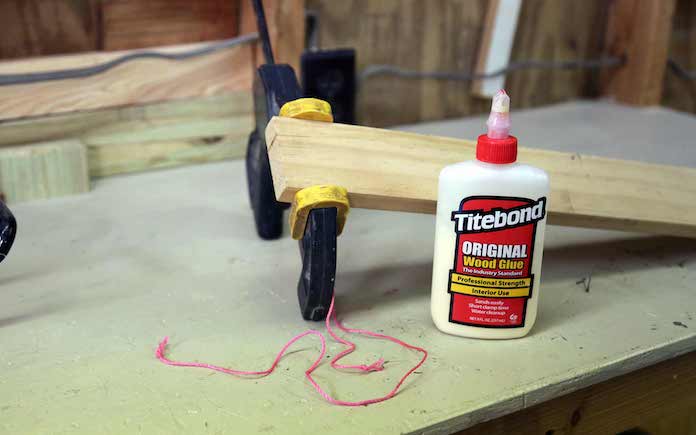
Have a split chair leg or a tabletop? Here’s how to get the wood glue in tight spaces when you fix it, and coat both sides evenly! (3 Echoes Content Studio)
Gluing Tight Cracks — When fixing a split chair rail, cracked baluster, or similar object, it’s difficult to apply glue because the crack is so tight. Try this:
Wedge open the crack with a small flat-blade screwdriver.
Then, squeeze in some glue and use a length of dental floss to work the glue deep into the crack.
Pull out the screwdriver, wipe away the excess glue and clamp the repair.
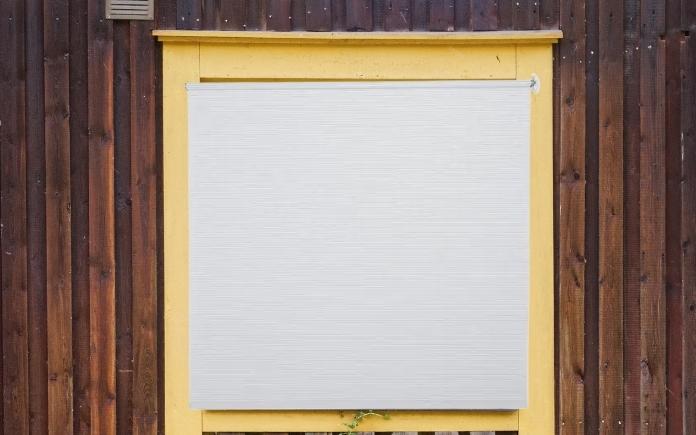
Outdoor roll-up blinds for your patio solve the problem of late afternoon and early-morning sun glare.
No matter where you build your patio (or porch or pergola), the sun is bound to blast that space at some time in the day.
Finding attractive blinds to block or filter the sun has always been a challenge. Some shades block too much of the outside view while others let too much light shine through.
Plus, the cords on blinds can easily become entangled, becoming a danger to children and pets.
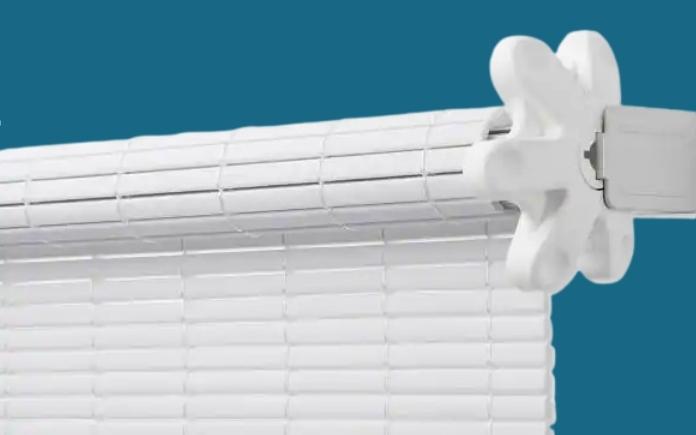
Coolaroo’s new outdoor roll-up blinds for your patio are the safe solution for this shade problem.
The unique wheel operation that allows you to easily adjust the height of your shade to control your privacy and comfort. (The Home Depot)
This page contains affiliate links. If you purchase a product from these links, we will earn a small commission at no additional cost to you.
This wheel design eliminates any dangling cords, making these outdoor roll-up blinds for your patio certified “Best for Kids” by the Window Covering Safety Council.
Products that qualify for “Best for Kids” either have no cords, no operating cords, or inner cords that can’t create a potential wrap-around hazard. To be certified, manufacturers must meet the program’s specifications and have their products tested in a third-party laboratory.
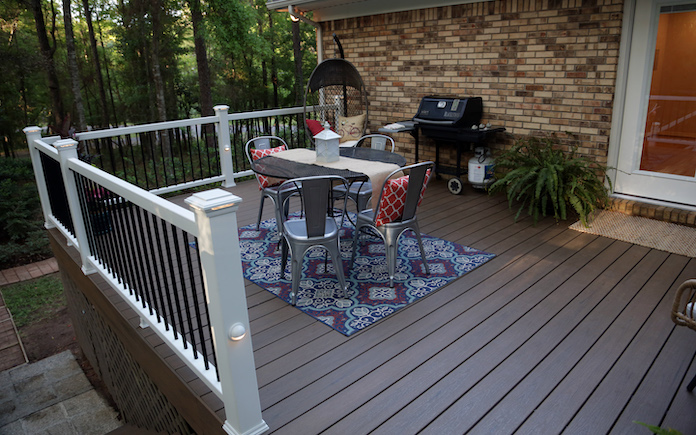
Low-maintenance backyard living is a must if you love the outdoors. Fortunately, creating a beautiful outdoor oasis is easy with composite decking.
A lot of homeowners want an outdoor living space, but don’t want the endless sanding, staining or painting that goes with a wood deck. The solution is beautiful and low-maintenance composite decking. It offers the beauty of wood, but won’t rot, warp, crack or splinter.
Composite decking — made from a blend of reclaimed wood and recycled plastic film — is stronger than regular wood planks and has a much longer lifespan.
Because of its protective cap, composite decking won’t rot, warp or decay like wood.
Benefits of Composite Decking
Here’s why more and more homeowners are choosing composite decking over wood:
Durability. Composite wood is ideal if you’re busy or have little time to maintain your deck. You won’t have to worry about replacing rotting wood, staining, or anything other than an occasional wash with soap and water.
Lifespan. A traditional wood deck lasts, on average, 10 to 15 years. However, composite decks are engineered to last 25 years or longer. This means a composite deck will theoretically last twice as long as a wood deck, without the added hassle of applying wood sealer and replacing rotting boards.
Environmentally friendly. Composite decking is sustainably made from recycled plastic and reclaimed wood, so you’re helping to save the planet by reducing deforestation and diverting plastics from landfills and waterways.
Beauty: Composite boards are available in different colors and have streaks and grains for a real-wood look that matches any home style.
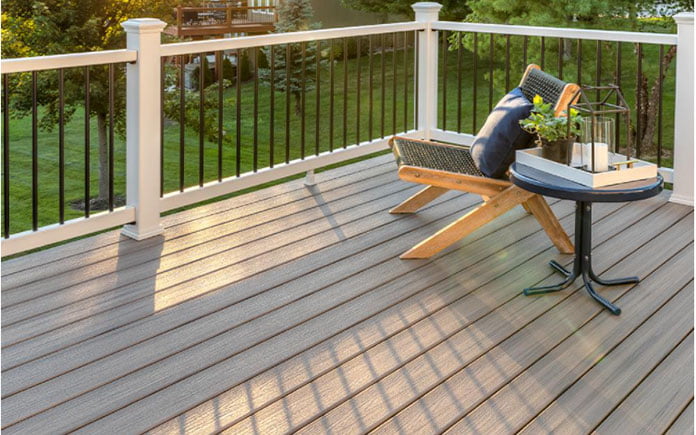
Trex Enhance composite decking is made with a high-performance shell, so it won’t fade, stain or scratch. (3 Echoes Content Studio)
Trex Enhance®
Trex Enhance composite decking is long-lasting, features an authentic wood-grain appearance and comes in many attractive colors.
Its high-performance shell is fade, stain and scratch-resistant, and no sanding or painting is needed. The low-maintenance material cleans easily with soap and water.
Plus, it’s not just good for your home; it’s also good for the environment.
No tree is cut to produce Trex decking — and it’s sustainably made from 95 percent recycled materials, including reclaimed industrial wood waste and polyethylene plastic film.
Finally, any major home improvement is an investment, but you can buy composite decking with confidence. Trex Enhance is backed by a 25-year limited residential warranty and a 25-year fade and stain warranty.
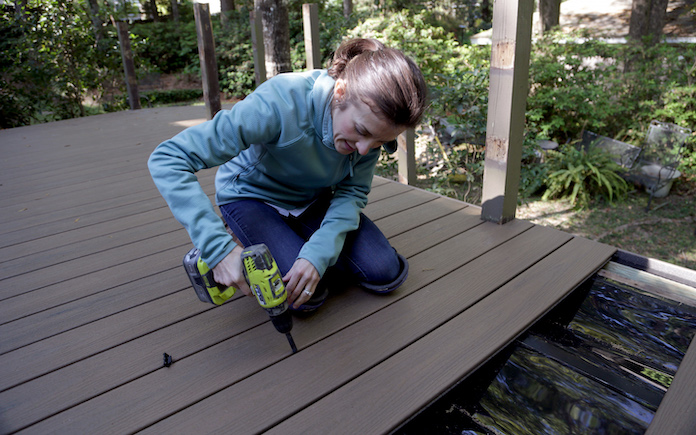
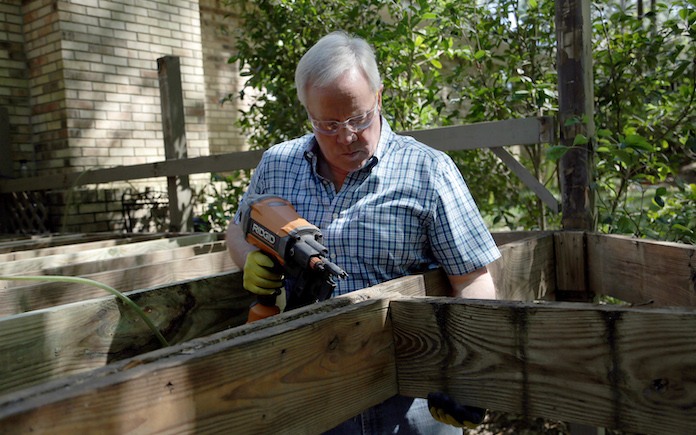
You don’t have to be a pro to install a composite deck. (3 Echoes Content Studio)
How to Install Composite Decking
Composite decking is a great do-it-yourself project, especially with Trex Enhance, which features grooved edges that allow for installation with hidden fasteners.
Trex® Hidden Fasteners screw into the joists and create uniform gaps that allow for expansion and contraction.
If you have an elevated deck, installing the Trex® RainEscape® system allows you to keep the underdeck area dry, which creates a space for storage or an additional outdoor living area beneath the deck to enjoy. The system of gutters and downspouts — designed to divert water from reaching the area below your deck — is installed above the joists to protect the entire substructure from moisture penetration and damage.
And Trex Enhance decking comes in nature-inspired, fade-resistant colors, including Rocky Harbor — a contemporary slate gray with rustic sandy undertones — so it matches any style of home.
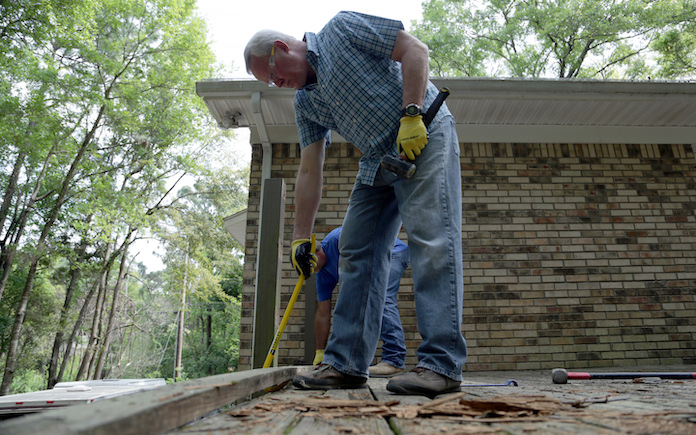
Remove old deck boards. Use a wrecking bar to pry the boards from the joists.
Make sure the joists are in good shape before you install composite decking. (3 Echoes Content Studio)
Inspect your deck’s frame. Most deck frames are constructed of pressure-treated wood, so it’s important to ensure that it’s structurally sound and can support new decking. If this isn’t the case, or if you’re building a composite deck from the ground up, you’ll have to build a new frame.
For added moisture protection, use Trex® Protect™ joist, beam and rim tape before you install the composite boards. This protects the tops of the joists and beams from developing rot and wood decay. Plus, it’s backed by a 20-year warranty.
You can install composite boards closer together, unlike wood boards, but be sure to follow the manufacturer’s guidelines for gapping. (3 Echoes Content Studio)
Align your composite boards with the deck frame. Make the necessary cuts to ensure a clean fit.
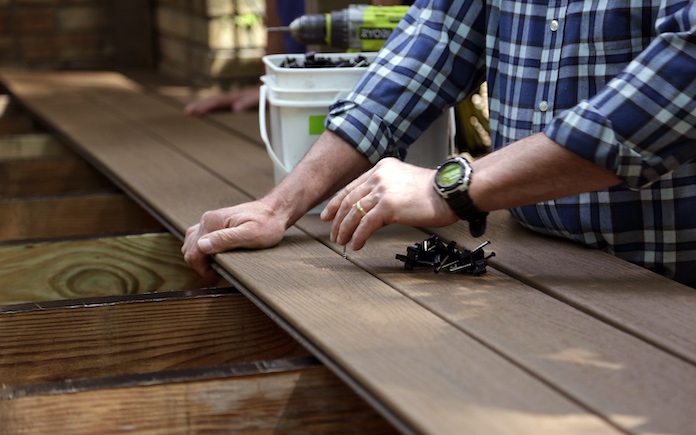
Trex’s hidden fasteners tuck in neatly between the boards for a smooth, hardware-free surface. (3 Echoes Content Studio)
Attach composite boards to your deck frame. When working with composite decking, you should use the Trex Hidden Fasteners rather than nails to achieve precisely consistent spacing between boards. Although the installation may take a bit longer, the result is a cleaner, more secure deck.
Install deck railing. Replace old deck posts, rails and spindles with Trex Enhance railing components. This railing system has the same weather-resistant characteristics as the deck boards.
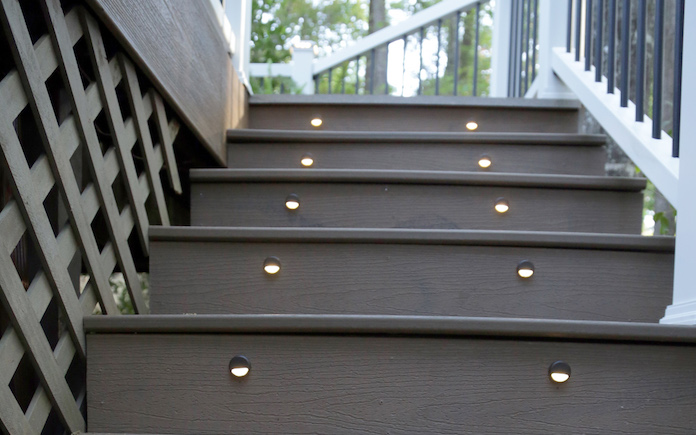
Place finishing touches. Clean and reinstall existing lattice and pressure wash any bricks or stepping stones. Add extra features like riser lights on the stairs, along with plants and planters.
Composite decking lasts for years with minimal maintenance. (Trex)
How to Maintain Composite Decking
Composite decking couldn’t be easier to clean — occasionally rinse it with soap and water. So, you can spend more time enjoying your deck instead of maintaining it!
To keep it looking new for decades, do the following:
Sweep regularly
Immediately clean grease and food debris
Scrub sticky spots with water and dish soap
Remove snow with plastic shovels to prevent damage from scraping.
Ready to make this home improvement? Trex decking is available at The Home Depot — purchase in stores or order online for home delivery or store pick-up.
An outdoor fireplace transforms your yard into a bonafide living area and increases your home’s value.
Whether you’re having a gathering with friends or unwinding after a long day, an outdoor fireplace is an investment that you will enjoy for many years.
Historically, fireplaces were used to keep a home’s interior warm during winter. But now, with outdoor living areas becoming increasingly more popular, fireplaces are popping up in many backyards.
These days, homeowners want the amenities of their indoor living rooms in the great outdoors. So the fireplace, an iconic element of any living room, is a must.
An outdoor fireplace still serves the same function of providing warmth, but it also adds to the backyard’s aesthetic.
Outdoor fireplaces come in many materials — such as steel, stone and terracotta — along with a range of shapes and sizes. Their fuel sources include wood, electric, gas and propane, and they can be in a fixed position or portable.
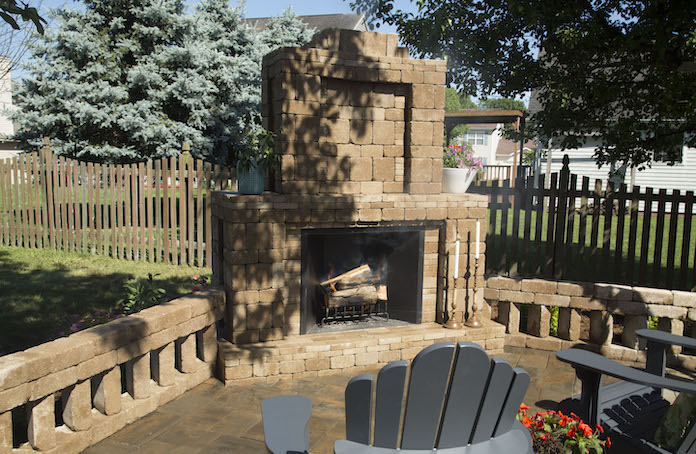
Paver outdoor fireplaces have the look of a traditional, interior fireplace. (3 Echoes Content Studio)
Wood-Burning Outdoor Fireplaces
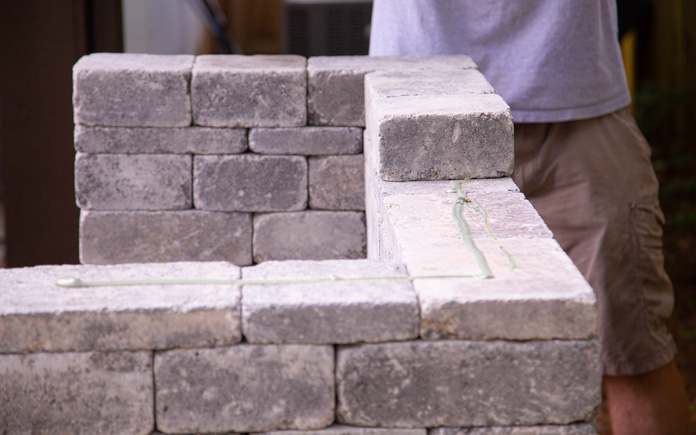
For a traditional-looking outdoor fireplace, one constructed using pavers is a popular option.
This type uses stacked pavers to create a customized wood-burning fireplace with a full-sized chimney.
You can also add paver surrounds around the fireplace to further define your outdoor living area.
Building a paver outdoor fireplace is a large project, so check with your local building department to see if you need a permit.
If you’re ready to take your outdoor living area to the next level with a paver outdoor fireplace, build one using Pavestone’s Rumblestone Fireplace Kit, which is available at The Home Depot.
The kit includes a firebox, a custom-fit 21-inch log grate for burning wood, a 14-inch chimney, 24 tubes of polyurethane adhesive, plus five pallets of coordinating RumbleStone blocks to build the surround.
The RumbleStone blocks’ weathered appearance offers a natural look and feel. They can be assembled in an infinite variety of configurations and orientations, so the possibilities for creative expression are as endless as your imagination.
When filling the bed, stop every three inches to compact the material using a tamper or compactor. Do this until the hole is filled to ensure a stronger base that will stand the test of time.
Add an inch of Pavestone Paver Sand on top of the aggregate before laying the blocks.
Once you’ve laid your fireplace base, it’s time to start stacking the blocks. To ensure that do-it-yourselfers get the right block in the right spot, the kit includes a set of color-coded drawings that detail which blocks go where on each step — from the initial footprint on the ground to the firebox installation and extending the structure up around the chimney.
Rumblestone blocks have round edges and come in a variety of shapes and sizes that all modulate on a 7-inch dimension.
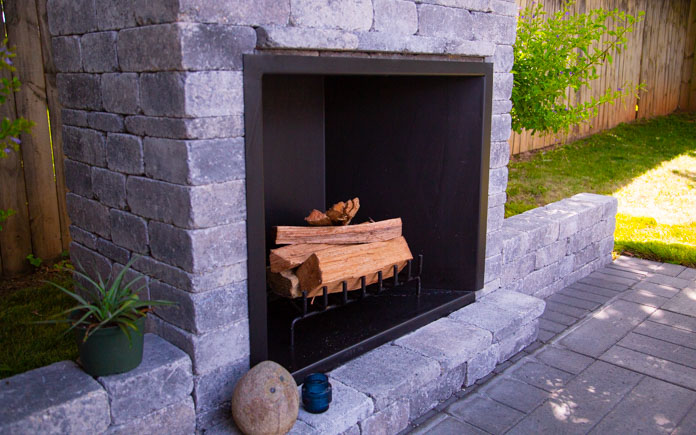
No mortar is needed to assemble a Pavestone Rumblestone fireplace — just construction adhesive. (3 Echoes Content Studio)
This building block design means you don’t need to cut any pavers, and there are no open seams because the blocks overlap each other for strength. All you need to secure them is some polymer construction adhesive.
Because this kit is so simple to put together, you can assemble this outdoor fireplace in just a few hours.
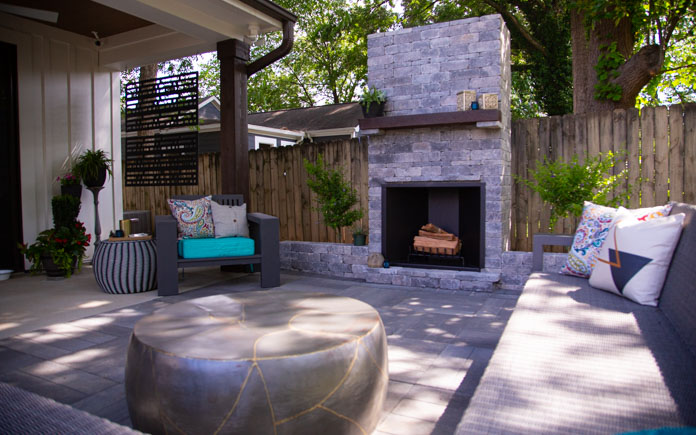
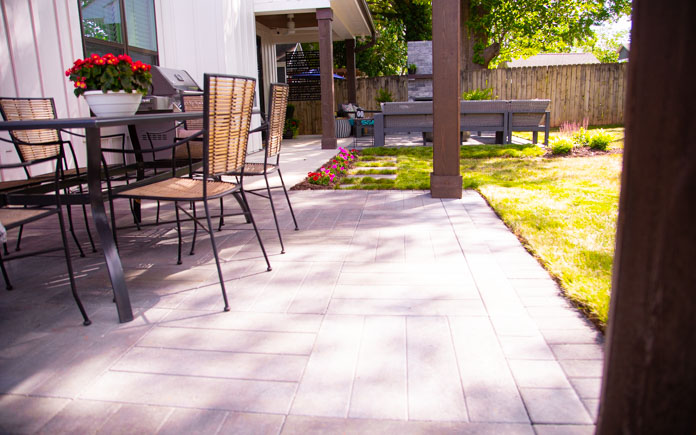
A paver patio, like this one made from Pavestone’s Avant XL pavers, provides a perfect surrounding for an outdoor fireplace. (3 Echoes Content Studio)
Complete Your Outdoor Living Area With a Patio
A stand-alone fireplace, though attractive, may look out of place in your backyard if you don’t add matching elements. So, build a patio to surround it and define the outdoor living area.
A patio not only complements your fireplace but also increases your home’s resale value.
The average cost of building a patio is between $3,000 and $5,500, according to Forbes. However, SuperMoney, an online financial comparison platform, says a patio can increase a home’s value by 8 to 10 percent and earn an 80 percent return on investment.
If you want a beautiful, consistent look to your patio and outdoor fireplace, construct them with the same materials.
Pavestone offers a variety of pavers in different textures, colors and sizes. A quick visit to their website leaves you brainstorming all sorts of ideas for your next backyard project, whether it’s a fireplace, a fire pit, a patio, or anything else.
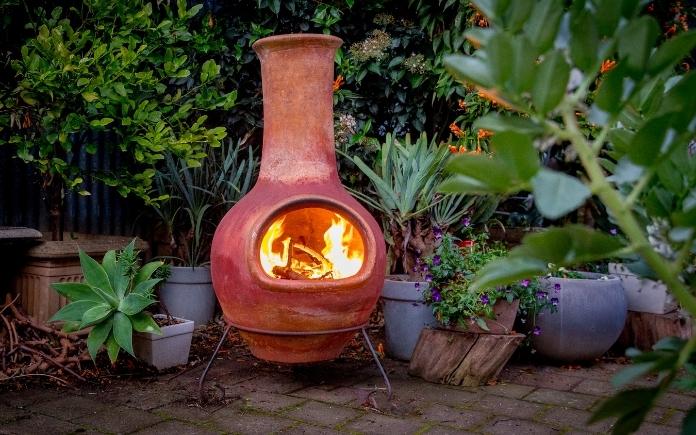
No assembly is required for a chiminea, and because it’s small, you move it anywhere you want. (MarkPiovesan, Getty Images)
A chiminea (Spanish for chimney) is a freestanding, front-loading fireplace with a bulbous shape and a vertical vent.
Traditionally, chimineas are made from clay, but some are metal or cast iron. You don’t need to assemble it, so the most work you have to do is transport it to where you want it.
However, despite its simplicity, there are some drawbacks.
A typical chiminea is small, so you’ll need to frequently add wood to keep a fire going. And, once lit, it has a hot shell, which can be dangerous to the touch, especially for children. In addition, it sits off the ground on a metal base, so it could tip over.
For these reasons, many homeowners prefer a permanent structure for creating warmth outdoors.
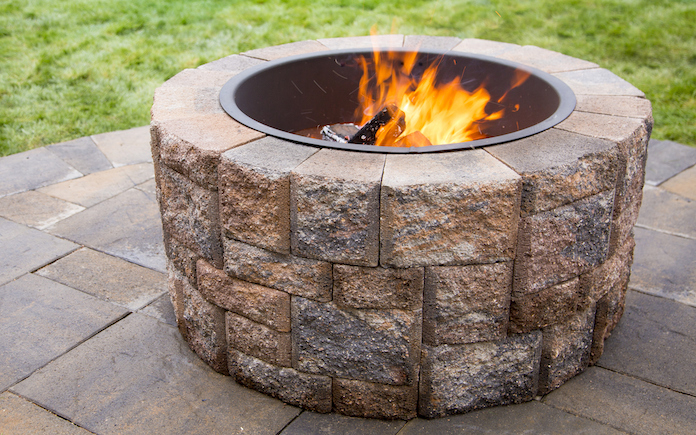
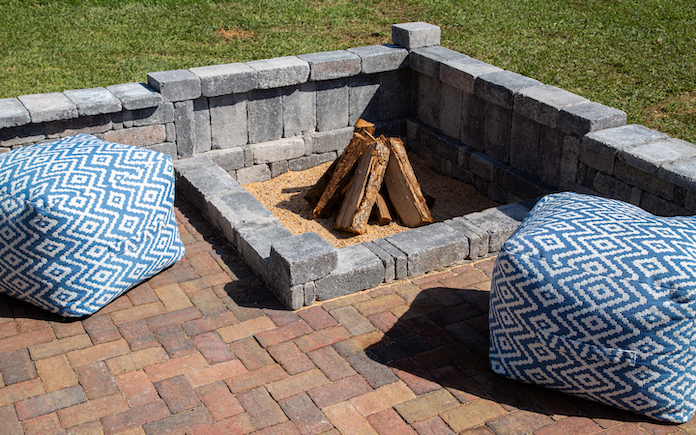
You can incorporate a fire pit into the corner of a patio, or build a standalone one in your yard. (3 Echoes Content Studio)
One such option is a fire pit. This type of outdoor fireplace also is simple: it has raised walls and an opening in the middle for a fire.
A fire pit can be made of metal, concrete or stone and use gas or wood for fuel.
Fire pits are easier to construct than an outdoor fireplace because a basic build only consists of a circle or square.
Pavestone offers fire pit kits — with up to 20 options — for easy, do-it-yourself, assembly.
Outdoor fireplaces add beauty and value to your home. The type you choose will depend on your budget, but investing in a paver fireplace will give you a better return on investment.
To get the most out of your home’s outdoor space, you’ll want to build a patio to go with your fireplace. A patio defines your backyard living space, enhances the exterior aesthetic with stylish hardscaping, and increases your home’s resale value.