We independently select these products—if you buy from one of our links, we may earn a commission. All prices were accurate at the time of publishing.
My husband happily serves as our resident grill master. I’m grateful for not only all the delicious food he dishes up, but also that he often takes care of grill cleanup duties. But now that we’ve recently added a Blackstone griddle to our Weber grill setup, I’ll be gladly pitching in with outdoor cleanup.
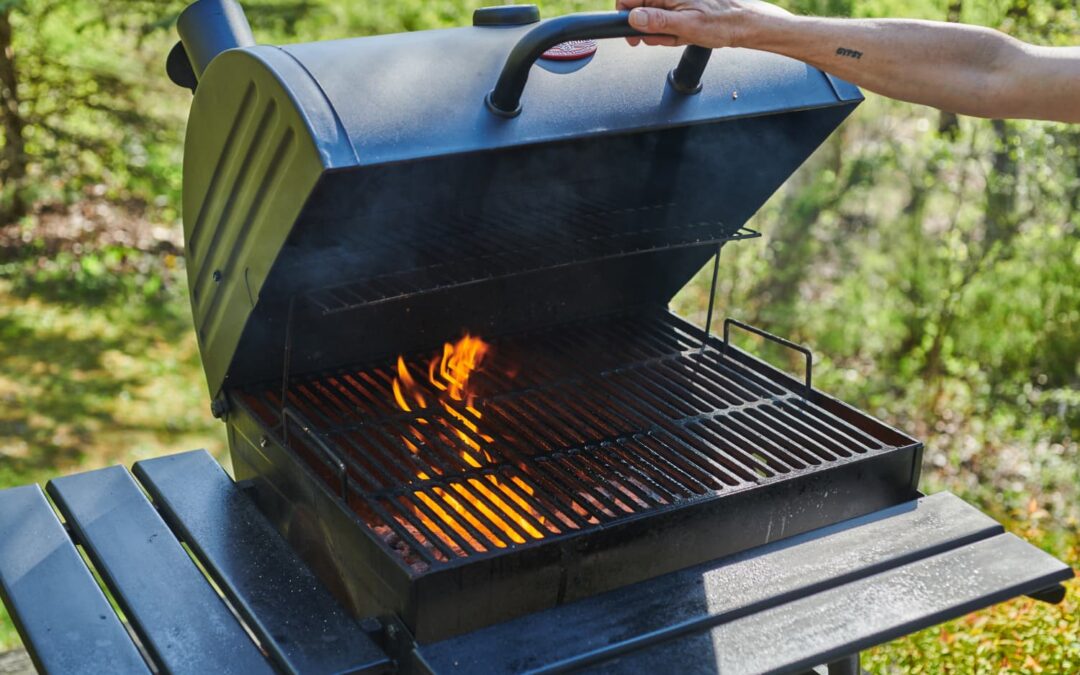
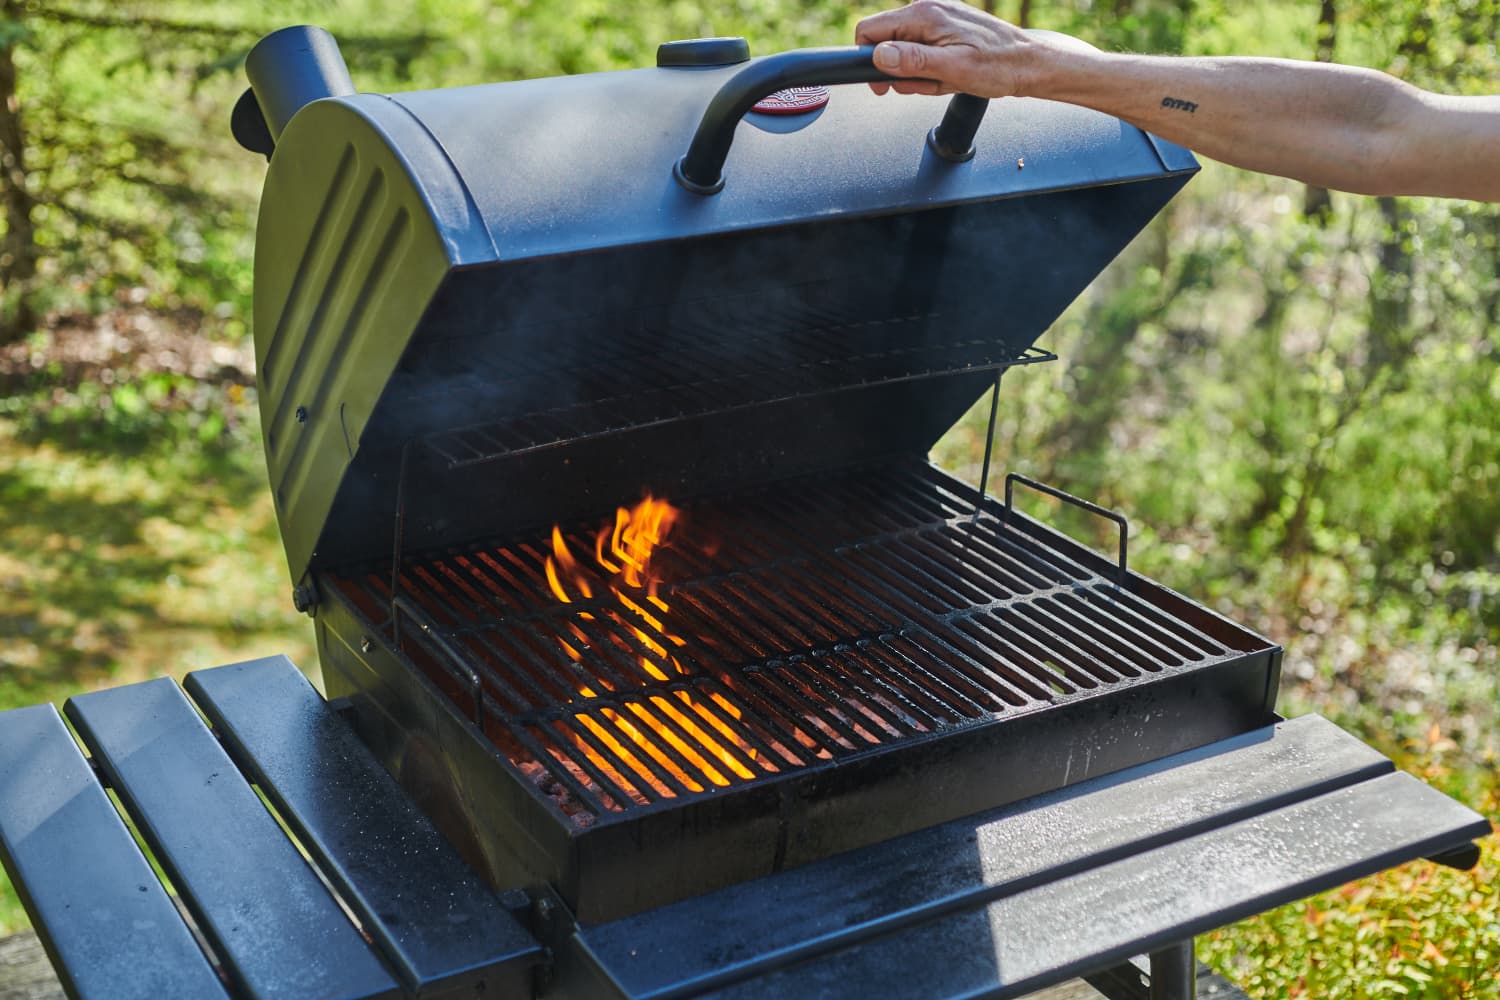
I won’t lie: I’m skittish around outdoor gas cooktops, especially with cleanup. Unlike letting a kitchen stovetop cool before you wipe it down, it’s actually easier to clean a grill when it’s still hot. So when I saw the rave reviews about the safe and easy-to-use Grill Rescue Brush, I knew I had to try it.
What Is the Grill Rescue Brush?
The Grill Rescue Brush is more than just a simple grill brush. It features a thick but soft cleaning head made of aramid fiber, which is the same fabric used in firefighter gear, so it’s not only durable but also heat-resistant. The cleaning sponge attaches to a long, sturdy red handle that’s lightweight but powerful. In fact, it’s “so strong you can run it over with your truck and it still won’t snap,” according to the website.
This nifty gadget was created by a firefighter not to prevent grill fires, but to protect people from grill brush injuries sustained by ingesting wire bristles that had fallen off during cleaning and ended up in grilled food. This is not an overreaction. Between 2002 and 2014, approximately 1,700 ER visits in the United States were reported due to ingested grill brush bristles. I once grabbed a grill brush by the bristles and found that to be painful enough, which made me even more excited to try Grill Rescue.
Why I Love the Grill Rescue Brush
I usually reserve my fangirling for indoor cleaning gadgets, but the Grill Rescue Brush is deserving of all the praise. To start, it’s incredibly simple to use. Here’s how it works:
I was a bit worried about the steam, so I was very glad that the brush has such a long handle to keep your hand at a safe distance. It was very satisfying to scrub the food residue off and watch the steam help release any greasy residue. The steam dissipates rather quickly, so you do have to work a bit fast. (You can also reheat and turn off the grill if needed.)
My husband normally uses a traditional grill brush or a ball of aluminum foil attached to the end of a long barbecue fork to clean the grill. But, after using the Grill Rescue, he was thoroughly impressed with how easy and effective it was. “Looks better than it did before I started grilling,” he said.
Why I’ll Keep Using the Grill Rescue Brush to Clean My Grill
I’m excited to try the Grill Rescue Brush on our new griddle, which needs a nonabrasive method to keep it clean. The reviews from other Blackstone griddle owners are stellar, although the commonly suggested tip is to carefully scrape off as much grease as possible before using Grill Rescue, as the cleaner head can be a chore to clean off later if not done properly.
As expected, the cleaning head looked a little worse for wear after I finished with the grill. But it’s super easy to clean. Just pinch one of the levers on either side of the head to pop it off, then scrub it by hand or put it in the dishwasher. I’m all for doing things the easy way, so into the dishwasher it went. It wasn’t sopping wet when it came out, but I did leave it on the kitchen windowsill to dry in the sun for next time.
The website says the cleaning head typically lasts between 25 and 100 uses, though maintenance and storage play a big role in longevity. The company reports that some customers have used it more than 600 times before replacing it, so I feel confident that Grill Rescue will come to the rescue with barbecue cleanup for a very long time.
A patio is a wonderful addition to any home, providing a space for relaxation, entertaining, and enjoying the outdoors. But weather conditions can cause mildew or algae. Let’s talk about how to clean the mildew and algae off your patio.
.tasty-pins-banner-container{display:block;margin-bottom:20px;position:relative;width:-moz-fit-content;width:fit-content}.tasty-pins-banner-container a{cursor:pointer;display:flex;font-size:14px;font-weight:700;letter-spacing:1px;line-height:1.8em;text-transform:uppercase}.tasty-pins-banner-container a:hover{opacity:1}.tasty-pins-banner-container .tasty-pins-banner{align-items:center;bottom:0;cursor:pointer;display:flex;justify-content:center;left:0;padding-bottom:1em;padding-top:1em;position:absolute;right:0}.tasty-pins-banner-container .tasty-pins-banner svg{margin-right:4px;width:32px}.tasty-pins-banner-container .tasty-pins-banner span{margin-top:4px}.tasty-pins-banner-container a.tasty-pins-banner{text-decoration:none}.tasty-pins-banner-container a.tasty-pins-banner:hover{opacity:.8}.tasty-pins-banner-container a.tasty-pins-banner-image-link{flex-direction:column}.tasty-pins-banner-container a img{margin-bottom:0}.entry-content .wp-block-image .tasty-pins-banner-container img{margin-bottom:0;padding-bottom:0}#et-boc .et-l div .et_pb_image_wrap .tasty-pins-banner-container .tasty-pins-banner{padding-bottom:1em!important;padding-top:1em;text-decoration:none}#et-boc .et-l div .et_pb_image_wrap .tasty-pins-banner-container a.tasty-pins-banner{cursor:pointer;display:flex;font-size:14px;font-weight:700;line-height:1.8em;text-transform:uppercase}#et-boc .et-l div .et_pb_image_wrap .tasty-pins-banner-container a.tasty-pins-banner span{letter-spacing:2px;margin-top:4px}.et-db #et-boc .et-l .et_pb_module .tasty-pins-banner-container a:not(.wc-forward){padding-bottom:0}
However, over time, patio slabs can become plagued with unsightly mildew and algae growth, particularly in shaded or damp areas.
Algae on patio surfaces not only look unpleasant but can also create a slip hazard.
In this blog post, we’ll explore effective methods for removing mildew and algae from your patio, ensuring it remains a safe and inviting space.
Gathering Necessary Supplies
Before starting the cleaning process, it’s important to have all the necessary supplies on hand. Here’s a handy list to get you prepared:
Stiff-bristle brush or scrubbing brush
Garden hose with a spray nozzle or a pressure washer
Protective gloves and eyewear
Broom or leaf blower
Tarp or drop cloths to shield nearby areas
Cleaning agents
Oxygen bleach, which is great for tackling mildew
Algae remover specifically designed for patio surfaces
White vinegar, a natural cleaning alternative
Baking soda for those tough stains
Chlorine bleach for the most stubborn mildew (just be careful with certain materials)
With these supplies, you’ll be ready to tackle any mildew or algae that has taken over your patio.
Preparing the Patio Area
Preparing your patio for cleaning is a straightforward but essential step.
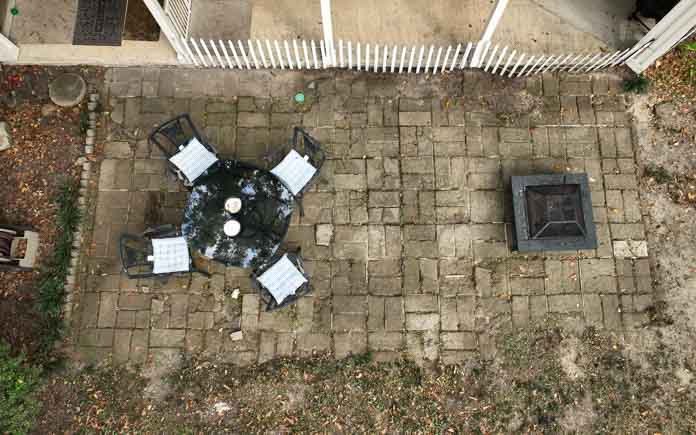
Start by moving all your furniture, potted plants, and decorative items to another spot. This will give you clear access to every inch of your patio and protect your belongings from any potential damage.
Next, grab a broom or a leaf blower to sweep away loose debris, leaves, and dirt.
To protect plants and nearby surfaces from cleaning agents, cover them with a tarp or drop cloth. This is particularly important if your patio is next to wooden decking or porous materials.
Taking these preparatory steps will ensure that your cleaning process goes smoothly and that everything stays in great shape.
Cleaning Methods for Mildew
To get rid of mildew on your patio, start by mixing oxygen bleach with warm water according to the instructions on the package.
Wearing gloves and protective eyewear, apply the solution to the mildew-infested areas using a stiff-bristle brush. Focus on small sections at a time to ensure thorough coverage.
Let the solution sit for about 10-15 minutes so it can break down the mildew effectively. After that, rinse the patio well with a garden hose or pressure washer to remove any residue.
If you prefer a natural approach, a mixture of white vinegar and water works wonders for less severe mildew. Just apply it in the same manner and scrub away.
Dealing with Algae on Your Patio
Algae can make your patio look grimy and can even be slippery.
If you’re dealing with light algae growth, start with a simple solution of water and baking soda.
Sprinkle the baking soda over the algae, then scrub it with a stiff-bristle brush. This should break up the algae and make it easier to wash away.
For more stubborn patches, you’ll want to use an algae remover that’s specifically designed for patio surfaces.
Follow the manufacturer’s instructions for application and let the product sit for the recommended time. Afterward, scrub the area thoroughly with your brush to ensure all the algae is lifted.
Once you’ve scrubbed away the algae, rinse the area well with a garden hose or pressure washer. Make sure to get rid of all the cleaning solution to prevent any residue from affecting the patio’s appearance or feel.
Remember, consistent cleaning can prevent algae from taking over, so make this a regular part of your patio maintenance routine.
Preventive Measures
To keep your patio looking its best and free of mildew and algae, regular upkeep is essential.
Start by sweeping your patio frequently to remove leaves, dirt, and other debris that can hold moisture and encourage growth.
Address any drainage issues promptly—standing water is a major contributor to mildew and algae.
Think about how much shade your patio gets. If it’s heavily shaded by trees or bushes, consider trimming them back to allow more sunlight to reach the area. Sunlight helps to dry out moisture and discourages growth.
If your patio is made from a porous material like concrete or sandstone, applying a sealant can provide an extra layer of protection.
Another tip is to move outdoor furniture and potted plants around occasionally. These items can trap moisture beneath them, creating ideal conditions for mildew and algae. By moving them, particularly out of shady areas, you allow those areas to dry out properly.
Consider setting a schedule for light cleanings using your preferred method. Whether it’s a quick scrub with a vinegar solution or a spray down with a hose, frequent maintenance can stop problems before they start.
If you live in a particularly wet or humid climate, you might need to increase the frequency of these cleanings.
By staying proactive, you can enjoy a beautiful and safe patio year-round.
Removing Mildew and Algae from Your Patio
Cleaning your patio can seem like a big job, but it doesn’t have to be overwhelming.
By gathering the right supplies and taking the time to prepare properly, you’ll be well on your way to a sparkling clean outdoor space.
Regular upkeep will not only keep your patio looking great but also prevent mildew and algae from taking hold in the first place.
Simple steps like sweeping often, addressing drainage issues, and allowing more sunlight to reach your patio can make a huge difference. Moving furniture and potted plants around occasionally will also help keep moisture from building up.
By making these tasks part of your regular routine, you’ll maintain a beautiful, safe patio that enhances your outdoor living experience.
So roll up your sleeves, get scrubbing, and enjoy your refreshed patio!
This week, a poured concrete patio turns a decaying patio into an outdoor living space this homeowner can truly love.
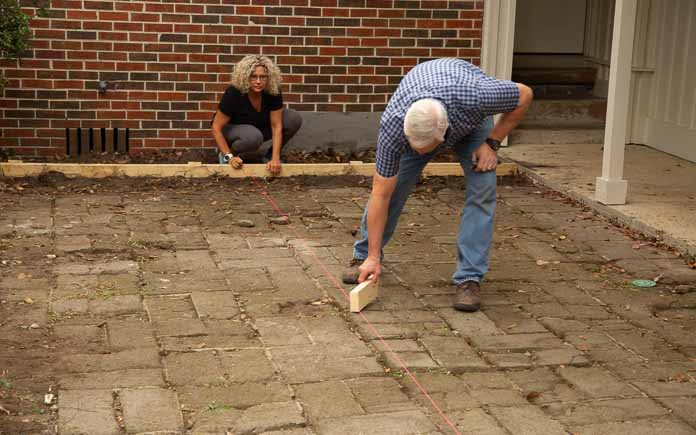
Gretchen Bayley lives alone in her mid-century home, but the house is always full of friends and family. We’re transforming her old, crumbling patio into an outdoor living space to give her more room to entertain.
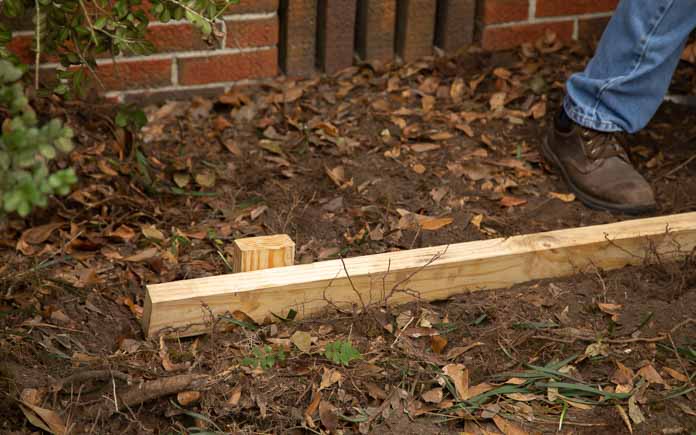
First, frame the area 12-by-23-foot area with 2-by-4s. Place the boards level with the existing carport concrete slab, then slope slightly downward so water will flow away from the carport.
Use a framing square to ensure each corner is at a 90-degree angle. To keep the form boards in place, screw them to evenly spaced wooden 2-by-4 stakes.
We use a masonry line to make sure the depth of the newly poured concrete patio will match the existing one. (3 Echoes Content Studio)
Once the final form board is installed, check the depth across the space to ensure there’s enough depth to use the old patio as a foundation and pour the new slab directly over it.
(Because the pavers are below the top edge of the carport concrete slab, we don’t need to dig them up.)
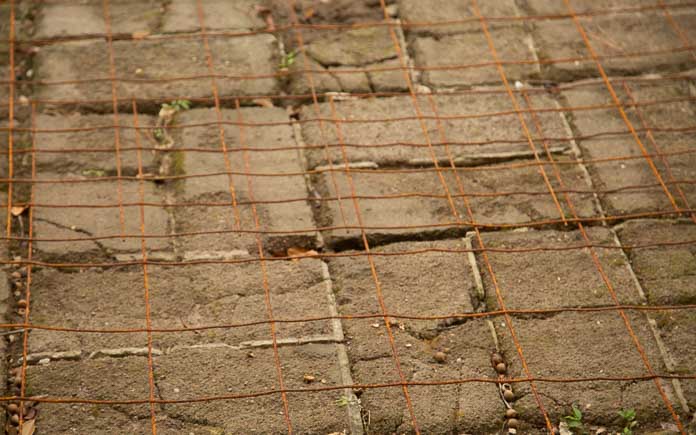
Finally, lay the reinforcement wire.
Steel reinforcement wire adds strength to the newly poured concrete patio. (3 Echoes Content Studio)
Once the forms are complete, a professional concrete finisher pours the slab. As the forms fill up, we tap the outside of them to release the air bubbles trapped in the concrete.
The concrete finisher moves a bull float over the freshly poured slab to smooth the surface. (3 Echoes Content Studio)
The concrete finisher uses special tools to smooth the top of the slab and create expansion joint lines to prevent cracking.
Once the concrete has cured for a bit, we drag a broom over it to create a textured finish.
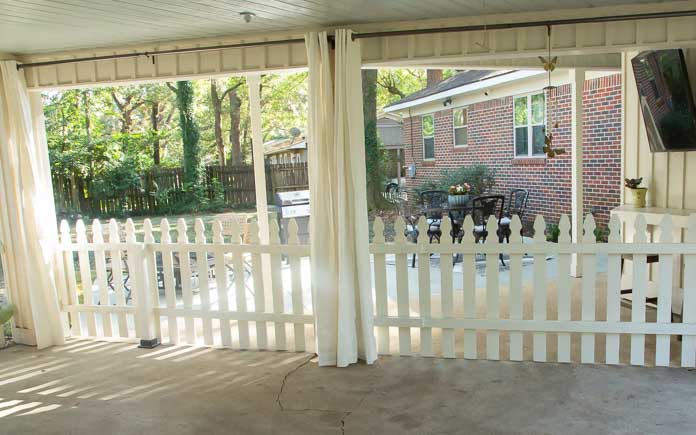
The new picket fence has a functioning gate that’s easier to open and close. (3 Echoes Content Studio)
Add Picket Fence Panels
Gretchen’s improvised roll fencing serves its purpose of containing her dogs in the backyard, but it’s not pretty. So, we’re adding some prettier (and sturdier) white picket fence panels.
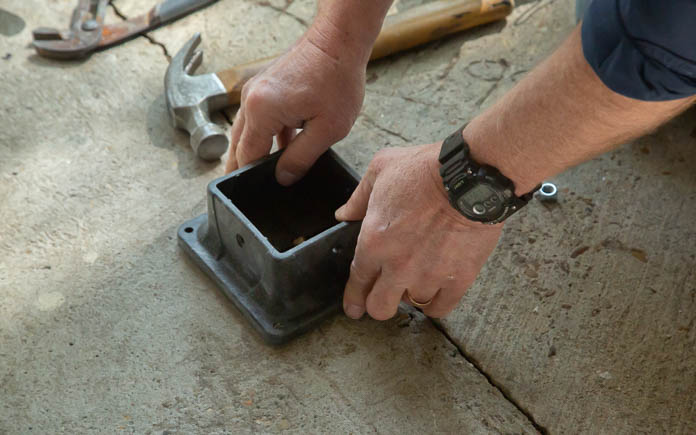
This post anchor allows us to secure the fence right onto the concrete slab. (3 Echoes Content Studio)
Instead of using a zip tie to keep the fence closed, we’re adding a gate at the corner of the carport to offer easier access to the new patio. To secure the post for the gate, we place it in a post anchor that can be drilled into the concrete.
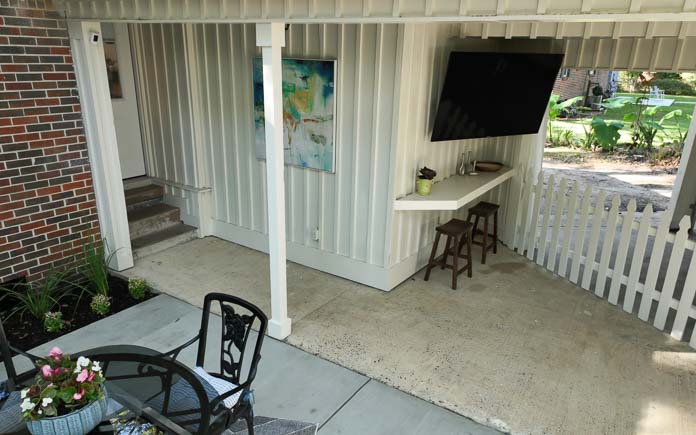
The new outdoor entertainment area features bar seating and an adjustable TV. (3 Echoes Content Studio)
Create Entertainment Area
Two large, empty shelves are wasting space in Gretchen’s carport. So, we remove the top one to make room for an outdoor TV and use the bottom one for bar seating.
These drop cloth curtains give this outdoor entertainment area warmth, texture, and the option for privacy. (3 Echoes Content Studio)
To create even more separation between the carport and the new outdoor entertainment area, Chelsea hangs drop-cloth curtains.
The curtains not only add some extra texture to the space but they also can be closed to hide Gretchen’s car when she’s entertaining.
Chelsea Lipford Wolf and Danny Lipford pose with homeowner Gretchen Bayley. (3 Echoes Content Studio)
Post-Production Thoughts
Even though it was a good size, Gretchen’s patio was decades past its prime. The crumbling pavers were more than unattractive — they were downright dangerous.
The roll fencing added along the edge to contain the dogs wasn’t helping the look of the space either. There was nothing about this outdoor living space that invited you to enjoy the spacious backyard.
But now, the new poured concrete patio that replaced the old patio is both stable and attractive. Its clean edges clearly define the space, while it flows almost seamlessly into the existing covered area.
The new fence suits the yard perfectly and its new location creates the ideal boundary between the carport and the covered patio area.
Chelsea’s curtains help reinforce that line while they soften the edges and add refinement. What was an overbuilt shelf has become a modest bar top and the refurbished patio furniture creates plenty of comfortable seating to enjoy the expansive backyard.
Other Tips From This Episode
Products Featured in This Episode
This page contains affiliate links. If you purchase a product from these links, we will earn a small commission at no additional cost to you.
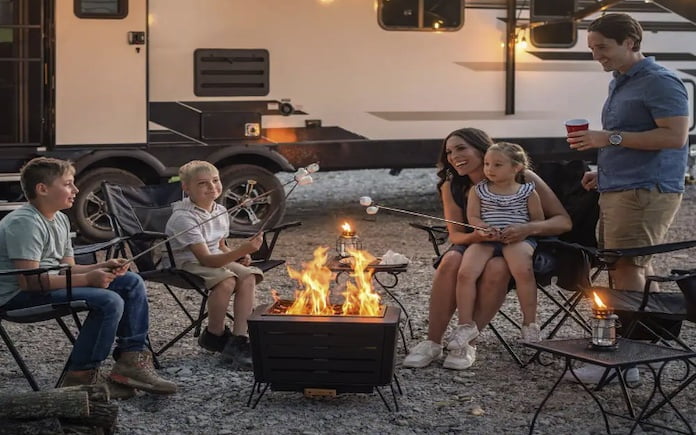
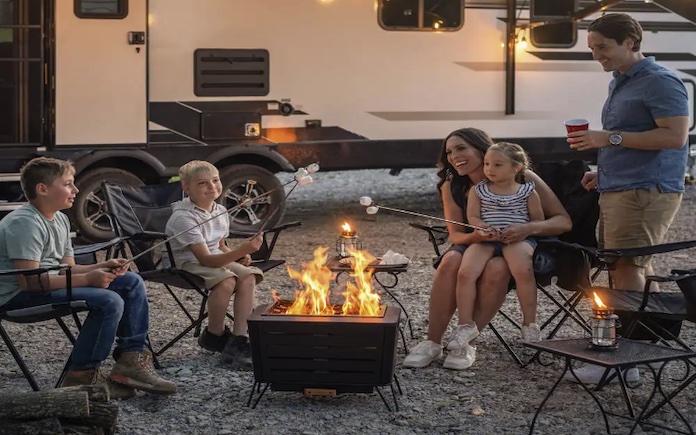
The durable, black stainless-steel rectangle design fits in smaller spaces, so packing it to travel is so easy!
Plus, it has built-in handles, so transporting it from your car to your hangout spot is simple!
You can breathe easily around this fire pit because it’s designed specifically for a low-smoke experience.
This fire pit might be small but it has a large flame design for a four-foot heat radius, so your guests don’t have to pack around it to feel the warmth.
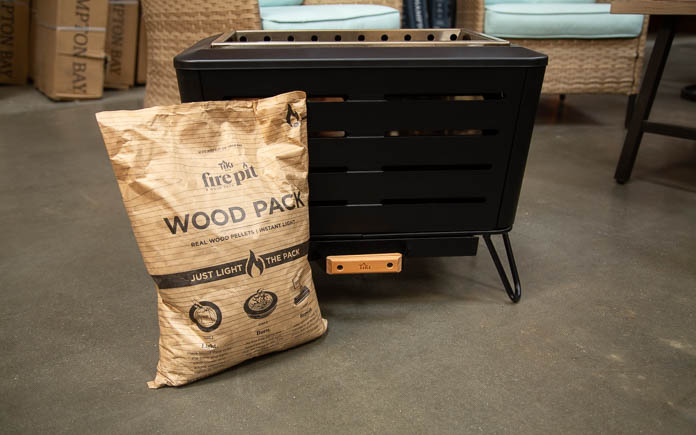
TIKI’s portable fire pit comes with a wood pack that creates instant light and burns for about 30 minutes. (3 Echoes Content Studio)
Easy to Maintain
A removable ash pan makes cleaning this fire pit hassle-free.
You can use traditional firewood or a TIKI Wood Pack, which creates instant light and burns for approximately 30 minutes per pack.
TIKI’s portable fire pit includes a stand and comes with a fabric cover to help protect it from the elements when it’s not in use.
Watch the video to learn all about this Best New Product!
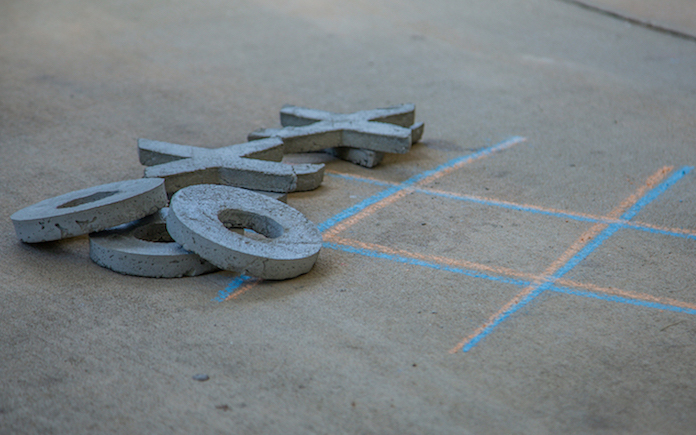
Oversized Tic-tac-toe is a great way for the family to play games together and enjoy the outdoors.
Tic-tac-toe, also known as Naughts and Crosses, has entertained people for centuries. It’s been found everywhere from the temples of ancient Egypt to the medieval cathedrals of England, according to UC Berkeley GamesCrafters.
Read on to learn how to make concrete Tic-tac-toe pieces.
5 spray-paint can lids or another cylindrical object
Fast-drying caulk
Melamine shelf boards
Miter saw
Wood screws
Drill & Drill bits
Tape measure
Wood pencil
Trowel
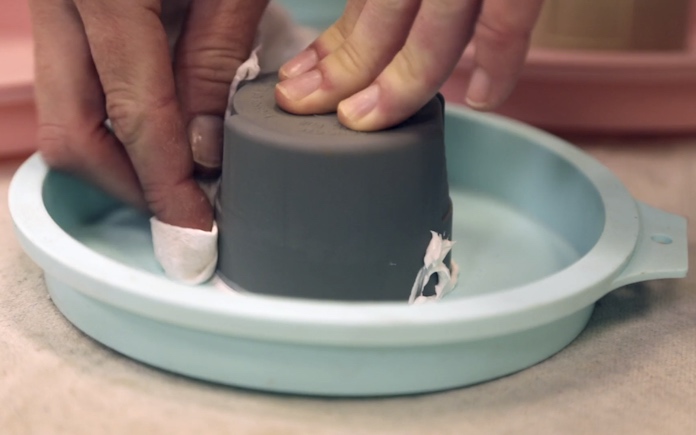
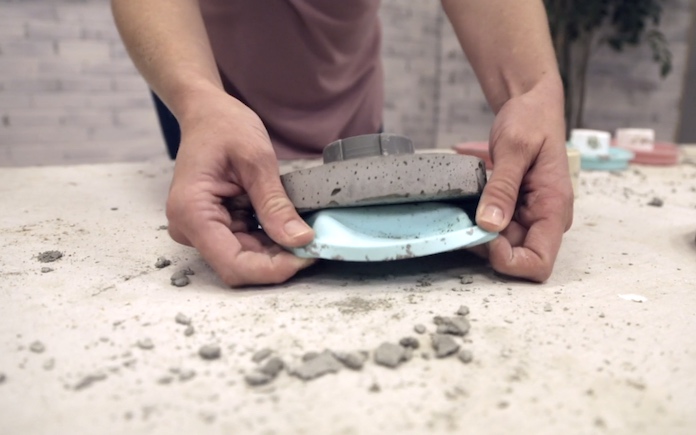
Silicone cake pans allow for easy removal once the concrete pieces are cured. (3 Echoes Content Studio)
Create Forms
To create forms for o’s, use 6-inch silicone cake pans and lids from spray-paint cans. Glue the lids to the centers of the cake pans with fast-drying caulk. Wipe off the excess caulk.
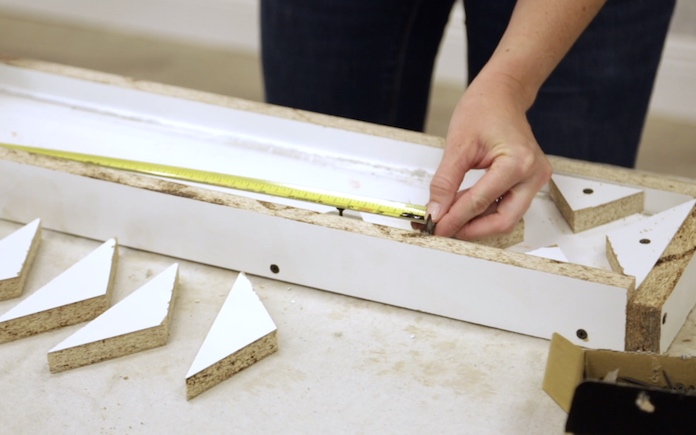
Melamine has a hydrophobic (water-resistant) coating that allows concrete to cure at the surface. This makes it easier to remove when the concrete is cured. (3 Echoes Content Studio)
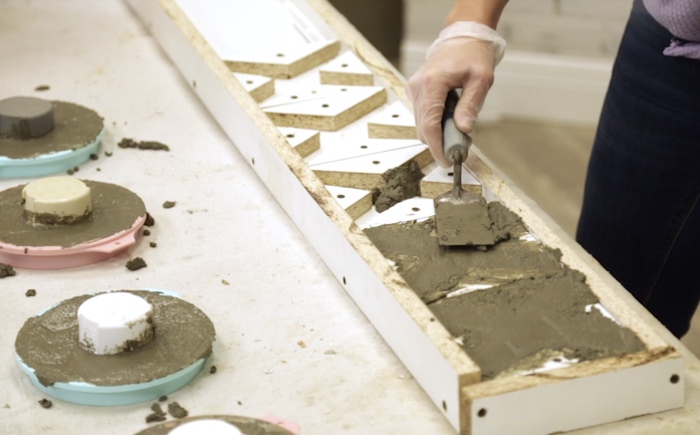
To make the x’s, cut a melamine shelf board to build a 30-inch by 6-inch open tray.
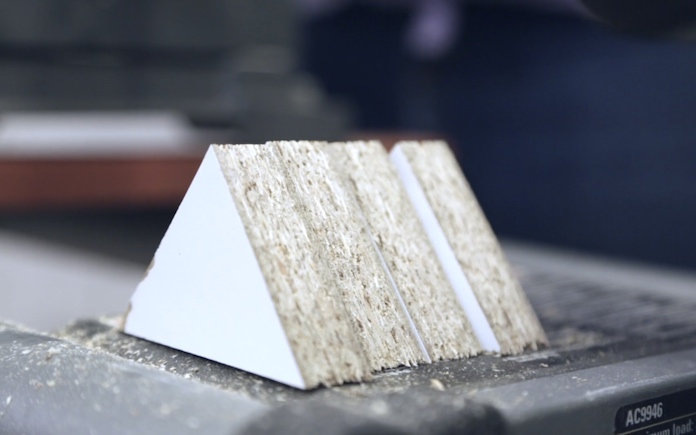
A miter saw makes it easy to cut the triangles at a perfect angle. (3 Echoes Content Studio)
You need two triangle sizes to create the x’s:
Cut 10 triangles at a 38-degree angle from a 2-inch piece of melamine board.
Cut 10 triangles at a 59-degree angle from a 1-⅞-inch piece of melamine board.
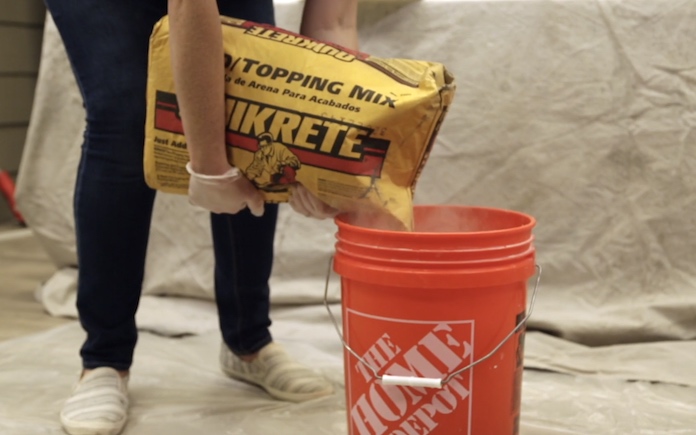
Once the concrete is thoroughly mixed, scoop it into the forms and use the trowel to level the mix with the top of each form. Cover the molds with plastic to help curing.
Let the tic-tac-toe pieces cure for five days in warm weather (at 70 degrees Fahrenheit or higher) or for seven days in colder weather (50-70 degrees Fahrenheit).
Once the pieces have cured, remove them from the forms. Rough edges can be easily removed by sanding.
Now, all you need is a little sidewalk chalk to draw your game grid — then the fun can begin!