Learn the secret to removing vinyl wallpaper and how to prevent internal frost on windows. (3 Echoes Content Studio)
Hour 1
Learn what trends are hot in kitchen remodeling, how to prevent internal frost on windows, the difference between refacing and refinishing cabinets and more.
As a home improvement professional, I’m always looking to learn about the latest design trends. I recently came across the 2023 U.S. Houzz Kitchen Trends Study, and I have to say, the findings are quite interesting.
The study surveyed more than 2,000 U.S. homeowners who are in the midst of, are planning, or recently completed a kitchen renovation project, and the results provide a valuable glimpse into what’s trending in kitchen design. Here’s what stood out the most to me:
Renovation Spending Rises: The median spend on a minor remodel increased $4,000 year over year to $14,000 by mid-2022. Homeowners spent $15,000 on a minor remodel of a larger kitchen and $13,000 on a smaller kitchen.
Sustainability Influences Choices: 92 percent of homeowners incorporate sustainable features during a kitchen remodel. These include LED lightbulbs, energy-efficient appliances and water-efficient fixtures.
Open Layouts are Here to Stay: Following a dip in the trend of open kitchens last year, this year renovators are once again more likely to open their kitchens to other interior spaces and outdoor spaces. The most popular choice for kitchens newly open to interior spaces still is to have no wall separation. For the transition between the kitchen and outdoor areas, the most common choice is double doors or a row of doors.
Wood Cabinets Gain Popularity: White cabinets aren’t going out of style anytime soon. The color remains the most popular choice, but wood tones are a strong contender. Nearly a quarter of homeowners choose wood-tone cabinets.
Colorful Islands: 46 percent of homeowners selected an island cabinet color that contrasts the color of the main cabinets. The popularity of blue and gray declined slightly, while black, medium-tone wood and dark wood saw increases.
Frost building up on the inside of windows and doors during extremely cold temperatures could mean the humidity in the home is too high. (Julie Geving)
A homeowner in Wyoming says during the last cold snap, temperatures dropped to around 36 degrees below zero! She noticed frost building up on the inside of all of her windows and doors.
“Is there anything we can do to prevent this from happening?” she asks.
Frost building up on the inside of windows and doors during extremely cold temperatures can be caused by a number of factors.
Our first thought is that the doors and windows are older and defective. However, the homeowner says the house is new, so the doors and windows are very energy efficient. Because of this, less humidity is escaping from the home through the windows and doors. So, once the moisture in the air makes contact with those cold surfaces, it freezes.
So what’s causing this high humidity? Some possible explanations include:
Lack of ventilation: Insufficient ventilation can cause humidity to build up in a home, especially in bathrooms and kitchens where moisture is generated from cooking, bathing and showering.
Houseplants: Large numbers of houseplants can release moisture into the air, contributing to high humidity.
High occupancy: High occupancy in a house can increase humidity levels because of the many people living and breathing in the same space.
The solutions to high humidity are adding ventilation and insulation, and in extreme cases installing a whole-house dehumidifier. Make sure you’re venting any moisture out of the house, like using a range hood and bathroom vent fan.
To keep an eye on humidity levels in your home, and address the underlying causes, get a hygrometer to measure the amount of humidity in your home. It shouldn’t exceed 50 percent.
Refacing vs. Refinishing Cabinets
Refacing is the process of covering the existing cabinets with new materials to change the overall design while refinishing is the process of applying a new finish on the existing cabinets. (3 Echoes Content Studio)
We’re renovating our kitchen, but the budget doesn’t allow for all new cabinets. So, we were planning on refinishing them by sanding and then repainting. But then I read an article about refacing the cabinets. What’s the difference between refinishing and refacing, and which would you recommend?
Refinishing and refacing are two different methods used to update the look of kitchen cabinets.
Refinishing involves sanding down the existing finish on the cabinets and applying a new finish, such as paint or stain. This method is typically less expensive than refacing and is a good option for those looking to change the color of their cabinets. However, it does not change the overall design of the cabinets and can be time-consuming and labor-intensive.
Refacing, on the other hand, involves covering the existing cabinet doors and drawer fronts with new materials, such as veneer, laminate or solid wood. This can change the overall design of the cabinets and can be used to update the look of your kitchen. It’s also a more expensive option than refinishing, but it’s a quick way to change the appearance of your cabinets, and it’s less disruptive to your kitchen.
In summary, refinishing is the process of applying a new finish on the existing cabinets, while refacing is the process of covering the existing cabinets with new materials to change the overall design.
Hour 2
Hear the secret to removing vinyl wallpaper, tips for staining a pressure-treated wood fence, and more.
The Secret Removing Vinyl Wallpaper
Removing wallpaper may seem daunting, but with the right tools and techniques, it’s a manageable task. (3 Echoes Content Studio)
A homeowner wants to know — what’s the trick to removing vinyl wallpaper?
“I sprayed it down with DIF wallpaper remover, covered the wall with thin plastic, and then waited an hour or so, but the wallpaper was still stuck in place. I don’t want to damage the drywall by trying to scrape it off. What do you suggest?” he asks.
When removing vinyl wallpaper, you need to score the vinyl coating in order for the DIF wallpaper remover to work. To do this, use a tool called a paper tiger. Simply rub it over the face of vinyl to poke thousands of holes in it. This will allow the remover to penetrate to the wallpaper and deactivate it, so you can easily remove it.
To remove the wallpaper, mix in a 5-gallon bucket:
Stir the mixture, then apply it to the wall using a pump-up garden sprayer. After thoroughly soaking the wallpaper, cover the wall with a layer of thin (0.7 mil) plastic, using a wallpaper brush to press the plastic onto the wall.
Let the wallpaper remover soak on the wall for at least three hours, overnight would be even better. The mixture will dissolve almost all the adhesive, allowing you to peel away the wallpaper with virtually no effort!
Oil-based stains are the best option for pressure-treated wood because they’re more effective at penetrating the wood. (IcemanJ, Getty Images)
A homeowner wants to stain her newly installed pressure-treated wood fence. She asks, “Can you give me some tips or advice?”
Staining a pressure-treated wood fence can be a great way to protect the wood and enhance its natural beauty. However, there are a few things to keep in mind to ensure that the stain is applied properly and adheres well to the wood:
Wait for the wood to dry: Pressure-treated wood is typically wet when it is first installed, so wait for it to dry completely before staining. This can take several weeks or even months, depending on the weather and the wood’s exposure to the elements. You can also try this test.
Clean the wood: Before staining, clean the wood to remove any dirt, grime, or other contaminants that may be on the surface. A solution of water and a mild detergent is usually sufficient, but you can also use a wood cleaner specifically designed for pressure-treated wood.
Choose the right stain: Not all stains are suitable for pressure-treated wood, so choose a stain that is specifically formulated for use on pressure-treated wood. Oil-based stains are the best option because they’re more effective at penetrating the wood.
Apply the stain evenly: Apply the stain evenly and in the direction of the wood grain. Work the stain into the wood using a brush, roller or pump-up, then back-brush it into the wood to ensure it’s thoroughly covered.
Allow the stain to dry: After staining, allow the wood to dry completely before applying a second coat or using the fence. This can take several hours or even days, depending on the weather and what stain was used.
Best New Products
Ridgid’s new and improved 2.0 Pro Gear System portable toolbox keeps all your tools organized and easily accessible while you’re on the go. Learn more >>
Simple Solutions
Conditioning a paint roller prevents loose fibers from shedding into the paint. (3 Echoes Content Studio)
Condition New Paint Roller — Before using a brand-new paint-roller sleeve, it’s important to “condition” it, so that it spreads paint evenly and smoothly.
Place the new sleeve on the paint roller, fill a plant mister with water, then spin the sleeve as you spray it liberally with water.
Dry-spin the sleeve to remove any excess water, then roll the sleeve onto a piece of cardboard or other bare, clean surface. That will help remove any loosened fibers from the roller sleeve — and prevent them from getting into the paint or onto the newly painted surface.
Now use the dampened, conditioned sleeve to immediately apply paint.
Hanging S-hooks from ventilated metal-wire shelving is an easy way to add extra storage. (Photo illustration: ABBPhoto, Getty Images/Adobe Stock)
Extra Storage for Ventilated Shelving — If you have ventilated metal-wire shelving in your closet or pantry, here’s a quick, simple way to gain a little extra storage.
Buy several metal S-hooks and slip them onto the wire shelving. Use pliers to pinch closed the hooks so they can’t pop off.
The hooks are great for hanging all sorts of items that would ordinarily be taking up valuable shelf space, including dust brooms, hand towels, flashlights, belts, scarves, etc.
Further Reading
Radio Show & Podcast: Send us your question!
If you have a comment, general question about home improvement, or something we’ve featured on Today’s Homeowner, please fill in this form:
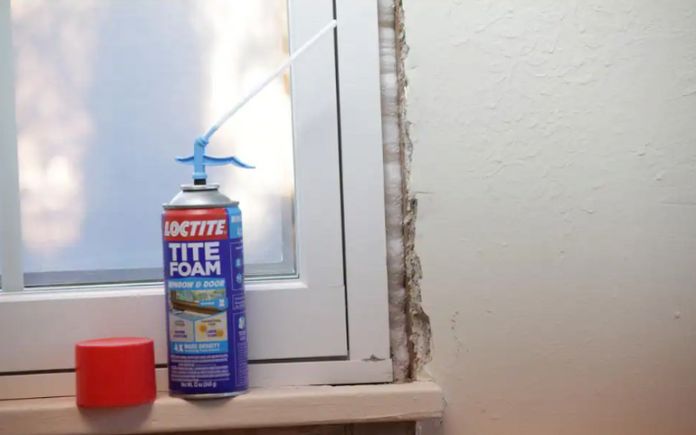
Drafty windows can be a major source of discomfort and can lead to higher energy bills. They let in cold air in the winter and hot air in the summer, making it difficult to maintain a comfortable temperature in the home.
The formula’s purified and concentrated ingredients ensure that the foam is durable enough to do its job for the long haul. It dries to a bright white finish that withstands UV rays and can be trimmed in 50 to 70 minutes.
Plus it sticks to almost any building material in your house, like wood, concrete, brick, stone, metal, PVC, and more.
In this special New Year’s Eve episode, we’re playing back some of our favorite segments from the past year. (3 Echoes Content Studio)
In this special New Year’s Eve episode, we’re playing back some of our favorite segments from the past year. We wish you a happy new year and hope you look at 2023 as an opportunity for you to get things done around your home.
Cutting crown molding is easy when you use our Simple Solution. (DepositPhotos)
Cutting Crown Molding: To make miter cuts in crown molding, turn a panel upside down on the miter saw table. This allows the angled back edges to rest against the fence and the table during cutting.
Holding the molding in the right position while you make a cut is the difficult part.
The solution is to hot glue a piece of 1-by-2 wood to the saw table so it acts as a cleat to hold the molding in the proper position.
Use plastic liners in your apron to easily switch between nails and screws. (3 Echoes Content Studio)
Easy Nail Apron Liners: Make interchangeable liners for your nail apron or tool pouch out of one-quart plastic motor oil bottles.
Cut off the spout, wipe the bottle clean, fill it with nails or screws, and slip the liner into the apron pouch.
Fill up several bottles with various types and sizes of fasteners, so you can quickly and easily switch them in and out without having to dump out the apron.
In this special Christmas episode, we’re playing back some of our favorite segments from the past year, as well as sharing some of our holiday traditions and memories.
How to Stack Firewood for Optimal Seasoning — Most people place firewood in one row, all the way across, and they work their way up with the same pattern. Now, there’s nothing particularly wrong with that method.
But if you want to know how to stack firewood so it’s as ready as it’s going to be for burning in your fireplace, then you’ll need to learn some new tricks.
You should stack the wood in alternating courses — that is, in opposite directions, row by row — and you continue that pattern. This way, there’s much more space for the air to circulate.
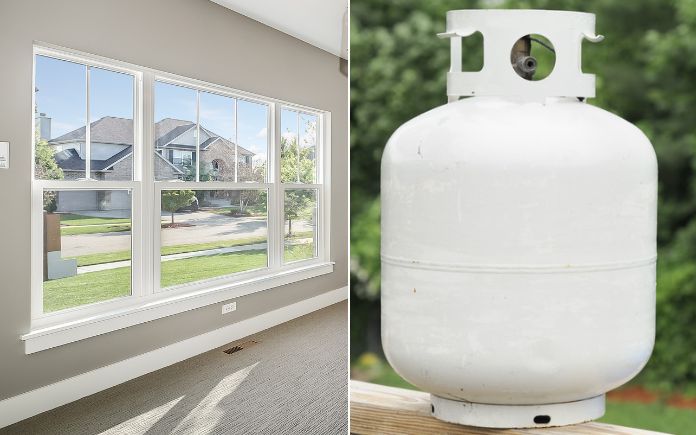
This week, hear how to replace two small windows with a large one and learn why cold weather can make propane less effective. (PC Photography, Getty Images/gmnicholas, Getty Images Signature)
Note: Audio from the latest episode of “The Today’s Homeowner Radio Show” is available Sundays after 4 p.m. CST.
Hour 1
Hear how to install laminate flooring around a door jamb, repair cracks in plaster and more.
Installing Laminate Flooring Around Door Jambs
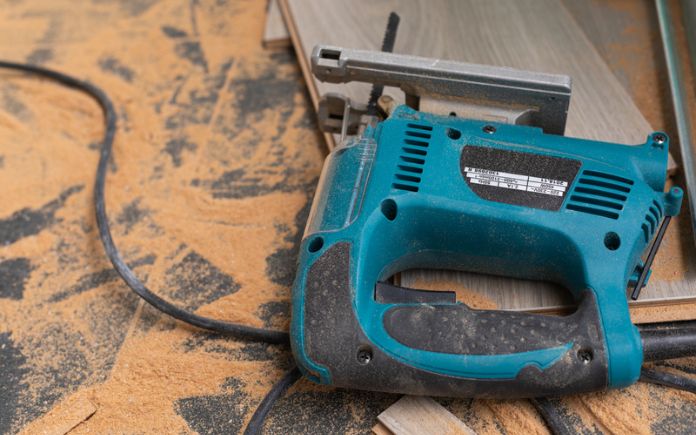
To install laminate flooring around door jambs, you’ll need to trim the jamb with a saw so the flooring can slip under it. (Ocskaymark, Getty Images)
A caller asks: “How do you cut laminate flooring to fit neatly around door jambs in a cased opening between two rooms?”
Most of the time, you’re not cutting the flooring, but you’re cutting the bottom of the jamb where it hits the floor.
A tool called a jamb saw is perfect for doing this. It’s like a circular saw, but the blade is turned 90 degrees so you can easily slide it into the jamb. You can rent one of these from a home center.
If you don’t want to rent a jamb saw, you can take a scrap piece of the flooring and put it on the subfloor against the jamb to get its exact height. If there’s any type of underlayment that goes under the laminate flooring, put that under it as well.
Then, use a reciprocating saw or a hand saw to cut a little bit off of the jamb so the flooring can slip under it. The thickness of the blade should leave enough room for the laminate flooring to expand and contract.
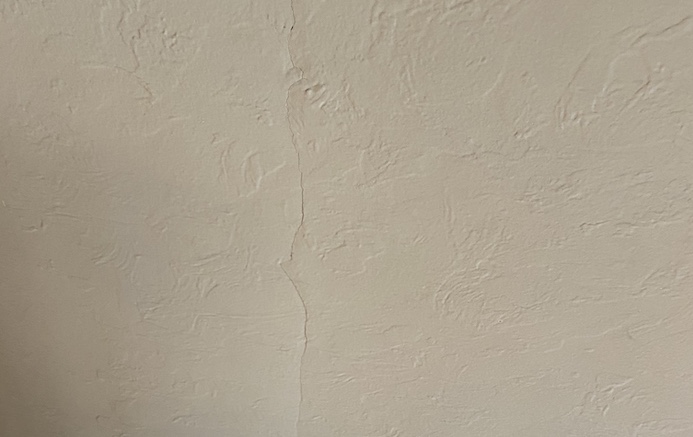
If you see a crack in your plaster, don’t panic! Small cracks can be repaired fairly easily. (Courtesy of Wes Burchell)
“What’s the best way to repair this old plaster wall?
Working with plaster is a little like working with drywall, but the final finish can be tricky to match.
The first thing you need to do is scrape out the crack using the pointed tip of a can opener. What you’re doing is widening that crack into a v-shaped opening to hold more plaster compound. Make it at least a quarter-inch wide.
Then, vacuum the dust out of the crack and clean the surface around it with a damp towel to remove any dust.
Then, you use joint compound or patching plaster to fill in the crack.
Once the crack is patched, prime and paint it to match the rest of the wall. With any paint repair, don’t just paint the repair area. Spread the paint out at least a couple of feet in each direction.
Hear a caller’s Simple Solution suggestion: how to replace two small windows with a large one, and more.
Simple Solution Suggestion
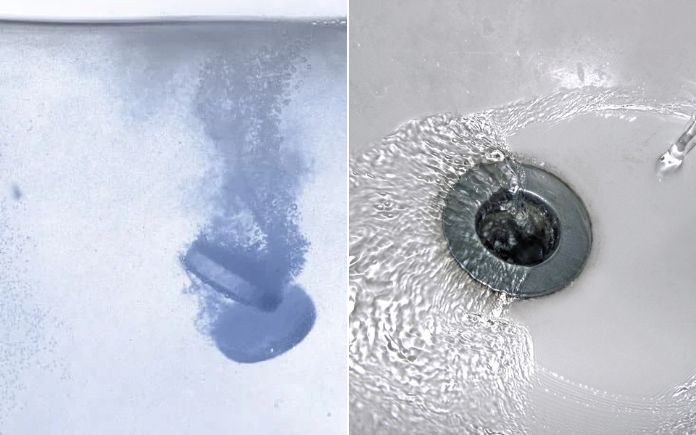
The effervescent action of denture tablets loosens buildup in a drain and makes it easier to flush away. (LdF, Getty Images Signature/laymul, Getty Images)
Diane McClaskey in Missouri has a potential Simple Solution suggestion for cleaning a sink drain.
After removing the pop-up stopper, add six to eight denture cleaning tablets to the drain, and add just a little water. Wait to let the cleaning begin, and add a little water as needed until clean.
The effervescent action will help to break up any dirt or grime and leave your sink sparkling clean!
So why would this work? The main ingredient in denture cleaning tablets is sodium bicarbonate, commonly known as baking soda.
Replacing two small windows with a large one is a great way to let in more light and improve your home’s curb appeal. (PC Photography, Getty Images)
A caller wants to replace two small windows with a larger one in her living. There’s a six-inch wall in between the windows, and she was told she needed to put in a header.
“I don’t know how to do this. Can you explain please?” she asks.
When you take a window out, you need to replace it with something to fill that void. A header basically is a 2-by-4 to a 2-by-12. A header spans horizontally above the window to support its weight. This prevents the ceiling joists, roof rafters, and anything above that might be bearing down on the window from sagging.
However, it’s a very tricky project. First, you have to access that area, and that’s done by cutting the drywall or plaster away from the inside above the upper part of the window opening so you’ll have room to cut out whatever’s there and put in the new beam.
Unless you’re very good at carpentry work, I suggest calling a professional to do this. The last thing you want is any sagging on the window down the road.
A professional can also ensure the new window is sealed properly to avoid drafts and energy loss.
Call your local home builder’s association and ask for their recommendations.
Can Cold Temps Damage a Propane Tank?
Cold temperatures can cause propane to become less effective. (gmnicholas, Getty Images Signature)
A caller says: “I have a backup propane tank that I store in my garage. It’s been there for over a year. I can’t get my grill to start with it. Does storing the tank for that long in a cold garage damage it?”
In order to keep propane in a liquid state, it has to be stored under pressure. Cold temperatures can cause the liquid propane to condense, which can then decrease the pressure inside the tank.
Propane turns to a liquid at -42 degrees C; if it gets that cold or colder, the pressure inside your propane tank will drop, eventually reaching a point where it is too low to effectively light a grill or other appliances, according to Lansing Ice and Fuel.
Bring it inside and let it warm up and check the level of gas. When in doubt, take it to get it refilled.
In the future, to keep the pressure higher, keep the tank at least 30 percent full at all times, and use a small insulated frame shelter to protect the tank from colder temperatures.
Best New Products
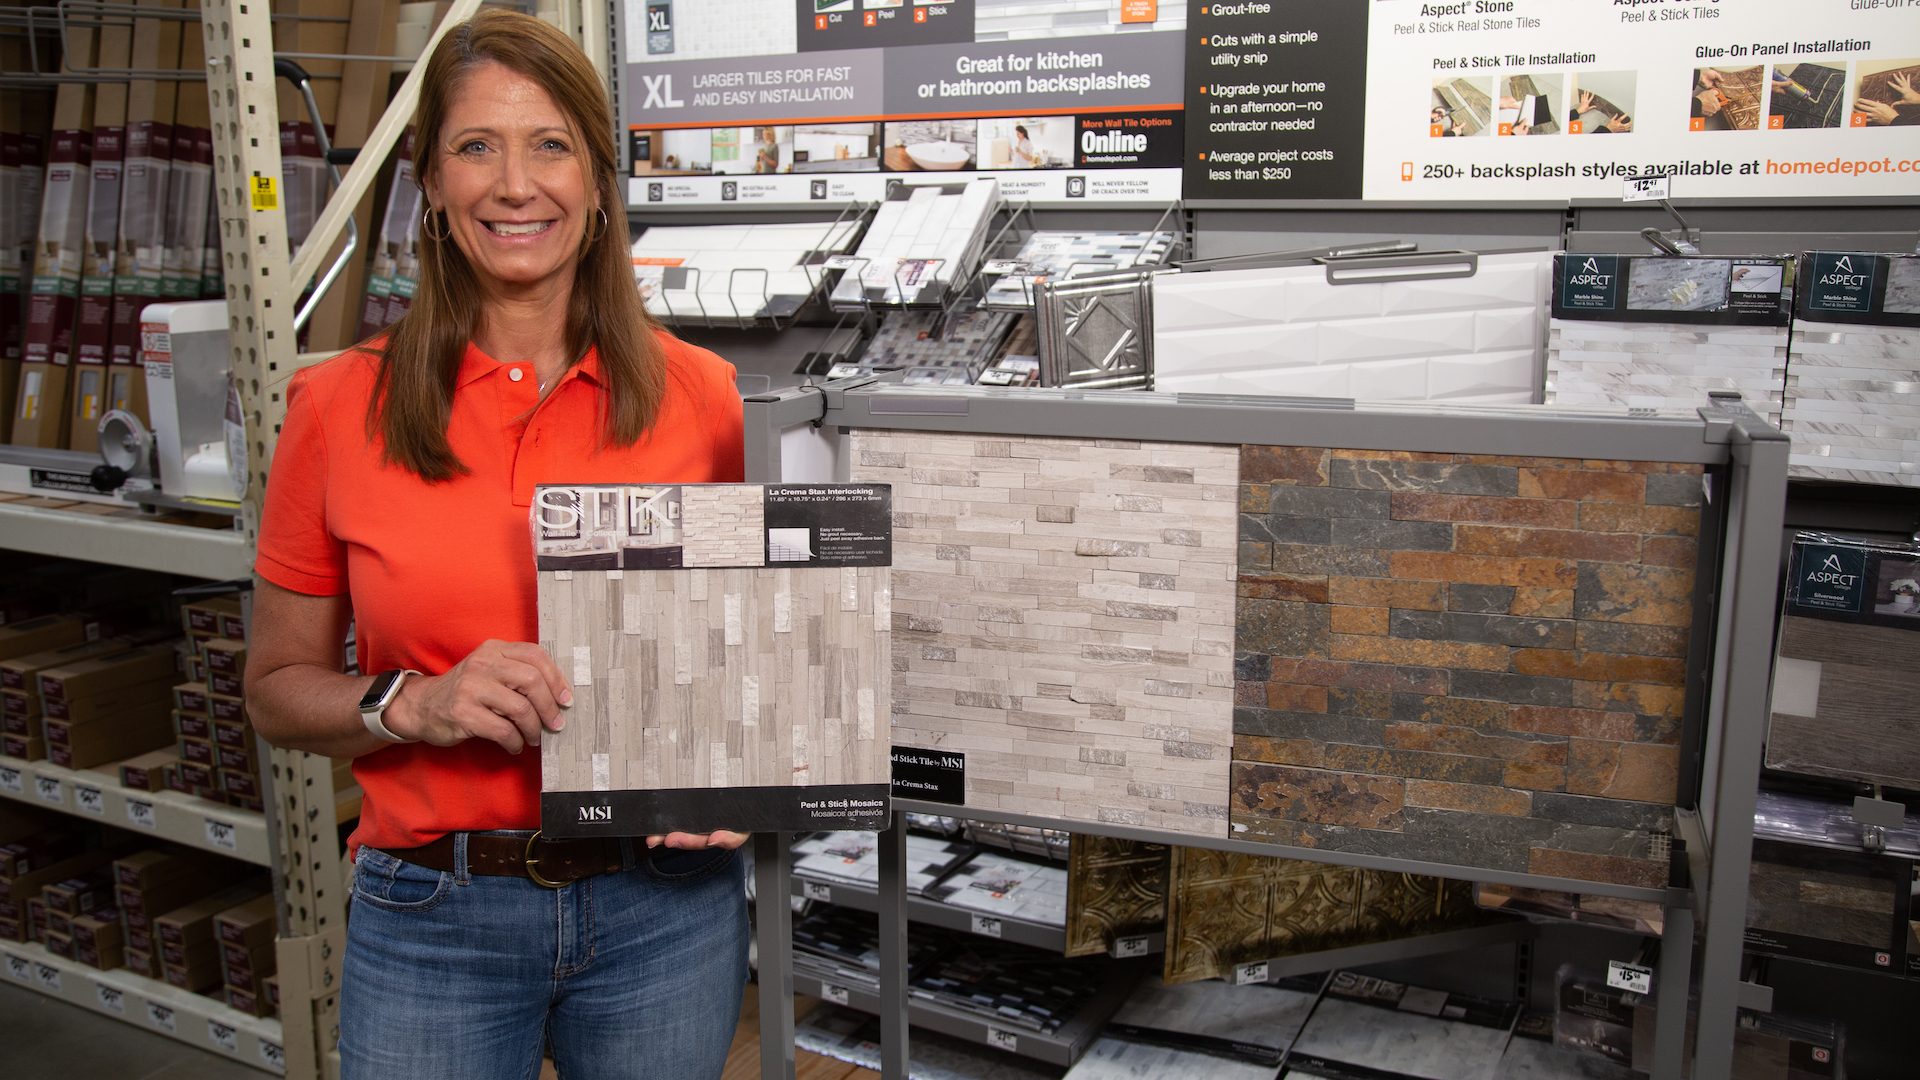
MSI’s new peel-and-stick backsplash gives you the look of real tile without all the hassle of a traditional thin-set application. Learn more >>
Simple Solutions
Using a power drill to wrap nylon string around a spool will speed up the process and lessen the likelihood of tangles. (3 Echoes Content Studio)
Fast and Neat Way to Wind String onto a Spool — A spool of nylon string can be used for many things — general crafting, fishing and hunting, and laying mason lines.
The string is easy to unwind off the spool, but it’s not as easy to get back on after you’ve used it. Winding it by hand back onto the spool can lead to tangles and uneven distribution. And eventually, you’ve got an unusable mess that you have to cut up. Here’s a much better, and faster, solution:
Take a screw and drive it through the end of the plastic housing that the spool is on. Then, chuck it into a drill.
Turn on the drill to the lowest setting, and just like that, you can now use the power of the drill to put the line back on the spool.
It only takes a few seconds to wind the nylon string back onto the spool! As you’re winding up the nylon string, slowly move it back and forth along the spool. This way, you don’t overload one side or the other, and the string winds up neatly every time.
A toilet bowl cleaner’s spout makes it perfect for pouring into grout lines. (3 Echoes Content Studio)
Inexpensive Alternative to Commercial Grout Cleaners — If you have tile in your home, chances are you’ve spent some time cleaning grout. While there are several grout cleaning products on the market, you might have something in your home right now that works just as well — toilet bowl cleaner.
Regular old toilet bowl cleaner that comes in a squeeze bottle can clean grout! Toilet bowl cleaner contains bleach, so it will not only lighten grout stains, but it will also kill any mold or mildew.
Plus, toilet bowl cleaner is cheaper than grout cleaner.