Lubricating your garage door and cleaning windows are easy chores to tackle during downtime when you’re home for the holidays. (knowlesgallery, Getty Images/Manuel-F-O, Getty Images)
In this special Ask Danny podcast, Danny talks about some simple home maintenance tasks to do during the downtime of the holidays.
Lubricating your garage door is a great way to help it run smoothly and reduce noise. (knowlesgallery, Getty Images)
Lubricate Door Hinges
An easy chore to tackle while you’re home for the holidays is silencing squeaky doors.
With just a few simple steps, you can easily lubricate your door hinges and keep them running smoothly!
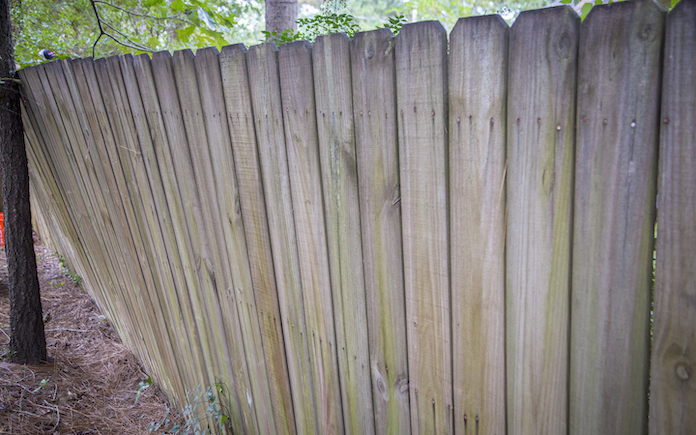
To lubricate door hinges, you’ll need some lubricant like WD-40. Use graphite lubricant on exterior hinges, like fence gates.
Start by opening the door and spraying the lubricant onto the hinges. Next, close the door and use a clean rag to wipe away any excess lubricant. Finally, open and close the door a couple of times to make sure the hinges are properly lubricated.
Don’t forget about your garage door! Lubricating a garage door with lithium grease is a great way to help it run smoothly and reduce noise.
To start, you’ll want to make sure the garage door is completely clean and free of dust and debris.
Once the garage door is clean, you can apply a thin layer of lithium grease to any metal-on-metal contact points on the door.
Make sure to avoid any plastic or rubber parts, as the lithium grease could damage them.
After you’ve applied the grease, you can test the door to make sure it’s working properly.
Gutter downspouts should carry water at least 10 feet away from the home. (ziggy1, Getty Images Pro)
Direct Drainage Away from Your Home
Proper home drainage is incredibly important for keeping your home safe and preventing damage to the structure.
Poorly drained homes can suffer from issues such as foundation damage, cracked walls, and mold or mildew growth. Additionally, poor drainage can lead to flooding, which can be both costly and dangerous.
Depending on your situation, there are a few options you could consider for directing drainage away from your home.
If you have rain gutters installed, simply direct the downspouts away from your home.
Another option is installing a French drain, which is a gravel-filled trench with a pipe that diverts water away from the area.
You could also install a sump pump, which pumps the water away from the area.
If you’re looking for a more natural solution, you could consider planting vegetation that can absorb water and direct it away from your home.
A great way to get started on organizing your garage is to divide the space into sections and designate a purpose for each. (3 Echoes Content Studio)
Organize Your Garage
Organizing your garage can save you time and energy in the long run, so it’s worth making the effort to do it when you’re home for the holidays.
It can help you to find items more quickly, as you’ll know exactly where everything is located. It can also free up more space for storage, making it easier to store items that need to be kept out of the way.
Furthermore, it can help to protect valuables from the elements and make your garage look more presentable.
Cleaning windows with microfiber cloths is a great way to get a streak-free shine. (Manuel-F-O, Getty Images)
Clean Windows and Doors
Cleaning house windows is a relatively straightforward task that can make a big difference in the overall appearance of your home. Here are some tips to help you get started:
Start by using a soft cloth to wipe away any dirt and dust that has accumulated on the windows.
Once the windows are free of dust, use a mild cleaning solution (diluted dish soap, a store-bought cleaner or a combination of white vinegar and water) to clean the glass. Don’t forget to clean the tracks too!
Use a squeegee or a soft cloth to wipe the windows clean. Start from the top and work your way down in overlapping strokes.
For extra sparkle, finish by wiping the windows with a cloth dampened with distilled white vinegar.
Draining some of the water out of your hot water heater annually removes sediment that settles in the bottom of the tank. (C5Media, Getty Images Pro)
Drain Water Heater
Draining your water heater can make your water heater more efficient and extend its life by draining the tank and flushing away sediment at least once a year.
A perfect time to do it is after all your guests have left your home for after the holidays.
Here’s all you have to do.
For electric heaters, turn off the power at the breaker box. For gas units, turn the fuel control to the off setting.
Next, turn off the cold water inlet valve, and attach a garden hose to the outlet valve at the bottom of the tank. When you open the outlet valve, be careful; it is hot water, after all.
To get the water flowing, you also have to flip the pressure relief valve near the top of the tank to break the vacuum inside.
Once the hot water drains, open the cold water valve to flush out the tank, and then simply reverse the process to restore normal operation.
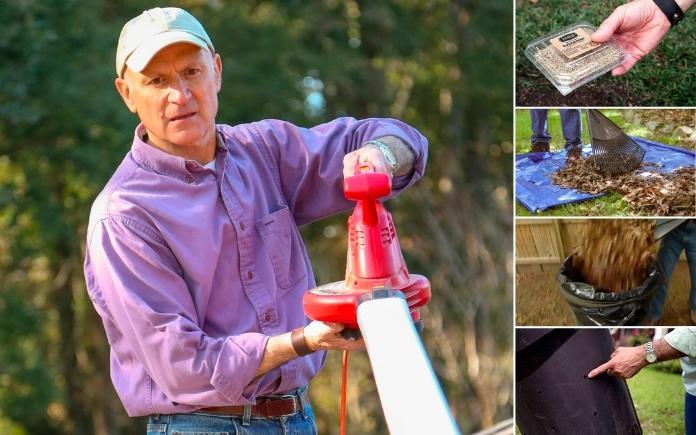
When raking leaves and putting them into a trashcan lined with a plastic bag, the weight of the leaves tends to pull the bag down inside the can. Every time you dump in leaves, you have to readjust the bag.
To prevent this from happening, put the bag in the trash can and fold its open end over the can, as usual.
Next, stretch a bicycle inner tube around the outside of the trash can to securely hold the bag in place.
Bike inner tubes are available in sizes up to about 26-inch diameter, so you should be able to find one to fit your trash can.
A leaf blower and some plastic downspout are all you need for the fastest and best way to clean gutters. (3 Echoes Content Studio)
3. Fast Way to Clean Gutters
Our next Fall Simple Solution is a clever way to clean gutters using a 10-foot length of a vinyl downspout.
Start by using a pair of snips to cut the end of the downspout, then pinch it closed with duct tape. This will create more power and pressure at the end.
Now, slip the opposite end of the downspout onto the leaf blower and you’re ready to power-blast your gutters clean.
You can blow out 8 to 10 feet of gutter from one position to either side, meaning you’ll only have to move the ladder maybe once or twice to clean the gutters along the entire house.
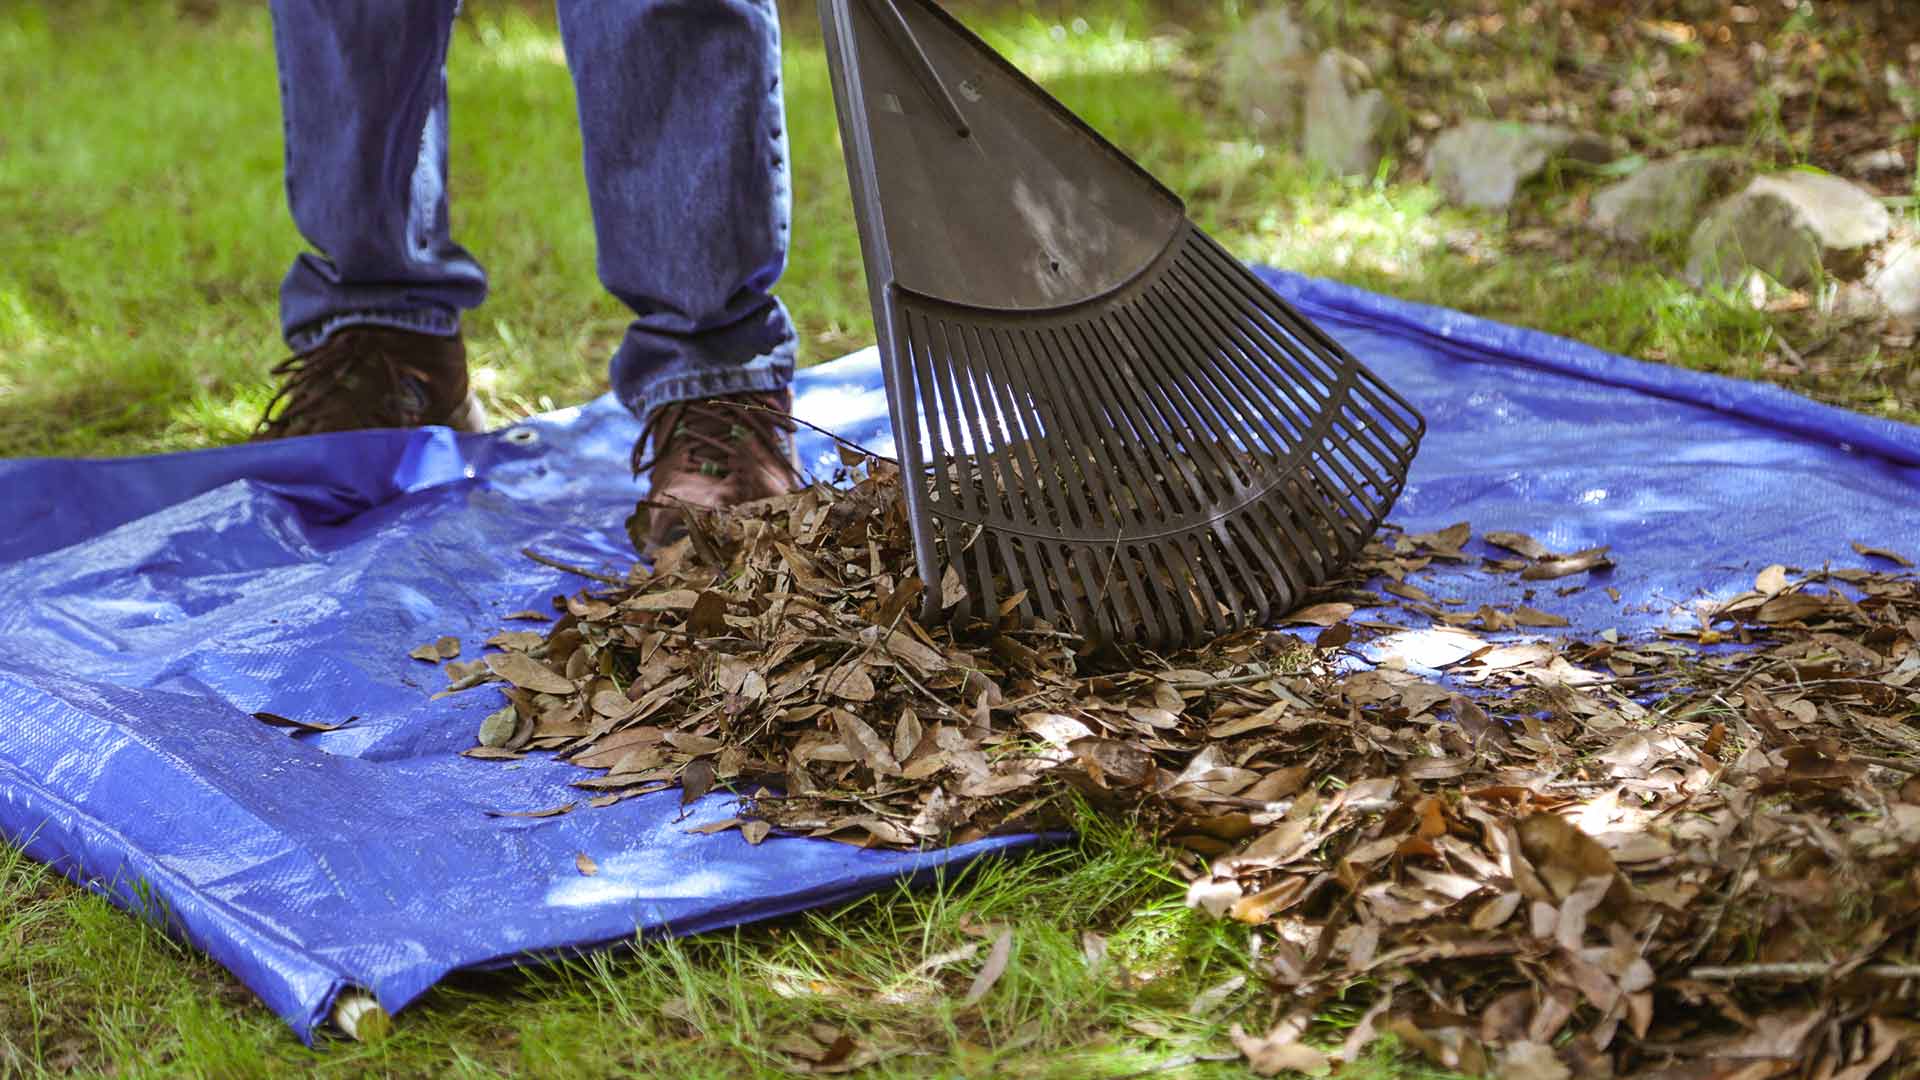
A slotted berry container is a perfect tool to evenly distribute grass seeds. (3 Echoes Content Studio)
4. DIY Grass Seed Shaker
Fall is the best time of year to sow grass seed because of the mix of warm soil and cool air.
Here’s a tip for over-seeding any bare or thin spots on your lawn.
Begin by getting a small plastic clam-shell berry container, the kind that supermarkets use to sell blueberries and raspberries. The containers have small slotted drainage slots that are perfect for distributing grass seeds.
Just dip the berry container in a seed bag, close the lid, and gently shake it over the bare spots. You’ll get a nice, even distribution of seeds, without wasting seeds.
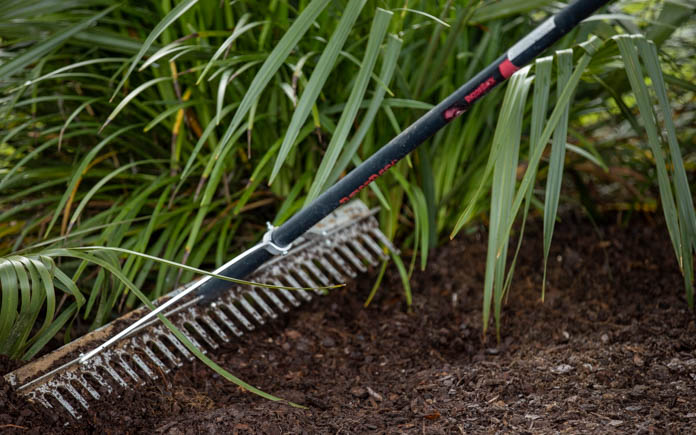
Next, rake the seeds into the soil, water the area, and cover with mulch hay.
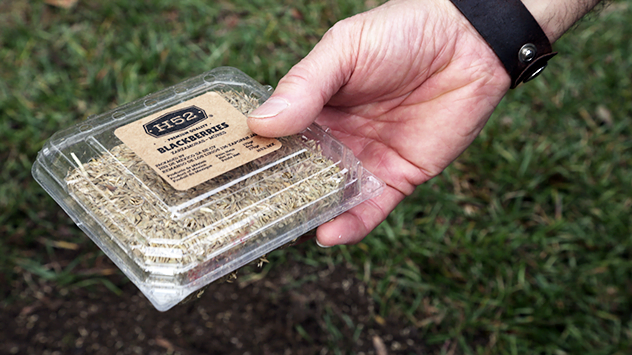
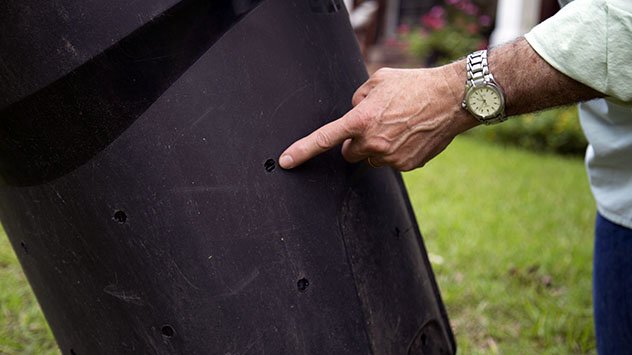
Drilling holes into the side of a garbage can is a quick and easy way to relieve suction. (3 Echoes Content Studio)
5. Non-Suctioning Garbage Can
Most people collect leaves by simply dumping them into a large plastic bag inside a trash can.
And there’s nothing wrong with that except when you go to remove the full bag of leaves — the bag forms suction at the bottom, making it difficult to yank out the bag.
So, here’s how to break that vacuum so the bag slides right out: Take a 5/8-inch diameter drill bit and drilled a series of holes around the outside of the can and also in the bottom.
The holes will allow air to flow into the can, breaking the vacuum.
Staying comfortable is essential during the hottest months, so we teamed up with American Standard Heating and Air Conditioning to share these tips on whether to maintain or replace your AC.
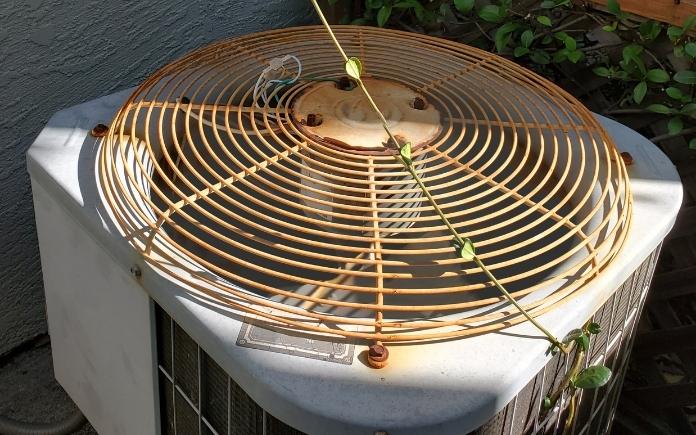
Plants growing on your AC’s condenser unit block airflow, which can lead to cooling problems. (TomSmith585, Getty Images Signature)
DIY Maintenance
If your air conditioner is less than 10 years old, then some do-it-yourself maintenance can help improve its efficiency.
These are some things you can do to keep your home air conditioner running smoothly.
Replace the air filter every month to avoid unnecessary calls to a heating, ventilation and air conditioning technician. After you remove the old filter, vacuum or wipe off the grill that holds the filter in place and insert the new filter. Then close the cover.
Make sure the heating and cooling system’s ductwork is insulated. If your home and its ductwork are air-sealed properly, your home can cool much faster, and maintain that temperature much longer.
Remove any debris and vegetation from around the outside condenser unit to maximize airflow.
If your best efforts to maintain your AC aren’t enough to keep your home cool, call a professional. (American Standard)
When to Call a Professional
If you’ve performed seasonal maintenance on your home’s air conditioner and it’s still not functioning properly, it’s time to call a professional.
Also, if your home air conditioner malfunctions, or has damaged ductwork or exposed electrical connections, don’t try to fix this yourself.
These issues must be addressed by a trained technician who can evaluate your system and make the best recommendation based on your needs.
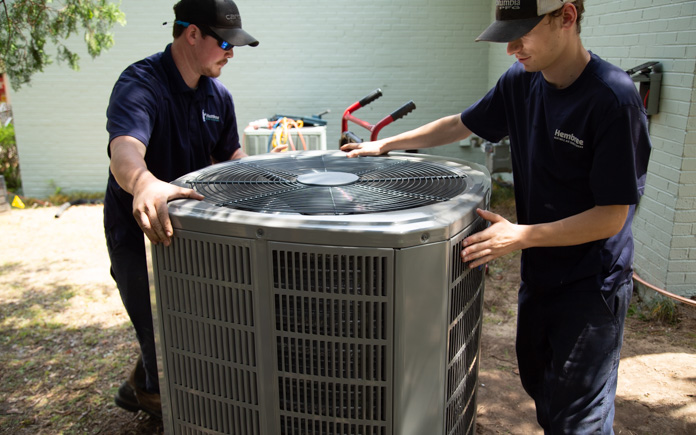
When the cost to repair exceeds the cost of a new home air conditioner, it’s time to replace it. (3 Echoes Content Studio)
Time to Replace Your Home Air Conditioner
Choosing to repair or replace your home air conditioner both cost. By weighing the options, you can determine what gives you the biggest return on your investment.
If you have an older system, it may cost more to operate and/or repair, because it is not as energy efficient, and manufacturing for some of its parts may have been discontinued.
Most older units use the outdated refrigerant Freon, so eventually, you’ll have to upgrade to equipment that uses the latest refrigerant.
Does your unit frequently break down? Does it make odd noises or take a long time to reach the cooling set point? If so, you may need to seriously consider a replacement.
A good rule of thumb for determining whether to repair or replace a home air conditioner is to use the $5,000 rule. Just multiply the age of your equipment by the estimated repair cost. If the number you get is more than $5,000, consider a replacement. If less, repair it.
In the market for a new air conditioner? Local rebates or tax credits may be available for purchasing an energy-efficient system.
First, call a professional to do a free in-home visit and learn about your options. To find your local American Standard Customer Care Dealer, visit their website at americanstandardair.com.
With help from our friends at The Home Depot, we’ve compiled this list of timely chores to keep your house clean and comfortable.
Listen to this special-edition Today’s Homeowner Podcast, and follow along below, to learn all about the top summer home maintenance projects!
Changing the air conditioner filter makes your AC work better to keep you cooler. (3 Echoes Content Studio)
1. Change AC & Heating System Filters
Regularly changing your HVAC system’s filters is important because a dirty filter will slow down and strain your system. It should take about two to three minutes to take out your old filter and put in a new one.
Also, once your filter is out, go ahead and vacuum the cavity in case of dust build-up.
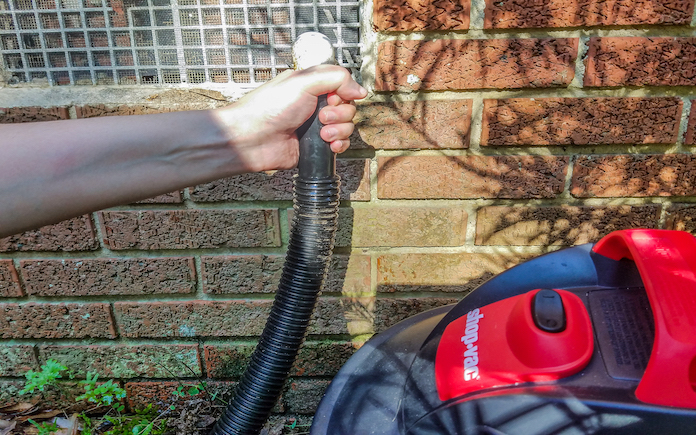
Your AC drain line can get blocked with mold and mildew, causing its pan to overflow. Flush it with bleach twice during the summer, when it’s working at its hardest.
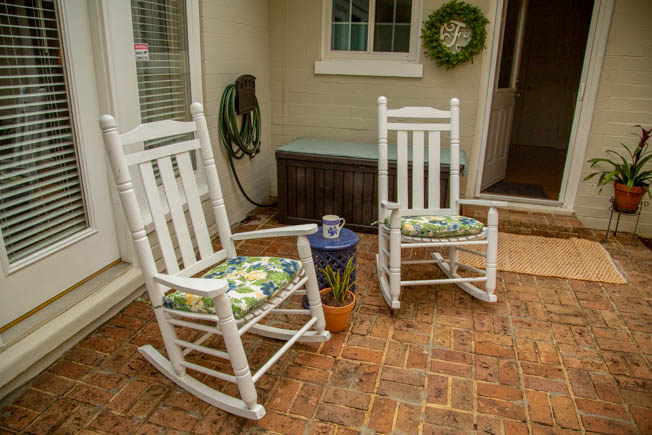
3. Check for Loose Railings or Damage on Wooden Decks
Changing weather can take a toll on your deck. Nails and screws can loosen during the temperature change and splinters can pop up once the heat rises.
Inspect and repair any damage to your deck so you can have some safe fun in the sun. Top it off with a coat of sealer to keep it protected all summer long.
Check for any loose parts or rot (if it’s wood). If you have cushions, be sure to wash them. In addition, if your cushions get wet from rain, be sure to hang them out to dry on a sunny day to avoid mold.
If you do this on a regular basis, it makes it a lot easier to keep everything clean.
Your fireplace will be ready for winter if you have it inspected this summer. (3 Echoes Content Studio)
7. Have Chimney Inspected & Cleaned
Now’s a great time to have a professional inspect your fireplace and chimney because you aren’t using them during the summer.
Plus, you’ll have more time for repairs if needed.
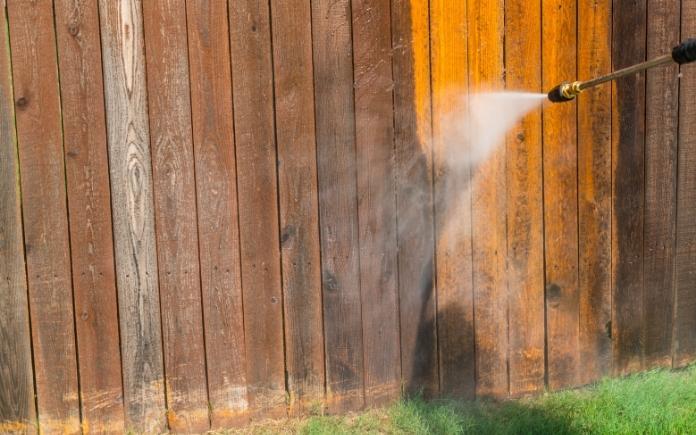
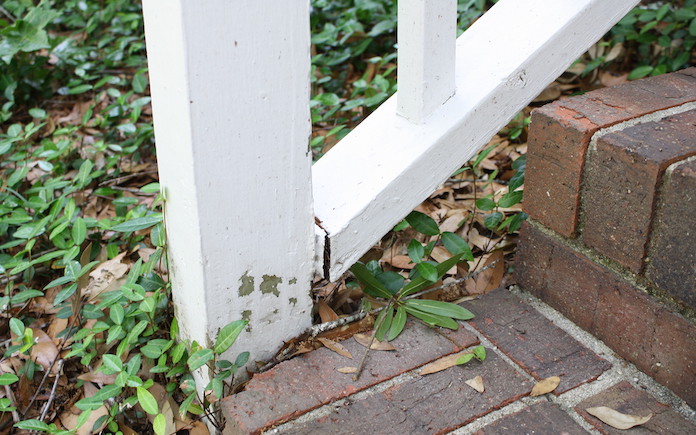
Scrape off peeling paint and put on a fresh coat for an exterior refresh. (mehampson, Getty Images)
8. Scrape Loose Paint from Siding & Trim
Boost your home’s curb appeal by freshening up siding. Scrape away any loose paint, sand if needed, then prime and paint on a fresh coat.
If it’s an older paint, be sure to test it for lead as a precaution.
Mix 1 teaspoon of baby shampoo to 1 gallon of water, or 1-1/2 cups of vinegar to 1 gallon of water, and wipe windows down with newspaper for a streak-free shine.
Involve family members and tag-team to speed things up! Have one person clean the windows inside while another cleans the outside.
Finally, summer blooms are burgeoning! Now is the perfect time to pull any weeds from garden beds and prevent further weed growth by adding 2 to 3 inches of mulch.
Listen to this special-edition Today’s Homeowner Podcast for more summer home maintenance tips!
Modern-day victory gardens are a way for people to become more self-sufficient. (Kampus Production/Pexels)
Victory gardens are experiencing a resurgence as the effects of the COVID-19 pandemic are still lingering two years on.
The renewed interest in victory gardens began at the onset of the COVID-19 pandemic. Online searches for victory gardens surged in April 2020, the start of lockdown. As people were quarantined, they were looking for ways to channel emotional energy in a positive way, while also securing a safe source of fresh produce.
Now, victory gardens are experiencing a second wave of popularity. Supply chain issues and food shortages have more people than ever unsure if they will be able to purchase their food when they need it.
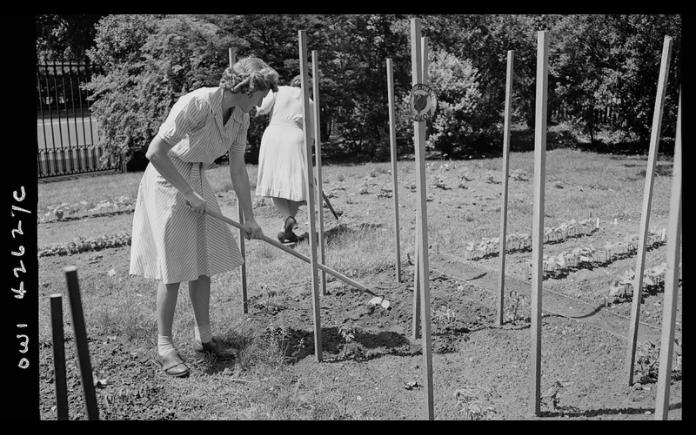
A woman tends to a victory garden in New York City in June 1944. (Farm Security Administration – Office of War Information photograph collection/Library of Congress)
History of Victory Gardens
Victory gardens were vegetable gardens planted during World War II in order to ensure an adequate food supply for civilians and troops.
The goal of the Victory Garden Program, which started in 1942, was to reduce demand for commercially grown vegetables by encouraging Americans to grow their own produce and preserve and can their surplus harvest. By empowering people to grow their own food, victory gardens made Americans feel part of a greater cause.
Victory gardens supplied 40 percent of the nation’s produce by 1944. By the time the war ended the next year, American families had grown about 8 million tons of food.
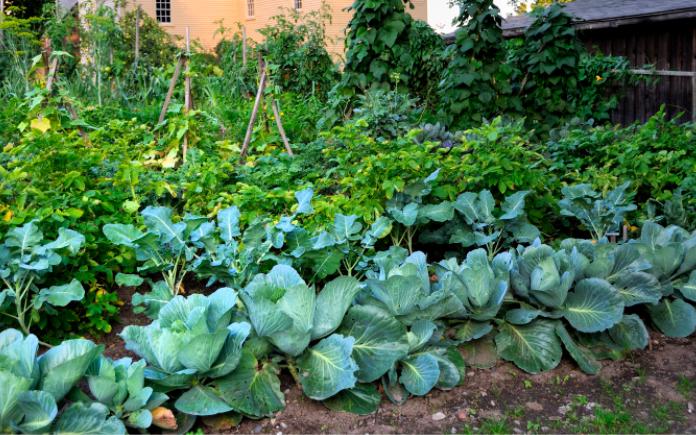
With the preparations, you can have your own bountiful victory garden. (MikeCheram/Getty Images Signature)
Starting a Victory Garden
With proper planning and regular maintenance, you too can have a bountiful victory garden.
Choose a place where your plants can get at least six full hours of sun. Don’t plant your victory garden near trees or shrubs, as those can compete for nutrients and water.
Also, make sure you will have easy access to water. Consider a raised bed or container gardening if you don’t have much space.
Browse through garden catalogs and check out garden stores to help you choose what you want to plant.
Because what you can grow is highly dependent on the climate where you live, refer to the USDA Plant Hardiness Zone Map to find what vegetables are good to grow in your environment.
Historically, some of the most popular produce grown in victory gardens included beans, beets, cabbage, carrots, kale, kohlrabi, lettuce, peas, tomatoes, turnips, squash and Swiss chard.
To ensure your victory garden plants grow at their best, do a soil test and amend it to suit your crops. (pixelshot)
Prepping for Your Garden
Remove grass and sod and till the upper layers of soil in your garden area.
Then, be sure to add four to eight inches of organic matter for the first year or two in new gardens if the soil is of poor quality. Home-made or store-bought compost provides good options for adding organic matter.
Perform a soil test to provide information about the pH (acidity and alkalinity) and available nutrients in your soil. A soil test also provides recommendations on how to amend your soil to better support plant growth.
Add compost as top-dressing or mulch throughout the growing season but incorporate it lightly to keep it from washing away. Add 1-2 inches of compost each year after you’ve started your garden.
Gardens that have yearly additions of organic matter may have enough nutrients to grow most crops without the need for supplemental fertilizer.
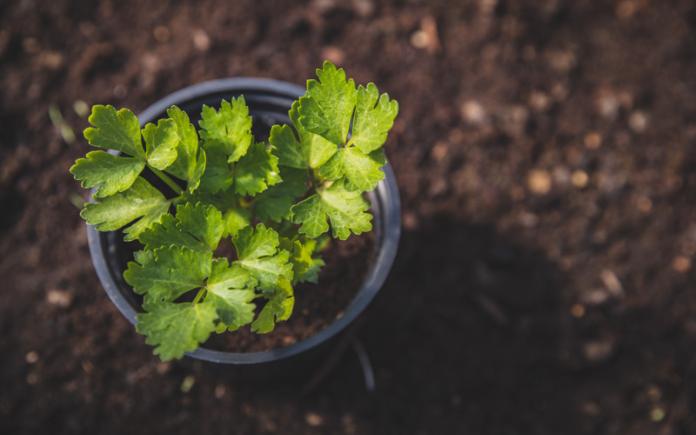
When transplanting plants, handle them carefully so you don’t bruise the stems or damage the roots. (Eva-Foreman/Getty Images)
Planting a Victory Garden
Plant your seeds according to the instructions on the packet. Firm the soil over your seeds to increase soil contact and speed up germination.
If you don’t want to start your victory garden from seed, buy transplants from a garden center. Choose vegetable plants that are stocky, disease-free, insect-free, and have good roots.
Plant transplants on a cloudy, windless day in the late afternoon or early evening to prevent wilting. Water the plants several hours before transplanting so the roots won’t dry out.
Dig a hole large enough to hold the roots and set the plant just slightly deeper than previously planted.
One exception is tomatoes. They should be planted deep enough to leave only two or three sets or leaves exposed because they will develop new roots along the stems.
Press the soil firmly around the roots of the transplant. Water, then pour starter solution around the roots per instructions on the starter solution label.
Plant the remaining plants, and keep them spread apart according to their recommended spacing.
To protect the new plants from wind and direct sun, cover them with a plastic jug for a few days. Make sure there is adequate ventilation so the plants do not overheat.
Pickling is one method of preserving vegetables harvested from a victory garden. (Nahhan/Getty Images)
Preserving Your Victory Garden Produce
If you’ve properly cared for the plants in your victory garden, you might find you have too big of a harvest to eat before it goes bad. Here are some ways to preserve your produce:
Canning: Canned vegetables are heated hot enough and long enough in a jar to destroy organisms that can make people sick and spoil food quality.
Pressure canning is the only safe method of canning all vegetables, except tomatoes. Jars of food are placed in a pressure canner which is heated to an internal temperature of at least 240°F. This temperature can be reached only in a pressure canner.
Drying: The University of Georgia rates carrots, sweet corn, garlic, mushrooms, onions, parsley, parsnips, peppers and potatoes as “excellent” or “good” for their quality after drying.
You can dry out these vegetables in the oven or a food dehydrator. Before drying, blanch the vegetables in boiling water to destroy enzymes that can cause color and flavor issues.
Properly stored, dried vegetables keep well for six to 12 months, and a great to use in soups, stews, sauces and dips.
Pickling: Pickling uses vinegar and other acids to preserve food. Mix in some herbs and spices to add extra flavor.