Today’s Homeowner TV host Danny Lipford and Today’s Homeowner Media Production Manager Corey Wilson. (3 Echoes Content Studio)
Raising backyard chickens can be a fun and rewarding experience, providing fresh eggs and even a source of companionship. However, before you start your backyard chicken journey, it’s important to understand the basics of building and maintaining a chicken coop.
Today’s Homeowner Production Manager Corey Wilson is joining me to chat chicken.
A chicken coop’s size depends on how many chickens you own, so one this size is perfect for a couple of chickens. (RandallJSylvia, Getty Images)
Coop Size
When it comes to building or buying a chicken coop, size is an important consideration. The amount of space needed for each bird will vary depending on the number of birds you plan to keep, but a general rule of thumb is to provide 2-3 square feet of coop space per bird and 5-10 square feet of run space per bird.
Remember —chickens sleep in the air, perched on a limb, so make sure to include enough space for them to sleep comfortably.
Hay flooring absorbs moisture so the bottom of the chicken coop stays dry and smells fresh. (GarysFRP, Getty Images Signature)
Coop Components
A chicken coop typically includes several key parts: nesting boxes, roosts, runs, and an enclosed area for sleeping and protection.
Nesting boxes provide a safe and secure place for chickens to lay their eggs, while roosts give the birds a place to sleep.
Runs are essential for exercise and foraging. The enclosed area serves as a protected space for the birds to sleep, rest and take shelter.
When it comes to flooring, use materials like sand, hay or pine shavings. These materials are comfortable for the chickens and easy to clean. They also absorb moisture, which helps keep the coop dry and smelling fresh.
A well-built and maintained coop is crucial for the health and well-being of your chickens. Providing enough space, perches, and suitable materials for the birds, will ensure that they are comfortable and healthy and can produce eggs efficiently.
Egg-laying chickens lay up to one egg per day at their peak. (georgeclerk, Getty Images Signature)
Egg Production
A healthy hen will typically lay one egg per day, with her reproductive cycle lasting between 24-27 hours. However, the actual egg production can vary depending on a number of factors such as the amount of daylight, comfort, predators, and nutrition.
Daylight: Chickens need at least 14 hours of daylight in order to lay eggs. In the winter, when daylight hours are shorter, egg production will naturally decrease. You can use artificial light to supplement the daylight hours, but it’s important to use the right type of light and the right amount to avoid stressing the birds.
Comfort: Chickens need a clean, dry and safe place to lay their eggs. A well-maintained chicken coop with nest boxes will provide the comfort and security that chickens need to lay eggs.
Predators: Chickens that feel threatened by predators will not lay eggs. It’s important to protect your chickens from predators by securing the coop and the surrounding area.
Nutrition: Chickens need a balanced diet that provides the necessary nutrients for egg production. Feed specifically formulated for laying hens will provide the right balance of protein, calcium, and other essential nutrients.
Interestingly enough, a rooster is not necessary for a hen to lay eggs. Hens will lay eggs whether or not there is a rooster present. However, if you want to breed chickens, you will need a rooster.
Chicken scratch is a type of feed that is made up of whole grains such as corn, barley, oats, wheat or other grains. (maerzkind, Getty Images)
Chicken Food
There are a variety of types of chicken food available on the market, each designed to meet the specific nutritional needs of chickens at different stages of their life.
Starter feed: This type of food is formulated for chicks during their first six weeks of life. It contains a high level of protein, around 20-24 percent, to help them grow and develop quickly.
Grower feed: As the chicks grow, they need different food. Designed for chickens between 6-20 weeks old, grower feed contains a lower protein level around 16-18 percent as they don’t need as much protein as when they were chicks but still need enough to support their growth.
Layer feed: Chickens are adults once they reach 20 weeks old, so they now need a different type of food. Layer feed is formulated for egg-laying hens, so it contains a higher level of calcium to support the formation of eggshells.
Pellets: These small, easy-to-eat pieces are convenient to use and store, and are often used as a complete feed for chickens.
Crumbles: Similar to pellets, crumbles are also compressed, but they are smaller in size and tend to be more palatable for chickens.
Mash: Mash is made by mixing together different grains and protein sources. It is usually moist and easy for chickens to eat.
Scratch: Scratch is a type of feed that is made up of whole grains such as corn and barley. Chickens are encouraged to forage, so this type of food is can used as a treat.
On average, a flock of 10 chickens will consume about one bag of feed every three weeks. (3 Echoes Content Studio)
Cost to Feed Chickens
When it comes to feeding your chickens, a good rule of thumb is to plan for about one bag of food every three weeks for a flock of 10 hens.
On average, a bag of chicken feed can cost anywhere from $40 to $50. This may seem like a lot, but when you consider the fact that chickens will lay eggs almost every day, it’s a small price to pay for the delicious, fresh eggs they provide.
In addition to regular chicken feed, provide your birds with oyster shells for calcium. This is essential for maintaining the strength of their eggshells. You can purchase oyster shells in a bag and they usually cost around $10-15.
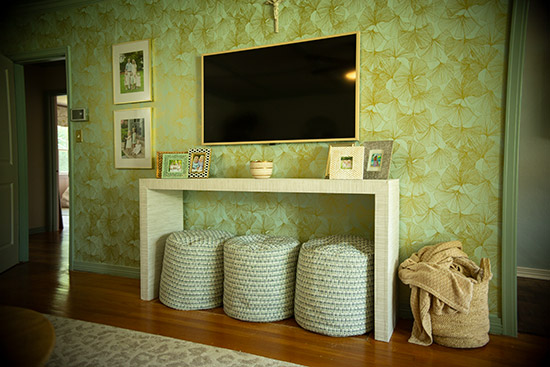
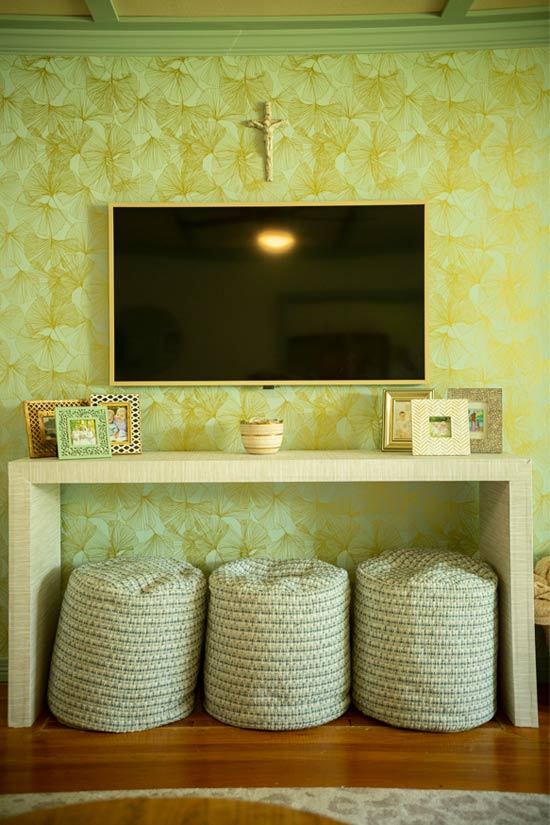
Inspired by currently trending raffia-covered furniture, I’m showing you how to build your own TV console table covered in wallpaper for $150!
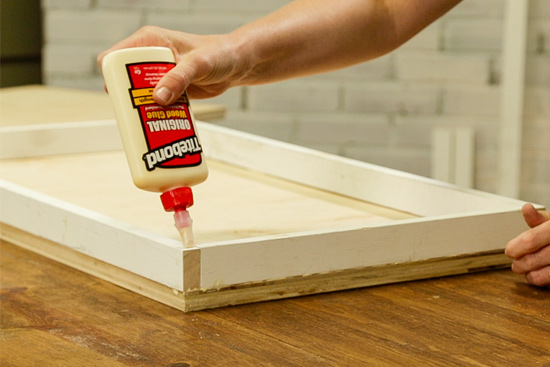
**I partnered with Titebond for this project which makes me really excited because…I used their original wood glue and ONLY their wood glue to hold my entire table together! What?!**
The goal for my house was a tall and wide table without any visible supports that broke up the clean lines. The overall dimensions of my finished table are 70″ wide and 35″ tall. So keep that in mind with the materials and cut lists below!
What to Buy
What to Cut
1x2s:
(4) @ 32″
(7) @ 14-1/2″
(2) @ 70″
3/4″ plywood:
(4) 32″ long x 16″ wide
(2) 70″ long x 16″ wide
Building the Console Table Boxes
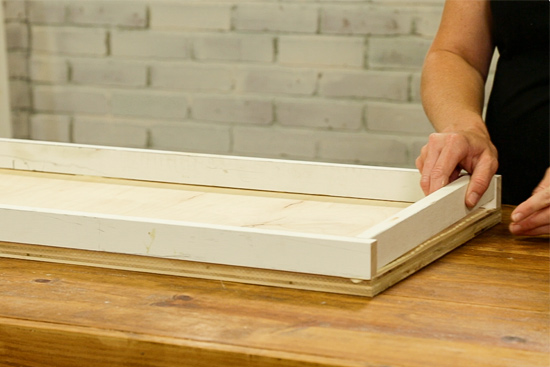
Essentially we are creating 3 separate boxes. 2 will be the legs and 1 will be the tabletop.
Start with the 2 smaller boxes (legs) to get your feet wet. Lay a 32″ piece of plywood down and add your Titebond wood glue along the top side of all 4 edges. Then lay a 1×2 on its side on top of the glue, making sure it’s flush with the edge of the plywood.
The 32″ pieces of 1×2 will go from edge to edge of the plywood while the 14.5″ pieces should fit snuggly between.
Once you have the 1x2s lined up on the edges just so, run a bead of wood glue on the top of them.
Gently set another 32″ piece of plywood on top. Now your box leg is complete!
Repeat for the other leg, using a few clamps if necessary to create super tight joints!
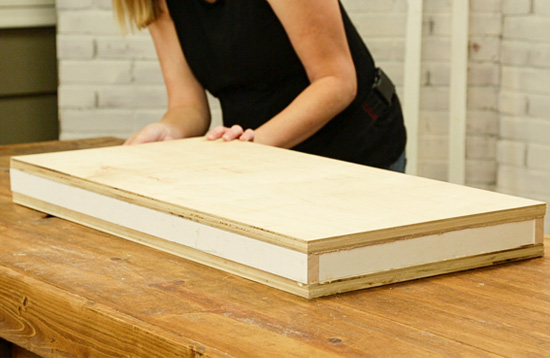
You’ll follow the same steps to create the tabletop, only you’ll add an additional 14.5″ 1×2 support somewhere in the middle. This will help keep the long 1x2s from sinking in and add overall stability to the table.
Waiting is the Hardest Part
If you’ve ever tried to pry wood apart that’s been glued with Titebond, even for a few minutes, you know it’s basically impossible to do well.
And that’s why you don’t need any nails or screws to hold your table together. Wood glue, when fully dried and cured, is actually stronger than fasteners! So crazy but oh so true!
Let your 3 boxes dry and set up for at least 30 minutes before moving on to the next step.
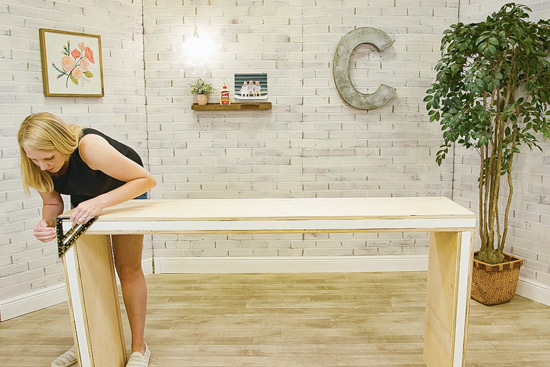
Adding Legs to the Table Top
Assuming your floor is level, set your leg boxes upright, approximately 70″ apart. Apply ample amounts of wood glue to the tippy top of your legs and gently set the tabletop in place. Adjust the top so it’s flush with the outside of your leg on one side before adjusting the other leg.
For a table this large, it would be helpful to have a friend or spouse hold the good side in place while you manipulate the other side. But with a few back-and-forths, you can handle it yourself too!
I used a speed square to make sure the legs were at 90-degree angles. Not a bad tool to have in your arsenal if you don’t have one already!
When you’re satisfied with your leg situation, let it sit for about 30 minutes before you start covering everything in wallpaper!
Adhering Wallpaper to the Console Table
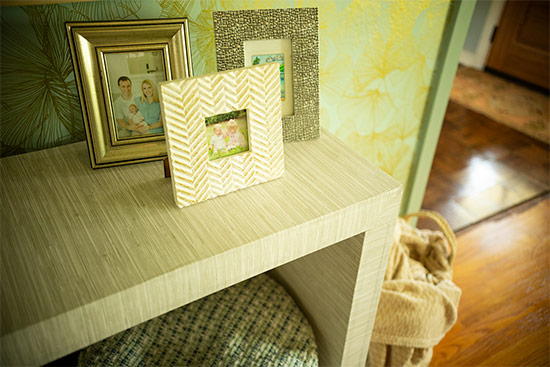
I love the texture of a raffia or light-colored wood table. And after a friend shared an inexpensive peel-and-stick wallpaper she used that looked like faux grasscloth, I knew I could use that to create the texture I wanted for this piece of furniture.
I also wanted the table to look like one slab of wood. To create that effect with the wallpaper, I started at the bottom of one leg, took it up and over the top, and then down the other leg without any cuts or seams. I also lined it up with the back edge of the table so it could fold and go down the front edge without any seams.
Hopefully, the video better illustrates how I handled the corners, so watch it above! I had the paper that came from the tabletop under the paper from the legs. Then I scored on the paper itself the 45-degree angle from the inside corner to the outside corner of the wood structure. I cut any excess paper from the top and then stuck it down. Next, I cut the layer of paper coming from the legs along the line I just scored. So when everything was laid flat and stuck down good, it looks like my legs and tabletop were mitered together.
Originally I planned to carefully trim the excess at the end of the front edge, but since it folded so nicely without any bubbling, I folded the inch or so excess and stuck it to the inside of the table.
And that got covered up next with another run of wallpaper. I bought enough wallpaper (2 rolls) to cover the inside of the legs and the underside of the tabletop. And since I was less concerned on the underside about seeing seams, I covered them individually and ended up not covering the underside of the tabletop itself. You really can’t see it during everyday use and it saved me $27 by not opening the second roll.🤷♀️
Oh and for the legs, the inside wallpaper was flush with the front edge so the excess was just folded over and stuck onto the back of the legs. Yes, it looks unfinished from the backside. BUT WHO CARES?!
The only place I needed to trim wallpaper was at the base of the legs. I propped up one leg at a time with a scrap piece of 1×2 so I could trim it as precisely as possible. I didn’t want any sliver of wood showing and giving away my table’s secrets!
About an hour or so after completing the table, there was still a little wobble to it if you shifted it from side to side. But after leaving it alone overnight, the wiggle was gone and this table was sturdy, stable and ready to move to its new home!
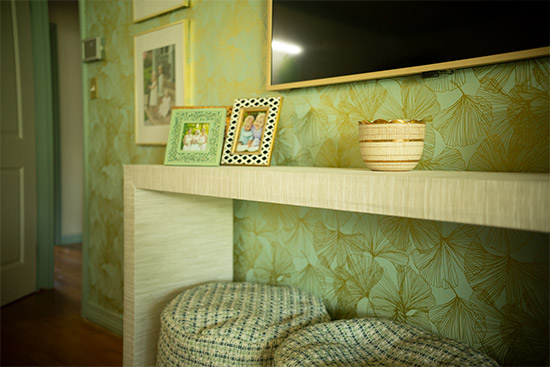
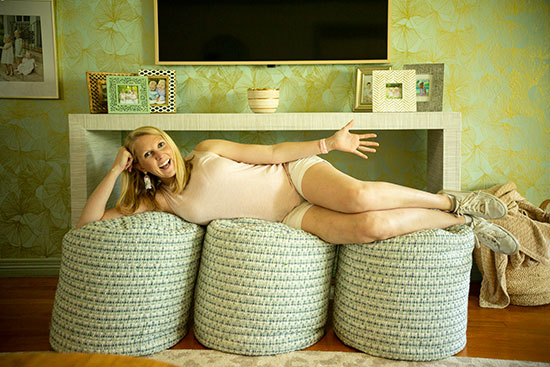
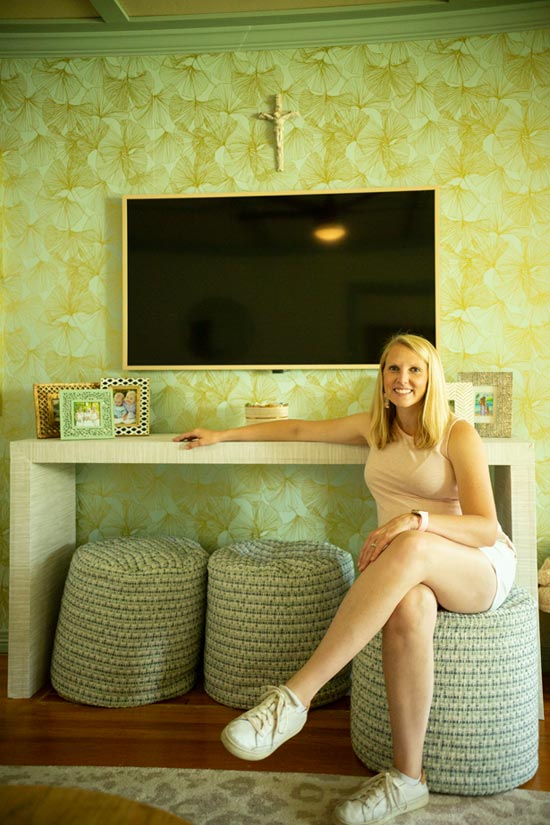
I ordered our poufs from Home Depot* to serve as decoration AND additional seating. They are like sophisticated beanbag chairs and the kids have already pulled them out to sit and roll around several times!
The wallpaper behind the TV and console was recently hung to create an accent wall. I like it by itself but I’m still trying to figure out if I like the room as a whole with the wallpaper in it.🤔
But we do love the sleekness of our Frame TV*! It was a splurge we treated ourselves to when our previous house sold for way over the asking price. Now I’m thinking I might brush some gold paint on the frame to match other gold frames in the room. The projects and ideas never stop around here! Ha!
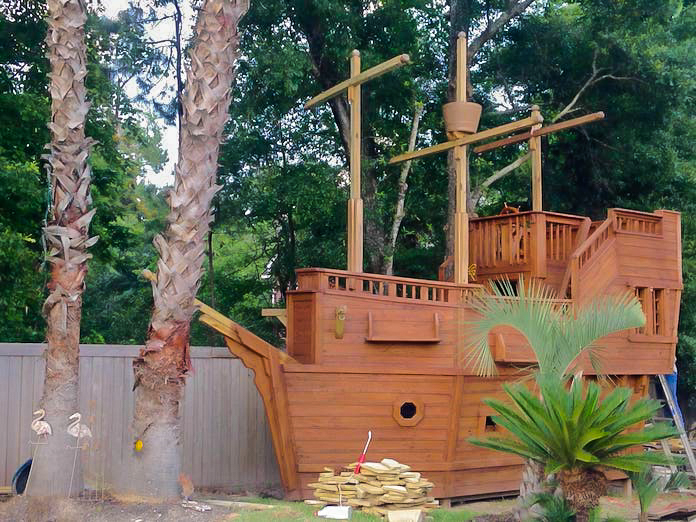
It all started in 2015 when a swingset broke in Jeff Headrick’s backyard.
So Jeff, a master carpenter, decided to use his decades’ worth of building experience to construct a new place for his grandchildren to have fun outside.
When asked what kind of playhouse his grandchildren wanted, the kids, aged 1-9, decided on a miniature pirate ship.
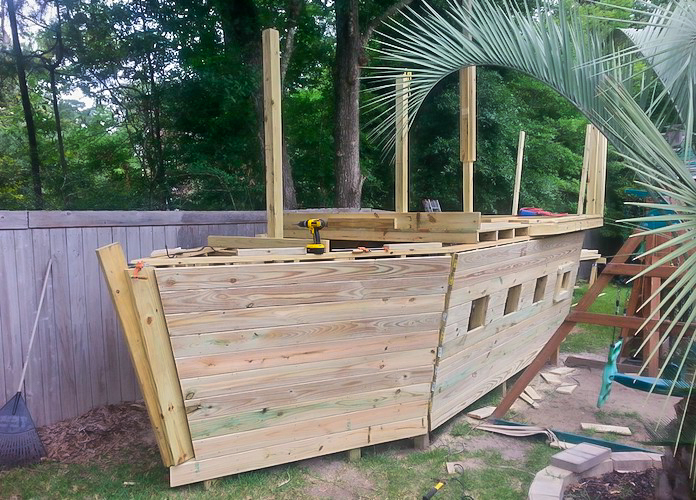
Jeff’s wife Debbie says he drew up some rough sketches for the playhouse and constructed and deconstructed parts along the way. He wanted the project to “not only be perfectly square, but safe for his grandsons.”
In this 2017 photo, Jeff and Debbie Headrick had just applied the first coat of stain to the pirate ship playhouse. (Pirate Ship Playhouse Facebook)
Over the years, multiple levels were added and it grew bigger and bigger.
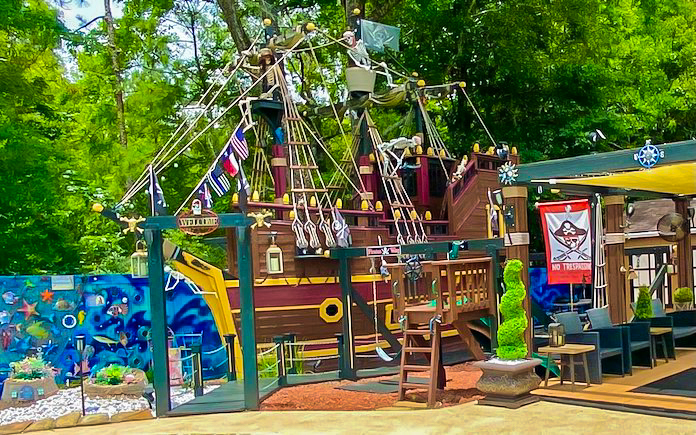
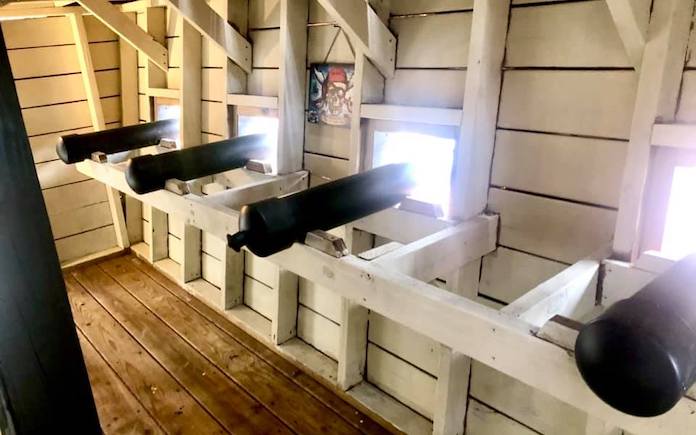
Now, the “miniature” pirate ship is held into the ground by 10 concrete piers, 25,000 screws, and has multiple levels that are large enough for an adult to stand up in.
So, how long did it take to complete this pirate ship? About five years — four years to construct the playhouse, and then another year or so to finish the surrounding features.
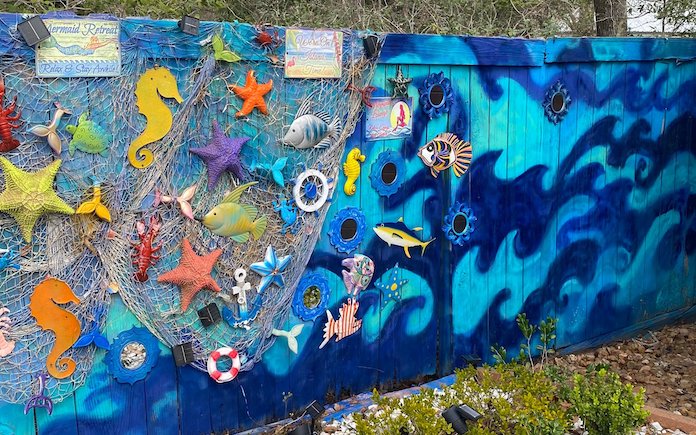
The couple is also adding extra details surrounding the ship, like an under-the-sea mural on the fence. Debbie used more than a dozen cans of spray paint and real starfish she got on a trip to the Bahamas.
But, it’s all worth it, they say, because of the enjoyment their grandchildren, and neighbors, get out of the playhouse.
At this point, the “playhouse” in the Headricks’ backyard is more than just a playhouse. They see it as a small second house that they occasionally open to large audiences on special occasions.
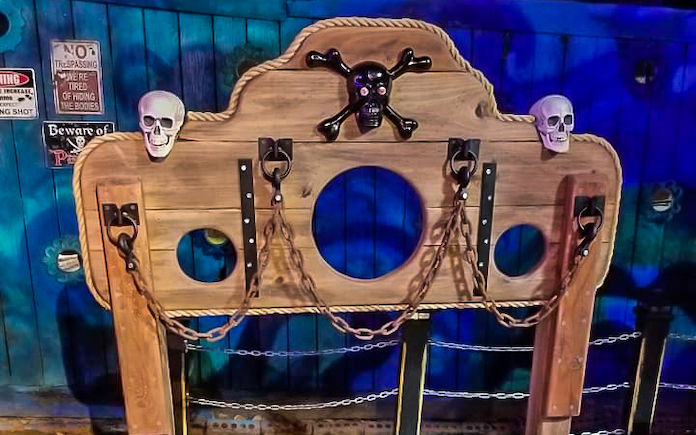
The Headricks have opened up their backyard for Halloween for the past two years. In just four hours, 475 people came through to see the pirate ship in 2020 and 600 in 2021.
The family goes all-out for the occasion by dressing up in pirate costumes, providing a stockade for photo ops, treasure chests, spooky music, and more.
The couple has been very firm with keeping the ship private and only open for Halloween fun. However, they will give tours to those who ask and let children play.
“You’d be amazed at how many adults stop and ask if they can see it and take photos,” Debbie says.
Jeff and Debbie say their backyard “Peter Pan/Pirates of the Caribbean theme park” will continue on for future generations. Their five grown children have even bigger plans for the property when they inherit the property.
The wood and everything else will receive the same regular upkeep that it’s had over the past years, but there are plans to convert the backyard, which includes a pool, into a rental Airbnb property.
The children promise they’ll never sell the property and also have plans to convert two other backyard buildings (currently used as Halloween storage and another as a small record studio) into small cabins for renters as well.
The Headricks say there were some regrets after converting their backyard into a theme park, but they’re outweighed by the joy it brings their grandchildren.
Debbie advises that if someone else wants to do this, plan for regular maintenance and have someone else do the building.
There aren’t any blueprints for this pirate playhouse, so if you want to build one yourself, you’ll have to use your imagination.
However, if you do decide to build one, the couple has these words of advice: Be prepared for many people to stop and take pictures.
Making your house look great at the first glance doesn’t have to be a costly investment. These simple and affordable curb appeal ideas can update your home while boosting its appeal to visitors and potential buyers.
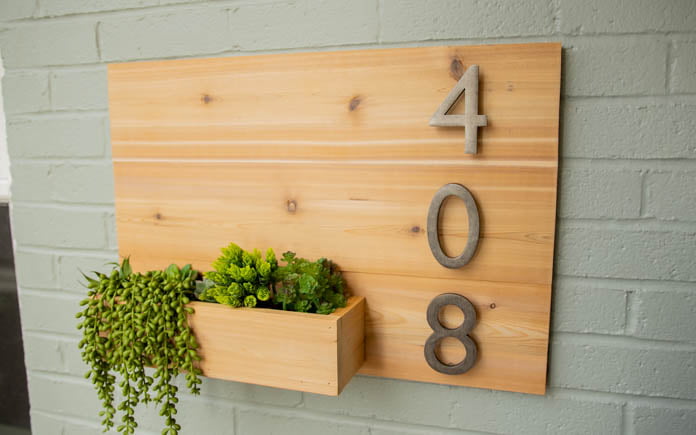
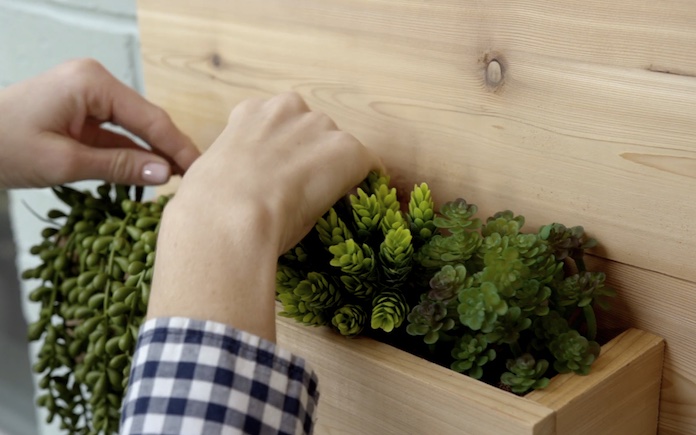
This house number wall planter adds natural texture to a brick exterior. (3 Echoes Content Studio)
1. Dress Up Your House Number
First on our list of curb appeal ideas is stylishly displaying your house number. Not only does it add curb appeal but it also clearly shows your house number for first responders and ensures packages get delivered to the right home.
This house number wall planter project is a two-for-one – you get a wall planter that also prominently displays your house number. Plus, it can be built in less than half a day.
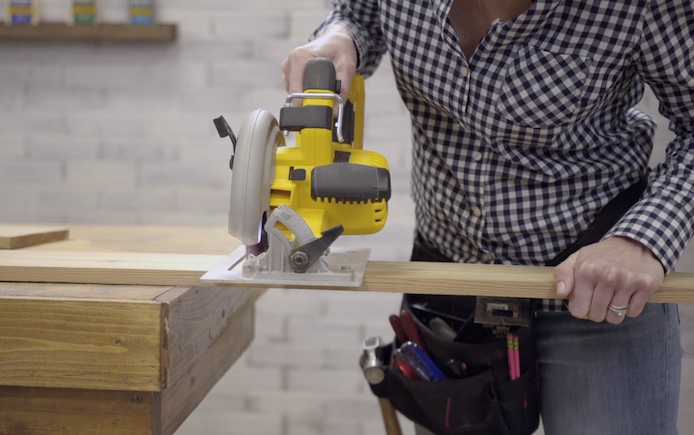
First, measure and cut the wood for your house number wall planter. For this project, we used cedar because of its scent, but you can use any type of wood.
Here are the cuts you’ll need:
Three 1x6s at 24 inches
Two 1x4s at 3.5 inches
One 1×4 at 12 inches
One 1×4 at 13.5 inches
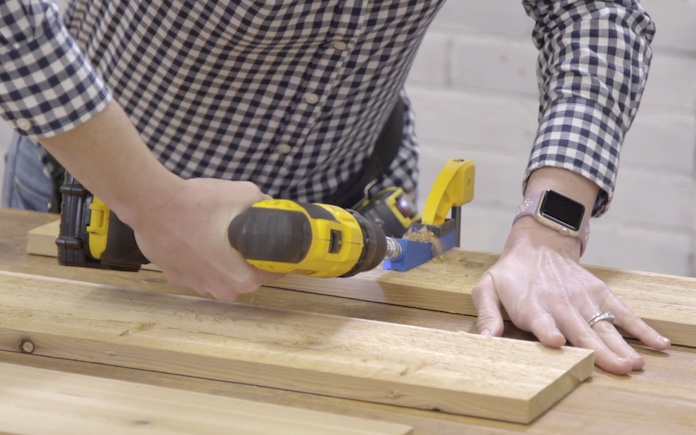
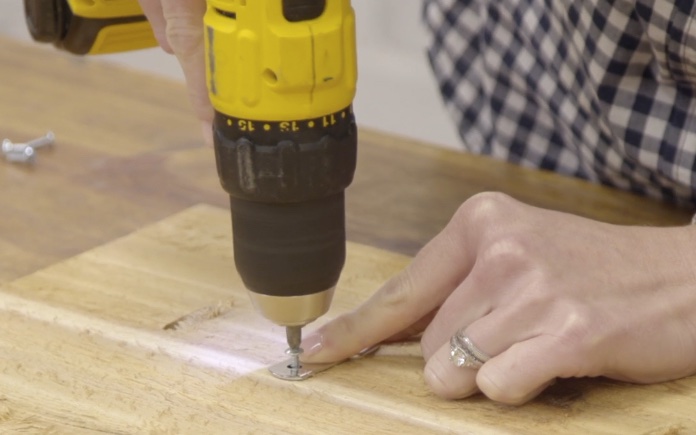
Pocket holes prevent wood screws from penetrating the panel’s front side. (3 Echoes Content Studio)
Step 2
Choose whether you want the rough side or the smooth side of your cedar facing out, then drill pocket holes on the backs of two of your 1×6 boards.
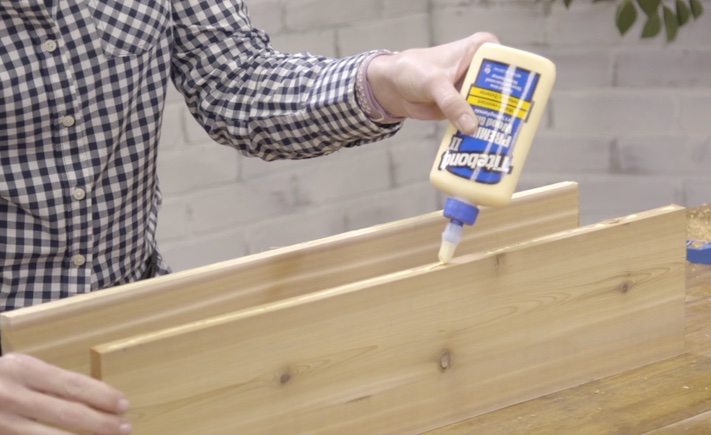
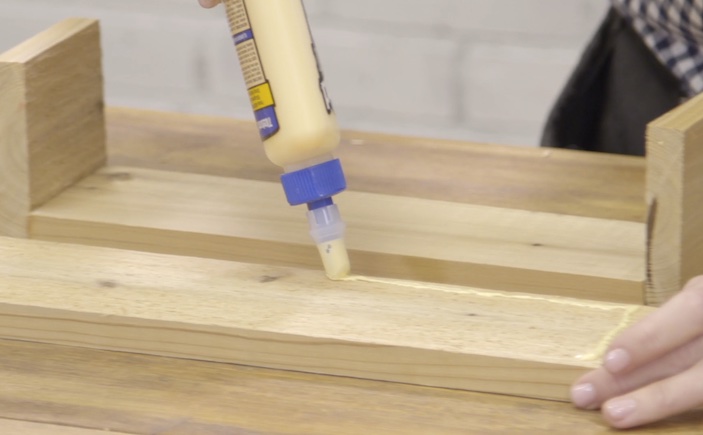
To assemble the planter box, use the 12-inch piece for the bottom, the 13.5-inch piece for the front and the two 3.5-inch pieces as the sides. Apply wood glue and then nail them together.
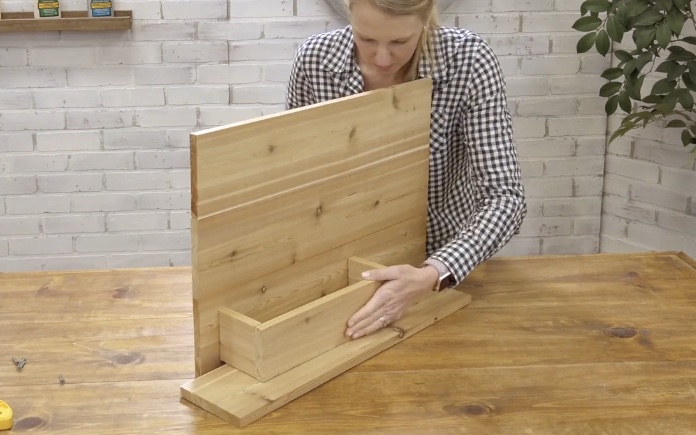
A scrap piece of wood is the perfect height to hold up the planter box place while you attach it to the panel. (3 Echoes Content Studio)
Step 6
Use a scrap piece of wood to hold the planter box three-quarters of an inch from the bottom of the panel. Then, attach the planter box to the panel using wood screws from behind. Sand the house number planter box. If you want a glossy look, apply a wood sealer.
Hang the wall planter up on your house before adding the dirt and plants.
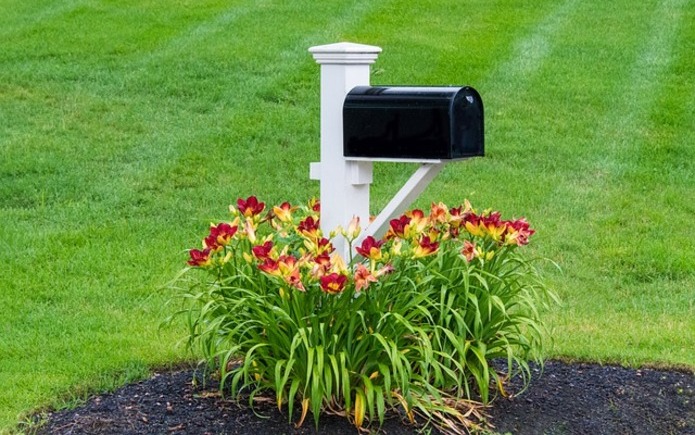
Your mailbox says a lot about your home, and you. To maintain curb appeal, keep it painted well or purchase a new one that meets United States Postal Service guidelines.
2. Replace Your Mailbox
While we’re on the subject of house numbers, give some attention to your mailbox!
Mailboxes serve a dual purpose: they collect your mail, but they also send a message about the homeowner’s attentiveness to their dwelling.
A tattered old mailbox suggests a lack of care. Don’t risk sending the wrong message: install a sparkling new mailbox.
From traditional to polished-nickel options, choose from dozens of styles and sizes. Consider whether you’ll need to enlist help for installation: a wall-mounted mailbox will only require some screws and a screwdriver, but roadside mailboxes that sit on posts might require an expert’s help.
If you have to dig a post hole for your new mailbox, call 811 before you dig to ensure that you stay clear of any utility lines.
And before you do anything, always review the US Postal Service’s mailbox requirements.
Yes, the USPS has requirements, and it enforces those requirements! For instance, roadside mailboxes must be at least 6 inches back from the curb.
If you’re installing a door slot, USPS requires that the opening be at least 1.5 by 7 inches.Find all the specifics atusps.com.
A front porch isn’t complete without comfortable chairs and potted plants.(DepositPhotos)
3. Spruce Up the Front Porch
Next on our list of curb appeal ideas is spruing up the front porch.
Here’s an easy formula to improve your front porch’s appearance: furniture, plants and wreaths.
Furniture
Front porch furniture — like gliding, lounging or rocking chairs — welcomes guests and invites them to sit, take a load off and enjoy some conversation.
You can find nice, inexpensive furniture at a thrift store to add character. Shop for something that looks good but doesn’t require refinishing.
Plants
Plants offer a nice break from your home’s hard features (such as windows, doors, roofing and siding). To add texture and soften your home’s exterior appearance, purchase plants at the home and garden center and place them in pots made for outdoor use.
Just get one or two planters — most hardware stores or gardening shops sell inexpensive faux terracotta ones — to arrange near your front entrance. Place two planters on either side of your front door or cascade multiple down the front steps.
Here’s a suggestion for a starter plant: hardy and beautiful hibiscus! These slow growers provide abundant greenery with massive (up to 10-inch) blooms.
When the weather turns colder, move the pots indoors to enjoy them through the winter months.
When you’re picking out your plants, one simple phrase should be the key to your planter or window box: “fillers, spillers and thrillers.”
Fillers: Leafy greens will fill the space and complete the look
Spillers: Flowers like Creeping Jenny flow over the container’s sides
Thrillers: These plants offer the “wow” factor. Pops of color will draw the visitor’s eye
To fully capture the senses, add some aromatics to emit a gentle fragrance as guests enter your home. Keep in mind that your climate will also play a role in what you should plant.
Check the online version of the Farmers’ Almanac to learn what will and won’t grow well in your area.
Wreaths
Who says door wreaths are just for winter holidays? Make any door look great with a year-round wreath. Embellish the wreath based on the current season and add or remove accessories — such as a large initial of your family’s last name — as needed.
Scan the web, shop around and purchase these items in advance and you can move them into position and dress your front porch in less than an hour!
You can paint a door on its hinges, but doors with lots of imperfections need special treatment.
4. Paint the Front Door
A new paint color is the most budget-friendly of this list of curb appeal ideas. Don’t underestimate the power of a fresh coat of paint. The average gallon of paint costs between $15 and $30 — a reasonable investment that packs a punch when it comes to improving the look of a home.
Options for front door colors are as endless as your imagination. However, choose one that complements the color scheme of your home’s exterior. For a monochromatic color scheme, choose darker and lighter shades within the same color. To add eye-catching contrast, pick a door color that’s on the opposite end of the color wheel as your home’s main color.
Playful pops of colors are very on trend when it comes to door updates. But classic colors and stains never go out of style. A simple coat of faux mahogany finish can give instant curb appeal and won’t cost you a boatload.
Tips
Get the most mileage out of your paint job with these tips:
1. Remove any hardware. This includes knockers, kick plates and door handles. By taking these off, you avoid getting paint on your hardware, and you can ensure that you cover the whole door with paint.
2. Clean it. Soap and water should do the job, but if there’s years’ worth of build up, use a pressure washer to power wash the grim away.
3. Lay it flat. Taking the door off its hinges is an extra step that most likely means a two-person job, but removing the door makes it easier to apply the paint in even coats.
4. Sand it. By sanding your door before you paint, you can remove dust, debris, and old paint layers. Sanding can also help your paint stick better, giving you a cleaner, crisper fresh coat.
5. Change the locks. Now is a great time to invest in some new home security. Replace your old deadbolt and handle with a brand new set and consider installing smart locks for keyless entry.
Installing a new door handle is a small change that can make a big difference. (Jason Finn, Getty Images)
5. Add New Hardware
Number five on our list of curb appeal ideas is upgrading your front door’s hardware.
It’s a simple, cost-effective and you can choose from a variety of colors and metal types, like silver, gold, satin nickel, copper, and oiled bronze.
Plus, hardware comes in many shapes and sizes, so before heading to the home center, consider the look and function you want — for instance, do you want knobs or levers? Do you want to turn, pull or push the handle to open the door?
With all of these options, you can easily find hardware to match your personal style and enhance your home’s aesthetic on a budget.
Just consider how the new hardware will look compared with your interior doors’ hardware. You may not want, say, an oiled bronze lever on the front door if brass knobs are on two close-by interior doors.
Or you may want to replace all your interior knobs with levers to match the front door for a consistent look throughout the home. Or at least spray the existing knobs with an oiled bronze finish to match.
Either way, it’s your home, and it’s your decision.
Lawn borders contain your mulch and define flowerbeds and pathways, giving your landscaping a finished look.
It doesn’t cost much to install concrete borders — expect to pay an estimated $2 per linear foot for materials. Out of all these curb appeal ideas, this is the most hands on, do-it-yourself project, so keep in mind the time and labor it will take.
Expect to dig a trench, build and install wood forms, pour in some gravel and then top that with concrete mix. Add just a few extra steps if you want to color the concrete mix, and give this project about three days to cure.
In a week, your flower beds will look better than ever and your front yard will have a sense of order to it — all thanks to a simple border!
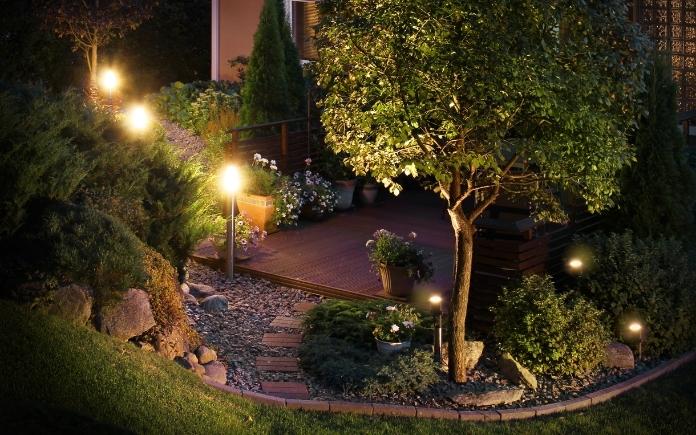
Want to add ambiance to your yard? Add landscape lighting. (Alberto Sava via Canva)
7. Install Exterior Lighting
While we’re on the subject of lawns, here’s another home curb appeal idea: install exterior lighting.
Adding a few lights to your front yard allows you to literally shine a spotlight on your home’s best features.
Landscape lightsare easy to install, and solar varieties are self-sufficient, so they won’t put a strain on your energy bill.
First, light walkways with garden lights or bollard lights, then move on to accent lighting. Use spotlights or up/down lights to highlight features like a large tree or a flag pole.
Want to add some ambiance to your patio? Hang some string lights!
Before you install landscape lighting, test the layout and determine the focal point for the brightest light. Simply tape flashlights to stakes and position them around the yard at night to see how halogen or incandescent landscape lights will look.
You can also place luminaries – composed of a white bag with sand and a candle inside – around your yard at night to mimic the look of solar-powered landscape lighting.
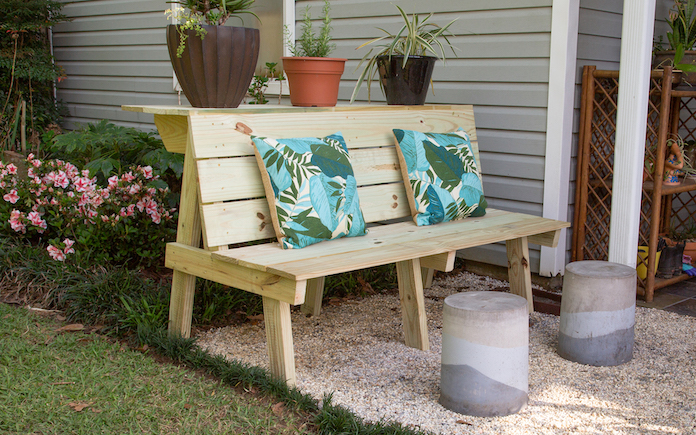
Free bench plans are now available for Tips for Today’s Homeowner newsletter subscribers.
This two-in-one seating option offers space for guests AND plants! No green thumb? No problem. Use the plant shelf as a countertop — it’s the perfect height to pull up a chair and set your drink down.
Subscribe to the Tips for Today’s Homeowner newsletter for the full plans.
Subscribe to our weekly Tips for Today’s Homeowner newsletter below (it’s free) and get the bench plans now! You’ll receive the latest Today’s Homeowner TV episodes, contests and giveaways, how-to tips, radio shows, podcasts, Best New Products and Simple Solutions.