Today’s Homeowner TV host Danny Lipford and Today’s Homeowner Media Production Manager Corey Wilson. (3 Echoes Content Studio)
Raising backyard chickens can be a fun and rewarding experience, providing fresh eggs and even a source of companionship. However, before you start your backyard chicken journey, it’s important to understand the basics of building and maintaining a chicken coop.
Today’s Homeowner Production Manager Corey Wilson is joining me to chat chicken.
A chicken coop’s size depends on how many chickens you own, so one this size is perfect for a couple of chickens. (RandallJSylvia, Getty Images)
Coop Size
When it comes to building or buying a chicken coop, size is an important consideration. The amount of space needed for each bird will vary depending on the number of birds you plan to keep, but a general rule of thumb is to provide 2-3 square feet of coop space per bird and 5-10 square feet of run space per bird.
Remember —chickens sleep in the air, perched on a limb, so make sure to include enough space for them to sleep comfortably.
Hay flooring absorbs moisture so the bottom of the chicken coop stays dry and smells fresh. (GarysFRP, Getty Images Signature)
Coop Components
A chicken coop typically includes several key parts: nesting boxes, roosts, runs, and an enclosed area for sleeping and protection.
Nesting boxes provide a safe and secure place for chickens to lay their eggs, while roosts give the birds a place to sleep.
Runs are essential for exercise and foraging. The enclosed area serves as a protected space for the birds to sleep, rest and take shelter.
When it comes to flooring, use materials like sand, hay or pine shavings. These materials are comfortable for the chickens and easy to clean. They also absorb moisture, which helps keep the coop dry and smelling fresh.
A well-built and maintained coop is crucial for the health and well-being of your chickens. Providing enough space, perches, and suitable materials for the birds, will ensure that they are comfortable and healthy and can produce eggs efficiently.
Egg-laying chickens lay up to one egg per day at their peak. (georgeclerk, Getty Images Signature)
Egg Production
A healthy hen will typically lay one egg per day, with her reproductive cycle lasting between 24-27 hours. However, the actual egg production can vary depending on a number of factors such as the amount of daylight, comfort, predators, and nutrition.
Daylight: Chickens need at least 14 hours of daylight in order to lay eggs. In the winter, when daylight hours are shorter, egg production will naturally decrease. You can use artificial light to supplement the daylight hours, but it’s important to use the right type of light and the right amount to avoid stressing the birds.
Comfort: Chickens need a clean, dry and safe place to lay their eggs. A well-maintained chicken coop with nest boxes will provide the comfort and security that chickens need to lay eggs.
Predators: Chickens that feel threatened by predators will not lay eggs. It’s important to protect your chickens from predators by securing the coop and the surrounding area.
Nutrition: Chickens need a balanced diet that provides the necessary nutrients for egg production. Feed specifically formulated for laying hens will provide the right balance of protein, calcium, and other essential nutrients.
Interestingly enough, a rooster is not necessary for a hen to lay eggs. Hens will lay eggs whether or not there is a rooster present. However, if you want to breed chickens, you will need a rooster.
Chicken scratch is a type of feed that is made up of whole grains such as corn, barley, oats, wheat or other grains. (maerzkind, Getty Images)
Chicken Food
There are a variety of types of chicken food available on the market, each designed to meet the specific nutritional needs of chickens at different stages of their life.
Starter feed: This type of food is formulated for chicks during their first six weeks of life. It contains a high level of protein, around 20-24 percent, to help them grow and develop quickly.
Grower feed: As the chicks grow, they need different food. Designed for chickens between 6-20 weeks old, grower feed contains a lower protein level around 16-18 percent as they don’t need as much protein as when they were chicks but still need enough to support their growth.
Layer feed: Chickens are adults once they reach 20 weeks old, so they now need a different type of food. Layer feed is formulated for egg-laying hens, so it contains a higher level of calcium to support the formation of eggshells.
Pellets: These small, easy-to-eat pieces are convenient to use and store, and are often used as a complete feed for chickens.
Crumbles: Similar to pellets, crumbles are also compressed, but they are smaller in size and tend to be more palatable for chickens.
Mash: Mash is made by mixing together different grains and protein sources. It is usually moist and easy for chickens to eat.
Scratch: Scratch is a type of feed that is made up of whole grains such as corn and barley. Chickens are encouraged to forage, so this type of food is can used as a treat.
On average, a flock of 10 chickens will consume about one bag of feed every three weeks. (3 Echoes Content Studio)
Cost to Feed Chickens
When it comes to feeding your chickens, a good rule of thumb is to plan for about one bag of food every three weeks for a flock of 10 hens.
On average, a bag of chicken feed can cost anywhere from $40 to $50. This may seem like a lot, but when you consider the fact that chickens will lay eggs almost every day, it’s a small price to pay for the delicious, fresh eggs they provide.
In addition to regular chicken feed, provide your birds with oyster shells for calcium. This is essential for maintaining the strength of their eggshells. You can purchase oyster shells in a bag and they usually cost around $10-15.
2022 has been a year of incredible makeovers here at Today’s Homeowner. Here are our favorite before-and-after transformations from the past year.
This front porch now invites you to pull up a chair and enjoy the view. (3 Echoes Content Studio)
5. Front Porch Makeover
Mike and Leigh Ann have a beautiful piece of property that they share with their horses. But they felt like the front of their house lacked the visual appeal that the land it sits on deserved.
The walkway to it was incomplete and unattractive, while the front porch was a sea of dingy paint, stuck on the front of a white house. There was nothing to draw you in or make you feel welcome.
But now, the front porch is freshly painted, and even though we only added a little gray to the mix, there’s enough contrast to give the space some personality.
The rotten wood and peeling paint are gone, and so is the poorly poured sidewalk. In its place is a symmetrically arranged walkway of 12 stepping stones — made from Quikrete’s Walkmaker molds — that create a graceful transition to the porch steps.
The porch now invites you to pull up a chair and enjoy the view.
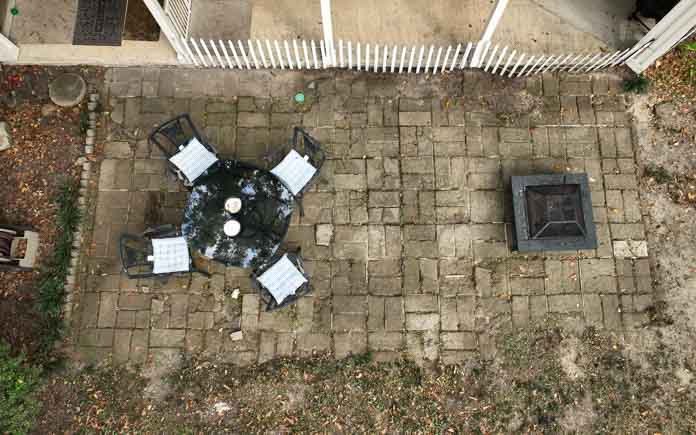
Large-format pavers make the patio seem larger than it actually is and the new fire pit is the ideal spot for entertaining. (3 Echoes Content Studio)
4. Two Patios are Better Than One
Jerry and Shay have a beautiful backyard with great shade trees and a lush lawn. But their old fire pit had seen better days and the existing patio offered few opportunities to enjoy the outdoor space. It was too small for entertaining and the monotone color palette lacked any real interest.
Now, the whole backyard has come alive with the addition of a big new patio that complements the shape of the trees while it enjoys its shade.
Large-format Pavestone pavers make the patio seem larger than it actually is and the new fire pit is the ideal spot for entertaining.
There are two large steps that create a graceful transition to the old patio, which has been revived with a new shade of stain and a bold color on the doors.
That same color on the storage shed plus some simple landscaping has transformed this yard into a spot you just can’t wait to enjoy.
Chelsea and Brandon’s bathroom is 65 years old. At that age, there’s some baggage — like the pink tub and the lack of ventilation.
The vanity was newer than that, but it really didn’t fit the style of the room and it lacked character.
But now, the bathroom is overflowing with character and grandmillennial style. The wraparound wallpaper not only creates the jewelry box feel that Chelsea was after; it also makes the pink tub look intentional.
The vent fan makes the space more functional, and the larger vanity makes it easier to use. Plus, its black finish complements the room style, and the new Fluidmaster bidet toilet seat elevates the whole room to a spa-like experience.
This bedroom has a clear purpose, which is to make guests feel right at home. (3 Echoes Content Studio)
2. Guest Bedroom Update
Corey and Grace’s extra bedroom was just that — it lacked any real identity. The hardware and paint color lifted by the previous homeowners didn’t make the welcoming statement they wanted for their guests.
But now, the guest bedroom has a clear purpose and that’s to make visitors feel right at home. The board and batten accent wall draws you into the space and the custom trim around the windows tells you they were intentional about making this room nice for you.
The floating shelves and nightstand are functional for short-term guests without taking up as much space as larger pieces of furniture. And the warm wood tones complement the cool green accent wall, just as the gold wall sconces do.
This breezeway has taken on the feel of a courtyard in a fancy hotel. (3 Echoes Content Studio)
1. A More Inviting Entrance
Delane’s breezeway is the main entrance to her home, but before, it had a very tired and haphazard feel to it. The random collection of different slabs on the floor left visitors with questions about what the space was supposed to be.
The sad empty planting bed made the house feel a lot older than it actually was. And the chain link fence made it feel more like a cage than a relaxing space.
But now, the whole space has taken on the feel of a courtyard in a fancy hotel. The consistency of the stencil floor ties everything together from the wrought iron gates to the lush green planting beds.
The door adds a pop of color while the fountain adds a cool visual element and a peaceful soundtrack for the space.
The simple curtain rod and the curtains frame the backyard and somehow make it all feel like a resort.
Sustainable living protects our ecosystem and preserves natural resources for future generations — and it improves the quality of our lives.
Living “green” means being aware of how your actions affect the environment and those around you. Then, you can take everyday actions to improve outcomes.
This may sound like a tall order, but this lifestyle shift doesn’t need to be overwhelming. Here are some simple things you can do now to transform your home for sustainable living.
A key part of sustainable living is using only energy you need — that starts with insulating your home. Doing so will conserve energy, save you money and increase personal comfort.
The North American Insulation Manufacturers Association estimates up to 90 percent of homes are underinsulated. So, your home probably could use more insulation!
However, not all insulation is equal — or sustainable. Some companies use large amounts of non-renewable energy to produce their insulation, which has negative environmental impact.
“Embodied carbon refers to the carbon dioxide equivalent emitted throughout the product life-cycle, including raw material extraction, transportation, and manufacture,” the company’s website states.
In addition to being sustainably produced and soft as cotton, it’s made with natural materials. Owens Corning PINK Next Gen Fiberglas Insulation has the highest recycled content in the industry.
PINK Next Gen Fiberglas batts come in pre-cut lengths to save time, making them ideal for framed cavities. The batts are extra stiff, so they slide in easily and resist slumping in areas like walls. And if you need to make cuts, they split cleanly.
After installing insulation in the attic and crawlspace, you need to prevent inside air from escaping, and outside air from getting in — here’s how to eliminate cracks and gaps:
Caulk around windows and doors. Homes expand and contract due to humidity changes, so you should do this each summer and winter.
Check each entry door’s threshold for damage and replace a failing rubber seal — or the entire threshold — as needed.
Check for gaps between the threshold and the door and install door sweeps as needed. Some door sweeps attach to the bottom of the door; others are mounted inside the door.
You also can insulate electrical outlets, install or replace weatherstripping in windows and doors, and cover window air conditioners for a weather-tight seal.
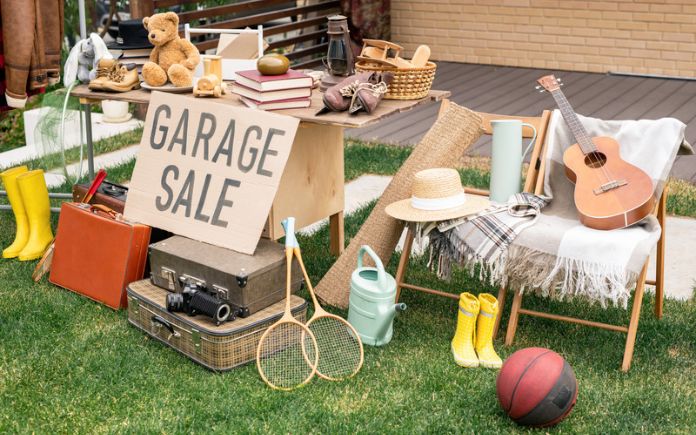
Garage sales are a great place to find like-new furnishings for your home. (shironosov, Getty Images)
2. Reduce, Reuse and Recycle
Living sustainably is all about keeping as much out of the landfill as you can. To do that, start with the 3 Rs — reduce, reuse, recycle.
Reduce: Ditch bottled water and install a home water filter to save money, have healthier drinking water, and help the environment. Eliminating bottled water consumption cuts down its carbon footprint left from transportation to stores and discarded plastic bottles.
Reuse: Furnishing your home? Avoid fast furniture! Like fast fashion, these furniture pieces are mass-produced and relatively inexpensive, so they’re easy to obtain and then abandon. Instead, look for second-hand furniture at online marketplaces, thrift stores and yard sales.
Recycle: Buying new items for your home? Look for the post-consumer label. This means the product is made from recycled materials. You might be surprised at how many things are made from post-consumer recyclables — fences, playground equipment, carpet, and even roofing shingles can be created from garbage.
But to get to that post-consumer point, people need to make the simple decision to recycle at home. Hang these recycling bins on your garage wall so they’re not only out of the way but also in plain sight so you won’t forget this important step!
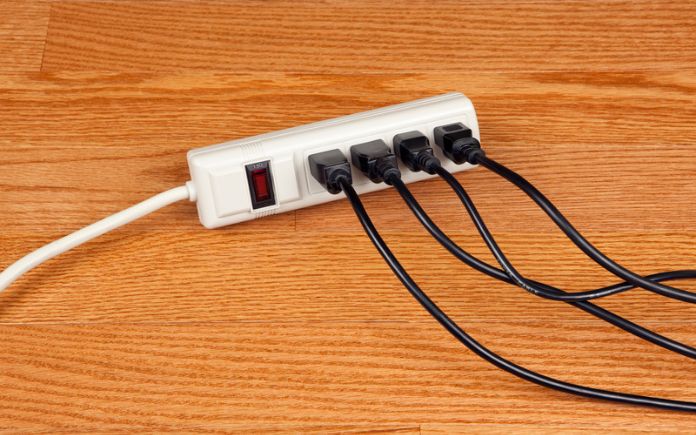
To keep electronics from using energy when they’re not in use, plug them into a power strip that you can turn on and off. (DonNichols, Getty Images Signature)
3. Unplug Devices Not in Use
Just because an electronic device is turned off doesn’t mean it’s using no power.
Energy vampires are electronic items that suck up electricity when not in use (phantom power) — adding at least 10 percent to your monthly utility bill, according to the U.S. Department of Energy.
If you have a light switch that can turn outlets off and on, plug your biggest electronic items (such as TVs and computers) into these switch-controlled outlets, and simply flip the switch when you no longer need the device.
Alternatively, plug media devices — some of the worst energy-sucking offenders — into a power strip and, again, control their power use with a switch.
If neither is an option, avoid leaving your TV or computer idle; power off the flat screen and put the laptop in sleep or hibernate mode. Or simply unplug devices you’re not currently using.
Solar power panels can provide electricity and heat your home’s water. (zstockphotos)
4. Use Renewable Energy Sources
Reducing dependence on non-renewable fuels is at the core of sustainable living, and there’s no better renewable energy source than the sun.
Solar technologies convert sunlight into electrical energy through photovoltaic panels or mirrors that concentrate solar radiation, according to energy.gov. Integrating solar power into your home can be as simple as installing a single panel and battery system or as robust as having a full array of panels powering your entire home.
Solar power can provide electricity for air conditioning, lighting and appliances, and it has virtually no environmental footprint. You can also use solar power to heat your home’s water.
Solar water-heating systems likey won’t provide all the hot water you may need, but for most folks, it can cover 50-80 percent of your hot water needs. Although these systems use some energy, the cost to operate them is only about 10 percent of a conventional water heating system.
Not ready to commit to these big-ticket solar-powered items? Start small with solar lighting to illuminate your landscape and — bonus — deter intruders from coming near your home.
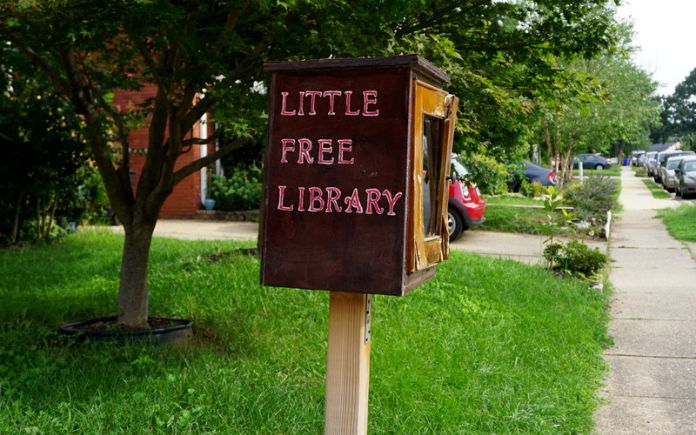
A Little Free Library can foster a sense of community and promote education and literacy. (Scott Fields, Getty Images)
5. Share and Share Alike
Sustainable living isn’t just about the environment. The three pillars of sustainability are environmental, economic and social, and one of the social goals is to educate your community.
You can share knowledge with neighbors by passing along books you’ve read. Little Free Library, a nonprofit organization, promotes literacy, creativity and community through book exchanges.
The signature bookcase — resembling a small building — makes a Little Free Library instantly recognizable. It’s usually made of wood, mounted on a post, and has a door with a window to protect books from the elements.
Another way to share with your community is to grow a community or victory garden. Conventional food distribution with long-distance transportation to grocery stores exhausts energy and human resources.
By growing produce, you can reduce the demand for commercially grown vegetables. Plus, if you grow enough, your can share your surplus harvest with neighbors and reduce food waste.
These are just a few lifestyle changes you can make to live more sustainably. Find more information and tools to help reduce your impact on the environment on the EPA’s Greener Living website.
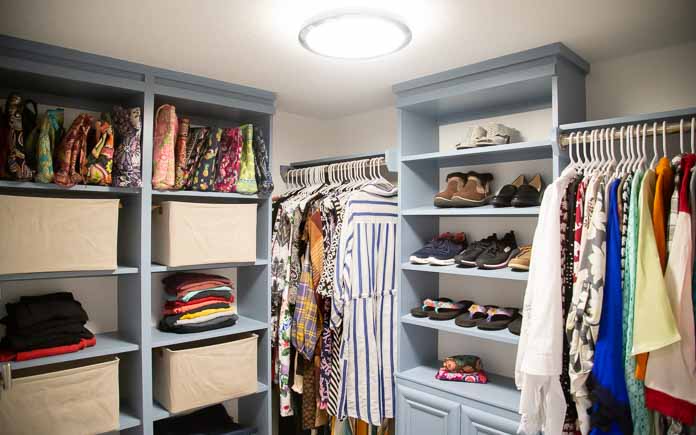
Kelly and Jennifer Foster love improving their home, but their closet has them stumped — what’s good for him isn’t necessarily good for her. So, we’re creating a custom closet system to maximize storage space in a couple’s divided closet.
The Projects
The shelves on Jennifer’s side of the closet create space for purses, shoes and folded clothes. (3 Echoes Content Studio)
Build new shelving
The first step in creating a custom closet system is to remove the old wire shelving. These builder-grade wire shelves are common in newer homes, but they’re not very user-friendly. The slats are the right size for hangers, but it’s impossible to slide them to create more space.
After the shelves are out, we patch the holes left behind and set up Kelly to paint the closet walls and Jennifer to pre-paint the shelf boards we’ll be using for the new storage systems.
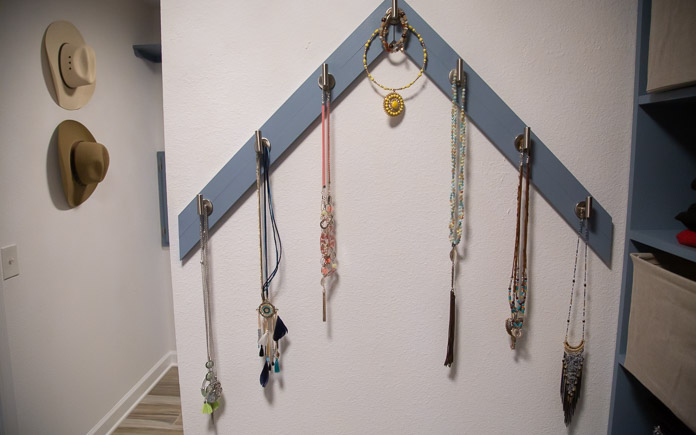
And on the dividing wall, we install wall hooks to hang necklaces on.(3 Echoes Content Studio)
The shelving unit on Jennifer’s side of the closet is too large to assemble outside, so we put it together inside the closet. It includes space for purses, folded clothes, and cubbies for bins.
To create space for shoe storage, we remove the hanging towel cabinet and use it as a base for more shelves.
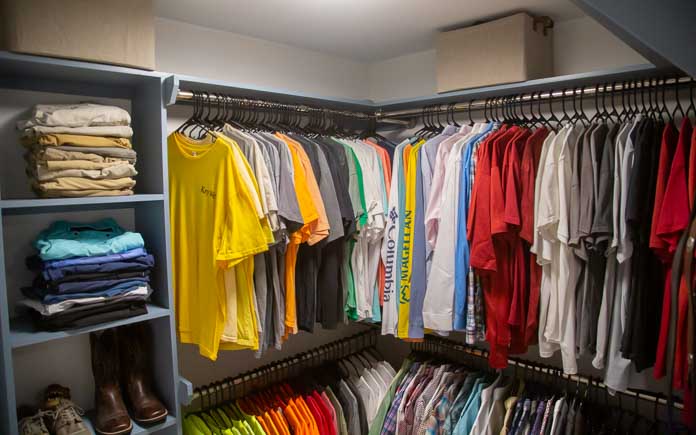
The double horizontal rods maximize the number of shirts that can hang in the closet. (3 Echoes Content Studio)
For Kelly’s side of the closet, we install double horizontal rods to get double the amount of hanging space.
For his shoe rack, we build a smaller version of the shelf unit Chelsea built earlier. But because of its size, we can assemble this one entirely in the garage.
This laundry chute/linen cabinet combo provides space for storing towels. (3 Echoes Content Studio)
Install laundry chute
Every time Kelly and Jennifer walk into their closet, their eyes are immediately drawn to their dirty clothes hamper.
Since their laundry room is on the other side of the wall on Kelly’s side, we install a laundry chute so the dirty clothes can go straight to where they need to be.
To finish the opening, we build a box that exactly fits the space and adds trim on one side so we can slip into position and add trim on the other side.
Then, we add shelves to stock clean towels. This one opening serves as both a linen cabinet and laundry chute.
Kelly and Jennifer have a spacious closet but there was very little about it that was efficient or convenient. The wire shelves only offered the bare minimum to utilize the space available not to mention the fact that there was nothing “pretty” about them.
But now, the space feels even larger thanks to a custom closet system that features shelving that organizes and displays the contents of the closet for both ease of use and visual appeal. And the addition of all those horizontal surfaces hasn’t reduced the hanging space at all because the double rods we installed have made up the difference.
Plus, the new laundry chute/linen cabinet combo is the definition of efficiency.
Other Tips From This Episode
Products Featured in This Episode
This page contains affiliate links. If you purchase a product from these links, we will earn a small commission at no additional cost to you.
This week, a poured concrete patio turns a decaying patio into an outdoor living space this homeowner can truly love.
Gretchen Bayley lives alone in her mid-century home, but the house is always full of friends and family. We’re transforming her old, crumbling patio into an outdoor living space to give her more room to entertain.
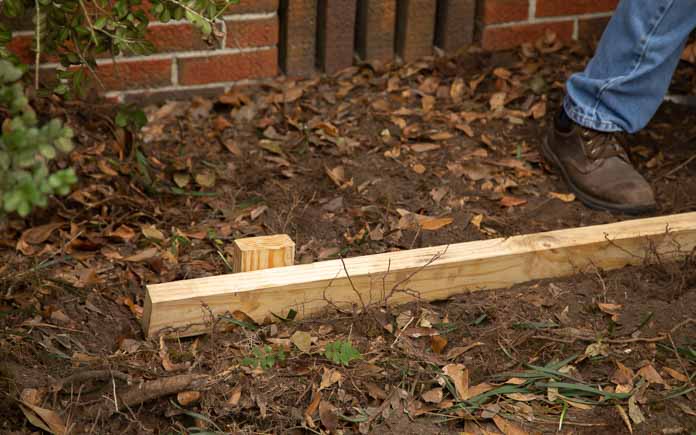
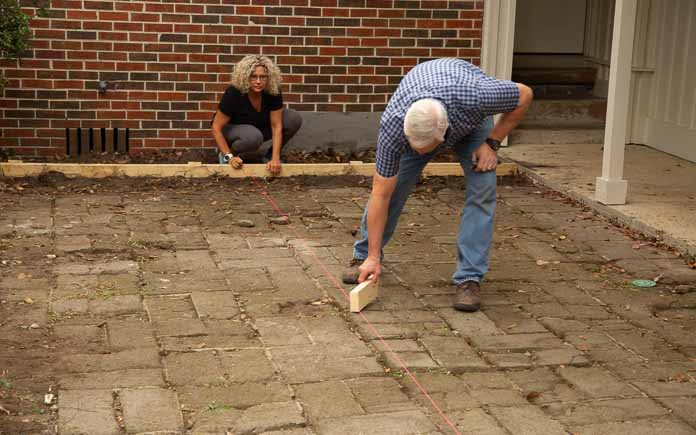
First, frame the area 12-by-23-foot area with 2-by-4s. Place the boards level with the existing carport concrete slab, then slope slightly downward so water will flow away from the carport.
Use a framing square to ensure each corner is at a 90-degree angle. To keep the form boards in place, screw them to evenly spaced wooden 2-by-4 stakes.
We use a masonry line to make sure the depth of the newly poured concrete patio will match the existing one. (3 Echoes Content Studio)
Once the final form board is installed, check the depth across the space to ensure there’s enough depth to use the old patio as a foundation and pour the new slab directly over it.
(Because the pavers are below the top edge of the carport concrete slab, we don’t need to dig them up.)
Finally, lay the reinforcement wire.
Steel reinforcement wire adds strength to the newly poured concrete patio. (3 Echoes Content Studio)
Once the forms are complete, a professional concrete finisher pours the slab. As the forms fill up, we tap the outside of them to release the air bubbles trapped in the concrete.
The concrete finisher moves a bull float over the freshly poured slab to smooth the surface. (3 Echoes Content Studio)
The concrete finisher uses special tools to smooth the top of the slab and create expansion joint lines to prevent cracking.
Once the concrete has cured for a bit, we drag a broom over it to create a textured finish.
The new picket fence has a functioning gate that’s easier to open and close. (3 Echoes Content Studio)
Add Picket Fence Panels
Gretchen’s improvised roll fencing serves its purpose of containing her dogs in the backyard, but it’s not pretty. So, we’re adding some prettier (and sturdier) white picket fence panels.
This post anchor allows us to secure the fence right onto the concrete slab. (3 Echoes Content Studio)
Instead of using a zip tie to keep the fence closed, we’re adding a gate at the corner of the carport to offer easier access to the new patio. To secure the post for the gate, we place it in a post anchor that can be drilled into the concrete.
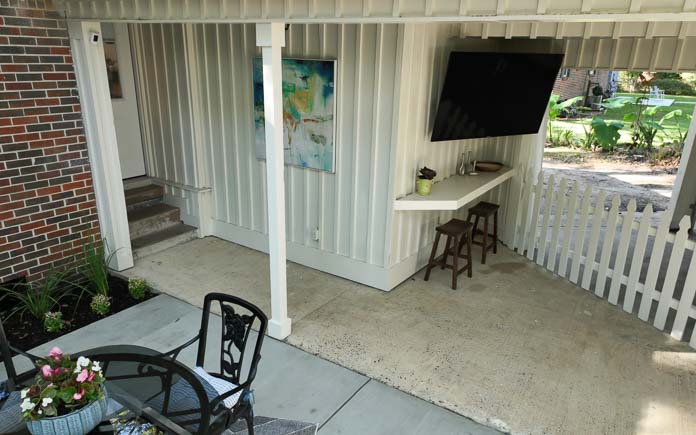
The new outdoor entertainment area features bar seating and an adjustable TV. (3 Echoes Content Studio)
Create Entertainment Area
Two large, empty shelves are wasting space in Gretchen’s carport. So, we remove the top one to make room for an outdoor TV and use the bottom one for bar seating.
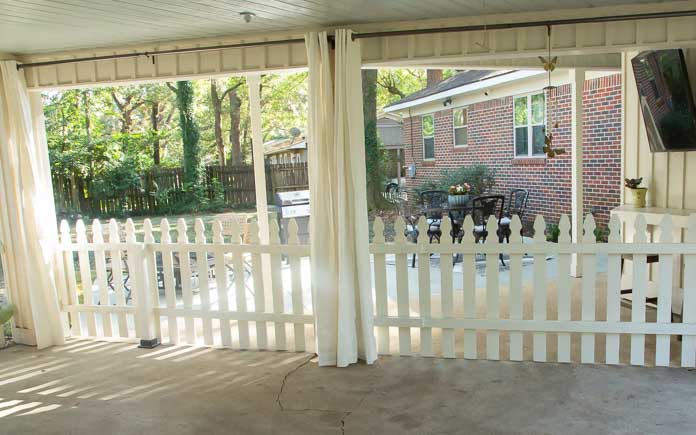
These drop cloth curtains give this outdoor entertainment area warmth, texture, and the option for privacy. (3 Echoes Content Studio)
To create even more separation between the carport and the new outdoor entertainment area, Chelsea hangs drop-cloth curtains.
The curtains not only add some extra texture to the space but they also can be closed to hide Gretchen’s car when she’s entertaining.
Chelsea Lipford Wolf and Danny Lipford pose with homeowner Gretchen Bayley. (3 Echoes Content Studio)
Post-Production Thoughts
Even though it was a good size, Gretchen’s patio was decades past its prime. The crumbling pavers were more than unattractive — they were downright dangerous.
The roll fencing added along the edge to contain the dogs wasn’t helping the look of the space either. There was nothing about this outdoor living space that invited you to enjoy the spacious backyard.
But now, the new poured concrete patio that replaced the old patio is both stable and attractive. Its clean edges clearly define the space, while it flows almost seamlessly into the existing covered area.
The new fence suits the yard perfectly and its new location creates the ideal boundary between the carport and the covered patio area.
Chelsea’s curtains help reinforce that line while they soften the edges and add refinement. What was an overbuilt shelf has become a modest bar top and the refurbished patio furniture creates plenty of comfortable seating to enjoy the expansive backyard.
Other Tips From This Episode
Products Featured in This Episode
This page contains affiliate links. If you purchase a product from these links, we will earn a small commission at no additional cost to you.