Discover an easy-to-follow bathroom deep cleaning checklist designed for busy families. From gathering supplies to tackling tough spots like grout and mildew, this guide covers step-by-step cleaning tips and practical advice for involving kids. Learn how to organize your bathroom for long-term cleanliness and turn a dreaded chore into a manageable, even enjoyable, routine.
Cleaning the bathroom is often seen as one of the least enjoyable household chores, but it doesn’t have to be a dreaded task. With a clear plan and the right tools, you can make this chore manageable and even satisfying.
.tasty-pins-banner-container{display:block;margin-bottom:20px;position:relative;width:-moz-fit-content;width:fit-content}.tasty-pins-banner-container a{cursor:pointer;display:flex;font-size:14px;font-weight:700;letter-spacing:1px;line-height:1.8em;text-transform:uppercase}.tasty-pins-banner-container a:hover{opacity:1}.tasty-pins-banner-container .tasty-pins-banner{align-items:center;bottom:0;cursor:pointer;display:flex;justify-content:center;left:0;padding-bottom:1em;padding-top:1em;position:absolute;right:0}.tasty-pins-banner-container .tasty-pins-banner svg{margin-right:4px;width:32px}.tasty-pins-banner-container .tasty-pins-banner span{margin-top:4px}.tasty-pins-banner-container a.tasty-pins-banner{text-decoration:none}.tasty-pins-banner-container a.tasty-pins-banner:hover{opacity:.8}.tasty-pins-banner-container a.tasty-pins-banner-image-link{flex-direction:column}.tasty-pins-banner-container a img{margin-bottom:0}.entry-content .wp-block-image .tasty-pins-banner-container img{margin-bottom:0;padding-bottom:0}#et-boc .et-l div .et_pb_image_wrap .tasty-pins-banner-container .tasty-pins-banner{padding-bottom:1em!important;padding-top:1em;text-decoration:none}#et-boc .et-l div .et_pb_image_wrap .tasty-pins-banner-container a.tasty-pins-banner{cursor:pointer;display:flex;font-size:14px;font-weight:700;line-height:1.8em;text-transform:uppercase}#et-boc .et-l div .et_pb_image_wrap .tasty-pins-banner-container a.tasty-pins-banner span{letter-spacing:2px;margin-top:4px}.et-db #et-boc .et-l .et_pb_module .tasty-pins-banner-container a:not(.wc-forward){padding-bottom:0}
In this post, we’ll walk you through a bathroom deep cleaning checklist that covers everything from scrubbing the tiles to maintaining a sparkling sink. We’ll also share some tips on keeping the bathroom tidy when you have kids at home.
Navigate This Post
Ready to turn your bathroom into a spotless sanctuary? Let’s get started!
Gathering Supplies
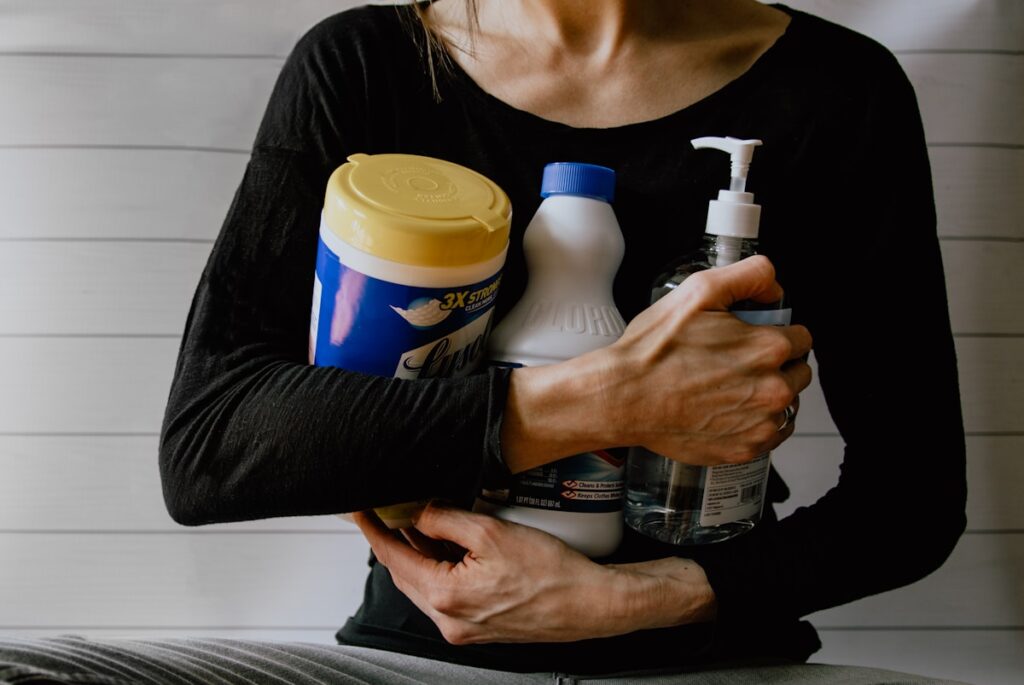
Before you start, make sure you have all your cleaning supplies ready to go. This will streamline the process and save you time.
You’ll need essentials like a toilet brush, mop, scrub pads, microfiber cloths, all purpose bathroom cleaner, and wipes. Keep glass cleaner handy for your mirrors, and have vinegar on hand for a natural disinfectant.
For those tough spots like grout and mildew, specialized products will be a big help. Don’t forget your tile cleaner and a reliable all-purpose cleaner for other surfaces.
A sturdy pair of rubber gloves and a mask can also be beneficial to protect yourself from any fumes. Having everything within reach means you can dive right in without any interruptions.
Step-by-Step Cleaning Guide
The key to effective bathroom deep cleaning is working from top to bottom.
Start by dusting off the ceiling, vents, fans, and light fixtures to get rid of any cobwebs or dust. Next, move on to the light switches, walls, and tiles, making sure to clean the grout lines well.
Use a spray bottle with a mix of vinegar and water for a natural cleaning option.
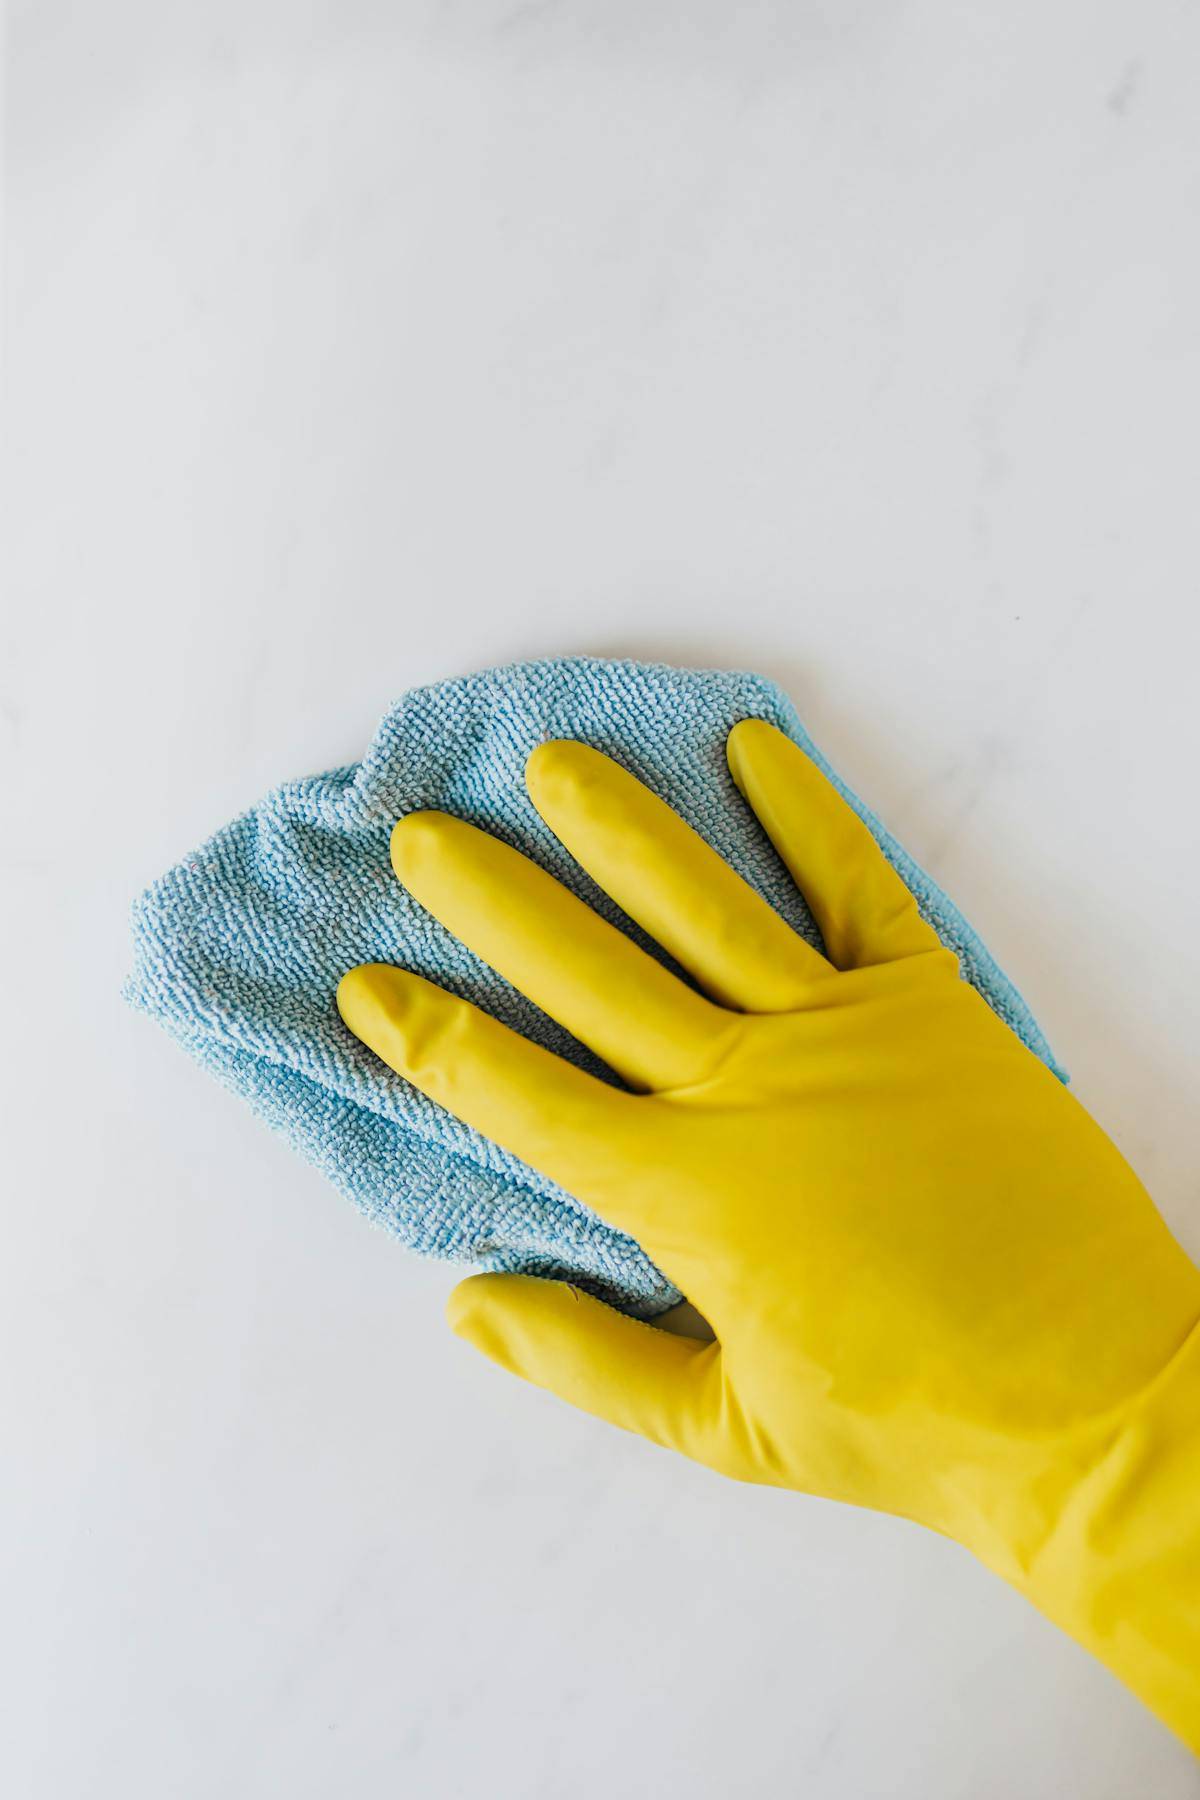
For the sink, use a brush to scrub away grime and water spots.
Clean your mirrors with glass cleaner and microfiber cloths to avoid streaks.
When it comes to the toilet, give it a thorough scrub with a toilet brush and disinfect it with a toilet bowl cleaner properly. Don’t forget the exterior and lid.
If your shower curtain looks dingy, either wash it in the washing machine or replace it if necessary.
Lastly, shake out or vacuum any rugs and tackle the floor with a mop to catch any dust, dirt, or debris that’s fallen during the cleaning process.
By following this order, you’ll make sure areas you’ve already cleaned stay clean.
Tackling Tough Spots
Some spots in the bathroom can be particularly stubborn.
For soap scum and hard water stains on tiles, a glass shower door, and fixtures, a mix of vinegar and baking soda can work wonders. Apply it to the affected area, let it sit for a few minutes, and then scrub away the residue.
Mold and mildew are common issues, especially in damp areas like the shower.
Use mildew-specific bathroom cleaners or a mixture of vinegar and water to treat these spots. Be sure to ventilate the bathroom well and wear gloves to protect your hands from harsh chemicals.
Regular attention to these areas can prevent buildup and keep your bathroom healthy.
Maintaining a Clean Bathroom with Kids
Getting kids involved in keeping the bathroom clean can be both fun and educational.
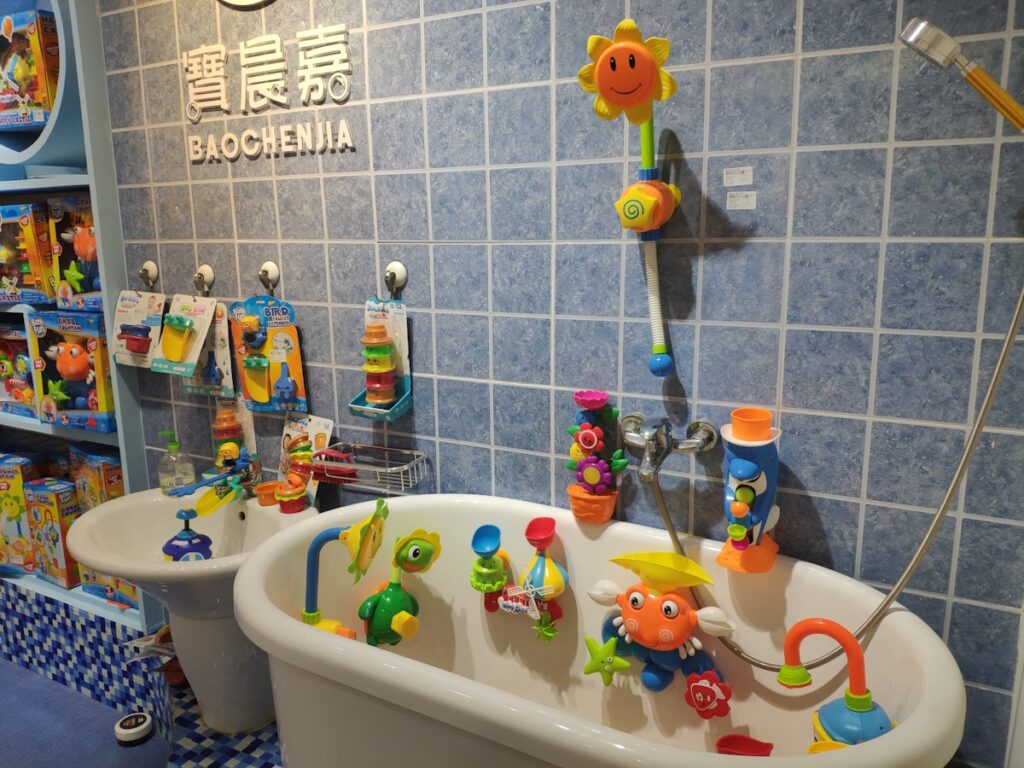
Start by giving them age-appropriate tasks. Younger children can wipe down the sink and faucet with disinfectant wipes, empty trash bags, or tidy up bath toys, while older kids can help with more challenging chores like scrubbing tiles or mopping the floor. Use colorful wipes and playful scrub brushes to make these tasks more appealing to them.
Establishing a routine is crucial for managing bathroom mess.
Teach your kids to put things back in their place after use. This includes hanging up towels, closing shampoo bottles, and putting away personal items. You could even make a game out of it, rewarding them with stickers or small treats for completing their tasks.
Another great idea is to set up a kid-friendly cleaning kit. Fill a small caddy with safe, non-toxic cleaning supplies that they can use. This empowers them to take charge of their chores and fosters a sense of responsibility.
For families with multiple kids, a chore chart or weekly bathroom cleaning checklistcan help divide tasks fairly and ensure everyone participates. Rotate duties weekly so that each child learns to handle different aspects of bathroom upkeep.
Lastly, keep storage within easy reach for kids. Install lower hooks for their towels and use baskets for their bath toys and other items. This will make it easier for them to tidy up, turning cleanliness into a team effort.
Organizing for Long-Term Cleanliness
A well-organized bathroom is the cornerstone of long-term cleanliness.
Start by decluttering your space and getting rid of items you don’t need or use regularly. Invest in shelves, baskets, and hooks to keep everything in its place.
Clear containers are great for storing small items like cotton swabs, hair ties, and makeup, and labeling them makes finding what you need a breeze.
Think about adding vertical storage solutions to maximize space. Over-the-door racks and hanging organizers can hold everything from towels to toiletries. Drawer dividers are another excellent option to keep your drawers tidy and easy to navigate.
Another tip is to keep daily essentials within easy reach. Use a caddy or a small tray on your countertop for items you use every day, like toothpaste, face wash, and hand soap. This not only keeps things organized but also speeds up your morning routine.
Don’t forget about the shower area. Use shower caddies or shelves to store shampoos, conditioners, and body washes. This prevents bottles from accumulating on the floor or tub edge, making it easier to keep clean.
Finally, ensure your cleaning supplies are stored in an accessible spot. This way, quick touch-ups are convenient and you’re more likely to stick to your cleaning routine.
With these strategies, maintaining a tidy bathroom becomes a lot more manageable.
Final Thoughts on Bathroom Deep Cleaning
Deep cleaning your bathroom might seem daunting, but with a bit of planning and the right tools, it’s totally manageable.
Remember, the trick is to work from top to bottom, making sure you don’t miss any spots along the way.
Keep an eye on those tricky areas like grout and mildew, as regular attention can keep them from becoming bigger problems.
Getting the kids involved not only helps distribute the workload but also teaches them valuable life skills. Plus, it can turn a mundane task into a fun family activity.
Staying organized is crucial; it makes future cleanings easier and quicker. With a solid routine and some teamwork, maintaining a clean bathroom becomes a much simpler task.
Listen to hear how to prevent nails from pooping out, raise an outdoor dryer vent’s height, and more!
How to Stop Drywall Nails from Popping Out
Use a drywall screw instead of a nail to stop nails from backing out. ( 3 Echoes Content Studio)
A homeowner’s house was built in 1954 and she is tired of watching nails back out of the drywall.
She asks, “How do I fix this? Can I pound the nails back in?”
First, pounding the nails back in is just a temporary fix — they will eventually pop out again. But the bigger question is this: why does it happen?
In a home, there is a lot of movement — doors slamming, people walking, etc. All these movements cause vibrations. And, over time, those vibrations will cause a drywall nail to back out.
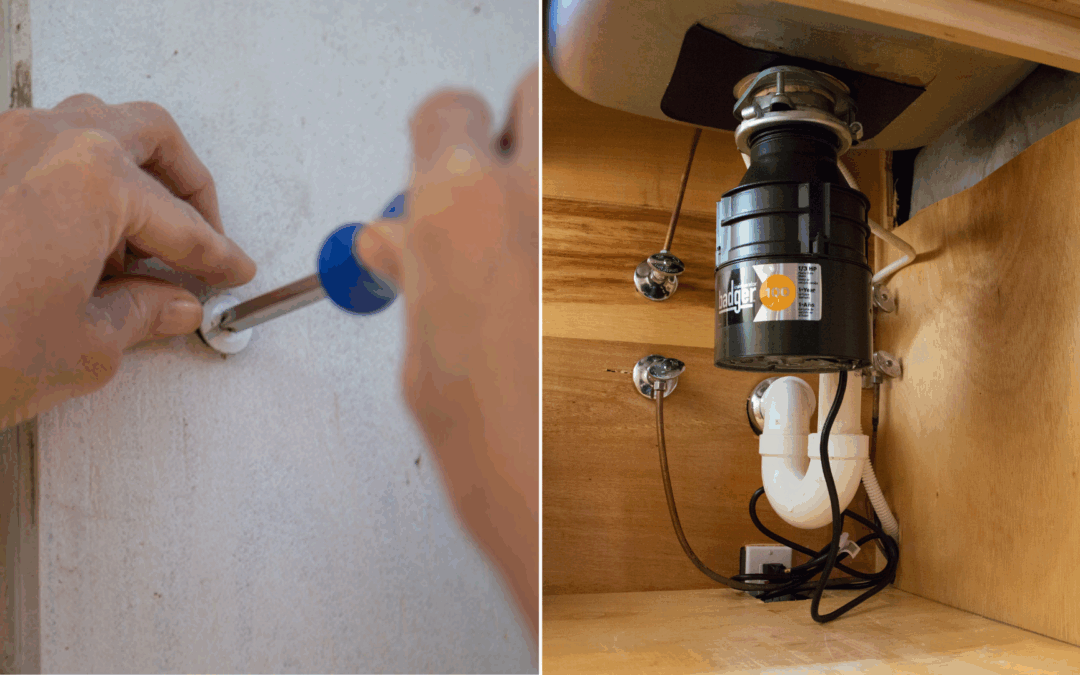
To fix this problem, you’ll need to remove the nails and replace them with screws because drywall screws are the better option.
You don’t want to just remove the nail and replace it with a screw before checking if the nail is in the center of the stud or close to the center. The stud might be the reason it is popping out.
So, we recommend taking a hammer and a finishing nail and tapping through the drywall until you find the center of the stud.
Once you find the center and pull out the nail, then drive one or two drywall screws an inch or two above the old nail hole. This will hold it tight.
After replacing the nail with a drywall screw, put joint compound over the screw heads and in the old nail hole, let it dry, sand it, and do it again. Once you have it filled and sanded dry, paint it.
The screws will hold up very well, and you will hopefully never have to do this process again!
An outdoor dryer vent should be at least 12 inches from the ground. (3 Echoes Content Studio)
A homeowner’s dryer vent runs on an exterior wall and under the brick veneer. It is installed about an inch off the ground instead of 12 or more (the recommendation).
He has trouble with stormwater getting into the vent, and now asks, “Do you have any recommendations for me?”
First, it’s rare to find a dryer vent so low to the ground. It is possible that when the vent was originally installed, it was the correct height off the ground. However, as time passed, grading and landscaping could have been added, and the vent got closer to the ground.
To make this dryer vent work efficiently, you’ll want to have as short of a path as possible. So, we do not recommend rerouting the current ductwork and going through the soffit.
Instead, we recommend trying to elevate or extend the existing vent upward, or digging dirt around the vent to give it more space. You could also add a slight turn and elbow to get it off the ground.
Check your local home center for a device that curls up at 90 degrees, which will help elevate the vent on the outside. There are many dryer vent options.
For safety, do not use PVC pipe for an elbow because it cannot handle the high temperatures that come through a dryer vent.
In addition, make sure you frequently clean your dryer vent to prevent house fires and keep your dryer working efficiently.
Hour 2
Listen to learn about garbage disposal rules, how to fix a toilet that won’t flush, how to lay an underlayment over a tile floor, and more!
What You Can Put Down a Garbage Disposal
It is acceptable to put things down a garbage disposal if they are small enough. (3 Echoes Content Studio)
A homeowner and his wife have had an ongoing disagreement about whether it is okay to put scraps of meat down the garbage disposal. They have septic tank disposal.
He says, “Can you settle this debate?”
It is perfectly fine to have a garbage disposal with a septic tank. However, some septic tanks are really good, and others are very marginal. That plays a large part in the disposal’s functionality and what waste it accepts.
When it comes to garbage disposals, you do want to use them sparingly and not put everything down it. You want to avoid putting large substances down.
The answer to the question would be yes, but only small pieces of meat, and don’t pack it full.
Make sure you use and maintain garbage disposals correctly. It is recommended to use cold water to wash waste down the drain and ensure you don’t put something in the garbage disposal and not run it!
If your garbage disposal gets clogged, use this trick!
How to Solve Toilet Flushing Issues
Adjusting the chain is an easy fix to solve toilet flushing issues. (3 Echoes Content Studio)
A homeowner is struggling to get her toilet to flush completely. She says she has to hold the handle down until the bowl is flushed.
She wants to know, “Why does this happen, and how can I fix it?”
There are two reasons that she may be having this problem. One, there is not enough water in the tank, meaning the water stops before reaching about half an inch below the overflow tube. That is where you want to adjust it.
Next, you want to ensure that when you push down the handle, the flapper stays open to allow the flushing action and then closes. If the chain is too short or too long, that will prevent that from happening.
Another reason is an obstruction in the drain. If there is an obstruction, then you won’t get that flushing action because it’s resisting the water going into it.
It is most likely the first problem. This is a very common fix, and there are lots of great repair kits out there. Do this quickly so you won’t waste water!
Although fixing a toilet might not be the most glamorous form of home improvement, it is so important to have a working toilet that will stay in good shape for a long time.
Make sure you use the right notch trowel size to install an underlayment. (3 Echoes Content Studio)
A homeowner wants to put a quarter-inch underlayment over a tile floor.
He asks, “Do I need to nail or screw it? What do I use?”
No, you are not going to want to nail through or screw it. You will have to glue it down. Do some research and find the right adhesive you need, depending on the materials you are using. Most likely, it will be in a bucket, and you’ll use a notch trowel to install the right amount.
Make sure that you read the directions to ensure you use the recommended notch trowel size. A lot of people do not realize that the size of the notch trowel needs to correlate with the adhesive in order to work well.
To ensure there is no movement when putting down the floor, use leftover blocks, bricks, or heavy objects to weigh it down a little bit. Leave it overnight so that it will dry and really cure well.
There are multiple options for underlayment. One option is a self-leveling underlayment. This is like really thin concrete. Do a thin coat over the tile to create a smooth and flat surface for a vinyl floor to be put over.
The StyleWell Parker Mill 4-Piece Metal Patio Set is durable and long-lasting, providing you with the outdoor furniture you can count on. Learn more>>
Simple Solutions
Use a push broom before painting to remove dust and dirt from walls. (®JodiJacobson via Canva)
Push Broom Paint Prep—Prior to painting a room, it’s important to clean the walls and ceiling to remove all dust, dirt, and cobwebs. Here’s a quick and easy way to do that: Wrap a towel around the head of a push broom, and secure it with a binder clip or pinch clamp. Then lightly mist the towel with water. Now use the towel-wrapped broom to wipe down the walls and ceiling. The damp towel will trap any dust or dirt, leaving behind a clean, ready-to-paint surface. This tip also works great to remove joint-compound dust from newly sanded drywall joints.
Use concrete blocks to create easy storage for your gardening tools. (3 Echoes Content Studio)
Easy-Access Garden-Tool Storage—Most people store their lawn and garden tools in the garage or shed by simply standing them up and leaning them in the corner. There’s nothing particularly wrong with this except that it’s a little messy, and it’s hard to grab one tool without knocking over another. So, here’s a super simple solution to that problem: Take three concrete blocks and stack them up wherever you want to store your tools. What you end up with is two deep compartments for storing long-handled tools. The blocks are heavy enough that you don’t have to worry about them falling over, no matter how many tools you put in there. If you don’t have enough headroom, you can use two blocks so you can lift the tools out. This will give you a neat place where your tools are out of the way and easily accessible, and you don’t have to worry about them falling over.
The bathroom is typically where we center ourselves with self care in the mornings and evenings. Believe it or not, the color of your bathroom can help with this mind shift. Green bathrooms exude a rejuvenating energy, reminding us of nature and the great outdoors. Green can make us feel calm or exhilarated, depending on the shade, so it’s important to consider what kind of boost is best for you. Sage green bathrooms are soothing, which is helpful in bringing down stress and anxiety, while lime green bathrooms deliver a powerful visual jolt to wake up the brain. Whichever mood you’re looking for, we’ve got 40 green bathroom design ideas with tips and accessories to help you create it.
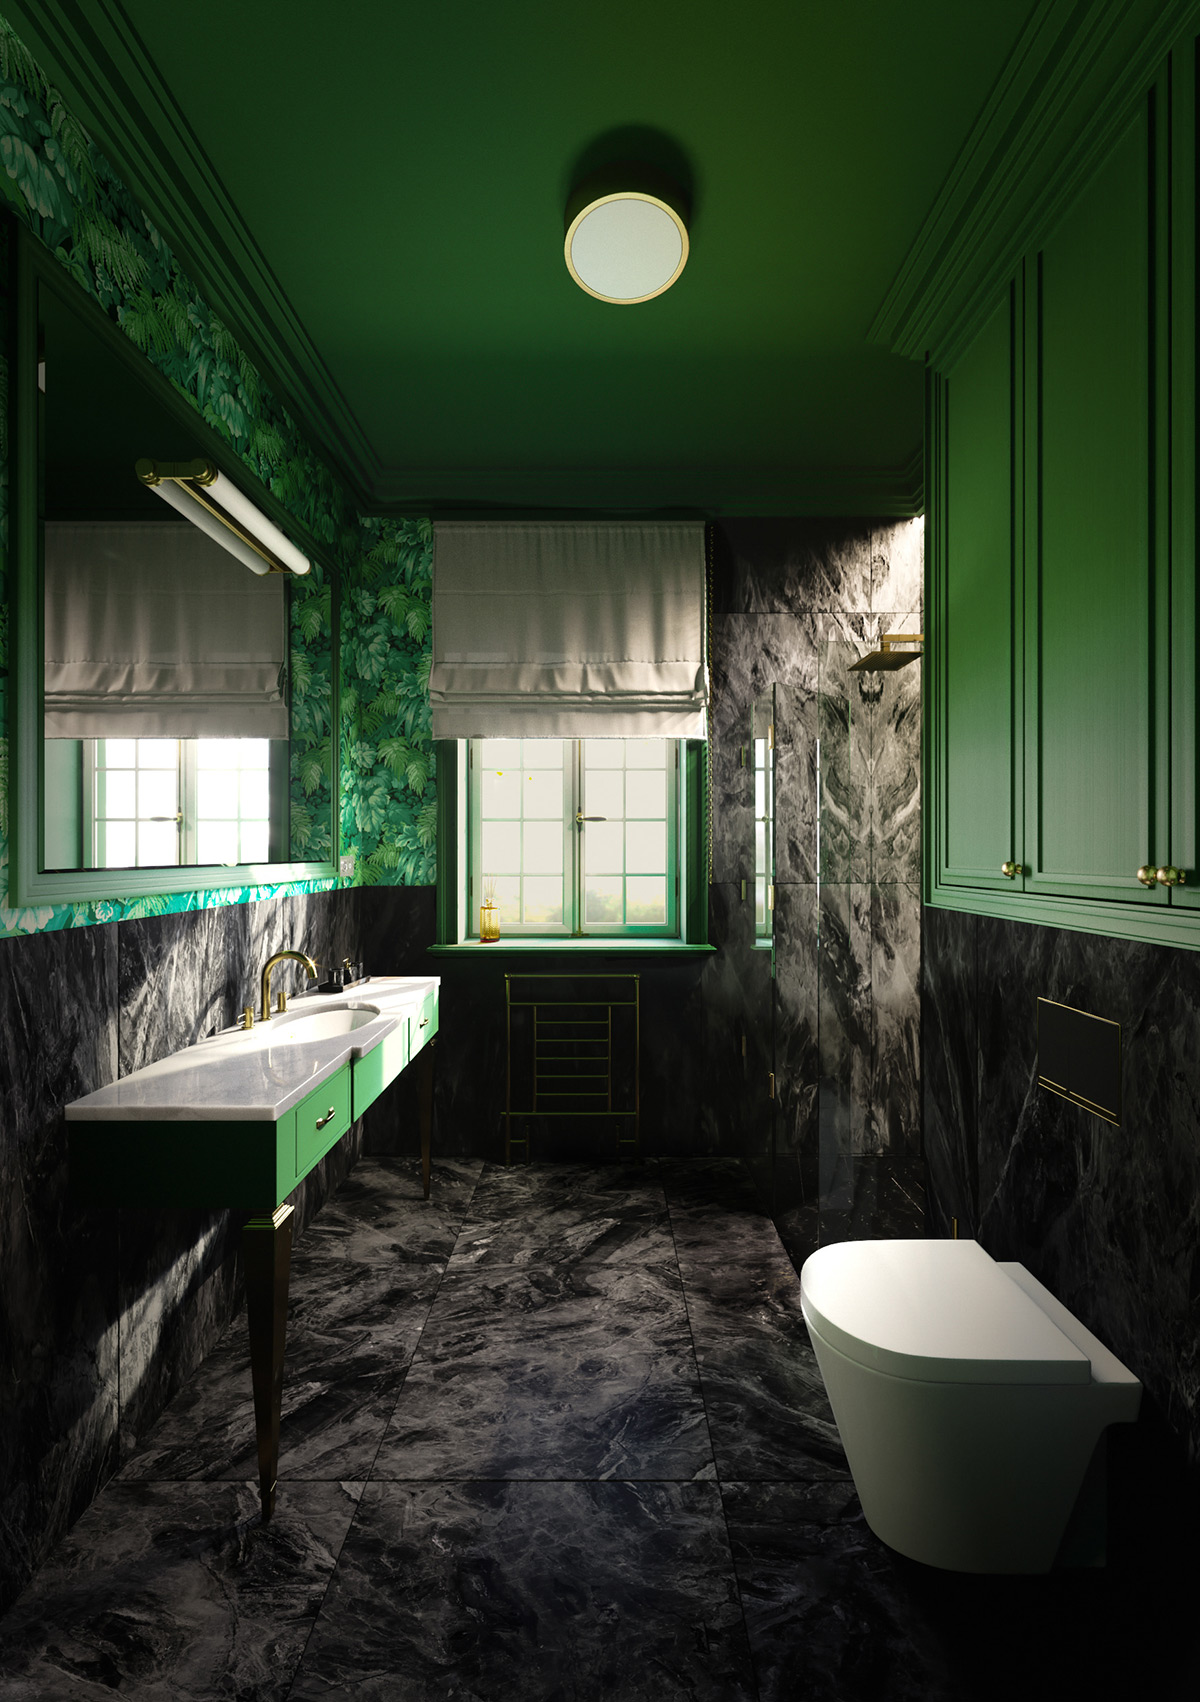
A green bathtub shines like an emerald in this moody bathroom scheme. Green paintwork continues up from the walls onto the ceiling for a full wraparound finish.
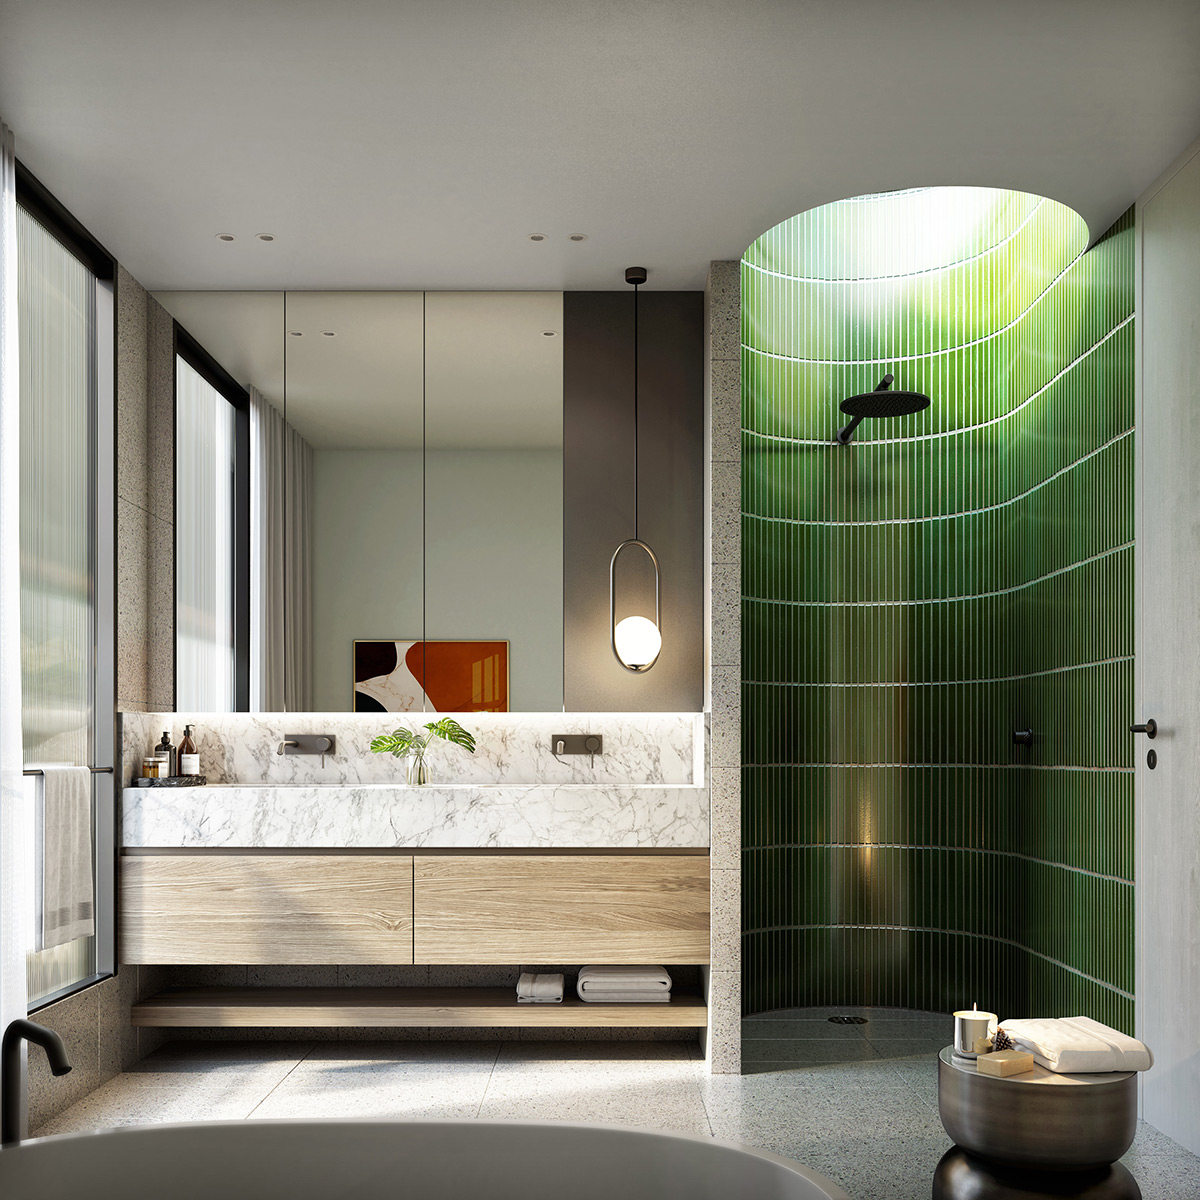
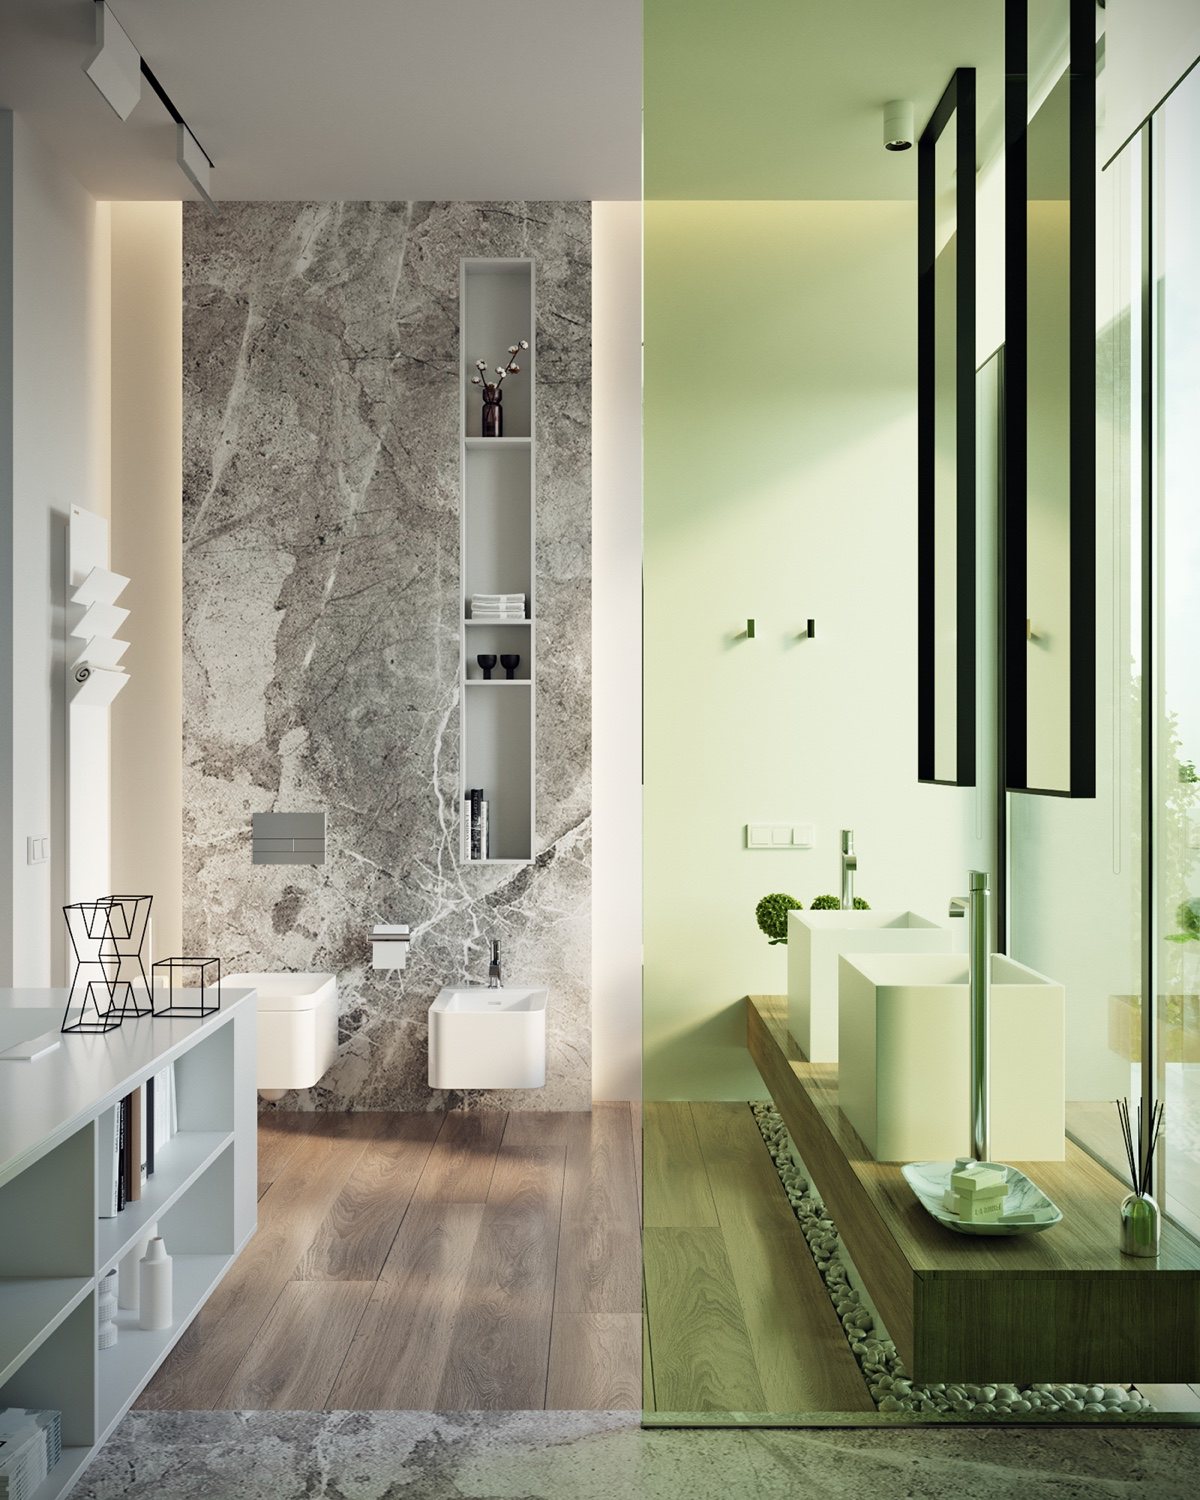
In this airy bathroom concept, a green ceiling is punctuated with a round, white ceiling recess for the shower. Pivoting glass doors connect the space with a sunny terrace.
Advertisement
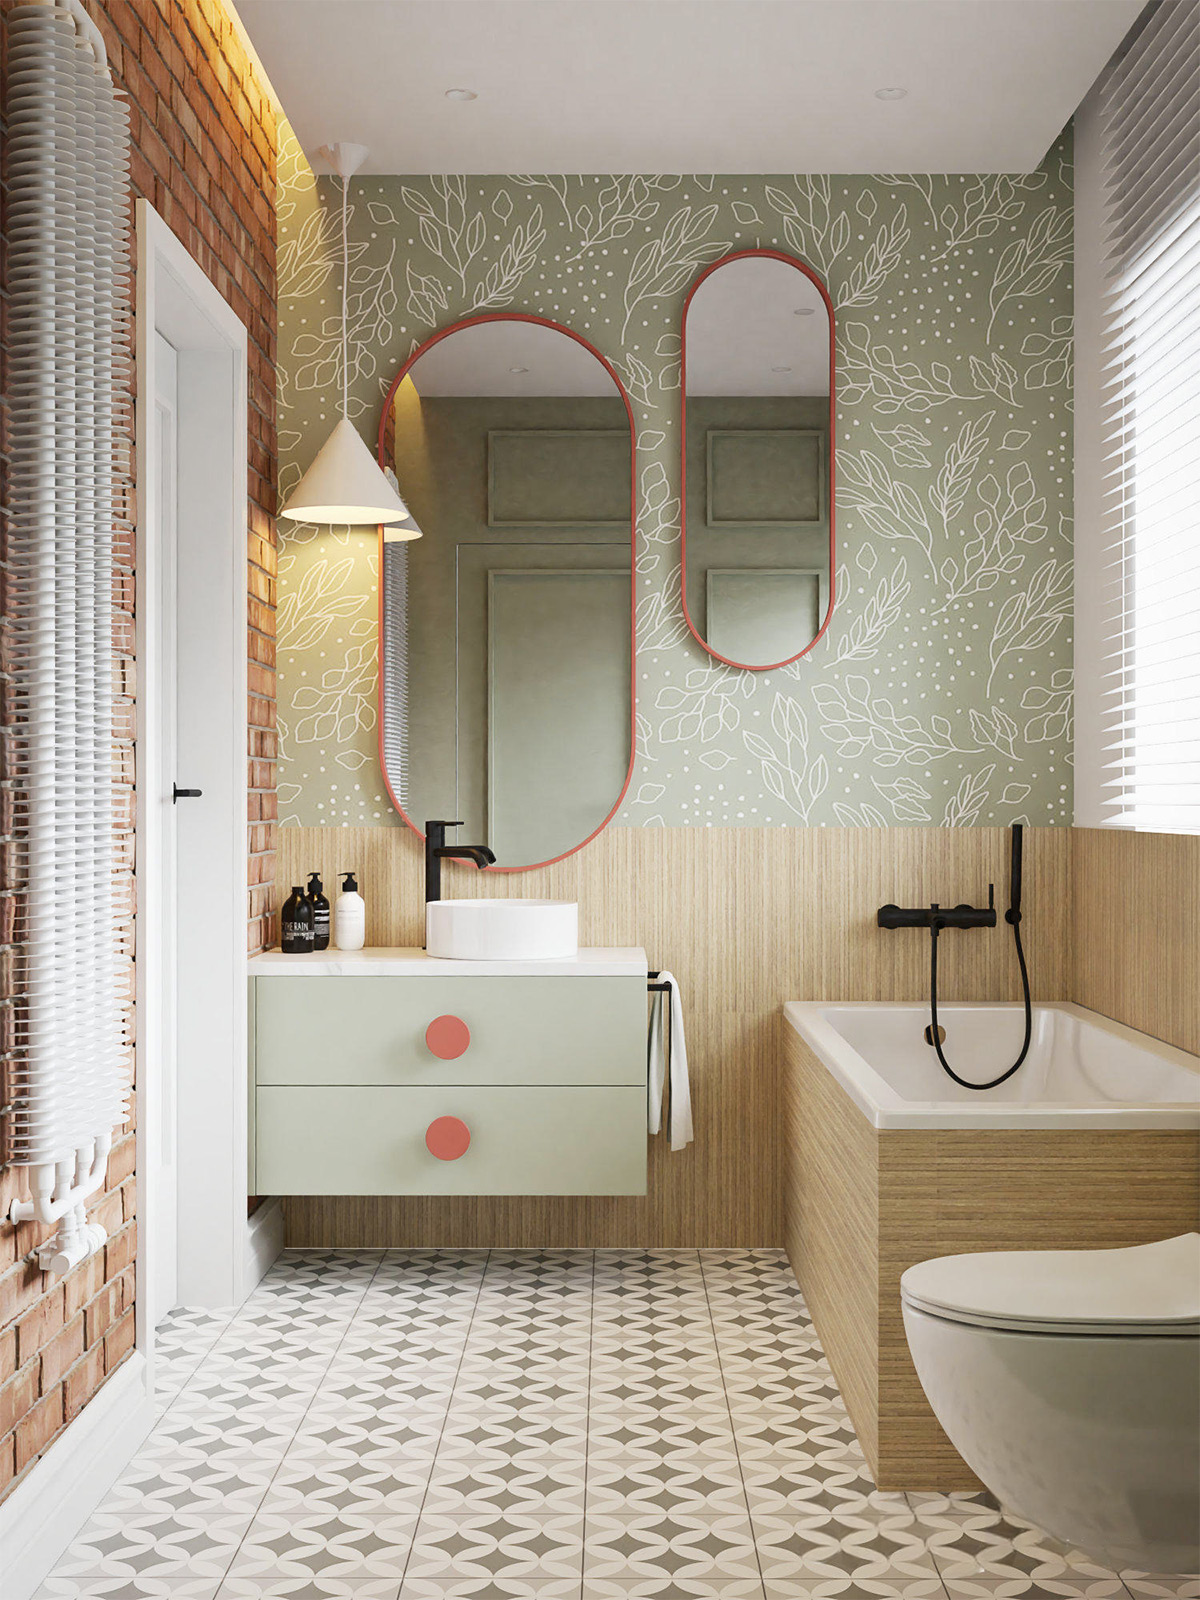
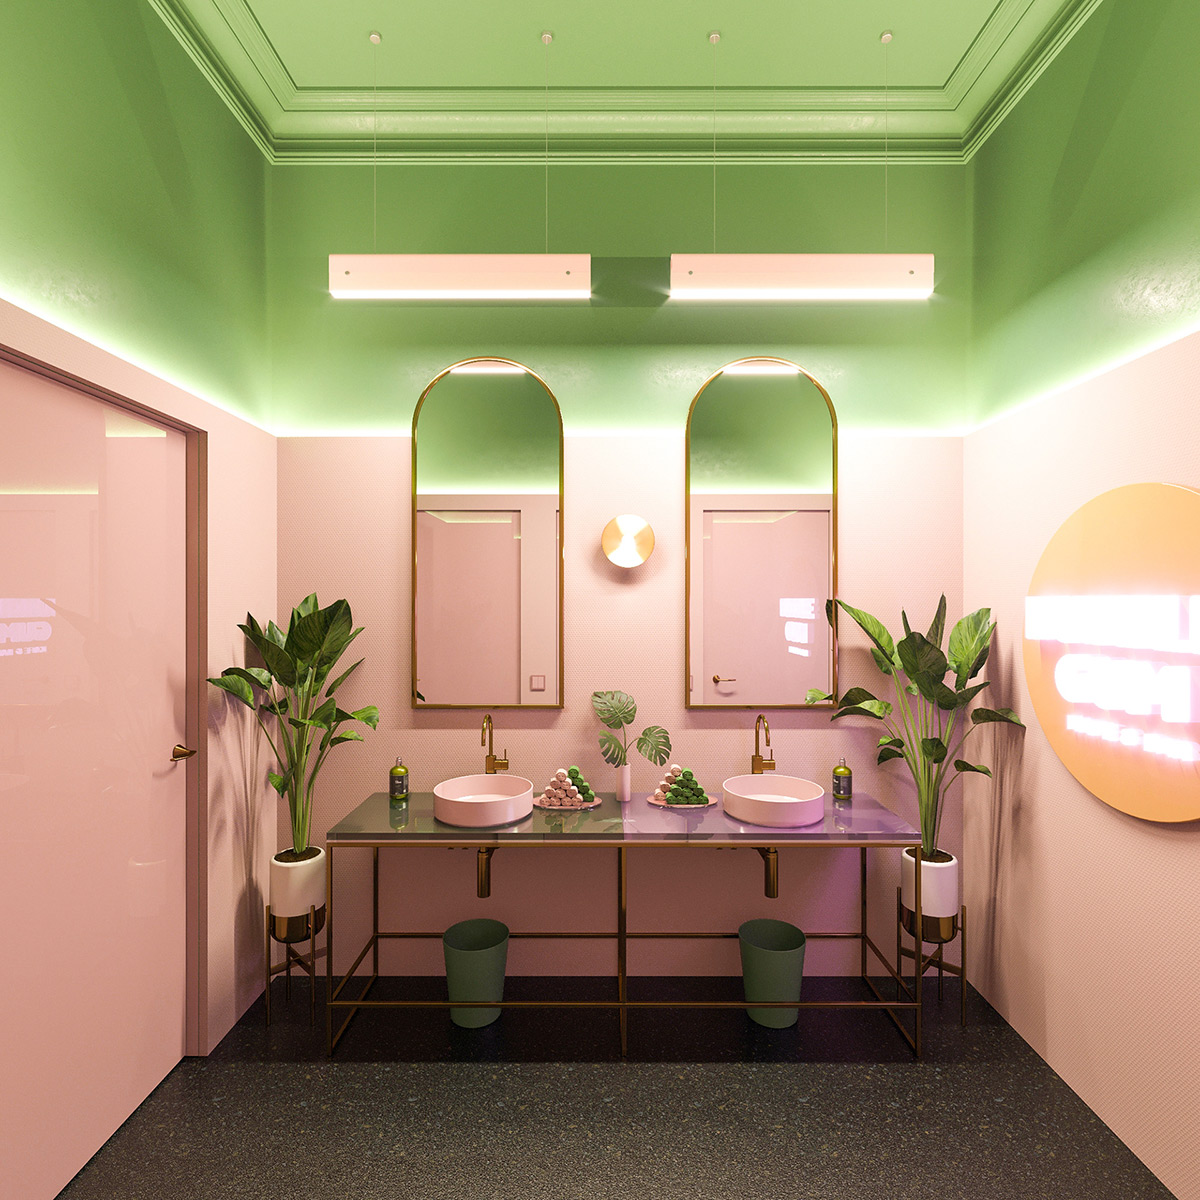
Racetrack-shaped bathroom mirrors place contrasting coral accents onto sage green bathroom wallpaper, here. Coral hardware continues the warming accent onto a pale green vanity unit.
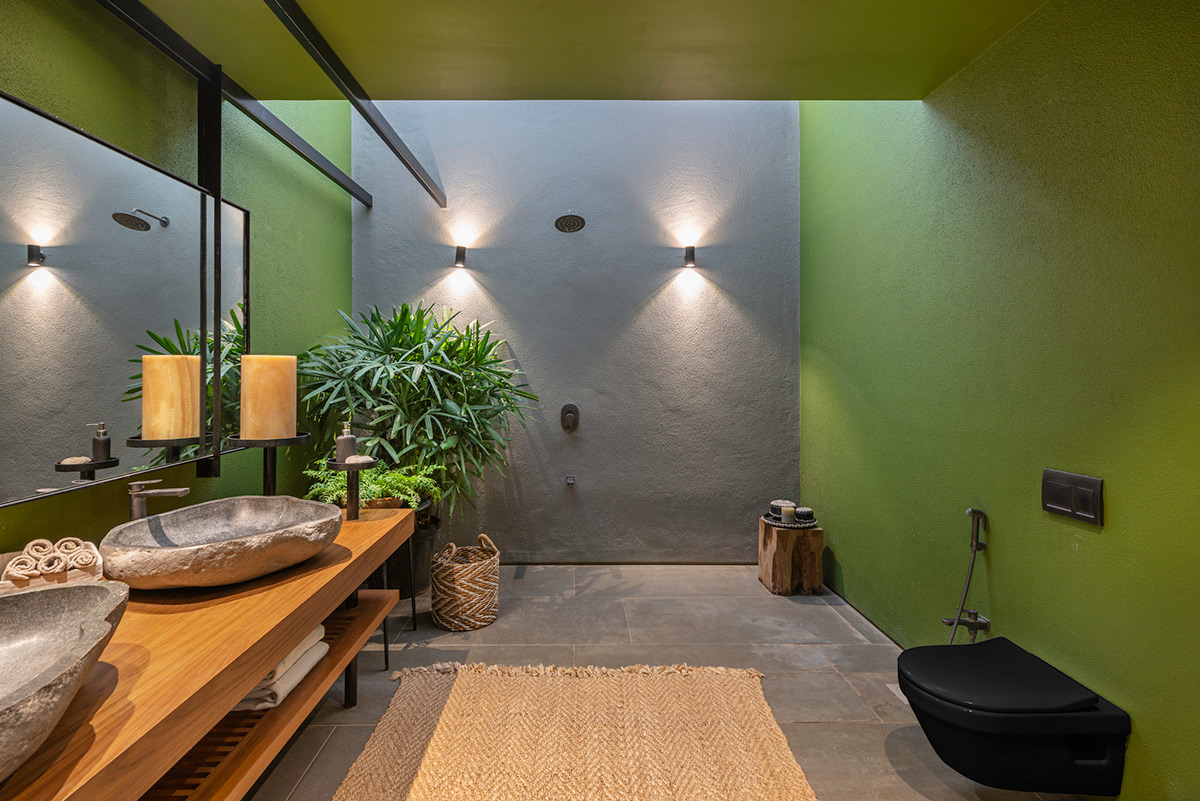
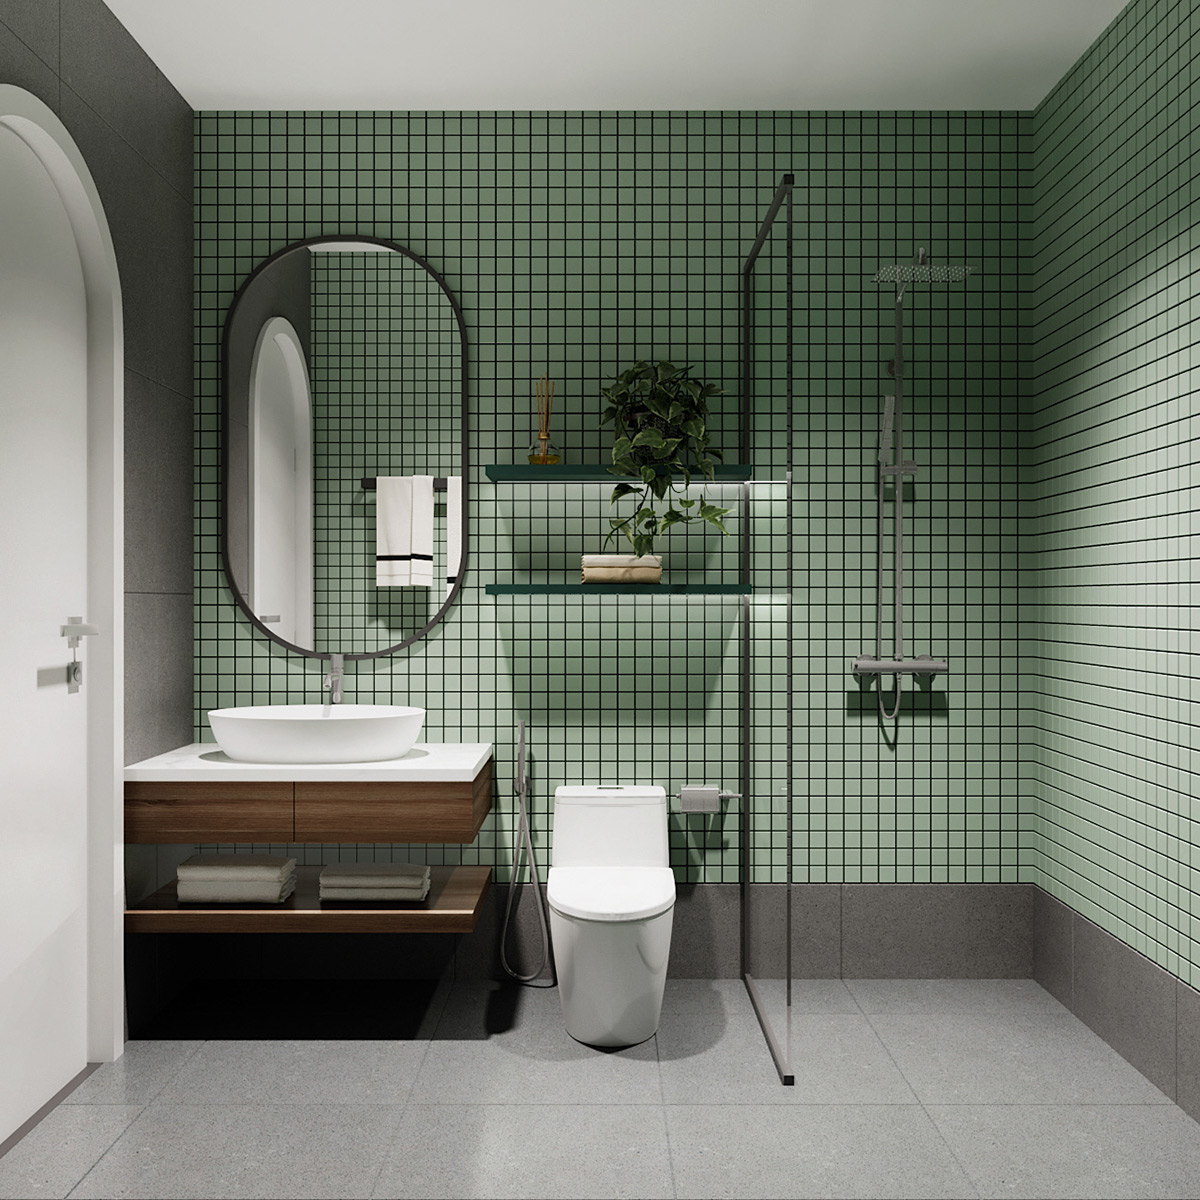
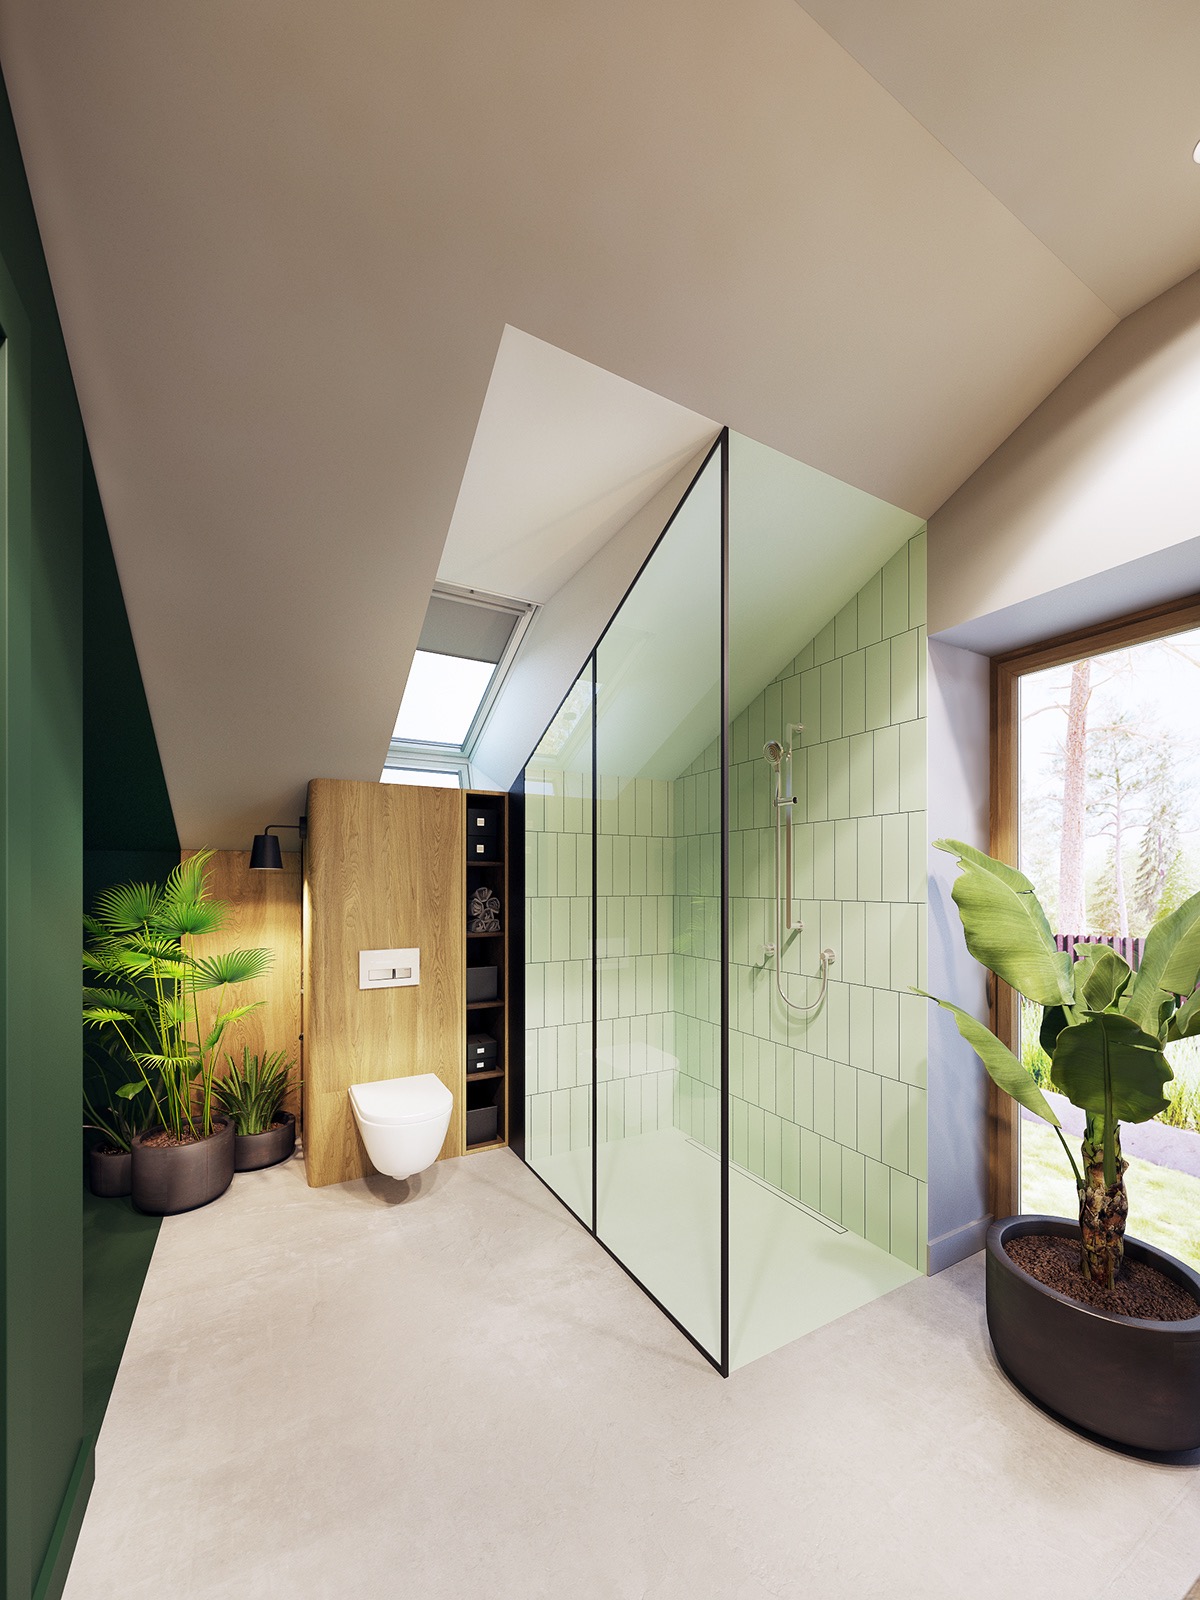
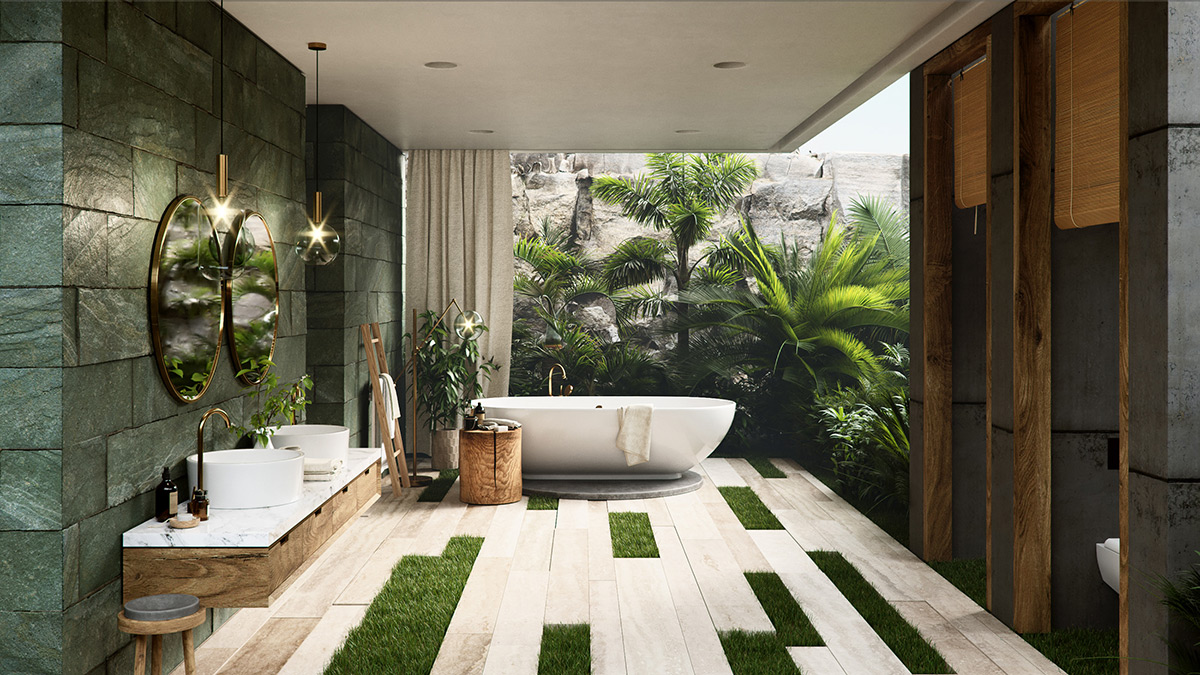
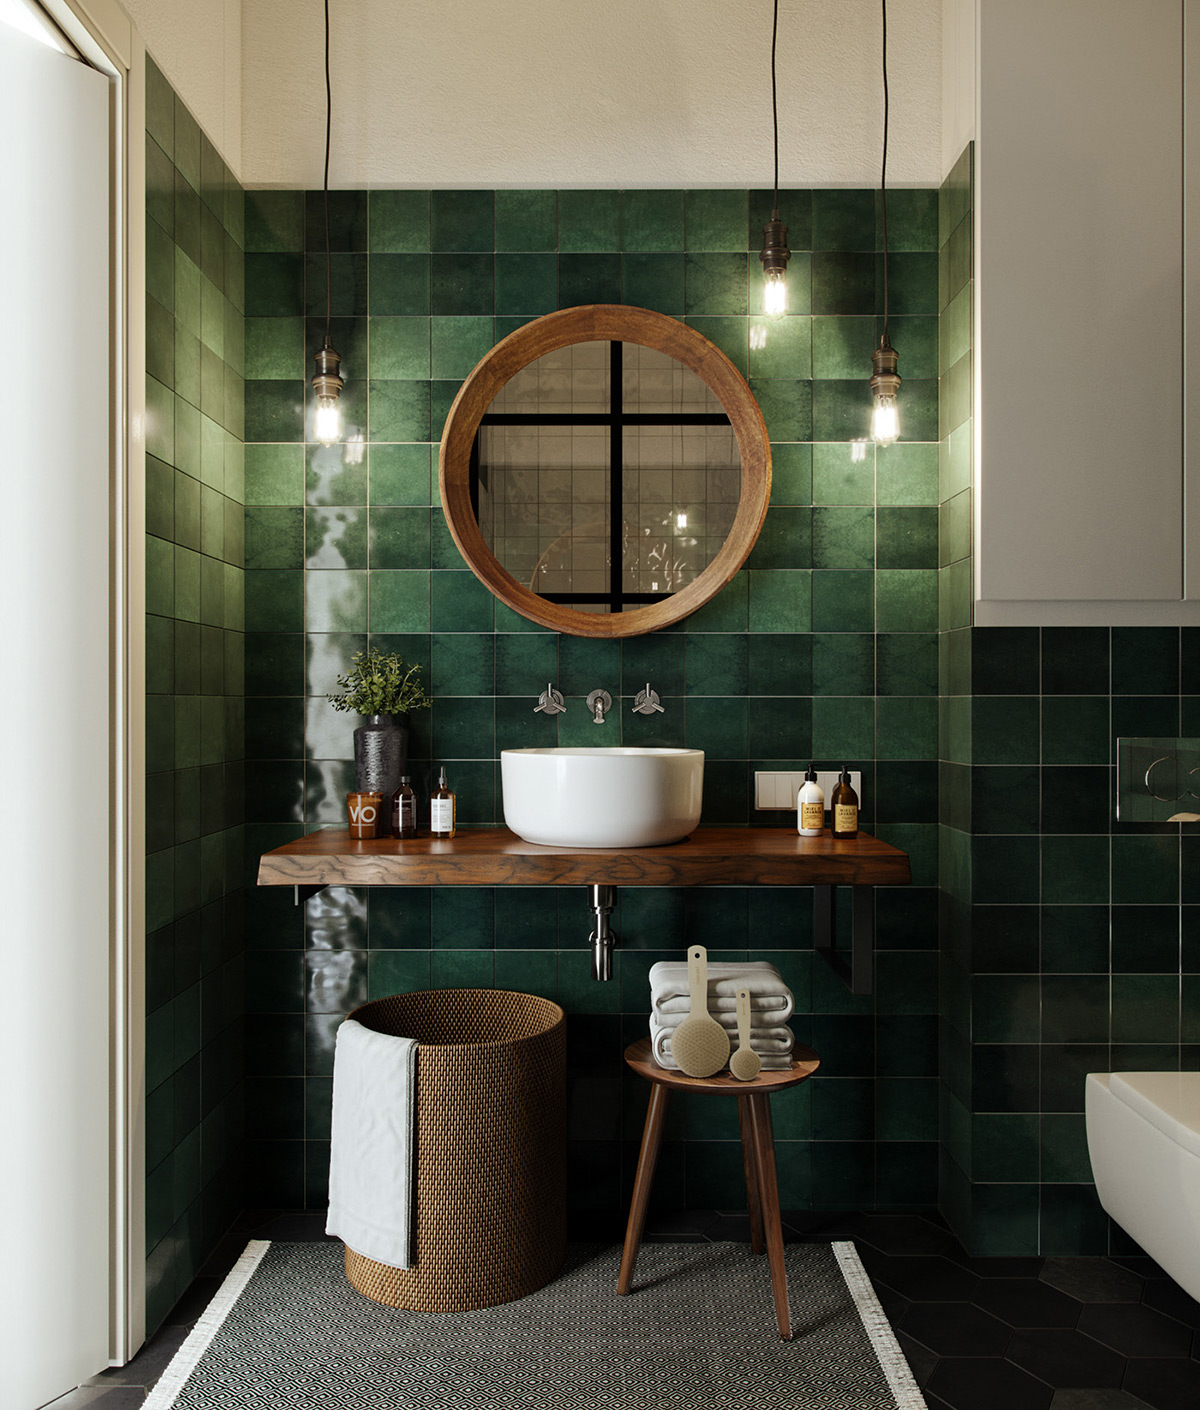
Indoor plants go hand-in-hand with a green bathroom decor scheme. Continue the natural theme with wood and rattan elements.
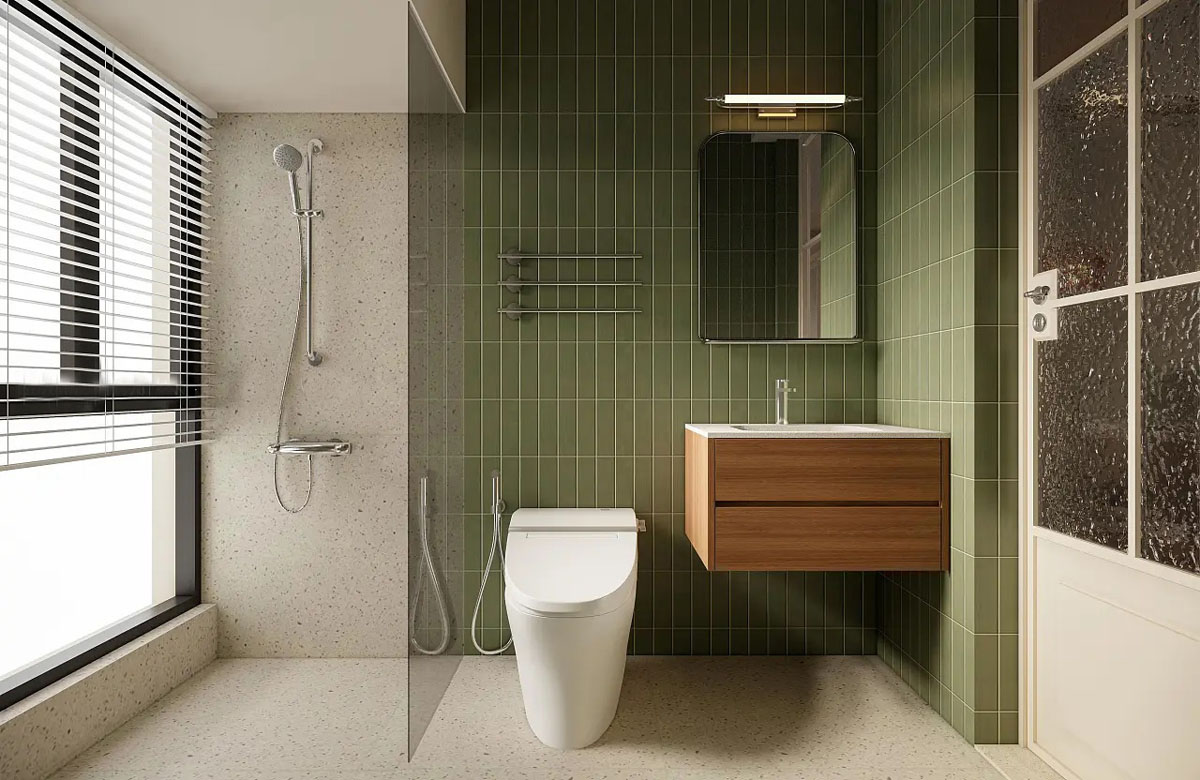
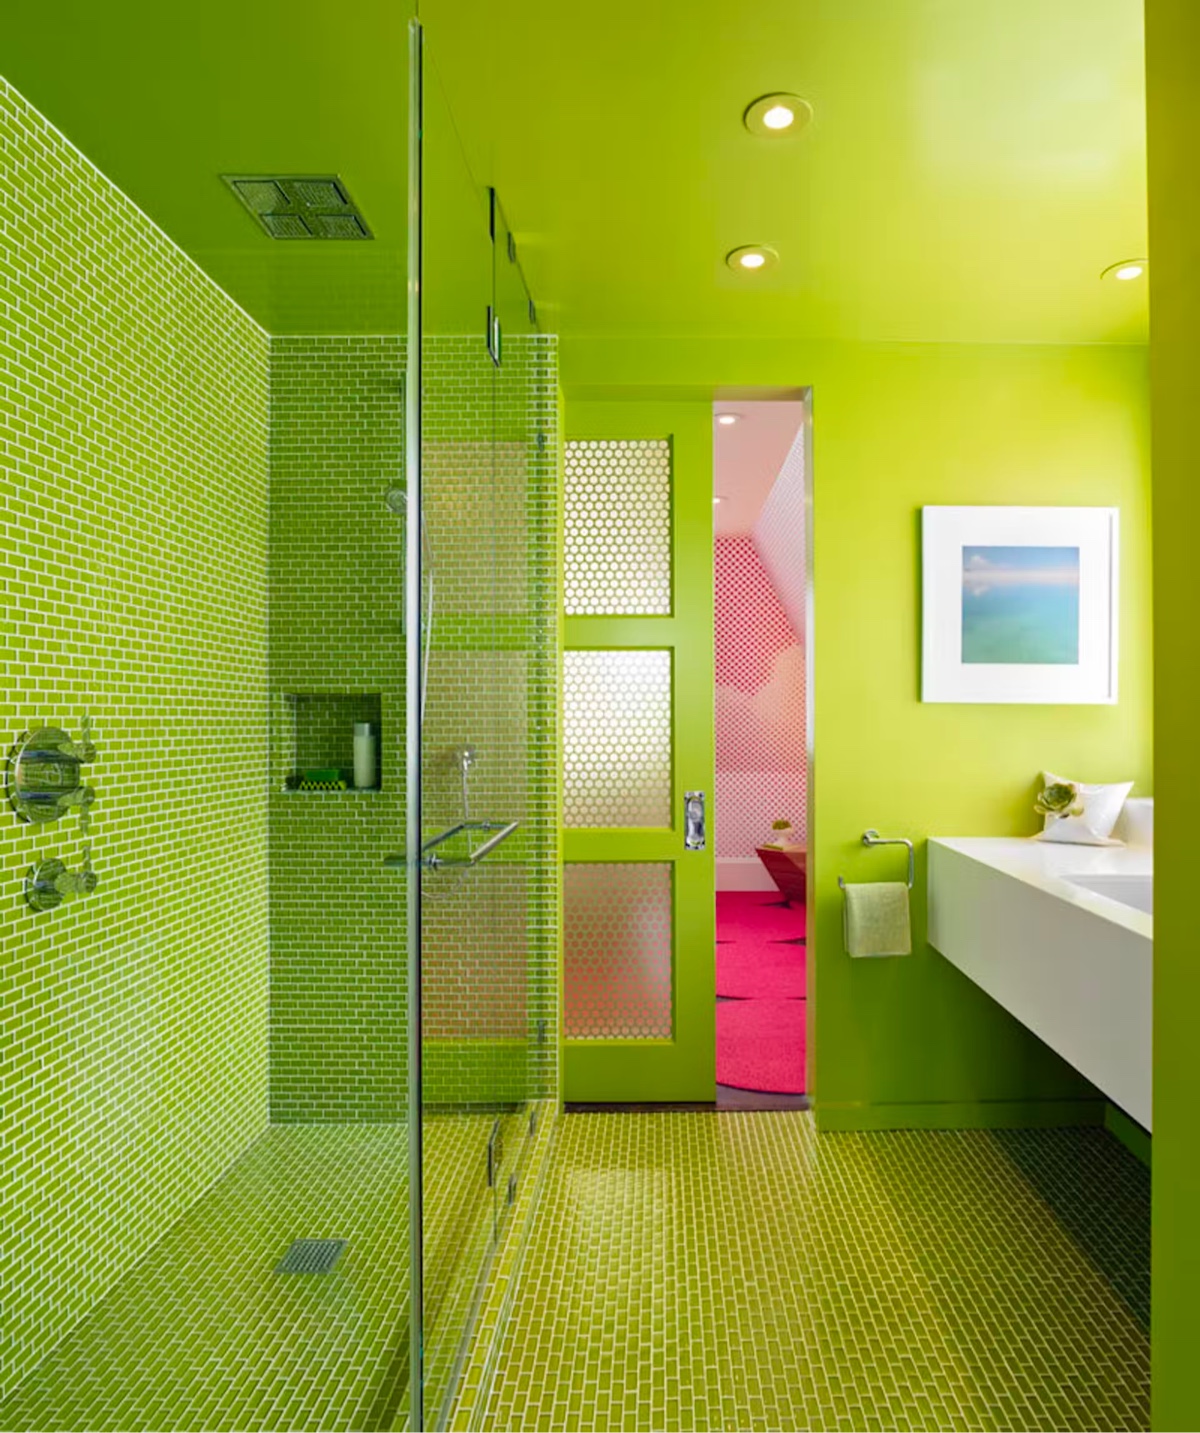
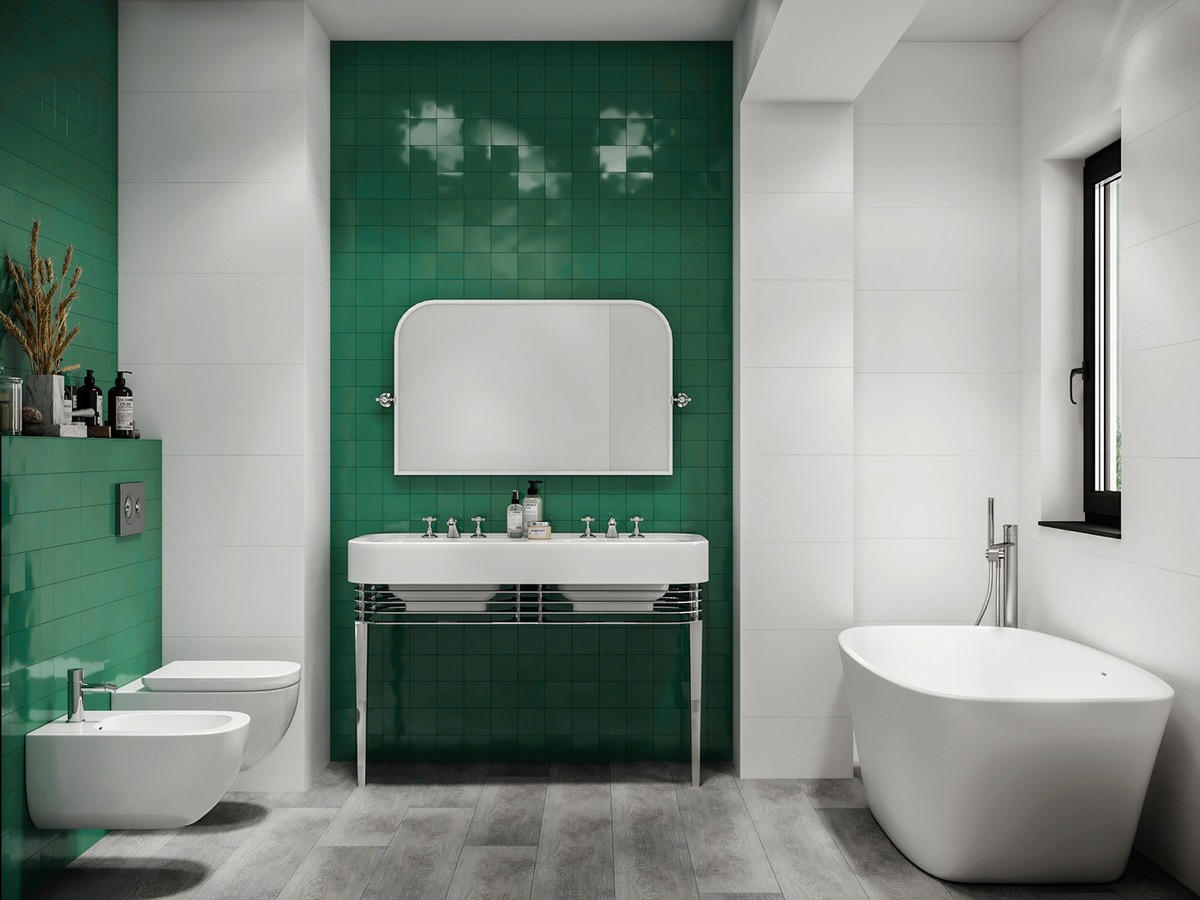
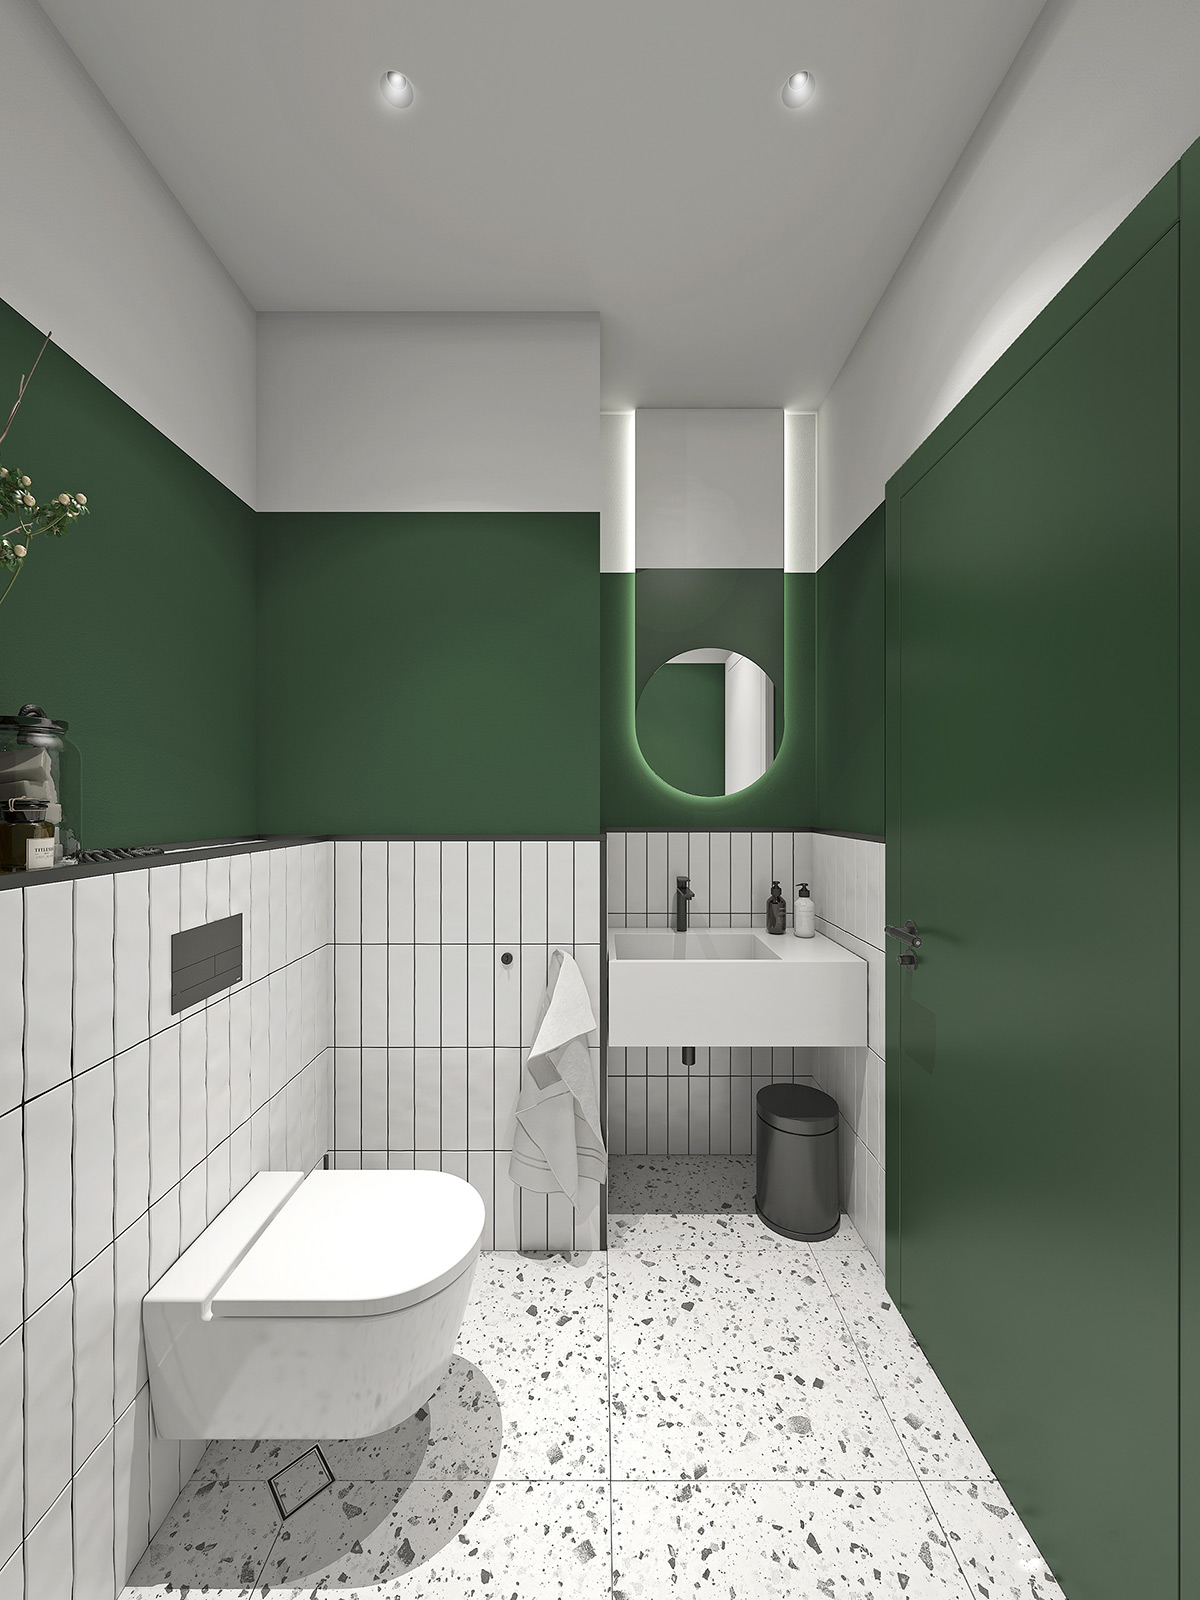
Green subway tiles, mounted vertically, construct a modern look.
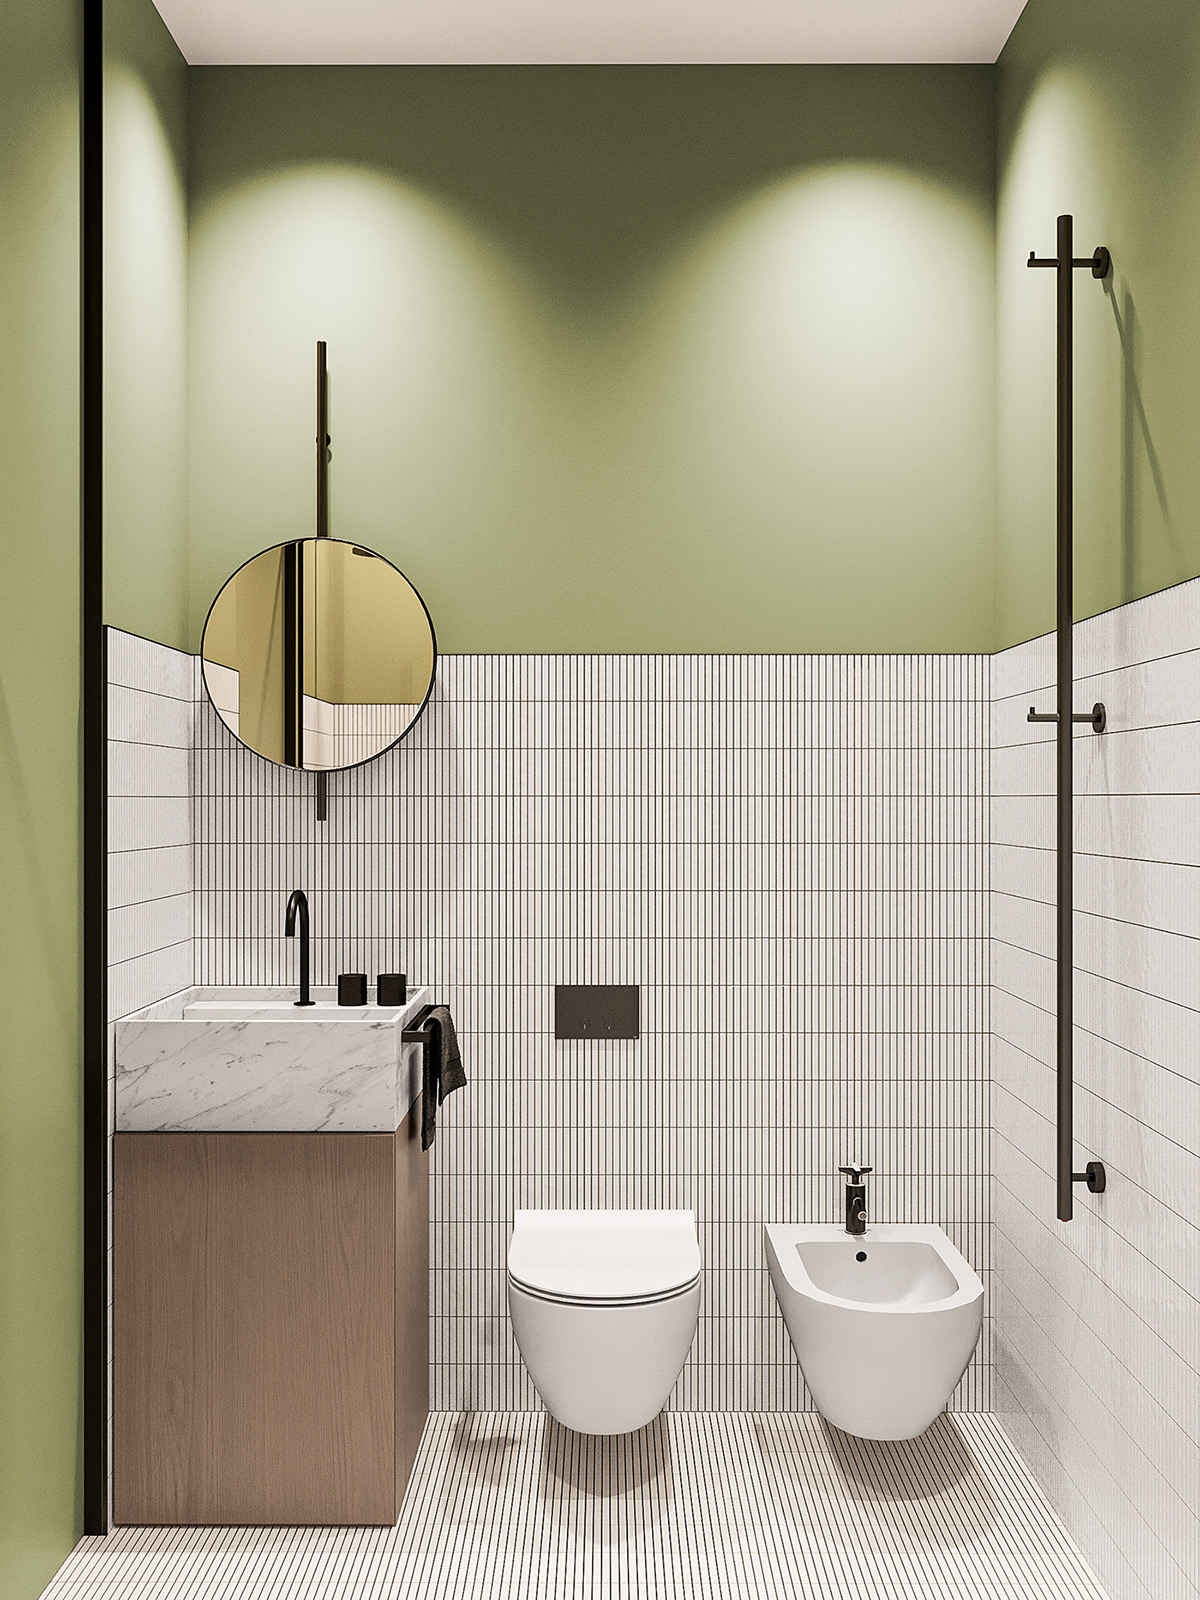
If you’re not sure whether or not to commit to a green color scheme, select neutral fixtures and fittings and apply color only with your paintwork. That way, it will be quick and inexpensive to switch out.
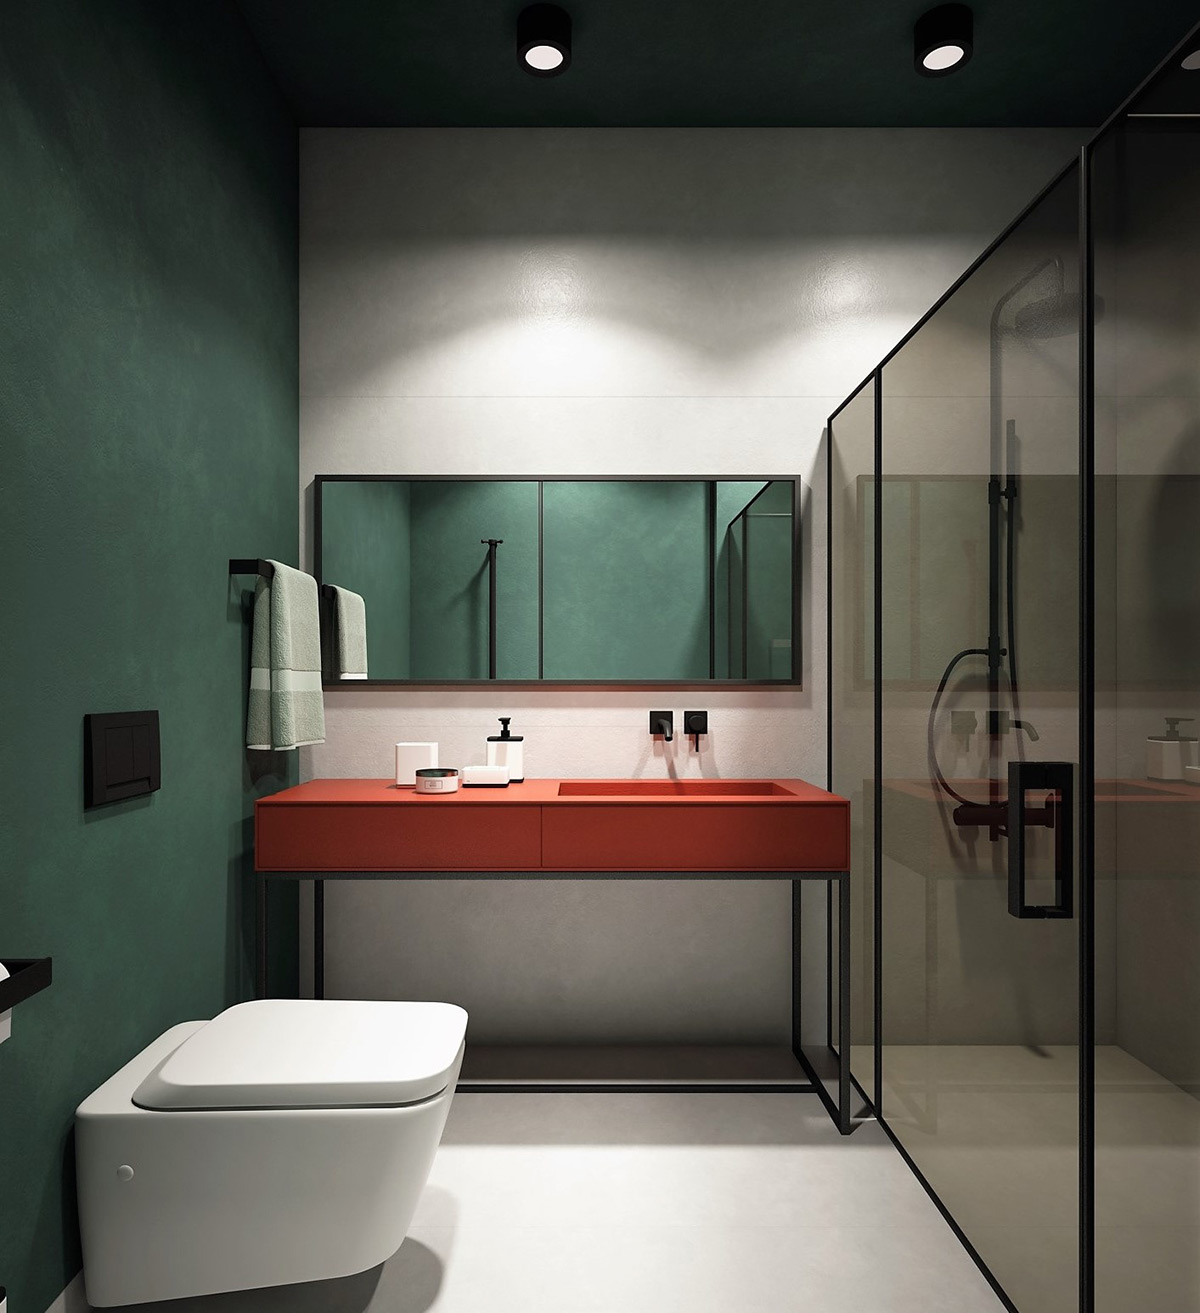
Green basins, a green vanity unit, and green wall tiles build a color-saturated scheme. A black bathtub and toilet break up the layout.
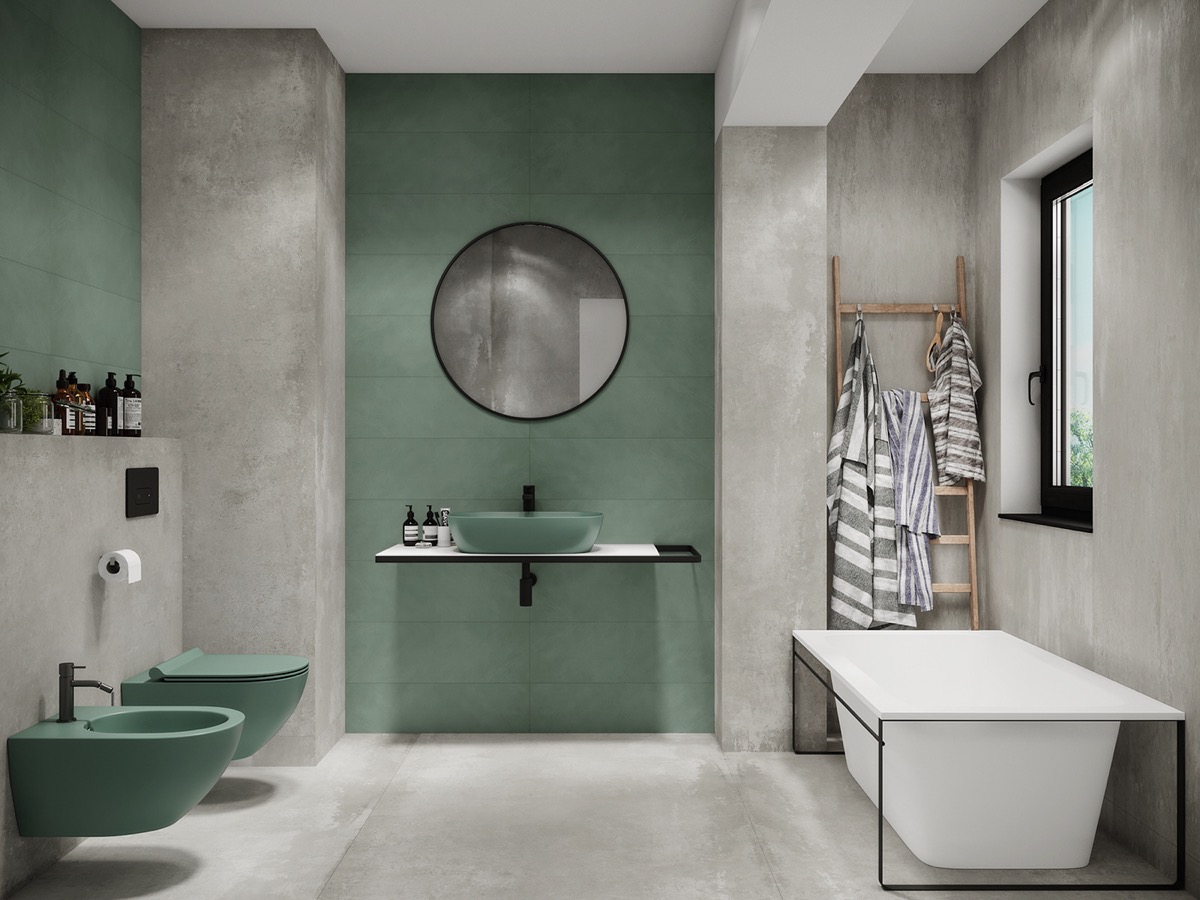
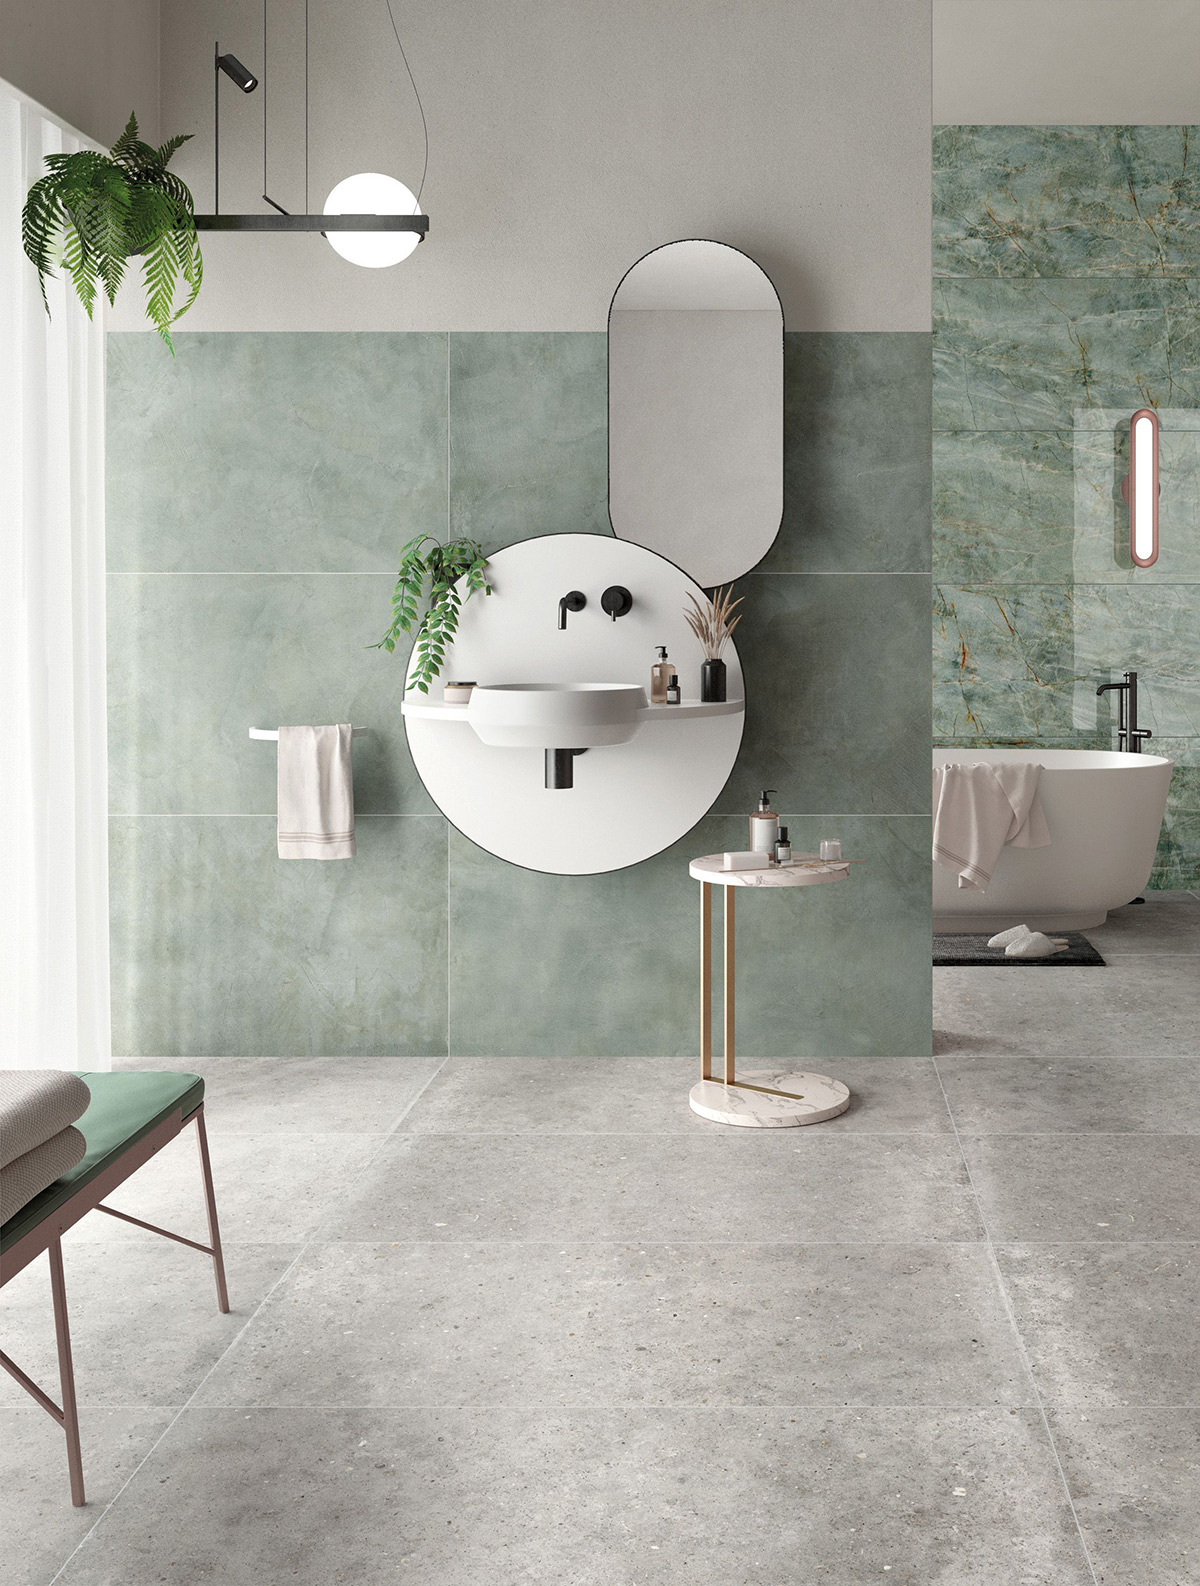
Combine concrete decor with green accents to establish a cool, industrial base with uplifting interludes.
Advertisement
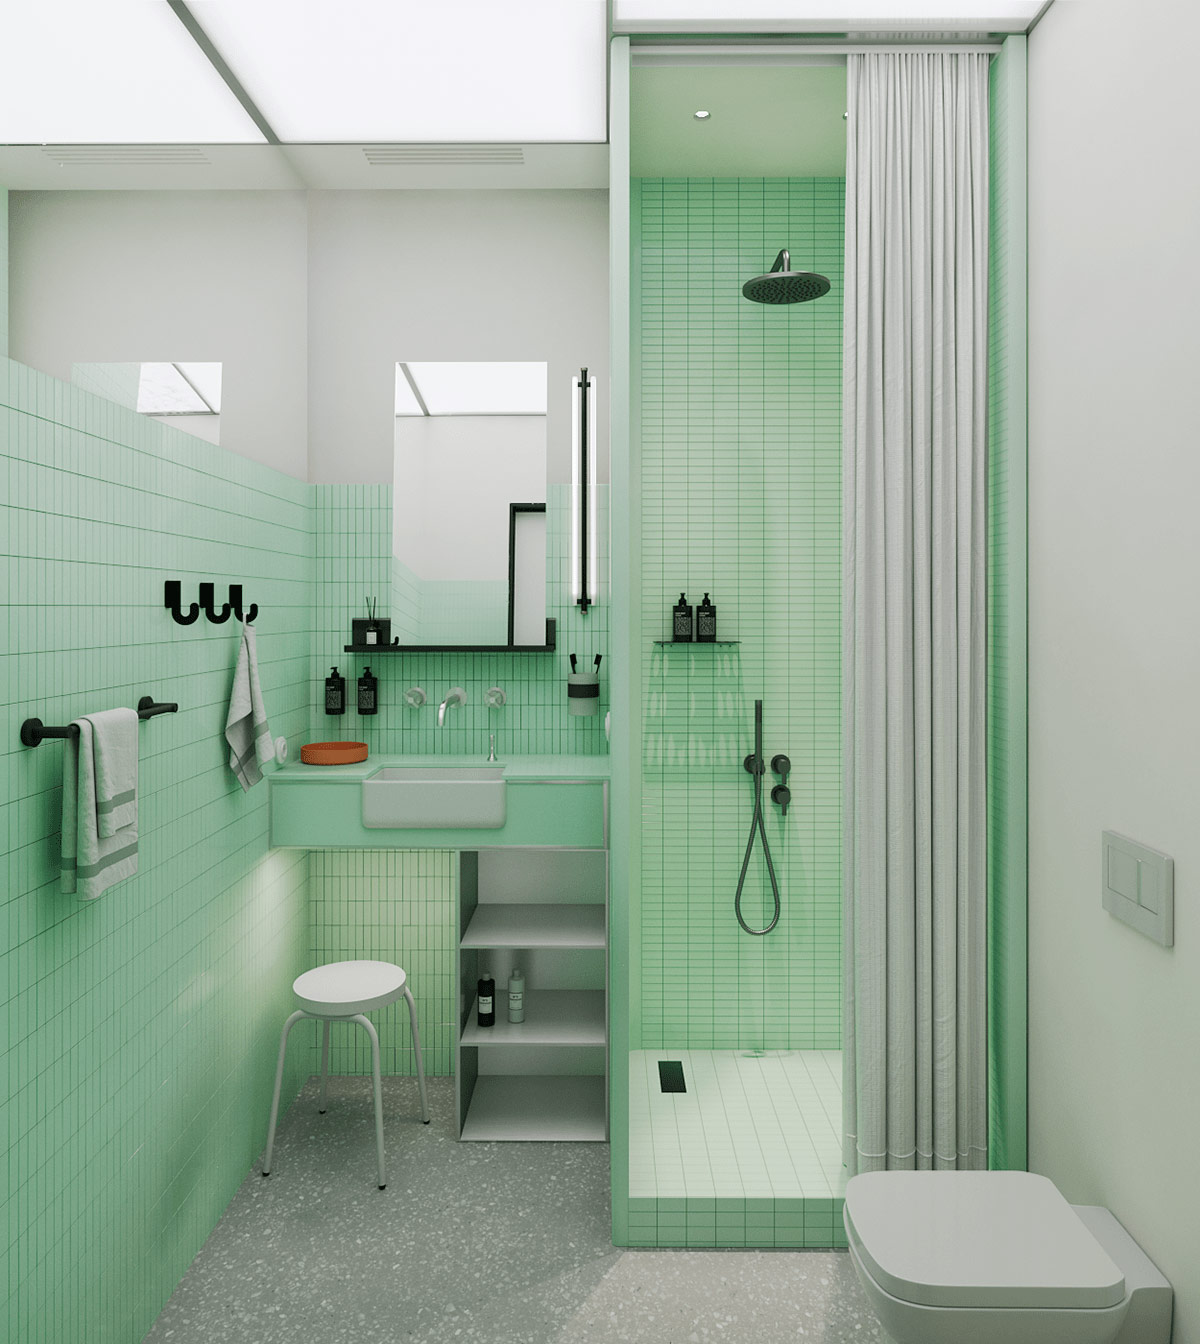
A white farmhouse sink and black bathroom fixtures break up this bold, seafoam green bathroom design.
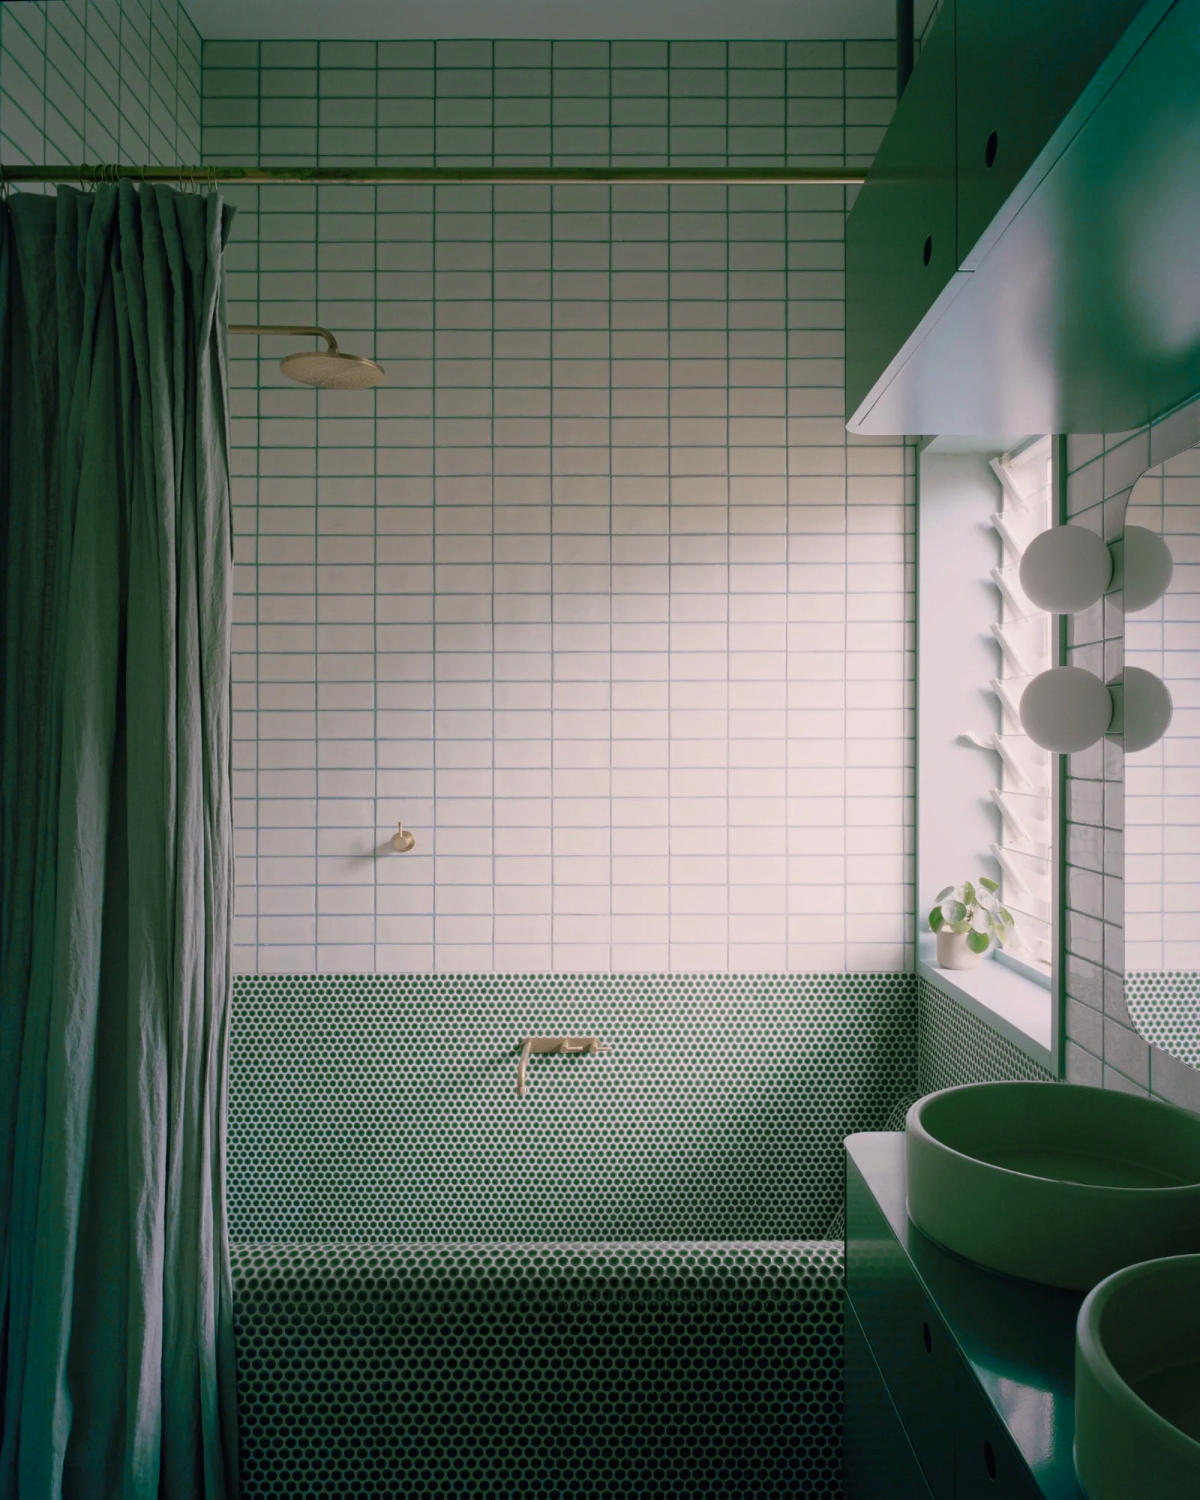
Green mosaic tiles smoothly wrap around this built-in bathtub to create a bespoke finish.
Give your green decor scheme a bold black outline that defines the edges of doorways, archways, and windows.
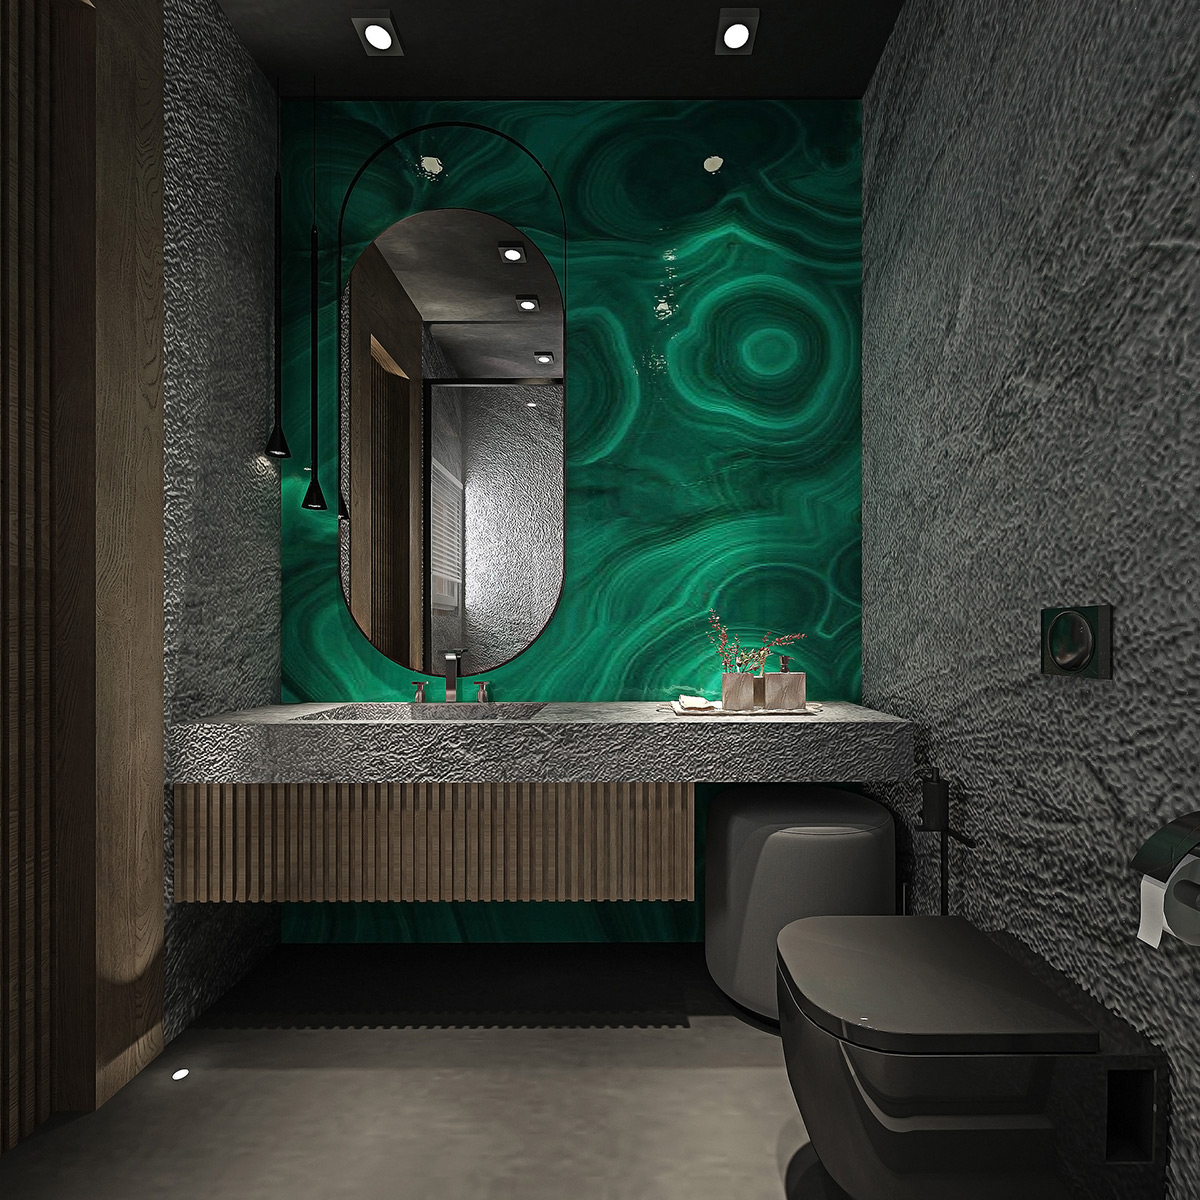
Create a green liquid marble backsplash to introduce stunning texture.
Large-format green tiles increase the sense of space in a bathroom.
Black and green bathroom decor fashions a room with great depth.
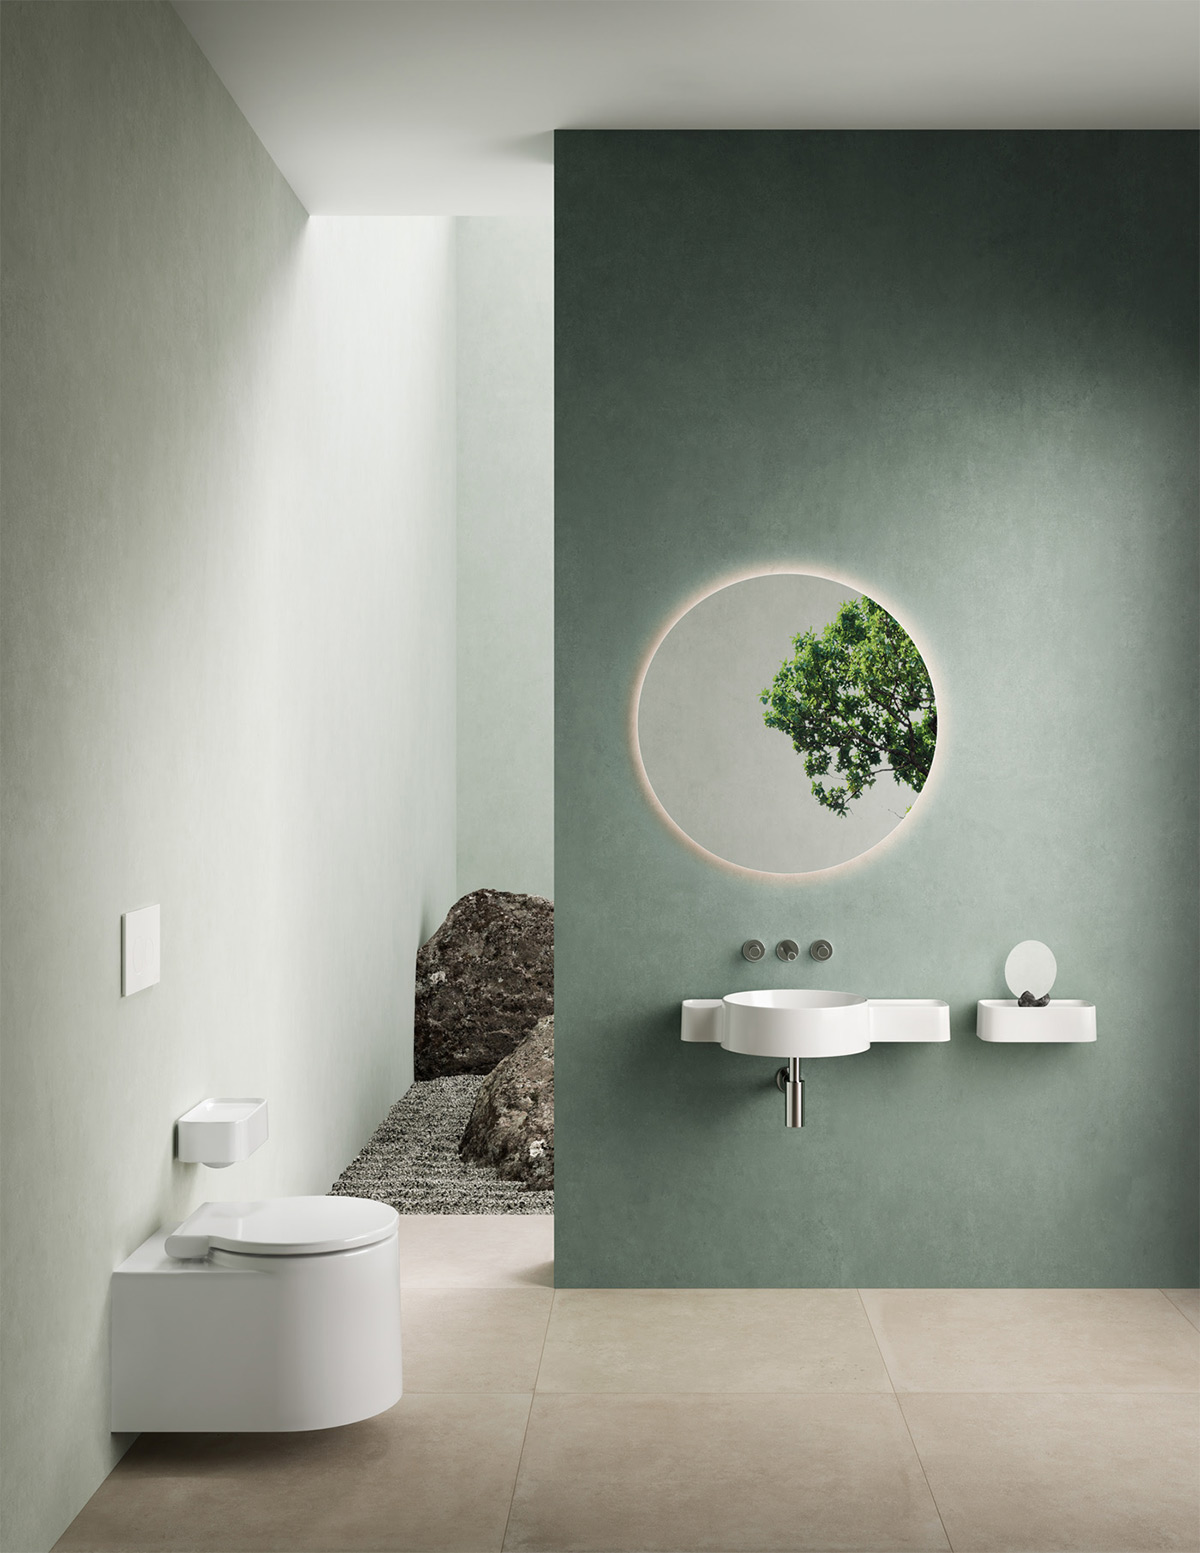
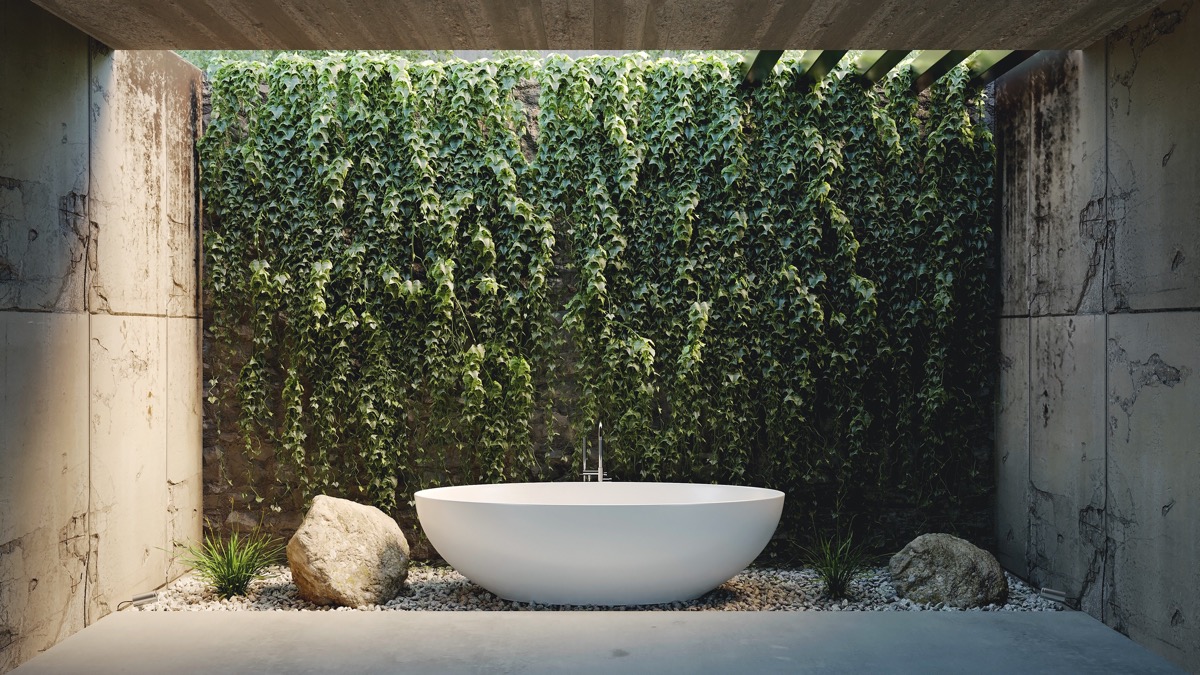
A peekaboo courtyard gives this soothing, sage green space an outdoor feel.
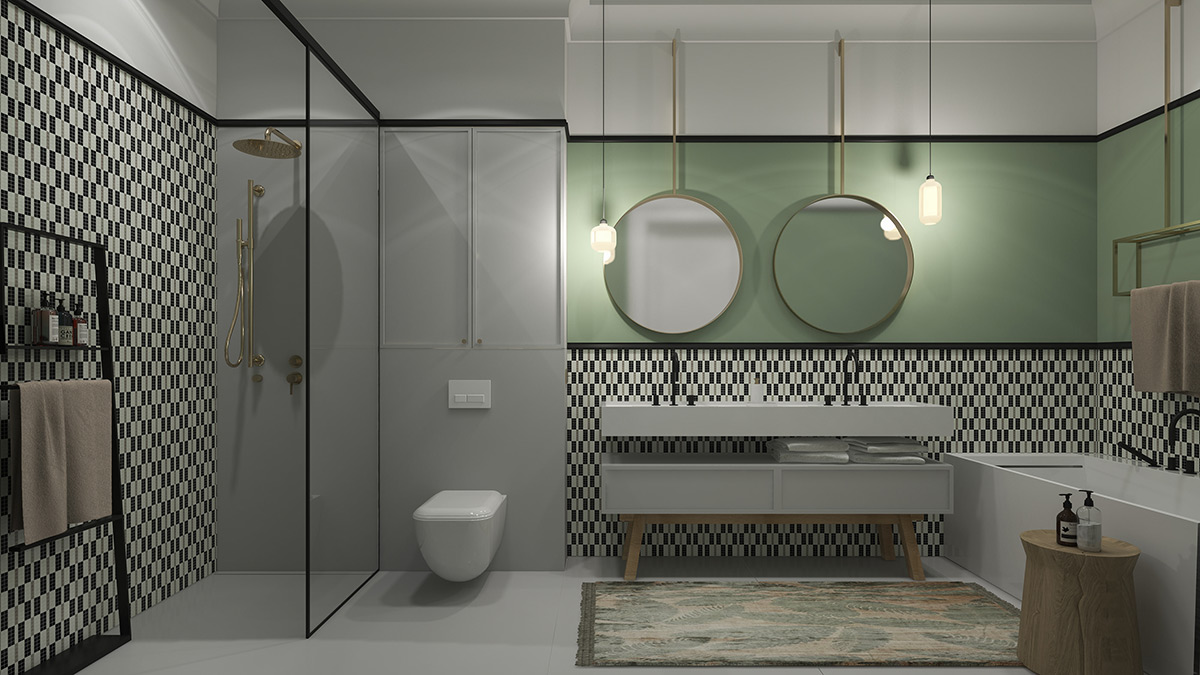
Wicker towel baskets, a rattan pendant light shade, and wood-slatted accents give this gray and green bathroom concept a natural, boho essence.
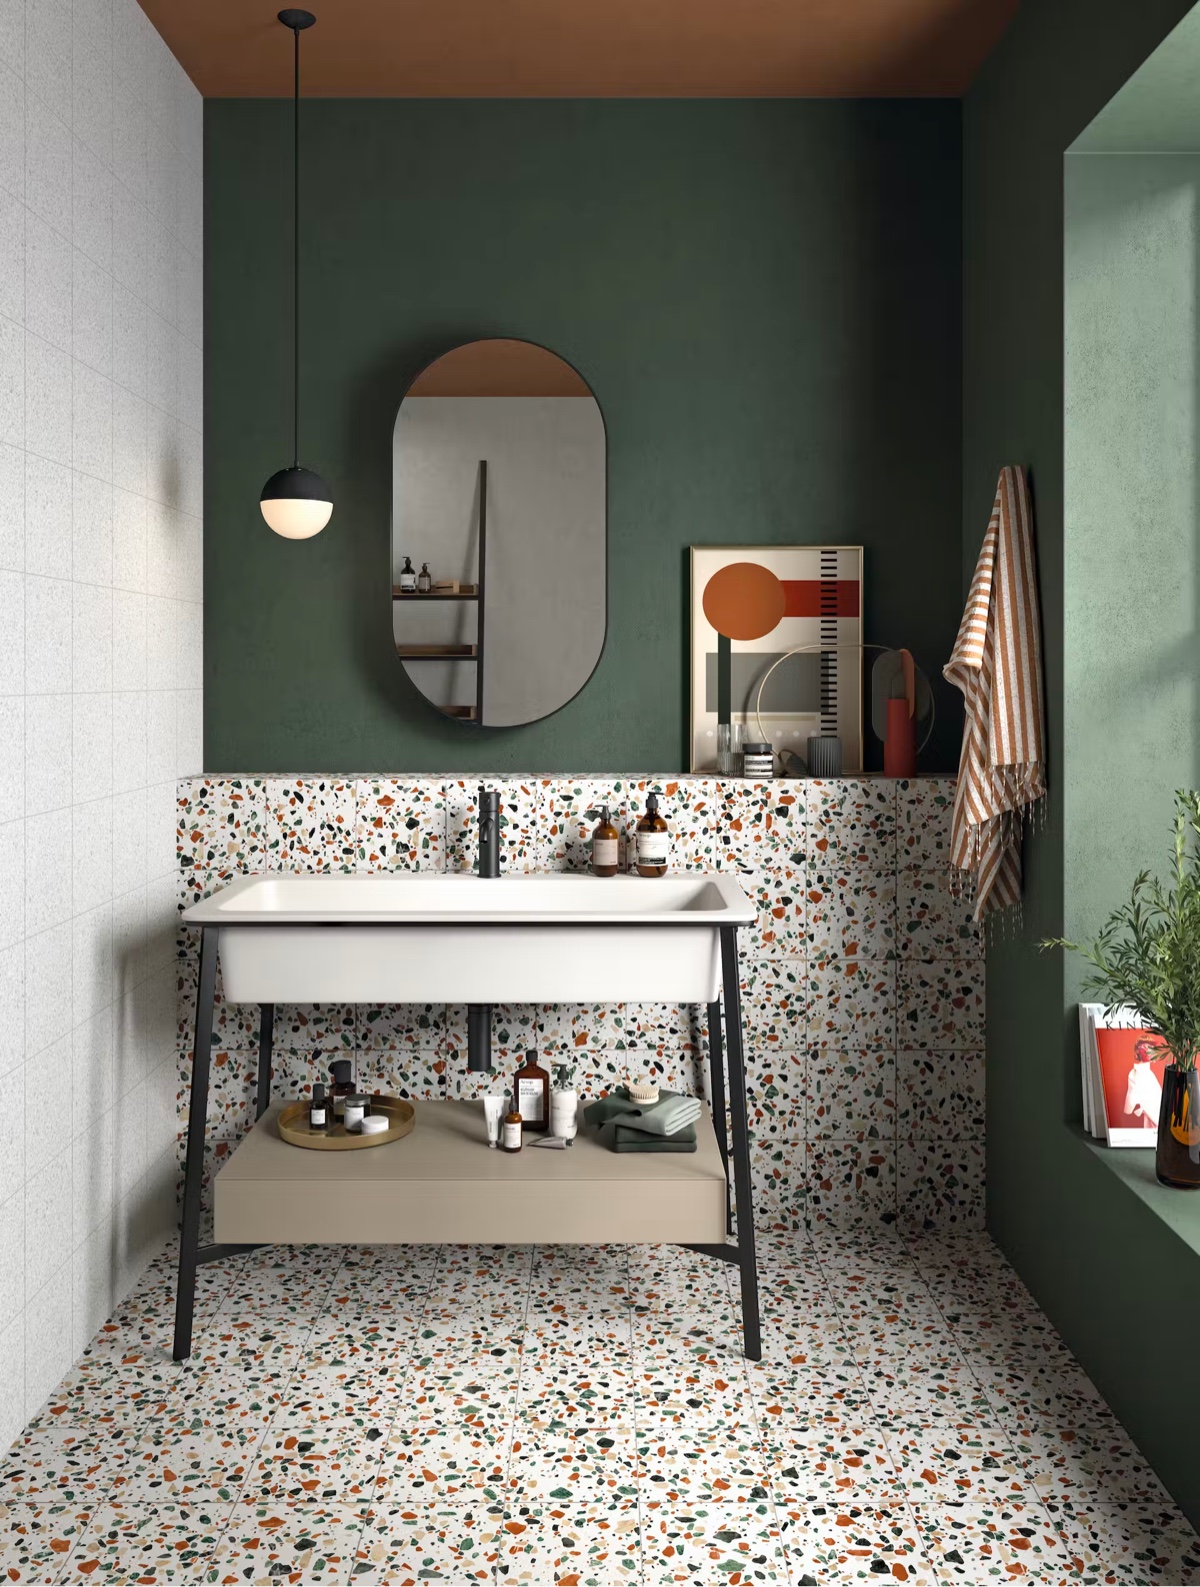
Terrazzo tiles layer a riot of pattern over these forest green walls to attain a fashion forward image. A globe bathroom vanity light and a racetrack vanity mirror complete the concept.
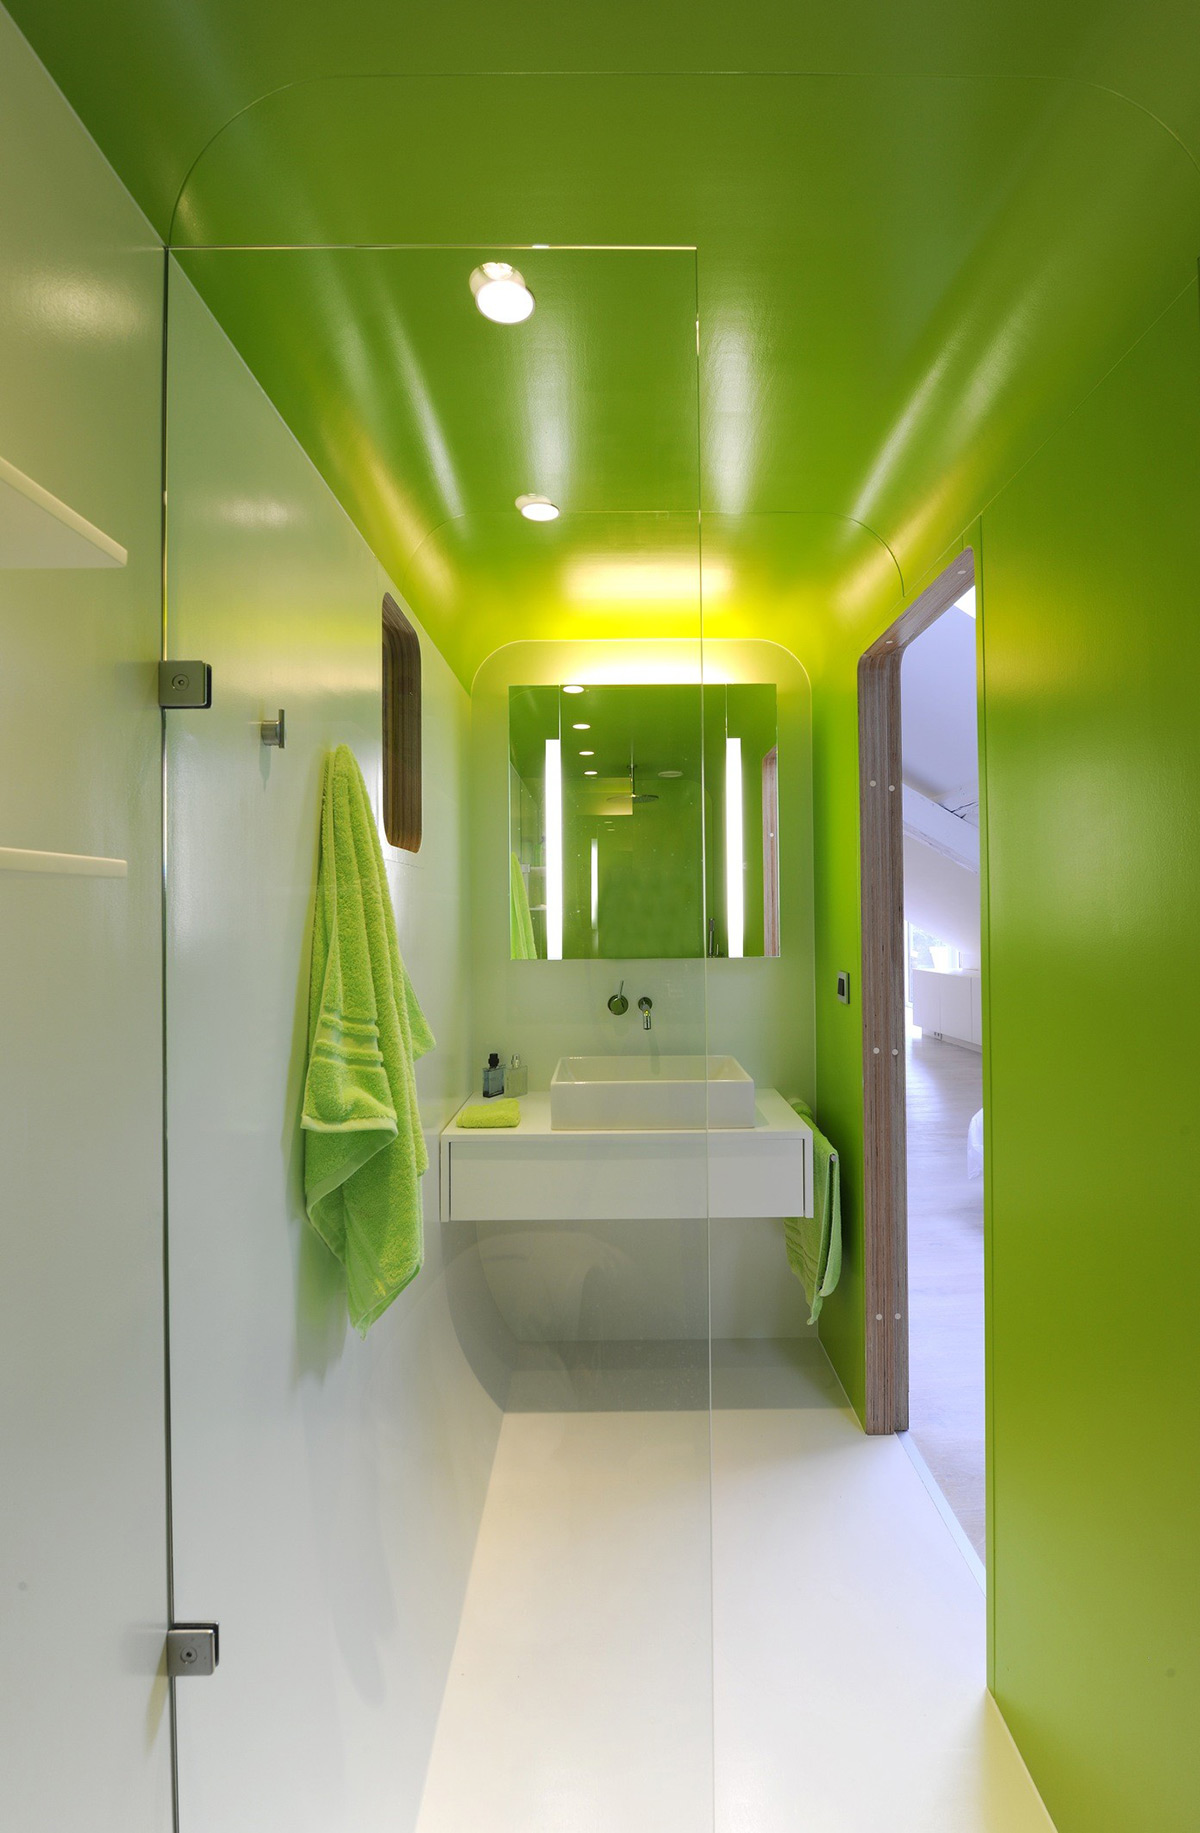
You know it’s time to wake up when you’re faced with lime green walls and a matching ceiling.
Green wall tiles define this wonderfully rounded shower space design from a predominantly neutral bathroom scheme.
Pink and green bathroom decor produces a fun, tropical vibe. Add in a playful neon wall sign and tropical plants to amp up the vibe.
Neon green decor schemes are not for the shy and reserved homeowner but they do pack a powerful punch.
This bright green bathroom design incorporates a curved ceiling profile to turn the narrow room proportions into a positive feature.
Contrast green bathroom decor with the opposite side of the color wheel. Red mirror frames and towels add bold contradiction.
This standalone red vanity unit has a transformative effect on a dark green and white bathroom.
Use green tiles to create an expanse of color around the wet zone, while the rest of the room fades into the background in shades of gray.
White, metal-framed furniture places crisp outlines onto this green bathroom background.
Combine different shades of green to create defined areas of light and shade.
A green-tinted shower screen adds just a hint of color without causing visual overwhelm.
Paint a band of color to pull a large bathroom scheme together.
Select key areas of your bathroom to highlight with green tiles. A focal point behind the vanity unit or across a toilet cistern concealment wall works well.
Install natural wood shelf inserts into a green cistern concealment wall and wooden countertops onto a green vanity unit to enrich the aesthetic.
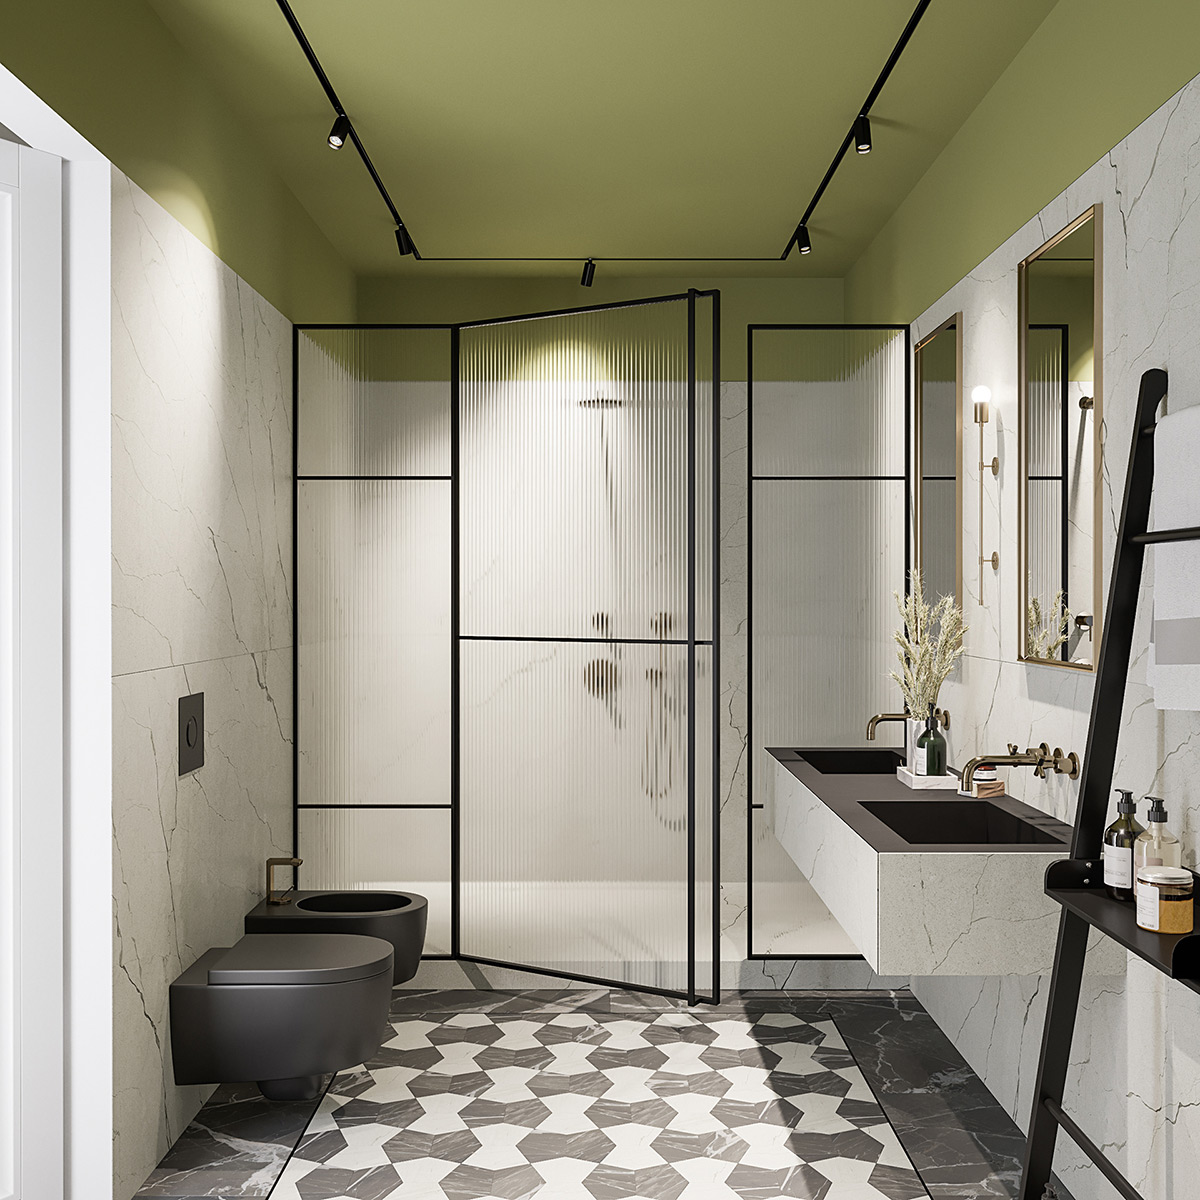
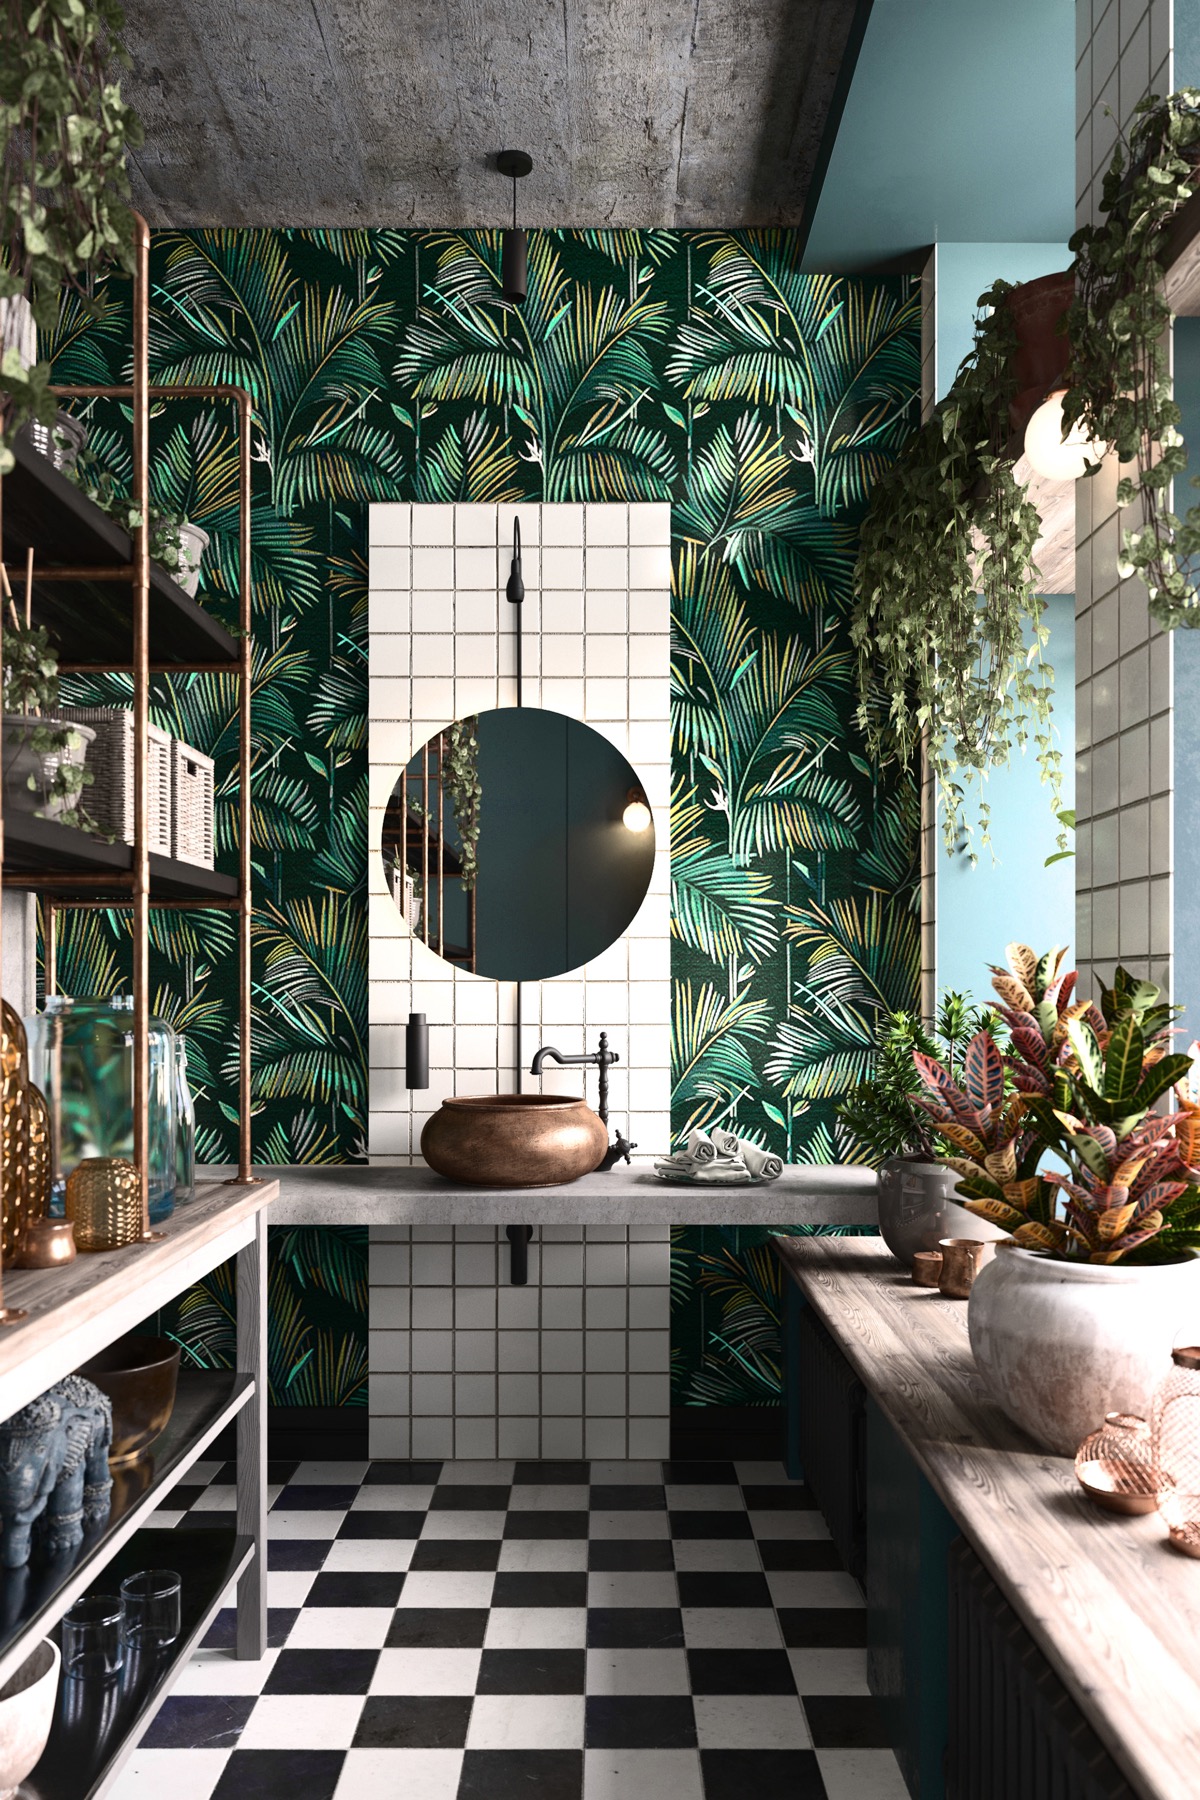
A black and white floor tile pattern creates bold balance for a solid green bathroom ceiling treatment.
Let plants grow all the green accents for you.
A vertical garden wall makes a deeply textural green focal point.
Swap out floor tiles or wood planking for naturally green ground cover.
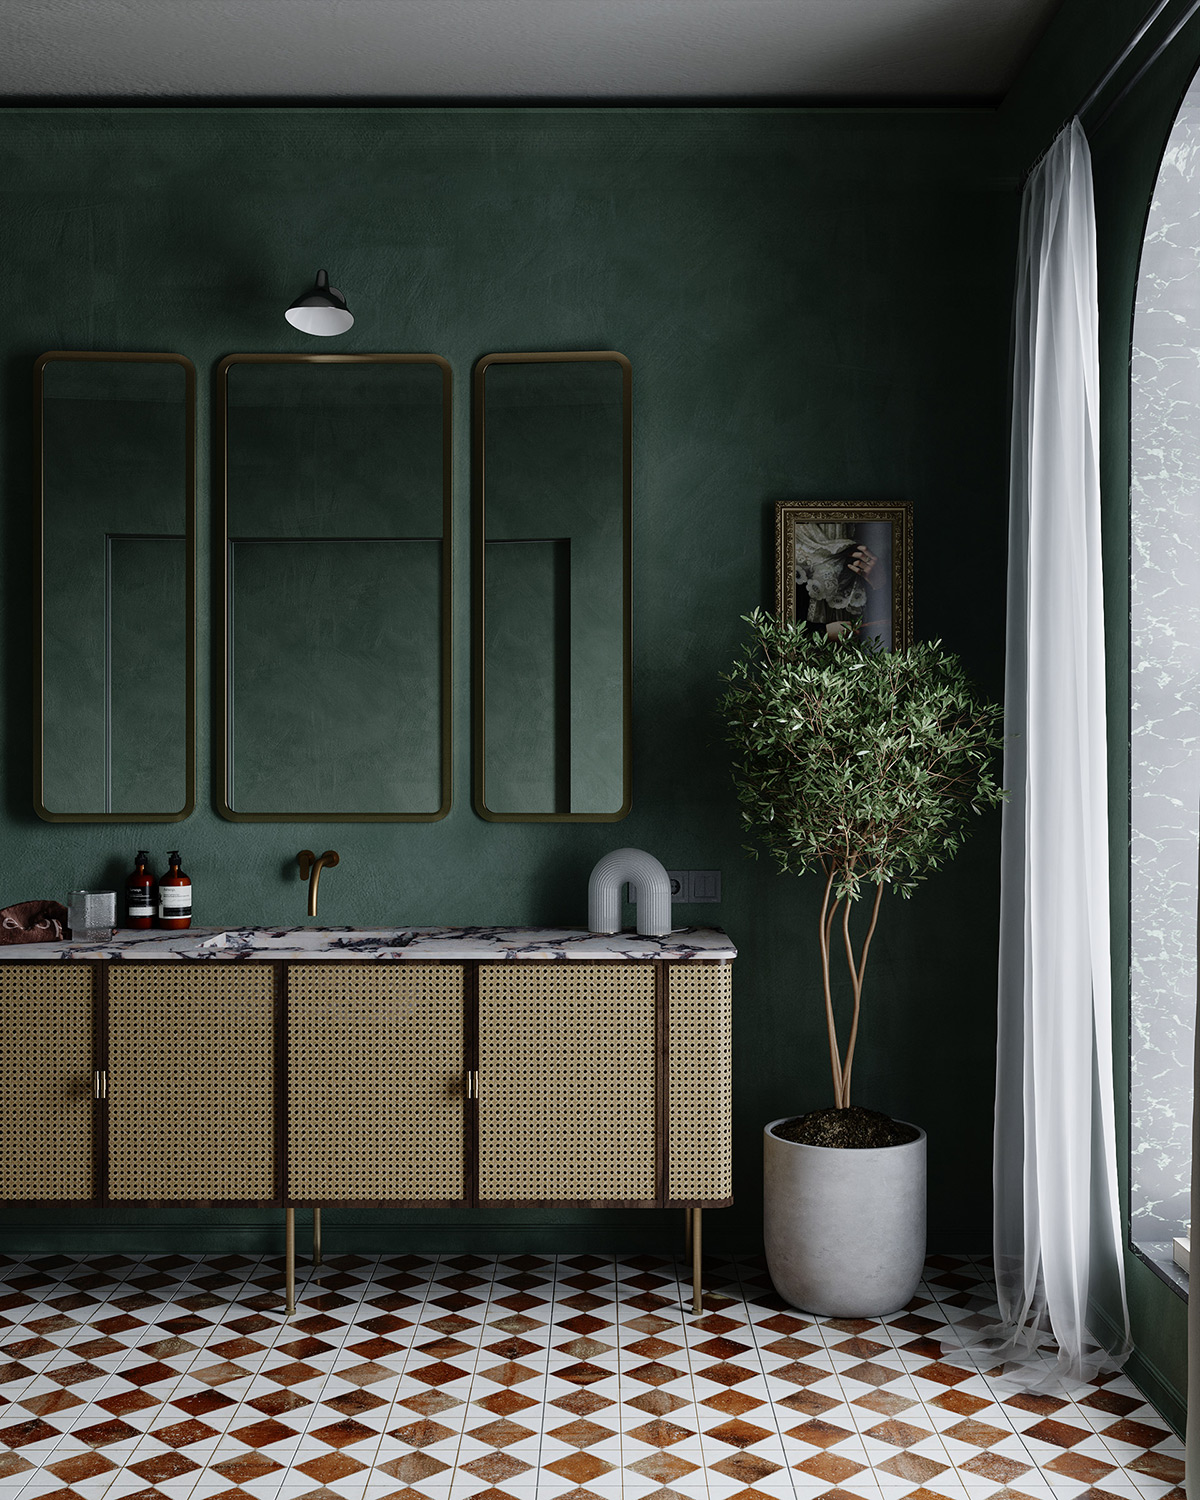
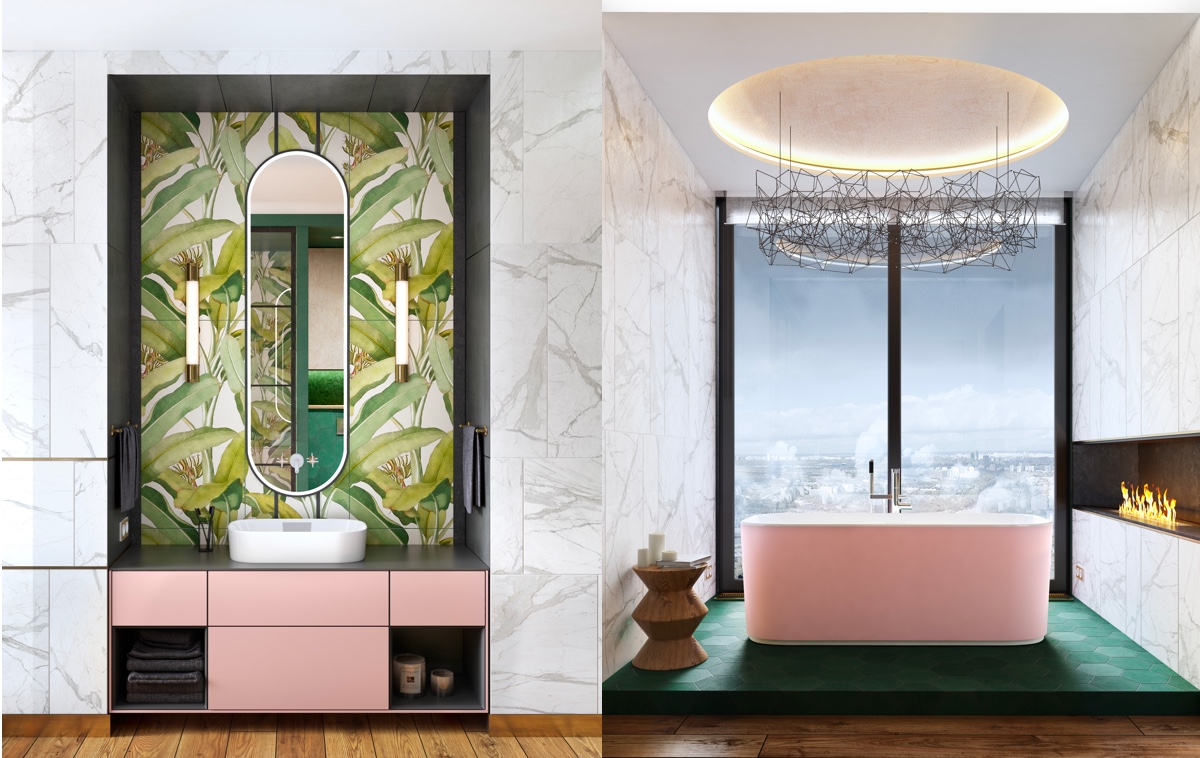
Botanical wallpaper builds up a natural theme with or without indoor plants. Add gold, brass, or bronze accents to add a rich and regal air to the space.
This botanical feature wall is accentuated with a pink vanity unit, while a pink bathroom sweetly contrasts emerald green bathroom floor tiles.
Doors often go overlooked when changing up a decor scheme, but painting the bathroom door a coordinating color elevates the room.
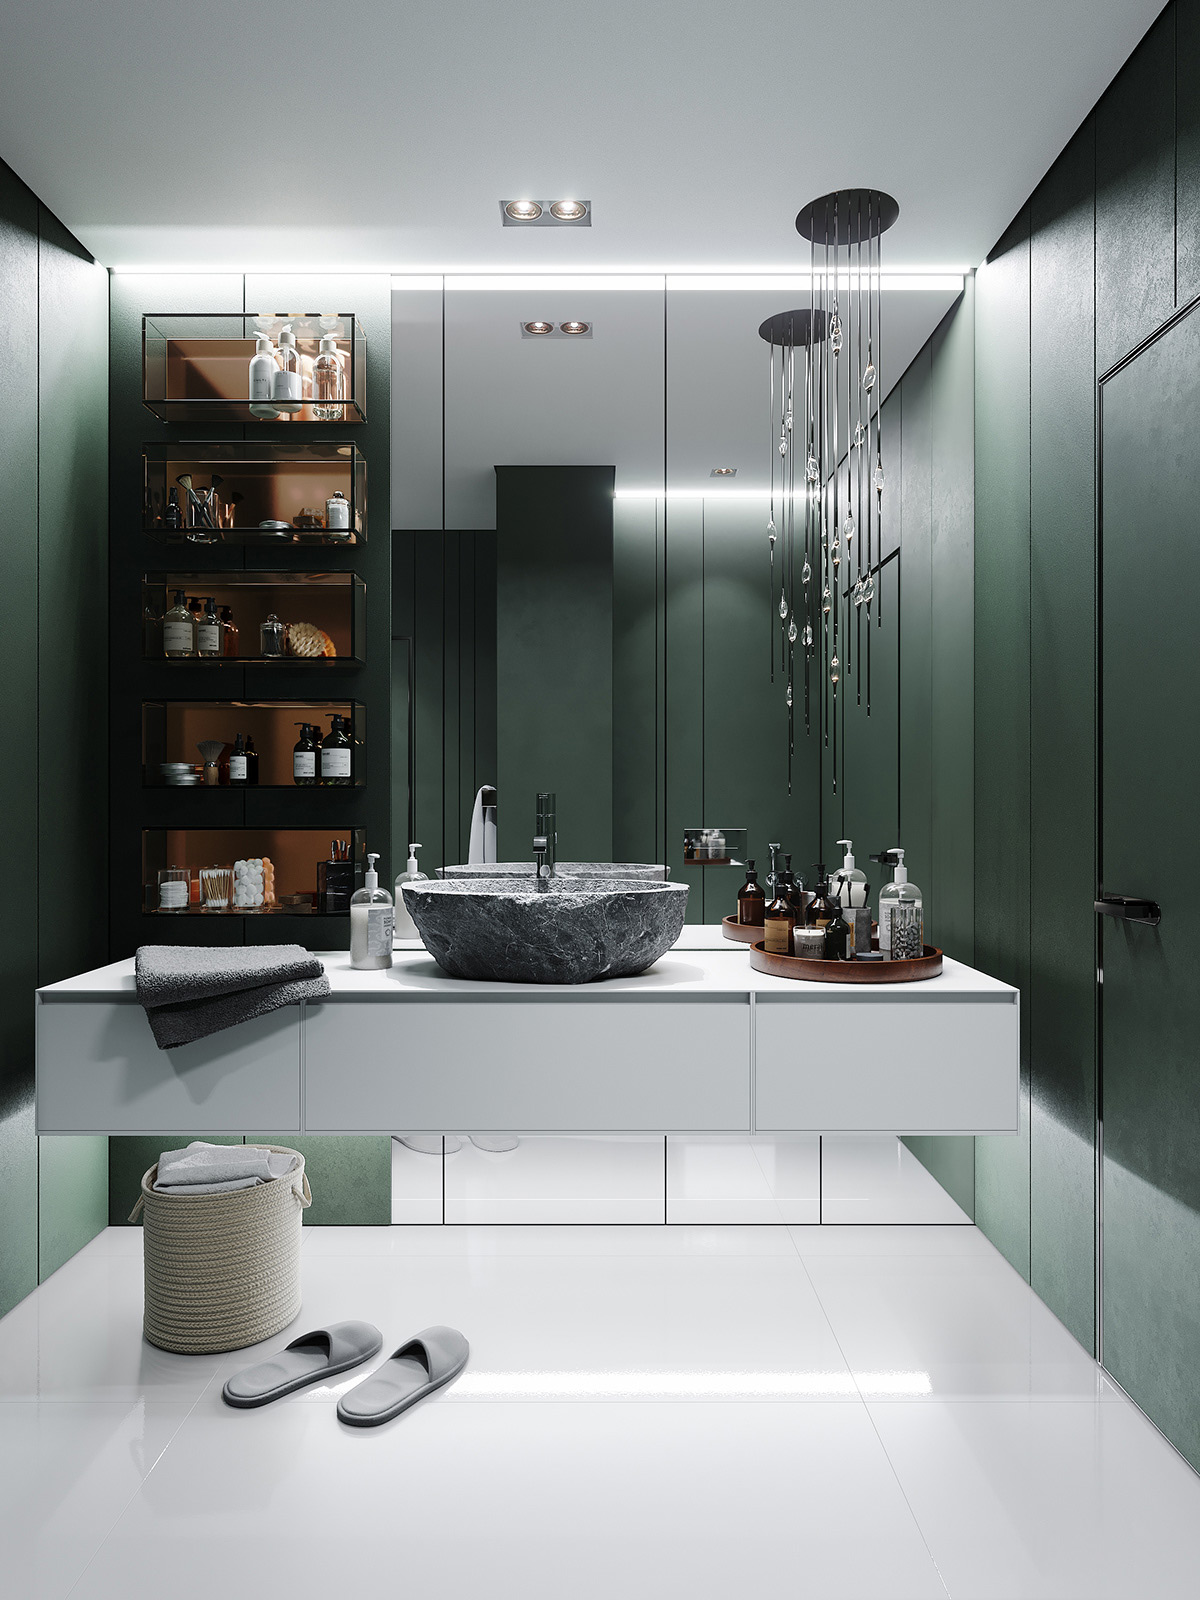
Use dark green wall paneling to construct a sleek, tailored perimeter. A solid white floor, vanity unit, and ceiling prevent a small space from becoming dreary.
Choose green tiles with shade differences to construct a green feature wall with tonal interest. This one is dressed with chunky wood accent pieces to achieve an earthy appeal.
Sarah is a staff writer at Apartment Therapy. She completed her MA in journalism at the University of Missouri and has a bachelor’s degree in journalism from Belmont University. Past writing and editing stops include HGTV Magazine, Nashville Arts Magazine, and several outlets local to her hometown, Columbia, Missouri.