A patio is a wonderful addition to any home, providing a space for relaxation, entertaining, and enjoying the outdoors. But weather conditions can cause mildew or algae. Let’s talk about how to clean the mildew and algae off your patio.
.tasty-pins-banner-container{display:block;margin-bottom:20px;position:relative;width:-moz-fit-content;width:fit-content}.tasty-pins-banner-container a{cursor:pointer;display:flex;font-size:14px;font-weight:700;letter-spacing:1px;line-height:1.8em;text-transform:uppercase}.tasty-pins-banner-container a:hover{opacity:1}.tasty-pins-banner-container .tasty-pins-banner{align-items:center;bottom:0;cursor:pointer;display:flex;justify-content:center;left:0;padding-bottom:1em;padding-top:1em;position:absolute;right:0}.tasty-pins-banner-container .tasty-pins-banner svg{margin-right:4px;width:32px}.tasty-pins-banner-container .tasty-pins-banner span{margin-top:4px}.tasty-pins-banner-container a.tasty-pins-banner{text-decoration:none}.tasty-pins-banner-container a.tasty-pins-banner:hover{opacity:.8}.tasty-pins-banner-container a.tasty-pins-banner-image-link{flex-direction:column}.tasty-pins-banner-container a img{margin-bottom:0}.entry-content .wp-block-image .tasty-pins-banner-container img{margin-bottom:0;padding-bottom:0}#et-boc .et-l div .et_pb_image_wrap .tasty-pins-banner-container .tasty-pins-banner{padding-bottom:1em!important;padding-top:1em;text-decoration:none}#et-boc .et-l div .et_pb_image_wrap .tasty-pins-banner-container a.tasty-pins-banner{cursor:pointer;display:flex;font-size:14px;font-weight:700;line-height:1.8em;text-transform:uppercase}#et-boc .et-l div .et_pb_image_wrap .tasty-pins-banner-container a.tasty-pins-banner span{letter-spacing:2px;margin-top:4px}.et-db #et-boc .et-l .et_pb_module .tasty-pins-banner-container a:not(.wc-forward){padding-bottom:0}
However, over time, patio slabs can become plagued with unsightly mildew and algae growth, particularly in shaded or damp areas.
Algae on patio surfaces not only look unpleasant but can also create a slip hazard.
In this blog post, we’ll explore effective methods for removing mildew and algae from your patio, ensuring it remains a safe and inviting space.
Gathering Necessary Supplies
Before starting the cleaning process, it’s important to have all the necessary supplies on hand. Here’s a handy list to get you prepared:
Stiff-bristle brush or scrubbing brush
Garden hose with a spray nozzle or a pressure washer
Protective gloves and eyewear
Broom or leaf blower
Tarp or drop cloths to shield nearby areas
Cleaning agents
Oxygen bleach, which is great for tackling mildew
Algae remover specifically designed for patio surfaces
White vinegar, a natural cleaning alternative
Baking soda for those tough stains
Chlorine bleach for the most stubborn mildew (just be careful with certain materials)
With these supplies, you’ll be ready to tackle any mildew or algae that has taken over your patio.
Preparing the Patio Area
Preparing your patio for cleaning is a straightforward but essential step.
Start by moving all your furniture, potted plants, and decorative items to another spot. This will give you clear access to every inch of your patio and protect your belongings from any potential damage.
Next, grab a broom or a leaf blower to sweep away loose debris, leaves, and dirt.
To protect plants and nearby surfaces from cleaning agents, cover them with a tarp or drop cloth. This is particularly important if your patio is next to wooden decking or porous materials.
Taking these preparatory steps will ensure that your cleaning process goes smoothly and that everything stays in great shape.
Cleaning Methods for Mildew
To get rid of mildew on your patio, start by mixing oxygen bleach with warm water according to the instructions on the package.
Wearing gloves and protective eyewear, apply the solution to the mildew-infested areas using a stiff-bristle brush. Focus on small sections at a time to ensure thorough coverage.
Let the solution sit for about 10-15 minutes so it can break down the mildew effectively. After that, rinse the patio well with a garden hose or pressure washer to remove any residue.
If you prefer a natural approach, a mixture of white vinegar and water works wonders for less severe mildew. Just apply it in the same manner and scrub away.
Dealing with Algae on Your Patio
Algae can make your patio look grimy and can even be slippery.
If you’re dealing with light algae growth, start with a simple solution of water and baking soda.
Sprinkle the baking soda over the algae, then scrub it with a stiff-bristle brush. This should break up the algae and make it easier to wash away.
For more stubborn patches, you’ll want to use an algae remover that’s specifically designed for patio surfaces.
Follow the manufacturer’s instructions for application and let the product sit for the recommended time. Afterward, scrub the area thoroughly with your brush to ensure all the algae is lifted.
Once you’ve scrubbed away the algae, rinse the area well with a garden hose or pressure washer. Make sure to get rid of all the cleaning solution to prevent any residue from affecting the patio’s appearance or feel.
Remember, consistent cleaning can prevent algae from taking over, so make this a regular part of your patio maintenance routine.
Preventive Measures
To keep your patio looking its best and free of mildew and algae, regular upkeep is essential.
Start by sweeping your patio frequently to remove leaves, dirt, and other debris that can hold moisture and encourage growth.
Address any drainage issues promptly—standing water is a major contributor to mildew and algae.
Think about how much shade your patio gets. If it’s heavily shaded by trees or bushes, consider trimming them back to allow more sunlight to reach the area. Sunlight helps to dry out moisture and discourages growth.
If your patio is made from a porous material like concrete or sandstone, applying a sealant can provide an extra layer of protection.
Another tip is to move outdoor furniture and potted plants around occasionally. These items can trap moisture beneath them, creating ideal conditions for mildew and algae. By moving them, particularly out of shady areas, you allow those areas to dry out properly.
Consider setting a schedule for light cleanings using your preferred method. Whether it’s a quick scrub with a vinegar solution or a spray down with a hose, frequent maintenance can stop problems before they start.
If you live in a particularly wet or humid climate, you might need to increase the frequency of these cleanings.
By staying proactive, you can enjoy a beautiful and safe patio year-round.
Removing Mildew and Algae from Your Patio
Cleaning your patio can seem like a big job, but it doesn’t have to be overwhelming.
By gathering the right supplies and taking the time to prepare properly, you’ll be well on your way to a sparkling clean outdoor space.
Regular upkeep will not only keep your patio looking great but also prevent mildew and algae from taking hold in the first place.
Simple steps like sweeping often, addressing drainage issues, and allowing more sunlight to reach your patio can make a huge difference. Moving furniture and potted plants around occasionally will also help keep moisture from building up.
By making these tasks part of your regular routine, you’ll maintain a beautiful, safe patio that enhances your outdoor living experience.
So roll up your sleeves, get scrubbing, and enjoy your refreshed patio!
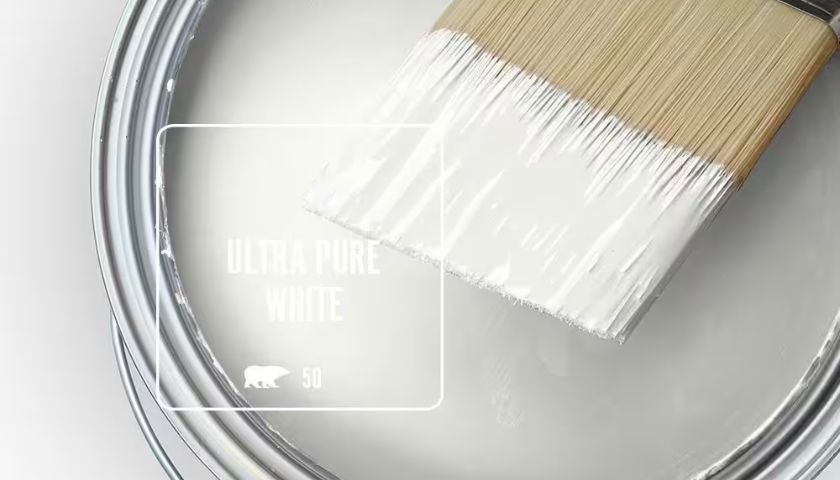
If you or a family member are sensitive to strong odors then you know that painting the inside of your house can be challenging. So, BEHR has formulated their new PREMIUM PLUS Interior Paint & Primer to be “Low Odor”,
This page contains affiliate links. If you purchase a product from these links, we will earn a small commission at no additional cost to you.
Interior Paint & Primer: Key Features
helping it meet LEED and GREENGUARD Gold requirements. But it also offers exceptional durability and hide with a finish that resists mildew and stains. This coating also has exceptional scrub-ability so it’s easy to maintain the color and finish. That makes it ideal for family rooms, living rooms, dining rooms, bedrooms, and ceilings. For more information on this Behr Premium Plus Low Odor Interior Paint & Primer, log on to Home-Depot-Dot-Com.
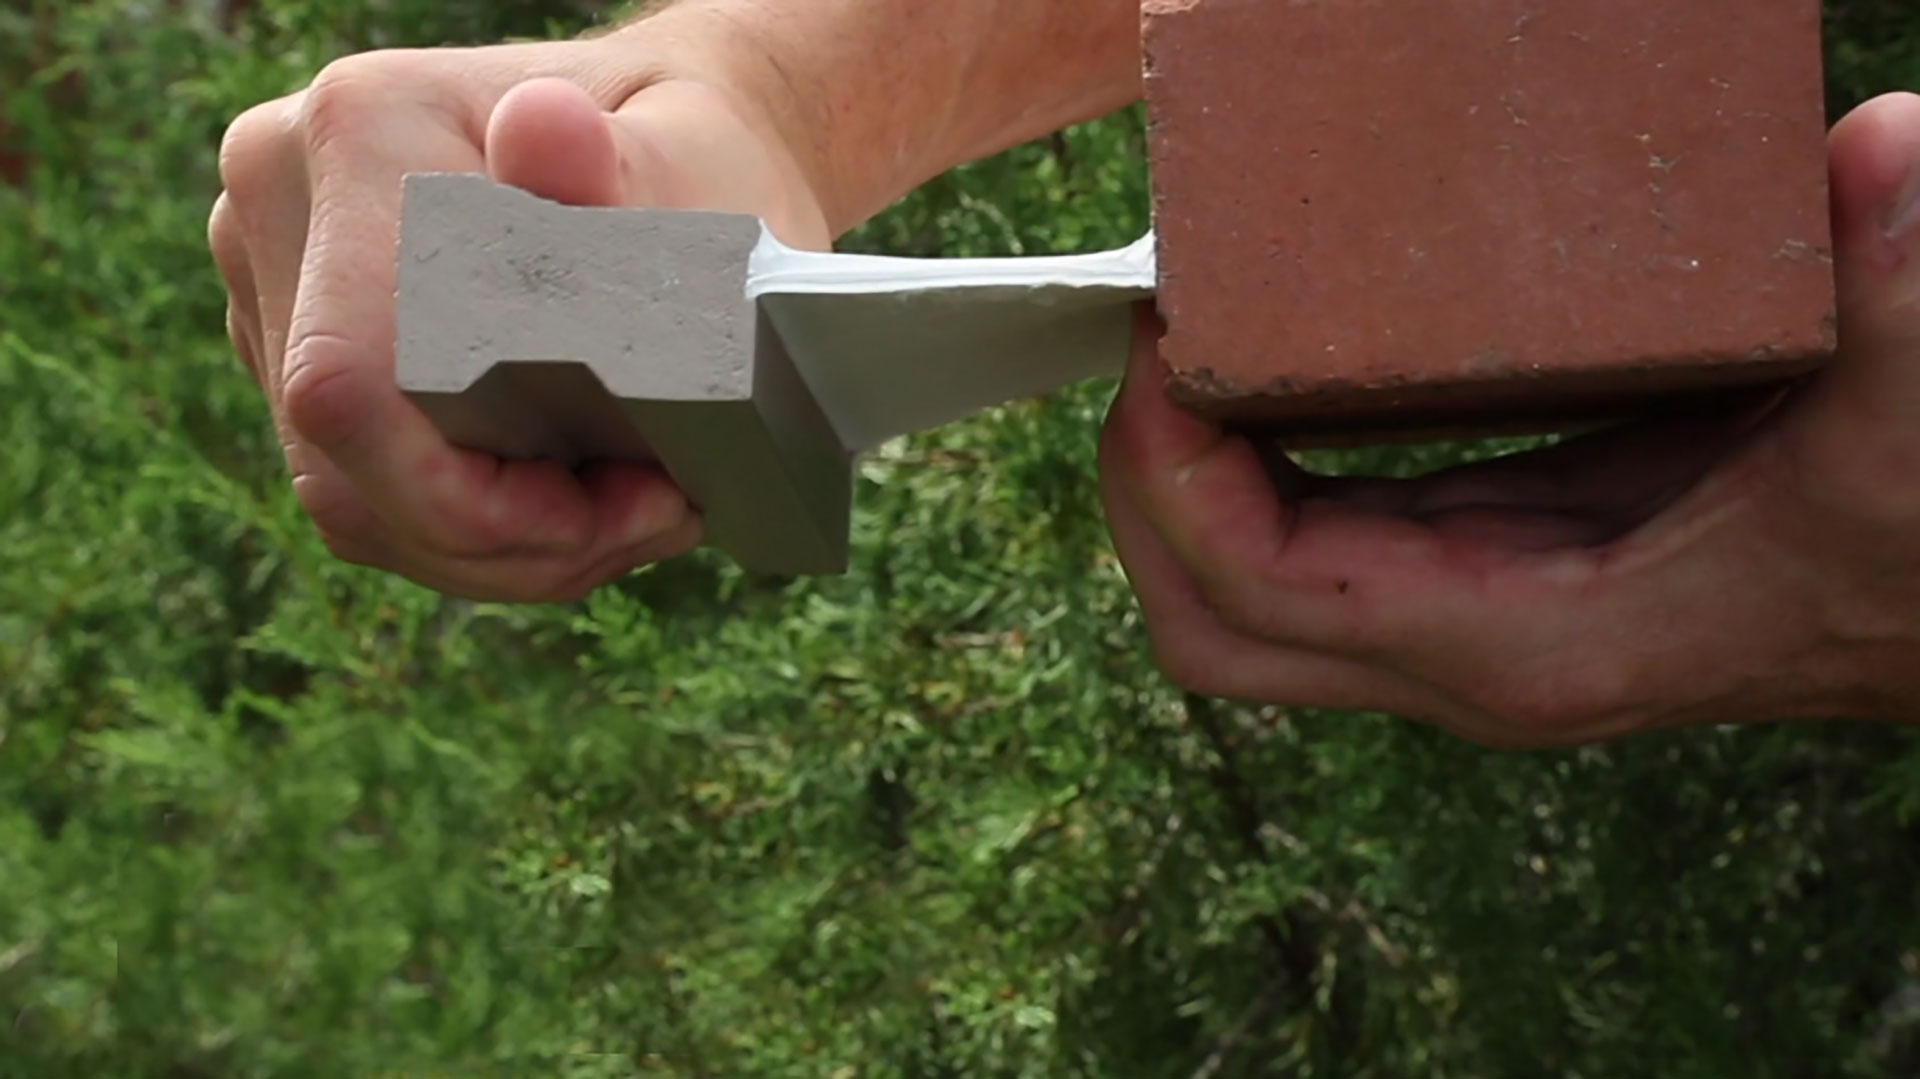
The purpose of a sealant, or caulk, on the exterior of a home is to seal gaps that allow air and moisture to infiltrate the structure of the home.
That seems simple enough, but the reality of building materials is that they are constantly moving.
Changes in temperature and humidity cause them to continually expand and contract which means the size of those gaps is constantly changing.
This means that the caulk filling those gaps is regularly being stretched and squeezed, so if it dries hard it will crack within a season or two due to the movement. To have any longevity in an exterior environment, a sealant needs to remain flexible even after it dries.
Because most homes are comprised of many different types of materials, the gaps that need to be filled are often between completely different building materials. So, a successful exterior caulk also needs to bond, or adhere, well to a wide variety of materials and surface textures.
Because an exterior sealant is very visible, it’s also important for it to blend aesthetically with your home. Some caulk options are very flexible but cannot be painted and only come in a few colors. While there are plenty of “paintable” caulk options, many of them dry relatively hard within a few months.
Solution: Elastomeric Caulk
Elastomeric caulk is a great solution because it has the ability to stretch.
Titebond has addressed all those issues with their new all-purpose exterior sealant called TiteShield.
It’s an elastomeric caulk which, as the name implies, can stretch even after it’s completely dry. In fact, TiteShield can expand and contract up to 50% of the joint size while covering gaps up to two inches in width.
TiteShield also bonds well to a variety of building materials from wood and metal to concrete and glass.
Plus, it’s available in a wide variety of colors but can also be painted with ordinary latex paint.
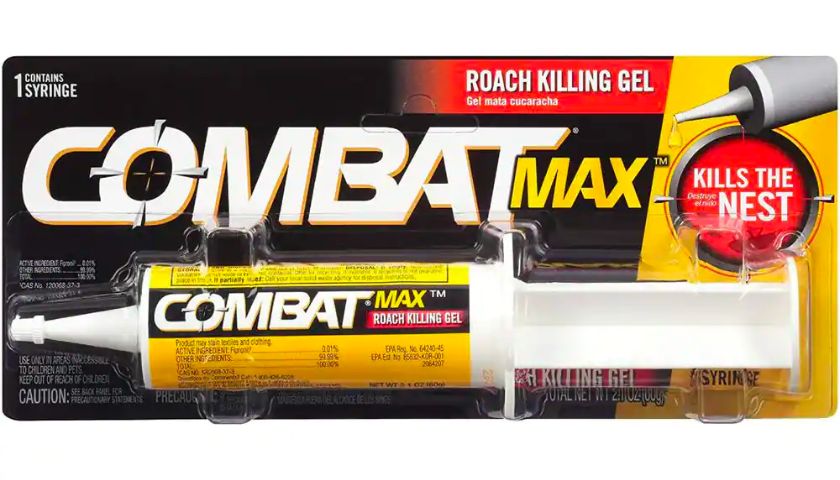
Nobody likes finding roaches in their house. Unfortunately, finding them is a difficult job when you’re ready to apply pesticides. They hide in nooks and crannies you can hardly see, let alone treat!
That’s where COMBAT Max Roach Killing Gel comes in.
This page contains affiliate links. If you purchase a product from these links, we will earn a small commission at no additional cost to you.
Combat Max Road Killing Gel: Key Features
COMBAT Max Roach Killing Gel’s formula attracts roaches with the food and water they need.
And because it’s a gel you apply with a syringe, you can treat those nooks and crannies where roaches hang out.
Plus the gel starts killing both large and small roaches within a matter of hours by ingestion OR contact so you eliminate even more pests.
Listen to hear how to prevent nails from pooping out, raise an outdoor dryer vent’s height, and more!
How to Stop Drywall Nails from Popping Out
Use a drywall screw instead of a nail to stop nails from backing out. ( 3 Echoes Content Studio)
A homeowner’s house was built in 1954 and she is tired of watching nails back out of the drywall.
She asks, “How do I fix this? Can I pound the nails back in?”
First, pounding the nails back in is just a temporary fix — they will eventually pop out again. But the bigger question is this: why does it happen?
In a home, there is a lot of movement — doors slamming, people walking, etc. All these movements cause vibrations. And, over time, those vibrations will cause a drywall nail to back out.
To fix this problem, you’ll need to remove the nails and replace them with screws because drywall screws are the better option.
You don’t want to just remove the nail and replace it with a screw before checking if the nail is in the center of the stud or close to the center. The stud might be the reason it is popping out.
So, we recommend taking a hammer and a finishing nail and tapping through the drywall until you find the center of the stud.
Once you find the center and pull out the nail, then drive one or two drywall screws an inch or two above the old nail hole. This will hold it tight.
After replacing the nail with a drywall screw, put joint compound over the screw heads and in the old nail hole, let it dry, sand it, and do it again. Once you have it filled and sanded dry, paint it.
The screws will hold up very well, and you will hopefully never have to do this process again!
An outdoor dryer vent should be at least 12 inches from the ground. (3 Echoes Content Studio)
A homeowner’s dryer vent runs on an exterior wall and under the brick veneer. It is installed about an inch off the ground instead of 12 or more (the recommendation).
He has trouble with stormwater getting into the vent, and now asks, “Do you have any recommendations for me?”
First, it’s rare to find a dryer vent so low to the ground. It is possible that when the vent was originally installed, it was the correct height off the ground. However, as time passed, grading and landscaping could have been added, and the vent got closer to the ground.
To make this dryer vent work efficiently, you’ll want to have as short of a path as possible. So, we do not recommend rerouting the current ductwork and going through the soffit.
Instead, we recommend trying to elevate or extend the existing vent upward, or digging dirt around the vent to give it more space. You could also add a slight turn and elbow to get it off the ground.
Check your local home center for a device that curls up at 90 degrees, which will help elevate the vent on the outside. There are many dryer vent options.
For safety, do not use PVC pipe for an elbow because it cannot handle the high temperatures that come through a dryer vent.
In addition, make sure you frequently clean your dryer vent to prevent house fires and keep your dryer working efficiently.
Hour 2
Listen to learn about garbage disposal rules, how to fix a toilet that won’t flush, how to lay an underlayment over a tile floor, and more!
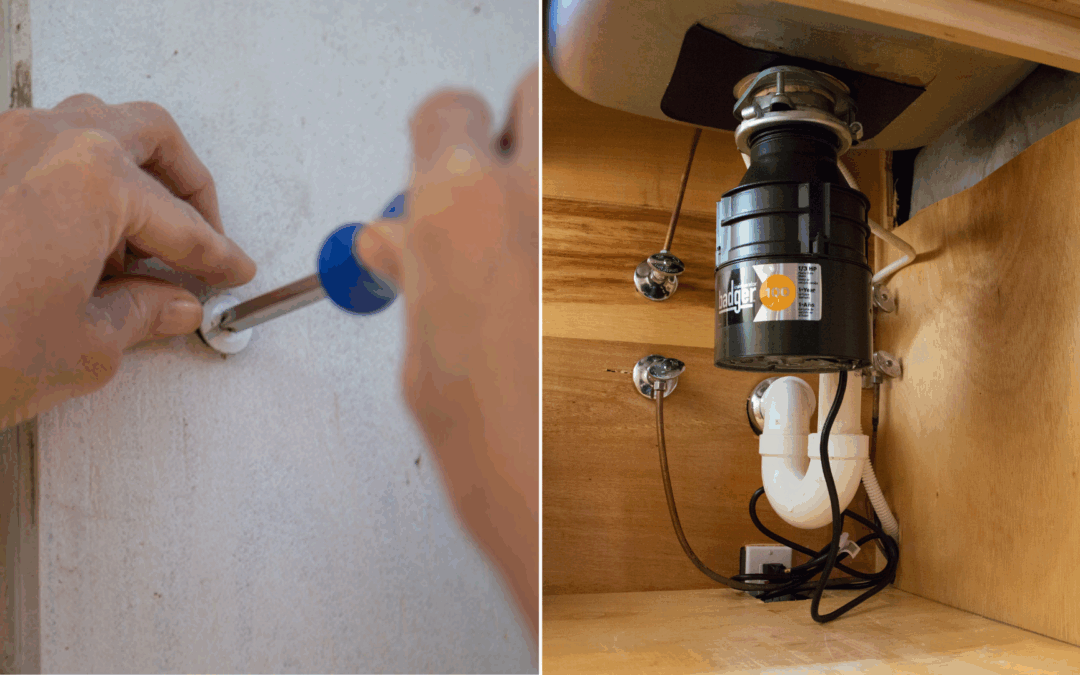
What You Can Put Down a Garbage Disposal
It is acceptable to put things down a garbage disposal if they are small enough. (3 Echoes Content Studio)
A homeowner and his wife have had an ongoing disagreement about whether it is okay to put scraps of meat down the garbage disposal. They have septic tank disposal.
He says, “Can you settle this debate?”
It is perfectly fine to have a garbage disposal with a septic tank. However, some septic tanks are really good, and others are very marginal. That plays a large part in the disposal’s functionality and what waste it accepts.
When it comes to garbage disposals, you do want to use them sparingly and not put everything down it. You want to avoid putting large substances down.
The answer to the question would be yes, but only small pieces of meat, and don’t pack it full.
Make sure you use and maintain garbage disposals correctly. It is recommended to use cold water to wash waste down the drain and ensure you don’t put something in the garbage disposal and not run it!
If your garbage disposal gets clogged, use this trick!
How to Solve Toilet Flushing Issues
Adjusting the chain is an easy fix to solve toilet flushing issues. (3 Echoes Content Studio)
A homeowner is struggling to get her toilet to flush completely. She says she has to hold the handle down until the bowl is flushed.
She wants to know, “Why does this happen, and how can I fix it?”
There are two reasons that she may be having this problem. One, there is not enough water in the tank, meaning the water stops before reaching about half an inch below the overflow tube. That is where you want to adjust it.
Next, you want to ensure that when you push down the handle, the flapper stays open to allow the flushing action and then closes. If the chain is too short or too long, that will prevent that from happening.
Another reason is an obstruction in the drain. If there is an obstruction, then you won’t get that flushing action because it’s resisting the water going into it.
It is most likely the first problem. This is a very common fix, and there are lots of great repair kits out there. Do this quickly so you won’t waste water!
Although fixing a toilet might not be the most glamorous form of home improvement, it is so important to have a working toilet that will stay in good shape for a long time.
Make sure you use the right notch trowel size to install an underlayment. (3 Echoes Content Studio)
A homeowner wants to put a quarter-inch underlayment over a tile floor.
He asks, “Do I need to nail or screw it? What do I use?”
No, you are not going to want to nail through or screw it. You will have to glue it down. Do some research and find the right adhesive you need, depending on the materials you are using. Most likely, it will be in a bucket, and you’ll use a notch trowel to install the right amount.
Make sure that you read the directions to ensure you use the recommended notch trowel size. A lot of people do not realize that the size of the notch trowel needs to correlate with the adhesive in order to work well.
To ensure there is no movement when putting down the floor, use leftover blocks, bricks, or heavy objects to weigh it down a little bit. Leave it overnight so that it will dry and really cure well.
There are multiple options for underlayment. One option is a self-leveling underlayment. This is like really thin concrete. Do a thin coat over the tile to create a smooth and flat surface for a vinyl floor to be put over.
The StyleWell Parker Mill 4-Piece Metal Patio Set is durable and long-lasting, providing you with the outdoor furniture you can count on. Learn more>>
Simple Solutions
Use a push broom before painting to remove dust and dirt from walls. (®JodiJacobson via Canva)
Push Broom Paint Prep—Prior to painting a room, it’s important to clean the walls and ceiling to remove all dust, dirt, and cobwebs. Here’s a quick and easy way to do that: Wrap a towel around the head of a push broom, and secure it with a binder clip or pinch clamp. Then lightly mist the towel with water. Now use the towel-wrapped broom to wipe down the walls and ceiling. The damp towel will trap any dust or dirt, leaving behind a clean, ready-to-paint surface. This tip also works great to remove joint-compound dust from newly sanded drywall joints.
Use concrete blocks to create easy storage for your gardening tools. (3 Echoes Content Studio)
Easy-Access Garden-Tool Storage—Most people store their lawn and garden tools in the garage or shed by simply standing them up and leaning them in the corner. There’s nothing particularly wrong with this except that it’s a little messy, and it’s hard to grab one tool without knocking over another. So, here’s a super simple solution to that problem: Take three concrete blocks and stack them up wherever you want to store your tools. What you end up with is two deep compartments for storing long-handled tools. The blocks are heavy enough that you don’t have to worry about them falling over, no matter how many tools you put in there. If you don’t have enough headroom, you can use two blocks so you can lift the tools out. This will give you a neat place where your tools are out of the way and easily accessible, and you don’t have to worry about them falling over.
The gardening statistics are in. Surveys over the last few years reveal the latest home gardening trends that we can expect for 2023. From flowers to homegrown vegetables, fruit, decorations, and new gardening challenges in today’s world, here are the biggest takeaways from 2021 and 2022.
The most popular houseplant of 2022 was the Philodendron. 1
86% of home gardeners grow tomatoes in their vegetable garden. 2
The average U.S. garden produces $600 worth of food. 2
Flowers, veggies, and houseplants are the most popular types of gardening activities. 3
One in five of the world’s plants — 4,400 in the U.S. — are at risk of extinction. 4
In 2022, there were 52,793,657 trees planted. 5
The No. 1 most hated garden chore in U.S. households is weeding. 6
Gnomes were the biggest garden trend of 2022. 7
In 2021, the U.S. city with the most community gardens per 1,000 residents was Portland, OR.17
79% of American gardeners take gardening advice from online sources. 6
Gardening Sales
Gardening has always been popular in the U.S., but we continue to see gardening retail sales and horticulture increase, whether it be at a garden center or elsewhere.
From 2019 to 2020, the U.S. was the largest importer of gardening tools at $93.5 million 8
Globally, the sale of gardening supplies is projected to be $120.5 billion in 2023.18
Plant costs rose by 8–13% in 2021. 9
In the past two years, mowers, leaf blowers, and other electric equipment or building materials accounted for 17% of the U.S. market, 3x that of electric cars. 6
The U.S. garden hand tool market is expected to grow at 2.5% yearly, from USD 3131.91 million in 2020 to 3632 million by 2026. 10
The growth rate of nurseries and garden stores is projected to grow by 0.5% in 2023. 11
Gardening Demographics
In addition to millennials doing most gardening post-pandemic, we‘re learning more about the demographics of today’s growers and new gardeners.
43.6% of all gardeners are women, while 56.4% are men. 12
The most common ethnicity of gardeners is White (56.7%), followed by Hispanic or Latino (28.0%), Black or African American (7.8%), and Unknown (4.2%). 12
The average age group range for gardeners is 35–44.16
3% of all gardeners are LGBT. 12
Gardening Jobs
American households and homeowners don’t always do the work themselves. Here is a breakdown of stats on professional services in the gardening industry.
The average age of an employed gardener is 41 years old. 12
Gardeners are mostly in demand in New York, NY. 12
The media industry is the highest-paying for gardeners. 12
53% of gardeners work for private companies, followed by 30% working with education companies. 9% work for public companies, and 8% work for the government. 13
Types of Gardening
Home gardening statistics also show there is more than one way to garden or use gardening products, and some don’t involve holes in the dirt.
Gravel gardens require 80% less maintenance. 6
Container gardening is the No. 1 way 34–45-year-old gardeners prefer to garden. 6
In an average household, the second most popular gardening trend in 2022 is urban gardening.7
The urban farming market was valued at $213 billion in 2020 and is projected to grow continuously at 2.8% each year until 2026. 14
In food gardening, the second most popular vegetables to grow are cucumbers, followed by sweet peppers. 16
The average garden size is 600 square feet, but the median size is 96 square feet. 16
Small space design and container garden research reaches new highs on Google Trends each season. 6
Gardening and the Environment
Many people garden for their mental health or well-being and feel a sense of accomplishment, while others like DIY projects and growing their own food. A survey commissioned by the National Wildlife Federation found more people are actually gardening for environmental reasons. According to that survey:
One in three respondents (32%) stated they would purchase mostly or all organic products for their garden. 15
One in three U.S. adults (34%) purchase plants to help wildlife, up 26% in 2020. 15
One in four people (25%) buys native plants, up 17% in 2020. 15
The number of people adding wildflower native landscapes doubled from 9% in 2019 to 19% in 2021. 15