How to Clean Mildew and Algae Off Your Patio

How to Clean Mildew and Algae Off Your Patio

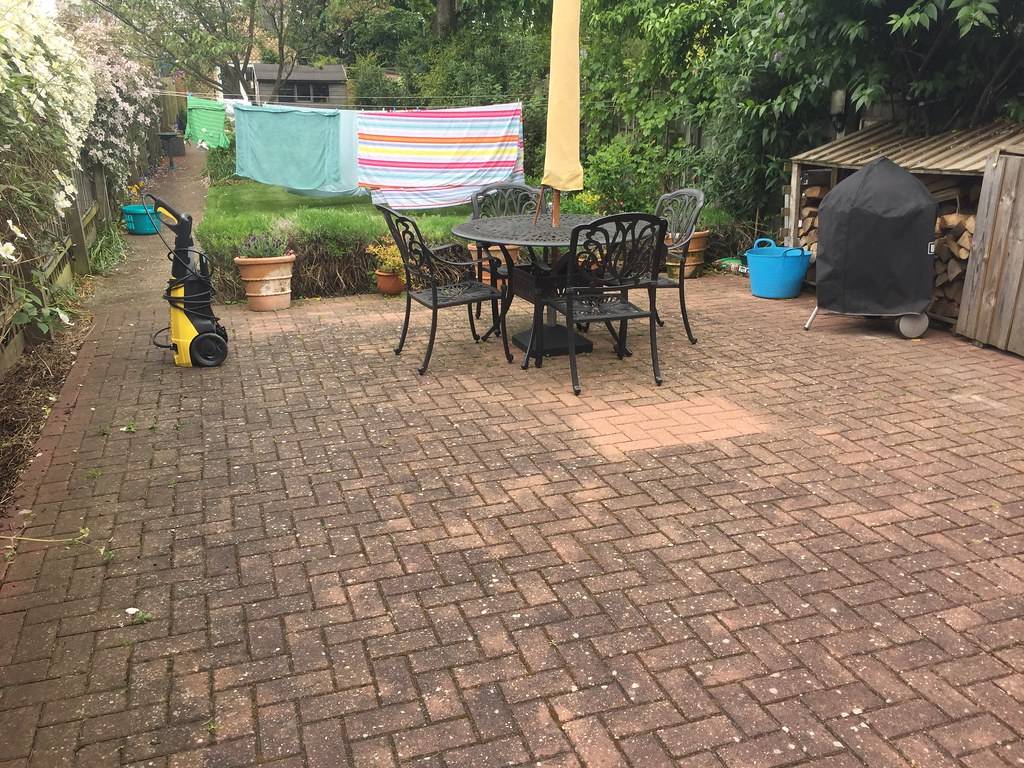
A patio is a wonderful addition to any home, providing a space for relaxation, entertaining, and enjoying the outdoors. But weather conditions can cause mildew or algae. Let’s talk about how to clean the mildew and algae off your patio.

.tasty-pins-banner-container{display:block;margin-bottom:20px;position:relative;width:-moz-fit-content;width:fit-content}.tasty-pins-banner-container a{cursor:pointer;display:flex;font-size:14px;font-weight:700;letter-spacing:1px;line-height:1.8em;text-transform:uppercase}.tasty-pins-banner-container a:hover{opacity:1}.tasty-pins-banner-container .tasty-pins-banner{align-items:center;bottom:0;cursor:pointer;display:flex;justify-content:center;left:0;padding-bottom:1em;padding-top:1em;position:absolute;right:0}.tasty-pins-banner-container .tasty-pins-banner svg{margin-right:4px;width:32px}.tasty-pins-banner-container .tasty-pins-banner span{margin-top:4px}.tasty-pins-banner-container a.tasty-pins-banner{text-decoration:none}.tasty-pins-banner-container a.tasty-pins-banner:hover{opacity:.8}.tasty-pins-banner-container a.tasty-pins-banner-image-link{flex-direction:column}.tasty-pins-banner-container a img{margin-bottom:0}.entry-content .wp-block-image .tasty-pins-banner-container img{margin-bottom:0;padding-bottom:0}#et-boc .et-l div .et_pb_image_wrap .tasty-pins-banner-container .tasty-pins-banner{padding-bottom:1em!important;padding-top:1em;text-decoration:none}#et-boc .et-l div .et_pb_image_wrap .tasty-pins-banner-container a.tasty-pins-banner{cursor:pointer;display:flex;font-size:14px;font-weight:700;line-height:1.8em;text-transform:uppercase}#et-boc .et-l div .et_pb_image_wrap .tasty-pins-banner-container a.tasty-pins-banner span{letter-spacing:2px;margin-top:4px}.et-db #et-boc .et-l .et_pb_module .tasty-pins-banner-container a:not(.wc-forward){padding-bottom:0}

However, over time, patio slabs can become plagued with unsightly mildew and algae growth, particularly in shaded or damp areas. 

Algae on patio surfaces not only look unpleasant but can also create a slip hazard.

In this blog post, we’ll explore effective methods for removing mildew and algae from your patio, ensuring it remains a safe and inviting space.

Gathering Necessary Supplies

Before starting the cleaning process, it’s important to have all the necessary supplies on hand. Here’s a handy list to get you prepared:

  • Stiff-bristle brush or scrubbing brush
  • Garden hose with a spray nozzle or a pressure washer
  • Protective gloves and eyewear
  • Broom or leaf blower
  • Tarp or drop cloths to shield nearby areas

Cleaning agents

  • Oxygen bleach, which is great for tackling mildew
  • Algae remover specifically designed for patio surfaces
  • White vinegar, a natural cleaning alternative
  • Baking soda for those tough stains
  • Chlorine bleach for the most stubborn mildew (just be careful with certain materials)

With these supplies, you’ll be ready to tackle any mildew or algae that has taken over your patio.

algae on patio

Preparing the Patio Area

Preparing your patio for cleaning is a straightforward but essential step. 

Start by moving all your furniture, potted plants, and decorative items to another spot. This will give you clear access to every inch of your patio and protect your belongings from any potential damage. 

Next, grab a broom or a leaf blower to sweep away loose debris, leaves, and dirt.

To protect plants and nearby surfaces from cleaning agents, cover them with a tarp or drop cloth. This is particularly important if your patio is next to wooden decking or porous materials. 

Taking these preparatory steps will ensure that your cleaning process goes smoothly and that everything stays in great shape.

Cleaning Methods for Mildew

To get rid of mildew on your patio, start by mixing oxygen bleach with warm water according to the instructions on the package. 

Wearing gloves and protective eyewear, apply the solution to the mildew-infested areas using a stiff-bristle brush. Focus on small sections at a time to ensure thorough coverage. 

Let the solution sit for about 10-15 minutes so it can break down the mildew effectively. After that, rinse the patio well with a garden hose or pressure washer to remove any residue.

If you prefer a natural approach, a mixture of white vinegar and water works wonders for less severe mildew. Just apply it in the same manner and scrub away.

Dealing with Algae on Your Patio

Algae can make your patio look grimy and can even be slippery. 

If you’re dealing with light algae growth, start with a simple solution of water and baking soda. 

Sprinkle the baking soda over the algae, then scrub it with a stiff-bristle brush. This should break up the algae and make it easier to wash away.

For more stubborn patches, you’ll want to use an algae remover that’s specifically designed for patio surfaces. 

Follow the manufacturer’s instructions for application and let the product sit for the recommended time. Afterward, scrub the area thoroughly with your brush to ensure all the algae is lifted.

Once you’ve scrubbed away the algae, rinse the area well with a garden hose or pressure washer. Make sure to get rid of all the cleaning solution to prevent any residue from affecting the patio’s appearance or feel.

Remember, consistent cleaning can prevent algae from taking over, so make this a regular part of your patio maintenance routine.

Preventive Measures

To keep your patio looking its best and free of mildew and algae, regular upkeep is essential. 

Start by sweeping your patio frequently to remove leaves, dirt, and other debris that can hold moisture and encourage growth. 

Address any drainage issues promptly—standing water is a major contributor to mildew and algae.

Think about how much shade your patio gets. If it’s heavily shaded by trees or bushes, consider trimming them back to allow more sunlight to reach the area. Sunlight helps to dry out moisture and discourages growth. 

If your patio is made from a porous material like concrete or sandstone, applying a sealant can provide an extra layer of protection.

Another tip is to move outdoor furniture and potted plants around occasionally. These items can trap moisture beneath them, creating ideal conditions for mildew and algae. By moving them, particularly out of shady areas, you allow those areas to dry out properly.

Consider setting a schedule for light cleanings using your preferred method. Whether it’s a quick scrub with a vinegar solution or a spray down with a hose, frequent maintenance can stop problems before they start. 

If you live in a particularly wet or humid climate, you might need to increase the frequency of these cleanings.

By staying proactive, you can enjoy a beautiful and safe patio year-round.

Removing Mildew and Algae from Your Patio

Cleaning your patio can seem like a big job, but it doesn’t have to be overwhelming. 

By gathering the right supplies and taking the time to prepare properly, you’ll be well on your way to a sparkling clean outdoor space. 

Regular upkeep will not only keep your patio looking great but also prevent mildew and algae from taking hold in the first place. 

Simple steps like sweeping often, addressing drainage issues, and allowing more sunlight to reach your patio can make a huge difference. Moving furniture and potted plants around occasionally will also help keep moisture from building up. 

By making these tasks part of your regular routine, you’ll maintain a beautiful, safe patio that enhances your outdoor living experience. 

So roll up your sleeves, get scrubbing, and enjoy your refreshed patio!

Other Articles You May Love

How to Whitewash a Brick Fireplace

How to Whitewash a Brick Fireplace

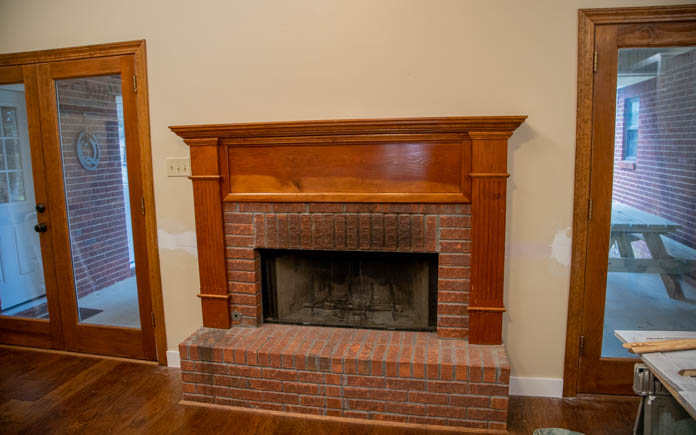
Whitewashing a brick fireplace can brighten and add character to a dated room.

The sheerness of the whitewash paint lets some of the original brick colors show through and gives the fireplace a unique look that many people love.

Whitewashing is basically diluting white latex paint with water and lightly coating the surface of a wall or fireplace. It’s an easy project and can be done in just a weekend.


Materials Needed


It’s important to start with a clean brick surface, or else soot stains will show through the whitewash.

Clean The Bricks

Before you begin, you need to clean the bricks. Mix a little TSP, or Trisodium Phosphate, with water and use it on a scrub brush to clean the brick surface and mortar joints between.

This is important to remove soot stains and create a clean surface so the whitewash will adhere well.


Diluting the white paint will allow the brick’s color to show through the whitewash.

Create Your Whitewash Mix

When the bricks are completely dry, mix up your whitewash. We’re using ordinary flat white latex paint mixed with water at a one-to-one ratio.

Dampening the bricks with water on a paintbrush before you begin will help them absorb the stain more evenly.


The key technique when whitewashing a fireplace is to be “consistently inconsistent.”

Apply Whitewash

Begin applying the whitewash lightly until you get a feel for the bricks’ texture. In this case, they have a rough surface, so dragging the brush over them lightly leaves lots of nooks and crannies with the natural brick color.

If you apply too heavily in one area, some can be dabbed off with a rag. When it’s complete, the surface should vary from light to dark, creating interest in what was a bland brick wall.

Watch the video above for more information!


Cost

Transform your fireplace for less than $40! Here’s the breakdown of costs:


Further Reading

An Exquisite Weekend House In A Sapota Plantation In Northern India [Video]

An Exquisite Weekend House In A Sapota Plantation In Northern India [Video]

In the outskirts of Bharuch, Gujarat, the dense 50 year old Sapota plantations held both the main attraction and the biggest challenge in the design of this weekend house for the Shah family. Situated within 800,000 square feet of farmland, the plot has 30 fully grown Sapota trees that the clients wanted to preserve in all their glory. External link: Dipen Gada Architects came up with a plan to form a 15,000 square foot house around the mature trees, making them the main feature of the impressive home. A central courtyard hosts one of these majestic trees right at the heart of the home, whilst another climbs through a picturesque balcony.

Check out the home tour video:

[embedded content]

Be sure to subscribe to Home Designing on Youtube for regular architecture and design videos.

Did you like this article?

Share it on any of the following social media channels below to give us your vote. Your feedback helps us improve.

A 135-Year-Old Loft Shows the Power of a Little Paint & Furniture Rearranging

A 135-Year-Old Loft Shows the Power of a Little Paint & Furniture Rearranging

We independently select these products—if you buy from one of our links, we may earn a commission.

Name: Taylor (myself), my three cats, Talulah, Remi, Phoebe, and German Shepherd puppy Gwen
Location: Pioneer Square — Seattle, Washington
Size: 2500 square feet
Type of Home: Loft
Years lived in: Over 3 years, renting

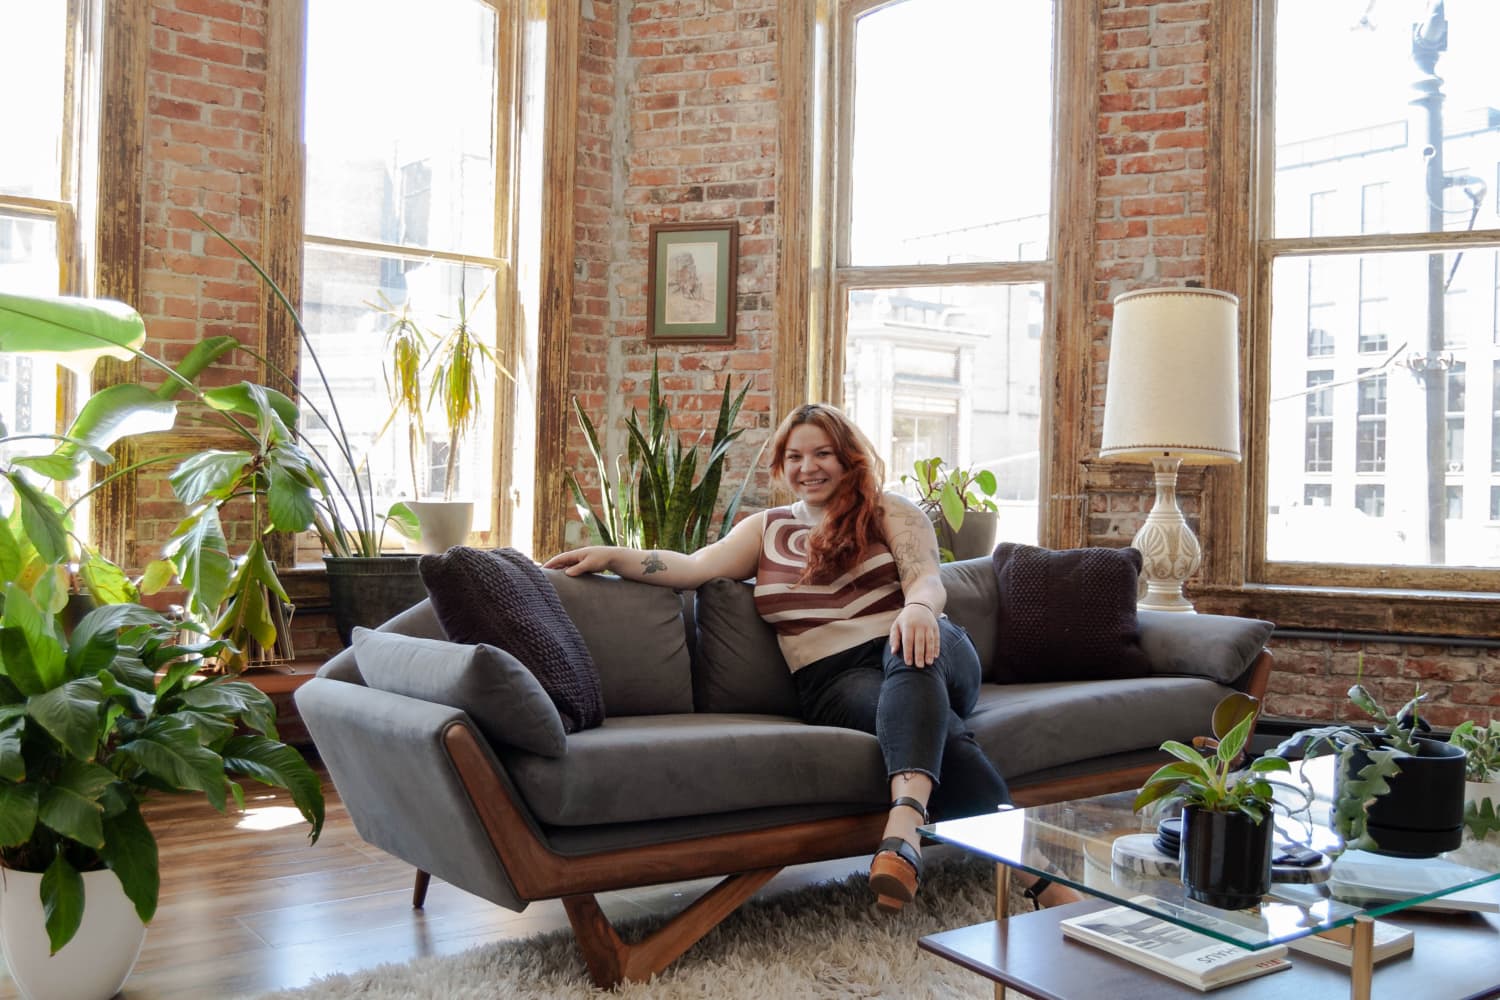
Taylor, an interior designer and the owner of the plant shop, FRINGE, says this 135-year-old loft is everything she’s always dreamed of. “I remember watching movies when I was younger about creatives living in cool old New York-style lofts, and I couldn’t wait to find mine one day. I knew it was not going to be easy, and I wasn’t going to find it on Craigslist, and that was the charm of finding a diamond in the rough,” she explains. “I would walk past this old three-story gray building on the way to my job in the neighborhood I lived in 10 years ago when I moved to Seattle and always wondered what was going on inside the building. It always seemed kind of abandoned but years later there was a cool vintage furniture shop on the ground floor and that was my first time in the building. It was very historic, very raw, and I saw how much potential it had.”

This isn’t the first time that Apartment Therapy has shared a look into her stylish brick space; her first loft tour was three years ago, but today it’s a different space than it was then. “I have redone the entire kitchen, both bathrooms, and the overall design of the space including paint, lighting, fixtures, etc.,” Taylor explains. She’s updated some of the furniture — an orange couch has been swapped out for a more subdued gray one, for instance — and different living areas have been swapped (like the living room and dining areas), and a little bit of paint color has easily transformed the small bathroom. The space, which is sometimes used for photoshoot rentals, is proof that even small updates can make for a big transformation.

Apartment Therapy Survey:

My Style: Mid-Century Modern Minimalist, Historic Industrial 

Inspiration: The 1960s + 1970s

Favorite Element: That’s a tough question… I love everything about my home. I have spent the last three years restoring it and making it a beautiful place. I have redone the entire kitchen, both bathrooms, and the overall design of the space including paint, lighting, fixtures, etc. The entire place is my favorite!

Biggest Challenge: My biggest challenge with the space was a small budget. I have done everything on my own and with some help here and there. I’ve spent so many late nights in this old space jamming out to music, drinking wine, and painting or ripping up flooring and giving the space an overall new look. If I had an unlimited budget with this space I could REALLY do some damage!

Proudest DIY: My proudest DIY was the bathroom. I ripped out the previous flooring and installed penny tile and it was my first time grouting or tiling a bathroom. It was not easy, but very fun. 

Biggest Indulgence: All of the paint. I’ve painted, changed, and changed again the paint colors in the space over and over. I run a photo studio out of it as well, so I love to keep it fresh and new looking for clients to want to return over and over and not be bored.

Is there something unique about your home or the way you use it? I use the space as a photo studio and a way to inspire creatives and photographers around the area. It’s called That Brick Loft and it’s become a moody sanctuary for creatives, artists, and influencers all around the PNW.

What are your favorite products you have bought for your home and why? My furniture! It’s all either vintage or something I just couldn’t live without. Some pieces are new and were purchased locally, which I love as well. 

Finally, what’s your absolute best home secret or decorating advice? Purchasing items that you feel you love, or bring a sentimental value to your space. We all only have so much room in our homes, and you want each piece to be unique whether it may be an object, a plant, a piece of furniture, or art. Keep it fresh, not too cluttered, but make it you.

This house tour’s responses were edited for length and clarity.

Adrienne Breaux

House Tour Editor

Adrienne loves architecture, design, cats, science fiction and watching Star Trek. In the past 10 years she’s called home: a van, a former downtown store in small town Texas and a studio apartment rumored to have once been owned by Willie Nelson.

Follow Adrienne
This Rental Has a Great Green Sofa Against Envy-Inducing Exposed Brick Walls

This Rental Has a Great Green Sofa Against Envy-Inducing Exposed Brick Walls

Name: Lara Jojo
Location: Seattle, Washington
Type of home: Apartment
Size: 830 square feet
Years lived in: Two months, renting

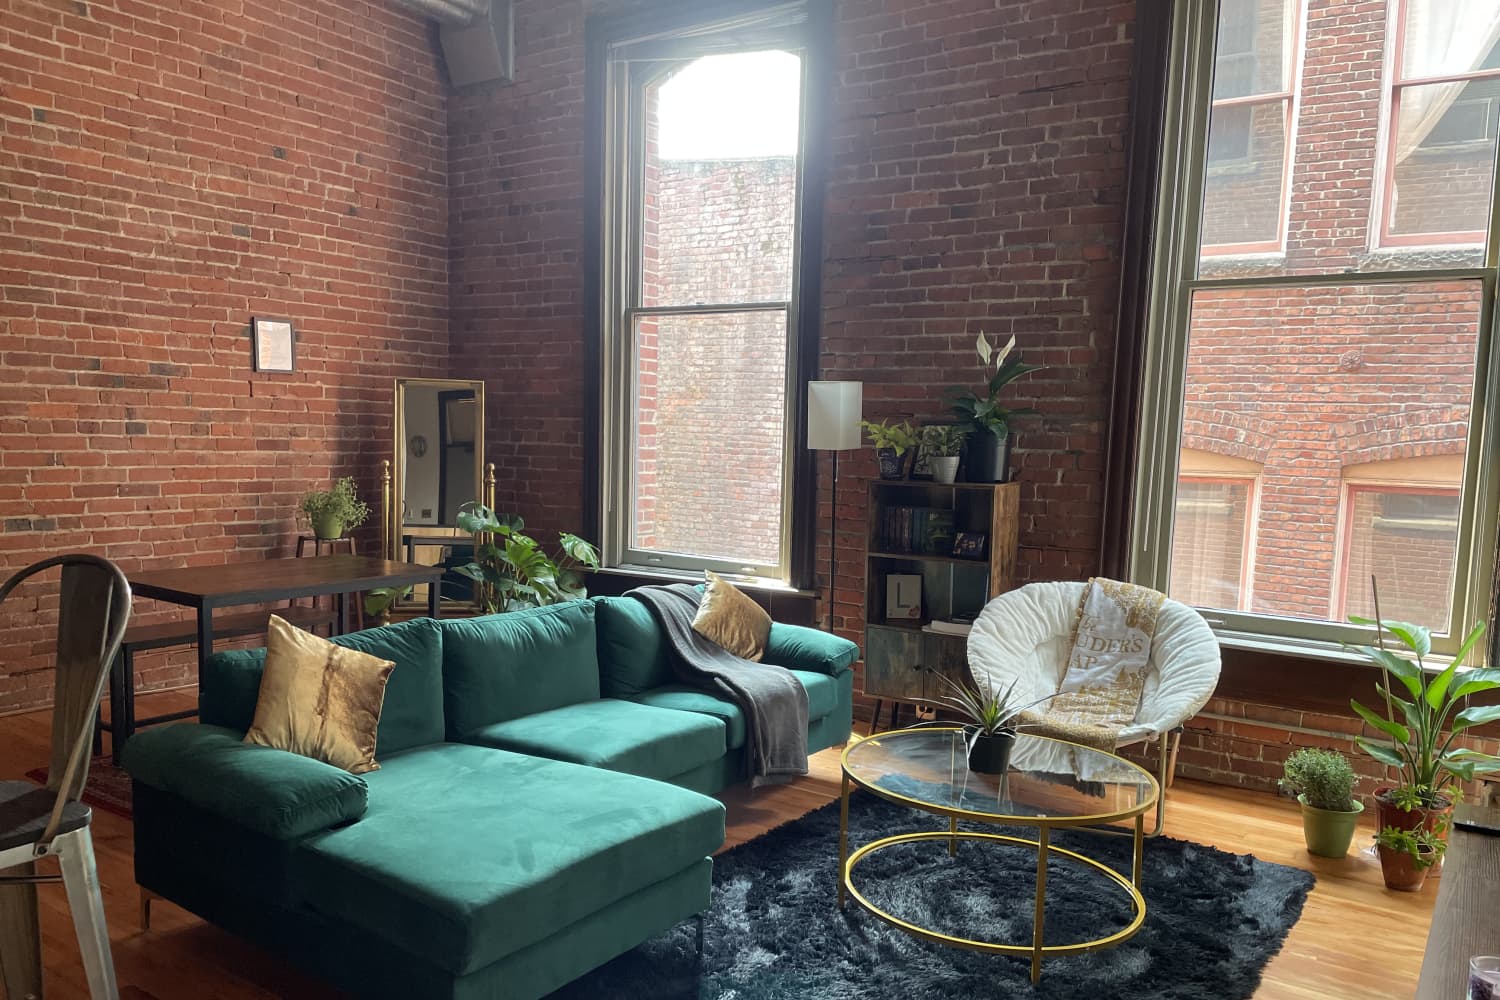
Tell us a little (or a lot) about your home and the people who live there: I am an immigrant from India but raised in Qatar and now in America. I have experienced personalities and people from a lot of cultures, and I love reflecting that in my home with my furniture and more. I absolutely LOVE my apartment. I’ve been dreaming of an exposed brick wall apartment for as long as I can remember, and now that I finally have it after college, I love it so much. I also decorated the way I love with my dark green velvet couch, red carpet, antique gold mirror, and more.

What is your favorite room and why? I love the living room because I feel like years of me dreaming about the perfect exposed brick wall apartment has finally come true. It’s like WandaVision but LaraVision!

Describe your home’s style in 5 words or less: Rustic, Industrial, Exposed Brick, Vintage, Classy

What’s the last thing you bought (or found!) for your home? The last thing I bought for the apartment was my red rug.

Any advice for creating a home you love? A lot of what you want in a home comes from your personality. Mirror your personality when you’re creating your home and you’ll be more than content.

This submission’s responses and photos were edited for length/size and clarity.