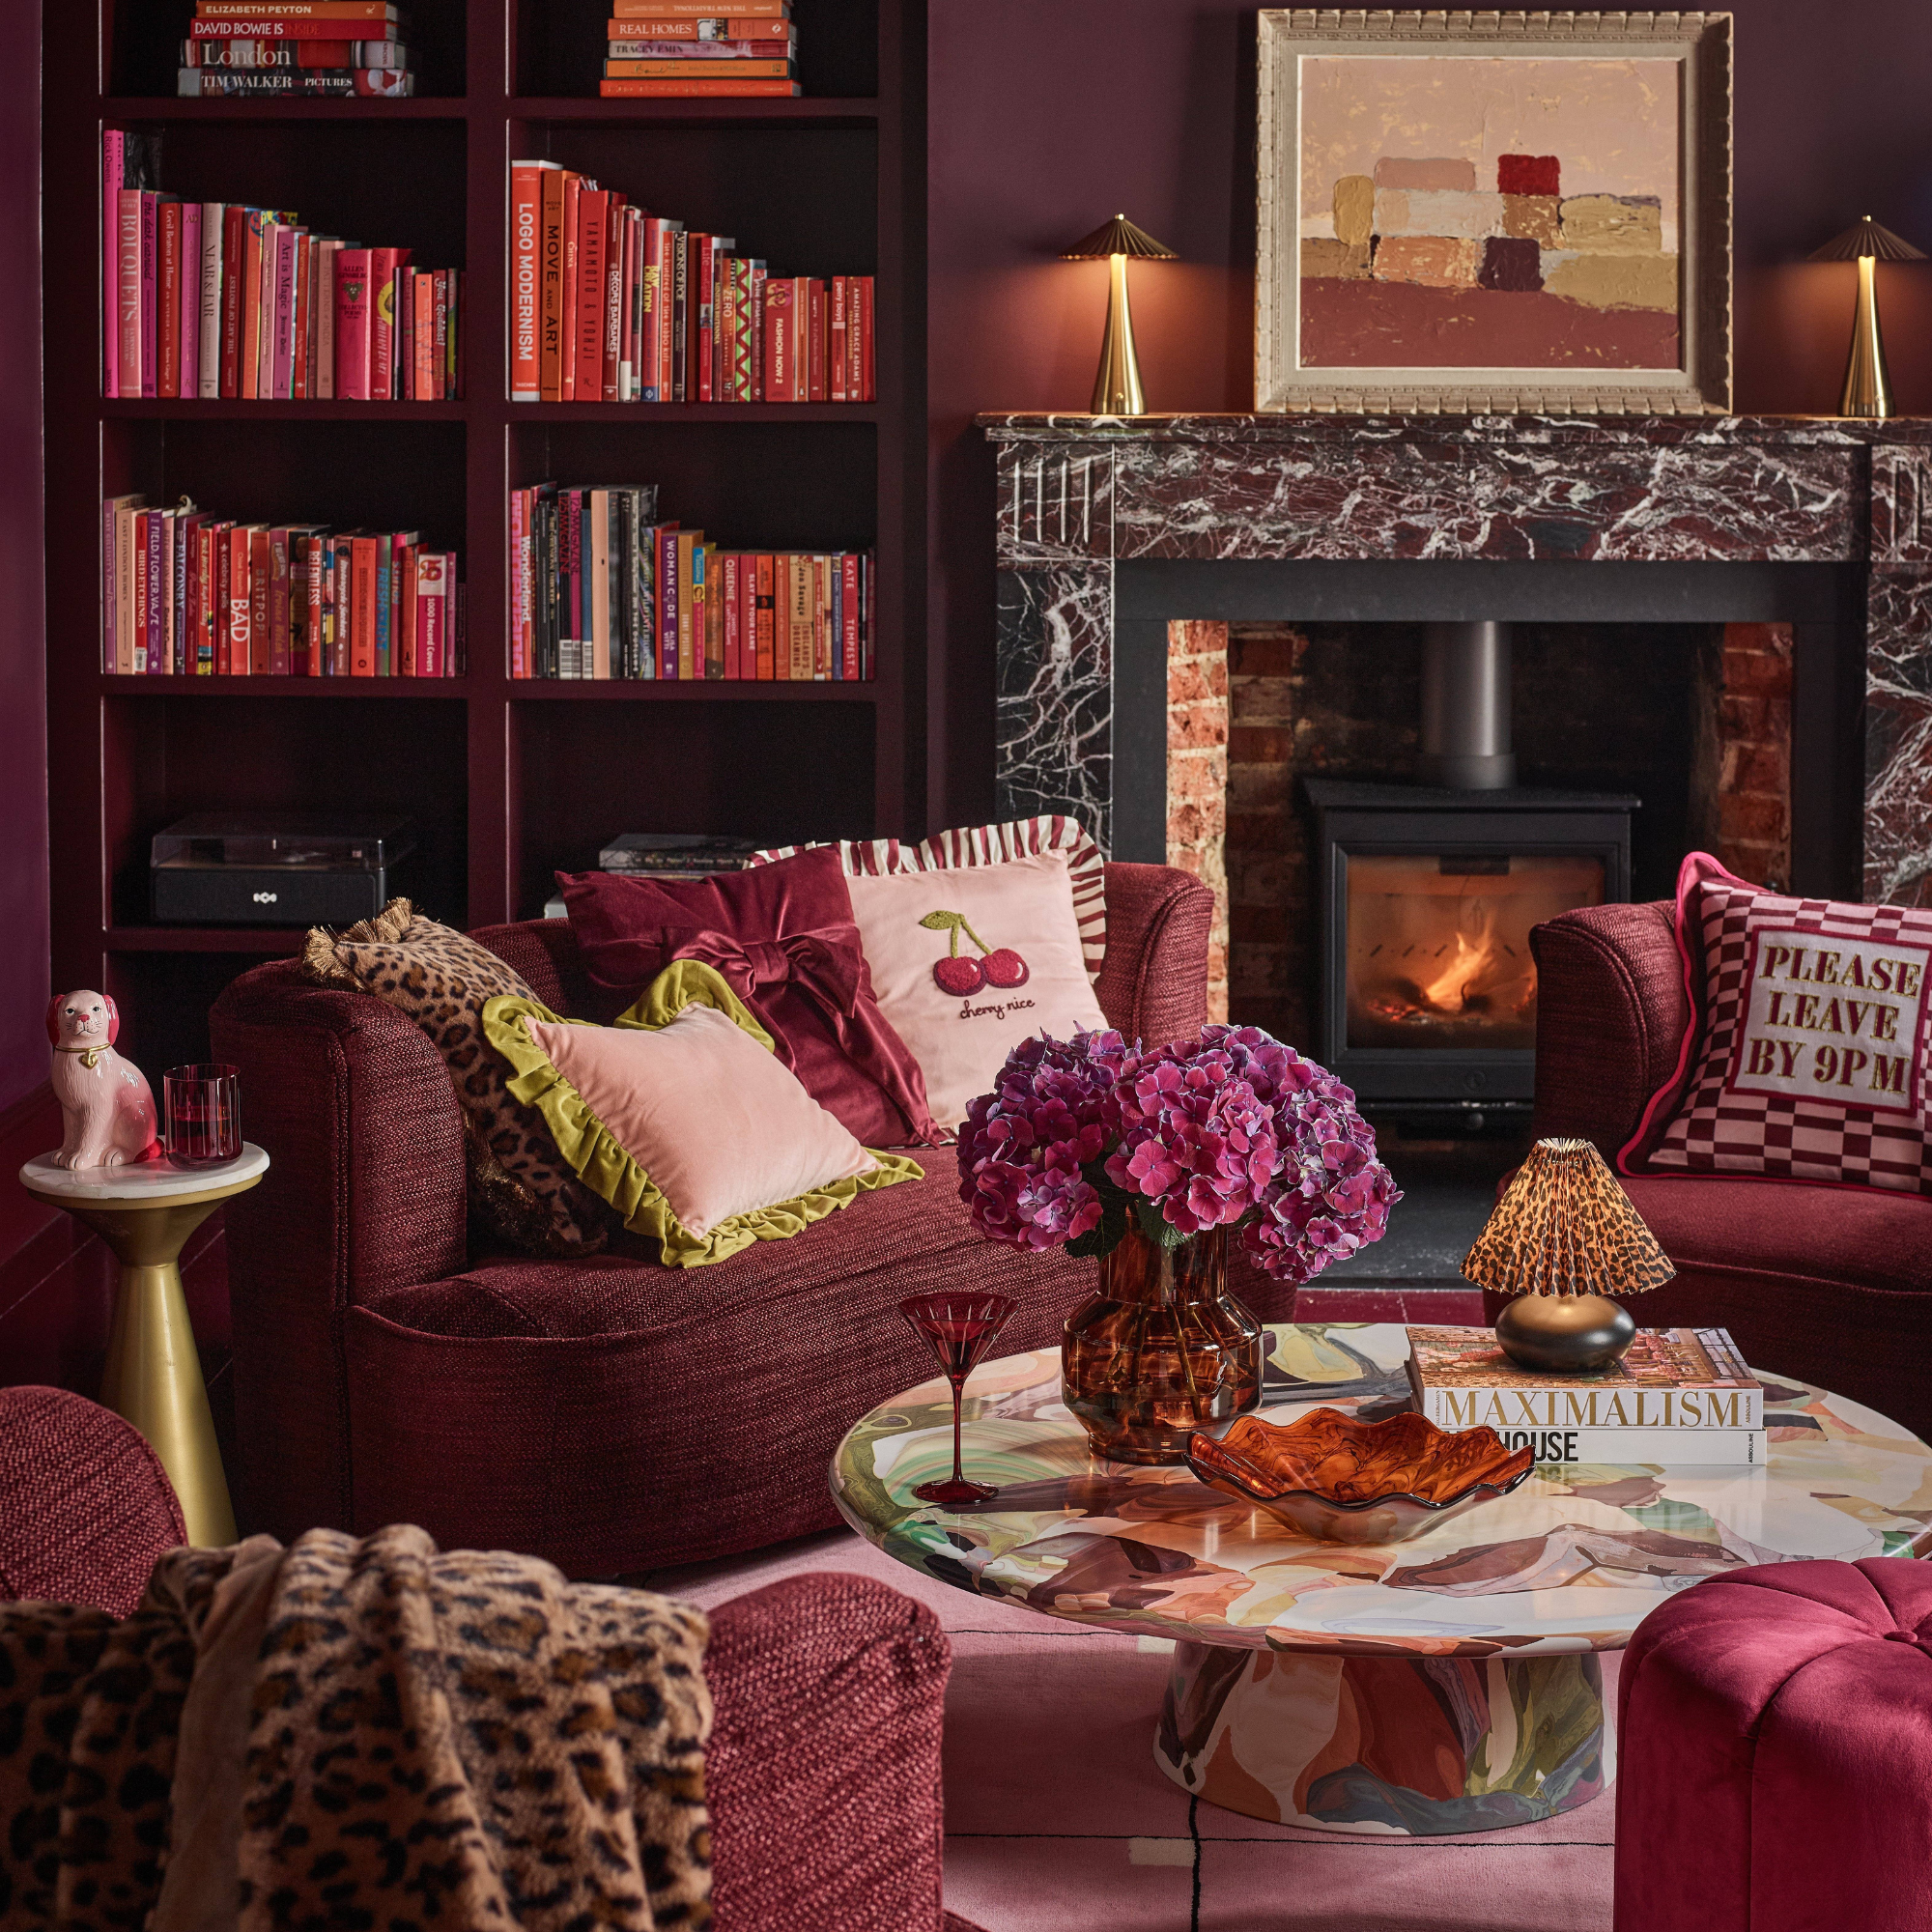
It may only be July, but George Home has just dropped their autumn/ winter collections for 2026, and they’re serving up so many stylish home buys at bargain prices.
George Home is honestly one of my favourite places to shop for the latest home decor trends. It can give Oliver Bonas a run for its money with its bold and colourful homeware, but it is also home to many luxe-looking pieces, including statement vases and gorgeous bedding.
The latest AW26 drops are not short of variety either. There are five collections: Grounded, Supper Club, Snug Season, Luxe Remix and Disco Prairie, and I’ve spotted a few hidden gems with a high-end look hiding amongst them.
Latest Videos From
(Image credit: George Home)
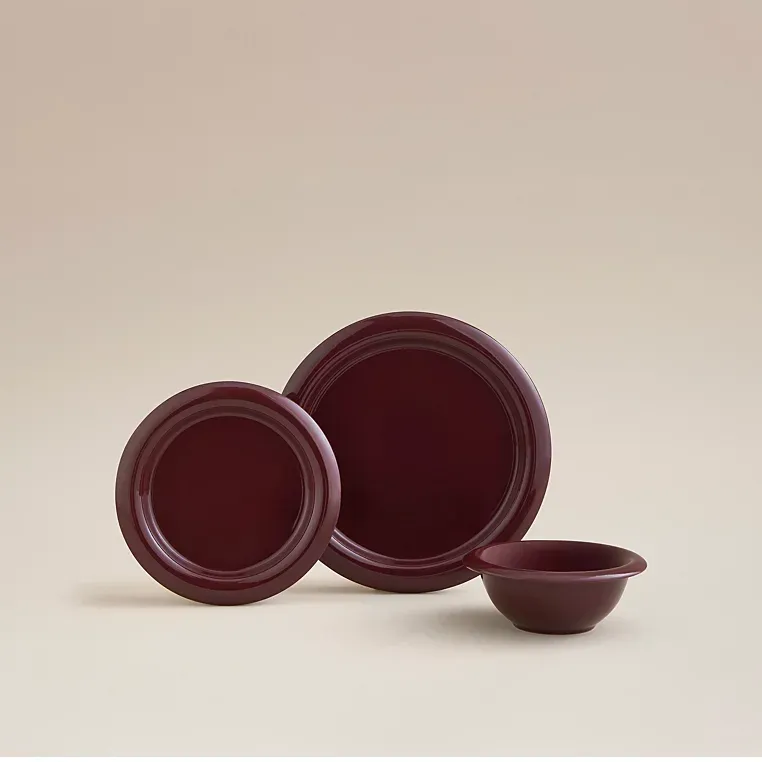
Immediately jumping out was the 12 Piece Burgundy Curved Dinner Set (£28), which is a dead ringer for HAY’s iconic Burgundy Barrow Plates. Bubble tableware was one of the biggest kitchenware trends last year due to its chic, retro look, and this favour of chunky tableware hasn’t disappeared this summer. In fact, brands like George Home are making it more accessible for everyone.
If you’re looking for small changes that will give your home a luxury update, here are my top six picks from George Home’s AW26 collections.
George Home
Burgundy Curved Dinner Set 12 Piece
<aside data-block-layout="hero" data-block-type="featured-product" data-editorial-currency="GBP" data-editorial-merchant-name="£28 at George Home" data-hawk-json="{"product":{"variants":{"Default":{"image":{"copyright":"","height":1026,"id":"97ifAAno4UKifnmGNnM45L","mimeType":"image\/webp","mos":"https:\/\/cdn.mos.cms.futurecdn.net\/v2\/t:264,l:0,cw:762,ch:762,q:80\/97ifAAno4UKifnmGNnM45L.webp","role":"","width":762,"credit":"George Home","alt":"George Home, Burgundy Curved Dinner Set 12 Piece","caption":"","crop":{"label":"1:1","left":0,"top":264,"cropWidth":762,"cropHeight":762,"quality":80}},"strapline":"
Sorry HAY, this dinner set looks almost exactly like the Barro collection but at \u00a328, is a bargain price.","brand":"George Home","name":"Burgundy Curved Dinner Set 12 Piece","urlStyle":"","layout":"hero","noFollow":true,"noAffiliateTracking":false,"promoLabel":"","price":null,"salePrice":null,"currency":"GBP","linkLayout":"text","sponsored":false,"hawkProductNameMatchedCode":"","review":{"cons":[],"id":"","name":"","pros":[],"rating":0,"strapline":"","url":""},"id":"","lastCheckedPriceDate":"","link":{"url":"https:\/\/www.anrdoezrs.net\/click-100624752-15729988?sid=hawk-custom-tracking&url=https:\/\/direct.asda.com\/george\/home\/tableware\/burgundy-curved-dinner-set-12-piece\/060173813,default,pd.html?","linkText":"\u00a328 at George Home","editorialMerchantName":"\u00a328 at George Home","merchantName":"George at Asda","merchantId":446839,"merchantNetwork":"CJ","merchantUrl":"direct.asda.com"}}}}}” data-link=”https://www.anrdoezrs.net/click-100624752-15729988?sid=hawk-custom-tracking&url=https://direct.asda.com/george/home/tableware/burgundy-curved-dinner-set-12-piece/060173813,default,pd.html?” data-link-merchant=”George at Asda” data-link-text=”£28 at George Home” data-merchant-id=”446839″ data-merchant-name=”George at Asda” data-merchant-network=”CJ” data-merchant-url=”direct.asda.com” data-model-brand=”George Home” data-model-name=”George Home Burgundy Curved Dinner Set 12 Piece” data-name=”Product Block merchantlink widget” data-render-type=”fte” data-show-fallback=”button” data-widget-type=”merchantlink” class=”hawk-root”>
Sorry HAY, this dinner set looks almost exactly like the Barro collection but at £28, is a bargain price.
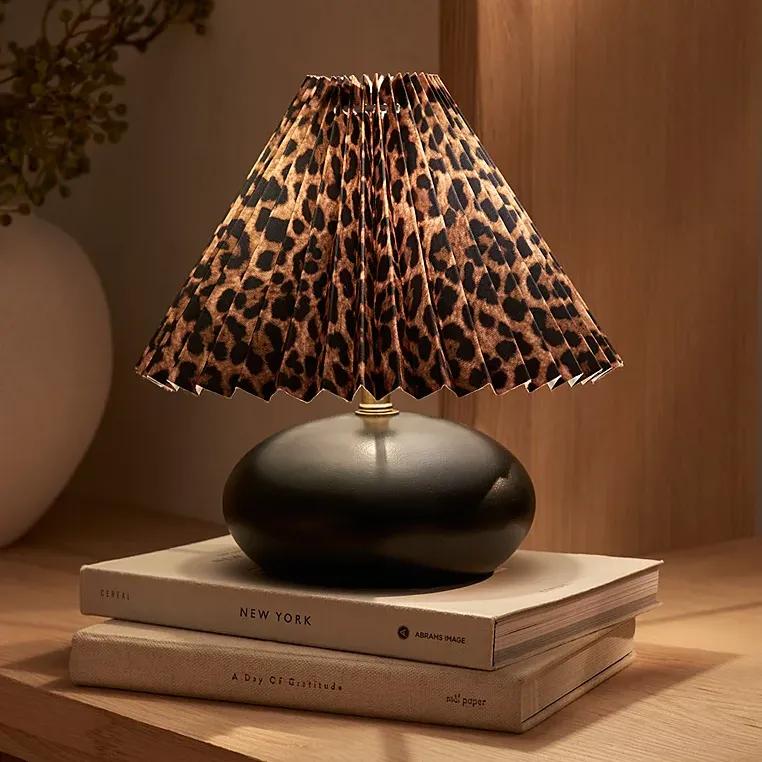
George Home
Black Leopard Print Battery Table Lamp
<aside data-block-layout="hero" data-block-type="featured-product" data-editorial-currency="GBP" data-editorial-merchant-name="£15 at George Home" data-hawk-json="{"product":{"variants":{"Default":{"image":{"copyright":"","height":1026,"id":"GYBEyeXWkiMFVpPiufSFQU","mimeType":"image\/webp","mos":"https:\/\/cdn.mos.cms.futurecdn.net\/v2\/t:193,l:0,cw:762,ch:762,q:80\/GYBEyeXWkiMFVpPiufSFQU.webp","role":"","width":762,"credit":"George Home","alt":"George Home, Black Leopard Print Battery Table Lamp","caption":"","crop":{"label":"1:1","left":0,"top":193,"cropWidth":762,"cropHeight":762,"quality":80}},"strapline":"
I’m a sucker for both leopard print and Rockett St George’s homeware, but for just \u00a315, this is the leopard print table lamp of my dreams.","brand":"George Home","name":"Black Leopard Print Battery Table Lamp","urlStyle":"","layout":"hero","noFollow":true,"noAffiliateTracking":false,"promoLabel":"","price":null,"salePrice":null,"currency":"GBP","linkLayout":"text","sponsored":false,"hawkProductNameMatchedCode":"","review":{"cons":[],"id":"","name":"","pros":[],"rating":0,"strapline":"","url":""},"id":"","lastCheckedPriceDate":"","link":{"url":"https:\/\/www.anrdoezrs.net\/click-100624752-15729988?sid=hawk-custom-tracking&url=https:\/\/direct.asda.com\/george\/home\/lighting\/table-lamps\/black-leopard-print-battery-table-lamp\/060181134,default,pd.html?]","linkText":"\u00a315 at George Home","editorialMerchantName":"\u00a315 at George Home","merchantName":"George at Asda","merchantId":446839,"merchantNetwork":"CJ","merchantUrl":"direct.asda.com"}}}}}” data-link=”https://www.anrdoezrs.net/click-100624752-15729988?sid=hawk-custom-tracking&url=https://direct.asda.com/george/home/lighting/table-lamps/black-leopard-print-battery-table-lamp/060181134,default,pd.html?]” data-link-merchant=”George at Asda” data-link-text=”£15 at George Home” data-merchant-id=”446839″ data-merchant-name=”George at Asda” data-merchant-network=”CJ” data-merchant-url=”direct.asda.com” data-model-brand=”George Home” data-model-name=”George Home Black Leopard Print Battery Table Lamp” data-name=”Product Block merchantlink widget” data-render-type=”fte” data-show-fallback=”button” data-widget-type=”merchantlink” class=”hawk-root”>
I’m a sucker for both leopard print and Rockett St George’s homeware, but for just £15, this is the leopard print table lamp of my dreams.
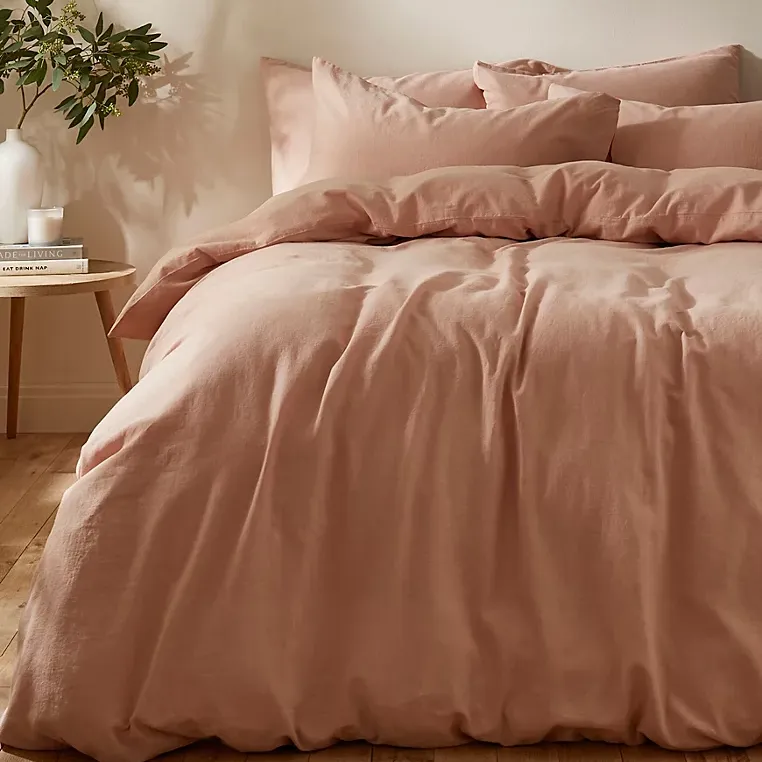
George Home
Martex Touch of Linen Seashell Pink Duvet Cover Set
<aside data-block-layout="hero" data-block-type="featured-product" data-editorial-currency="GBP" data-editorial-merchant-name="From £43 at George Home" data-hawk-json="{"product":{"variants":{"Default":{"image":{"copyright":"","height":1026,"id":"9zGxCZAvQdHw4Nh4L5RT9e","mimeType":"image\/webp","mos":"https:\/\/cdn.mos.cms.futurecdn.net\/v2\/t:179,l:0,cw:762,ch:762,q:80\/9zGxCZAvQdHw4Nh4L5RT9e.webp","role":"","width":762,"credit":"George Home","alt":"George Home, Martex Touch of Linen Seashell Pink Duvet Cover Set","caption":"","crop":{"label":"1:1","left":0,"top":179,"cropWidth":762,"cropHeight":762,"quality":80}},"strapline":"
This stunning bedding set is a mix of cotton and linen. I love it’s dusky pink colourway which is both warming and stylish.","brand":"George Home","name":"Martex Touch of Linen Seashell Pink Duvet Cover Set","urlStyle":"","layout":"hero","noFollow":true,"noAffiliateTracking":false,"promoLabel":"","price":null,"salePrice":null,"currency":"GBP","linkLayout":"text","sponsored":false,"hawkProductNameMatchedCode":"","review":{"cons":[],"id":"","name":"","pros":[],"rating":0,"strapline":"","url":""},"id":"","lastCheckedPriceDate":"","link":{"url":"https:\/\/www.anrdoezrs.net\/click-100624752-15729988?sid=hawk-custom-tracking&url=https:\/\/direct.asda.com\/george\/home\/bedding\/duvet-covers\/martex-touch-of-linen-seashell-pink-duvet-cover-set\/GEM1392230-3168416,default,pd.html?","linkText":"From \u00a343 at George Home","editorialMerchantName":"From \u00a343 at George Home","merchantName":"George at Asda","merchantId":446839,"merchantNetwork":"CJ","merchantUrl":"direct.asda.com"}}}}}” data-link=”https://www.anrdoezrs.net/click-100624752-15729988?sid=hawk-custom-tracking&url=https://direct.asda.com/george/home/bedding/duvet-covers/martex-touch-of-linen-seashell-pink-duvet-cover-set/GEM1392230-3168416,default,pd.html?” data-link-merchant=”George at Asda” data-link-text=”From £43 at George Home” data-merchant-id=”446839″ data-merchant-name=”George at Asda” data-merchant-network=”CJ” data-merchant-url=”direct.asda.com” data-model-brand=”George Home” data-model-name=”George Home Martex Touch of Linen Seashell Pink Duvet Cover Set” data-name=”Product Block merchantlink widget” data-render-type=”fte” data-show-fallback=”button” data-widget-type=”merchantlink” class=”hawk-root”>
This stunning bedding set is a mix of cotton and linen. I love it’s dusky pink colourway which is both warming and stylish.
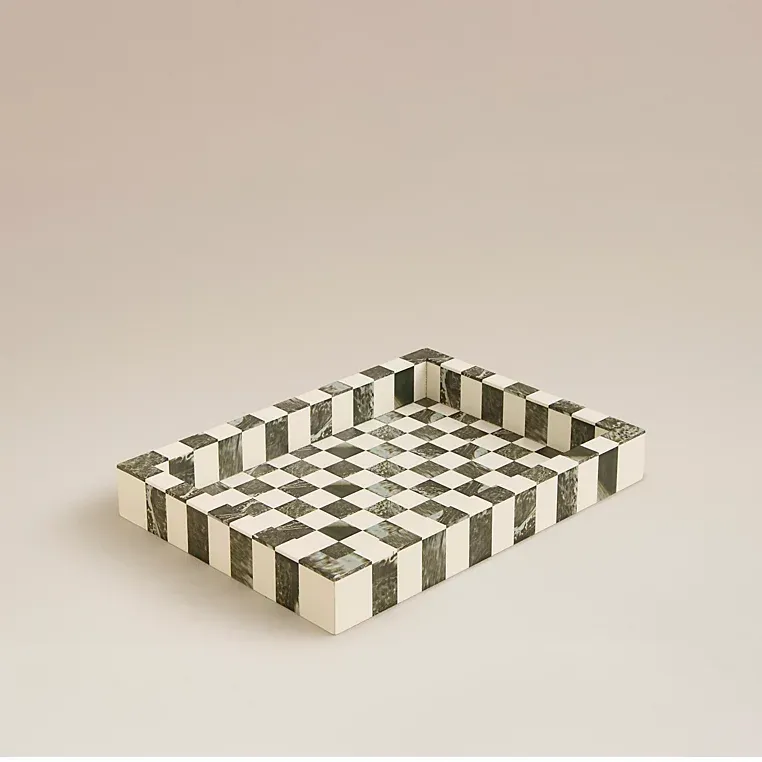
George Home
Green Marble-Effect Checkerboard Tray
<aside data-block-layout="hero" data-block-type="featured-product" data-editorial-currency="GBP" data-editorial-merchant-name="£5 at George Home" data-hawk-json="{"product":{"variants":{"Default":{"image":{"copyright":"","height":1026,"id":"iQPPS8ag8fhaDn5wgoMten","mimeType":"image\/webp","mos":"https:\/\/cdn.mos.cms.futurecdn.net\/v2\/t:264,l:0,cw:762,ch:762,q:80\/iQPPS8ag8fhaDn5wgoMten.webp","role":"","width":762,"credit":"George Home","alt":"George Home, Green Marble-Effect Checkerboard Tray","caption":"","crop":{"label":"1:1","left":0,"top":264,"cropWidth":762,"cropHeight":762,"quality":80}},"strapline":"
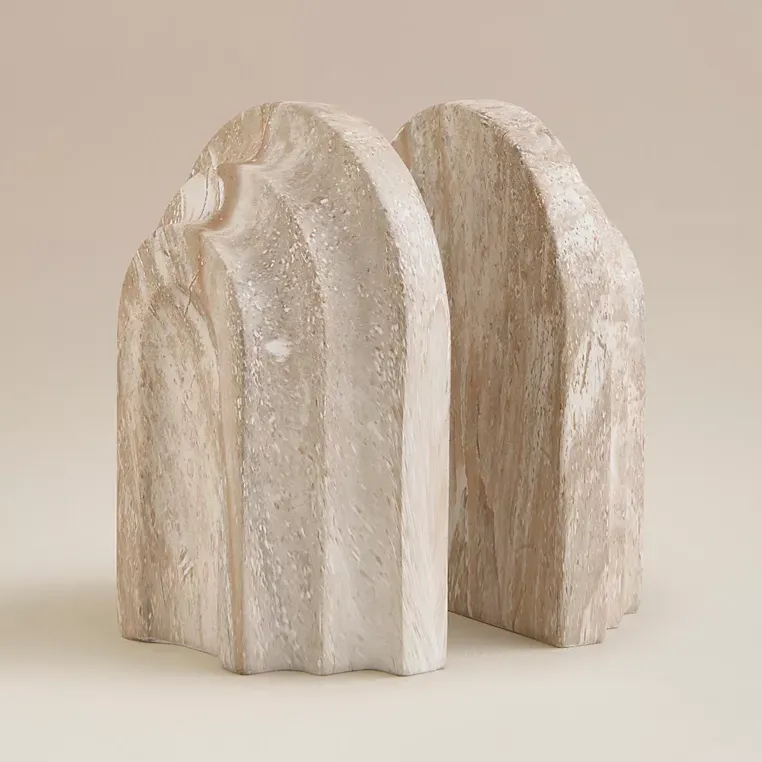
<aside data-block-layout="hero" data-block-type="featured-product" data-editorial-currency="GBP" data-editorial-merchant-name="£14 at George Home" data-hawk-json="{"product":{"variants":{"Default":{"image":{"copyright":"","height":1026,"id":"EZcZmpg5eR5ECR6jXxdcAC","mimeType":"image\/webp","mos":"https:\/\/cdn.mos.cms.futurecdn.net\/v2\/t:222,l:0,cw:762,ch:762,q:80\/EZcZmpg5eR5ECR6jXxdcAC.webp","role":"","width":762,"credit":"George Home","alt":"George Home, Marble-Effect Book Ends","caption":"","crop":{"label":"1:1","left":0,"top":222,"cropWidth":762,"cropHeight":762,"quality":80}},"strapline":"
I’m on a mission to organise my bookshelves this month and these stylish bookends will add a touch of class to my reads.","brand":"George Home","name":"Marble-Effect Book Ends","urlStyle":"","layout":"hero","noFollow":true,"noAffiliateTracking":false,"promoLabel":"","price":null,"salePrice":null,"currency":"GBP","linkLayout":"text","sponsored":false,"hawkProductNameMatchedCode":"","review":{"cons":[],"id":"","name":"","pros":[],"rating":0,"strapline":"","url":""},"id":"","lastCheckedPriceDate":"","link":{"url":"https:\/\/www.anrdoezrs.net\/click-100624752-15729988?sid=hawk-custom-tracking&url=https:\/\/direct.asda.com\/george\/home\/ornaments\/marble-effect-book-ends\/060181007,default,pd.html?","linkText":"\u00a314 at George Home","editorialMerchantName":"\u00a314 at George Home","merchantName":"George at Asda","merchantId":446839,"merchantNetwork":"CJ","merchantUrl":"direct.asda.com"}}}}}” data-link=”https://www.anrdoezrs.net/click-100624752-15729988?sid=hawk-custom-tracking&url=https://direct.asda.com/george/home/ornaments/marble-effect-book-ends/060181007,default,pd.html?” data-link-merchant=”George at Asda” data-link-text=”£14 at George Home” data-merchant-id=”446839″ data-merchant-name=”George at Asda” data-merchant-network=”CJ” data-merchant-url=”direct.asda.com” data-model-brand=”George Home” data-model-name=”George Home Marble-Effect Book Ends” data-name=”Product Block merchantlink widget” data-render-type=”fte” data-show-fallback=”button” data-widget-type=”merchantlink” class=”hawk-root”>
I’m on a mission to organise my bookshelves this month and these stylish bookends will add a touch of class to my reads.
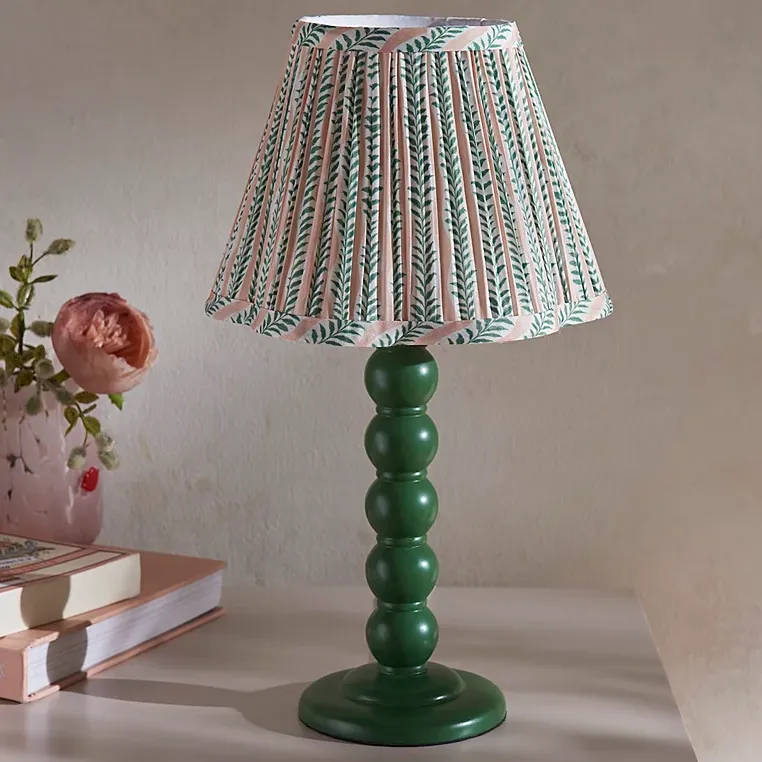
George Home
Green Trailing Leaf Bobbin Table Lamp
<aside data-block-layout="hero" data-block-type="featured-product" data-editorial-currency="GBP" data-editorial-merchant-name="£15 at George Home" data-hawk-json="{"product":{"variants":{"Default":{"image":{"copyright":"","height":1026,"id":"m6WpJRgcMPoyQpi3iHNAWK","mimeType":"image\/webp","mos":"https:\/\/cdn.mos.cms.futurecdn.net\/v2\/t:135,l:0,cw:762,ch:762,q:80\/m6WpJRgcMPoyQpi3iHNAWK.webp","role":"","width":762,"credit":"George Home","alt":"George Home, Green Trailing Leaf Bobbin Table Lamp","caption":"","crop":{"label":"1:1","left":0,"top":135,"cropWidth":762,"cropHeight":762,"quality":80}},"strapline":"
If you love Pooky lamps, but have a smaller budget, this lamp is just the ticket. It has a gorgeous bobbin base and a patterned shade, which adds to the luxe heritage look.","brand":"George Home","name":"Green Trailing Leaf Bobbin Table Lamp","urlStyle":"","layout":"hero","noFollow":true,"noAffiliateTracking":false,"promoLabel":"","price":null,"salePrice":null,"currency":"GBP","linkLayout":"text","sponsored":false,"hawkProductNameMatchedCode":"","review":{"cons":[],"id":"","name":"","pros":[],"rating":0,"strapline":"","url":""},"id":"","lastCheckedPriceDate":"","link":{"url":"https:\/\/www.anrdoezrs.net\/click-100624752-15729988?sid=hawk-custom-tracking&url=https:\/\/direct.asda.com\/george\/home\/lighting\/table-lamps\/green-trailing-leaf-bobbin-table-lamp\/060180014,default,pd.html?","linkText":"\u00a315 at George Home","editorialMerchantName":"\u00a315 at George Home","merchantName":"George at Asda","merchantId":446839,"merchantNetwork":"CJ","merchantUrl":"direct.asda.com"}}}}}” data-link=”https://www.anrdoezrs.net/click-100624752-15729988?sid=hawk-custom-tracking&url=https://direct.asda.com/george/home/lighting/table-lamps/green-trailing-leaf-bobbin-table-lamp/060180014,default,pd.html?” data-link-merchant=”George at Asda” data-link-text=”£15 at George Home” data-merchant-id=”446839″ data-merchant-name=”George at Asda” data-merchant-network=”CJ” data-merchant-url=”direct.asda.com” data-model-brand=”George Home” data-model-name=”George Home Green Trailing Leaf Bobbin Table Lamp” data-name=”Product Block merchantlink widget” data-render-type=”fte” data-show-fallback=”button” data-widget-type=”merchantlink” class=”hawk-root”>
If you love Pooky lamps, but have a smaller budget, this lamp is just the ticket. It has a gorgeous bobbin base and a patterned shade, which adds to the luxe heritage look.
Which piece is your favourite?
Sign up to our newsletter for style inspiration, real homes, project and garden advice and shopping know-how
If you thought a rug was just a rug, stand back and let us ‘floor’ you with our guide to rugs!
A well-chosen rug can completely transform a room, adding warmth, texture, colour and comfort while also protecting your floors and helping to define your living space.
Whether you’re looking for a practical hallway runner, a statement rug for your living room or a cosy addition to your bedroom, understanding the different types of rugs will help you make the right choice.
Why Use a Rug?
Rugs are one of the easiest and most affordable ways to update a room without redecorating. They can instantly soften hard flooring, introduce pattern and colour, and make a space feel more welcoming.
Some of the biggest benefits include:
Protecting wooden, laminate and tiled floors from scratches, scuffs and furniture marks.
Reducing wear in high-traffic areas such as hallways and entrances.
Helping to absorb sound, making rooms feel quieter and less echoey.
Adding warmth and insulation underfoot, especially on hard flooring.
Improving safety by reducing slippery surfaces when paired with a quality non-slip underlay.
Defining different zones within an open-plan space, such as separating a dining area from a seating area.
Introducing colour, texture and pattern without the commitment of painting or replacing flooring.
Making a room feel more comfortable, balanced and inviting.
Rugs vs Mats: What’s the Difference?
Although the terms are often used interchangeably, there are some important differences.
Mats are generally designed with a practical purpose in mind. They tend to be smaller, tougher and easier to clean. Examples include:
Doormats
Boot mats
Kitchen mats
Bath mats
Utility room mats
Their primary role is protecting floors, trapping dirt or providing additional grip.
Rugs, on the other hand, are usually larger and are chosen for both their appearance and practicality. While they still protect flooring and improve comfort, they’re often used as decorative features that help complete a room’s interior design.
Different Types of Rugs
There are hundreds of rug styles available, but most fall into a few main categories.
Area rugs are by far the most popular choice for modern homes. Unlike fitted carpets, they cover only part of the floor, allowing attractive flooring to remain visible around the edges.
Available in almost every imaginable size, shape, colour and material, area rugs work well in:
Living rooms
Dining rooms
Bedrooms
Home offices
Conservatories
A large area rug can anchor your furniture and make a room feel more cohesive. Ideally, the front legs of sofas and chairs should sit on the rug to create a balanced layout.
Runner Rugs
Runner rugs are long, narrow rugs designed for hallways, corridors, kitchens and other transitional spaces.
Because hallways are often among the busiest areas of the home, runners help protect flooring while making these spaces feel warmer and more welcoming.
Look for runners with durable fibres and washable finishes if they’ll receive heavy daily use.
Stair Runners
Stair runners are specially designed to fit staircases.
Besides creating an elegant, traditional look, they also offer several practical advantages:
Reduce slipping on wooden stairs.
Cushion footsteps.
Minimise noise.
Protect timber treads from everyday wear.
Professional installation is usually recommended to ensure the runner is securely fixed.
Round Rugs
Round rugs are ideal for breaking up the straight lines found in many interiors.
They’re particularly effective beneath:
Round dining tables
Coffee tables
Reading chairs
Pendant lighting
Children’s play areas
A circular rug can soften a room and create an attractive focal point.
Outdoor Rugs
Made from weather-resistant synthetic fibres, outdoor rugs are designed for patios, decking, balconies and garden rooms.
Many can also be used indoors in busy family homes because they’re extremely durable and easy to clean.
Choosing the Right Rug Material
The material you choose affects both appearance and durability.
Wool is naturally soft, warm and long-lasting, making it ideal for living rooms and bedrooms.
Cotton rugs are lightweight, affordable and often machine washable.
Jute and sisal create a relaxed, natural look and work beautifully in contemporary, coastal and Scandinavian-inspired interiors.
Synthetic fibres, such as polypropylene, are stain-resistant, hardwearing and ideal for busy households with children or pets.
Faux sheepskin adds luxurious texture and is perfect layered over larger natural-fibre rugs.
Choosing the Right Rug Size
One of the biggest decorating mistakes is choosing a rug that’s too small.
As a general guide:
Living room: Choose a rug large enough for at least the front legs of your seating to sit on.
Dining room: The rug should extend at least 60-70cm beyond the edge of the table so chairs remain on the rug when pulled out.
Bedroom: A large rug placed beneath the lower two-thirds of the bed creates a luxurious hotel-style look.
Hallway: Leave a small border of flooring visible around the runner for a neater appearance.
When in doubt, go larger rather than smaller.
Layering Rugs
Layering rugs has become an increasingly popular interior design trend.
Try placing:
a faux sheepskin over a woven jute rug
a patterned vintage rug over a large neutral rug
a colourful runner across natural timber flooring
Layering adds depth, texture and visual interest while allowing you to refresh a room without replacing your larger rug.
Caring for Your Rug
Always choose a rug that’s suitable for the room where it will be used.
For busy areas such as hallways, kitchens and family rooms, washable or stain-resistant rugs are usually the best option.
To keep your rug looking its best:
Vacuum regularly.
Rotate it every six months to ensure even wear.
Blot spills immediately rather than rubbing them.
Use a rug underlay to prevent slipping and reduce wear.
Follow the manufacturer’s cleaning instructions carefully.
Natural fibre rugs may shed slightly when new, while delicate wool or handmade rugs may require professional cleaning.
The Finishing Touch
A beautiful rug does much more than cover a floor. It can soften a space, introduce personality, improve comfort and help pull an entire room together.
Whether you prefer timeless Persian-inspired patterns, bold geometric prints, natural woven textures or luxurious wool designs, the right rug can completely change the atmosphere of a room without the expense of replacing your flooring.
With so many colours, materials and styles available, investing a little time in choosing the right rug is well worth the effort—and once it’s in place, you’ll wonder how the room ever looked complete without it.
Top Product Picks
Vivienne rug, £175 from Cox & Cox. Inspired by a timeless heritage design, this Vivienne rug adds a touch of vintage appeal to your home.
Indra dark grey handwoven wool round rug, £149.99 from daals. Handmade by artisans from India using traditional local weaving techniques, this textured rug feels comfortable underfoot and adds interest to your room.
Stripy jute rug (above and main image), from £295 from Loaf. Handmade on the loom using old-school techniques, each one is unique with a casual, comfy feel that’s crafted to last. Available in three sizes.
Blue and orange stripe woven runner rug, £75 from Oliver Bonas. Woven runner rug featuring a vertical blue, cream and orange stripe pattern that follows the long edge.
Pink and natural stripe coir door mat, £5.95 from Melody Maison.
It’s July, the sun is shining, and right now the only things on my radar are beaches, beer gardens, finding ways to keep my home cool and … Christmas?!
In the interiors world, and magazine world for that matter, Christmas in July is quite normal. As a journalist, I’m used to previewing baubles and tinsel in 30-degree summer heat. But this year, Christmas in July seems to be spilling into a home decor trend, and I’m not sure how I feel about it.
Is July too early to start thinking about Christmas? Is thinking about the festivities now proof of a pro planner, or is it a gimmicky excuse to spend money? The Ideal Home team is split – and we need you to help us decide.
Latest Videos From
‘It’s good for bargain hunters’
Rebecca Knight
As someone who works in media, I’m well accustomed to the concept of Christmas in July. It’s the time of year when all the brands hold previews for their A/W and Christmas collections, and while it might seem early to some, I’ve become a fan of the time it gives me to get my Christmas decorating ideas in order and start getting prepped for the festive season.
(Image credit: Future PLC/Katie Lee)
As someone with expensive taste but a small budget, starting my Christmas prep in July not only means I can spread out the expense of buying new decorations and gifts, but I can also usually buy last season’s decorations at bargain prices. The best time to buy Christmas decorations on sale is in January, but there are still deals to be had in July. This year, I’ve spotted bargains at The White Company, with decorations going for under £5, and Balsam Hill is also holding massive sales on its gorgeous faux Christmas trees.
I love going all out on my decorations, so starting my Christmas planning and shopping in July is my savvy trick to make sure I can achieve that in December
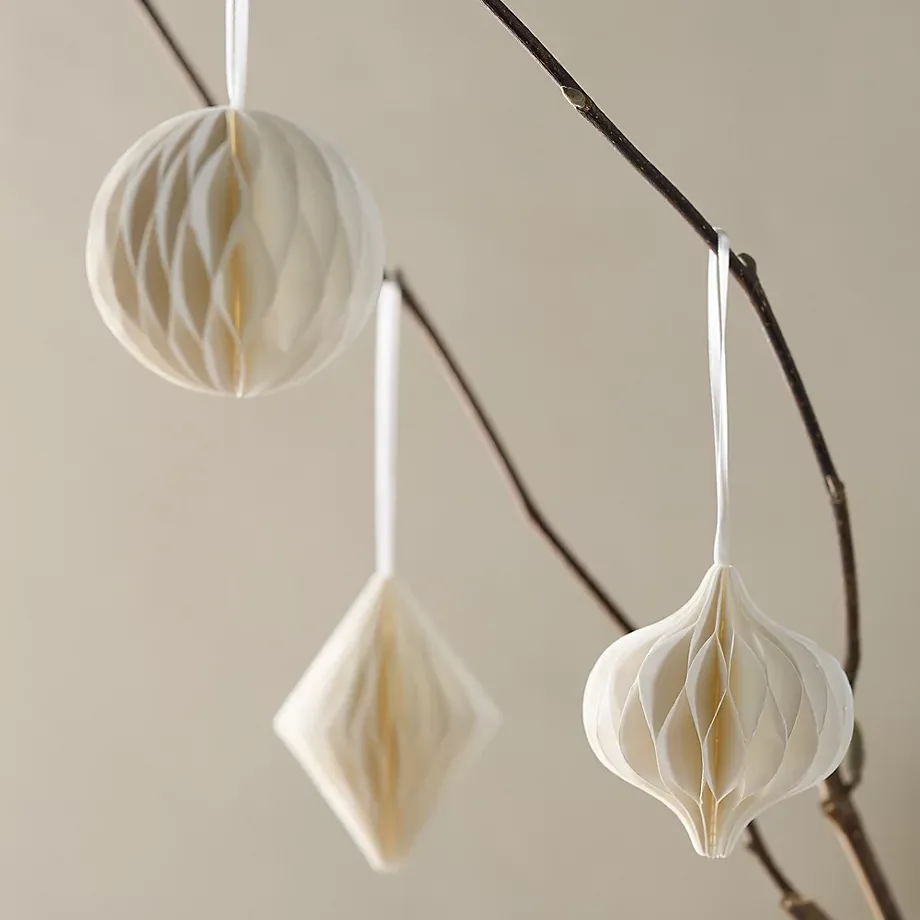
The White Company
White Paper Decorations – Set of 3
<aside data-block-layout="hero" data-block-type="featured-product" data-editorial-currency="GBP" data-editorial-merchant-name="Was £30, now £12 at The White Company" data-hawk-json="{"product":{"variants":{"Default":{"image":{"copyright":"","height":1178,"id":"E8XHtadNPzMdWmrbGZgWTd","mimeType":"image\/webp","mos":"https:\/\/cdn.mos.cms.futurecdn.net\/v2\/t:65,l:0,cw:920,ch:920,q:80\/E8XHtadNPzMdWmrbGZgWTd.webp","role":"","width":920,"credit":"The White Company","alt":"The White Company, ","caption":"","crop":{"label":"1:1","left":0,"top":65,"cropWidth":920,"cropHeight":920,"quality":80}},"strapline":"
If you love The White Company, but not their prices, now is a great time to grab a bargain on their Christmas shop. These stylish paper baubles won’t go out of style.","brand":"The White Company","name":"White Paper Decorations \u2013 Set of 3","urlStyle":"","layout":"hero","noFollow":true,"noAffiliateTracking":false,"promoLabel":"","price":null,"salePrice":null,"currency":"GBP","linkLayout":"text","sponsored":false,"hawkProductNameMatchedCode":"","review":{"cons":[],"id":"","name":"","pros":[],"rating":0,"strapline":"","url":""},"id":"","lastCheckedPriceDate":"","link":{"url":"https:\/\/thewhitecompany.sjv.io\/c\/221109\/2016291\/24982?subId1=hawk-custom-tracking&sharedId=hawk-prefix&u=https%3A%2F%2Fwww.thewhitecompany.com%2Fuk%2FWhite-Paper-Decorations–Set-of-3%2Fp%2FA17521%3F","linkText":"Was \u00a330, now \u00a312 at The White Company","editorialMerchantName":"Was \u00a330, now \u00a312 at The White Company","merchantName":"The White Company","merchantId":495723,"merchantNetwork":"ImpactRad","merchantUrl":"thewhitecompany.com\/uk"}}}}}” data-link=”https://thewhitecompany.sjv.io/c/221109/2016291/24982?subId1=hawk-custom-tracking&sharedId=hawk-prefix&u=https%3A%2F%2Fwww.thewhitecompany.com%2Fuk%2FWhite-Paper-Decorations–Set-of-3%2Fp%2FA17521%3F” data-link-merchant=”The White Company” data-link-text=”Was £30, now £12 at The White Company” data-merchant-id=”495723″ data-merchant-name=”The White Company” data-merchant-network=”ImpactRad” data-merchant-url=”thewhitecompany.com/uk” data-model-brand=”The White Company” data-model-name=”The White Company White Paper Decorations – Set of 3″ data-name=”Product Block merchantlink widget” data-render-type=”fte” data-show-fallback=”button” data-widget-type=”merchantlink” class=”hawk-root”>
If you love The White Company, but not their prices, now is a great time to grab a bargain on their Christmas shop. These stylish paper baubles won’t go out of style.
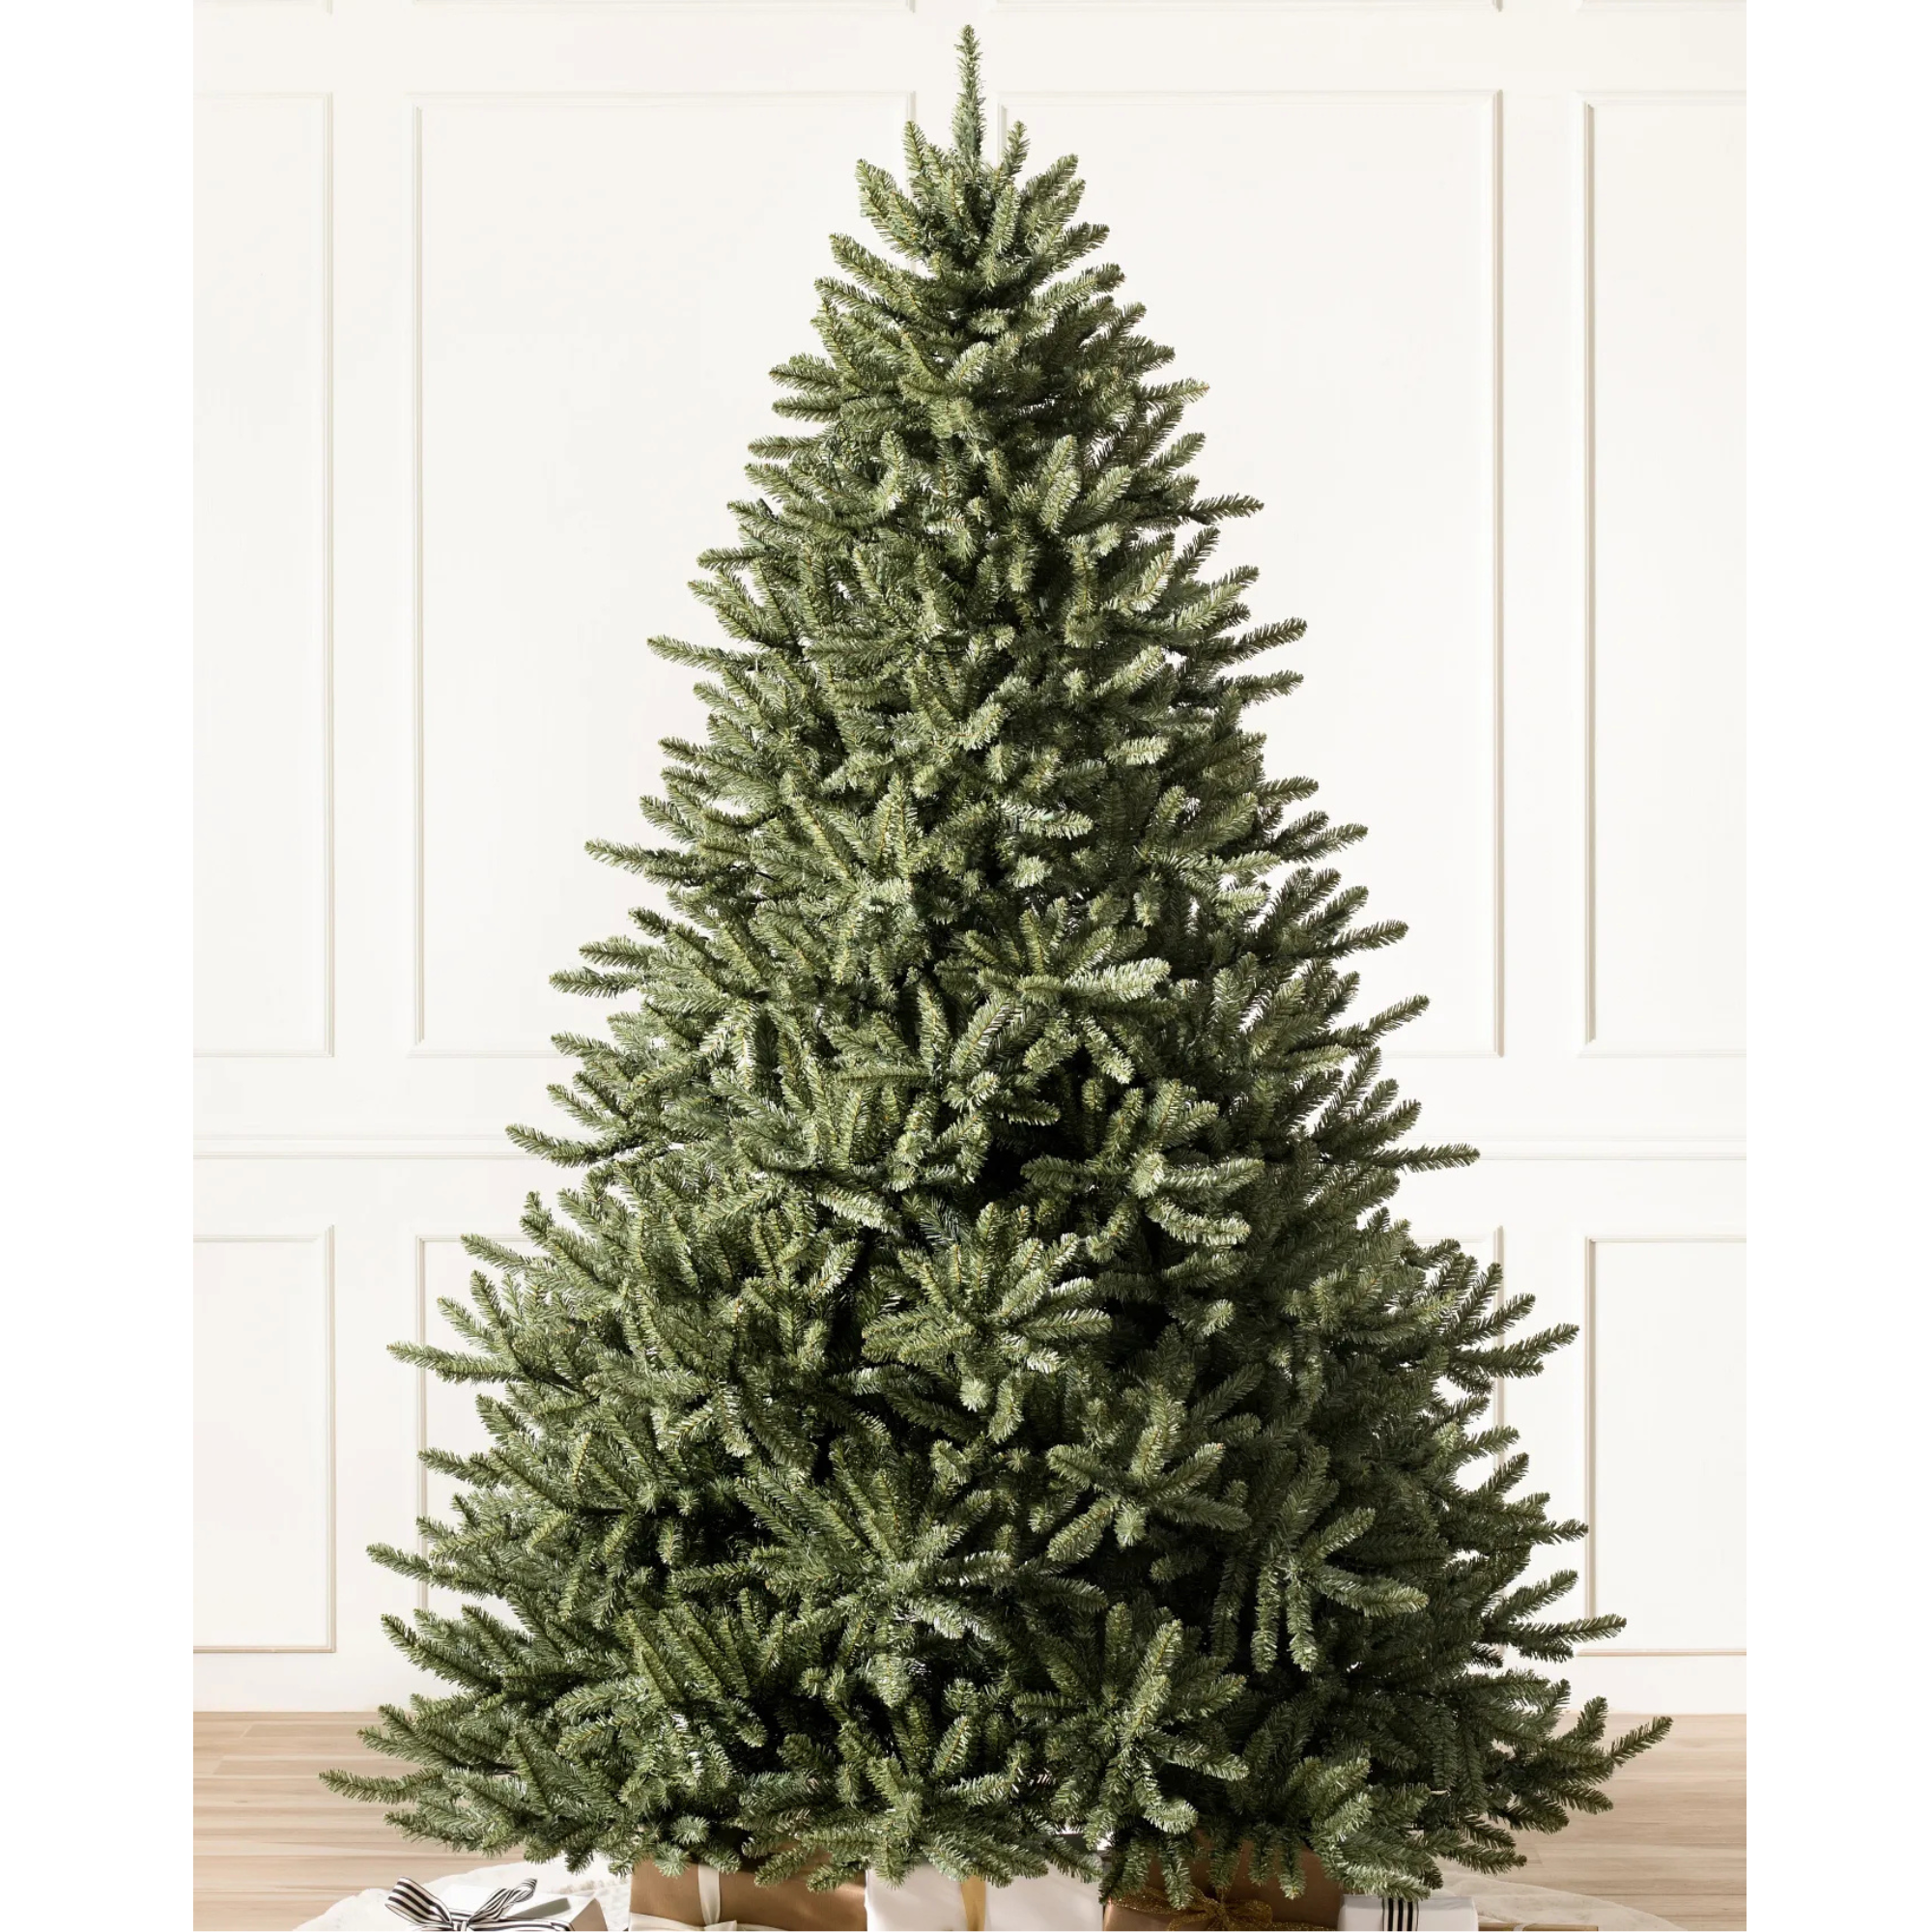
Balsam Hill
Canadian Blue Green Spruce Christmas Tree
Selections
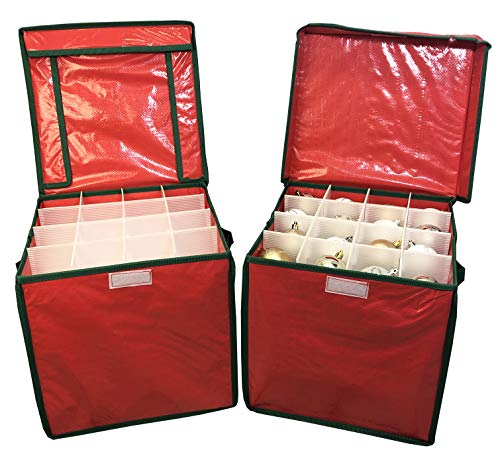
Christmas Bauble Decorations Storage Box Bag With Adjustable Dividers 64 Compartments – Pack of 2
<aside data-block-layout="hero" data-block-type="featured-product" data-editorial-currency="GBP" data-editorial-price="15.98" data-hawk-json="{"product":{"variants":{"Default":{"image":{"copyright":"","height":464,"id":"Ca5U9kBLVaB5RfenXdo777","mimeType":"image\/jpeg","mos":"https:\/\/cdn.mos.cms.futurecdn.net\/Ca5U9kBLVaB5RfenXdo777.jpg","role":"","width":500,"credit":"Selections","alt":"Selections Christmas Bauble Decorations Storage Box Bag With Adjustable Dividers 64 Compartments – Pack of 2","caption":""},"strapline":"
Now is also a good time to assess your storage solutions ahead of the festivities. It can make unpacking and repacking decorations way more simple and efficient.","brand":"Selections","name":"Christmas Bauble Decorations Storage Box Bag With Adjustable Dividers 64 Compartments – Pack of 2","urlStyle":"","retailer":"","layout":"hero","linkText":"","noFollow":true,"noAffiliateTracking":false,"promoLabel":"","price":15.98,"salePrice":null,"currency":"GBP","linkLayout":"text","sponsored":false,"hawkProductNameMatchedCode":"","review":{"cons":[],"id":"","name":"","pros":[],"rating":0,"strapline":"","url":""},"id":"","externalId":"4b49e1d7f464dd4e62764ea0e8ad206921e23014","lastCheckedPriceDate":"","link":{"url":"https:\/\/target.georiot.com\/Proxy.ashx?tsid=107653&GR_URL=https%3A%2F%2Famazon.co.uk%2FSelections-Christmas-Bauble-Decorations-Storage%2Fdp%2FB081JVL3HZ%2Fref%3Dasc_df_B081JVL3HZ%3Ftag%3Dftr-idealhome-gb-21%26ascsubtag%3Dhawk-custom-tracking-21","merchantName":"Amazon UK","merchantId":1027,"merchantNetwork":"Amazonuk","merchantUrl":"amazon.co.uk"}}}}}” data-link=”https://target.georiot.com/Proxy.ashx?tsid=107653&GR_URL=https%3A%2F%2Famazon.co.uk%2FSelections-Christmas-Bauble-Decorations-Storage%2Fdp%2FB081JVL3HZ%2Fref%3Dasc_df_B081JVL3HZ%3Ftag%3Dftr-idealhome-gb-21%26ascsubtag%3Dhawk-custom-tracking-21″ data-link-merchant=”Amazon UK” data-merchant-id=”1027″ data-merchant-name=”Amazon UK” data-merchant-network=”Amazonuk” data-merchant-url=”amazon.co.uk” data-model-brand=”Selections” data-model-name=”Selections Christmas Bauble Decorations Storage Box Bag With Adjustable Dividers 64 Compartments – Pack of 2″ data-name=”Product Block merchantlink widget” data-render-type=”fte” data-show-fallback=”button” data-widget-type=”merchantlink” class=”hawk-root”>
Now is also a good time to assess your storage solutions ahead of the festivities. It can make unpacking and repacking decorations way more simple and efficient.
‘Can we not just enjoy summer?’
Kezia Reynolds
I’ll start by saying that I completely agree that shopping out of season is a great opportunity to snap up sale bargains that are likely to go back up in price for Christmas. I’ve also been known for starting my Christmas present shopping in the summer months because it prevents last-minute panic buying and spreads the cost of Christmas over a few months – which I know my bank balance really appreciates.
Sign up to our newsletter for style inspiration, real homes, project and garden advice and shopping know-how
(Image credit: Future PLC / Colin Poole)
But can we stop wishing the summer away? I know it’s been a hot one, but every time I go on TikTok or Instagram, I’m bombarded with nostalgic videos yearning for Christmas and cosy season. I hate the cold, and I’m not one to wish my life away – please, can we stop?
In June, EastEnders had one of its core characters celebrate ‘half Christmas’ complete with a decorated tree and turkey dinner, and it made me feel quite unwell. I’m all for sourcing a bargain, but I’m starting to feel like I can’t escape Christmas in July, and do we really need another excuse to spend money?
If you’ve actually snapped up a festive bargain, fair play, but to me, Christmas in July is just another sales trick to make you part with your hard-earned cash.
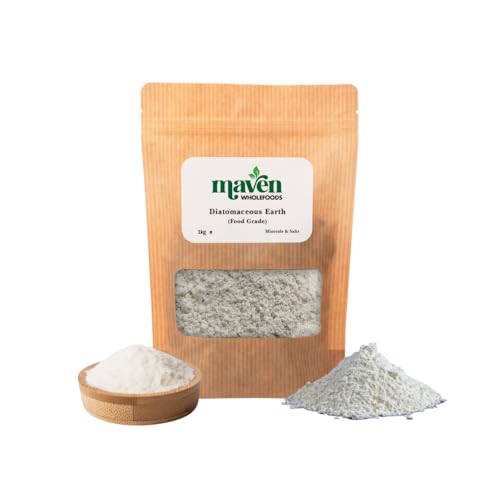
If ants have been plaguing your garden this summer, diatomaceous earth (£14.45, Amazon) is the all-natural solution I’m recommending to gardeners, and it works just as well as white vinegar.
If you’ve been looking to make the most of your garden this summer, it can be a little disheartening to see trails of ants making themselves at home on your patio. While there are many ways to get rid of ants, this pest control-approved method is completely natural and organic.
Diatomaceous earth is an effective pest control measure, but it’s really important to buy the correct type. Here’s everything you need to know and how to use it.
Latest Videos From
What is diatomaceous earth?
It may have a fancy scientific name, but diatomaceous earth is simply the microscopic remains of ancient aquatic sea life.
(Image credit: Future PLC/Lizzie Orme)
‘Diatomaceous earth is a naturally occurring powder made from the fossilised remains of tiny aquatic organisms called diatoms. It looks and feels like a fine white dust, but under a microscope, it is razor-sharp. It is one of the few natural pest control products that pest professionals genuinely rate, though most consumers buy the wrong type and wonder why it does not work,’ says Mosh Latifi, Co-Owner, EcoCare Pest Management.
‘This is the detail most guides leave out. There are two main grades: food-grade and filter-grade. Food-grade diatomaceous earth is what you want for pest control. Filter-grade, often sold for pool filtration, has been chemically treated and is far less effective as a deterrent and potentially harmful to inhale. Always buy food-grade and check the label before purchasing.’
Multi-Mite
2kg Bucket Feed Grade Diatomaceous Earth
Maven Wholefoods
Diatomaceous Earth Food Grade Powder 1kg
Diatom Retail
Diatompure® Human Food Grade 350g Diatomaceous Earth
Sign up to our newsletter for style inspiration, real homes, project and garden advice and shopping know-how
To use diatomaceous earth, you need to apply a thin layer to entry points, windowsills, doorways and basically anywhere you’ve spotted ants congregating. You’ll want to apply a fine layer, as ants will simply avoid walking over too thick a layer. Remember, diatomaceous earth stops working when wet, so you’ll need to reapply when it rains.
(Image credit: Getty Images)
‘The microscopic sharp edges of the particles pierce the waxy outer coating of an ant’s exoskeleton as it walks through the powder, causing it to dehydrate and die. It is a purely physical process rather than a chemical one, which means ants cannot build resistance to it the way they eventually do to some chemical products,’ adds Mosh.
‘The main limitation is that it kills individual ants rather than addressing the colony, so it works best as part of a broader approach rather than a standalone solution. For outdoor use or as a preventative barrier inside, it is genuinely worth using.’
If you want to reclaim your garden from ants this summer, diatomaceous earth is the all-natural solution that’s safe to use around pets and kids. It’s cheap and will get the job done.
<aside data-block-layout="horizontal" data-block-type="featured-product" data-hawk-json="{"product":{"variants":{"Default":{"image":{"copyright":"","height":2000,"id":"UEREX7ubi3tLNsS4pTdJrQ","mimeType":"image\/jpeg","mos":"https:\/\/cdn.mos.cms.futurecdn.net\/UEREX7ubi3tLNsS4pTdJrQ.jpg","role":"","width":2000,"credit":"Future PLC","alt":"Ideal Home logo on white background","caption":""},"strapline":"
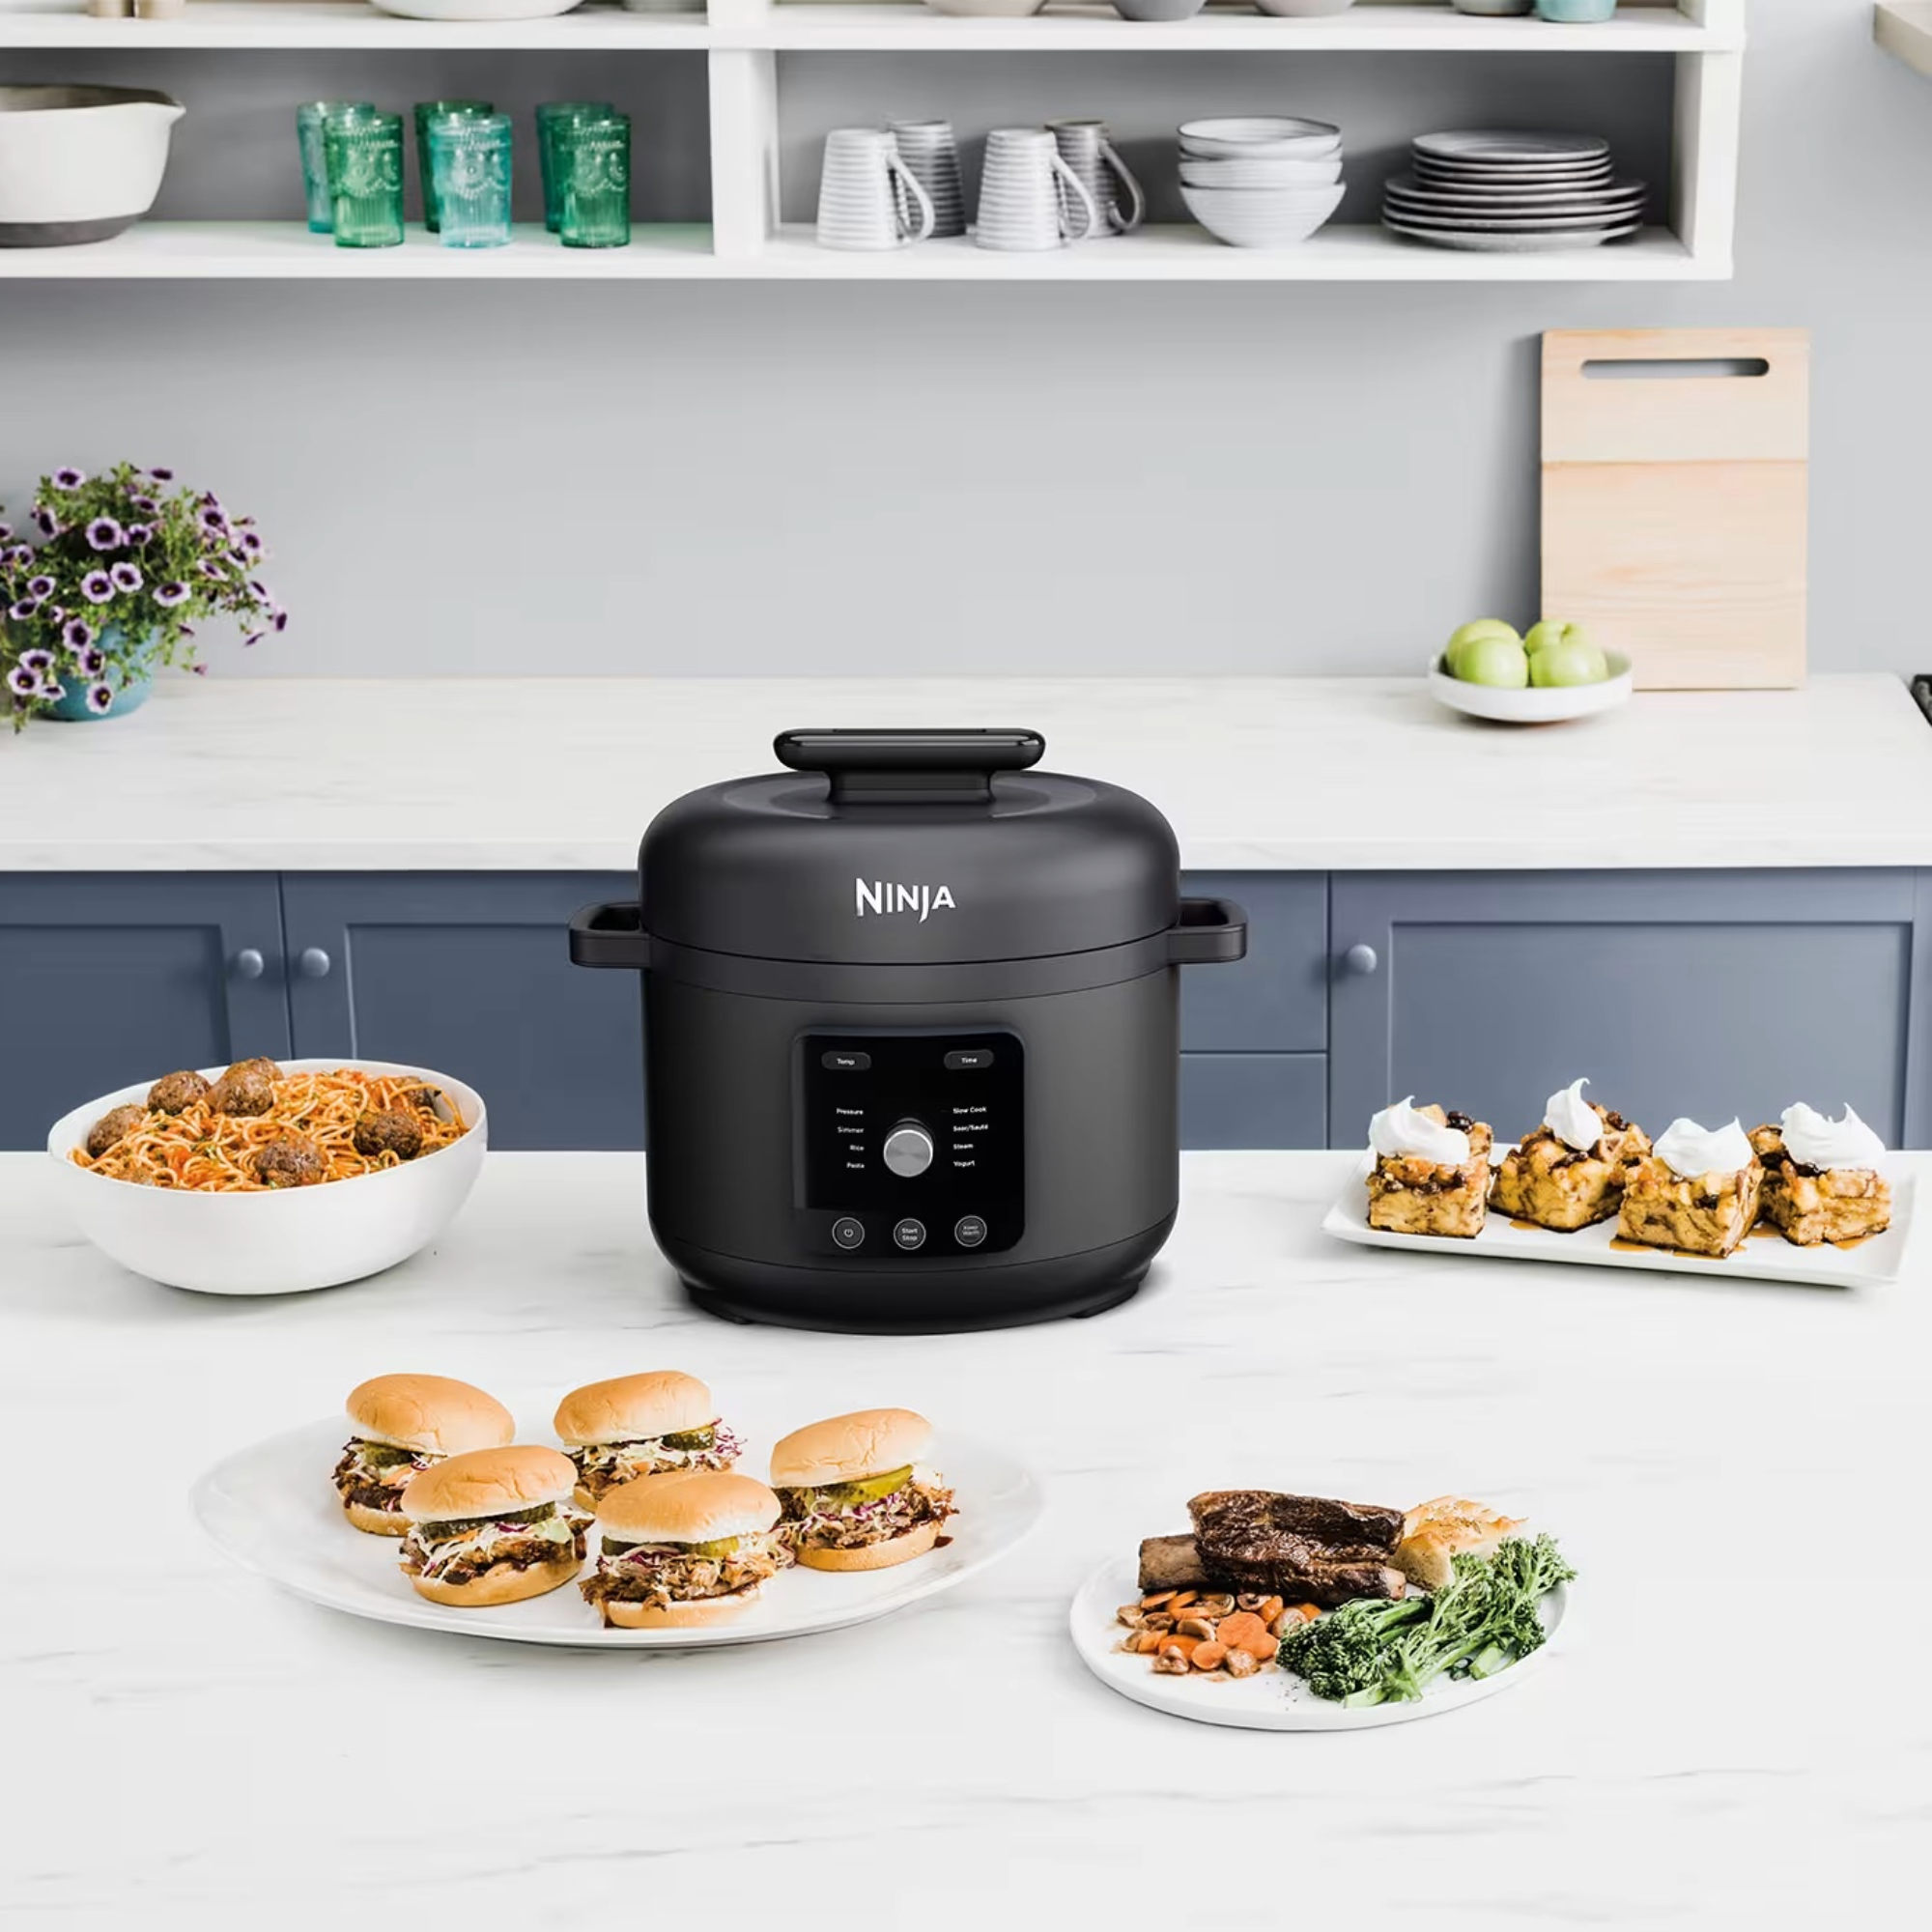
The setting I’m most excited about is rice cooking – which is something I absolutely loved when I tested what I think is the best multi-cooker on the market, the Ninja Foodi Possible. As well as that, the HyperHeat also has a pressure cooker setting, meaning that it can save you a huge amount of time on meal prep. Here’s what else it can do!
This 9-in-1 cooker is phenomenal value and looks much more pleasing on the eye than previous multi-cookers from the brand too. ","brand":"Ninja","name":"Hyperheat 6l 9-In-1 Pressure & Rice Cooker Pc201uk","urlStyle":"","retailer":"","layout":"standard","linkText":"","noFollow":false,"noAffiliateTracking":false,"promoLabel":"","price":149.99,"salePrice":null,"currency":"GBP","linkLayout":"text","sponsored":false,"hawkProductNameMatchedCode":"","review":{"cons":[],"id":"","name":"","pros":[],"rating":0,"strapline":"","url":""},"id":"","externalId":"f625329aa175110dd8463c19e8430db2ba7ab1e6","lastCheckedPriceDate":"","link":{"url":"https:\/\/www.awin1.com\/awclick.php?awinmid=8059&awinaffid=103504&clickref=hawk-custom-tracking&p=https%3A%2F%2Fwww.sharkninja.co.uk%2Fninja-hyperheat-6l-9-in-1-pressure-rice-cooker-pc201uk%2FPC201UK.html","merchantName":"SharkNinja UK","merchantId":13520,"merchantNetwork":"AW","merchantUrl":"sharkninja.co.uk"}}}}}” data-link=”https://www.awin1.com/awclick.php?awinmid=8059&awinaffid=103504&clickref=hawk-custom-tracking&p=https%3A%2F%2Fwww.sharkninja.co.uk%2Fninja-hyperheat-6l-9-in-1-pressure-rice-cooker-pc201uk%2FPC201UK.html” data-link-merchant=”SharkNinja UK” data-merchant-id=”13520″ data-merchant-name=”SharkNinja UK” data-merchant-network=”AW” data-merchant-url=”sharkninja.co.uk” data-model-brand=”Ninja” data-model-name=”Ninja Hyperheat 6l 9-In-1 Pressure & Rice Cooker Pc201uk” data-name=”Product Block merchantlink widget” data-render-type=”fte” data-show-fallback=”button” data-widget-type=”merchantlink” class=”hawk-root”>
This 9-in-1 cooker is phenomenal value and looks much more pleasing on the eye than previous multi-cookers from the brand too.
The HyperHeat is so called because it has the ability to lock in high temperatures and pressure in order to speed up your cooking process. Its pressure cooking mode is one of its big selling points, alongside the other functions, which are steam, slow cook, sear/sauté, rice, pasta, simmer, keep warm & yoghurt.
If you’ve never used a pressure cooker before then the big thing to know is that it can seriously save you time in the kitchen. Ninja claims that with the HyperHeat you can cook up to 70% faster than with hob cooking – though you do have to reserve time for the pot to pre-heat. It locks in steam and heat to supercharge the cooking process so that stews or rice will be cooked in record time in your home.
(Image credit: Ninja)
The capacity of this cooker is tailor-made for families, too. It has six litres of space, meaning you can batch cook with it or use it for family dinners. The sear and sauté functions allow you to use the inner pot as a stand-in hob, too – perfect if you need an all-in-one appliance if your kitchen is currently out of action. That’s exactly what our Senior Digital Editor, Jenny McFarlane did recently in her temporary kitchen whilst hers was being renovated.
I’m evangelical about the need for a rice cooker in every household – no matter the size – thanks to its ability to help you whip up quick meals with essentially no effort. The reviews from users so far on the HyperHeat, where it currently has a 4.6 star rating out of 5 from 29 people, are overwhelmingly impressed with the rice cooking functionality in particular.
Sign up to our newsletter for style inspiration, real homes, project and garden advice and shopping know-how
(Image credit: Ninja)
Another benefit of this new Ninja cooker is the included stainless steel reversible rack. Reviewers have been putting this to good use in order to cook across two levels in one pot. You can steam grains in the bottom while your protein is cooked to perfection on top.
Though it might seem counterintuitive in this heat given they have a reputation for being used to make soups and stews, a multi-cooker is actually a great appliance for the hot months. With it, there’s no sweating over your hob or lengthy prep times. Instead, you can throw everything into a cooker like this and quickly return to your finished meal, especially if you’re using the pressure cooking setting on this appliance.
Whether you’re already a multi-cooker convert or not, the HyperHeat certainly looks like an impressive new entry into the category for Ninja. Could you see yourself using this in your kitchen?
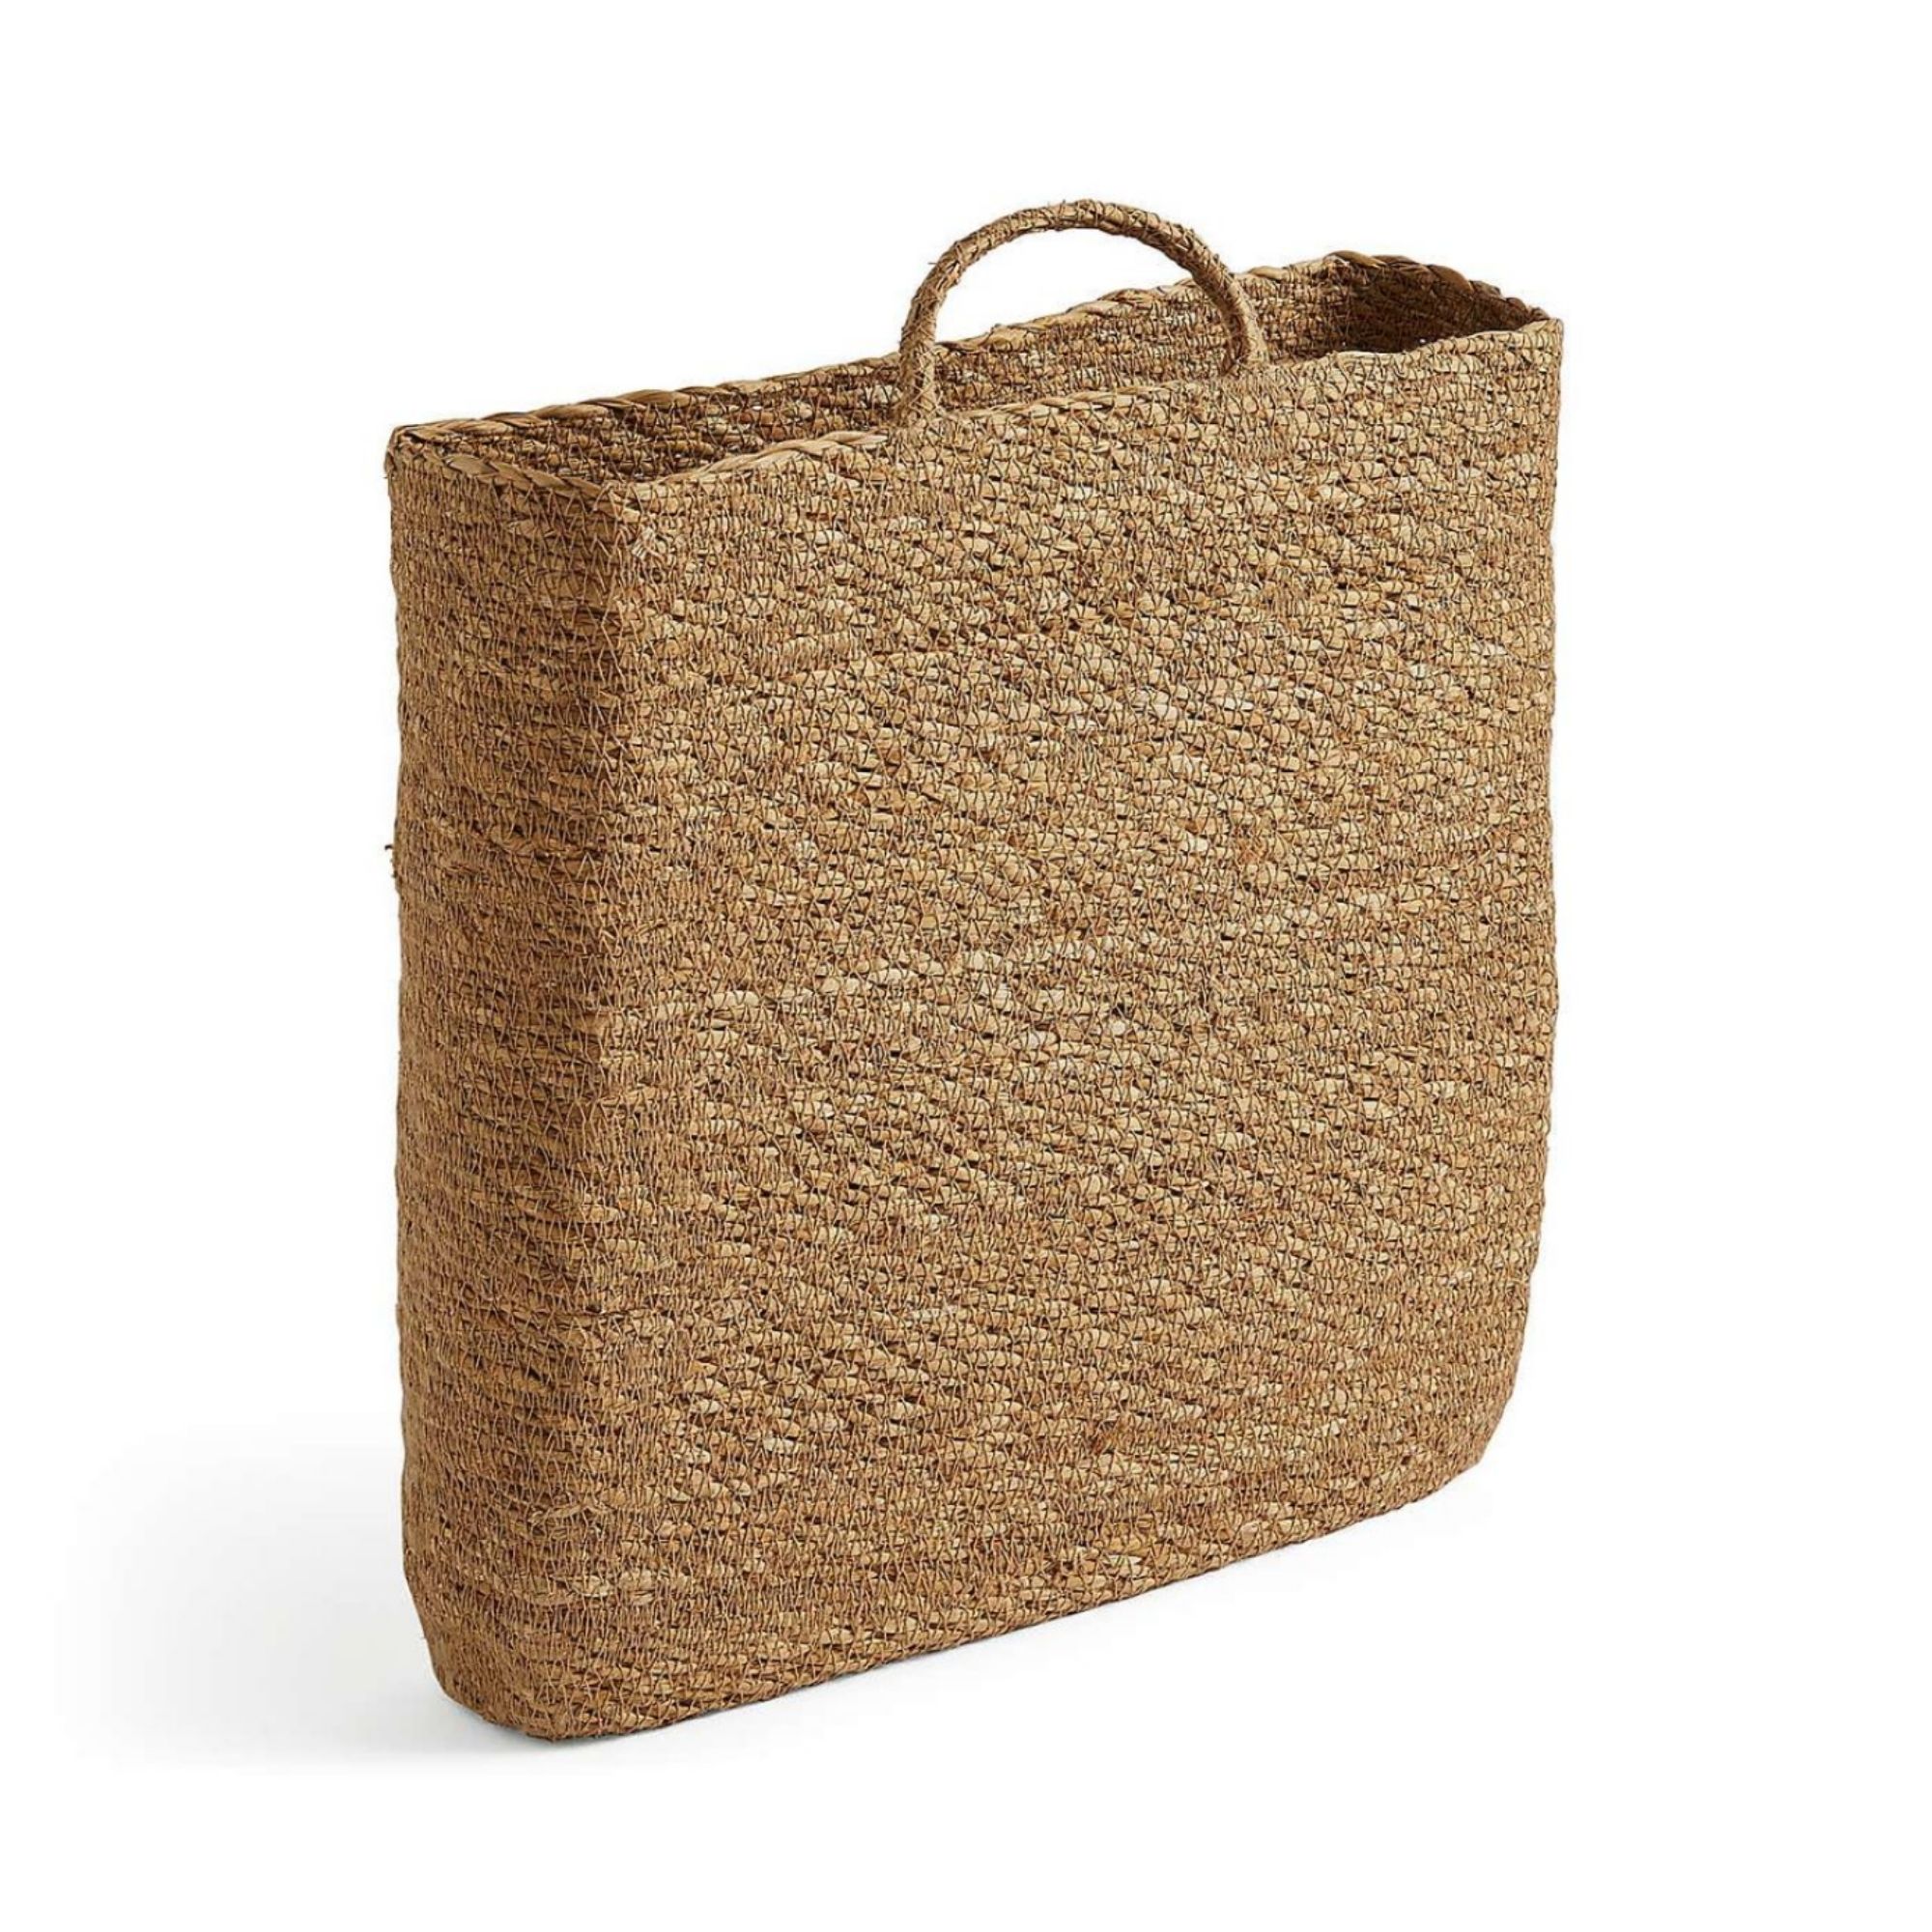
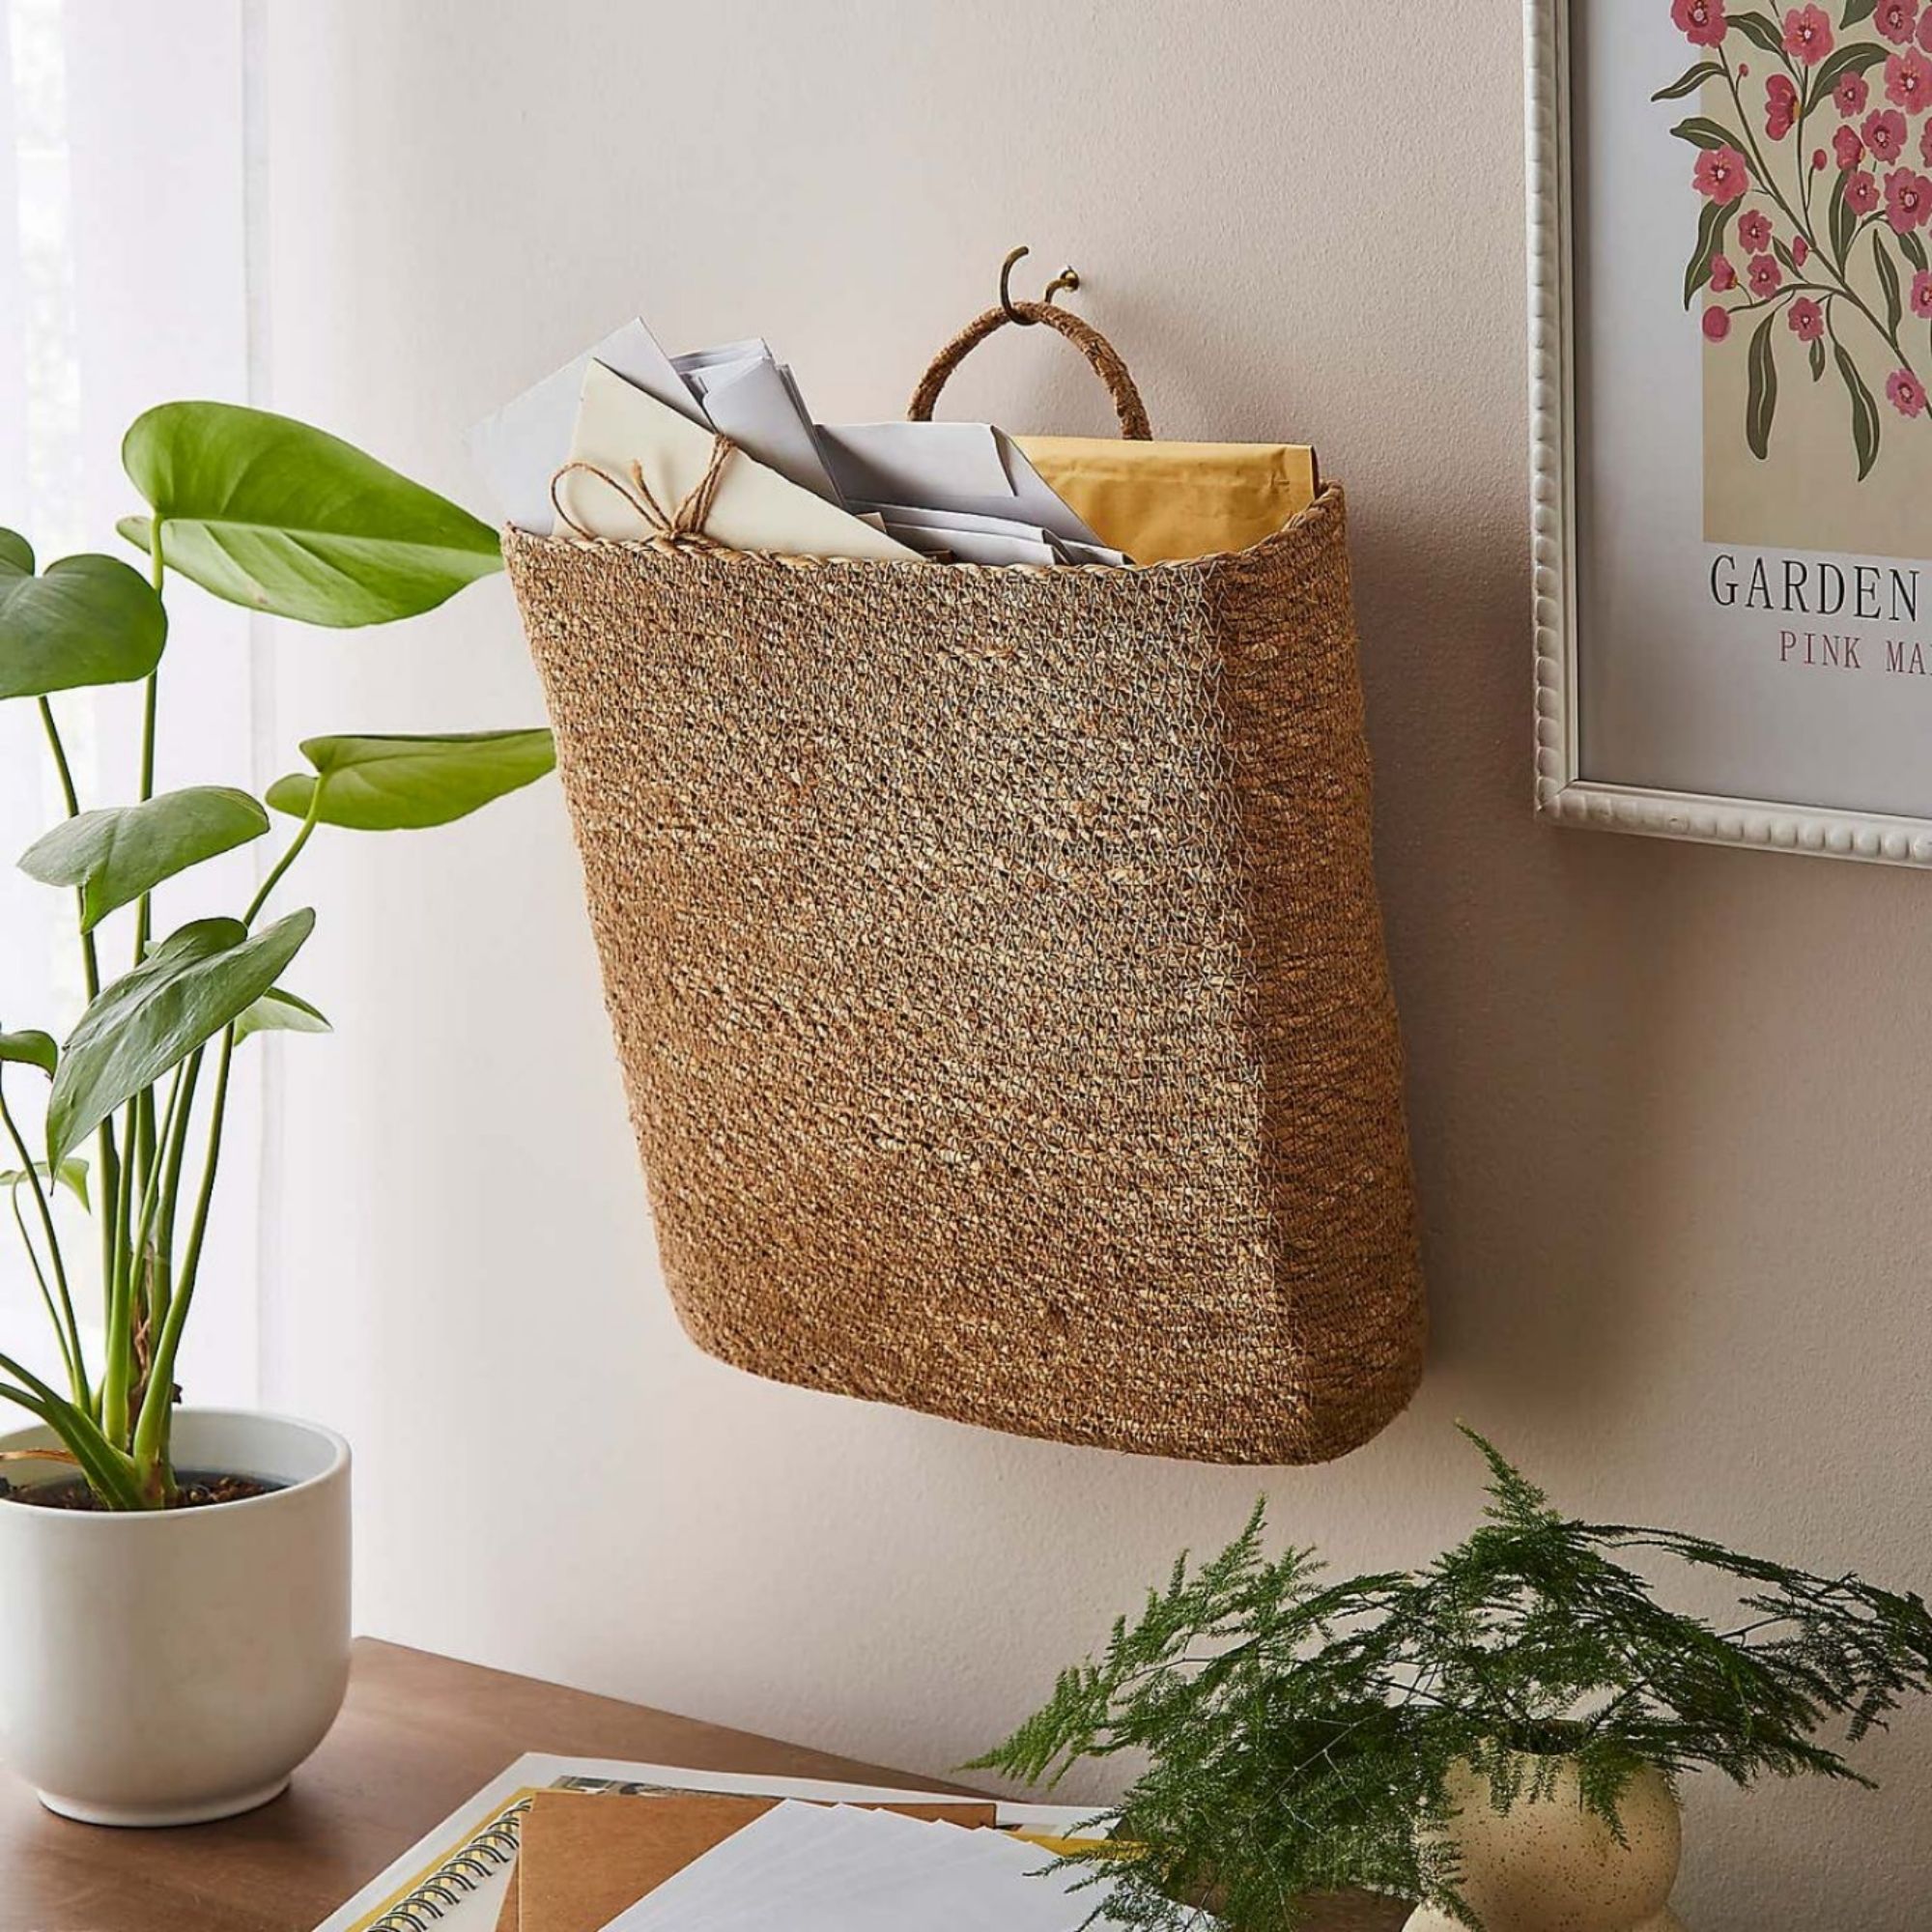
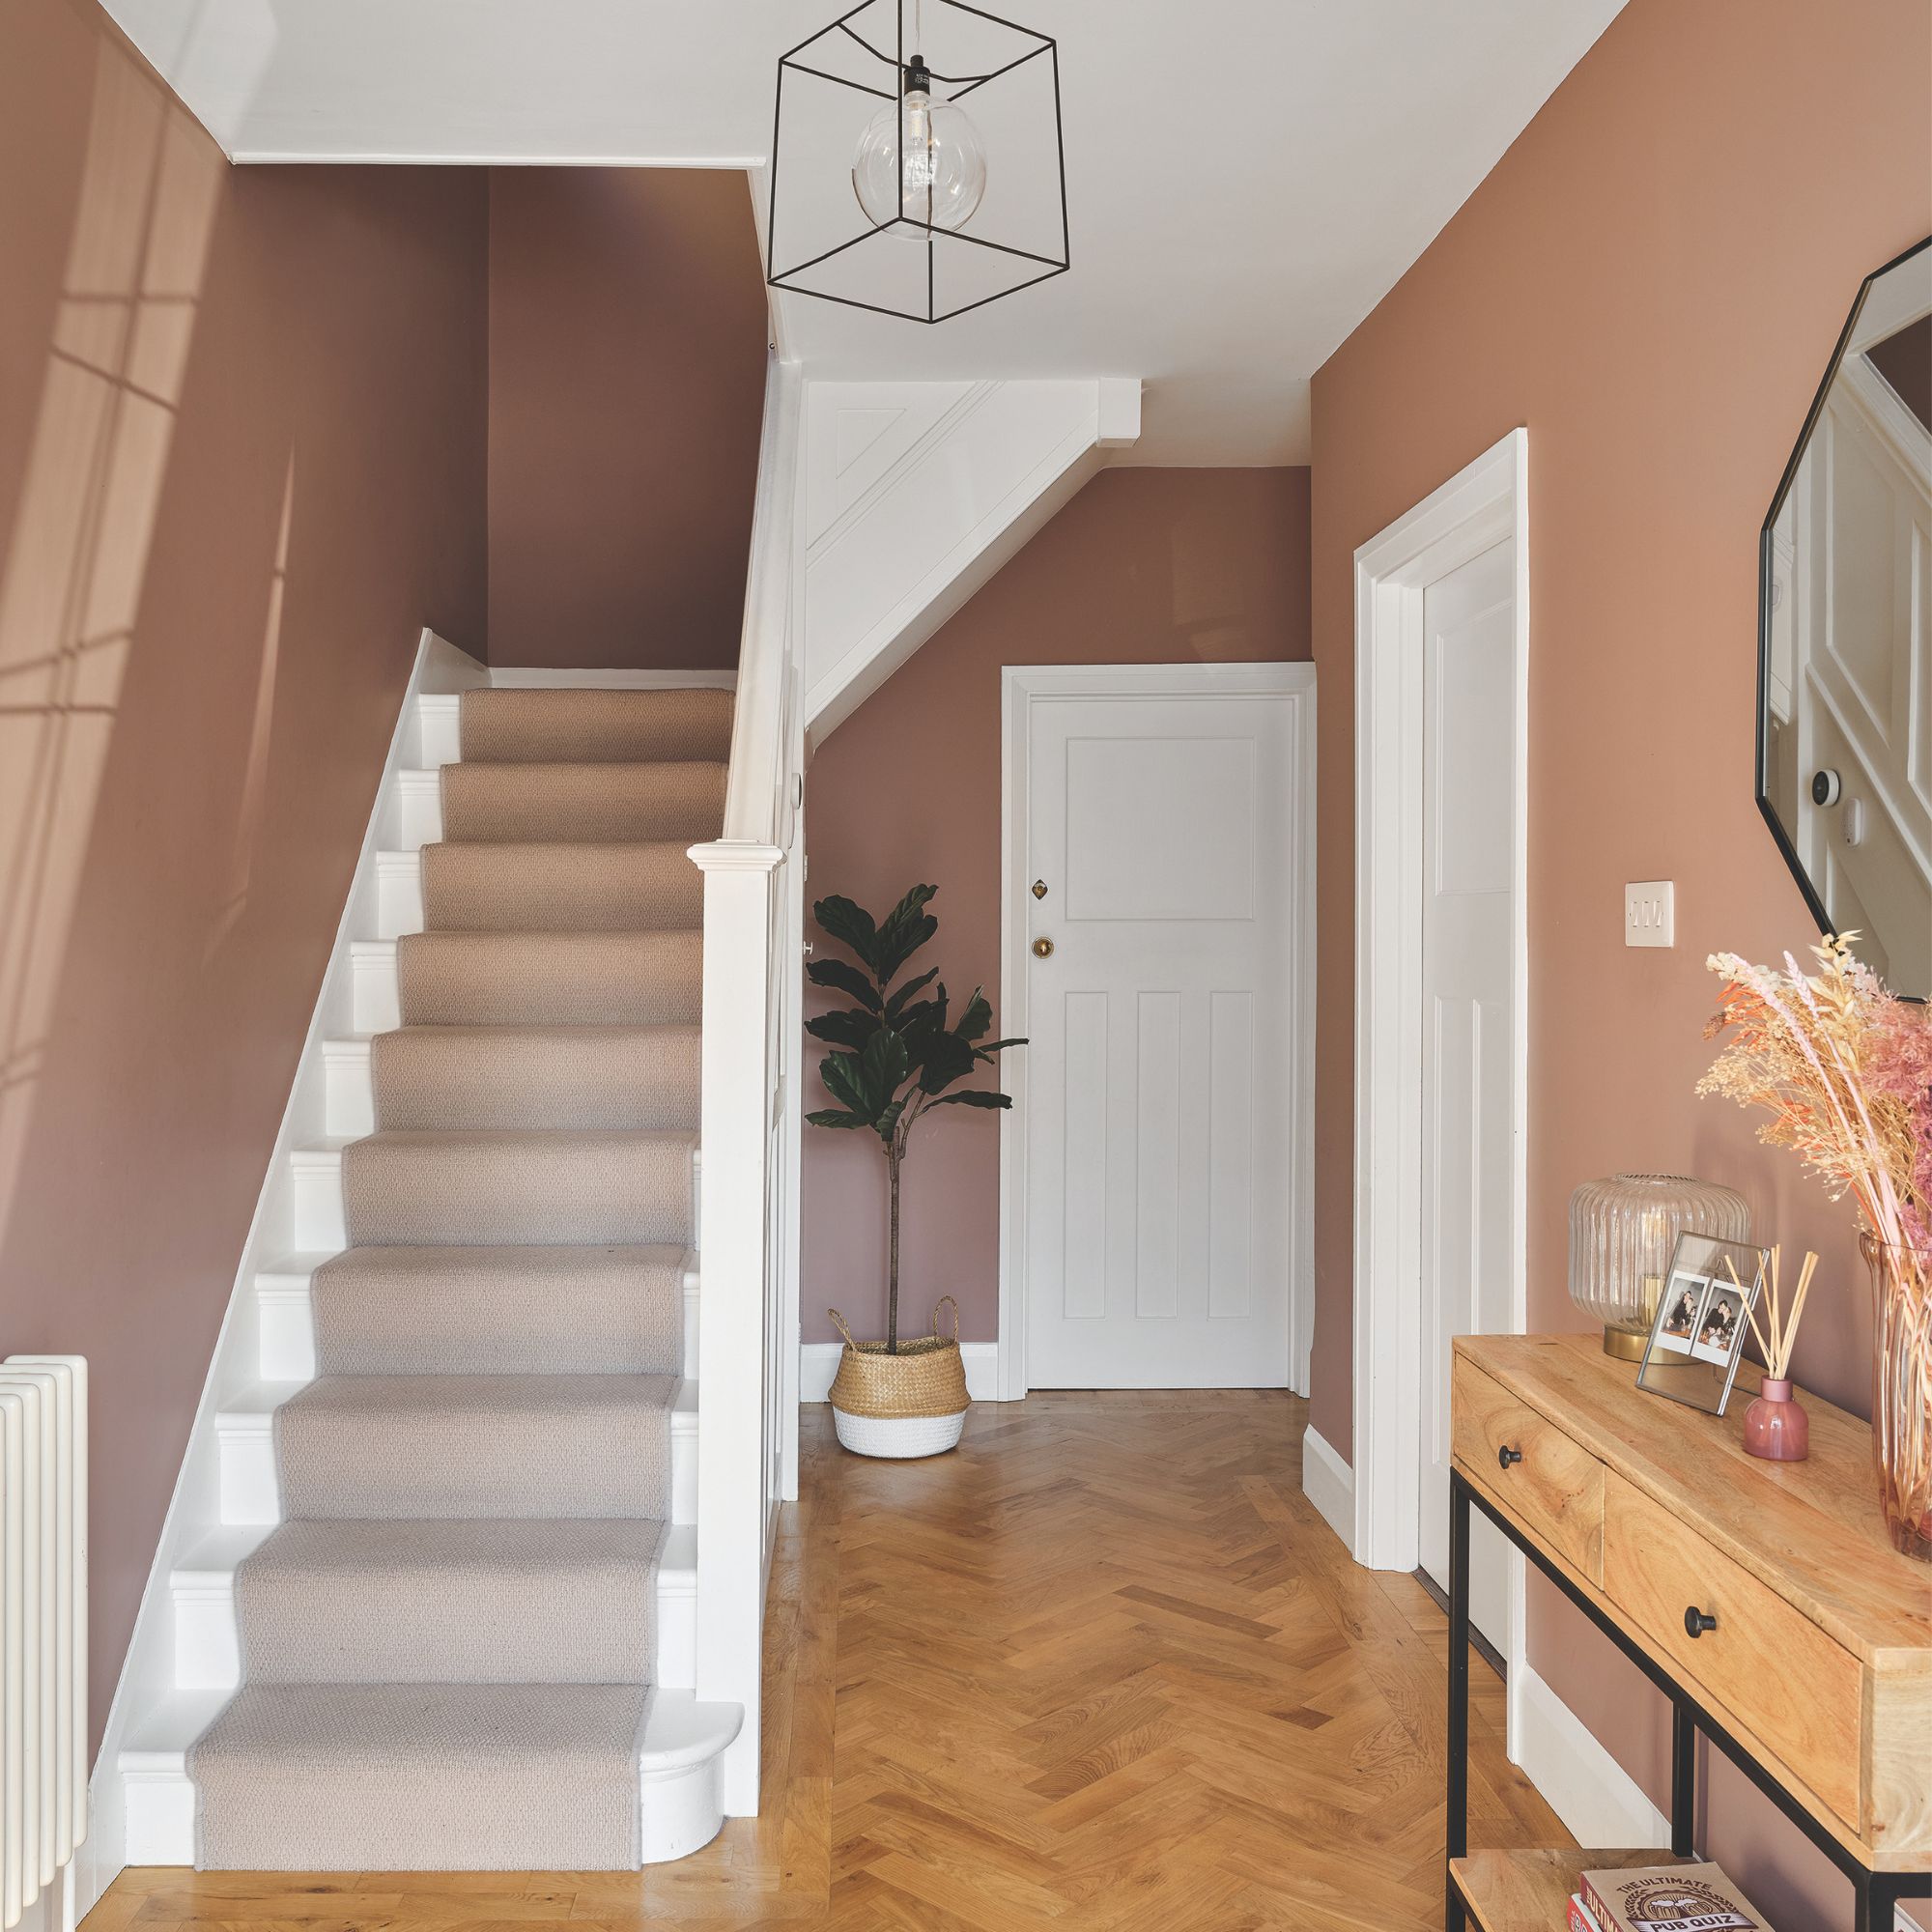
Although it’s often the smallest area in our homes, we expect our hallway to hold everything from shoes and coats to bags and dog leads. And that’s before I mention the important letters and parcels we receive – or the ones we want to send out. That’s why I was incredibly intrigued when I spotted this clever Seagrass Letter Holder Basket (£8 at Dunelm).
Yes, while I do everything I can to be like the people with consistently tidy hallways, I find that paperwork and parcels create clutter that I can’t seem to shift – especially when they’re important letters that require my attention before they can be thrown away or popped in the post box.
The Seagrass Letter Holder Basket offers an alternative, though. By hanging this on your hallway wall, you can prevent letters from cluttering your console table (or even your floor) while still keeping them within easy reach so you don’t lose them. And it’s the clutter-busting addition my hallway has been crying out for!
Latest Videos From
Dunelm
Seagrass Letter Holder Basket
<aside data-block-layout="horizontal" data-block-type="featured-product" data-editorial-currency="GBP" data-editorial-price="8" data-hawk-json="{"product":{"variants":{"Default":{"image":{"copyright":"","height":2000,"id":"gEcgqYUiUQx6joWDT5Nd4S","mimeType":"image\/jpeg","mos":"https:\/\/cdn.mos.cms.futurecdn.net\/gEcgqYUiUQx6joWDT5Nd4S.jpg","role":"","width":2000,"credit":"Dunelm","alt":"Dunelm Seagrass Letter Holder Basket with a handle, on a white background","caption":""},"strapline":"
Practical, pretty, and extremely affordable, this letter holder is ideal for any hallway. ","brand":"Dunelm ","name":"Seagrass Letter Holder Basket","urlStyle":"","retailer":"","layout":"horizontal","linkText":"","noFollow":true,"noAffiliateTracking":false,"promoLabel":"","price":8,"salePrice":null,"currency":"GBP","linkLayout":"text","sponsored":false,"hawkProductNameMatchedCode":"","review":{"cons":[],"id":"","name":"","pros":[],"rating":0,"strapline":"","url":""},"id":"","externalId":"9051cb29ffc8f54d71efd66919faa43514428814","lastCheckedPriceDate":"","link":{"url":"https:\/\/www.prf.hn\/click\/camref:1011l5dAX6\/pubref:hawk-custom-tracking\/destination:https%3A%2F%2Fwww.dunelm.com%2Fproduct%2Fseagrass-letter-holder-basket-1000287093","merchantName":"Dunelm","merchantId":579677,"merchantNetwork":"PHG","merchantUrl":"dunelm.com"}}}}}” data-link=”https://www.prf.hn/click/camref:1011l5dAX6/pubref:hawk-custom-tracking/destination:https%3A%2F%2Fwww.dunelm.com%2Fproduct%2Fseagrass-letter-holder-basket-1000287093″ data-link-merchant=”Dunelm” data-merchant-id=”579677″ data-merchant-name=”Dunelm” data-merchant-network=”PHG” data-merchant-url=”dunelm.com” data-model-brand=”Dunelm ” data-model-name=”Dunelm Seagrass Letter Holder Basket” data-name=”Horizontal Product Block merchantlink widget” data-render-type=”fte” data-show-fallback=”button” data-widget-type=”merchantlink” class=”hawk-root”>
Practical, pretty, and extremely affordable, this letter holder is ideal for any hallway.
Many of the hallway storage solutions out there aren’t equipped to deal with the onslaught of paperwork and parcels we receive on a daily basis. Instead, they focus on larger hallway items like shoes, bags and coats.
Even the best pretty-but-practical storage baskets are typically too large to safely store loose paperwork in small hallways without them crumpling, ripping, or getting lost at the bottom. Plus, they’re typically shoved in a corner to be forgotten about, taking up much-needed floor space.
But Dunelm’s Seagrass Letter Holder Basket allows you to keep these important documents front-and-centre, while adding some natural warmth and intrigue to your hallway walls. All you have to do is hang it from your walls using a hook like these KINGLAKE 115 Pcs Screw in Hooks (£7.99 at Amazon).
(Image credit: Dunelm)
If you’re a renter or just don’t want to make any permanent holes in your wall, you could also avoid drilling by using these Command Wire Toggle Hooks (£16 at Amazon). Either way, the sturdy rope handle will keep the basket slightly open, so you can easily grab what you need without having to take it down every time.
Sign up to our newsletter for style inspiration, real homes, project and garden advice and shopping know-how
It also takes advantage of vertical space, which is a must when you want to create order in small homes with limited storage, as it keeps everything off the ground and makes a small space – like a hallway – look even bigger and tidier.
(Image credit: Future PLC/Chris Snook)
However, I think the beauty of this letter holder is that it doesn’t just have to store letters. In fact, I’m going to snap a second one up to hold all of my ugly dog walking accessories that I don’t want on show. This way, my dog’s leads and treat pouch will be readily available by the front door, without cluttering up the space.
The textured seagrass weave is also incredibly versatile, suiting any hallway style, whether you’ve opted for a natural boho look, a cottage-style vibe, or a more modern look. And for £8, can you really go wrong?! I don’t think so.
If you want to add a pop of colour to your hallway, this rack has space for smaller letters and hanging hooks for your keys to keep everything in one place. ","brand":"Dunelm","name":"Remi Letter Rack & Key Hooks","urlStyle":"","retailer":"","layout":"hero","linkText":"","noFollow":true,"noAffiliateTracking":false,"promoLabel":"","price":8,"salePrice":null,"currency":"GBP","linkLayout":"text","sponsored":false,"hawkProductNameMatchedCode":"","review":{"cons":[],"id":"","name":"","pros":[],"rating":0,"strapline":"","url":""},"id":"","externalId":"784a90edf5f66e989a9570a0a35b1477afea1327","lastCheckedPriceDate":"","link":{"url":"https:\/\/www.prf.hn\/click\/camref:1011l5dAX6\/pubref:hawk-custom-tracking\/destination:https%3A%2F%2Fwww.dunelm.com%2Fproduct%2Fremi-letter-rack-key-hooks-1000240114","merchantName":"Dunelm","merchantId":579677,"merchantNetwork":"PHG","merchantUrl":"dunelm.com"}}}}}” data-link=”https://www.prf.hn/click/camref:1011l5dAX6/pubref:hawk-custom-tracking/destination:https%3A%2F%2Fwww.dunelm.com%2Fproduct%2Fremi-letter-rack-key-hooks-1000240114″ data-link-merchant=”Dunelm” data-merchant-id=”579677″ data-merchant-name=”Dunelm” data-merchant-network=”PHG” data-merchant-url=”dunelm.com” data-model-brand=”Dunelm” data-model-name=”Dunelm Remi Letter Rack & Key Hooks” data-name=”Product Block merchantlink widget” data-render-type=”fte” data-show-fallback=”button” data-widget-type=”merchantlink” class=”hawk-root”>
If you want to add a pop of colour to your hallway, this rack has space for smaller letters and hanging hooks for your keys to keep everything in one place.
Amazon
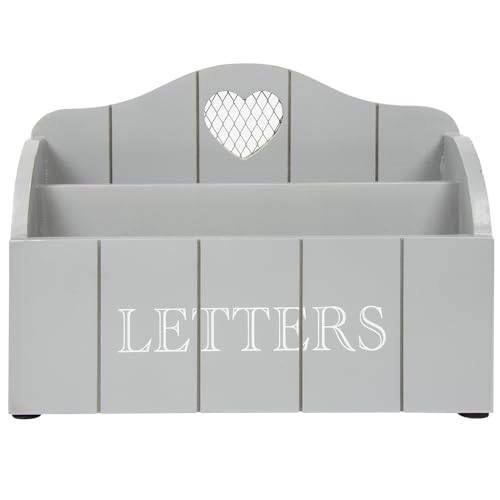
Grey Letter Rack
<aside data-block-layout="hero" data-block-type="featured-product" data-editorial-currency="GBP" data-editorial-price="13.95" data-hawk-json="{"product":{"variants":{"Default":{"image":{"copyright":"","height":500,"id":"v7Hkoz9CJ2pnpp9duidmfY","mimeType":"image\/jpeg","mos":"https:\/\/cdn.mos.cms.futurecdn.net\/v7Hkoz9CJ2pnpp9duidmfY.jpg","role":"","width":500,"credit":"THORNE ANTIQUES AND COLLECTABLES","alt":"Grey Letter Rack With Contrasting White Letters Wording and Cutout Heart Detail, Twin Compartment Decorative Mail Organiser (grey)","caption":""},"strapline":"
If you want a more traditional storage option for your letters, this letter rack is both cute and practical. ","brand":"Amazon","name":"Grey Letter Rack ","urlStyle":"","retailer":"","layout":"hero","linkText":"","noFollow":true,"noAffiliateTracking":false,"promoLabel":"","price":13.95,"salePrice":null,"currency":"GBP","linkLayout":"text","sponsored":false,"hawkProductNameMatchedCode":"","review":{"cons":[],"id":"","name":"","pros":[],"rating":0,"strapline":"","url":""},"id":"","externalId":"8a03db6da10dba5ff61bf82bace4fa608ab93c6d","lastCheckedPriceDate":"","link":{"url":"https:\/\/target.georiot.com\/Proxy.ashx?tsid=107653&GR_URL=https%3A%2F%2Famazon.co.uk%2FContrasting-Letters-Compartment-Decorative-Organiser%2Fdp%2FB0CH16CG5F%2F%3Fth%3D1%26tag%3Dftr-idealhome-gb-21%26ascsubtag%3Dhawk-custom-tracking-21","merchantName":"Amazon UK","merchantId":1027,"merchantNetwork":"Amazonuk","merchantUrl":"amazon.co.uk"}}}}}” data-link=”https://target.georiot.com/Proxy.ashx?tsid=107653&GR_URL=https%3A%2F%2Famazon.co.uk%2FContrasting-Letters-Compartment-Decorative-Organiser%2Fdp%2FB0CH16CG5F%2F%3Fth%3D1%26tag%3Dftr-idealhome-gb-21%26ascsubtag%3Dhawk-custom-tracking-21″ data-link-merchant=”Amazon UK” data-merchant-id=”1027″ data-merchant-name=”Amazon UK” data-merchant-network=”Amazonuk” data-merchant-url=”amazon.co.uk” data-model-brand=”Amazon” data-model-name=”Amazon Grey Letter Rack” data-name=”Product Block merchantlink widget” data-render-type=”fte” data-show-fallback=”button” data-widget-type=”merchantlink” class=”hawk-root”>
If you want a more traditional storage option for your letters, this letter rack is both cute and practical.
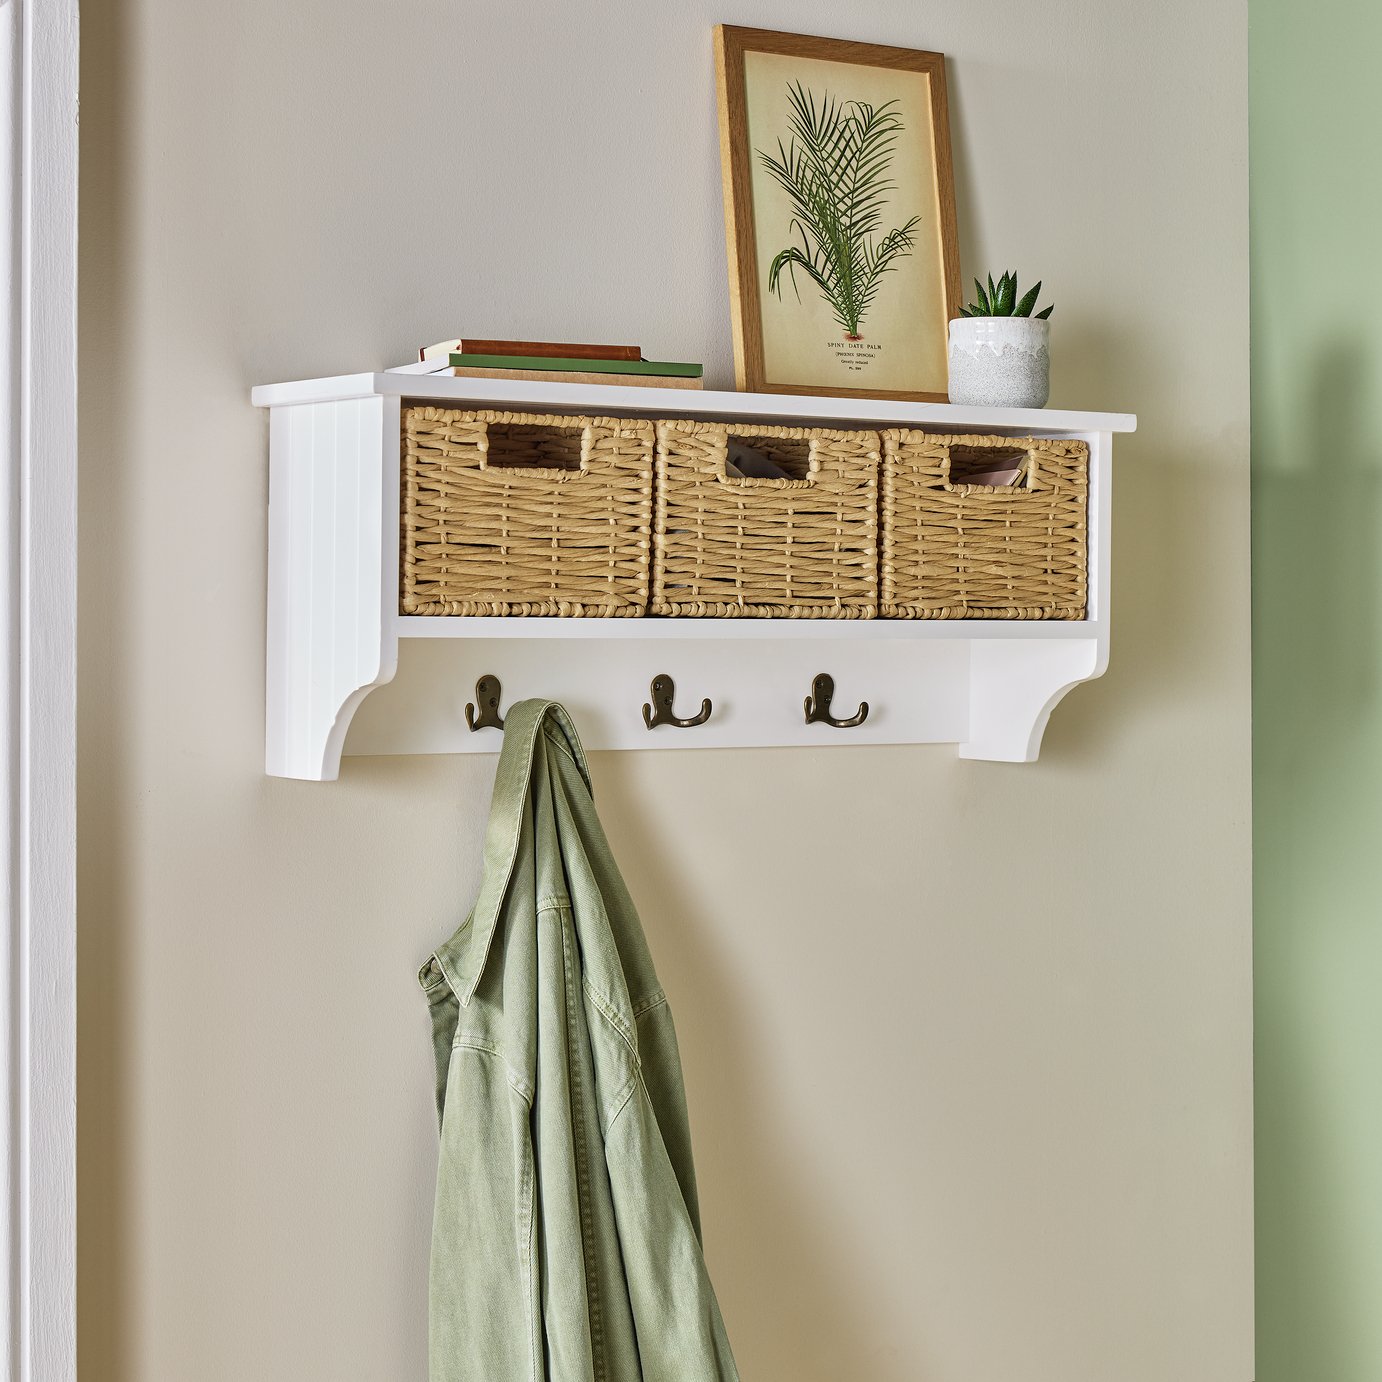
Argos Home
Hallway Wall Shelf & Coat Rack With Storage Boxes
<aside data-block-layout="hero" data-block-type="featured-product" data-editorial-currency="GBP" data-editorial-price="52" data-hawk-json="{"product":{"variants":{"Default":{"image":{"copyright":"","height":1382,"id":"6VoUBe8oYerMDw4PbtPkoP","mimeType":"image\/jpeg","mos":"https:\/\/cdn.mos.cms.futurecdn.net\/6VoUBe8oYerMDw4PbtPkoP.jpg","role":"","width":1382,"credit":"Argos Home","alt":"Argos Home Hallway Wall Shelf & Coat Rack With Storage Boxes","caption":""},"strapline":"
Need more hallway storage for larger items, too? This rack has space for letters and small items in the boxes and on the shelf, as well as coats and bags on the hooks. ","brand":"Argos Home","name":"Hallway Wall Shelf & Coat Rack With Storage Boxes","urlStyle":"","retailer":"","layout":"hero","linkText":"","noFollow":true,"noAffiliateTracking":false,"promoLabel":"","price":52,"salePrice":null,"currency":"GBP","linkLayout":"text","sponsored":false,"hawkProductNameMatchedCode":"","review":{"cons":[],"id":"","name":"","pros":[],"rating":0,"strapline":"","url":""},"id":"","externalId":"c8edff7963e692a043343b8d31943f87c816ea2b","lastCheckedPriceDate":"","link":{"url":"https:\/\/www.anrdoezrs.net\/click-100624752-15618761?sid=hawk-custom-tracking&url=https:\/\/www.argos.co.uk\/product\/7816943","merchantName":"Argos","merchantId":535,"merchantNetwork":"CJ","merchantUrl":"argos.co.uk"}}}}}” data-link=”https://www.anrdoezrs.net/click-100624752-15618761?sid=hawk-custom-tracking&url=https://www.argos.co.uk/product/7816943″ data-link-merchant=”Argos” data-merchant-id=”535″ data-merchant-name=”Argos” data-merchant-network=”CJ” data-merchant-url=”argos.co.uk” data-model-brand=”Argos Home” data-model-name=”Argos Home Hallway Wall Shelf & Coat Rack With Storage Boxes” data-name=”Product Block merchantlink widget” data-render-type=”fte” data-show-fallback=”button” data-widget-type=”merchantlink” class=”hawk-root”>
Need more hallway storage for larger items, too? This rack has space for letters and small items in the boxes and on the shelf, as well as coats and bags on the hooks.
A tidy, clutter-free hallway doesn’t have to be expensive!