How to Whitewash a Brick Fireplace

How to Whitewash a Brick Fireplace

Whitewashing a brick fireplace can brighten and add character to a dated room.

The sheerness of the whitewash paint lets some of the original brick colors show through and gives the fireplace a unique look that many people love.

Whitewashing is basically diluting white latex paint with water and lightly coating the surface of a wall or fireplace. It’s an easy project and can be done in just a weekend.


Materials Needed


It’s important to start with a clean brick surface, or else soot stains will show through the whitewash.

Clean The Bricks

Before you begin, you need to clean the bricks. Mix a little TSP, or Trisodium Phosphate, with water and use it on a scrub brush to clean the brick surface and mortar joints between.

This is important to remove soot stains and create a clean surface so the whitewash will adhere well.


Diluting the white paint will allow the brick’s color to show through the whitewash.

Create Your Whitewash Mix

When the bricks are completely dry, mix up your whitewash. We’re using ordinary flat white latex paint mixed with water at a one-to-one ratio.

Dampening the bricks with water on a paintbrush before you begin will help them absorb the stain more evenly.


The key technique when whitewashing a fireplace is to be “consistently inconsistent.”

Apply Whitewash

Begin applying the whitewash lightly until you get a feel for the bricks’ texture. In this case, they have a rough surface, so dragging the brush over them lightly leaves lots of nooks and crannies with the natural brick color.

If you apply too heavily in one area, some can be dabbed off with a rag. When it’s complete, the surface should vary from light to dark, creating interest in what was a bland brick wall.

Watch the video above for more information!


Cost

Transform your fireplace for less than $40! Here’s the breakdown of costs:


Further Reading

How to Install a Butcher Block Countertop

How to Install a Butcher Block Countertop

If you need a countertop that can stand up to heavy use, a butcher block countertop is just the surface for you.

These wooden surfaces can withstand heavy daily use and food preparation. They’re the perfect surface for your kitchen or laundry room. 

Butcher block countertops come in a variety of sizes and designs, so you can find the perfect fit for your space. Here’s how to install one.


Materials Needed


This page contains affiliate links. If you purchase a product from these links, we will earn a small commission at no additional cost to you.


Cut the wood to fit your space.

Trim the Butcher Block to Fit Your Space

This butcher block countertop is six feet long and twenty-five inches wide. It needs to be cut down for a five-foot cabinet that is twenty-two inches deep. Start by trimming two and a half inches off along the length of the piece. Use a table saw to make this cut so it is perfectly consistent from end to end. The two-and-a-half-inch piece will serve as a backsplash. 

Next, mark the panel at the five-foot mark with a framing square before making the cross-grain cut with a circular saw. Cut the narrow backsplash piece to five feet on the miter saw. 


Extra sanding will help smooth out the surface perfectly.

Sand the Wood

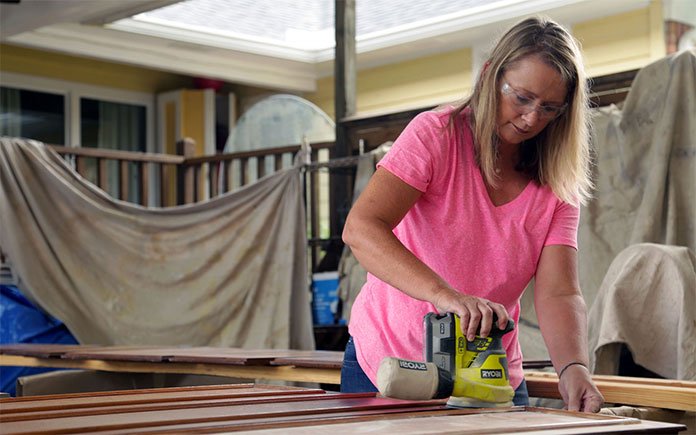
The butcher block is pretty smooth right out of the package, but before it’s installed and finished, sand it once more with a fine-grit sandpaper. 


Adhesive on cabinet
Using construction adhesive will eliminate the need for nailing.

Apply Adhesive

Applying a heavy-duty construction adhesive allows you to simply set the countertop in place without the need for any fasteners to secure it. While the adhesive is still wet, double-check the overhang margins before we glue the backsplash in place. 


Sealing your countertop will make the wood grain pattern pop!

Seal the Butcher Block

Use a tung oil-based wood sealer and finish that penetrates the wood to seal and protect it from moisture. Applying it with a stain pad allows you to rub the formula into the grain of the wood. After two or three coats of this, the countertop is complete.

Watch the video above for more information!


Cost

This project is on the pricier side, but it’s far less expensive than hiring a professional.

Here’s what you can expect to pay for this project:


Further Reading

Install a Butcher Block Countertop

Install a Butcher Block Countertop

If you need a countertop that can stand up to heavy use, a butcher block countertop is just the surface for you.

These wooden surfaces can withstand heavy daily use and food preparation. They’re the perfect surface for your kitchen or laundry room. 

Butcher block countertops come in a variety of sizes and designs, so you can find the perfect fit for your space. Here’s how to install one.


Materials Needed


This page contains affiliate links. If you purchase a product from these links, we will earn a small commission at no additional cost to you.


Cut the wood to fit your space.

Trim the Butcher Block to Fit Your Space

This butcher block countertop is six feet long and twenty-five inches wide. It needs to be cut down for a five-foot cabinet that is twenty-two inches deep. Start by trimming two and a half inches off along the length of the piece. Use a table saw to make this cut so it is perfectly consistent from end to end. The two-and-a-half-inch piece will serve as a backsplash. 

Next, mark the panel at the five-foot mark with a framing square before making the cross-grain cut with a circular saw. Cut the narrow backsplash piece to five feet on the miter saw. 


Extra sanding will help smooth out the surface perfectly.

Sand the Wood

The butcher block is pretty smooth right out of the package, but before it’s installed and finished, sand it once more with a fine-grit sandpaper. 


Adhesive on cabinet
Using construction adhesive will eliminate the need for nailing.

Apply Adhesive

Applying a heavy-duty construction adhesive allows you to simply set the countertop in place without the need for any fasteners to secure it. While the adhesive is still wet, double-check the overhang margins before we glue the backsplash in place. 


Sealing your countertop will make the wood grain pattern pop!

Seal the Butcher Block

Use a tung oil-based wood sealer and finish that penetrates the wood to seal and protect it from moisture. Applying it with a stain pad allows you to rub the formula into the grain of the wood. After two or three coats of this, the countertop is complete.

Watch the video above for more information!


Cost

This project is on the pricier side, but it’s far less expensive than hiring a professional.

Here’s what you can expect to pay for this project:


Further Reading

How to Make Rustic Light Balls with Chicken Wire

How to Make Rustic Light Balls with Chicken Wire

Want to give your backyard a modern farmhouse vibe? Make these chicken-wire light balls!

Hanging these handmade orbs around your yard will add rustic ambiance and create the perfect environment for a backyard party.

They’re simple to make and add character to any outdoor space!


Materials Needed

Wire cutters
Use heavy-duty snips to cut through chicken wire.

1. Cut and Roll the Chicken Wire

Cut a section of chicken wire about three times wider than the diameter you want for the finished light ball. Use snips tough enough to cut through metal.

Then roll the chicken wire into a cylinder and tie it together with the wire. 


chicken wire
Shape the chicken wire as desired for your light ball.

2. Sculpt Your Wire Light Ball

Fold the cylinder’s ends into the middle and begin sculpting the orb shape. Be sure to secure the folds by bending over the wire’s raw ends. 


Chelsea orb light
Wrap string lights around the chicken wire light ball.

3. Add the Lights

Fish one end of string lights through holes in the chicken wire and begin wrapping the string around the orb until you reach the other end. 

Then, repeat the process of fishing the plug to secure the string lights. 

Now the light ball is ready to hang — by itself or with others.

Watch the video above for more information!


Chicken wire orb light
Chicken wire light balls can be hung in groups around your yard.

This page contains affiliate links. If you purchase a product from these links, we will earn a small commission at no additional cost to you.


Cost

We purchased enough materials to create multiple sets of light balls.

Here’s what you can expect to pay for this project:


Further Reading

Previous articleThis Stepladder is Safe, Secure and Has Space for Tools

Backed by his 40-year remodeling career, Danny served as the home improvement expert for CBS’s The Early Show and The Weather Channel for more than a decade. His extensive hands-on experience and understanding of the industry make him the go-to source for all things having to do with the home – from advice on simple repairs, to complete remodels, to helping homeowners prepare their homes for extreme weather and seasons.

Upgrade an Old Concrete Porch with a Painted Pattern

Upgrade an Old Concrete Porch with a Painted Pattern

If you want to give your concrete porch some extra flair, paint a pattern on it! Using a stencil makes this a do-it-yourself friendly project.

You don’t need special skills or tools to tackle this project, but do you need patience and time, because attention to detail is a must!


Materials Needed

  • Stencil kit
  • Paint
  • Paint roller
  • Tape

1. Pick a Pattern

Before you begin, find a pattern you like. The stencil kit we’re using on this project includes two pattern types: a smaller version for edges and a larger version for wide-open spaces.

Registration marks on the stencil edges ensure proper alignment for the next application.


Homeowners carefully position the stencil before painting
The key to painting an even pattern is to perfect the stencil’s position.

2. Perfect the Position

Remember that attention to detail? It starts before you even paint a thing!

Precision is key, so it’s important to carefully tape the stencil in the middle of the space, and then work toward the edges.

Working from the inside out helps to keep the pattern even across the entire surface.  


A couple paints a blue pattern on a concrete floor with a stencil
When you paint over the stencil, do so in one direction — never back and forth.

3. Paint, Paint, Paint

Paint over the surface in one direction. We’re using a One Part Epoxy Coating designed specifically for concrete. 

To avoid bleed-through, remove the excess paint from the roller each time you dip it in the tray. It’s also a good idea to wipe the paint off the underside of the stencil after each application. 

For sharp pattern edges and a clean look, take your time while applying, removing and painting the stencil. 


Painted concrete porch, stenciled in light blue
This formerly plain concrete floor now has some style, and the transformation cost less than $100!

Costs

It doesn’t cost much to transform an old, worn-out concrete porch into a stylish surface for gliders, rocking chairs and outdoor sofas.

Here’s what you can expect to pay for this project:

Further Reading