Danny Lipford and Lydia Crowder (Drywall Shorty) chat this week about drywall. (3 Echoes Content Studio/Drywall Shorty)
In this week’s episode of “Ask Danny,” I’m chatting with Lydia Crowder, a.k.a Drywall Shorty, about patching holes, texture and more.
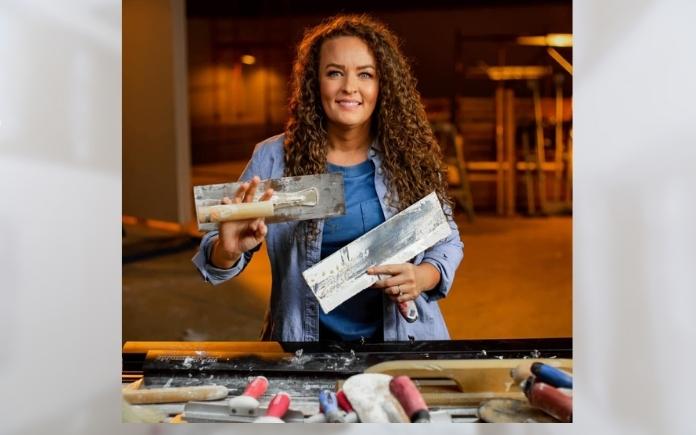
Lydia Crowder, a.k.a. Drywall Shorty, has more than 20 years’ experience installing drywall. (facebook.com/drywallshorty)
About Lydia Crowder
Lydia Crowder is a second-generation drywall contractor with over 20 years in the trade. She owns a contracting business with her husband Ryan, and together they finish over 500,000 square feet of drywall every year.
Lydia has taught a drywall course at MT Copeland and is a weekly contributor to The Build Show network with Matt Risinger. She was featured on the cover of Women in Trade magazine in Summer/Autumn 2021.
She has a large social media following, sharing drywall tips and tricks and helping others with their drywall. You can find her on Instagram, Facebook, YouTube and TikTok.
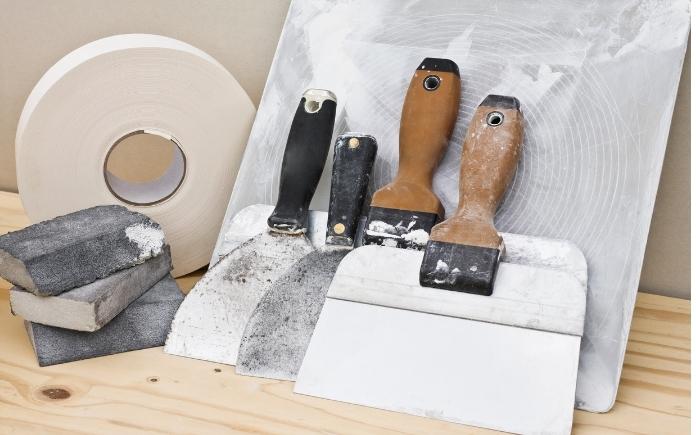
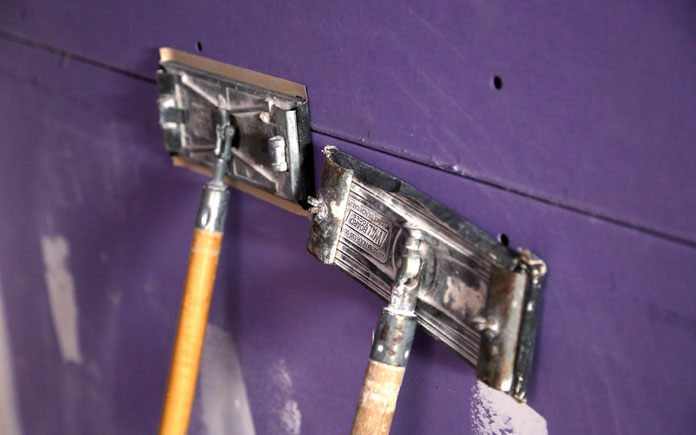
For any drywall repair job, you need the right tools. (skhoward, Getty Images Signature)
Repairing Ceilings
How do you repair loose drywall tape on ceilings?
Drywall Shorty: Basically, there are three parts to drywall: the paper face, mud and paper tape. The mud is like glue, so when the adhesion of the mud is missing, the paper won’t stay on.
Here’s what you need to do:
Remove the loose tape
Retape everything
Feather out the joints
Retexture
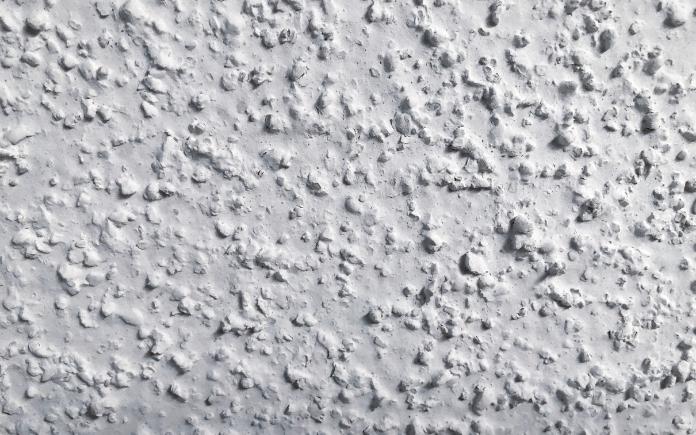
With some practice, popcorn ceiling texture can be matched with the canned stuff. (TriggerPhoto, Getty Images Signature)
Drywall Texture
What are your thoughts on the canned texture?
Drywall Shorty: It really depends on how big the patch is. If it’s something small, sometimes you can get away with it. Shake it extremely well and do test patches on a piece of scrap drywall before you spray it on the wall. That will give you a feel of how it’s acting, how much texture it’s leaving, and if your spray pattern is correct.
For bigger patches, you’ll need to use a commercial tool, like a Hopper. Spray the new texture further back into the existing texture.
People tend to keep the patch area small because they think if they go bigger it will cause problems. However, it actually catches your eye more if you have a pinpoint spot. Feather it out to get everything to match as best as you can with a sponge.
Finishes
What’s the most common finish you do?
Drywall Shorty: The swirl texture. We spray on thin, watered-down mud, and take pull trowels and do figure eights on the surface for a swirly pattern.
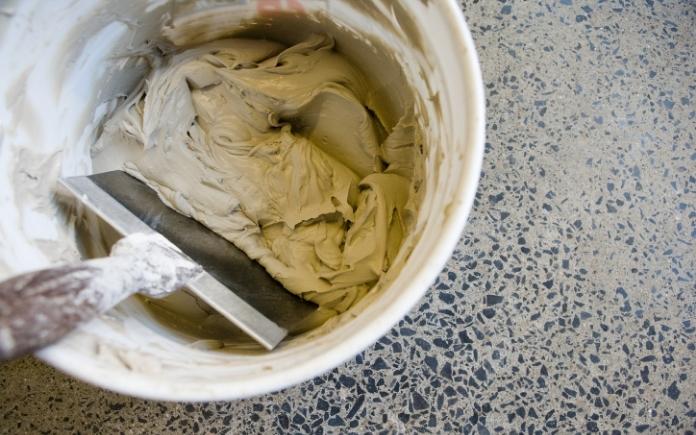
All joint compound is not created equally. (Jupiterimages, Photo Images)
Fast-Drying Mud
Do you work with fast-drying drywall mud, and what are your thoughts on it?
Drywall Shorty: Absolutely. Fast-drying drywall mud is good to start out with filling big holes, but when you’re working on texture or the final coat, use a regular box mud.
If you have big gaps, like a doorknob through a wall, you need to fill the hole first before you patch it. This is where fast-drying mud comes in handy. It dries very hard and fast.
Also, something to keep in mind: When you look at the minutes on the bag of fast-drying drywall mud, this is referring to how much working time you have before it sets, it has nothing to do with the hardness of the product.
Dust is inevitable when installing drywall, but there are ways to minimize it. (3 Echoes Content Studio)
Dealing with Dust
What do you think about sanding vacuum cleaning setups?
Drywall Shorty: Nothing is 100 percent dust free, but when you’re working in an environment where you need to keep your dust down, that’s your best bet for keeping your dust to a minimum.
Be careful that you’re not using too high of a speed and too low of a grit. We like to use Festool PLANEX 2 electric sander.
You need a good-quality pad on the sanding head. Start with a high grit — it won’t hurt to go over it a couple of extra times. You’re much better off gently sanding than power sanding through it and causing more work for yourself on the backend.
For dealing with dust during a home remodel, regularly check your HVAC system’s air filter, and change it out if you notice more dust accumulation.
Drywall Shorty: It depends on what you have access to.
A hot patch, or California patch, is a great fix for this. Most home centers sell small pieces of drywall, about a 2-by-2-inch square, for this.
However, it won’t be crazy strong, so if it’s a spot that keeps getting hit, you can always screw some backing in there. Take a piece of wood and screw it into the drywall behind the patch so you can have some support.
You can also use snap-off repair clips. Simply Slip clips onto the edge of the damaged wall, screw through the new patch into each repair clip, then snap the tabs off the front. These are great for areas with no backing because the clips create the backing for you.
Practice makes perfect, and the garage is a great place to sharpen your drywall skills. (3 Echoes Content Studio)
Drywall Shorty’s Tips
Start in your garage. Most garages aren’t as finished as the house, so it’s a great place to start practicing and work on your skills.
Give yourself the freedom to explore: try different tools and techniques
If you mess up, it’s not the end of the world. You can always sand over your mistakes.
Further Reading
Ask a Question! (Podcast)
Ask a question and we could answer it on the “Today’s Homeowner Podcast!” We also may use it on our nationally syndicated radio broadcast or on todayshomeowner.com.
Danny Lipford and Lydia Crowder (Drywall Shorty) chat this week about drywall. (3 Echoes Content Studio/Drywall Shorty)
In this week’s episode of “Ask Danny,” I’m chatting with Lydia Crowder, a.k.a Drywall Shorty, about patching holes, texture and more.
Lydia Crowder, a.k.a. Drywall Shorty, has more than 20 years’ experience installing drywall. (facebook.com/drywallshorty)
About Lydia Crowder
Lydia Crowder is a second-generation drywall contractor with over 20 years in the trade. She owns a contracting business with her husband Ryan, and together they finish over 500,000 square feet of drywall every year.
Lydia has taught a drywall course at MT Copeland and is a weekly contributor to The Build Show network with Matt Risinger. She was featured on the cover of Women in Trade magazine in Summer/Autumn 2021.
She has a large social media following, sharing drywall tips and tricks and helping others with their drywall. You can find her on Instagram, Facebook, YouTube and TikTok.
For any drywall repair job, you need the right tools. (skhoward, Getty Images Signature)
Repairing Ceilings
How do you repair loose drywall tape on ceilings?
Drywall Shorty: Basically, there are three parts to drywall: the paper face, mud and paper tape. The mud is like glue, so when the adhesion of the mud is missing, the paper won’t stay on.
Here’s what you need to do:
Remove the loose tape
Retape everything
Feather out the joints
Retexture
With some practice, popcorn ceiling texture can be matched with the canned stuff. (TriggerPhoto, Getty Images Signature)
Drywall Texture
What are your thoughts on the canned texture?
Drywall Shorty: It really depends on how big the patch is. If it’s something small, sometimes you can get away with it. Shake it extremely well and do test patches on a piece of scrap drywall before you spray it on the wall. That will give you a feel of how it’s acting, how much texture it’s leaving, and if your spray pattern is correct.
For bigger patches, you’ll need to use a commercial tool, like a Hopper. Spray the new texture further back into the existing texture.
People tend to keep the patch area small because they think if they go bigger it will cause problems. However, it actually catches your eye more if you have a pinpoint spot. Feather it out to get everything to match as best as you can with a sponge.
Finishes
What’s the most common finish you do?
Drywall Shorty: The swirl texture. We spray on thin, watered-down mud, and take pull trowels and do figure eights on the surface for a swirly pattern.
All joint compound is not created equally. (Jupiterimages, Photo Images)
Fast-Drying Mud
Do you work with fast-drying drywall mud, and what are your thoughts on it?
Drywall Shorty: Absolutely. Fast-drying drywall mud is good to start out with filling big holes, but when you’re working on texture or the final coat, use a regular box mud.
If you have big gaps, like a doorknob through a wall, you need to fill the hole first before you patch it. This is where fast-drying mud comes in handy. It dries very hard and fast.
Also, something to keep in mind: When you look at the minutes on the bag of fast-drying drywall mud, this is referring to how much working time you have before it sets, it has nothing to do with the hardness of the product.
Dust is inevitable when installing drywall, but there are ways to minimize it. (3 Echoes Content Studio)
Dealing with Dust
What do you think about sanding vacuum cleaning setups?
Drywall Shorty: Nothing is 100 percent dust free, but when you’re working in an environment where you need to keep your dust down, that’s your best bet for keeping your dust to a minimum.
Be careful that you’re not using too high of a speed and too low of a grit. We like to use Festool PLANEX 2 electric sander.
You need a good-quality pad on the sanding head. Start with a high grit — it won’t hurt to go over it a couple of extra times. You’re much better off gently sanding than power sanding through it and causing more work for yourself on the backend.
For dealing with dust during a home remodel, regularly check your HVAC system’s air filter, and change it out if you notice more dust accumulation.
Drywall Shorty: It depends on what you have access to.
A hot patch, or California patch, is a great fix for this. Most home centers sell small pieces of drywall, about a 2-by-2-inch square, for this.
However, it won’t be crazy strong, so if it’s a spot that keeps getting hit, you can always screw some backing in there. Take a piece of wood and screw it into the drywall behind the patch so you can have some support.
You can also use snap-off repair clips. Simply Slip clips onto the edge of the damaged wall, screw through the new patch into each repair clip, then snap the tabs off the front. These are great for areas with no backing because the clips create the backing for you.
Practice makes perfect, and the garage is a great place to sharpen your drywall skills. (3 Echoes Content Studio)
Drywall Shorty’s Tips
Start in your garage. Most garages aren’t as finished as the house, so it’s a great place to start practicing and work on your skills.
Give yourself the freedom to explore: try different tools and techniques
If you mess up, it’s not the end of the world. You can always sand over your mistakes.
Further Reading
Ask a Question! (Podcast)
Ask a question and we could answer it on the “Today’s Homeowner Podcast!” We also may use it on our nationally syndicated radio broadcast or on todayshomeowner.com.
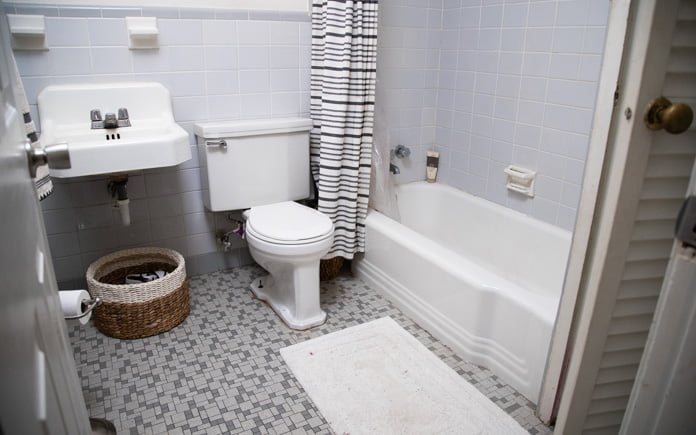
When you have a master bathroom that’s anything but, and you’re working with a limited budget, it’s time for a small bathroom remodel.
This mid-century house belongs to Logan and Hannah, who share it with their daughters Brooklyn and Dakota and, soon, another baby girl.
The growing family has a master bathroom that needs to grow too, but since it can’t, we’re making the most of what they have.
This bathroom looks dated and institutional. It’s not the inviting spa that it should be — but it has plenty of potential.
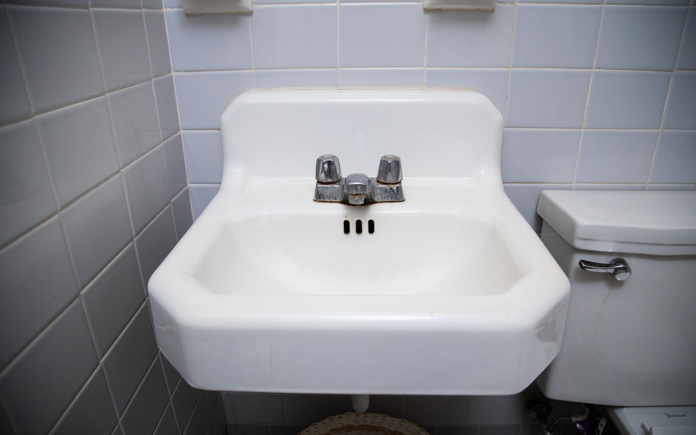
The Problems
Logan and Hannah’s master bathroom is not much of a master. It’s small and has a dated light fixture and medicine cabinet, tired tile, a toilet too large for the space, and an overall lack of storage.
Then there’s an oddly placed outlet that prevents Logan from entering the bathroom without getting tangled up while Hannah blow-dries her hair.
Finally, their exhaust fan sounds like a freight train when it’s turned on.
And we’re going to fix all these problems with a small bathroom remodel on this episode of Today’s Homeowner.
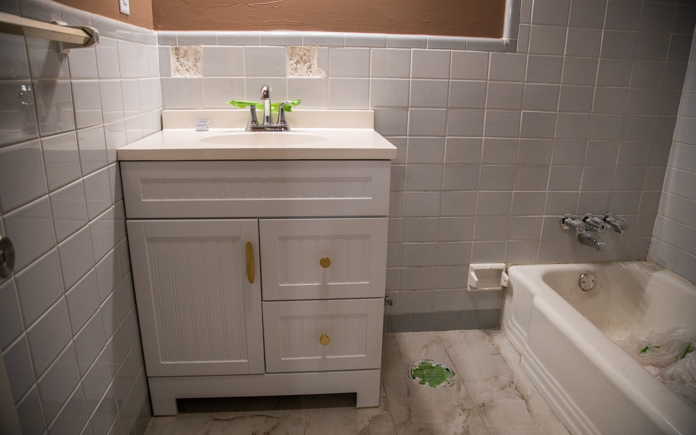
A sink without a vanity isn’t very functional. Every bathroom needs storage underneath.
Adding a Vanity
The sink is, well, just a sink. There’s no vanity, and that means there are no drawers, no doors, and no storage. That means Hannah has to store things in a basket under the sink — not ideal. So, the first thing we’ll do during this small bathroom remodel is replace this sink with a proper vanity.
Usually, when you have water lines coming out of a bathroom, there’s a shutoff valve. While there’s one of those near the toilet that we removed, there’s not one for the sink. That means we have to turn the water off at the street and then add shutoff valves. This is a job for the plumber, Artie.
This bathroom is really coming along! It’s starting to take on the grand appearance the homeowners wanted.
He will do more than add shutoff valves; he’ll also install an offset toilet flange. This will allow us to position the toilet closer to the vanity.
But before he arrives, I’ll remove the dated ceramic cup holder and toothbrush caddy.
Megan is a writer and editor who specializes in home upgrades, DIY projects, hacks, and design. Before Apartment Therapy, she was an editor at HGTV Magazine and This Old House Magazine. Megan has a degree in Magazine Journalism from Northwestern University’s Medill School of Journalism. She is a self-taught weighted blanket connoisseur.
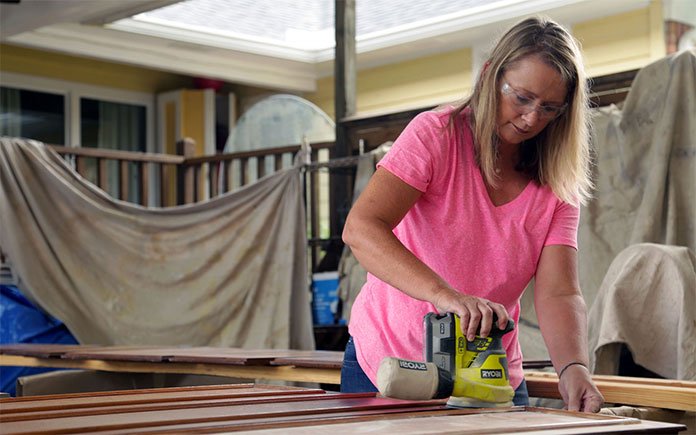
You can easily update your kitchen cabinets by painting them. However, a good paint job depends on a great prep job. Prepare the surface properly so the paint will adhere and not peel or chip over time.
While you can paint cabinets with a brush, a sprayer is faster and leaves a smoother surface.
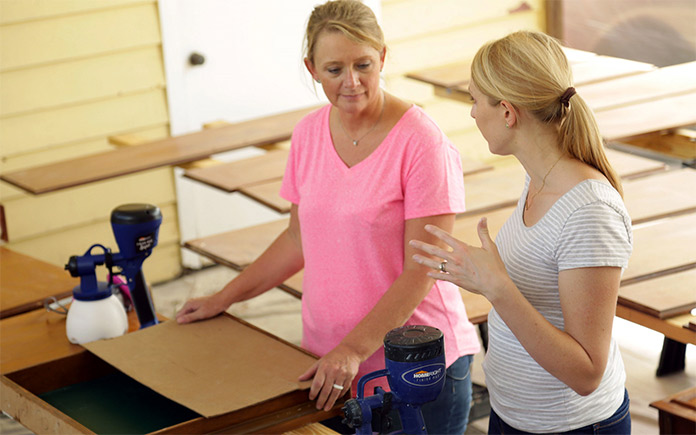
Sanding kitchen cabinets before painting them is important to ensure the paint will adhere to them.
Preparing the Surface
Before you can start painting the kitchen cabinets, you need to prepare the surface. Prepping usually is the longest part of the job, and it’s the most important part to ensure the finishing coats properly cover the cabinets.
1. Remove doors and drawers: Take the doors and hardware off the cabinet boxes and remove drawers and hardware from the cabinets. You will paint the doors and drawers separately.
2. Place the doors on sawhorses. Spreading the doors on two-by-fours stretched between sawhorses will allow you to prep and paint without moving the doors.
3.Clean the Cabinets: Clean all surfaces thoroughly with a household cleaner to remove any grease or grime.
4. Sand the Cabinets: Lightly sand all the surfaces. If the old finish is in good condition, you don’t have to sand it down to bare wood, just until it’s smooth and free of gloss.
A pad sander with 220-grit paper will make quick work of the flat areas and a sanding sponge is ideal for curved edges and recesses. The goal here is to rough up the surface enough to accept the primer.
If there is any greasy residue left after sanding, mineral spirits will remove it.
5. Remove the dust: Vacuum off any sanding dust, and then wipe the cabinets down with a clean, damp cloth.
Before you prime and paint your kitchen cabinets, make sure you know who’s doing what, if you’re working in pairs or groups. In addition, wear the proper safety gear, such as safety glasses and a respirator.
Priming and Painting the Kitchen Cabinets
1. Prime the cabinets: Apply an oil-based, stain-blocking primer to the cabinets. Oil-based primers adhere and block stains better than latex primers.
We’re using a high-volume, low-pressure spray gun to apply both the primer and paint. These sprayers are inexpensive and user-friendly but the operator should be protected by a respirator.
When you spray paint, it’s important to keep the spray tip a consistent distance from the surface and make slow passes back and forth. Each pass should begin and end beyond the edge of the door so there’s no buildup of paint on the edges.
We’re using the same sprayer on the cabinet boxes inside since the floors are covered and the room is sealed.
In this case, we’re painting the inside of the cabinets to avoid overspray marks or the need to mask each opening of the cabinets.
2. Cover imperfections. After the primer dries, fill any holes or dents with a two-part auto body filler. After the filler has hardened, sand it smooth with the surface. You also may need to putty nail holes or caulk cracks and seams.
3. Paint the cabinets: Use a high-quality woodwork enamel paint on your kitchen cabinets. You can use oil or latex paints, though they each have their advantages and disadvantages:
Oil-based paint has a smoother surface and dries harder than latex; but it requires a solvent like mineral spirits for clean-up, has a strong odor, and slowly dries.
Latex paint cleans up easily with water, comes in low and no VOC (volatile organic compounds) formulas, and dries quickly; but it shows brush marks more, is softer, and tends to imprint, allowing items placed on shelves to stick unless shelf paper is applied.
I prefer a medium gloss (such as semigloss or eggshell) paint for kitchen cabinets, though high gloss holds up well. Avoid using flat paint on kitchen cabinets, since it doesn’t clean as well.
Apply the paint, sanding lightly between coats. Spraying the doors horizontally reduces the risk of drips, which can mar the finish.
Allow the two coats of finish paint to dry thoroughly before handling the doors and replacing the hardware.
If you’re changing hardware, consider buying new hinges with the same footprint as the old ones. This will simplify installation and hide any indentations left by the old hinges.