If disaster strikes, will your homeowners insurance cover the cost to replace your home? A basic policy might not be enough to provide peace of mind — you need guaranteed replacement cost coverage.
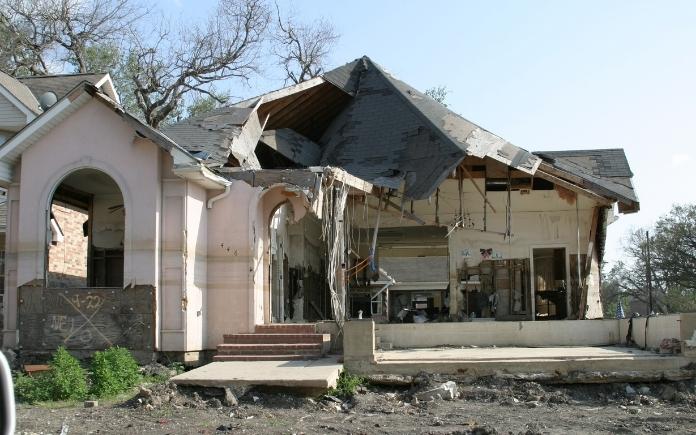
If your home insurance is lacking, you might be paying out of pocket to rebuild your home. (bjunda, Getty Images Signature)
What is Guaranteed Replacement Cost?
When something goes wrong, such as a natural disaster or a fire, the insurance company will cover your loss—or at least, up to a certain dollar amount—after you pay a deductible based on your policy’s terms and conditions.
Many people believe an insurance policy will cover all the damage after a disaster. Unfortunately, this isn’t automatically true — and many people don’t realize it until it’s too late.
For example, if an electrical fire claimed your home, depending on the type of insurance coverage you have, your policy might only cover the home’s current value minus depreciation and wear and tear. That means the insurance company wouldn’t write a check to cover the entire cost of building a new house if construction costs significantly increased due to inflation or unforeseen circumstances.
You could pay out of pocket to cover the remainder — or cut costs by sacrificing some of your old home’s features. But those options add steps and stress to the project during an already difficult time.
Guaranteed replacement cost, on the other hand, covers the amount to repair or replace your home after a covered loss — even if it would cost more to rebuild your home today than it did when you bought it.
With Erie Insurance’s Guaranteed Replacement Cost coverage, you’re covered even if you have to build a new home.
Of course, there are some important terms and conditions.
Under Guaranteed Replacement Cost coverage, you must report home improvements over $5,000 — such as, say, new construction on an addition — within 90 days. Depreciation may be deducted until repair or replacement is.
In addition, the coverage of costs is subject to limits and must comply with laws or ordinances, so terms may vary based on where you live.
Guaranteed Replacement Cost Coverage is not available in all states, so check with your insurance agent to see if you qualify.
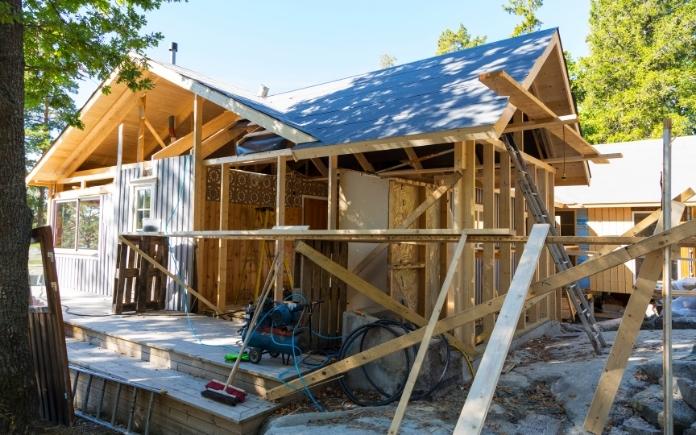
Guaranteed Replacement Cost covers the amount to rebuild your home, even if it costs more to rebuild today than when you bought it. (brittak, Getty Images Signature)
Why You Need Guaranteed Replacement Cost
Even if your homeowners insurance has a high limit, the cost to repair or rebuild is always in flux.
Your policy’s current limit might allow you to completely rebuild your home this year, but if building costs and inflation rise, it may only cover a portion of that next year.
Guaranteed replacement cost coverage, then, provides greater peace of mind than policies that deduct for depreciation when calculating reimbursement.
If you don’t have guaranteed replacement cost coverage, the work stops when the money runs out. So, you’re left with an incomplete project that you must pay out of pocket to finish.
Having this coverage could potentially save you thousands of dollars after a disaster.
Insurance can be complicated, so speak with an Erie Insurance agent to find the best policy for you. (Pixelshot)
Which Insurance Policy is the Best?
Now that you know what guaranteed replacement cost is, it’s time to consider what type of policy you need to accompany it.
A common question is, “How much coverage should I get for my home?” The answer boils down to how much you’re willing to sacrifice — which should be nothing.
Always opt for full coverage. If you go with any less, you could potentially lose tens to hundreds of thousands of dollars if something goes wrong — just to save a couple of hundred dollars in an annual premium.
Home insurance can be complicated, so let an experienced agent help you assess your needs and risk tolerance to find the right coverage.
Erie Insurance, established in 1925, has claims adjusters who are trained to know how different homes are constructed, the materials used, and which kinds of damage can occur.
Their independent agents provide 24-7 support, a wide array of coverages, and no gray areas so that you’re provided with a full understanding of your policy.
An outdoor fireplace transforms your yard into a bonafide living area and increases your home’s value.
Whether you’re having a gathering with friends or unwinding after a long day, an outdoor fireplace is an investment that you will enjoy for many years.
Historically, fireplaces were used to keep a home’s interior warm during winter. But now, with outdoor living areas becoming increasingly more popular, fireplaces are popping up in many backyards.
These days, homeowners want the amenities of their indoor living rooms in the great outdoors. So the fireplace, an iconic element of any living room, is a must.
An outdoor fireplace still serves the same function of providing warmth, but it also adds to the backyard’s aesthetic.
Outdoor fireplaces come in many materials — such as steel, stone and terracotta — along with a range of shapes and sizes. Their fuel sources include wood, electric, gas and propane, and they can be in a fixed position or portable.
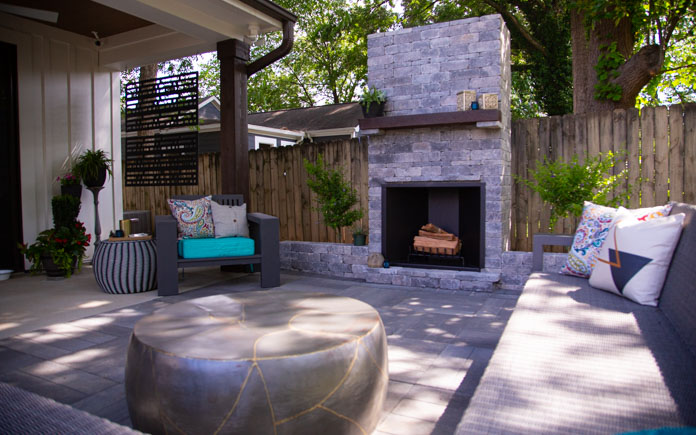
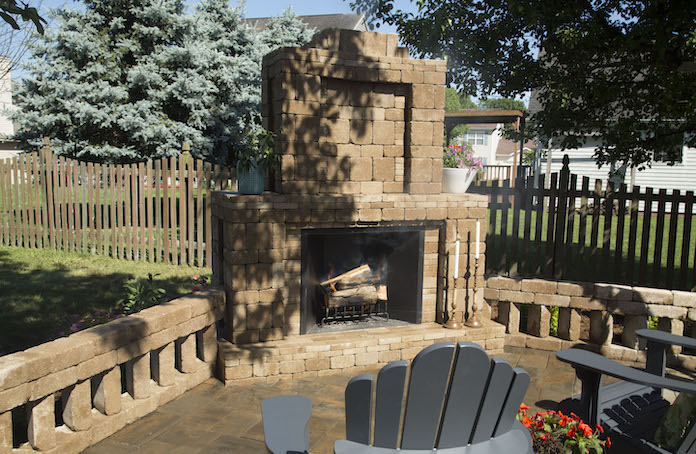
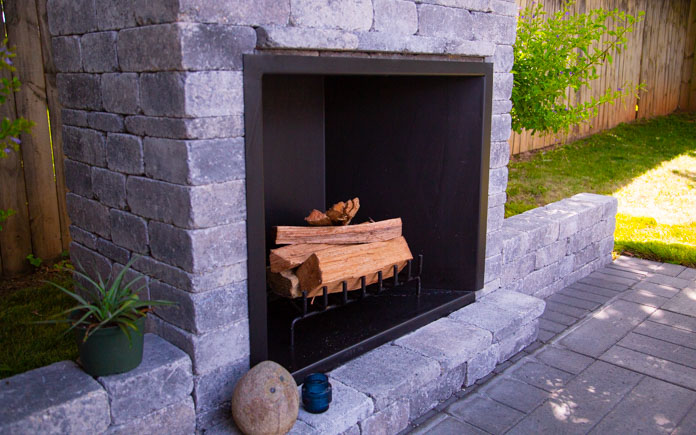
Paver outdoor fireplaces have the look of a traditional, interior fireplace. (3 Echoes Content Studio)
Wood-Burning Outdoor Fireplaces
For a traditional-looking outdoor fireplace, one constructed using pavers is a popular option.
This type uses stacked pavers to create a customized wood-burning fireplace with a full-sized chimney.
You can also add paver surrounds around the fireplace to further define your outdoor living area.
Building a paver outdoor fireplace is a large project, so check with your local building department to see if you need a permit.
If you’re ready to take your outdoor living area to the next level with a paver outdoor fireplace, build one using Pavestone’s Rumblestone Fireplace Kit, which is available at The Home Depot.
The kit includes a firebox, a custom-fit 21-inch log grate for burning wood, a 14-inch chimney, 24 tubes of polyurethane adhesive, plus five pallets of coordinating RumbleStone blocks to build the surround.
The RumbleStone blocks’ weathered appearance offers a natural look and feel. They can be assembled in an infinite variety of configurations and orientations, so the possibilities for creative expression are as endless as your imagination.
When filling the bed, stop every three inches to compact the material using a tamper or compactor. Do this until the hole is filled to ensure a stronger base that will stand the test of time.
Add an inch of Pavestone Paver Sand on top of the aggregate before laying the blocks.
Once you’ve laid your fireplace base, it’s time to start stacking the blocks. To ensure that do-it-yourselfers get the right block in the right spot, the kit includes a set of color-coded drawings that detail which blocks go where on each step — from the initial footprint on the ground to the firebox installation and extending the structure up around the chimney.
Rumblestone blocks have round edges and come in a variety of shapes and sizes that all modulate on a 7-inch dimension.
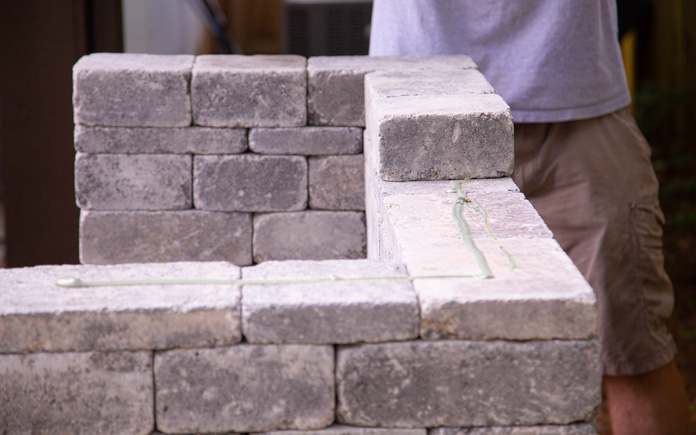
No mortar is needed to assemble a Pavestone Rumblestone fireplace — just construction adhesive. (3 Echoes Content Studio)
This building block design means you don’t need to cut any pavers, and there are no open seams because the blocks overlap each other for strength. All you need to secure them is some polymer construction adhesive.
Because this kit is so simple to put together, you can assemble this outdoor fireplace in just a few hours.
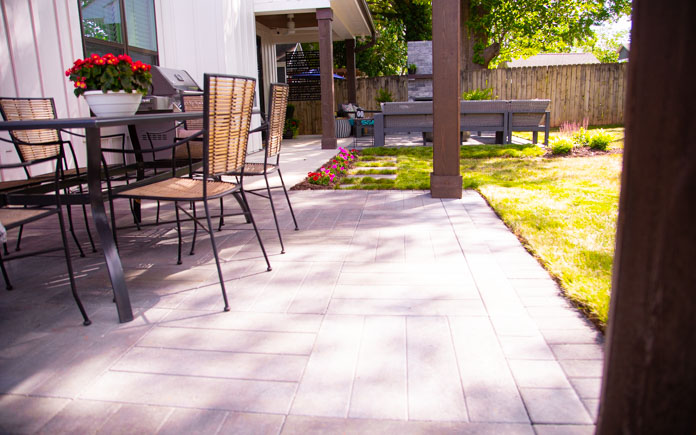
A paver patio, like this one made from Pavestone’s Avant XL pavers, provides a perfect surrounding for an outdoor fireplace. (3 Echoes Content Studio)
Complete Your Outdoor Living Area With a Patio
A stand-alone fireplace, though attractive, may look out of place in your backyard if you don’t add matching elements. So, build a patio to surround it and define the outdoor living area.
A patio not only complements your fireplace but also increases your home’s resale value.
The average cost of building a patio is between $3,000 and $5,500, according to Forbes. However, SuperMoney, an online financial comparison platform, says a patio can increase a home’s value by 8 to 10 percent and earn an 80 percent return on investment.
If you want a beautiful, consistent look to your patio and outdoor fireplace, construct them with the same materials.
Pavestone offers a variety of pavers in different textures, colors and sizes. A quick visit to their website leaves you brainstorming all sorts of ideas for your next backyard project, whether it’s a fireplace, a fire pit, a patio, or anything else.
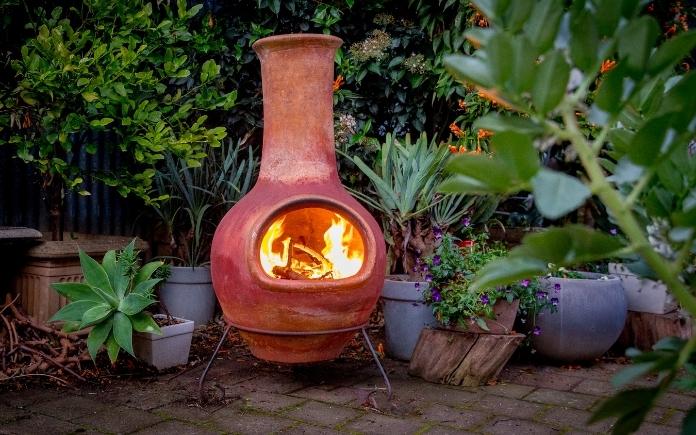
No assembly is required for a chiminea, and because it’s small, you move it anywhere you want. (MarkPiovesan, Getty Images)
A chiminea (Spanish for chimney) is a freestanding, front-loading fireplace with a bulbous shape and a vertical vent.
Traditionally, chimineas are made from clay, but some are metal or cast iron. You don’t need to assemble it, so the most work you have to do is transport it to where you want it.
However, despite its simplicity, there are some drawbacks.
A typical chiminea is small, so you’ll need to frequently add wood to keep a fire going. And, once lit, it has a hot shell, which can be dangerous to the touch, especially for children. In addition, it sits off the ground on a metal base, so it could tip over.
For these reasons, many homeowners prefer a permanent structure for creating warmth outdoors.
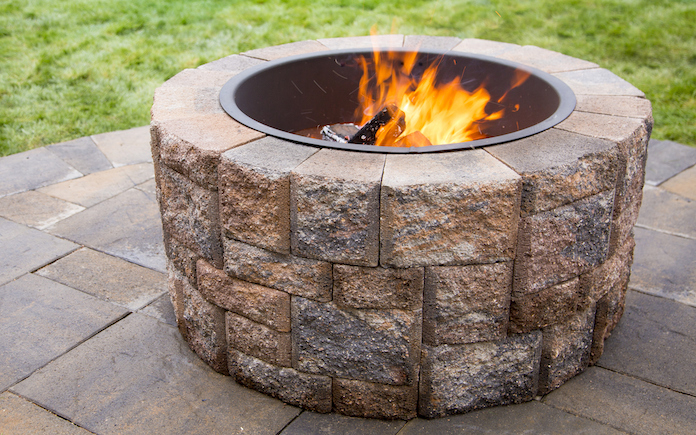
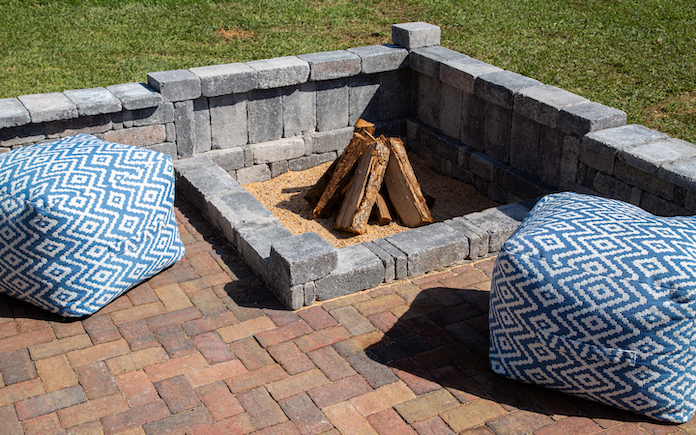
You can incorporate a fire pit into the corner of a patio, or build a standalone one in your yard. (3 Echoes Content Studio)
One such option is a fire pit. This type of outdoor fireplace also is simple: it has raised walls and an opening in the middle for a fire.
A fire pit can be made of metal, concrete or stone and use gas or wood for fuel.
Fire pits are easier to construct than an outdoor fireplace because a basic build only consists of a circle or square.
Pavestone offers fire pit kits — with up to 20 options — for easy, do-it-yourself, assembly.
Outdoor fireplaces add beauty and value to your home. The type you choose will depend on your budget, but investing in a paver fireplace will give you a better return on investment.
To get the most out of your home’s outdoor space, you’ll want to build a patio to go with your fireplace. A patio defines your backyard living space, enhances the exterior aesthetic with stylish hardscaping, and increases your home’s resale value.
Making your house look great at the first glance doesn’t have to be a costly investment. These simple and affordable curb appeal ideas can update your home while boosting its appeal to visitors and potential buyers.
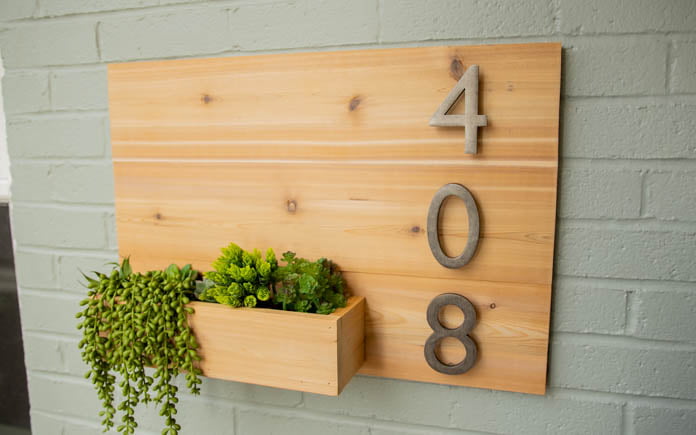
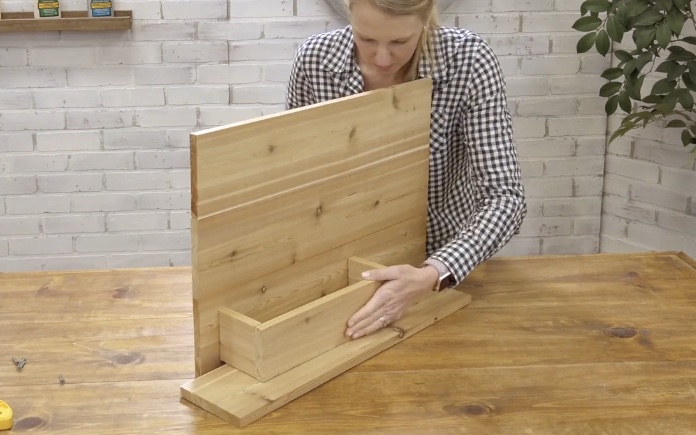
This house number wall planter adds natural texture to a brick exterior. (3 Echoes Content Studio)
1. Dress Up Your House Number
First on our list of curb appeal ideas is stylishly displaying your house number. Not only does it add curb appeal but it also clearly shows your house number for first responders and ensures packages get delivered to the right home.
This house number wall planter project is a two-for-one – you get a wall planter that also prominently displays your house number. Plus, it can be built in less than half a day.
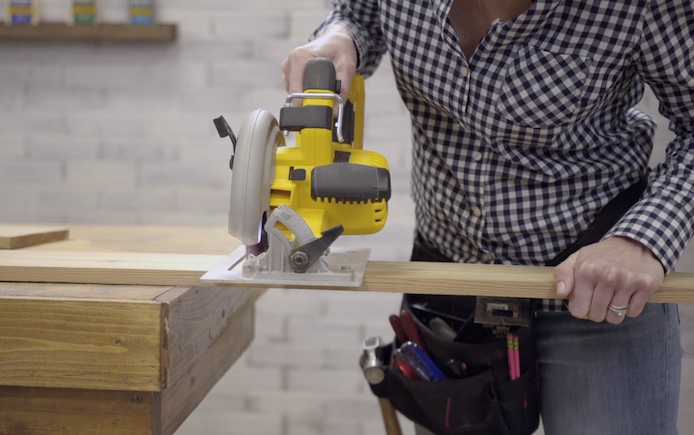
First, measure and cut the wood for your house number wall planter. For this project, we used cedar because of its scent, but you can use any type of wood.
Here are the cuts you’ll need:
Three 1x6s at 24 inches
Two 1x4s at 3.5 inches
One 1×4 at 12 inches
One 1×4 at 13.5 inches
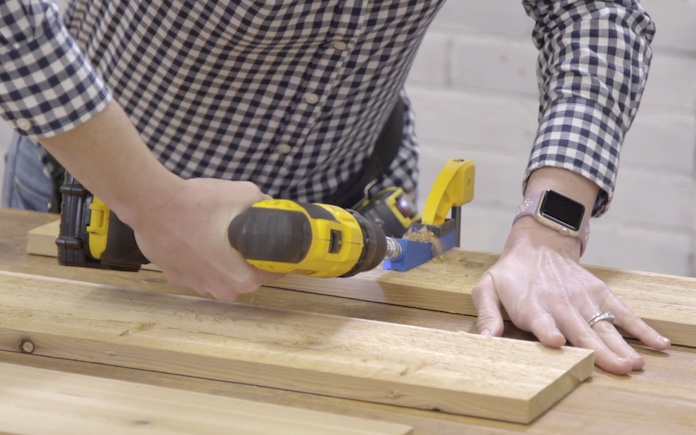
Pocket holes prevent wood screws from penetrating the panel’s front side. (3 Echoes Content Studio)
Step 2
Choose whether you want the rough side or the smooth side of your cedar facing out, then drill pocket holes on the backs of two of your 1×6 boards.
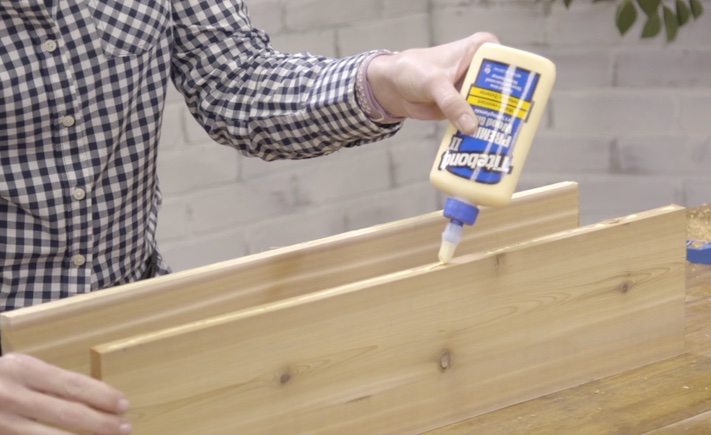
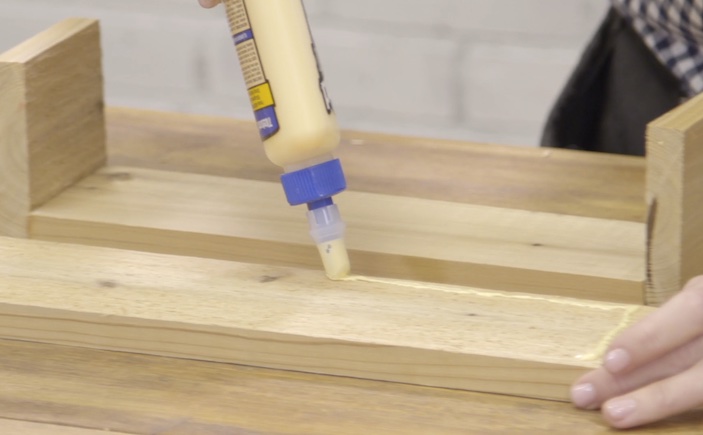
To assemble the planter box, use the 12-inch piece for the bottom, the 13.5-inch piece for the front and the two 3.5-inch pieces as the sides. Apply wood glue and then nail them together.
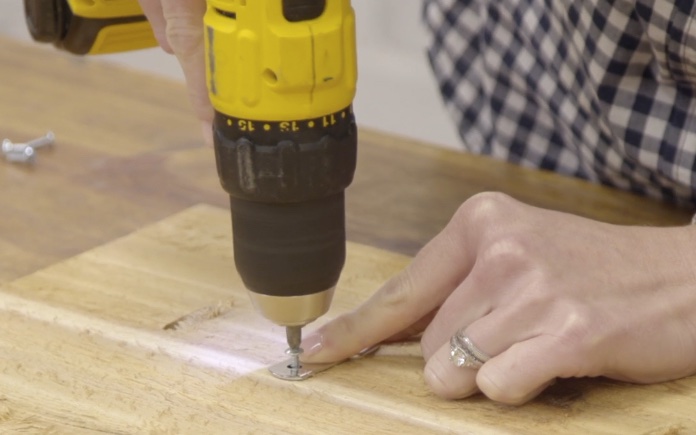
A scrap piece of wood is the perfect height to hold up the planter box place while you attach it to the panel. (3 Echoes Content Studio)
Step 6
Use a scrap piece of wood to hold the planter box three-quarters of an inch from the bottom of the panel. Then, attach the planter box to the panel using wood screws from behind. Sand the house number planter box. If you want a glossy look, apply a wood sealer.
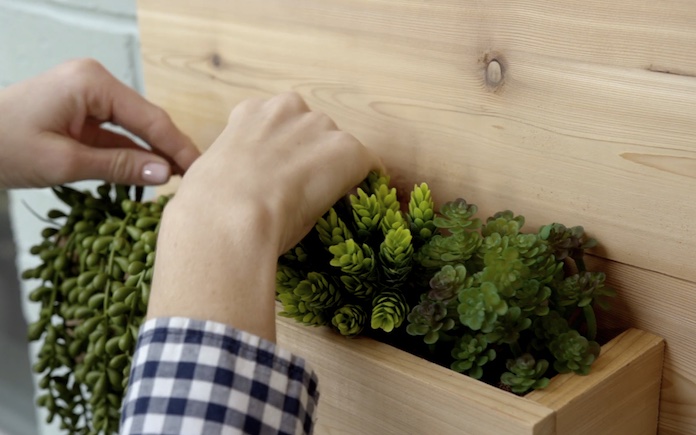
Hang the wall planter up on your house before adding the dirt and plants.
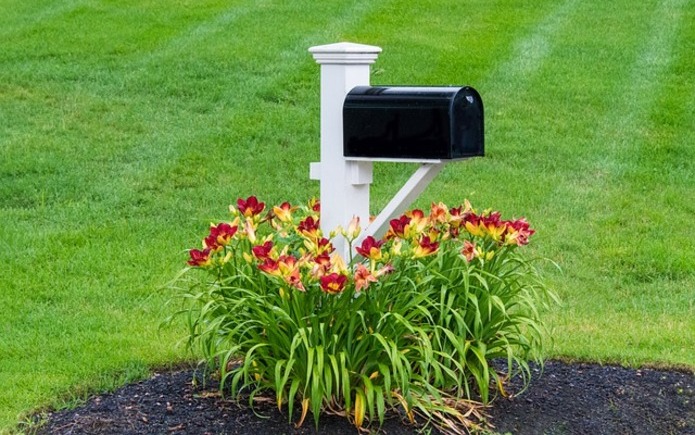
Your mailbox says a lot about your home, and you. To maintain curb appeal, keep it painted well or purchase a new one that meets United States Postal Service guidelines.
2. Replace Your Mailbox
While we’re on the subject of house numbers, give some attention to your mailbox!
Mailboxes serve a dual purpose: they collect your mail, but they also send a message about the homeowner’s attentiveness to their dwelling.
A tattered old mailbox suggests a lack of care. Don’t risk sending the wrong message: install a sparkling new mailbox.
From traditional to polished-nickel options, choose from dozens of styles and sizes. Consider whether you’ll need to enlist help for installation: a wall-mounted mailbox will only require some screws and a screwdriver, but roadside mailboxes that sit on posts might require an expert’s help.
If you have to dig a post hole for your new mailbox, call 811 before you dig to ensure that you stay clear of any utility lines.
And before you do anything, always review the US Postal Service’s mailbox requirements.
Yes, the USPS has requirements, and it enforces those requirements! For instance, roadside mailboxes must be at least 6 inches back from the curb.
If you’re installing a door slot, USPS requires that the opening be at least 1.5 by 7 inches.Find all the specifics atusps.com.
A front porch isn’t complete without comfortable chairs and potted plants.(DepositPhotos)
3. Spruce Up the Front Porch
Next on our list of curb appeal ideas is spruing up the front porch.
Here’s an easy formula to improve your front porch’s appearance: furniture, plants and wreaths.
Furniture
Front porch furniture — like gliding, lounging or rocking chairs — welcomes guests and invites them to sit, take a load off and enjoy some conversation.
You can find nice, inexpensive furniture at a thrift store to add character. Shop for something that looks good but doesn’t require refinishing.
Plants
Plants offer a nice break from your home’s hard features (such as windows, doors, roofing and siding). To add texture and soften your home’s exterior appearance, purchase plants at the home and garden center and place them in pots made for outdoor use.
Just get one or two planters — most hardware stores or gardening shops sell inexpensive faux terracotta ones — to arrange near your front entrance. Place two planters on either side of your front door or cascade multiple down the front steps.
Here’s a suggestion for a starter plant: hardy and beautiful hibiscus! These slow growers provide abundant greenery with massive (up to 10-inch) blooms.
When the weather turns colder, move the pots indoors to enjoy them through the winter months.
When you’re picking out your plants, one simple phrase should be the key to your planter or window box: “fillers, spillers and thrillers.”
Fillers: Leafy greens will fill the space and complete the look
Spillers: Flowers like Creeping Jenny flow over the container’s sides
Thrillers: These plants offer the “wow” factor. Pops of color will draw the visitor’s eye
To fully capture the senses, add some aromatics to emit a gentle fragrance as guests enter your home. Keep in mind that your climate will also play a role in what you should plant.
Check the online version of the Farmers’ Almanac to learn what will and won’t grow well in your area.
Wreaths
Who says door wreaths are just for winter holidays? Make any door look great with a year-round wreath. Embellish the wreath based on the current season and add or remove accessories — such as a large initial of your family’s last name — as needed.
Scan the web, shop around and purchase these items in advance and you can move them into position and dress your front porch in less than an hour!
You can paint a door on its hinges, but doors with lots of imperfections need special treatment.
4. Paint the Front Door
A new paint color is the most budget-friendly of this list of curb appeal ideas. Don’t underestimate the power of a fresh coat of paint. The average gallon of paint costs between $15 and $30 — a reasonable investment that packs a punch when it comes to improving the look of a home.
Options for front door colors are as endless as your imagination. However, choose one that complements the color scheme of your home’s exterior. For a monochromatic color scheme, choose darker and lighter shades within the same color. To add eye-catching contrast, pick a door color that’s on the opposite end of the color wheel as your home’s main color.
Playful pops of colors are very on trend when it comes to door updates. But classic colors and stains never go out of style. A simple coat of faux mahogany finish can give instant curb appeal and won’t cost you a boatload.
Tips
Get the most mileage out of your paint job with these tips:
1. Remove any hardware. This includes knockers, kick plates and door handles. By taking these off, you avoid getting paint on your hardware, and you can ensure that you cover the whole door with paint.
2. Clean it. Soap and water should do the job, but if there’s years’ worth of build up, use a pressure washer to power wash the grim away.
3. Lay it flat. Taking the door off its hinges is an extra step that most likely means a two-person job, but removing the door makes it easier to apply the paint in even coats.
4. Sand it. By sanding your door before you paint, you can remove dust, debris, and old paint layers. Sanding can also help your paint stick better, giving you a cleaner, crisper fresh coat.
5. Change the locks. Now is a great time to invest in some new home security. Replace your old deadbolt and handle with a brand new set and consider installing smart locks for keyless entry.
Installing a new door handle is a small change that can make a big difference. (Jason Finn, Getty Images)
5. Add New Hardware
Number five on our list of curb appeal ideas is upgrading your front door’s hardware.
It’s a simple, cost-effective and you can choose from a variety of colors and metal types, like silver, gold, satin nickel, copper, and oiled bronze.
Plus, hardware comes in many shapes and sizes, so before heading to the home center, consider the look and function you want — for instance, do you want knobs or levers? Do you want to turn, pull or push the handle to open the door?
With all of these options, you can easily find hardware to match your personal style and enhance your home’s aesthetic on a budget.
Just consider how the new hardware will look compared with your interior doors’ hardware. You may not want, say, an oiled bronze lever on the front door if brass knobs are on two close-by interior doors.
Or you may want to replace all your interior knobs with levers to match the front door for a consistent look throughout the home. Or at least spray the existing knobs with an oiled bronze finish to match.
Either way, it’s your home, and it’s your decision.
Lawn borders contain your mulch and define flowerbeds and pathways, giving your landscaping a finished look.
It doesn’t cost much to install concrete borders — expect to pay an estimated $2 per linear foot for materials. Out of all these curb appeal ideas, this is the most hands on, do-it-yourself project, so keep in mind the time and labor it will take.
Expect to dig a trench, build and install wood forms, pour in some gravel and then top that with concrete mix. Add just a few extra steps if you want to color the concrete mix, and give this project about three days to cure.
In a week, your flower beds will look better than ever and your front yard will have a sense of order to it — all thanks to a simple border!
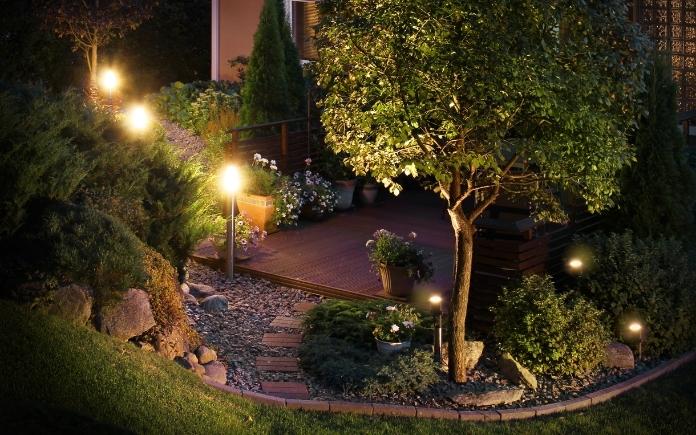
Want to add ambiance to your yard? Add landscape lighting. (Alberto Sava via Canva)
7. Install Exterior Lighting
While we’re on the subject of lawns, here’s another home curb appeal idea: install exterior lighting.
Adding a few lights to your front yard allows you to literally shine a spotlight on your home’s best features.
Landscape lightsare easy to install, and solar varieties are self-sufficient, so they won’t put a strain on your energy bill.
First, light walkways with garden lights or bollard lights, then move on to accent lighting. Use spotlights or up/down lights to highlight features like a large tree or a flag pole.
Want to add some ambiance to your patio? Hang some string lights!
Before you install landscape lighting, test the layout and determine the focal point for the brightest light. Simply tape flashlights to stakes and position them around the yard at night to see how halogen or incandescent landscape lights will look.
You can also place luminaries – composed of a white bag with sand and a candle inside – around your yard at night to mimic the look of solar-powered landscape lighting.
Concrete garden spheres add curb appeal or enhance your backyard with whimsical hardscaping. Think of them as a modern interpretation of the classic garden gnome!
Nestle these spheres between plants or use them to accent porch steps or the patio. No matter where you put them, they’ll make a great conversation piece.
Here’s how to make your own.
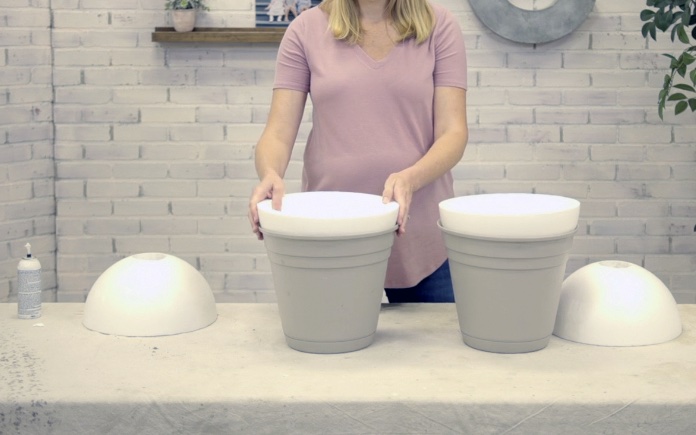
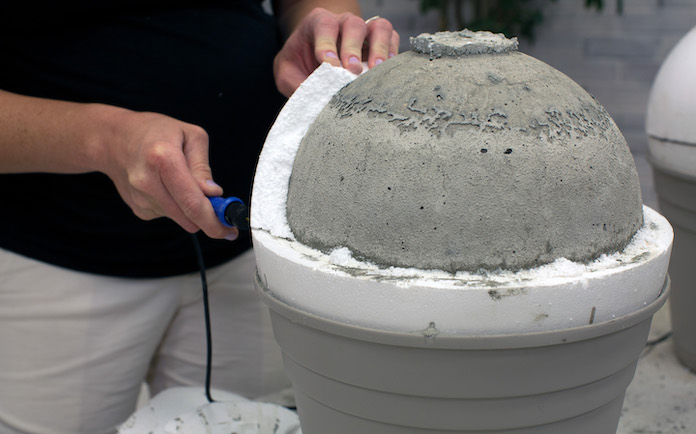
Plastic planters hold the forms in place while the concrete cures. (3 Echoes Content Studio)
You’ll need two hollow half foam balls for each garden sphere you want to create. I’m making two spheres at a time, so I’ve got four half foam balls.
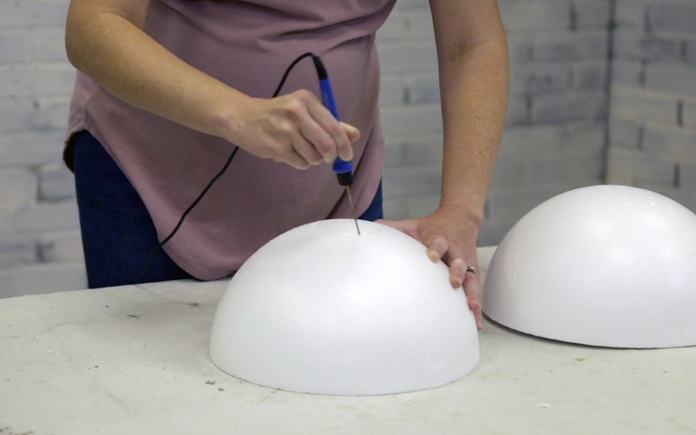
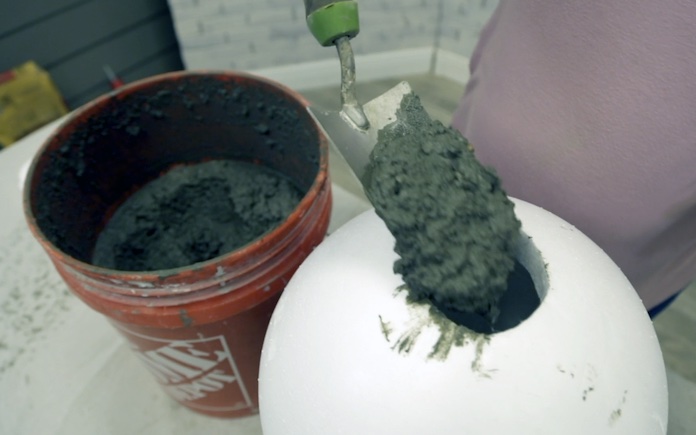
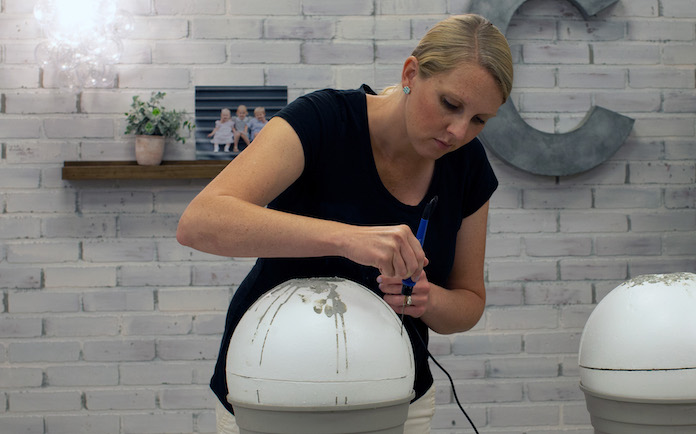
First, use a hot knife foam cutter to make a 2- or 3-inch-diameter hole in the tops of two half foam balls. (These will serve as the spheres’ tops, in which you’ll pour the concrete — but we’ll get to that later.)
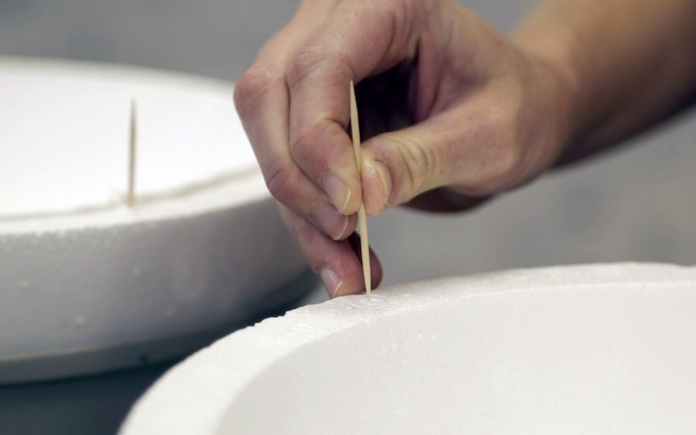
Then, set the other two half foam balls in planters or containers filled with dirt to hold them steady. (These will serve as the spheres’ bottoms.) Stick toothpicks into the rims of each bottom half foam ball and apply caulk all along the rims. The toothpicks keep the top foam ball from shifting, while the caulk creates a seal so no concrete mix seeps out.
Place the other two half foam balls on top of the bottom half balls, ensuring the toothpicks connect the bottom halves with their tops, all the way around. Wait for the caulk to dry. Most silicone caulk takes 24 hours to dry, but some fast-drying caulks only take one to three hours.
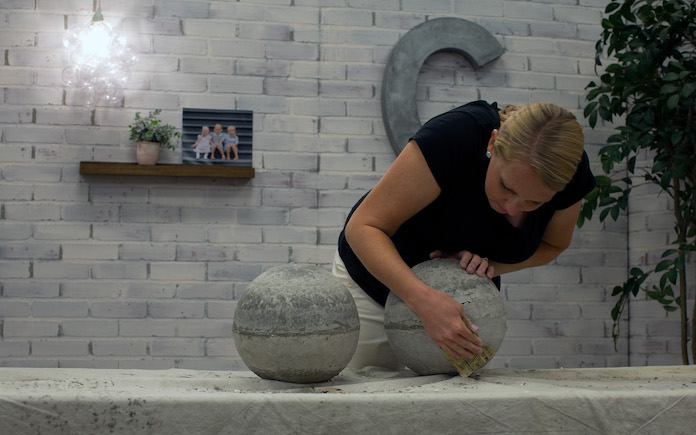
Once you remove all the foam, sand the entire sphere with 120- or 150-grit sandpaper for a smooth finish.
Sealing concrete is always a good idea — it will keep the garden spheres from getting moldy, and it will add a slight sheen. Use Quikrete Acrylic Cure and Seal once the concrete has hardened and the surface sheen has disappeared.
Now, all that’s left to do is decide where you want to show them off in your garden!
This week, we’re creating a grandmillenial-style bathroom by incorporating modern elements to Chelsea’s mid-century main bathroom.
Chelsea plans to do a primary bathroom addition in the future, so for now, we’re updating this bathroom to accommodate her and her husband, Brandon, while keeping in mind its future use for her daughters.
For this reason, we’re keeping the pink bathtub and tile but introducing some new elements that will tie in well to this grandmillenial-style bathroom.
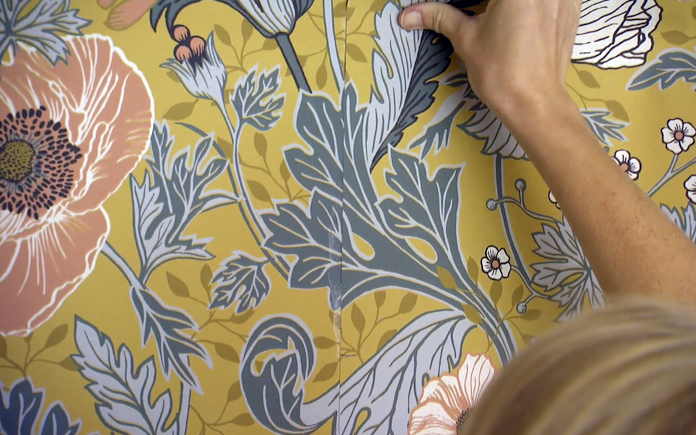
This granny-chic wallpaper pattern is perfect for this grandmillenial style bathroom. (3 Echoes Content Studio)
Hang Wallpaper
When Chelsea first moved into her home, she removed dated the wallpaper in the bathroom. And now, we’ve come full circle and are applying a new, modern-printed paper that will complement the bathroom’s retro elements and complete this bathroom’s modern grandmillenial design.
We’re encasing this bathroom with literal wall-to-wall wallpaper, including the ceiling. This will give this future girl’s bathroom a jewelry-box feel.
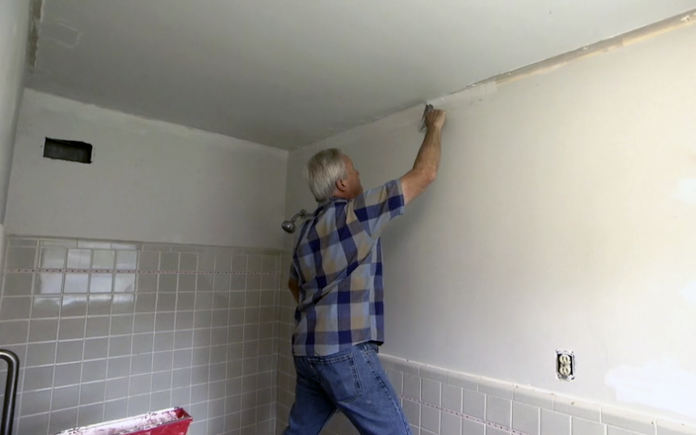
Patching the wall where the ceiling trim once was gives us an even surface for our wallpaper. (3 Echoes Content Studio)
First, we remove the ceiling trim so our wallpaper runs seamlessly onto the ceiling. To fill the spots behind the trim, we apply drywall mud with a putty knife to fill in the gaps left behind.
Next, we clean the ceiling and walls with a mold killer so we have a fresh slate for the new wallpaper.
Then, we hang the wallpaper. Here’s a step-by-step guide (link) on how to do it.
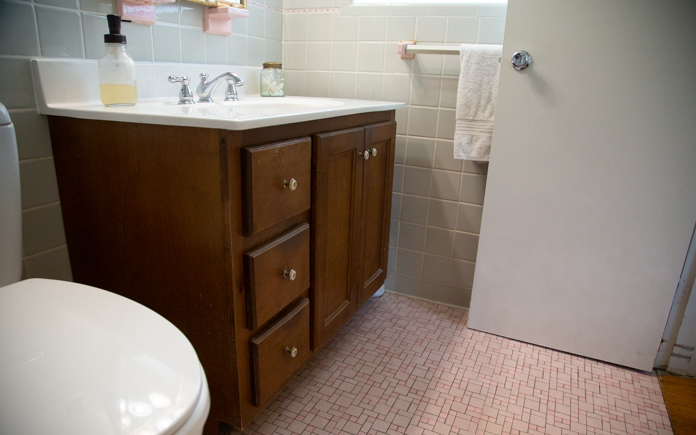
Encasing the bathroom with wallpaper creat a jewelry box feel. (3 Echoes Content Studio)This outdated vanity offers little storage space and stands out in a bad way. (3 Echoes Content Studio)
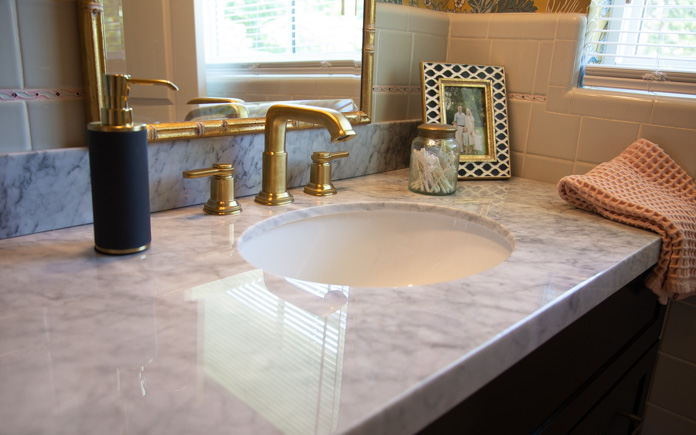
Replace Vanity
This vanity isn’t original to the house, so it looks out of place in this bathroom. Plus, it’s a little too short and narrow. So we’re replacing it with a more functional, modern one that still works with our grandmillenial style.
To replace the vanity, we remove the toiletries stored inside and disconnect the sink plumbing. This old vanity wasn’t connected to the wall, so a firm tug is all that’s needed to detach it.
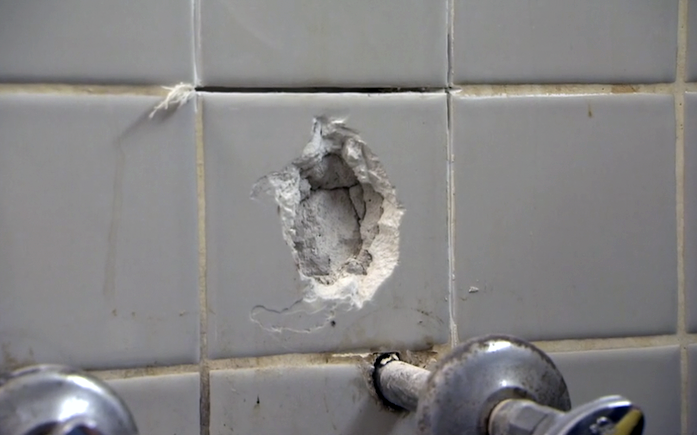
The wall tile fused to the wall underneath, making it impossible to remove whole pieces. (3 Echoes Content Studio)
Before we install the new vanity, we try to salvage some of the wall tiles behind it to use for replacement tiles on the wall behind the ceramic towel holder. Unfortunately, the tile is not coming off in one whole piece.
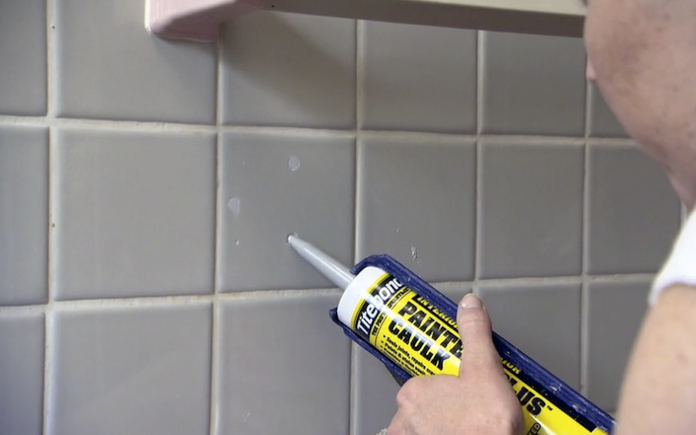
Grey painter’s caulk camouflages the holes left behind from the grab bar. (3 Echoes Content Studio)
We’re disappointed we can’t remove the towel bar, but when in the end, it’s still functional. The metal grab bars, however, can be removed. We remove the screws and fill the holes with grey caulk that’s a near match to the tile color.
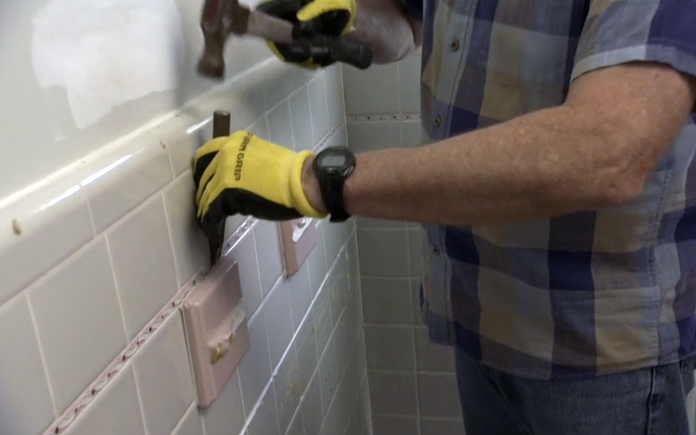
A chisel and hammer easily knock off these ceramic holders so we have a flush surface for our vanity mirror. (3 Echoes Content Studio)
We knock off the ceramic soap and toothbrush holders above the sink so the mirror can lay flush above the vanity.
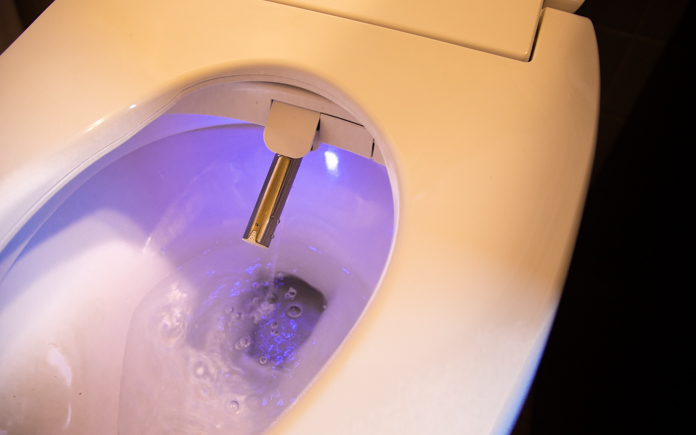
The toilet in the bathroom is the only thing that’s been updated this century, so we keep it. However, to add some extra pizzazz, we install a bidet.
This page contains affiliate links. If you purchase a product from these links, we will earn a small commission at no additional cost to you.
We chose theFluidmaster Soft Spa Electronic Bidet Toilet Seat. It features an integrated water heater, adjustable water pressure and wand positioning, as well as a heated seat and warm air-dryer. Plus, it has a remote, so you can face forward to use it, instead of reaching behind to make adjustments.
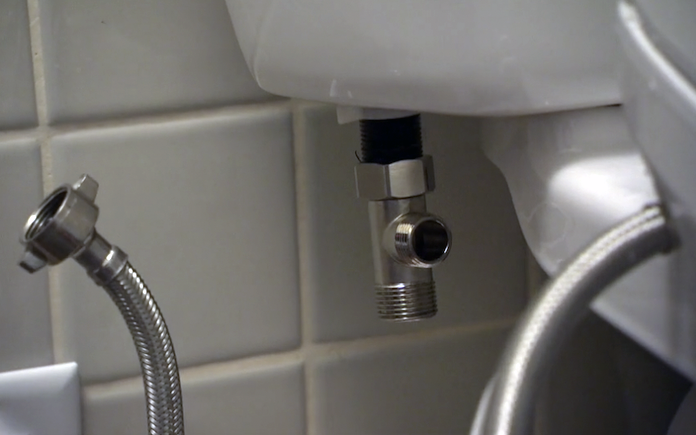
A T-valve connects to the existing water line that supplies the water to your bidet toilet seat. (3 Echoes Content Studio)
The bidet requires a water line, so we shut off the water at the toilet to install a T-valve so both the toilet and the seat can get water from the same source.
Chelsea and Brandon’s bathroom is 65 years old. At that age, there’s some baggage like the pink tub and the lack of ventilation.
The vanity was newer than that, but it really didn’t fit the style of the room and it lacked character.
But now, the room is overflowing with character and grandmillenial style. The wraparound wallpaper not only creates the jewelry box feel that Chelsea was after it also makes the pink tub look intentional.
The vent fan makes the space more functional, and the larger vanity makes it easier to use. Plus, its black finish complements the room style, and the new bidet toilet seat elevates the whole room to a spa-like experience.