In this week’s radio show, some good news on the home improvement horizon, plus some tips for painting and how to fix a bowed stud.
Home Improvement News
Lumber prices are falling after months of price increases. (elenaleonova, Getty Images Signature)
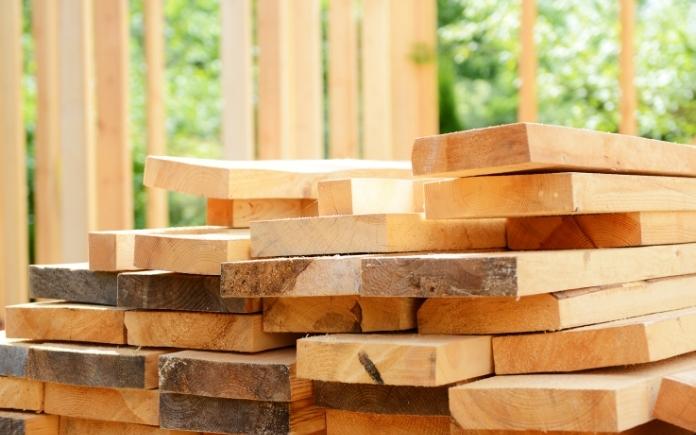
Good news on the home improvement front! Lumber prices are starting to fall.
At the start of the year, the price of lumber was $1,112 per thousand board feet, and as of June 23, the price has fallen to $617 per thousand board feet, according to the Chicago Mercantile Exchange.
So, if you’ve been thinking about replacing a fence or building a deck, there’s some hope in sight.
But, there’s also more to keep in mind. If you’re planning a project, you’ll need to order things well in advance. The lead times on some common materials may take a lot longer than you think.
The average delivery time for materials increased in May to 85 days, according to the Institute for Supply Management’s latest manufacturing report.
Joe is installing a bay window, and he ordered it a few weeks ago and it’s supposed to come in at the end of July. (They didn’t tell him the year so we’re assuming it’s next month!)
So, if you want to complete a new project this year or buy a new appliance, don’t put it off!
Skip to [00:28] for the full segment on the Today’s Homeowner Radio Show.
The Secret to Vanishing Brushstrokes
It’s possible to get the look of airbrushed painted cabinets while using a paintbrush. (3 Echoes Content Studio)
Add an additive like Flood Floetrol Latex Paint Additive to your paint. Add a little bit to the paint and it does an amazing job of evening out the brushstrokes.
Also, don’t skimp on a cheap foam brush. Buy a good-quality brush that will last a long time.
Skip to [52:09] for the full segment on the Today’s Homeowner Radio Show.
How to Straighten a Bowed Stud
If you find a bowed stud after removing drywall, you can fix it without removing the whole board. (Pancaketom)
Gordon Lipinski in Akron, Ohio is in the middle of a major bath renovation. He ripped out an old bathtub to replace it with a large shower.
However, when he went to install the cement backer board to the 2-by-4 wall frame, he found that one stud is bowed out slightly, making it impossible to set the backer board flat against the wall.
“There’s no easy way to remove the bowed stud now, so should I shim out the other four studs or is there some way to straighten out the bowed stud?” he asks.
To fix this so the backer board is level against the stud, use a cordless saw to vertically cut the stud along the bowed area.
Before you cut, pop a line from top to bottom. This will get it back in line with the wall.
Skip to [54:05] for the full segment on the Today’s Homeowner Radio Show.
Around the Yard
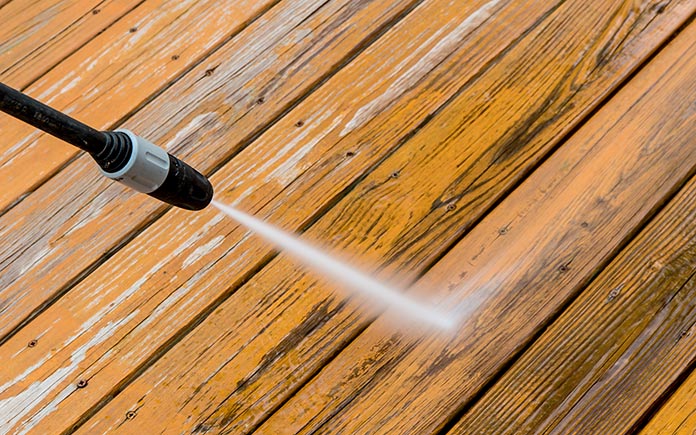
Make deck dirt and buildup disappear with the swipe of a pressure washer wand.(DepositPhotos)
If you love creating or improving outdoor spaces like I do, you know how frustrating it can be when they start to get dingy and dirty.
It’s inevitable, that pergola, deck or paver patio you built will eventually start to gather dirt and mildew until it looks old and tired — stealing the joy you used to feel every time you looked at your creation.
With the swipe of a pressure washer wand, your deck or patio can go from cruddy to clean in minutes.
So here are some tips to make the job faster and more efficient.
First, choose the right cleaning solution. If you’re using the pressure wand to apply it, be sure the formula is “pressure washer safe.” Anything containing bleach can damage the pump in your machine. However, if you need bleach, apply it separately with a pump-up sprayer.
Next, choose the right tip. Most pressure washers come with a variety of tips ranging from a narrow point to a broad fan pattern. The finer the pattern the greater the chance of doing damage to softer surfaces like wood. User a wider tip for a fence or deck than you would for a patio or driveway.
Finally, get some good accessories. One of my favorites is the cleaning disc that snaps onto the wand in place of the pressure tip. Inside the disc there are two fine tips that spin in a circle to clean large, flat areas fast. Plus, there’s less chance of leaving streaks behind when you’re done.
Skip to [34:12] for the full segment on the Today’s Homeowner Radio Show.
Also on this episode:
Best New Product
Get the same power as gas minus all the noise with Ryobi’s Whisper Walk electric push mower. Learn more>>
Other Products and Links Mentioned
Further Reading
Radio Show: Send us your question!
If you have a comment, general question about home improvement, or something we’ve featured on Today’s Homeowner, please fill in this form:
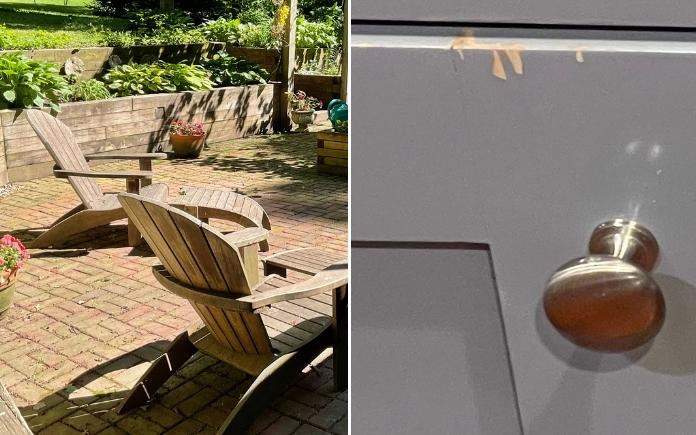
This week, we’re talking about making this old patio look new and repairing a chipped painted cabinet. (Photos by Nancy Kelly, Chris Hartsfield)
This week, we’re giving tips on how to refresh an old brick patio, repair chipped painted cabinets and remove shelf liner adhesive.
New Life for an Old Patio
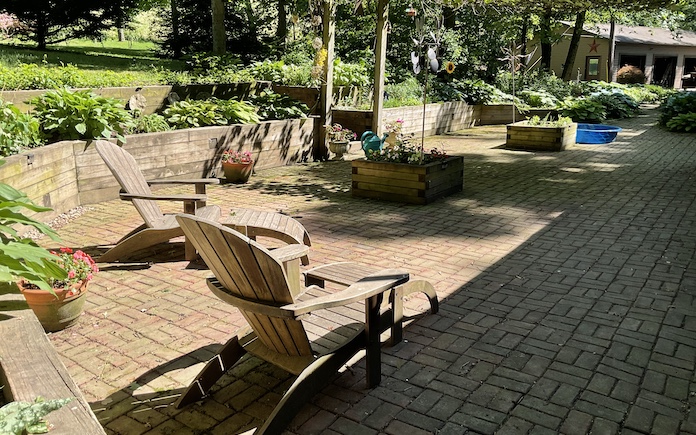
Nancy Kelly is looking for advice on how to keep weeds from creeping up on her brick paver patio. (Nancy Kelly)
Nancy Kelly installed a brick paver patio outside her Pennsylvania home over 20 years ago. Nowadays, constant weeds have turned it into just a glorified walkway. How can she bring this patio back to its glory days?
First, kill the weeds in between the pavers. There are many ways to get rid of them:
Chemical weed control: Herbicides kill weeds fast, but they’re potent and can be hazardous to your health if you’re not careful. When applying herbicide, wear a long-sleeved shirt, long pants, boots, rubber gloves and protective eyewear to prevent any contact with your skin or eyes.
Boiling water:Pour boiling water directly on the weeds to kill them immediately.
Iodized salt: Spreading iodized salt on the gravel will kill weeds, but it will sterilize the ground for years to come, so use it sparingly.
Gardening vinegar: Spray weeds with gardening vinegar. Because it’s 30 percent more concentrated than regular household and cooking vinegar, it will wilt the weeds.
Once the weeds are dead, clear them out from in between the bricks and pack in some polymeric sand. Much like putting mulch in a flowerbed, the polymeric sand will block the weeds from sprouting up between the bricks.
Sweep the sand into the cracks and mist it. Once you mist it, the polymeric sand will bind together to form a weed-protective barrier.
After the polymeric sand has set, apply a sealer over the whole patio. This will bring out the color and character of the bricks. Put at least two coats on and let it dry for 24 hours.
Skip to [11:08] for the full segment on the Today’s Homeowner Radio Show.
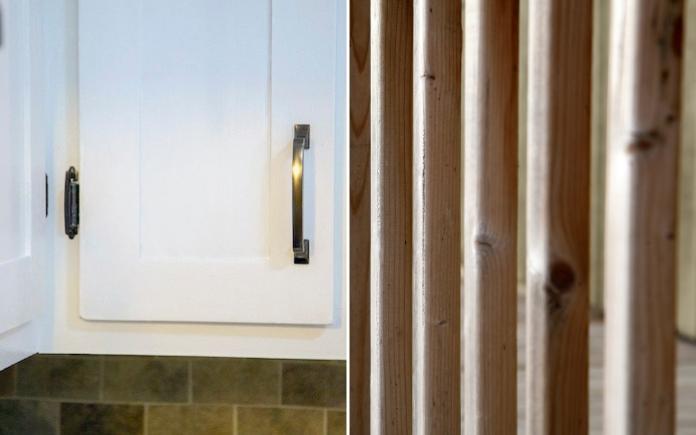
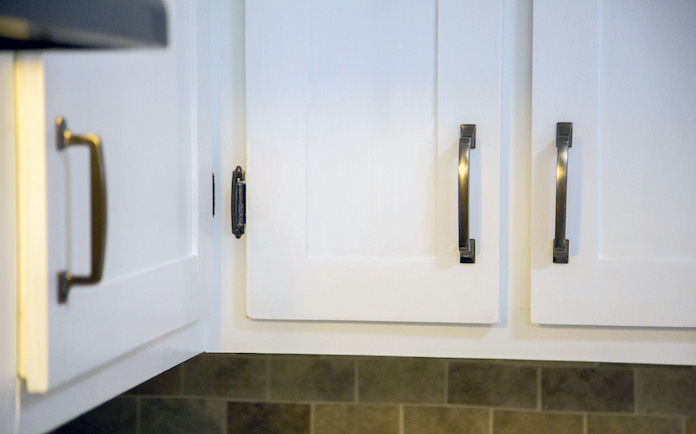
Correcting Chipped Paint on Kitchen Cabinets
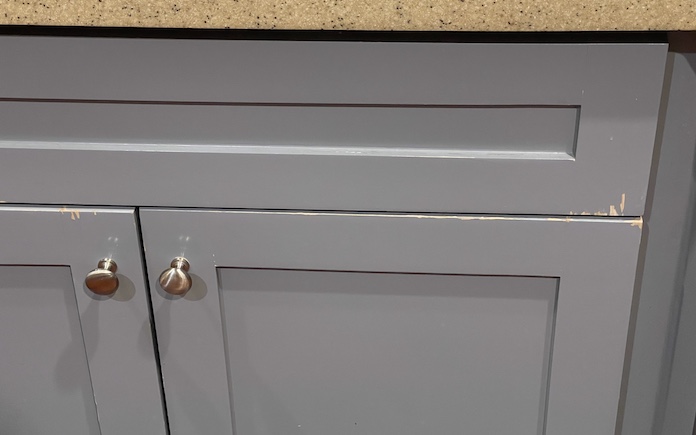
Everyday wear and tear can cause painted cabinets to chip. (Chris Hartsfield)
Chris Hartsfield in Texas refaced and spray-painted his kitchen cabinets a few years ago, but now, some of the paint has chipped off. What’s the best way to fix this?
With frequent and repetitive use, a fingernail or ring can easily chip some paint off a cabinet door.
It’s difficult to match a sprayed finish using a paintbrush. Try sanding the chipped area with a fine 220-grit sandpaper, then paint it.
The chip won’t be blended completely into the rest of the cabinet, but it won’t be as noticeable.
For a seamless repair, you’ll need to contact the professional who refaced the cabinets.
Skip to [59:15] for the full segment on the Today’s Homeowner Radio Show.
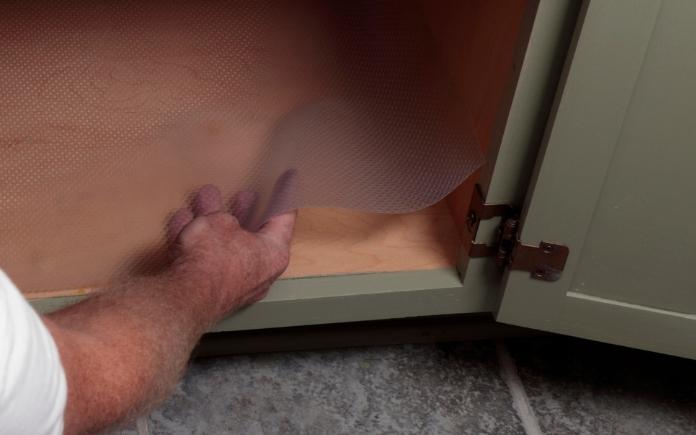
Solving a Sticky Problem
Self-adhesive shelf liner stays put when you need it but leaves behind a sticky mess. (Serenethos, Getty Images)
Heidi in Georgia moved into a house less than a year ago, and every kitchen and bathroom cabinet had white spongy shelf liners. She’s removed the old liners from the painted shelves, but the surfaces are still sticky. She’s wondering if she should just repaint the shelves.
In order to repaint the shelves, you must remove the old adhesive or the paint won’t stick.
Skip to [1:10:25] for the full segment on the Today’s Homeowner Radio Show.
In the Aisles of The Home Depot
This Father’s Day, buy dad a new toolset! (The Home Depot)
Father’s Day is just around the corner, so now’s the time to start thinking about the perfect gift. From smart home to tools to grilling, The Home Depot has a wide variety of products you need to make this Father’s Day the best one yet.
Tools: Gear up dad for his next home project by gifting him the tools he needs to get the job done. Help Dad update his power tool game or start from scratch with something simple.
Smart Home: Whether dad is dabbling in some new tech tools to upgrade his home or is a smart home pro, The Home Depot has products to meet his needs.
Grilling: Whether your dad is a grilling apprentice or an absolute pro, The Home Depot offers the latest in all-things-grilling — from the grill itself to essential accessories.
DIY Projects: For the more hands-on dad, The Home Depot has a wide variety of projects that are perfect to complete together this Father’s Day.
Skip to [1:06:51]for the full segment on the Today’s Homeowner Radio Show.
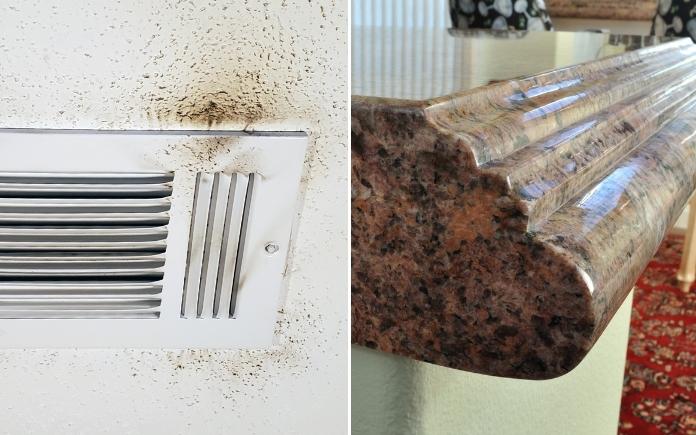
Dirty ceiling vents can cause health problems. Also: You don’t need a pro to fix a chip on a granite countertop. (Photos from Donna De Cant and MichaelRLong, Getty Images)
This week, we’re giving advice on how to repair a cracked sloped ceiling, how to clean a popcorn ceiling around a vent and how to fix a chipped granite countertop.
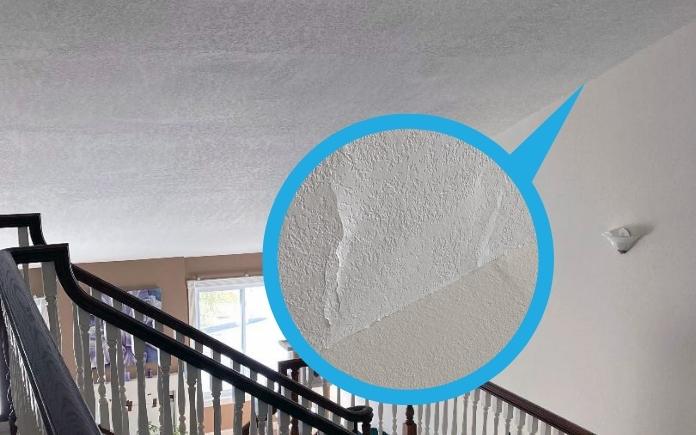
A Solution to a Cracking Sloped Ceiling
This sloped vaulted ceiling is starting to bubble and crack. (Photo illustration using images from Jim Marsh)
The sloped vaulted ceiling in Jim Marsh’s Thousand Oaks, Calif., townhome is loosening from the rafter and starting to bubble and crack.
Contractors have advised him against patching the problem areas because of how big the ceiling is (it’s 17 feet wide by 53 feet long!). He wants to know if it’s structurally sound to place drywall over existing drywall.
First off, we agree with what the contractors are telling Jim. With such a large ceiling, if you were to try to scrape the spots and blend them in with a knockdown finish, they would still stand out.
Also, more cracks could pop up.
And yes, you can put drywall over existing drywall. The process of doing that is called veneering, and quarter-inch drywall is available for this.
You’ll need to identify where each ceiling joist is and pop chalk lines on each one. Then, insist on using screws, not nails, so they’ll stay in place and won’t pop out.
Another option is to tear out the ceiling and start from scratch. The bubbling could be caused by a moisture problem, so doing this will expose if that is the case.
Skip to [10:52] for the full segment on the Today’s Homeowner Radio Show.
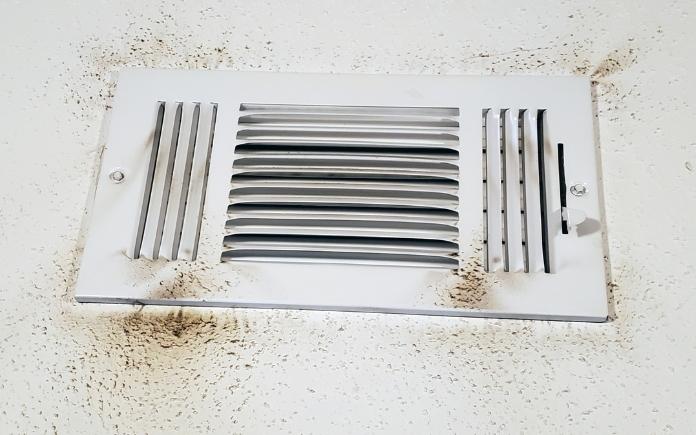
Cleaning a Popcorn Ceiling
If you have a dirty A/C ceiling vent like this, you may need to replace more than just the air filter. (Photo by Donna De Cant)
Dirt is accumulating outside the ceiling vent in Donna De Cant’s home in Live Oak, Fla. She’s tried to clean the ceiling, but only the popcorn texture comes off, not the dirt.
To clean a popcorn ceiling, use the upholstery brush on your vacuum cleaner to remove the dust. Unscrew the vent from the ceiling and clean the grill with oxygen bleach or another cleaning agent. Oil up the moving parts with machine oil
If the dirt has stained it, mix some warm water and oxygen bleach in a spray container, and carefully spray the ceiling. Don’t oversaturate it or the popcorn ceiling will come loose.
Once it’s dry, go over it with a stain-blocking primer and paint it.
So what’s causing this? The vent is blowing air out, and in that air are dust particles. Anytime you’re changing your A/C filter, vacuum out the space behind the return air vent.
Also, moisture in the air can make those dust particles stain the ceiling. Moisture could come from the air or you could have leaky ductwork. Make sure the humidity in your home isn’t too high, and have an air conditioner technician check your ductwork to make sure it’s sealed properly.
Skip to [22:17] for the full segment on the Today’s Homeowner Radio Show.
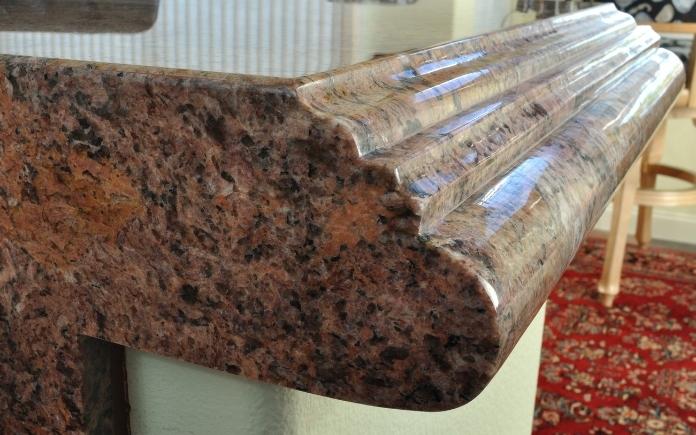
Repairing Chips on a Granite Countertop
There is a quick fix for repairing chips in granite countertops. (MichaelRLong, Getty Images)
Granite is a natural material, so there are different layers of stone that can loosen up. This, in turn, can make them susceptible to chipping.
Simply dropping a can from a cabinet can cause a knick on the surface.
To repair chips in granite, you can use epoxy glue. It dries a cloudy gray color so it will blend in with darker-colored countertops.
It can be tough to blend it to match since each granite countertop has a unique color texture.
For a more precise repair that won’t stand out, buy a ProCaliber Granite Repair Kit. No color matching is necessary for this kit.
Skip to [56:24] for the full segment on the Today’s Homeowner Radio Show.
Also in this episode:
Best New Product
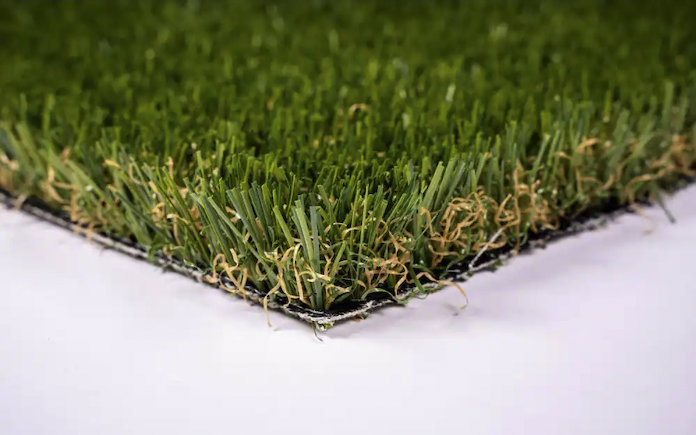
Whether you want to protect your lawn from pets digging or create a space for them to roam, Lifeproof Premium Pet Turf has you covered. Learn more>>
Other Products and Links Mentioned
Further Reading
Radio Show: Send us your question!
If you have a comment, general question about home improvement, or something we’ve featured on Today’s Homeowner, please fill in this form:
Pet turf is a godsend for homeowners who lack a lush lawn space for their furry friends to roam.
It also could be a solution to a four-legged problem child digging up a preciously manicured lawn.
Pet owners know the challenge. You let them out to take care of business and they wind up digging in the dirt and bringing it back inside. Not to mention the damage they do to the grass outside.
Repointing the brick on this historic home will help the exterior upkeep for longer. (Photo by Scott Evans)
Repointing brick is the process of renewing the pointing, or external mortar joints, in between them. Over time, weather deteriorates the mortar, which could then cause water to leak inside the brick wall.
Repointing a historic brick home requires a different type of mortar so it will last for years to come.
Scott Evans in Rochester, Ill., has begun repointing his 155-year-old brick home in Rochester, Ill., but the mortar is popping out.
So, what’s the solution?
Scott’s problem has to do with the type of mortar he used.
When repointing an older brick home, you don’t want a mortar that will cure harder than the brick itself.
Older bricks are soft, and they tend to expand and contract more in temperature and humidity changes than newer, harder bricks.
Use type O mortar — a high-lime mortar with low compression strength. It contains less Portland cement and more lime, which makes it softer and also more waterproof.
Here are the basics for repointing brick:
Use a chisel or handheld grout saw to remove the mortar.
Wet the bricks and let them soak overnight. Keeping them hydrated will prevent the bricks from soaking up too much of the water in the mortar mix.
Next, mix the mortar. The general rule for mixing mortar is to use three parts sand to one part mortar mix. Combine the mix with water until it reaches the consistency of cake frosting. Work in small batches so the mortar doesn’t dry out before you apply it.
Work the mortar between the bricks using a pointing trowel. Use the flat end of the trowel to scrape away any excess on the face of the brick.
For the next three days, mist the mortar daily so it dries slowly and won’t crack.
Skip to [9:35]for the full segment on the Today’s Homeowner Podcast.
Also on this episode:
Best New Product
LG’s new convection oven with air fry capability saves on counter space and can cook for a crowd. Learn more>>
Simple Solutions
Adding Epsom salt to your tomato plant soil will improve its health and taste. (pixabay)
Epsom Salt in the Garden — Epsom salt is magnesium sulfate, which is rich in minerals that plants need.
By adding Epsom salt to your garden, the plants will absorb much more nutrients from the soil and fertilizer.
Here are three ways to grow healthy plants with Epsom salt:
1) Plants in the nightshade family — tomatoes, peppers, eggplants, potatoes — need magnesium to produce greater yields and more flavorful fruits and vegetables. Sprinkle 1 tablespoon of Epsom salt around the base of your plants. Or, mix the salt with a gallon of water and water the plants with the mixture. Repeat every two weeks.
2) Is your lawn looking dull? Add three pounds of Epsom salt for every 1,250 square feet of grass and then water your lawn.
3) Want robust roses? Sprinkle Epsom salt at the time of planting and when the flowers are in bloom. The salt encourages the rose bushes to produce larger flowers with deeper colors.
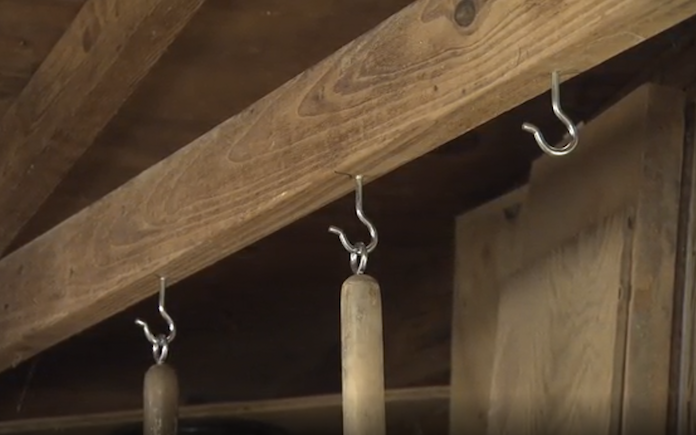
Hanging tools on screw hooks keeps them off the floor and out of the way.
Storing Garden Tools — Here’s an easy and effective way to store long-handled garden tools in a shed or garage:
Drill a pilot hole in an overhead joist and twist in a screw hook.
Then, drill a pilot hole in every end of the tool’s handle, and twist in a screw eye.
Now you can simply suspend the tools from the overhead hooks.
Q: I live in north Georgia where the soil is comprised almost entirely of red clay, so it’s nearly impossible to grow flowers and vegetables in my gardens. I tried tilling the soil and using fertilizers, but nothing seems to grow, except weeds. Do you have any suggestions?
A: Clay soil has poor drainage and is compacted tightly, so roots won’t hold well.
Typically, tilling the clay soil and adding a layer of topsoil is enough for grass to grow. However, for plants with deeper root systems, like vegetables and flowers, you’ll need to do a fair amount of work to make that clay soil suitable.
First, till the soil and aerate it as much as possible. Then, sprinkle about an inch of expanded shale over the soil.
Till the expanded shale into the clay soil, and then spread two to three inches of compost over it.
Finally, till the compost into the shale and clay soil mixture.
Once your soil is prepped, make sure the pH is correct for whatever plants you choose.
Skip to [33:50]for the full segment on the Today’s Homeowner Podcast.
Other Products and Links Mentioned
Further Reading
Ask a Question! (Podcast)
Ask a question and we could answer it on the “Today’s Homeowner Podcast!” We also may use it on our nationally syndicated radio broadcast or on todayshomeowner.com.