Listen to hear how to prevent nails from pooping out, raise an outdoor dryer vent’s height, and more!
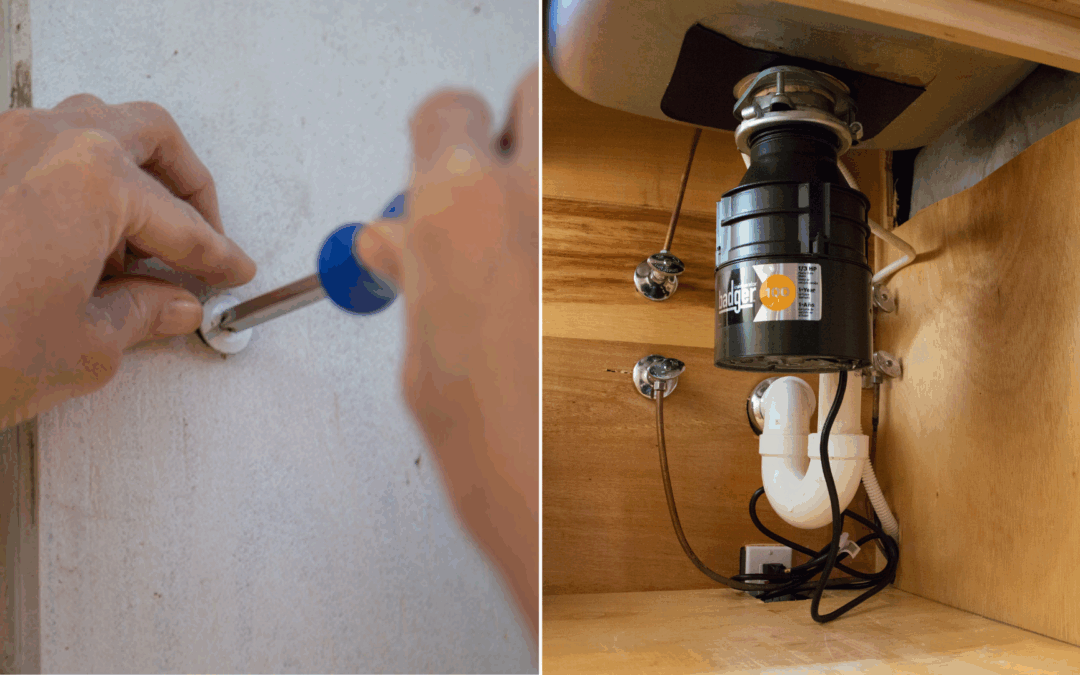
How to Stop Drywall Nails from Popping Out
Use a drywall screw instead of a nail to stop nails from backing out. ( 3 Echoes Content Studio)
A homeowner’s house was built in 1954 and she is tired of watching nails back out of the drywall.
She asks, “How do I fix this? Can I pound the nails back in?”
First, pounding the nails back in is just a temporary fix — they will eventually pop out again. But the bigger question is this: why does it happen?
In a home, there is a lot of movement — doors slamming, people walking, etc. All these movements cause vibrations. And, over time, those vibrations will cause a drywall nail to back out.
To fix this problem, you’ll need to remove the nails and replace them with screws because drywall screws are the better option.
You don’t want to just remove the nail and replace it with a screw before checking if the nail is in the center of the stud or close to the center. The stud might be the reason it is popping out.
So, we recommend taking a hammer and a finishing nail and tapping through the drywall until you find the center of the stud.
Once you find the center and pull out the nail, then drive one or two drywall screws an inch or two above the old nail hole. This will hold it tight.
After replacing the nail with a drywall screw, put joint compound over the screw heads and in the old nail hole, let it dry, sand it, and do it again. Once you have it filled and sanded dry, paint it.
The screws will hold up very well, and you will hopefully never have to do this process again!
An outdoor dryer vent should be at least 12 inches from the ground. (3 Echoes Content Studio)
A homeowner’s dryer vent runs on an exterior wall and under the brick veneer. It is installed about an inch off the ground instead of 12 or more (the recommendation).
He has trouble with stormwater getting into the vent, and now asks, “Do you have any recommendations for me?”
First, it’s rare to find a dryer vent so low to the ground. It is possible that when the vent was originally installed, it was the correct height off the ground. However, as time passed, grading and landscaping could have been added, and the vent got closer to the ground.
To make this dryer vent work efficiently, you’ll want to have as short of a path as possible. So, we do not recommend rerouting the current ductwork and going through the soffit.
Instead, we recommend trying to elevate or extend the existing vent upward, or digging dirt around the vent to give it more space. You could also add a slight turn and elbow to get it off the ground.
Check your local home center for a device that curls up at 90 degrees, which will help elevate the vent on the outside. There are many dryer vent options.
For safety, do not use PVC pipe for an elbow because it cannot handle the high temperatures that come through a dryer vent.
In addition, make sure you frequently clean your dryer vent to prevent house fires and keep your dryer working efficiently.
Hour 2
Listen to learn about garbage disposal rules, how to fix a toilet that won’t flush, how to lay an underlayment over a tile floor, and more!
What You Can Put Down a Garbage Disposal
It is acceptable to put things down a garbage disposal if they are small enough. (3 Echoes Content Studio)
A homeowner and his wife have had an ongoing disagreement about whether it is okay to put scraps of meat down the garbage disposal. They have septic tank disposal.
He says, “Can you settle this debate?”
It is perfectly fine to have a garbage disposal with a septic tank. However, some septic tanks are really good, and others are very marginal. That plays a large part in the disposal’s functionality and what waste it accepts.
When it comes to garbage disposals, you do want to use them sparingly and not put everything down it. You want to avoid putting large substances down.
The answer to the question would be yes, but only small pieces of meat, and don’t pack it full.
Make sure you use and maintain garbage disposals correctly. It is recommended to use cold water to wash waste down the drain and ensure you don’t put something in the garbage disposal and not run it!
If your garbage disposal gets clogged, use this trick!
How to Solve Toilet Flushing Issues
Adjusting the chain is an easy fix to solve toilet flushing issues. (3 Echoes Content Studio)
A homeowner is struggling to get her toilet to flush completely. She says she has to hold the handle down until the bowl is flushed.
She wants to know, “Why does this happen, and how can I fix it?”
There are two reasons that she may be having this problem. One, there is not enough water in the tank, meaning the water stops before reaching about half an inch below the overflow tube. That is where you want to adjust it.
Next, you want to ensure that when you push down the handle, the flapper stays open to allow the flushing action and then closes. If the chain is too short or too long, that will prevent that from happening.
Another reason is an obstruction in the drain. If there is an obstruction, then you won’t get that flushing action because it’s resisting the water going into it.
It is most likely the first problem. This is a very common fix, and there are lots of great repair kits out there. Do this quickly so you won’t waste water!
Although fixing a toilet might not be the most glamorous form of home improvement, it is so important to have a working toilet that will stay in good shape for a long time.
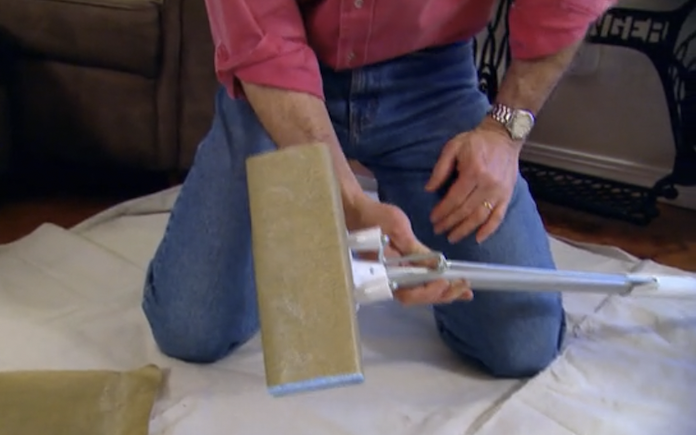
Make sure you use the right notch trowel size to install an underlayment. (3 Echoes Content Studio)
A homeowner wants to put a quarter-inch underlayment over a tile floor.
He asks, “Do I need to nail or screw it? What do I use?”
No, you are not going to want to nail through or screw it. You will have to glue it down. Do some research and find the right adhesive you need, depending on the materials you are using. Most likely, it will be in a bucket, and you’ll use a notch trowel to install the right amount.
Make sure that you read the directions to ensure you use the recommended notch trowel size. A lot of people do not realize that the size of the notch trowel needs to correlate with the adhesive in order to work well.
To ensure there is no movement when putting down the floor, use leftover blocks, bricks, or heavy objects to weigh it down a little bit. Leave it overnight so that it will dry and really cure well.
There are multiple options for underlayment. One option is a self-leveling underlayment. This is like really thin concrete. Do a thin coat over the tile to create a smooth and flat surface for a vinyl floor to be put over.
The StyleWell Parker Mill 4-Piece Metal Patio Set is durable and long-lasting, providing you with the outdoor furniture you can count on. Learn more>>
Simple Solutions
Use a push broom before painting to remove dust and dirt from walls. (®JodiJacobson via Canva)
Push Broom Paint Prep—Prior to painting a room, it’s important to clean the walls and ceiling to remove all dust, dirt, and cobwebs. Here’s a quick and easy way to do that: Wrap a towel around the head of a push broom, and secure it with a binder clip or pinch clamp. Then lightly mist the towel with water. Now use the towel-wrapped broom to wipe down the walls and ceiling. The damp towel will trap any dust or dirt, leaving behind a clean, ready-to-paint surface. This tip also works great to remove joint-compound dust from newly sanded drywall joints.
Use concrete blocks to create easy storage for your gardening tools. (3 Echoes Content Studio)
Easy-Access Garden-Tool Storage—Most people store their lawn and garden tools in the garage or shed by simply standing them up and leaning them in the corner. There’s nothing particularly wrong with this except that it’s a little messy, and it’s hard to grab one tool without knocking over another. So, here’s a super simple solution to that problem: Take three concrete blocks and stack them up wherever you want to store your tools. What you end up with is two deep compartments for storing long-handled tools. The blocks are heavy enough that you don’t have to worry about them falling over, no matter how many tools you put in there. If you don’t have enough headroom, you can use two blocks so you can lift the tools out. This will give you a neat place where your tools are out of the way and easily accessible, and you don’t have to worry about them falling over.
In this special New Year’s Eve episode, we’re playing back some of our favorite segments from the past year. (3 Echoes Content Studio)
In this special New Year’s Eve episode, we’re playing back some of our favorite segments from the past year. We wish you a happy new year and hope you look at 2023 as an opportunity for you to get things done around your home.
Cutting crown molding is easy when you use our Simple Solution. (DepositPhotos)
Cutting Crown Molding: To make miter cuts in crown molding, turn a panel upside down on the miter saw table. This allows the angled back edges to rest against the fence and the table during cutting.
Holding the molding in the right position while you make a cut is the difficult part.
The solution is to hot glue a piece of 1-by-2 wood to the saw table so it acts as a cleat to hold the molding in the proper position.
Use plastic liners in your apron to easily switch between nails and screws. (3 Echoes Content Studio)
Easy Nail Apron Liners: Make interchangeable liners for your nail apron or tool pouch out of one-quart plastic motor oil bottles.
Cut off the spout, wipe the bottle clean, fill it with nails or screws, and slip the liner into the apron pouch.
Fill up several bottles with various types and sizes of fasteners, so you can quickly and easily switch them in and out without having to dump out the apron.
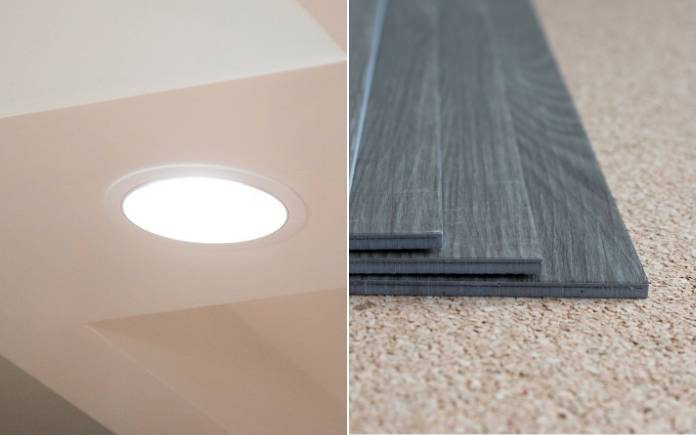
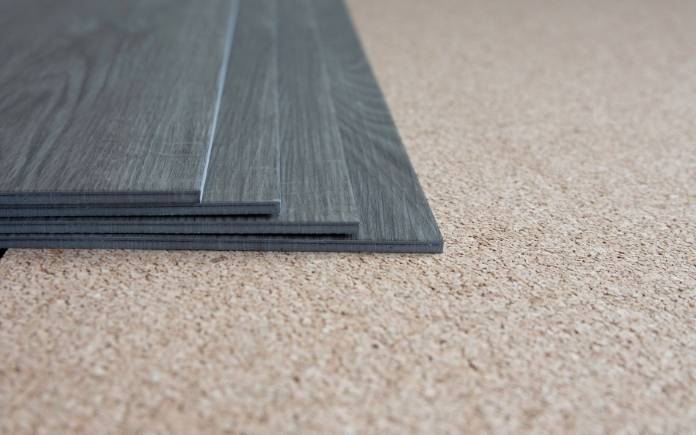
This week, hear how to insulate around recessed lighting, plus the best options for vinyl floor underlayment. (3 Echoes Content Studio/psahota, Getty Images)
Hour 1
Hear underlayment options for vinyl plank flooring, a tip for insulating around recessed lights, and more.
Underlayment for Vinyl Plank Flooring
The proper underlayment for vinyl plank flooring will block out moisture and serve as insulation. (psahota, Getty Images)
Paul in Illinois wants to replace the carpet on the lower level of his tri-level home with vinyl plank flooring. This level is on a concrete slab, and the floor gets very cold in the wintertime.
He wants to know if he can put a quarter-inch or half-inch high-density foam board under the flooring to act as insulation between the concrete floor and the flooring.
“Will that cause problems with trapping moisture under that?” he asks.
Having existing carpet there will be a pretty good test of moisture accumulation. If you pull the carpet up and don’t see signs of moisture damage, he should be fine.
In terms of putting anything dense over the slab, any layer will certainly help insulate it a little bit. A quarter-inch underlayment, glued and screwed down properly, will work well, and some would even say it’s overkill.
Check with the vinyl floor manufacturer first. Some are very specific about what types of underlayment to use. Some will allow a very thin underlayment, no more than an eighth of an inch, and others don’t recommend one.
Vinyl plank flooring doesn’t have structural stability or strength like engineered wood flooring or plastic laminate. Anything underneath that might be soft could make the floor unstable. You could get some waviness and some joint separation.
Try Homasote ComfortBase. It’s an engineered bottom surface that provides a built-in ventilation system that allows concrete to breathe naturally without causing panels to curl or bow.
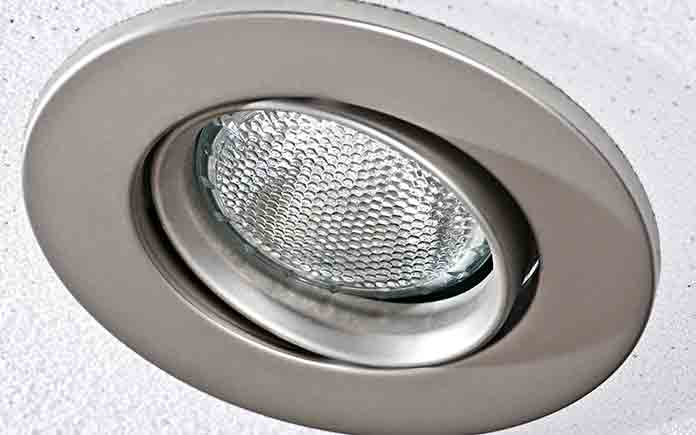
Insulating Recessed Lights
Inside air can escape through the crevices around recessed lights. Make sure there’s a proper layer of insulation above them. (DepositPhotos)
Adding insulation to your attic is one of the best returns on your home improvement dollar. And, it’s a lot easier than you think because you don’t have to do it all at once. Every time you put a piece of insulation in your attic, you’re going to be saving money.
But, if you have recessed lights, how do you insulate those? Some units have an IC rating, meaning they can come in contact with insulation. If your units don’t have this rating, here’s what you need to do:
Change to LEDs if you haven’t already. This will reduce the amount of heat generated by the lights.
Create 1-by-1-by-1 baskets from hardware cloth, pull the insulation back, and set each basket on top of the drywall, encasing the can.
Then cover it with insulation.
Attic insulation should have an R-value of 36-38. You can achieve this by adding about 13-14 inches of insulation.
Hour 2
Listen for an easy way to cut insulation, how to remove metal dust from a painted door and more.
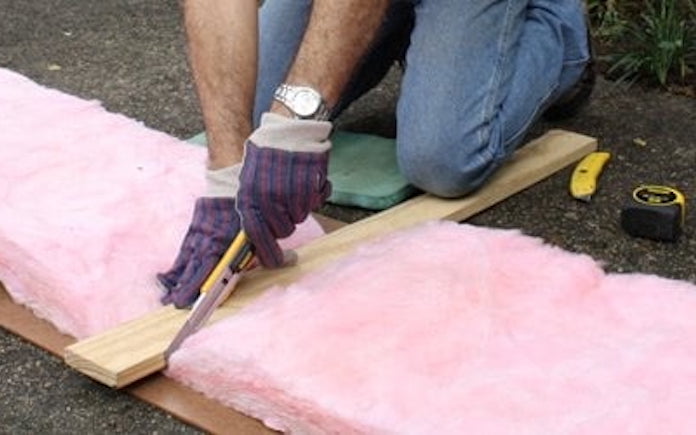
Easy Way to Cut Insulation
To cut thick batts or rolls of fiberglass insulation easily, use an extendable utility knife that has snap-off blades. (3 Echoes Content Studio)
To cut insulation squarely and accurately use a utility knife with snap-off blade. Extend the blade all the way out and lock it. The resulting 3- to 4-inch blade will make it easier to cut through thick batts of insulation.
Position the insulation on a piece of scrap plywood where you want to cut it.
Lay the straight edge of a piece of wood across the insulation.
Kneel on one end of the insulation to compress it and run the blade down the edge of the wood for a nice square cut.
For thicker pieces of fiberglass insulation use a board to compact the insulation and provide a straight edge for cutting.
Remember, to keep the fibers from irritating your skin wear a long-sleeved shirt, pants, gloves, dust mask and safety glasses.
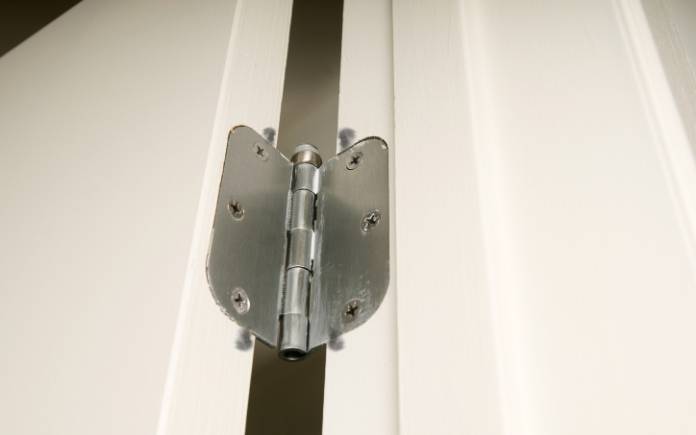
Tightly secured pins in door hinges can shave off metal dust over time. (Photo illustration: Jupiterimages, Photo Images)
Kristin in Oregon recently installed new hinges on all the doors in her master bedroom, closet and bathroom.
Now, after about six months, there’s black dust on the newly painted doors all around the hinges.
“Any idea what’s causing this? And how do I clean it off?” she asks.
Assuming no one put graphite lubricant on it, it’s probably metal dust. Because they’re new, the pins are probably lodged tightly inside the hinge, and the friction is causing the dust to deposit on the door.
Mr. Clean Magic Eraser Sponge will wipe those dust spots right off. They’re not abrasive, to they won’t damage the new paint job on your doors.
Sooner or later, enough metal will rub off the pins, and they won’t create this black dust, but there is a way to prevent this:
Tap out the hinge pins
Sand them with 120-grit sandpaper
Buff them clean
Apply a single bead of light machine oil to the pins
Spooky season is creeping up on us, so it’s time to start thinking about ways to bring the spirit of Halloween to your fall decor.
From the scary to the silly, The Home Depot has a wide variety of fall and Halloween decorations that will set the tone no matter what your personal style.
Or, do you prefer more silly and family-family friendly yard fare? The Home Depot offers inflatables featuring some favorite Hollywood characters from classic films and shows – perfect for the kids!
For a more hands-on approach, The Home Depot has a wide variety of projects on HomeDepot.com that are perfect to round out your Halloween collection this year, from how to decorate and carve a pumpkin, to how to make a jack-o’lantern flower pot or candy holder for your porch.
Best New Product
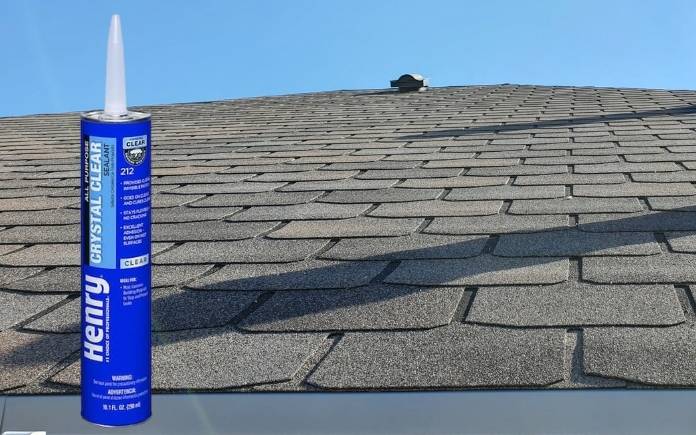
Don’t wait to fix a roof leak after it rains. With Henry’s new Purpose Crystal Clear Sealant, you can patch your roof while it’s still wet! Learn more >>
Simple Solutions
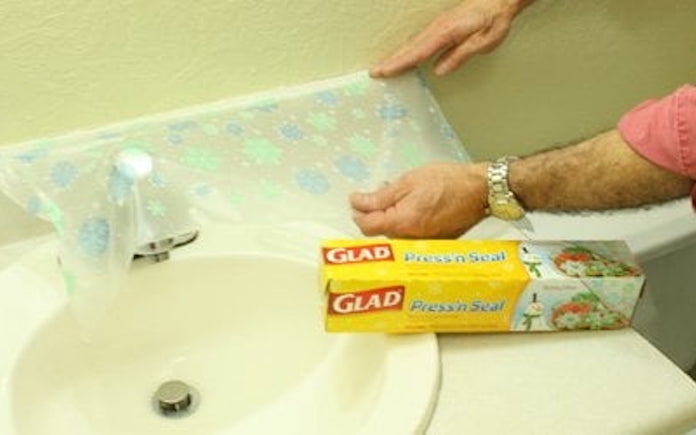
When painting, tear off a sheet of plastic food wrap to the length needed, and apply it, adhesive side down, to the surface you want to protect. (3 Echoes Content Studio)
Press-in-Place Paint Protection — Protect surfaces from paint spatters by covering them with adhesive-backed plastic food wrap, such as Glad’s Press/N Seal.
This trick is great for protecting items that can’t easily be moved out of the way, such as toilets, light fixtures, sinks and counters.
Restore wood glue to its original consistency with some water and a hex-key wrench. (EasyBuy4u, Getty Images Signature)
Rescue Old Wood Glue — When old wood glue becomes too thick to dispense easily, twist off the bottle top and pour out as much glue as possible into a small bowl.
Then, add a couple of tablespoons of water and mix with a hex-key wrench chucked into a drill.
When the glue is the right consistency, pour it back into its original bottle.
Products and Links Mentioned
Further Reading
Radio Show & Podcast: Send us your question!
If you have a comment, general question about home improvement, or something we’ve featured on Today’s Homeowner, please fill in this form:
In Hour 1 of the Today’s Homeowner Radio Podcast, learn how to remove rusty bolts from concrete, get the most out of kitchen cabinet space and more.
Removing Rusty Bolts From Concrete
Rust can spread through concrete if you don’t eliminate or seal off the source. (Stolk, Getty Images Signature)
Cliff Dodd in Mobile, Ala., recently removed his pool diving board and pedestal base, but the severely rusty bolts are still embedded in the concrete.
“When I took dive off, the bolts were three rusted mounds. I couldn’t differentiate between the nuts, bolts and washers,” he says.
He wants to know, is there a way to remove the bolts, and if not, what’s the best way to prevent these old bolts from rusting and having a rust stain on the concrete in the future?
Removing bolts from concrete can be tricky, because they were put there in the first place to stay put. To remove them, use a center punch tool to drill a hole in the middle of the bolt. Then, drill it out as much of the rusty bolt as you can. After that, use a hammer and cold chisel to crush what’s remaining of the bolt inward to get it below the surface. This way you’re not disturbing the concrete around it too much.
Another option is to grind the bolts down below the surface as much as you can. To do this, use a disc grinder, and make sure you wear safety gloves and glasses while doing it. Hone the grinder back and forth until the bolt is about a quarter-inch below the surface.
To prevent the rusted bolts from staining the concrete, spray or brush on two to three coats of metal primer over the rusted bolt. This will seal off the rust and keep it from spreading into the concrete. To keep the paint from getting onto the concrete surface, cut a hole that’s the same size as the bolt in a paper plate and place it over the bolt area.
Next, cover the holes with a concrete patch. The challenge when working with existing concrete is getting the patch to match. For a uniform look, apply a concrete resurfacer over the entire slab.
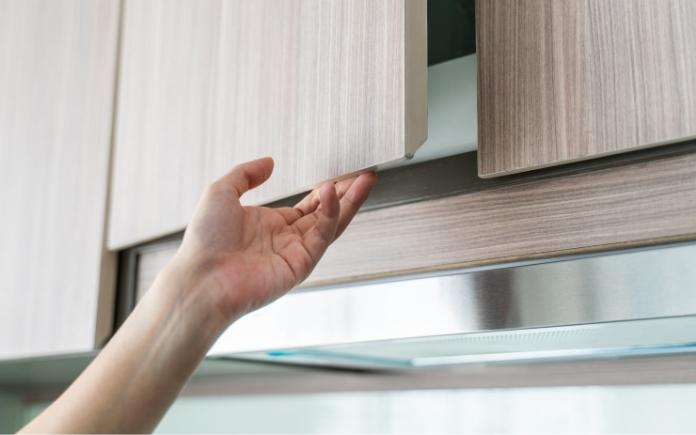
Getting the Most Out of Your Cabinet Space
Pull-out shelves prevent an avalanche of Tupperware when you open cabinets. (sirawitt99, Getty Images)
Dorene in Pennsylvania needs some advice on her kitchen cabinet storage.
She has pull-out shelves in her base cabinets, but half of them are broken. She’s ready to just remove them and install permanent half shelves.
Our advice: Don’t install stationary shelves; repair or replace the pull-out shelves.
When you look at the cubic feet of storage in a cabinet, you’re only using about 50 percent of it with stationary half shelves.
With a full pull-out shelf, you can use the most space and still have easy access to your items.
Repairing the pull-out shelves could be as simple as replacing the slides. Purchase new slides through the manufacturer.
To utilize even more cabinet space, consider installing a new pull-out shelf configuration. Home Depot offers many pull-out options, from corner cabinet pullouts to spice racks and more.
Before buying, take careful measurements of the depth and width of a cabinet. Retrofitted pieces of hardware are only expandable to a certain degree.
Hour 2
In Hour 2, we talk about the pros and cons of peel-and-stick wallpaper, the best paint for hardwood floors and more.
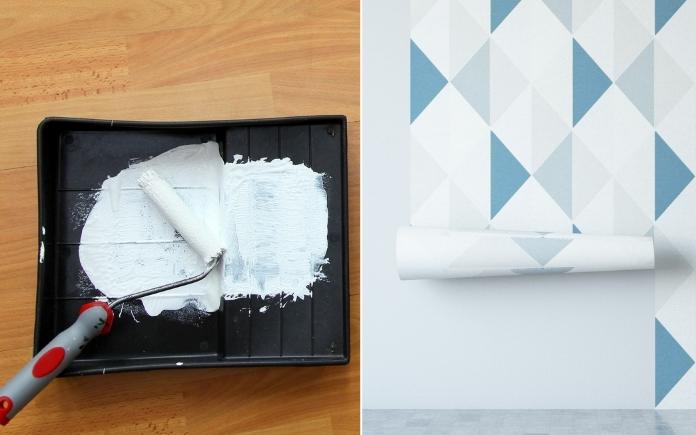
Pros and Cons of Peel-and-Stick Wallpaper
Peel-and-stick wallpaper is a temporary way to add style to a room. (asbe, Getty Images Signature)
Peel-and-stick wallpaper is perfect for renters or homeowners who like to change their interior design often.
Because the adhesive is already applied, you don’t have to worry about making a mess with paste.
Before buying peel-and-stick wallpaper, consider the following:
Price: Prices for peel-and-stick wallpaper can vary. The cheaper it is, it will probably be more difficult to hang it smoothly. If you’re on a budget and going with the lowest price point, consider just using it for an accent wall. Also, keep in mind that the cheaper adhesive might damage your wall.
The higher in price you go, the easier the application and stronger the hold will be. Also, the more expensive types are easier to remove and leave behind less residue.
Location: Before putting up peel-and-stick wallpaper, take the room into consideration. A bathroom is very humid, so you need wallpaper with a strong adhesive. Otherwise, it might peel off by itself.
Also, because peel-and-stick wallpaper is made from plastic, heat can melt it. Don’t install it near a stove or a fireplace.
Our advice: Don’t buy the cheapest option. Buy mid-price peel-and-stick wallpaper and always check the reviews. If you find it costs the same as traditional wallpaper, you might as well hang regular wallpaper.
Painting a Wood Floor
If you must paint a wood floor, be sure to prime it first. (mattjeacock, Getty Images)
Karen Pittman in Tennessee lives in an older home that needs new flooring. Her current floors are wood, but she says they’re not worth refinishing.
“Until we can afford new flooring, is there a paint that will withstand the pitter patter of my 100-pound puppy’s little feet?” she asks.
We don’t often recommend painting a wood floor, but if it’s your only option, you need to use the right kind of paint.
This time of year we spend more and more time outside. But for many of us It’s just downright HOT in July. So finding some shade for our outdoor living spaces is a priority. If you don’t just happen to have a perfectly positioned tree over your deck or patio, here are some ideas that may give you some relief from the Summer sun.
A pergola or arbor is the first thing many people think about when they want shade, but most of these structures don’t actually provide much of it on their own. Those vertically oriented boards across the top of them look really cool but they only block the sun at just the right angle. However, if you plant some climbing vines around the perimeter of the structure, in time they’ll create a canopy over the arbor that provides plenty of shade.
If early morning or late afternoon sun is a problem in your favorite spot, you may get some relief from a vertical hanging screen. The big decision here is whether you want to be able to move the screen when the sun isn’t intruding. Lattice panels are great for fixed screens but for a movable option, you might consider a rolling screen that works much like a window shade on a larger scale. I’ve even seen people make shade curtains from drop cloths with some success.
But by far the easiest and most popular way to produce shade is by hanging a fabric shade sail over the space. These are available in a variety of shapes, sizes and colors depending on your situation. The important thing to consider here is the tie-down locations. Be sure they’re sturdy enough to support the shade in the wind and allow some way to re-tension it since it will inevitably begin to sag over time.
This Around The Yard segment is brought to you by Quikrete and Pavestone.
Best New Products
A smart grill takes the guesswork out of grilling. See why this new technology can make your barbecue better than ever. Learn more >>
Simple Solutions
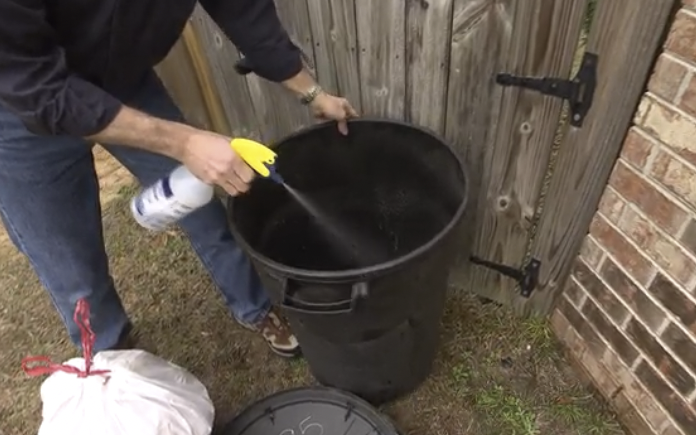
Ammonia not only disinfects trash cans, but it also repels critters. (3 Echoes Content Studio)
Pest-Proof Your Garbage Cans — Fill a spray bottle with ammonia and spray the outside of your garbage cans to repel raccoons, dogs and other critters from knocking over and rummaging through your trash. Also, liberally spray the ammonia on the ground around the garbage cans.
Converting a sponge mop into a pole sander can save you from stretching. (3 Echoes Content Studio)
Improvised pole sander — A pole sander is great for sanding and smoothing lots of different surfaces, including walls, ceilings, decks and porches. However, if you don’t own a pole sander, you can make one from a sponge mop. Start by removing the sponge head from the mop and then wrap it in sandpaper. Screw the head back onto the mop and you’ve got a long-handled tool that’s ready for sanding.
In this week’s radio show, learn how to unclog a sink and install a window on a door. (Split image credit Igal Vaisman, TriggerPhoto from Getty Images and Getty Images Signature)
Hour 1
In Hour 1 of the Today’s Homeowner Radio Podcast, should you put new shingles over old ones? Plus, how to unclog a stubborn sink once and for all.
Listen to Hour 2 to learn how to remove tile from drywall and insert a window into a door.
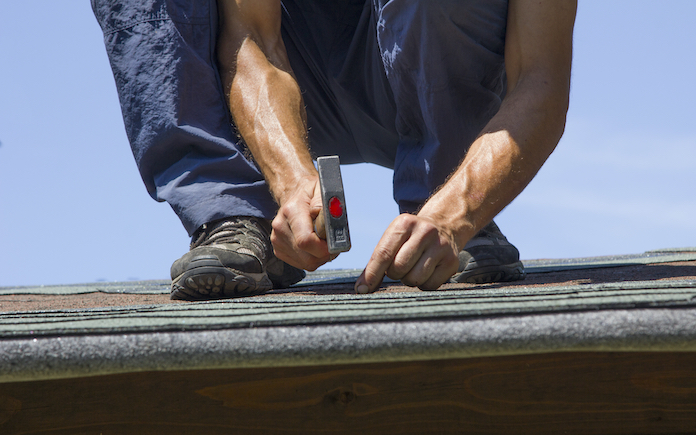
Should You Put New Shingles Over Old Ones?
Placing new shingles over existing ones might seem like an easy fix, but in the long run, it’s better to replace your roof. (Adobe Stock)
Sometimes, we here at Today’s Homeowner can act as a mediator for married couples when home problems arise.
Couples who disagree about the solution to fixing a long-standing issue come to us for a definitive answer.
Such is the case with Kimberly Bell. She and her husband have differing opinions on how to fix their leaky roof.
Her husband already has installed new asphalt shingles over the old shingles, but Kimberly thinks that’s a bad idea. She wants him to take off the old shingles to see if the plywood is damaged and, if so, replace it.
She also asks about the load of the new shingles laying on top of the old ones. “Doesn’t it put more weight on the roof?” she says.
Here’s our verdict: Kimberly is right. Putting new asphalt shingles over existing ones adds a lot more weight — and it might be too much for the roof’s structure to handle.
Also, adding new shingles over existing ones usually voids the roofing manufacturer’s warranty.
Like Kimberly suspects, there could be some damaged decking that you can’t see unless you remove the shingles.
Now, let’s be clear. Many people install new shingles over old ones and have no issue, but in the long run, you’re better off removing the shingles to see if there’s any damage.
And here’s a pro tip: When replacing a roof, have it built to FORTIFIED Roof standards — beyond-code construction designed to strengthen roofs to withstand hurricanes, high winds, hail and severe thunderstorms.
Also, a FORTIFIED designation may qualify you for financial incentives, like insurance discounts, tax credits or lower deductibles.
Unclogging a Sink For Good
Chemicals won’t unclog this sink — you need to clear the pipe with a snake. (Igal Vaisman, Getty Images)
June Thomas is at her wit’s end over her kitchen sink.
Her two-bowl kitchen sink drains very slowly. On the side with the garbage disposal, a half-full sink of water takes over a minute to drain! Worse yet, she says the other side of the sink takes nearly as long.
She’s tried everything — pumping out the septic tank, using a septic tank cleaner every month, and treating the sink drain with salt, baking soda, vinegar, and hot water.
But none of these remedies has made a difference!
Now, June’s asking what else can she can do before calling a plumber.
We can feel her frustration! The solution to this involves spending some time under your sink.
Whenever you have a slow-draining sink, it’s typically due to a clog somewhere down the line — not enough to stop the flow of water entirely; just enough to slow it down.
The problem isn’t in the septic tank. If the septic tank is full, you’ll have water coming up from all water sources in the house, not just one sink.
So, get under the sink, remove the U-shaped trap, and run a drain snake into the straight drain pipe going into the wall.
Whatever you do, don’t pour a lot of caustic chemicals down the drain! Even some that require a licensed plumber to buy don’t work, and the smell is awful.
Worst of all, these harsh chemicals can eat through plastic pipes. And, if you plunge after pouring these chemicals, they could splash up and harm your eyes and skin.
As a preventive measure, make sure everyone in your household knows how to use a garbage disposal.
Feed any food particles into your disposal a little at a time, and only use cold water. The cold water helps fats and oils solidify, so they’re easier for the garbage disposal to grind and will move through the drain faster.
Hour 2
In Hour 2 of the Today’s Homeowner Radio Podcast, learn how to remove tile from drywall and insert a window into a door.
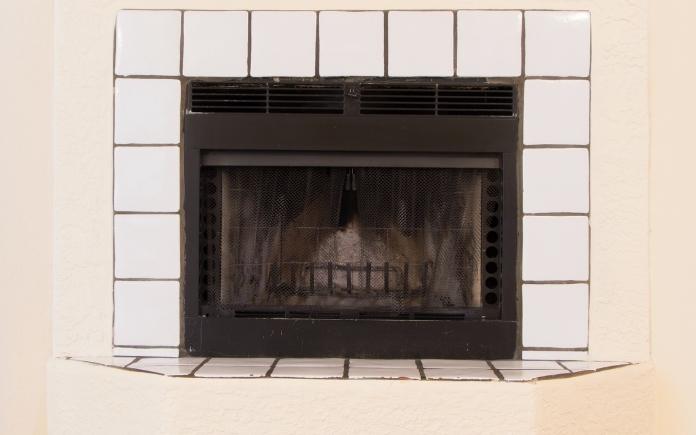
Removing Tile From Drywall
There’s no easy way to remove tiles from drywall — but that’s a good thing. (cloudyaz, Getty Images)
Need help removing tiles around a fireplace? So does a homeowner who called into the Today’s Homeowner Radio Show!
The homeowner says when he applies enough pressure on the tile to remove it, the drywall comes off with it — which, of course, is not the goal for this project.
“Can I remove the drywall and put the fiberboard on top of the studs?” he asks. “I just don’t want to ruin anything.”
Unfortunately, there’s no way to remove tile from drywall without removing the drywall.
But here’s the good news: taking all of the drywall off is actually much easier than trying to chisel away at the tile.
Use a reciprocating saw to cut the tile from the wall. Cut the blade so that when it’s fully extended, it’s only about an inch long. This prevents the saw from puncturing the other side of the wall.
Cut along the grout and remove manageable sections one at a time. Then install a new cement backer board.
Now you have a blank slate to install ceramic, porcelain tile, marble, and really, just about anything that will make a statement on what’s usually the room’s focal point!
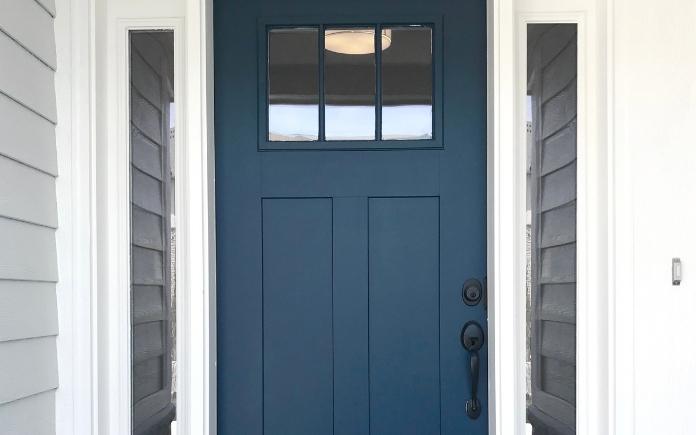
Inserting a Window on a Door
A door glass insert makes it easy to add a window to a door. (TriggerPhoto, Getty Images Signature)
Marie Juneau in California wants to add more form and function to her existing entry door — specifically, by adding some glass.
She wants to know if she can install a window in the door herself, or should she just buy a door that already has one.
You can buy a door glass insert and install it yourself. The double-paned glass window is already assembled and the frame is insulated.
Pease Doors has many shapes and sizes to choose from. Their frames fit most door brands and they’re sold in kits with everything you need to install it yourself.
There’s just one problem, however.
These glass inserts don’t open up for ventilation, so if you’re wanting to let the fresh air in, install a screen door outside.
If you don’t want to add an extra door, consider a retractable screen. These screens roll up and tuck away into a housing unit on the side of the frame.
Set up your backyard for summer entertaining with outdoor lighting options from EcoSmart. Whether your summer plans include hosting backyard barbecues or refreshing your outdoor oasis, here are fun and easy ways to light up your space:
Play your favorite tunes for you and your guests with a Bluetooth Speaker LED Light Bulb that combines color-selectable lighting with Bluetooth technology. Simply connect to your favorite Bluetooth device without the need for extra wiring or a hub.
Illuminate the night and decorate with the warm glow of the EcoSmart Flame LED Light Bulb. This LED light bulb creates an alluring ambiance that simulates a warm and realistic flickering flame effect without emitting any heat and eliminating the risk of a real flame.
The Outdoor Bug LED Light Bulb is a summertime essential. Yellow LED light bulbs repel insects and can be used as an alternative to bug sprays, keeping bugs out of your outdoor spaces.
Upgrade your entertainment space with a Color Changing Party LED Light Bulb to set a fun and festive mood. It makes any occasion more decorative with red, green, blue, and yellow light and gives five light effect options to choose from. Easily switch between colors using the toggle on each bulb or conveniently cycle between colors with a simple flip of a standard wall switch.
Enhanced EcoSmart LED light bulbs use up to 90 percent less energy than standard incandescent light bulbs and operate with a longer lifespan – saving homeowners on household energy costs over the course of the bulb’s 25,000-hour lifetime.
Available exclusively online and in-store at The Home Depot, the new EcoSmart light bulb product line features the latest in lighting innovation and technology.
This section is sponsored by The Home Depot and contains affiliate links. If you purchase a product from these links, we will earn a small commission at no additional cost to you.
Best New Products
EcoSmart’s LED Tape Light makes it easy to get under-cabinet lighting right where you need it. Learn more >>
Half-Lid Painting Tip — Over the years, I’ve shared more than 500 Simple Solutions and many of them have to do with painting specifically painting neatly. Here’s a tip that came in from John a listener from Clancy, Montana, on how to paint neatly from a can when using a paintbrush.
Start by taking a lid from an old discarded can of paint and cutting the lid in half using a pair of aviation snips.
Then, tap the half lid onto the paint can.
Now, when you dip your brush into the paint, you can very easily and neatly strike off the excess paint by running the bristles against the edge of the half lid.
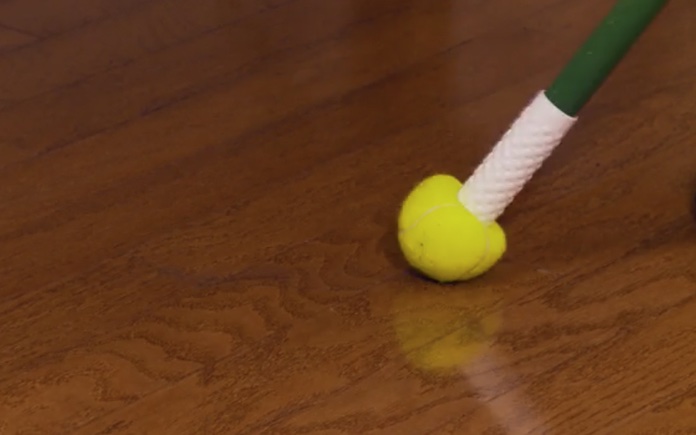
Easily remove scuff marks from hardwood floors with a tennis ball. (3 Echoes Content Studio)
How to Remove Scuffs with a Tennis Ball — All you need to remove scuff marks from floors is a fuzzy new tennis ball.
Simply take the tennis ball and rub the scuff mark. The fuzzy exterior of the ball will easily erase any black marks made by the heels of shoes and boots.
And for extra convenience, use a utility knife to cut an X into the ball, then stick the ball onto the end of your broom handle. Then, it’ll be there whenever you need it.
By the way, this trick can be used on all hard-surface floors, including wood, tile, laminate, and even vinyl.