This week, hear how to replace two small windows with a large one and learn why cold weather can make propane less effective. (PC Photography, Getty Images/gmnicholas, Getty Images Signature)
Note: Audio from the latest episode of “The Today’s Homeowner Radio Show” is available Sundays after 4 p.m. CST.
Hour 1
Hear how to install laminate flooring around a door jamb, repair cracks in plaster and more.
Installing Laminate Flooring Around Door Jambs
To install laminate flooring around door jambs, you’ll need to trim the jamb with a saw so the flooring can slip under it. (Ocskaymark, Getty Images)
A caller asks: “How do you cut laminate flooring to fit neatly around door jambs in a cased opening between two rooms?”
Most of the time, you’re not cutting the flooring, but you’re cutting the bottom of the jamb where it hits the floor.
A tool called a jamb saw is perfect for doing this. It’s like a circular saw, but the blade is turned 90 degrees so you can easily slide it into the jamb. You can rent one of these from a home center.
If you don’t want to rent a jamb saw, you can take a scrap piece of the flooring and put it on the subfloor against the jamb to get its exact height. If there’s any type of underlayment that goes under the laminate flooring, put that under it as well.
Then, use a reciprocating saw or a hand saw to cut a little bit off of the jamb so the flooring can slip under it. The thickness of the blade should leave enough room for the laminate flooring to expand and contract.
If you see a crack in your plaster, don’t panic! Small cracks can be repaired fairly easily. (Courtesy of Wes Burchell)
“What’s the best way to repair this old plaster wall?
Working with plaster is a little like working with drywall, but the final finish can be tricky to match.
The first thing you need to do is scrape out the crack using the pointed tip of a can opener. What you’re doing is widening that crack into a v-shaped opening to hold more plaster compound. Make it at least a quarter-inch wide.
Then, vacuum the dust out of the crack and clean the surface around it with a damp towel to remove any dust.
Then, you use joint compound or patching plaster to fill in the crack.
Once the crack is patched, prime and paint it to match the rest of the wall. With any paint repair, don’t just paint the repair area. Spread the paint out at least a couple of feet in each direction.
Hear a caller’s Simple Solution suggestion: how to replace two small windows with a large one, and more.
Simple Solution Suggestion
The effervescent action of denture tablets loosens buildup in a drain and makes it easier to flush away. (LdF, Getty Images Signature/laymul, Getty Images)
Diane McClaskey in Missouri has a potential Simple Solution suggestion for cleaning a sink drain.
After removing the pop-up stopper, add six to eight denture cleaning tablets to the drain, and add just a little water. Wait to let the cleaning begin, and add a little water as needed until clean.
The effervescent action will help to break up any dirt or grime and leave your sink sparkling clean!
So why would this work? The main ingredient in denture cleaning tablets is sodium bicarbonate, commonly known as baking soda.
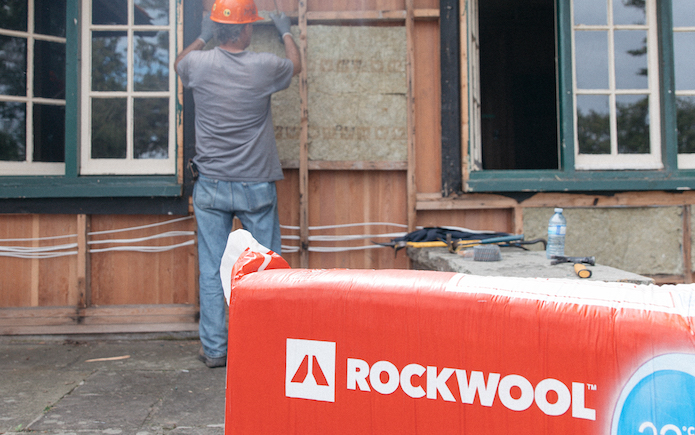
Replacing two small windows with a large one is a great way to let in more light and improve your home’s curb appeal. (PC Photography, Getty Images)
A caller wants to replace two small windows with a larger one in her living. There’s a six-inch wall in between the windows, and she was told she needed to put in a header.
“I don’t know how to do this. Can you explain please?” she asks.
When you take a window out, you need to replace it with something to fill that void. A header basically is a 2-by-4 to a 2-by-12. A header spans horizontally above the window to support its weight. This prevents the ceiling joists, roof rafters, and anything above that might be bearing down on the window from sagging.
However, it’s a very tricky project. First, you have to access that area, and that’s done by cutting the drywall or plaster away from the inside above the upper part of the window opening so you’ll have room to cut out whatever’s there and put in the new beam.
Unless you’re very good at carpentry work, I suggest calling a professional to do this. The last thing you want is any sagging on the window down the road.
A professional can also ensure the new window is sealed properly to avoid drafts and energy loss.
Call your local home builder’s association and ask for their recommendations.
Can Cold Temps Damage a Propane Tank?
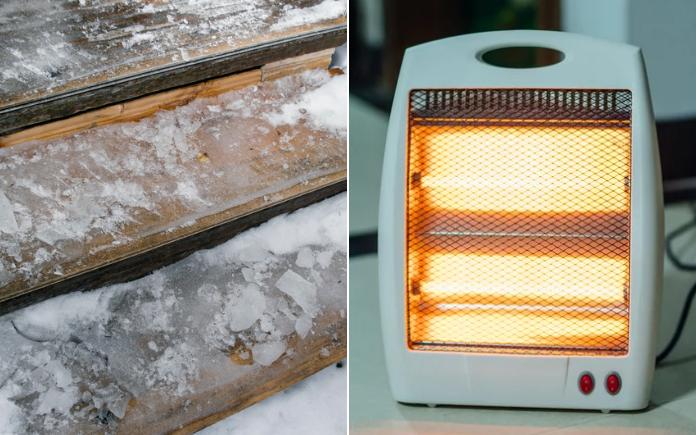
Cold temperatures can cause propane to become less effective. (gmnicholas, Getty Images Signature)
A caller says: “I have a backup propane tank that I store in my garage. It’s been there for over a year. I can’t get my grill to start with it. Does storing the tank for that long in a cold garage damage it?”
In order to keep propane in a liquid state, it has to be stored under pressure. Cold temperatures can cause the liquid propane to condense, which can then decrease the pressure inside the tank.
Propane turns to a liquid at -42 degrees C; if it gets that cold or colder, the pressure inside your propane tank will drop, eventually reaching a point where it is too low to effectively light a grill or other appliances, according to Lansing Ice and Fuel.
Bring it inside and let it warm up and check the level of gas. When in doubt, take it to get it refilled.
In the future, to keep the pressure higher, keep the tank at least 30 percent full at all times, and use a small insulated frame shelter to protect the tank from colder temperatures.
Best New Products
MSI’s new peel-and-stick backsplash gives you the look of real tile without all the hassle of a traditional thin-set application. Learn more >>
Simple Solutions
Using a power drill to wrap nylon string around a spool will speed up the process and lessen the likelihood of tangles. (3 Echoes Content Studio)
Fast and Neat Way to Wind String onto a Spool — A spool of nylon string can be used for many things — general crafting, fishing and hunting, and laying mason lines.
The string is easy to unwind off the spool, but it’s not as easy to get back on after you’ve used it. Winding it by hand back onto the spool can lead to tangles and uneven distribution. And eventually, you’ve got an unusable mess that you have to cut up. Here’s a much better, and faster, solution:
Take a screw and drive it through the end of the plastic housing that the spool is on. Then, chuck it into a drill.
Turn on the drill to the lowest setting, and just like that, you can now use the power of the drill to put the line back on the spool.
It only takes a few seconds to wind the nylon string back onto the spool! As you’re winding up the nylon string, slowly move it back and forth along the spool. This way, you don’t overload one side or the other, and the string winds up neatly every time.
A toilet bowl cleaner’s spout makes it perfect for pouring into grout lines. (3 Echoes Content Studio)
Inexpensive Alternative to Commercial Grout Cleaners — If you have tile in your home, chances are you’ve spent some time cleaning grout. While there are several grout cleaning products on the market, you might have something in your home right now that works just as well — toilet bowl cleaner.
Regular old toilet bowl cleaner that comes in a squeeze bottle can clean grout! Toilet bowl cleaner contains bleach, so it will not only lighten grout stains, but it will also kill any mold or mildew.
Plus, toilet bowl cleaner is cheaper than grout cleaner.
This week, Artie McGowan, master plumber and owner of Colony Plumbing in Mobile, Ala., is back! He’s providing answers to more common plumbing problems, like dripping faucets, long waits for hot water and more.
He’s a long-time friend of mine who’s also done hundreds of jobs for my construction company.
Often, it’s easier to replace a dripping tub faucet than it is to repair it. (pastorscott, Getty Images Signature)
Dripping Faucets
What should you do if water pours from a shower-tub combo’s faucet while the shower is on and water drips from the shower head when it’s off?
Artie: If it’s a tub spout, the best thing to do is replace it. Some have repair kits, but it’s usually not worth it.
Unscrew the spout, take it to Home Depot, and they’ll have a replacement for it that will more than likely match it very easily.
With older faucets that have a third handle in the middle, you’ll need to take the stem assembly out and put a backup seal on it as well as a new washer. This can get complicated, so I’d suggest calling a plumber.
Also, call a plumber if you have a newer single-lever valve that has a push button under the handle instead of a spout to divert the water.
If your water takes a long time to heat up, it’s time to invest in a hybrid recirculating valve. (aristotoo, Getty Images Signature)
Long Waits for Hot Water
What’s the best way to address long wait times for hot water to reach the faucet?
Artie: If you have a tank water heater, you can install a hybrid recirculating valve on the top. Once you do that, install take a transfer valve on the faucet plumbing. This pushes the hot water gently into the cold side — that way you don’t have to run a separate recirculation line.
This gives you hot water much more quickly in bathrooms that are farther away from the water heater.
The other way, of course, is to install a recirculation line, but the problem with that is you have to find a way to snake it through the house.
Tankless water heaters nowadays have a recirculating pump already installed. If you don’t want to go tankless, you can invest in a hybrid hot water heater.
If your water meter lacks a flow indicator, write down the numbers that appear on the meter followed by the number on the hand of the large rotary dial. Check the meter again after an hour and write down any changes in the numbers or dials. (3 Echoes Content Studio)
Finding a Water Leak
What is the best way to diagnose a leak around or in your home?
Artie: I suggest turning off all the appliances that use water in your home and checking the meter. Most newer meters have a tattletale dial on them, so you can see if any water is being used when everything is turned off.
Older meters will have a triangle that turns. With the newer digital ones that you can read with the satellite, you need to close the lid and open it again. On the right, you’ll see a tattle tale number that will let you know if you’re losing any amount of water.
If after you’ve done this and you see the meter is moving, turn off the valve to the water heater. This kills half the water to the house. If the meter is still moving, then you know the problem is on the cold side and the problem could be in the yard or underneath the foundation.
If it did stop moving after you turned off the water heater, then the problem is on the hot side, and you know where to look.
Electric water heaters take longer to recover after all the hot water has been used. (JulNichols, Getty Images Signature)
Electric vs. Gas Water Heaters
If you have a choice between an electric water heater and a gas one, which would you choose?
Artie: If gas is available, I’ll always go with gas. It recovers quicker, it’s cheaper to run and it’s much more efficient.
Electric takes longer to recover and heat up. You can wait a half hour, 45 minutes for the tank to heat back up. And if you have a large family on a 50-gallon tank, you could be waiting two hours on hot water.
Draining your water heater once a year removes sediment from the tank that can cause it to work harder and cost more to use. (3 Echoes Content Studio)
Draining a Water Heater
Why is it important to drain your water heater at least every couple of years?
Artie: Believe it or not, most people do nothing to their water heaters.
When high-velocity water is being used (pressurized water to push debris out of pipes to prevent blockage), all that crust builds up and drops to the bottom of the heater.
Even if there’s a swifter in the bottom that pushes it around to get it out of the system, it cakes up down there. And then, you’ll start to lose the efficiency of your heat.
Imagine putting a thick layer of insulation on the bottom of your tank, and the tank has to heat through that to get through the water. This is why you should drain your water heater at least every two years.
Ask a question and we could answer it on the “Today’s Homeowner Podcast!” We also may use it on our nationally syndicated radio broadcast or on todayshomeowner.com.
This week, hear our thoughts on extending a tile backsplash to a side wall and tips for hanging outdoor holiday lights. (Greg Wolf/bauhaus1000, Getty Images Signature)
Hour 1
Hear Joe’s tips for hanging holiday lights, options for installing a side wall tile backsplash, repairing a rotten door jamb, and more.
Tips for Hanging Holiday Lights
Net lights, like the one on these bushes, evenly distribute lights on contoured surfaces. (bauhaus1000, Getty Images Signature)
Winter’s almost here, and as the days are getting shorter, there’s one bright spot on the horizon — it’s now time to decorate your home with holiday lights!
When hanging holiday lights on your home, switch up the types to add some variety.
To highlight your roof, use traditional C9 or icicle lights. Run C9 string lights along the eaves — usually attached to the gutters — and then up the gable ends to the peak of the roof. You can also place C9 light strands vertically down each corner of the house to outline your home for more brightness and definition. Or, string icicle lights from second-story balconies or perimeter joists of decks, or hang them from rain gutters.
For wrapping columns, railings or trees, use mini string lights. Mini strings have bulbs closely spaced along the strand for more lights overall, so they’re ideal for spiral-wrapping columns, posts, and porch and deck railings.
To illuminate shrubs, bushes and hedges, use net lights. These lights are easy to drape over contoured surfaces.
Use spotlights to illuminate certain areas of your home, like where wreaths are hanging.
Quick tip: Never connect strings of lights together that are different light counts. For instance, don’t connect a 100-light string to a 50-light string. If you mismatch the light counts, the string with the fewest bulbs with burn out prematurely.
Should you add a tile backsplash to this side wall? It depends on your preferences. (Photo courtesy Greg Wolf)
A homeowner is installing a tile backsplash in his kitchen between the upper cabinets and the back edge of the countertop, and he wants to know the preferred installation on the blank side wall.
“Do you keep that blank? Tile it from the bottom of the top cabinet all the way down? Or add an edging piece on the bottom? My main two concerns are the look and if it does not have a backsplash then it leaves that part of the wall unprotected,” he says.
Essentially, what he’s asking is how to finish off that edge that’s not capped off by the cabinets or the countertop backsplash. There are several different things you can do, and what it really boils down to is your personal preference.
What we’ve done most often in a case like this is not install the backsplash on that outer wall — just butt it up to the corner, and leave the tile backsplash in between the cabinet and counter. Of course, this doesn’t give that wall any protection.
However, we’ve also done it the other way, bringing the tile even to under the wall cabinet and matching it to the top of the countertop. Then, add a metal strip at the top and end of the backsplash to give it a finished look. Depending on the type of tile you use, you can use grout instead. Just be sure to use some painter’s tape to get a clean line.
A middle-of-the-road option is to continue the backsplash but only to the point of the upper cabinet. Don’t extend it to the front edge of the countertop. This way, it wraps around the corner but doesn’t stick too far out.
Repairing a Rotting Door Jamb
This rotten door jamb can easily be fixed with some auto body filler. (Photo courtesy Wes Allbrighton)
When you’re dealing with damaged woodwork, the question that always follows is, “Do I repair it or do I replace it?”
The answer can be found in the purpose of the damaged component. If its function is purely aesthetic — like molding, trim, or siding — then it can often be patched.
Automobile body filler, like Bondo, is a great choice because this two-part compound dries very hard, very quickly, so you can fill voids and make repairs very easily.
Once it’s dry, sand it just like wood to create a smooth, finished surface.
Hear tips for hiding electronic cords, addressing condensation issues on A/C ducts and more.
Tip for Hiding Electronic Cords
Dangling TV cords are an eyesore. We have two ways you can hide them. (Adobe Stock)
A homeowner is looking for advice on how to hide ugly electronic cords.
“We remodeled our family room recently and installed a new flat-screen TV and sound system. The TV is mounted to the wall and the rest of the electronic equipment is on nearby shelves. The problem is that there are wires everywhere. We tried tucking them away and securing them with zip ties, but it’s still an ugly, tangled mess. Do you know how I can hide the wires from view?” he asks.
This is a very common problem with several different approaches to solve it.
The easiest option is to use a cable raceway. It’s a plastic cover that attaches to the wall with adhesive. You can paint it to match the wall, and that way, you won’t see any dangling wires.
However, nothing is as good as routing the lines behind the wall. If the equipment can be located below the TV, like on a shelf, you can drop the wires inside the wall and bring them out by the electrical outlet.
Addressing Condensation Issues on A/C Ducts
Foil-faced duct insulation won’t help with condensation unless the ducts are sealed with mastic. (Kameleon007, Getty Images Signature)
A homeowner is concerned about humidity and condensation problems with his insulated A/C ducts. They’re wrapped with foil-faced insulation, which he says appears to be in good condition.
He wants to know: “Can I simply wrap the ducts with another layer of insulated foil-faced duct insulation? Or, can I drape unfaced batts over and around the ducts? Or, would it be best to remove all the existing insulation and start from scratch?”
Oftentimes, A/C ducts are insulated but not sealed. You’re supposed to seal them with a mastic. Brush it on all the joints and it stops the flow of air from leaking out, then you insulate it.
Since the insulation is in good condition, we suggest removing part of it to make sure these joints are sealed.
If they aren’t, remove the insulation and seal the joints, then re-apply the insulation. As always, it never hurts to add more insulation around them.
Best New Products
Ryobi’s new magnifying glass with light not only makes reading fine print easier, but it also has clamps to stay put in your workspace. Learn more >>
Simple Solutions
Place a pencil in the quarter-inch notch, then slide the speed square along the board to draw a straight line. (3 Echoes Content Studio)
5 Ways to Use a Speed Square —The ingeniously simple speed square is an efficient and useful hand tool. Here are five of its popular uses:
Because of its triangular shape, a speed square is great for marking 90-degree square crosscuts and 45-degree lines.
A speed square can be used as a protractor. Hold its pivot point against the edge of the board and then rotate to mark angles between zero and 90 degrees.
A speed square has quarter-inch notches that can be used to quickly scribe lines onto a board. Put your pencil into one of the notches and slide it along the board.
Most speed squares have a diamond cutout exactly 3½-inch from the edge of the square, which is exactly the width of a 2×4. Put your pencil in the cutout and slide it along the board to draw a line that’s exactly the width of a 2×4.
Saw guide — hold the square against the board’s edge and guide the saw right along the edge of the square to produce a perfectly straight, square cut.
Have leftover tiles after completing a project? Make a trivet out of one! (3 Echoes Content Studio)
Homemade Trivet — Protect tabletops and counters by making a trivet from a leftover ceramic tile.
Start by spraying a light coating of cooking oil spray onto a piece of wax paper.
Then, lay two paint sticks across the wax paper. Next, use a hot-melt glue gun to put a half-inch-diameter dab of hot glue onto each back corner of the tile.
Then, immediately press the tile down onto the wood sticks. The sticks serve as spacers to ensure that each glue pad is exactly the same thickness, and the cooking oil prevents the glue from sticking to the wax paper.
Let the glue harden for a few minutes, then peel off the wax paper.
This week, Artie McGowan, master plumber and owner of Colony Plumbing in Mobile, Ala., joins me to provide solutions to some of the most common plumbing problems, like low water pressure and clogged drains.
He’s a long-time friend of mine who’s also done hundreds of jobs for my construction company.
Increasing the water pressure on a sink faucet might be as simple as cleaning the aerator. (Koldunova_Anna, Getty Images)
Low Water Pressure
If a homeowner is experiencing low water pressure, what would be the likely cause?
Artie: Well sometimes, it might just be that ol’ cousin Earl parked his truck over your water meter and squished the line. But more often than not it’s something else.
First, take a look at where the problem is. In the kitchen bathroom sink or lavatory, sometimes debris comes up through the water and gets into the faucet aerator to slow it down or almost clog it.
Some houses are a bit more complicated and have a water pressure-reducing valve that comes right off the meter. When it does, it goes bad over the years. It’s best to let a professional repair this because most of the time it has to be replaced.
If you need to replace a 3/4-inch supply line, is there any advantage to stepping that up to a 1-inch line?
Artie: The best thing to do is to increase it. This will give you a little bit more velocity at the faucet.
When the water’s running through, let’s say if you run it through a small half-inch line, once the fixture starts delivering that water, the pressure drops really quickly.
The larger pipe you have, the more volume of water you have. It’s less likely to drop in pressure, especially if it’s a long run to the house.
What would you say is the right PSI going to a house?
Artie: The optimal water pressure I prefer is 75 PSI on a three-quarter line. Most city water is about that PSI, some of it is in the 60s and 50s, depending on how new the system is.
On wells, most of the time it’s about 45 PSI, but you can increase it. A well has a pressure holding tank, so you can have a little bit lower pressure at the pump, but that tank will keep it up.
Occasionally, sinks clog, and when that happens, you don’t need to call a handyman or plumber to fix the problem. (laymul, Getty Images)
Slow Draining
We get a lot of questions about how to fix a slow-draining sink or tub. What is the common cause?
Artie: If you run the water and it backs up immediately, the clog is between the top of the sink and the bottom of the trap. It’s more likely hair catching on a trip lever that operates the pop-up valve. Easily fix this by removing the pop-up valve and pulling the hair out with needle-nose pliers.
But, if you run the water and it takes about 30 seconds for it to fill up, the problem is down the line in the drain. It could be five, six, or 10 feet away from where you are. If that’s the case, you use a liquid drain cleaner with high sulfuric acid content. You can easily find this type because it’s packaged double — in a bottle and also in a bag.
Follow the directions, and wear the proper safety equipment, like glasses and gloves. You should let it sit in the drain for about 30 minutes.
If it doesn’t work, then call a professional to route it out with an auger.
A running toilet wastes a lot of water and costs you a lot of cash. (DepositPhotos)
Running Toilet
Another common question we receive is that their toilet seems to be constantly running. What’s the cause/solution for that?
Artie: This means there’s a problem with the flush valve, the apparatus that holds the flapper.
Most times, you need to replace the flapper, but sometimes it could be a crack in the flush valve and water is finding its way into the bowl.
You can do the food coloring test to check for leaks. Then, you know the problem is in the flush valve and flapper area.
There are many products out there that make flapper replacement easy. For instance, Fluidmaster’s 502 PerforMAX Water-Saving, Adjustable Flapper offers a customized flush. To use it, you just have to turn the dial left for more water per flush, or right for less, depending on your needs.
The good thing about plumbing today is that it’s become so user-friendly because of products like Fluidmaster’s. I use their flappers, fill valves and flush valves often because I’ve had so much success with them.
In this episode of “Ask Danny,” we’re talking with Josh Hembree, owner of Hembree Heating and Air Conditioning. (3 Echoes Content Studio/Josh Hembree)
In this episode of “Ask Danny,” I’m talking with third-generation heating specialist Josh Hembree, general manager of Hembree Heating & Air Conditioning in Mobile, Ala. He’s answering some of the most-asked questions we get about heating your home.
Josh Hembree of Hembree Heating and Air Conditioning. (Photo courtesy Josh Hembree)
About Josh
Born and raised in Mobile, Josh moved away for a bit to earn a law degree, but his entrepreneurial spirit and drive to continue family legacies brought him back to run the family business.
Josh loves helping people, from serving in his church to offering his community the best care the heating and air industry has to offer.
He’s been married to Kala for six years, and they have a 4-year-old daughter and a 1-year-old son.
Before winter comes into full force, have an HVAC professional service your heating system. (aytacbicer, Getty Images Signature)
Preseason Maintenance
Q. With the weather getting colder, what should homeowners do right now to help keep their homes warm this winter?
Josh: We always recommend preseason maintenance – pre-season preventative maintenance, if you will. Your home heating system needs some love, and often times if you proactively do that, you can avoid problems before they become a problem.
It’s even more important going into the winter season to have your heating system inspected compared to your air conditioning system because safety inspections on heating systems can save your life. For instance, making sure the vents are working properly to prevent carbon monoxide poisoning.
Don’t be alarmed if there’s a burning smell when you turn on your heater for the first time this season. (tab1962)
What’s That Burnt Dust Smell?
Q. Homeowners are always asking me, what is that smell when you turn on the heater for the first time? So ill ask you, what is that smell?
Josh: When the first cold snap happens, our phones start ringing off the hook with that questions. It’s a very common odor when you first turn your heater on. The good news is there’s a simple explanation for it.
When your system’s been cooling all summer long — the heating system has not been run in months — little pieces of dust can accumulate on the inside parts of the system.
So when you turn your heating on for the first time in a long time, there are certain parts of the system that are designed to get hot. Those heating parts actually heat up the dust and cause that burning smell.
Oftentimes, it’s nothing to worry about, and the smell will go away after a short while.
A heat pump reverses the flow of refrigerant to pump warm air back inside your home. (jpproductions, Getty Images)
Heat Pumps
Q. I think most homeowners don’t really understand how a heat pump works during the winter. Tell us.
Josh: What we’re talking about here is a heat pump versus a gas furnace heating system. Those are the two primary types of heating systems you can have.
In regards to a heat pump specifically, in the summertime, when you’re system’s running in cooling mode, have you ever walked out to your outdoor unit and felt the air blowing out of the top it? It’s hot air.
A heat pump simply works by being able to reverse the flow of refrigerant in your system. When in cooling mode, the cold gasses are pumped into your home, and in heating mode, the process is reversed and hot gasses are pumped into your home.
So it’s actually reversing the flow of refrigerant to heat or cool your home.
And, on the bitter cold days of the year, when you’re heat pump is struggling to keep up, there are electric heat strips in the system that kick on to heat your home fast.
In theory, you can recirculate warm air from a cast iron stove throughout your home, but you shouldn’t rely on this method. (fodera72, Getty Images)
Third-Party Heating
Q. Is it feasible to only run your system on fan mode to circulate heat from another heat source? (like a fireplace, space heater, or cast iron stove)
Josh: This is a unique conversation that I honestly don’t have often. But, it could work. So long as that third-party heat source is close to the return of your central system. That way your central system will have the best chance of sucking up the heat and redistributing it throughout the home.
However, in our experience, in most cars that third-party heat source is not going to produce enough heat to keep the entire home comfortable. Airflow in the wintertime can be uncomfortable unless it’s properly heated.
It could work in theory, but it’s just not likely to be able to work well.
Also, make sure the third-party heat source is not putting off carbon monoxide. If it is, that could get into a safety issue with your central system pumping that throughout the whole home.
In unique situations, it might help some, but don’t rely on it.
Listen to the entire podcast for more home heating tips.