Kelly and Jennifer Foster love improving their home, but their closet has them stumped — what’s good for him isn’t necessarily good for her. So, we’re creating a custom closet system to maximize storage space in a couple’s divided closet.
The Projects
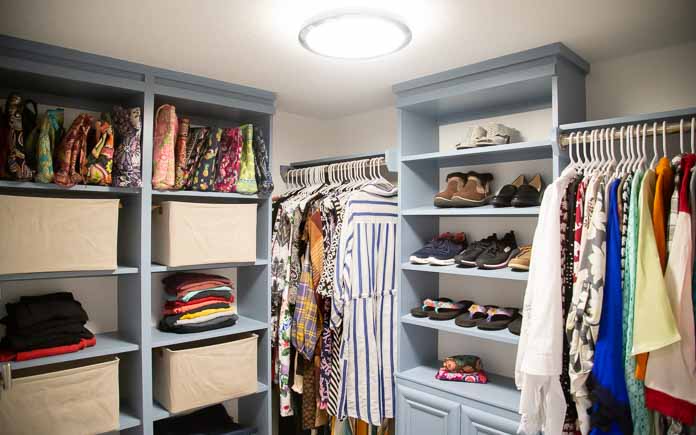
The shelves on Jennifer’s side of the closet create space for purses, shoes and folded clothes. (3 Echoes Content Studio)
Build new shelving
The first step in creating a custom closet system is to remove the old wire shelving. These builder-grade wire shelves are common in newer homes, but they’re not very user-friendly. The slats are the right size for hangers, but it’s impossible to slide them to create more space.
After the shelves are out, we patch the holes left behind and set up Kelly to paint the closet walls and Jennifer to pre-paint the shelf boards we’ll be using for the new storage systems.
And on the dividing wall, we install wall hooks to hang necklaces on.(3 Echoes Content Studio)
The shelving unit on Jennifer’s side of the closet is too large to assemble outside, so we put it together inside the closet. It includes space for purses, folded clothes, and cubbies for bins.
To create space for shoe storage, we remove the hanging towel cabinet and use it as a base for more shelves.
The double horizontal rods maximize the number of shirts that can hang in the closet. (3 Echoes Content Studio)
For Kelly’s side of the closet, we install double horizontal rods to get double the amount of hanging space.
For his shoe rack, we build a smaller version of the shelf unit Chelsea built earlier. But because of its size, we can assemble this one entirely in the garage.
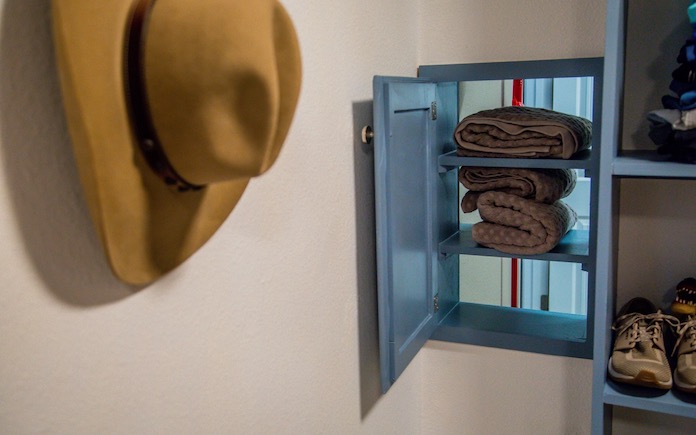
This laundry chute/linen cabinet combo provides space for storing towels. (3 Echoes Content Studio)
Install laundry chute
Every time Kelly and Jennifer walk into their closet, their eyes are immediately drawn to their dirty clothes hamper.
Since their laundry room is on the other side of the wall on Kelly’s side, we install a laundry chute so the dirty clothes can go straight to where they need to be.
To finish the opening, we build a box that exactly fits the space and adds trim on one side so we can slip into position and add trim on the other side.
Then, we add shelves to stock clean towels. This one opening serves as both a linen cabinet and laundry chute.
Kelly and Jennifer have a spacious closet but there was very little about it that was efficient or convenient. The wire shelves only offered the bare minimum to utilize the space available not to mention the fact that there was nothing “pretty” about them.
But now, the space feels even larger thanks to a custom closet system that features shelving that organizes and displays the contents of the closet for both ease of use and visual appeal. And the addition of all those horizontal surfaces hasn’t reduced the hanging space at all because the double rods we installed have made up the difference.
Plus, the new laundry chute/linen cabinet combo is the definition of efficiency.
Other Tips From This Episode
Products Featured in This Episode
This page contains affiliate links. If you purchase a product from these links, we will earn a small commission at no additional cost to you.
This week, a poured concrete patio turns a decaying patio into an outdoor living space this homeowner can truly love.
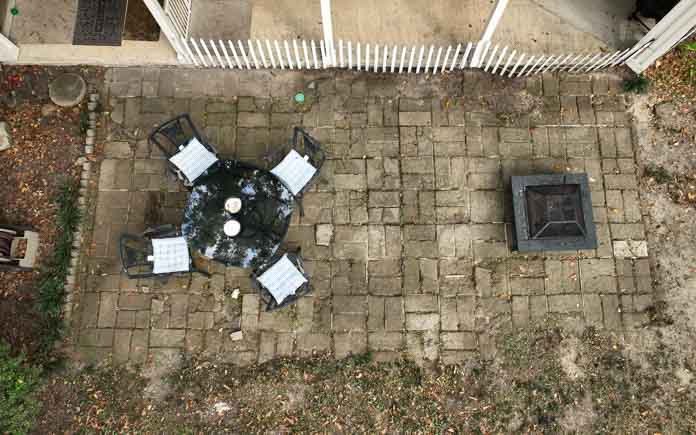
Gretchen Bayley lives alone in her mid-century home, but the house is always full of friends and family. We’re transforming her old, crumbling patio into an outdoor living space to give her more room to entertain.
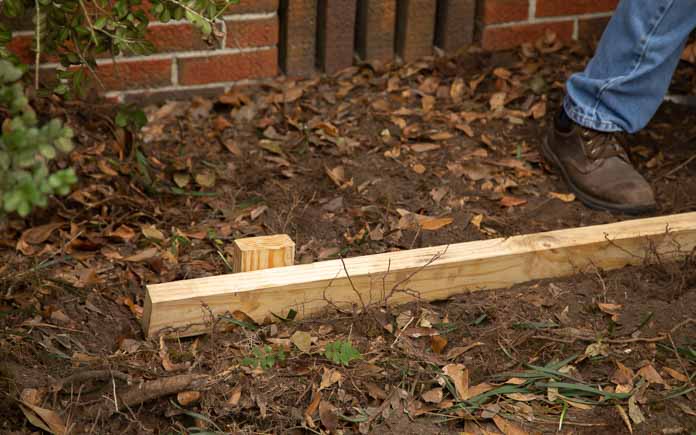
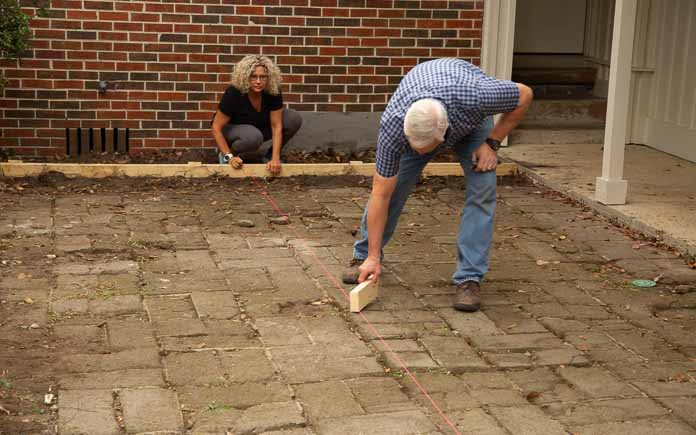
First, frame the area 12-by-23-foot area with 2-by-4s. Place the boards level with the existing carport concrete slab, then slope slightly downward so water will flow away from the carport.
Use a framing square to ensure each corner is at a 90-degree angle. To keep the form boards in place, screw them to evenly spaced wooden 2-by-4 stakes.
We use a masonry line to make sure the depth of the newly poured concrete patio will match the existing one. (3 Echoes Content Studio)
Once the final form board is installed, check the depth across the space to ensure there’s enough depth to use the old patio as a foundation and pour the new slab directly over it.
(Because the pavers are below the top edge of the carport concrete slab, we don’t need to dig them up.)
Finally, lay the reinforcement wire.
Steel reinforcement wire adds strength to the newly poured concrete patio. (3 Echoes Content Studio)
Once the forms are complete, a professional concrete finisher pours the slab. As the forms fill up, we tap the outside of them to release the air bubbles trapped in the concrete.
The concrete finisher moves a bull float over the freshly poured slab to smooth the surface. (3 Echoes Content Studio)
The concrete finisher uses special tools to smooth the top of the slab and create expansion joint lines to prevent cracking.
Once the concrete has cured for a bit, we drag a broom over it to create a textured finish.
The new picket fence has a functioning gate that’s easier to open and close. (3 Echoes Content Studio)
Add Picket Fence Panels
Gretchen’s improvised roll fencing serves its purpose of containing her dogs in the backyard, but it’s not pretty. So, we’re adding some prettier (and sturdier) white picket fence panels.
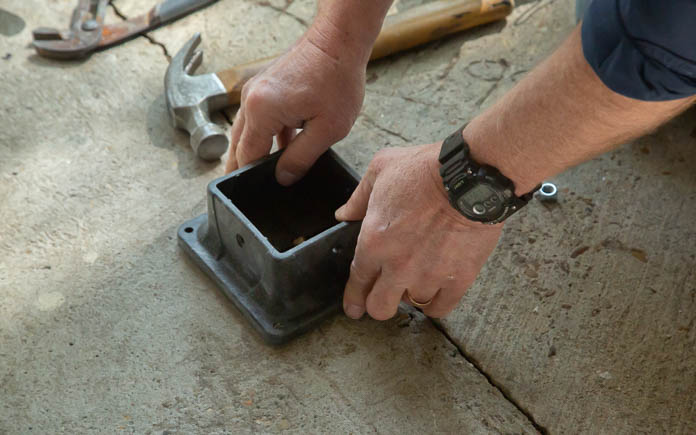
This post anchor allows us to secure the fence right onto the concrete slab. (3 Echoes Content Studio)
Instead of using a zip tie to keep the fence closed, we’re adding a gate at the corner of the carport to offer easier access to the new patio. To secure the post for the gate, we place it in a post anchor that can be drilled into the concrete.
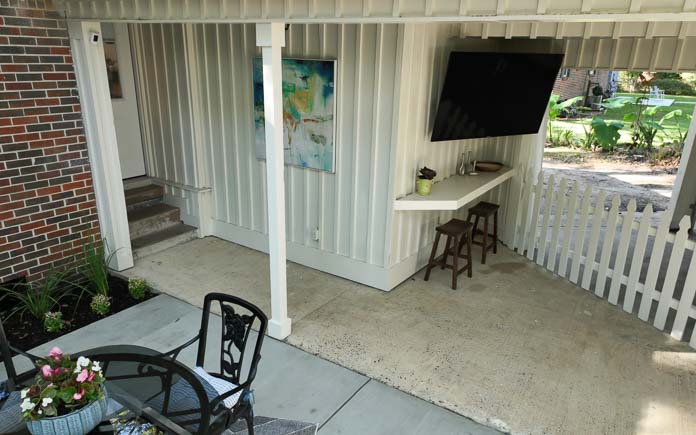
The new outdoor entertainment area features bar seating and an adjustable TV. (3 Echoes Content Studio)
Create Entertainment Area
Two large, empty shelves are wasting space in Gretchen’s carport. So, we remove the top one to make room for an outdoor TV and use the bottom one for bar seating.
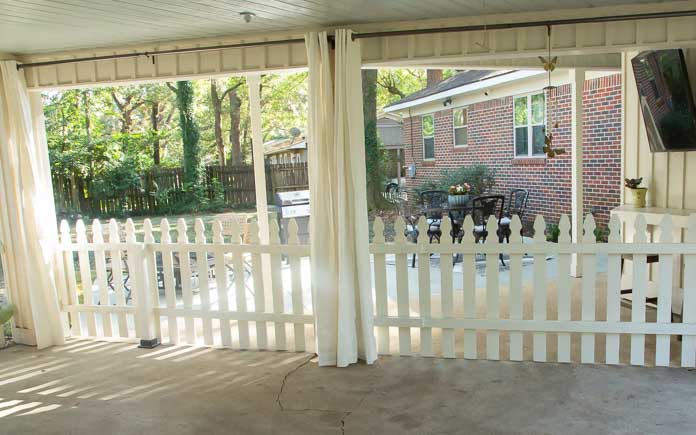
These drop cloth curtains give this outdoor entertainment area warmth, texture, and the option for privacy. (3 Echoes Content Studio)
To create even more separation between the carport and the new outdoor entertainment area, Chelsea hangs drop-cloth curtains.
The curtains not only add some extra texture to the space but they also can be closed to hide Gretchen’s car when she’s entertaining.
Chelsea Lipford Wolf and Danny Lipford pose with homeowner Gretchen Bayley. (3 Echoes Content Studio)
Post-Production Thoughts
Even though it was a good size, Gretchen’s patio was decades past its prime. The crumbling pavers were more than unattractive — they were downright dangerous.
The roll fencing added along the edge to contain the dogs wasn’t helping the look of the space either. There was nothing about this outdoor living space that invited you to enjoy the spacious backyard.
But now, the new poured concrete patio that replaced the old patio is both stable and attractive. Its clean edges clearly define the space, while it flows almost seamlessly into the existing covered area.
The new fence suits the yard perfectly and its new location creates the ideal boundary between the carport and the covered patio area.
Chelsea’s curtains help reinforce that line while they soften the edges and add refinement. What was an overbuilt shelf has become a modest bar top and the refurbished patio furniture creates plenty of comfortable seating to enjoy the expansive backyard.
Other Tips From This Episode
Products Featured in This Episode
This page contains affiliate links. If you purchase a product from these links, we will earn a small commission at no additional cost to you.
We’re helping a couple who aren’t strangers to do-it-yourself projects.
Matt and Lindsey Binion bought their mid-1950s house in the midtown area of Mobile, Ala., a few years ago and have been busy making it their own ever since.
After completely renovating their kitchen because of a water leak, they installed their old kitchen cabinets in the laundry room to give it a bit of a facelift. However, its overall look and functionality need some improvement. So, we’re here to help!
The Projects
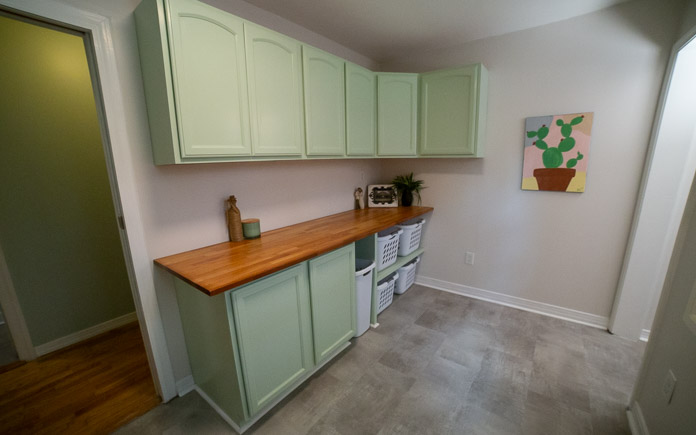
The new cabinet configuration works with the room instead of against it. (3 Echoes Content Studio)
Rearrange the Cabinets
Matt and Lindsey were on the right path when they repurposed the old kitchen cabinets for storage, but their configuration just wasn’t working for the room.
There were large gaps between the cabinets and the walls, and items ended up being placed all around. The room was treated more like an indoor garage than a laundry room.
So, we reposition them and remove some to create storage that makes sense for what the couple needed from it.
Then we sand, prime and paint the cabinets a fresh new color.
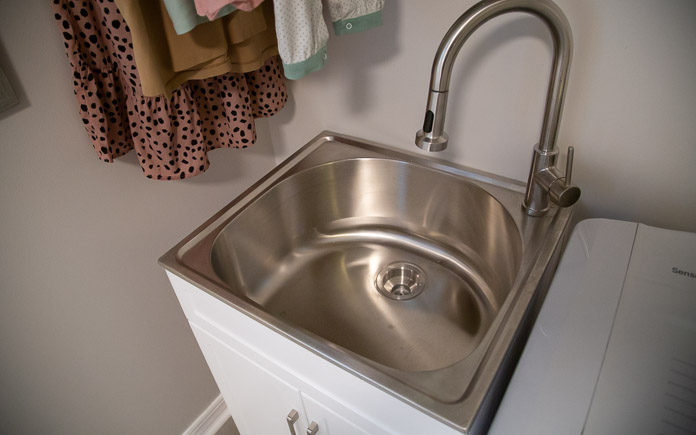
Lindsay won’t have to wash clothes in the kitchen sink now that she has a utility sink in the laundry room. (3 Echoes Content Studio)
Add a Utility Sink
In a house with four boys, a laundry room with a utility sink is a must.
Lindsey has been using their new kitchen sink to wash their boys’ muddy clothes after sports practices. And after handwashing, she has no place to hang clothes to dry.
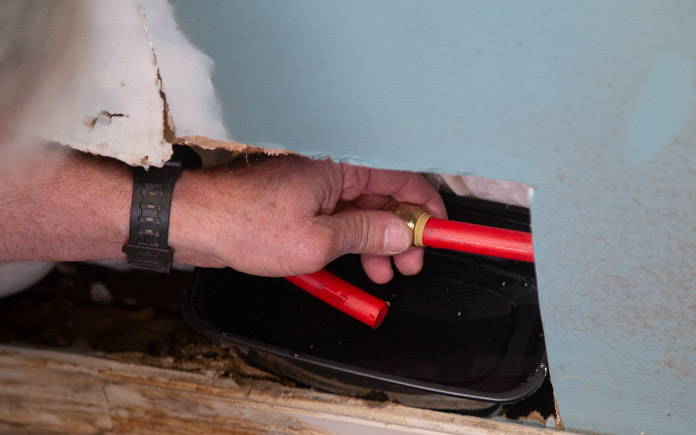
To install the utility sink, we first moved the water and dryer so we could access the plumbing. Unfortunately, we found some water damage behind the wall.
Unbeknownst to the couple, water had been dripping from the cross-linked polyethylene, or PEX, line for a few days. We immediately cap the line with a Sharkbite cap until the plumber arrives to install the sink.
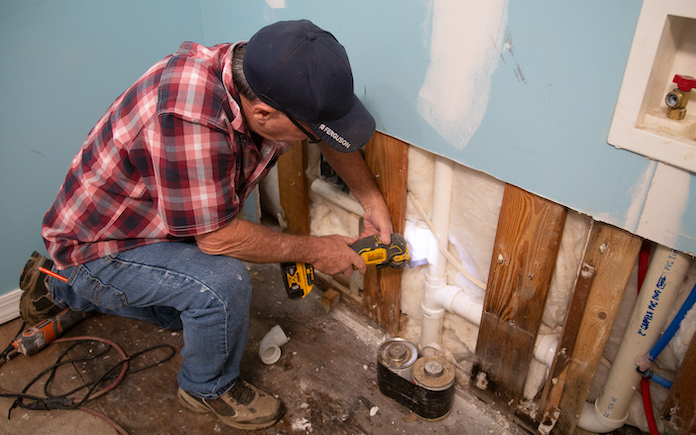
Our plumber uses an oscillating saw to cut the PVC pipe so it can be rerouted to the sink. (3 Echoes Content Studio)
When our plumber arrives, we cut a hole in the drywall so he can access the pipes and reroute them to the spot the sink will be. The plumber then runs the new drain line for the sink and extends the water supply lines from the spot where we capped the leak.
We then replace the drywall around the new pipes and finally install the laundry sink cabinet and sink.
The luxury vinyl tile is the same flooring in the kitchen, so now the two rooms are connected. (3 Echoes Content Studio)
Replace Flooring
The tile grout on the laundry room floor is coming loose, so we’re going to replace it with some leftover luxury vinyl tile that the couple used in their kitchen renovation.
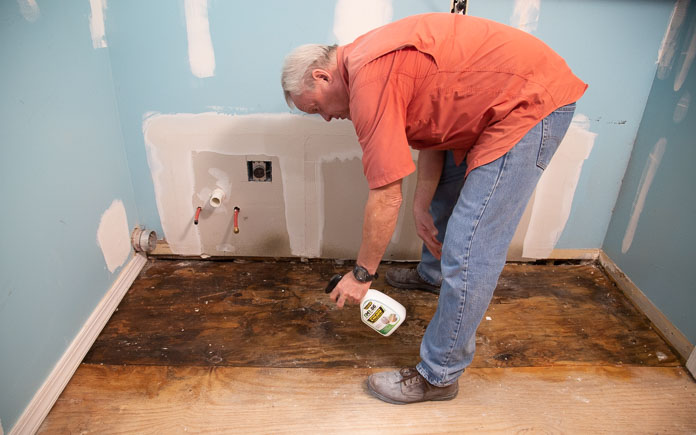
Thankfully, we caught the water leak in the hex pipe just in time for us to treat the subfloor with antimicrobial spray and let it dry overnight. (3 Echoes Content Studio)
After we remove the tiles and backer board with a pry bar, we find a wet spot on the subfloor where the PEX pipe was leaking. Because we caught the water leak early, we won’t have to replace the subfloor. We use some dehumidifiers and fans to dry it out overnight, and then treat it with an antimicrobial spray to make sure no mold comes up through the floor.
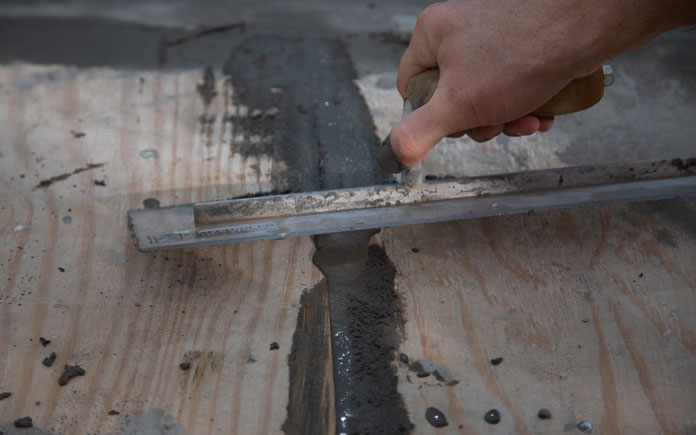
To level out the subfloor, we mix some floor patch compound that he spreads over the surface to fill in low spots and smooth out the transitions. We then installed the rectangular luxury vinyl tile long-ways in the room to complement the narrow room.
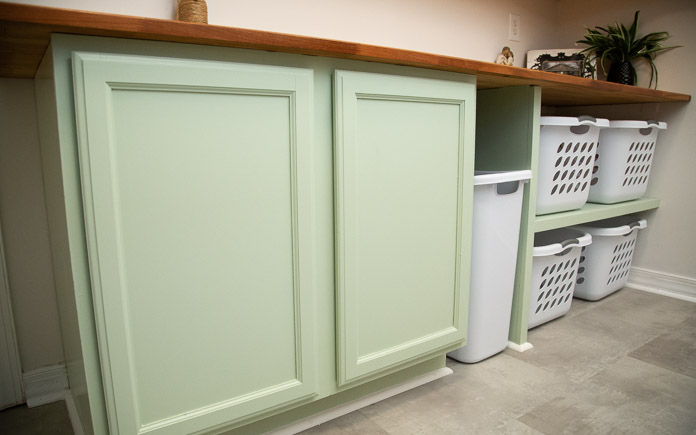
The new cabinet has room for everyone’s laundry basket, plus plenty of countertop space for folding. (3 Echoes Content Studio)
Install Countertops and Cubbies
Matt and Lindsey used a piece of plywood as a makeshift countertop for the repurposed kitchen cabinets. But, the plywood wasn’t a prime surface for folding laundry, so the couple was forced to pile laundry in the living room and fold them from their couch.
To make this counter space more functional, we first install 1-by-2 cleats to support a new butcher block countertop as well as a shelf unit that will organize the kids’ laundry baskets.
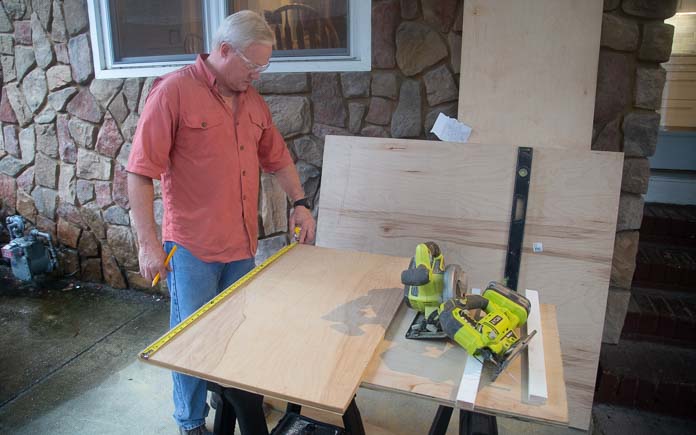
We use 3/4-inch plywood and 1×2 boards to create the cubbies for the laundry baskets. (3 Echoes Content Studio)
For our shelf unit, we cut our wood pieces on a table saw outside and assemble them with nails and wood glue. We then attach them to the cleat we installed next to the base cabinets.
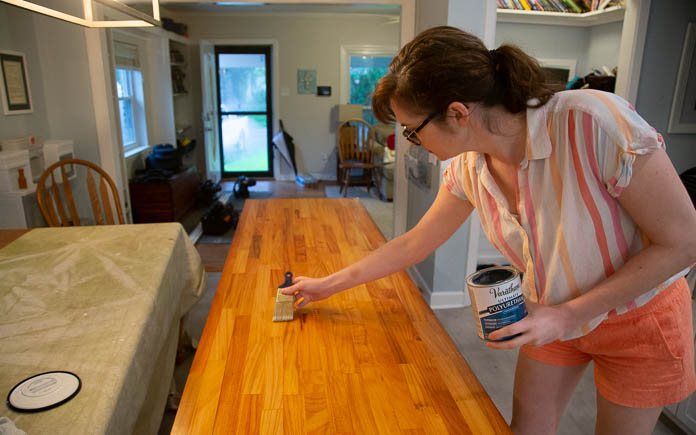
Polyurethane seals the butcher block countertop so it’s more durable. (3 Echoes Content Studio)
Next, Lindsey coats the butcher block with polyurethane. After that’s dry, we install the countertop over the shelving unit and base cabinets.
Matt and Lindsey had a decent-sized laundry room with lots of storage space, but because it had been thrown together with salvage materials from an emergency kitchen renovation, the surfaces all looked a little worse for wear and the room lacked the thoughtful organization and visual appeal they really wanted for the space.
But now, the old recycled cabinets have a clean new look and a simplified layout that works with the room rather than overpowering it. The new luxury vinyl tile flooring has replaced the old cracked ceramic tiles and connects the room to the rest of the house.
The laundry sink makes the family’s everyday chores easier and less stressful, especially with the hanging space directly above it and the new countertop is both attractive and useful for a family with lots of laundry to fold.
Plus. We did it all for less than $2,000 in materials.
Other Tips From This Episode
Products Featured in This Episode
This page contains affiliate links. If you purchase a product from these links, we will earn a small commission at no additional cost to you.
This week, we’re transforming a breezeway that looks almost accidental into a more inviting entrance.
Delane Caldwell’s breezeway to her front door is just a narrow hallway to the backyard, but we’re going to find a way to incorporate it more as a living space.
The Projects
Grinding the concrete smooths out the uneven surfaces of the patchwork slabs. (3 Echoes Content Studio)
Refinish the Concrete Slab
The concrete in the breezeway looked like a patchwork of slabs. So, to create a uniform-looking slab, we smooth the concrete surface with a grinder.
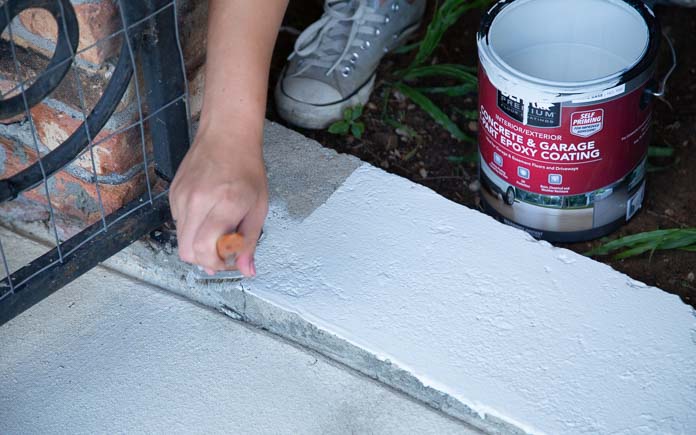
Coating the breezeway with concrete epoxy paint creates a uniform color throughout the breezeway. (3 Echoes Content Studio)
After we sweep the dust away and rinse the slab off with a water hose, we paint the new smooth slab with a base coat of white epoxy paint.
After the base coat dries, we pop a chalk layout line on the slab to start our stenciling.
This stencil pattern is based on traditional Portuguese Azulejos tile designs. We used black epoxy paint to fill in the tile pattern on the concrete.
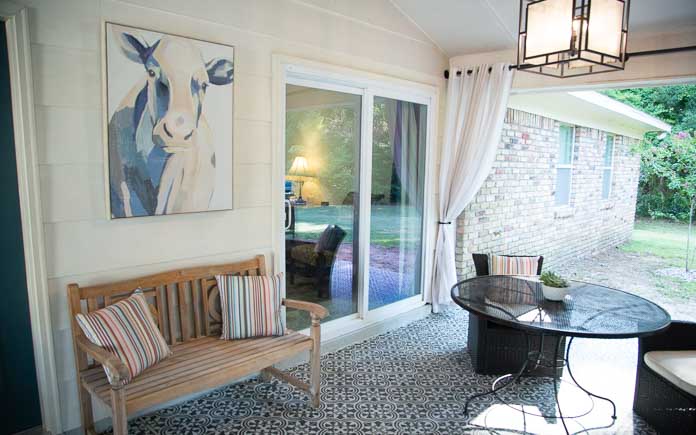
Curtains make this space feel more like an outdoor living room than a breezeway. (3 Echoes Content Studio)
Hang Curtains
To make the breezeway feel more like a living space, we remove the chain link fence at the end and add curtains.
The fence posts are set in concrete, so to remove them, we’ll need some leverage. After digging up the dirt around the base, we place a concrete block next to the post to act as a fulcrum for our shovel.
To make the curtain rod wide enough to fill the breezeway, we connected two galvanized pipes together with a tee fitting. (3 Echoes Content Studio)
Our curtains are going to hang the curtains from a galvanized threaded rod. We first measure the breezeway to ensure our rod is long enough to span the entire opening.
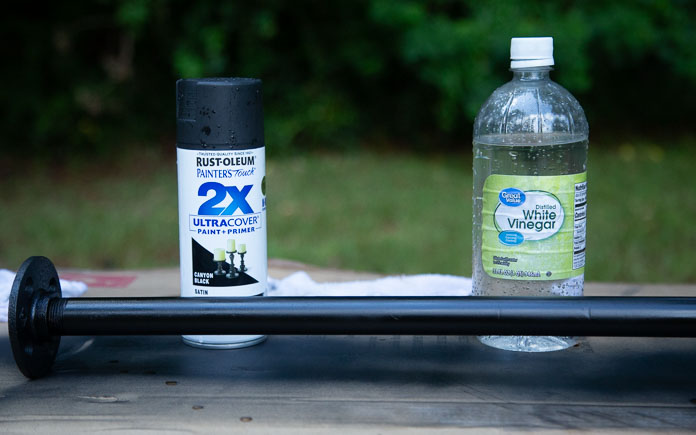
Etching the galvanzied pipe with vinegar ensures the spray paint will stick. (3 Echoes Content Studio)
Before we install the rod, we paint it black to match the wrought iron. But, before we can paint, we have to etch the rod with vinegar to ensure the spray paint adheres to it.
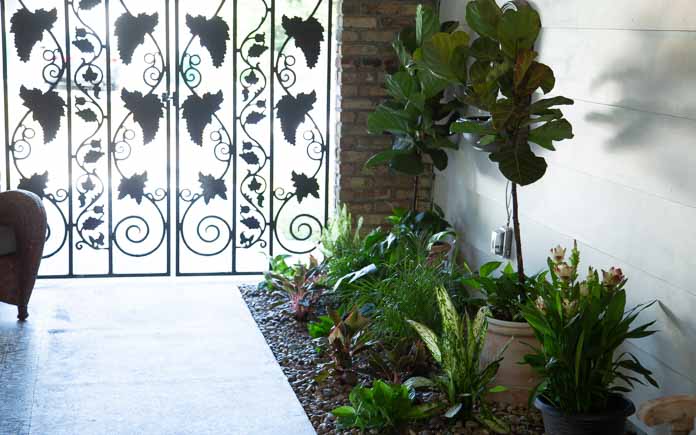
Green leafy plants with varying heighth add depth and breadth to the garden space. (3 Echoes Content Studio)
Fill Garden Bed
Our next project is to transform the garden bed inside the breezeway from a dirt pit to a green oasis.
We add a mix of green, leafy plants to fill the once-defunct garden space.
We surprised Delane with a smart lock deadbolt to not only dress up her front door but also make her home a little more secure.
The Kwikset Halo Touch Wi-Fi Fingerprint Smart Lock uses Delane’s unique fingerprint to open and lock her front door. This single-cylinder deadbolt also can be locked or unlocked by using the keypad or key from the outside as well as the turn button from the inside.
The smart lock has built-in Wi-Fi that connects directly to the home Wi-Fi network and smartphone for a secure smart home that does not require a third-party smart home hub, panel or subscription.
We also:
Touched up the paint on ironwork with spray paint
Painted front door and patio door dark teal
Today’s Homeowner TV host Danny Lipford and co-host Chelsea Lipford Wolf pose with Delane Caldwell and her father, Tim Caldwell. (3 Echoes Content Studio)
Post-Production Thoughts
Delane’s breezeway is the main entrance to her home, but before it had a very tired and haphazard feel to it the random collection of different slabs on the floor only left visitors with questions about what the space was supposed to be.
The sad empty planting bed made the house feel a lot older than it actually was, and the chain link fence made it feel more like a cage than a relaxing space.
But now, the whole Space is taken on the field of a courtyard in a fancy hotel the consistency of the stencil floor ties everything together from the wrought iron gates to the lush green planting beds.
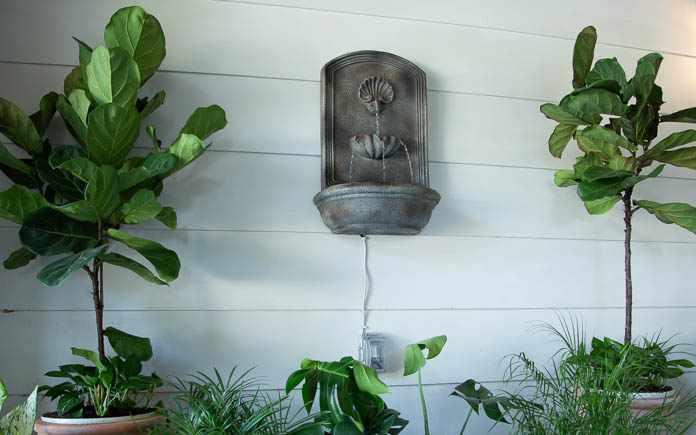
The door adds a pop of color while the fountain adds a cool visual element and a peaceful soundtrack for the space.
The simple curtain rod and the curtains frame the backyard and somehow make it all feel like a resort and we did it all for less than $1,200.
When the house at the end of the cul-de-sac hasn’t changed in 28 years, it’s time for some front porch rehab.
This house belongs to Jeff and Eliese McAllister. The couple, known as Lolli and Pop to their grandchildren, want to update the front porch on “Camp Lollipop” so their grandchildren can enjoy their front yard as much as their children did while growing up.
The porch is blocked off by tall shrubs and is too narrow for the couple to comfortably sit and watch their grandchildren play.
And that’s where we can help!
The Projects
“Open concept” isn’t just for interiors! We’re opening up this front porch.
Opening Up the Front Porch
Removing the shrubs and handrails blocking Jeff and Eliese’s front-yard view is our first big job.
We have to pressure-wash the house to create a clean slate to start our work. Jeff and I remove shrubs, with the help of the couple’s grandsons, while Chelsea and Eliese tackle the handrails.
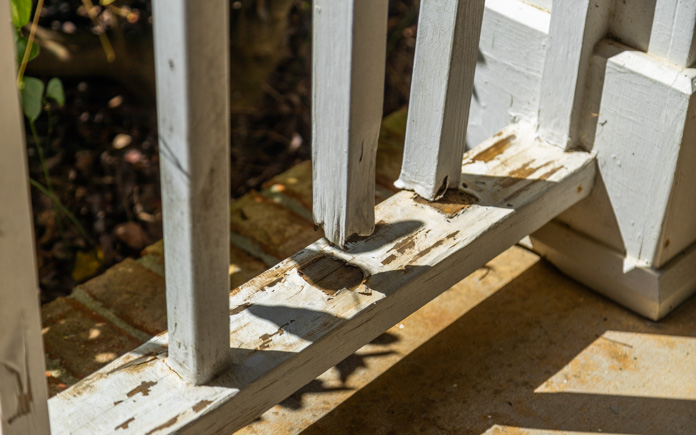
This is what happens when your wood isn’t treated before painting or staining it.
Because the wood handrails aren’t treated, they are rotting away. So, knocking them out with a sledgehammer is the best way to open up the porch — and, maybe, release some tension along the way.
After removing the handrails, we apply putty and sand the columns so it’s like they were never there, to begin with.
Repairing siding isn’t just a cosmetic fix; it can prevent bigger problems later on if the elements enter your home.
Repairing the Shutters and Dormers
This curb appeal makeover requires more than opening up the front porch. We’ve noticed some problems that needed immediate fixes!
First, we repair the ground floor’s damaged shutters. Then, we get up on the roof to repair siding on the dormers. Of the 12 shutters on the front of this house, just one set has a little wood rot. So, Jeff doesn’t want to replace them all.
Since none of these pieces were standard lumber sizes, we had to cut them down on the table saw. Chelsea used the old pieces as a pattern to cut new pieces from the fiber cement material.
A Woodcraft WoodRiver General Purpose Carbide Tipped Saw Blade comes in handy when you need to make custom cuts.
This front porch is coming along, but it could use more character. We will paint the porch to add some.
Painting the Front Porch
After all the repairs were done, we put a fresh coat of paint on the siding, trim and front porch ceiling. The green shutters clashed with the red-tinted wood door, so we painted them gray to tone it down.
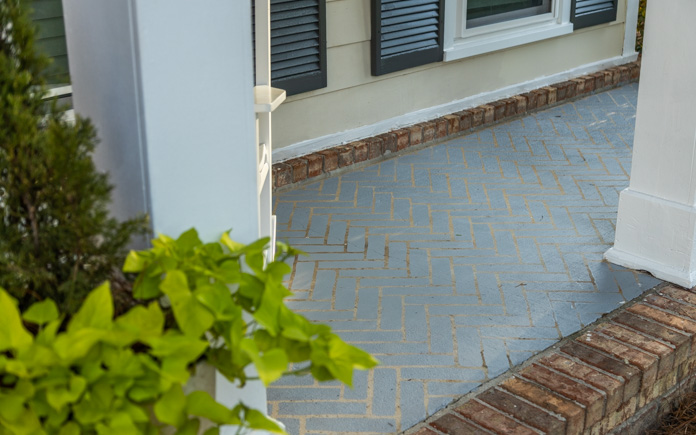
The painted pattern adds a pop of color to this front porch.
The concrete on the front porch has seen better days. Instead of gutting the concrete, we painted a pattern on it using a stencil! It’s a great way to give your concrete a fresh look without breaking the bank.
Spreading out the new flowerbeds adds to the open feeling.
Planting New Flowerbeds
Next, we added some fresh landscaping. Before, the plants were too concentrated at the front of the porch, so we spread them out to maintain the open space feel.
Finally, we put down a fresh layer of pine straw to finish off the flowerbed.
We also:
Added address numbers to the porch column
Removed the intercom/doorbell
Installed a new porch light
Installed soffit vents
Replaced the rocking chairs
“Today’s Homeowner” hosts Danny Lipford and Chelsea Lipford Wolf, pictured with Jeff and Eliese McAllister.
Post-Production Thoughts
This front porch rehab really brings things full circle: Jeff and Eliese’s kids grew up here, and now they’re seeing their grandkids grow here.
At one point, the couple thought about selling the house. But with this new front yard, they’re happy to be able to stay in the home they raised their kids, and now, their grandkids as well.