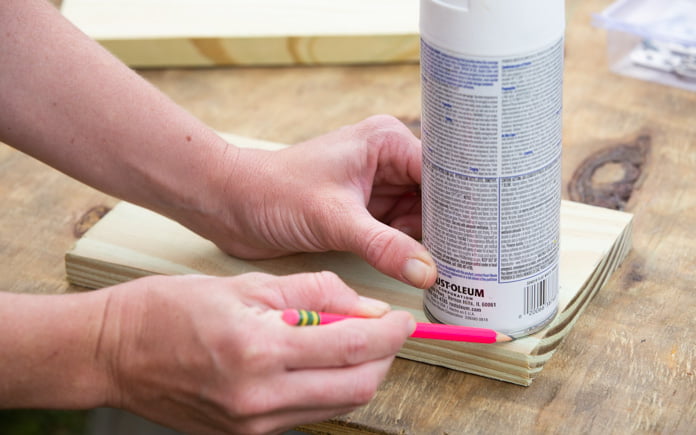
In this week’s episode, we provide solutions for out-of-control Asiatic jasmine and a dripping range hood. (Carey Bradley, Today’s Homeowner Media/Osvaldo Maldonado, Getty Images/BillionPhotos)
Hour 1
In Hour 1, we share a listener’s tip on how to track down rats in an attic, offer solutions for an invasive ground cover and more.
Tracking Down Rats in an Attic
Find where rats have been in your attic by using a black light. (Photo illustration: MikeLane45, Getty Images Pro/Adobe Stock)
In the July 30 show, Chris Welsh in Florida called to ask about eliminating the rat urine smell in his attic. He wanted to install new insulation and asked us if he should remove the old, soiled insulation before he installs new.
We told Chris that since it’s been a few years and the smell is still there, plus he’s already going to install new insulation, he should get rid of the soiled insulation. Although it can dissipate over time, there’s no guarantee. Plus, this could be his only chance to remove it, because once the new insulation is installed, it’s there for good.
One of our listeners, Dean, heard this and called to give this tip: Use a black light to find rat urine in an attic.
This is a great tip because it’s often hard to see how widespread the rat infestation is on smell alone.
According to chemistry expert Anne Marie Helmenstine, Ph.D., urine glows under a black light primarily because it contains the element phosphorus. Phosphorus glows yellowish green in the presence of oxygen, with or without black light, but the light imparts additional energy that makes the chemiluminescence easier to see.
A black light also works well to find pet urine. So if you have a problem cat that’s not keeping its business in the litterbox, use a black light to find urine spots.
Water Dripping from a Range Hood
Water dripping from a range hood indicates an insulation problem. (Photo illustration; Osvaldo Maldonado, Getty Images/BillionPhotos)
Water is constantly dripping from the range hood in David Henderson’s kitchen. He’s spending a small fortune on paper towels to absorb the drips on the stovetop.
The duct vents to the outside of the house, he maintains a steady temperature inside, and the new roof he just had installed didn’t make a difference.
“I’ve been beating my brains out trying to figure it out,” David says. “I am 69 years old and have lived in many houses in my life but have never seen this before.”
The vast majority of the time, when a vent pipe is dripping water down through the range hood, it means condensation isn’t forming on the outside but on the inside.
Install some duct wrap insulation on the pipe to minimize the difference in temperature inside the pipe and in the attic. Since the pipe is already in place, get the type that comes on a roll, not a cylindrical form. That way you won’t have to disconnect the pipe to slide the insulation over it.
This will stop the dripping and you’ll also greatly reduce your paper towel budget!
Controlling Asiatic Jasmine
Asiatic jasmine is a great groundcover, but it can get out of control if not properly maintained. (Carey Bradley, Today’s Homeowner Media)
Sue wants to know: How can I get rid of Asiatic jasmine that is taking over our yard?
“It has spread from the neighbors on each side of us. Pulling it up is a never-ending task and we have gotten too old to deal with it. Help!” Sue says
Asiatic jasmine is a perennial evergreen vine that makes for a wonderful ground cover, but it’s very invasive.
First, try cutting it right at the bed, and keep it under control with a string trimmer.
We don’t often recommend using herbicides, but you might need them in this case. Cut it back as far as you can, then spray on an herbicide.
If you don’t want to use an herbicide, spray it with home and garden vinegar.
Hour 2
In Hour 2, learn how to paint unfinished cabinets yourself, when to paint walls in a new house and more.
Painting Unfinished Cabinets
You can get the look of professionally painted kitchen cabinets yourself if you make the right preparations. (Kameleon007, Getty Images Signature)
A caller wants her unfinished cabinets professionally painted, but the professionals have given her “outrageous” estimates.
“Can I do this myself, and what kind of sprayer should I get?” she asks.
It is a fair amount of work to finish cabinets yourself, but the end result is very gratifying.
Because the cabinets are unfinished, you won’t have to worry about removing any old paint.
Basically, here’s what you need to do.
Sand the cabinets so the paint will stick.
Smooth out any imperfections with water putty or epoxy finish
Prime the cabinets with a bonding primer
Apply two coats of acrylic latex paint in either a semi-gloss or eggshell finish
Don’t wait for your house to “settle” to start painting it. (Curtis Adams, Pexels)
Robert Lang in Kentucky just bought his first home — a new build that was completed in February 2022.
“I want to paint the interior to not only change the color but use a better grade of paint. I’ve read that I should wait before painting. If this is true, how long should I wait? Do I need to allow the house to settle before I attempt to paint?” Robert asks.
There’s no reason to wait to paint in a newly built home. There’s no way to know how much settling or expansion and contraction are going to happen.
There are so many factors that could influence it, like how wet the framing got during the building process or how many screws were used versus nails.
If there is going to be some settling, it probably won’t show up for at least five years.
Go ahead and make the house your own. Just, make sure the walls are nice and clean before you paint them.
The Defiant Wi-Fi and Bluetooth-enabled smart plug gives you control over lights, appliances, or any device you plug into it from anywhere. (Image via The Home Depot)
There are all kinds of ways to add smart control to your home these days. But undoubtedly, one of the easiest ways is to simply control an outlet from your phone using a smart plug.
Use a voice control assistant to turn on and off devices. (Image via The Home Depot)
Danny Lipford chats with Shannon Yodice, a.k.a. “That Tile Chick” in this week’s episode of The Ask Danny Podcast.
On this week’s episode of “Ask Danny,” Schannon Yodice, also known as “That Tile Chick” on Instagram, has all the answers to your tile questions.
Schannon is a tile contractor who specializes in tile installation and design. She worked on tile projects part-time until August 2020, when she took the leap of faith to go into setting tile full-time. Since then, she’s grown her social media into her own business.
Read on to learn more about all things tile.
Very rarely is it OK to glue tile directly to a wood subfloor. (joshuaraineyphotography, Getty Images)
Flooring Matters
Can you glue tile directly onto a wood subfloor?
That Tile Chick: Technically, you can do it, but you have to have a certain thickness and the joist spacing needs to be correct. It’s not recommended.
Always use an uncoupling membrane over a wood subfloor, like one from Schluter Ditra.
This page contains affiliate links. If you purchase a product from these links, we will earn a small commission at no additional cost to you.
This beautiful, marbled tile was installed right over ceramic tiles. (3 Echoes Content Studio)
That Tile Chick: It depends. This is where people can get confused. Some say it’s fine to do so while others say no.
Here’s a good rule to follow: The tile you’re installing is only as good as what it’s stuck to.
So, if you are setting new tile on top of ceramic tile that’s in bad shape, your new tile installation will likely fail.
If the ceramic tile has a solid base, like it was set mud bed, and there aren’t any cracks or loose tiles, you can probably tile over it. But, you have to prime it with a product made for tiling over tile. I use Mapei ECO Prim Grip. Roll on two coats, and always follow the instructions.
Durable porcelain tile is best for the outdoors. (stevecoleimages, Getty Images Signature)
Tips for Outdoor Tiling
What are your tips for installing outdoor tile?
That Tile Chick: Always use porcelain tile. It’s much more durable than ceramic, so it won’t crack as easily.
If you are in an area prone to freeze-thaw, you must use a thin-set mortar or an adhesive that is rated for outdoors. Not all adhesives are rated for outdoors, so if you use one that isn’t, your tile could pop up from the surface.
Prep the surface well. Many outdoor surfaces, like concrete patios or porches, are sloped away from the house, so you won’t get a truly level surface. Fill in any dips or low spots with a concrete patching compound so water doesn’t pool under the tile.
Because grout is porous, bleach and vinegar will eat away at it over time and also leave a film that will attract dirt.
Above all, read the instruction, That Tile Chick says! (Jupiterimages, Photo Images)
Most Common Mistake
What are the biggest mistakes homeowners make when installing tile?
That Tile Chick: Not reading instructions. Every product out there has a data sheet that will tell you its limitations. This gives you factual information, not opinions.
Always follow manufacturer recommendations — they’ve created the product, tested it and know its limitation.
I’m going to listen to them over someone on YouTube. It’s great to get an opinion but always double-check with the manufacturer.
When doing home improvement projects, always keep an eye on the cat. (bakan, Pixabay)
Watch Out For Pets
That Tile Chick: I work a lot in other people’s homes, and in those homes, people have pets. I love animals and interacting with them while I work, but you need to keep an eye on them.
We were working on a shower in a home with a cat. Keep in mind, when you’re working on a shower, you’re typically opening up a subfloor to remove plumbing.
When we were done for the day, we put a piece of plywood over the opening so the homeowner’s children wouldn’t accidentally fall in.
The next morning, when we removed the plywood, out came this black blob. The cat was trapped in the subfloor overnight!
It was a wake-up call for me as a contractor. As much as I love animals, I couldn’t imagine being responsible for harming them.
Ask a question and we could answer it on the “Today’s Homeowner Podcast!” We also may use it on our nationally syndicated radio broadcast or on todayshomeowner.com.
Everyone needs a place to relax. Man caves are where men play games, watch sports and hang out with friends. She sheds are where women craft, scrapbook or — if you’re like Chelsea — build things. If you want a she shed, but you’re not sure where to start, here are some ideas to create the perfect getaway.
But first, it’s important to understand more about man caves and she sheds, and why we need them.
Men and women thrive on spending time alone in their personal space with relaxed rules. This relieves stress, fosters creativity and improves mental health, according to clinical psychologist Dr. Libby Watson.
That’s just one reason why man caves and she sheds — which, typically, couldn’t be more different in appearance and function — have become popular ideas for modern homes.
From the furniture to décor, a man cave often looks nothing like the rest of the house. It may have a pool table, putting green and full-service bar. It may have antlers mounted on driftwood and framed jerseys and trophies on display. And you can bet there’s a huge flat-screen TV.
That’s all by design.
Man caves are more than a place to drink beer and watch sports, according to psychologist Sam Gosling, author of “Snoop: What Your Stuff Says About You.” These spaces — which may resemble a dorm room or bachelor pad compared to the rest of the house — are necessary for men to express their identity.
Women usually influence the home’s design and decor, which leaves some men feeling restless. So, creating a space to indulge in their hobbies meets men’s emotional needs, according to some psychologists.
They’re not alone — professional women and stay-at-home moms also need a place where they can relax, unwind and pursue their pastimes without interruption.
The she shed usually is outdoors, but it could be a converted garage or even a spare room — anywhere a woman can be alone, or with friends, to craft, read, scrapbook, sew or garden.
Women, like men, have different pastimes, but here are some she shed ideas that should work regardless of your interests.
1. Add a Table
If you want to instantly give a she shed some function and versatility, add this to your list of ideas: add a table and a chair. Suddenly, you’ll have a place to pay bills, sew and wrap gifts.
Enjoy woodworking? This table also can serve as a workbench! And you can write, paint and make small home repairs here. Just a simple table can be quite the workhorse.
And furnishing your she shed doesn’t have to be expensive. Just grab a table from storage, purchase one from a thrift store or check neighbors’ garbage piles.
After all, one person’s trash is another person’s treasure, and sometimes, it just takes a little cleaning, staining or painting to make something look new!
Design is in the details, so look for opportunities to transform the table beyond its color or finish. For instance, just adding an inlay can take a table from ordinary to extraordinary!
A container garden is much easier to plan and maintain than its in-ground counterpart.
And the job is more forgiving on your neck, back and legs when you have a potting bench. This elevated area allows you to work comfortably with less physical strain.
Stylish potting benches range from $200 to $1,000 but repurposing old furniture — whether it’s from storage or someone’s garbage pile — is an economical, eco-friendly alternative.
All you need to create a functional potting bench — perfect for working with tall and small planters — is an entertainment, or media, center that you don’t mind sawing up.
If you’ve got a blank wall in your she shed, install some pegboard. It has all kinds of uses, whether you enjoy crafting, painting or woodworking.
Drill two hooks through some spread-apart holes, run a dowel through a roll of wrapping paper and hang it up for a convenient gift-wrapping station.
Your local home center has all kinds of hooks for hanging custom wood shelves, canvas paintbrush storage and PVC pipes for sliding in pencils and pens.
But before you install pegboard, consider making a stylish, beveled cleat so you can hang it up and take it down with ease.
Here’s a bonus idea for your she shed: Paint the pegboard, frame it and make it blend in with the rest of your décor!
4. Repurpose Old Cabinets for a Workbench
Upgrading your kitchen? Don’t discard the cabinets! You can repurpose them for your she shed and reduce the budget for outfitting the space.
Just secure the base cabinets to the wall and add a plywood top. If you do a lot of woodworking, the workbench will take a lot of abuse, so go ahead and stain, not paint, the plywood. That should hold up better.
If your she shed is more for crafting, painting or sewing, you can paint the plywood to match surrounding décor. Or, if you want to spend a little more, you can always top those cabinets with a laminate or granite countertop.
It’s your she shed, your budget and your style — so take these ideas and have fun with it!
Simple lifestyle changes can conserve water, one of our most precious resources, and save money. (aristotoo, Getty Images Signature)
Water conservation is fast becoming a priority for many homeowners.
The Environmental Protection Agency estimates that leaks account for 9,400 gallons of water wasted each year. That’s about the amount of water needed to wash more than 300 loads of laundry.
Whether your reason for conserving water is mandated because of a drought or to combat high utility bills, adopt these simple water-saving measures to dramatically cut your home’s water usage.
Here are the 5 hot spots to tackle.
Insulating water pipes with foam helps water heat up faster, so you waste less time waiting for hot water. (nsj-images, Getty Images Signature)
1. Home Infrastructure and Appliances
To conserve more water in your home, start at the source.
First, check for leaks in the pipes. A visual inspection can quickly reveal any problems that need repairs.
In addition, read your water meter when no water is being used, then look at it again after a few hours to see if the gauge has changed.
Fixing the leak could be as simple as replacing a faucet washer, or you may discover a more serious problem such as an unseen leak in a pipe.
Here’s a win-win solution: Installing foam insulation on hot water pipes saves both water and energy by providing hot water faster and keeping it hot longer. This reduces the water wasted from running the tap to heat it up.
Finally, when replacing appliances like dishwashers or washing machines, look for models that have earned the U.S. government’s Energy Star rating, certifying they use less water and energy.
Plumbing fixtures such as faucets and toilets that carry the Environmental Protection Agency WaterSense label use, on average, 20 percent less water than conventional fixtures.
Fluidmaster’s 400H Toilet Fill Valve fixes a constantly running, noisy or slow-filling toilet and is one of the quietest fill valves available. (3 Echoes Content Studio)
2. Your Bathrooms
Toilets are the largest users of water in the home — but some of them are more efficient than others. Look on the bottom of the tank lid, or inside the tank wall, to find the date your toilet was manufactured. Toilets made before 1993 use two to three times the water of new ones.
If you have an older model, consider replacing it with a new low-flush or a dual-flush toilet that can use as little as 1 gallon per flush for maximum water conservation.
If replacing a toilet isn’t in your budget, add a few inches of gravel or sand to a plastic soft drink bottle, fill it with water, screw on the cap, and put it in the tank away from the float and flapper. The increased volume from the bottle reduces the amount of water in the tank, so less is used per flush.
If you notice your toilet refilling periodically when it hasn’t been flushed, it’s a sure sign your toilet has a leak. These leaks can waste thousands of gallons of water if not repaired.
A constantly running toilet, weak or incomplete flushing and a slow-filling tank aren’t just frustrating — they can also increase your water usage.
The DIY-friendly kit comes with a toilet fill valve, flush valve with stainless-steel bolts, Tank-To-Bowl Gasket and color-coded tools for the fastest installation possible and, if necessary, a complete tank rebuild. It eliminates the need for extra trips to the store for an unknown part or tool — and that saves time, money and frustration.
To conserve more water, change up your hygiene routine. Reducing time spent in the shower can save 2 to 5 gallons of water per minute, or GPM. Installing a water-saving showerhead will prevent thousands of gallons a year from going down the drain.
To see if you need a new showerhead, put a 5-gallon bucket in the shower and turn on the water. If it fills in less than two minutes, consider replacing the showerhead with a water-saving model that uses two GPM or less.
Finally, leaving the faucet running while you shave or brush your teeth wastes water. Turn the water off while you brush and fill the sink to rinse your razor.
Only running a dishwasher when it’s full can save nearly 320 gallons of water annually. (Irina Drazowa-Fischer, Getty Images)
3. The Kitchen
A few changes in the kitchen can significantly cut down your water usage. For instance, thaw frozen food in the refrigerator overnight instead of using a running tap of hot water — it’s not necessary.
When used properly, a dishwasher uses less water than hand-washing. Run your dishwasher only when it’s full and use water-saving settings for more efficiency. Doing this saves the average family nearly 320 gallons of water annually.
If you hand-wash, fill one side of a double sink with soapy water for washing and the other with clean water for rinsing. Letting your faucet run for five minutes while washing dishes can waste 10 gallons of water.
Also, install low-flow aerators on faucets — these reduce water flow to one gallon per minute or less.
Finally, do you drink a lot of tap water? If so, don’t keep the water running until it cools off for drinking. Instead, fill a pitcher or bottle and keep it in the fridge.
Don’t do laundry until you have enough clothes for a full load. (Oksana Vejus via Canva)
4. Your Laundry Room
Washing clothes accounts for the second-largest water use in the home. Put off doing laundry for the sake of water conservation.
Only run the washer with a full load of clothes and use the shortest cycle for lightly soiled clothing. And if you really want to reduce water use, avoid the permanent press cycle, which uses up to 5 gallons more water per load.
While washing clothes in cold water saves energy by reducing water heating, it uses the same amount of water as warm or hot settings.
Every year, we waste billions of gallons of water to keep our lawns and gardens green. Much of this water is lost due to overwatering, evaporation, poor sprinkler design or lack of maintenance.
Use a drip irrigation system or a soaker hose to reduce water use. These methods deliver water slowly and directly to the plant’s roots, and much less water is lost to evaporation.
If you have a programmable irrigation system, install a rain sensor. It will interrupt the program cycle when it rains, so you won’t overwater your lawn.
Better yet, start at the ground level to keep your water use at a minimum. Choose native and drought-tolerant plants to create a water-smart landscape that’s beautiful and efficient.
Here are some other water conservation options for the yard:
Sweep driveways, sidewalks and steps rather than hosing them down.
Wash the car with water from a bucket, or consider using a commercial car wash that recycles water.
If you have a pool, use a cover to reduce evaporation when it’s not in use.
Following these water-saving tips can reduce household water use by 30 percent or more.
Start simple by changing wasteful habits and fixing leaks, then move up to installing water-saving fixtures and appliances.
Not only will it save money, but you’ll also reduce the needless drain on one of our most precious resources.
Water conservation is fast becoming a priority for many homeowners.
The Environmental Protection Agency estimates that leaks account for 9,400 gallons of water wasted each year. That’s about the amount of water needed to wash more than 300 loads of laundry.
Whether your reason for conserving water is mandated because of a drought or to combat high utility bills, adopt these simple water-saving measures to dramatically cut your home’s water usage.
Here are the 5 hot spots to tackle.
Insulating water pipes with foam helps water heat up faster, so you waste less time waiting for hot water. (nsj-images, Getty Images Signature)
1. Check Fixtures and Appliances
To conserve more water in your home, start at the source.
First, check for leaks in the pipes. A visual inspection can quickly reveal any problems that need repairs.
In addition, read your water meter when no water is being used, then look at it again after a few hours to see if the gauge has changed.
Fixing the leak could be as simple as replacing a faucet washer, or you may discover a more serious problem such as an unseen leak in a pipe.
Here’s a win-win solution: Installing foam insulation on hot water pipes saves both water and energy by providing hot water faster and keeping it hot longer. This reduces the water wasted from running the tap to heat it up.
Finally, when replacing appliances like dishwashers or washing machines, look for models that have earned the U.S. government’s Energy Star rating, certifying they use less water and energy.
Plumbing fixtures such as faucets and toilets that carry the Environmental Protection Agency WaterSense label use, on average, 20 percent less water than conventional fixtures.
Fluidmaster’s 400H Toilet Fill Valve fixes a constantly running, noisy or slow-filling toilet and is one of the quietest fill valves available. (3 Echoes Content Studio)
2. Improve Your Toilets
Toilets are the largest users of water in the home — but some of them are more efficient than others. Look on the bottom of the tank lid, or inside the tank wall, to find the date your toilet was manufactured. Toilets made before 1993 use two to three times the water of new ones.
If you have an older model, consider replacing it with a new low-flush or a dual-flush toilet that can use as little as 1 gallon per flush for maximum water conservation.
If replacing a toilet isn’t in your budget, add a few inches of gravel or sand to a plastic soft drink bottle, fill it with water, screw on the cap, and put it in the tank away from the float and flapper. The increased volume from the bottle reduces the amount of water in the tank, so less is used per flush.
If you notice your toilet refilling periodically when it hasn’t been flushed, it’s a sure sign your toilet has a leak. These leaks can waste thousands of gallons of water if not repaired.
A constantly running toilet, weak or incomplete flushing and a slow-filling tank aren’t just frustrating — they can also increase your water usage.
The DIY-friendly kit comes with a toilet fill valve, flush valve with stainless-steel bolts, Tank-To-Bowl Gasket and color-coded tools for the fastest installation possible and, if necessary, a complete tank rebuild. It eliminates the need for extra trips to the store for an unknown part or tool — and that saves time, money and frustration.
To conserve more water, change up your hygiene routine. Reducing time spent in the shower can save 2 to 5 gallons of water per minute, or GPM. Installing a water-saving showerhead will prevent thousands of gallons a year from going down the drain.
To see if you need a new showerhead, put a 5-gallon bucket in the shower and turn on the water. If it fills in less than two minutes, consider replacing the showerhead with a water-saving model that uses two GPM or less.
Finally, leaving the faucet running while you shave or brush your teeth wastes water. Turn the water off while you brush and fill the sink to rinse your razor.
Only running a dishwasher when it’s full can save nearly 320 gallons of water annually. (Irina Drazowa-Fischer, Getty Images)
3. Make Changes in the Kitchen
A few changes in the kitchen can significantly cut down your water usage. For instance, thaw frozen food in the refrigerator overnight instead of using a running tap of hot water — it’s not necessary.
When used properly, a dishwasher uses less water than hand-washing. Run your dishwasher only when it’s full and use water-saving settings for more efficiency. Doing this saves the average family nearly 320 gallons of water annually.
If you hand-wash, fill one side of a double sink with soapy water for washing and the other with clean water for rinsing. Letting your faucet run for five minutes while washing dishes can waste 10 gallons of water.
Also, install low-flow aerators on faucets — these reduce water flow to one gallon per minute or less.
Finally, do you drink a lot of tap water? If so, don’t keep the water running until it cools off for drinking. Instead, fill a pitcher or bottle and keep it in the fridge.
Don’t do laundry until you have enough clothes for a full load. (Oksana Vejus via Canva)
4. Adjust Your Laundry Room Routine
Washing clothes accounts for the second-largest water use in the home. Put off doing laundry for the sake of water conservation.
Only run the washer with a full load of clothes and use the shortest cycle for lightly soiled clothing. And if you really want to reduce water use, avoid the permanent press cycle, which uses up to 5 gallons more water per load.
While washing clothes in cold water saves energy by reducing water heating, it uses the same amount of water as warm or hot settings.
Every year, we waste billions of gallons of water to keep our lawns and gardens green. Much of this water is lost due to overwatering, evaporation, poor sprinkler design or lack of maintenance.
Use a drip irrigation system or a soaker hose to reduce water use. These methods deliver water slowly and directly to the plant’s roots, and much less water is lost to evaporation.
If you have a programmable irrigation system, install a rain sensor. It will interrupt the program cycle when it rains, so you won’t overwater your lawn.
Better yet, start at the ground level to keep your water use at a minimum. Choose native and drought-tolerant plants to create a water-smart landscape that’s beautiful and efficient.
Here are some other water conservation options for the yard:
Sweep driveways, sidewalks and steps rather than hosing them down.
Wash the car with water from a bucket, or consider using a commercial car wash that recycles water.
If you have a pool, use a cover to reduce evaporation when it’s not in use.
Following these water-saving tips can reduce household water use by 30 percent or more.
Start simple by changing wasteful habits and fixing leaks, then move up to installing water-saving fixtures and appliances.
Not only will it save money, but you’ll also reduce the needless drain on one of our most precious resources.