Have you ever come across a piece of furniture you thought was perfect for your patio or balcony, but it wasn’t quite outside friendly? It happens, and it’s especially frustrating considering that patio furniture can be pretty limited in terms of choice or availability, making it tricky to find something that fits your vision for an outdoor oasis that is also safe to use or leave outside. If this is you, then there are some simple workarounds here. While you can’t make all furniture weatherproof — sorry! — there are some tricks to help make certain pieces more outside-ready. Start with these simple DIY weatherproofing tips below.
Add an outdoor sealant to wood.
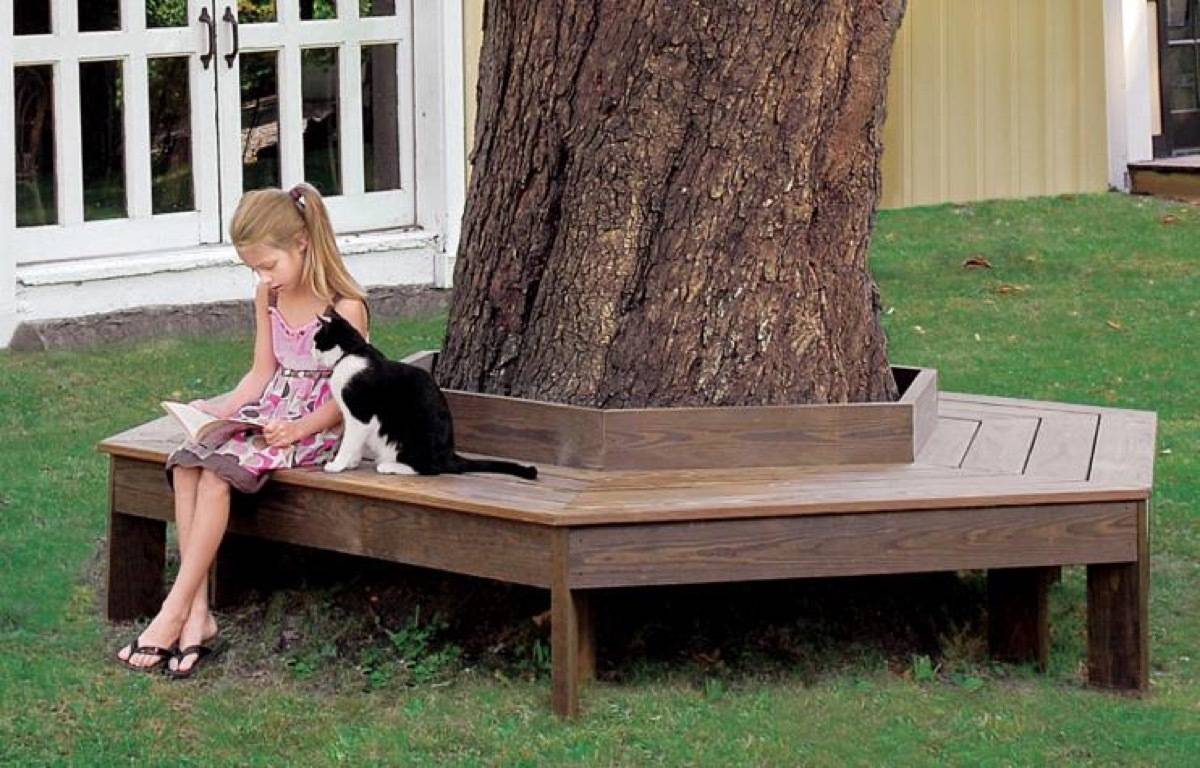
Do you have a wooden table that would make the perfect patio dining table, or a wooden bench that would look lovely underneath your backyard tree? Turn it into an outdoor piece with the help of sealant.
“While ideally you would choose furniture made of naturally water-resistant materials like cedar, teak, or cypress woods, any wood furniture can be treated with an outdoor sealant,” says Morgan McBride, founder of DIY home improvement website CharlestonCrafted.com. “Pretty much every sealant brand makes outdoor sealants. Look for something clear, and be sure to note if the sealant is glossy or matte, which can really change the final look of your wooden furniture.” This way, you don’t have to worry that a light drizzle will warp your wood.
Don’t sleep on waterproofing sprays for washable fabrics.
Whether you want to give outdoor cushions an extra boost in protection or wish to weatherproof a certain pillow, waterproofing sprays are at your service. “Outdoor cushions are usually made of water-resistant materials, but adding a coat of an outdoor weather shield, like Scotchgard, is a great way to give it further protection. This will help prolong the fabric’s life and foam,” McBride says.
Just make sure only to use it on washable fabrics — you won’t get the same results with leather, for example. Look at the tag of your pillow or cushion. If it’s X-coded, it means it can’t be cleaned with solvents or water. That means you can’t coat it with a weather shield, either.
Swap in more waterproof fabrics when possible.
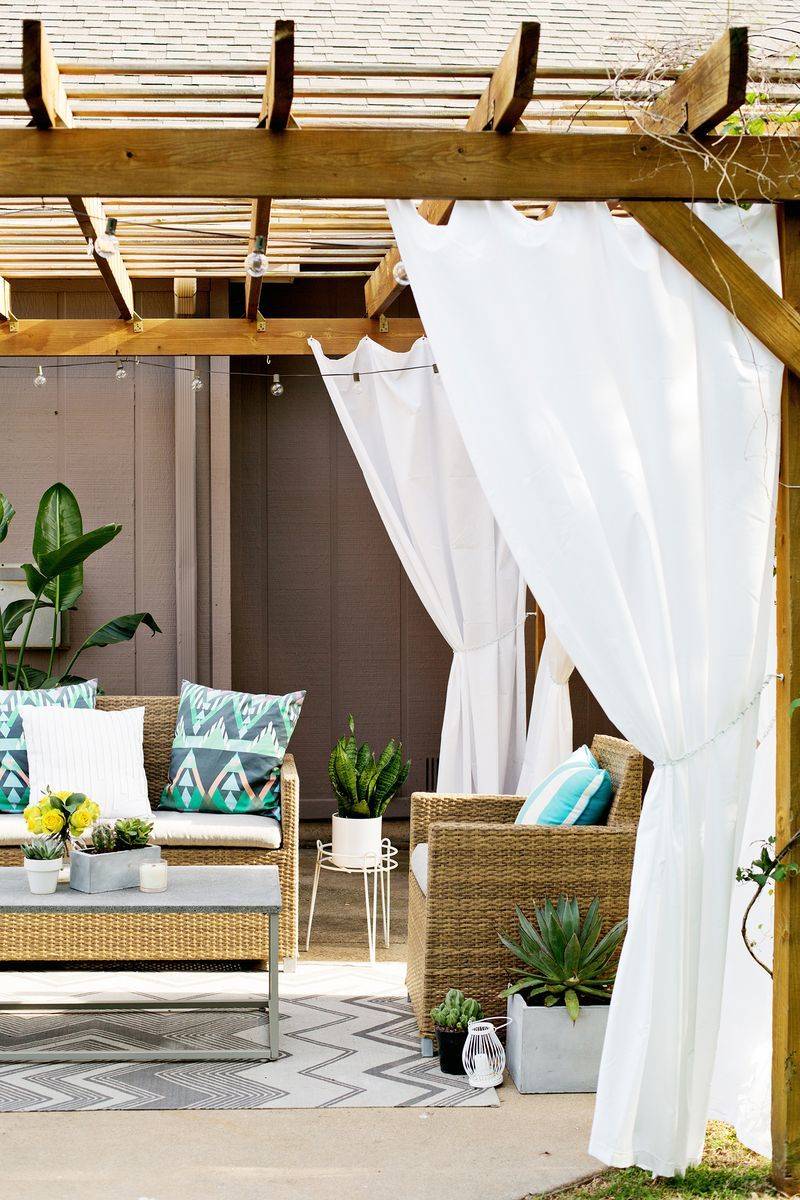
Did you find a great couch, some unique seats, or a perfectly sized pillow, but the cushions aren’t waterproof? (Been there.) Keep the frame and the foam, but swap the cloth for waterproof fabrics. “During my travels to India and Southeast Asia, I was entranced by the fabric-making traditions of the local artisans. I decided to take those traditions outside with a Sunbrella partnership. This performance fabric is resistant to mold, mildew, staining, and fading, making it suitable for outdoor use,” said textile designer John Robshaw. You can make the furniture much more waterproof if you use performance fabric that could take a bit of a beating. Just reupholster your pieces with it.
This tip isn’t so much about waterproofing, but it will help your outdoor rug look nicer for longer. If you feel like your outdoor rugs get warped after a while, velcro can help remedy that issue.
“Outdoor rugs tend to get blown around in the wind, which can lead to them getting creased or warped. You can add strips of peel and stick velcro to the underside of the rug to hold it in place,” says McBride. “The velcro is removable in the future if you stop using the rug. If your outdoor rug gets dirty, the easiest way to clean it is with a pressure washer!” (Still shopping for an outdoor rug? These are on sale this weekend.)
Use heavy-duty weatherproof covers to protect furniture.
And finally, one of the best ways to waterproof non-waterproof furniture is to cover it with a tarp or furniture cover when you know a storm is coming. “It isn’t pretty, and might not be practical for everyday use, but putting on covers before big rainstorms or during long periods of time when the furniture won’t be needed is the best way to keep it in great shape,” advises McBride.
Marlen is a writer first, vintage hoarder second, and donut fiend third. If you have a passion for finding the best taco joints in Chicago or want to talk about Doris Day movies, then she thinks an afternoon coffee date is in order.
Being a homeowner is a big responsibility, and while there’s plenty to take care of inside you home, don’t forget about the outside, either. If you’ve ever looked into the cost of hiring a professional landscaper, you know they’re not cheap. Fortunately, there are a slew of inexpensive and affordable DIY landscaping ideas at your disposal, so long as you’re willing to get your hands a little dirty. From the front yard to the back, barbeque pits to bistro lights, here are 59 ways you can affordably improve your outdoor space.
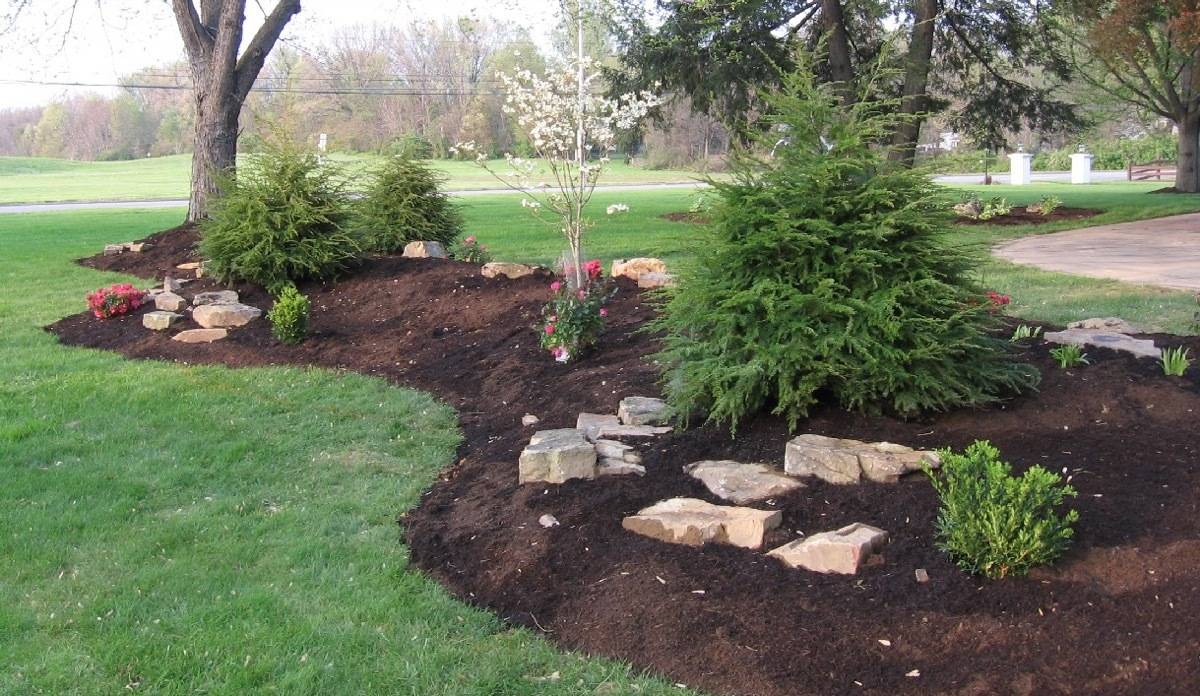
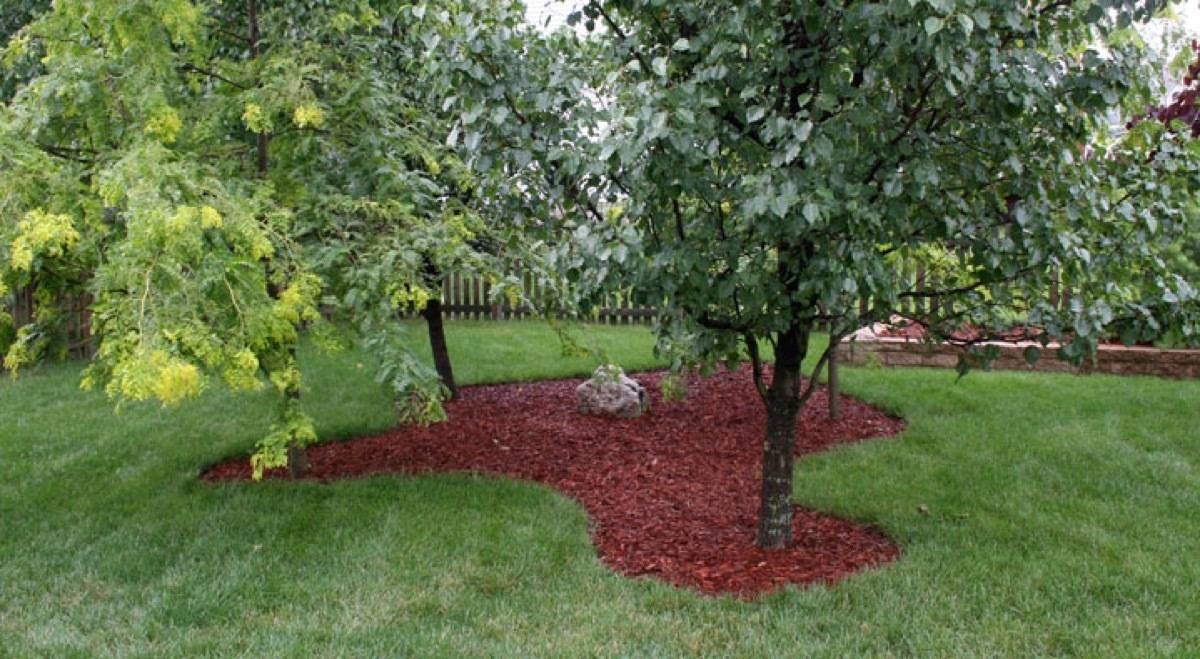
7. How about creating a berm? What’s a berm, you ask? It’s when you transform your totally flat yard by creating mounds of interest. Easy, and totally affordable. Be sure to do your research first before create a berm around the base of any tree, as too much dirt can suffocate the tree.
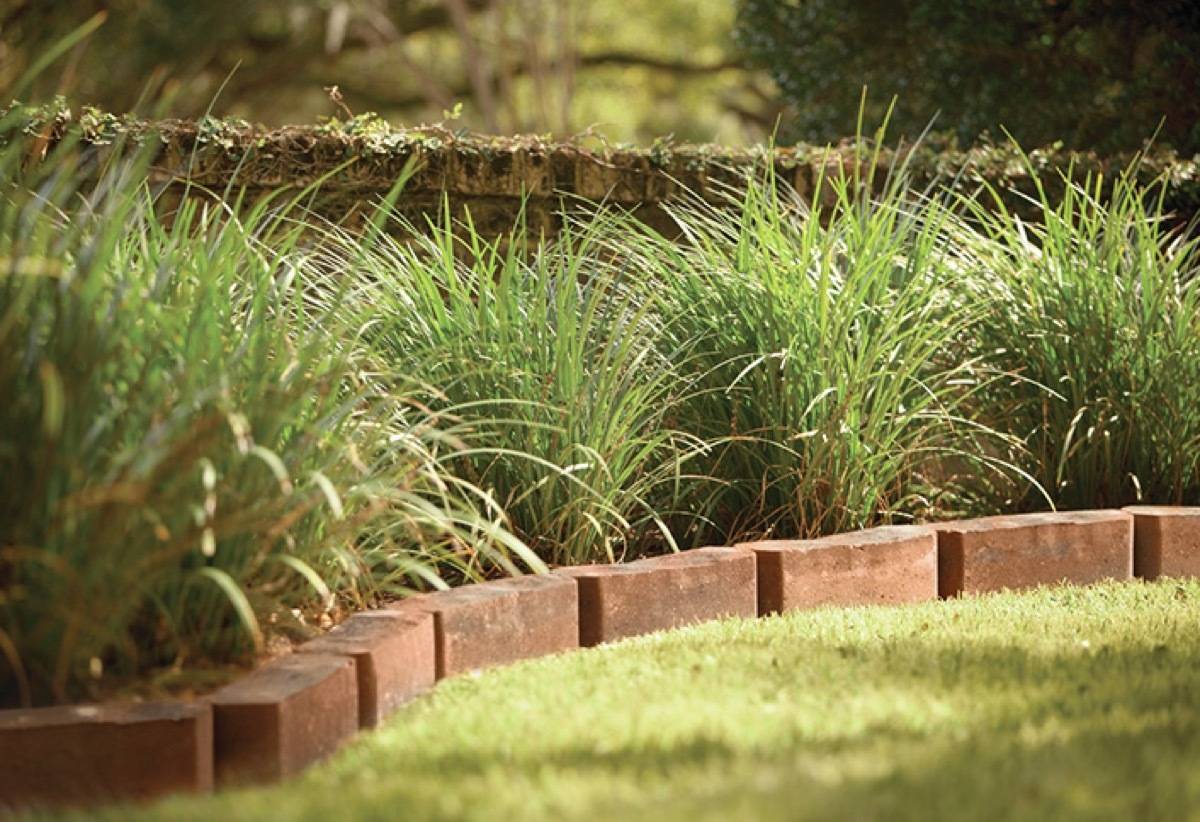
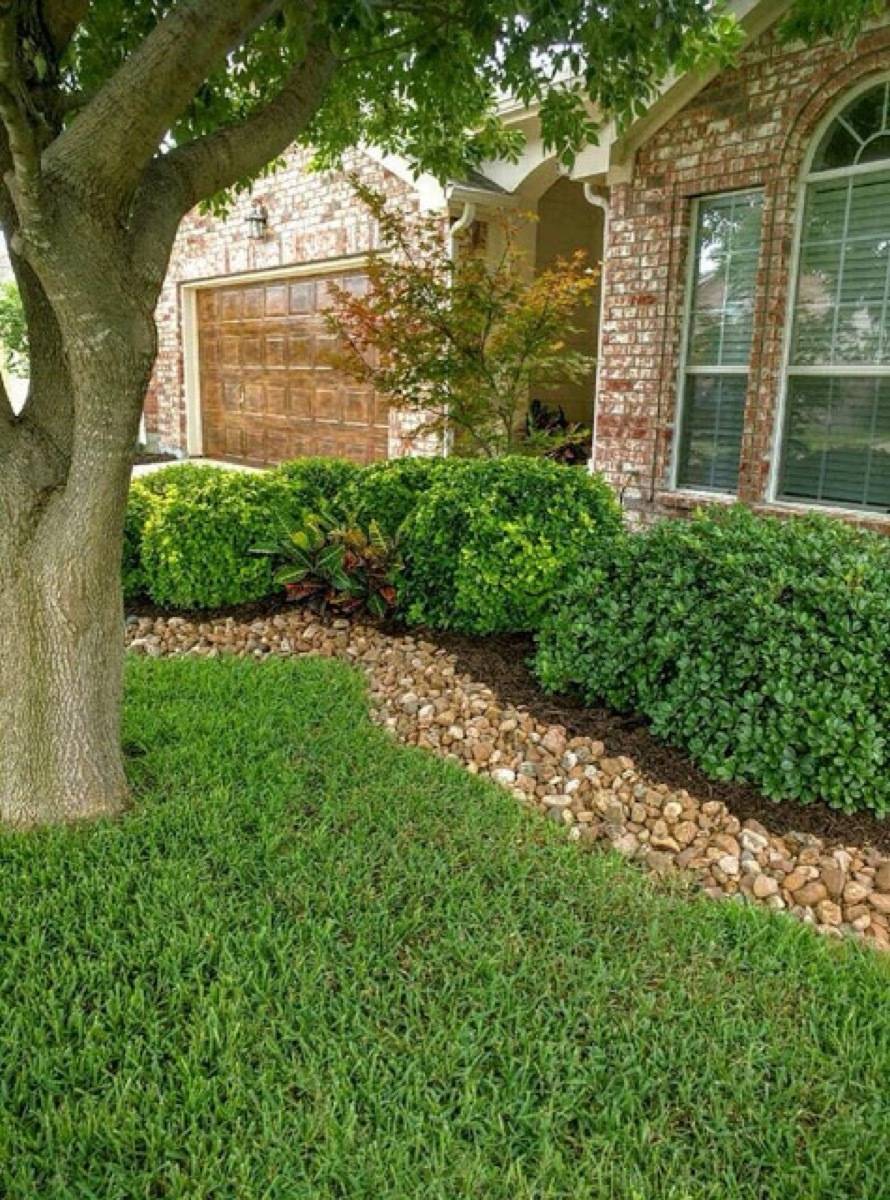
10. DIY landscaping ideas don’t get much more affordable than this: install brick edging to outline areas of your yard using salvaged or recycled brick.
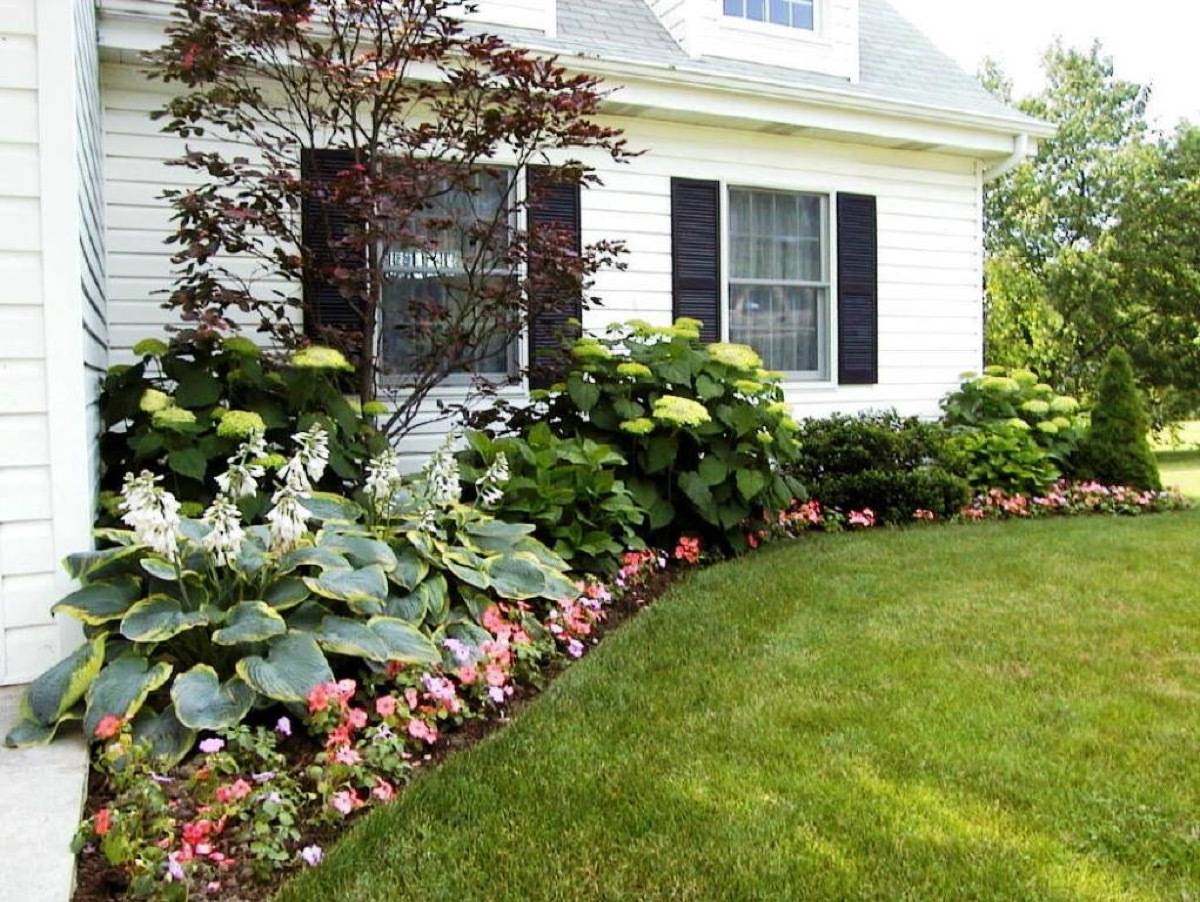
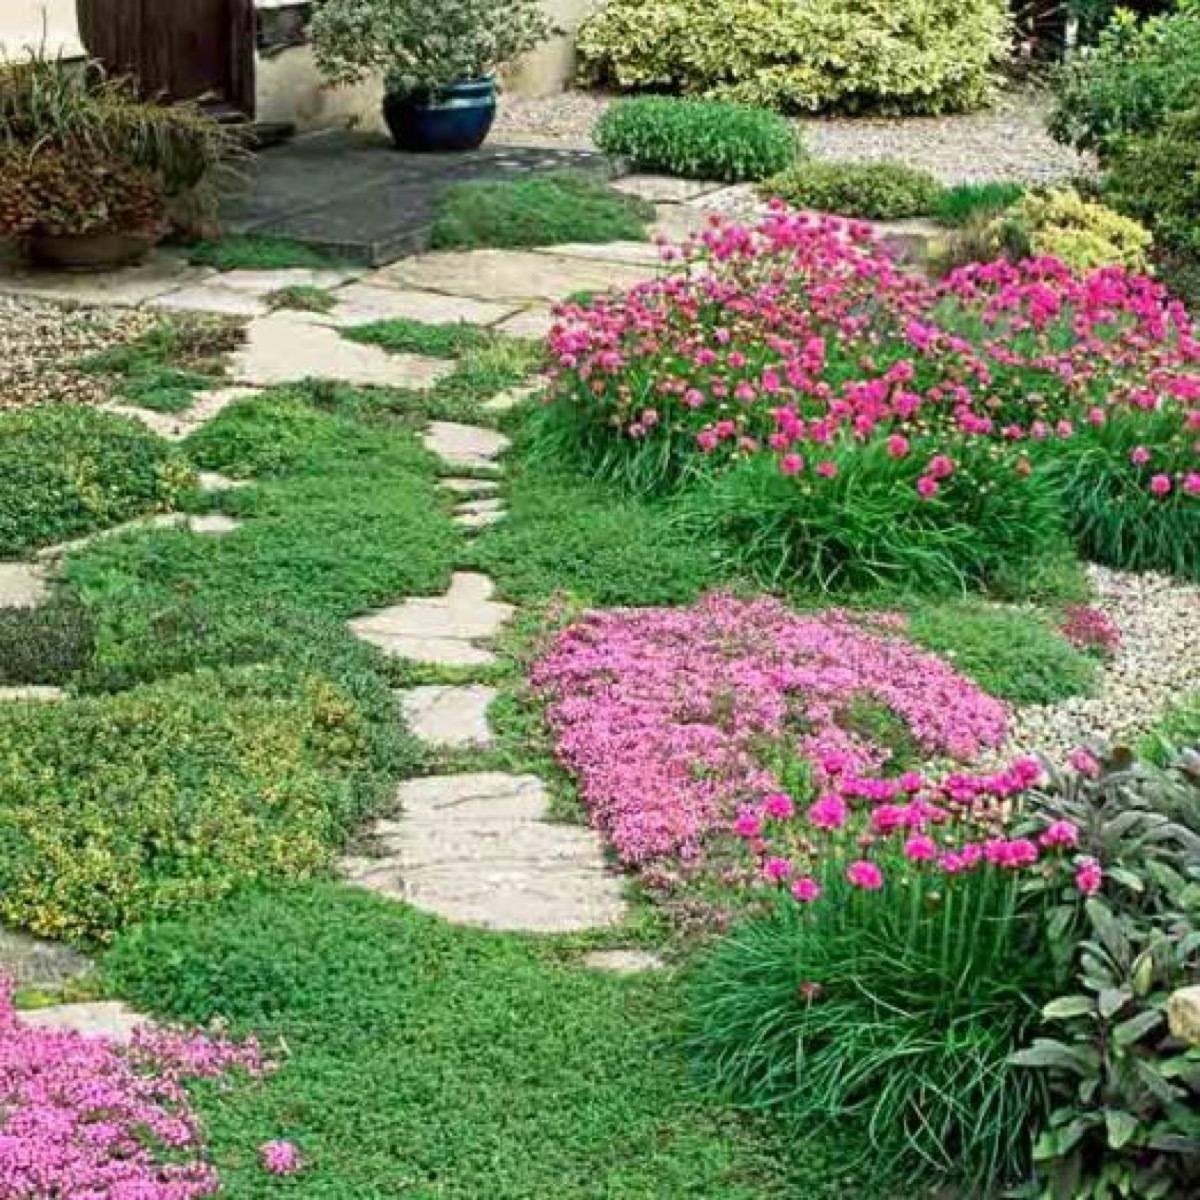
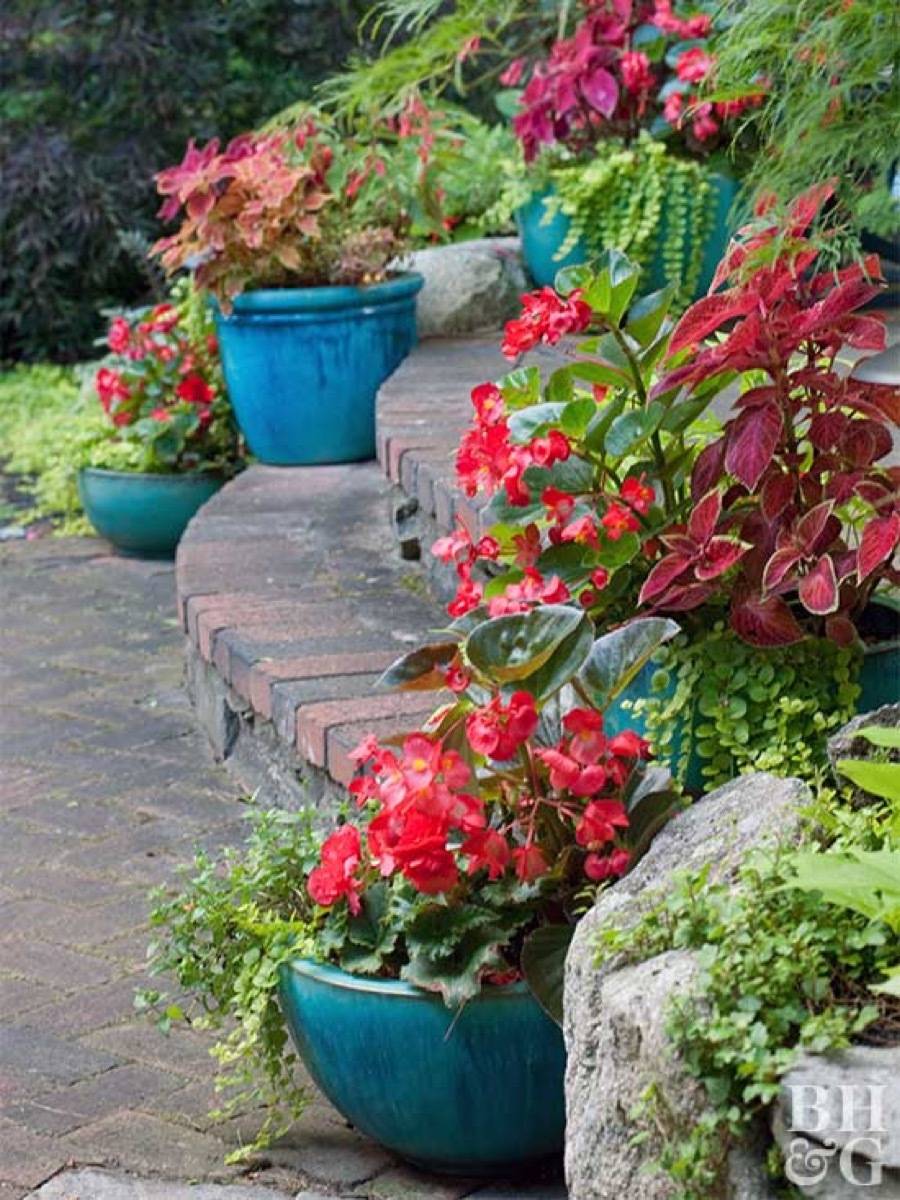
14. Display flowers in containers along steps, walkways, or on ledges. This is a great way to add visual interest if you have a lot of brick or asphalt in your front yard.
24. Get ready for DIY landscaping ideas straight out of childhood. Why not create a secret garden in your back yard? The 9-year-old in me is absolutely giddy over this idea.
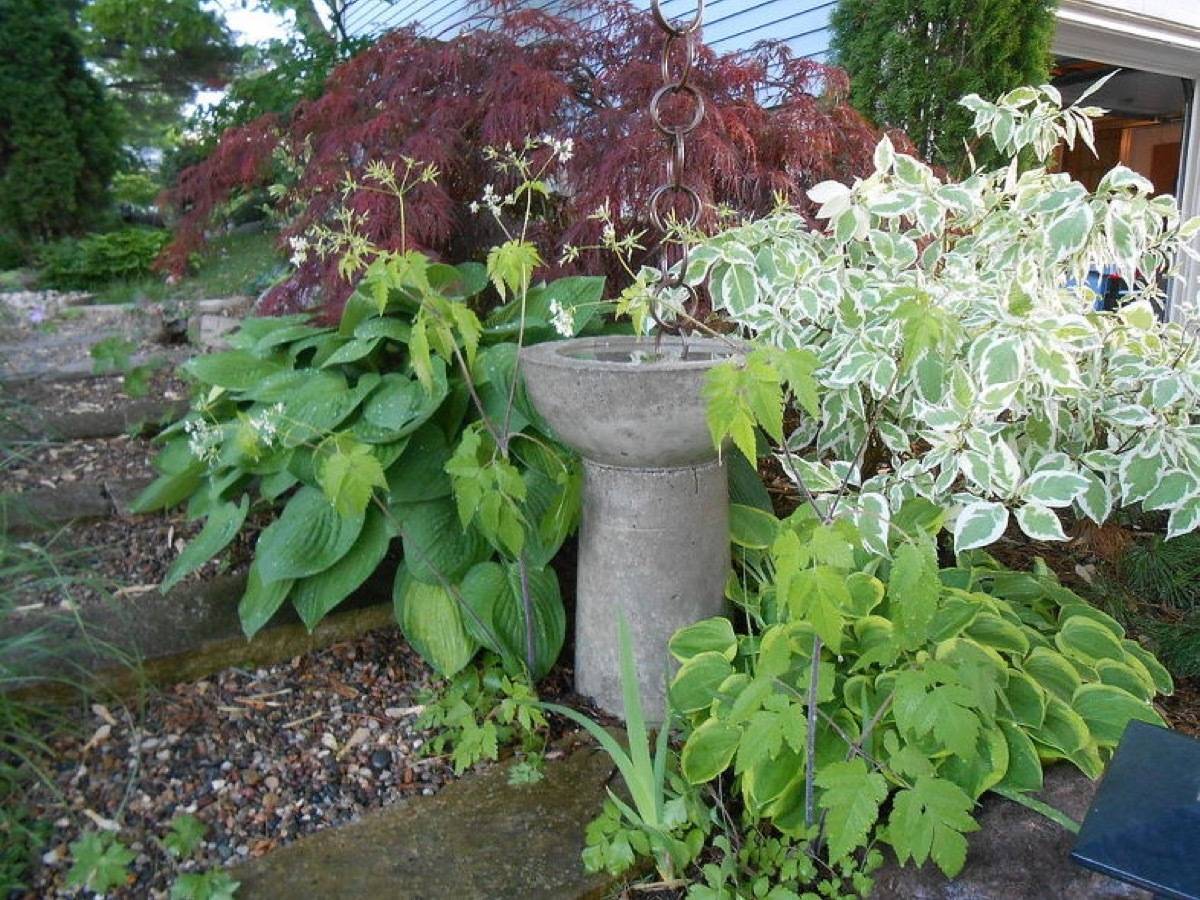
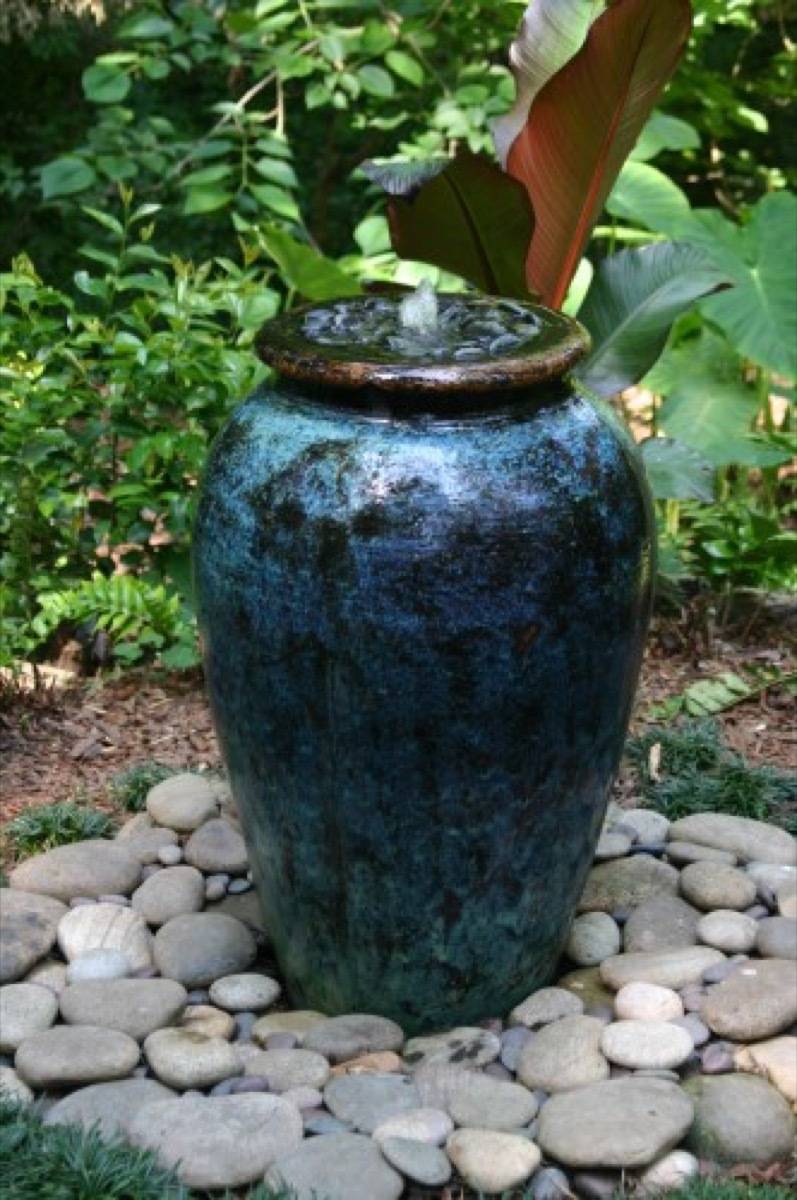
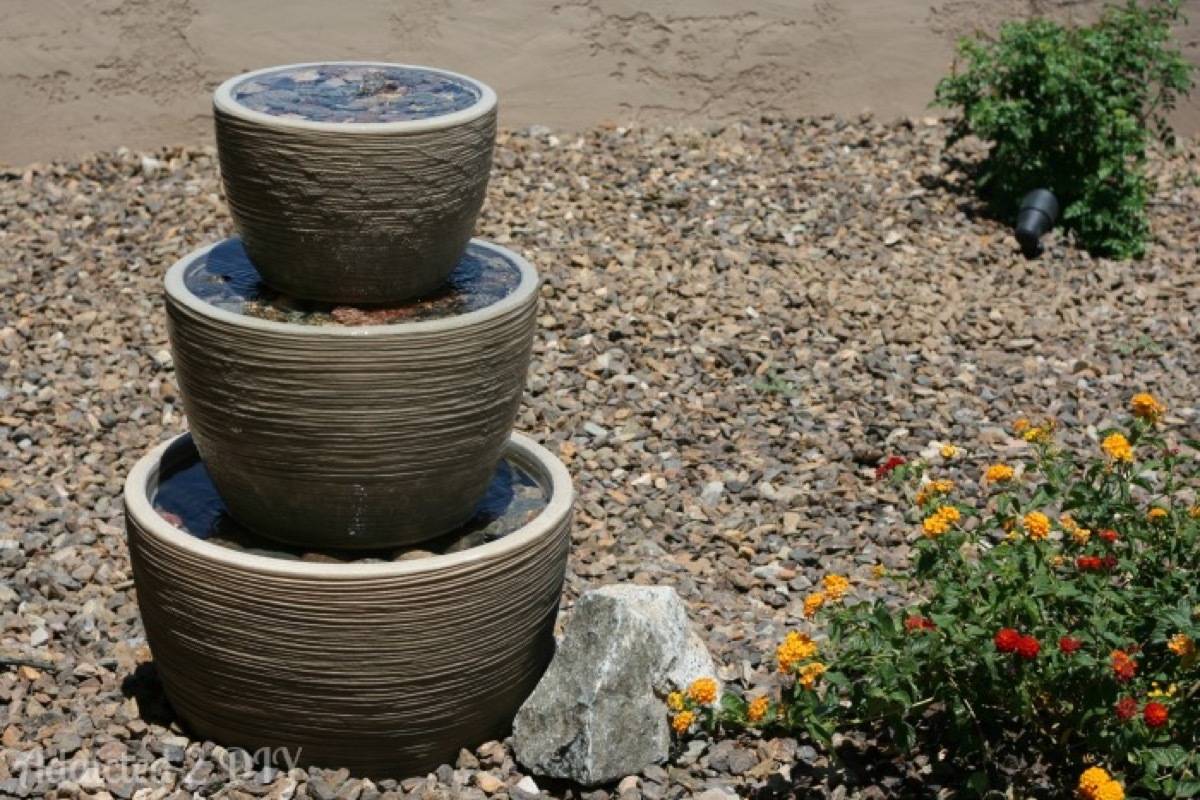
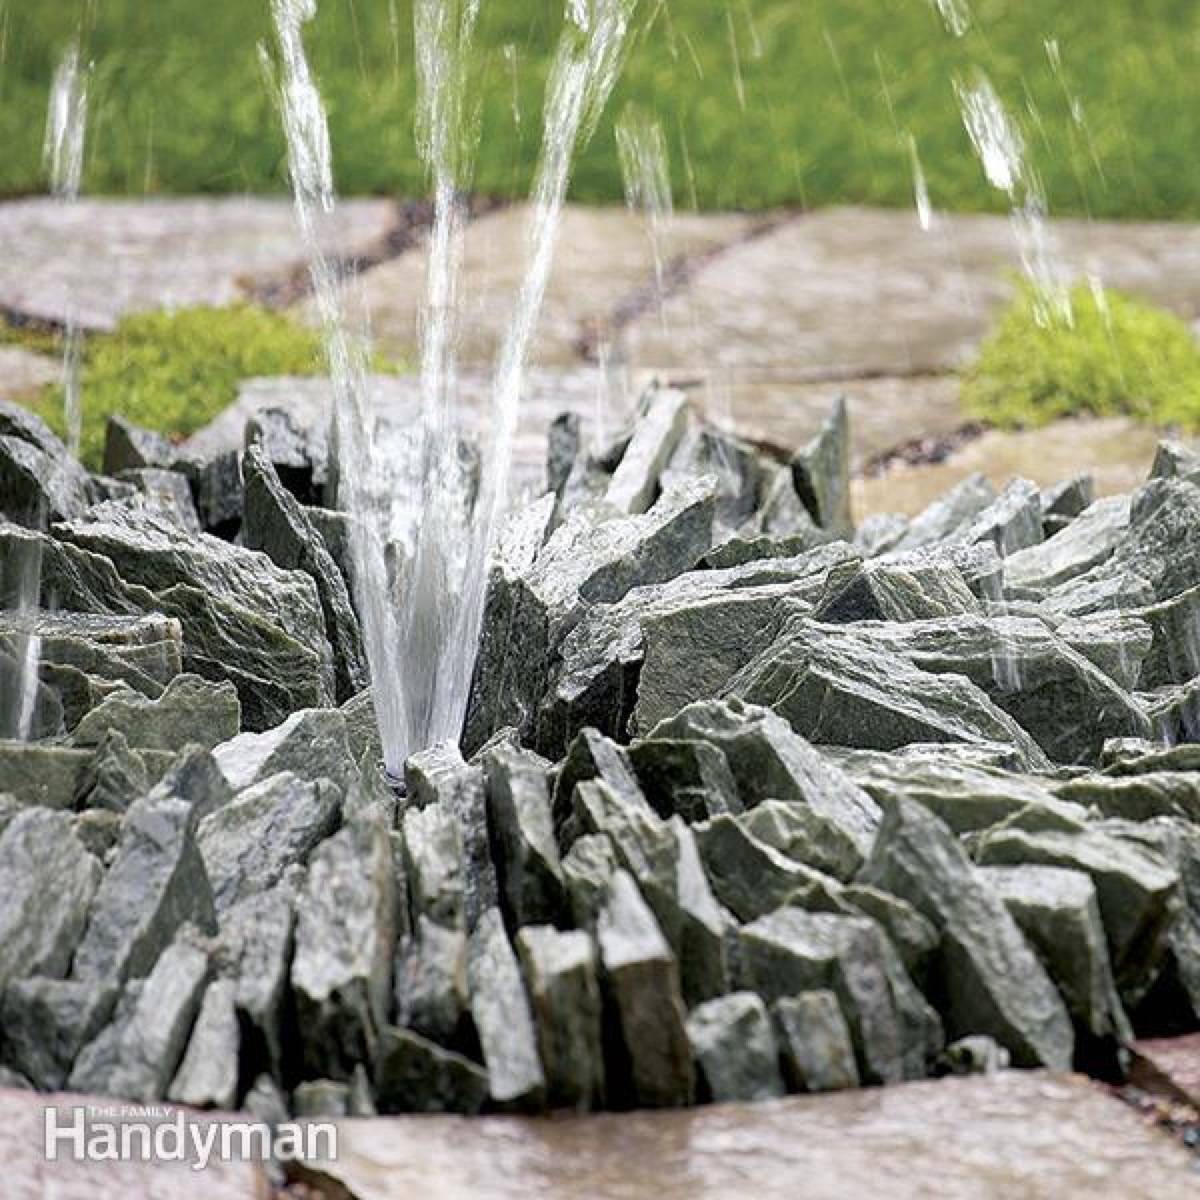
35. Stack ’em up! With a little extra effort, you can transform the previous project on this DIY landscaping ideas list into a multi-level water feature.
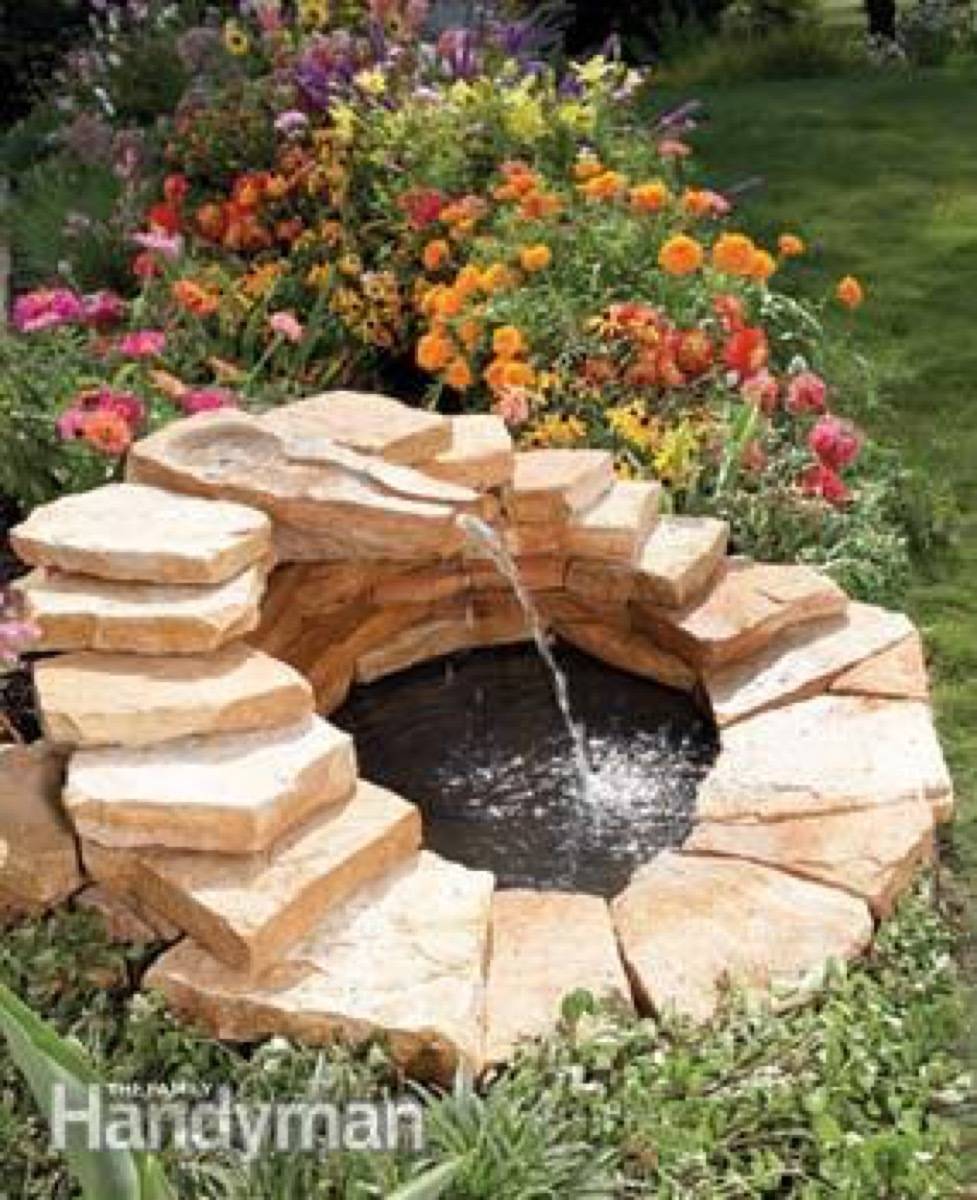
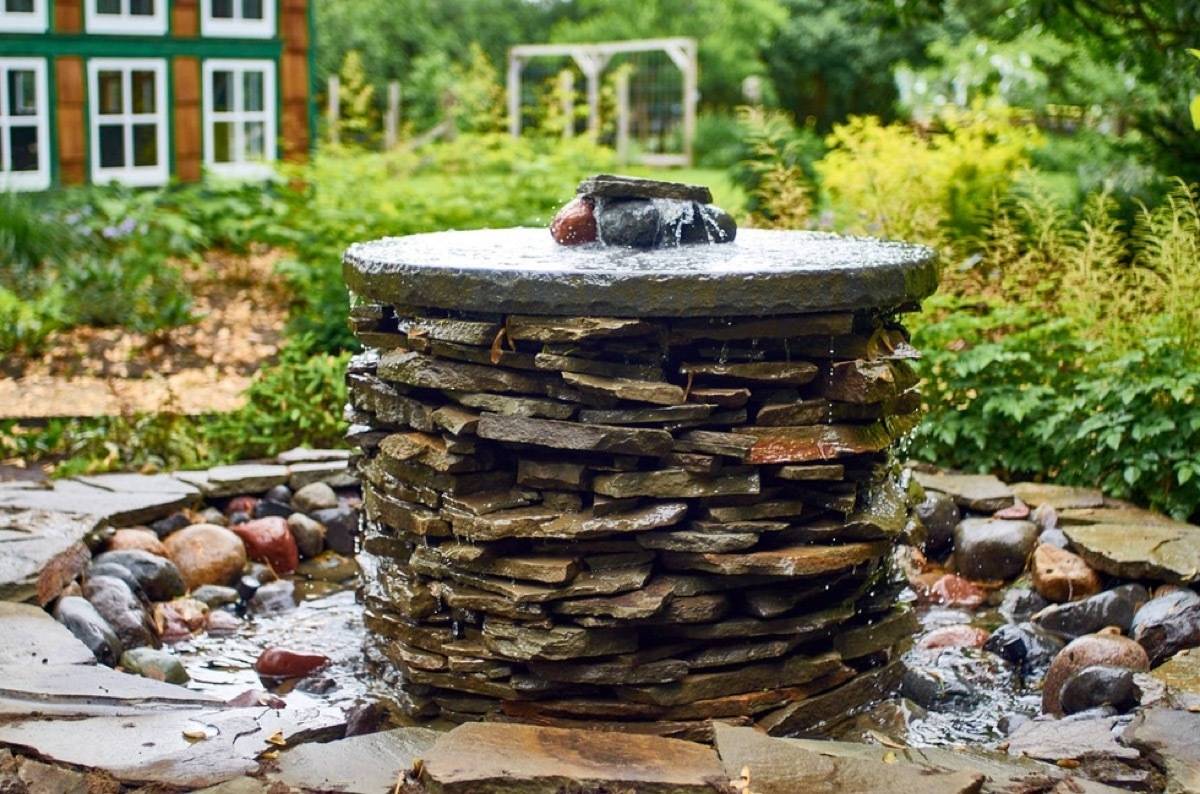
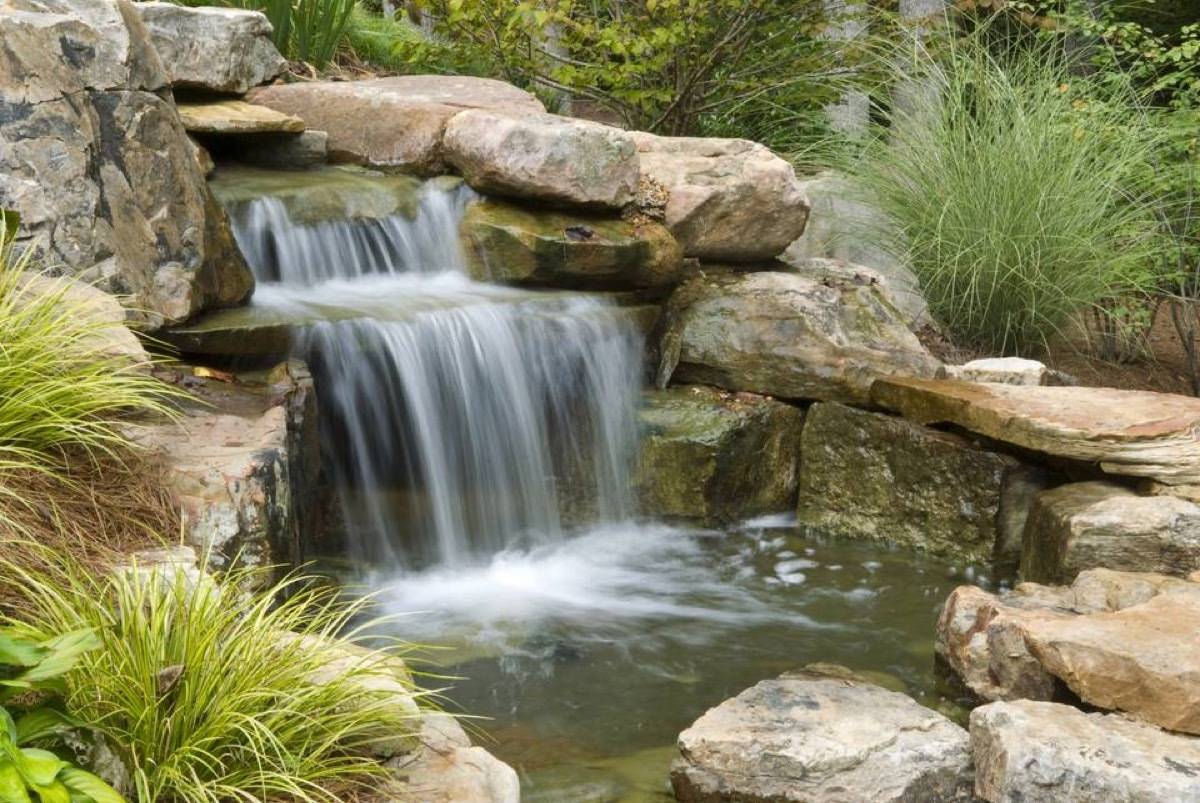
37. This is one of those DIY landscaping ideas that is going to require the help of a friend, but if you’re into drama, consider building a stone pond fountain.
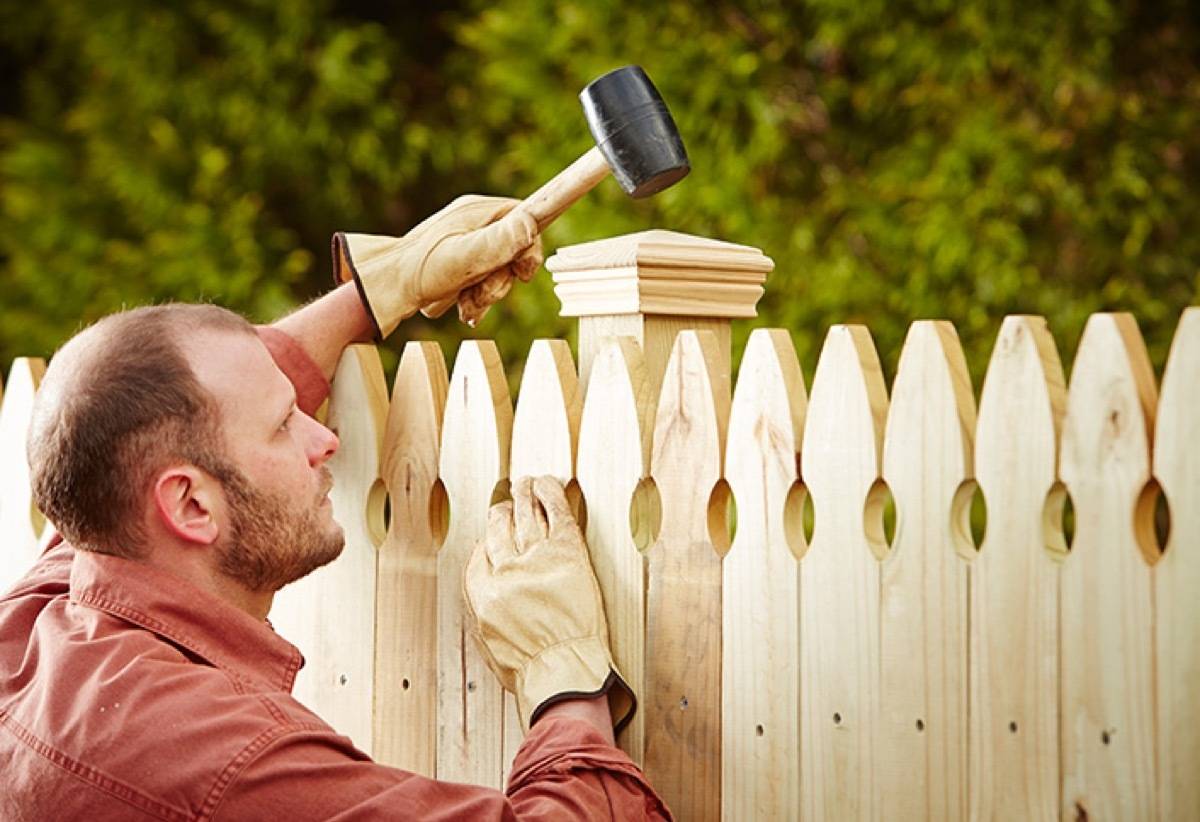
42. Nothing beats the backyard privacy of your own fence. Before you begin the building process, you’ll need to be sure of a few things: Verify your property line, check with your city or township about the limitations and height-restrictions of your fence, have someone from the city come and check for gas lines, and have a neighborly chat with anyone you’ll be sharing the fence line with.
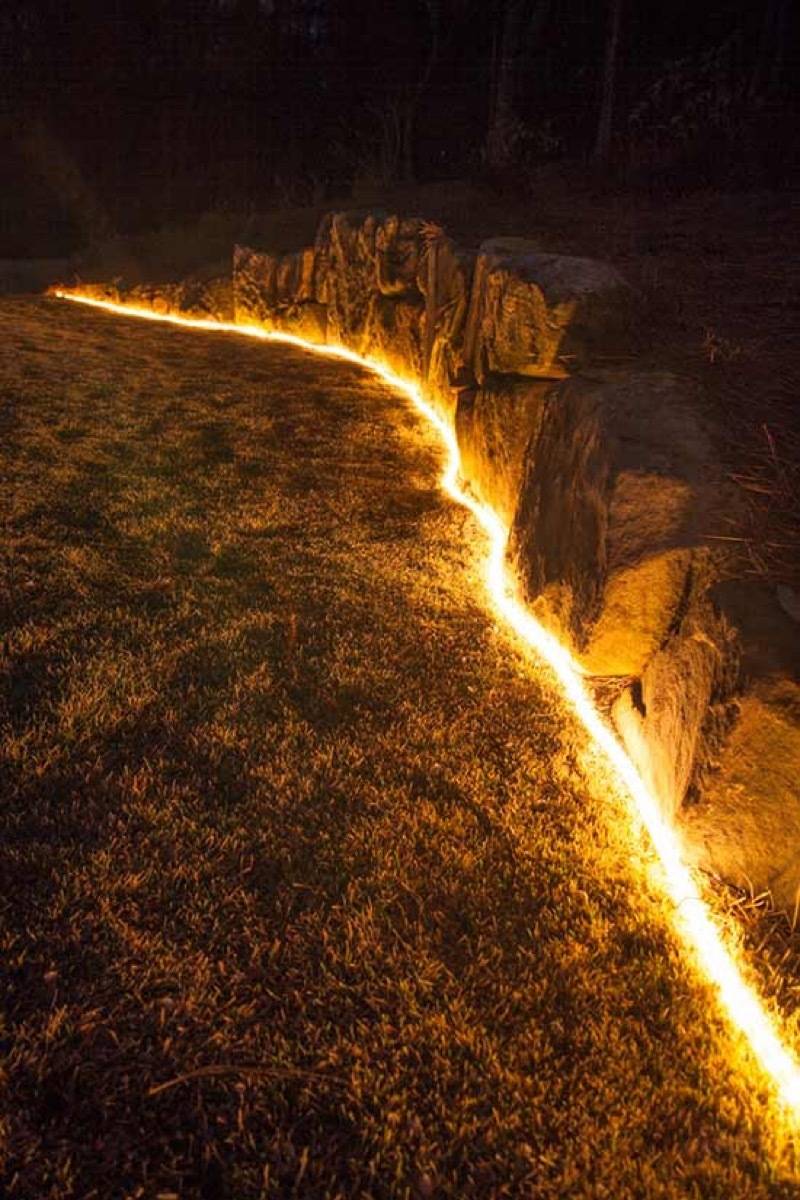
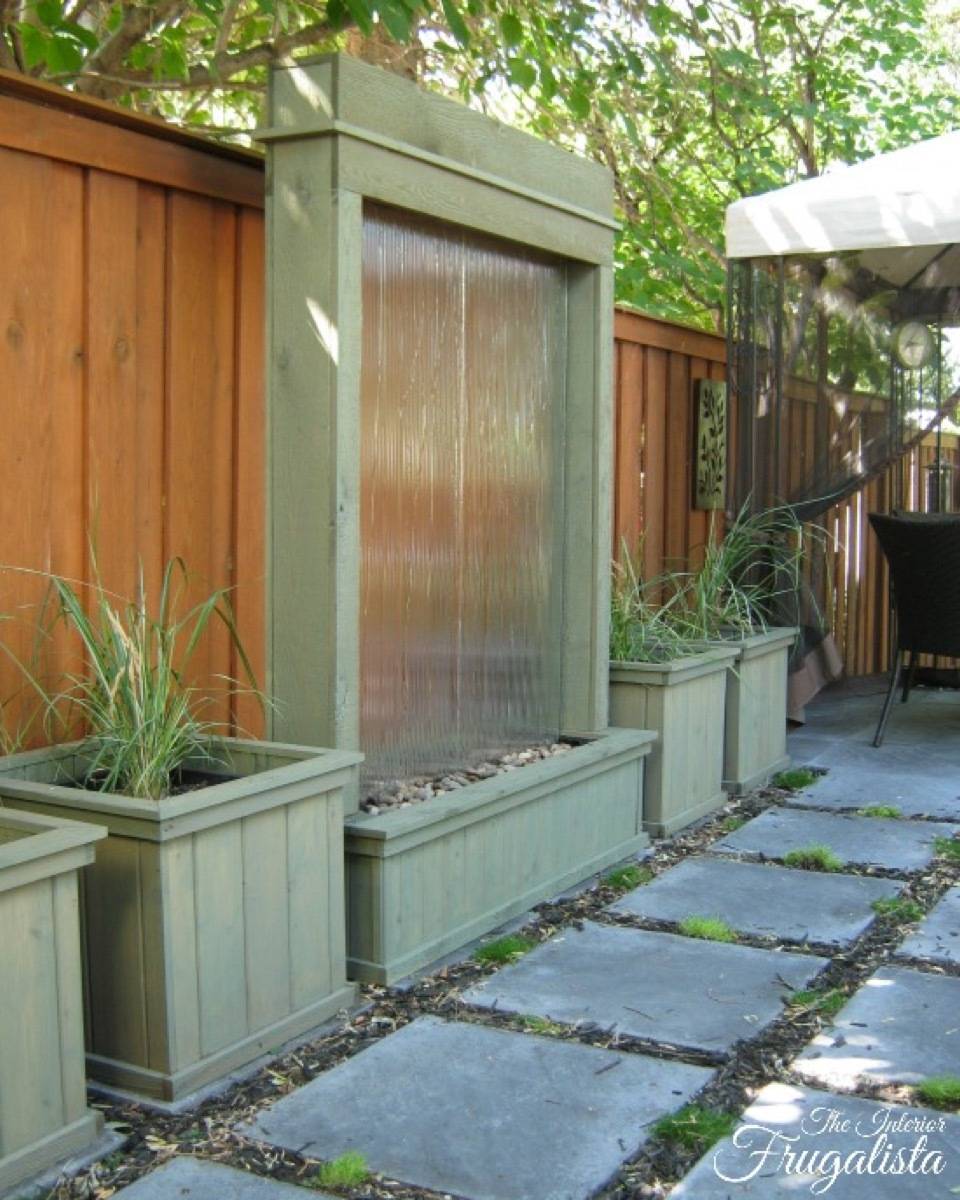
46. Transform your privacy wall using shou sugi – the process of burning wood, making it water-resistant. Side effect, the shou sugi treatment transforms wood to a beautiful, rich black color.
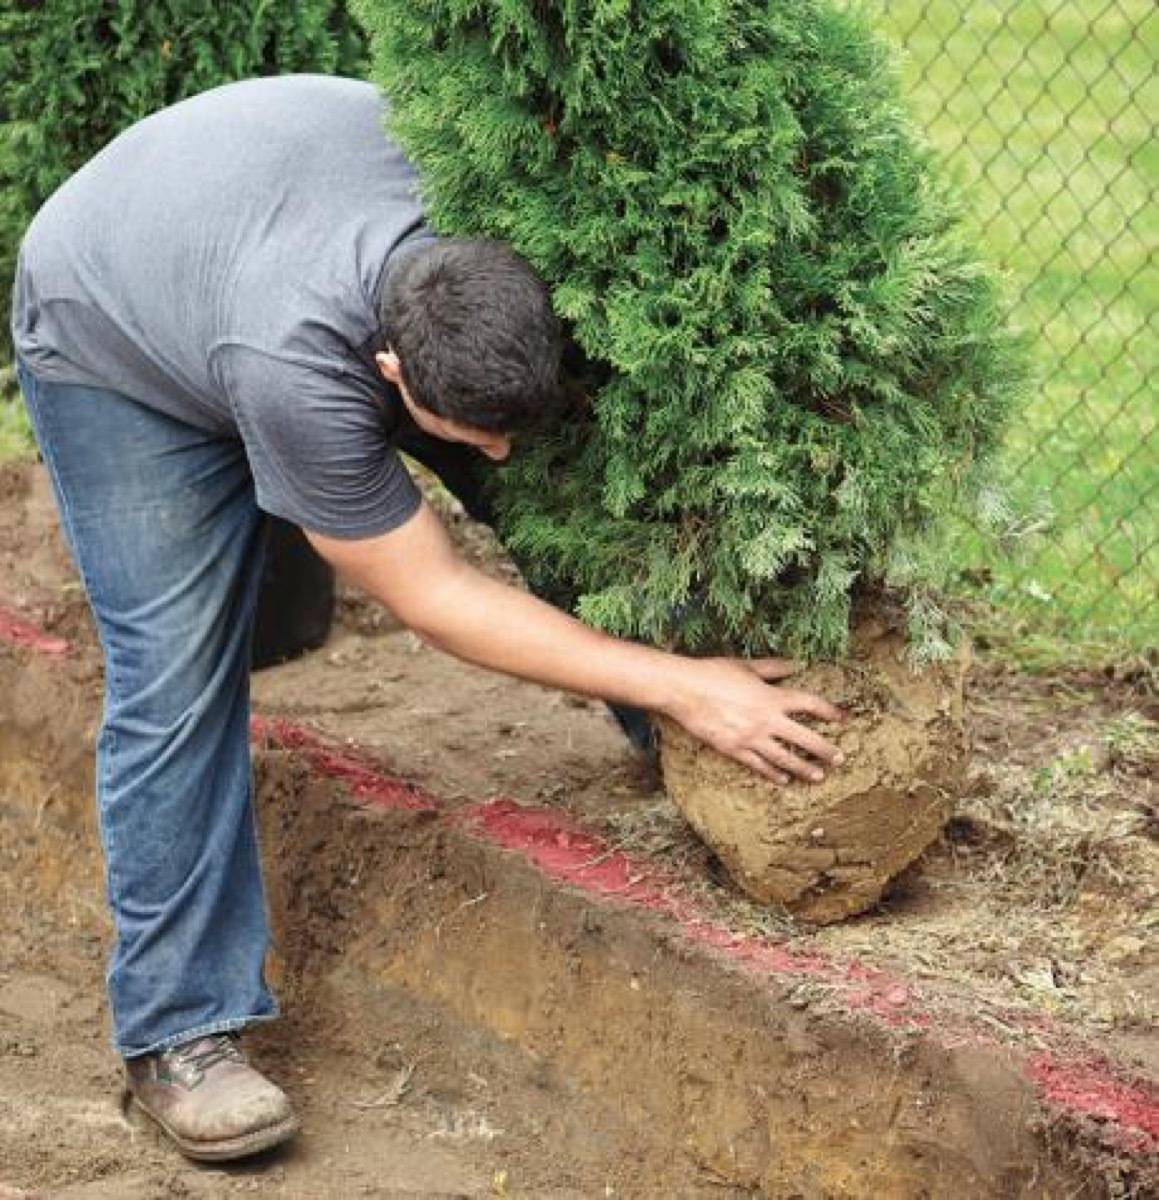
48. Need lots and lots of privacy? There are cheap trees you can buy that over time will block out the neighbors, like the inexpensive Leyland Cypress.
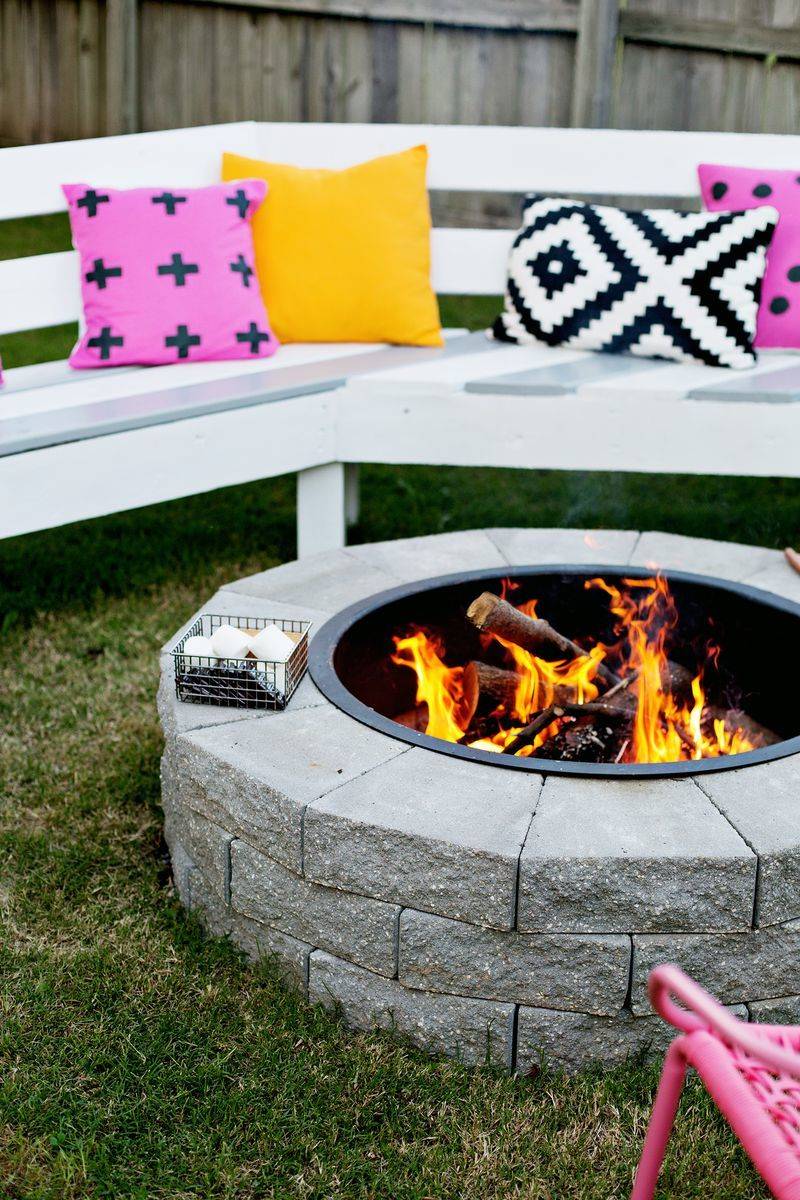
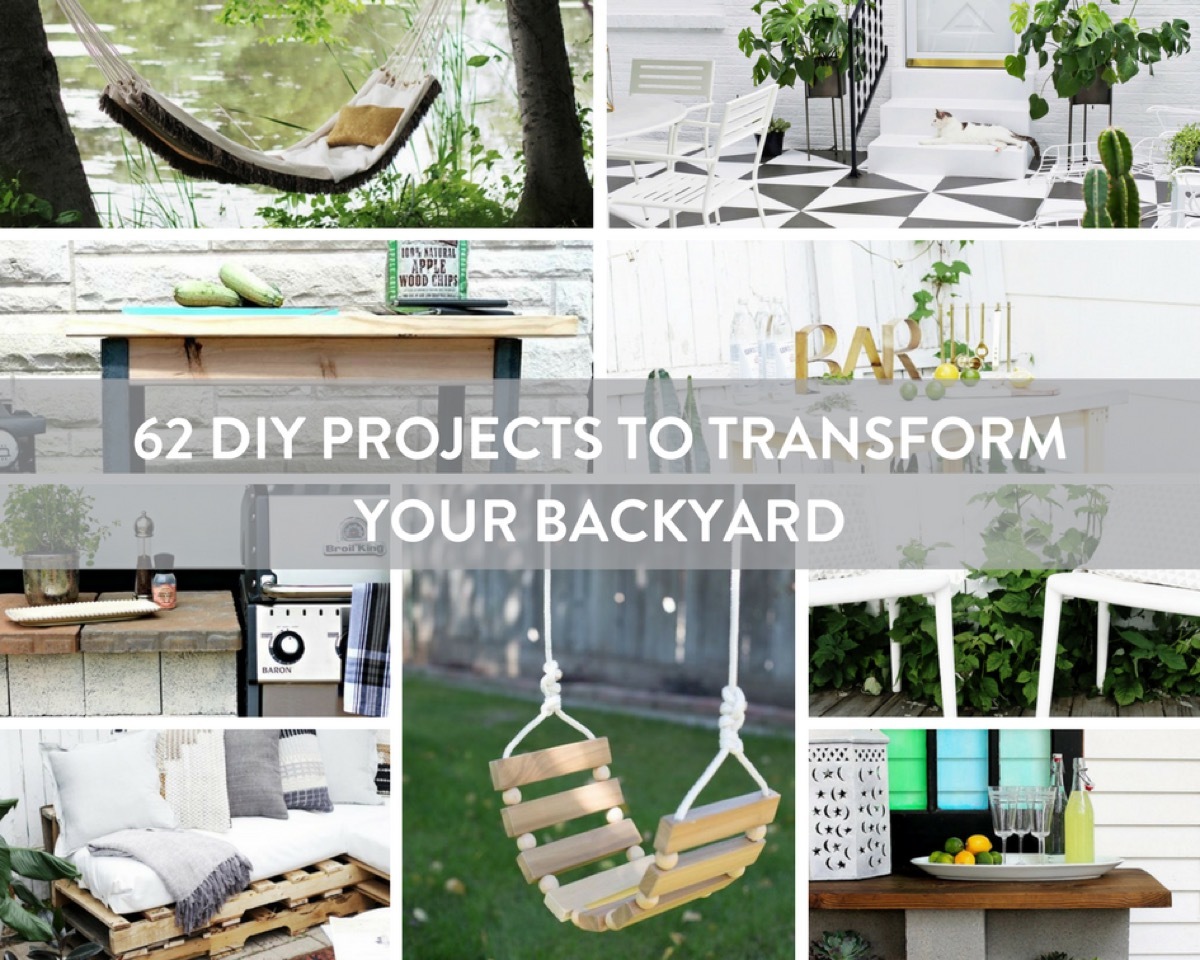
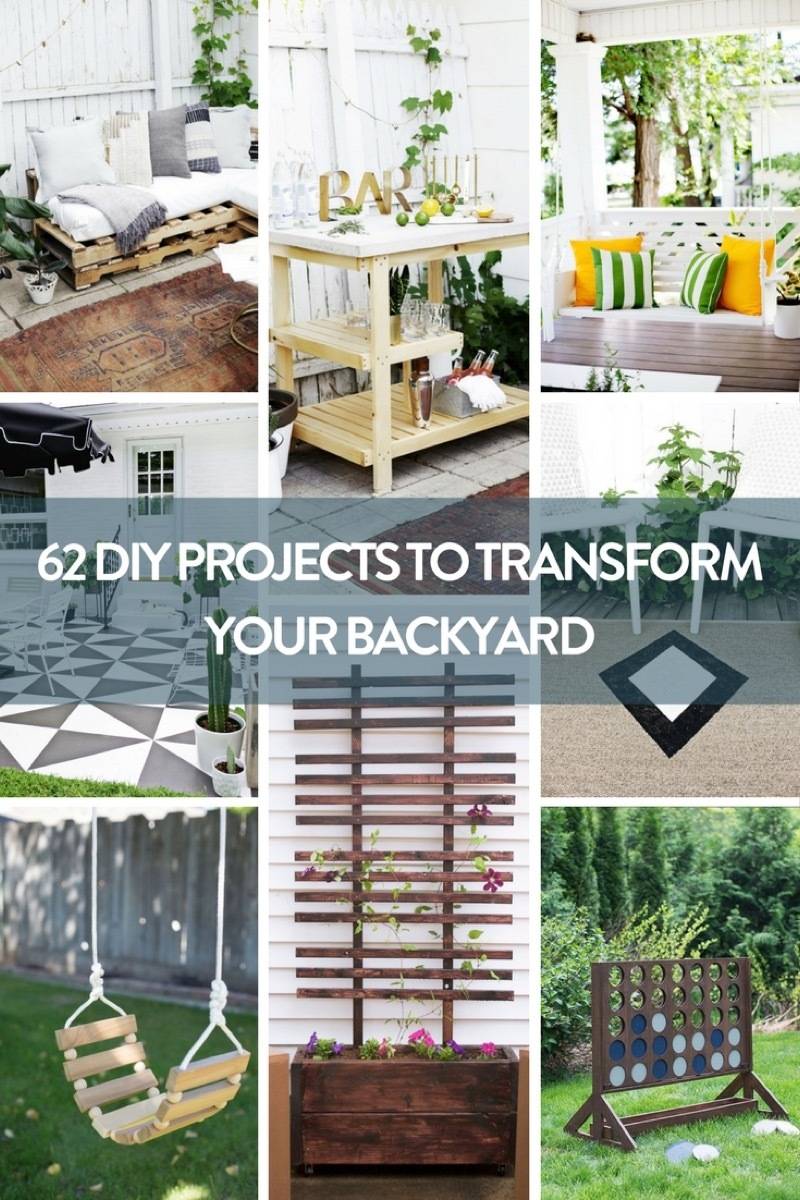
Blooming flowers and fresh rain can only mean one thing: spring has definitely sprung! That means summer will be here before you know it. If getting your backyard in order is on your to-do list but you’re having trouble getting started – don’t fret! You don’t need a total landscaping overhaul for your yard to feel refreshed and inviting. Sometimes it’s just a matter of hanging up some string lights or creating a simple fire pit. We’ve rounded up 62 outdoor DIY projects to get you excited to be outside again as the weather warms up. From plants to playhouses, keep scrolling for more inspiration!
What ways do you want to transform your backyard? Let us know in the comments!
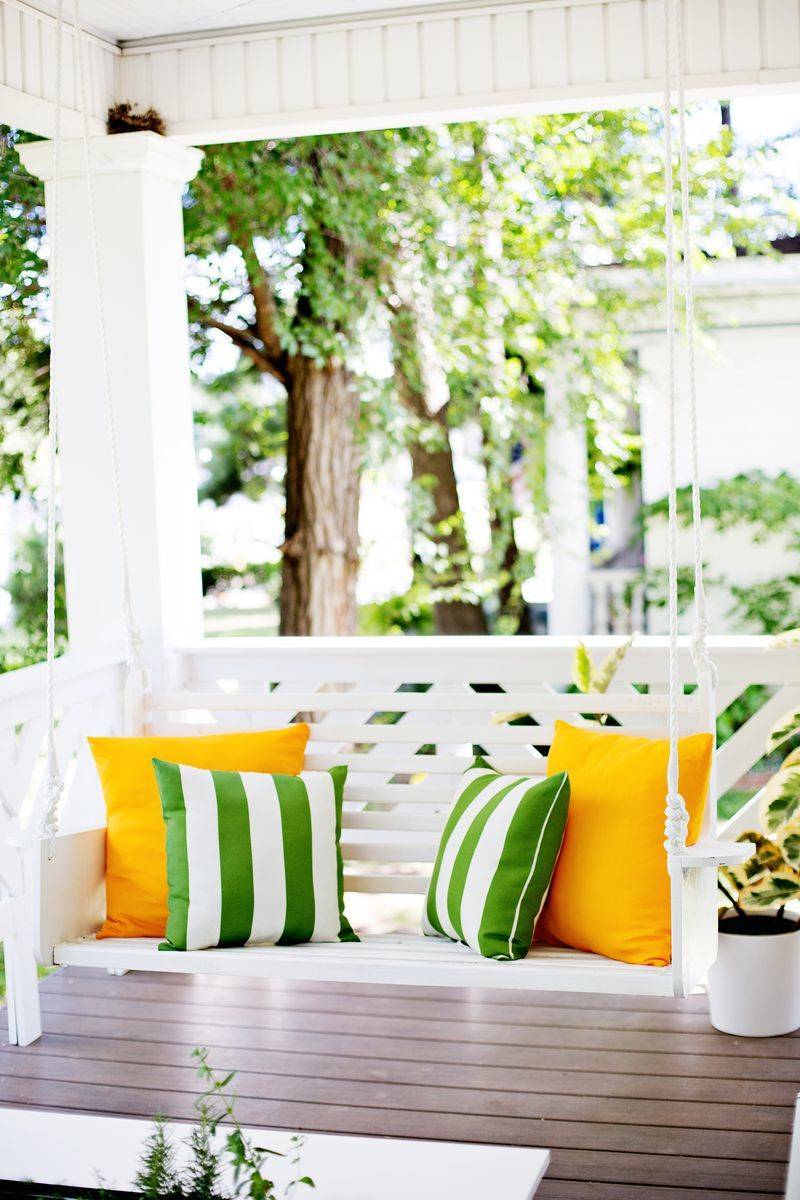
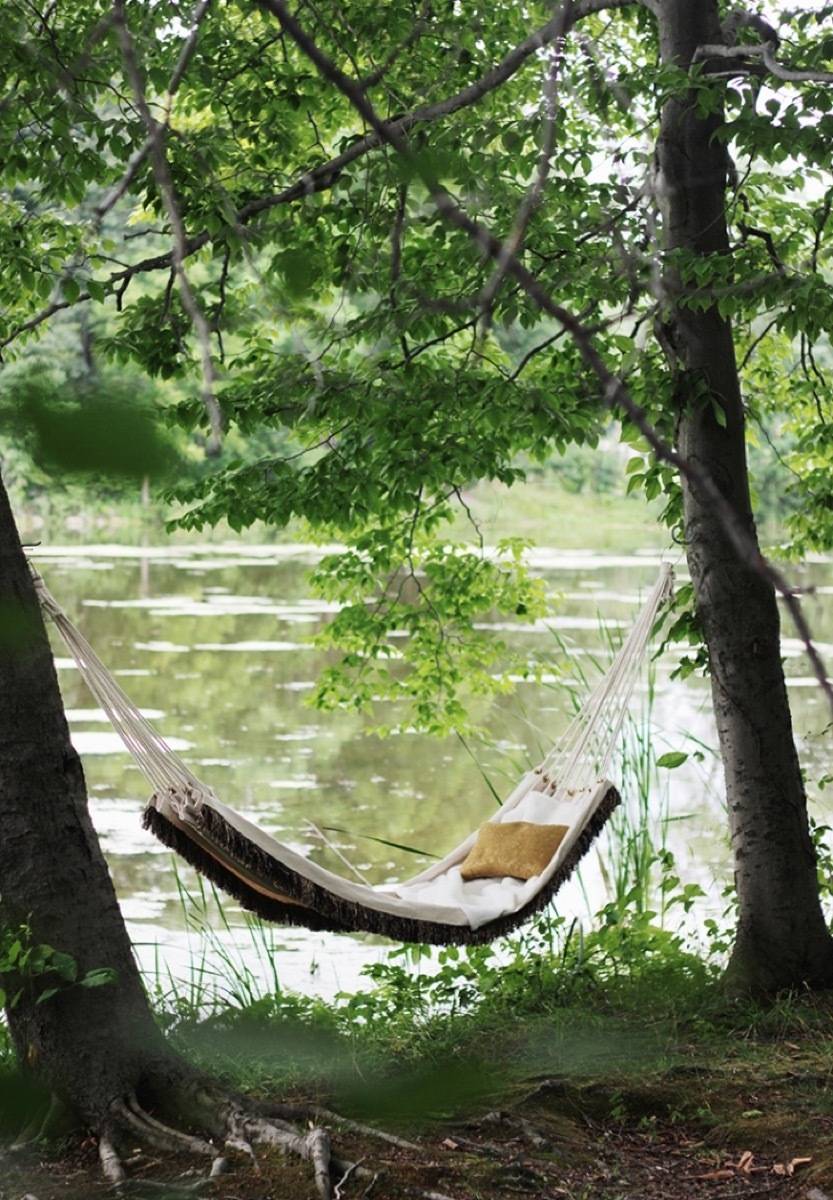
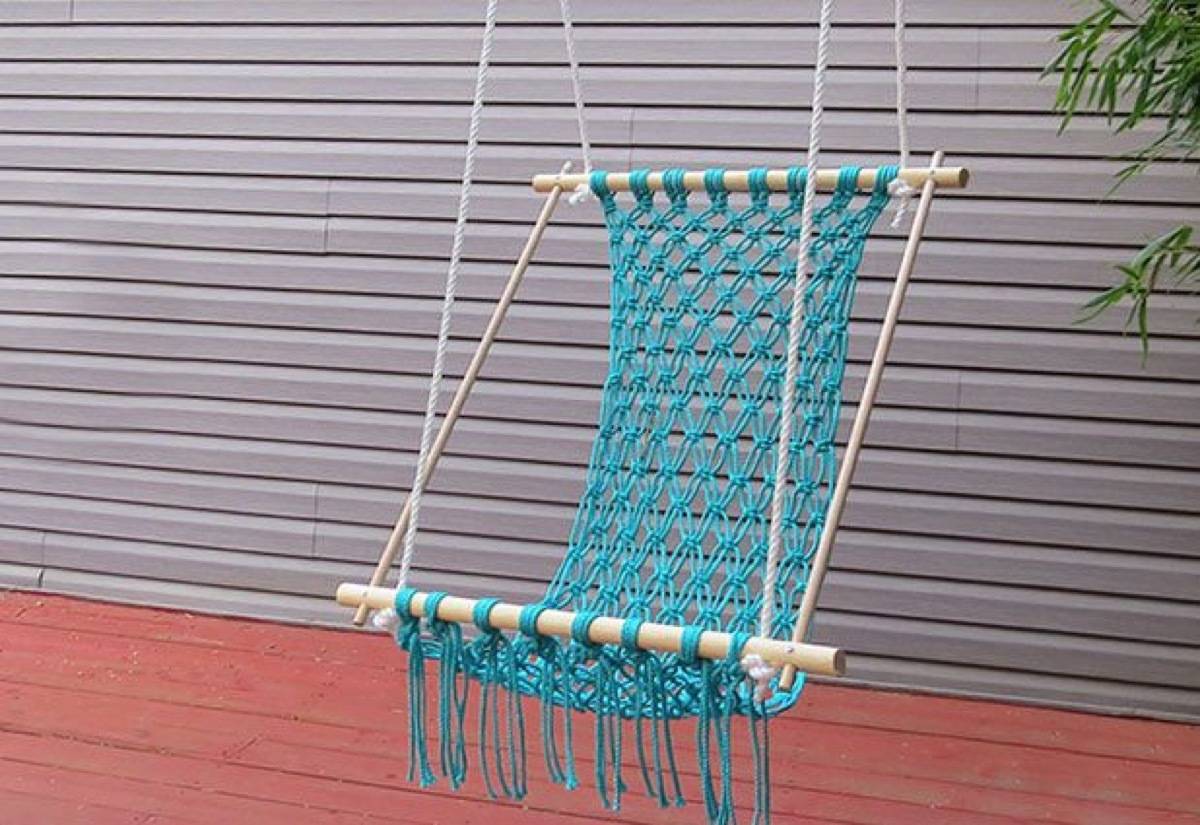
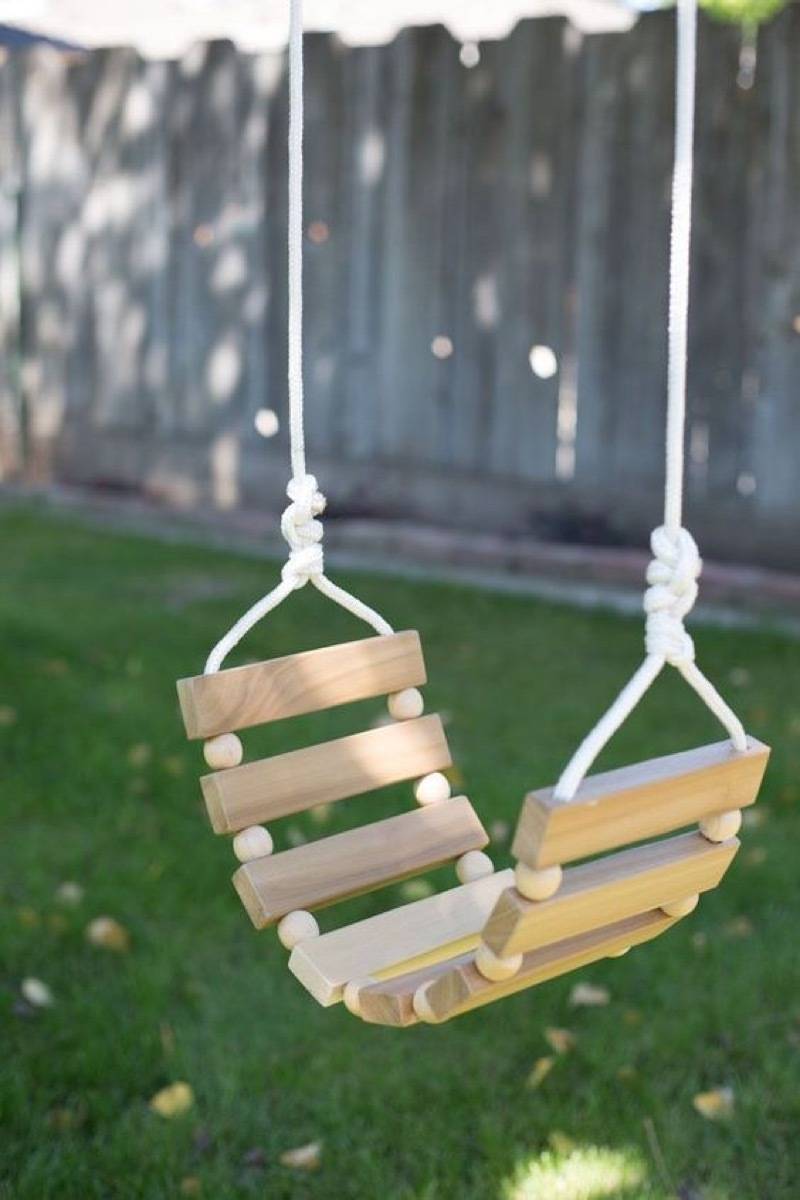
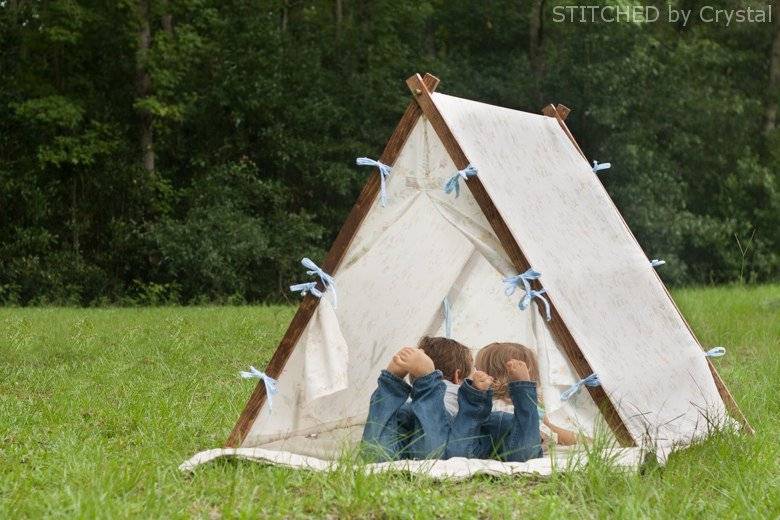
4. DIY Porch Swing: As Liz Lemon says, “I want to go to there!” Swinging in the spring breeze is a total DIY reality with this project from A Beautiful Mess.
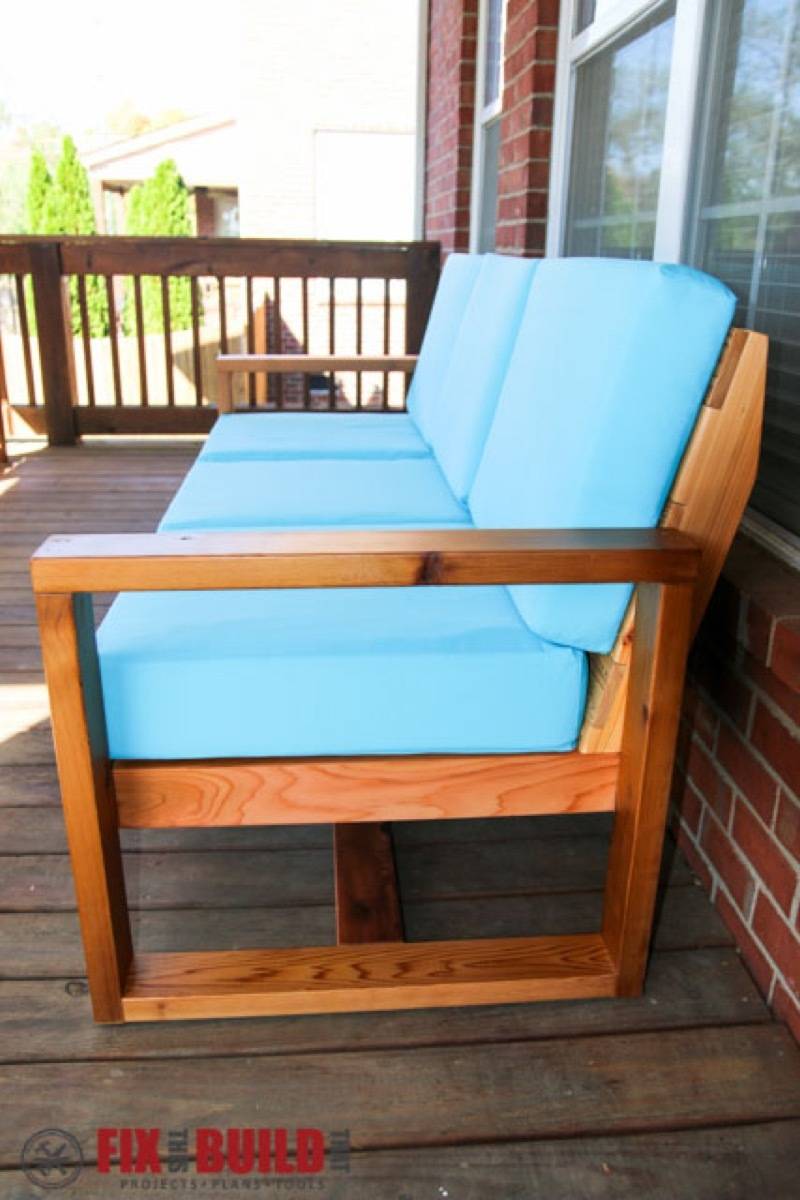
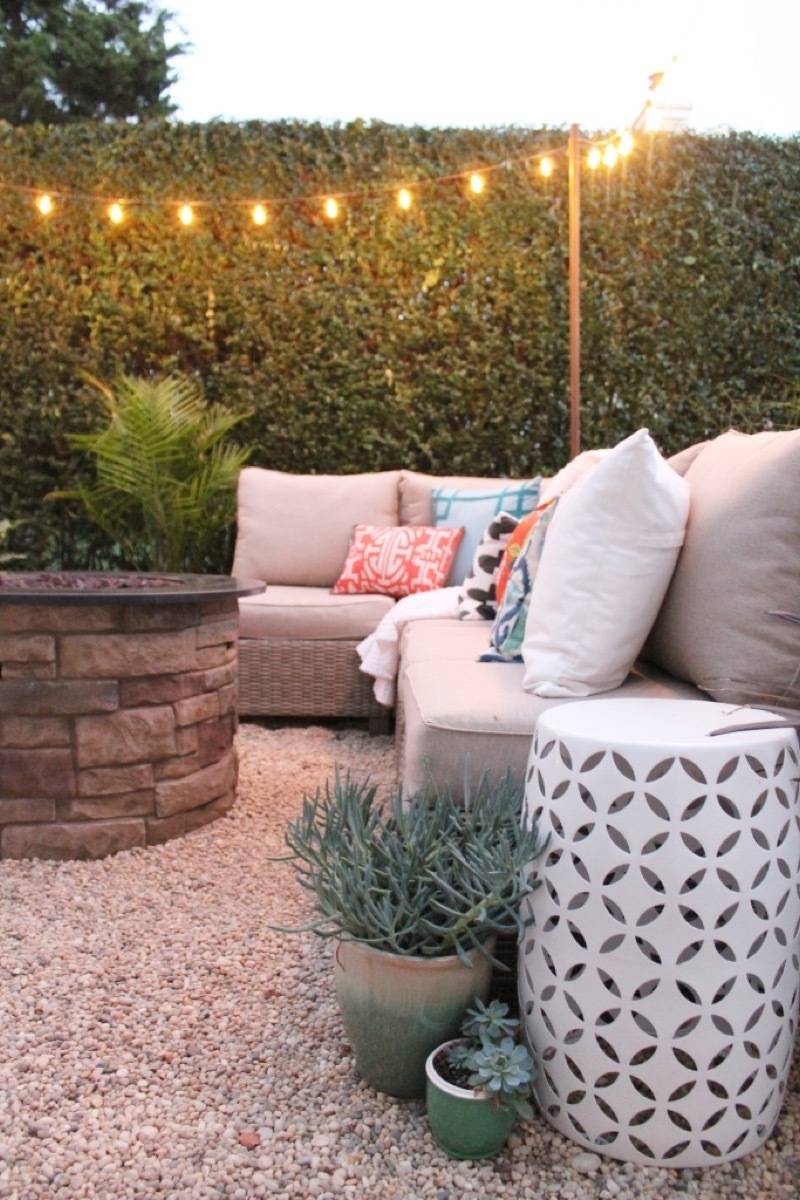
9. Modern Outdoor Sofa: This number is so sleek I might want to bring it inside my house! The good news is it’s built to withstand the elements, which means you can make your back deck super classy.
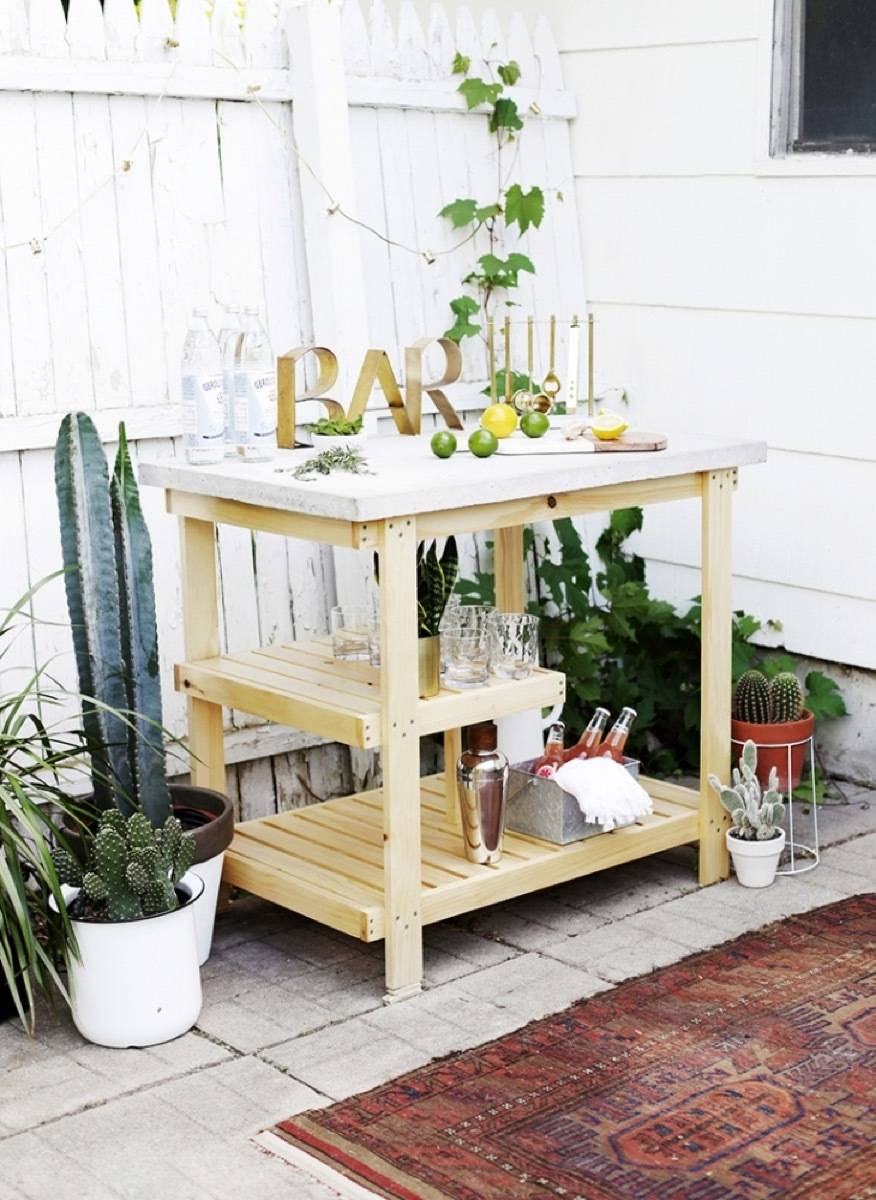
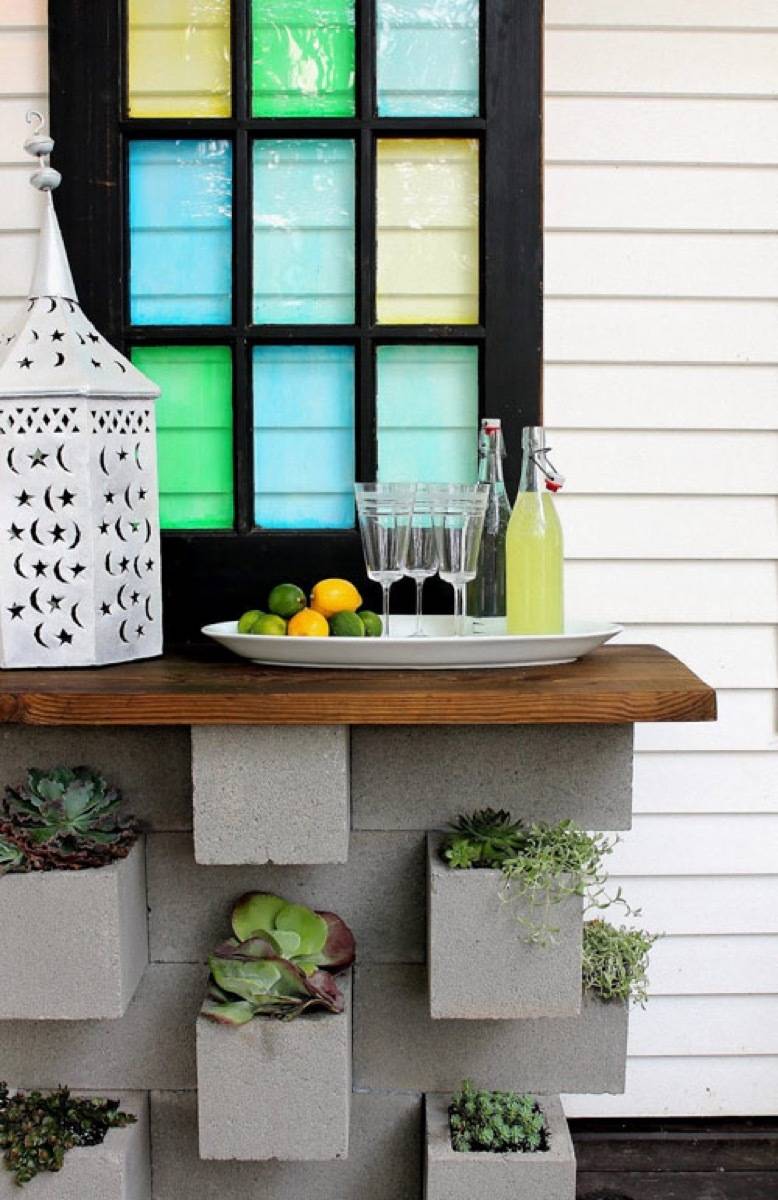
11. Outdoor Bar: If you’re not really the grill master type, but more of a whiskey woman, why not make a drink bar for your backyard?
Photo: Live Laugh Rowe
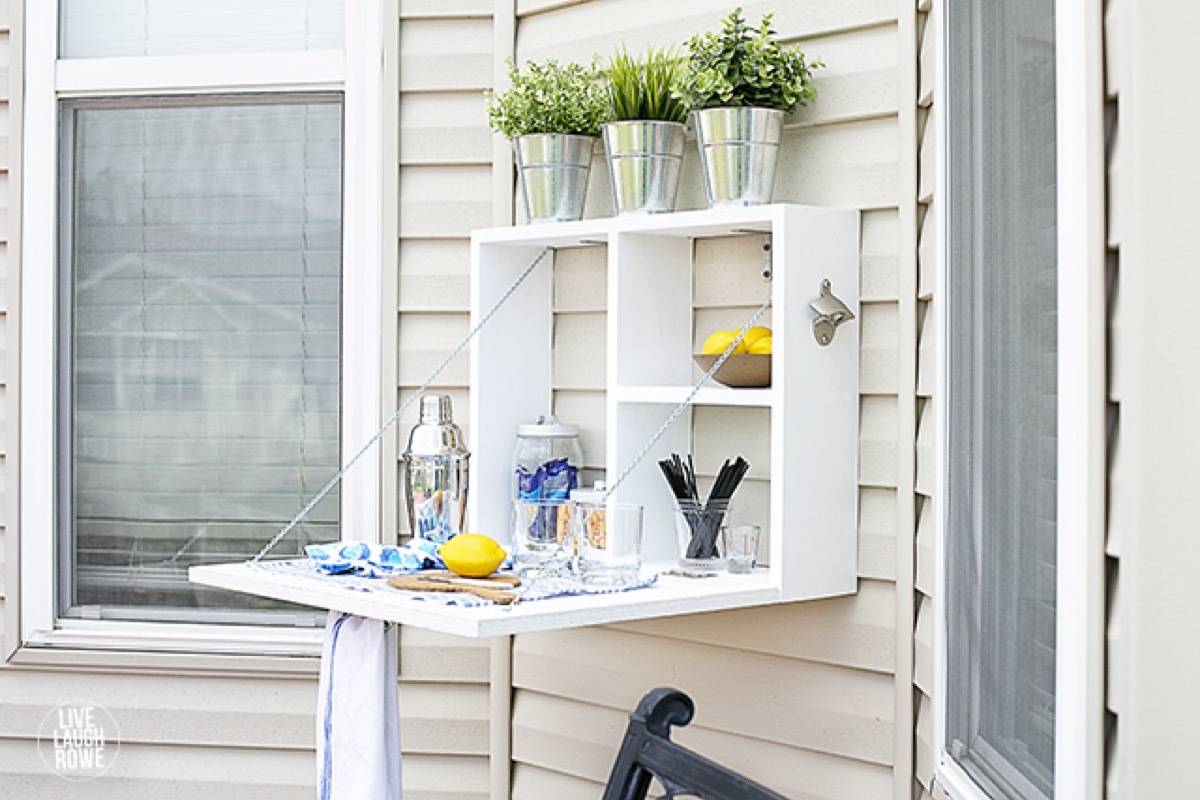
12. Wall-Mounted Serving Station: Want to entertain but don’t have space for a full outdoor kitchen? Go vertical by building this simple serving station with drop-down tabletop!
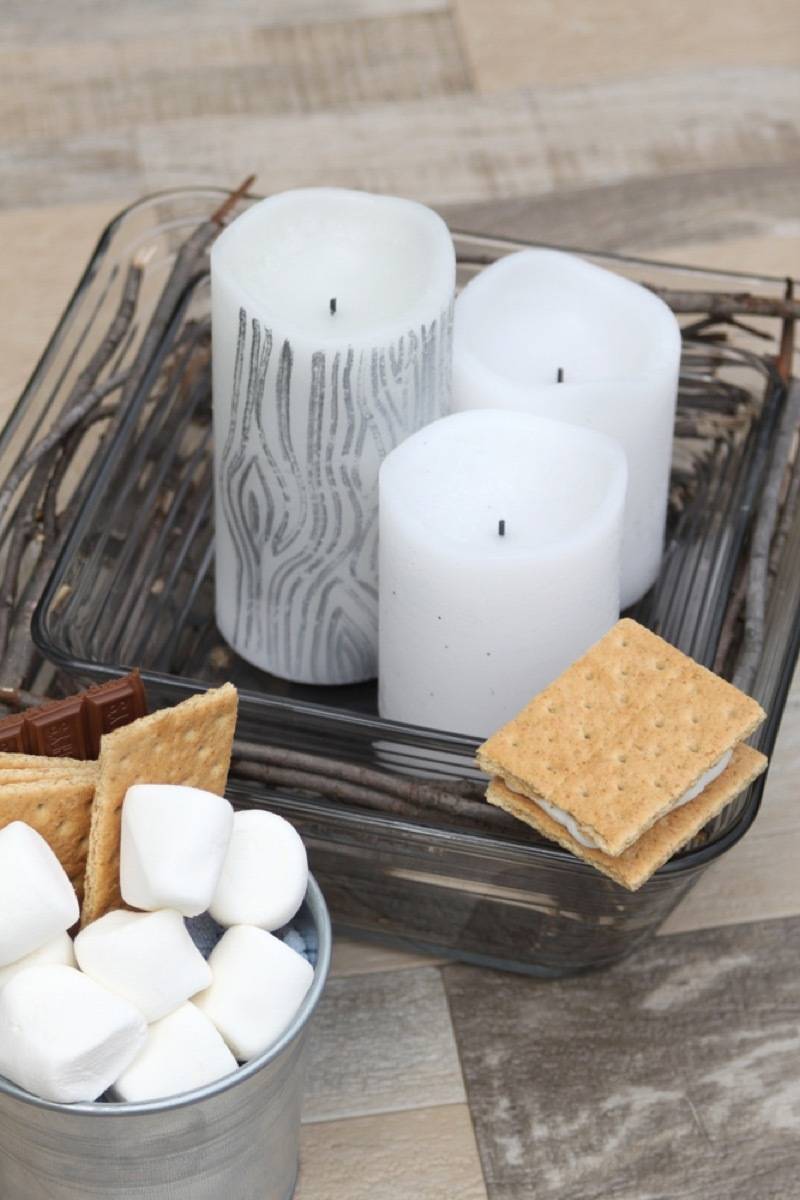
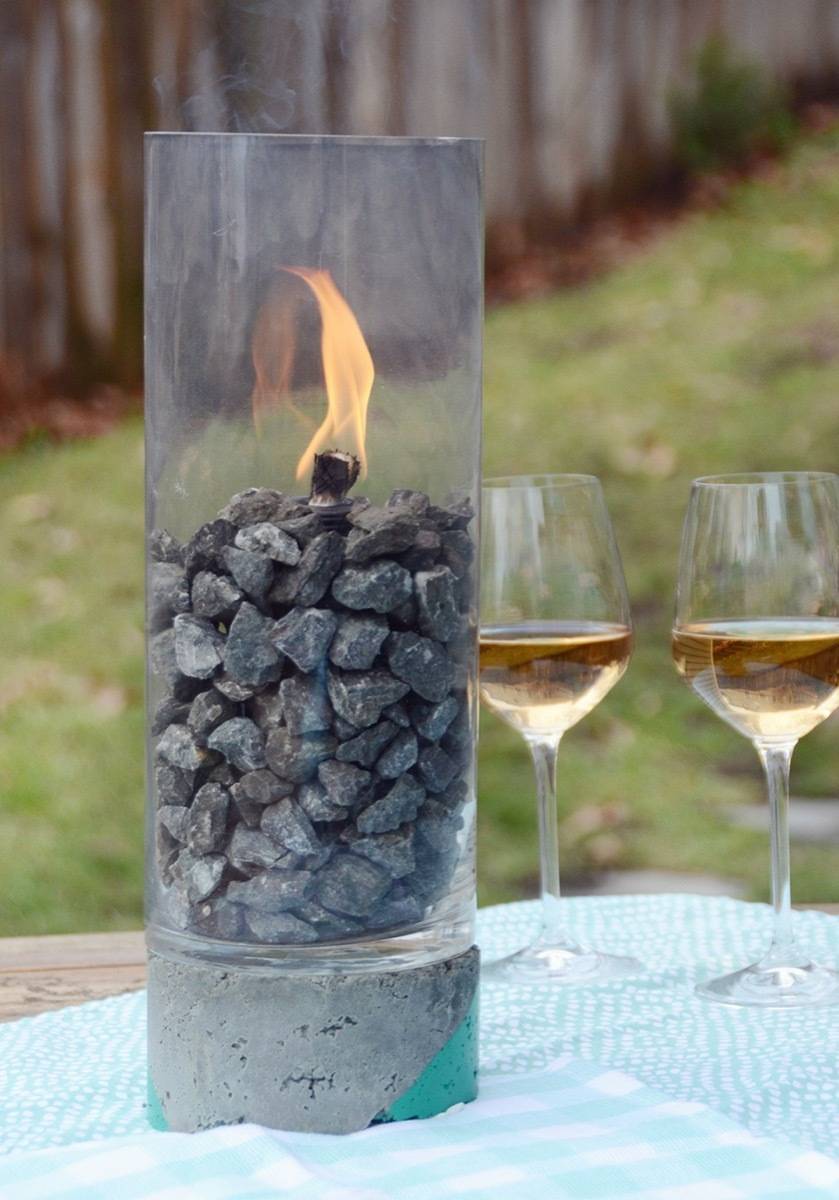
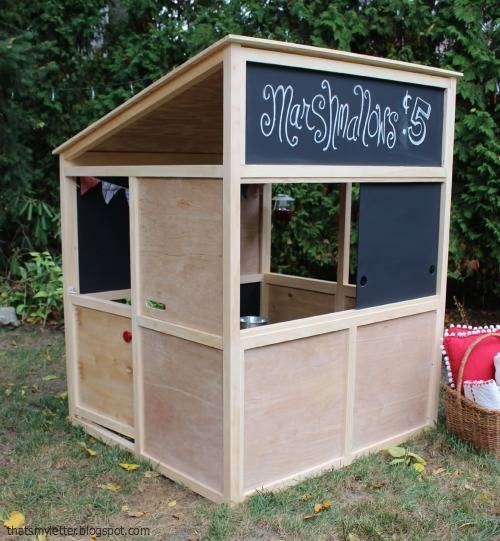
14. S’mores Station Centerpiece: Acting as both a lovely centerpiece and a warming station for marshmallow and chocolate, party guests are sure to be impressed by this s’mores machine (made from glass dishes!).
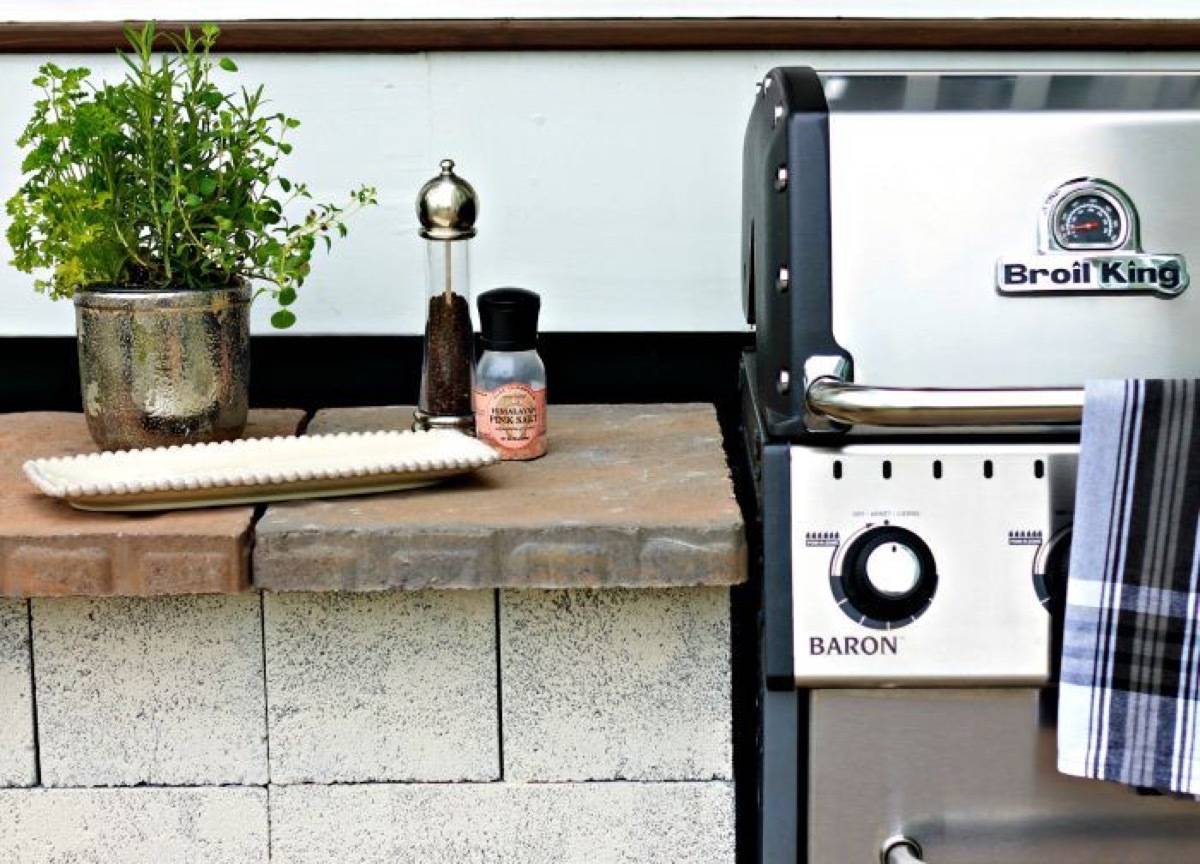
16. DIY Grill Countertop: Basically like having an outdoor kitchen, this brick counter space built around a grill surely makes outdoor entertaining a breeze.
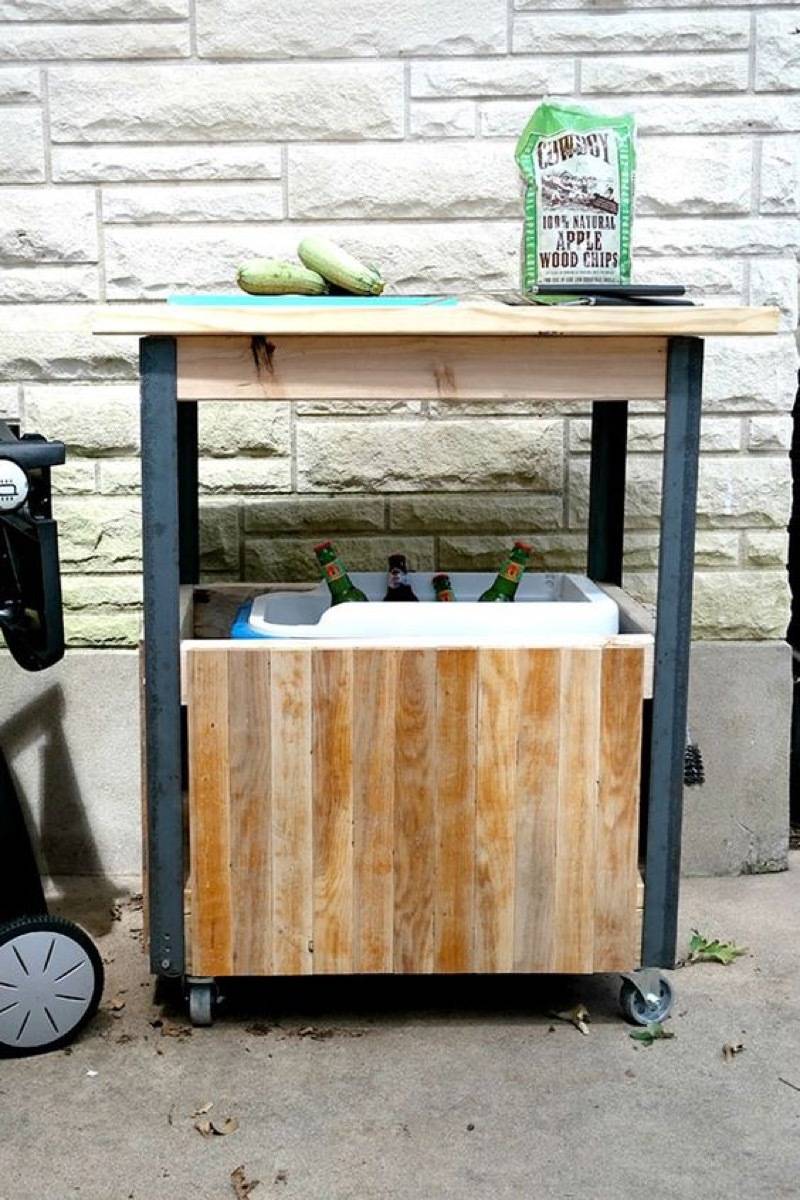
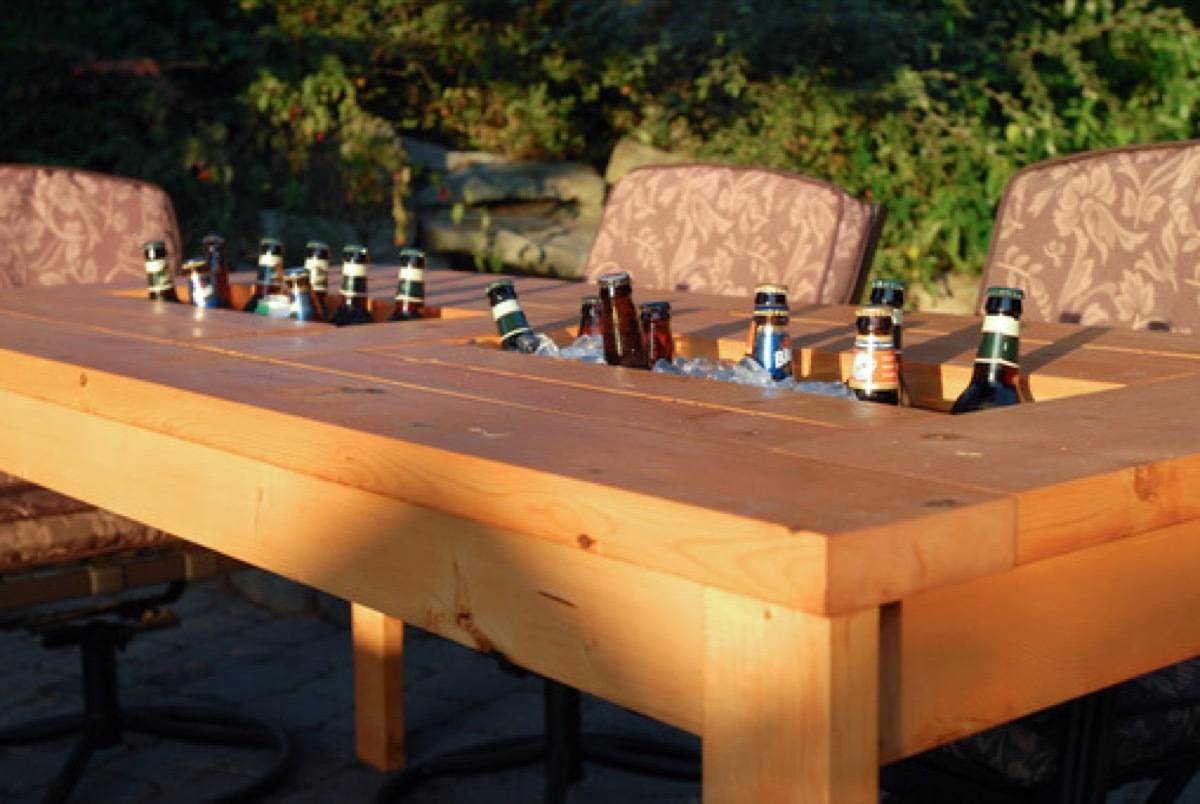
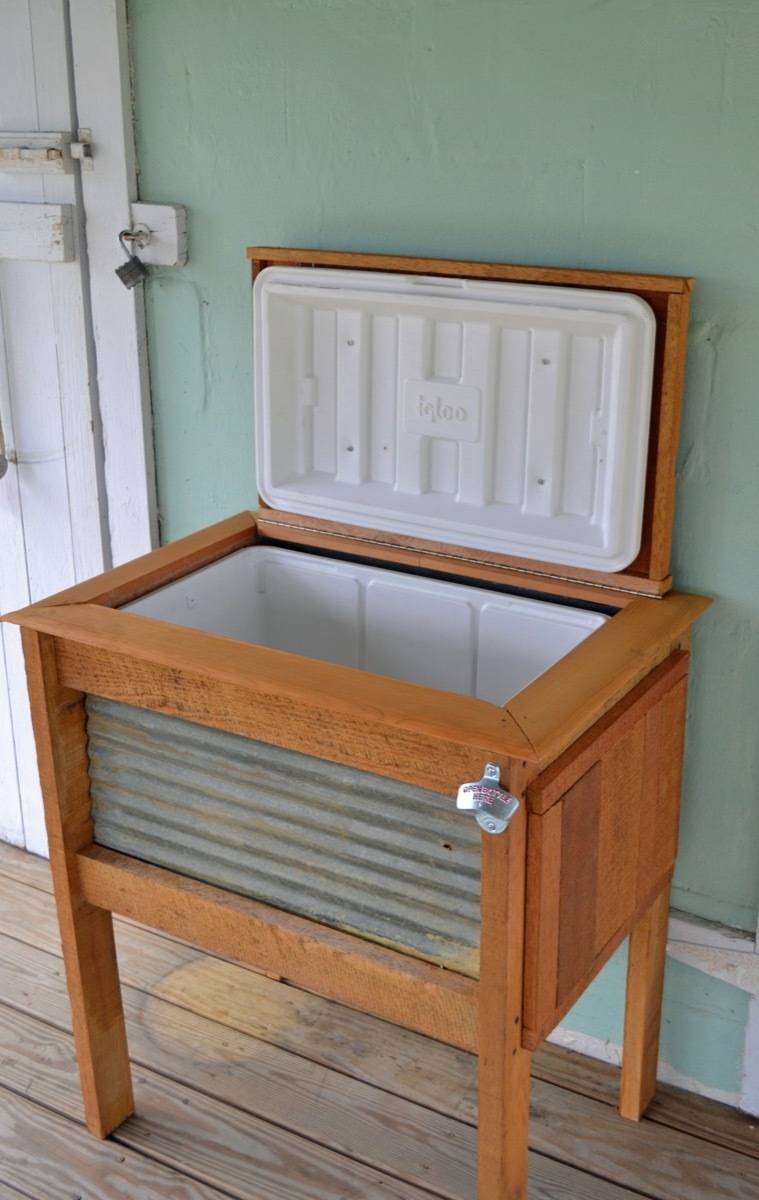
17. Drink Cooler Stand: If you’re constantly entertaining outside, or if you just enjoy having a cold beverage available whenever, this drink stand provides a classy solution to the standard cooler.
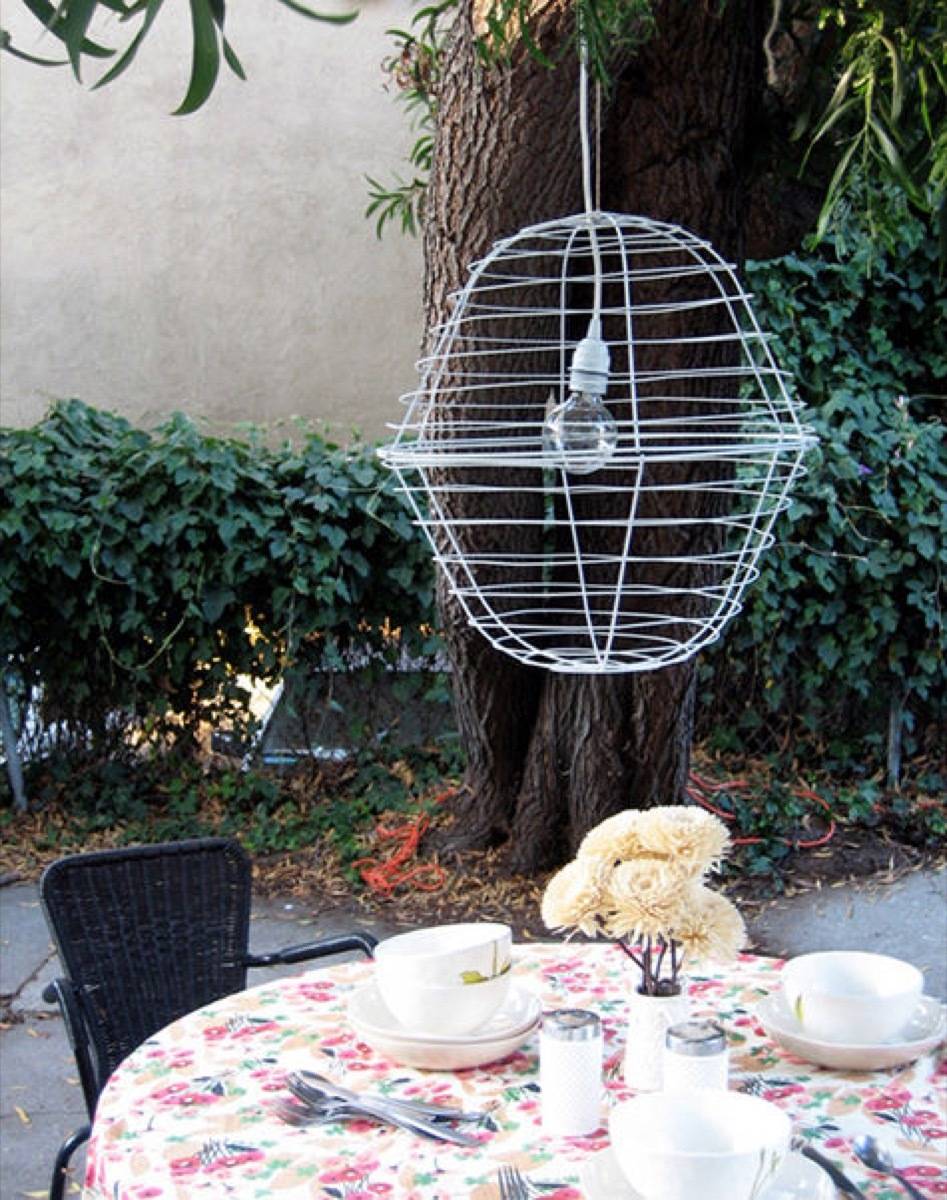
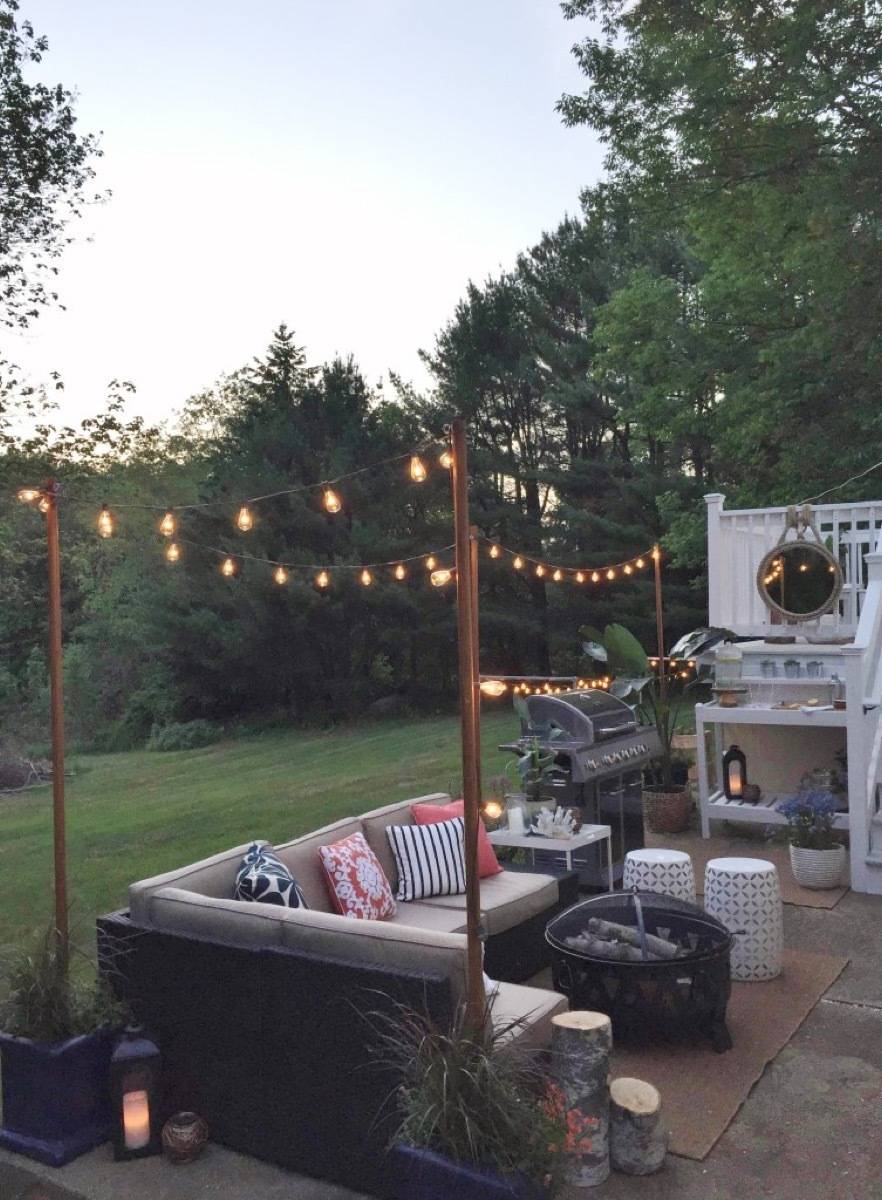
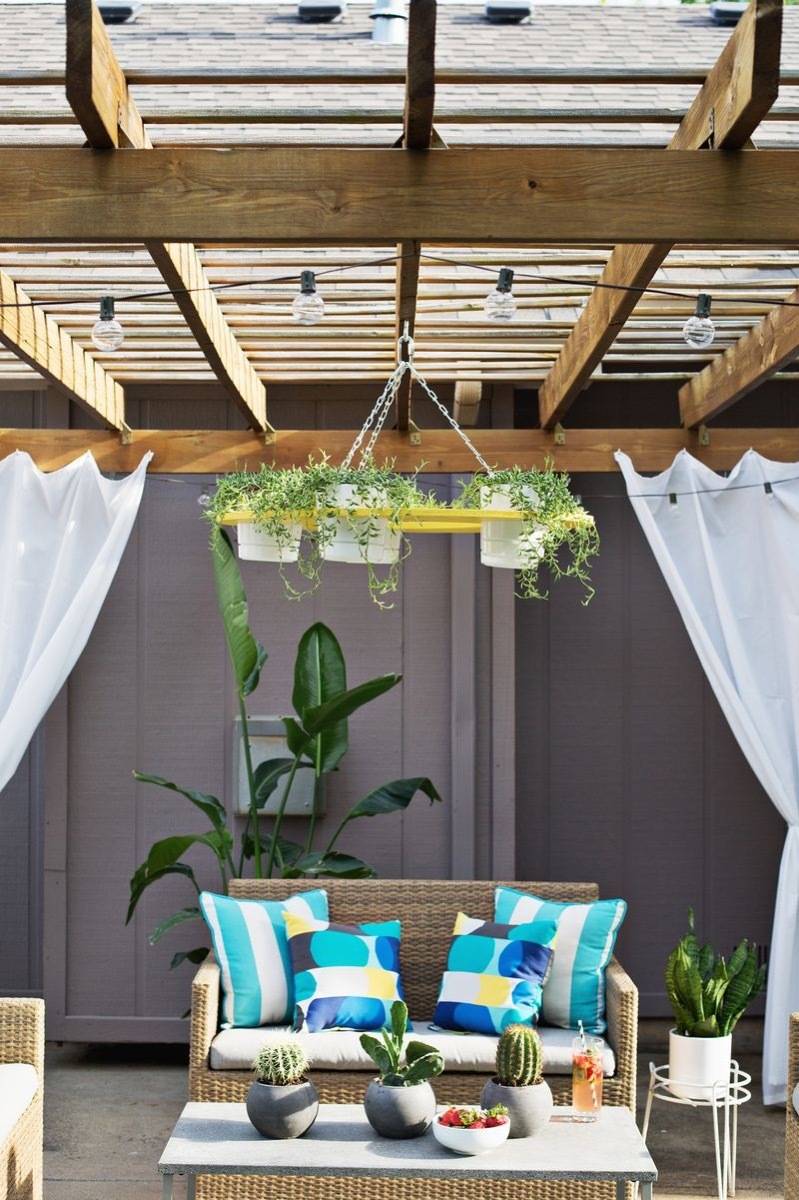
26. String Light Hanging Poles: If you want to hang string lights outside but don’t have anywhere to put them, City Farmhouse has an easy solution that also involves plants!
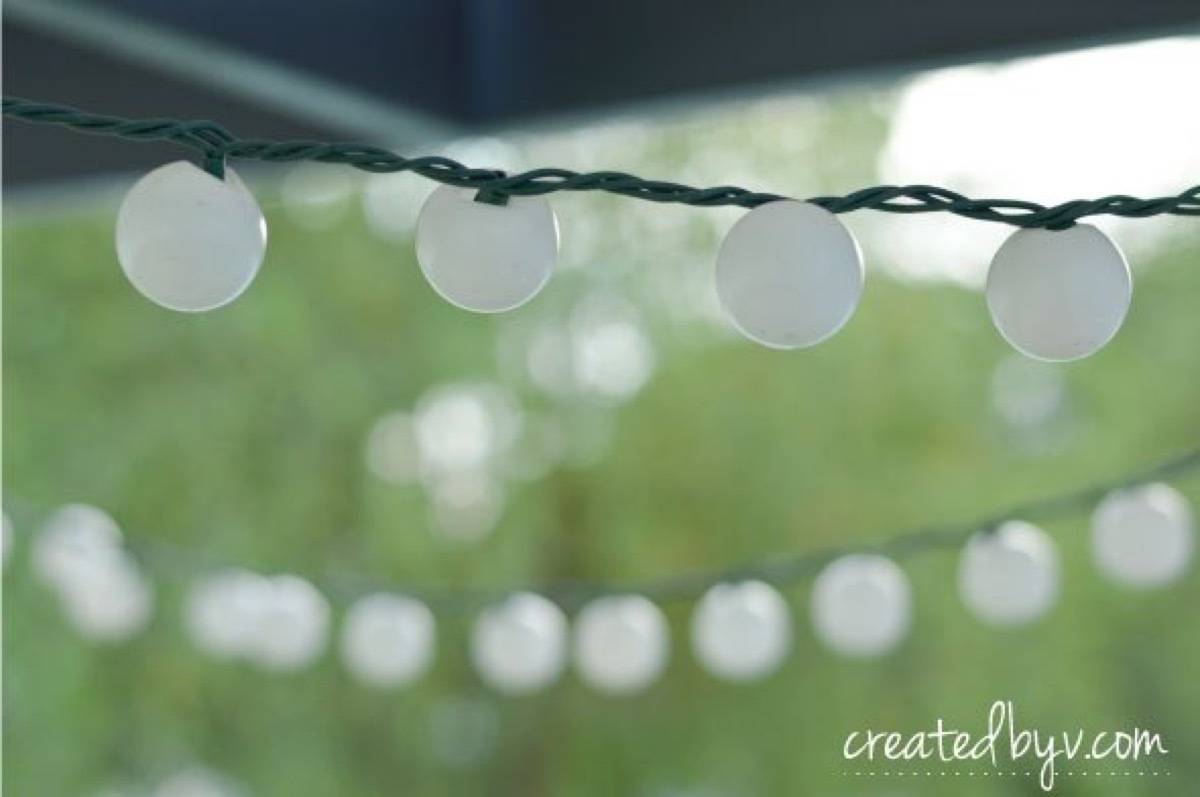
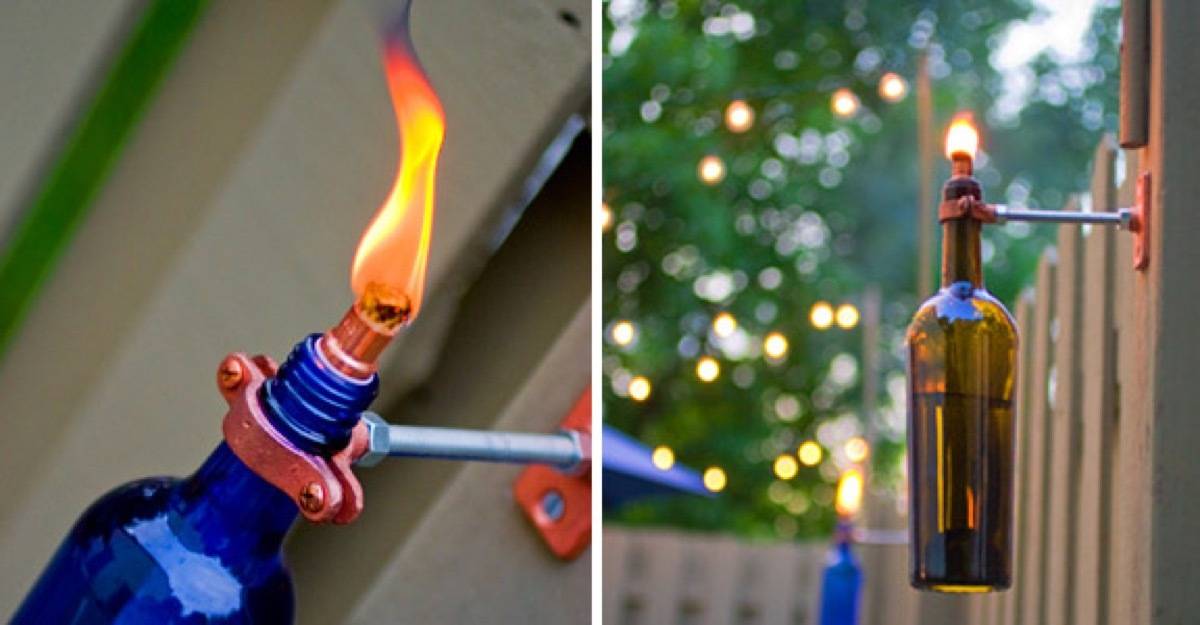
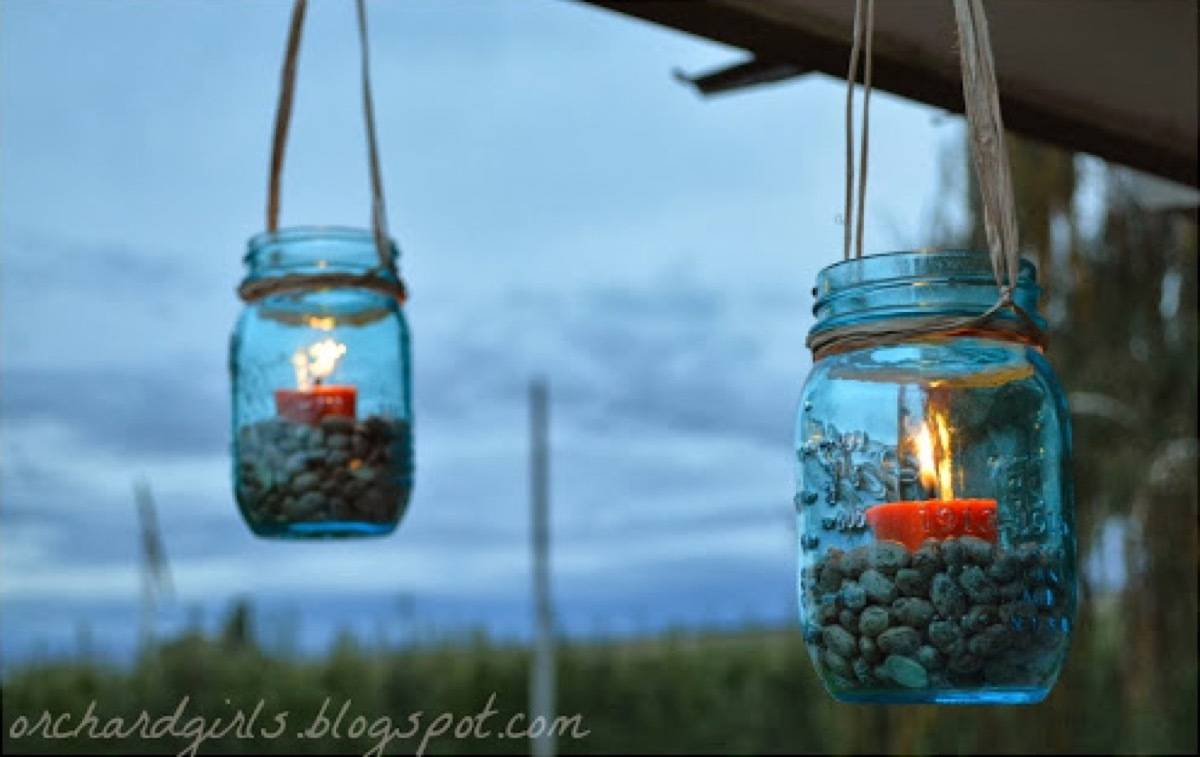
29. Tin Can Lights: This project is a classic, and couldn’t be left off the list! If you need a quick, easy, and cheap solution for your outdoor lighting situation, grab some tin cans, tea lights, a hammer and a large nail, and get to punching!
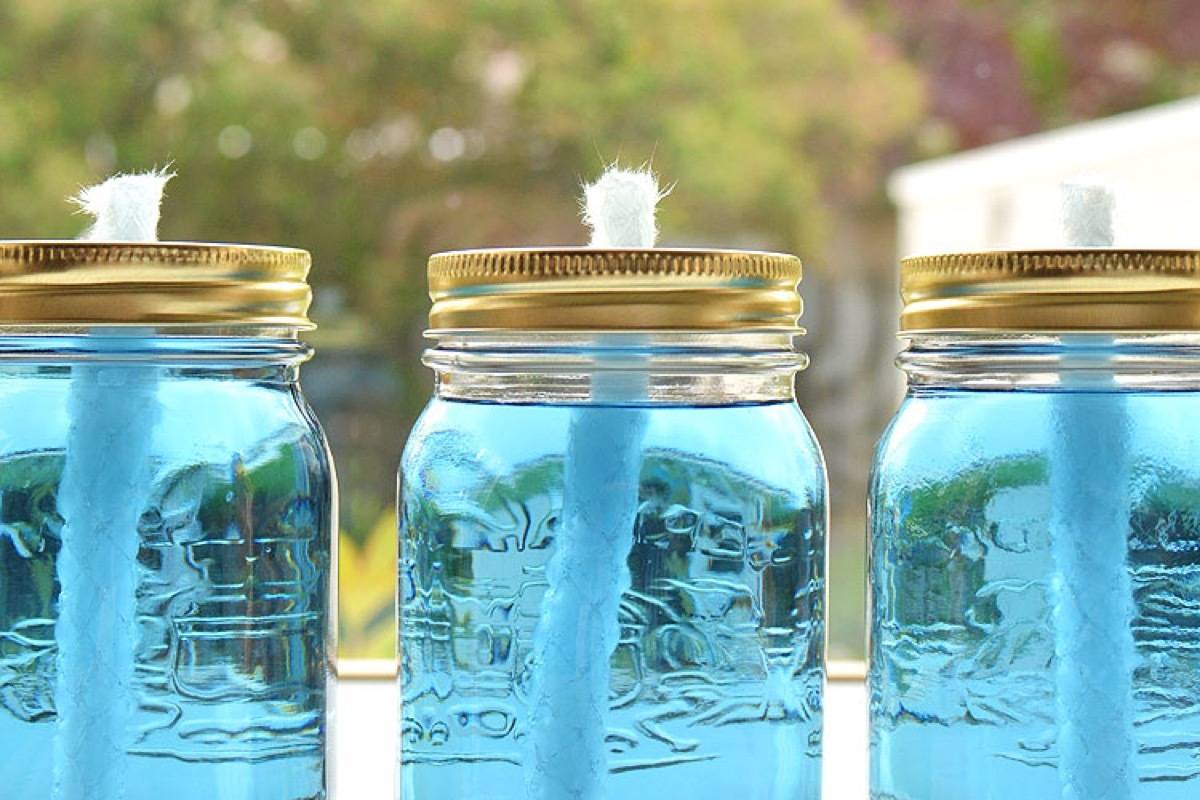
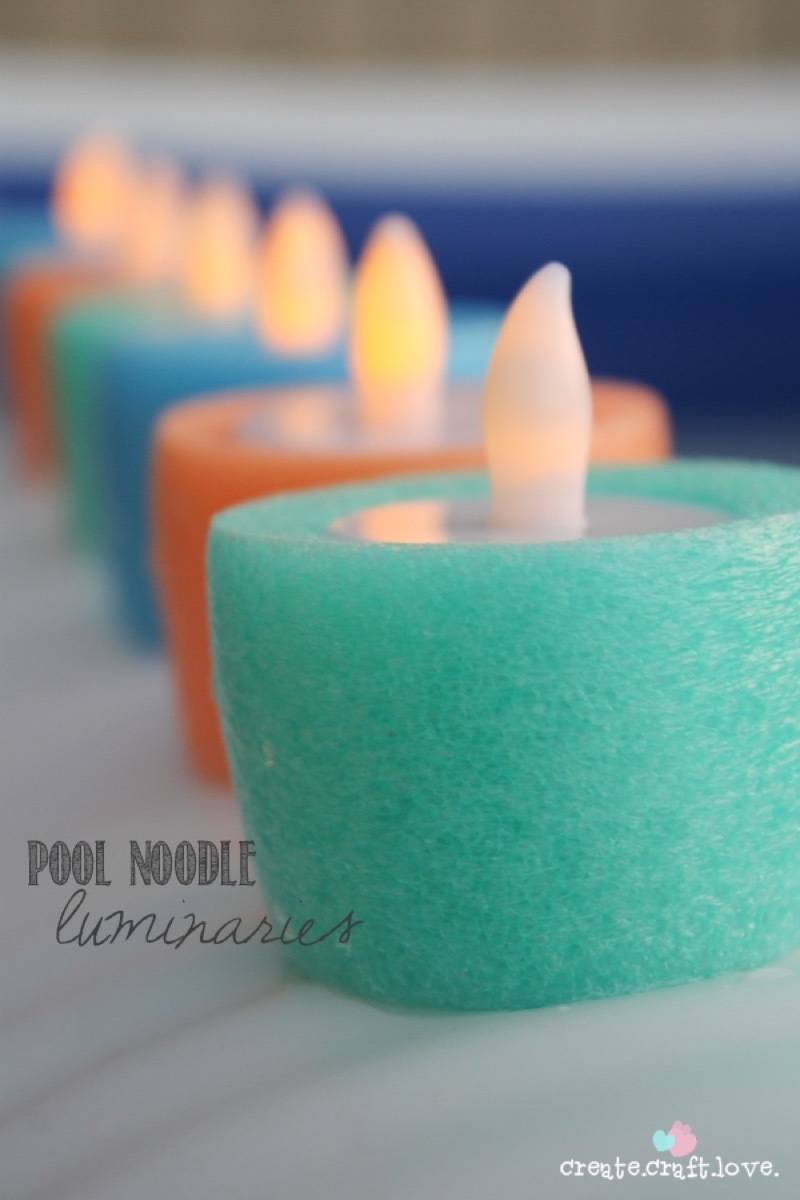
31. Pool Noodle Luminaries: Even if you don’t have a pool, you can set these floatable candles off in a large container of water to add ambiance to any space.
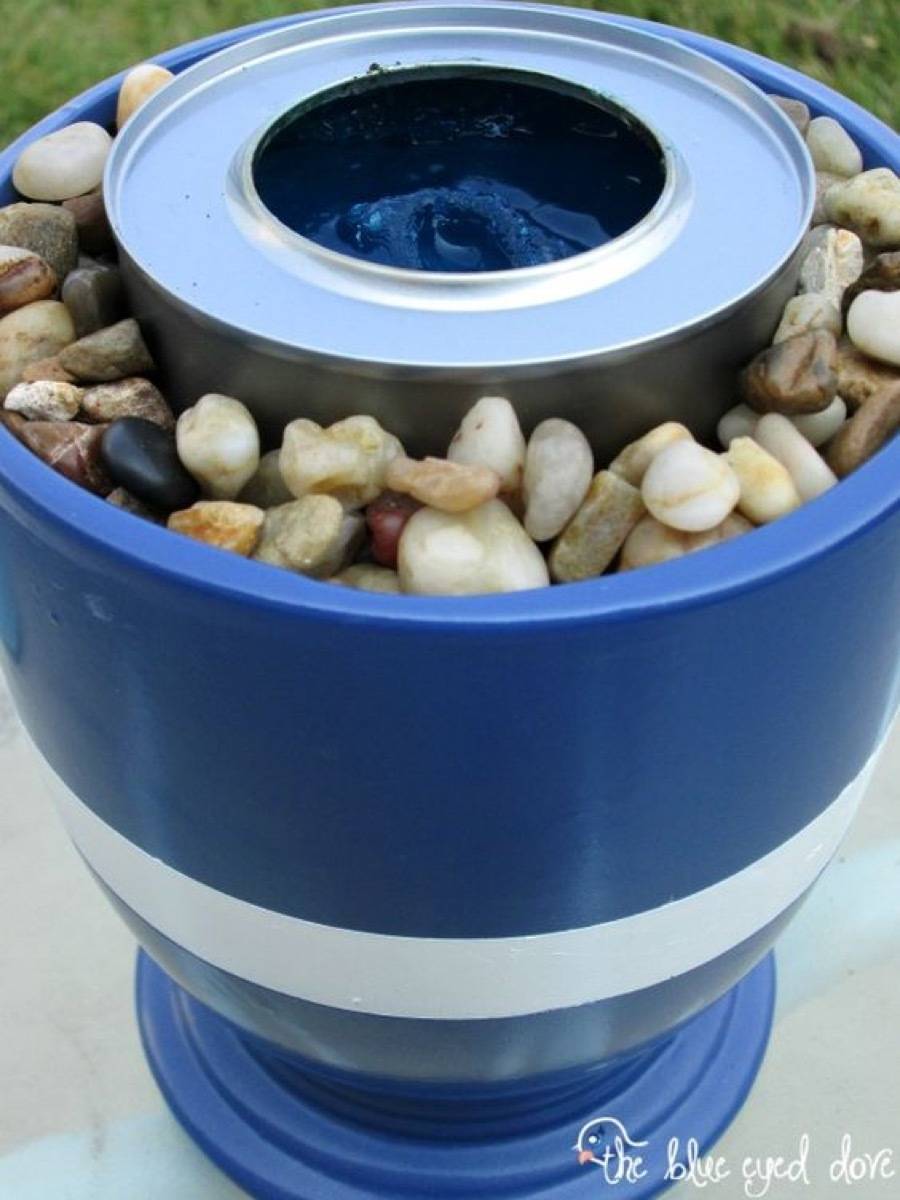
Photo: The Blue Eyed Dove
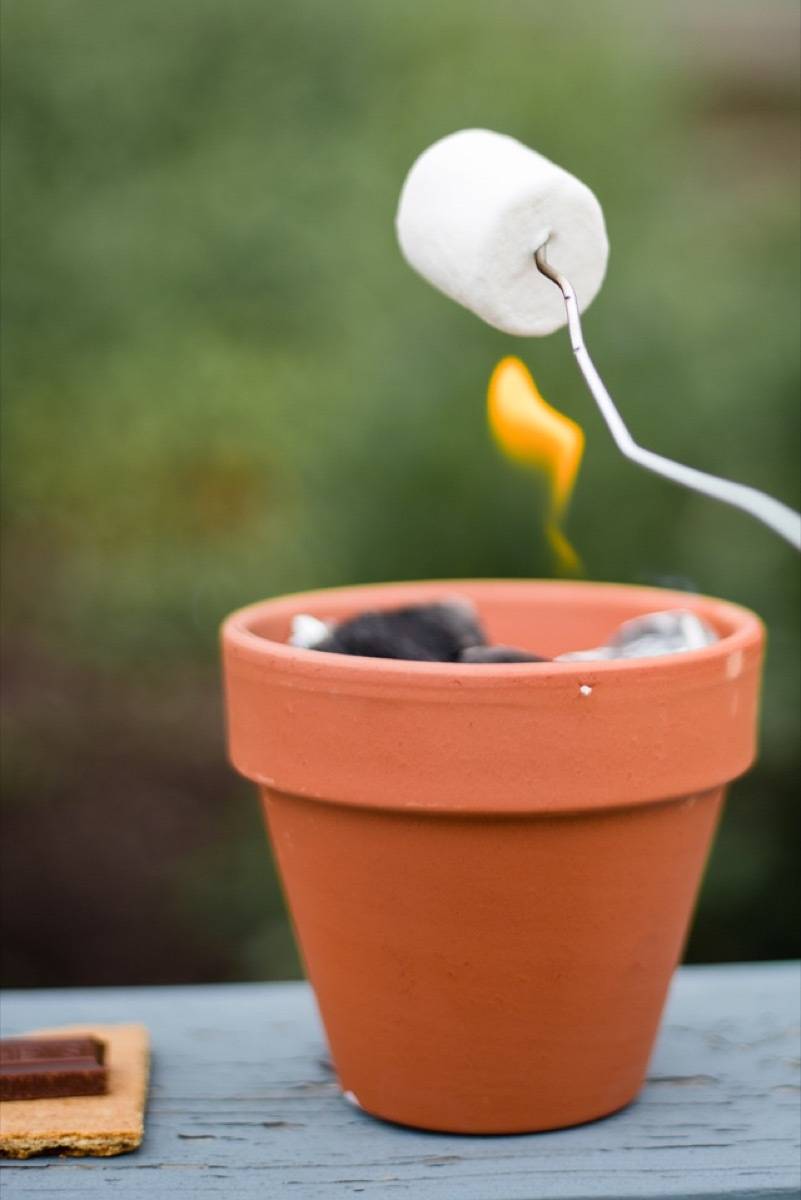
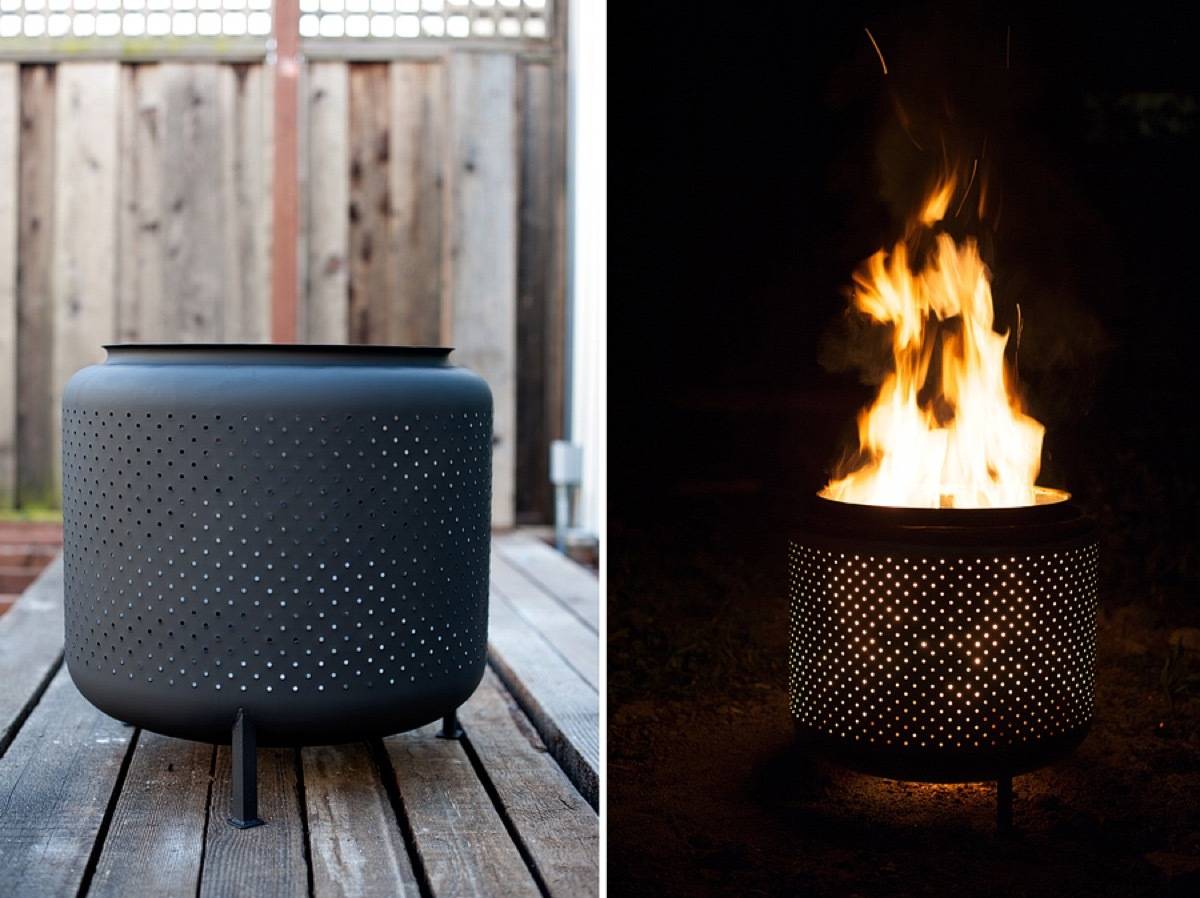
32. Flower Pot Fire Pit: Who says fire pits can’t be cute? Beautiful in blue, this outdoor DIY project only requires a flower pot, stones, and a little flame.
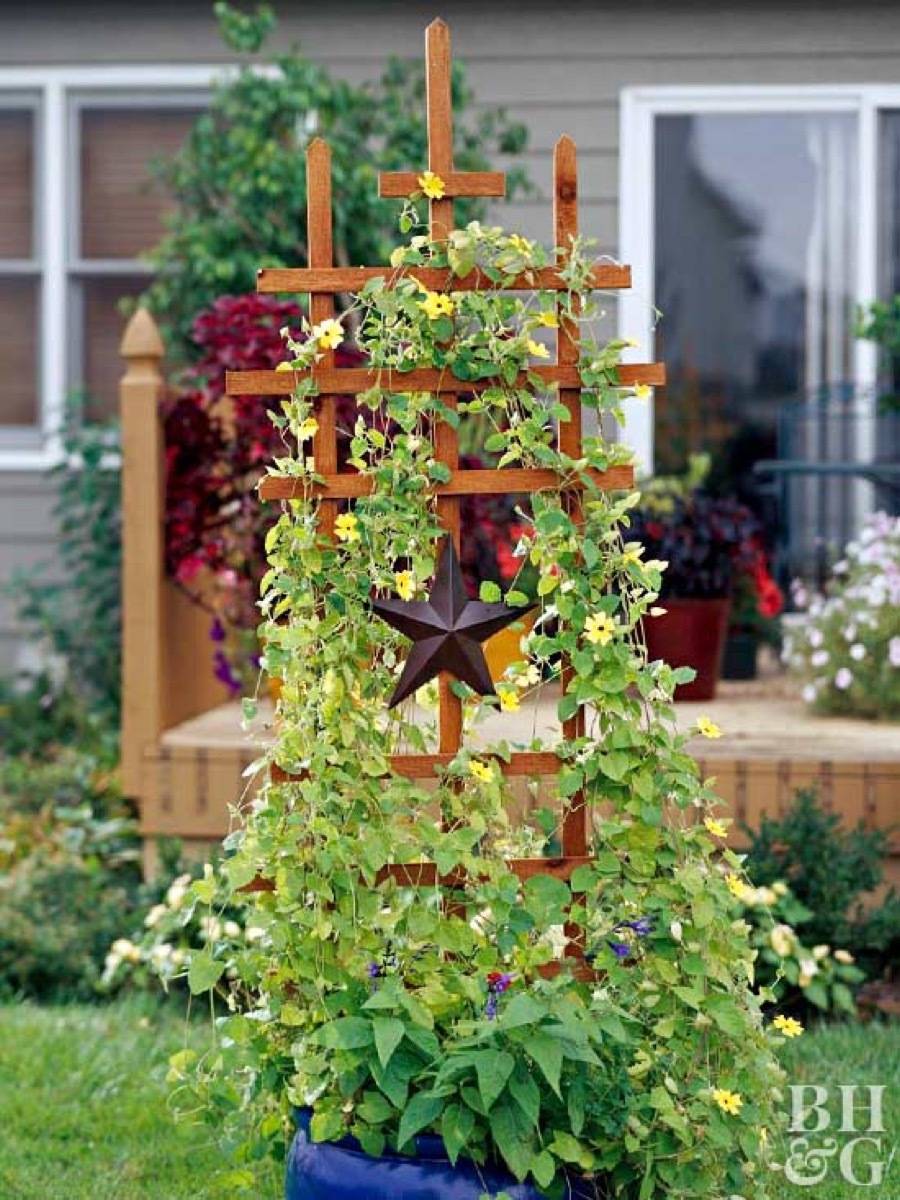
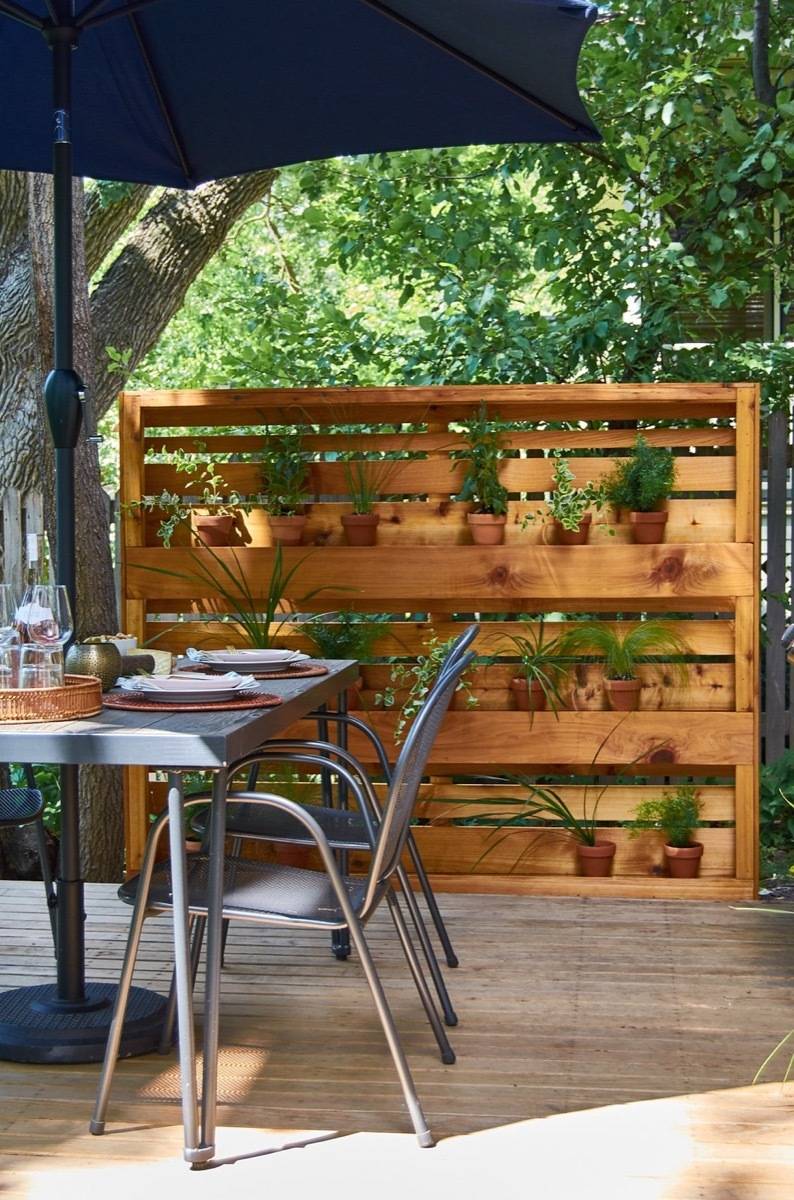
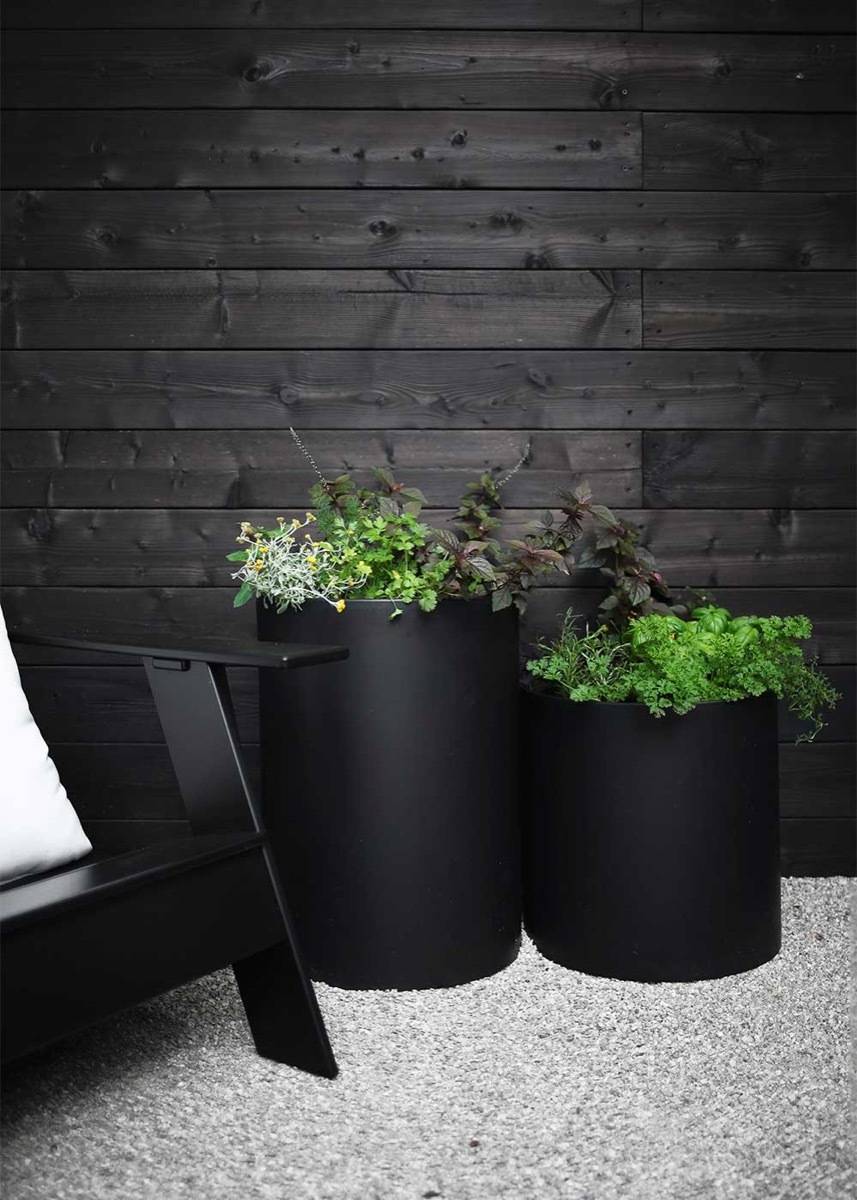
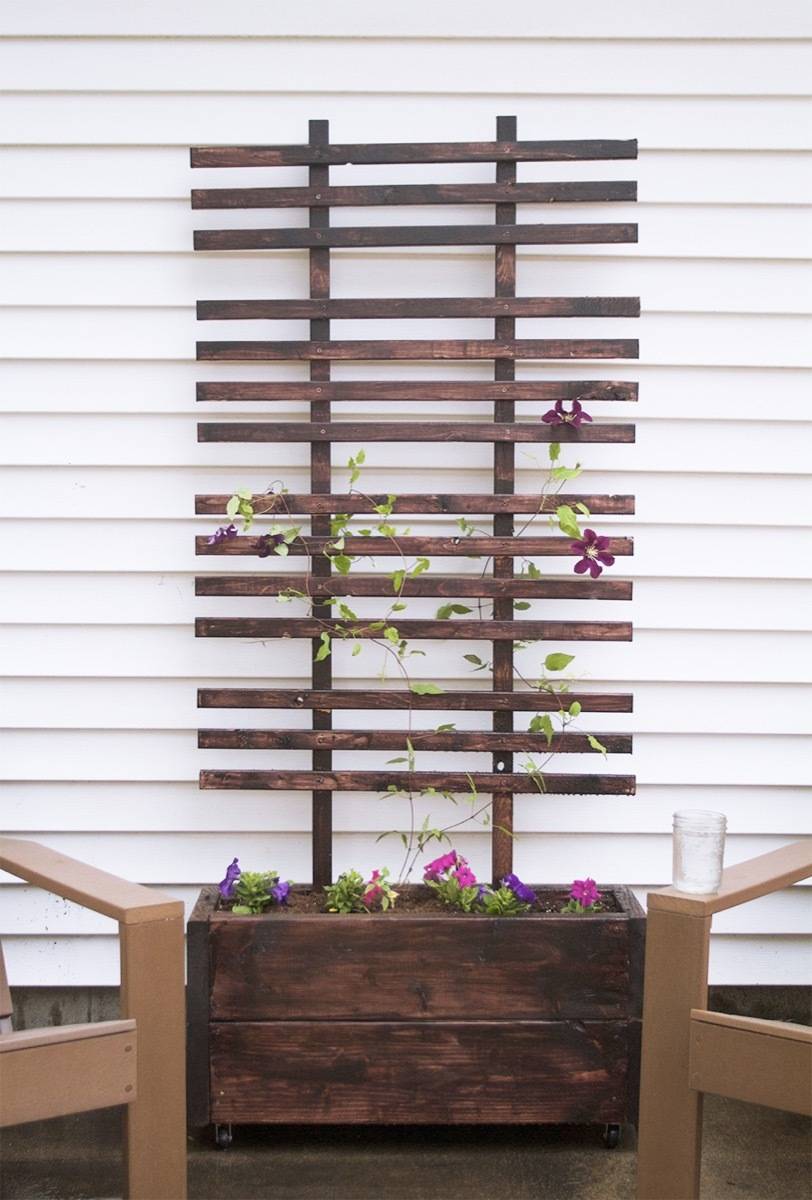
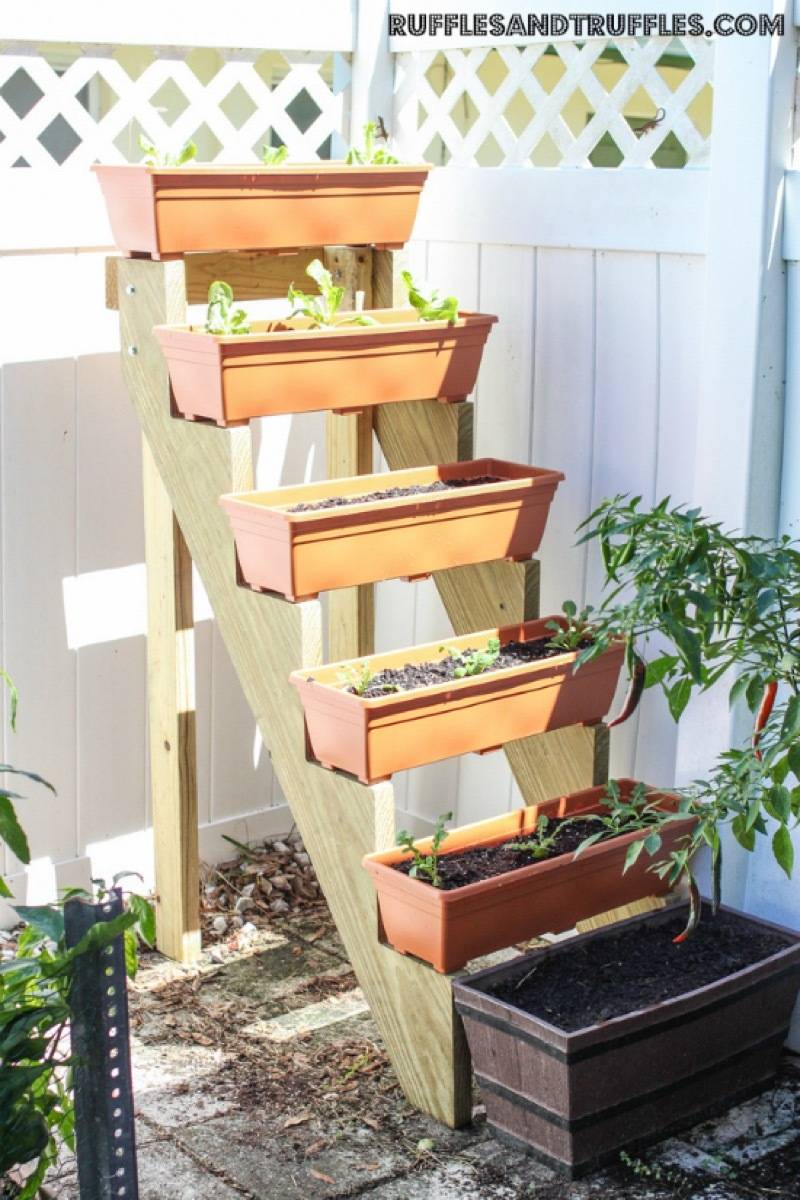
33. DIY Trellis with Planter Box: Give crawling plants somewhere to go by building them a trellis. This project is also great if you’re looking to fill visual space in your patio or deck area!
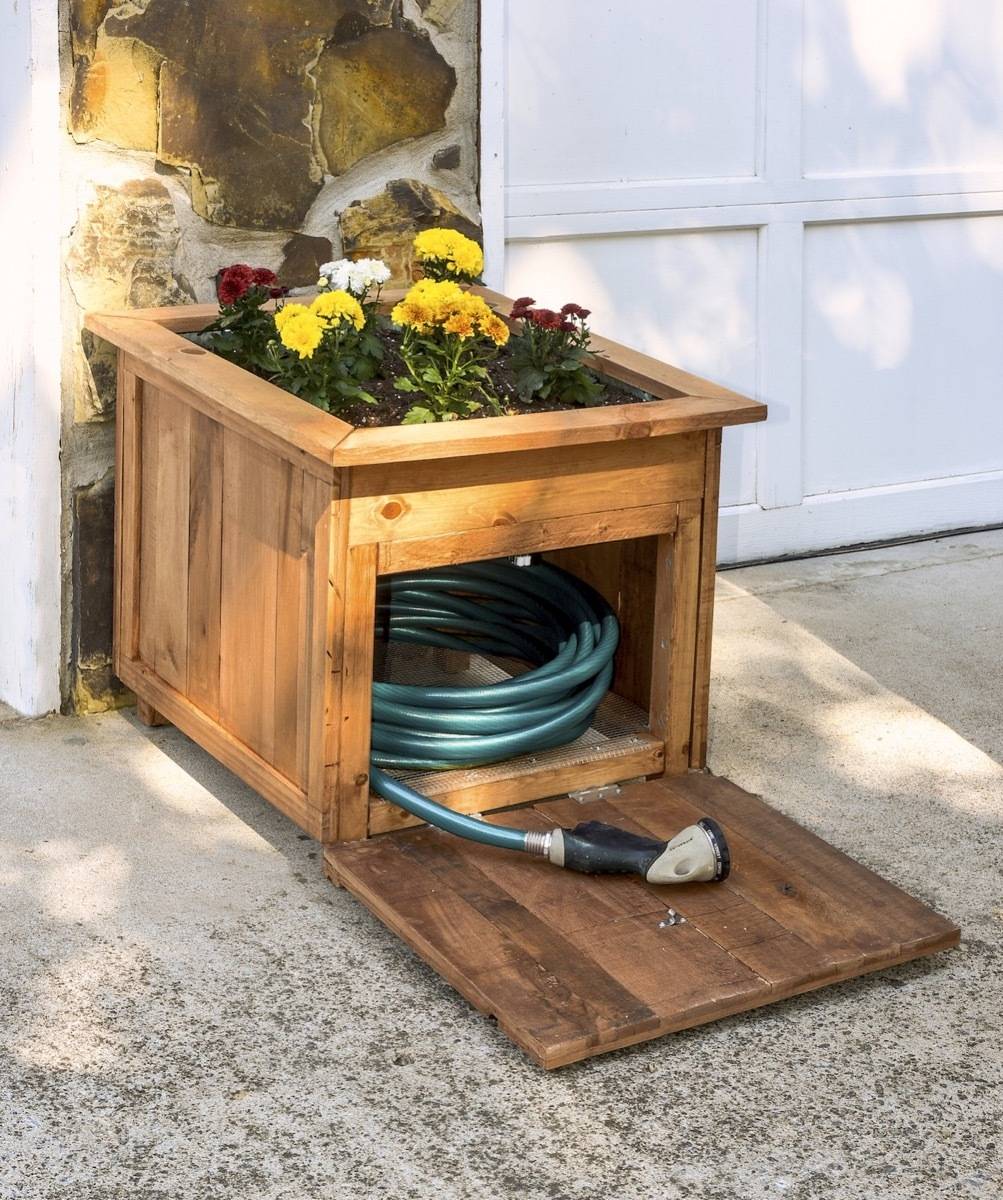
34. Hose Housing Station with Built-In Planter: Gardening hoses are hard to keep neat and pretty. This project solves that solution by keeping the hose hidden! Plus there are flowers involved, which is always a bonus.
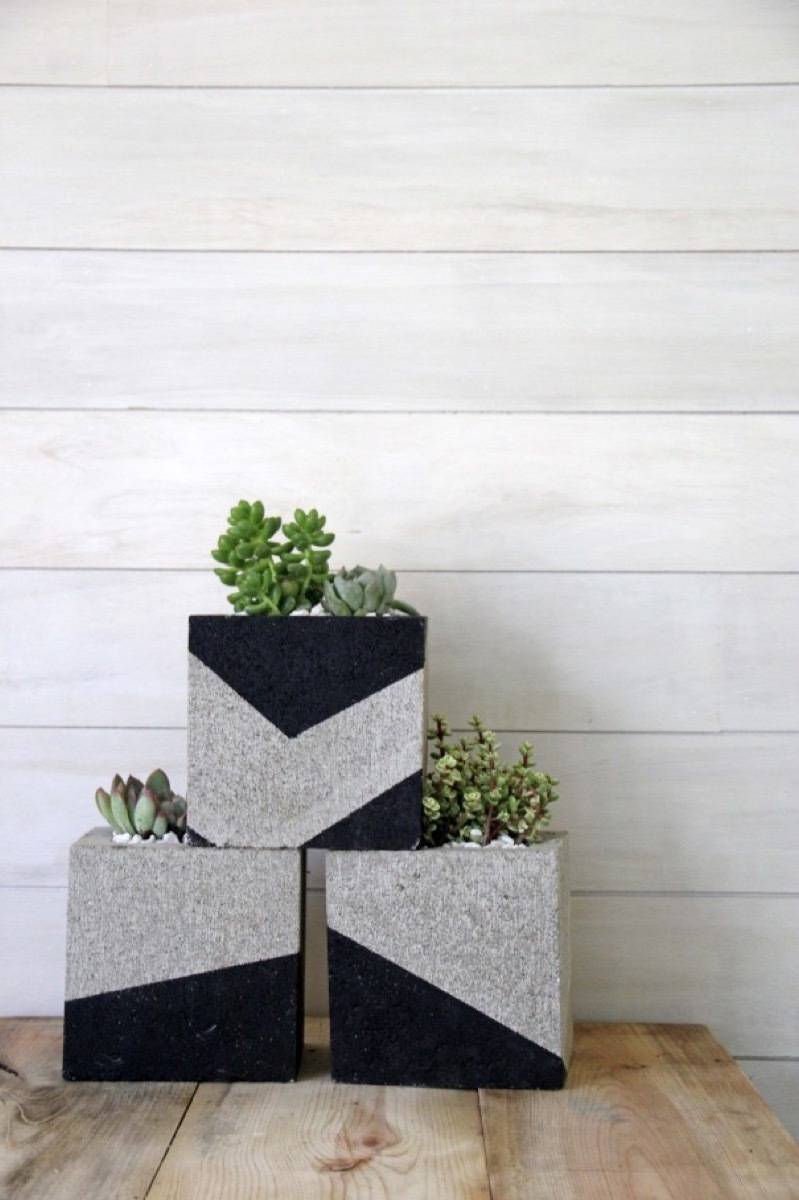
41. Geometric Cinder Block Planters: Cinder blocks are at it again! With a simple paint job, you can create a modern-looking planter to house all kinds of greenery.
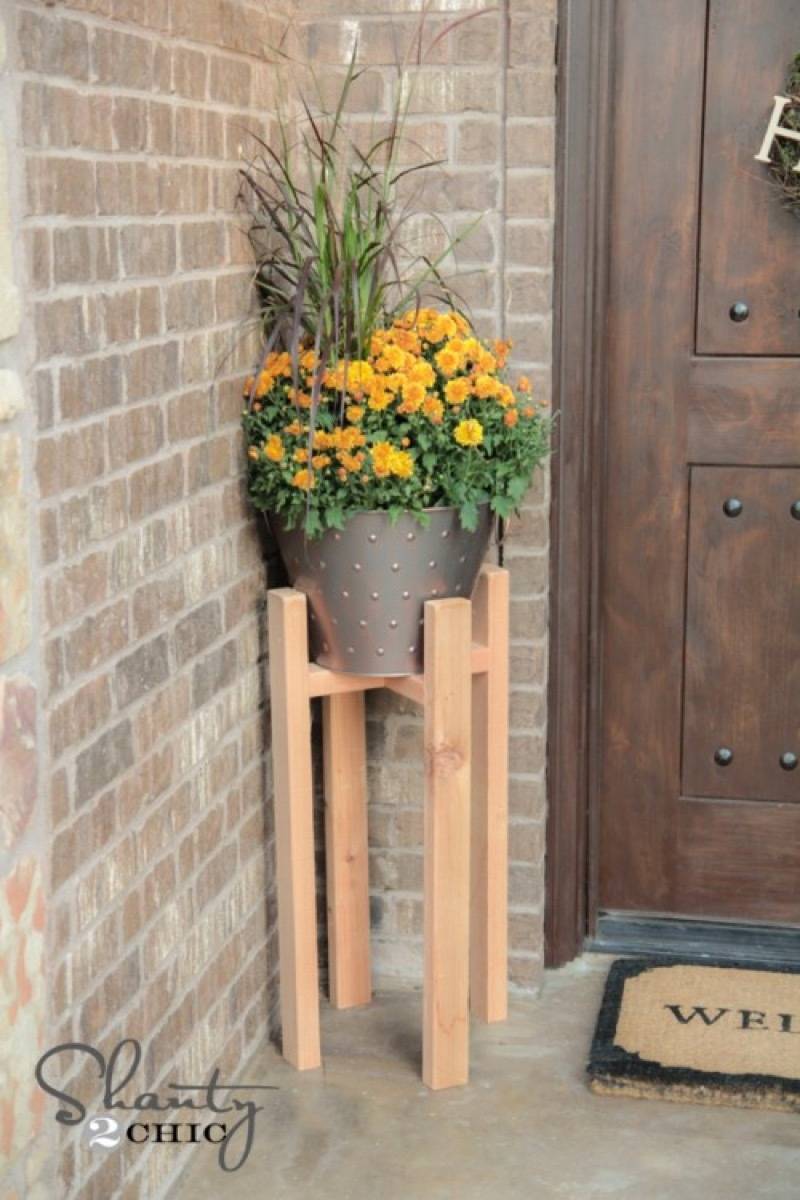
42. Wooden Plant Stand: If you’re looking for ways to add visual height to your plant-scape, Shanty 2 Chic has the plans to build a wooden plant stand.
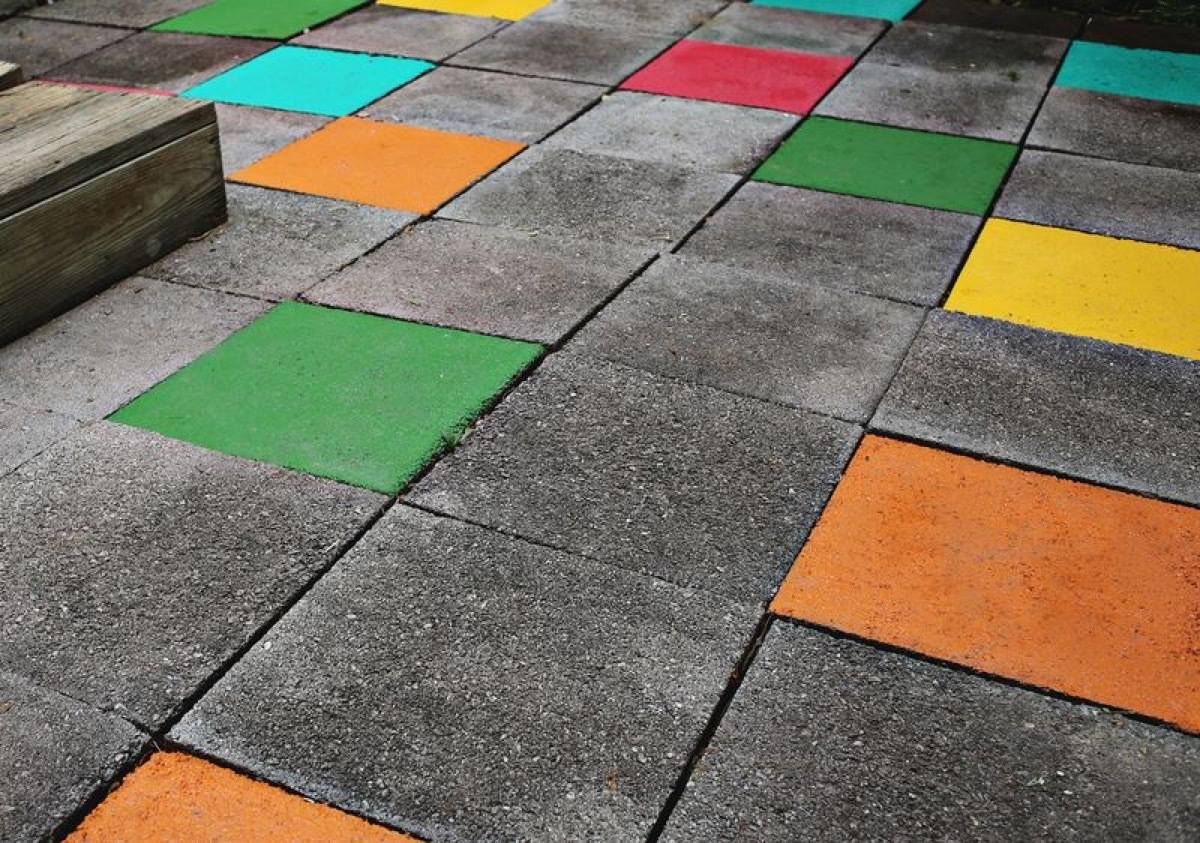
44. Colorful Patio Tiles: I can’t get over what a simple and transformative idea this is! If you can’t commit to painting your patio, try chalk for a temporarily colorful time!
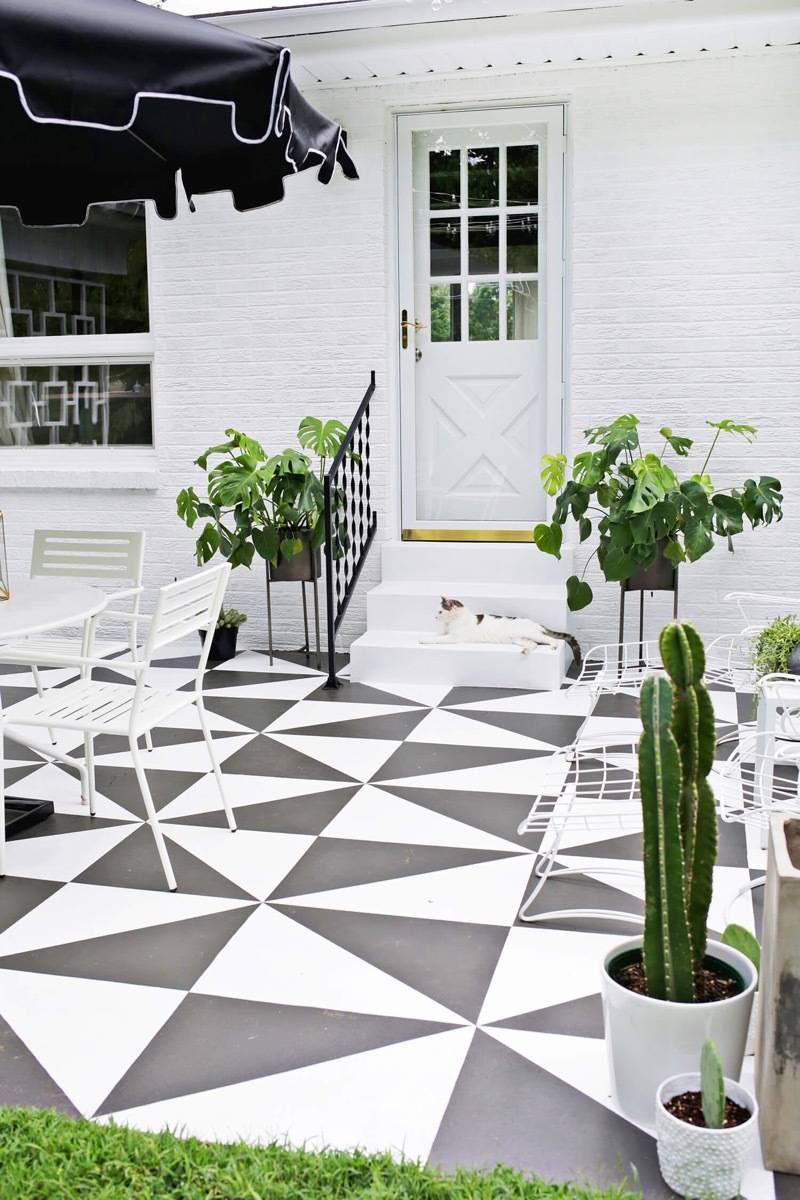
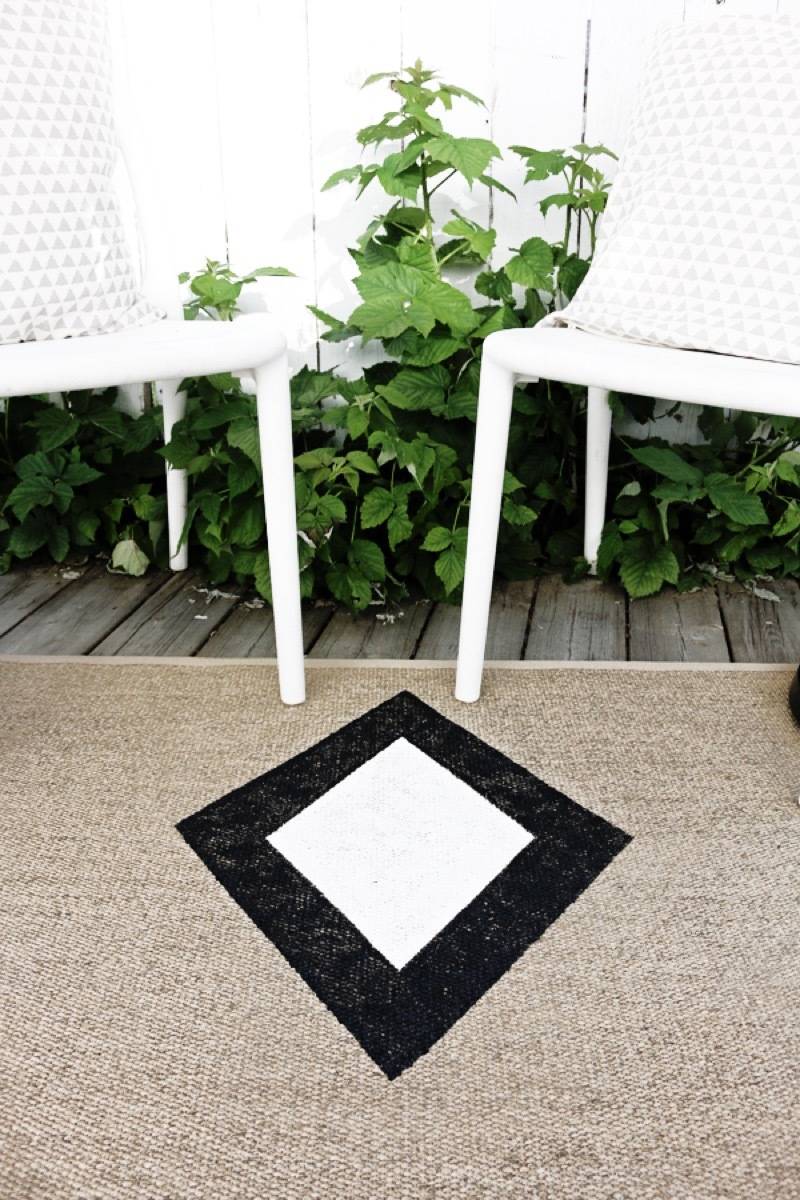
46. Stenciled Concrete: This stencil job mimics the look of a rug with the low-maintenance factor of concrete! Try this look on for size if you’re trying to create a more intimate outdoor living space.
53. Sandbox with Lid: It’s a gross reality, but if you have cats, you have to have a sandbox with a lid. Ana White has the plans for how to build one of your own.
54. Sandbox with Seating and Awning: Keep the kiddos safe from the sun by adding an awning to your sandbox. Plus these plans come with adorable seating!
58. Tire Teeter Totter: Alliteration aside, this teeter totter is adorable. Plus it’s made from recycled materials, so it’s good for the kids and the earth.
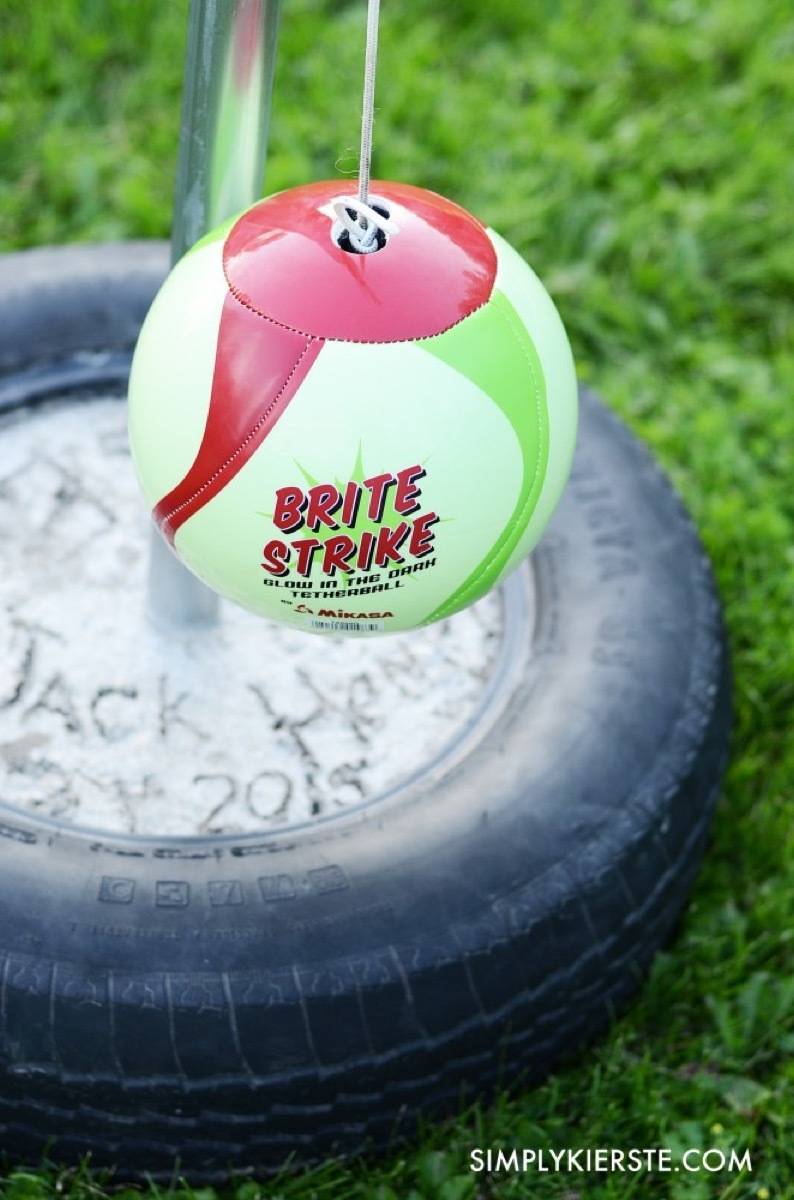
Photo: Simply Kierste
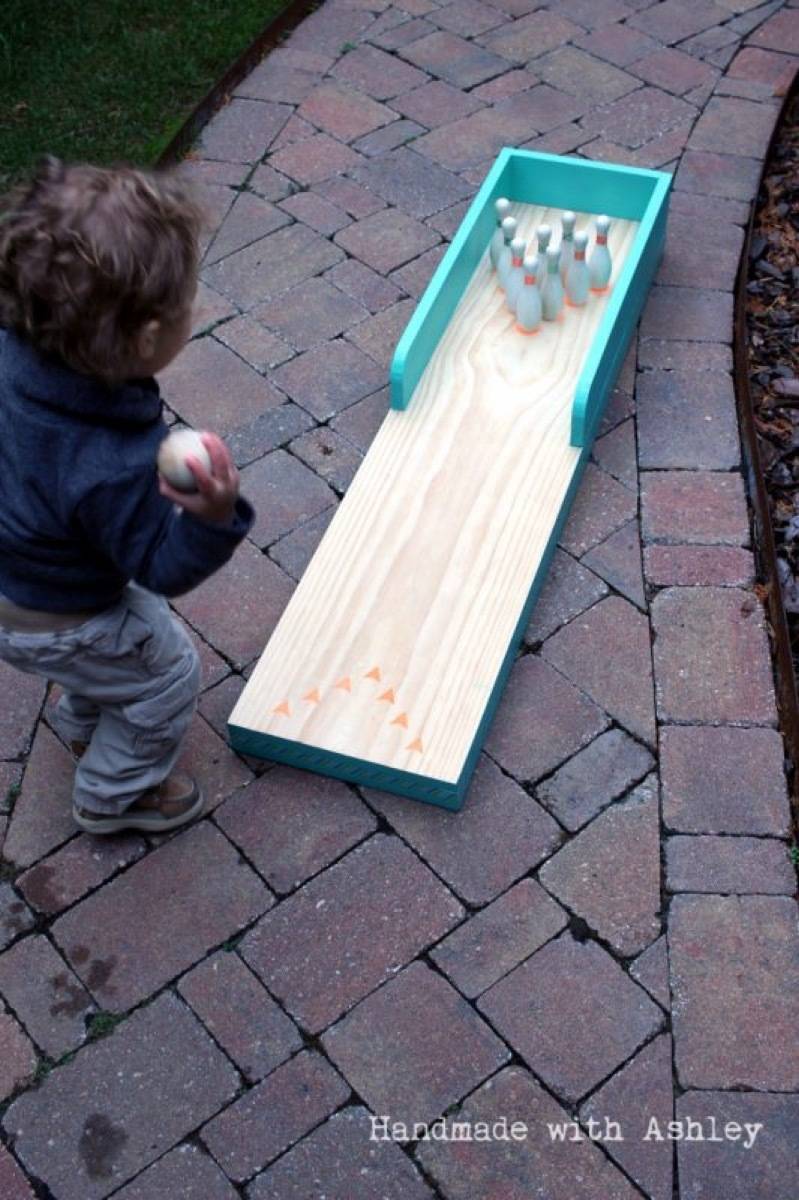
59. DIY Tether Ball: This DIY feels like a throwback! Do you guys remember playing tether ball long into the afternoon? Turns out it’s pretty easy to make one of your own for you or your offspring to enjoy!
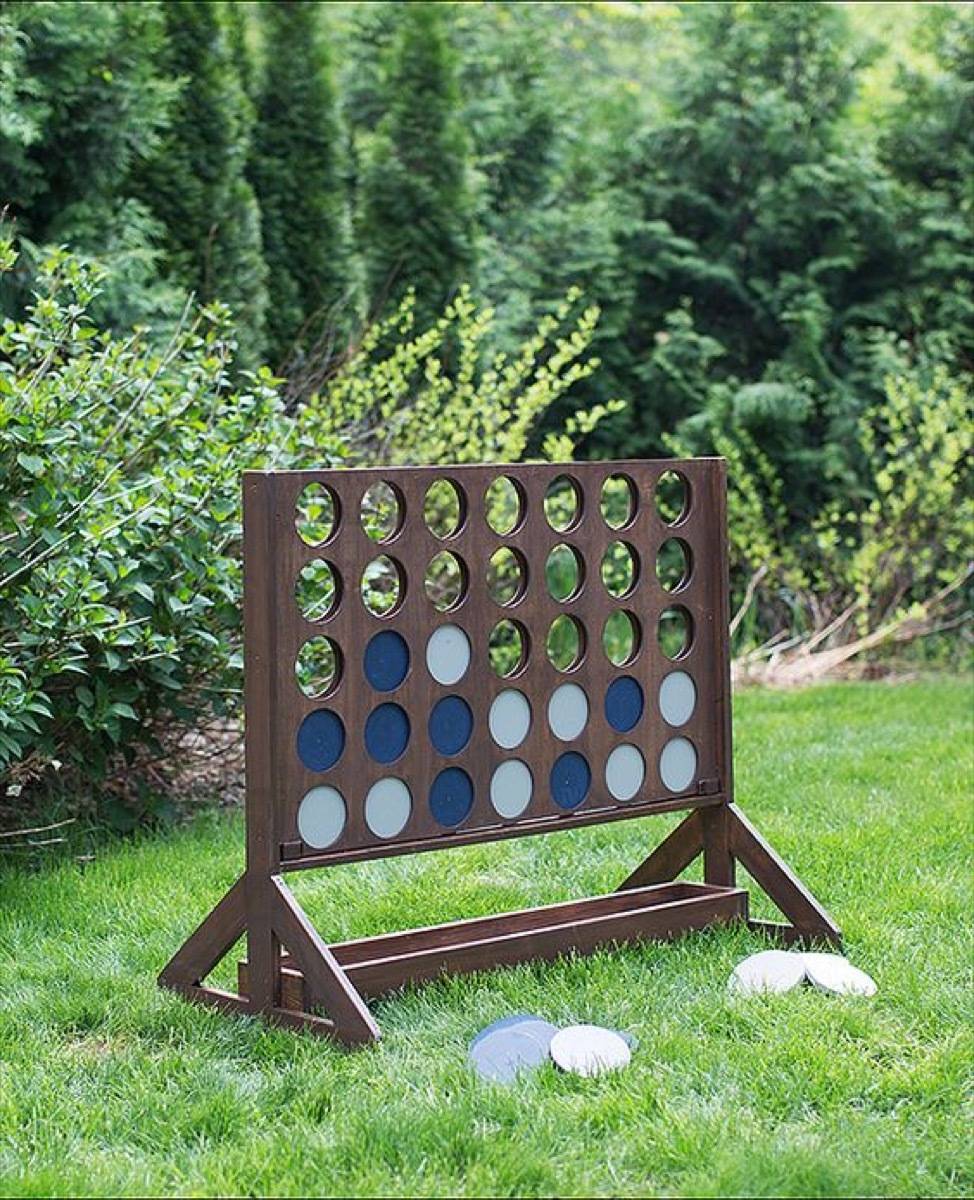
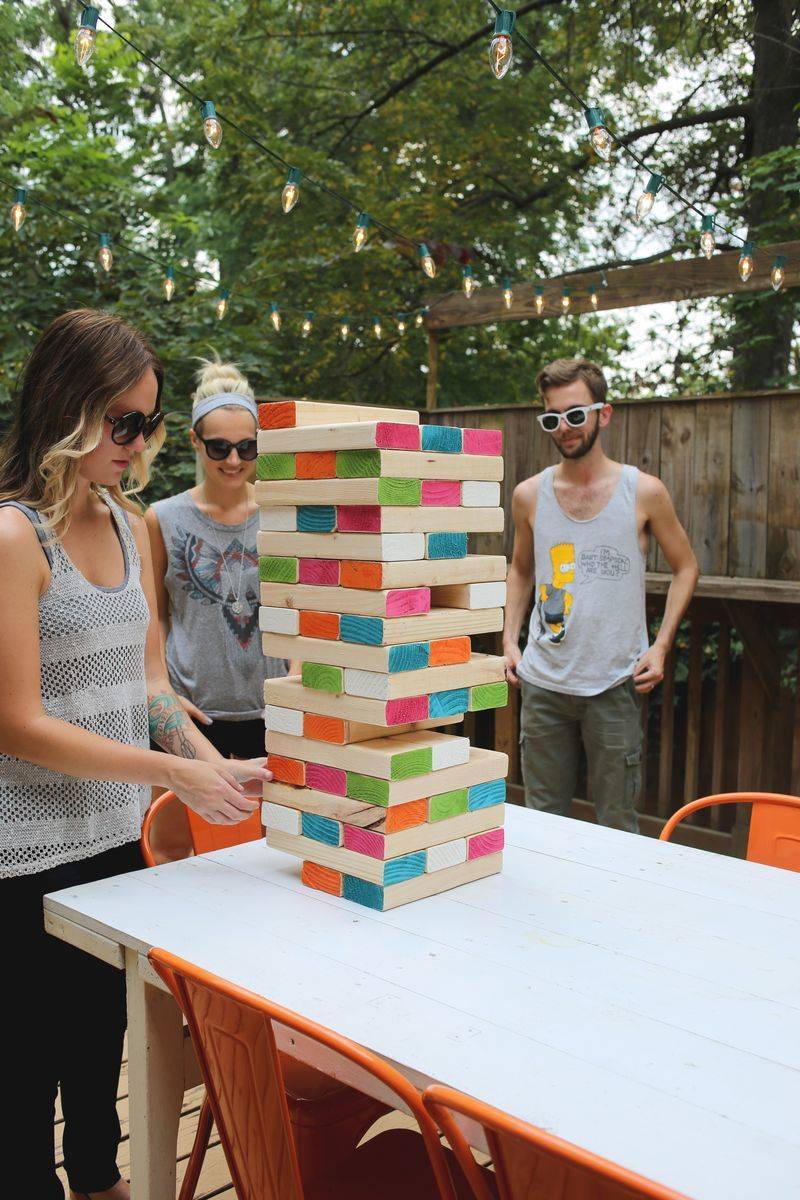
62. Giant Jenga: Last but not least, this thrilling game is the perfect addition to a summertime backyard party.
Bonus! Author Christina Pfeiffer is sharing What to plant for more drought resilient containers
By their nature, containers require more frequent watering than plantings in the ground. Smaller containers in full sun can need watering twice a day during hot spells. Go large when choosing new containers to save on time and water demands.
Choose a group of plants that are compatible in looks and culture. Match up their needs for light and water first, then play with combining colors and texture.
Sedums
These perennials are my first ‘go-to’ s for drought tolerant containers. They come in a variety of sizes, shapes and colors with blooms that benefit pollinator insects and ask for little in terms of water and fertilizer. Most will overwinter and also combine well with other drought tolerant plants.
Herbs for garden and kitchen
Culinary and ornamental herbs are another group happy in well drained soil and sun. Those with variegated foliage are stunning accents planted solo in a container. Among my top favorites are:
Variegated lemon thyme Sages that are edible and ornamental: ‘Berggarten’, ‘Aurea’, ‘Purpurescens’ and ‘Tricolor’ Oregano ‘Kent Beauty’ trails beautifully out of hanging baskets and into the marinara sauce.
Perennial favorites
These garden perennials make a successful leap between garden beds and containers and back again:
Coral bells, Heuchera ‘Green Spice’, ‘Peppermint Spice’ and ‘Moonlight’ Geranium x ‘Johnson’s Blue’ and other hardy geranium Oxalis tetraphylla ‘Iron Cross’ Dusty Miller – Sunrose, Helianthemum ‘Wisley Pink’ and ‘St. Mary’s’ Hardy fuchsia Cape fucshia
Add these grasses and grass-likes for contrasting texture
New Zealand Flax, Phormium and variegated iris both offer tall, strappy, striped leaves. Low growing glack mondo grass has dramatic dark foliage and and small white or purple flowers. Variegated lily turf, Liriope muscari ‘Variegata’, ‘Silver Dragon’ and ‘Sunproof’ all have white edged leaves and purple blooms.
Annuals that can take the heat (and a bit of drought)
Many of the popular annuals used for seasonal color do best with regular water and fertile soil. Be sure to keep these birds-of-a-feather together. Here are some great annuals that don’t like as much water and fertilizer and that combine well with other types of plants listed in this article:
African daisy, Osteospermum Symphony series Sweet allysum, Lobularia maritima Coreopsis tinctoria Dwarf snapdragons, Chinese Lantern series
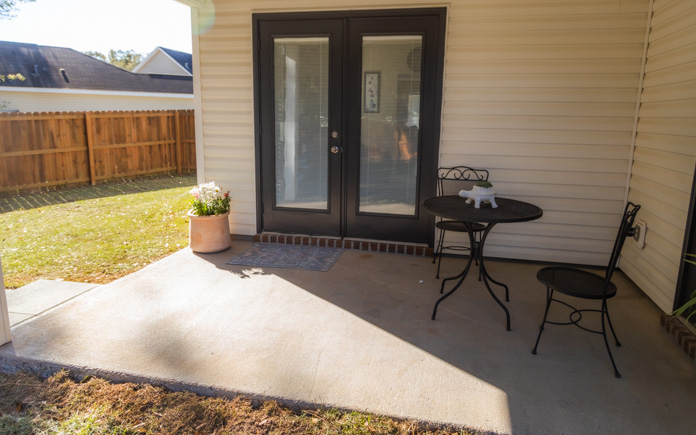
Jerry and Shay’s backyard is big enough for them to enjoy, but something is missing. Their small patio offers little space for entertaining guests, and their old firepit is secluded from any seating.
But that’s OK. Because when your patio is tiny, just create another one! That’s just what we’re doing on this episode of Today’s Homeowner.
The Projects
This patio is small but in good shape. Fresh paint and concrete stain brighten its appearance to better match the new patio.
We pressure wash the concrete pad and then stain it to better match the new paver patio. To apply the stain, we use a pump sprayer with circular motion, and then roll the stain to get it deep into the surface.
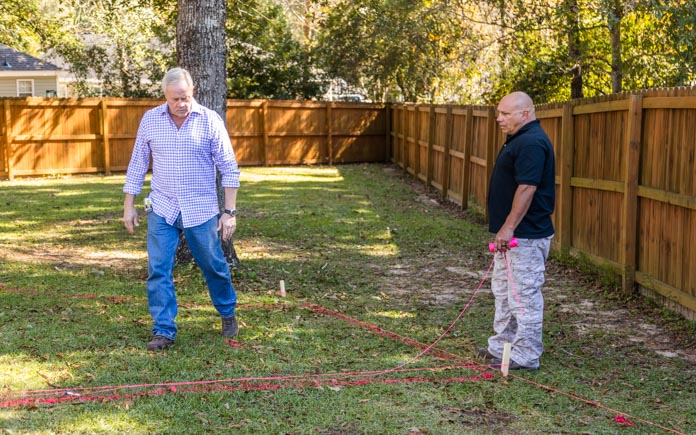
Before we can create a paver patio, we have to define the space.
Laying Out the New Patio
The first step to building a new paver patio is creating the layout. We determined where we wanted the fire pit and used a string and spray paint to find a radius for the paver patio surrounding it.
Once the layout was complete, we removed the grass with a rented sod cutter. Because the backyard had a slight slope to it, we needed a short retaining wall on the lower side of the space to create a graceful transition from the existing patio to our new one.
First, we had to dig a trench for the retaining wall. Next, we poured paver base into the trench and tamped it down. Compacting paver base deep into the dirt ensures the patio will have a strong foundation.
A retaining wall is a must for installing patios in sloped backyards.
Building a retaining wall isn’t the most glamourous part of the project, but it’s necessary. We used Pavestone Rumblestone Pavers for our wall.
To cut our pavers to the size we needed, we rented a concrete saw from The Home Depot. If you only plan to use an expensive tool once, it just makes sense to rent instead of buy.
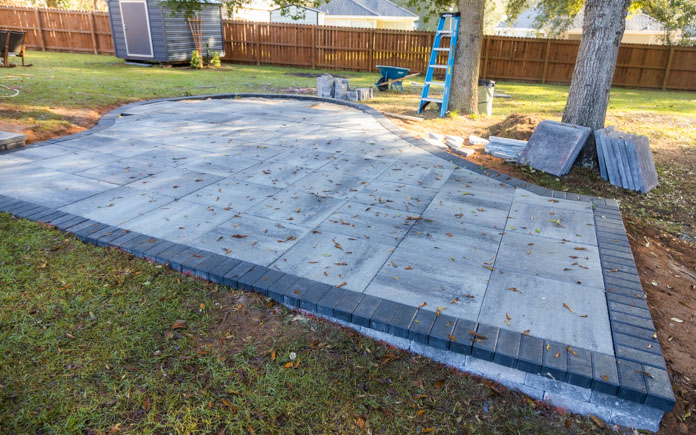
Large 2-by-2-foot pavers make this patio feel more spacious and look luxurious.
Build New Patio
After lining the patio with pavers, we prep the area for laying down slab pavers.
First, we compact the dirt and spread paver base. We then lay metals pipes before laying sand down to ensure the sand is a consistent depth throughout to support the heavy 2-by-2-foot pavers.
We added two steps from the existing patio to lead down to the new one. Both steps must be the same size, so we have to cut down some of the concrete on the existing patio.
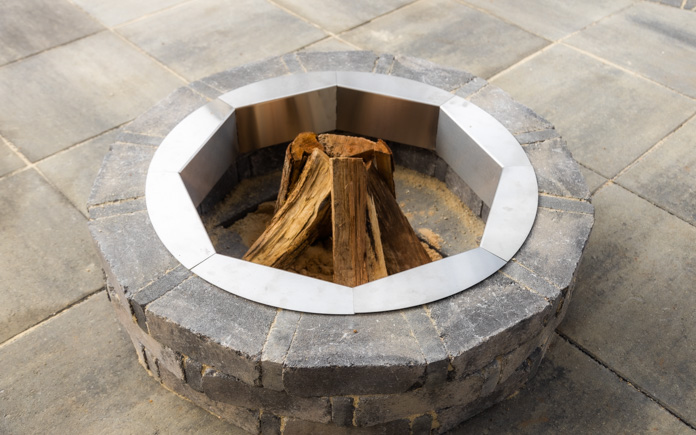
Jerry and Shay’s new firepit is now the focal point of their patio.
Once the pavers are complete, we sweep sand into the joints and we’re ready for the new fire pit. We used a Pavestone Rumblestone Fire Pit Kit, and assembled the fire pit in less than 20 minutes!
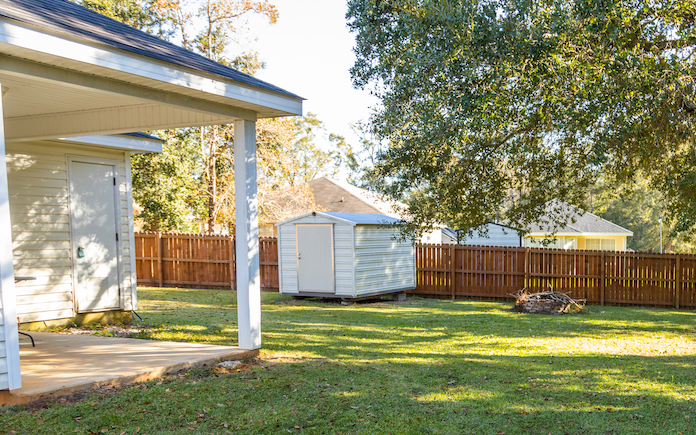
The shed in the backyard felt too out of place, so we painted it to tie into the house instead of standing alone.
To tie the shed to the patio, we used the same color to paint the back doors and trim.
We also:
“Today’s Homeowner” hosts Danny Lipford and Chelsea Lipford Wolf, pictured with homeowners Shay and Jerry.
Post-Production Thoughts
Jerry and Shay have a beautiful backyard with great shade trees and lawn. But the old fire pit had seen better days and the existing patio offered few opportunities to enjoy the outdoor space. It was too small for entertaining and the monotone color palette lacked any real interest.
Now, the whole backyard has come alive with the addition of a big new patio that complements the shape of the trees while it enjoys its shade.
Large-format pavers make the patio seem larger than it actually is and the new fire pit is the ideal spot for entertaining.
There are two large steps that create a graceful transition to the old patio, which has been revived with a new shade of stain and a bold color on the doors.
That same color on the storage shed plus some simple landscaping have transformed this yard into a spot you just can’t wait to enjoy.
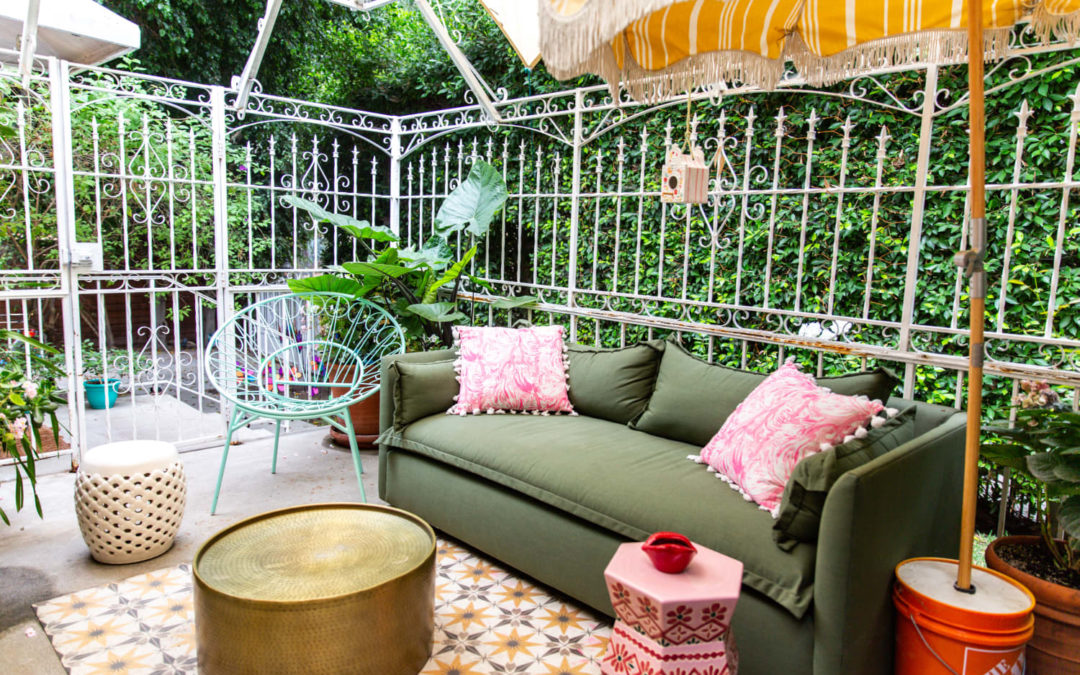
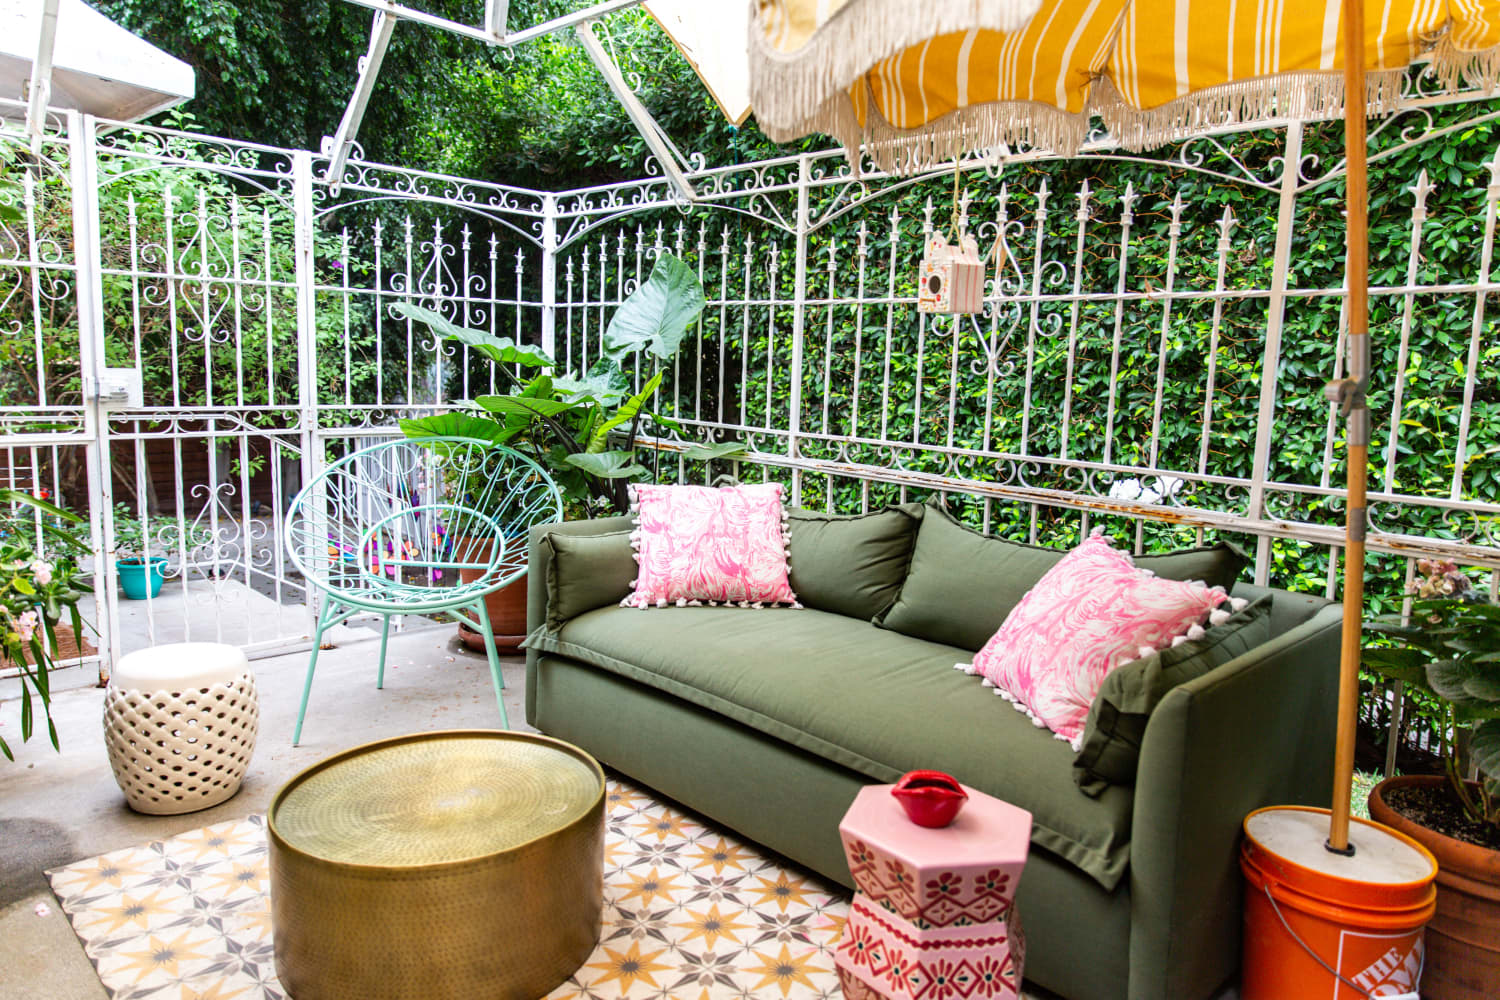
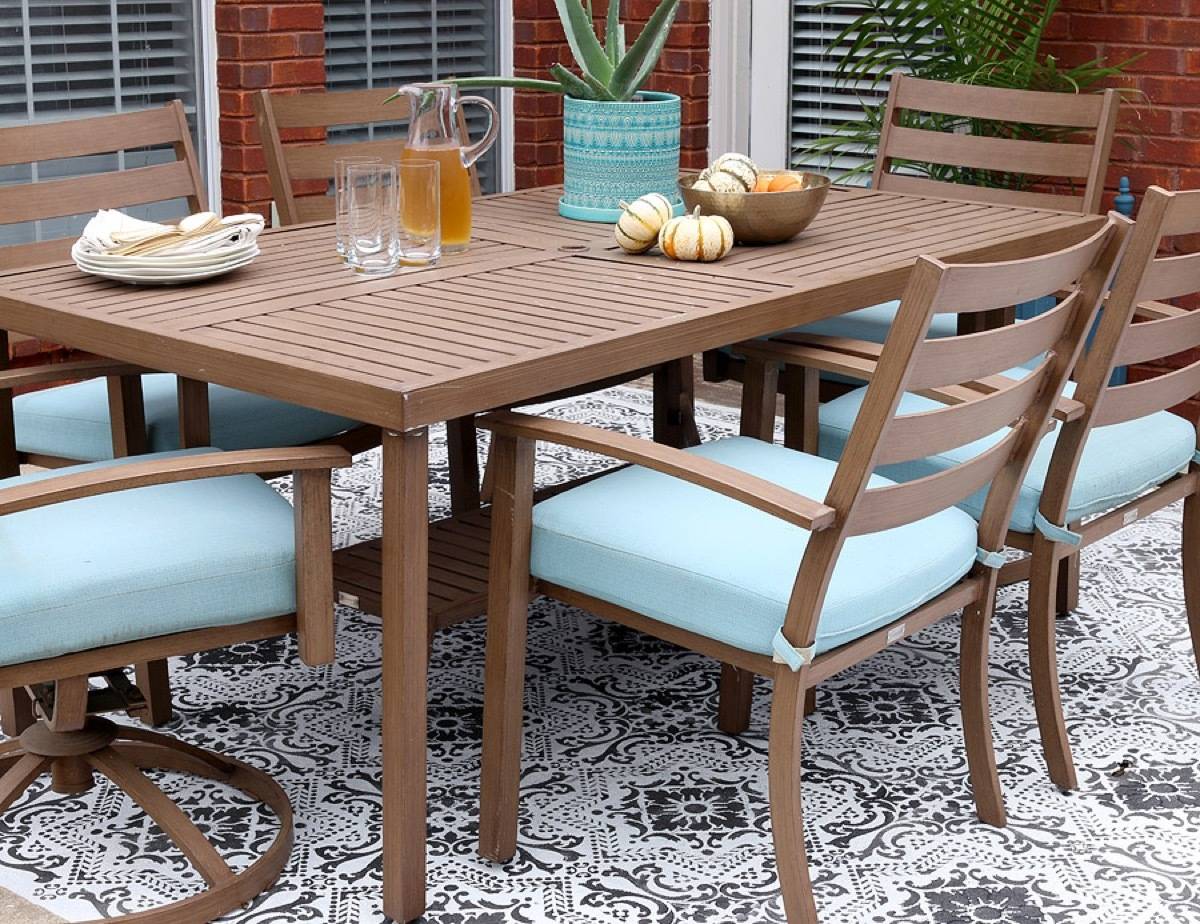
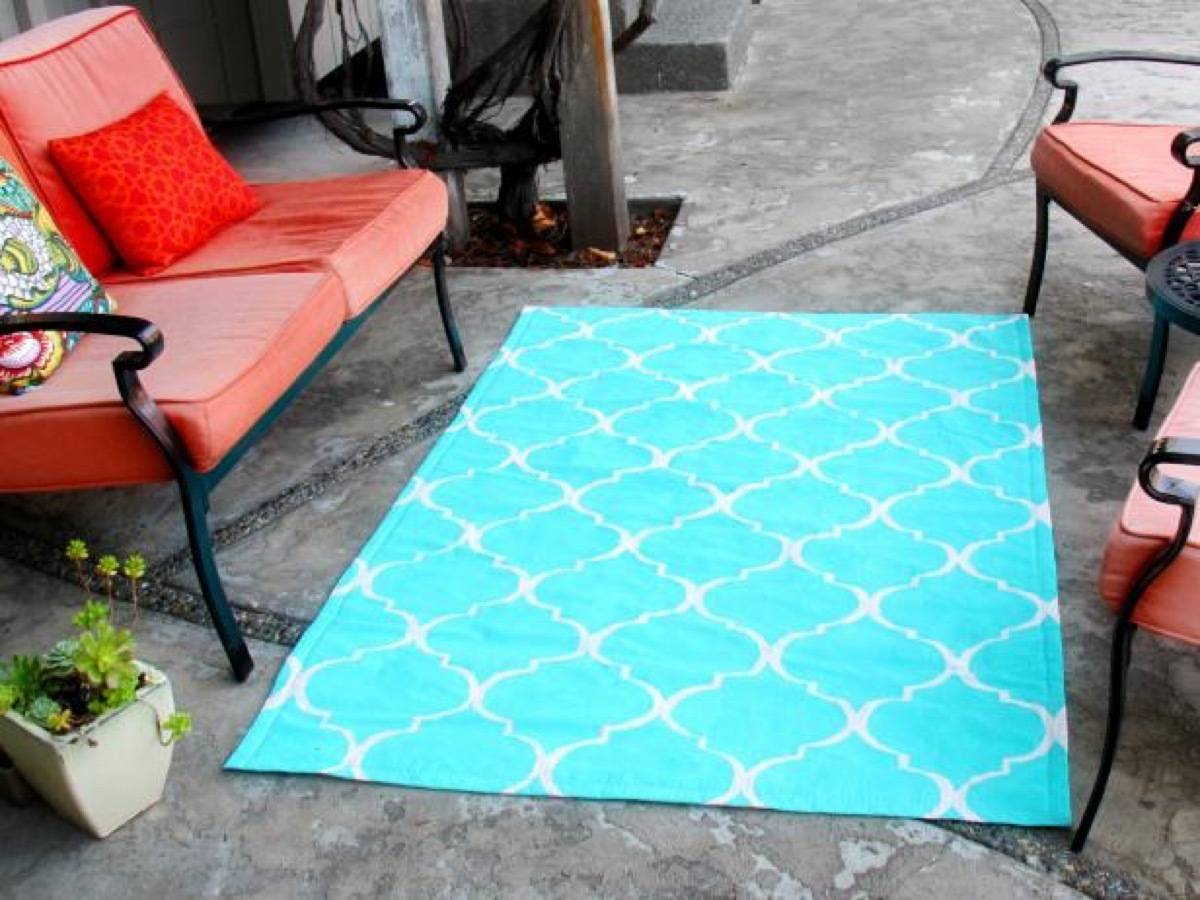
Make your outdoor living spaces feel just as welcoming as your interior by centering your furniture arrangements with a comfortable outdoor area rug. In this post, we’ve collected our favorite outdoor area rug designs sure to elevate the atmosphere of a patio, balcony, poolside, or sunroom. Each one is made from strong weather-resistant materials to withstand the elements for all-season style. Explore styles ranging from bohemian chic to modern minimalist, and even themed selections like floral and nautical. There’s something here for every outdoor gathering space.