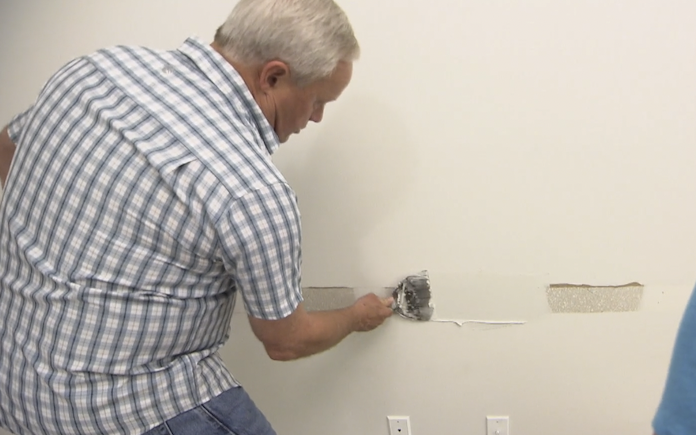
Over the years, I’ve shared more than 500 Simple Solutions — many of them have to do with painting specifically painting neatly.
And over time, many Today’s Homeowner fans have shared their own solutions on how to make painting easier.
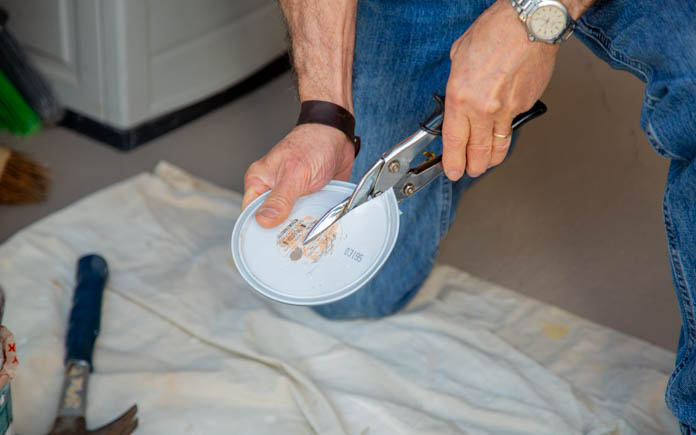
This tip from John from Clancy, Montana, will help you paint neatly from a can using a paintbrush.
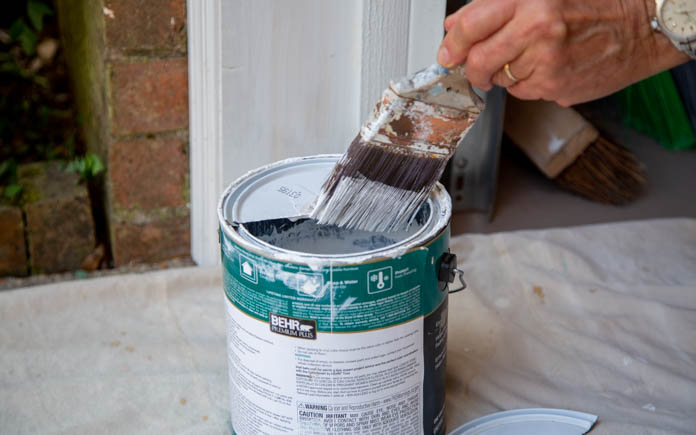
The challenge when dipping a paintbrush in a can is how to keep the paint from dripping around the rim. Not only do you waste paint, but you also make a mess on the outside of the paint can and the surface underneath it.
To prevent any paint from dripping down the side of the can, create a built-in paint scraper in the center of the can. Here’s how to do it:
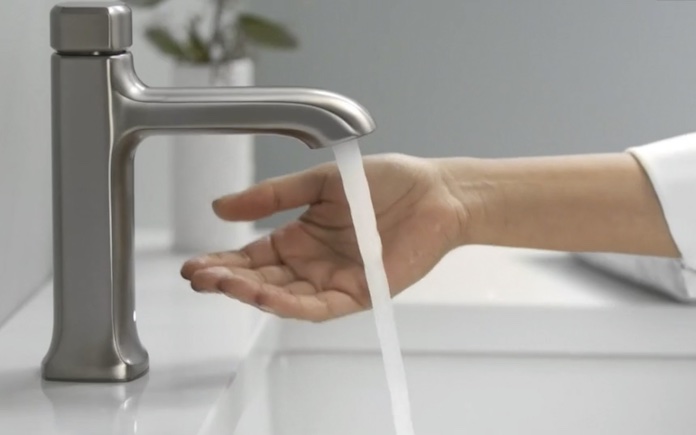
Touchless faucets are nothing new, but Kohler is bringing that technology to your home bathroom.
You’ve seen them in airports, arenas, restaurants and more. Touchless technology unquestionably prevents the spread of germs and limits water use.
Kohler’s touchless bathroom faucet gives you those touchless faucet benefits in the privacy of your home bathroom.
This post is sponsored by The Home Depot, and this page contains affiliate links. If you purchase a product from these links, we will earn a small commission at no additional cost to you.
This Kohler touchless bathroom faucet doesn’t need any knobs, so it opens up valuable countertop space. (3 Echoes Content Studio)
This touchless water faucet not only helps to limit water waste, but it’ll also save on your utility bill. You’ll be doing your part to conserve this precious resource while saving yourself a few dollars.
Because it’s touchless, that means fewer fingerprints. Plus, this Kohler touchless bathroom faucet has Spot Repel finish, so it resists fingerprints, smudges and water spots.
Kohler’s response technology uses a state-of-the-art motion sensor for reliable touchless activation. Just wave your hand to turn the water on and off.
The only time you need to touch the faucet is to adjust the temperature. Twist the temperature regulator at the top to customize how hot or cold you want your water.
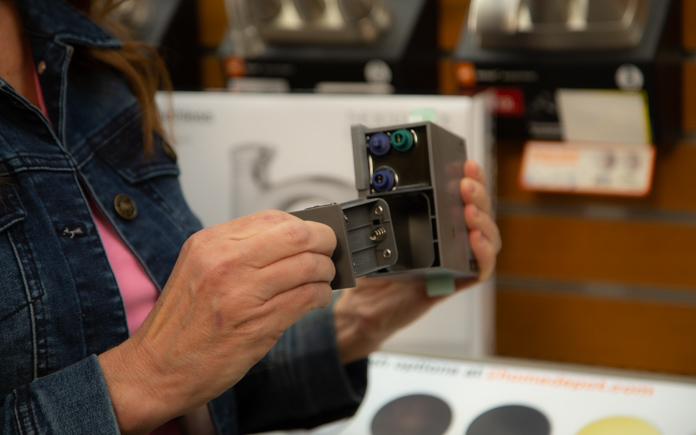
You don’t need to buy any special batteries for this faucet — it’s powered by AA batteries. (3 Echoes Content Studio)
Installing this touchless water faucet is quick and easy. The kit comes with supply lines, a plate, and a drain. The motion sensor is powered by six AA batteries, which are also included in the kit.
Watch the video to learn all about this Best New Product!
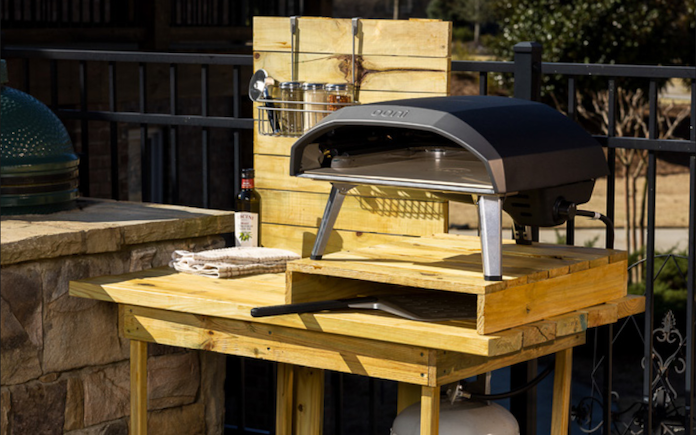
Enjoy a perfect slice of backyard life by making a DIY pizza oven stand.
No day full of family, friends, and fun is complete without a great dinner to close out the night — and pizza makes for the perfect topping to any backyard party.
Follow along with Doug Scott, landscape designer and host of Exmark’s Done-In-A-Weekend project series, to learn how to build a DIY pizza oven station.
This DIY outdoor pizza oven stand will complement any grilling area. (Exmark)
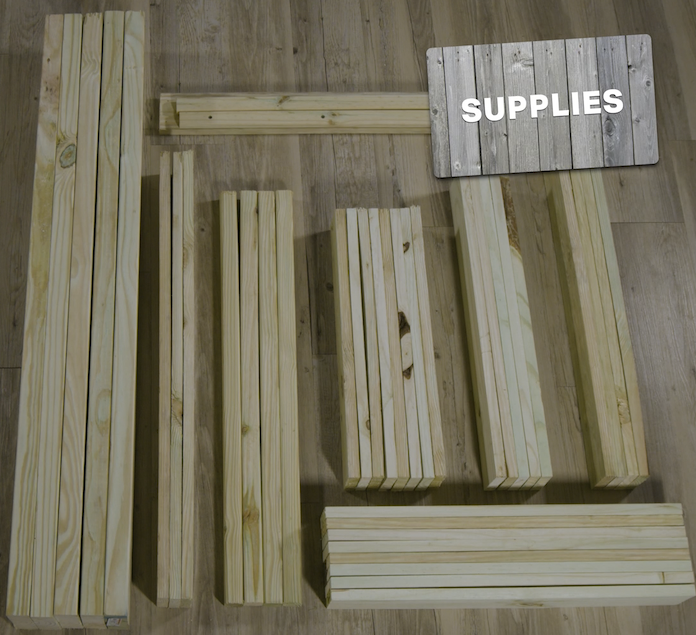
Pressure-treated boards will stand up to the outdoor elements. (Exmark)
Materials
Legs
(4) 2 inch x 2 inch x 32 inch pressure-treated boards
Frames
(4) 1-inch x 4-inch x 26 1/4 in. pressure-treated boards
(4) 1 in. x 4 in. x 34 1/2 in. pressure-treated boards
(1) 1 in. x 4 in. x 24 1/2 in. pressure-treated board
Cleats
(2) 1 in. x 2 in. x 31 1/2 in. pressure-treated boards
(2) 2 in. x 2 in. x 21 3/4 in. pressure-treated boards
Top
(5) 2 in. x 6 in. x 48 in. pressure-treated boards
Shelf
(10) 1 in. x 4 in. x 24 1/2 in. pressure-treated boards
Riser
(7) 1 in. x 4 in. x 21 in. pressure-treated boards
(2) 1 in. x 4 in. x 24 1/2 in. pressure-treated boards
Backboard
(9) 1 in. x 4 in. x 24 in. pressure-treated boards
(2) 1 in. x 4 in. x 53 1/2 in. pressure-treated boards
How to Build a Pizza Oven Station
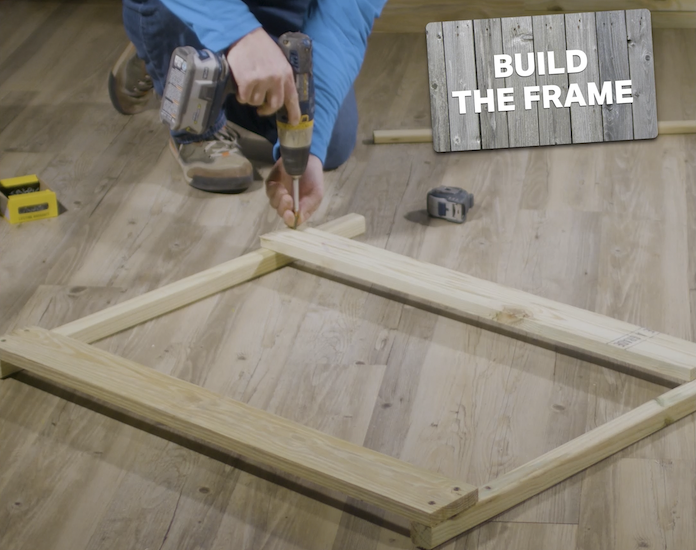
The two 1-inch x 4-inch boards give the legs extra support. (Exmark)
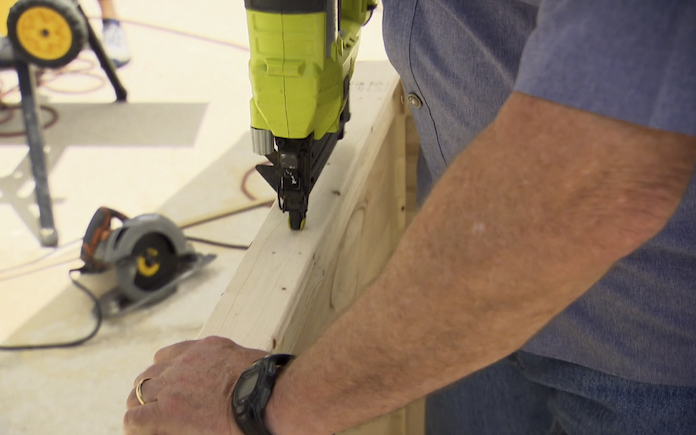
1. Take two of the 2-inch x 2-inch leg boards and one of the 1-inch x 4-inch x 34 1/2-inch frame boards. Place the 2-inch x 2-inch boards on both ends of the 1-inch x 4-inch board, making sure to align the edges and corners.
Then, take the other 1-inch x 4-inch board and repeat the step above for the other end of the 2-inch x 2-inch leg boards, but instead align it about five inches from the end of the leg board.
This 1-inch x 2-inch cleat will hold up the bottom shelf boards. (Exmark)
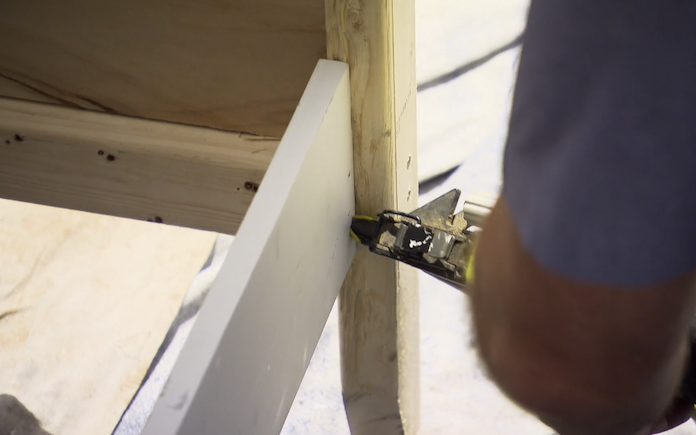
2. Screw a 1-inch x 2-inch cleat horizontally along this second 1-inch x 4-inch board, making sure it’s aligned between the 2-inch x 2-inch leg boards.
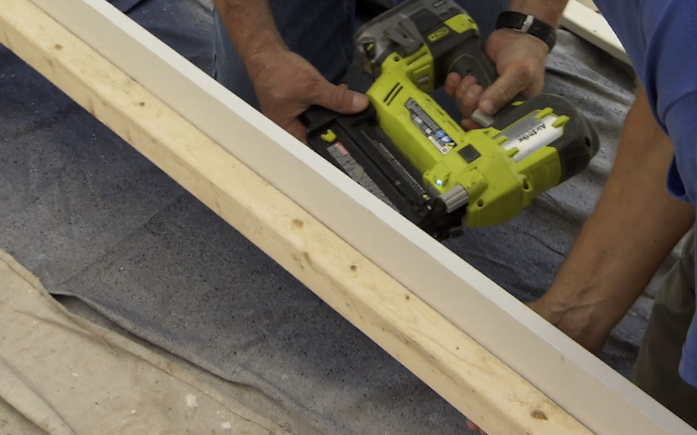
3. Repeat steps 1 and 2 for the second pair of legs.
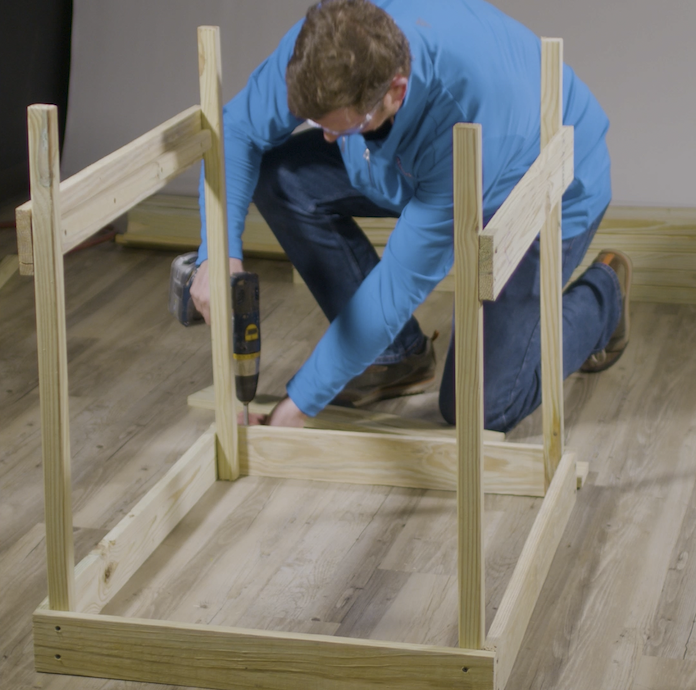
The 1-inch x 4-inch x 26 1/4-inch frame boards complete the frame for the top. (Exmark)
4. Stand up both sets of legs, making sure the ends with the 1-inch x 4-inch boards are flush with the ground, and that the sides with the cleats are pointed inwards. Take the 1-inch x 4-inch x 26 1/4-inch frame boards and use them to connect the two sets of legs, screwing them into the corners of all four frame boards.
5. Flip the build over.
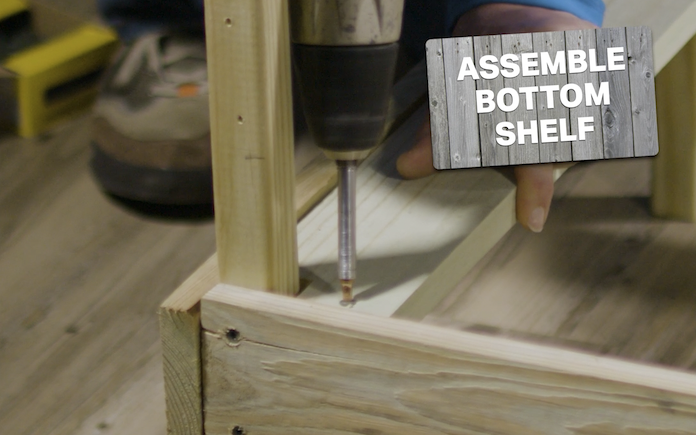
These notches make the bottom shelf line up flush with the frame boards (Exmark)
6. Next, take two of the 1-inch x 4-inch shelf boards and cut out a 2-inch x 2-inch square on the corner of each end of both boards. These squares should be on the same side of the boards.
Screw the newly cut board onto the cleat. (Exmark)
7. Take your newly cut boards and nest them in between the top frame boards, making sure the square you just cut out is flush with the leg boards, and screwing them into the 1-inch x 2-inch cleats.
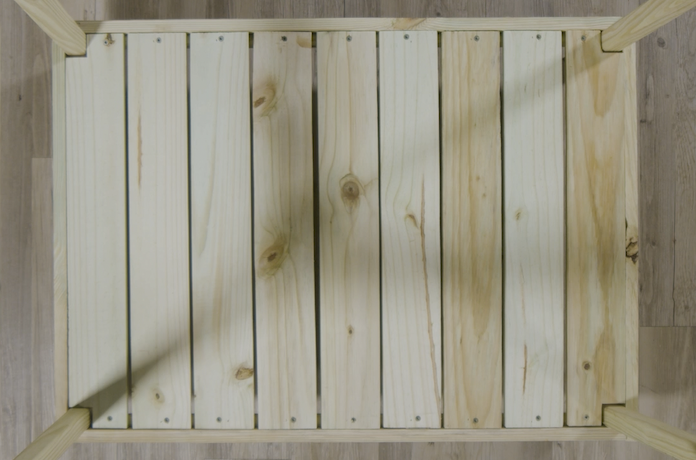
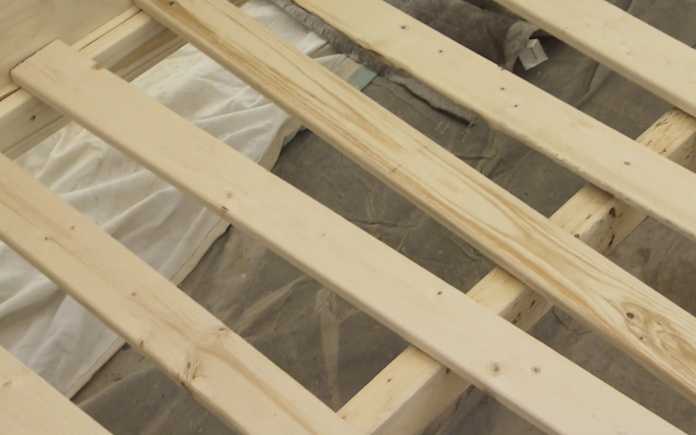
The bottom boards should be spaces enough for water to drain. (Exmark)
8. Then, take the remainder of the shelf boards and screw them in between the two you just placed.
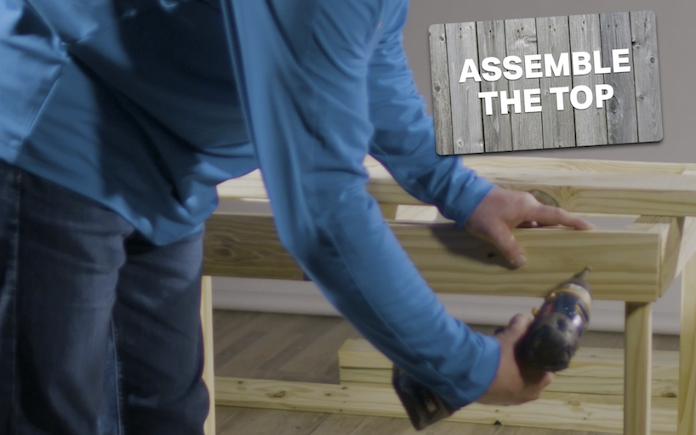
This middle board gives the top more support. (Exmark)
9. Screw the 1-inch x 4-inch x 24 1/2-inch frame board, aligned horizontally, into the middle of the top 1-inch x 4-inch x 34 1/2-inch boards.
The top boards will be screwed into these front and back cleat boards. (Exmark)
10. Screw 1-inch x 2-inch cleat boards on the front and back of the very top of the build.
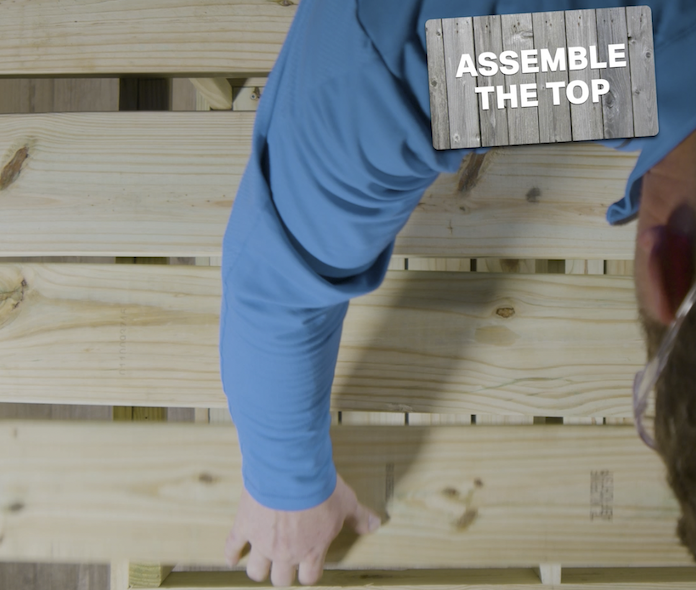
Just like on the bottom shelf, the top shelf boards should have some space between them. (Exmark)
11. Take all five of the top boards and screw them into place, using the cleats you just installed.
The backboard support boards should be spaced about 5 or 6 inches apart. (Exmark)
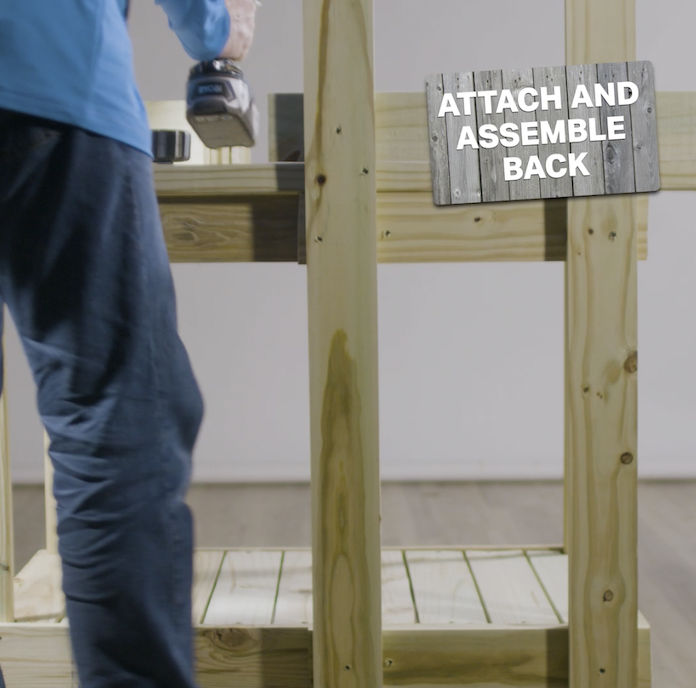
12. Take the 1-inch x 4-inch x 53 1/2-inch backboards and screw one to line up vertically with the back left corner of the build. Screw the next board in, spaced out about five or six inches to the right of the first.
The riser boards should extend 1 inch off of the inner backboard. (Exmark)
13. Take the other 1-inch x 4-inch x 21-inch riser boards and screw them horizontally in front of the vertical boards you just installed, aligning them so the right vertical support is one inch off the end of the 1-inch x 4-inch x 24-inch boards.
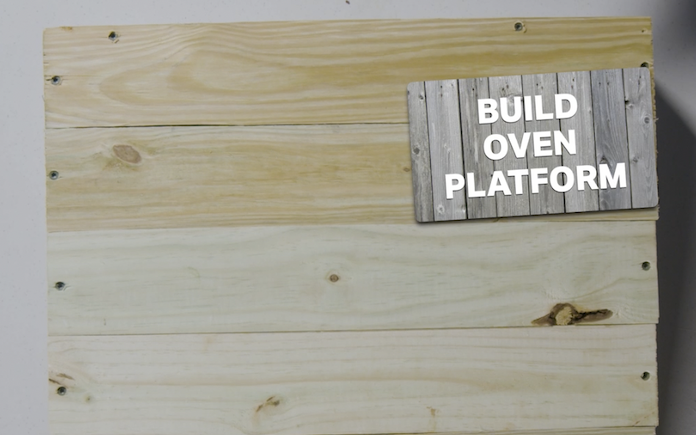
The oven platform creates space for utensils under the pizza oven. (Exmark)
14. Finally, put together the oven platform by placing the 1-inch x 4-inch x 24 1/2-inch boards on their sides (long ways) and screwing the 1-inch x 4-inch x 21-inch boards to adjoin them, making sure all the corners are flush.
Watch the video to see how it’s built!
Of course, no build is complete without the paint or stain to match your backyard aesthetic, and the necessary sealer to help it withstand everything Mother Nature will throw at it.
Once your DIY outdoor pizza oven stand is assembled, all that’s left to do is invite your friends and family over, buy the ingredients and bake away!
Looking to breathe new life into your outdoor spaces? Look no further than simple, cost-effective DIY projects. Exmark’s Done-In-A-Weekend project series will help you enjoy a better backyard life!
This week, we’re transforming a dull dining room into a diva den.
Homeowner Robin Stafford hasn’t used this room for dining since she moved into her home, so we’re going to turn it into a unique space for her to relax and unwind with her daughter.
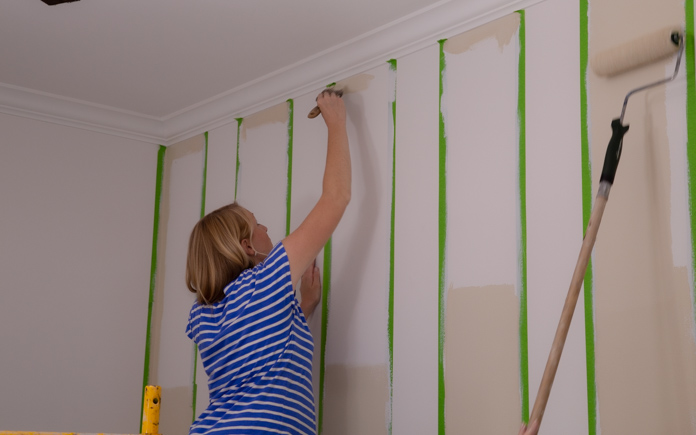
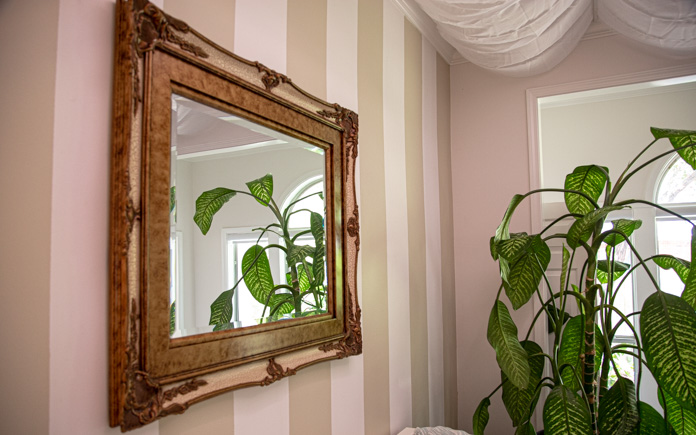
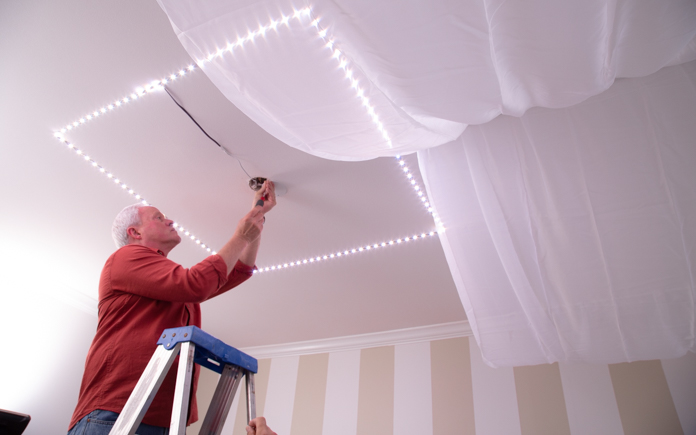
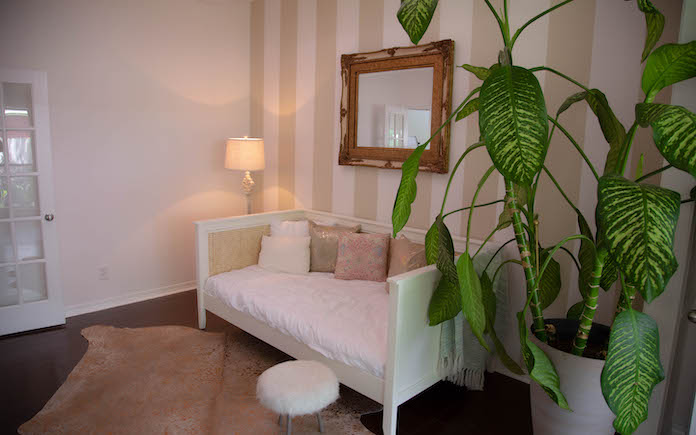
Vertical stripes draw the eye up and highlight the room’s tall ceilings. (3 Echoes ContentStudio)
Paint Accent Wall
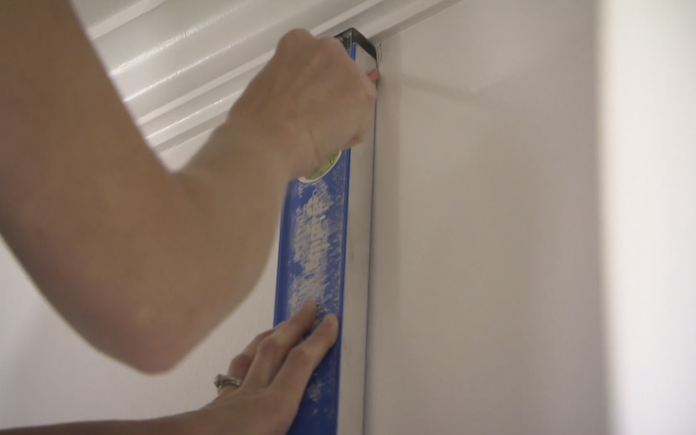
To create a focal point for the room, we paint a vertical striped accent wall. The vertical stripes draw your eyes up the wall and call attention to the tall ceiling.
Next, we measure out the width of our stripes and mark the lines with a pencil. Then, we use a level to create straight vertical lines for the tape to go over. we tape our vertical stripes on the wall.
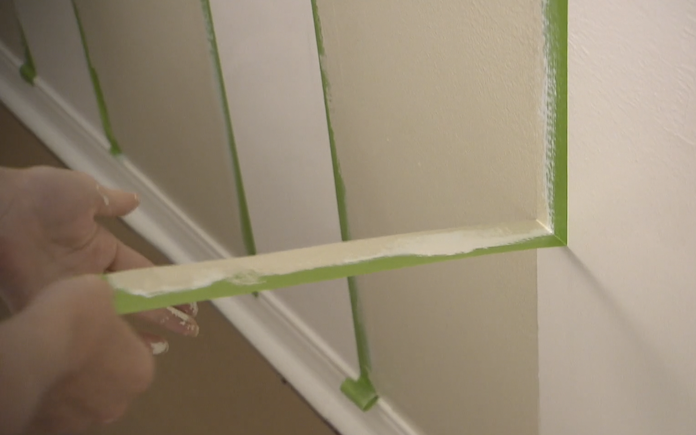
For the stripe colors, we’re going with tan and white. To make painting easier, we mark the slats for the tan stripes with an “x.”
Pulling the tape while the second coat of paint is still wet makes for clean lines. (3 Echoes Content Studio)
We use painter’s tape to mark off the stripes on the wall. After the tape is in place, we use the wall color to seal off the tape so none of our stripe color gets underneath.
We then apply two coats of our stripe color and remove the painter’s tape.
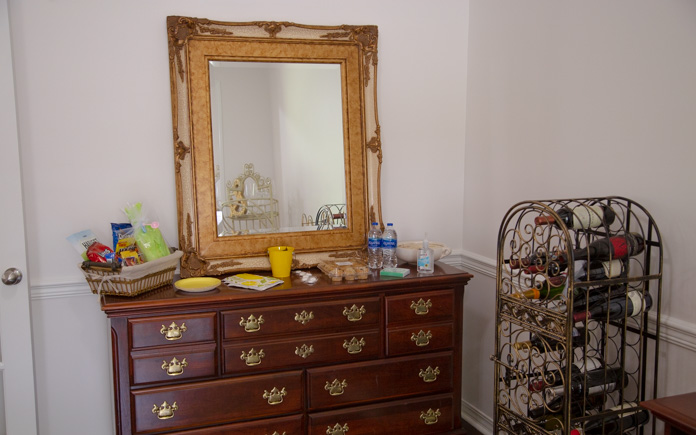
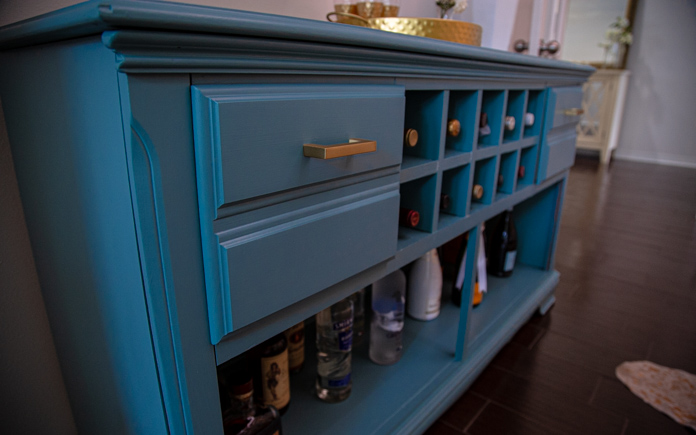
Robin has a dresser she inherited from her mother that we’re able to reuse and reconfigure for a bar.
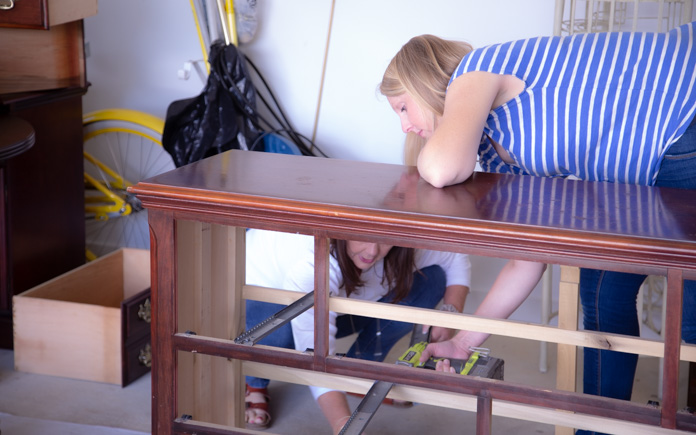
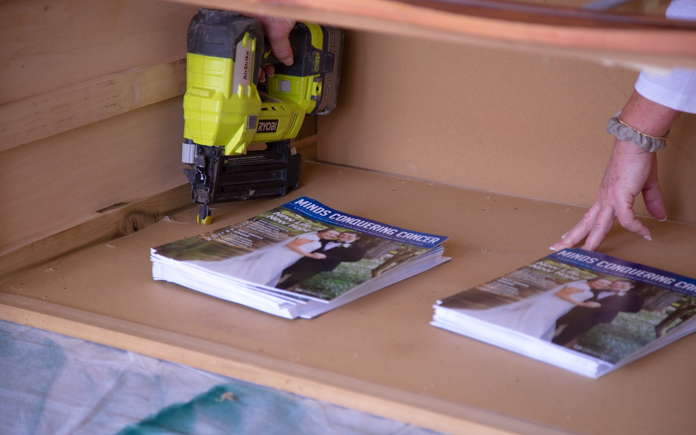
We remove the bottom two drawers to create a large bottom shelf for bottles. Then, we take out the large top middle drawer and convert that space into a wine rack.
Robin’s formal dining room had great natural light, tall ceilings and plenty of space, but it had no real purpose. So, it became a catch-all for furniture that had no other home. Because it was right next to the front door, it was the very first thing her guests saw.
But now, the room has a purpose and personality.
The bold stripes on the accent walls draw you in and accentuate the height of the ceiling, which makes a statement of its own with the soft LED lights filtering through the sheer drapes. This ceiling makes it clear this room is designed for relaxation.
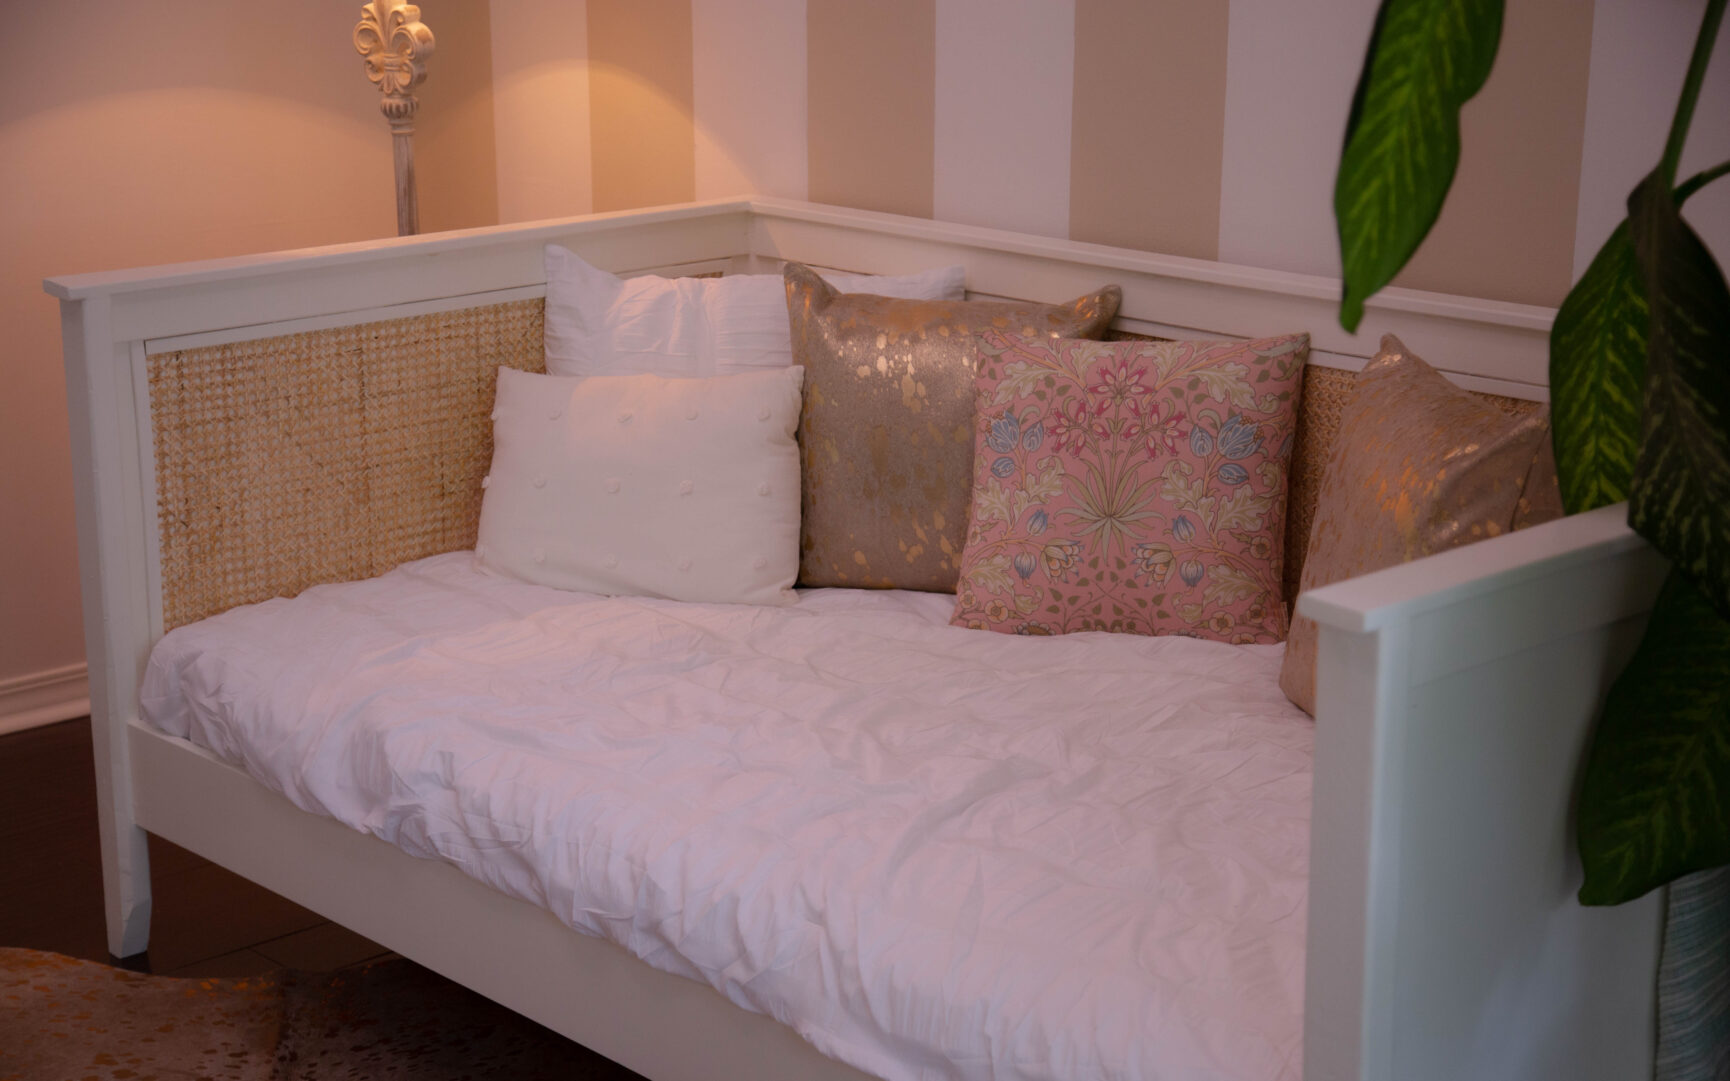
Of course, the custom day bed fits in perfectly with that scheme. It’s simple, comfortable, and complements the striped wall behind it. The dresser-turned-bar adds a pop of color to the room and pays homage to Robin’s mother while it serves a very practical purpose.
Other Tips From This Episode
Products Featured in This Episode
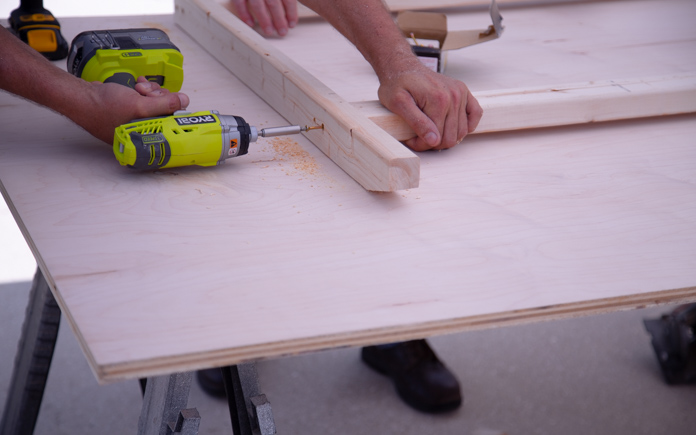
Materials for Day Bed
This page contains affiliate links. If you purchase a product from these links, we will earn a small commission at no additional cost to you.