There are moments in life when you suddenly feel like a real adult. Like when you buy your first car, or take that car for its first oil change. When you open a savings account, or purchase your first washer and dryer. Or like when you finally learn how to fold a fitted sheet properly.
.tasty-pins-banner-container{display:block;margin-bottom:20px;position:relative;width:-moz-fit-content;width:fit-content}.tasty-pins-banner-container a{cursor:pointer;display:flex;font-size:14px;font-weight:700;letter-spacing:1px;line-height:1.8em;text-transform:uppercase}.tasty-pins-banner-container a:hover{opacity:1}.tasty-pins-banner-container .tasty-pins-banner{align-items:center;bottom:0;cursor:pointer;display:flex;justify-content:center;left:0;padding-bottom:1em;padding-top:1em;position:absolute;right:0}.tasty-pins-banner-container .tasty-pins-banner svg{margin-right:4px;width:32px}.tasty-pins-banner-container .tasty-pins-banner span{margin-top:4px}.tasty-pins-banner-container a.tasty-pins-banner{text-decoration:none}.tasty-pins-banner-container a.tasty-pins-banner:hover{opacity:.8}.tasty-pins-banner-container a.tasty-pins-banner-image-link{flex-direction:column}.tasty-pins-banner-container a img{margin-bottom:0}.entry-content .wp-block-image .tasty-pins-banner-container img{margin-bottom:0;padding-bottom:0}#et-boc .et-l div .et_pb_image_wrap .tasty-pins-banner-container .tasty-pins-banner{padding-bottom:1em!important;padding-top:1em;text-decoration:none}#et-boc .et-l div .et_pb_image_wrap .tasty-pins-banner-container a.tasty-pins-banner{cursor:pointer;display:flex;font-size:14px;font-weight:700;line-height:1.8em;text-transform:uppercase}#et-boc .et-l div .et_pb_image_wrap .tasty-pins-banner-container a.tasty-pins-banner span{letter-spacing:2px;margin-top:4px}.et-db #et-boc .et-l .et_pb_module .tasty-pins-banner-container a:not(.wc-forward){padding-bottom:0}Share this life hack on Pinterest!
Once you learn the easiest way to fold a fitted sheet, your linen closets will never be the same.
The best part? This technique becomes second nature after just a few tries and only has a few easy steps. Let me walk you through exactly how to fold fitted sheets so they look as neat as your flat sheets.
Why Folding Fitted Sheets Feels Impossible
If you’ve ever wrestled with a fitted sheet and given up in frustration, you’re not alone. There’s a very real reason why folding fitted sheets feels so much harder than folding regular sheets, those elastic corners.
The stretchy edges and rounded corners that make fitted sheets hug your mattress perfectly are the same features that make traditional folding techniques completely useless.
You can’t simply fold a fitted sheet in half like you would a flat sheet because those elastic edges create bulk and rounded shapes that refuse to cooperate.
Most people resort to balling up their fitted sheets and shoving them in the linen closet and leaving the closet an absolute mess.
It’s not laziness. It’s just that no one ever showed us an actual method that works. The elastic creates resistance, the corners bunch up and creases awkwardly, and before you know it, you’ve got what looks like a fabric burrito instead of a neatly folded sheet.
But here’s the good news: there’s a specific corner-tucking technique that makes folding fitted sheets genuinely easy.
Once you understand how to nest the corners properly, the process takes less than two minutes. The trick is working with the elastic corners instead of fighting against them.
What You Need to Fold a Fitted Sheet
One of the best things about this method is how simple it is. You don’t need any special tools or equipment, just:
A clean, dry fitted sheet
Your hands
A flat surface (optional but helpful for the final folds)
That’s it!
No clips, no fancy folding boards, nothing to buy. You can fold a fitted sheet standing up, sitting on your bed, at a table, or wherever feels most comfortable. The whole process takes just two to three minutes once you know the technique.
I recommend starting on a bed or large table for your first few attempts. Having that flat surface nearby makes it easier to lay the sheet down for the final folds. But honestly, once you’ve practiced a few times, you can do this anywhere.
The Easiest Method: How to Fold Fitted Sheets Step-by-Step
Ready to master this life-changing skill? I’m breaking down the easiest way to fold a fitted sheet into clear, manageable steps. Follow along with the video below, or use these written instructions—whichever works best for you!
Getting Your Starting Position
Start by holding your fitted sheet lengthwise—meaning the longer sides are stretched between your hands. Face toward a bed or table where you’ll eventually lay the sheet flat.
Place your hands inside the two top corners of the sheet with the elasticized edges facing you. The seams should be facing outward. This starting position is crucial because it sets you up for the corner-tucking magic that follows.
The First Corner Tuck
Now comes the key move that makes everything else work. While holding both top corners, bring your right hand over to meet your left hand. Tuck the right corner over and into the left corner. The elastic edges should now sit together neatly.
You’ll now have two corners resting on your left hand. Don’t worry if it feels a bit awkward at first—this is the trickiest part, and it gets easier with practice. Make sure those corners are properly nested together before moving on.
Finding the Bottom Corners
With the top two corners secured on your left hand, use your right hand to reach down and locate the two bottom corners of the sheet. Keep the top corners steady in your left hand as you work.
The fitted sheet will be hanging down, and you’re looking for where the elastic edges meet at the bottom two corners. These are easier to find if you gently shake the sheet to let them fall naturally.
Bringing All Corners Together
This is where it all comes together—literally! Bring the bottom right corner up to meet the top corners in your left hand. Tuck it into the other corners so all three are nested together.
Repeat this with the bottom left corner. Now, all four corners are tucked into one hand, and you should be holding what looks like a roughly rectangular piece of fabric with elastic edges, all nestled on one side.
Smoothing and Shaping
Give the sheet a gentle shake to release any bunched-up fabric. Smooth the material with your free hand, encouraging it to form a rectangular shape. The elastic edges should all be together on one side, and the rest of the sheet should hang fairly straight.
This shake-and-smooth step is more important than it seems. Taking a moment here to work out the wrinkles and get a nice shape makes the final folding much easier.
The Final Folds
Lay your sheet on your flat surface with the elastic edges facing the same direction. Smooth it out into the neatest rectangle you can manage. The elastic corners will create a bit of bulk on one end—that’s totally normal and fine.
Fold the sheet in thirds lengthwise to create a long, narrow rectangle. Then fold it in thirds or in half widthwise, depending on your storage space. You can adjust these final folds based on the size of your linen closet shelves.
The result? A neat, flat rectangle that looks like you actually know what you’re doing with laundry! Sure, it might not be quite as crisp as a flat sheet, but it’s a million times better than the crumpled ball you started with.
Pro Tips for Perfect Fitted Sheet Folding
Once you’ve got the basic technique down, these tips will help you fold fitted sheets even more efficiently and neatly.
Start with the long side. Holding the sheet lengthwise creates better balance and makes it easier to control as you’re tucking corners. If you start with the short side, the sheet feels heavier and more awkward to manipulate.
Use a flat surface for the final folds. While you can do the corner-tucking while standing, having a bed or table to lay the sheet on for those final folds creates much crisper, cleaner results. The difference is noticeable in how your sheets look in the closet.
Practice makes perfect. Your first attempt might feel clumsy, and that’s completely normal. By the third or fourth time, though, your hands will remember the movements and it’ll start feeling natural. I promise it clicks faster than you’d expect!
Smooth as you go. Don’t wait until the end to deal with wrinkles and bunched fabric. A quick smoothing motion after each corner tuck keeps everything neat and makes the final result much better.
The corners are everything. Getting all four corners properly nested together is what creates that neat rectangular shape. If your sheet doesn’t look right at the end, it’s usually because one corner didn’t get fully tucked in with the others. Don’t rush this part!
Match your sheet size to your folding style. King and queen fitted sheets are easier to fold on a bed, while twin sheets work fine folded at a table or even standing up. Adjust your approach based on what you’re working with.
What to Do If It’s Not Perfect
Let’s be real—your first folded fitted sheet probably won’t look Instagram-worthy, and that’s okay! Even an imperfect fold is dramatically better than the ball-of-fabric situation you had before.
The corners might stick out slightly, creating little lumps on one end of your folded sheet. This is normal because that’s where all the elastic is gathered. As long as your sheet is generally rectangular and reasonably flat, you’re doing great.
If your sheet is wrinkled, give it a quick smooth with your hands before the final folds. Or better yet, fold your sheets right out of the dryer when they’re still slightly warm—the heat helps them smooth out naturally.
If your first attempt looks terrible, just unfold it and try again! The beauty of this skill is that there’s no penalty for practice. Each time you do it, you’ll understand the technique a little better.
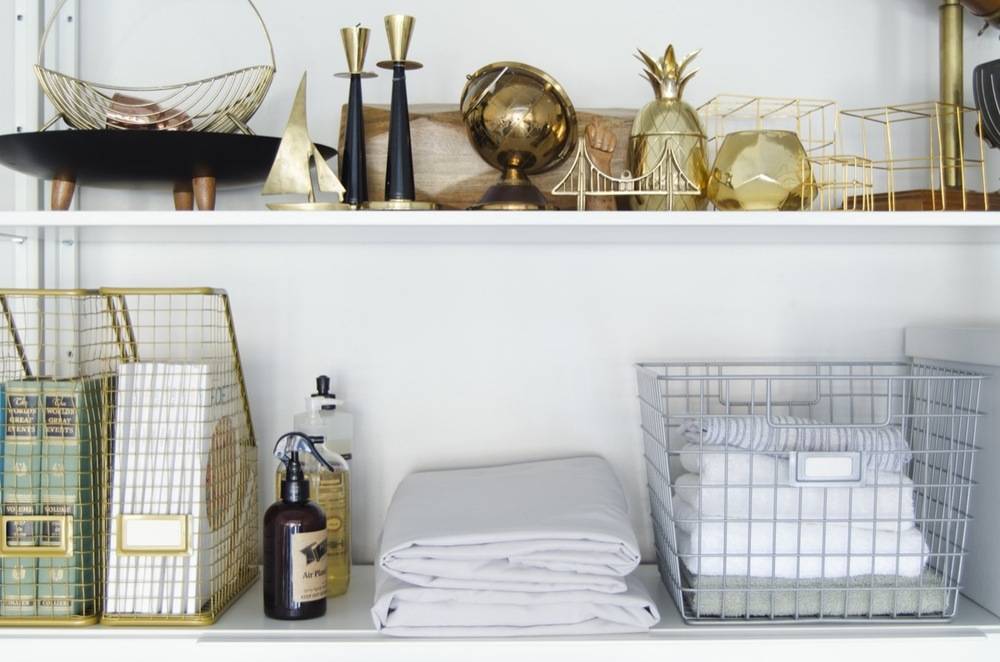
How to Store Your Beautifully Folded Fitted Sheets
Now that you can fold fitted sheets like a pro, let’s talk about how to store them so your linen closet stays organized and your sheets stay neat.
The game-changing trick? Store complete sheet sets together. Fold your fitted sheet, flat sheet, and pillowcases to similar sizes, then tuck everything inside one of the pillowcases. This creates a neat “bundle” that keeps sets together and makes it easy to grab what you need without disturbing other sheets.
Stack sheets by bed size on your linen closet shelves. Keep all your twin sheets together, all your queen sheets together, and so on. If you have multiple sets for each bed, rotate them to distribute wear evenly.
Consider using shelf dividers if you have lots of sheet sets. This prevents stacks from toppling and makes it easy to pull out a set without disturbing others. You can find simple wire dividers at any home store, or even use tension rods installed vertically.
Label your shelves if you have sheets for multiple beds in your home. A simple label like “Master Bed – Queen” or “Guest Room – Full” saves time when you’re making beds and ensures sheets end up back in the right spot.
Vertical storage can work well too, especially if you have deep shelves. Stand your folded sheet bundles on end like books. This makes it easy to see all your options at once and grab what you need without unstacking.
With properly folded fitted sheets, you’ll be amazed at how much more space you have in your linen closet. No more shoving crumpled sheets into overstuffed shelves!
Common Mistakes to Avoid When Folding Fitted Sheets
Even with the best instructions, there are a few common pitfalls that can trip you up. Here’s what to watch out for and how to fix these issues.
Trying to fold it like a flat sheet is the number one mistake. The elastic corners make this impossible, so you have to use the corner-tucking method. If you catch yourself attempting traditional folds, stop and start over with the proper technique.
Not getting all four corners together properly will leave you with a lumpy, misshapen result. Take your time with each corner tuck, making sure they’re fully nested before moving to the next one. This is the foundation of the whole method.
Rushing through the corner-tucking steps leads to corners that aren’t secure and sheets that unfold themselves. Slow down, especially while you’re learning. Speed comes naturally once you’ve mastered the technique.
Folding on a lumpy surface makes it hard to get clean, crisp final folds. Your bed can work, but make sure there aren’t any blankets or pillows creating bumps underneath. A clear table or dresser top is ideal.
Folding sheets when they’re slightly damp creates wrinkles and can even lead to mildew if they’re stored before fully drying. Always make sure your fitted sheets are completely dry before folding and storing them.
You’ve Got This!
Learning how to fold fitted sheets properly is one of those life skills that seems impossible until someone shows you the trick. Then suddenly, it’s so simple you wonder why it ever seemed hard! The corner-tucking method works because it embraces what makes fitted sheets unique—those elastic corners—rather than fighting against them.
After your first few attempts, this technique will become second nature. You won’t have to think through each step; your hands will just know what to do. And the payoff is worth it: an organized linen closet with neat stacks of sheets, more storage space, and the satisfying feeling of having conquered the fitted sheet challenge.
Remember, perfection isn’t the goal—progress is. Even if your folded fitted sheet isn’t magazine-worthy, it’s infinitely better than a crumpled ball shoved in the back of the closet. Give yourself grace during the learning process, and celebrate the fact that you now have this skill in your life-management toolkit.
Have you tried the corner-tucking method? What tips would you add for fellow fitted-sheet folders? Share your experiences in the comments below—we’d love to hear your success stories or any questions you have!
We independently select these products—if you buy from one of our links, we may earn a commission. All prices were accurate at the time of publishing.
Fireplaces, thanks to their dreamy mantels, are one of the most sought-after home features — especially around the holiday season. That area essentially becomes the heart or focal point of your Christmas decor, as it’s where stockings are hung and family gathers. However, if you’re justdecorating the actual mantel and not the space around it, then you’re really missing out on a dramatic decor moment.
Carrie Miller from @acarriedaffairdesigns wanted a Christmas aesthetic that’s “classy with elegance, but nostalgic.” And to Miller, that means going back to basics with garlands, tinsel, and pops of red. In the living room, Miller gave the mantel the Christmas treatment, but also carried the decor to the ceiling, which really transformed the entire room.
“This is hands-down my favorite Christmas look I’ve ever done,” Miller wrote in an Instagram caption. “I thought last year would be impossible to top, but I did it! And we don’t even have the tree yet.”
How to Make Your Mantel Pop This Christmas
Miller’s fireplace is set along a wall of bookshelves, so there’s a perfect alcove to hang garland above the mantel. But you can easily re-create this setup with a bump-out fireplace, or if your fireplace is set into a flat wall.
“I started with adding garland to the top of the bookshelves, and then of course, added some red garland,” Miller said in the video. Miller draped a swag of faux greenery above the mantel and then layered a red ornament garland and a handmade red paper chain garland in front of it. Then, Miller carried the paper chain into the center of the room, where a wreath was hung like a pendant light.
“And then I wanted to do something even more crazy and put a wreath in the center of our living room because we don’t have lighting,” Miller continued. “I added different sizes of red ornaments and used ribbon like streamers and topped it with some poinsettias and red holly stems.”
Of course, Miller’s actual mantel gets the Christmas treatment, too, with some faux pine stems, large red ornaments, and red velvet bows tied to the candlesticks. But it’s really all about what’s happening up above.
Think outside the box when decorating your mantel this Christmas, and you might end up with the most whimsical, nostalgic, and perfectly over-the-top decor ever!
In my role at Apartment Therapy, I’m most passionate about making my home look beautiful and organized and helping our readers do the same — often at a discount. Although I cover my fair share of newsy pieces, my work focuses on long-form service articles that help our audience…read more
Kelly Dawson is a writer, editor, and media consultant. Her writing has appeared in almost every major American design publication, most notably as a longtime contributor to Architectural Digest and Dwell, and she’s also been published in places like The New York Times, AFAR,…read more
I recently read that Ina Garten likes to give “disappearing gifts.” By this, she means consumable gifts that don’t take up room in the recipient’s home (maybe just some room in their stomachs). She noted that material gifts often come with an unintentional burden on the recipient to find space to use, store, or display an item. The easiest way avoid that? Give someone something that isn’t a permanent thing at all! Here are 30 ideas for gifts that won’t take up any space at all – from experiences and edible delights, to subscriptions or charitable ideas packed with meaning. Also, if you’re running late on gift planning, so many of these would be ready right on time for the holidays!
We’re definitely not against physical gifts – we’re giving several this year! But since downsizing to a smaller home, we think about the whole “where will this thing live in our house” more often than we did in a larger house. And I think that thought process has shaped us to become more intentional about what we bring into our home… and what we give others. Thankfully, there are plenty of intangible gifts that are just as fun, unique, and thoughtful as physical ones… maybe even more so!
30 Gifts That Don’t Take Up Space
Feel free to think of this generalized list below as a jumping-off point. We’ll include more specific examples in other sections, but sometimes just seeing the outlined categories below can get your wheels turning. You might even say they help you think outside of the box (I’m sorry, that was almost *too punny* – and I don’t say that often). The majority of non-physical gifts fall into these five buckets:
Food & Drink
Experiences
Services
Subscriptions & Memberships
Charitable Donations
Food & Drink Gift Ideas
Yes, food and drinks are technically physical items, but the point is that once they’re consumed, they disappear! Plus, these are great options because it’s hard to fail (everybody eats!) and easy to be unique and thoughtful.
1. Prepared Food
Anything from gift baskets (wine, cheese, fruit) to treats (donuts, chocolate) to full meals is on the table (I’m sorry, yet another pun). Send a favorite item of yours, or a new spin on something that your recipient already loves.
Turn a culinary gift into an experience by sending a cooking or baking kit. This is especially great for kids or families who love to do that sort of activity together. You can even bring it over and make it with them.
Give someone a tried-and-true favorite or fun new flavor of wine, coffee, tea, beer, or soda. You can really adjust these to your budget, making them great for stocking stuffers, host gifts, neighbor treats, and more.
This could be a simple gift card or date night to a favorite restaurant (or a new one to try), but could also mean calling around to see if there are special chef tastings or events available.
6. Fast Food & Delivery
Think gift cards to a favorite drive-thru or fast casual place (believe it or not, we know someone who loves a Culver’s gift card more than anything else) – or even a gift card to Door Dash, Instacart, or some other food delivery service. You can also use one of those to order something fresh that shows up at your recipient’s door.
7. Meal Kit Subscriptions
Did you know most meal kit delivery services like Hello Fresh and Green Chef offer gift cards? These are great to help an existing customer extend their subscription or give someone new a chance to try them out.
Experience Gift Ideas
After consumables, experiential gifts are probably the most popular form of non-material gifts. While these might be hard to “package” or “unwrap,” we love them because they create opportunities for rest, adventure, learning, and quality time.
8. Event Tickets
Think concerts, plays, and sporting events… or even just the local movie theater. Many of these might be a splurge, but services like Ticketmaster and Live Nation offer gift cards. Every year we do a big group gift to John’s mom for the Broadway tour that comes through her town.
9. Pampering
Book an appointment or get a gift card for a local spa or salon (services like massages, hair styling, or manicures can be so enjoyable – you know which friends and family members love these). Also consider in-home services for an out-of-the-ordinary treat.
10. Tours
Book a guided tour, like a sightseeing tour, walking historical tours, food tours, ghost tours, etc. You can book these either in your recipient’s own town (many of us never do these “touristy” things where we live) or in a town that you know the recipient is traveling to soon. We gave John’s parents a gift card for a local food tour last year and they loved it! Check out sites like Eventbrite, TripAdvisor, or Airbnb Experiences for ideas & bookings.
11. Classes
Cooking, dancing, crafting, or even learning an instrument – these can be great gifts for someone who enjoys any of those hobbies or passions. These could be a one-off event (like a ceramics lesson or candle-making class) or a recurring occasion (like a series of painting classes). If there’s nothing in person in your area, consider a site like Outschool (for kids) or Masterclass (for adults).
12. Adventures
Are there rentals for bikes, boats, ATVs, jet skis, snowmobiles, or kayaks that could make for a fun, physical outing that your recipient may not think to try on their own? Book an appointment, get a gift card, or write a coupon for a future excursion together.
13. Fitness
Get a gift card for a local spin, yoga, or pilates studio – maybe a place they go regularly, or a spot they might have fun trying out. You could also book an appointment with a personal trainer or other fitness expert if you think they’d enjoy that or have mentioned wanting to try it.
14. Time Together
It sounds cheesy, but people always enjoy quality time with loved ones. So planning an outing, event, or activity with your recipient could be as simple as bingeing a show at your home or theirs (gather all of their favorite snacks). You can even plan a weekend getaway to a local hotel or nearby town you think would be fun to explore.
Service Gift Ideas
Similar to experiences, think about services you could give (via gift card, booking appointments, or do-it-yourself!) that might be a treat for your recipient. These can really alleviate stress in someone’s life (especially if they’re a busy parent to young kids or an aging homeowner). They might seem like a weird choice, but it can really relieve a burden for someone you love, and help them finally get that nagging thing done.
15. Car Wash or Detailing
Lots of car wash companies offer gift cards or membership packages, or you could book an at-home detailing for a special service that requires no work on the recipient’s part.
16. House or Yard Cleaning
Book an appointment with a house cleaner or landscape company to tidy up the home, mow the grass, or cross off an annoying chore like blowing leaves, mulching in the spring, or even hanging lights around the holidays!
17. Photo Session
Hire a photographer to take family photos, headshots, or even photos of your recipient’s home design projects. You can also do one of those retro photo sessions at a department store with your family or give that to someone you love! Ten points if they’re people who will do something amazing like matching cat sweaters.
18. Consultations
Would your recipient enjoy one-on-one time with an expert like a personal stylist or color consultant. I loved having “my colors done” by Created Colorful (I yapped about them enough that they gave me a coupon code, which is YHL20 to get $20 off a color consult). Or maybe you know someone who would love a virtual design or front landscaping plan? Heck, you could even get a psychic or tarot card reading if they’d be into it! I would LOVE receiving that.
19. Babysitting
Whether you’re offering to do it yourself or hire someone, giving someone a day or evening off to spend however they like is such a great and thoughtful gift. Sites like Care.com even offer gift cards!
Subscription Gift Ideas
We’ve already talked about meal kit services, but there are plenty of other subscriptions and memberships that will stretch your gift for days, months, or even the whole year!
20. Museum & Park Memberships
This is a favorite in our extended family. We’ve given memberships to tons of different museums (art, history, science, children’s) and park systems (state parks, national parks, etc) over the years. This is a great way to support a local spot that offers so much value (rehabilitating animals, preserving nature, etc) too!
21. Entertainment Subscriptions
Think about a TV, gaming, or music service that someone already enjoys or might want to try (Apple TV, Spotify, Minecraft, etc). These days you can often pick up physical gift cards that can go toward starting, extending, or upgrading someone’s digital subscription.
22. Reading Subscriptions
We love to give someone a subsciption to a newspaper, magazine, news app, e-book service (like Kindle), or even a favorite creator’s Substack. John took forever to upgrade to the paid New York Times Games and now he’s obsessed with it. Just think if someone had gifted it to him sooner!
23. Paid App Services
Again, in a similar vein, think about popular paid apps like Duolingo (language learning), Strava (exercise tracking), or Calm (meditation).
Charitable Gift Ideas
Donating to a charity that reflects your recipient’s passions or interests can be an incredibly thoughtful gift. For instance, we often find a local animal shelter or rescue organization for a cat-loving family member. But here are some more specific examples:
24. Charitable Gift Cards
Sites like TisBest and CharityOnTop let you purchase a gift card and then your recipient chooses the charity they want to support with it. These could even make great stocking stuffers!
25. Symbolic Animal Adoption
If you want a donation that comes with some physical representation of your gift, try the WWF (where you can purchase a matching stuffed animal) or Fahlo that includes a bracelet and app to track your adopted creature.
26. Volunteer
Give the “gift of time,” specifically yours, spent supporting a cause important to your recipient. Maybe even invite them to join you! This could be at an animal shelter, food bank, senior living facility, or even a walk or 5K benefiting a cause close to their heart.
Other Non-Physical Gift Ideas
To round out our list, here are a final handful of ideas that didn’t fit as nicely into a category above. Some weird, some sentimental, all without that “burden of space.”
27. Celebrity Cameo
Cameo is a website where you can order personalized video greetings from celebrities, creators, comedians, athletes, and more. For example, John once got me a birthday greeting from Real Housewife Countess LuAnn (for $40 ages ago!) and we still talk about it. There was singing and a reference to her falling into a bush. There are a surprising number of celebs on it now!
28. Storyworth
We’ve gifted Storyworth subscriptions a couple of times over the years and it has always been a special & memorable gift. It sends the recipient weekly email prompts like “What was your first job?” and “How did you meet your spouse?” So by the end of the year, you’ve helped capture their life story. You can even order a printed book with photos when you’re done! This is a great gift for grandparents!
29. Digitizing Old Photos & Videos
Speaking of memories, you can help someone declutter their old photo albums of VHS videos by purchasing a digitization gift set from a site like LegacyBox or iMemories. This is one of those things many of us need nudging to get done. In fact, we’re hoping to complete this in 2026!
30. Gas, Grocery, or Phone Gift Cards
Helping cover essential living expenses might be just the gift someone needs this holiday season. Maybe it alleviates stress in their life or frees up some funds for them to treat themselves to something special.
31. Thoughtful Letters
Take time to write a substantive note to someone. Or get your whole family to write a collection of them for a grandparent, teacher, etc. Tell them what you admire about them, how they’ve impacted your year or life, or recount an important memory of the two of you together.
Need More Gift Ideas?
And of course, if you want some additional gift suggestions, here are a few posts that will help you out:
*This post contains affiliate links, so we may earn a small commission when you make a purchase through links on our site at no additional cost to you.