Wainscoting is a beautiful and classic addition to any home architecture. This design style includes adding wood panels, chair railing (framing), or decorative moldings to the lower half of the walls. Used to make a space feel enchanting, it’s also practical because it protects the walls from everyday wear and tear.
Whether you are remodeling a traditional, modern, or eclectic home, wainscoting is a versatile way to add character and charm to your living room, bedroom, and more.
Check out our list of 21 wainscoting ideas, each with unique tips on how wainscoting can take your interior design game to a whole new level.
1. Keep it Classic
The classic raised panel look of traditional wainscoting is all about a timeless look.
The design includes raised panels, creating an aura of elegance. It’s a perfect choice for formal dining rooms and living spaces and can even serve as a beautiful feature of your entryway.
You can select from different panel profiles to match your own home’s overall style.
.tasty-pins-banner-container{display:block;margin-bottom:20px;position:relative;width:-moz-fit-content;width:fit-content}.tasty-pins-banner-container a{cursor:pointer;display:flex;font-size:14px;font-weight:700;letter-spacing:1px;line-height:1.8em;text-transform:uppercase}.tasty-pins-banner-container a:hover{opacity:1}.tasty-pins-banner-container .tasty-pins-banner{align-items:center;bottom:0;cursor:pointer;display:flex;justify-content:center;left:0;padding-bottom:1em;padding-top:1em;position:absolute;right:0}.tasty-pins-banner-container .tasty-pins-banner svg{margin-right:4px;width:32px}.tasty-pins-banner-container .tasty-pins-banner span{margin-top:4px}.tasty-pins-banner-container a.tasty-pins-banner{text-decoration:none}.tasty-pins-banner-container a.tasty-pins-banner:hover{opacity:.8}.tasty-pins-banner-container a.tasty-pins-banner-image-link{flex-direction:column}.tasty-pins-banner-container a img{margin-bottom:0}.entry-content .wp-block-image .tasty-pins-banner-container img{margin-bottom:0;padding-bottom:0}#et-boc .et-l div .et_pb_image_wrap .tasty-pins-banner-container .tasty-pins-banner{padding-bottom:1em!important;padding-top:1em;text-decoration:none}#et-boc .et-l div .et_pb_image_wrap .tasty-pins-banner-container a.tasty-pins-banner{cursor:pointer;display:flex;font-size:14px;font-weight:700;line-height:1.8em;text-transform:uppercase}#et-boc .et-l div .et_pb_image_wrap .tasty-pins-banner-container a.tasty-pins-banner span{letter-spacing:2px;margin-top:4px}.et-db #et-boc .et-l .et_pb_module .tasty-pins-banner-container a:not(.wc-forward){padding-bottom:0}Image by Yorkshirehousebuild
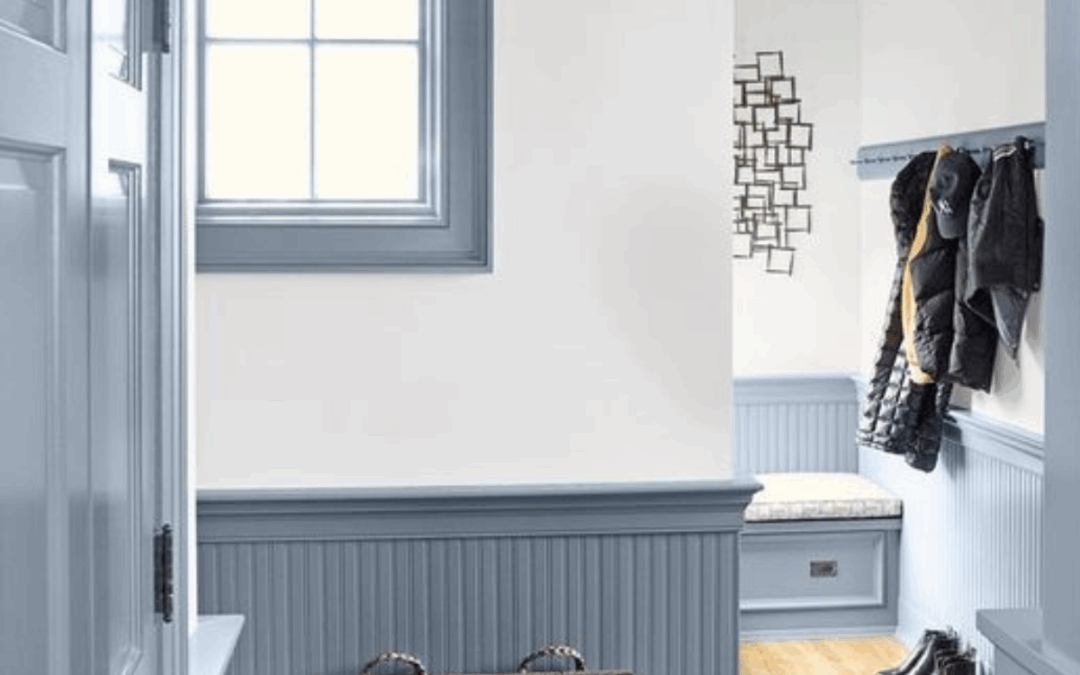
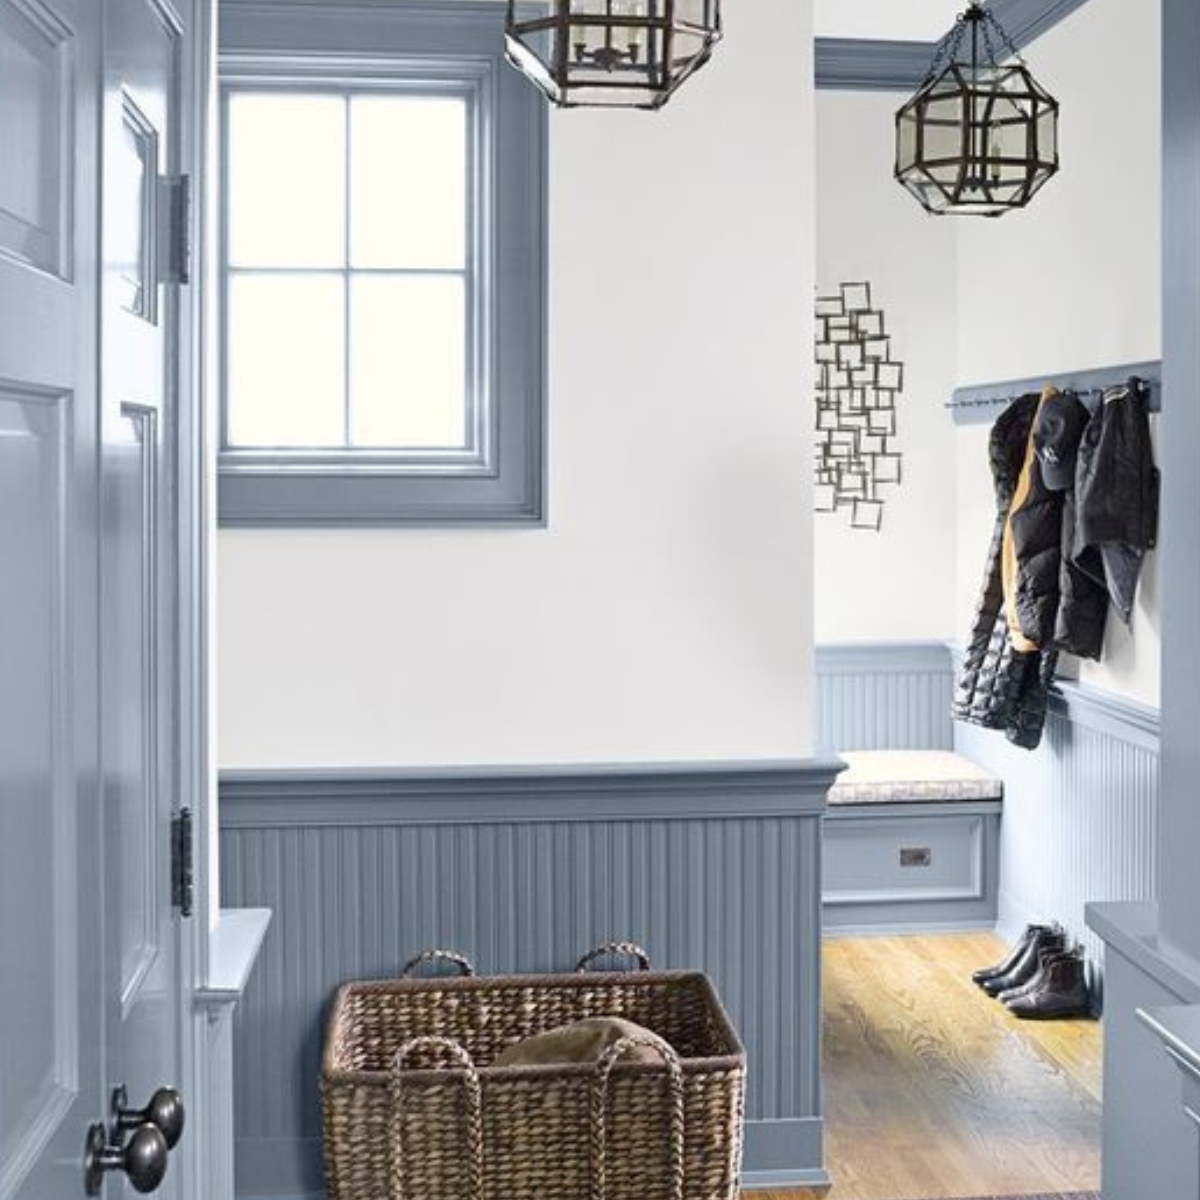
2. Try beadboard
Beadboard wainscoting gives off a relaxed, cottage-style feel. Forming narrow vertical planks with beading in between, it’s ideal for coastal, rustic, or country-themed interiors.
Beadboard wainscoting is often chosen for kitchens, bathrooms, and bedrooms, creating a warm and charming energy.
3. Layer on board and batten
The board and batten wainscoting design is a rustic and straightforward choice. It features wide vertical boards interwoven with thin battens (a strip of solid wood).
Complimenting farmhouse, country, or shabby-chic aesthetics, this design can be painted in various colors to align with your decor.
4. Picture It
Picture frame molding adds an artsy touch by creating a series of rectangular frames on your walls. You can adjust frame size and spacing, making it a great choice for your entryway or hallways.
The frames can be highlighted with opposite colors to add depth and personality to your space.
5. Grab some shiplap
Shiplap wainscoting has grown in popularity in recent years because it gives off a rustic, cozy feel. It is often used to create an accent wall or infuse a cottage-inspired vibe.
Featuring horizontal wooden planks with slight gaps in between, its versatility makes it a suitable choice for both traditional and modern homes.
6. Go modern
For a clean and contemporary look, modern flat panel wainscoting is a go-to option. This design features smooth, unadorned panels, creating a sleek, minimalistic aesthetic.
This one is for you if you live in an urban apartment or a modern home and its simplicity allows it to adapt to various interior styles.
7. Add some dimension
Recessed panel wainscoting adds depth and dimension to your walls.
Achieved by installing panels that are set back within a frame, it creates a three-dimensional effect that’s well-suited for formal dining rooms, libraries, and offices.
8. DIY
If you’re on a budget or feeling up to a do-it-yourself project, faux wainscoting can provide the illusion of wainscoting using trim pieces.
This technique adds visual interest to your walls while keeping costs in check.
While it may not offer the same level of wall protection, installation might be easier, and it’s a creative way to enhance your home’s aesthetics.
9. So french
French boiserie can make any room feel luxurious with intricate, ornate details.
This style includes richly carved woodwork, gilded accents, and elaborate decorations, making it a perfect choice for elegant living rooms and dining spaces.
It also adds a touch of opulence and historical charm to any room.
10. Shelves, shelves, shelves
Combine function and style by adding shelves to your wainscoting design.
This feature is especially useful in kitchens, home offices, or family rooms, as it provides storage and display space while adding a custom touch to your walls.
Shelves can be changed to meet your specific needs, thus adding an element of personalization to your space.
11. Two-tone is better than one
Two-tone wainscoting adds a beautiful visual while also creating contrast to your interiors.
By painting the upper portion of your wall a different color than the color below, you create a dynamic, dramatic effect.
This method adds depth and personality, making it an ideal choice for rooms in need of a bold and unique touch.
12. Reflections
Mirrored wainscoting is where functionality meets sophistication.
In spaces like powder rooms and entryways, mirrored wainscoting adds an air of elegance and creates an illusion of more significant space by reflecting light. This choice provides both practicality and aesthetic appeal.
Feeling bold?
Try varying wall panel sizes.
13. Go geometric
Want to grab attention?
Try geometric patterns!
Whether your vibe is herringbone, chevron, or hexagonal patterns, it will add a contemporary twist to your home.
Geometric patterns are also great for modern or mid-century styles.
14. Lighten up
Elevate your room’s aura by adding hidden LED lighting to your wainscoting.
This subtle and modern touch offers a warm glow in your home, perfect for bedrooms, media rooms, and home theaters.
Hidden lights can change the atmosphere and draw attention to your room’s design.
15. Texturize
Want walls you’ll want to touch?
Try textured wainscoting.
Materials like metal or wood can be used to create a dramatic design.
This style is perfect for spaces in need of a layer of depth, such as formal dining rooms or studies. Plus, guests won’t want to keep their hands off these panels.
16. Upholster
Upholstering adds an opulent and cozy feel to your space. It incorporates padded panels covered in fabric or leather, offering both a tactile and inviting experience.
Upholstered wainscoting is a luxurious choice for bedrooms and dining areas, adding a touch of warmth and comfort.
17. Give it a wood finish
If you’re feeling more of a rustic vibe in your home, reclaimed wood is the way.
The character of aged wood, complete with its knots and spots, offers a sense of history and charm. Reclaimed wood wainscoting is ideal for eco-conscious homeowners looking for a sustainable and rustic aesthetic.
18. Add a pop of color
Adding a pop of color to your wainscoting design by using colored panels can inject personality into your space.
In areas like the kitchen, colored panels can be used to add light to an eating area or create an accent wall, adding a focal point to the room’s design.
This choice is expressive and can tie into your overall decor.
19. Take up space
Full wall wainscoting extends from floor to ceiling, making a bold statement.
This design, often picked for grand entryways and formal dining rooms, captures attention and boosts a room’s aesthetics.
In spaces with high ceilings, full wall wainscoting can serve as a gorgeous focal point.
20. Vertical, maybe?
Vertical strips can add height to your walls and make your space feel bigger.
This style is very useful in rooms with low ceilings.
Consider adding mirrors, wallpaper, or even playing with different colors to help maximize the space.
21. Off the rails
Wainscoting with plate rails combines function and form by adding a convenient ledge for displaying decorative plates, art, or collectibles.
This design is well-suited for dining rooms, kitchens, and cozy breakfast nooks, offering storage and a personalized touch.
If you’re looking to update your home or simply add more elegance to a room, wainscoting is a versatile design element that can enhance the beauty and character of your home.
No matter what wainscoting idea you try, it’ll be worth the compliments. Thinking about adding wainscoting to your bathroom? Check out this post, From Chic to Cozy: 25 Bathroom Wainscoting Ideas.
.tasty-pins-banner-container{display:block;margin-bottom:20px;position:relative;width:-moz-fit-content;width:fit-content}.tasty-pins-banner-container a{cursor:pointer;display:flex;font-size:14px;font-weight:700;letter-spacing:1px;line-height:1.8em;text-transform:uppercase}.tasty-pins-banner-container a:hover{opacity:1}.tasty-pins-banner-container .tasty-pins-banner{align-items:center;bottom:0;cursor:pointer;display:flex;justify-content:center;left:0;padding-bottom:1em;padding-top:1em;position:absolute;right:0}.tasty-pins-banner-container .tasty-pins-banner svg{margin-right:4px;width:32px}.tasty-pins-banner-container .tasty-pins-banner span{margin-top:4px}.tasty-pins-banner-container a.tasty-pins-banner{text-decoration:none}.tasty-pins-banner-container a.tasty-pins-banner:hover{opacity:.8}.tasty-pins-banner-container a.tasty-pins-banner-image-link{flex-direction:column}.tasty-pins-banner-container a img{margin-bottom:0}.entry-content .wp-block-image .tasty-pins-banner-container img{margin-bottom:0;padding-bottom:0}#et-boc .et-l div .et_pb_image_wrap .tasty-pins-banner-container .tasty-pins-banner{padding-bottom:1em!important;padding-top:1em;text-decoration:none}#et-boc .et-l div .et_pb_image_wrap .tasty-pins-banner-container a.tasty-pins-banner{cursor:pointer;display:flex;font-size:14px;font-weight:700;line-height:1.8em;text-transform:uppercase}#et-boc .et-l div .et_pb_image_wrap .tasty-pins-banner-container a.tasty-pins-banner span{letter-spacing:2px;margin-top:4px}.et-db #et-boc .et-l .et_pb_module .tasty-pins-banner-container a:not(.wc-forward){padding-bottom:0}
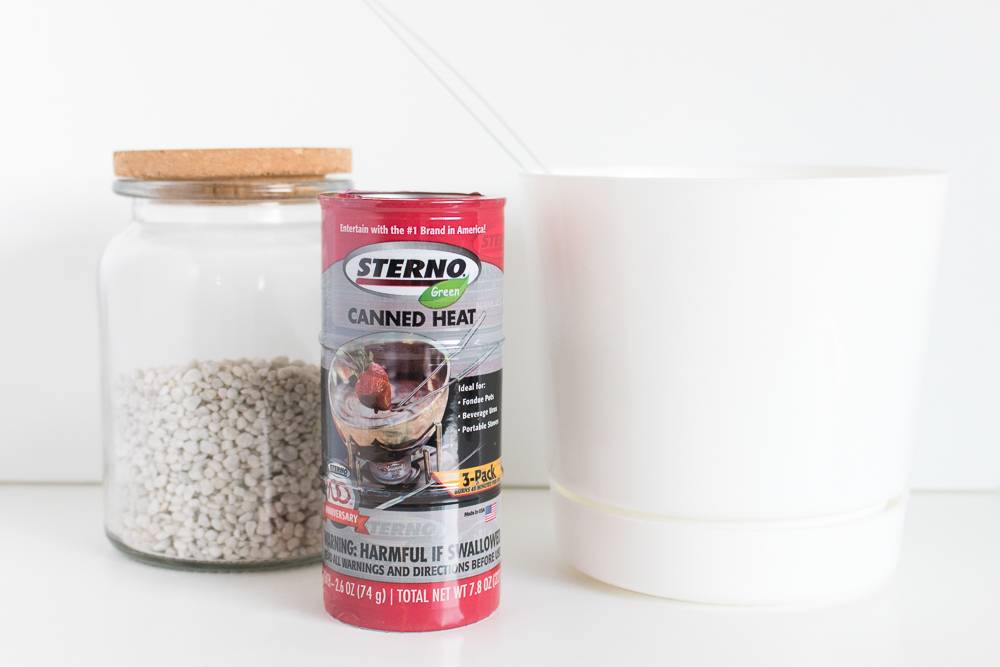
I grew up as a Girl Scout and did my fair share of camping, and the s’mores were always my favorite part. Even as an adult, I would toast s’mores on my gas stove, but sadly my current home has an electric stove, leaving me without a makeshift campire to make s’mores. Rather than letting that stop me, I made this portable s’mores fire pot with Sterno ethanol gel canisters and a planter pot!
This is an incredibly easy project to whip up with a pot and rocks, but it’s the perfect way to enjoy homemade s’mores with the same feeling of a campfire. As long as you burn the gel in a safe environment, it’s completely safe and easy to use. Get ready to make a lot of s’mores!
Materials:
Sterno ethanol gel canisters
Ceramic pot, heat safe
Rocks
Step
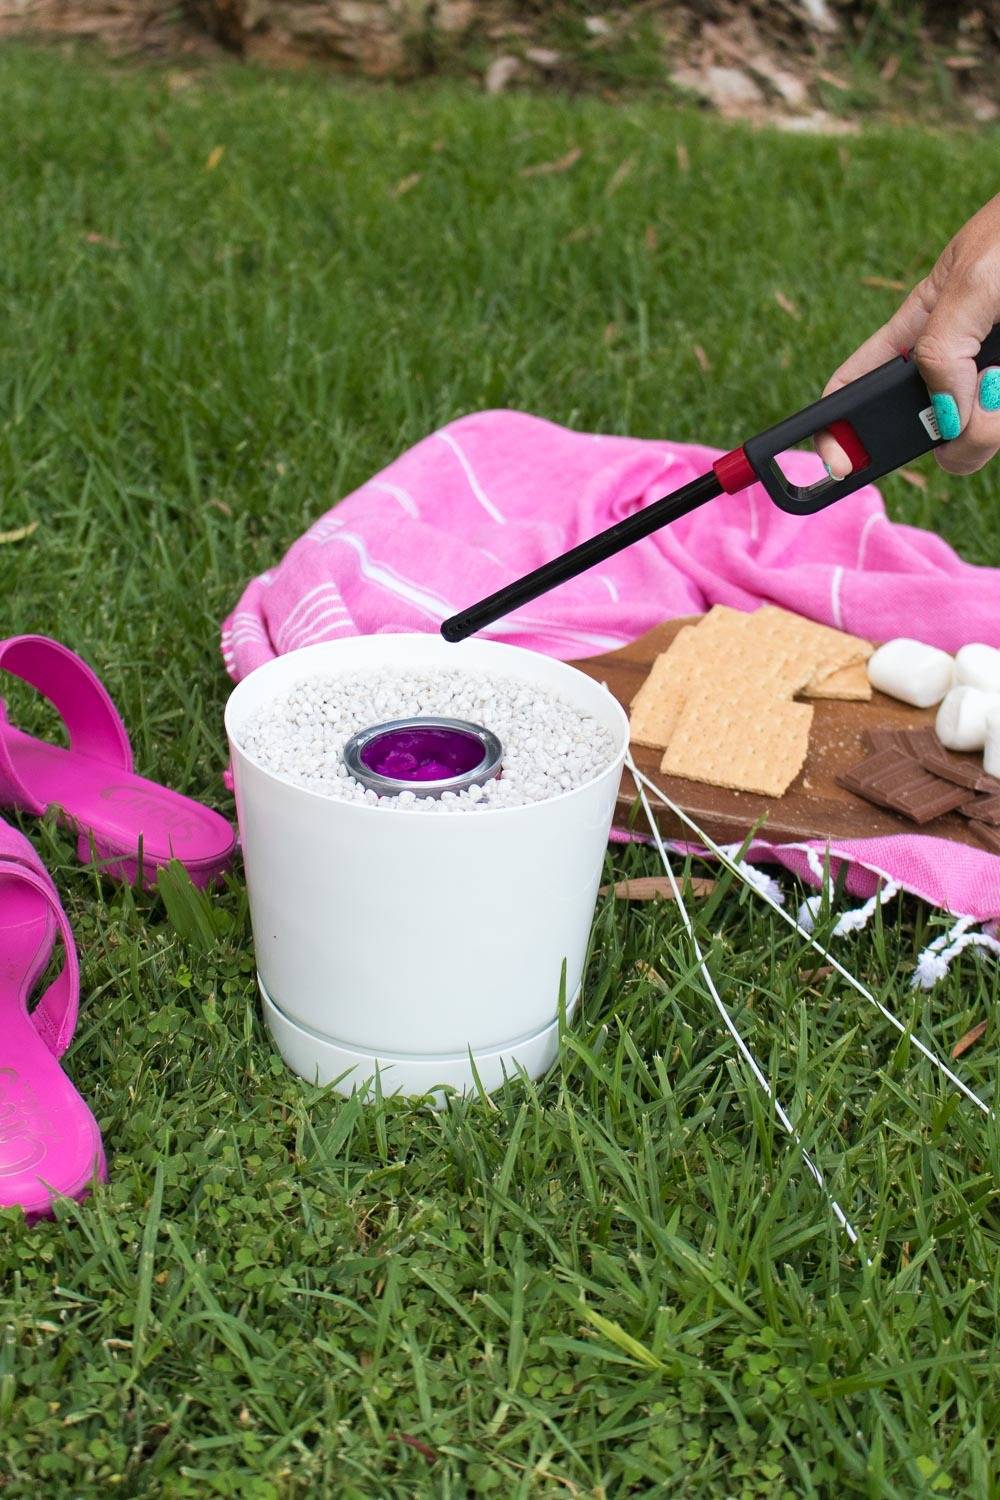
Place any larger rocks at the bottom of the pot. Then add small rocks until it is about 3/4 full.
Step
Carefully insert a Sterno ethanol gel canister into the center of the rocks.
Step
To use, carefully pry off the top of the canister with a screwdriver. Inside is a gel. When ready to toast marshmallows, light the gel with a long-stemmed lighter. The fire may not be easily visible because of the size. Stick marshmallows onto skewers and toast over the open flame just like a regular fire!
Step
To extinguish the flame, carefully place the lid back on top. This suffocates the fire and puts it out almost immediately. Note, Sterno canisters are intended for single-use.
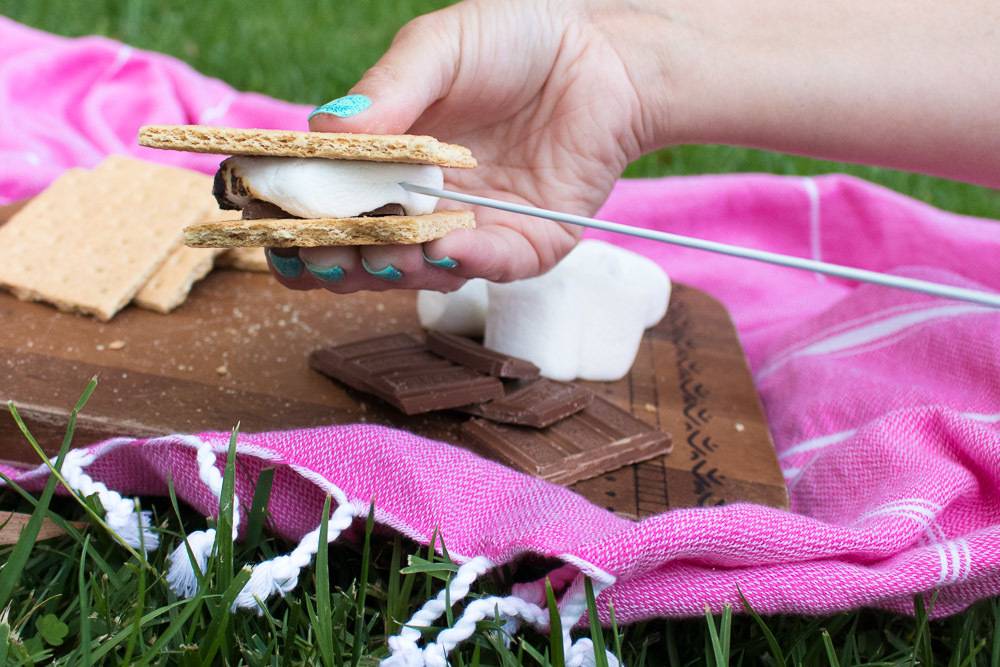
Sandwich the toasted marshmallows between chocolate and graham crackers and you can enjoy the best parts of camping right from your home!
.tasty-pins-banner-container{display:block;margin-bottom:20px;position:relative;width:-moz-fit-content;width:fit-content}.tasty-pins-banner-container a{cursor:pointer;display:flex;font-size:14px;font-weight:700;letter-spacing:1px;line-height:1.8em;text-transform:uppercase}.tasty-pins-banner-container a:hover{opacity:1}.tasty-pins-banner-container .tasty-pins-banner{align-items:center;bottom:0;cursor:pointer;display:flex;justify-content:center;left:0;padding-bottom:1em;padding-top:1em;position:absolute;right:0}.tasty-pins-banner-container .tasty-pins-banner svg{margin-right:4px;width:32px}.tasty-pins-banner-container .tasty-pins-banner span{margin-top:4px}.tasty-pins-banner-container a.tasty-pins-banner{text-decoration:none}.tasty-pins-banner-container a.tasty-pins-banner:hover{opacity:.8}.tasty-pins-banner-container a.tasty-pins-banner-image-link{flex-direction:column}.tasty-pins-banner-container a img{margin-bottom:0}.entry-content .wp-block-image .tasty-pins-banner-container img{margin-bottom:0;padding-bottom:0}#et-boc .et-l div .et_pb_image_wrap .tasty-pins-banner-container .tasty-pins-banner{padding-bottom:1em!important;padding-top:1em;text-decoration:none}#et-boc .et-l div .et_pb_image_wrap .tasty-pins-banner-container a.tasty-pins-banner{cursor:pointer;display:flex;font-size:14px;font-weight:700;line-height:1.8em;text-transform:uppercase}#et-boc .et-l div .et_pb_image_wrap .tasty-pins-banner-container a.tasty-pins-banner span{letter-spacing:2px;margin-top:4px}.et-db #et-boc .et-l .et_pb_module .tasty-pins-banner-container a:not(.wc-forward){padding-bottom:0}Photo: The Crafted Life
If you’ve ever lived in an apartment or a really tiny house, you probably understand the struggle of a tiny outdoor space. Generally, tiny porches are the only type of porches you’ll find with an apartment. While a tiny porch is better than no porch at all, sometimes you have to get creative with the small space you have with small balcony furniture and space saving solutions. Luckily, I’ve rounded up a bunch of ways to make the most of your tiny porch this summer, including DIYs, storage solutions and just plain cute pieces to add to your porch.
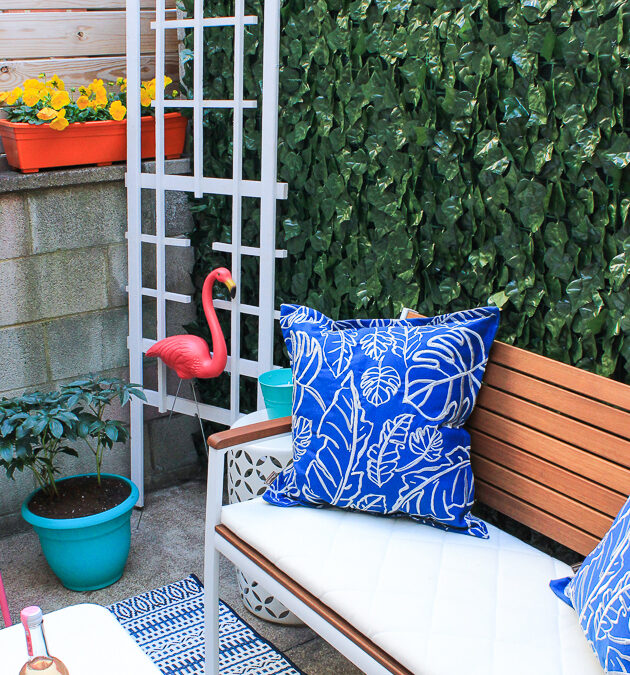
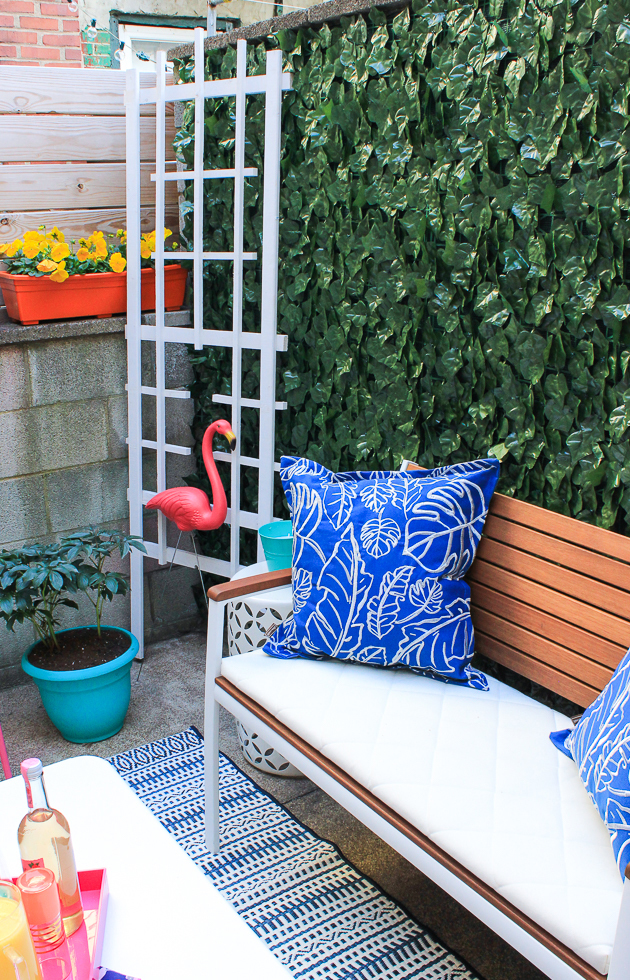
1. First of all, covering up ugly walls with faux ivy will make your porch look like a whole new space and adds lots of pretty green before even adding real plants! Plus, it’s renter friendly and easy to maintain. (above)
2. Build a DIY murphy bar to maximize space on the wall, so it folds down for a table or prep space. You’ll need it for making cocktails on your porch this summer!
3. A half circle table like this one is perfect for creating a small seating table on your tiny porch.
4. Leave space! In a small space, sometimes a bit of modern minimalism is the best way to embrace it. A couple chairs and plants may be all you need.
5. A vertical planter with multiple pots is a great space saver on a tiny porch! Hang it in a corner and you can have multiple pots in a smaller space.
6. Try something daring, like adding a little canopy on your porch and incorporating lots of colorful pieces. Why not?!
7. Decorate your porch with chalk for a non-permanent way to makeover unslightly walls and floors. Although it’s a temporary solution, it can last throughout the summer if you’re in a location that gets little rain.
8. Try incorporating bench seating as a space-saving way to seat multiple people. This way you have less pieces of furniture taking up space but can still seat the same amount of guests!
9. Who says your tiny porch can’t be comfortable? Lots of cushions and a well-placed hammock could create the perfect place to relax this summer.
10. Lights and plants make a HUGE difference in your outdoor space. Hang lights on your porch high enough that they don’t impact your vision, and incorporate plants throughout to make the space more homey. You’ll never know it’s a small space!
Sometimes small changes make a big impact when it comes to your tiny outdoor space. No matter the size or your porch or patio or whether you own or rent, these small porch ideas prove there are inspiring ways to makeover your space this summer (without breaking the bank).
Discover essential tips and techniques to effectively clean and maintain your wood cutting boards, ensuring they stay durable, hygienic, and beautiful for years to come.
.tasty-pins-banner-container{display:block;margin-bottom:20px;position:relative;width:-moz-fit-content;width:fit-content}.tasty-pins-banner-container a{cursor:pointer;display:flex;font-size:14px;font-weight:700;letter-spacing:1px;line-height:1.8em;text-transform:uppercase}.tasty-pins-banner-container a:hover{opacity:1}.tasty-pins-banner-container .tasty-pins-banner{align-items:center;bottom:0;cursor:pointer;display:flex;justify-content:center;left:0;padding-bottom:1em;padding-top:1em;position:absolute;right:0}.tasty-pins-banner-container .tasty-pins-banner svg{margin-right:4px;width:32px}.tasty-pins-banner-container .tasty-pins-banner span{margin-top:4px}.tasty-pins-banner-container a.tasty-pins-banner{text-decoration:none}.tasty-pins-banner-container a.tasty-pins-banner:hover{opacity:.8}.tasty-pins-banner-container a.tasty-pins-banner-image-link{flex-direction:column}.tasty-pins-banner-container a img{margin-bottom:0}.entry-content .wp-block-image .tasty-pins-banner-container img{margin-bottom:0;padding-bottom:0}#et-boc .et-l div .et_pb_image_wrap .tasty-pins-banner-container .tasty-pins-banner{padding-bottom:1em!important;padding-top:1em;text-decoration:none}#et-boc .et-l div .et_pb_image_wrap .tasty-pins-banner-container a.tasty-pins-banner{cursor:pointer;display:flex;font-size:14px;font-weight:700;line-height:1.8em;text-transform:uppercase}#et-boc .et-l div .et_pb_image_wrap .tasty-pins-banner-container a.tasty-pins-banner span{letter-spacing:2px;margin-top:4px}.et-db #et-boc .et-l .et_pb_module .tasty-pins-banner-container a:not(.wc-forward){padding-bottom:0}
Importance of Cleaning and Maintaining Wood Cutting Boards
Let’s be honest, your wood cutting board has seen some things.
Sunday meal prep, midnight snack sessions, that ambitious sourdough phase. It’s one of the most-used surfaces in your kitchen, and if you’re not caring for it properly, it might not be doing you any favors when it comes to hygiene.
Wood cutting boards are an investment worth protecting. When maintained correctly, they can last for decades, and often get better looking with age.
Ignore them, though, and you’re looking at warped boards, deep cracks, funky odors, and a breeding ground for bacteria.
The good news? Caring for your board is surprisingly simple once you know what to do (and what to avoid).
Why Wood Cutting Boards Require Special Care
Wood is a natural, porous material, which is exactly why it performs so well as a cutting surface, and also why it needs more attention than a plastic board.
Unlike a plastic cutting board, wood has natural antimicrobial properties; bacteria that sink into the grain tend to die off rather than multiply. But that doesn’t mean you can skip cleaning. Wood items also absorb water, oils, and food particles, which means:
Excess moisture can cause warping, cracking, and splitting
Trapped food particles lead to odors and bacterial growth
Harsh cleaners strip the wood’s natural oils, making it dry and brittle
Dishwasher heat and soaking can destroy the board’s structure entirely
Wood cutting boards thrive with gentle, consistent care, not harsh scrubbing or neglect.
Daily Cleaning Tips for Wood Cutting Boards
After every use, your board will need cleaning, but keep it simple:
Wash by hand with warm (not hot) soapy water and a stiff-bristle brush or clean sponge
Clean both sides of the board to prevent uneven moisture absorption, which causes warping
Rinse thoroughly and dry immediately with a clean towel
Stand the board upright or prop it at an angle to allow airflow on both sides; don’t lay it flat on the counter
Never submerge your board in water, and absolutely never put it in the dishwasher, the combination of heat, prolonged moisture, and harsh detergents will cause it to swell, crack, and split, sometimes after just one cycle.
Also, alternate sides when cutting to distribute wear evenly.
Deep Cleaning Methods to Remove Stains and Odors
Even with daily washing, your board will eventually pick up stubborn stains and odors. Here are three tried-and-true methods:
Salt and Lemon Scrub
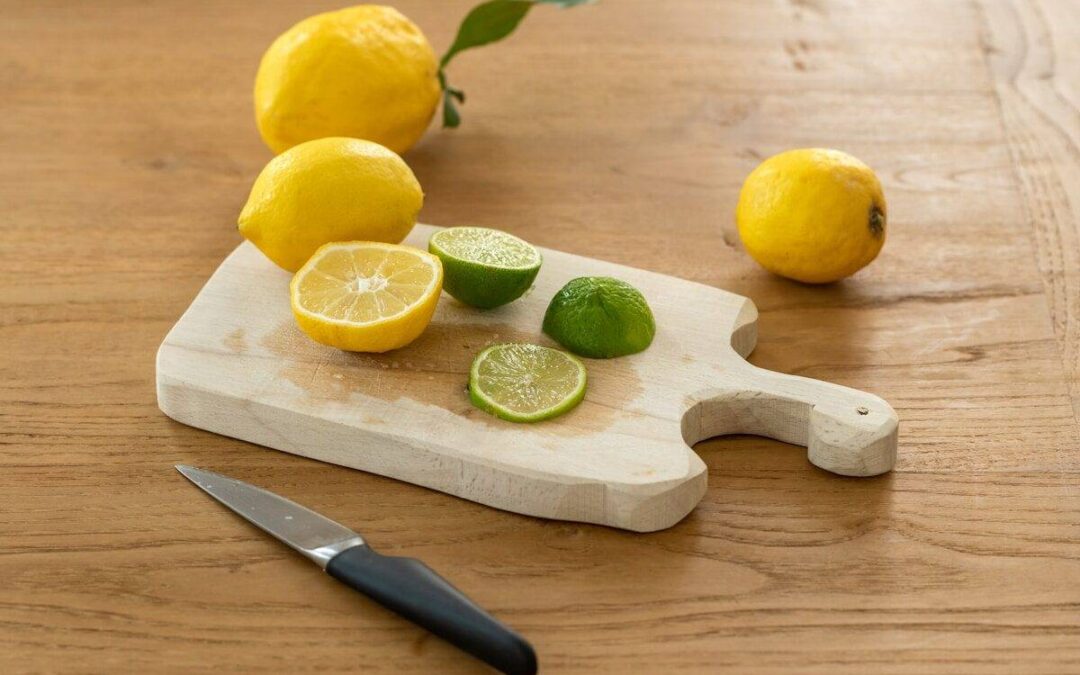
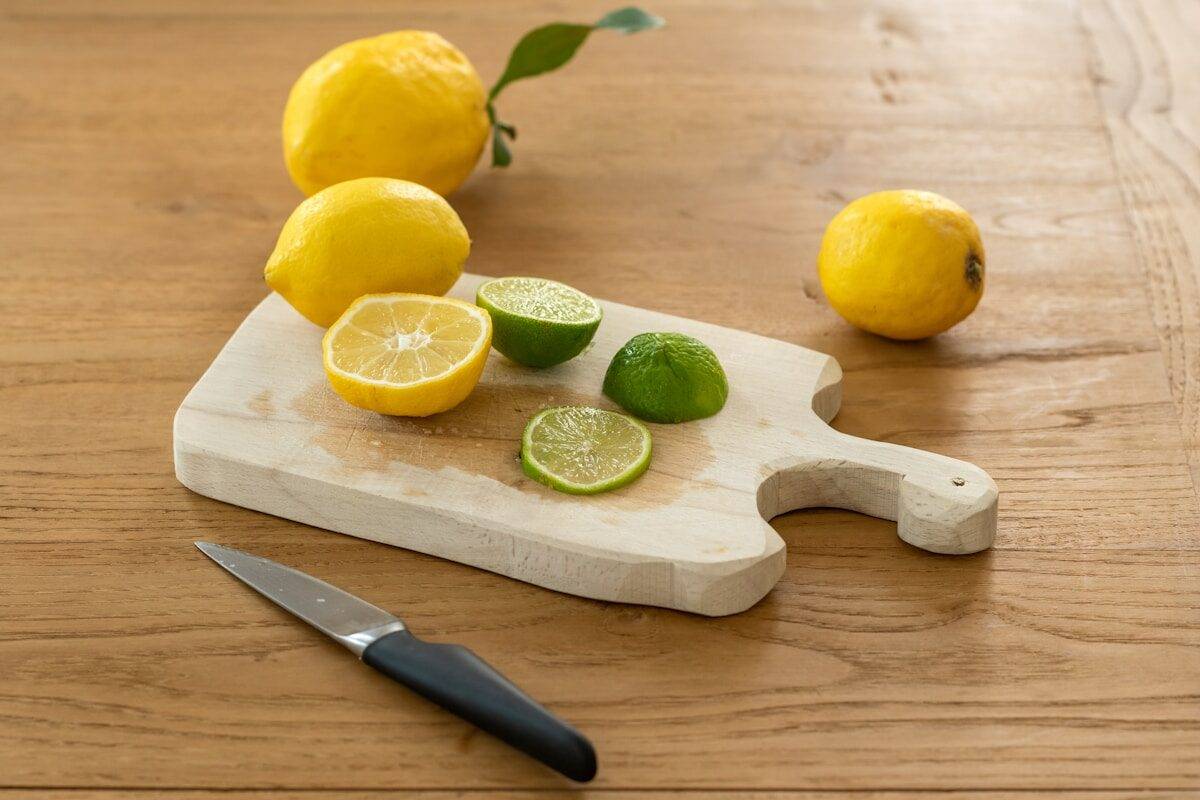
Sprinkle coarse salt over the surface, then scrub in circular motions using the cut side of a lemon half. The salt acts as a mild abrasive while the lemon juice deodorizes and lifts stains. Let the mixture sit for a few minutes, then scrape off and rinse.
Baking Soda Paste
Mix baking soda with just enough water to form a paste, spread the slurry over the stained area, let sit for 5 minutes, then scrub and rinse. It’s a natural deodorizer that’s gentle enough not to damage the wood.
White Vinegar or Hydrogen Peroxide
Spray undiluted white vinegar across the surface, let it sit for a few minutes, then rinse. For food safety after raw meat or poultry, use a 3% hydrogen peroxide spray instead, letting it sit several minutes before rinsing thoroughly.
Go easy on the vinegar. If used too frequently, its acidity can dry out the wood over time.
How to Properly Dry Wood Cutting Boards to Prevent Warping
Drying is arguably the most overlooked step in cutting board care, and it’s where many boards meet an early end. The goal is even, thorough drying with good airflow:
Pat the board dry with a clean dish towel right away after washing
Never lay a wet board flat; moisture gets trapped underneath
Stand it vertically in a dish rack or lean it against the backsplash
Keep it away from direct heat sources like burners or heating vents
When one side of the board dries faster than the other, the board warps into a curve — annoying and a safety hazard. In a humid kitchen, let the board air-dry for several hours to remove residual water, then store it flat.
Regular Maintenance: Oil and Condition Your Cutting Board
If daily cleaning is the baseline, oiling is the upgrade. Think of it like moisturizing — wood dries out over time, and regular oiling replenishes the natural oils that prevent cracking and splitting.
Food-grade mineral oil is the gold standard: affordable, odorless, flavorless, and it won’t go rancid.
Find it at most hardware stores or pharmacies.
Avoid vegetable, olive, or coconut oils; they’ll eventually go rancid inside the wood. Board cream (a blend of mineral oil and beeswax) is also excellent, offering both conditioning and a protective surface seal.
To oil your wooden cutting board, make sure it’s completely clean and dry, then apply a generous layer with a soft cloth, rubbing with the grain.
Let it soak in overnight, then wipe off any excess.
Repeat monthly, or whenever the wood looks dull.
Quick test: sprinkle a few drops of water on the surface — if they bead up, you’re good; if they soak in, it’s time to oil.
Tips to Prevent Cracks and Splits in Wood Cutting Boards
Cracks are the nemesis of a good cutting board. Once they form, they’re tough to reverse and can harbor bacteria.
Avoid thermal shock: don’t place a cold board on a hot stovetop or under a broiler
Never soak: prolonged moisture causes swelling, followed by cracking when it dries
Store in a cool, dry spot with good airflow — not wedged in a tight cabinet
Avoid the dishwasher: the heat and moisture cycle is devastating for wood boards
If you notice hairline cracks forming, act fast: sand the area lightly with fine-grit sandpaper (going with the grain), then immediately apply mineral oil.
Catching cracks early can stop them from deepening.
When to Replace Your Wood Cutting Board
Even the best-maintained board has a lifespan. It’s time for a new one if you notice:
Deep grooves or gouges that can no longer be sanded out
Persistent odors after deep cleaning — bacteria may have penetrated deep into the wood
Severe warping that makes the board unstable
Large cracks or splits running deep into the wood
Mold or dark discoloration that doesn’t respond to cleaning
Minor scratches are normal and can often be sanded smooth. But if the board feels unsafe for food prep, trust your instincts. When shopping for a replacement, look for end-grain or edge-grain hardwood in maple, walnut, or cherry — dense, durable, and gentle on knife edges.
The Ultimate Guide to Properly Clean and Maintain Your Wood Cutting Boards
Discover essential tips and techniques to effectively clean and maintain your wood cutting boards, ensuring they stay durable, hygienic, and beautiful for years to come.
Materials
Stiff-bristled brush or scrubbing sponge
Mild dish soap
Coarse salt (kosher or sea salt)
1 lemon, halved
Baking soda
White vinegar (in a spray bottle)
Hydrogen peroxide, 3% (in a spray bottle)
Clean dish towels or rags
Food-grade mineral oil or board cream
Fine-grit sandpaper (optional)
Instructions
DAILY CLEANING
Rinse with warm water immediately after use
Scrub both sides with soapy water and a stiff brush
Rinse thoroughly and pat dry right away
Stand upright or prop at an angle to air dry — never lay flat while wet
DEEP CLEANING
For stains: Sprinkle coarse salt on the surface and scrub with the cut side of a lemon half. Let sit a few minutes, then rinse.
For odors: Spread a baking soda and water paste over the surface. Let sit 5 minutes, then scrub and rinse.
For sanitizing: Spray undiluted white vinegar, let sit for a few minutes, then rinse. After raw meat, use 3% hydrogen peroxide instead.
OILING & CONDITIONING (Monthly)
Make sure the board is completely clean and dry
Rub food-grade mineral oil generously into the surface with the grain
Let soak overnight, then wipe off any excess
Repeat whenever water stops beading on the surface
CRACK PREVENTION
Oil regularly — dry wood cracks
Never soak or put in the dishwasher
Store in a cool, dry spot with airflow
Sand hairline cracks early, then oil immediately
NEVER DO THESE
Put the board in the dishwasher
Soak in water
Lay flat while wet
Use vegetable, olive, or coconut oil
WHEN TO REPLACE
Replace your board if you see deep gouges that can’t be sanded out, persistent odors after deep cleaning, severe warping, large cracks, or mold that won’t come clean.
Benefits of Proper Care for Longevity and Hygiene
A wood cutting board isn’t just a kitchen tool. It’s a surface you use every single day.
With a simple routine of gentle washing, proper drying, regular oiling, and occasional deep cleaning, your board can stay hygienic, beautiful, and functional for decades.
Proper maintenance also makes your kitchen safer. A clean, well-oiled board with a smooth surface is far less likely to harbor bacteria than a cracked, neglected one.
And once these habits become part of your routine, they take almost no extra effort: wash it after use, dry it standing up, oil it once a month.
Your cutting board has your back at every meal — a little regular care is the least you can do in return.
Whether you already have them in your home or will be installing them and are preparing for their proper care, this guide on how to clean quartz countertops will cover all your bases.
When it comes to adding an elegant touch to your kitchen or bathroom, nothing quite beats quartz countertops. Made mostly of natural quartz crystals bonded with engineered resin, they’re cut into slabs and often used as kitchen counter surfaces. Compared to granite or marble, quartz is low-maintenance because it’s non-porous, meaning liquids are less likely to seep through and cause staining.
.tasty-pins-banner-container{display:block;margin-bottom:20px;position:relative;width:-moz-fit-content;width:fit-content}.tasty-pins-banner-container a{cursor:pointer;display:flex;font-size:14px;font-weight:700;letter-spacing:1px;line-height:1.8em;text-transform:uppercase}.tasty-pins-banner-container a:hover{opacity:1}.tasty-pins-banner-container .tasty-pins-banner{align-items:center;bottom:0;cursor:pointer;display:flex;justify-content:center;left:0;padding-bottom:1em;padding-top:1em;position:absolute;right:0}.tasty-pins-banner-container .tasty-pins-banner svg{margin-right:4px;width:32px}.tasty-pins-banner-container .tasty-pins-banner span{margin-top:4px}.tasty-pins-banner-container a.tasty-pins-banner{text-decoration:none}.tasty-pins-banner-container a.tasty-pins-banner:hover{opacity:.8}.tasty-pins-banner-container a.tasty-pins-banner-image-link{flex-direction:column}.tasty-pins-banner-container a img{margin-bottom:0}.entry-content .wp-block-image .tasty-pins-banner-container img{margin-bottom:0;padding-bottom:0}#et-boc .et-l div .et_pb_image_wrap .tasty-pins-banner-container .tasty-pins-banner{padding-bottom:1em!important;padding-top:1em;text-decoration:none}#et-boc .et-l div .et_pb_image_wrap .tasty-pins-banner-container a.tasty-pins-banner{cursor:pointer;display:flex;font-size:14px;font-weight:700;line-height:1.8em;text-transform:uppercase}#et-boc .et-l div .et_pb_image_wrap .tasty-pins-banner-container a.tasty-pins-banner span{letter-spacing:2px;margin-top:4px}.et-db #et-boc .et-l .et_pb_module .tasty-pins-banner-container a:not(.wc-forward){padding-bottom:0}
Maybe you’re looking to add a quartz countertop to your home for your next remodel (or this surface is already featured in your space), but you aren’t sure how to maintain its appearance…you’re in luck.
After years of keeping my own quartz surfaces gleaming, I’ve learned what works (and what definitely doesn’t!).
Understanding Your Quartz Countertops
Before diving into cleaning techniques, it’s helpful to understand what makes quartz countertops unique. Unlike natural stone countertops such as granite or marble, quartz is an engineered stone, typically composed of about 90-95% ground natural quartz crystals, polymer resins, and pigments.
This manufacturing process creates a non-porous surface that’s highly stain-resistant and doesn’t require sealing like natural stone does.
The non-porous nature of quartz means bacteria and viruses have nowhere to hide, making these countertops exceptionally hygienic for food preparation.
However, the resin binders that make quartz so durable can be sensitive to certain harsh chemicals and high heat, which is why knowing the right cleaning methods is so important.
Daily Cleaning for a Fresh Start
The secret to keeping quartz countertops looking their best? Consistency. A quick daily wipe-down prevents buildup and keeps your surfaces sparkling with minimal effort. Here’s my go-to routine that takes just a few minutes:
Gather your supplies: a soft cloth or non-abrasive sponge, warm water, and mild dish soap. I keep a designated spray bottle under my sink filled with a gentle cleaning solution, it makes daily maintenance so much easier!
Mix equal parts warm water and soap to create your cleaning solution. If you prefer a spray bottle, use about two tablespoons of mild soap (dish soap works) per 16 ounces of water. This mild mixture is all you need for everyday cleaning and won’t damage the resin in your quartz counters.
Spray or dampen your cloth with the soapy water and wipe down your countertop, paying special attention to high-traffic areas around the sink, stove, and food prep zones. I like to work in sections, especially on larger kitchen islands, to ensure I don’t miss any spots.
Rinse your sponge or cloth with clean water, then wipe the surface again to remove any soap residue. This step is crucial, as soap film can dull the finish over time, so don’t skip it!
Finally, dry the countertop with a clean, dry microfiber cloth. This prevents water spots and streaks while giving you that gorgeous, streak-free shine. I find that microfiber cloths work better than paper towels for achieving that showroom finish.
The Best Cleaning Products for Quartz
While dish soap and water work beautifully for daily cleaning, you might want specialized cleaners for your quartz countertops. Look for pH-balanced, non-abrasive cleaners specifically formulated for quartz or stone surfaces. Many manufacturers recommend their own branded cleaners, but any gentle, stone-safe cleaner will work.
Some of my favorite store-bought options include Weiman Quartz Cleaner, Method Daily Granite Cleaner (which works great on quartz too), and Simple Green Stone Polish. These products are designed to clean effectively while enhancing the natural shine of quartz without leaving residue.
For a natural DIY approach, you can create an effective spray cleaner using water, a small amount of dish soap, and rubbing alcohol. The alcohol helps the solution dry quickly without streaks. Mix one cup of water, one tablespoon of dish soap, and one tablespoon of rubbing alcohol in a spray bottle for an economical cleaning solution.
What to Avoid: Products That Damage Quartz
Just as important as knowing what to use is understanding what to avoid. The resin in quartz countertops can be damaged by harsh chemicals, abrasive materials, and certain acidic substances. Here’s what should never touch your quartz surfaces:
Avoid bleach, ammonia, or any cleaners containing these ingredients. While quartz is stain-resistant, these harsh chemicals can break down the resins binding the quartz crystals together, leading to discoloration and dullness over time. If you accidentally use these products, rinse the area immediately with plenty of water.
Stay away from abrasive scrubbing pads, steel wool, or scouring powders. These can scratch the surface, creating tiny grooves where dirt and bacteria can accumulate. Even “soft scrub” type cleaners often contain mild abrasives that can damage quartz over time.
Skip acidic cleaners like vinegar, lemon juice, or lime-based products for regular cleaning. While quartz is more acid-resistant than natural stone, prolonged or repeated exposure to acidic substances can etch or dull the surface. If acidic foods or drinks spill on your counters, wipe them up promptly.
Avoid oil-based or wax cleaners, furniture polish, and cleaners with dyes. These can leave a film on your quartz that builds up over time, making your countertops look dull rather than shiny. The non-porous surface of quartz doesn’t need these products and won’t absorb them properly.
Never use oven cleaners, drain cleaners, turpentine, or any highly alkaline or highly acidic chemicals near your quartz countertops. If these products accidentally contact your surface, rinse immediately and thoroughly with water.
Tackling Stains and Stubborn Marks
Although quartz countertops are highly stain-resistant, they’re not stain-proof. Knowing how to address different types of stains quickly is key to keeping your surfaces pristine. Here’s how I handle the most common culprits:
Everyday Food and Beverage Stains
For most food and beverage spills, think coffee, tea, wine, or juice, the warm water and mild dish soap mixture works perfectly. The key is addressing these stains quickly. If you catch a spill within a few hours, it typically wipes away effortlessly.
For dried or set-in food stains, let your cleaning solution sit on the stain for a few minutes to break it down before wiping. Use a soft cloth or non-abrasive sponge and gentle circular motions. Rinse thoroughly with clean water and dry with a microfiber cloth.
Grease and Oil Stains
Kitchen oils and greasy splatters can leave stubborn marks on quartz if not cleaned promptly. For these, I use a slightly stronger approach: mix warm water with a bit more dish soap than usual to create a concentrated degreasing solution.
Apply the solution to the greasy area and let it sit for 5-10 minutes. The dish soap will break down the oil, making it easier to remove. Gently scrub with a soft cloth, rinse with clean water, and dry thoroughly. For particularly stubborn grease, you might need to repeat this process.
Dried or Stuck-On Messes
For gum, wax, hardened food, or other stuck-on substances, reach for a plastic putty knife or a credit card rather than a metal scraper. Gently scrape off the material, being careful not to scratch the surface. Work at an angle and use light pressure.
Once you’ve removed the bulk of the material, clean the area with your regular soap and water solution. If any residue remains, a small amount of rubbing alcohol on a cloth can help dissolve sticky remnants.
Tough Stains That Need Extra Help
For stubborn stains that resist regular cleaning, create a gentle paste using baking soda and water. Mix equal parts of each to form a thick paste with a consistency similar to toothpaste. Apply this paste directly to the stain and gently rub in circular motions using a soft cloth.
Let the paste sit for 10-15 minutes, then rinse thoroughly with water and dry. The mild abrasiveness of baking soda is usually safe for quartz, but always use gentle pressure and test in an inconspicuous area first if you’re concerned.
For stains from nail polish, ink, or permanent markers, dampen a cloth with isopropyl rubbing alcohol and gently dab the stained area. Don’t scrub aggressively—let the alcohol do the work. Rinse the area with clean water and dry completely.
Restoring Shine to Dull Quartz Countertops
Over time, even well-maintained quartz countertops can lose some of their luster due to soap buildup, hard water deposits, or general wear. If your once-gleaming counters look dull or hazy, don’t worry—you can restore that showroom shine!
Start by thoroughly cleaning the entire surface with your regular soap and water solution, then rinse extremely well to remove all soap residue. Sometimes dullness is simply caused by soap film buildup.
For a deeper clean, create a solution of equal parts water and rubbing alcohol. Spray or wipe this mixture over the entire countertop, then immediately buff dry with a clean microfiber cloth. The alcohol cuts through any remaining residue and evaporates quickly, leaving behind a brilliant shine.
If you have hard water in your area, mineral deposits might be causing dullness. Mix equal parts water and white vinegar, apply to the affected areas, and let sit for just one minute (no longer!). Rinse immediately and thoroughly with water, then dry completely. While we generally avoid acidic cleaners on quartz, this quick treatment can remove mineral buildup without causing damage.
For ongoing shine maintenance, consider using a quartz-specific polish or cleaner once a week. These products are specially formulated to enhance the natural luster of quartz without leaving harmful residue. Follow the manufacturer’s instructions carefully for best results.
Preventing Damage and Maintaining Beauty
Keeping your quartz countertops shiny and clean goes beyond just cleaning—it’s about protecting them from potential damage in the first place. Here are my essential prevention tips:
Always Use Cutting Boards
While quartz is extremely durable and scratch-resistant, it’s not scratch-proof. Always use cutting boards when preparing food. Cutting directly on quartz countertops can leave marks over time, especially from serrated knives or when applying significant pressure.
Protect from Heat
This is crucial: although quartz is heat-resistant, it’s not heatproof. The resin binders can be damaged by extreme temperatures. Always use trivets, hot pads, or heat-resistant mats under hot pots, pans, and dishes straight from the oven or stove.
I learned this lesson the hard way when I set a hot baking dish directly on my counter—it left a permanent mark that no amount of cleaning could remove. Prolonged exposure to temperatures above 300°F can cause discoloration, scorching, or even cracking. It’s simply not worth the risk!
Clean Spills Immediately
The beauty of quartz is that it’s non-porous, which means most spills won’t absorb if you wipe them up promptly. Make it a habit to address regular daily spills as soon as they happen, especially pigmented liquids like red wine, coffee, beet juice, or tomato sauce.
Even though quartz resists staining better than natural stone, allowing spills to sit for extended periods gives them more opportunity to adhere to the surface or affect the resin. A quick wipe prevents potential problems entirely.
Use Coasters and Placemats
Protect your countertops from potential ring marks and moisture by using coasters under glasses and mugs. While quartz won’t stain from water rings like wood furniture, acidic beverages can potentially affect the surface if left sitting for hours.
Common Mistakes to Avoid
Through my years of maintaining quartz countertops, I’ve learned that certain habits can actually harm rather than help. Here are the most common mistakes to avoid:
Don’t use excessive force when cleaning. Quartz is durable, but aggressive scrubbing with rough materials can cause surface damage. Let your cleaning products do the work—if something won’t come off with gentle pressure, it needs a different cleaning approach, not harder scrubbing.
Avoid letting cleaning products sit on the surface for extended periods. While a few minutes is fine for tough stains, leaving cleaners on quartz for hours can potentially cause discoloration or dull the finish. Always rinse thoroughly after cleaning.
Don’t assume all “stone cleaners” are safe for quartz. Some products designed for natural stone contain sealers or waxes that aren’t appropriate for engineered quartz. Always check that products are specifically labeled as safe for quartz.
Never place extremely cold items directly on quartz countertop surfaces either. While we often think about heat damage, extreme cold can also cause thermal shock. Let frozen items sit for a moment before placing them on counters, or use a trivet or towel.
Creating a Proper Maintenance Schedule
Consistency is the secret to effortlessly maintaining beautiful quartz countertops. Here’s the schedule I follow:
Daily: Quick wipe-down with soap and water, especially after meal prep and cooking. Dry thoroughly to prevent water spots.
Weekly: Deeper clean with a quartz-specific cleaner or polish to maintain shine. Address any spots or marks that regular cleaning might have missed.
Monthly: Inspect your countertops for any developing issues—minor scratches, dull areas, or persistent stains. Address problems early before they become harder to fix.
As Needed: Deep clean with baking soda paste for stubborn stains, or restore shine with alcohol and water solution if surfaces look dull.
This routine keeps my countertops looking pristine without requiring hours of work. The daily maintenance truly takes just minutes, and that consistency prevents bigger problems from developing.
When to Call a Professional
While most quartz countertop care is absolutely DIY-friendly, there are times when professional help is warranted. If you notice deep scratches, chips, cracks, or significant discoloration that doesn’t respond to cleaning, contact a stone restoration professional. They have specialized tools and products that can repair damage without replacing your countertops.
Similarly, if you’re unsure whether a particular stain or issue will respond to home treatment, consult the manufacturer or a professional before attempting potentially risky cleaning methods. It’s always better to ask first than to accidentally cause irreversible damage.
The Joy of Beautiful Countertops
You did it—you now have all the knowledge you need to keep your quartz countertops looking absolutely stunning! By following a regular cleaning routine, using the right products, and taking simple preventative measures, your countertops will maintain their elegance and durability for years to come.
The beauty of quartz is that it doesn’t demand complicated maintenance rituals or expensive specialty products. A little daily attention and some basic precautions are really all it takes to keep these surfaces looking their best. And there’s something so satisfying about that gleaming, clean countertop when you walk into your kitchen each morning—it just makes the whole space feel more welcoming and put-together.
Whether you’re cooking up a storm, hosting friends, or simply enjoying your morning coffee, those sparkling quartz countertops will continue to be a beautiful, functional feature of your home. Let those counters shine on!
Heat pumps are now widely used in homes throughout Los Angeles and Ventura County, CA. Many were added to increase efficiency, reduce gas usage, or replace older HVAC systems. But as these systems age, homeowners face a more pressing question: should the heat pump be repaired, or is it time to replace it?
This is seldom obvious at first glance. A system might boot only to perform at its worst. Repair costs rise. Energy bills change. Knowing when to repair and when to replace can help you avoid wasting money and enduring discomfort.
In this guide, we’ll help you work through the decision of whether to repair or replace a heat pump in a Southern California home.
Why This Decision Matters More in Southern California
Los Angeles and Ventura County have relatively mild winters and long cooling seasons. Heat pumps in that area usually operate 24/7 between heating and cooling seasons. That steady use affects wear.
Even when efficiency declines, a heat pump might seem “good enough” since winter is mild. Homeowners occasionally delay replacing it because the system is still producing heat or cooling. This can lead to higher operating costs, increased repairs, and even shorten the life of your equipment.
Climate affects the repair-versus-replace decision. Southern California systems are designed to perform well in mild conditions. When they fail to do so, replacement often delivers a proven benefit.
When Heat Pump Repair Makes Sense
Heat pump repair is often the best solution when the system is within its expected life, and the problem is localised.
The system is under 10 years old
When properly prepared and installed, most heat pumps are designed to last 12-15 years. If your unit is less than 10 years old, a repair is often the first and most cost-effective solution.
The issue is minor or well-defined
Typical repairable failures include defective sensors, worn contactors, motors, and other electrical components. These repairs restore function without affecting long-term reliability.
Energy bills have not changed significantly
If your heat pump is still working properly and you’re not seeing any significant changes in your utility bill, fixing it may be the most viable option.
The system has a good maintenance history
Heat pumps that are regularly serviced generally perform well in terms of repairs. Maintenance reduces wear and tear on critical components and extends system life.
In these cases, repair brings the unit back to standard and postpones replacement, without introducing habitual long-term cost changes.
When Heat Pump Replacement Makes More Sense
Replacement is the better choice once repairs are no longer viable.
The system is 12-15 years old or older
Performance degrades, and so too does the reliability of components. Operational costs, even for a system that crisis repairs bring into operation, often skyrocket.
Repairs are frequent or expensive
If there is more than one repair in a fairly short time span, you’re often better off replacing. But fixing one failed component will not prevent the next one from failing.
Heating or cooling performance is inconsistent
Fluctuating temperatures, AC running all the time, or inconsistent humidity control are usually signs of system failure. These problems rarely improve with a patch repair alone.
Energy bills are steadily increasing
In Southern California, a heat pump is likely effective at moderate temperatures. Increased expenditure generally indicates the system is less efficient.
Major components have failed
Compressor failure or refrigerant system issues often reach the point of replacement.
Replacement not only improves comfort and efficiency but also saves you the hassle of ongoing repairs.
The Role of Climate in Repair vs Replacement
However, the math changes in Southern California.
Heat pumps are most effective in moderate temperatures. If a system fails in Los Angeles or Ventura County, it’s typically a sign of deeper inefficiency rather than just extreme weather strain.
Heat demand is used so sparingly that efficiency losses can accumulate over time. In this equation, the replacement’s cost efficiency is typically factored in.
That’s why many people in this area replace systems more frequently than they would in cooler climates. The pace at which efficiency is being added to the system is accelerating.
Repair vs Replacement Cost: What to Consider
Upfront repair cost should not be the only factor.
A more modest repair bill now could mean higher operating costs tomorrow. Higher replacement costs may save you money on your monthly energy bills for years.
Questions to ask include:
How many maintenance tasks have been required for the system in the last two years?
Are the energy levels higher than in previous seasons?
Is the system still operating efficiently?
How long will you live in the home?
In Los Angeles and Ventura Counties, it is often prudent to replace equipment when heating and cooling performance is no longer sufficient, since the heat pump handles both.
Replacement Timing That Makes the Most Sense
Replacement is most cost-effective when done at the right time.
During a combined heating and cooling failure
Replacing a struggling heat pump saves you from spending money on repairs for a system that’s already on its last legs
When upgrading other home systems
Electrical upgrades or panel work could often be paired with the heat pump replacement.
When energy costs rise
Upgrading to a newer, higher-efficiency system can reduce long-term exposure to rising utility rates.
Replacing on schedule minimizes these types of emergency decisions and permits a better choice of the system.
Why Local Evaluation Matters
Online rules of thumb can be useful, but they don’t substitute for a local evaluation.
It can be influenced by the size of the home, the insulation in the walls and attic, the condition of the ductwork, and how you use your energy. For example, a system that appears fixable on paper may not work as intended when implemented in practice.
Local installers understand how heat pumps behave in Los Angeles and Ventura County climates. They can determine whether the repair will restore efficiency or merely postpone replacement.
Making a Confident Decision
There is no hard-and-fast rule about fixing versus replacing. Which option is best for a system or situation depends on the system’s age, performance, repair history, and local environment.
Efficiency drops to the point where many Southern California homeowners choose replacement as the better investment, even if the system continues to run. Comfort, dependability, and long-term cost are more important than keeping an old unit on life support.
If you would like an answer specific to your system and region, the next best step is a professional evaluation. For a free in-home heat pump evaluation to assess repair and replacement options for your Los Angeles or Ventura County residence, call Reliable Heating and Air.