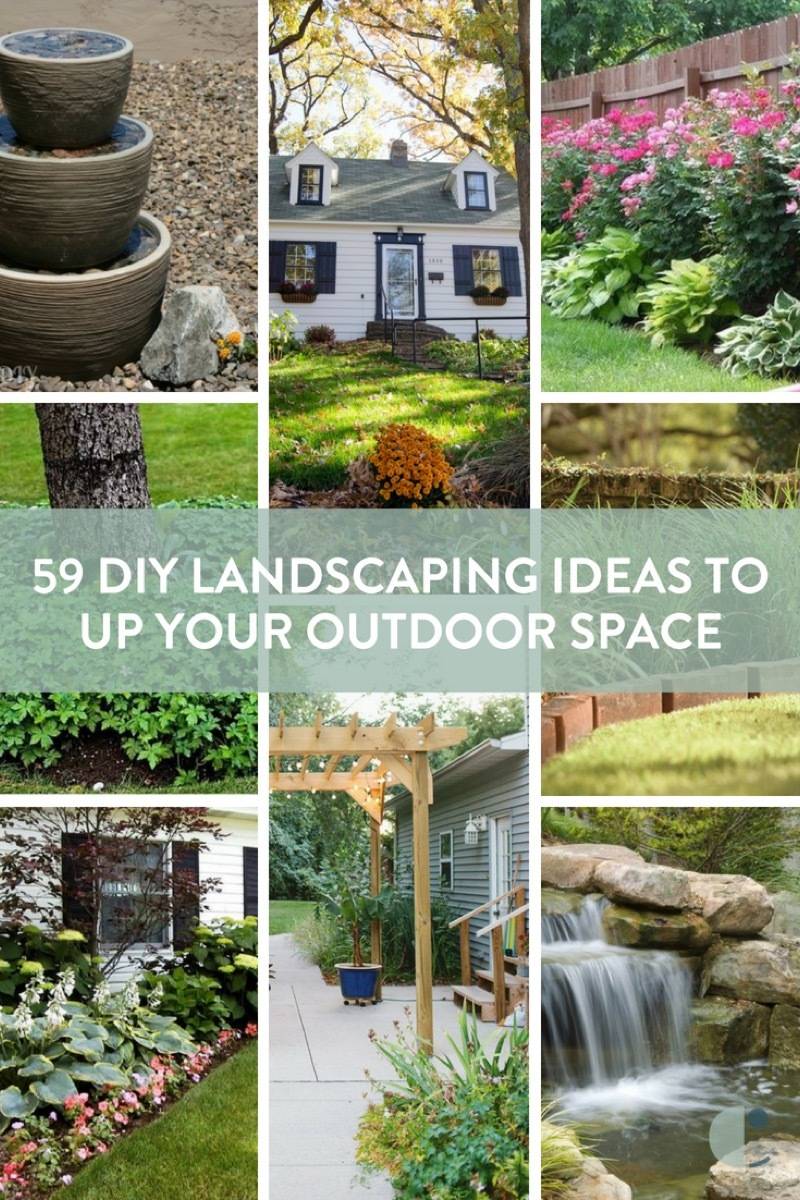
Being a homeowner is a big responsibility, and while there’s plenty to take care of inside you home, don’t forget about the outside, either. If you’ve ever looked into the cost of hiring a professional landscaper, you know they’re not cheap. Fortunately, there are a slew of inexpensive and affordable DIY landscaping ideas at your disposal, so long as you’re willing to get your hands a little dirty. From the front yard to the back, barbeque pits to bistro lights, here are 59 ways you can affordably improve your outdoor space.
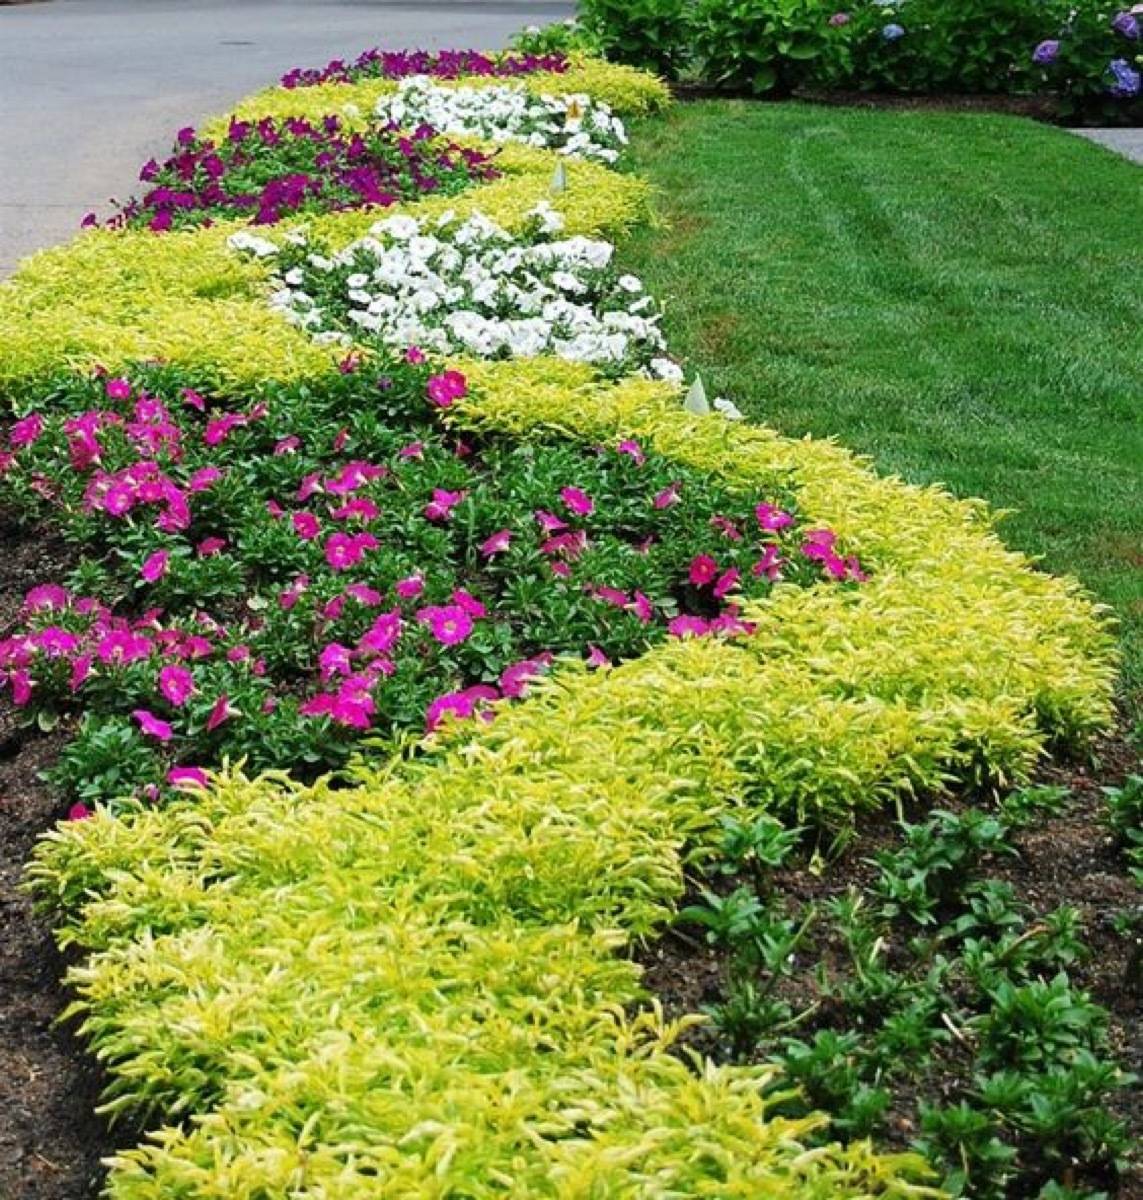
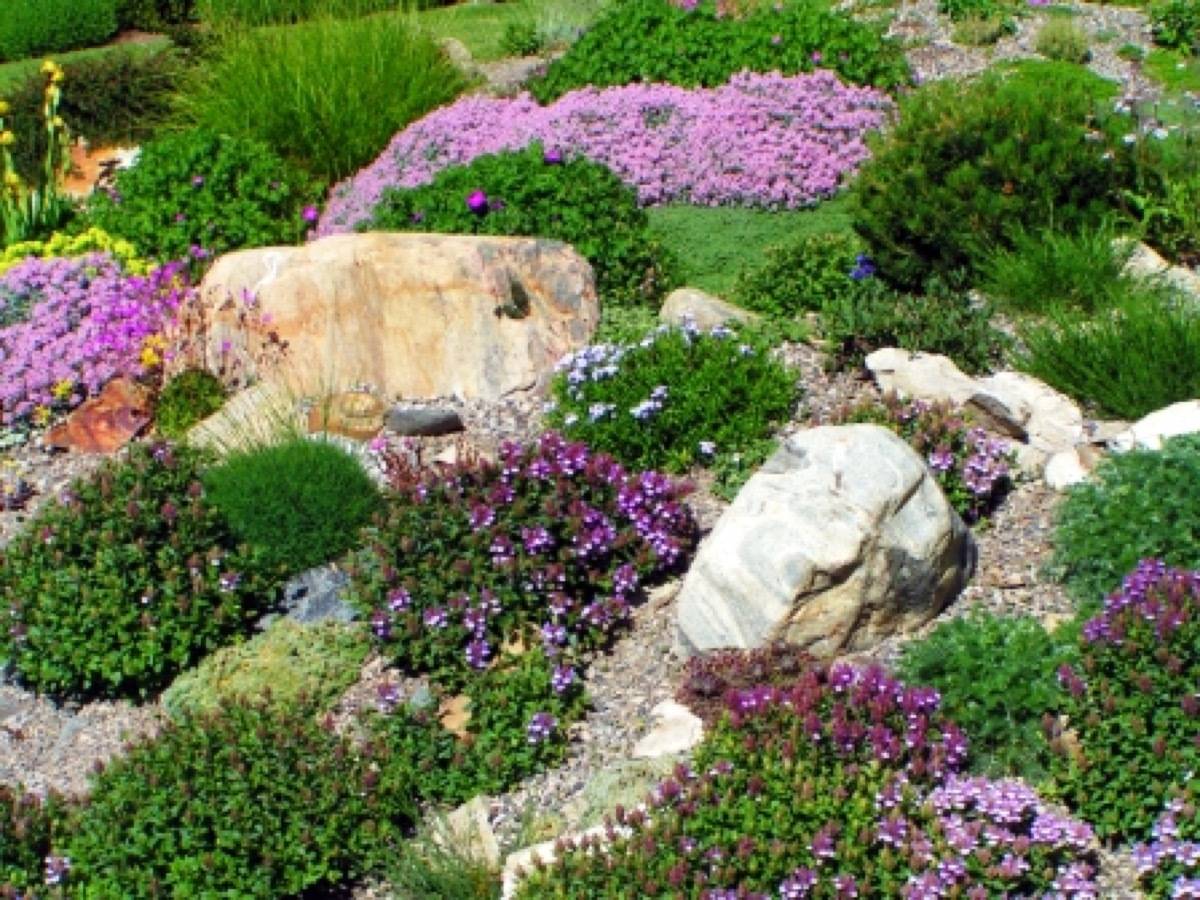
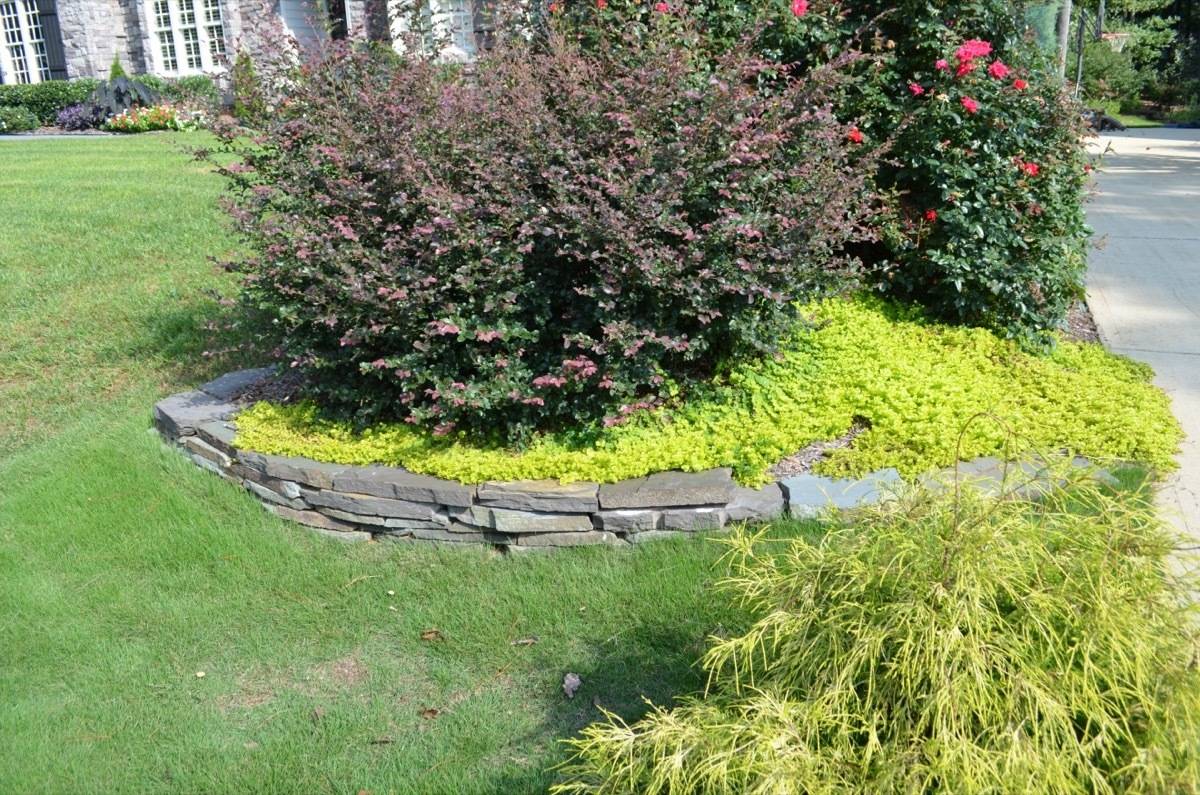
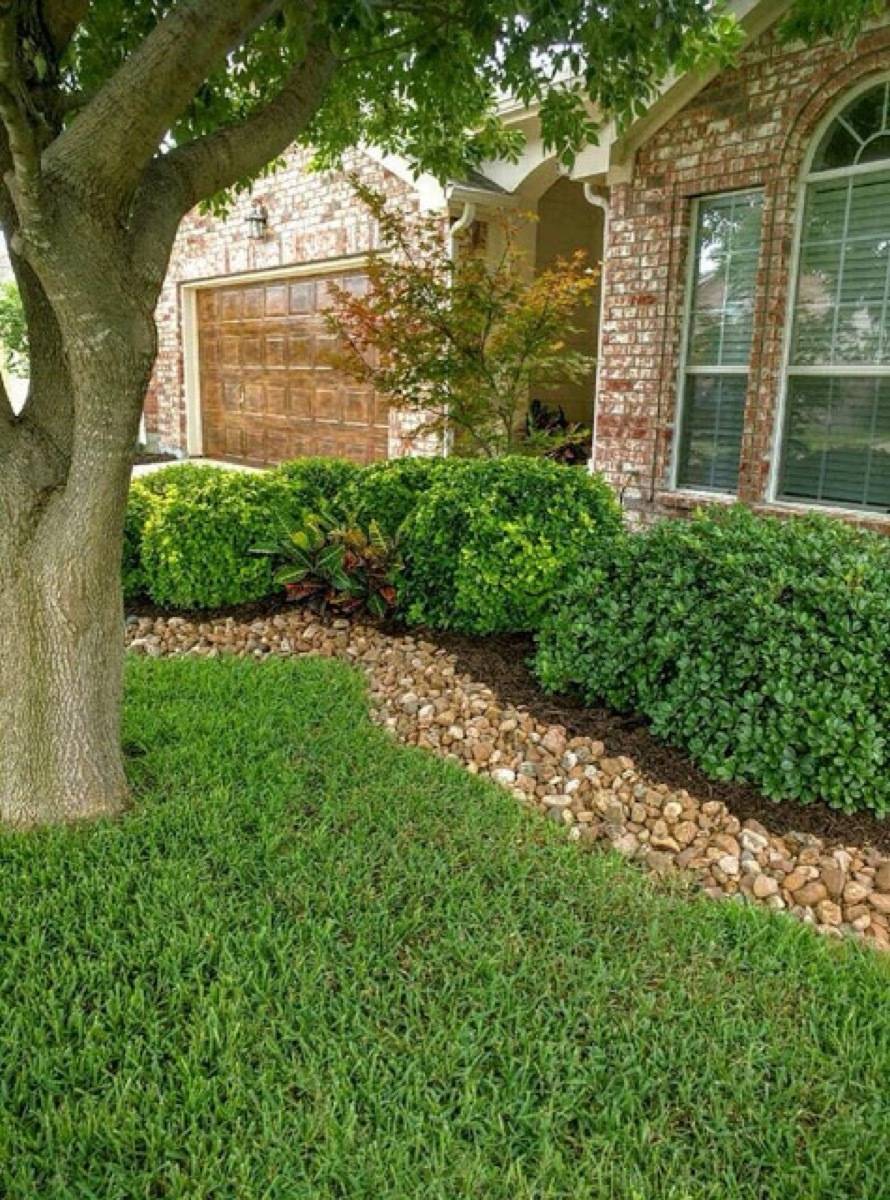
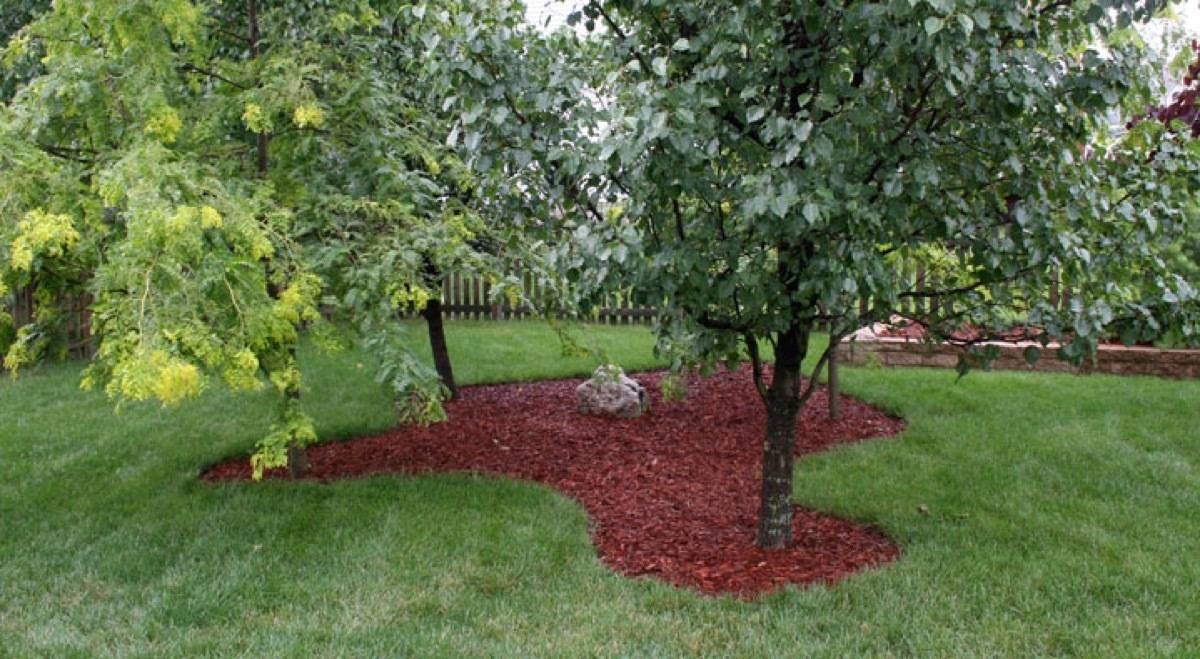
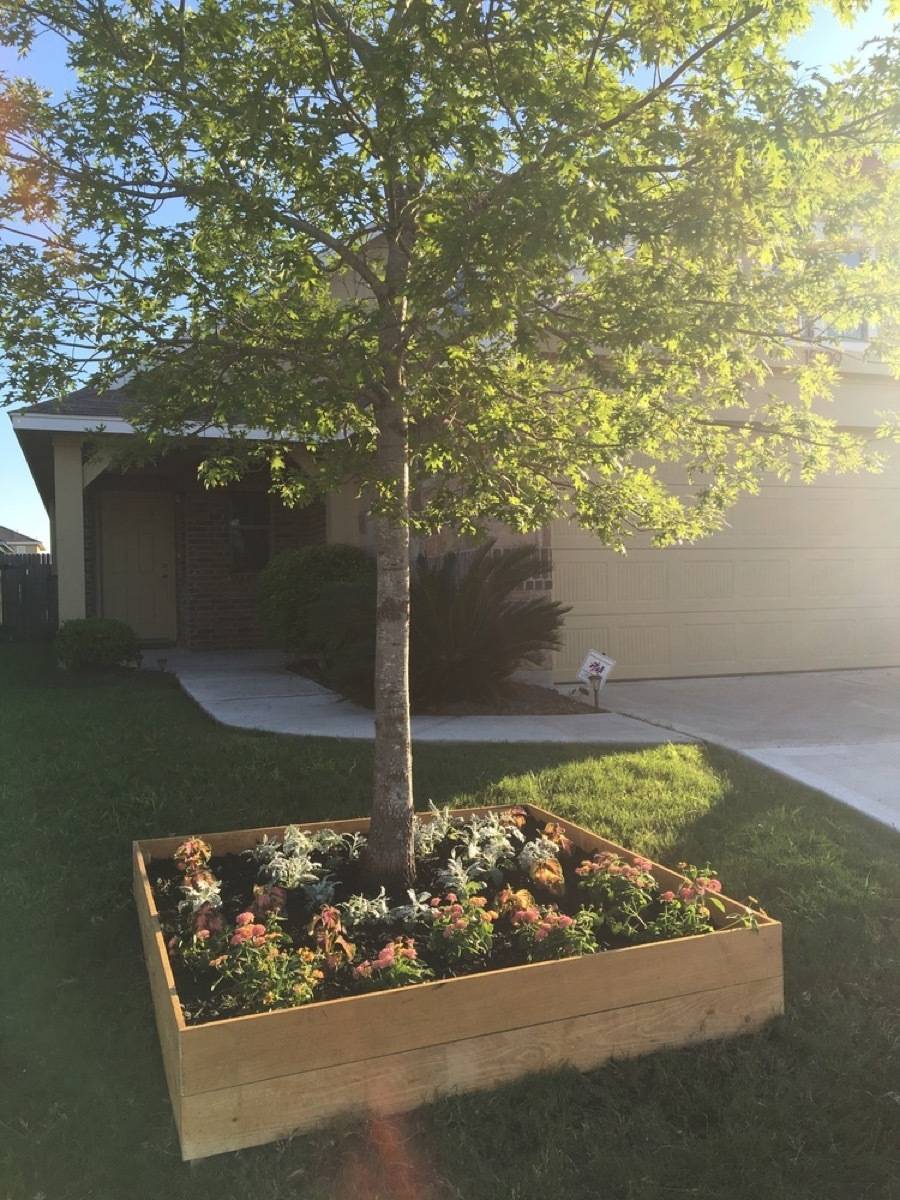
7. How about creating a berm? What’s a berm, you ask? It’s when you transform your totally flat yard by creating mounds of interest. Easy, and totally affordable. Be sure to do your research first before create a berm around the base of any tree, as too much dirt can suffocate the tree.
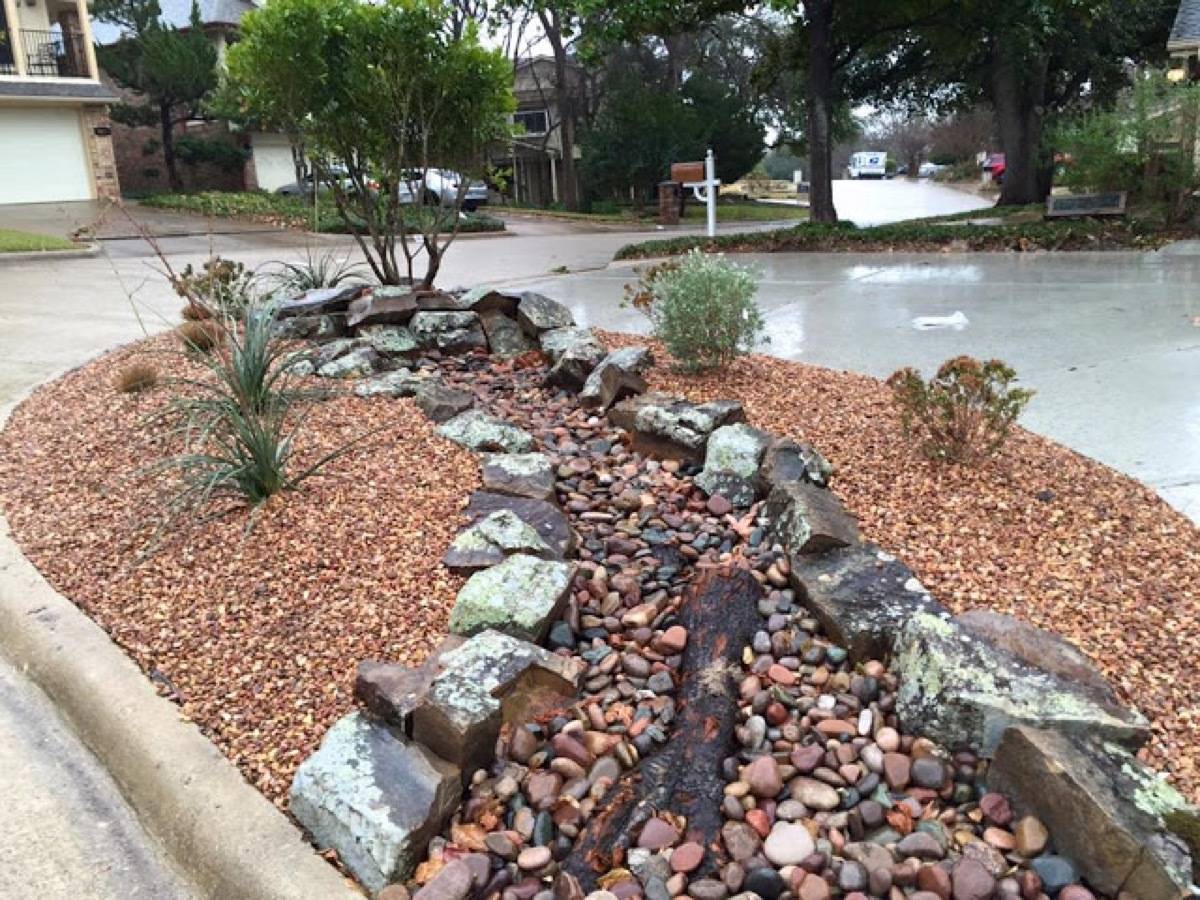
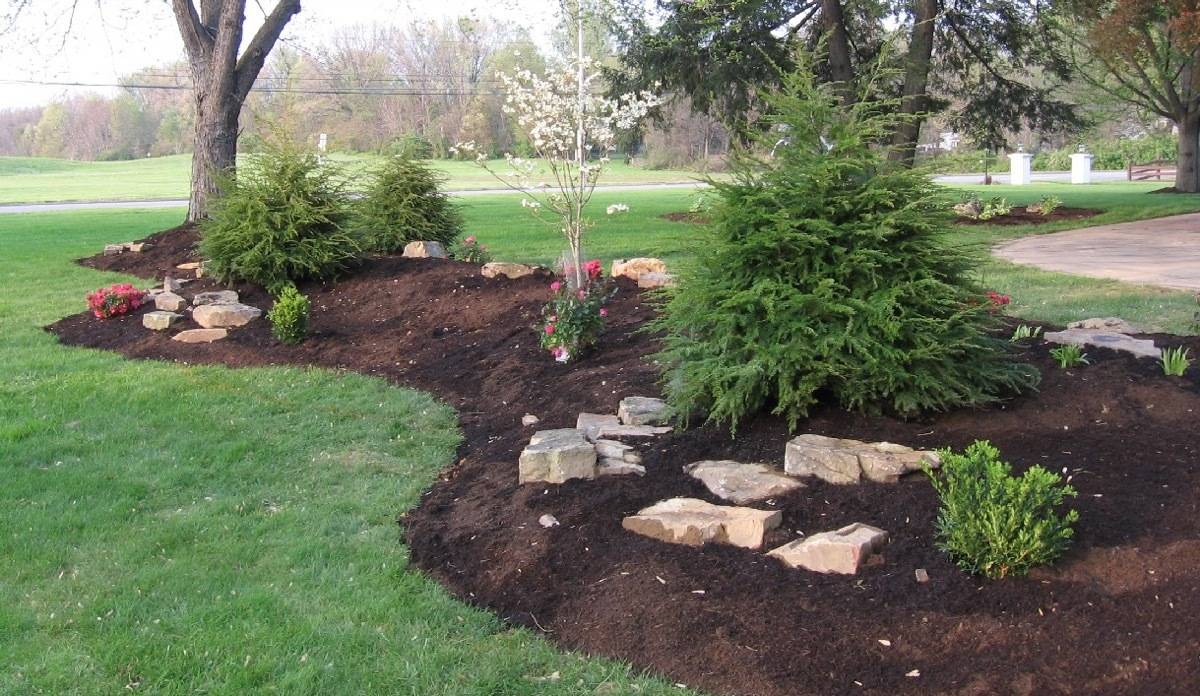
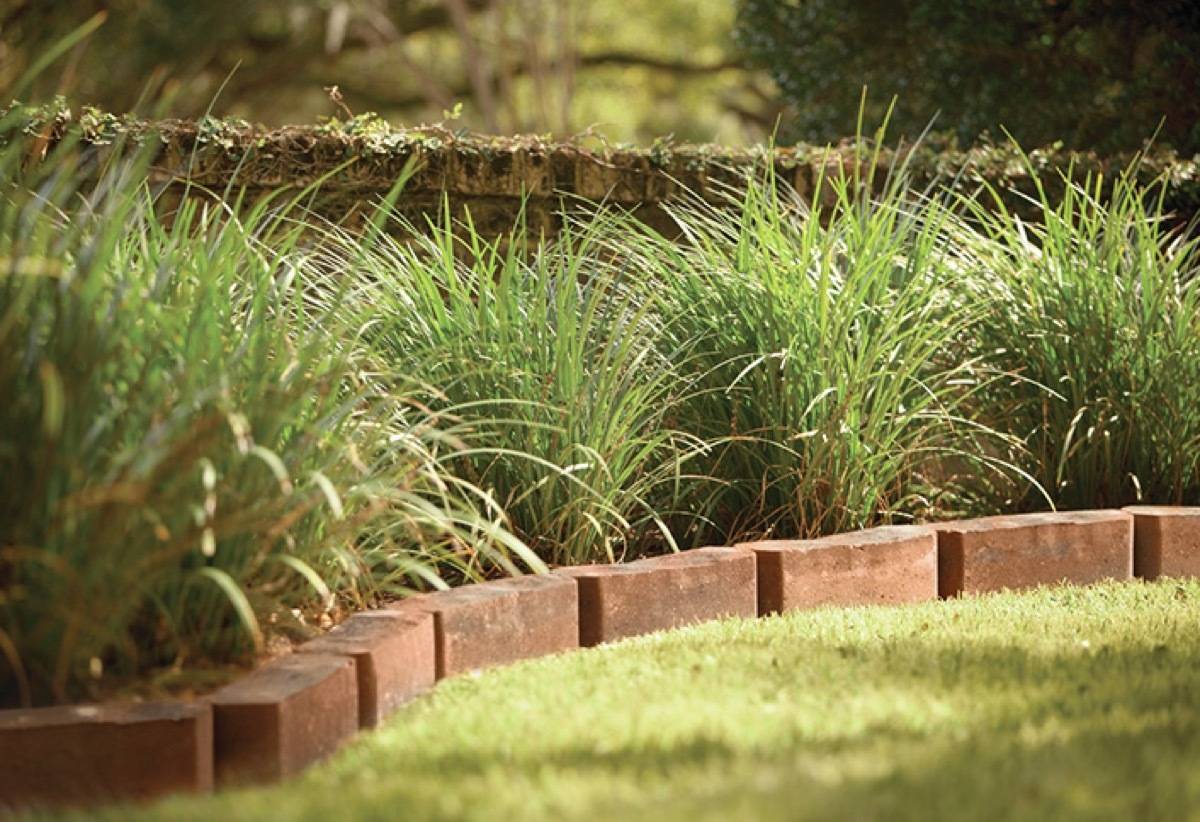
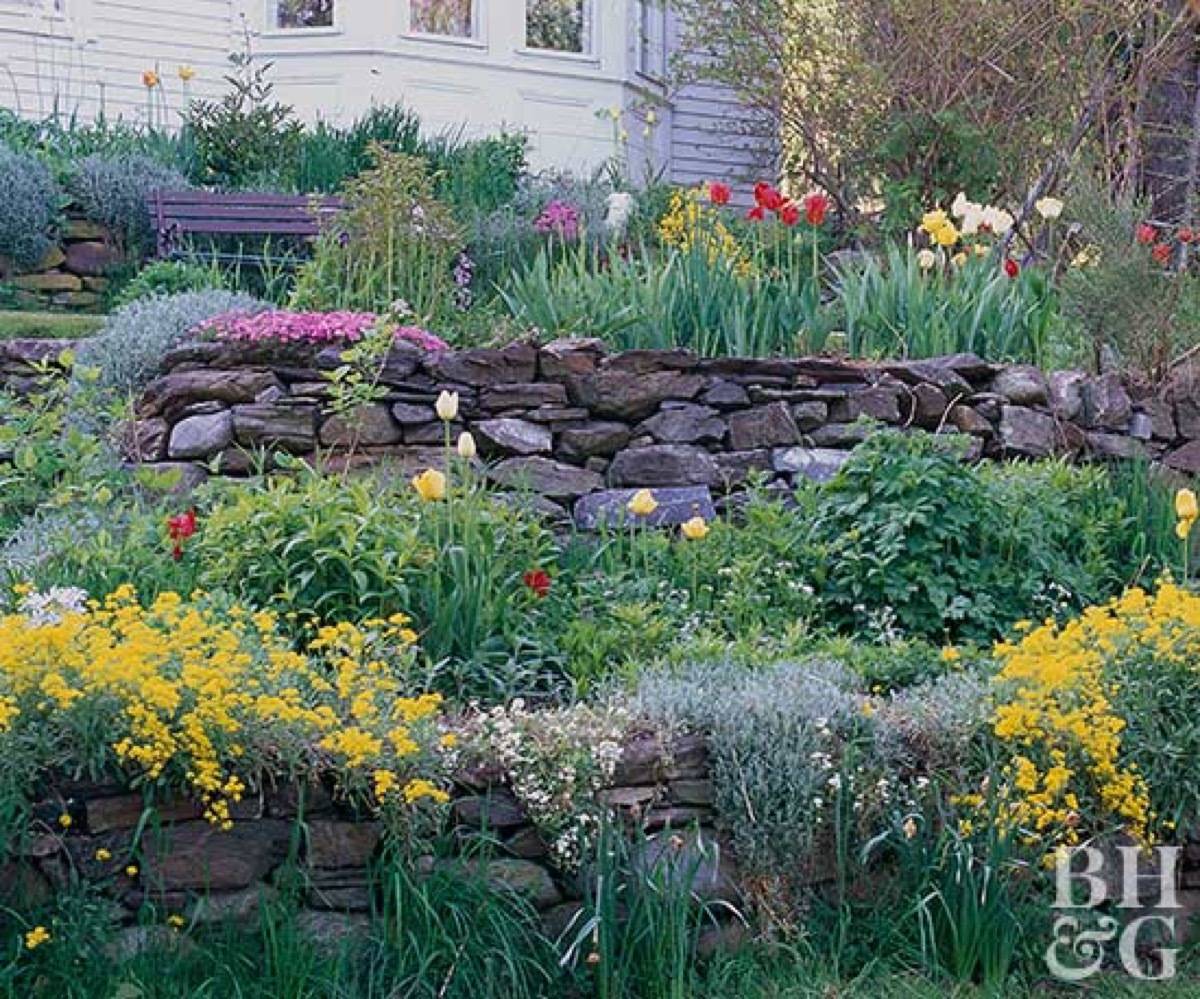
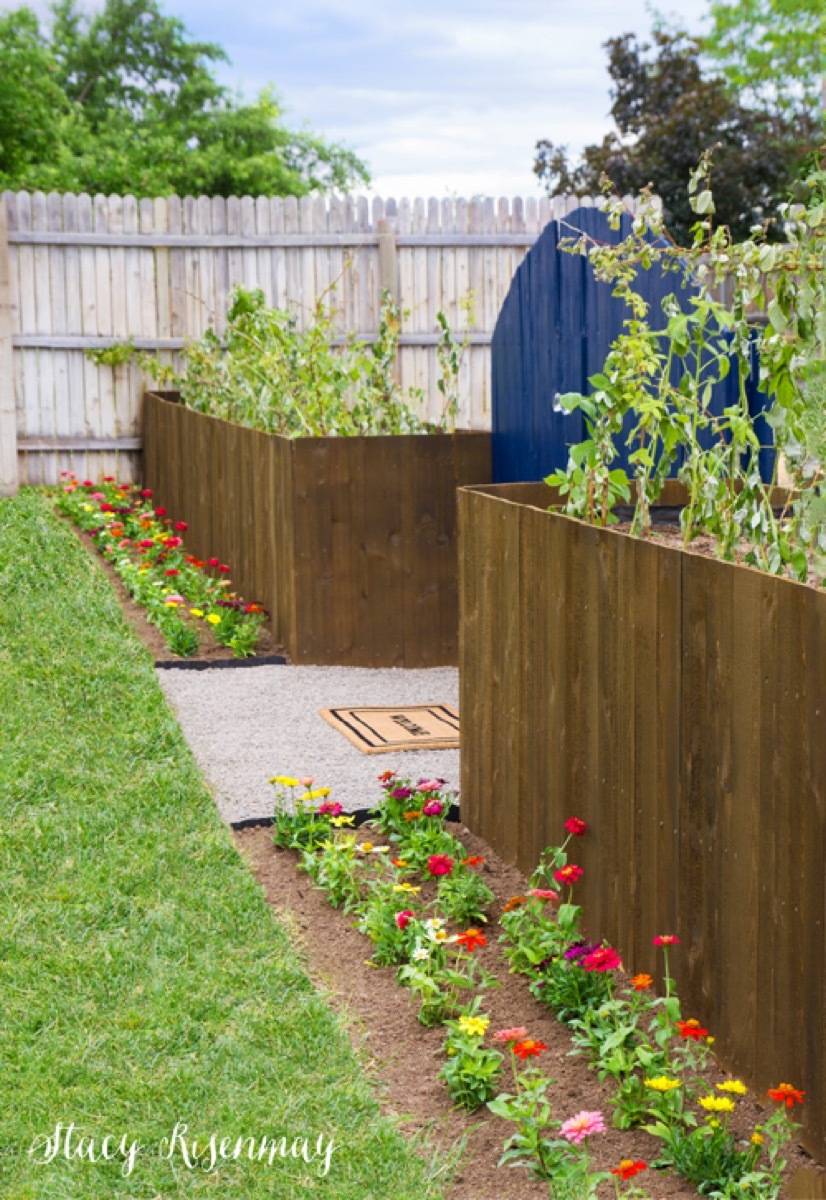
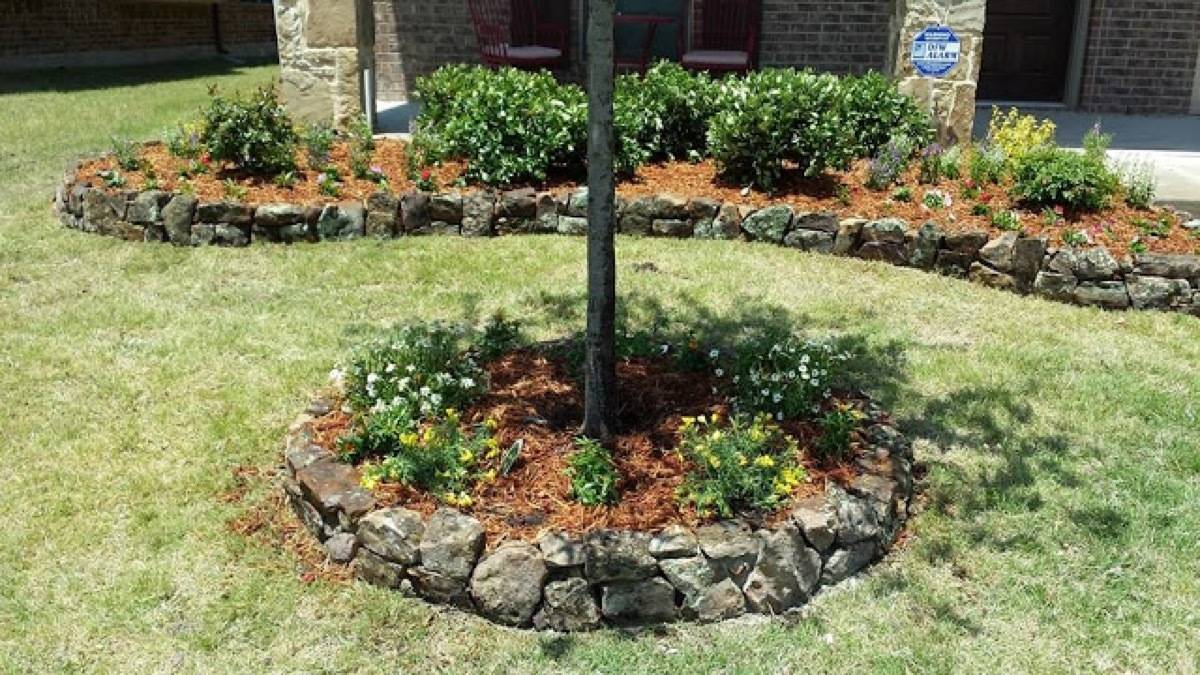
10. DIY landscaping ideas don’t get much more affordable than this: install brick edging to outline areas of your yard using salvaged or recycled brick.
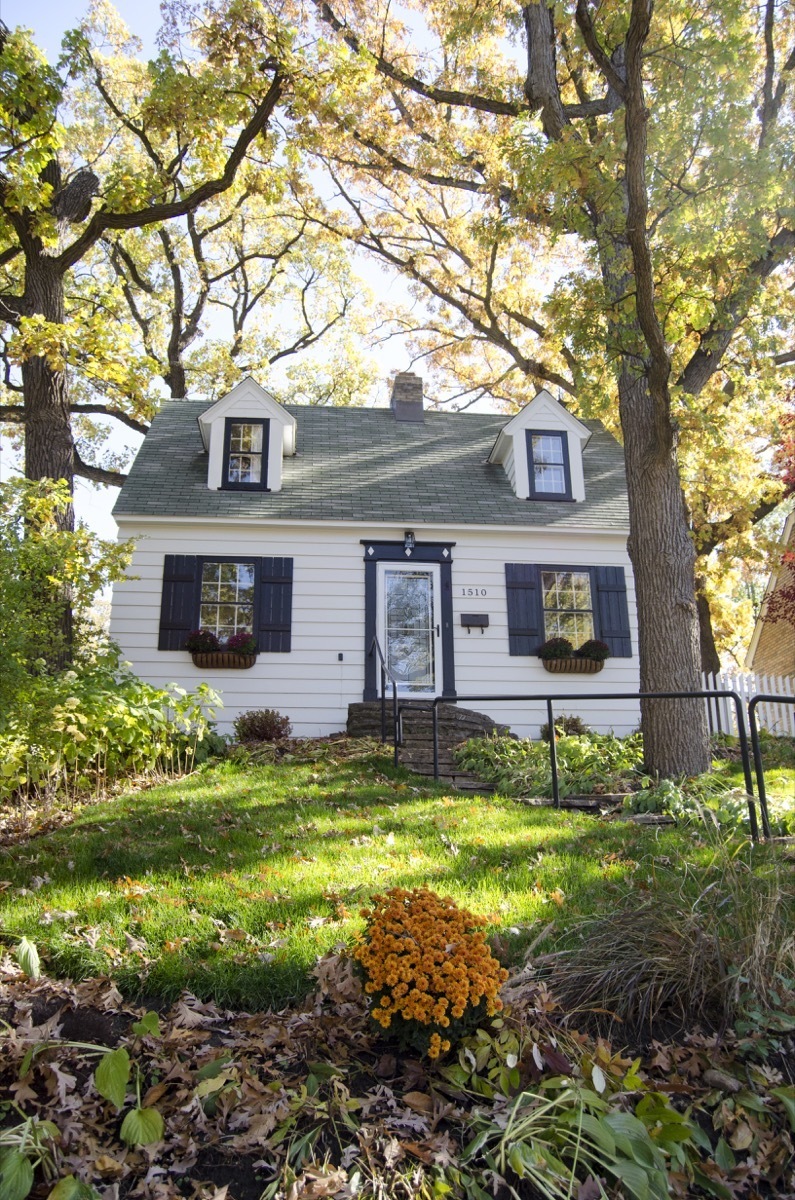
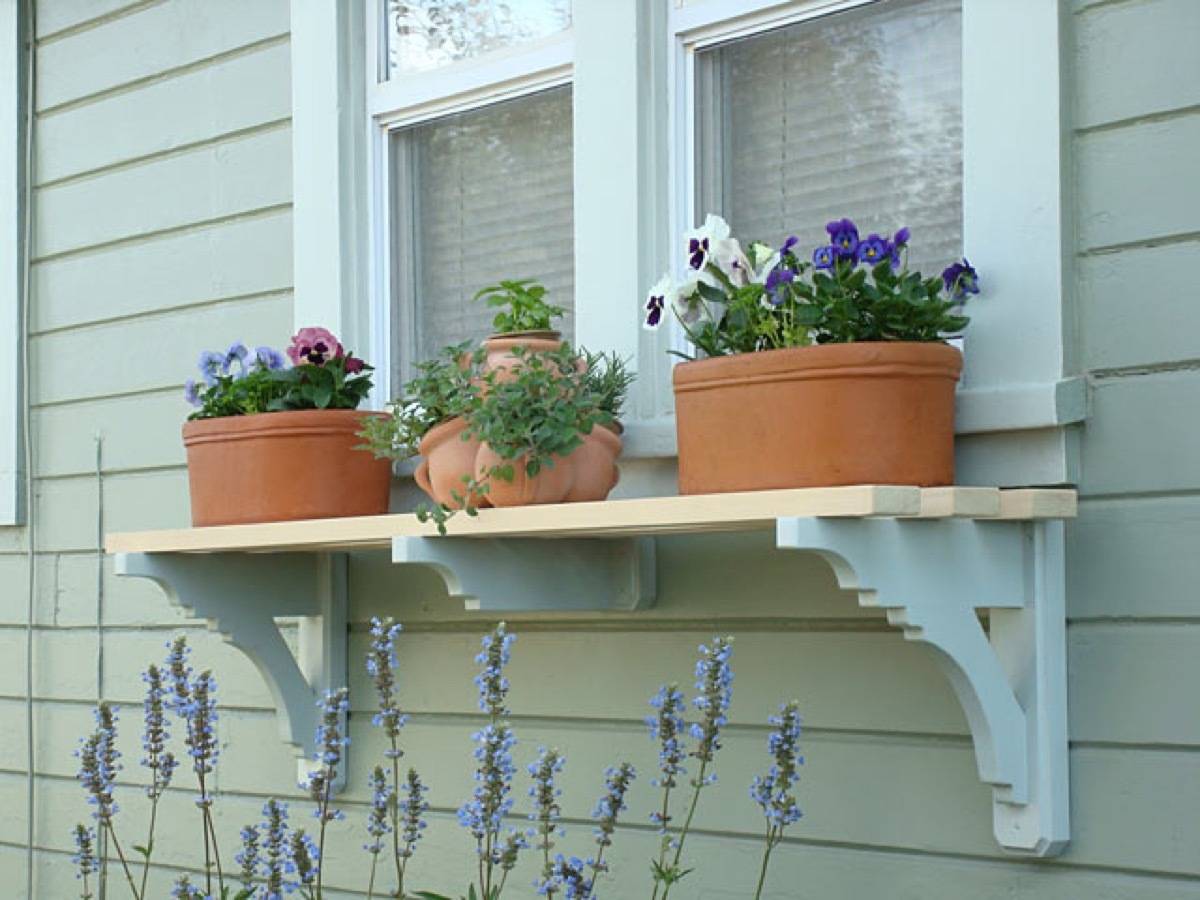
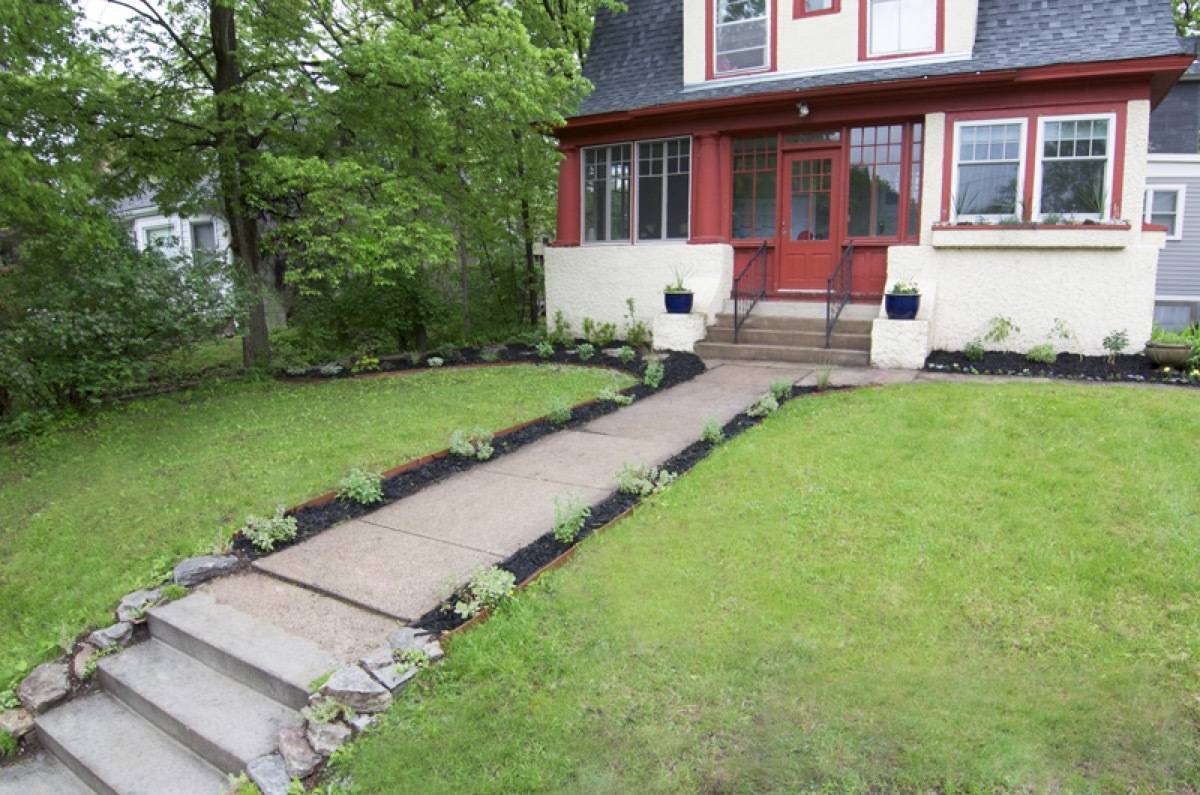
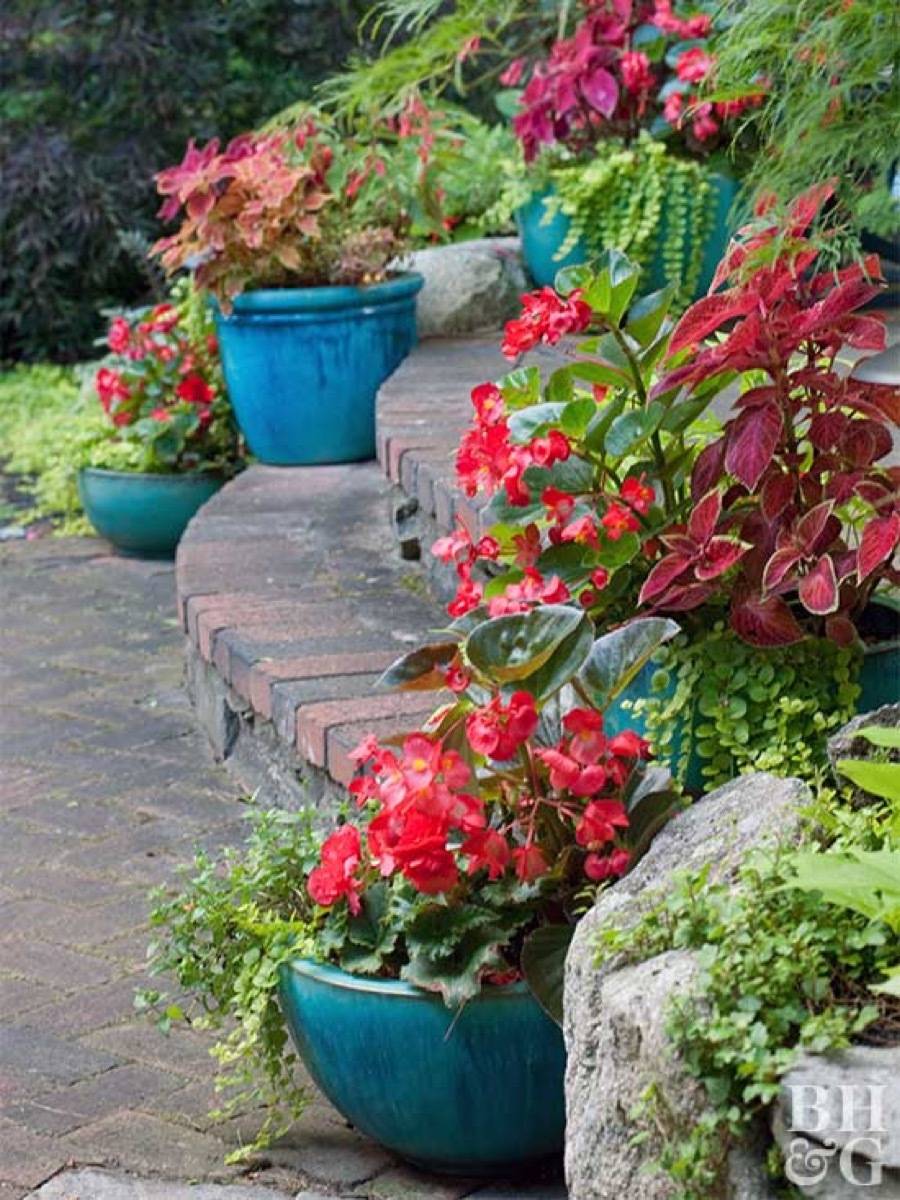
14. Display flowers in containers along steps, walkways, or on ledges. This is a great way to add visual interest if you have a lot of brick or asphalt in your front yard.
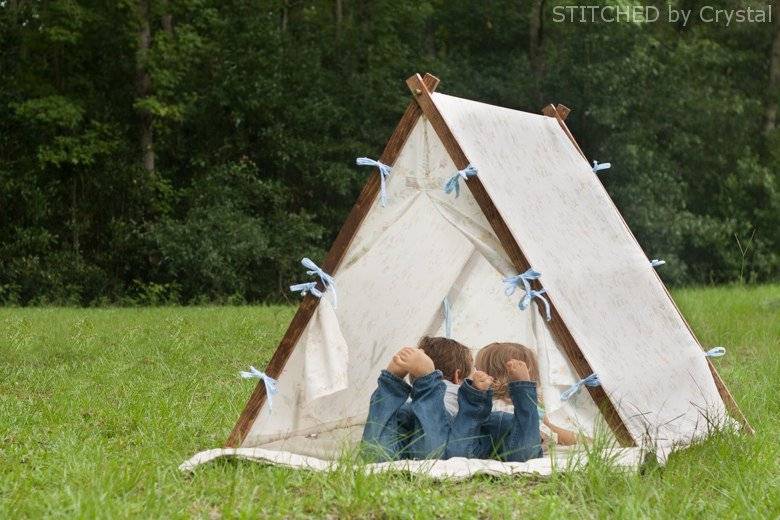
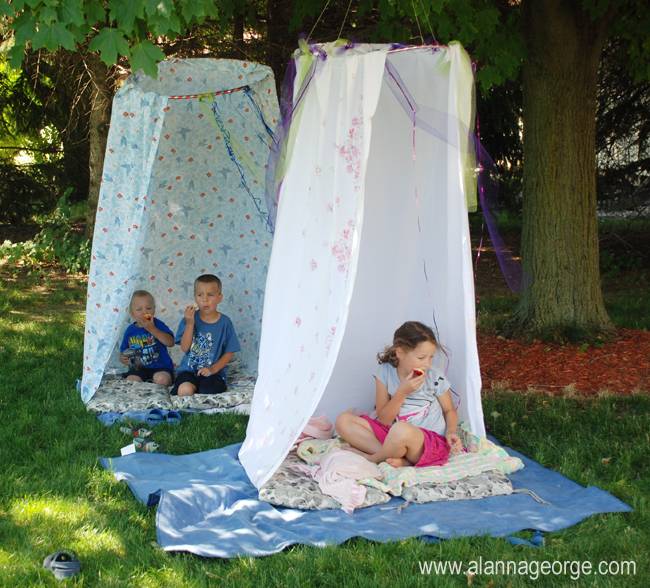
24. Get ready for DIY landscaping ideas straight out of childhood. Why not create a secret garden in your back yard? The 9-year-old in me is absolutely giddy over this idea.
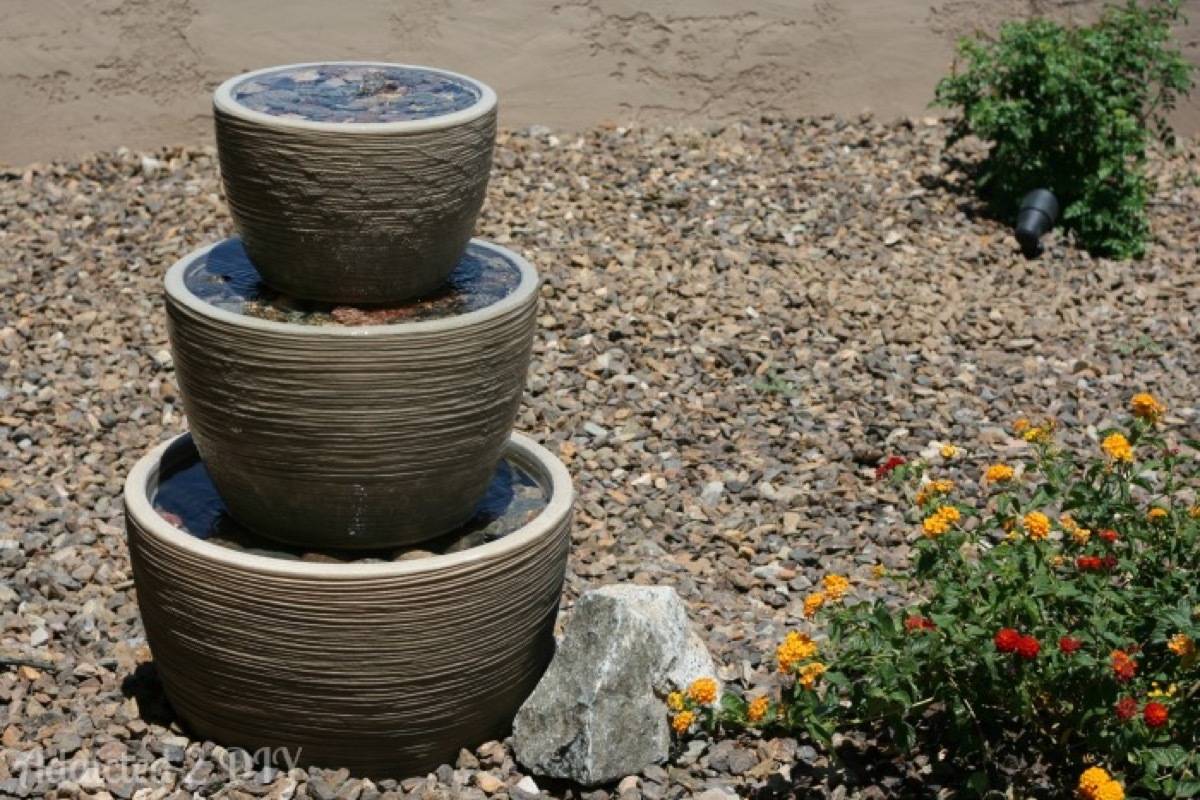
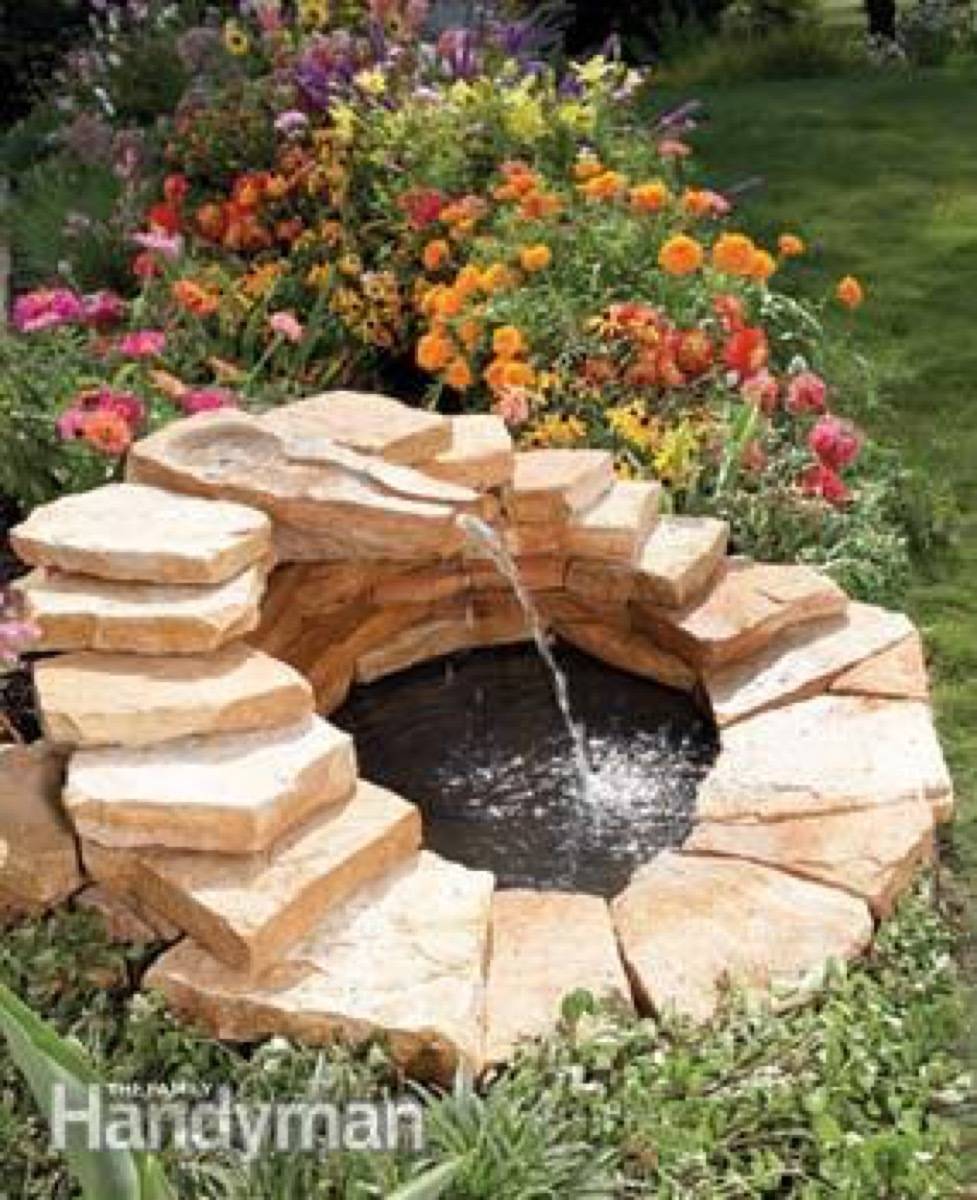
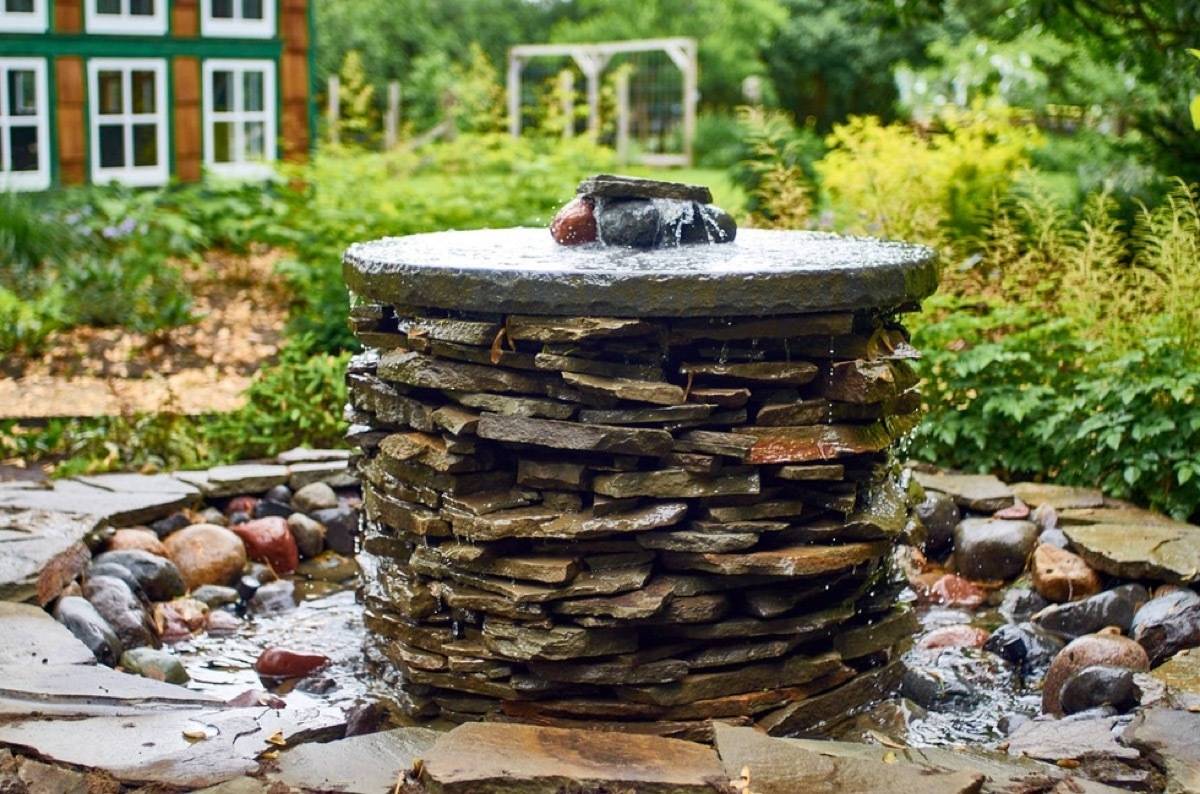
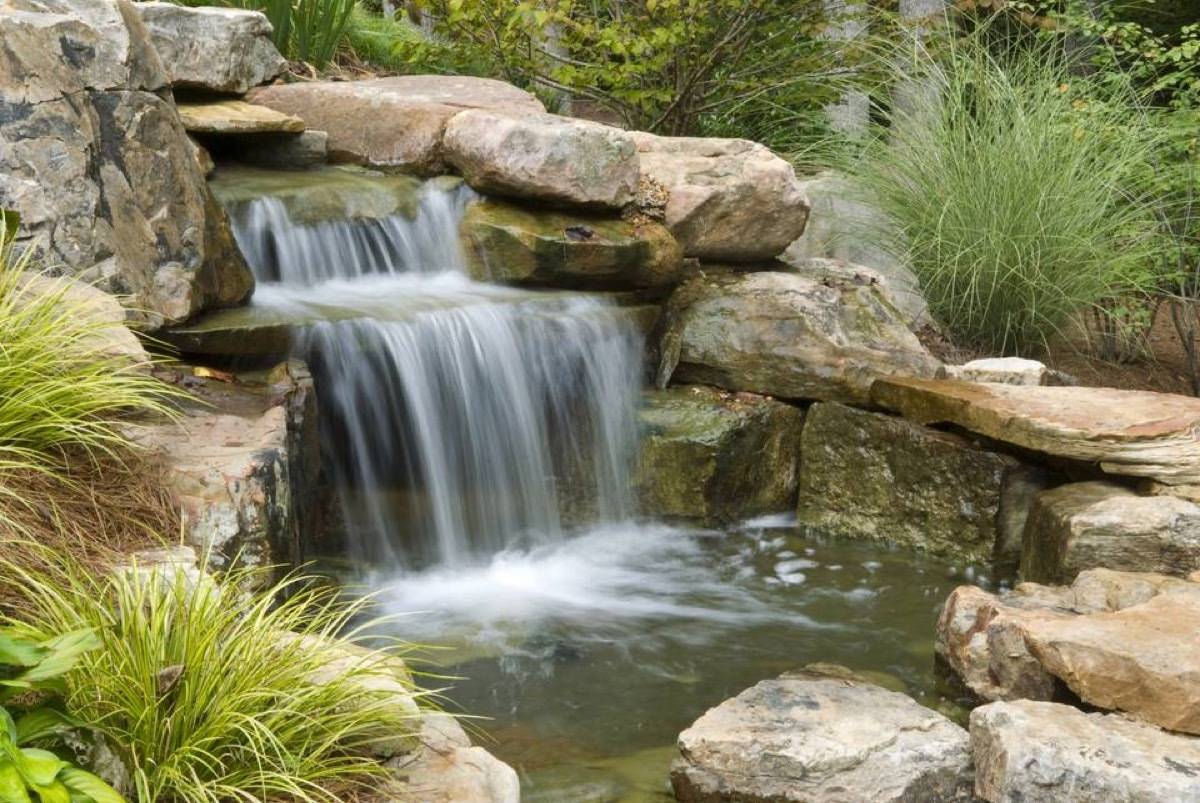
35. Stack ’em up! With a little extra effort, you can transform the previous project on this DIY landscaping ideas list into a multi-level water feature.
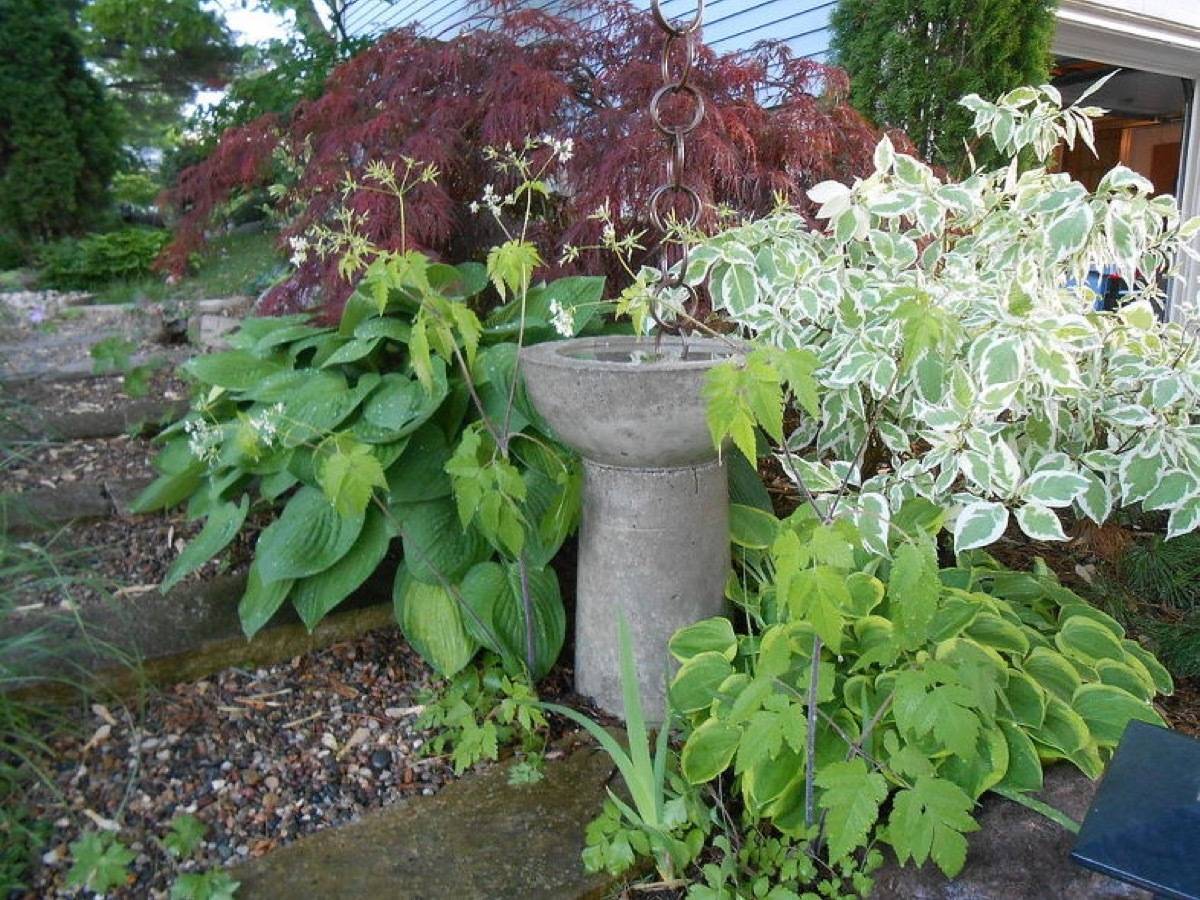
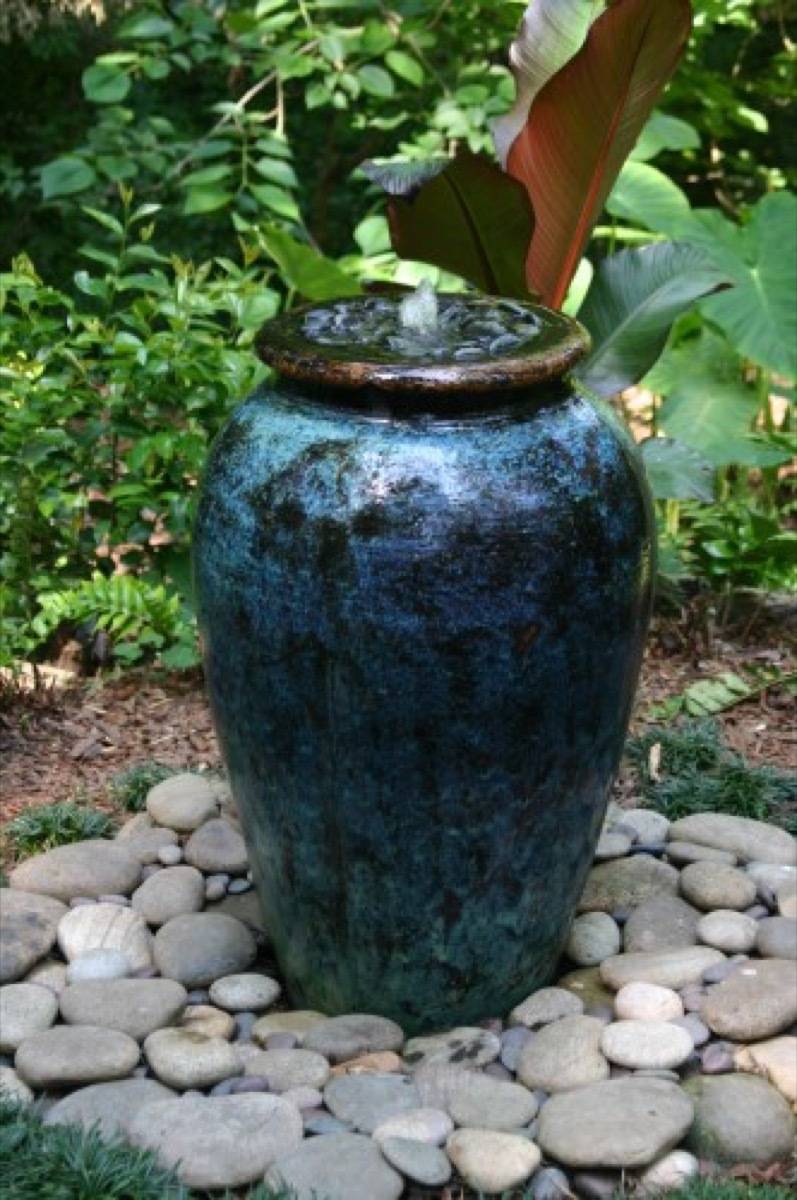
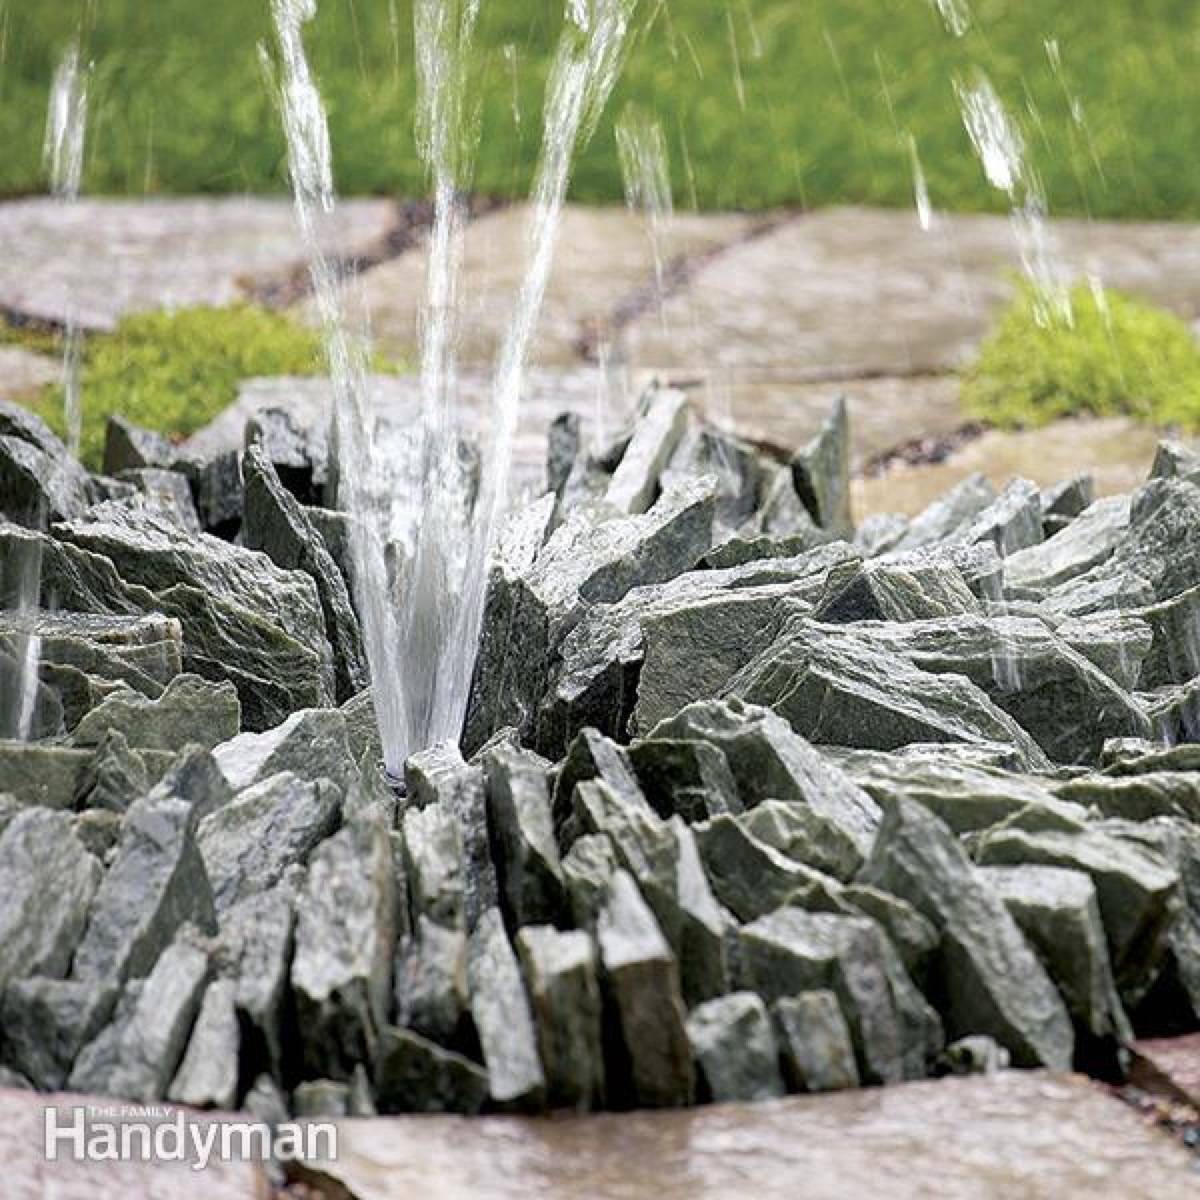
37. This is one of those DIY landscaping ideas that is going to require the help of a friend, but if you’re into drama, consider building a stone pond fountain.
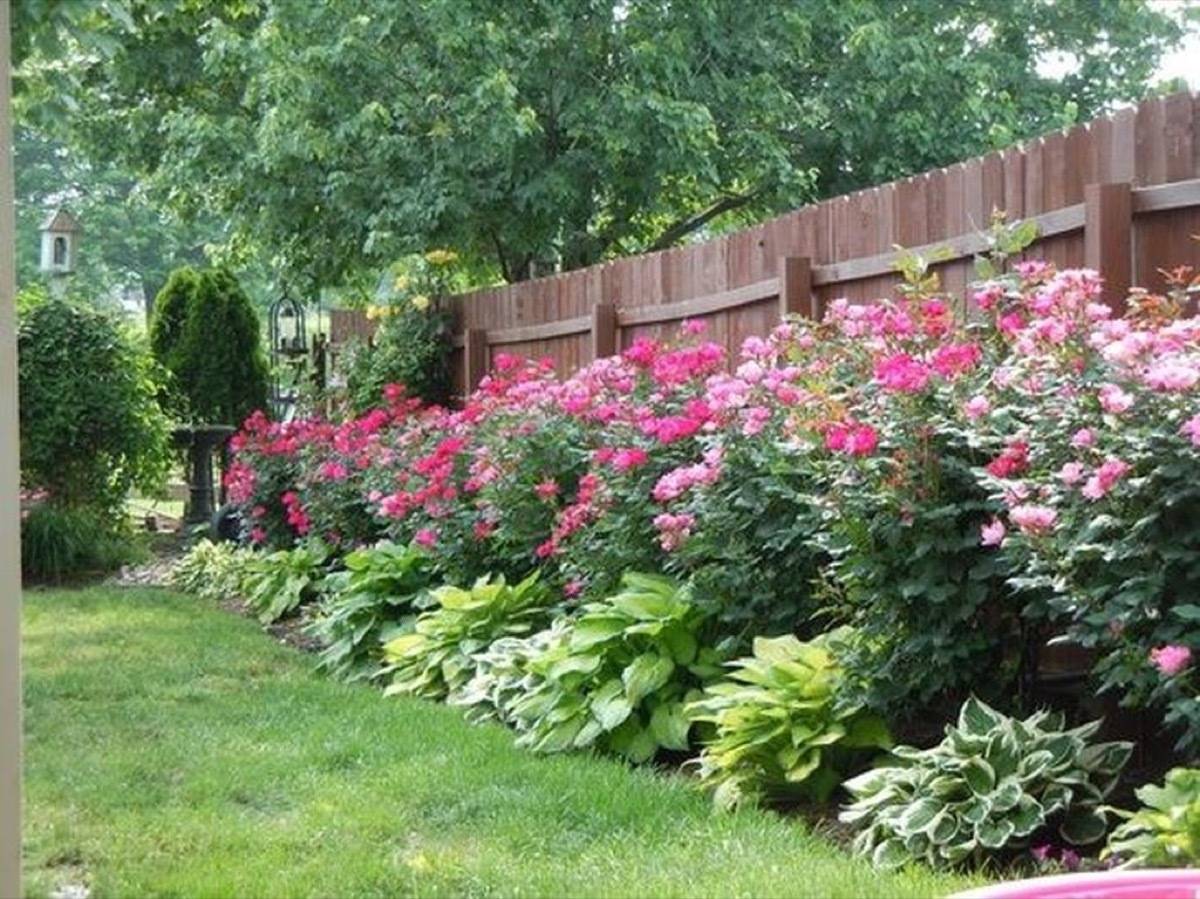
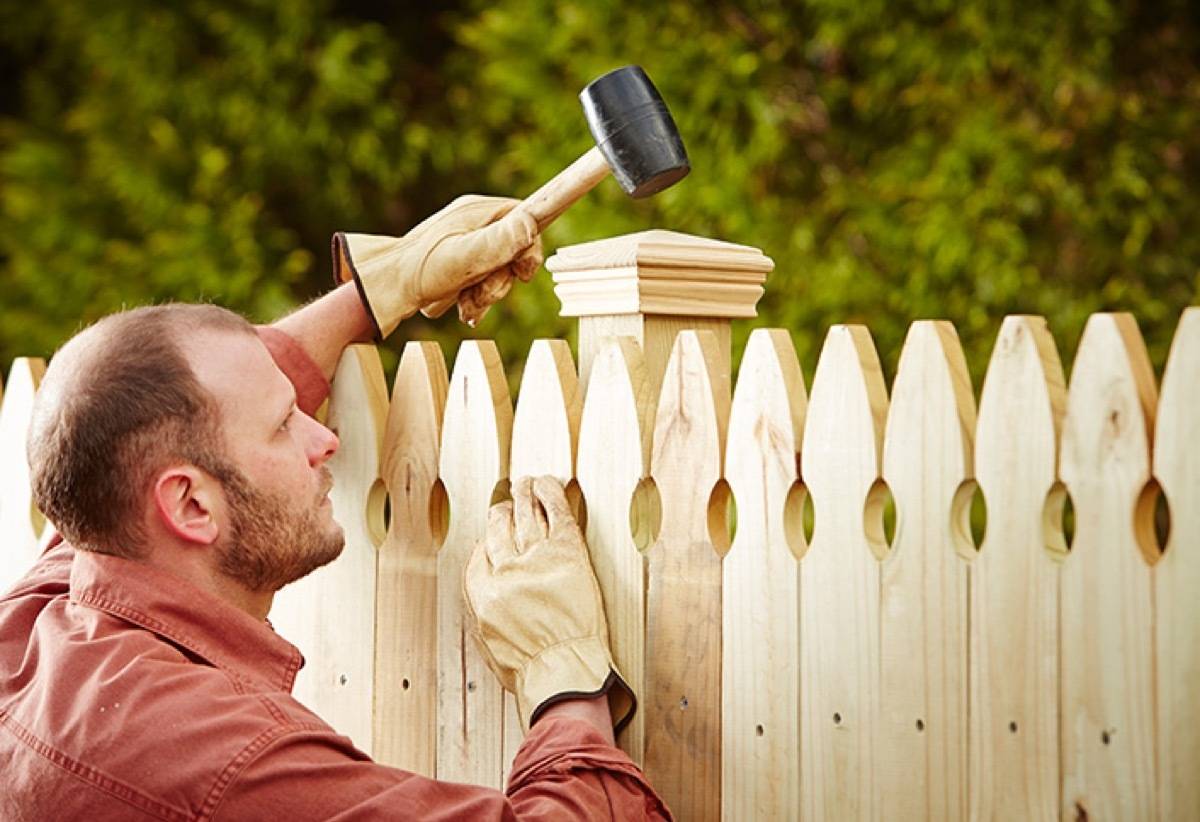
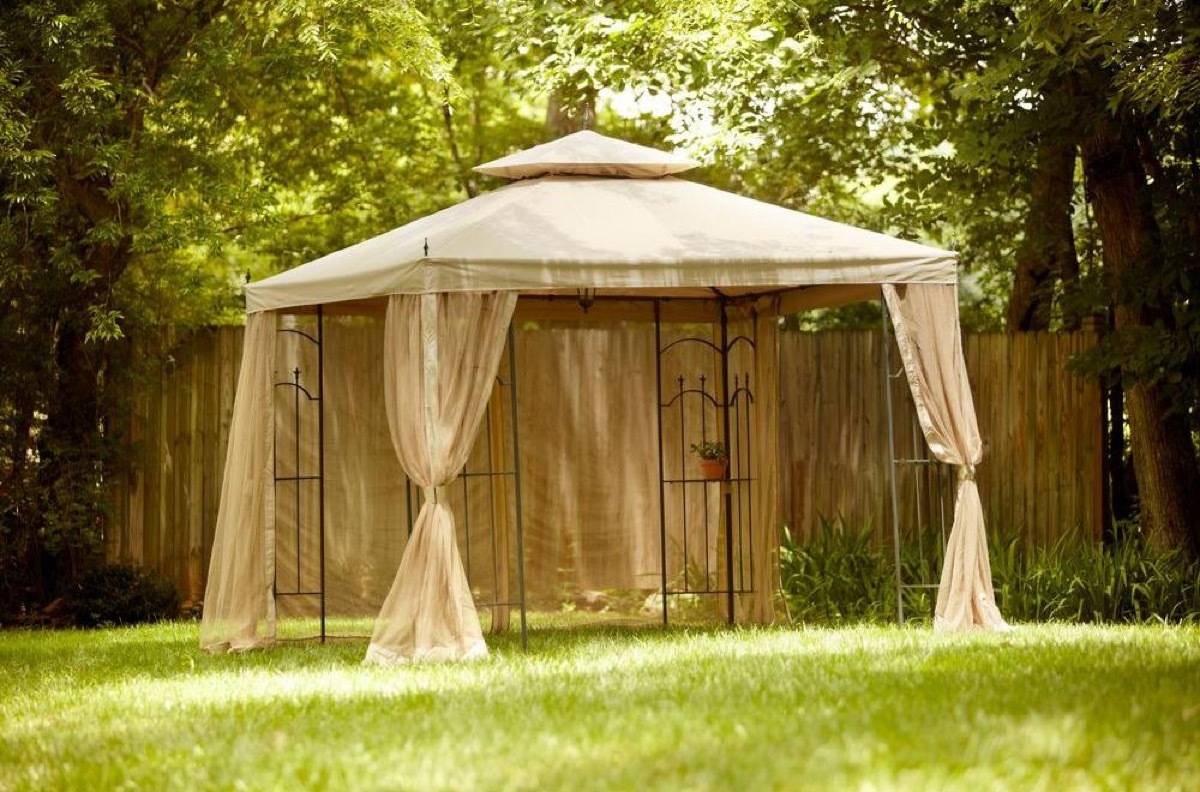
42. Nothing beats the backyard privacy of your own fence. Before you begin the building process, you’ll need to be sure of a few things: Verify your property line, check with your city or township about the limitations and height-restrictions of your fence, have someone from the city come and check for gas lines, and have a neighborly chat with anyone you’ll be sharing the fence line with.
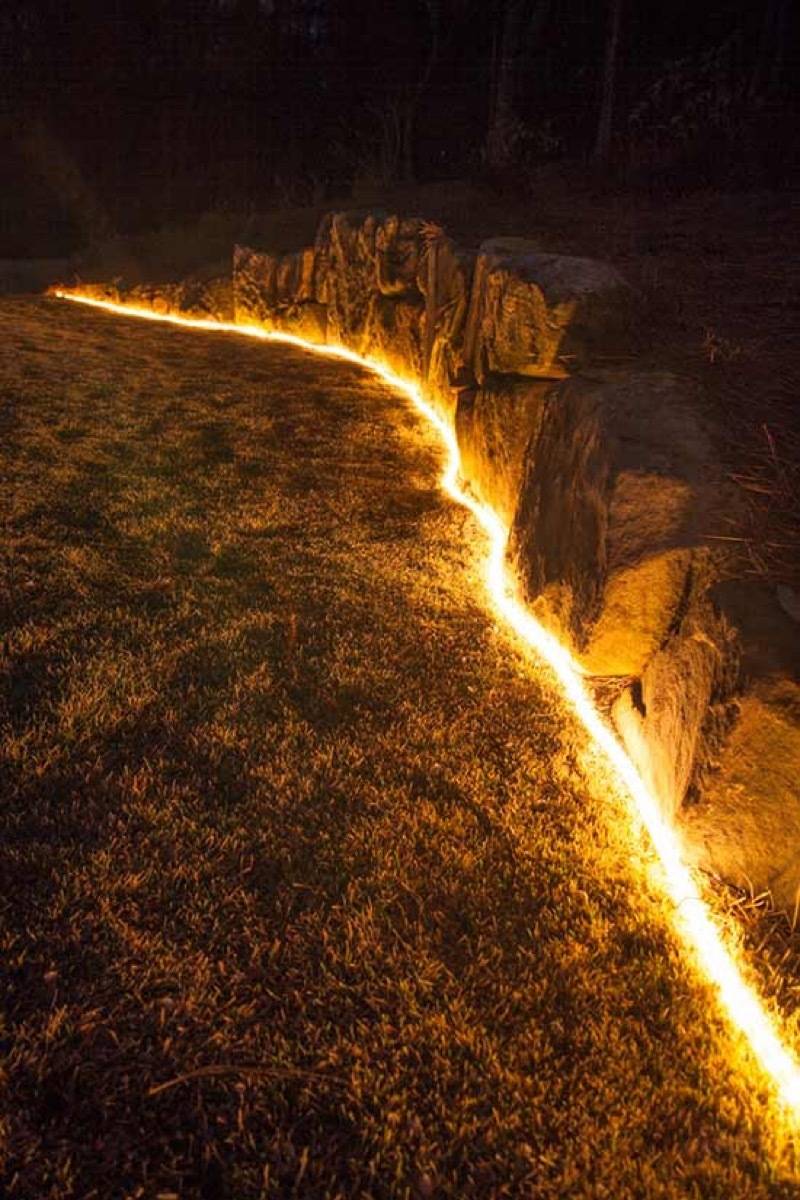
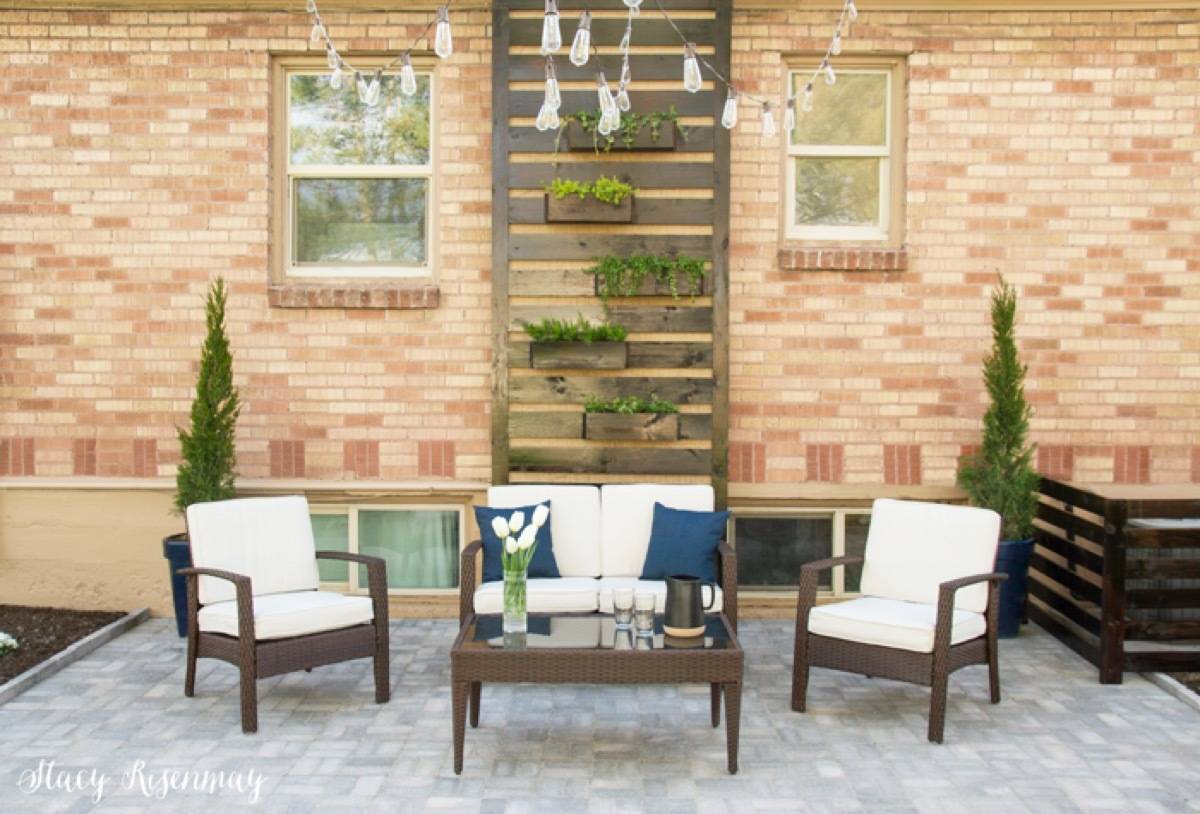
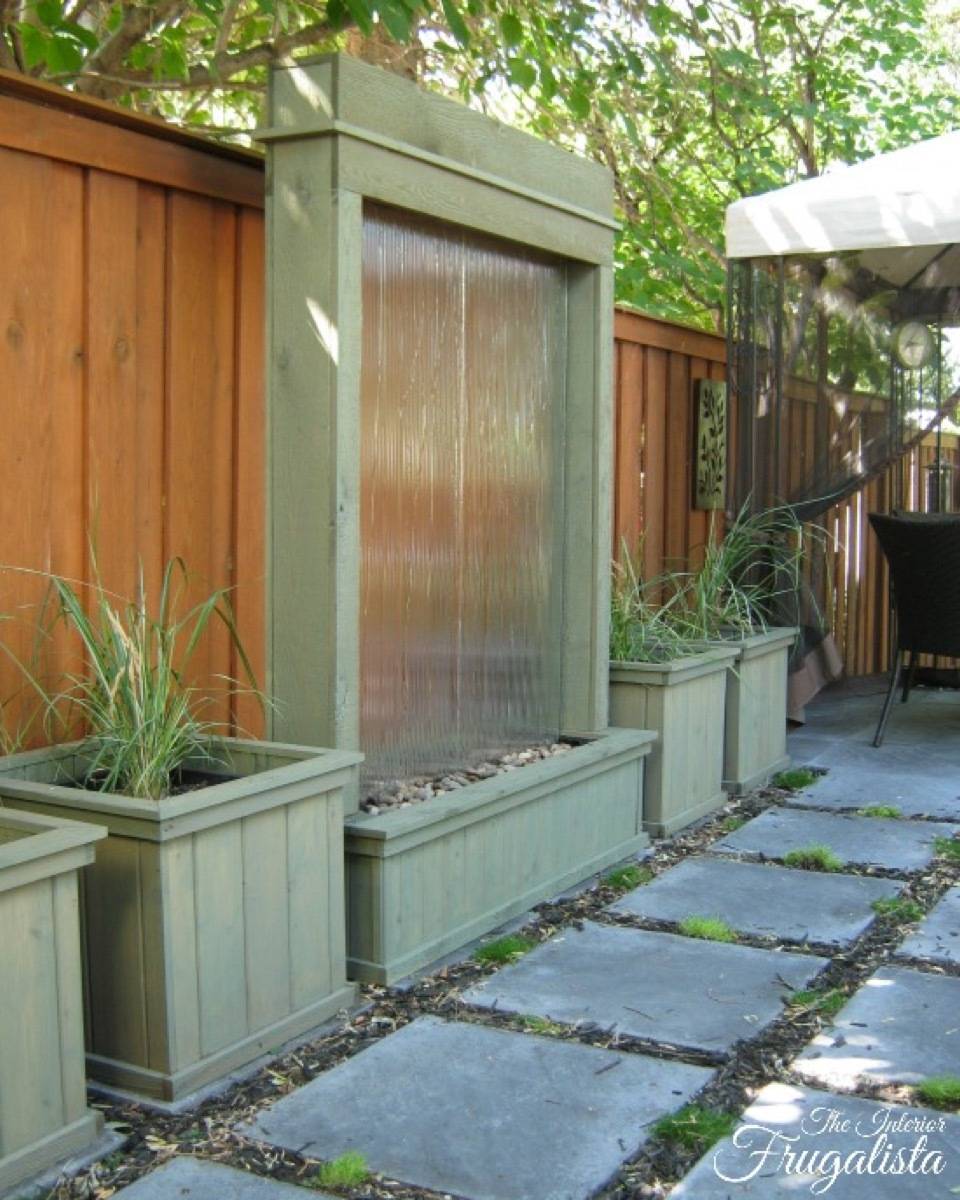
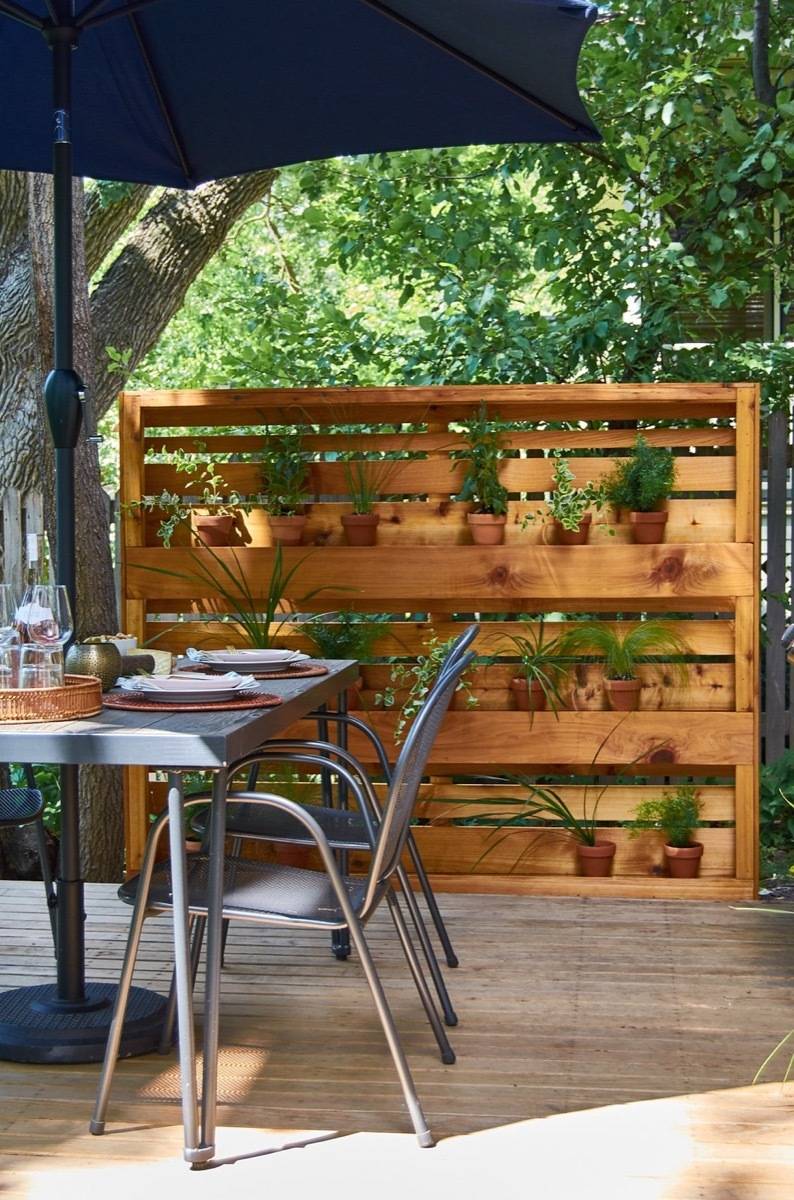
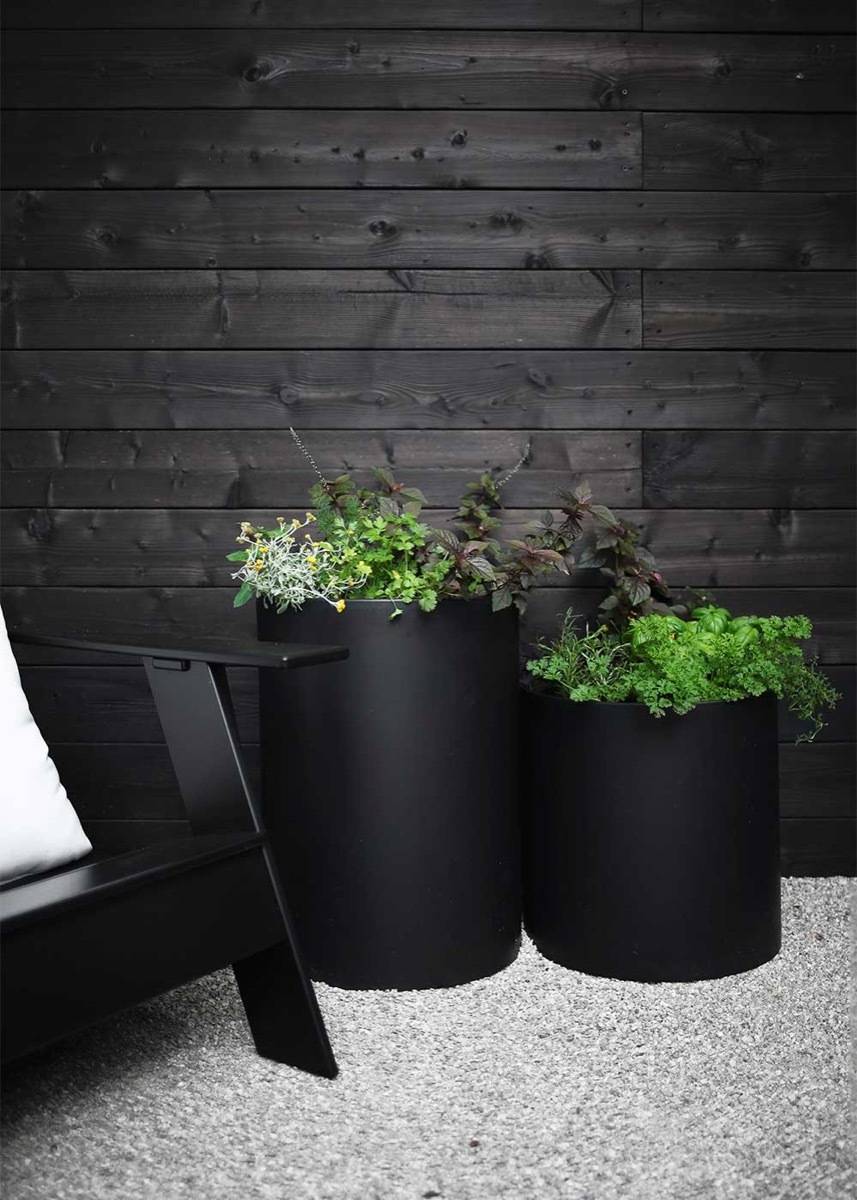
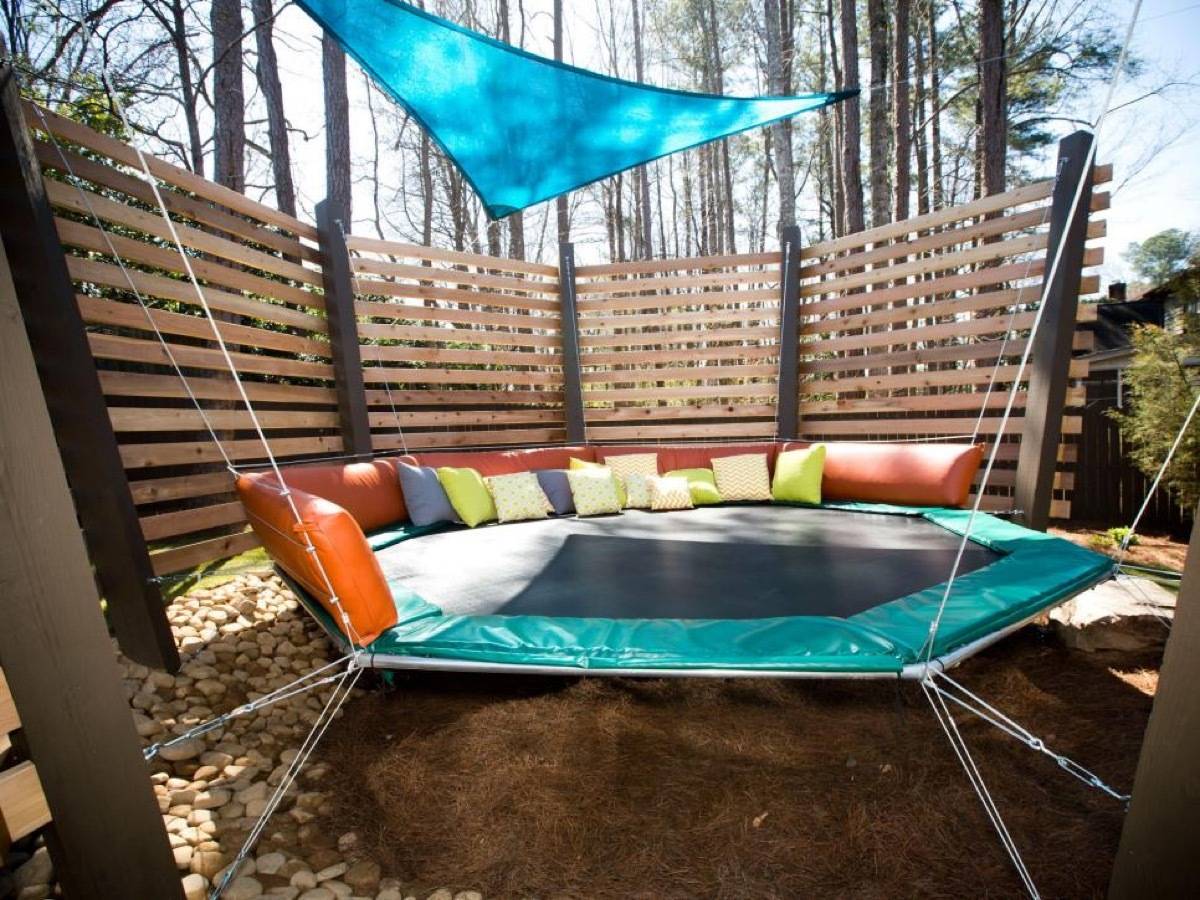
46. Transform your privacy wall using shou sugi – the process of burning wood, making it water-resistant. Side effect, the shou sugi treatment transforms wood to a beautiful, rich black color.
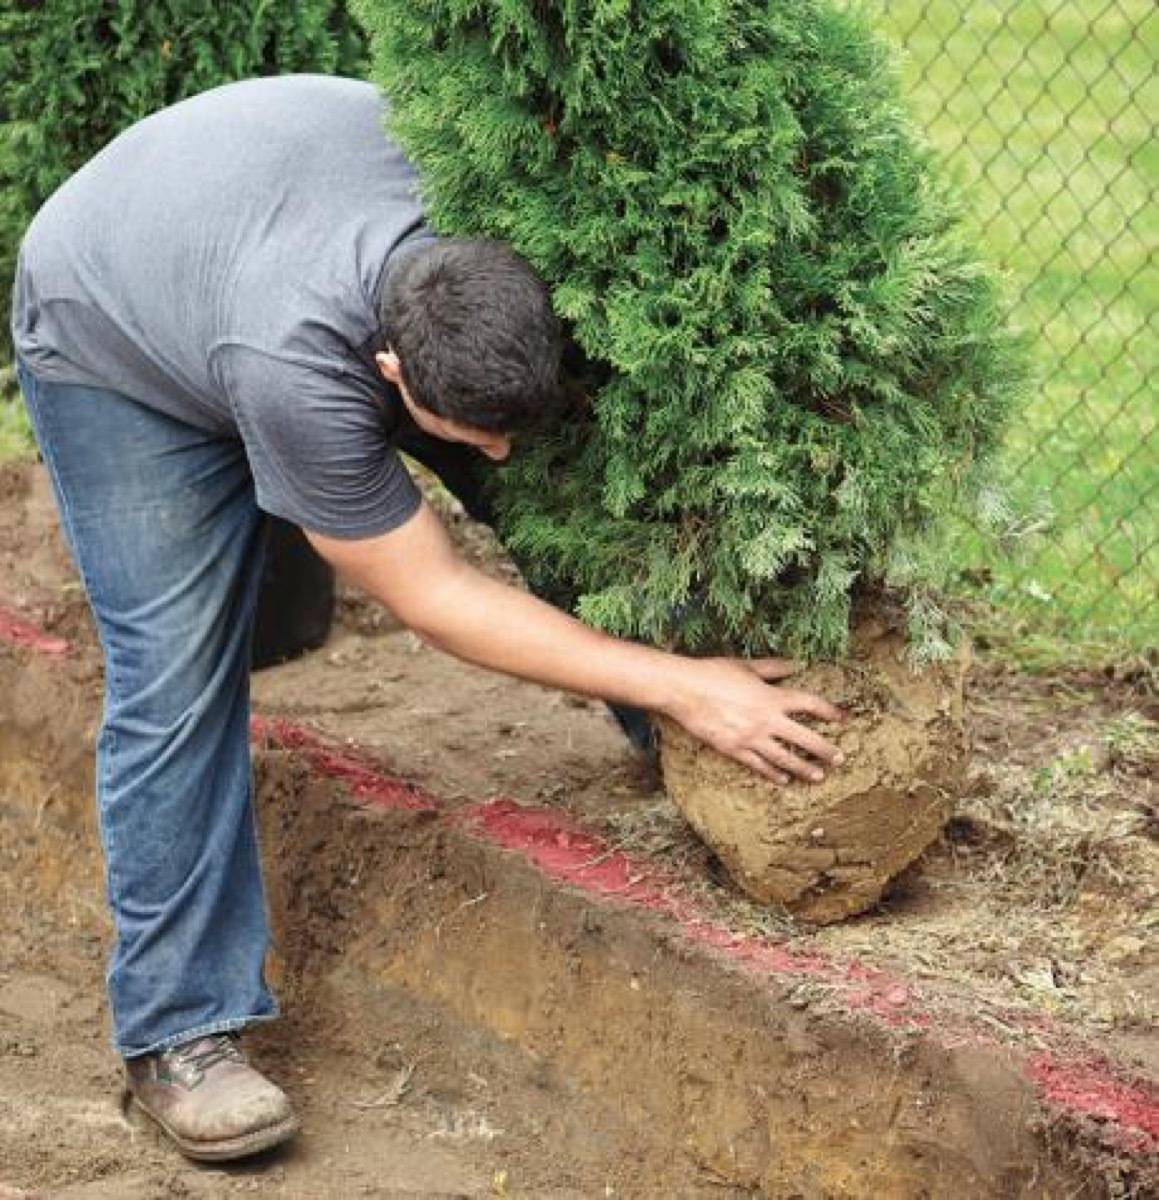
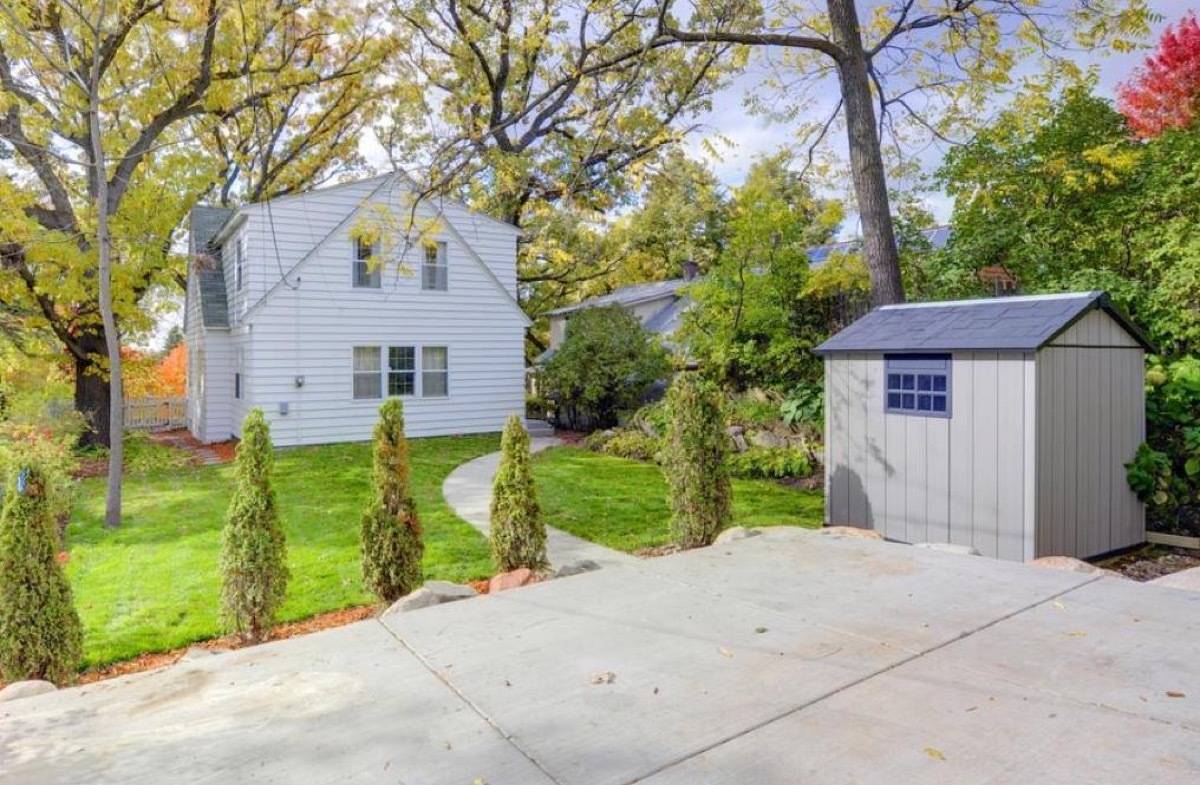
48. Need lots and lots of privacy? There are cheap trees you can buy that over time will block out the neighbors, like the inexpensive Leyland Cypress.
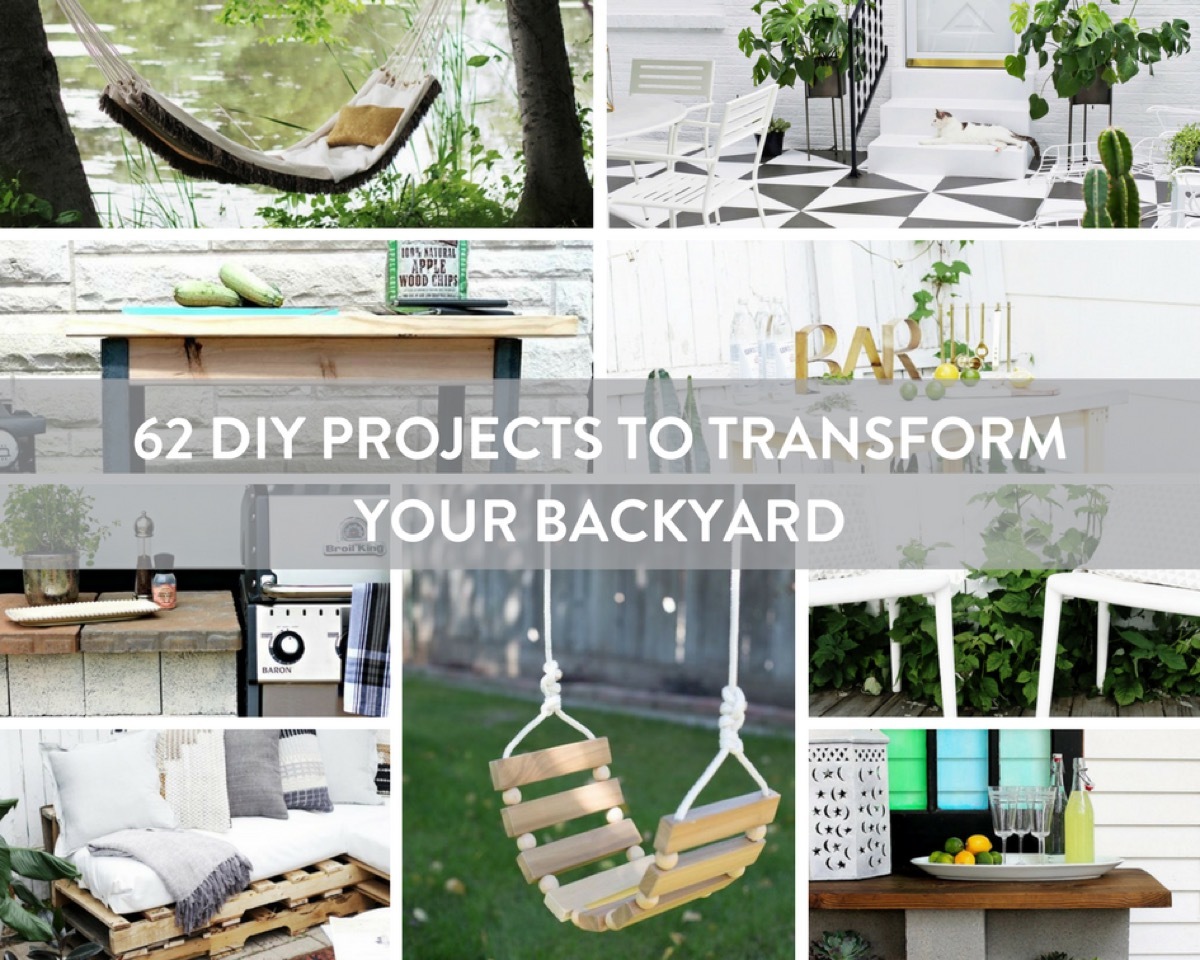
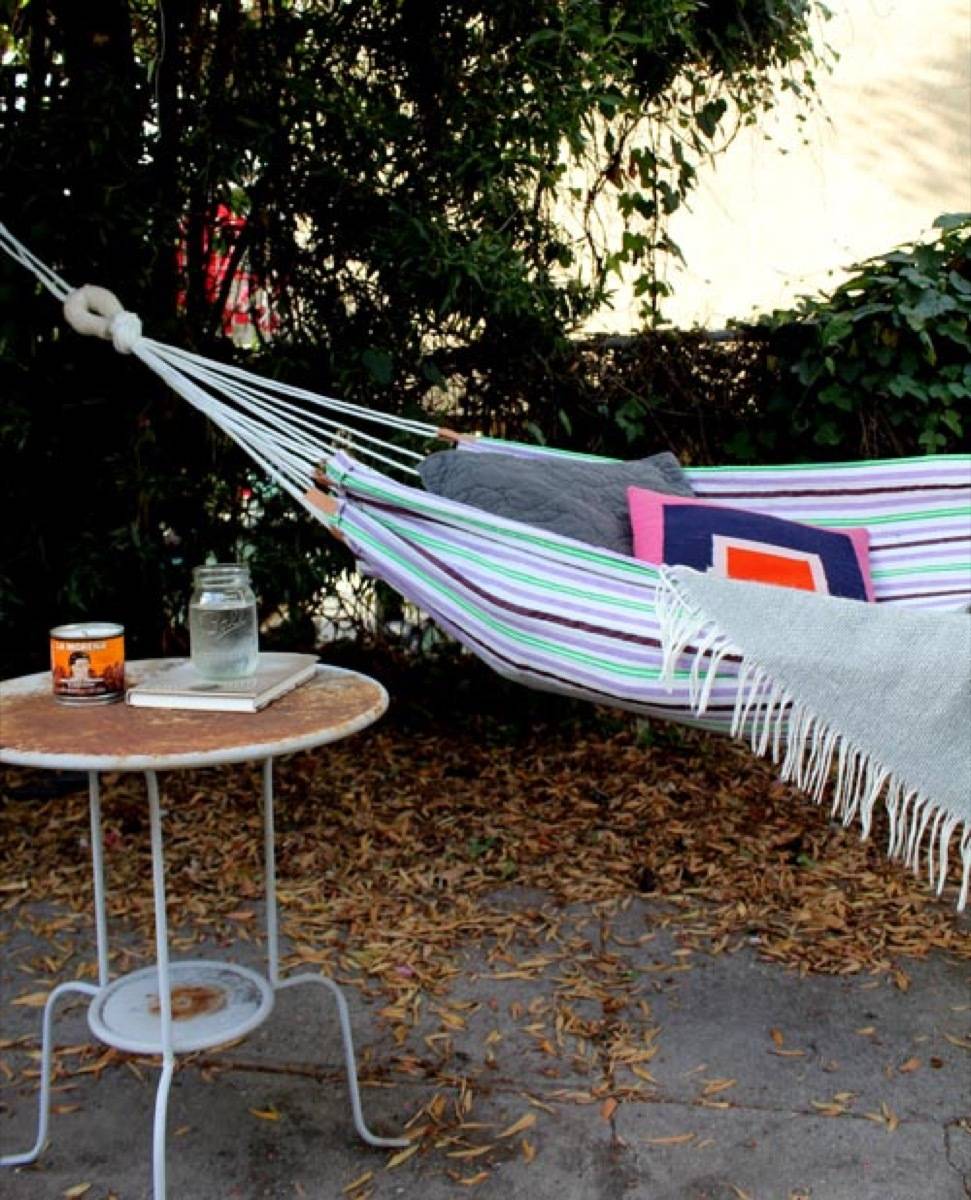
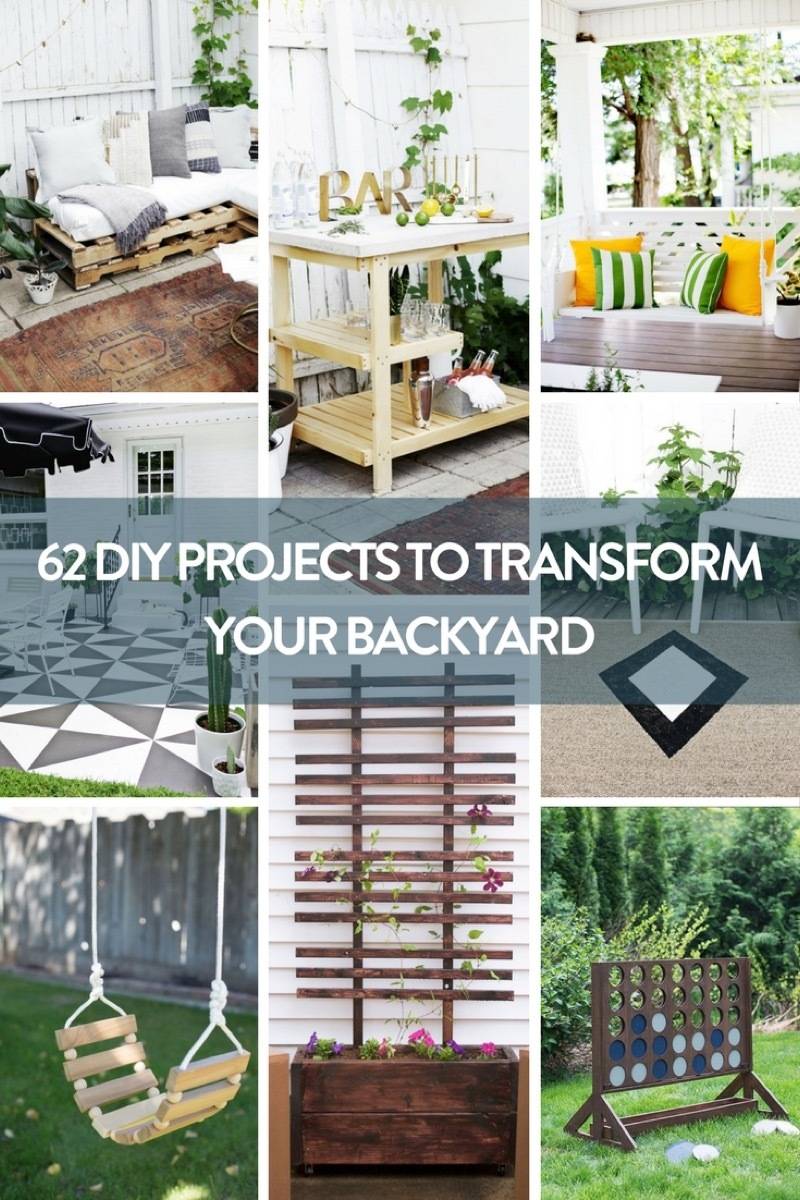
Blooming flowers and fresh rain can only mean one thing: spring has definitely sprung! That means summer will be here before you know it. If getting your backyard in order is on your to-do list but you’re having trouble getting started – don’t fret! You don’t need a total landscaping overhaul for your yard to feel refreshed and inviting. Sometimes it’s just a matter of hanging up some string lights or creating a simple fire pit. We’ve rounded up 62 outdoor DIY projects to get you excited to be outside again as the weather warms up. From plants to playhouses, keep scrolling for more inspiration!
What ways do you want to transform your backyard? Let us know in the comments!
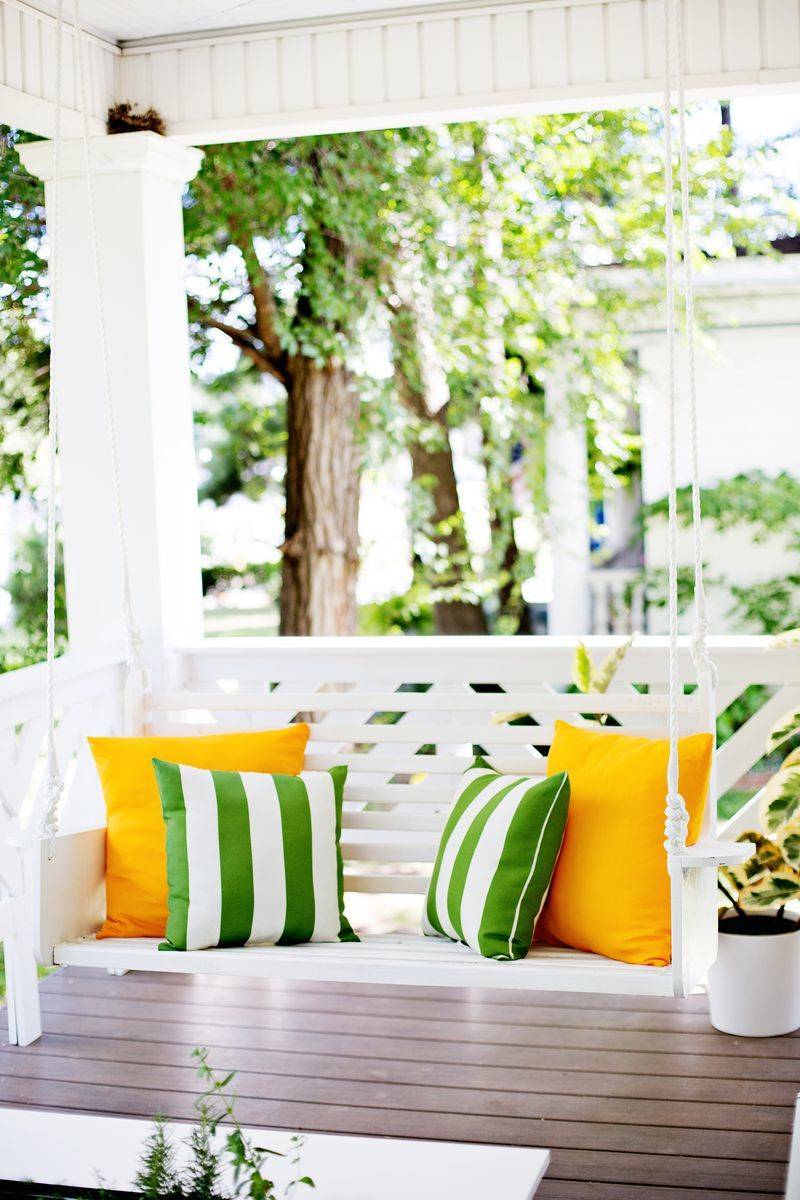
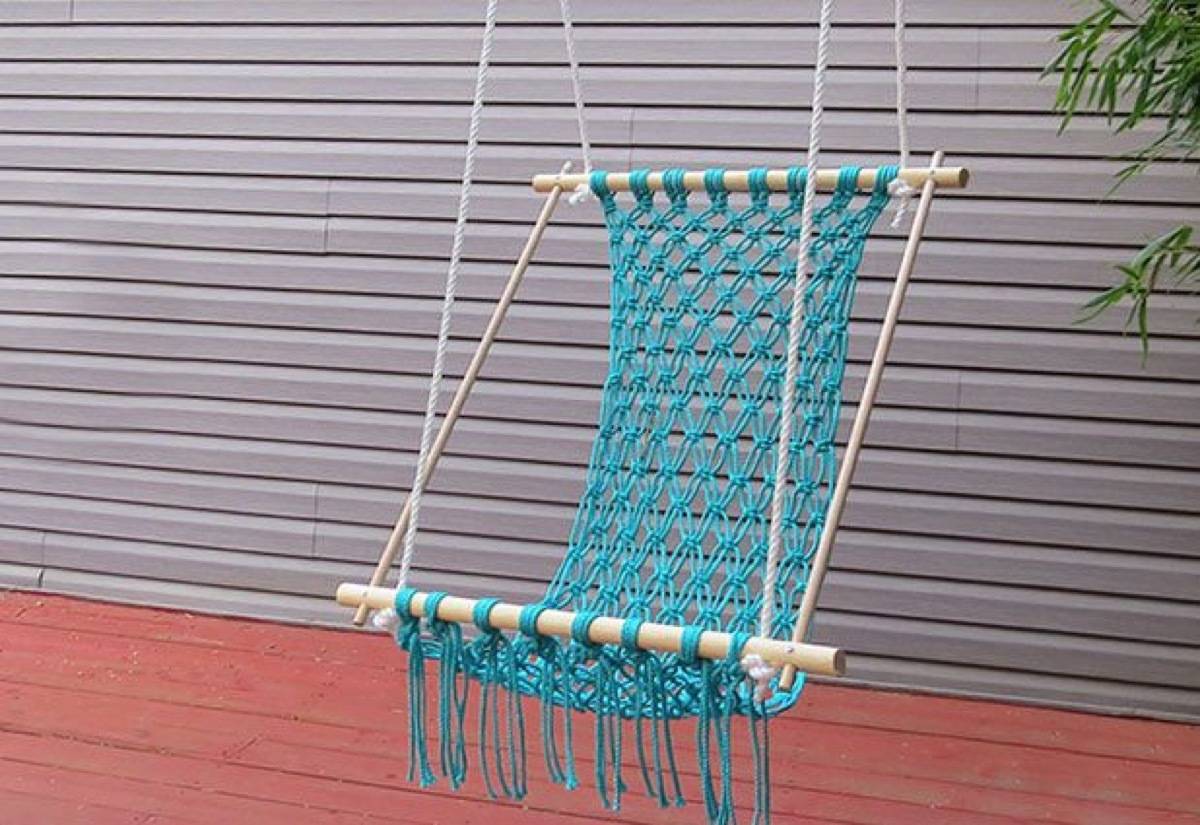
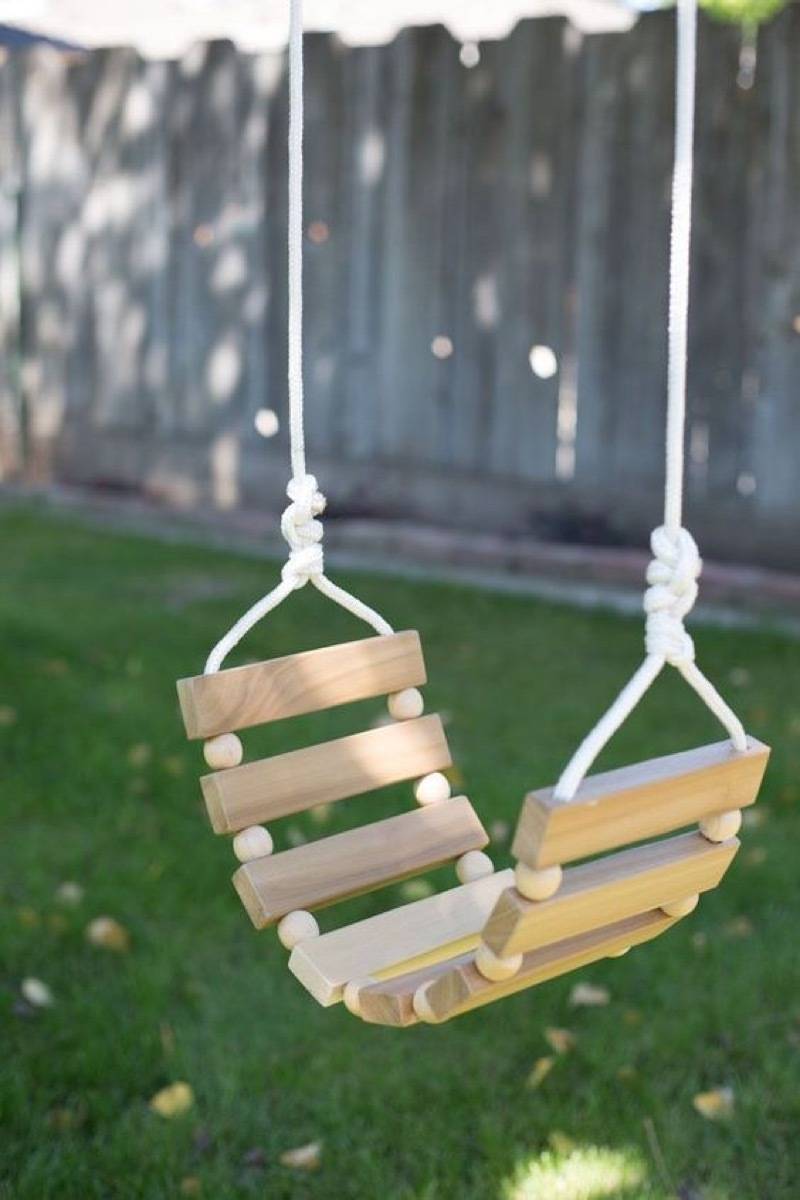
4. DIY Porch Swing: As Liz Lemon says, “I want to go to there!” Swinging in the spring breeze is a total DIY reality with this project from A Beautiful Mess.
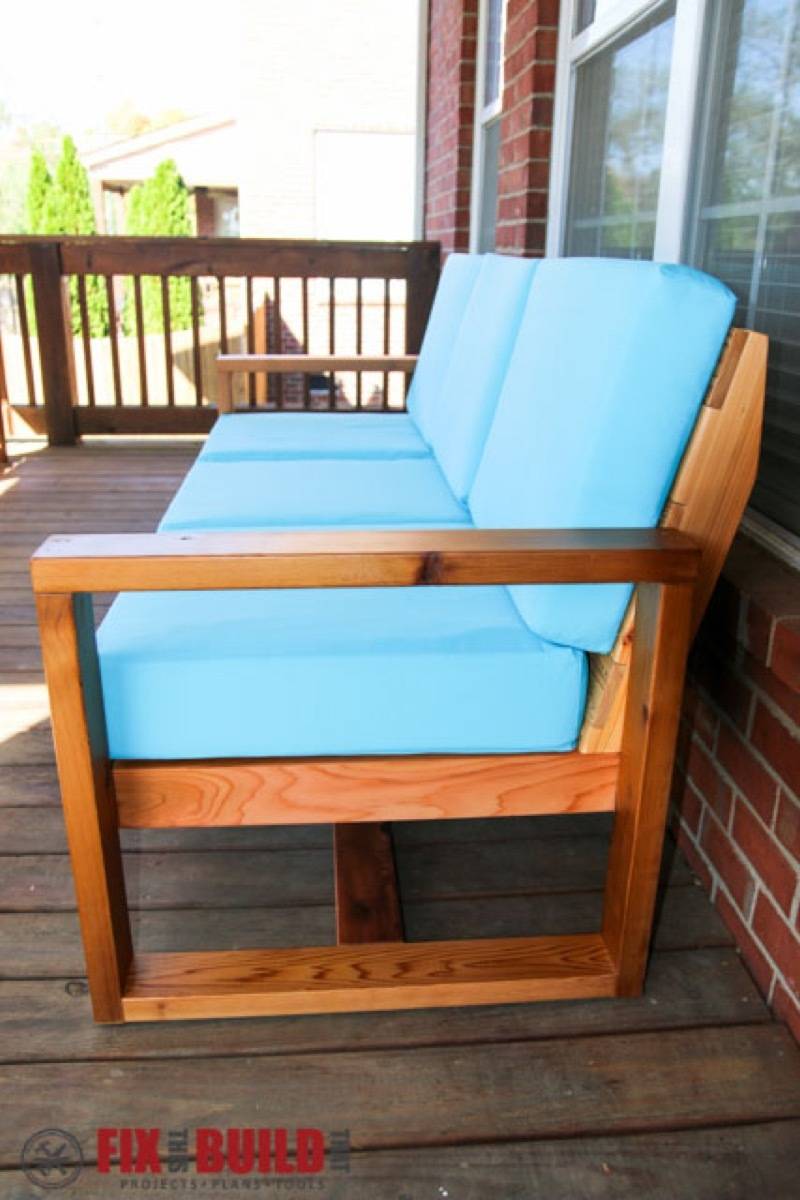
9. Modern Outdoor Sofa: This number is so sleek I might want to bring it inside my house! The good news is it’s built to withstand the elements, which means you can make your back deck super classy.
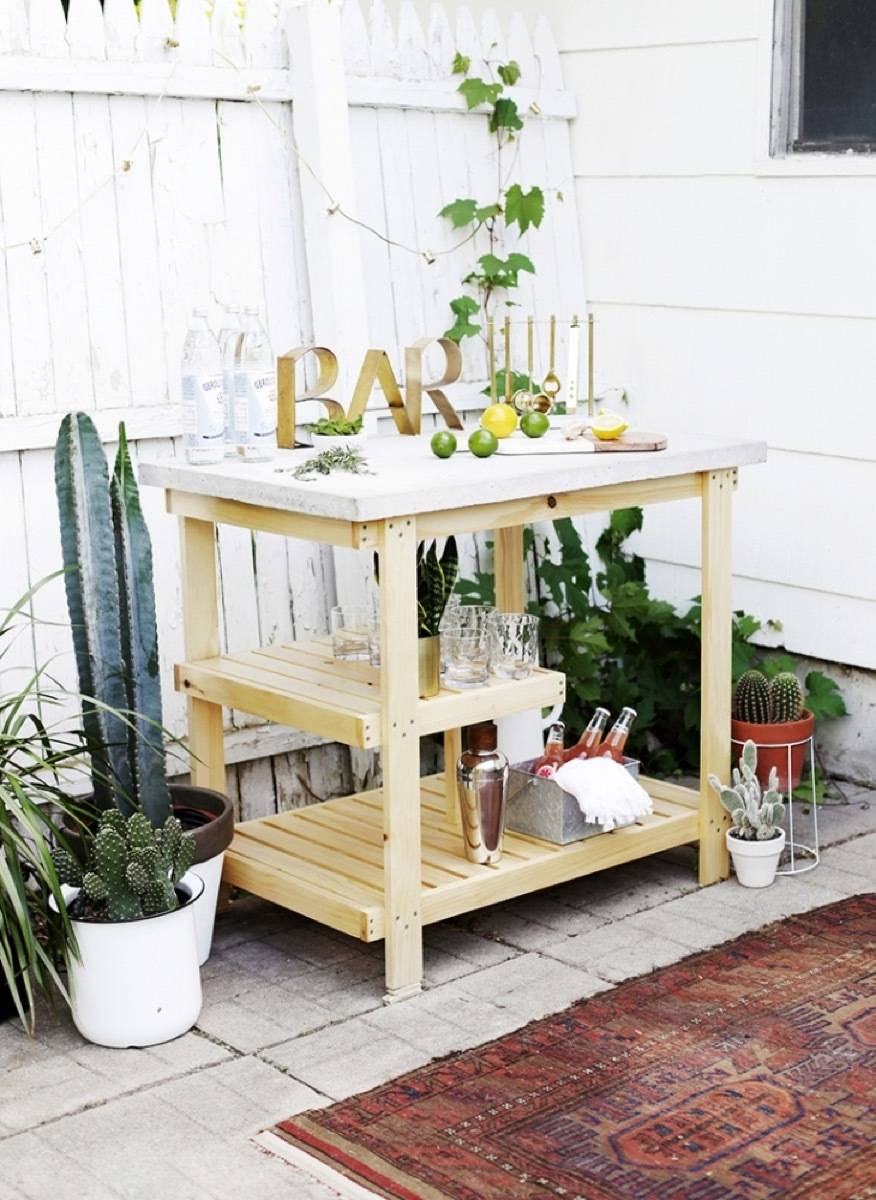
11. Outdoor Bar: If you’re not really the grill master type, but more of a whiskey woman, why not make a drink bar for your backyard?
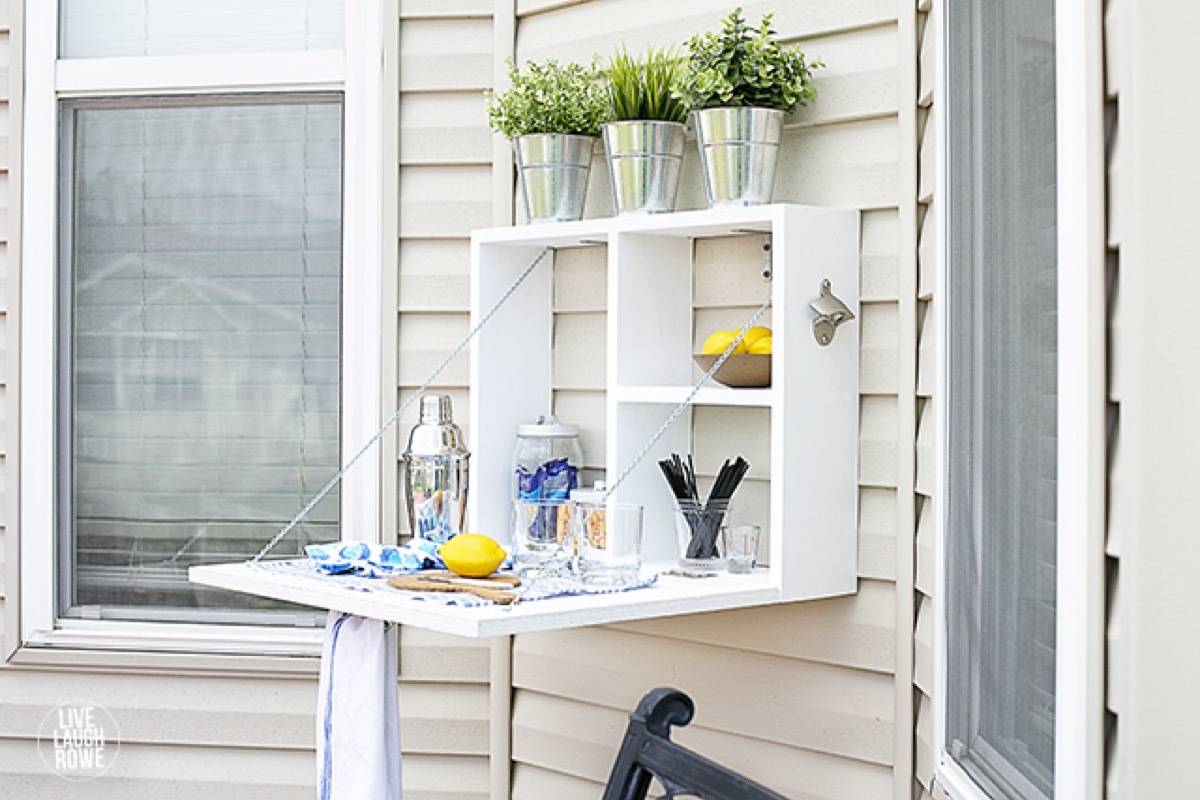
Photo: Live Laugh Rowe
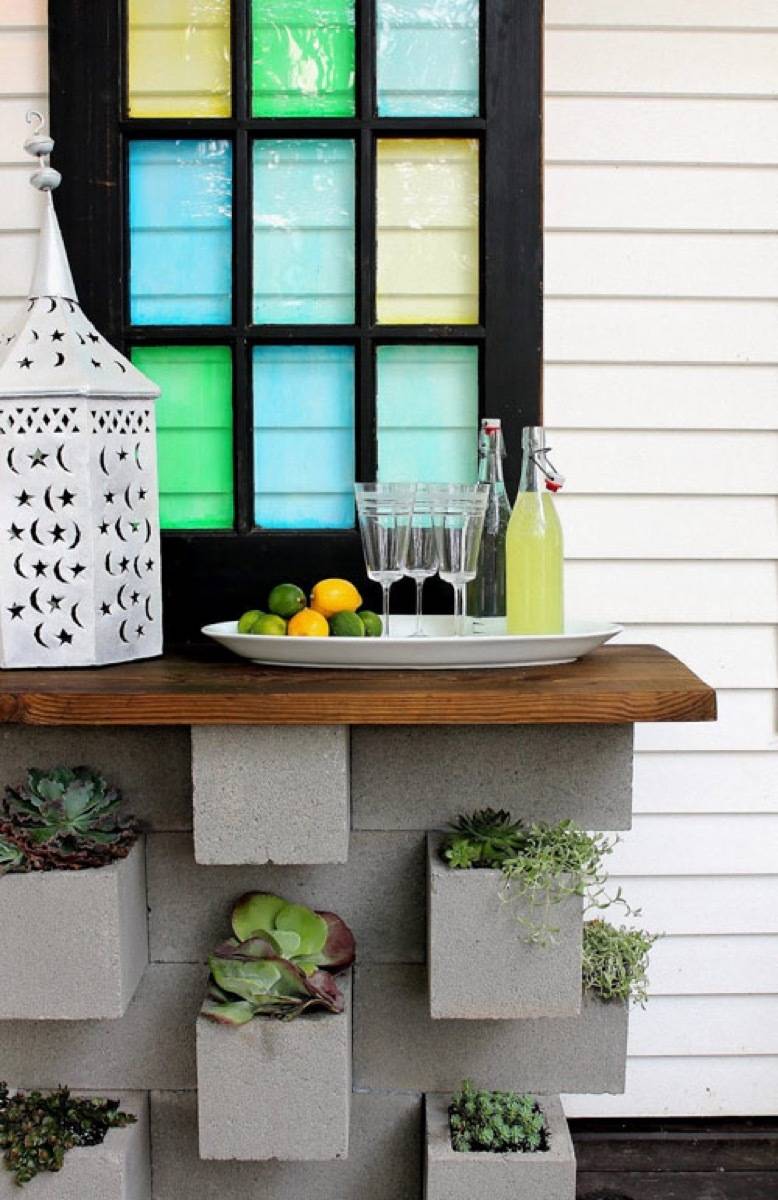
12. Wall-Mounted Serving Station: Want to entertain but don’t have space for a full outdoor kitchen? Go vertical by building this simple serving station with drop-down tabletop!
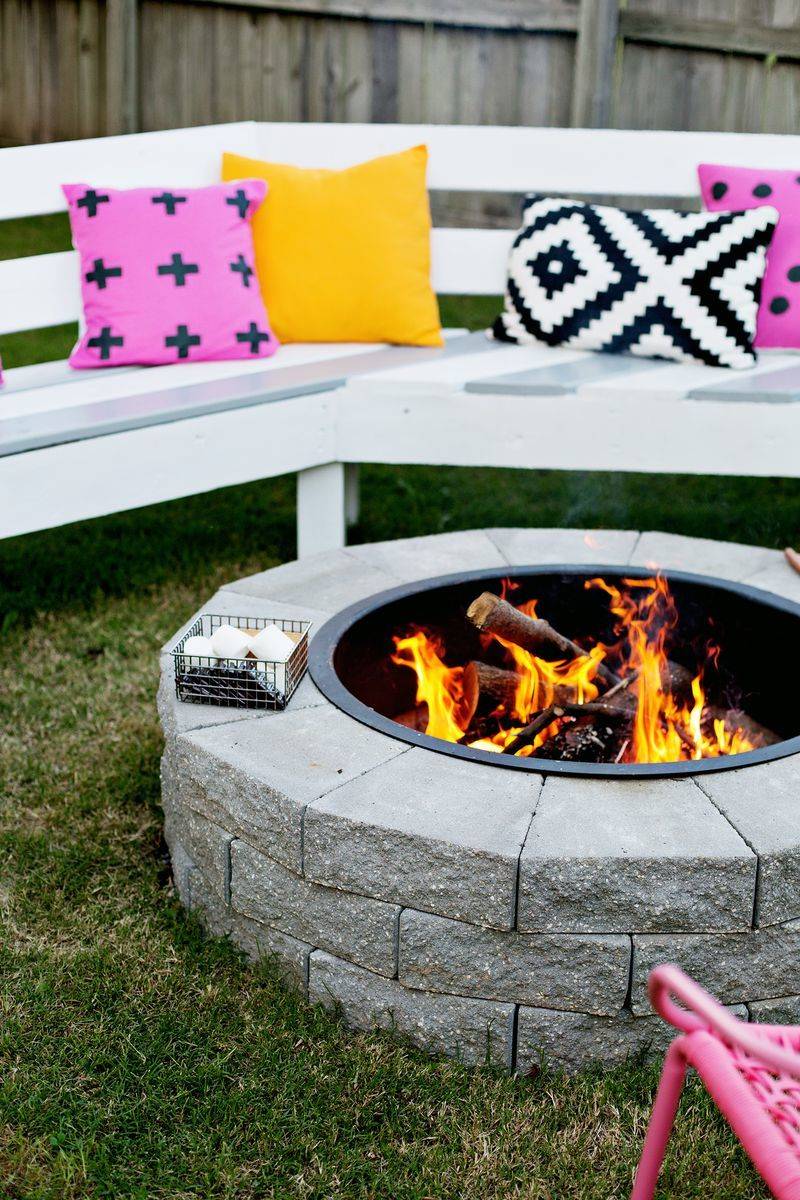
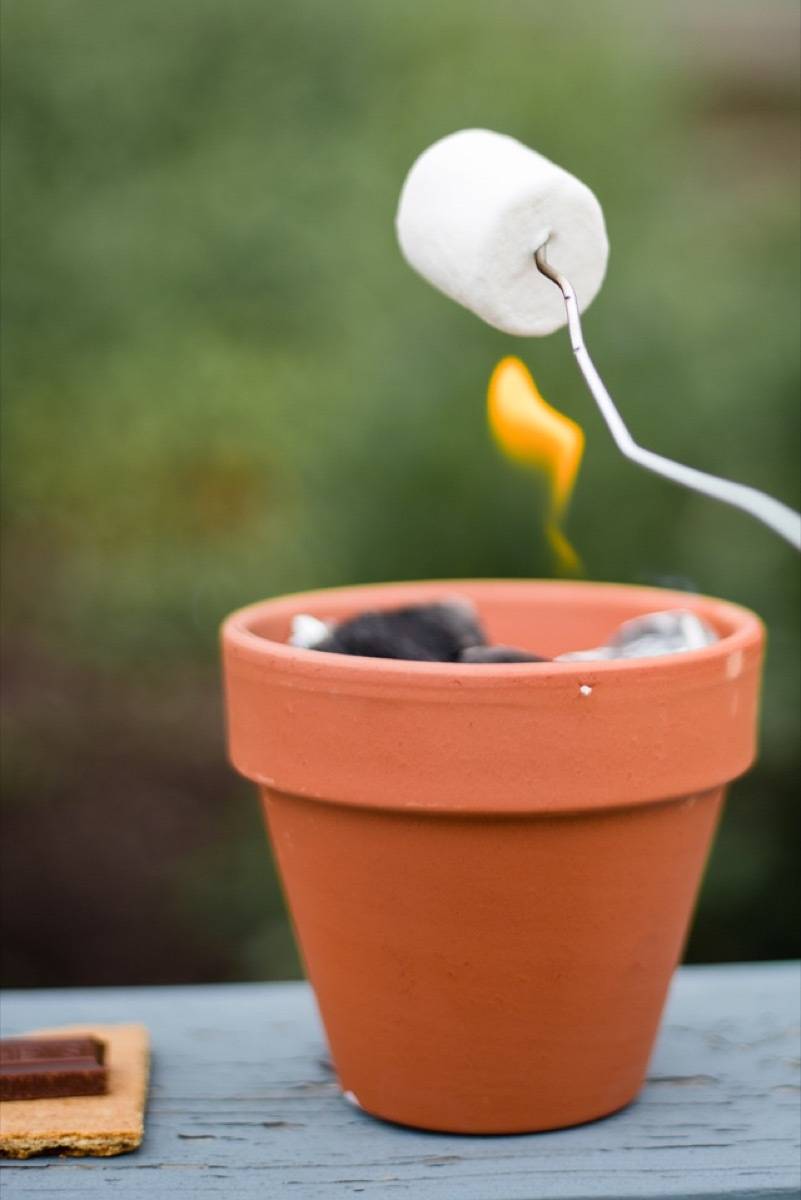
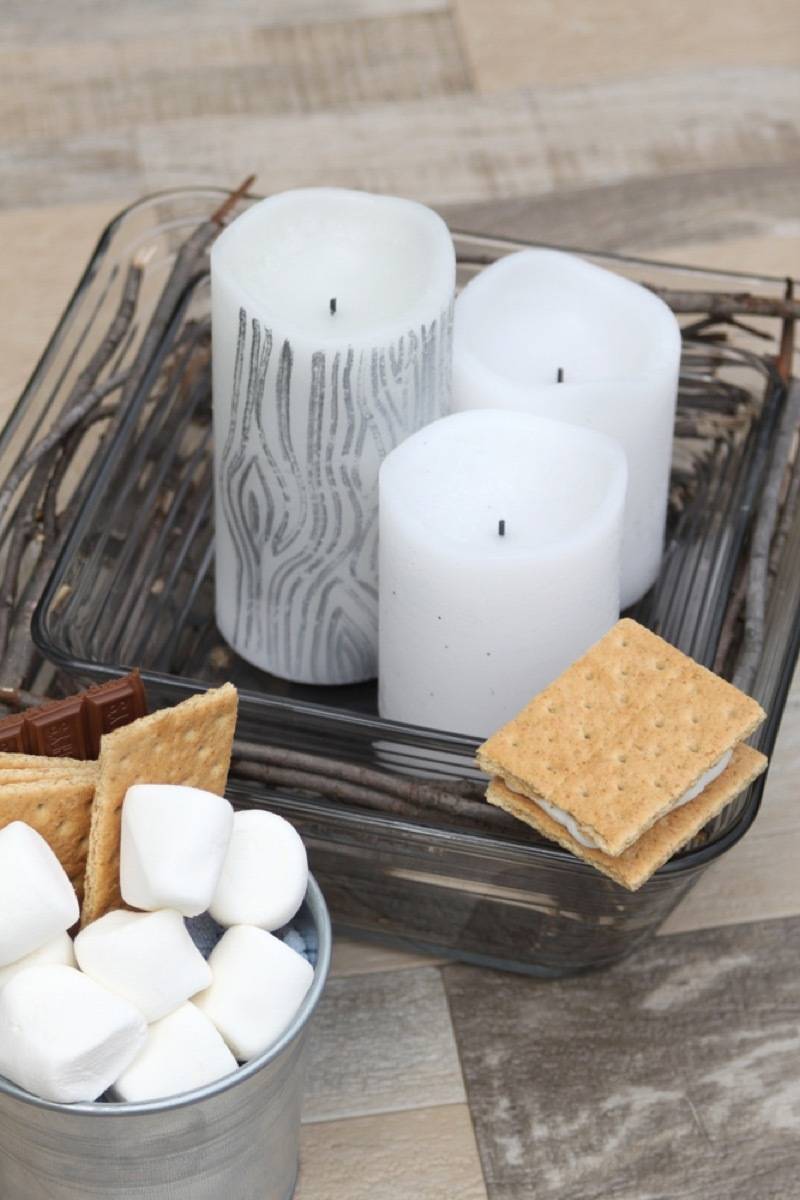
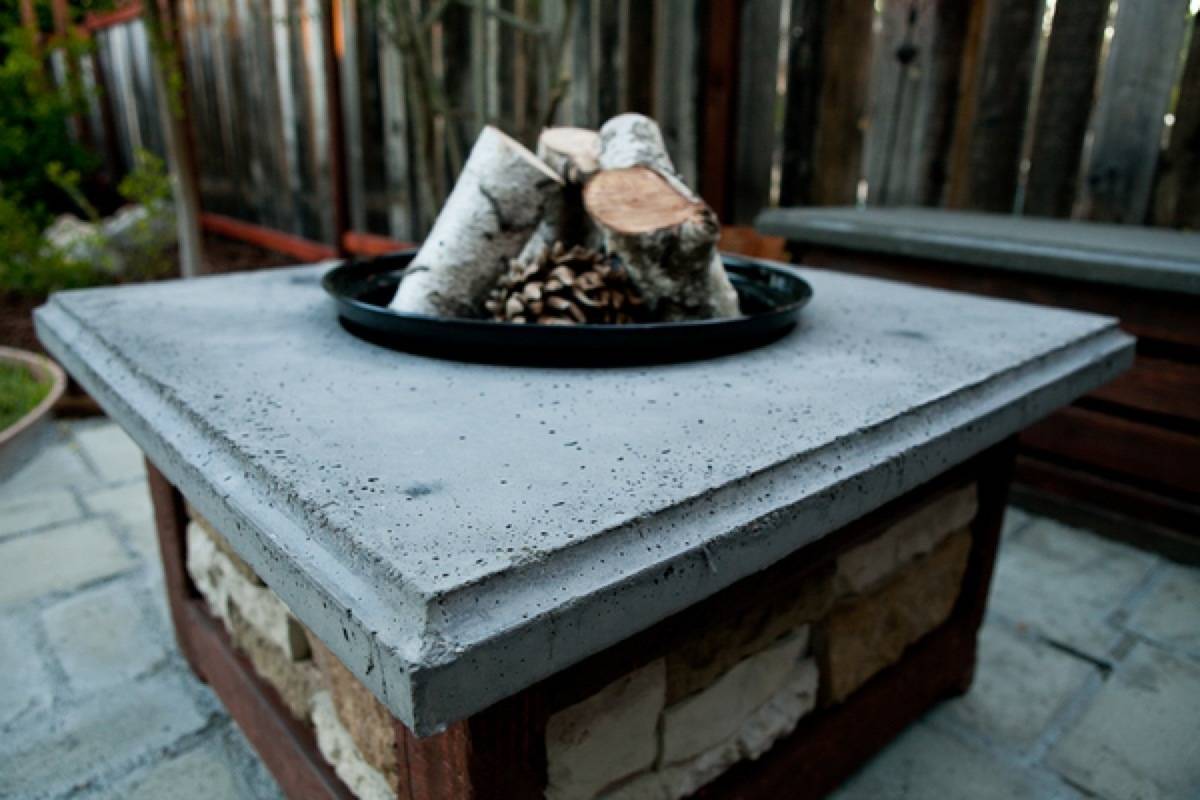
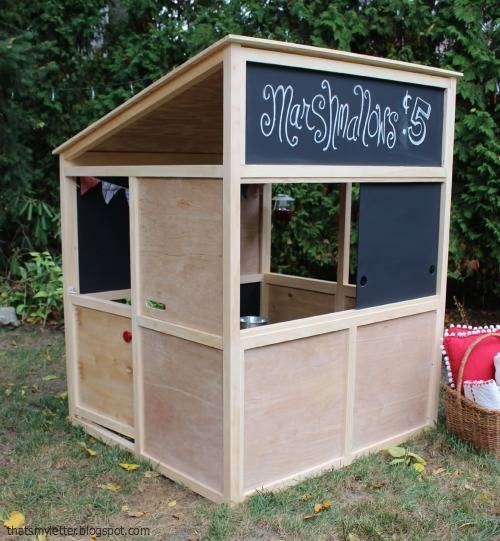
14. S’mores Station Centerpiece: Acting as both a lovely centerpiece and a warming station for marshmallow and chocolate, party guests are sure to be impressed by this s’mores machine (made from glass dishes!).
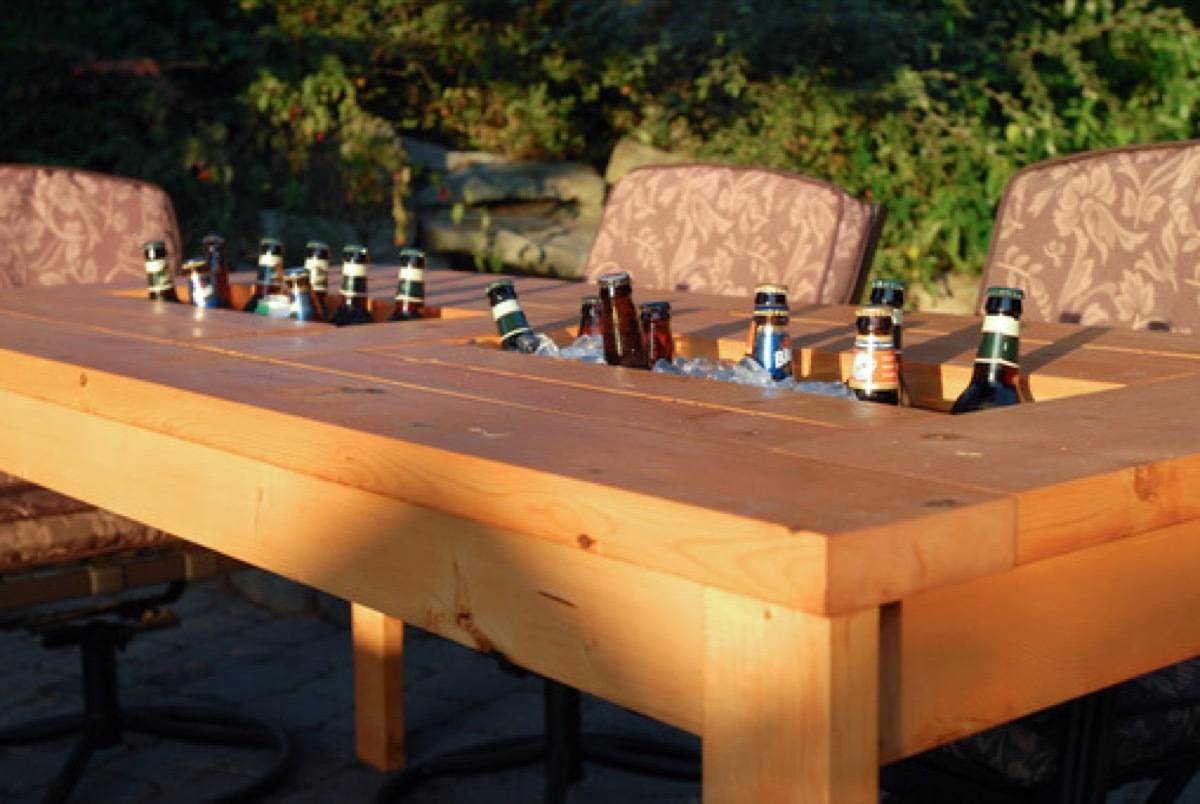
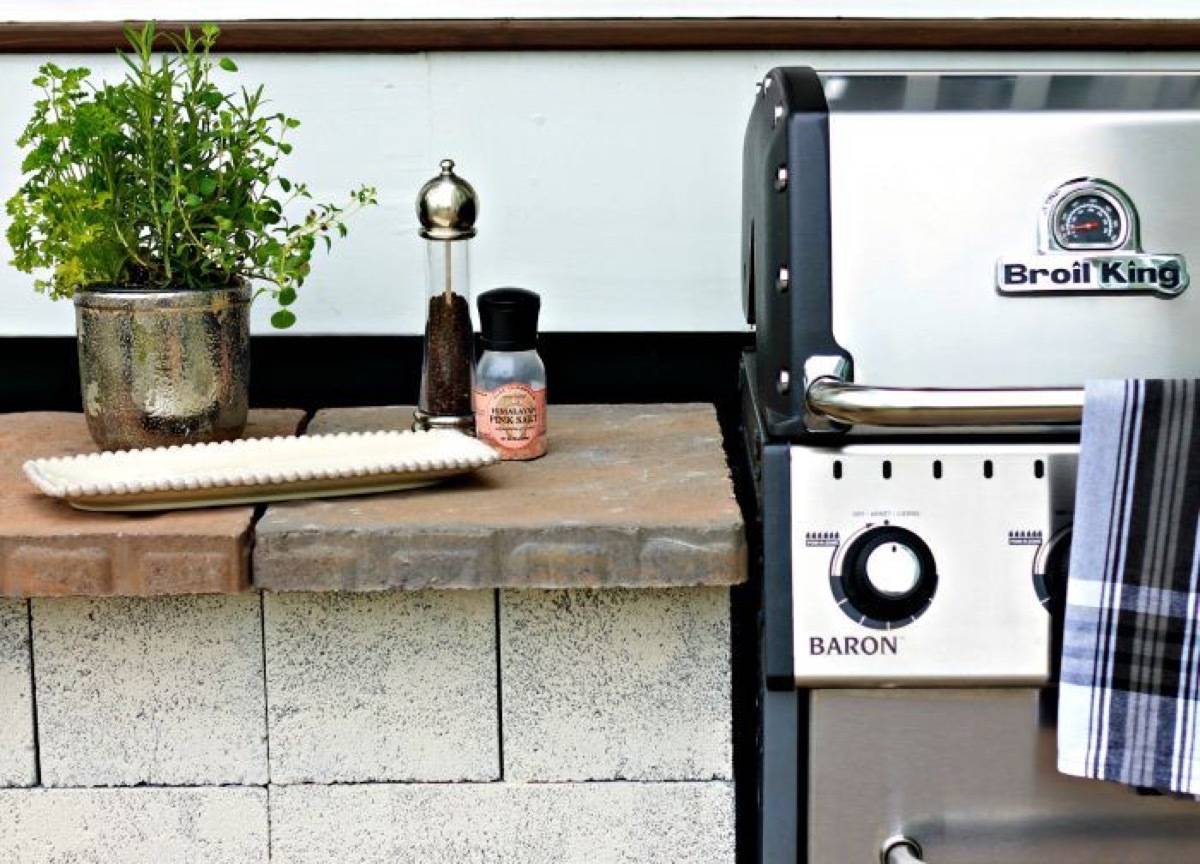
16. DIY Grill Countertop: Basically like having an outdoor kitchen, this brick counter space built around a grill surely makes outdoor entertaining a breeze.
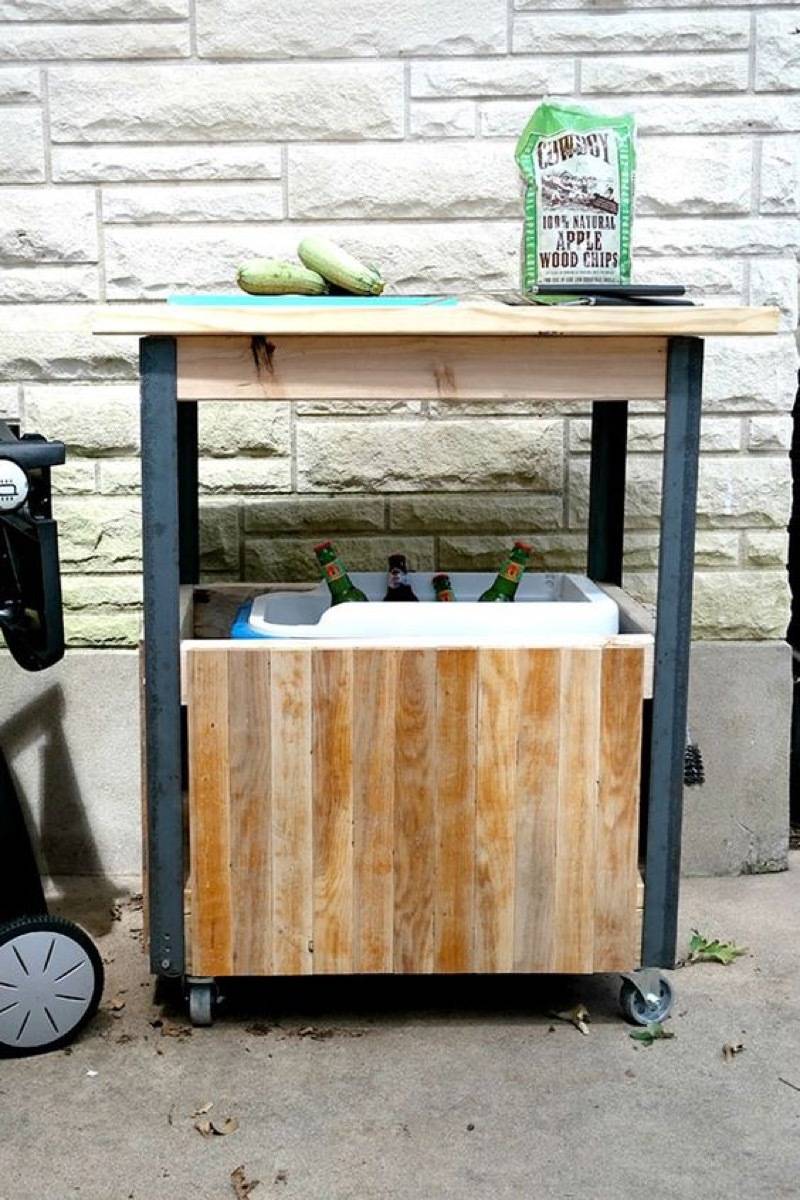
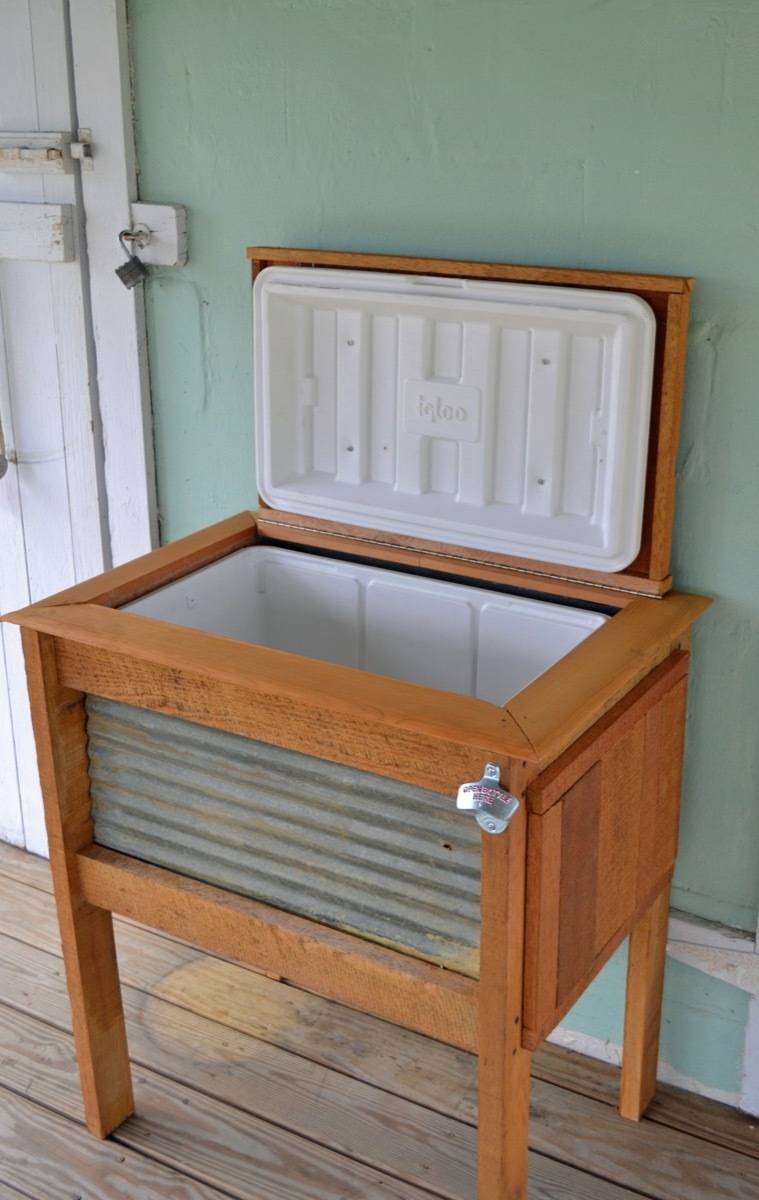
17. Drink Cooler Stand: If you’re constantly entertaining outside, or if you just enjoy having a cold beverage available whenever, this drink stand provides a classy solution to the standard cooler.
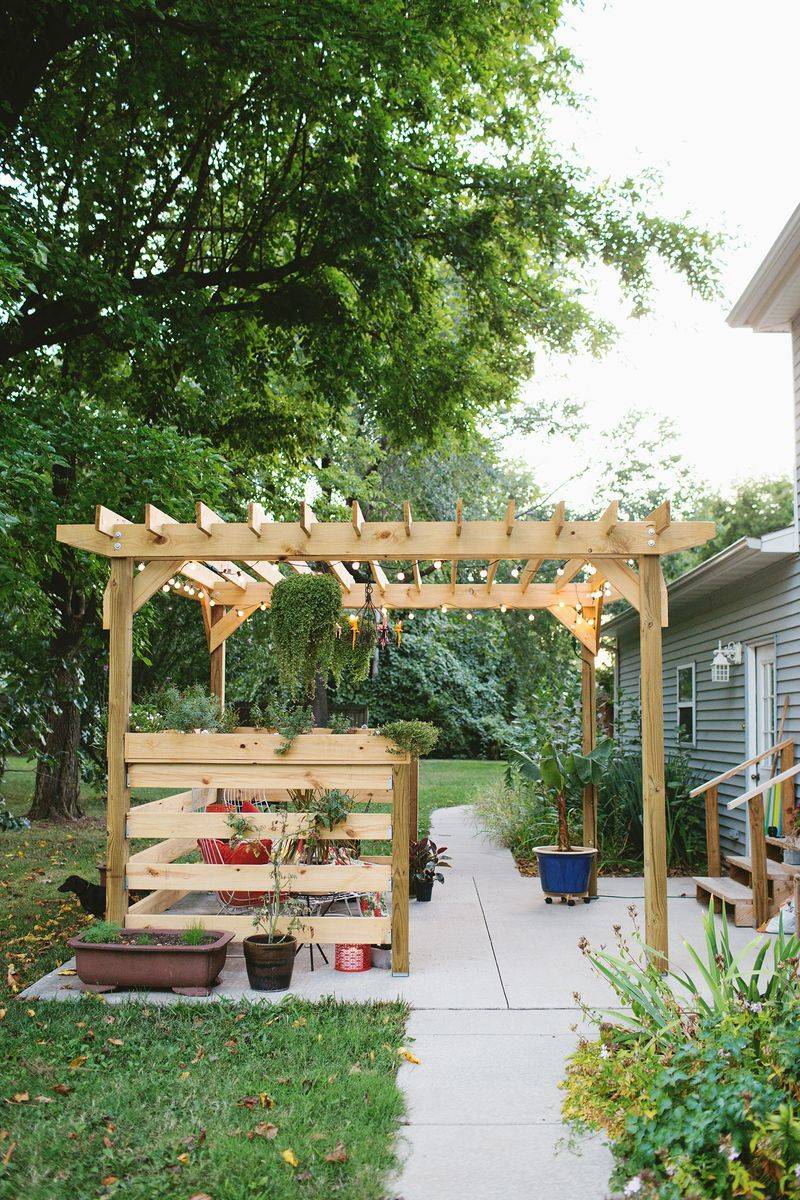
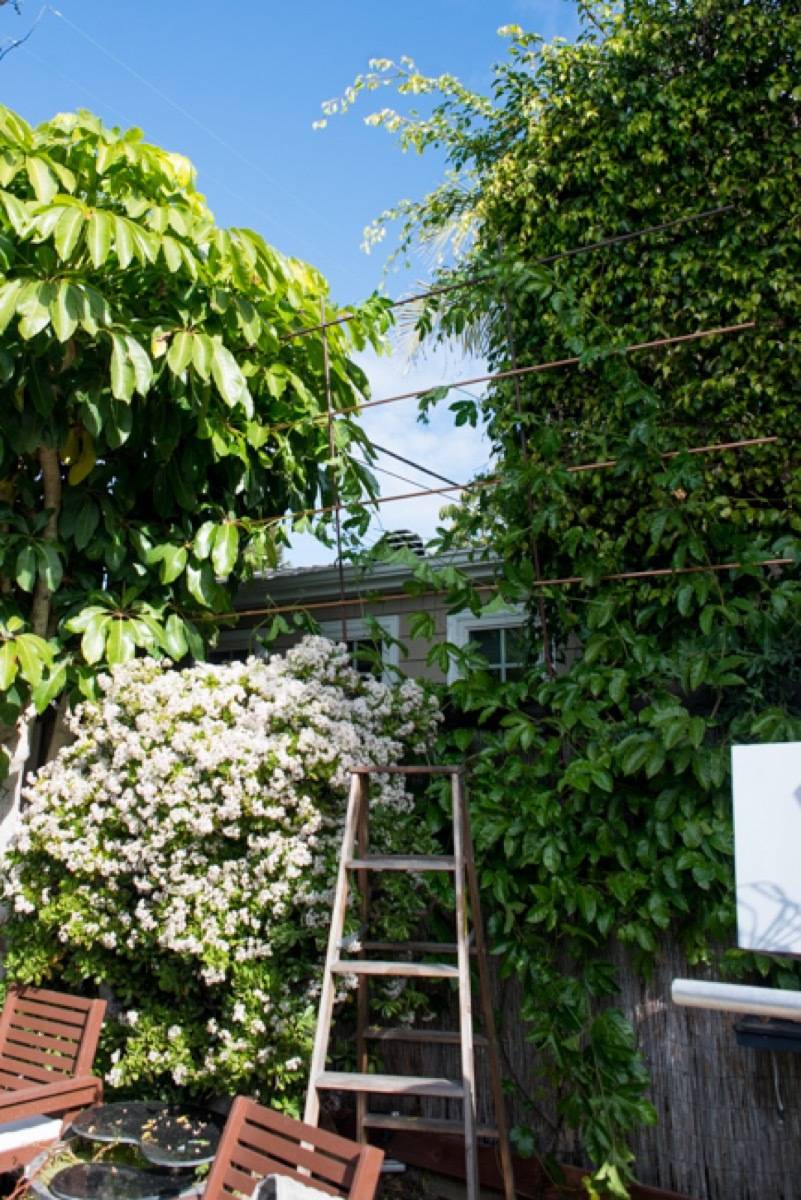
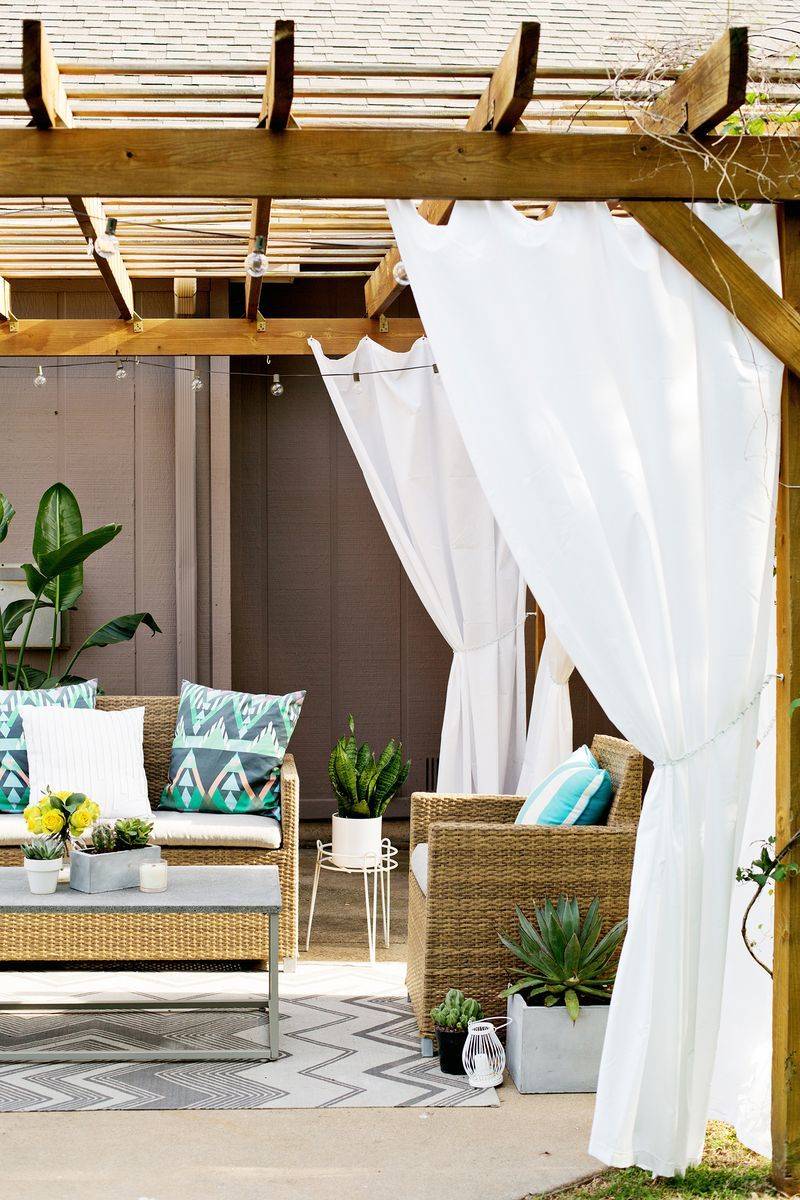
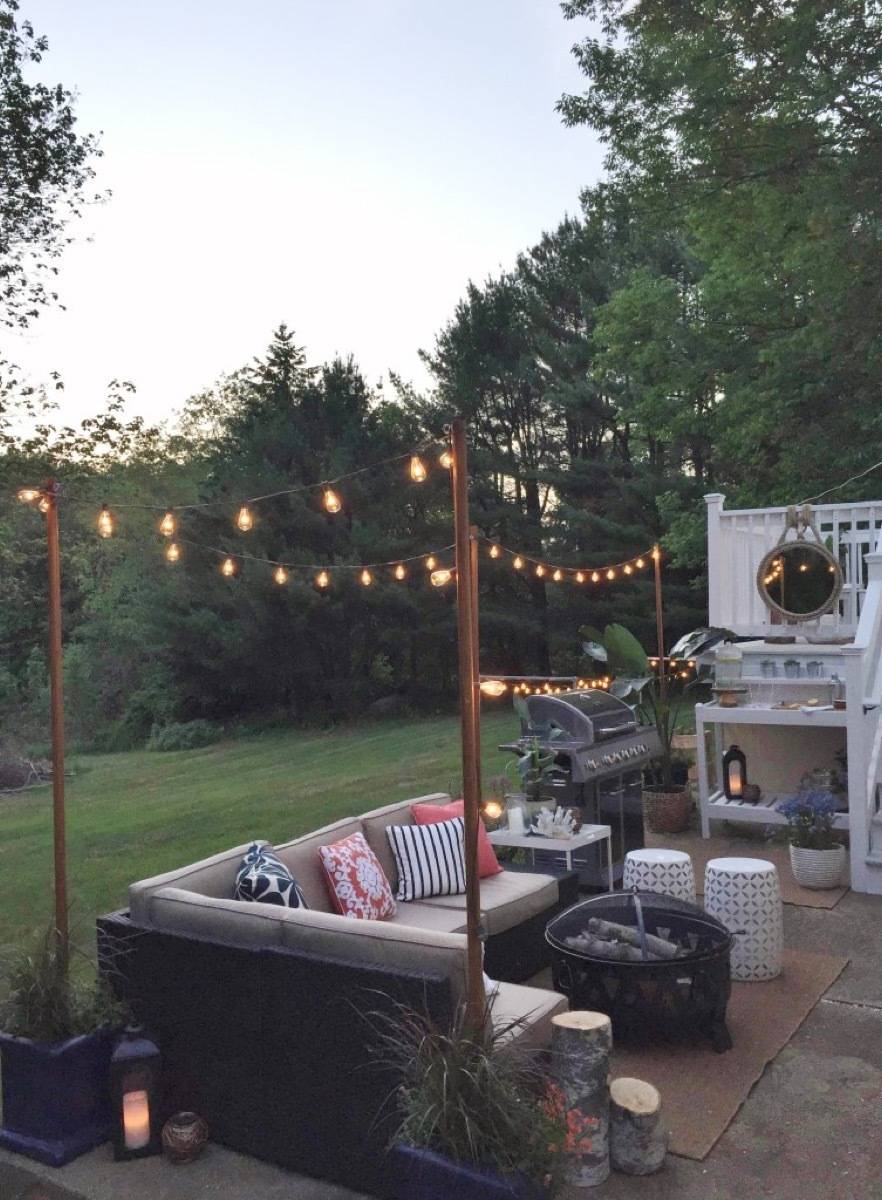
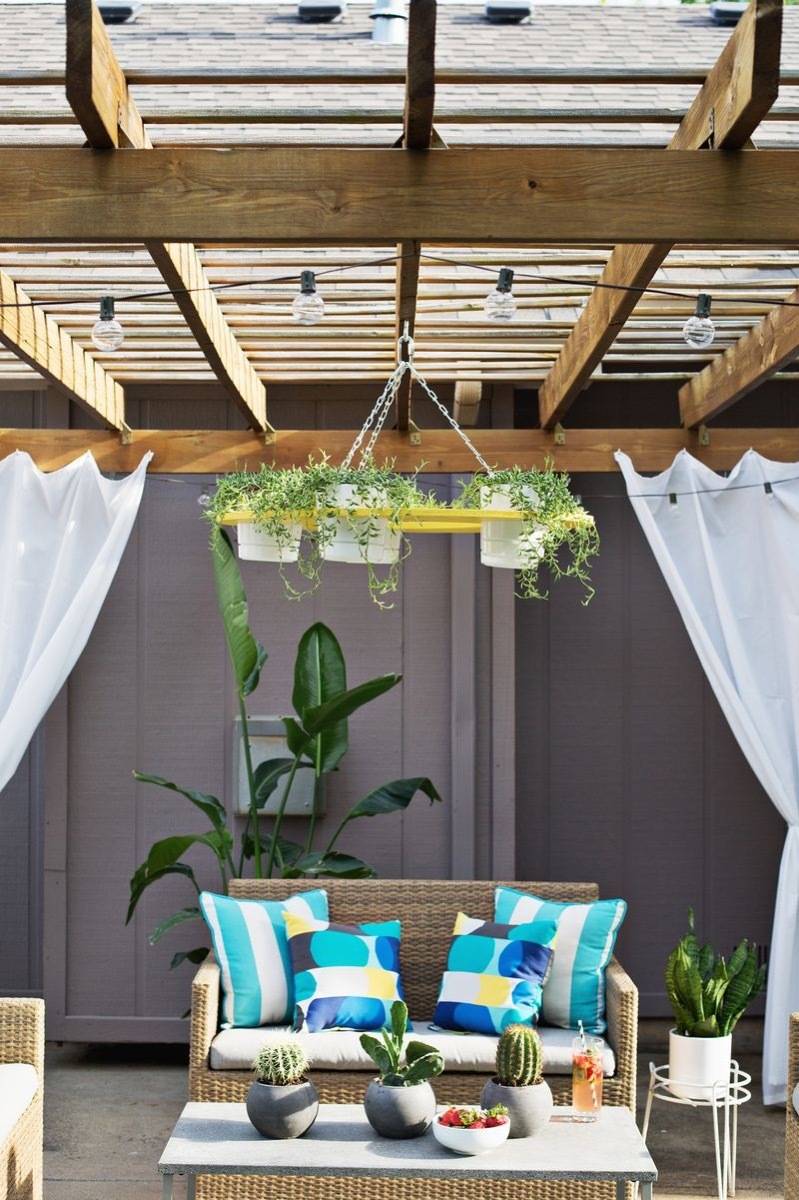
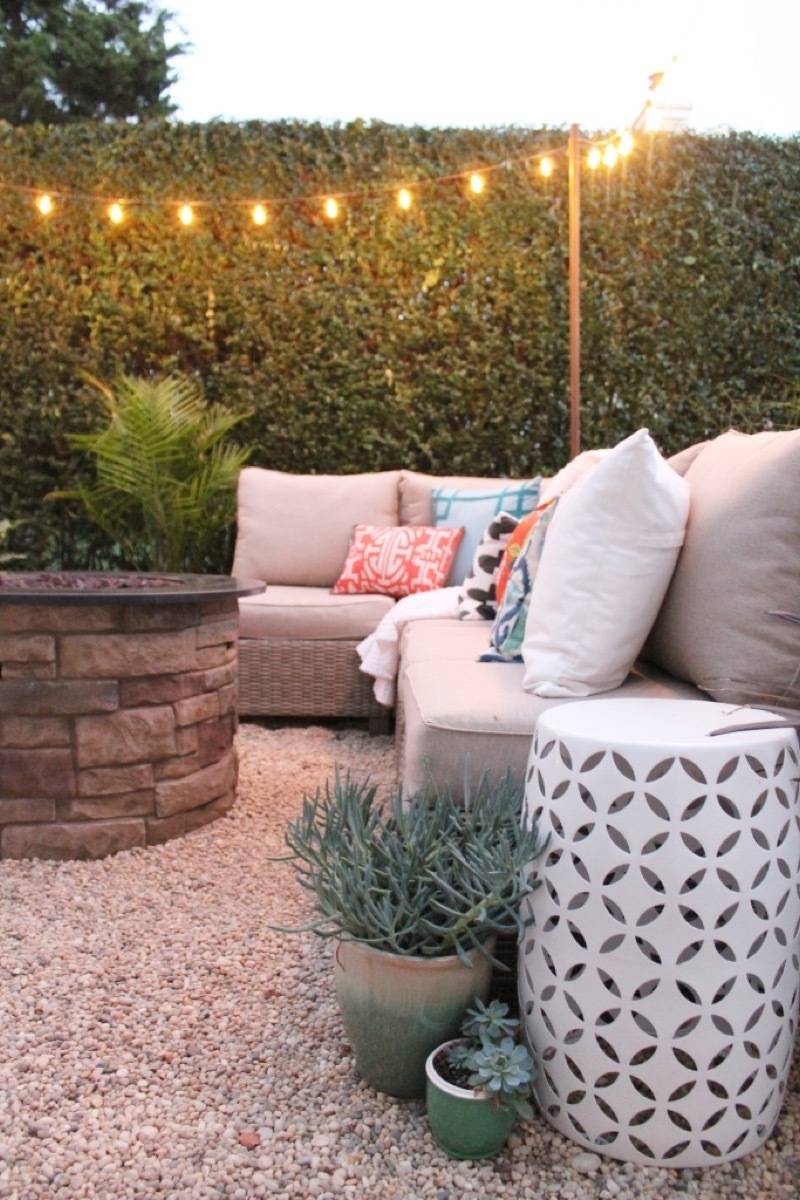
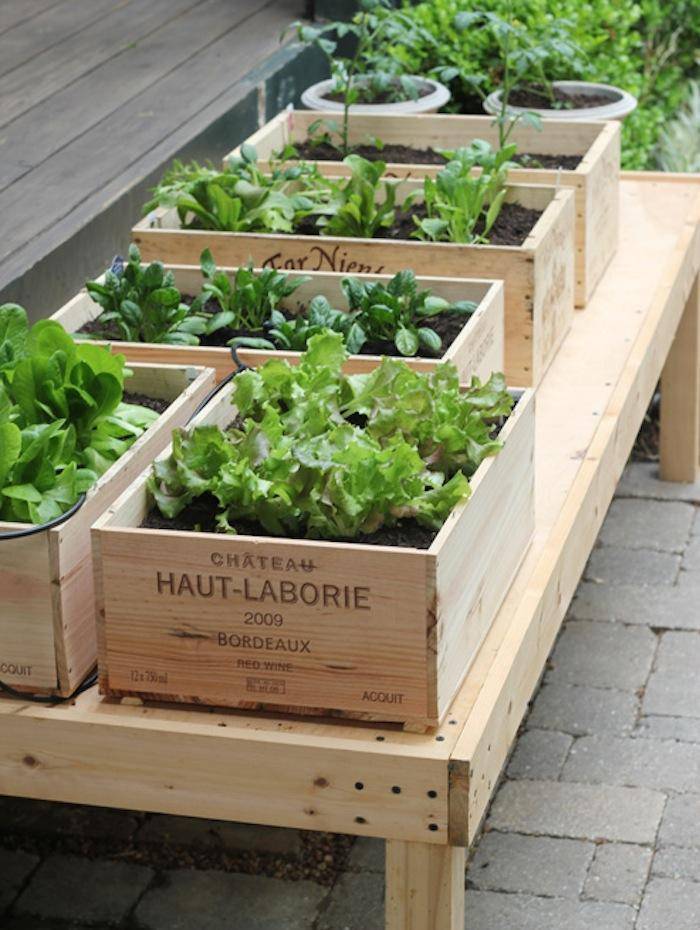
26. String Light Hanging Poles: If you want to hang string lights outside but don’t have anywhere to put them, City Farmhouse has an easy solution that also involves plants!
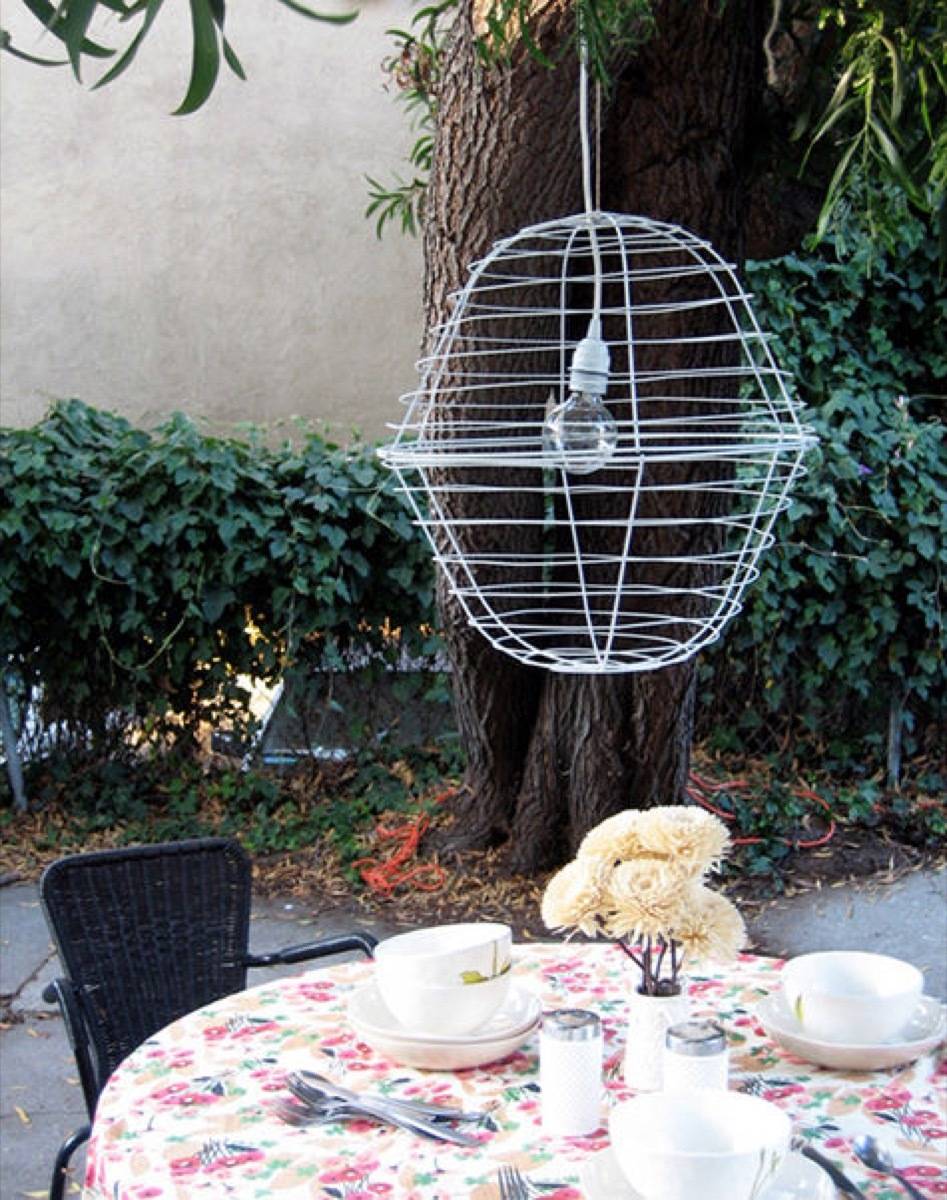
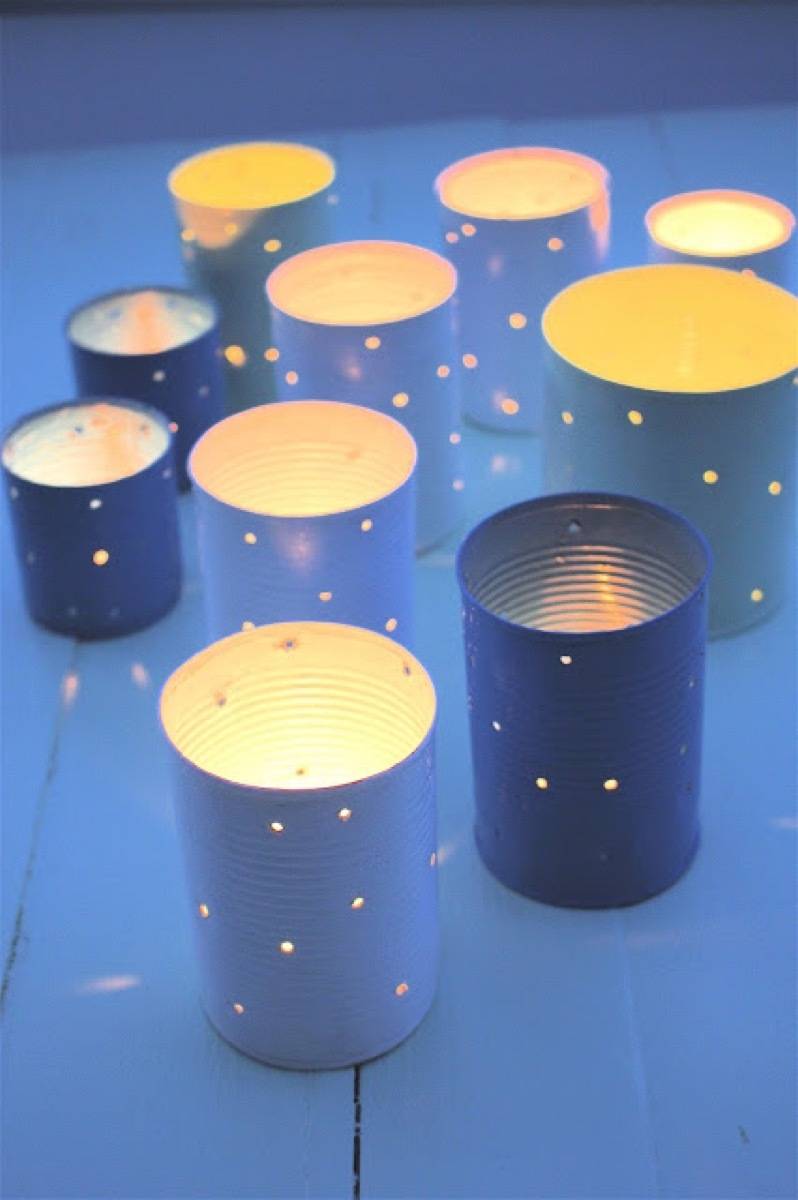
29. Tin Can Lights: This project is a classic, and couldn’t be left off the list! If you need a quick, easy, and cheap solution for your outdoor lighting situation, grab some tin cans, tea lights, a hammer and a large nail, and get to punching!
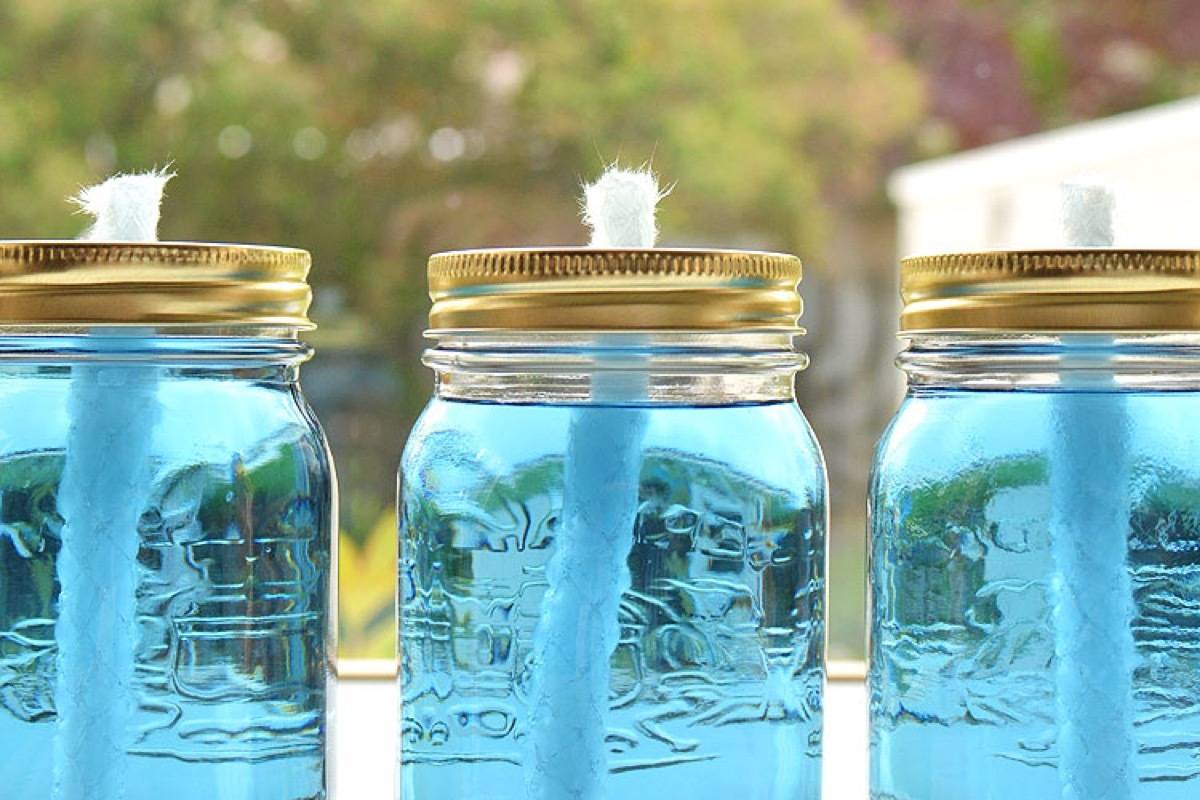
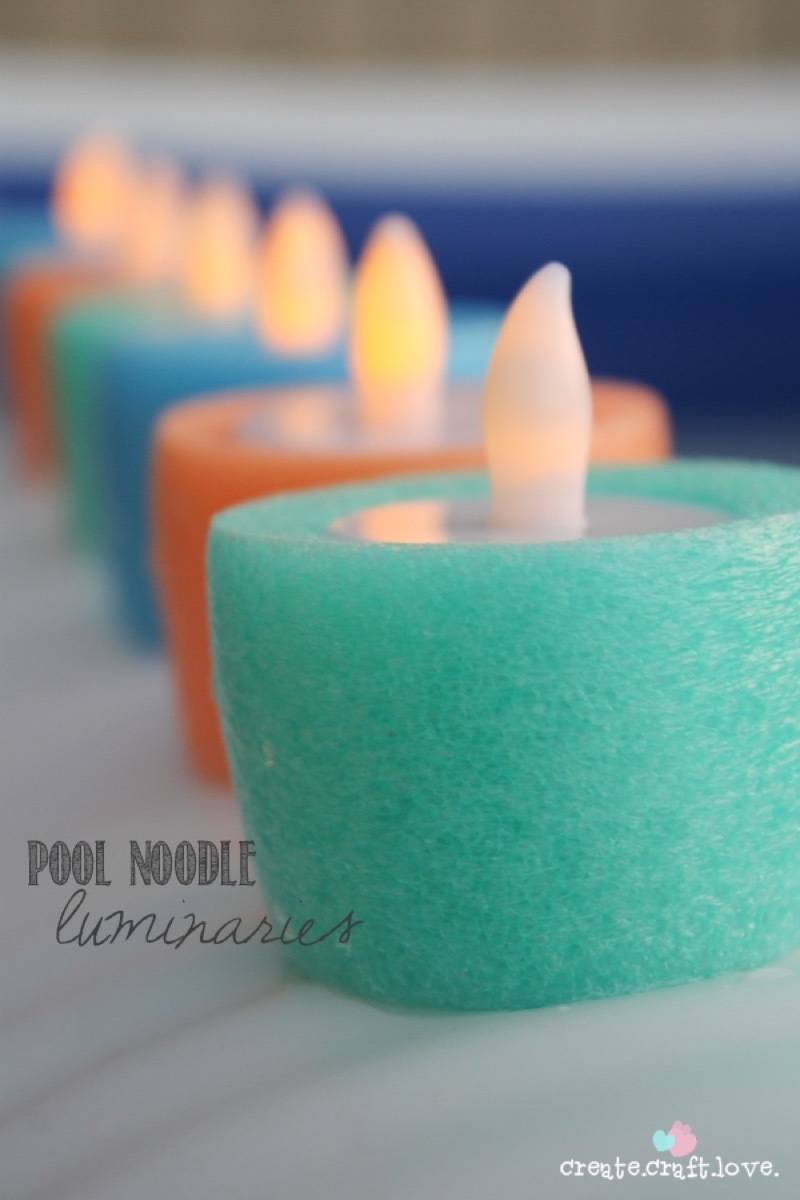
31. Pool Noodle Luminaries: Even if you don’t have a pool, you can set these floatable candles off in a large container of water to add ambiance to any space.
Photo: The Blue Eyed Dove
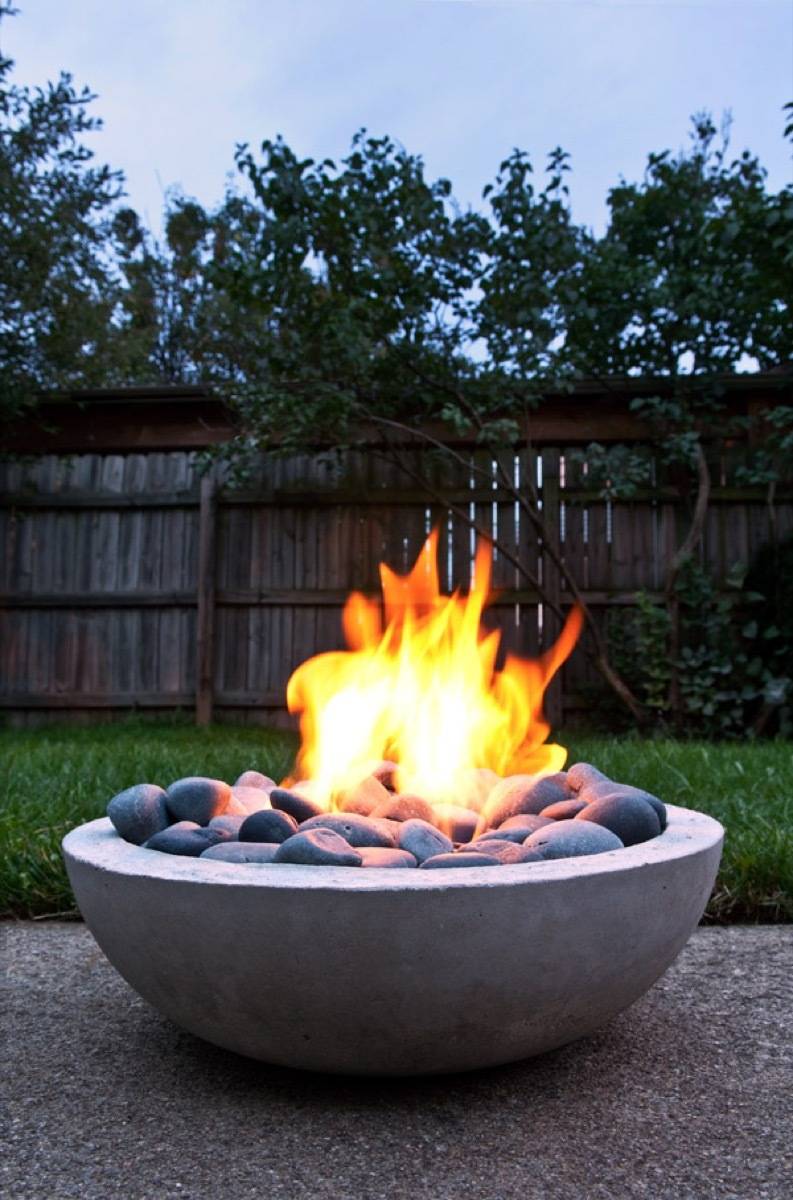
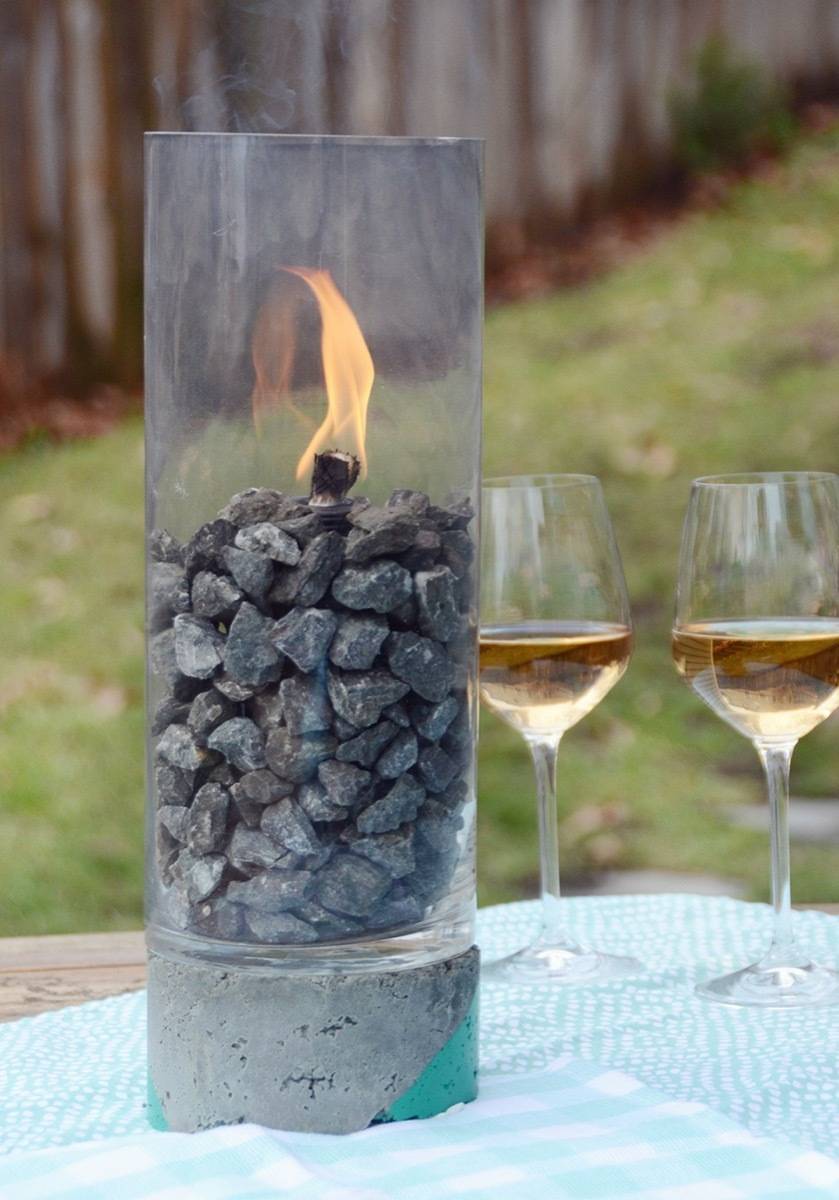
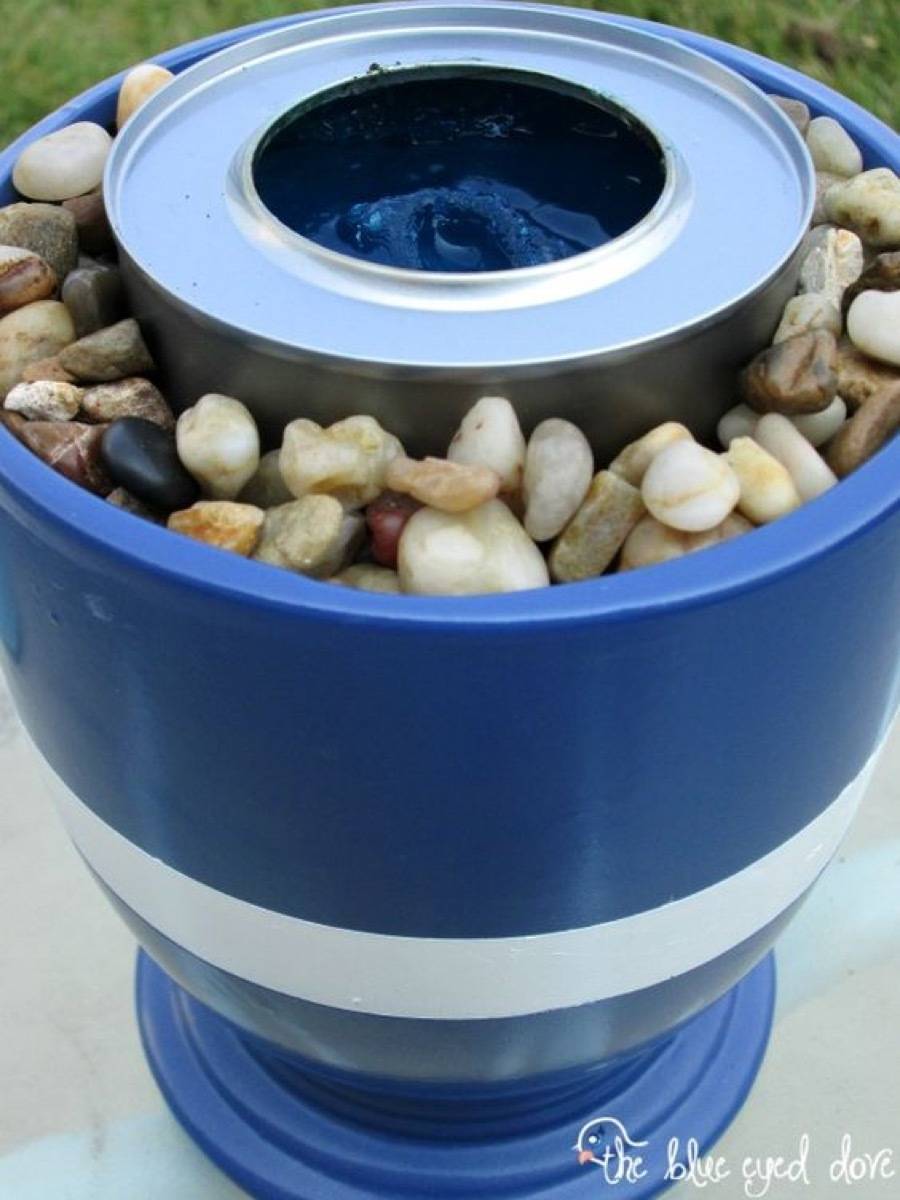
32. Flower Pot Fire Pit: Who says fire pits can’t be cute? Beautiful in blue, this outdoor DIY project only requires a flower pot, stones, and a little flame.
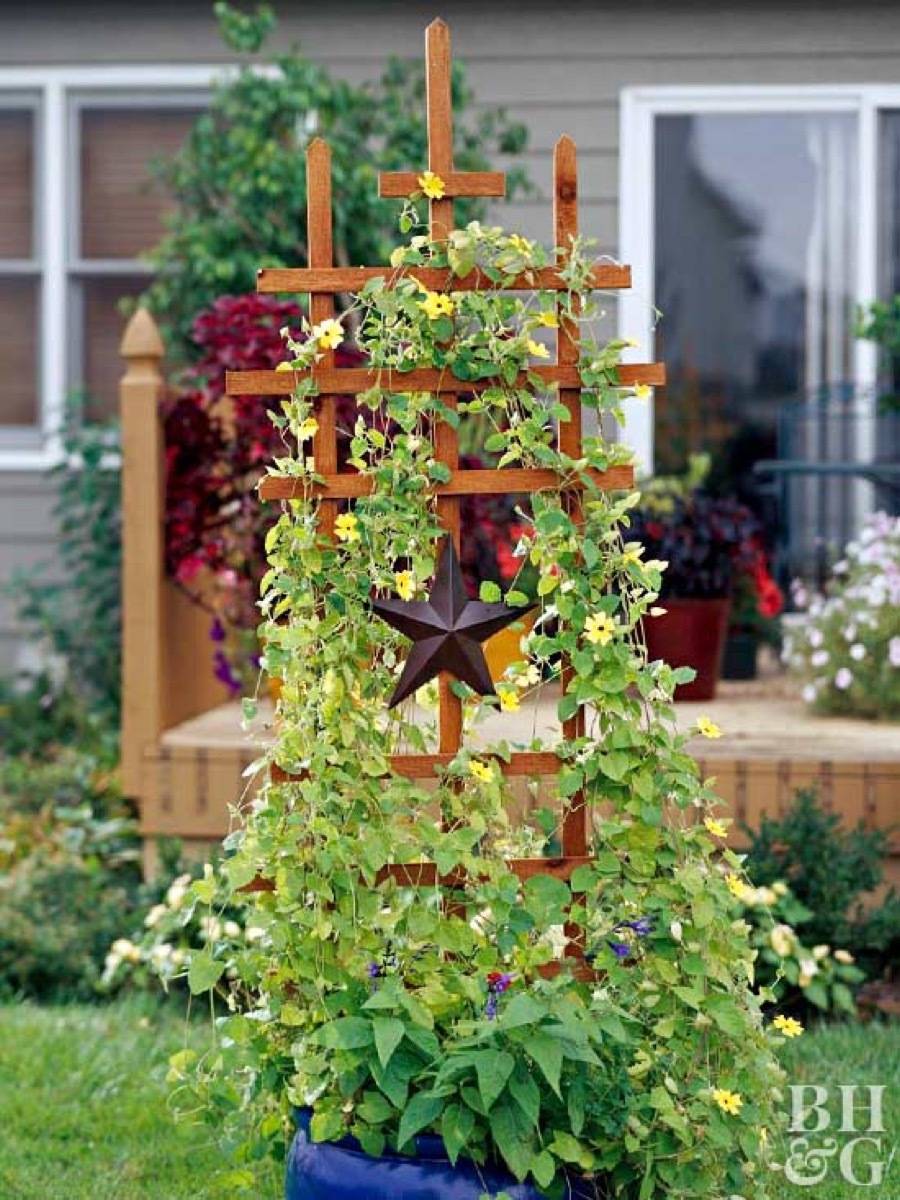
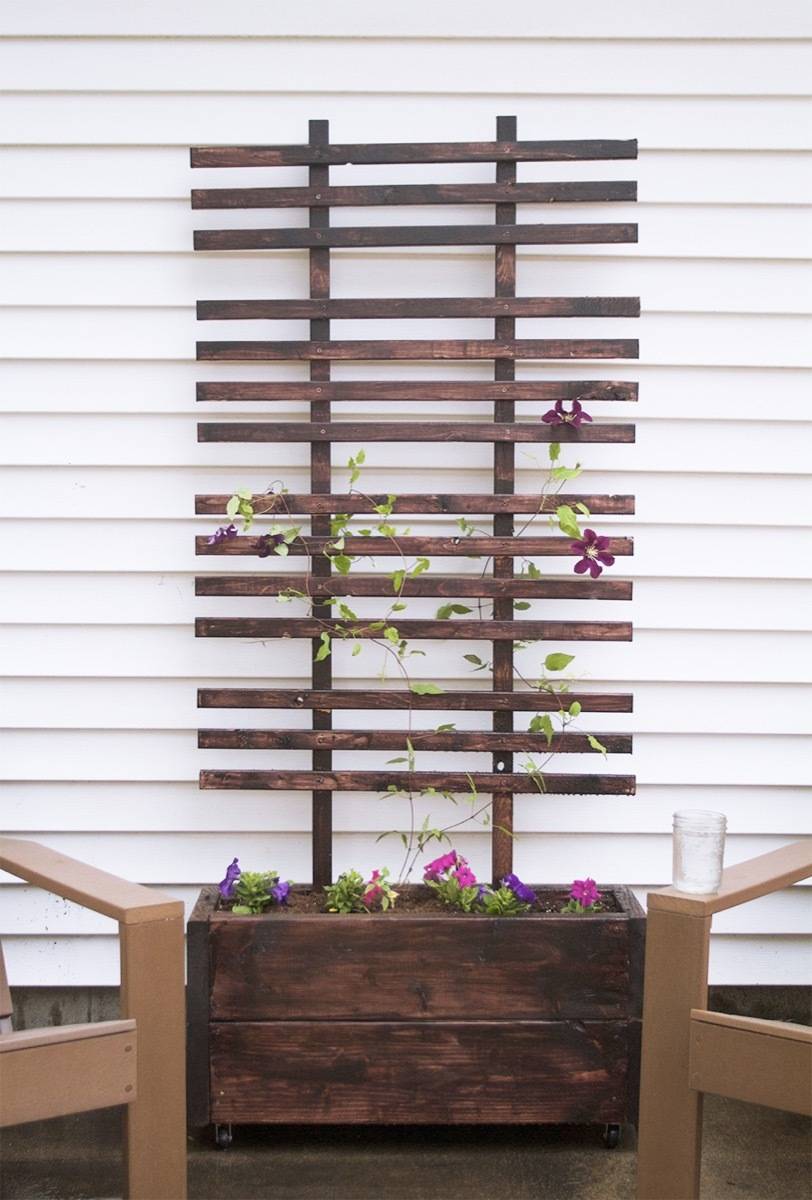
33. DIY Trellis with Planter Box: Give crawling plants somewhere to go by building them a trellis. This project is also great if you’re looking to fill visual space in your patio or deck area!
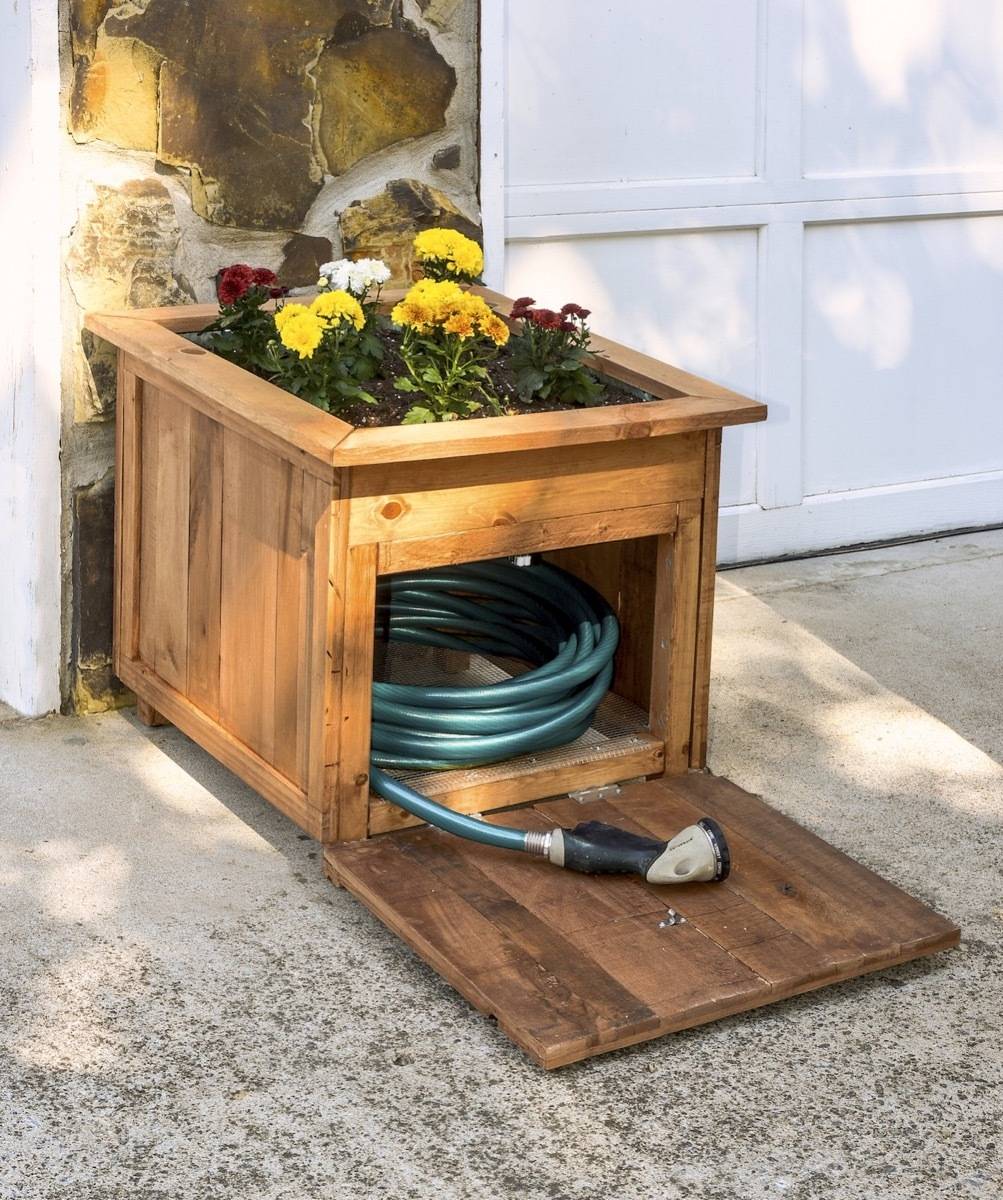
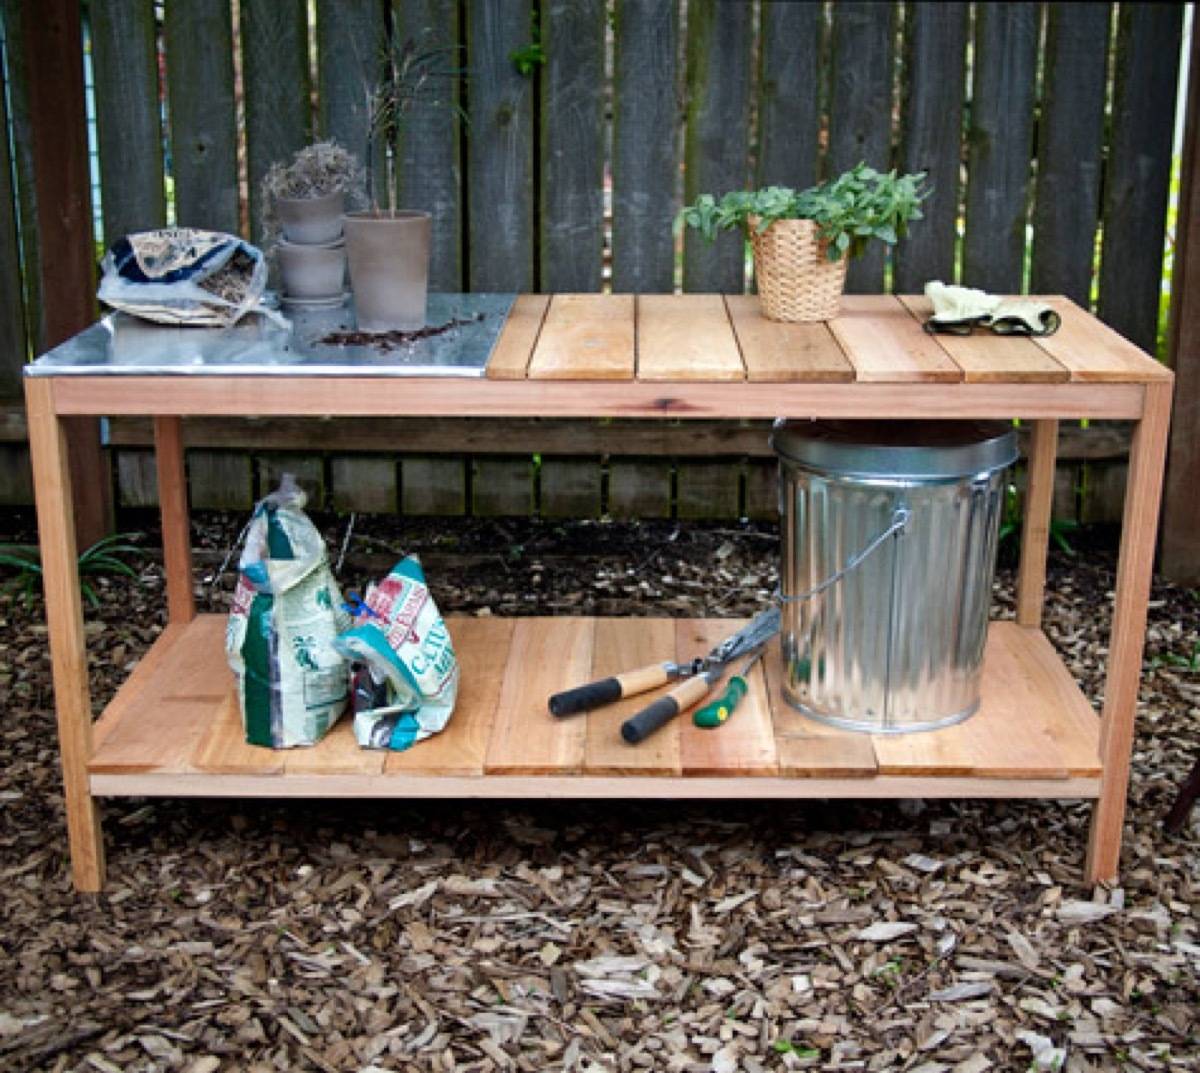
34. Hose Housing Station with Built-In Planter: Gardening hoses are hard to keep neat and pretty. This project solves that solution by keeping the hose hidden! Plus there are flowers involved, which is always a bonus.
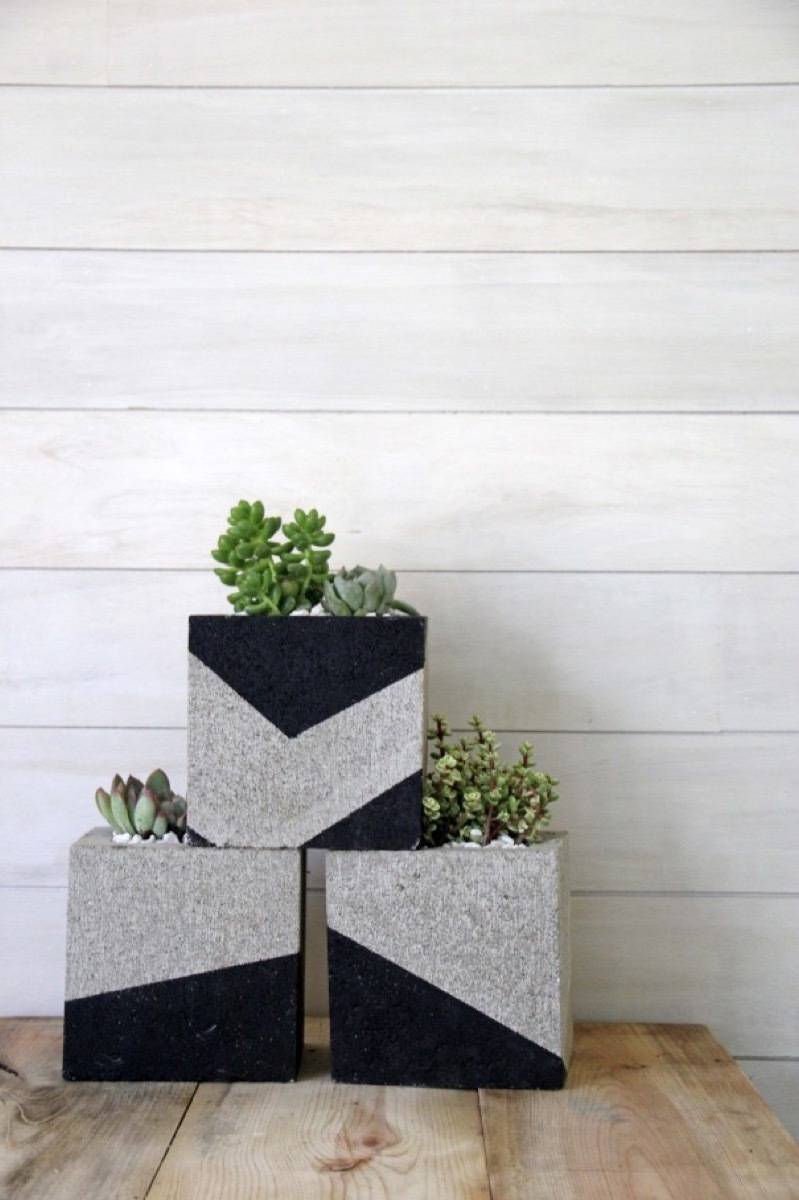
41. Geometric Cinder Block Planters: Cinder blocks are at it again! With a simple paint job, you can create a modern-looking planter to house all kinds of greenery.
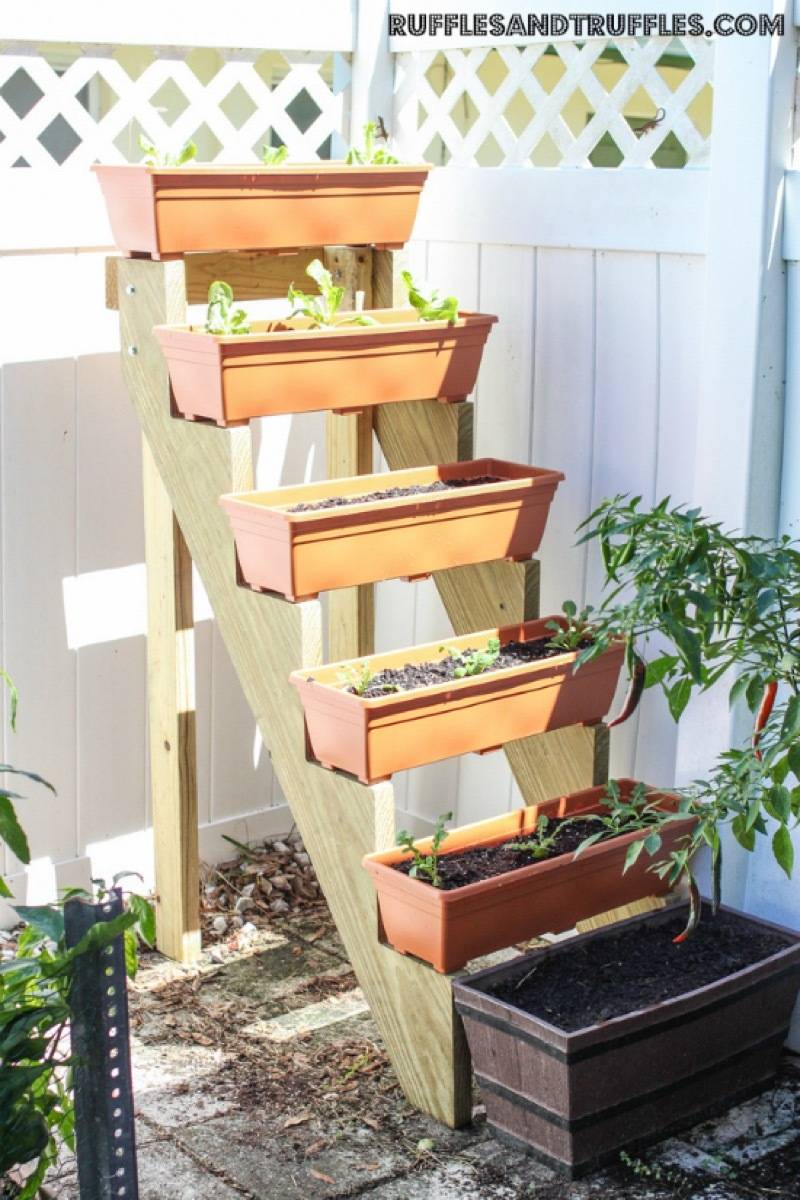
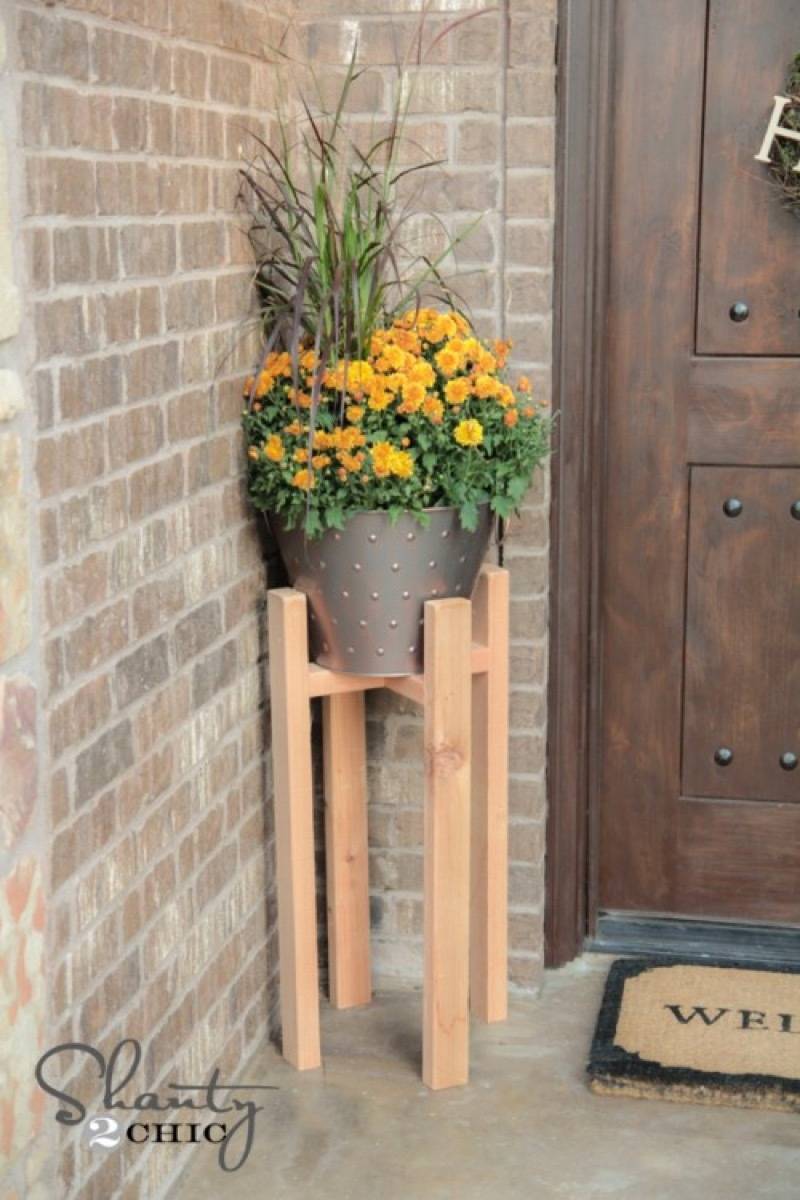
42. Wooden Plant Stand: If you’re looking for ways to add visual height to your plant-scape, Shanty 2 Chic has the plans to build a wooden plant stand.
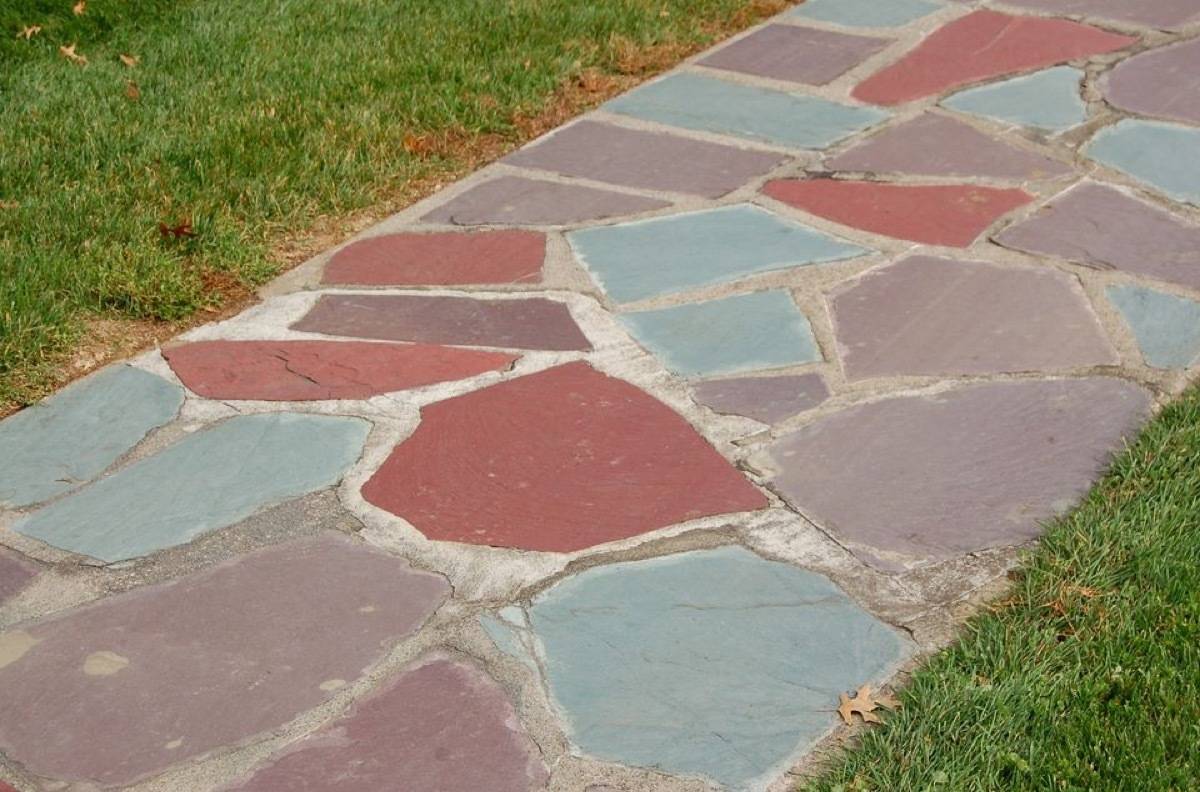
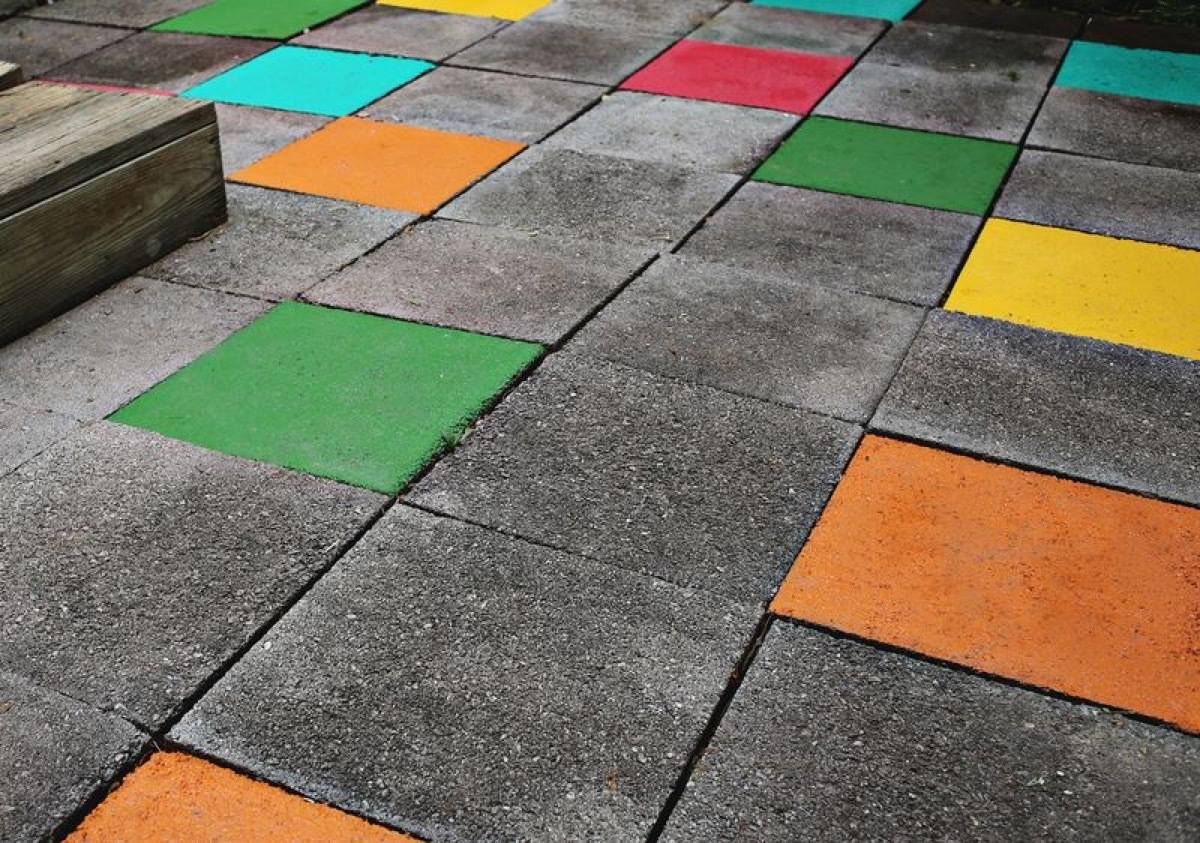
44. Colorful Patio Tiles: I can’t get over what a simple and transformative idea this is! If you can’t commit to painting your patio, try chalk for a temporarily colorful time!
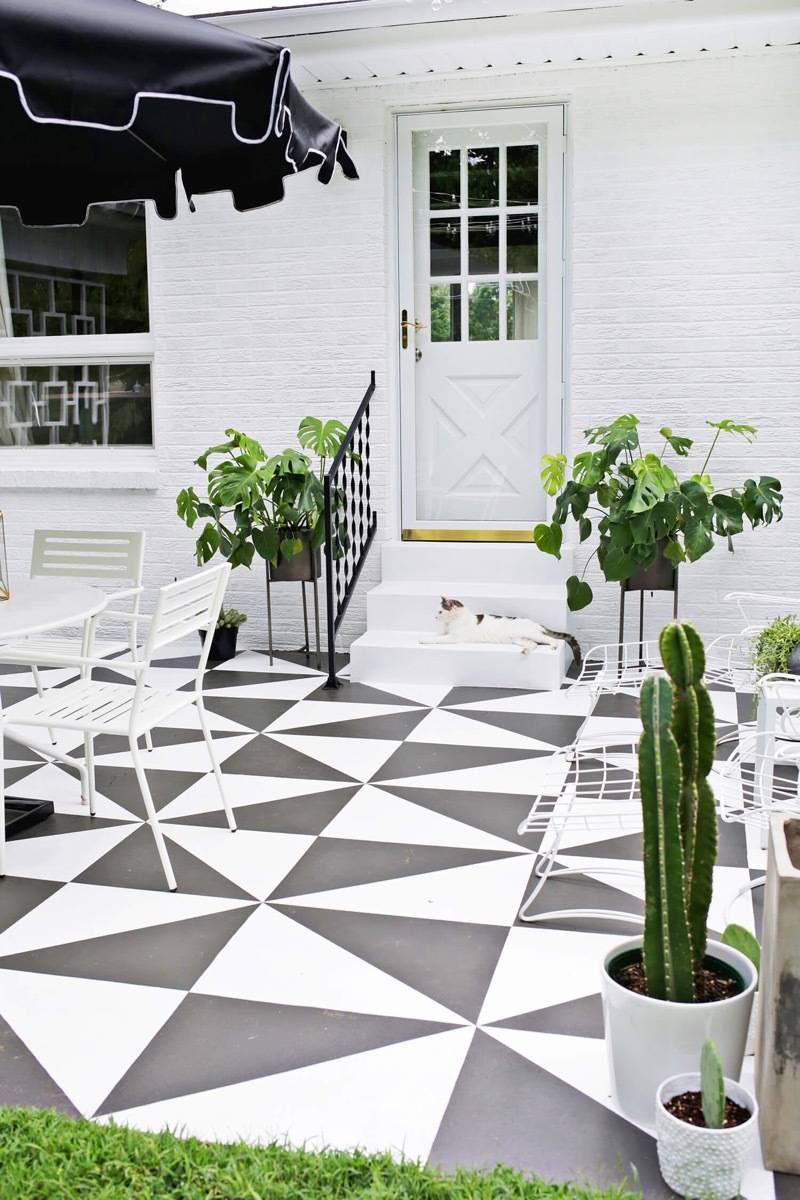
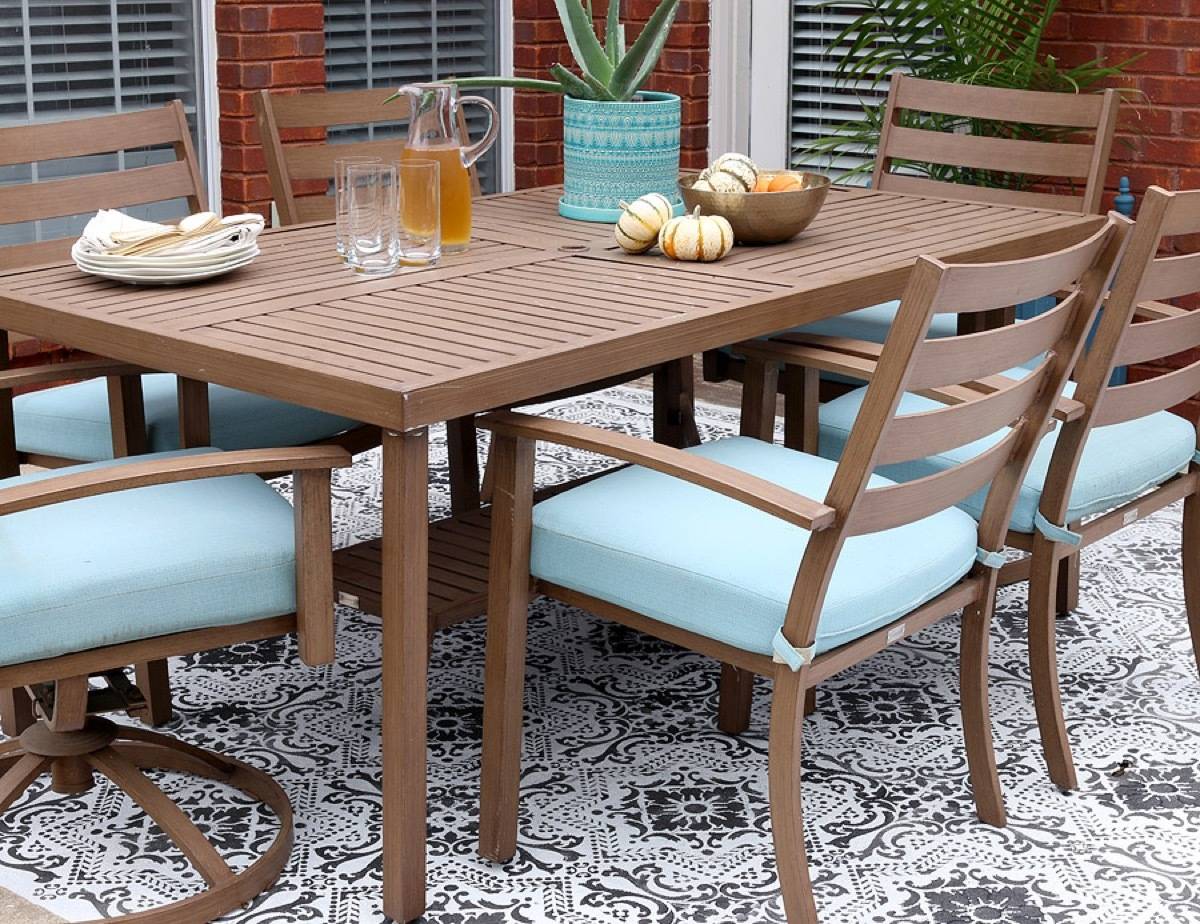
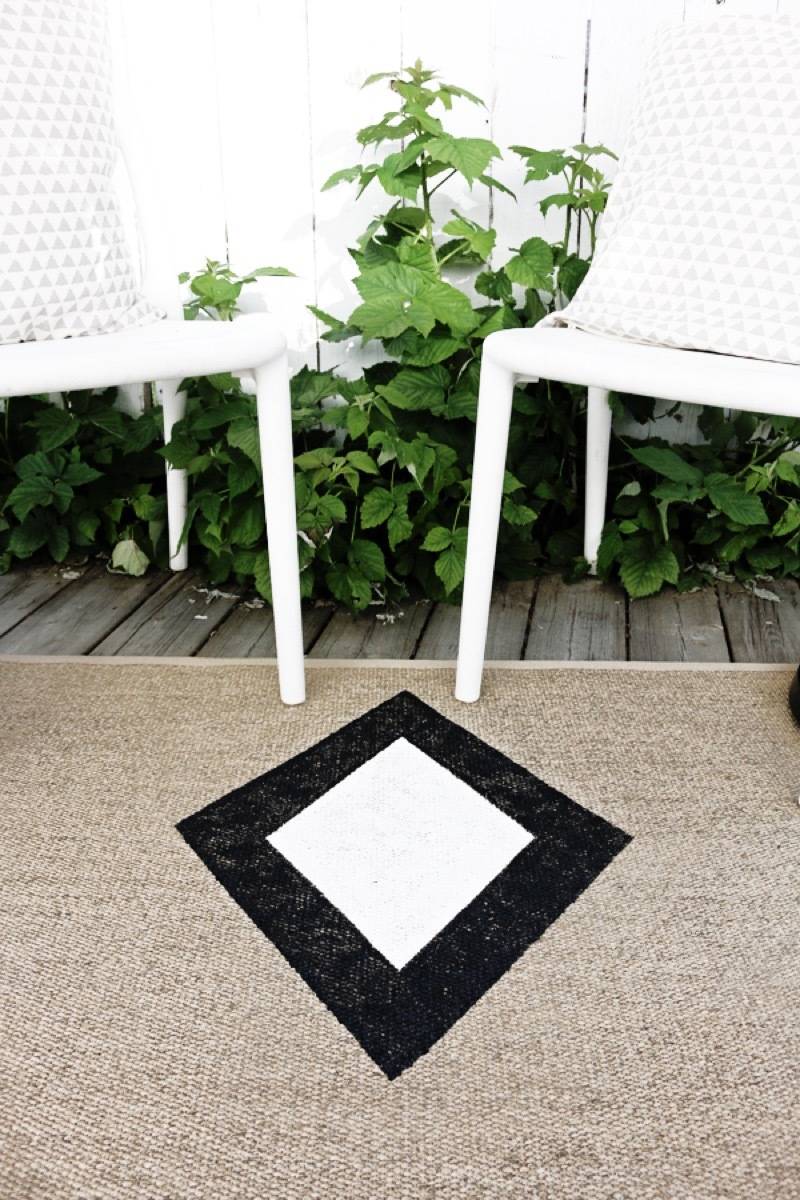
46. Stenciled Concrete: This stencil job mimics the look of a rug with the low-maintenance factor of concrete! Try this look on for size if you’re trying to create a more intimate outdoor living space.
53. Sandbox with Lid: It’s a gross reality, but if you have cats, you have to have a sandbox with a lid. Ana White has the plans for how to build one of your own.
54. Sandbox with Seating and Awning: Keep the kiddos safe from the sun by adding an awning to your sandbox. Plus these plans come with adorable seating!
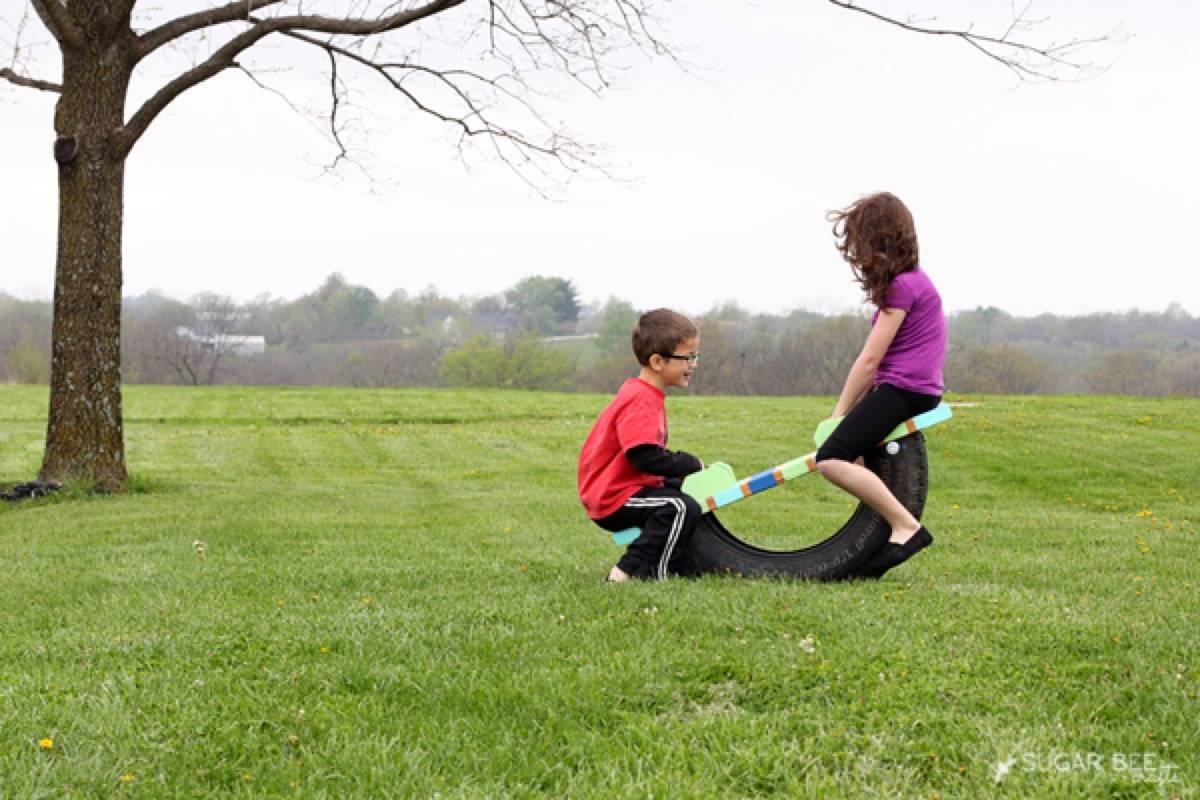
58. Tire Teeter Totter: Alliteration aside, this teeter totter is adorable. Plus it’s made from recycled materials, so it’s good for the kids and the earth.
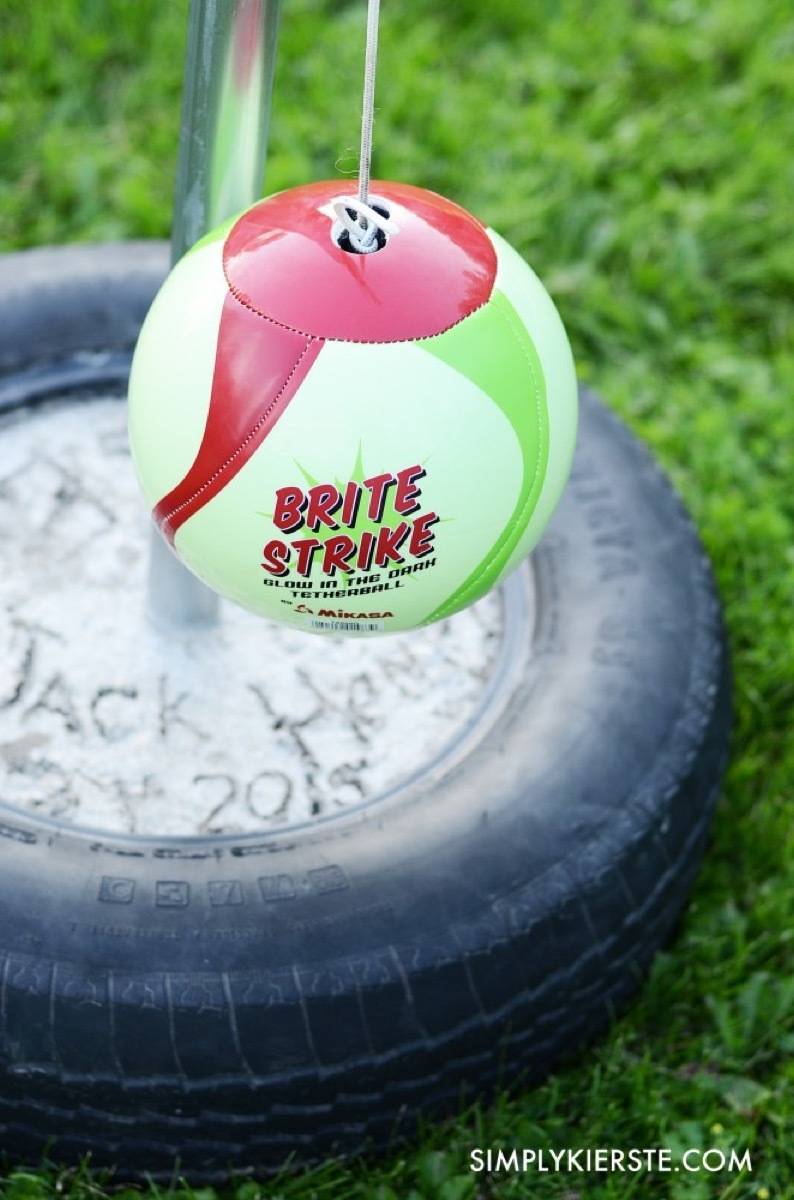
Photo: Simply Kierste
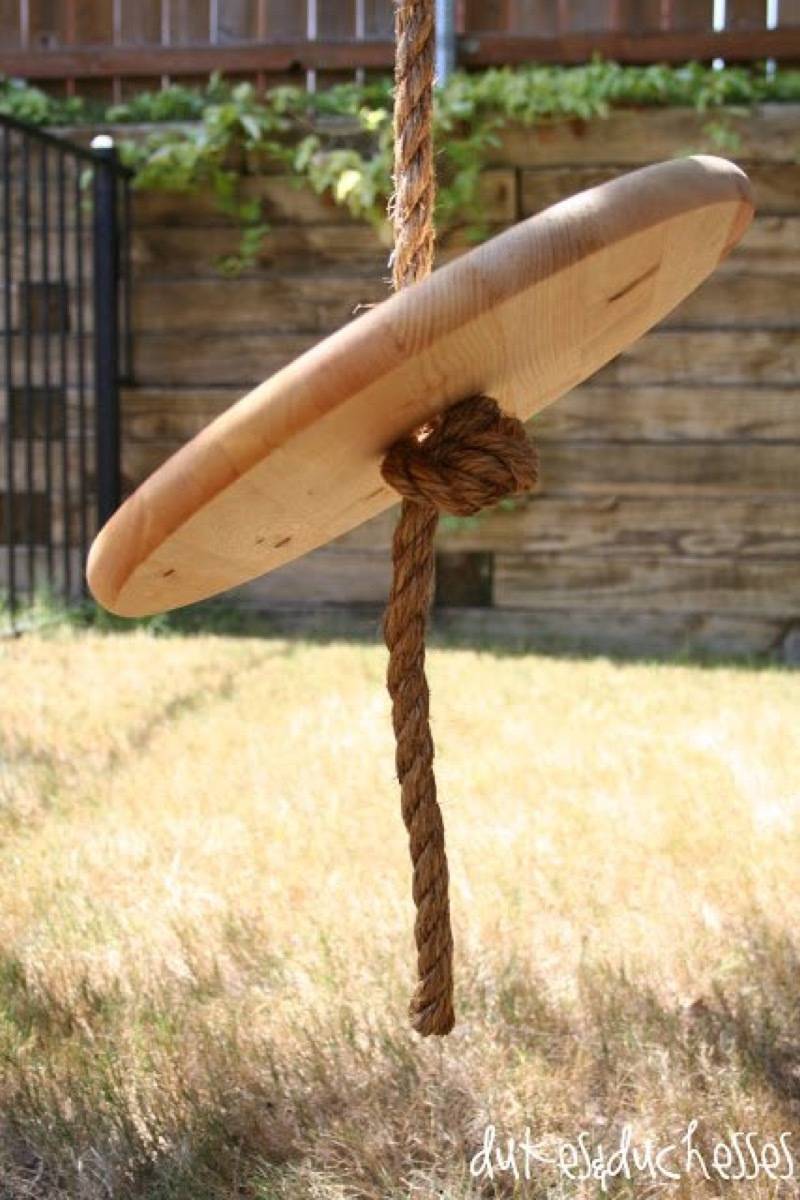
59. DIY Tether Ball: This DIY feels like a throwback! Do you guys remember playing tether ball long into the afternoon? Turns out it’s pretty easy to make one of your own for you or your offspring to enjoy!
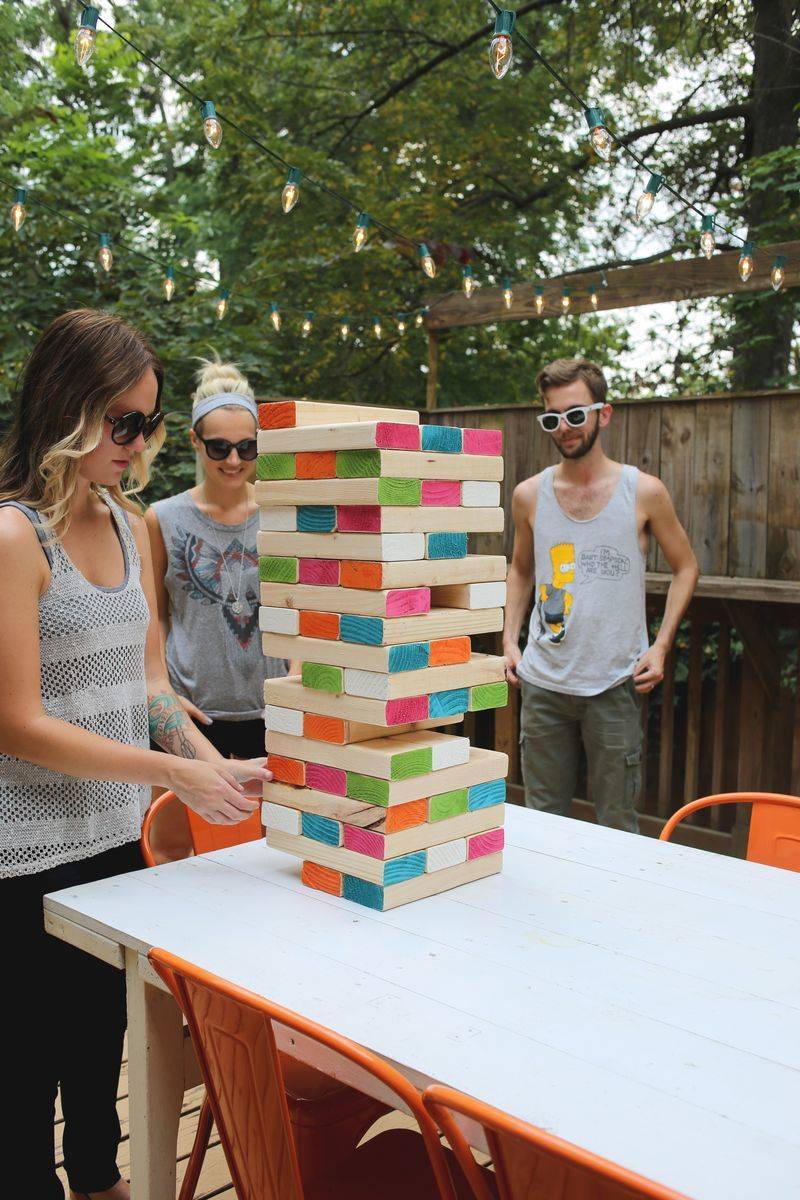
62. Giant Jenga: Last but not least, this thrilling game is the perfect addition to a summertime backyard party.
Bonus! Author Christina Pfeiffer is sharing What to plant for more drought resilient containers
By their nature, containers require more frequent watering than plantings in the ground. Smaller containers in full sun can need watering twice a day during hot spells. Go large when choosing new containers to save on time and water demands.
Choose a group of plants that are compatible in looks and culture. Match up their needs for light and water first, then play with combining colors and texture.
Sedums
These perennials are my first ‘go-to’ s for drought tolerant containers. They come in a variety of sizes, shapes and colors with blooms that benefit pollinator insects and ask for little in terms of water and fertilizer. Most will overwinter and also combine well with other drought tolerant plants.
Herbs for garden and kitchen
Culinary and ornamental herbs are another group happy in well drained soil and sun. Those with variegated foliage are stunning accents planted solo in a container. Among my top favorites are:
Variegated lemon thyme Sages that are edible and ornamental: ‘Berggarten’, ‘Aurea’, ‘Purpurescens’ and ‘Tricolor’ Oregano ‘Kent Beauty’ trails beautifully out of hanging baskets and into the marinara sauce.
Perennial favorites
These garden perennials make a successful leap between garden beds and containers and back again:
Coral bells, Heuchera ‘Green Spice’, ‘Peppermint Spice’ and ‘Moonlight’ Geranium x ‘Johnson’s Blue’ and other hardy geranium Oxalis tetraphylla ‘Iron Cross’ Dusty Miller – Sunrose, Helianthemum ‘Wisley Pink’ and ‘St. Mary’s’ Hardy fuchsia Cape fucshia
Add these grasses and grass-likes for contrasting texture
New Zealand Flax, Phormium and variegated iris both offer tall, strappy, striped leaves. Low growing glack mondo grass has dramatic dark foliage and and small white or purple flowers. Variegated lily turf, Liriope muscari ‘Variegata’, ‘Silver Dragon’ and ‘Sunproof’ all have white edged leaves and purple blooms.
Annuals that can take the heat (and a bit of drought)
Many of the popular annuals used for seasonal color do best with regular water and fertile soil. Be sure to keep these birds-of-a-feather together. Here are some great annuals that don’t like as much water and fertilizer and that combine well with other types of plants listed in this article:
African daisy, Osteospermum Symphony series Sweet allysum, Lobularia maritima Coreopsis tinctoria Dwarf snapdragons, Chinese Lantern series
Growing herbs is an easy way to get into gardening, and there are plenty of ways to make an herb garden even if you’re short on space. So to get you inspired, today we’re sharing 22 of our favorite creative herb garden ideas – both indoors and out. Click through to check ’em out!
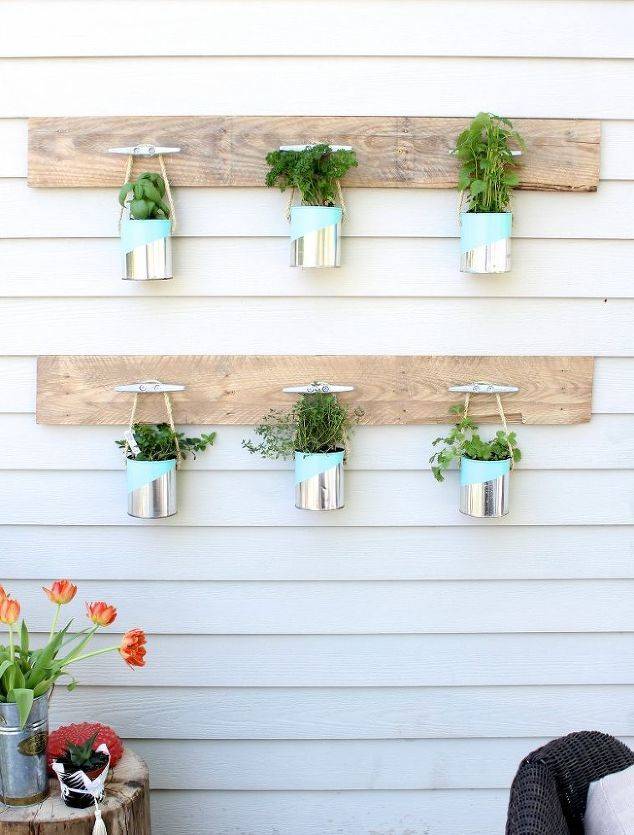
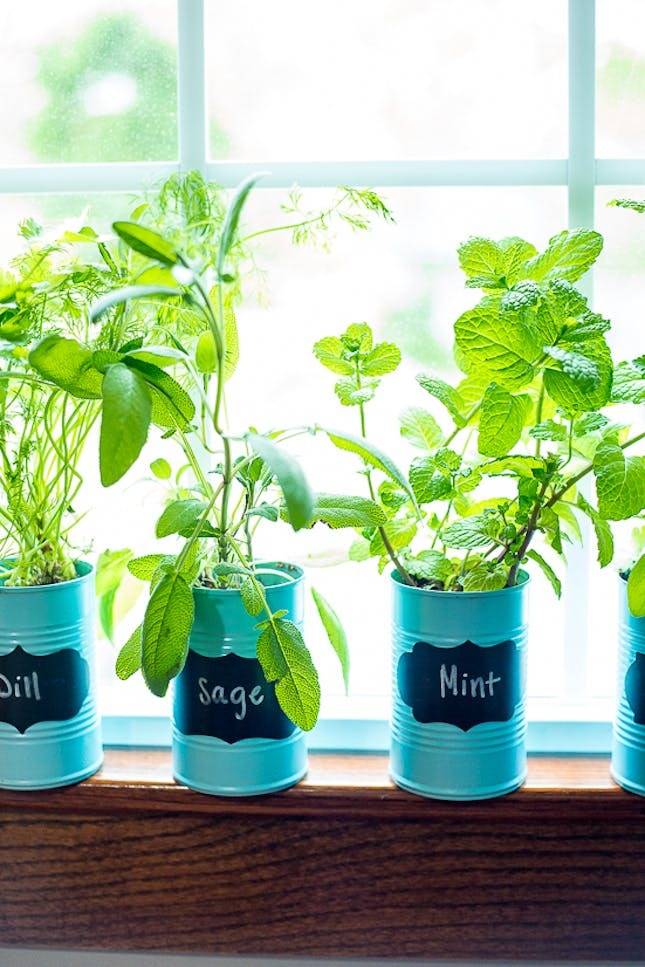
1. Take advantage of the vertical space on the side of your house by making this fun wall-mounted herb garden out of cans and metal cleats. Get the how-to here. [Photo: Simple Stylings]
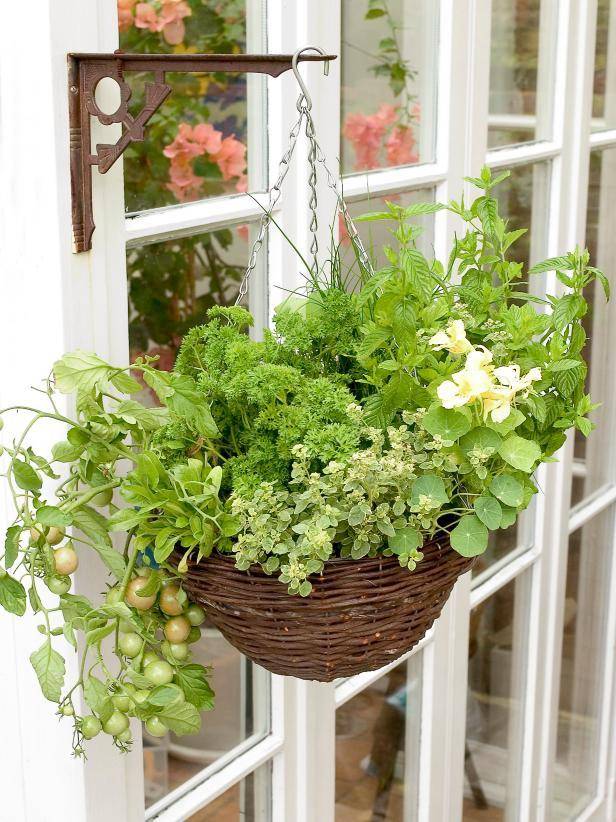
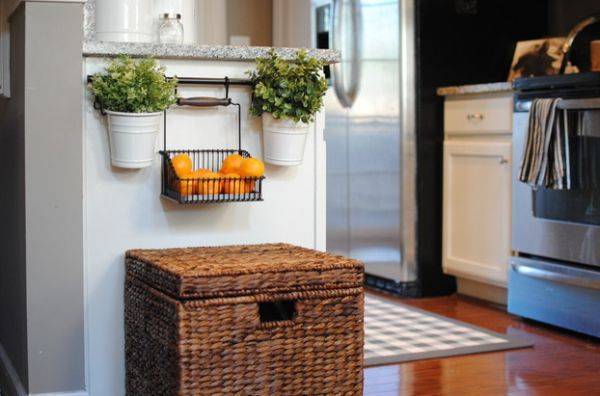
2. Create a beautiful hanging planter out of a basket, and fill it with all of your favorite herbs and even some cherry tomatoes. Get the tutorial over at HGTV. [Photo: HGTV]
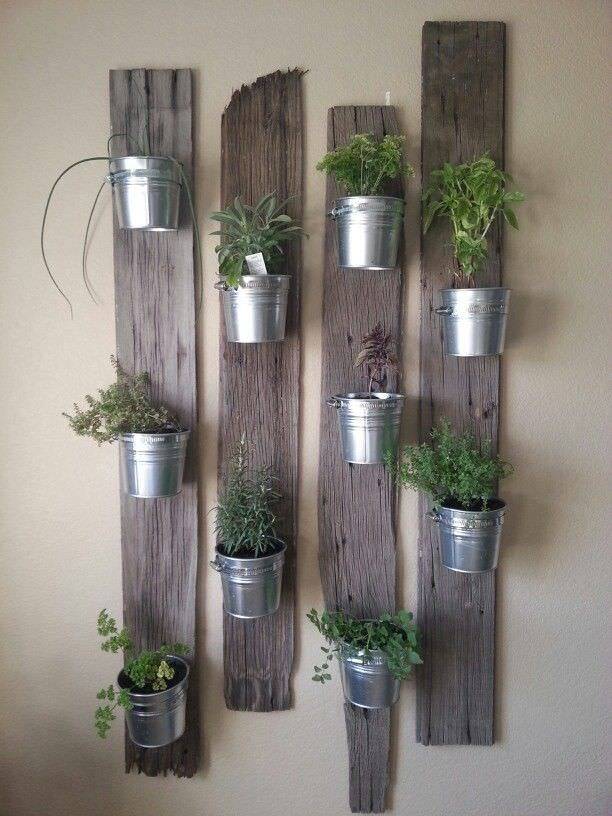
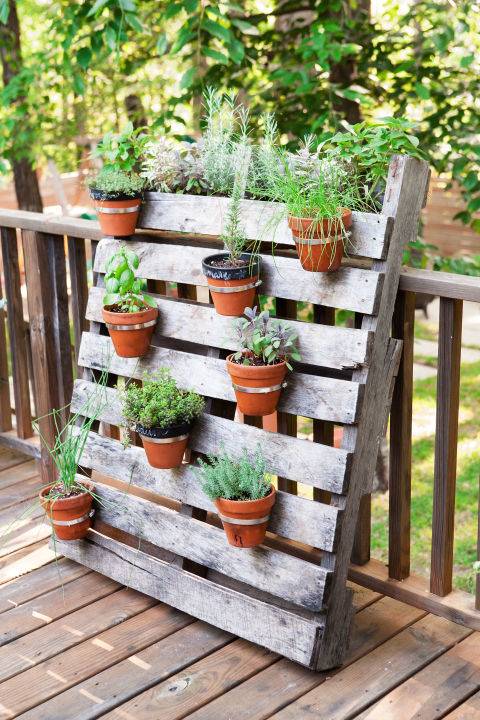
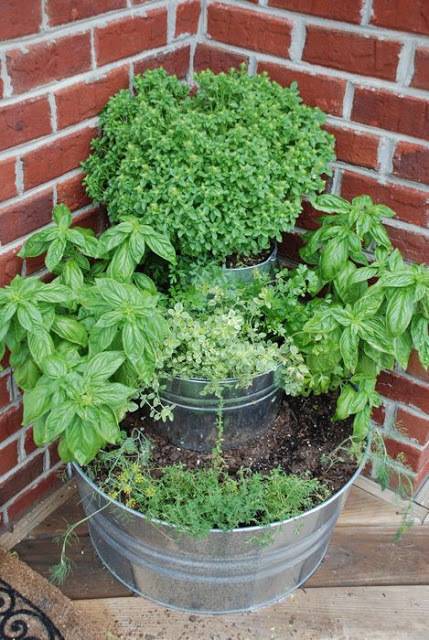
3. Reclaimed wood makes the perfect backdrop for small potted herbs. Just attach little metal buckets to the wood and plant your favorite herbs inside. Found over at Decorating Your Small Space. [Photo: Decorating Your Small Space]
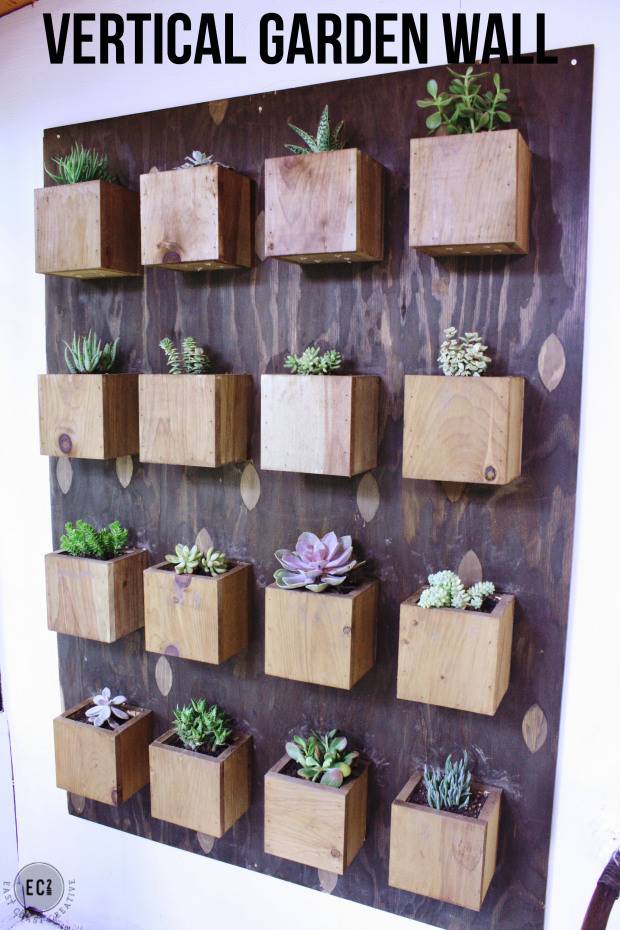
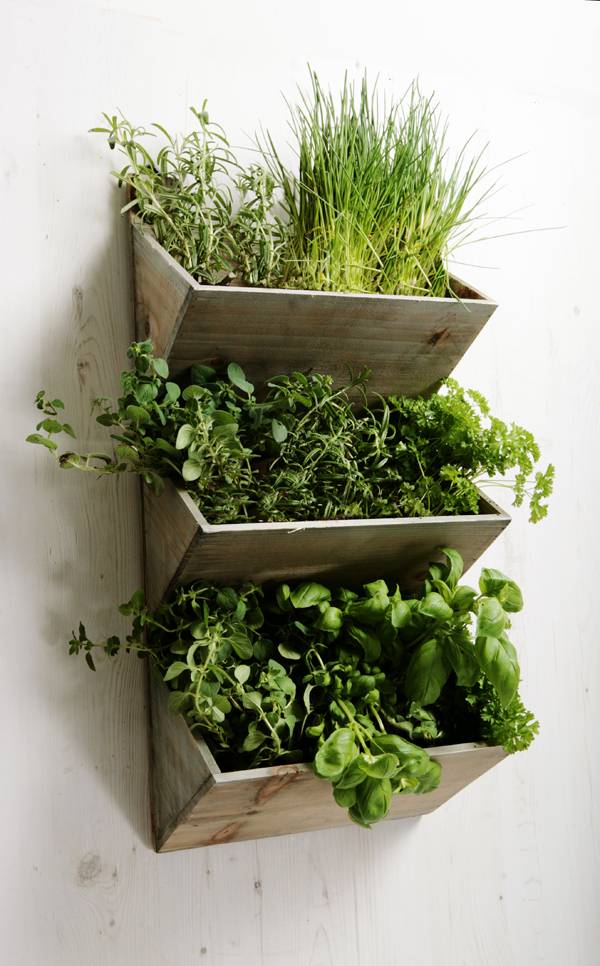
5. If you’re into woodworking, give this vertical herb garden a try. Head on over to East Coast Creative to check out the full tutorial. [Photo: East Coast Creative]
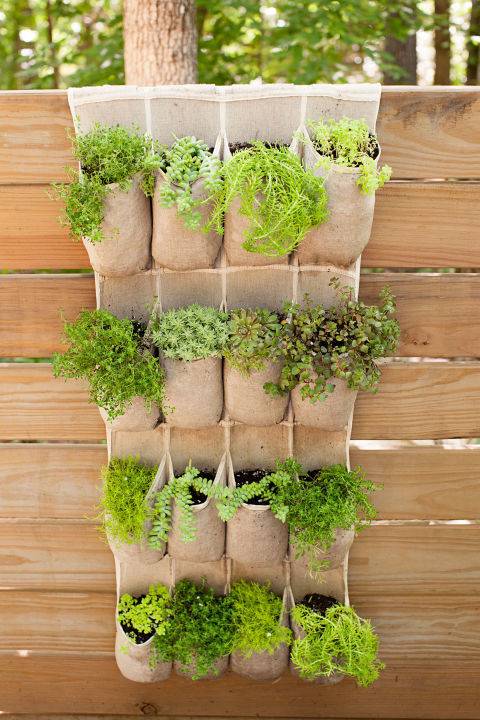
8. Turn a hanging shoe organizer into an herb garden! This is a great option for those with very limited space. Learn more here. [Photo: Good Housekeeping]
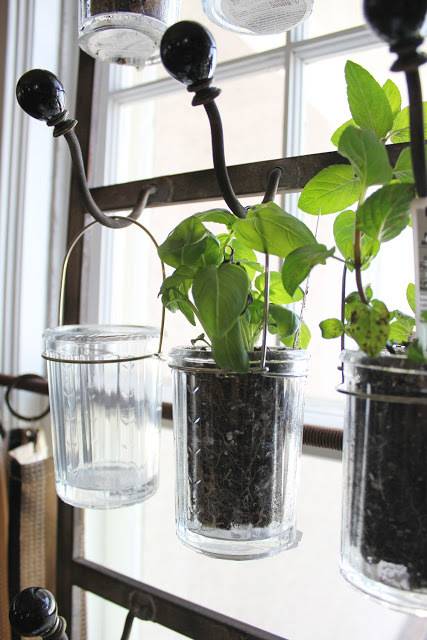
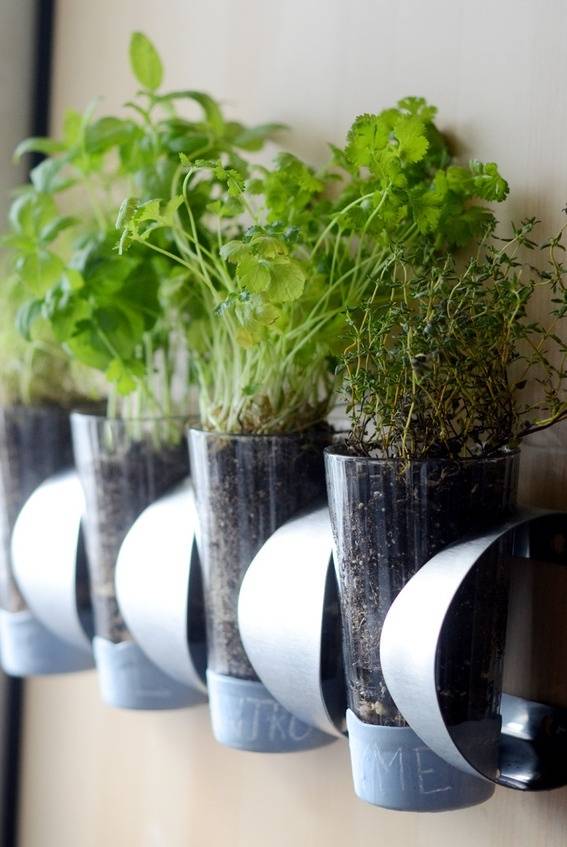
9. This IKEA hack by yours truly is a clever way to reinvent the IKEA Vurm wine rack… check out the full tutorial here. [Photo: Faith Towers Provencher]
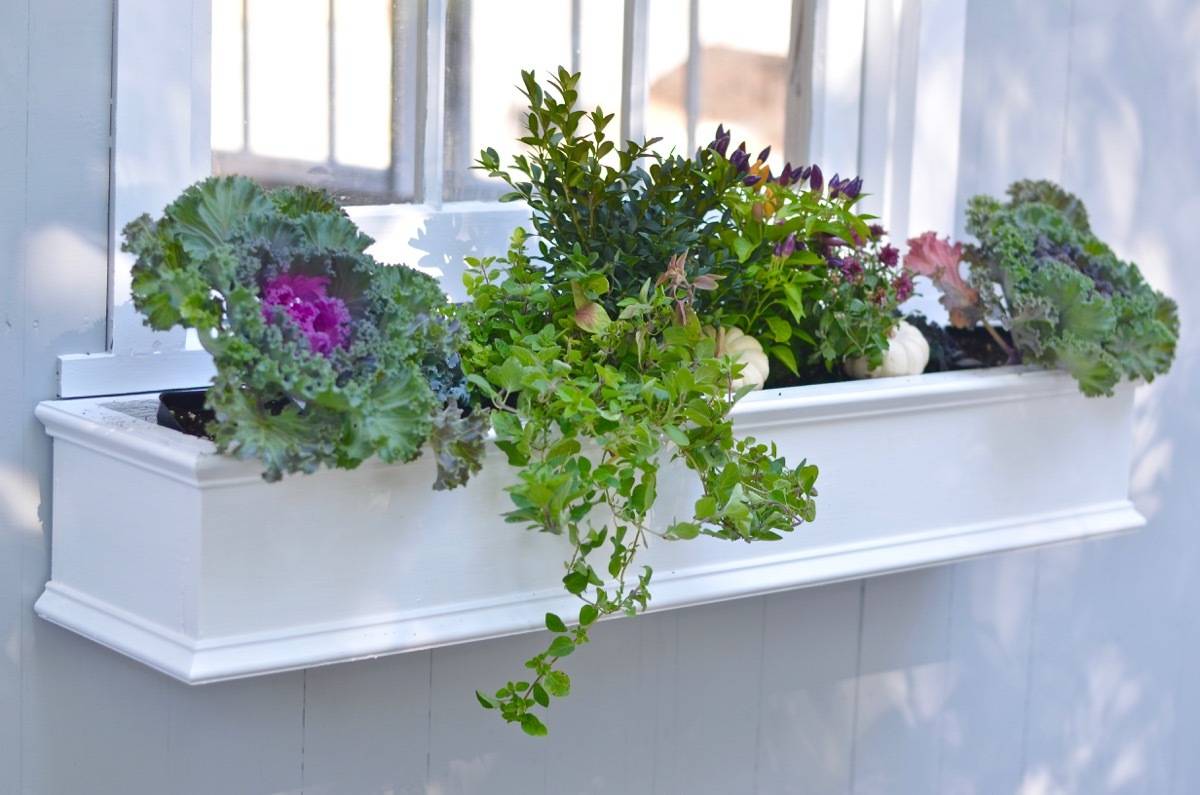
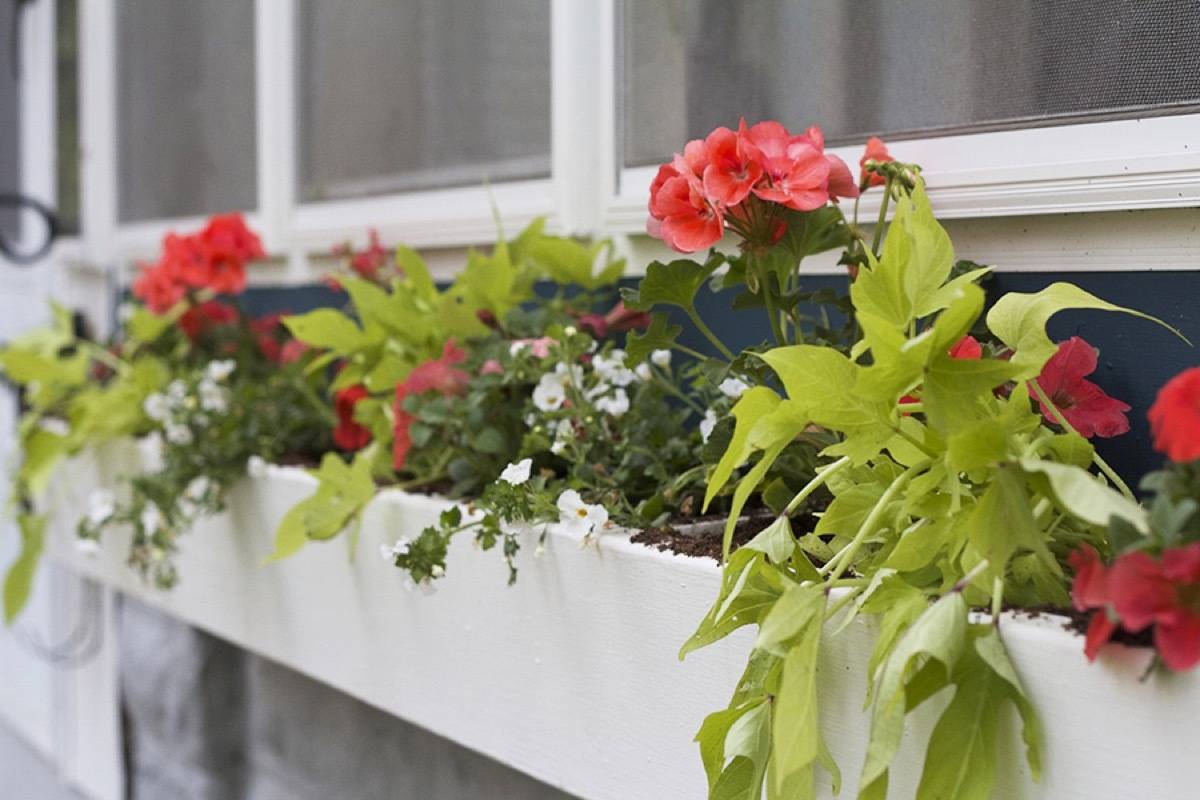
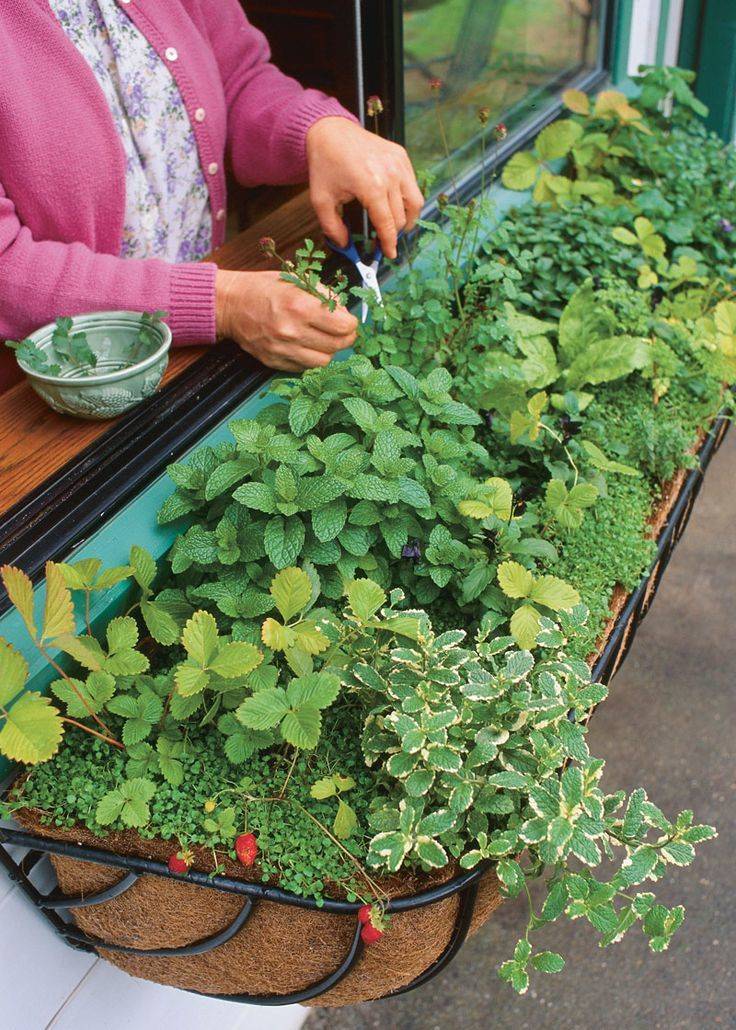
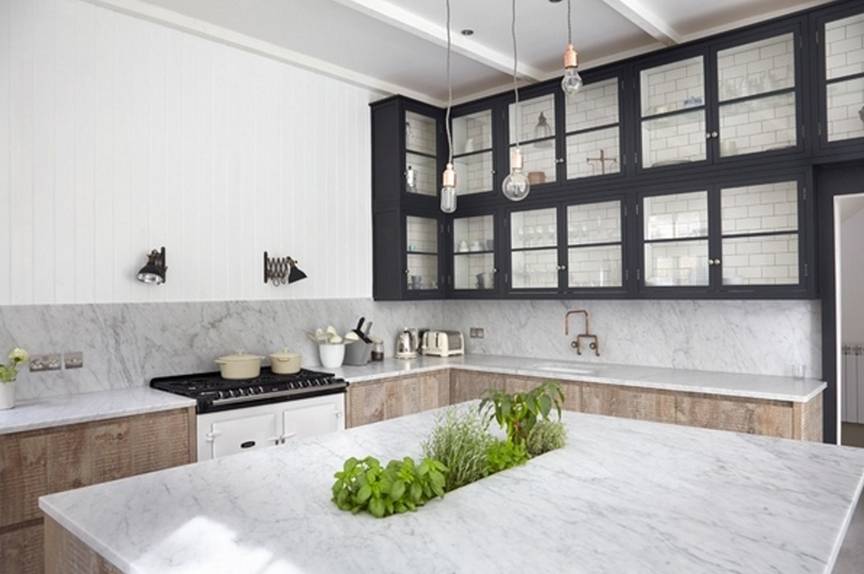
11. A window box is another great herb garden idea… it adds greenery to the outside of your house, and you can also easily access it from inside. [Photo: Bless My Weeds]
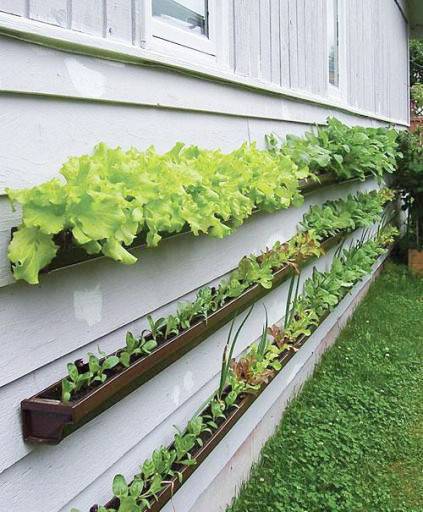
18. This might be my favorite… attach rain gutters to the side of your house and plant herbs inside. Just don’t forget to punch drainage holes in the bottom! [Photo via: Inspire Bohemia]
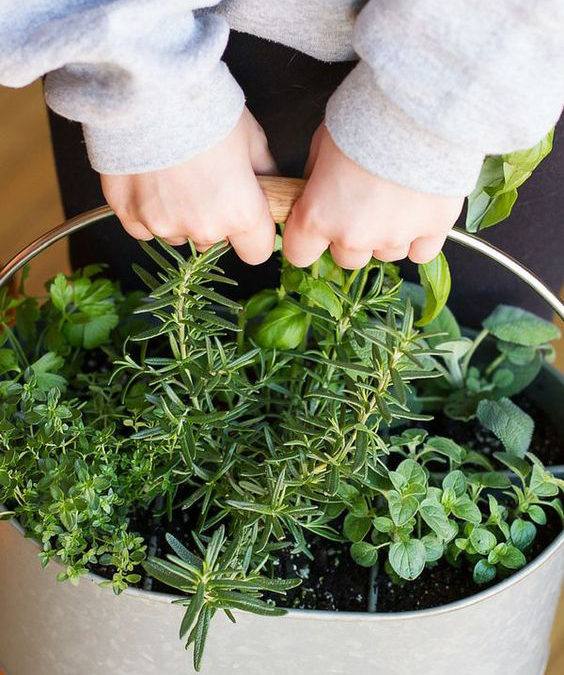
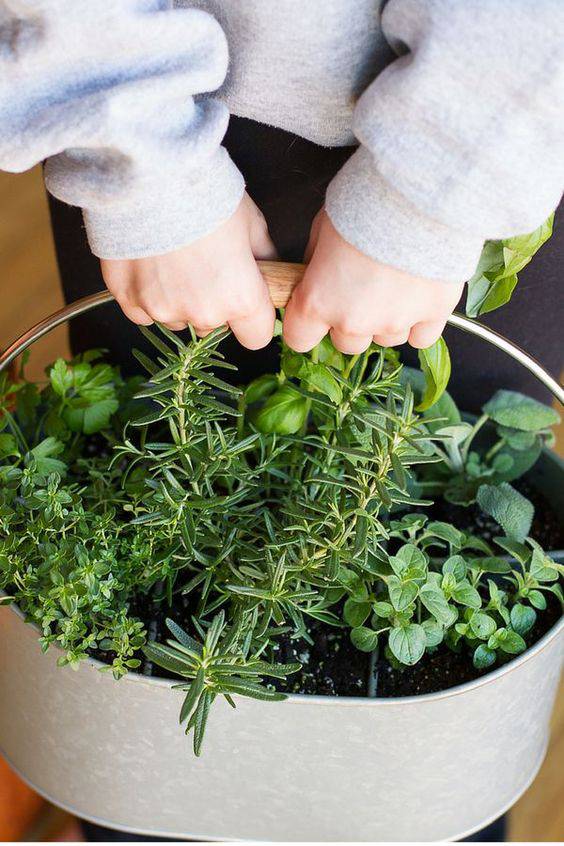
20. Here’s another clever one… fill a caddy with plants, putting a different herb in each section. This one is handy because you can carry it inside to harvest the herbs. [Photo: Backyard Boss]
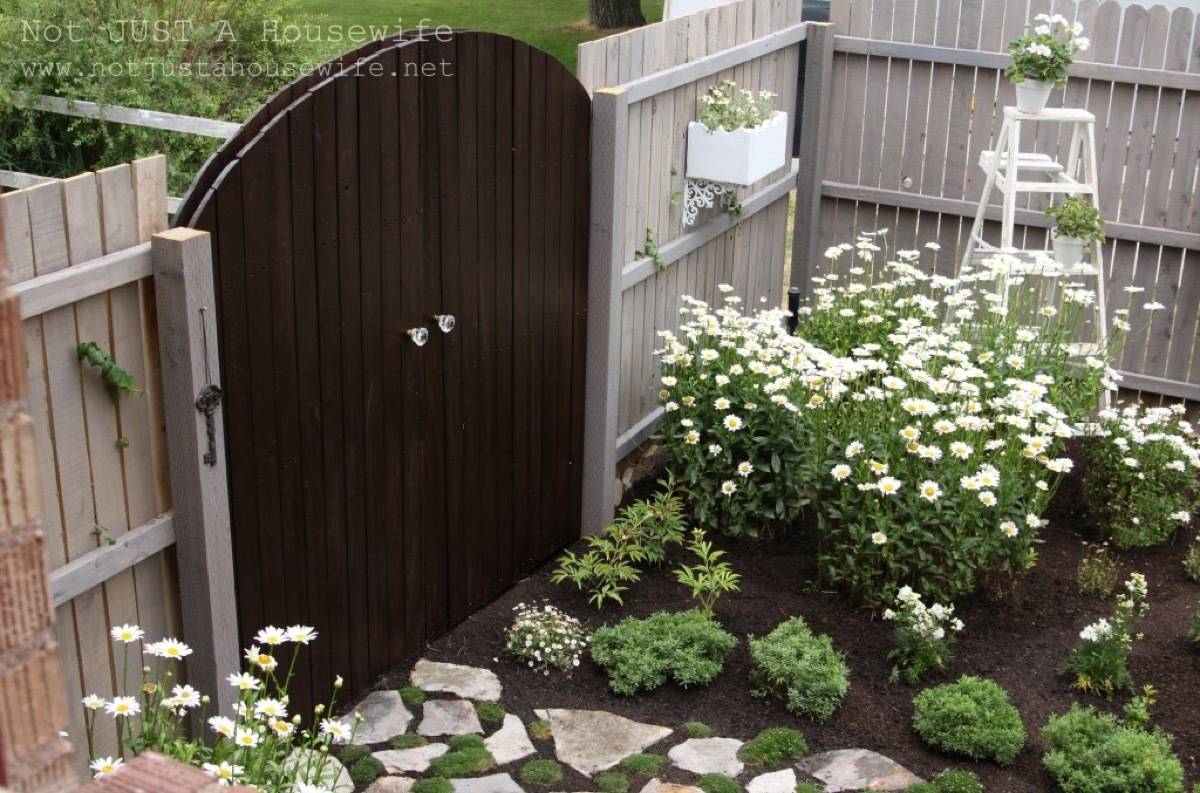
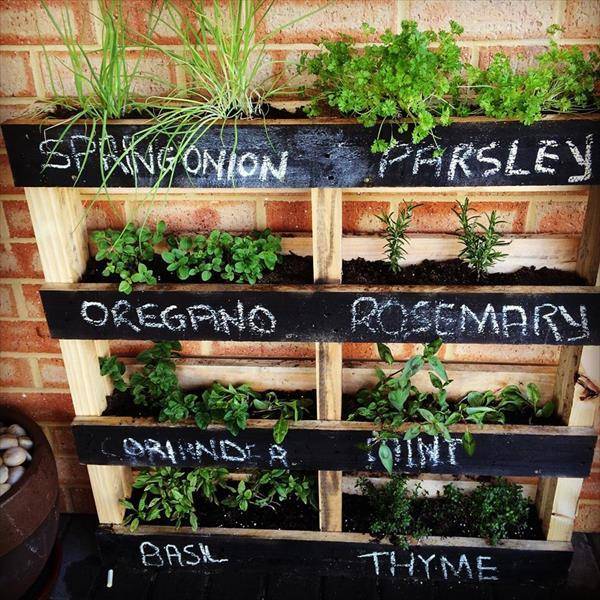
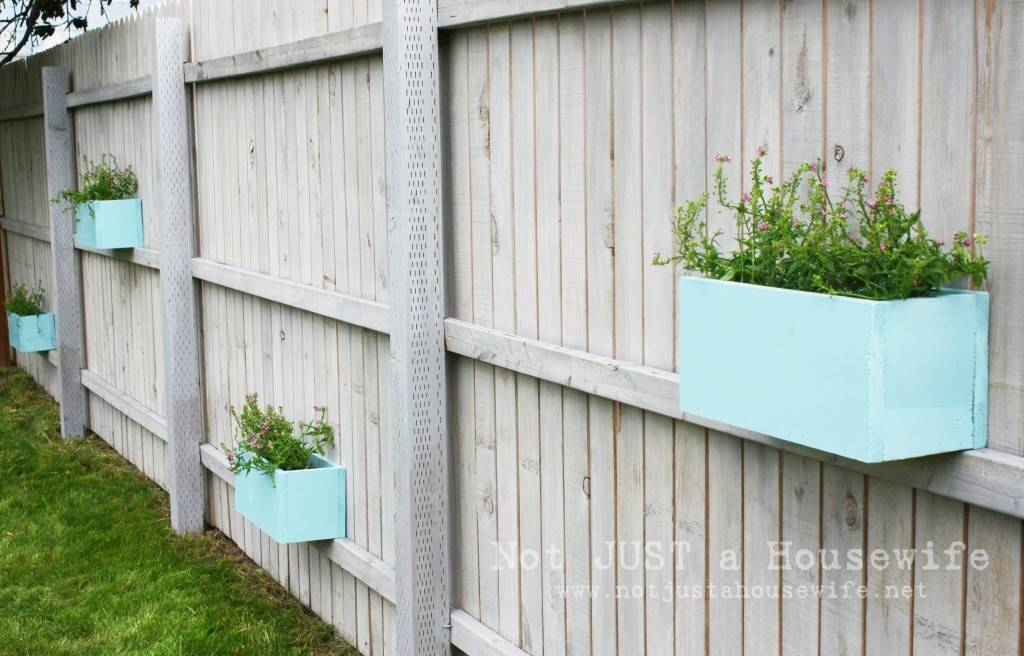
22. And last but certainly not least… add some pizzazz to your boring fence with colorful herb planter boxes! Get the how-to here. [Photo: Not Just A Housewife]
Did you enjoy this article? Share it on Pinterest! [Photo: Backyard Boss]
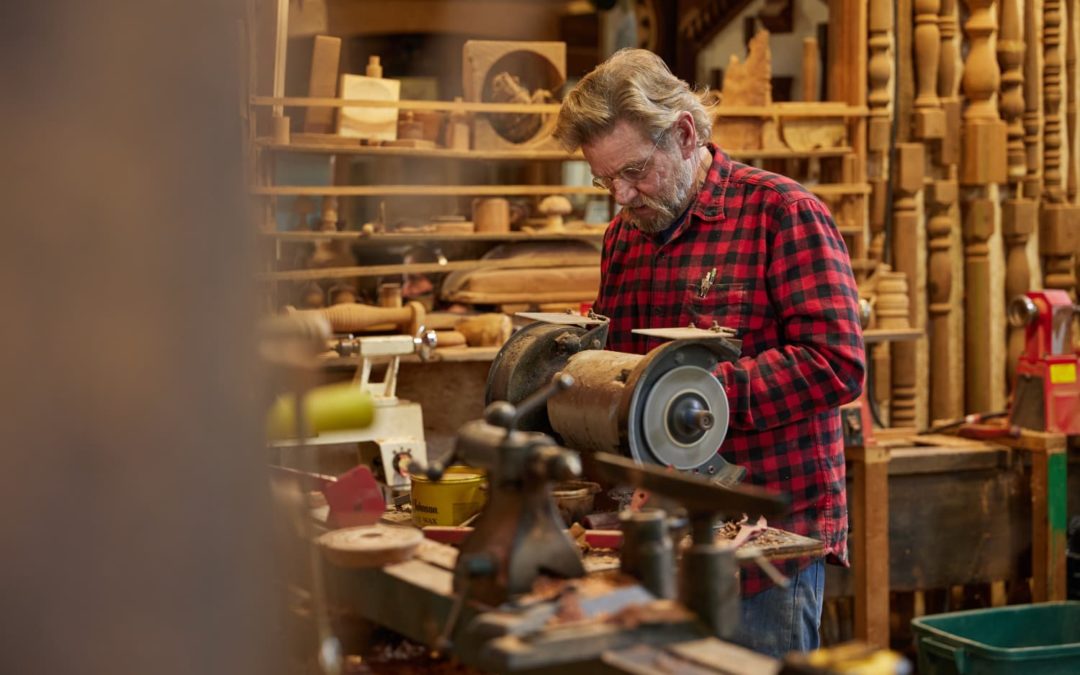
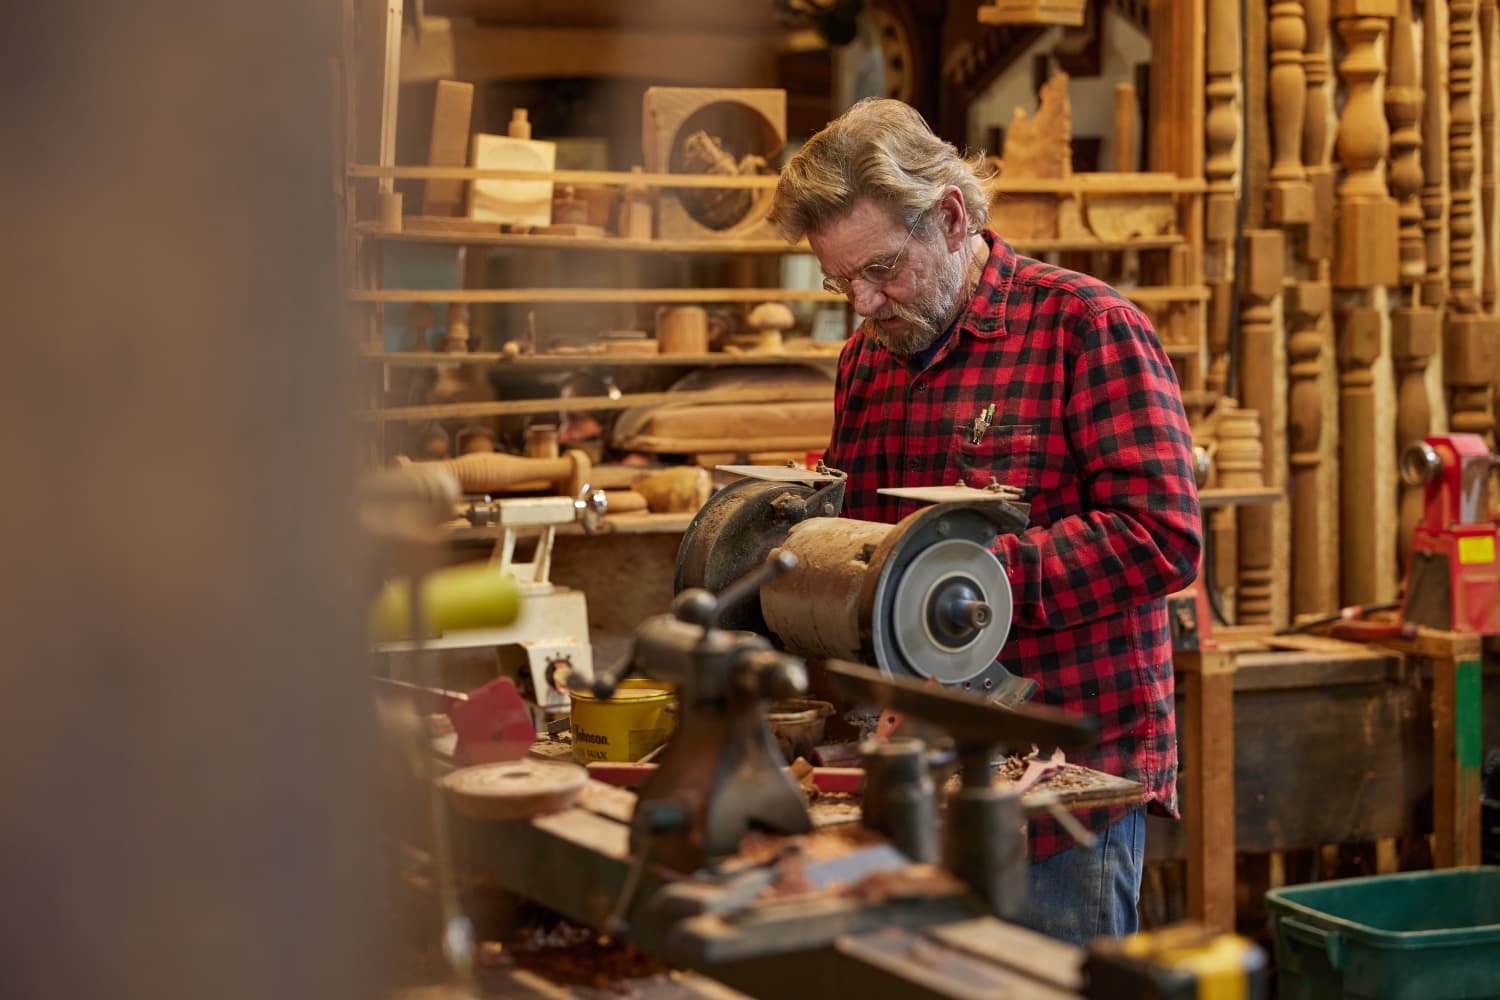
Eric Hollenbeck never saw himself leading a television series. A master craftsman, Hollenbeck was content to continue working at Blue Ox Millworks, his woodworking company in Northern California, but a call about a potential TV spot changed everything. Hollenbeck was originally only supposed to appear in one episode of a Discovery show, but when that didn’t work out, he was approached about potentially doing an entire series devoted to his life’s work.
“If you’re looking for a reality show [with a] protagonist, that kind of thing, we’re smoke,” he recalled telling the network during a recent video interview. “We are out of here, we are so far down the road, you won’t even see our dust.”
Fortunately, that’s not what the network — the Chip and Joanna Gaines-helmed Magnolia Network — had in mind. Instead, “The Craftsman” (airing Tuesday nights) is a relaxed, low-stakes series that follows Hollenbeck and his team (including his wife and daughters) as they work on various restoration projects throughout his beloved hometown of Eureka, California. Each episode tackles a different challenge, from an 1880s trolley to Hollenbook’s childhood movie theater, and offers some life insights along the way.
Apartment Therapy caught up with Hollenbeck ahead of the premiere of “The Craftsman” to chat about the basics of woodworking, the merits of restoration, and sharing his passion with the world. (This interview has been condensed and edited for clarity.)
Apartment Therapy: Can you tell us a little bit about how the show came to be?
Eric Hollenbeck: [We told the network] we will do this for two reasons. Number one: to promote craftsmanship amongst the young people, to tell the young people of the United States that being a craftsman is an honorable and noble way to spend the rest of your life and [that] you can make a good living at it, because the education system has not been telling them that. And number two: to show the world this lovely little gem that we live in called Eureka, California in Northern Northern Northern California. San Francisco thinks they’re Northern California. We’re five and a half hours north of them. So there’s two more ‘Northerns’ and evidently, they thought that was a good answer, because then the whole thing started.
AT: What sort of advice would you give to someone, maybe a younger person, looking to get into woodworking?
EH: Know that you’re going to start someplace and you’re going to get better at it, and better and better. If you work with these, your hands, you’re a tradesman, you’re a laborer. If you work with these [hands] and your head, you are a craftsman. If you work with these [hands], your head, and your heart, you’re a master craftsman. You put all of those together and then you’re putting your soul into what you’re doing.
AT: Do you have any beginner projects for people who are looking to get into this?
EH: I would say find something that you’re interested in, and then figure out how to do that. This is the first thing you have to learn and it’ll be the last thing you learn. I have to learn this with every project I do. The more complicated the project, the more I try [to] outthink it… I waste days. At some point you just have to start making sawdust, knowing you’re gonna throw those first boards away. It [doesn’t] make any difference. You’ve got to start. Because at the beginning of a project, you don’t even know the questions to ask. How can you try and figure out the answers when you don’t even know what to ask? You’ve got to start down the road, start building something. You’ll figure it out as you go along because every quest, every problem rises and you solve it, and then the next one rises and you solve it. It’s a stair step.
AT: I know that these days so many people are inclined to just knock things down and build a new or buy a new thing. Why do you think that restoration is so vital?
EH: You just hit the nail on the head on what I’ve been going through in my thought process and my life, about this series and everything else, and who I am and what I’m doing. And I have to tell you, there are times that I feel like one of the World War II monument men. Eureka is this wonderful little town. We have, I’m told, 68 percent of our original structure still standing. We don’t have art galleries like the Louvre or the Metropolitan Museum of Art. But we have our Louvre around us all the time as you walk down the streets. We have our Louvre in our architecture. And I have spent almost a lifetime trying to keep that in the forefront, trying to keep that preserved, doing the very best I could do. And at first that wasn’t very good. [Laughs.] It was something and I’ve gotten better at it, because it’s our cultural heritage. It’s who we are as a people, as a societal group, as Eurekans.
AT: Do you have any favorite memories from filming the series? Does any one moment stand out?
EH: When it clicked for me, what they were asking me to do, it was great. Because then I knew the game plan. I knew the battle of attack. I get it now. Boy, the first couple of weeks were ragged, I’ve gotta tell you. God bless the Magnolia Network. They are coming and finding people that have never [had a] camera in [their] face all the time. And they set up such a great team and made me finally get comfortable and natural with it. When that happens for the girls — and I think it’s gonna happen, I know it’s gonna happen, because I’m watching it; not this minute, but I’m watching this whole process — they are gonna shine and show the world their power too.
“The Craftsman” airs new episodes on Tuesdays at 9/8 central on the Magnolia Network and Discovery+.
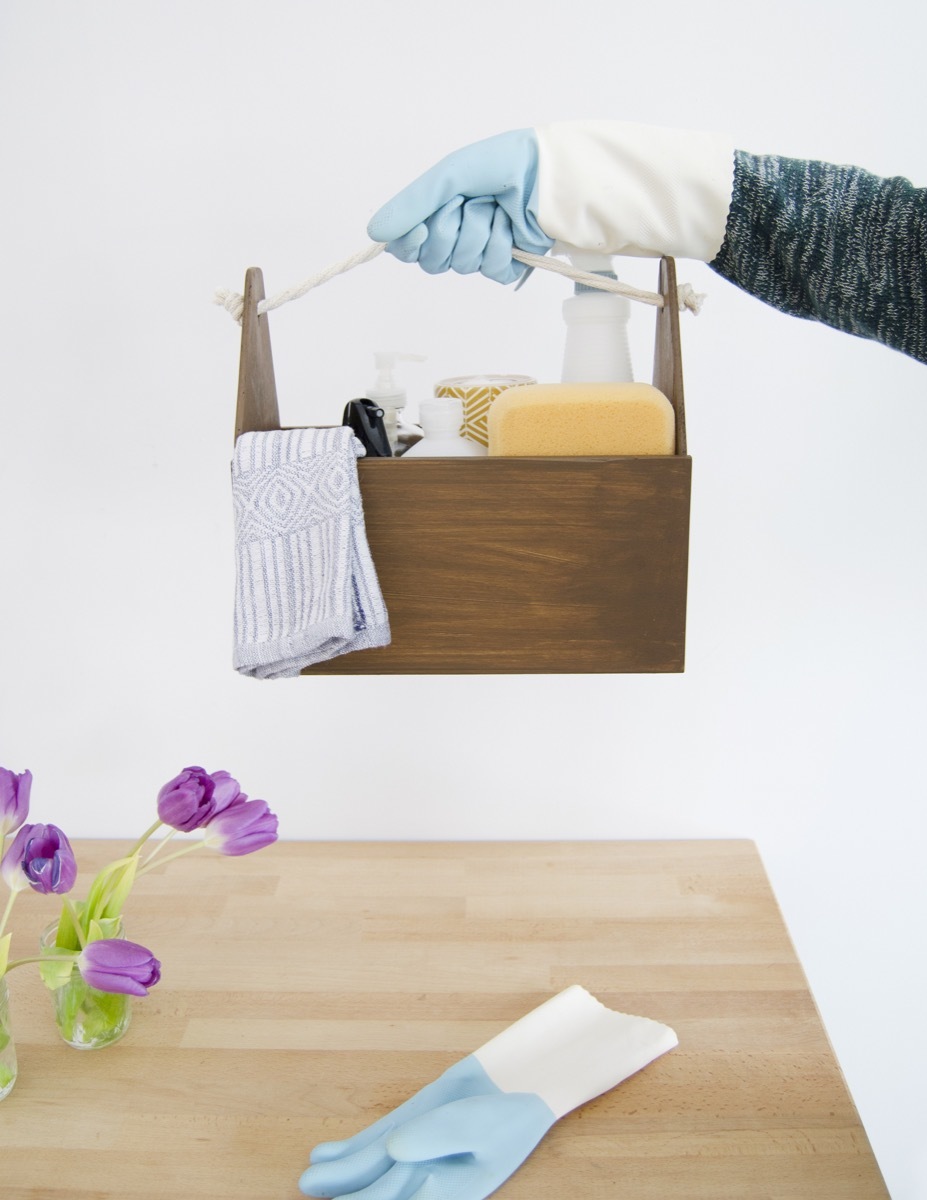
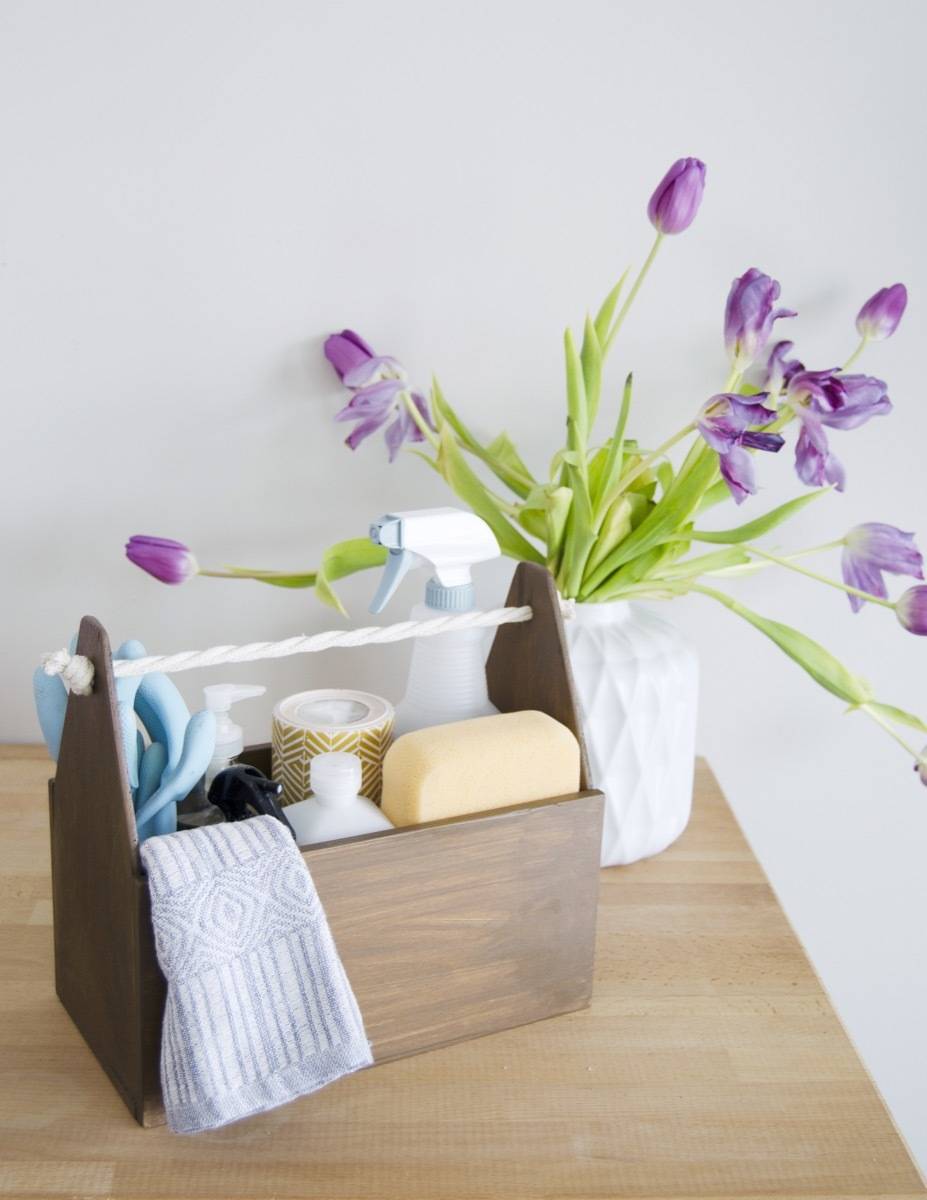
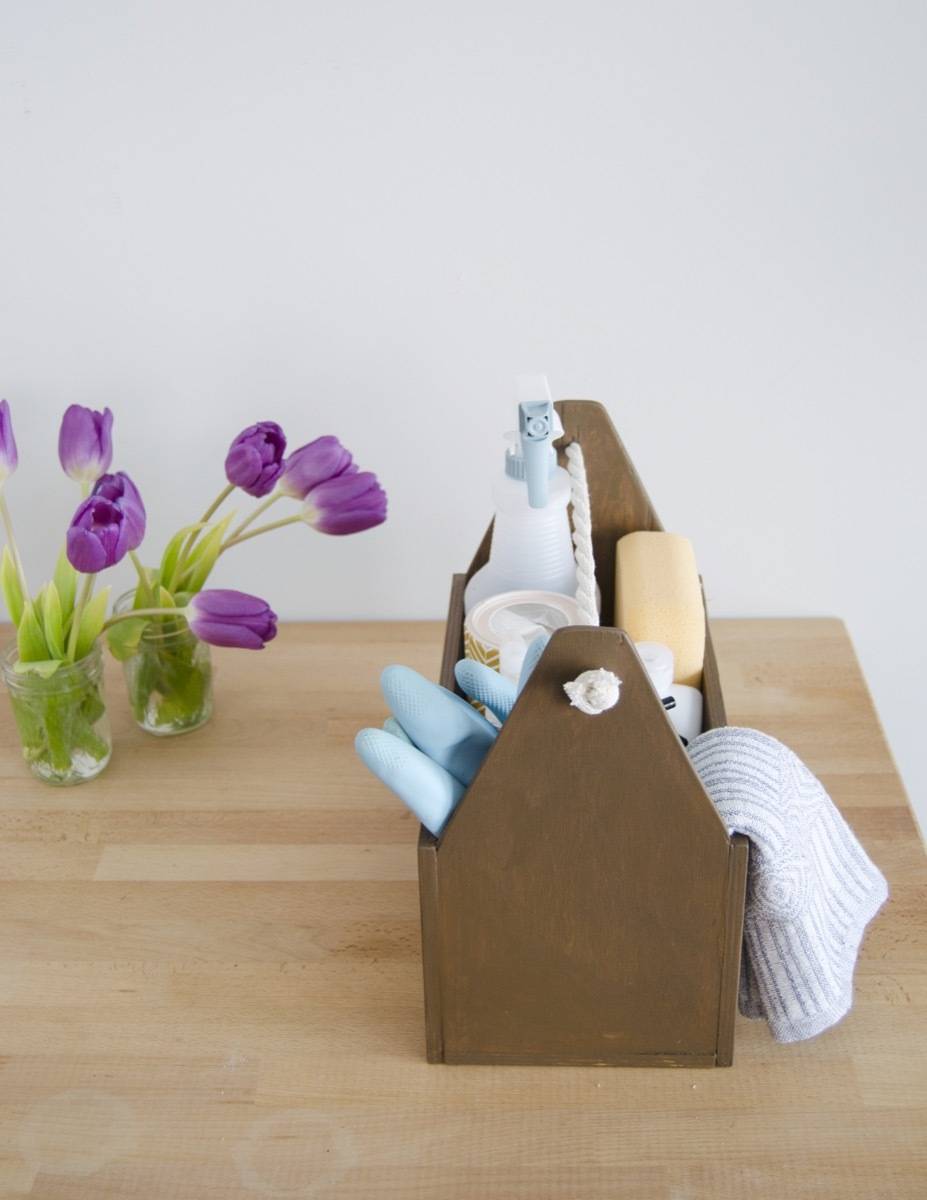
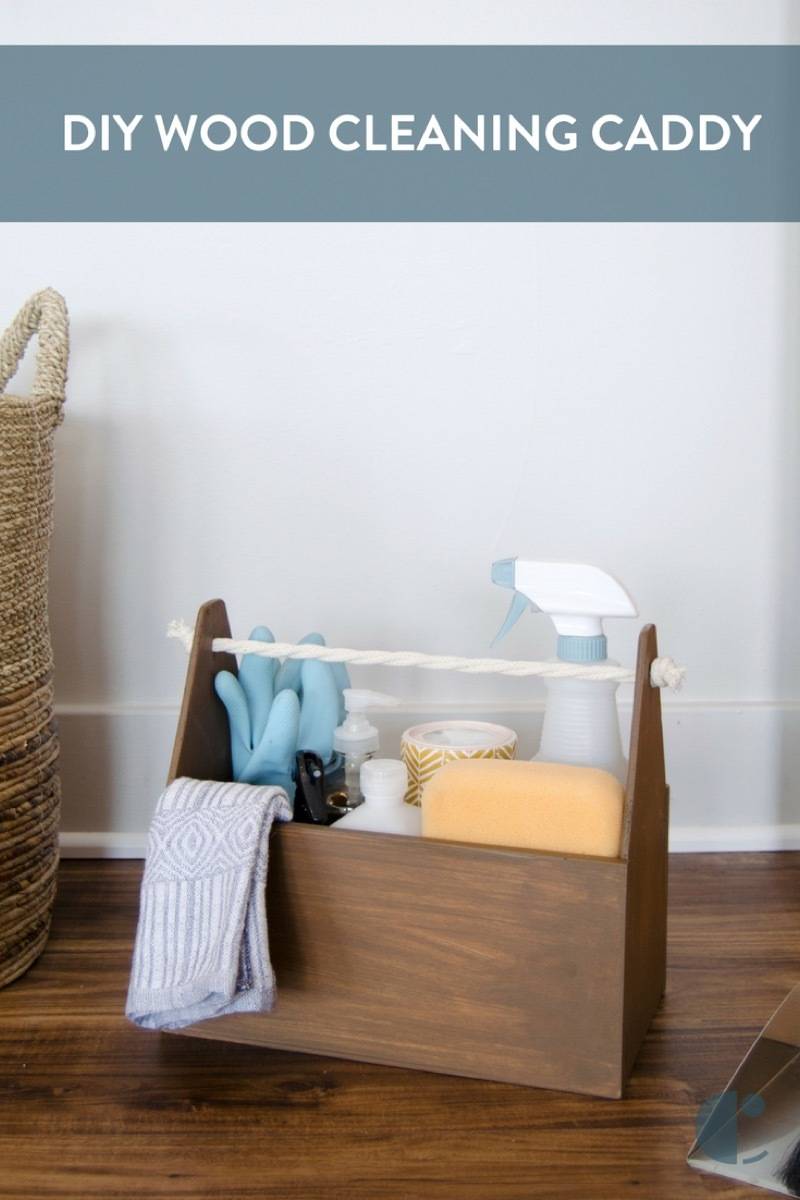
There are a couple rules-of-thumb when it comes to successfully keeping your home clean. One of those rules is that you should always keep your cleaning supplies in one place, and you should always put them back when you’re done using them. A cleaning caddy meets both those criteria, and – bonus – makes carrying household cleaners from room to room super easy! I’ve been wanting to incorporate a carrier into my cleaning routine for a while now, and rather than purchase a cheap-looking plastic one that will surely break over time, I opted to make one instead.
The plus side to making rather than buying a cleaning caddy is I could build it a little smaller than the store-standard sizes. Living in a smaller apartment, I’m always looking for ways to save on storage space!
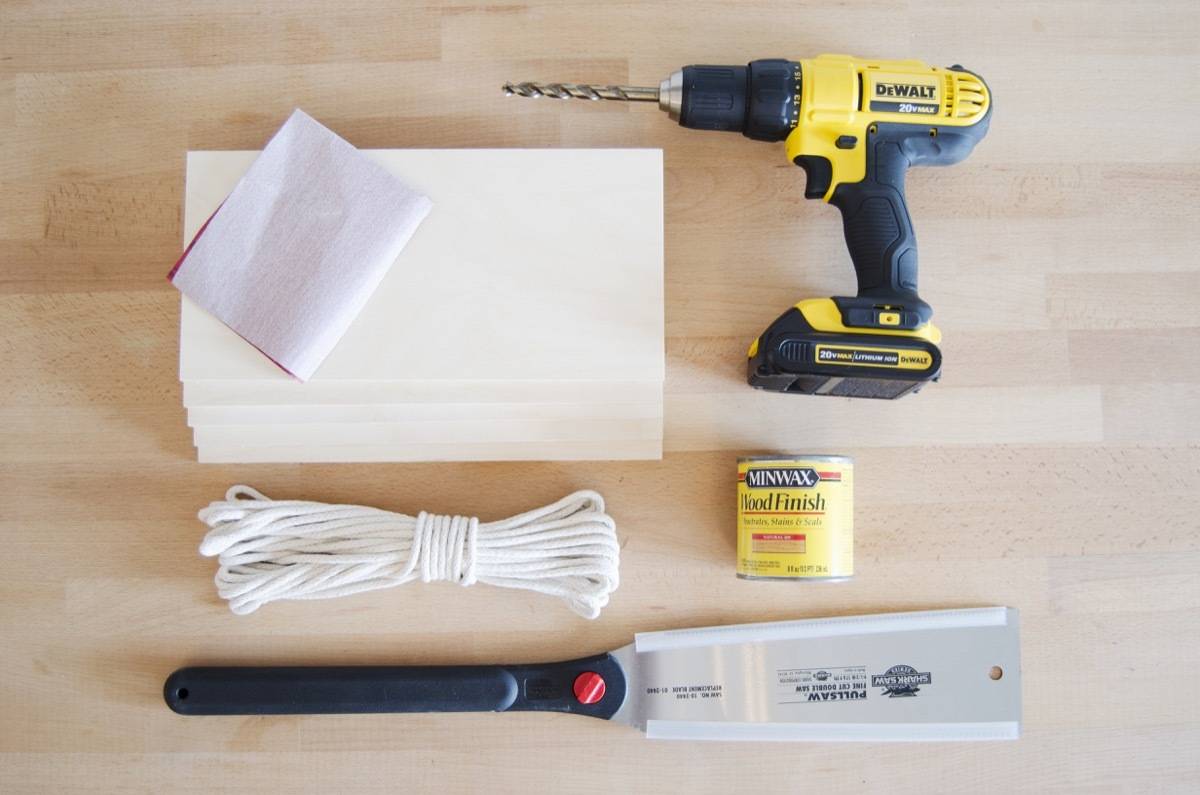
Materials
5 pieces of wood, measuring 6 by 12 inches each, with a 3/8 inch width
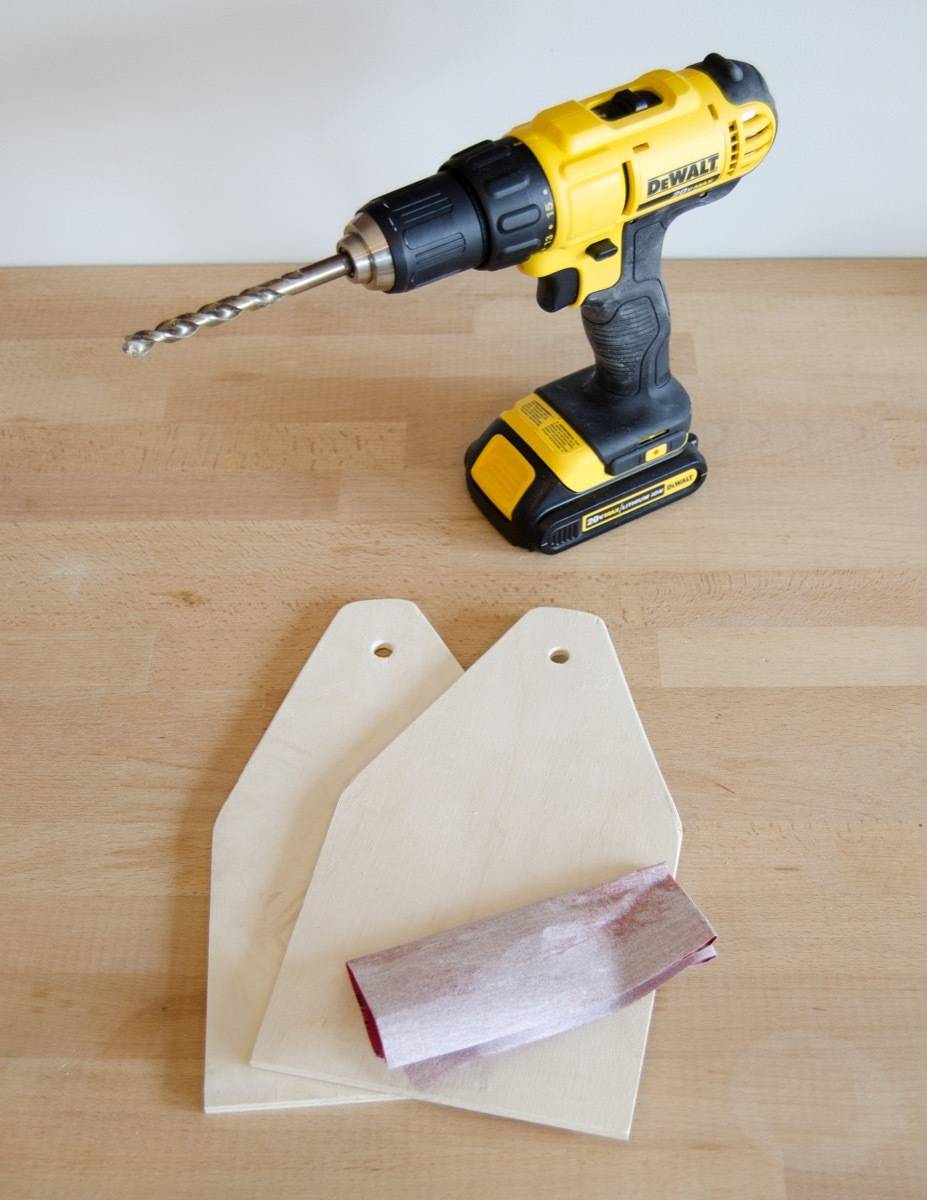
Cordless drill with drill bit (available at Home Depot)
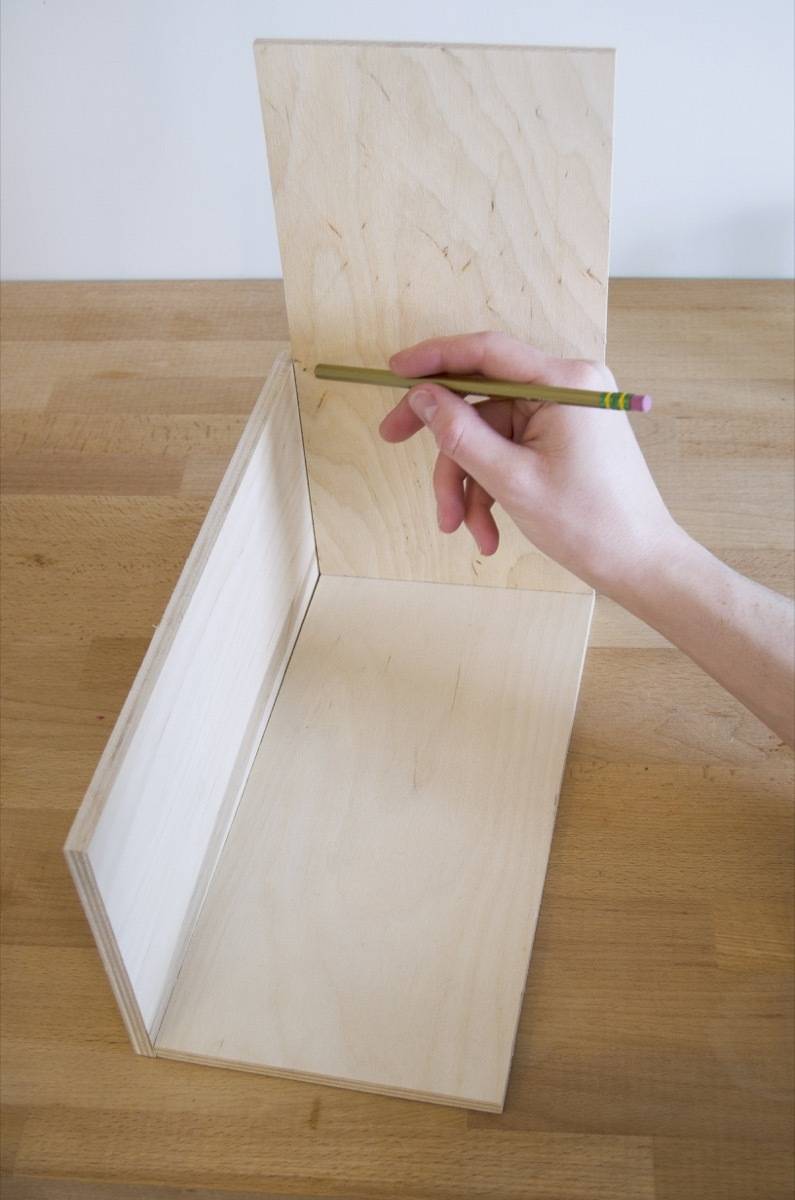
Begin by lining up the pieces of wood. Lay the first board on the bottom, and the second standing on its side flush with the edge of the bottom piece. Line a third board on top of the bottom board, and make a mark where it reaches the second board. This mark will lie about 5 1/2 inches from the edge of the board.
Step
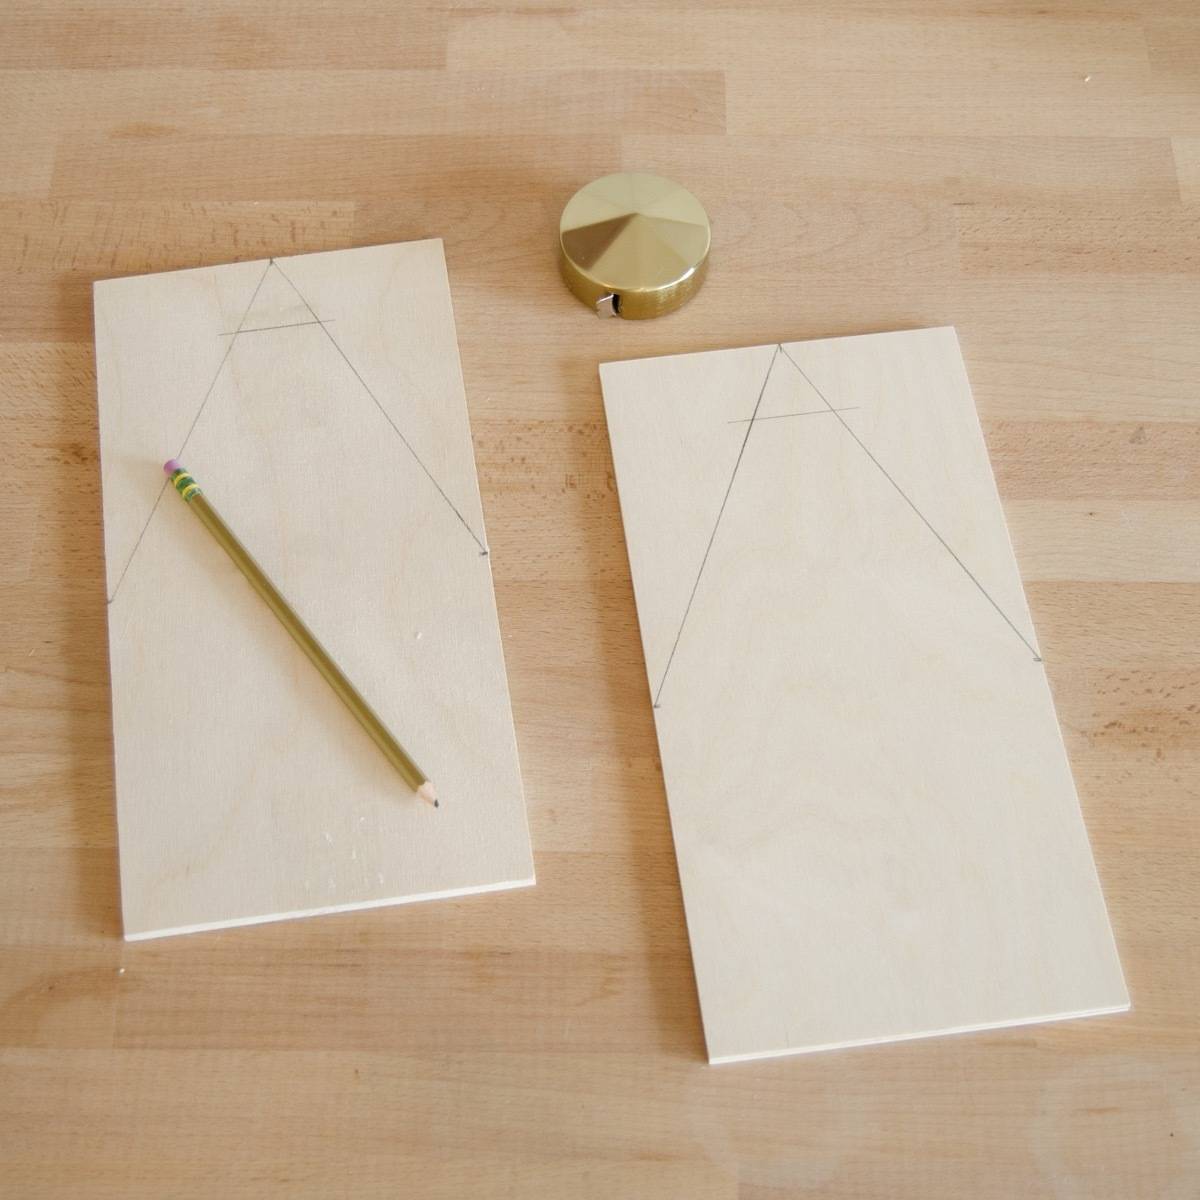
Make this mark on the opposite side of the board. Do the same for a fourth board. Next, make a mark in the middle of each board, and draw a line from the first marks to the middle point. About 1 1/2 inches down from the top, draw another line. This marks out what wood will be cut in the next step.
Step
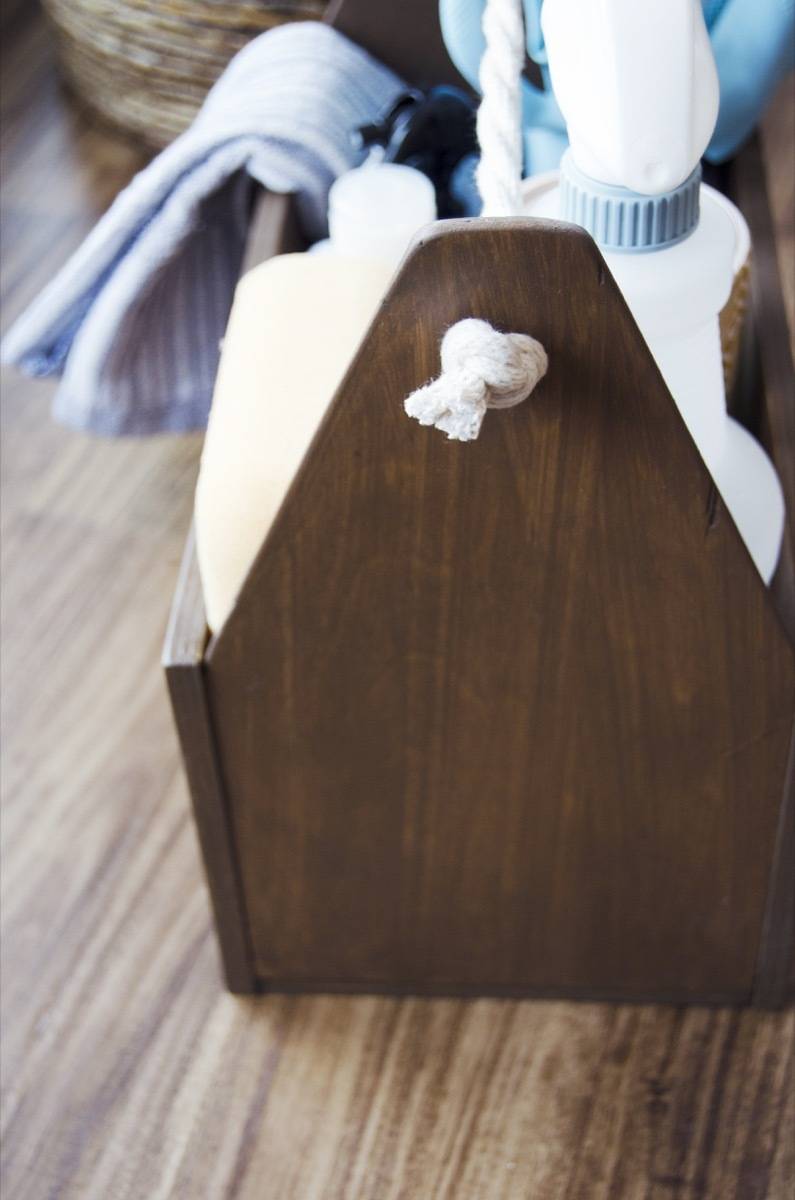
Cut along the drawn lines using a hand saw or a table saw. About 1 1/2 inch down from the pointed top of the cut boards, drill a 1/4 inch hole using a power drill. Sand all rough edges.
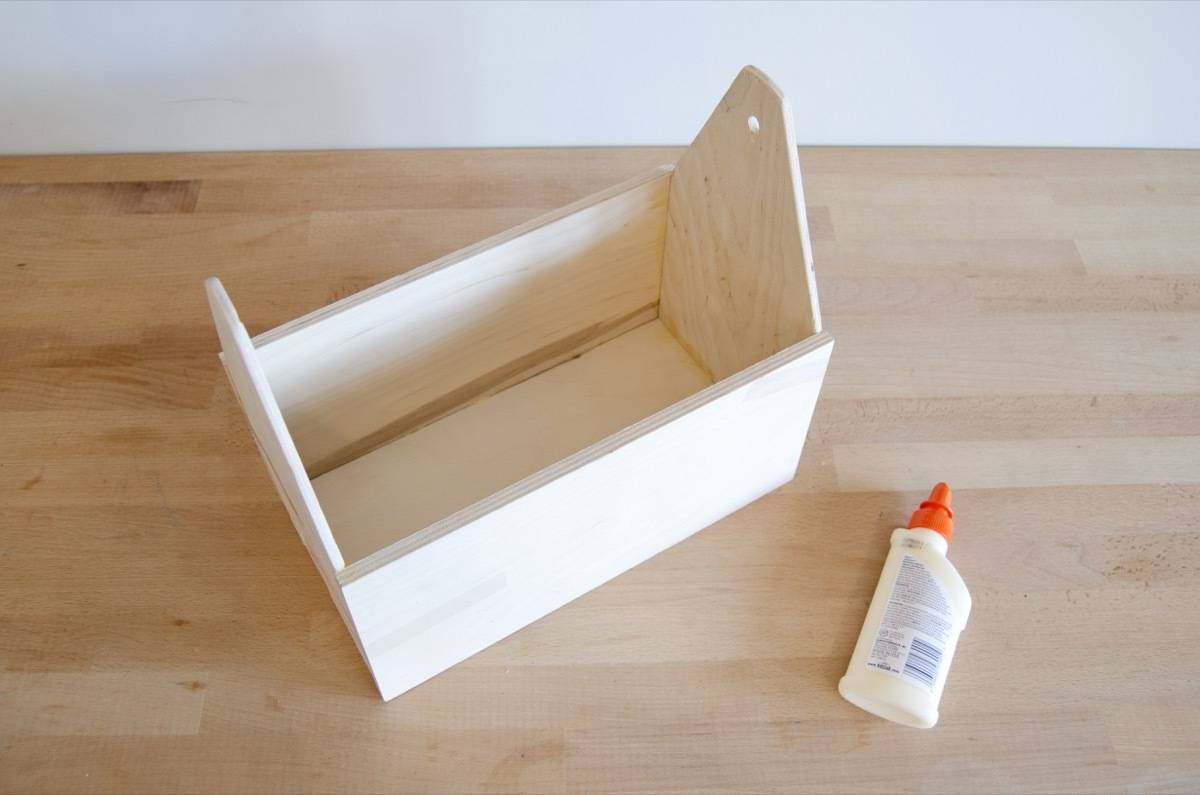
Step
Assemble the caddy using wood glue. Use masking tape to hold the pieces in place as they dry. Wipe up any excess glue with a damp paper towel before the glue dries.
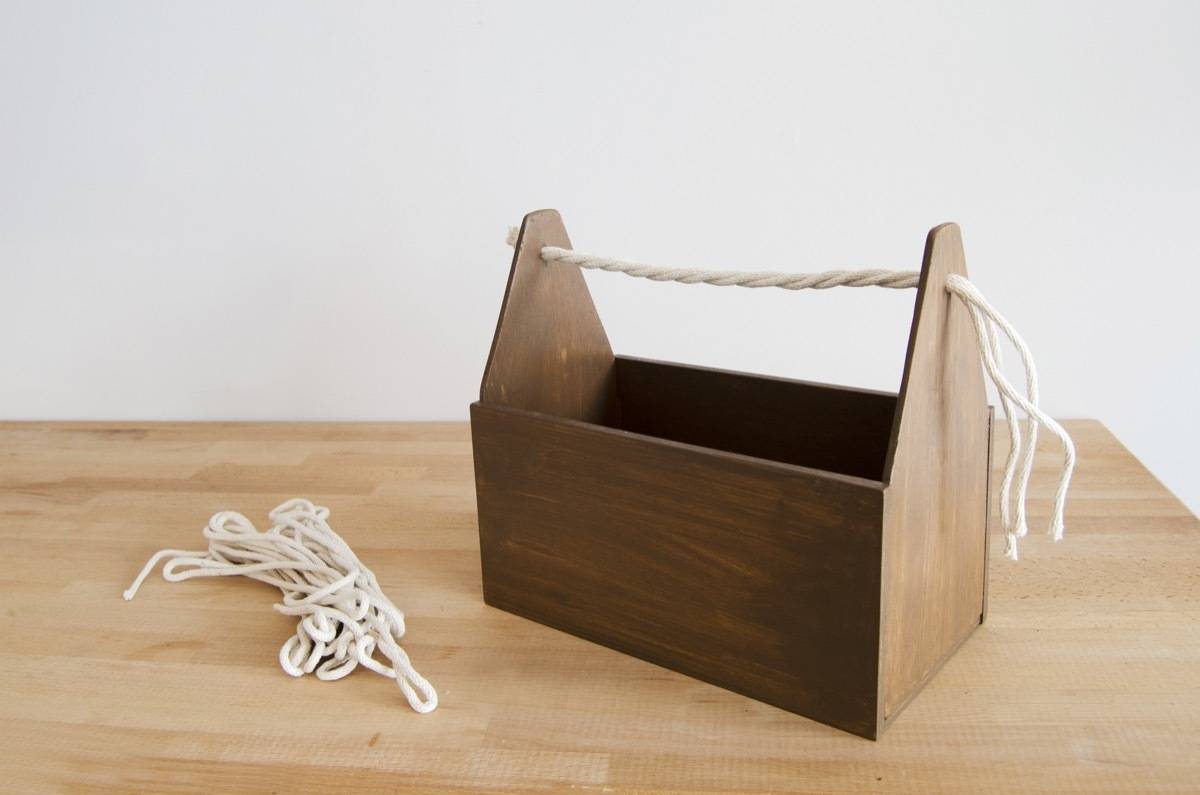
Step
Apply a layer of wood stain to the entire caddy. Wipe the wood with a dry paper towel once it has reached the desired darkness of stain, then let dry completely.
Step
Feed rope or twine through the drilled holes the cleaning caddy. Knot the rope on each end. Done!
Share this DIY on Pinterest!
I’m really hoping that having such a cute cleaning caddy will encourage me to clean more around my apartment. Fingers crossed!