When the house at the end of the cul-de-sac hasn’t changed in 28 years, it’s time for some front porch rehab.
This house belongs to Jeff and Eliese McAllister. The couple, known as Lolli and Pop to their grandchildren, want to update the front porch on “Camp Lollipop” so their grandchildren can enjoy their front yard as much as their children did while growing up.
The porch is blocked off by tall shrubs and is too narrow for the couple to comfortably sit and watch their grandchildren play.
And that’s where we can help!
The Projects
“Open concept” isn’t just for interiors! We’re opening up this front porch.
Opening Up the Front Porch
Removing the shrubs and handrails blocking Jeff and Eliese’s front-yard view is our first big job.
We have to pressure-wash the house to create a clean slate to start our work. Jeff and I remove shrubs, with the help of the couple’s grandsons, while Chelsea and Eliese tackle the handrails.
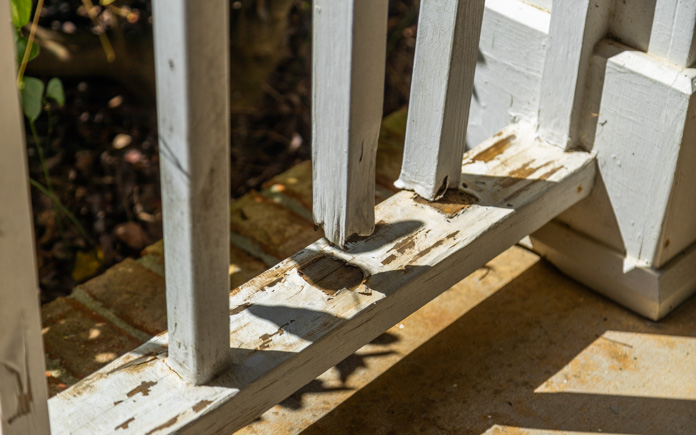
This is what happens when your wood isn’t treated before painting or staining it.
Because the wood handrails aren’t treated, they are rotting away. So, knocking them out with a sledgehammer is the best way to open up the porch — and, maybe, release some tension along the way.
After removing the handrails, we apply putty and sand the columns so it’s like they were never there, to begin with.
Repairing siding isn’t just a cosmetic fix; it can prevent bigger problems later on if the elements enter your home.
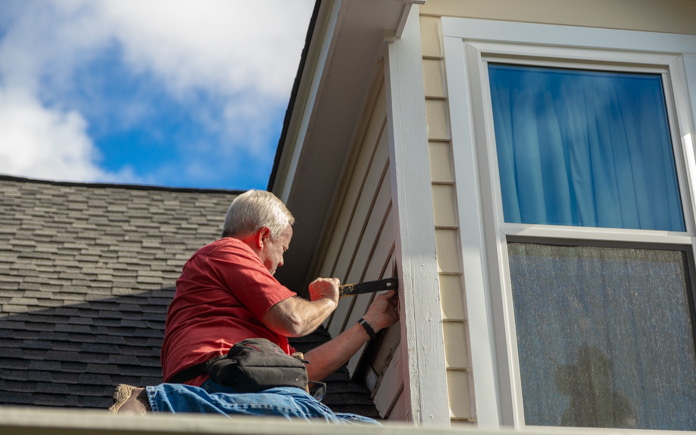
Repairing the Shutters and Dormers
This curb appeal makeover requires more than opening up the front porch. We’ve noticed some problems that needed immediate fixes!
First, we repair the ground floor’s damaged shutters. Then, we get up on the roof to repair siding on the dormers. Of the 12 shutters on the front of this house, just one set has a little wood rot. So, Jeff doesn’t want to replace them all.
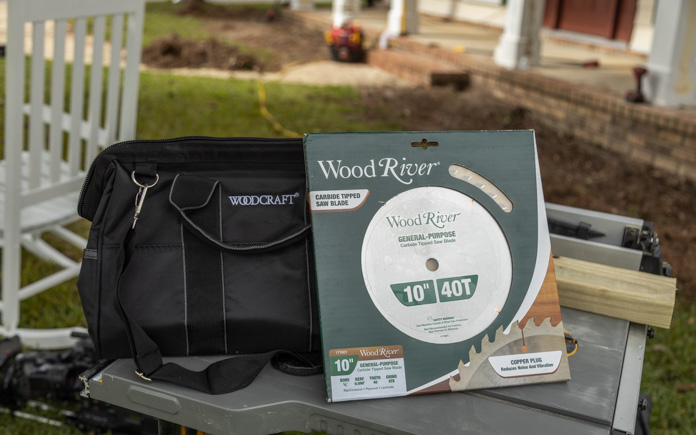
Since none of these pieces were standard lumber sizes, we had to cut them down on the table saw. Chelsea used the old pieces as a pattern to cut new pieces from the fiber cement material.
A Woodcraft WoodRiver General Purpose Carbide Tipped Saw Blade comes in handy when you need to make custom cuts.
This front porch is coming along, but it could use more character. We will paint the porch to add some.
Painting the Front Porch
After all the repairs were done, we put a fresh coat of paint on the siding, trim and front porch ceiling. The green shutters clashed with the red-tinted wood door, so we painted them gray to tone it down.
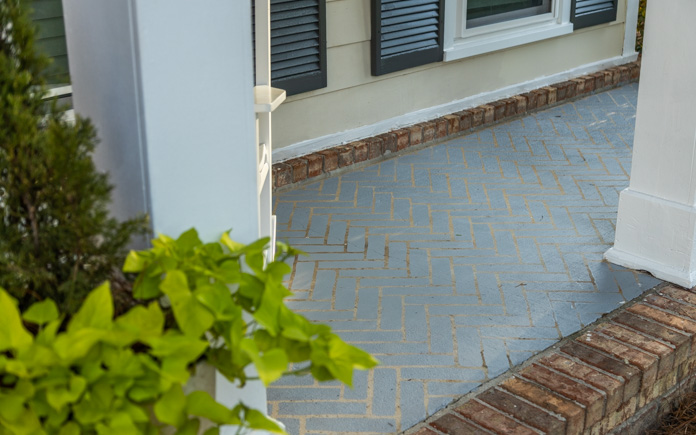
The painted pattern adds a pop of color to this front porch.
The concrete on the front porch has seen better days. Instead of gutting the concrete, we painted a pattern on it using a stencil! It’s a great way to give your concrete a fresh look without breaking the bank.
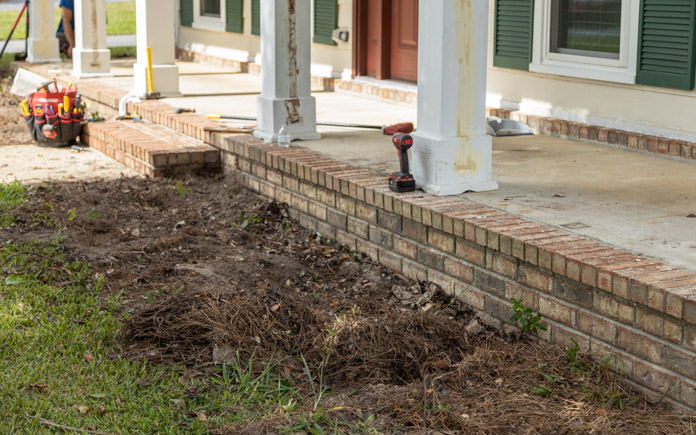
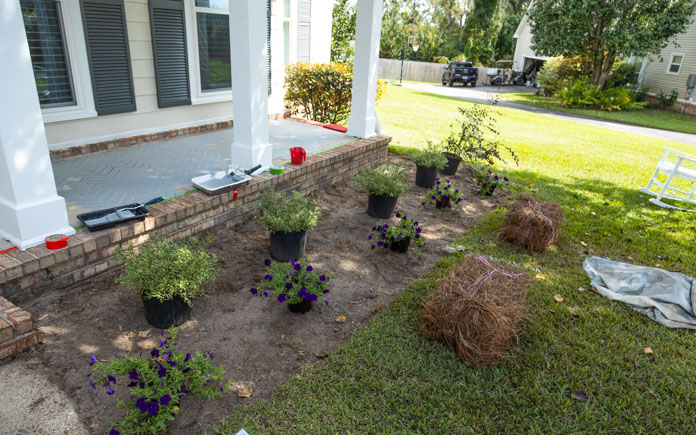
Spreading out the new flowerbeds adds to the open feeling.
Planting New Flowerbeds
Next, we added some fresh landscaping. Before, the plants were too concentrated at the front of the porch, so we spread them out to maintain the open space feel.
Finally, we put down a fresh layer of pine straw to finish off the flowerbed.
We also:
Added address numbers to the porch column
Removed the intercom/doorbell
Installed a new porch light
Installed soffit vents
Replaced the rocking chairs
“Today’s Homeowner” hosts Danny Lipford and Chelsea Lipford Wolf, pictured with Jeff and Eliese McAllister.
Post-Production Thoughts
This front porch rehab really brings things full circle: Jeff and Eliese’s kids grew up here, and now they’re seeing their grandkids grow here.
At one point, the couple thought about selling the house. But with this new front yard, they’re happy to be able to stay in the home they raised their kids, and now, their grandkids as well.
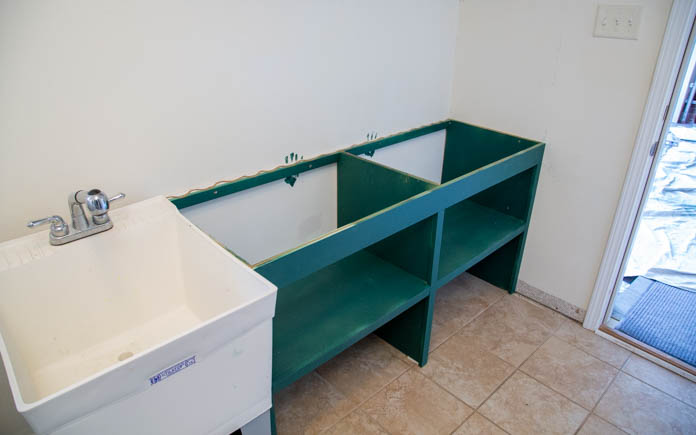
If you need a countertop that can stand up to heavy use, a butcher block countertop is just the surface for you.
These wooden surfaces can withstand heavy daily use and food preparation. They’re the perfect surface for your kitchen or laundry room.
Butcher block countertops come in a variety of sizes and designs, so you can find the perfect fit for your space. Here’s how to install one.
Materials Needed
This page contains affiliate links. If you purchase a product from these links, we will earn a small commission at no additional cost to you.
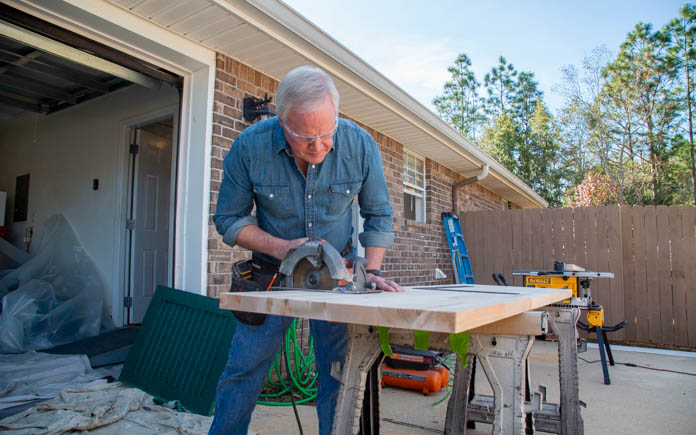
Cut the wood to fit your space.
Trim the Butcher Block to Fit Your Space
This butcher block countertop is six feet long and twenty-five inches wide. It needs to be cut down for a five-foot cabinet that is twenty-two inches deep. Start by trimming two and a half inches off along the length of the piece. Use a table saw to make this cut so it is perfectly consistent from end to end. The two-and-a-half-inch piece will serve as a backsplash.
Next, mark the panel at the five-foot mark with a framing square before making the cross-grain cut with a circular saw. Cut the narrow backsplash piece to five feet on the miter saw.
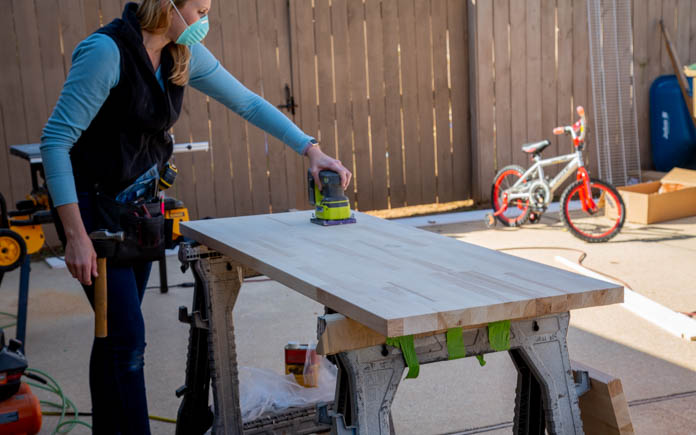
Extra sanding will help smooth out the surface perfectly.
Sand the Wood
The butcher block is pretty smooth right out of the package, but before it’s installed and finished, sand it once more with a fine-grit sandpaper.
Using construction adhesive will eliminate the need for nailing.
Apply Adhesive
Applying a heavy-duty construction adhesive allows you to simply set the countertop in place without the need for any fasteners to secure it. While the adhesive is still wet, double-check the overhang margins before we glue the backsplash in place.
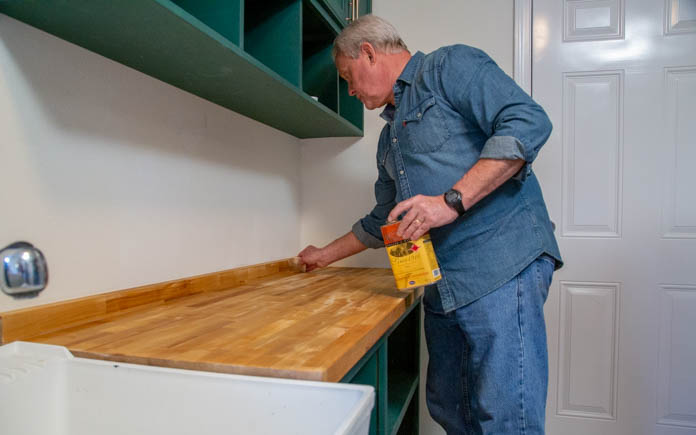
Sealing your countertop will make the wood grain pattern pop!
Seal the Butcher Block
Use a tung oil-based wood sealer and finish that penetrates the wood to seal and protect it from moisture. Applying it with a stain pad allows you to rub the formula into the grain of the wood. After two or three coats of this, the countertop is complete.
Watch the video above for more information!
Cost
This project is on the pricier side, but it’s far less expensive than hiring a professional.
Here’s what you can expect to pay for this project:
If you need a countertop that can stand up to heavy use, a butcher block countertop is just the surface for you.
These wooden surfaces can withstand heavy daily use and food preparation. They’re the perfect surface for your kitchen or laundry room.
Butcher block countertops come in a variety of sizes and designs, so you can find the perfect fit for your space. Here’s how to install one.
Materials Needed
This page contains affiliate links. If you purchase a product from these links, we will earn a small commission at no additional cost to you.
Cut the wood to fit your space.
Trim the Butcher Block to Fit Your Space
This butcher block countertop is six feet long and twenty-five inches wide. It needs to be cut down for a five-foot cabinet that is twenty-two inches deep. Start by trimming two and a half inches off along the length of the piece. Use a table saw to make this cut so it is perfectly consistent from end to end. The two-and-a-half-inch piece will serve as a backsplash.
Next, mark the panel at the five-foot mark with a framing square before making the cross-grain cut with a circular saw. Cut the narrow backsplash piece to five feet on the miter saw.
Extra sanding will help smooth out the surface perfectly.
Sand the Wood
The butcher block is pretty smooth right out of the package, but before it’s installed and finished, sand it once more with a fine-grit sandpaper.
Using construction adhesive will eliminate the need for nailing.
Apply Adhesive
Applying a heavy-duty construction adhesive allows you to simply set the countertop in place without the need for any fasteners to secure it. While the adhesive is still wet, double-check the overhang margins before we glue the backsplash in place.
Sealing your countertop will make the wood grain pattern pop!
Seal the Butcher Block
Use a tung oil-based wood sealer and finish that penetrates the wood to seal and protect it from moisture. Applying it with a stain pad allows you to rub the formula into the grain of the wood. After two or three coats of this, the countertop is complete.
Watch the video above for more information!
Cost
This project is on the pricier side, but it’s far less expensive than hiring a professional.
Here’s what you can expect to pay for this project: