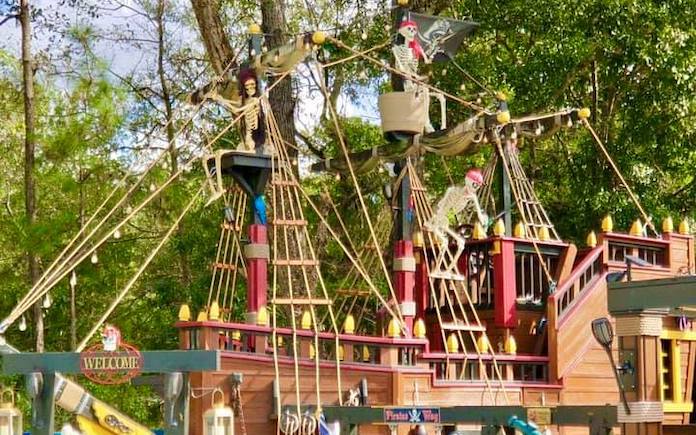
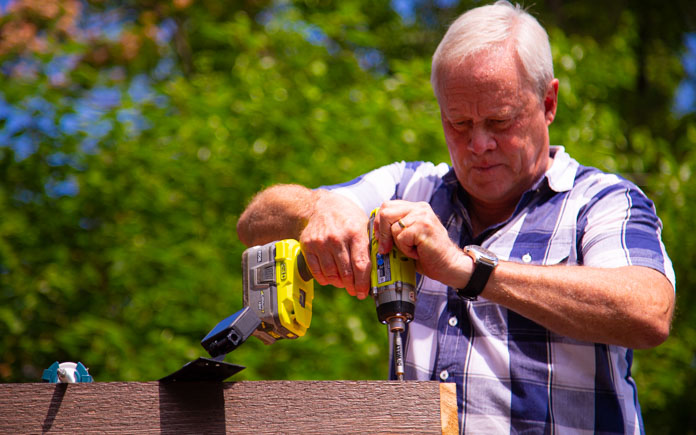
It all started in 2015 when a swingset broke in Jeff Headrick’s backyard.
So Jeff, a master carpenter, decided to use his decades’ worth of building experience to construct a new place for his grandchildren to have fun outside.
When asked what kind of playhouse his grandchildren wanted, the kids, aged 1-9, decided on a miniature pirate ship.
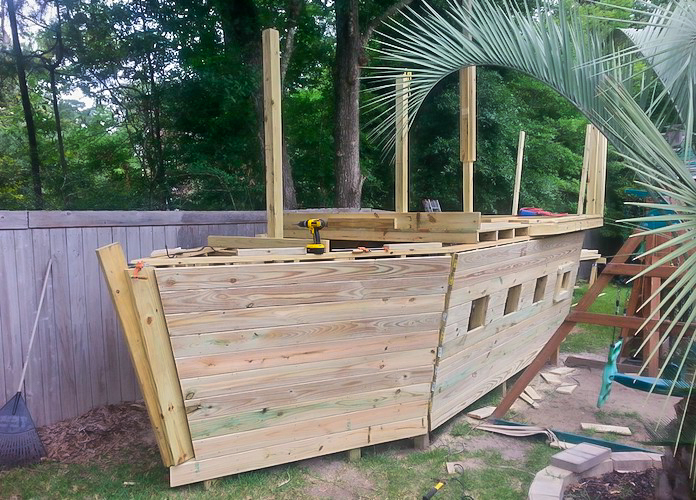
Jeff’s wife Debbie says he drew up some rough sketches for the playhouse and constructed and deconstructed parts along the way. He wanted the project to “not only be perfectly square, but safe for his grandsons.”
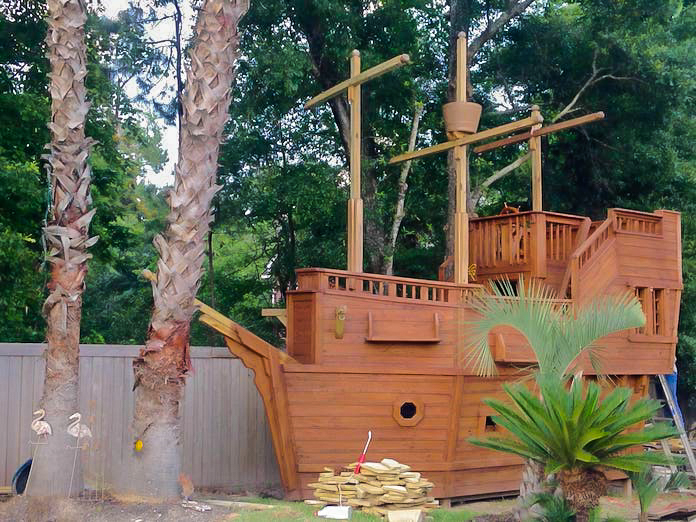
In this 2017 photo, Jeff and Debbie Headrick had just applied the first coat of stain to the pirate ship playhouse. (Pirate Ship Playhouse Facebook)
Over the years, multiple levels were added and it grew bigger and bigger.
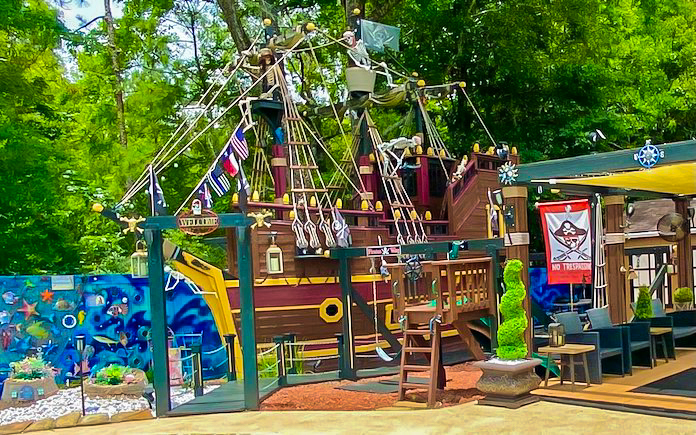
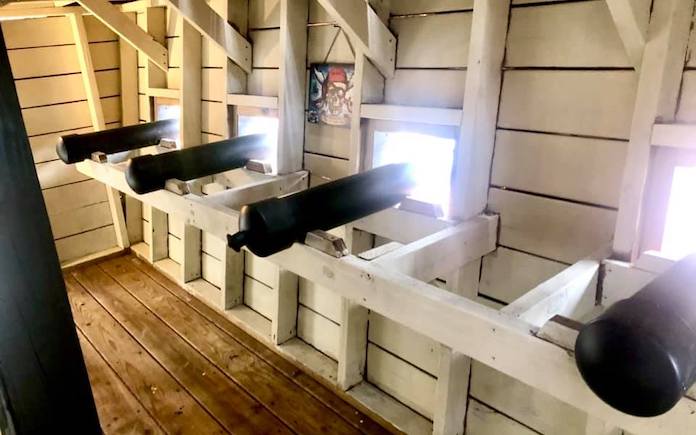
Now, the “miniature” pirate ship is held into the ground by 10 concrete piers, 25,000 screws, and has multiple levels that are large enough for an adult to stand up in.
So, how long did it take to complete this pirate ship? About five years — four years to construct the playhouse, and then another year or so to finish the surrounding features.
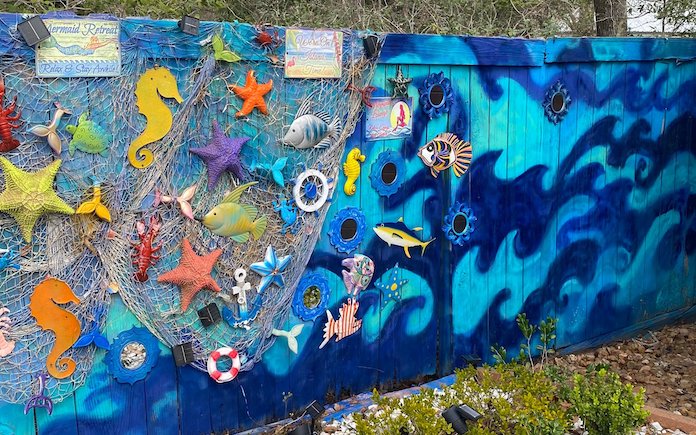
The couple is also adding extra details surrounding the ship, like an under-the-sea mural on the fence. Debbie used more than a dozen cans of spray paint and real starfish she got on a trip to the Bahamas.
But, it’s all worth it, they say, because of the enjoyment their grandchildren, and neighbors, get out of the playhouse.
At this point, the “playhouse” in the Headricks’ backyard is more than just a playhouse. They see it as a small second house that they occasionally open to large audiences on special occasions.
The Headricks have opened up their backyard for Halloween for the past two years. In just four hours, 475 people came through to see the pirate ship in 2020 and 600 in 2021.
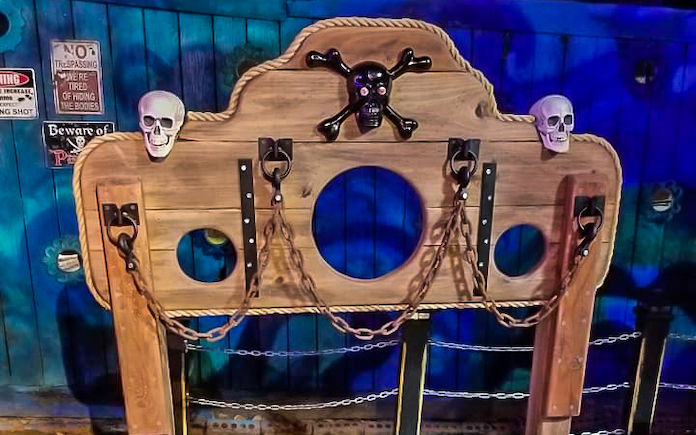
The family goes all-out for the occasion by dressing up in pirate costumes, providing a stockade for photo ops, treasure chests, spooky music, and more.
The couple has been very firm with keeping the ship private and only open for Halloween fun. However, they will give tours to those who ask and let children play.
“You’d be amazed at how many adults stop and ask if they can see it and take photos,” Debbie says.
Jeff and Debbie say their backyard “Peter Pan/Pirates of the Caribbean theme park” will continue on for future generations. Their five grown children have even bigger plans for the property when they inherit the property.
The wood and everything else will receive the same regular upkeep that it’s had over the past years, but there are plans to convert the backyard, which includes a pool, into a rental Airbnb property.
The children promise they’ll never sell the property and also have plans to convert two other backyard buildings (currently used as Halloween storage and another as a small record studio) into small cabins for renters as well.
The Headricks say there were some regrets after converting their backyard into a theme park, but they’re outweighed by the joy it brings their grandchildren.
Debbie advises that if someone else wants to do this, plan for regular maintenance and have someone else do the building.
There aren’t any blueprints for this pirate playhouse, so if you want to build one yourself, you’ll have to use your imagination.
However, if you do decide to build one, the couple has these words of advice: Be prepared for many people to stop and take pictures.
An outdoor fireplace transforms your yard into a bonafide living area and increases your home’s value.
Whether you’re having a gathering with friends or unwinding after a long day, an outdoor fireplace is an investment that you will enjoy for many years.
Historically, fireplaces were used to keep a home’s interior warm during winter. But now, with outdoor living areas becoming increasingly more popular, fireplaces are popping up in many backyards.
These days, homeowners want the amenities of their indoor living rooms in the great outdoors. So the fireplace, an iconic element of any living room, is a must.
An outdoor fireplace still serves the same function of providing warmth, but it also adds to the backyard’s aesthetic.
Outdoor fireplaces come in many materials — such as steel, stone and terracotta — along with a range of shapes and sizes. Their fuel sources include wood, electric, gas and propane, and they can be in a fixed position or portable.
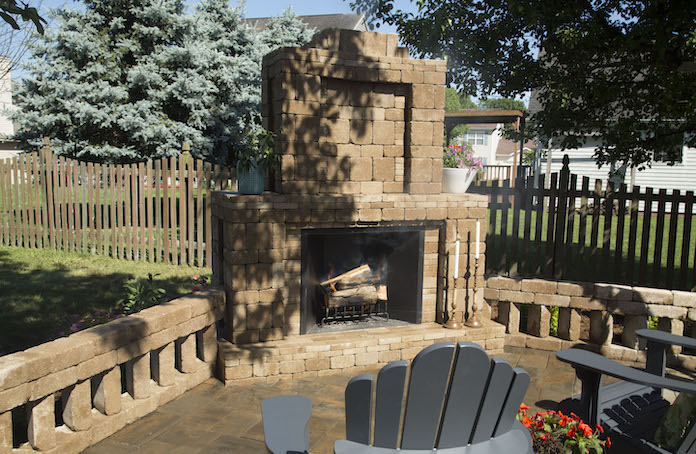
Paver outdoor fireplaces have the look of a traditional, interior fireplace. (3 Echoes Content Studio)
Wood-Burning Outdoor Fireplaces
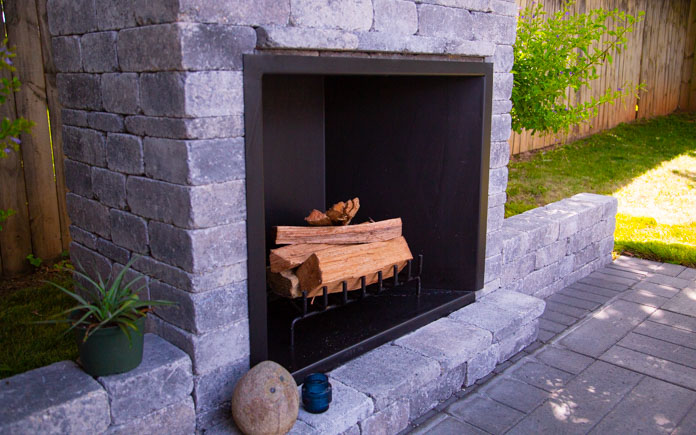
For a traditional-looking outdoor fireplace, one constructed using pavers is a popular option.
This type uses stacked pavers to create a customized wood-burning fireplace with a full-sized chimney.
You can also add paver surrounds around the fireplace to further define your outdoor living area.
Building a paver outdoor fireplace is a large project, so check with your local building department to see if you need a permit.
If you’re ready to take your outdoor living area to the next level with a paver outdoor fireplace, build one using Pavestone’s Rumblestone Fireplace Kit, which is available at The Home Depot.
The kit includes a firebox, a custom-fit 21-inch log grate for burning wood, a 14-inch chimney, 24 tubes of polyurethane adhesive, plus five pallets of coordinating RumbleStone blocks to build the surround.
The RumbleStone blocks’ weathered appearance offers a natural look and feel. They can be assembled in an infinite variety of configurations and orientations, so the possibilities for creative expression are as endless as your imagination.
When filling the bed, stop every three inches to compact the material using a tamper or compactor. Do this until the hole is filled to ensure a stronger base that will stand the test of time.
Add an inch of Pavestone Paver Sand on top of the aggregate before laying the blocks.
Once you’ve laid your fireplace base, it’s time to start stacking the blocks. To ensure that do-it-yourselfers get the right block in the right spot, the kit includes a set of color-coded drawings that detail which blocks go where on each step — from the initial footprint on the ground to the firebox installation and extending the structure up around the chimney.
Rumblestone blocks have round edges and come in a variety of shapes and sizes that all modulate on a 7-inch dimension.
No mortar is needed to assemble a Pavestone Rumblestone fireplace — just construction adhesive. (3 Echoes Content Studio)
This building block design means you don’t need to cut any pavers, and there are no open seams because the blocks overlap each other for strength. All you need to secure them is some polymer construction adhesive.
Because this kit is so simple to put together, you can assemble this outdoor fireplace in just a few hours.
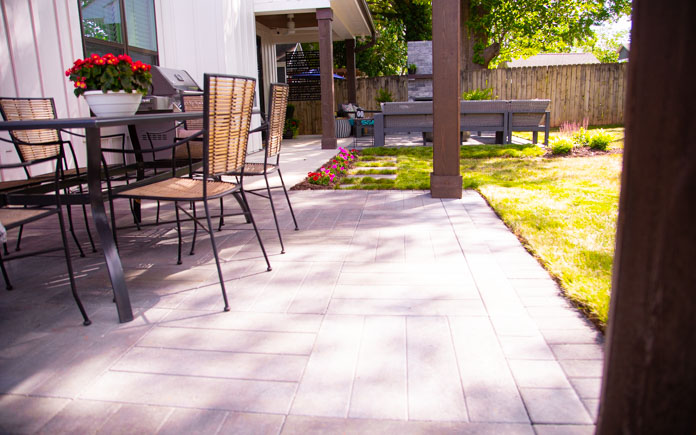
A paver patio, like this one made from Pavestone’s Avant XL pavers, provides a perfect surrounding for an outdoor fireplace. (3 Echoes Content Studio)
Complete Your Outdoor Living Area With a Patio
A stand-alone fireplace, though attractive, may look out of place in your backyard if you don’t add matching elements. So, build a patio to surround it and define the outdoor living area.
A patio not only complements your fireplace but also increases your home’s resale value.
The average cost of building a patio is between $3,000 and $5,500, according to Forbes. However, SuperMoney, an online financial comparison platform, says a patio can increase a home’s value by 8 to 10 percent and earn an 80 percent return on investment.
If you want a beautiful, consistent look to your patio and outdoor fireplace, construct them with the same materials.
Pavestone offers a variety of pavers in different textures, colors and sizes. A quick visit to their website leaves you brainstorming all sorts of ideas for your next backyard project, whether it’s a fireplace, a fire pit, a patio, or anything else.
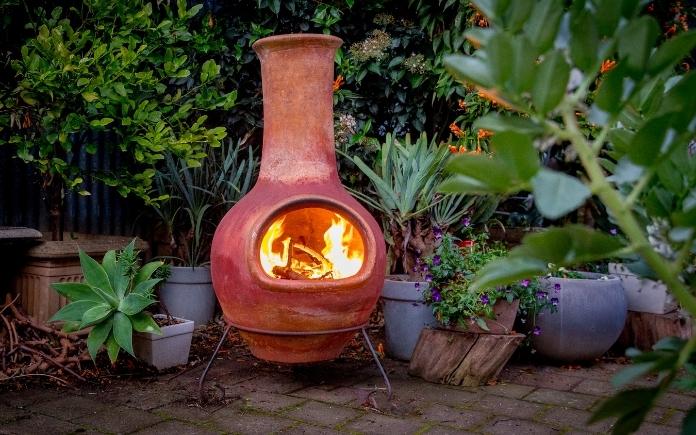
No assembly is required for a chiminea, and because it’s small, you move it anywhere you want. (MarkPiovesan, Getty Images)
A chiminea (Spanish for chimney) is a freestanding, front-loading fireplace with a bulbous shape and a vertical vent.
Traditionally, chimineas are made from clay, but some are metal or cast iron. You don’t need to assemble it, so the most work you have to do is transport it to where you want it.
However, despite its simplicity, there are some drawbacks.
A typical chiminea is small, so you’ll need to frequently add wood to keep a fire going. And, once lit, it has a hot shell, which can be dangerous to the touch, especially for children. In addition, it sits off the ground on a metal base, so it could tip over.
For these reasons, many homeowners prefer a permanent structure for creating warmth outdoors.
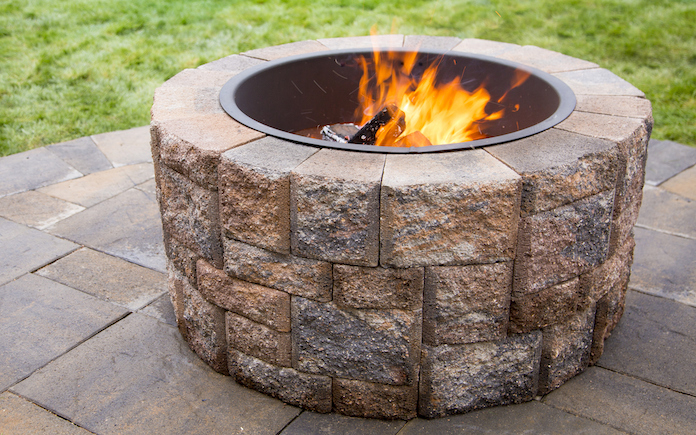
You can incorporate a fire pit into the corner of a patio, or build a standalone one in your yard. (3 Echoes Content Studio)
One such option is a fire pit. This type of outdoor fireplace also is simple: it has raised walls and an opening in the middle for a fire.
A fire pit can be made of metal, concrete or stone and use gas or wood for fuel.
Fire pits are easier to construct than an outdoor fireplace because a basic build only consists of a circle or square.
Pavestone offers fire pit kits — with up to 20 options — for easy, do-it-yourself, assembly.
Outdoor fireplaces add beauty and value to your home. The type you choose will depend on your budget, but investing in a paver fireplace will give you a better return on investment.
To get the most out of your home’s outdoor space, you’ll want to build a patio to go with your fireplace. A patio defines your backyard living space, enhances the exterior aesthetic with stylish hardscaping, and increases your home’s resale value.
This week, we’re in Charlotte, North Carolina, to create a beautiful outdoor area for our Backyard Paradise contest winners.
Courtney Claugus was selected as the lucky winner of our Backyard Paradise contest, so we’re giving her and her husband Adam’s backyard a makeover with help from our friends at Quikrete and Pavestone.
Read on to learn about some of the projects we tackled.
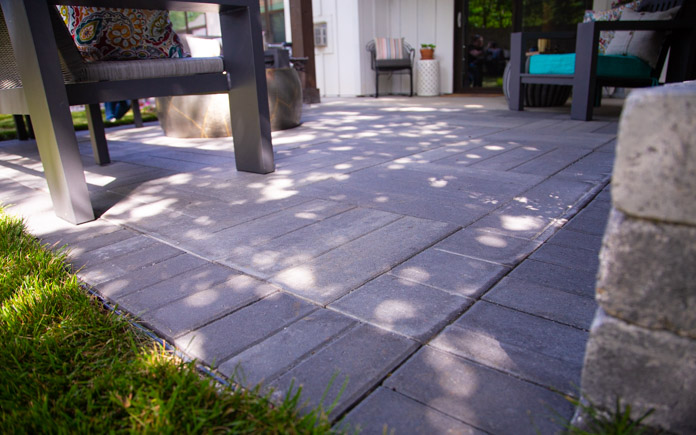
These large, gray linear pavers complement the Claugus’ contemporary home. (3 Echoes Content Studio)
Build Two Paver Patios
Two is better than one! And in this, case, two paver patios offer more space for outdoor living!
We designate one patio for seating and another for dining — like an open floor plan for the great outdoors.
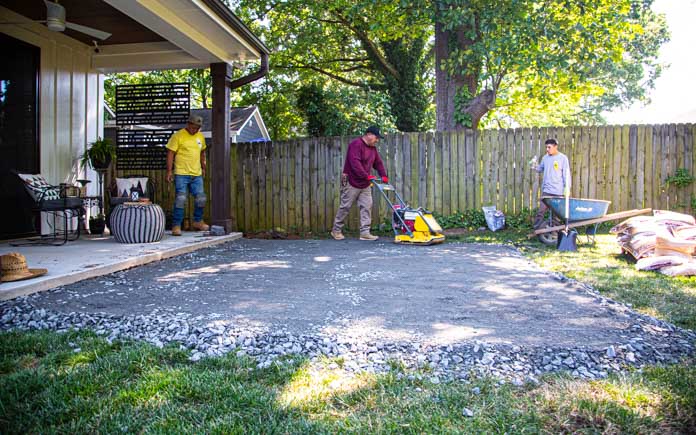
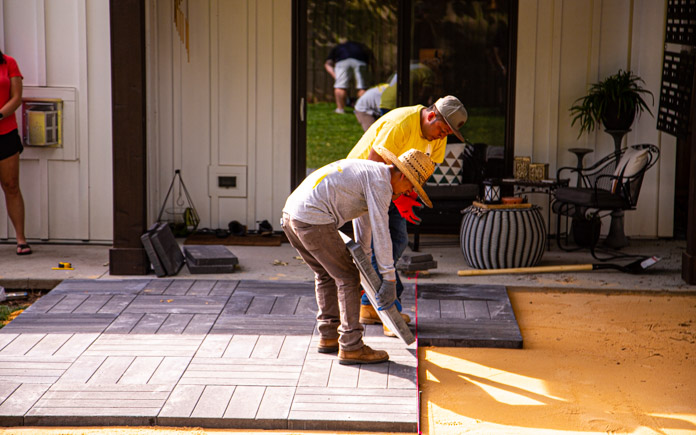
Crews from Quikrete, Pavestone and a local construction company build the dual patio setup. The first patio extends from the existing concrete patio, and the second is on the other side of the house.
Paver base provides a solid foundation and also raises the pavers to be even with the concrete patio. (3 Echoes Content Studio)
They first lay out the footprint for the patios, then add four inches of paver base to establish the foundation.
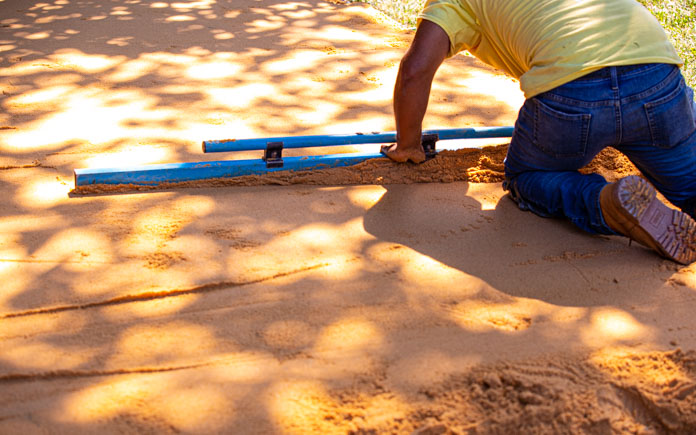
After compacting the paver base, they add one inch of paver sand, then use a level to make the surface even.
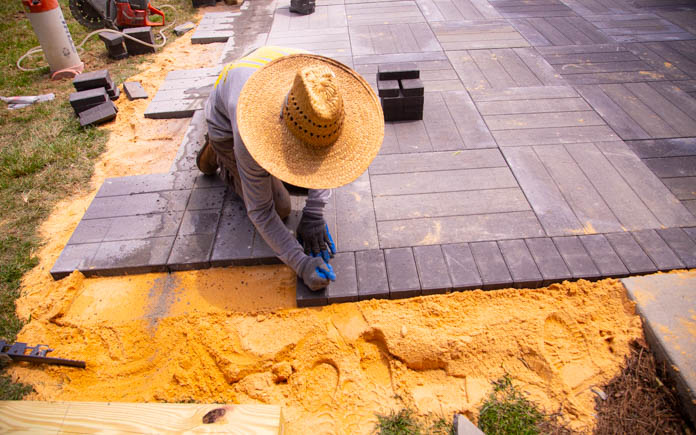
Workers use a string to ensure the lines stay even throughout the length of the patio. (3 Echoes Content Studio)
The patios are built with Pavestone’s Avant XL pavers. These large, 16-by-16-inch patio stones have the look of large format plank pavers. The false joints on the gray pavers create clean lines, so they go well with Adam and Courtney’s contemporary-style home. To add some line variety, the crew rotated each paver to create crisscrossed lines.
Once the large pavers are laid, the crew marks a line where the border will begin and cut it with a concrete saw. Then, they lay the smaller border pavers in a soldier course pattern.
Just like grout color matters when laying tile, paver sand color makes a difference on a patio. (3 Echoes Content Studio)
The last step is filling the joints. We use a granite screening to complement the pavers as well as the house’s color. for fine.
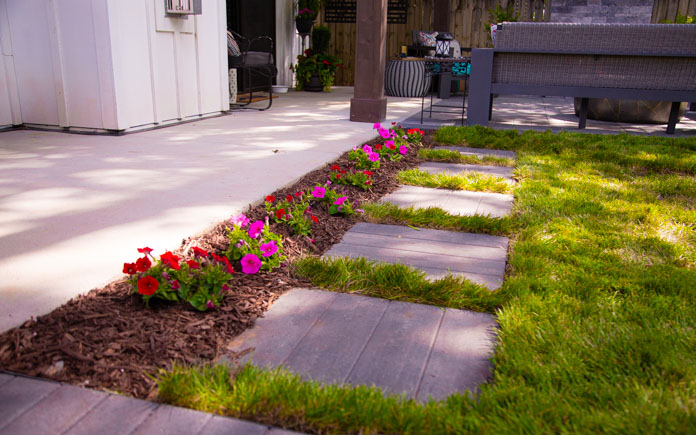
These matching pavers create stepping stones to unite the two patios. (3 Echoes Content Studio)
After the patios are complete, we place a few pavers between them to create stepping stones, so the two are united.
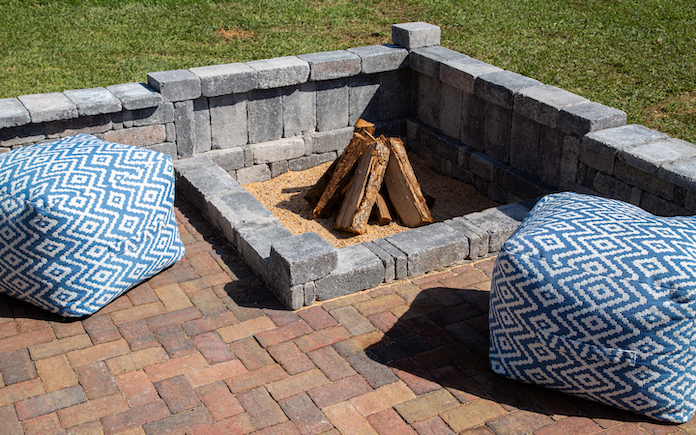
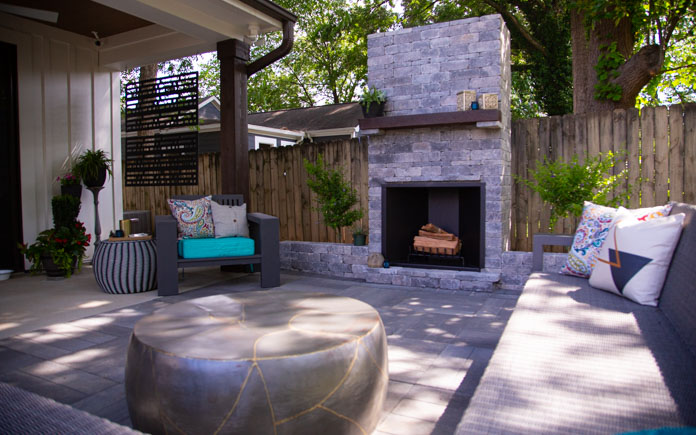
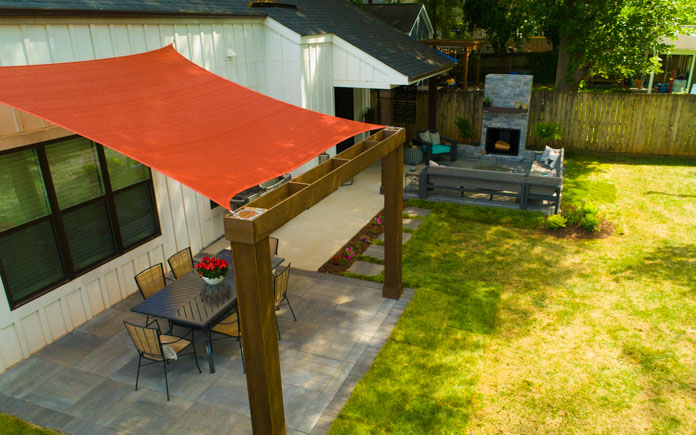
The outdoor fireplace becomes the perfect focal point for this seating area. (3 Echoes Content Studio)
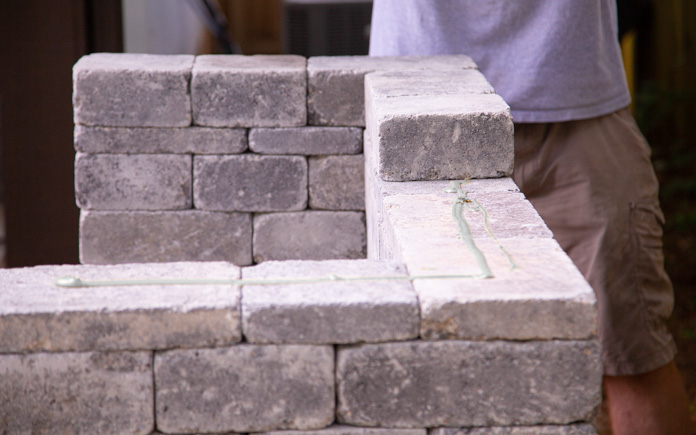
Build Outdoor Fireplace
Every seating area needs a focal point, so we build an outdoor fireplace.
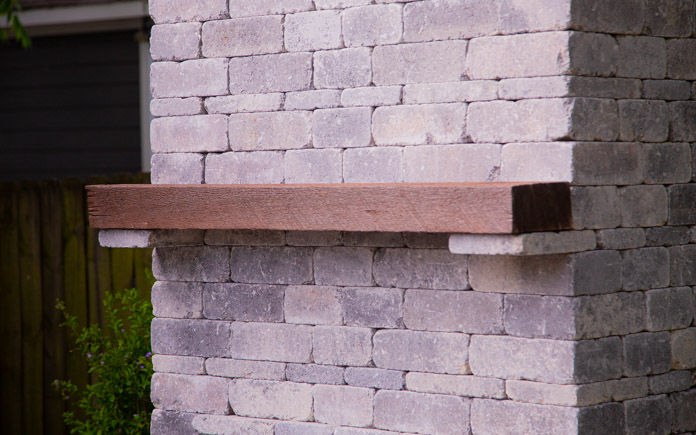
Pavestone representative Chris Claire found this wood mantel at his mother’s home. (3 Echoes Content Studio)
Once the fireplace is built, we add a mantel using a recycled piece of wood. It softens up the hard edges of the stone and warms up the space.
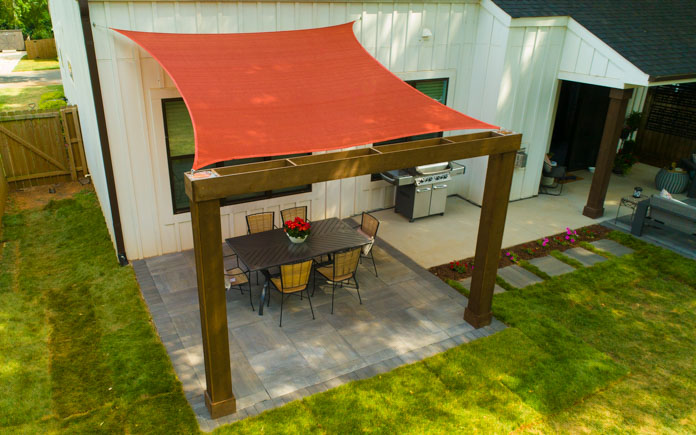
We install the shade sail hooks on the house slightly higher than the ones on the post so we can match the slope of the home’s roof. (3 Echoes Content Studio)
Install Shade Sail
The paver patio for dining offers little shade, so we install a shade sail to make the area more comfortable.
First, we dig holes for our two 6-by-6 posts that will support the shade sail. We set wood posts in the ground using Quikrete Fast-Setting Concrete, then surround them with pavers to match the patio.
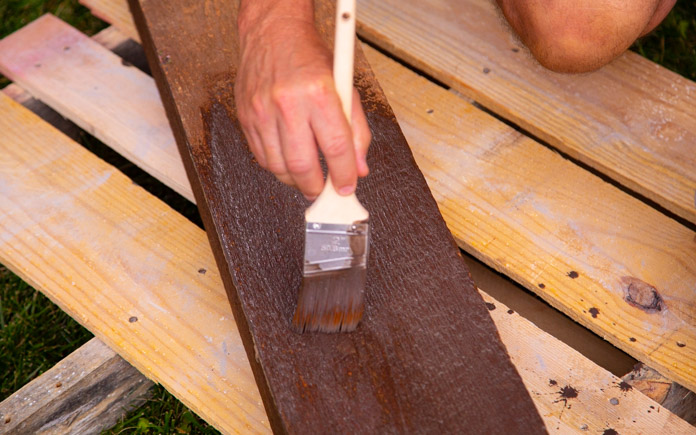
To match the posts to the house columns, we stain pieces of rough-sawn cedar and wrap them over the wood columns. Before we nail the wood over the posts, we add some spacers to keep the cedar planks from bowing. Wrapping these 6-by-6 posts not only makes them look larger, but it also hides the cracks that are inevitable with solid posts.
To join the two columns, we build a horizontal box beam with longer pieces of 1-by-8-inch cedar on the ground before we lift it into place.
Next, we attach two hooks to the top of the posts for half of our shade sail, then attach another two to the side of the house for the other two corners of the shade sail.
Then, we install those hooks slightly higher to give the shade sail a slope and match the angle of the roof.
Danny Lipford and Chelsea Lipford Wolf with Backyard Paradise winners Adam and Courtney Claugus and their dog Kendrick. (3 Echoes Content Studio)
Post-Production Thoughts
Courtney and Adam had a nice backyard, but they didn’t have much outdoor living space to enjoy it. With just a small covered concrete pad and a couple of chairs, their outdoor entertaining well was pretty limited.
Adam and Courtney had a big backyard but little room for entertaining. (3 Echoes Content Studio)
Now they have not one but two great Pavestone patios that offer plenty of space for entertainment. One is just the right size for outdoor dining under the cover of the shade sail we added, and the other offers a massive space to relax with friends.
By adding two paver patios, we’ve more than doubled the outdoor entertaining space in this backyard. (3 Echoes Content Studio)
The Rumblestone fireplace adds a focal point with loads of character and is bound to be very popular on those chilly nights. Plus, the large format pavers complement the contemporary home’s color and character.