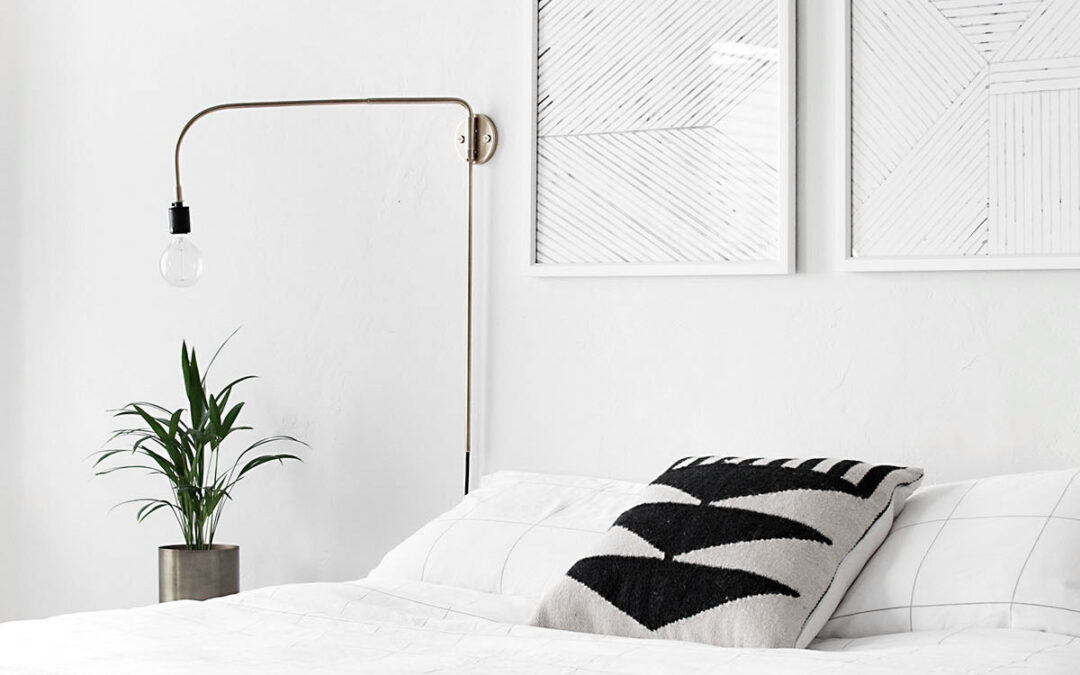
After a long day, comfortably resting in your bedroom is like retreating to the perfect oasis. It’s where you recharge and find peace. But if your bedroom doesn’t feel cozy, settling in might not come as easily. There’s a fix for that! With a few tweaks, you can turn your bedroom from simply a place to sleep into a place to relax and rejuvenate.
Start from scratch or opt for a complete refresh. These practical tips will help you create a bedroom that feels like the perfect place to say “ahh” after a long day.
.tasty-pins-banner-container{display:block;margin-bottom:20px;position:relative;width:-moz-fit-content;width:fit-content}.tasty-pins-banner-container a{cursor:pointer;display:flex;font-size:14px;font-weight:700;letter-spacing:1px;line-height:1.8em;text-transform:uppercase}.tasty-pins-banner-container a:hover{opacity:1}.tasty-pins-banner-container .tasty-pins-banner{align-items:center;bottom:0;cursor:pointer;display:flex;justify-content:center;left:0;padding-bottom:1em;padding-top:1em;position:absolute;right:0}.tasty-pins-banner-container .tasty-pins-banner svg{margin-right:4px;width:32px}.tasty-pins-banner-container .tasty-pins-banner span{margin-top:4px}.tasty-pins-banner-container a.tasty-pins-banner{text-decoration:none}.tasty-pins-banner-container a.tasty-pins-banner:hover{opacity:.8}.tasty-pins-banner-container a.tasty-pins-banner-image-link{flex-direction:column}.tasty-pins-banner-container a img{margin-bottom:0}.entry-content .wp-block-image .tasty-pins-banner-container img{margin-bottom:0;padding-bottom:0}#et-boc .et-l div .et_pb_image_wrap .tasty-pins-banner-container .tasty-pins-banner{padding-bottom:1em!important;padding-top:1em;text-decoration:none}#et-boc .et-l div .et_pb_image_wrap .tasty-pins-banner-container a.tasty-pins-banner{cursor:pointer;display:flex;font-size:14px;font-weight:700;line-height:1.8em;text-transform:uppercase}#et-boc .et-l div .et_pb_image_wrap .tasty-pins-banner-container a.tasty-pins-banner span{letter-spacing:2px;margin-top:4px}.et-db #et-boc .et-l .et_pb_module .tasty-pins-banner-container a:not(.wc-forward){padding-bottom:0}Photo by M&W Studios
Frame Your Space with Window Treatments
Windows can set the mood, and the right treatments can completely transform a basic, boring bedroom.
Curtains and Drapes: Heavy drapes in textures like velvet or linen add warmth and luxury. Sheer curtains make the space feel airy and romantic. If you’re looking for the best of both worlds, layer sheer panels under blackout curtains to adjust brightness levels throughout the day.
Shades or Roller Blinds: Floor-length curtains can feel overwhelming in smaller bedrooms. Shades or roller blinds offer a streamlined look, creating a clean, functional aesthetic.
Color Choices: Dark hues like charcoal or navy create intimacy, while lighter shades like cream or blush brighten the space.
Create Comfort with Pillows and Blankets
Imagine walking into your bedroom and seeing layers of plush pillows, soft blankets, and bedding that make you want to curl up and sleep. This isn’t some Pinterest fantasy. You can create this in your bedroom with a few additions.
Decorative Pillows: Go big! Mix sizes and textures (like faux fur and chunky knits). Arrange them in a cascading pattern: two large euro shams at the back, followed by standard pillows, then smaller accent cushions in front.
Blankets and Throws: A little goes a long way. Just draping a chunky knit throw casually over the foot of the bed instantly adds warmth. If you’re looking for more luxury, try a faux fur blanket or a quilt in rich, earthy tones.
Quality Bedding: Investing in good quality bedding can enhance the look of your bed while also improving how you feel when you sleep. Consider buying breathable linen or cotton sheets for comfort and durability. Pair them with a supportive mattress and a plush topper for that cloud-like feel.
Feel Cozy with Every Step
A rug is the unsung hero of a cozy bedroom. It doesn’t just soften hard flooring – it warms up the space and makes it feel like somewhere you want to get comfortable and chill.
Plush Rugs: A thick shag rug under your bed feels luxurious underfoot and muffles sound (win-win!).
Layering Rugs: Combine a large jute rug with a smaller patterned rug for depth and personality.
Color and Pattern: Use rug colors like deep green or burgundy for a moody feel, or ivory or beige for a light, boho-chic oasis. Soft geometric or floral patterns can also add character without overwhelming the space.
Create a Corner of Calm
Reading is a great way to relax your mind before heading to bed. Instead of reading in bed, create a reading nook for a dedicated spot to enjoy a warm cup of tea and your favorite new novel.
Seating Options: A simple cushioned bench under a window, paired with pillows, or a plush armchair in a corner, with a fluffy blanket, is all you need.
Storage Solutions: Floating shelves are a simple way to create a small bookshelf without taking up too much space – plus, they keep your favorite reads within reach. Add a basket for blankets and a side table for your mug.
Lighting: A floor lamp or wall-mounted sconce provides soft lighting (no big light needed).
Use Lighting as Your Secret Sauce
Speaking of lighting, how you choose to illuminate your bedroom can make or break the cozy factor. Harsh overhead lights feel sterile, while layered, soft lighting calms the mind.
Table Lamps: Choose lamps with fabric shades for a soft glow. Place them on nightstands for easy access.
Candles: Nothing beats the warmth of candles. Add scents like vanilla, sandalwood, or lavender for even more relaxation.
Bulbs and Color Temperature: Use warm bulbs (around 2700K) to mimic the golden glow of sunset.
Natural Light: Maximize daylight and use mirrors to your advantage! They help bounce light around the room.
Personalize Your Walls
Use your walls to your advantage. Often neglected, they are actually prime real estate for creating a cozy vibe.
Feature Wall: An accent wall can add character and evoke a sense of calm. Choose patterns with soft florals, muted geometrics, or textured neutrals.
Artwork: Use oversized art placed above your bed with imagery like coastal landscapes or waterfalls for an instant feeling of serenity.
Color Strategy: Use harmonious colors that enhance and complement your bedding and furniture for a harmonious look.
Organize for a Clear Mind
Imagine trying to chill in a room full of chaos – yeah, it doesn’t feel too relaxing. A tidy bedroom instantly offers peace of mind, so even if you have just 5 minutes before bed, try to tidy things up to ease into your night.
Nightstand Smart: Keep essentials out and put everything else away. Use your nightstand drawer to your advantage, or place a wicker basket nearby to toss extra items.
Smart Storage: Use under-bed drawers and floating shelves to keep clutter out of sight.
Dresser Organization: Divide drawers with organizers to easily store linens and clothing.
Breathe Life with Greenery
Plants can add a touch of softness to your bedroom. Placing indoor plants throughout invites peace and, as an added bonus, keeps the air clean.
Low-Maintenance Plants: Snake plants, pothos, and ZZ plants love being left alone for the most part and adapt well to low-light settings.
Placement Matters: Add a small plant to your nightstand, a trailing plant on a shelf, or a taller floor plant in an empty corner.
Try Alternatives: If live plants aren’t your thing, faux plants or even dried plants (like lavender) can still add a natural vibe.
Use Scents to Your Advantage
Your bedroom shouldn’t just feel relaxing, it should also smell relaxing. Scent is a powerful part of creating a cozy space, and the right scents can help you achieve.
Relaxing Fragrances: Lavender, chamomile, sandalwood, vanilla, and cedarwood are perfect for promoting relaxation.
Candles and Oils: Use scented candles or essential oil diffusers to set the tone for the evening.
Fresh Bedding Boost: Lightly mist pillows and sheets with a calming linen spray before bed to signal your brain that it’s time to unwind.
Create Comfort Through Sound
Sound is also just as important as what you see in your bedroom. Calming music or sounds can settle your energy for rest.
Soft Background Noise: If you struggle with insomnia, gentle rainfall sounds, or calming instrumental music can quiet your mind and promote better sleep.
Sound Control: Thick curtains, upholstered headboards, and rugs help absorb sound, making the room feel quieter.
Evening Rituals: Wind down with a consistent bedtime sound (chimes or soundbowl music) to reinforce your relaxation routine.
Colors for Cozy Vibes
As a final bonus tip, we encourage you the think about the color of your walls. Are they currently stark white? That’s great for waking up energy, but if you want to feel ease, consider colors that promote warmth.
Earth Tones: Shades like terracotta, clay, mustard, rust, and taupe naturally evoke comfort and make rooms feel more intimate.
Soft Neutrals: If color isn’t your style, choose warm neutrals like cream, greige, beige, or mushroom that gently reflect light.
Your Retreat Awaits
You deserve a cozy bedroom, and all it requires is a few small additions. A plush rug, velvety curtains, and fluffy pillows, combined with soft lighting, calming artwork, and decor, offer simple touches for relaxation. With these ideas, your bedroom can become the warm, inviting retreat you’ve always dreamed of — sweet dreams!
Ever looked at those pipes under your sink with anything more than irritation or neglect? Probably not, and that’s precisely why they deserve attention. Your home’s plumbing is truly the unsung hero of domestic infrastructure. That constant supply of clean water and efficient drainage is not a miracle; it’s the result of your pipes working correctly. But as much as we rely on them, we tend to forget that they need regular check-ups too.
The Perils of Ignored Plumbing
Credit: Deposit Photos
It’s a sad reality, but homeowners often perceive “plumbing problems” only when water starts gushing out where it shouldn’t. Neglecting your pipes is akin to waiting for a car to break down before considering an oil change. Water pipes endure pressure and erosion, gradually weakening over time. Small leaks can lead to significant structural damage, costly repairs, and, yes, even health hazards.
Don’t let a burst pipe be the wake-up call. Untended water damage can severely compromise your home’s foundation, leading to sagging floors and cracked walls, which ultimately diminish your home’s value. Mold growth is another silent threat when leaks are ignored. It’s more than unsightly—it’s a health risk that exacerbates allergies and respiratory issues.
Aside from the risks of severe water damage, ignoring plumbing problems often leads to unanticipated costs. These might start with small monthly increases on utility bills due to leaking pipes, but over time, these smaller sums accumulate into a hefty expense. Regular monitoring will let you catch anomalies early and potentially save on water bills.
Affecting Home Value
Damaged or leaky pipes can play a detrimental role when selling a home. Potential buyers may exercise caution if your house has a poor plumbing record, reducing offers or requesting considerable repairs before making a commitment. Thus, maintaining plumbing stands as a wise decision not just for your comfort, but your financial future as well.
Maintaining and addressing small issues in your plumbing system proactively can save you from significant trouble down the line. In a way, it’s much like regular maintenance on any other important aspect of a household, helping to ensure everything runs smoothly and efficiently. So jump right into engaging a professional plumbing solutions contractor like Nichols Mechanical.
Why Regular Check-Ups Matter
Getting a plumber to give your pipes a once-over every few years can extend their longevity and improve their function. Professionals identify issues that could remain hidden from the untrained eye, using specialized tools to check pipe health, identify leaks, and assess water pressure.
Maintenance is not just preventive care; it’s a pragmatic strategy. Much like a regular health check-up can thwart future medical emergencies, plumbing evaluations can save significant outlays down the track.
The Myths of Home Plumbing
Many homeowners operate under the illusion that “modern” plumbing systems are indestructible or fail-proof. A common myth is that once installed, these systems run forever without further attention. This couldn’t be further from the truth. Time affects everything, even the best-built plumbing systems. Rust forms, mineral sediments build up, and temperature fluctuations wreak havoc on your piping network over the years.
Another misconception lies in water heaters. They often operate behind closed doors, leading many to assume they require little maintenance. However, sediment build-up at the bottom can reduce the efficiency of heaters, unexpectedly increasing household costs. Regular draining and inspection will keep these appliances running smoothly.
A further misconception worth dispelling is the effectiveness of drain cleaning chemicals. Most believe that pouring such solutions down the drain will easily resolve all clogs. However, these aggressive substances can damage both pipes and joints, leading to future plumbing complications. Opt for mechanical solutions like drain snakes or plunger tools for safer results.
Additionally, some households overlook the importance of installing proper filtration systems. While municipal water treatment plants remove harmful bacteria, minerals can still be present in tap water, leading to build-up in your pipes over time. Implementing filtration solutions can not only enhance water quality but also prolong the lifespan of your plumbing infrastructure.
Some DIY Tips for Pipe Health
Credit: Deposit Photos
Are you someone who enjoys tackling household jobs yourself? There are proactive measures you can undertake to support your plumbing:
Insulate Pipes: During colder months, insulate pipes to guard against freezing. Burst pipes due to ice expansion are entirely preventable.
Avoid Chemical Drain Cleaners: Opt for enzyme-based products. Harsh chemicals can corrode pipes and worsen clogs over time.
Be Conscious of What You Flush: Toilets are not trash cans. Only human waste and toilet paper should be disposed of this way, or you risk unyielding blockages.
Monitor Water Pressure: Avoid sky-high water pressure, which can wear down fittings and lead to leaks. Install pressure regulators if necessary.
Moving Forward
Your home’s pipes do an impressive job day in and day out, and they deserve recognition and respect. Routine inspections shouldn’t be a dreaded chore but seen as an opportunity to enhance your home’s durability and safety. Taking a proactive approach to plumbing maintenance will not only spare you from costly repairs but also prolong the life of your precious property. It’s high time that pipes earn their place in your home health checklist — because when it comes to your plumbing, it’s not a question of if there will be an issue, but when.
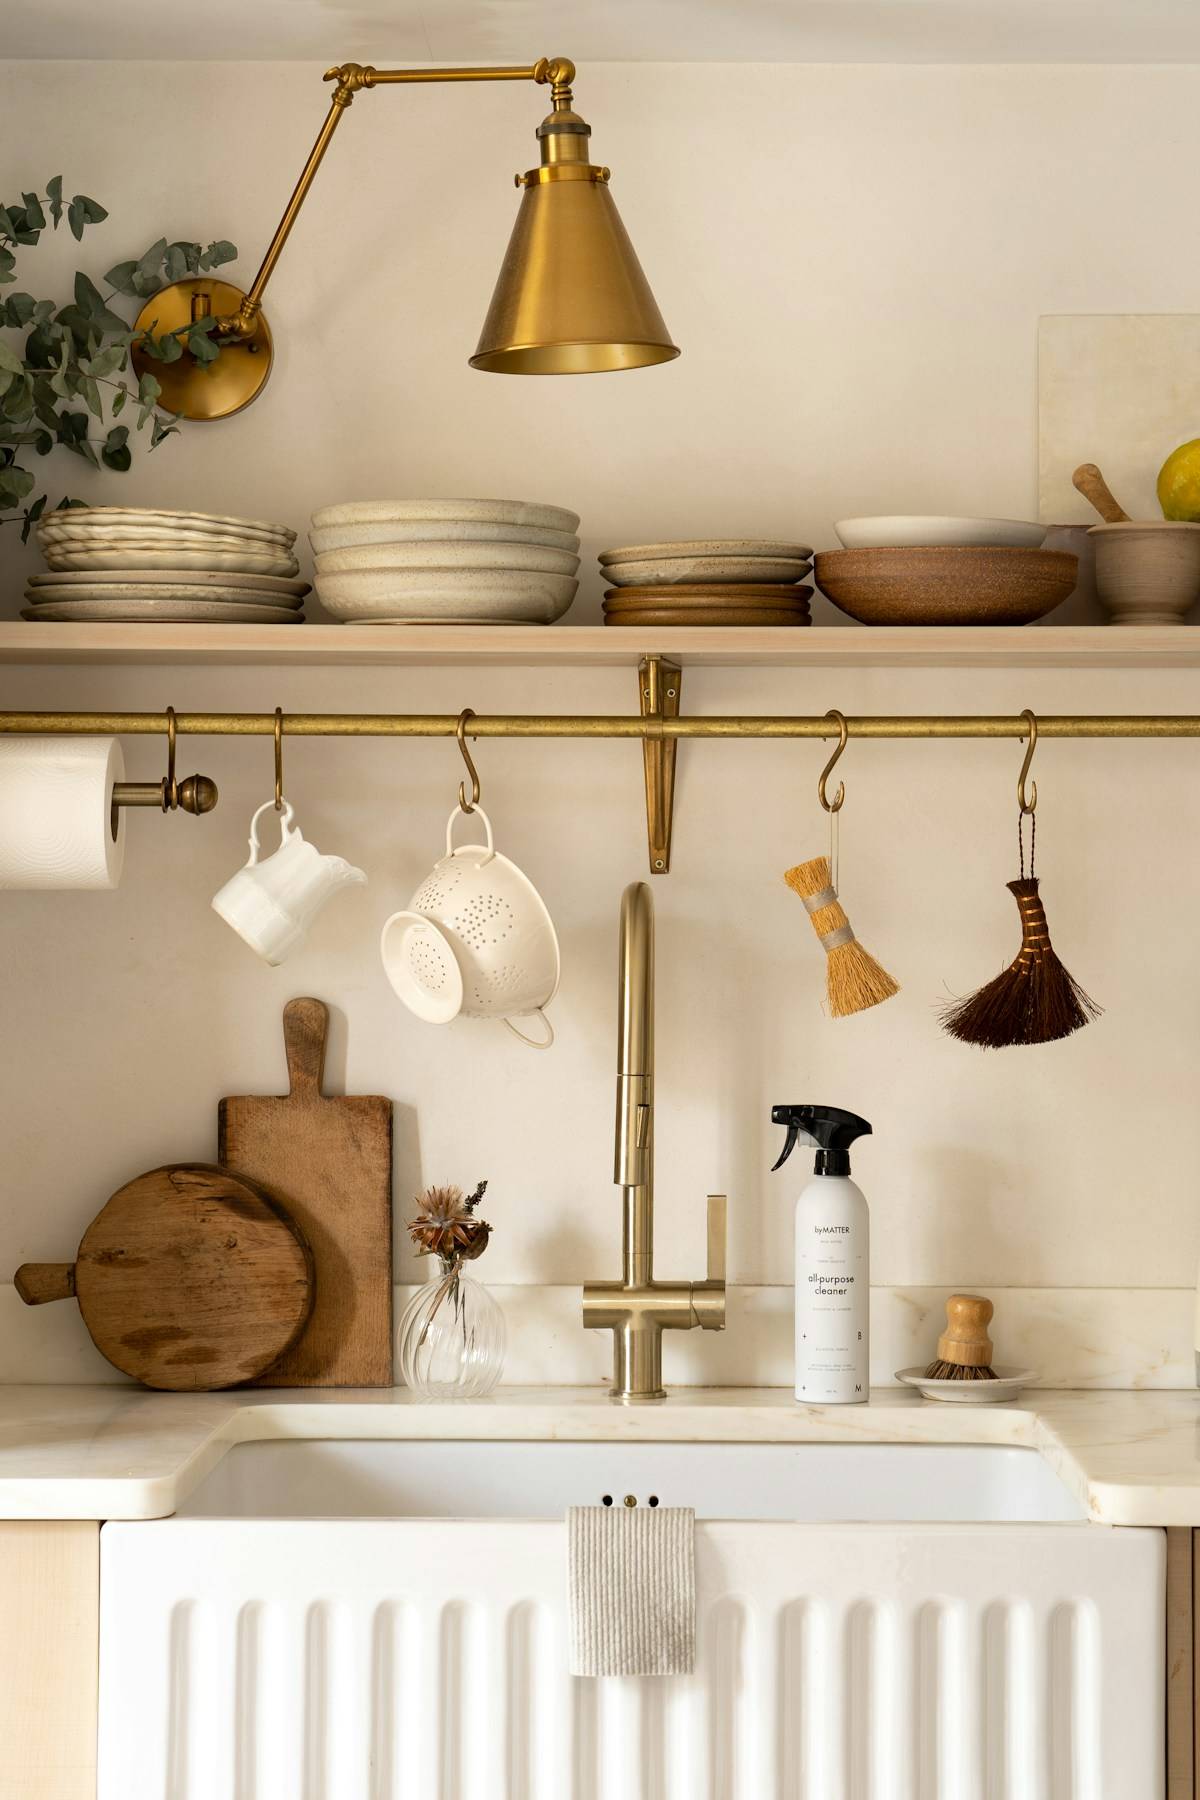
Are you ready for a sparkling clean home but want to avoid harsh cleaners?
Skip the chemicals and go the natural route. Cleaning product alternatives have been around for ages, often created with just a few staple kitchen ingredients. They are a great way to avoid harsh (and at times dangerous) irritants like chlorine bleach, ammonia, and synthetic fragrances.
These chemicals disinfect, but they also tend release gases and particles that can get into your lungs and the environment.
.tasty-pins-banner-container{display:block;margin-bottom:20px;position:relative;width:-moz-fit-content;width:fit-content}.tasty-pins-banner-container a{cursor:pointer;display:flex;font-size:14px;font-weight:700;letter-spacing:1px;line-height:1.8em;text-transform:uppercase}.tasty-pins-banner-container a:hover{opacity:1}.tasty-pins-banner-container .tasty-pins-banner{align-items:center;bottom:0;cursor:pointer;display:flex;justify-content:center;left:0;padding-bottom:1em;padding-top:1em;position:absolute;right:0}.tasty-pins-banner-container .tasty-pins-banner svg{margin-right:4px;width:32px}.tasty-pins-banner-container .tasty-pins-banner span{margin-top:4px}.tasty-pins-banner-container a.tasty-pins-banner{text-decoration:none}.tasty-pins-banner-container a.tasty-pins-banner:hover{opacity:.8}.tasty-pins-banner-container a.tasty-pins-banner-image-link{flex-direction:column}.tasty-pins-banner-container a img{margin-bottom:0}.entry-content .wp-block-image .tasty-pins-banner-container img{margin-bottom:0;padding-bottom:0}#et-boc .et-l div .et_pb_image_wrap .tasty-pins-banner-container .tasty-pins-banner{padding-bottom:1em!important;padding-top:1em;text-decoration:none}#et-boc .et-l div .et_pb_image_wrap .tasty-pins-banner-container a.tasty-pins-banner{cursor:pointer;display:flex;font-size:14px;font-weight:700;line-height:1.8em;text-transform:uppercase}#et-boc .et-l div .et_pb_image_wrap .tasty-pins-banner-container a.tasty-pins-banner span{letter-spacing:2px;margin-top:4px}.et-db #et-boc .et-l .et_pb_module .tasty-pins-banner-container a:not(.wc-forward){padding-bottom:0}Photo by Good Soul Shop
Over time, these chemicals can damage surfaces, affect indoor air quality, and even make you sick. Homemade cleaning products are safer and affordable.
Most of the items you’ll need to create your natural cleaning concoctions are right in your pantry, like baking soda, vinegar, and essential oils. And you can create natural cleaning products to tackle dirt, grease, and grime effectively and safely.
Plus, you can customize to your liking based on scent, strength, and purpose.
Find Your Homemade Cleaner
Keep Your House Spotless and the Family Safe
From pets to kids, everyone benefits from natural cleaning products. Commercial cleaners can trigger allergies, asthma, and sensitive skin.
If you have pets, many cleansers have toxic chemicals that can harm them if accidentally ingested. These chemicals can even be absorbed through their paws.
Little ones are especially vulnerable if they are crawling and playing on floors freshly cleaned with harsh chemicals.
Benefits of Homemade Cleaners
Non-Toxic: Generally a safer option if you have kids, pets, or allergy-prone family members
Eco-Friendly: Reduces plastic waste and chemical runoff
Budget-Friendly: Most recipes cost pennies per use and last longer
Customizable: Option to add your favorite scents and adjust ingredients depending on use
Multi-Purpose: One cleaner can work with multiple surfaces
Staple Ingredients for Natural Cleaning Goodness
Our list of homemade cleaners includes a few staple ingredients; all you need to do is check your pantry!
Baking Soda: Gentle yet abrasive, use this to scrub away stains and deodorize.
Borax: A natural mineral that boosts cleaning power and works great with laundry.
Castile Soap: A plant-based soap that has multiple uses, like all-purpose cleaning.
White Vinegar: Used in many cleaning recipes, it cuts through grease, dissolves minerals, and neutralizes smells.
Essential Oils: Offers fragrance to your cleaning solution (tea tree, lavender, and citrus) and is known to have antibacterial properties.
Olive Oil: Perfect for polishing wood furniture.
Hydrogen Peroxide: Naturally disinfects – great for cleaning bathrooms and kitchens.
Citrus (Lemon Juice): Brightens surfaces and helps remove stains, and leaves a pleasant clean scent behind.
Now that you’ve gathered your essentials, it’s time to put them to work. Let the mixing magic begin with these simple homemade cleaning recipes.
DIY All-Purpose Cleaner
A quick go-to for your countertops, tiles, and chrome fixtures.
Ingredients:
2 cups of warm water
1 cup of white vinegar
1 teaspoon castile soap
10 drops of your favorite essential oil (we like lavender or tea tree)
Directions:
Pour all your ingredients into a spray bottle.
Shake well before each use.
Spray on surfaces and then wipe with a soft cloth. For stainless steel, we recommend following the direction of the grain.
Natural Bathroom Scrub
Say goodbye to mold and soap scum!
Ingredients:
½ cup baking soda
2 tablespoons washing soda
1 tablespoon castile soap
A few drops of tea tree oil
Directions:
Mix all dry ingredients in a bowl.
Add castile soap and essential oil to form a paste.
Once paste is formed, apply it to tiles, grout, and basins with a brush.
Scrub and rinse with hot water.
If you’re dealing with stubborn grout stains, sprinkle some extra baking soda and scrub with an old toothbrush.
Homemade Toilet Bowl Cleaner
Skip chlorine bleach and try this natural fix.
Ingredients:
½ cup of baking soda
½ cup of white vinegar
10 drops of tea tree oil
Directions:
Sprinkle baking soda into the bowl.
Pour vinegar over it and let it fizz for 10 minutes.
Scrub with a toilet brush and flush.
Add a few drops of tea tree oil for a clean scent.
Furniture Polish
Keep wood surfaces shiny without harsh chemicals and fragrances.
Ingredients:
½ cup of olive oil
¼ cup of lemon juice
5 drops of essential oil (optional)
Directions:
Combine ingredients in a mason jar or spray bottle.
Dip a soft cloth into the mixture (or spray onto the cloth) and rub along the grain.
Buff with the dry cloth for a natural shine and add essential oil of choice for a natural scent.
Laundry Detergent Alternative
Commercial detergents can still be effective without scary chemicals.
Ingredients:
1 cup of washing soda
1 cup of borax
1 bar grated castile soap
Optional: a few drops of essential oil
Directions:
Mix all ingredients and store in an airtight container.
Use 2 tablespoons per load.
Glass & Mirror Cleaner
Get a beautiful streak-free shine with just three ingredients.
Ingredients:
1 cup of water
1 cup of white vinegar
1 tablespoon rubbing alcohol
Directions:
Combine ingredients in a spray bottle.
Spray and wipe with a lint-free cloth or newspaper.
Drain Deodorizer
Smelly drain? Here’s a recipe to keep it fresh.
Ingredients:
½ cup of baking soda
½ cup of vinegar
Boiling water
Directions:
Pour baking soda down your drain.
Add vinegar and let it fizz for 10 minutes.
Flush with boiling water.
Optional: Add in a few drops of essential oil
Stainless Steel Polish
An easy way to restore shine to appliances.
Ingredients:
1 tablespoon olive oil
Soft cloth
Directions:
Apply oil to the cloth.
Buff with a dry cloth.
Carpet & Upholstery Freshener
Neutralize odors from heavy foot traffic, pets, and more.
Ingredients:
1 cup baking soda
10 drops essential oil (lemon or eucalyptus)
Directions:
Mix and sprinkle over the carpet.
Let it sit for 15 minutes, then vacuum.
Natural Disinfectant Spray
A money-saving solution for doorknobs and light switches.
Ingredients:
1 cup of water
½ cup of hydrogen peroxide
10 drops of tea tree oil
Directions:
Combine in a spray bottle.
Spray and let air dry—no need to rinse.
Oven Cleaner
Some of the harshest fumes come from oven cleaners. Try this effective alternative:
Ingredients:
½ cup of baking soda
3 tablespoons of salt
Warm water (enough to make a paste)
Directions:
Spread paste inside the oven.
Let sit overnight.
Scrub with a damp sponge and rinse.
Degreaser for Kitchen Surfaces
Stubbon grease is no match for this natural recipe.
Ingredients:
Peels from 2–3 lemons or oranges
2 cups white vinegar
1 cup of water
10 drops lemon essential oil (optional)
Directions:
Place citrus peels in a jar and cover with vinegar.
Let sit for 1–2 weeks, then strain.
Mix vinegar blend with water in a spray bottle.
Homemade Floor Cleaner for Hardwood
Keep your hardwood floors clean without damaging the finish.
Ingredients:
• 4 cups of warm water
• ½ cup of white vinegar
• 2 tablespoons olive oil
• 10 drops of lemon essential oil
Directions:
1. Mix ingredients in a bucket.
2. Mop floors with a damp (not soaking) mop.
Keep Your Home Sparkling with These Tips for Success
Shake Well: Natural ingredients tend to separate, so make sure to give them a good shake.
Test First: Always test your mixture in a small area before applying to delicate surfaces.
Label Bottles: Write the recipe and date on each spray bottle for freshness.
Store Safely: Even natural ingredients can cause irrritation to kids and pets, so be sure to keep out of their reach.
Switching to homemade cleaners saves money and keeps your home environment healthy. As you reduce exposure to harsh chemicals, you also minimize environmental impact. So enjoy the peace of mind that comes from knowing your home is clean and so are your cleaning products.
There are moments in life when you suddenly feel like a real adult. Like when you buy your first car, or take that car for its first oil change. When you open a savings account, or purchase your first washer and dryer. Or like when you finally learn how to fold a fitted sheet properly.
.tasty-pins-banner-container{display:block;margin-bottom:20px;position:relative;width:-moz-fit-content;width:fit-content}.tasty-pins-banner-container a{cursor:pointer;display:flex;font-size:14px;font-weight:700;letter-spacing:1px;line-height:1.8em;text-transform:uppercase}.tasty-pins-banner-container a:hover{opacity:1}.tasty-pins-banner-container .tasty-pins-banner{align-items:center;bottom:0;cursor:pointer;display:flex;justify-content:center;left:0;padding-bottom:1em;padding-top:1em;position:absolute;right:0}.tasty-pins-banner-container .tasty-pins-banner svg{margin-right:4px;width:32px}.tasty-pins-banner-container .tasty-pins-banner span{margin-top:4px}.tasty-pins-banner-container a.tasty-pins-banner{text-decoration:none}.tasty-pins-banner-container a.tasty-pins-banner:hover{opacity:.8}.tasty-pins-banner-container a.tasty-pins-banner-image-link{flex-direction:column}.tasty-pins-banner-container a img{margin-bottom:0}.entry-content .wp-block-image .tasty-pins-banner-container img{margin-bottom:0;padding-bottom:0}#et-boc .et-l div .et_pb_image_wrap .tasty-pins-banner-container .tasty-pins-banner{padding-bottom:1em!important;padding-top:1em;text-decoration:none}#et-boc .et-l div .et_pb_image_wrap .tasty-pins-banner-container a.tasty-pins-banner{cursor:pointer;display:flex;font-size:14px;font-weight:700;line-height:1.8em;text-transform:uppercase}#et-boc .et-l div .et_pb_image_wrap .tasty-pins-banner-container a.tasty-pins-banner span{letter-spacing:2px;margin-top:4px}.et-db #et-boc .et-l .et_pb_module .tasty-pins-banner-container a:not(.wc-forward){padding-bottom:0}Share this life hack on Pinterest!
Once you learn the easiest way to fold a fitted sheet, your linen closets will never be the same.
The best part? This technique becomes second nature after just a few tries and only has a few easy steps. Let me walk you through exactly how to fold fitted sheets so they look as neat as your flat sheets.
Why Folding Fitted Sheets Feels Impossible
If you’ve ever wrestled with a fitted sheet and given up in frustration, you’re not alone. There’s a very real reason why folding fitted sheets feels so much harder than folding regular sheets, those elastic corners.
The stretchy edges and rounded corners that make fitted sheets hug your mattress perfectly are the same features that make traditional folding techniques completely useless.
You can’t simply fold a fitted sheet in half like you would a flat sheet because those elastic edges create bulk and rounded shapes that refuse to cooperate.
Most people resort to balling up their fitted sheets and shoving them in the linen closet and leaving the closet an absolute mess.
It’s not laziness. It’s just that no one ever showed us an actual method that works. The elastic creates resistance, the corners bunch up and creases awkwardly, and before you know it, you’ve got what looks like a fabric burrito instead of a neatly folded sheet.
But here’s the good news: there’s a specific corner-tucking technique that makes folding fitted sheets genuinely easy.
Once you understand how to nest the corners properly, the process takes less than two minutes. The trick is working with the elastic corners instead of fighting against them.
What You Need to Fold a Fitted Sheet
One of the best things about this method is how simple it is. You don’t need any special tools or equipment, just:
A clean, dry fitted sheet
Your hands
A flat surface (optional but helpful for the final folds)
That’s it!
No clips, no fancy folding boards, nothing to buy. You can fold a fitted sheet standing up, sitting on your bed, at a table, or wherever feels most comfortable. The whole process takes just two to three minutes once you know the technique.
I recommend starting on a bed or large table for your first few attempts. Having that flat surface nearby makes it easier to lay the sheet down for the final folds. But honestly, once you’ve practiced a few times, you can do this anywhere.
The Easiest Method: How to Fold Fitted Sheets Step-by-Step
Ready to master this life-changing skill? I’m breaking down the easiest way to fold a fitted sheet into clear, manageable steps. Follow along with the video below, or use these written instructions—whichever works best for you!
Getting Your Starting Position
Start by holding your fitted sheet lengthwise—meaning the longer sides are stretched between your hands. Face toward a bed or table where you’ll eventually lay the sheet flat.
Place your hands inside the two top corners of the sheet with the elasticized edges facing you. The seams should be facing outward. This starting position is crucial because it sets you up for the corner-tucking magic that follows.
The First Corner Tuck
Now comes the key move that makes everything else work. While holding both top corners, bring your right hand over to meet your left hand. Tuck the right corner over and into the left corner. The elastic edges should now sit together neatly.
You’ll now have two corners resting on your left hand. Don’t worry if it feels a bit awkward at first—this is the trickiest part, and it gets easier with practice. Make sure those corners are properly nested together before moving on.
Finding the Bottom Corners
With the top two corners secured on your left hand, use your right hand to reach down and locate the two bottom corners of the sheet. Keep the top corners steady in your left hand as you work.
The fitted sheet will be hanging down, and you’re looking for where the elastic edges meet at the bottom two corners. These are easier to find if you gently shake the sheet to let them fall naturally.
Bringing All Corners Together
This is where it all comes together—literally! Bring the bottom right corner up to meet the top corners in your left hand. Tuck it into the other corners so all three are nested together.
Repeat this with the bottom left corner. Now, all four corners are tucked into one hand, and you should be holding what looks like a roughly rectangular piece of fabric with elastic edges, all nestled on one side.
Smoothing and Shaping
Give the sheet a gentle shake to release any bunched-up fabric. Smooth the material with your free hand, encouraging it to form a rectangular shape. The elastic edges should all be together on one side, and the rest of the sheet should hang fairly straight.
This shake-and-smooth step is more important than it seems. Taking a moment here to work out the wrinkles and get a nice shape makes the final folding much easier.
The Final Folds
Lay your sheet on your flat surface with the elastic edges facing the same direction. Smooth it out into the neatest rectangle you can manage. The elastic corners will create a bit of bulk on one end—that’s totally normal and fine.
Fold the sheet in thirds lengthwise to create a long, narrow rectangle. Then fold it in thirds or in half widthwise, depending on your storage space. You can adjust these final folds based on the size of your linen closet shelves.
The result? A neat, flat rectangle that looks like you actually know what you’re doing with laundry! Sure, it might not be quite as crisp as a flat sheet, but it’s a million times better than the crumpled ball you started with.
Pro Tips for Perfect Fitted Sheet Folding
Once you’ve got the basic technique down, these tips will help you fold fitted sheets even more efficiently and neatly.
Start with the long side. Holding the sheet lengthwise creates better balance and makes it easier to control as you’re tucking corners. If you start with the short side, the sheet feels heavier and more awkward to manipulate.
Use a flat surface for the final folds. While you can do the corner-tucking while standing, having a bed or table to lay the sheet on for those final folds creates much crisper, cleaner results. The difference is noticeable in how your sheets look in the closet.
Practice makes perfect. Your first attempt might feel clumsy, and that’s completely normal. By the third or fourth time, though, your hands will remember the movements and it’ll start feeling natural. I promise it clicks faster than you’d expect!
Smooth as you go. Don’t wait until the end to deal with wrinkles and bunched fabric. A quick smoothing motion after each corner tuck keeps everything neat and makes the final result much better.
The corners are everything. Getting all four corners properly nested together is what creates that neat rectangular shape. If your sheet doesn’t look right at the end, it’s usually because one corner didn’t get fully tucked in with the others. Don’t rush this part!
Match your sheet size to your folding style. King and queen fitted sheets are easier to fold on a bed, while twin sheets work fine folded at a table or even standing up. Adjust your approach based on what you’re working with.
What to Do If It’s Not Perfect
Let’s be real—your first folded fitted sheet probably won’t look Instagram-worthy, and that’s okay! Even an imperfect fold is dramatically better than the ball-of-fabric situation you had before.
The corners might stick out slightly, creating little lumps on one end of your folded sheet. This is normal because that’s where all the elastic is gathered. As long as your sheet is generally rectangular and reasonably flat, you’re doing great.
If your sheet is wrinkled, give it a quick smooth with your hands before the final folds. Or better yet, fold your sheets right out of the dryer when they’re still slightly warm—the heat helps them smooth out naturally.
If your first attempt looks terrible, just unfold it and try again! The beauty of this skill is that there’s no penalty for practice. Each time you do it, you’ll understand the technique a little better.
How to Store Your Beautifully Folded Fitted Sheets
Now that you can fold fitted sheets like a pro, let’s talk about how to store them so your linen closet stays organized and your sheets stay neat.
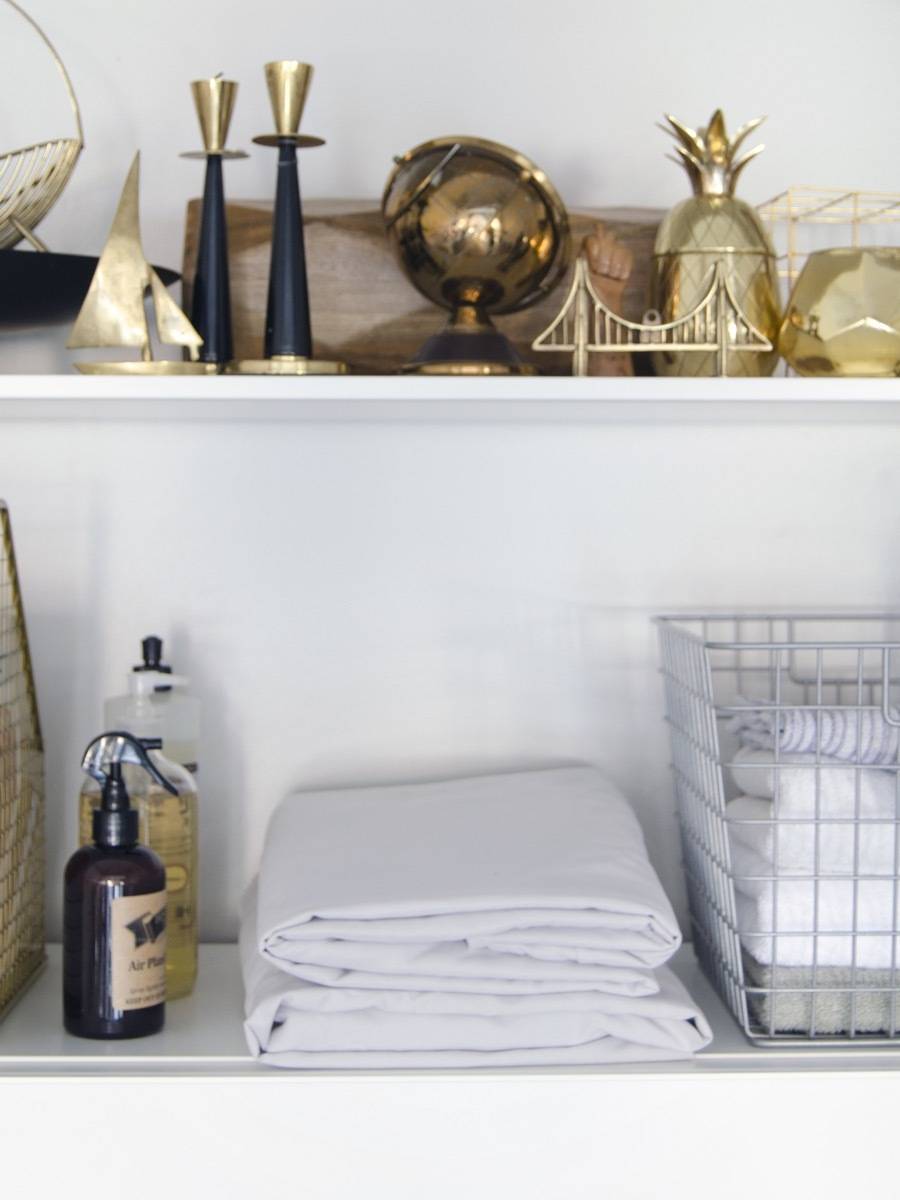
The game-changing trick? Store complete sheet sets together. Fold your fitted sheet, flat sheet, and pillowcases to similar sizes, then tuck everything inside one of the pillowcases. This creates a neat “bundle” that keeps sets together and makes it easy to grab what you need without disturbing other sheets.
Stack sheets by bed size on your linen closet shelves. Keep all your twin sheets together, all your queen sheets together, and so on. If you have multiple sets for each bed, rotate them to distribute wear evenly.
Consider using shelf dividers if you have lots of sheet sets. This prevents stacks from toppling and makes it easy to pull out a set without disturbing others. You can find simple wire dividers at any home store, or even use tension rods installed vertically.
Label your shelves if you have sheets for multiple beds in your home. A simple label like “Master Bed – Queen” or “Guest Room – Full” saves time when you’re making beds and ensures sheets end up back in the right spot.
Vertical storage can work well too, especially if you have deep shelves. Stand your folded sheet bundles on end like books. This makes it easy to see all your options at once and grab what you need without unstacking.
With properly folded fitted sheets, you’ll be amazed at how much more space you have in your linen closet. No more shoving crumpled sheets into overstuffed shelves!
Common Mistakes to Avoid When Folding Fitted Sheets
Even with the best instructions, there are a few common pitfalls that can trip you up. Here’s what to watch out for and how to fix these issues.
Trying to fold it like a flat sheet is the number one mistake. The elastic corners make this impossible, so you have to use the corner-tucking method. If you catch yourself attempting traditional folds, stop and start over with the proper technique.
Not getting all four corners together properly will leave you with a lumpy, misshapen result. Take your time with each corner tuck, making sure they’re fully nested before moving to the next one. This is the foundation of the whole method.
Rushing through the corner-tucking steps leads to corners that aren’t secure and sheets that unfold themselves. Slow down, especially while you’re learning. Speed comes naturally once you’ve mastered the technique.
Folding on a lumpy surface makes it hard to get clean, crisp final folds. Your bed can work, but make sure there aren’t any blankets or pillows creating bumps underneath. A clear table or dresser top is ideal.
Folding sheets when they’re slightly damp creates wrinkles and can even lead to mildew if they’re stored before fully drying. Always make sure your fitted sheets are completely dry before folding and storing them.
You’ve Got This!
Learning how to fold fitted sheets properly is one of those life skills that seems impossible until someone shows you the trick. Then suddenly, it’s so simple you wonder why it ever seemed hard! The corner-tucking method works because it embraces what makes fitted sheets unique—those elastic corners—rather than fighting against them.
After your first few attempts, this technique will become second nature. You won’t have to think through each step; your hands will just know what to do. And the payoff is worth it: an organized linen closet with neat stacks of sheets, more storage space, and the satisfying feeling of having conquered the fitted sheet challenge.
Remember, perfection isn’t the goal—progress is. Even if your folded fitted sheet isn’t magazine-worthy, it’s infinitely better than a crumpled ball shoved in the back of the closet. Give yourself grace during the learning process, and celebrate the fact that you now have this skill in your life-management toolkit.
Have you tried the corner-tucking method? What tips would you add for fellow fitted-sheet folders? Share your experiences in the comments below—we’d love to hear your success stories or any questions you have!
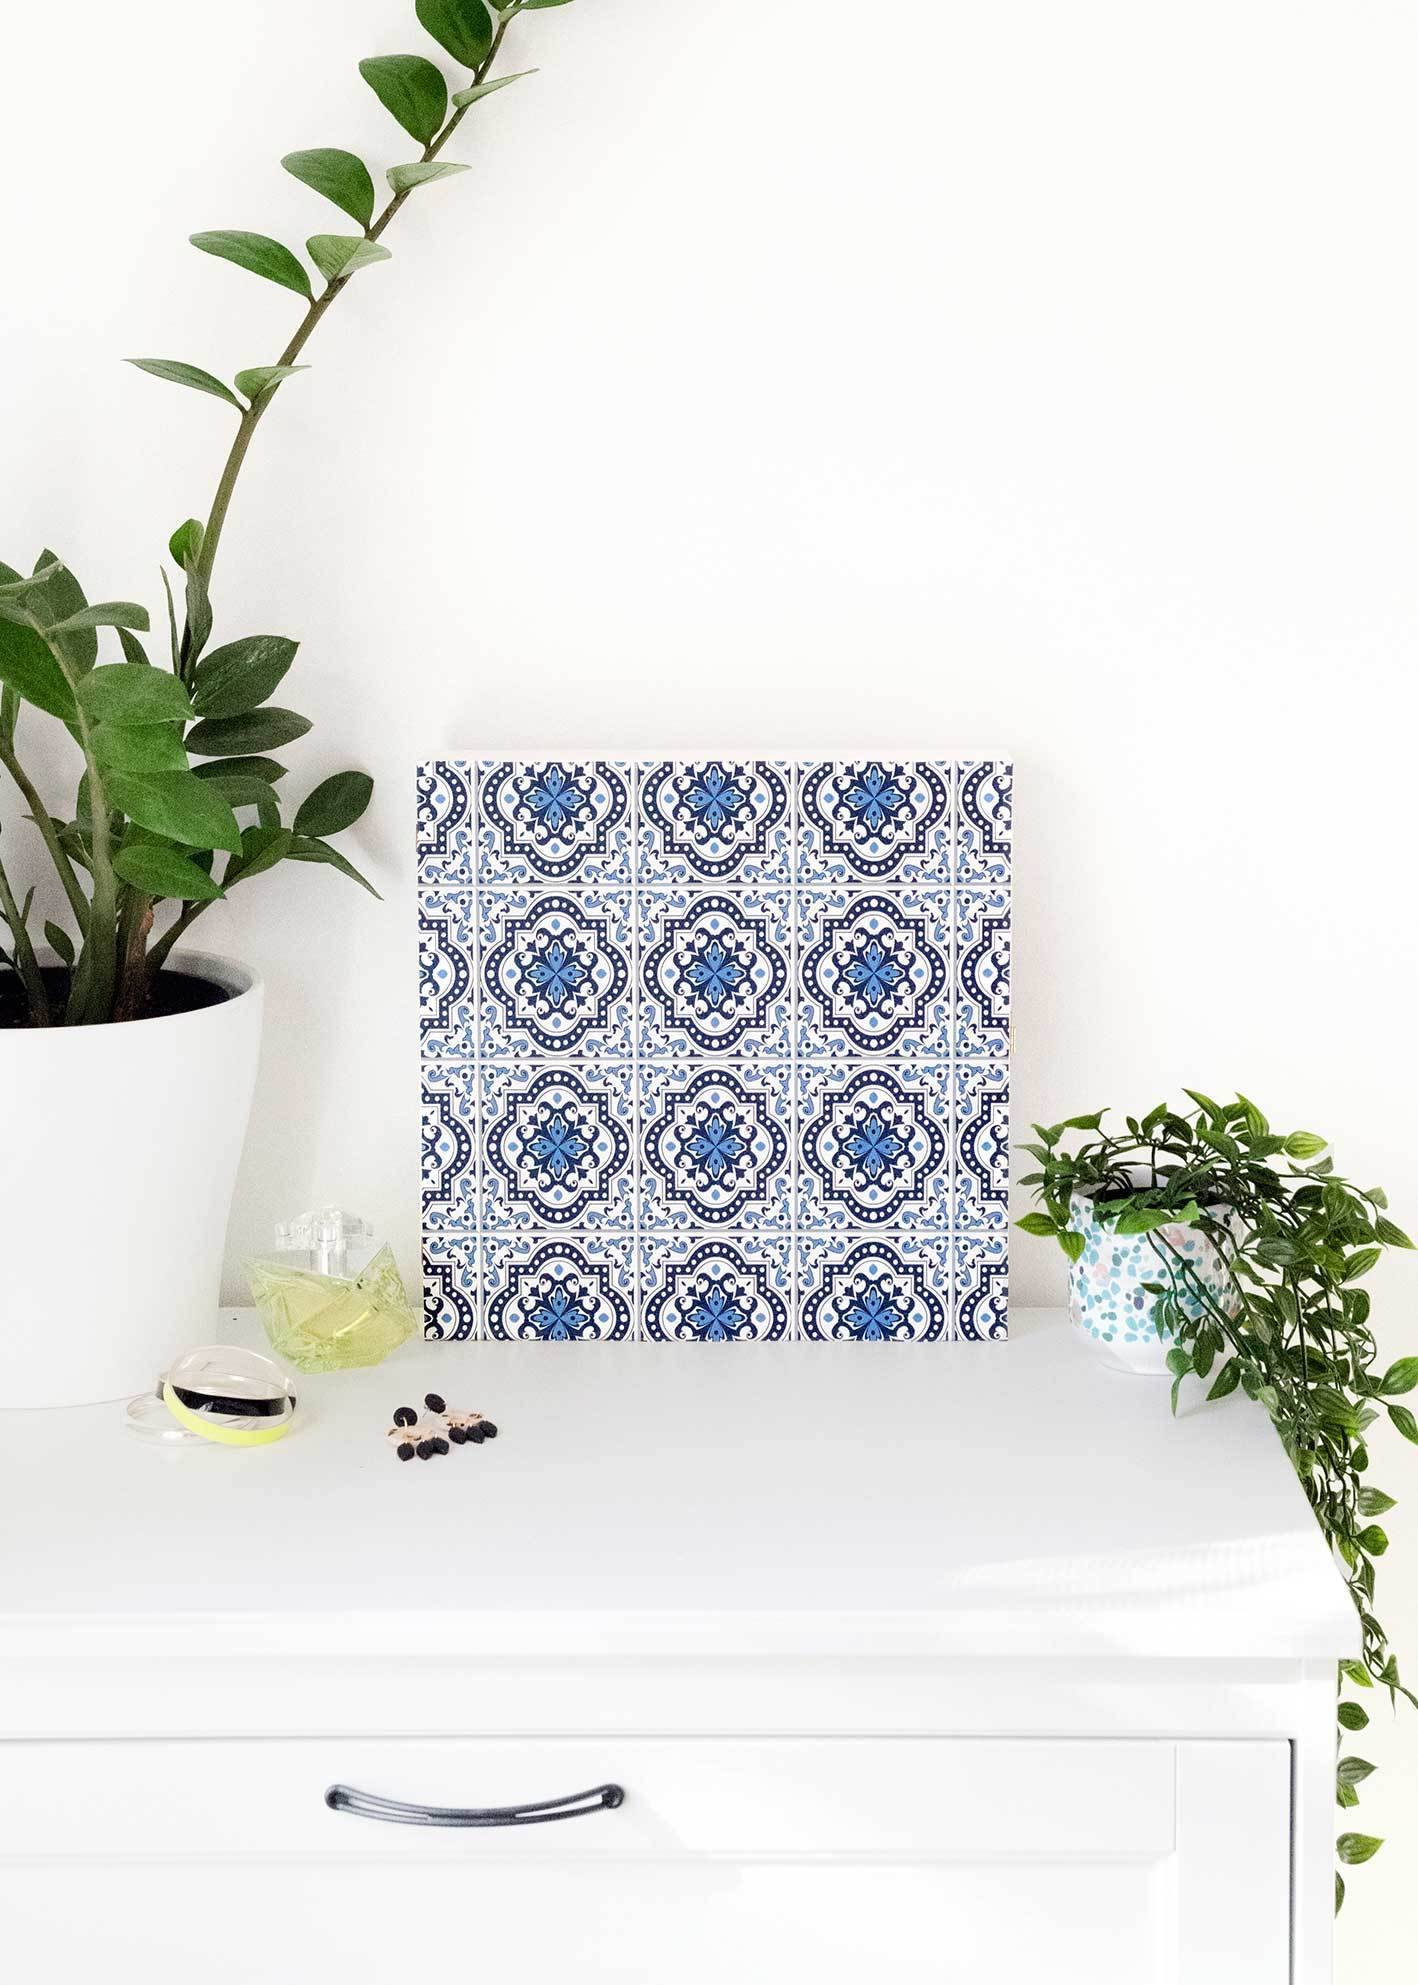
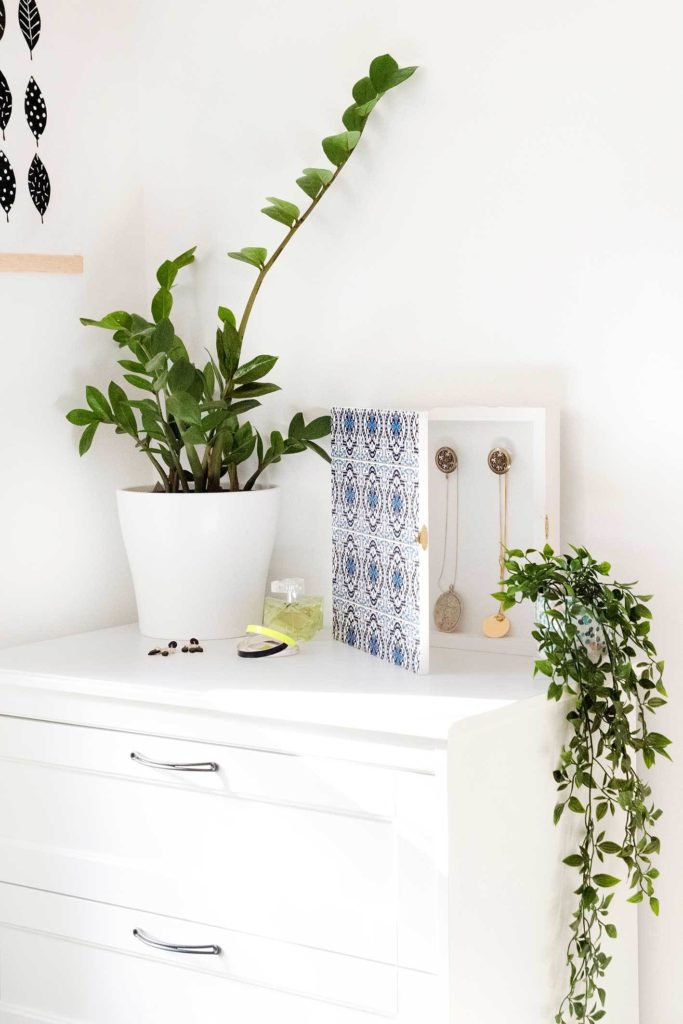
This art wall organizer provides functional storage while adding a beautiful decorative element to your walls. It’s the perfect solution for keeping your bedroom looking polished while keeping all your jewelry organized and accessible.
.tasty-pins-banner-container{display:block;margin-bottom:20px;position:relative;width:-moz-fit-content;width:fit-content}.tasty-pins-banner-container a{cursor:pointer;display:flex;font-size:14px;font-weight:700;letter-spacing:1px;line-height:1.8em;text-transform:uppercase}.tasty-pins-banner-container a:hover{opacity:1}.tasty-pins-banner-container .tasty-pins-banner{align-items:center;bottom:0;cursor:pointer;display:flex;justify-content:center;left:0;padding-bottom:1em;padding-top:1em;position:absolute;right:0}.tasty-pins-banner-container .tasty-pins-banner svg{margin-right:4px;width:32px}.tasty-pins-banner-container .tasty-pins-banner span{margin-top:4px}.tasty-pins-banner-container a.tasty-pins-banner{text-decoration:none}.tasty-pins-banner-container a.tasty-pins-banner:hover{opacity:.8}.tasty-pins-banner-container a.tasty-pins-banner-image-link{flex-direction:column}.tasty-pins-banner-container a img{margin-bottom:0}.entry-content .wp-block-image .tasty-pins-banner-container img{margin-bottom:0;padding-bottom:0}#et-boc .et-l div .et_pb_image_wrap .tasty-pins-banner-container .tasty-pins-banner{padding-bottom:1em!important;padding-top:1em;text-decoration:none}#et-boc .et-l div .et_pb_image_wrap .tasty-pins-banner-container a.tasty-pins-banner{cursor:pointer;display:flex;font-size:14px;font-weight:700;line-height:1.8em;text-transform:uppercase}#et-boc .et-l div .et_pb_image_wrap .tasty-pins-banner-container a.tasty-pins-banner span{letter-spacing:2px;margin-top:4px}.et-db #et-boc .et-l .et_pb_module .tasty-pins-banner-container a:not(.wc-forward){padding-bottom:0}
Those adorable little jewelry holders shaped like cacti and porcelain animals are undeniably cute, but let’s be honest, they don’t always hold much.
If you’ve got more than a handful of necklaces, you probably know the struggle of watching your favorite pieces overflow onto your dresser, getting tangled and covered in dust.
Why This Art Wall Organizer Works
This clever DIY project solves multiple problems at once.
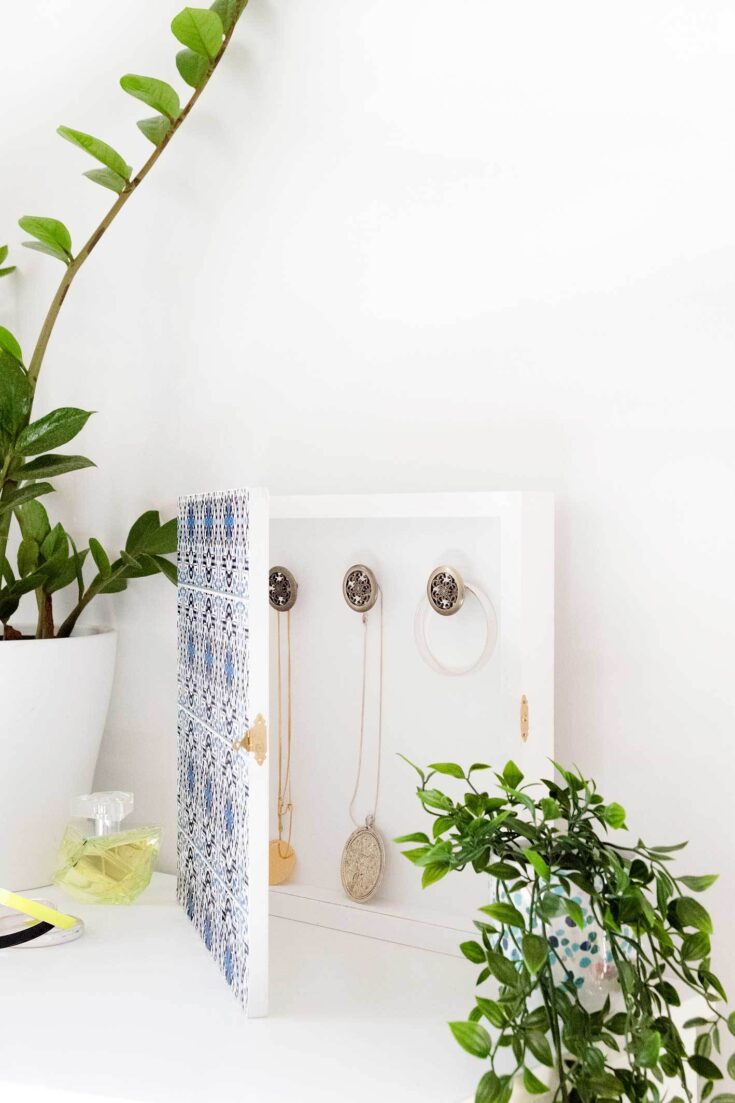
The hidden storage keeps your bedroom looking clean and clutter-free, while the shadow box design protects your jewelry from dust and tangles.
You can customize the front to match any decor style, from modern geometric patterns to vintage florals.
It’s perfect for small spaces where every square inch counts, and it’s a budget-friendly alternative to those expensive jewelry armoires that take up valuable floor space. Best of all, when the door is closed, no one will know it’s anything more than a pretty piece of wall art!
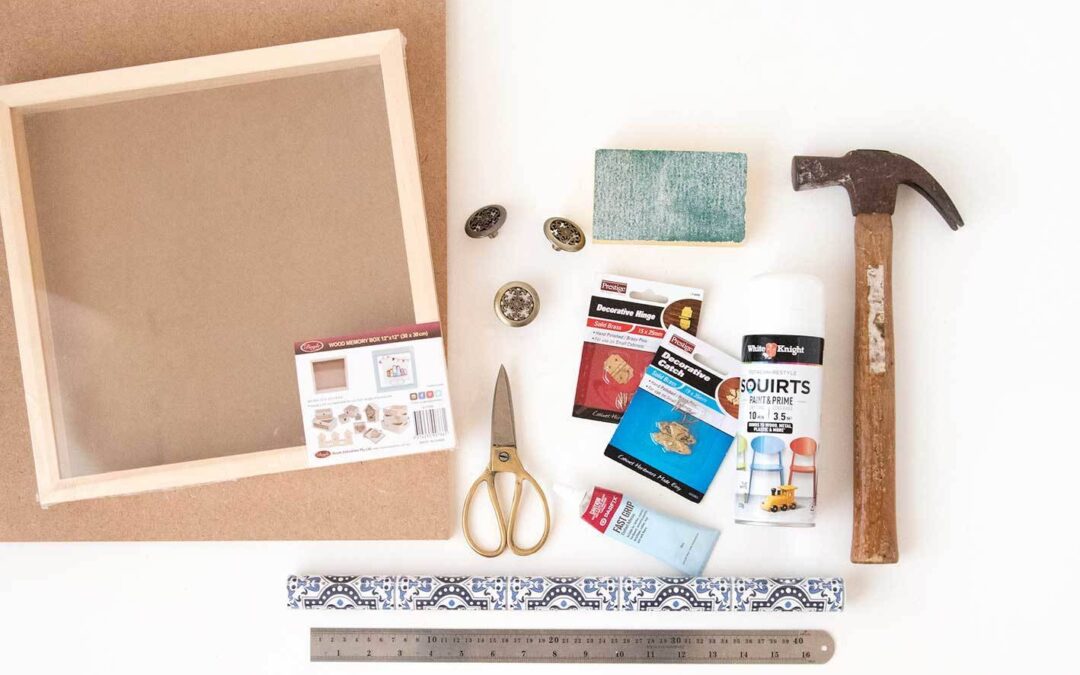
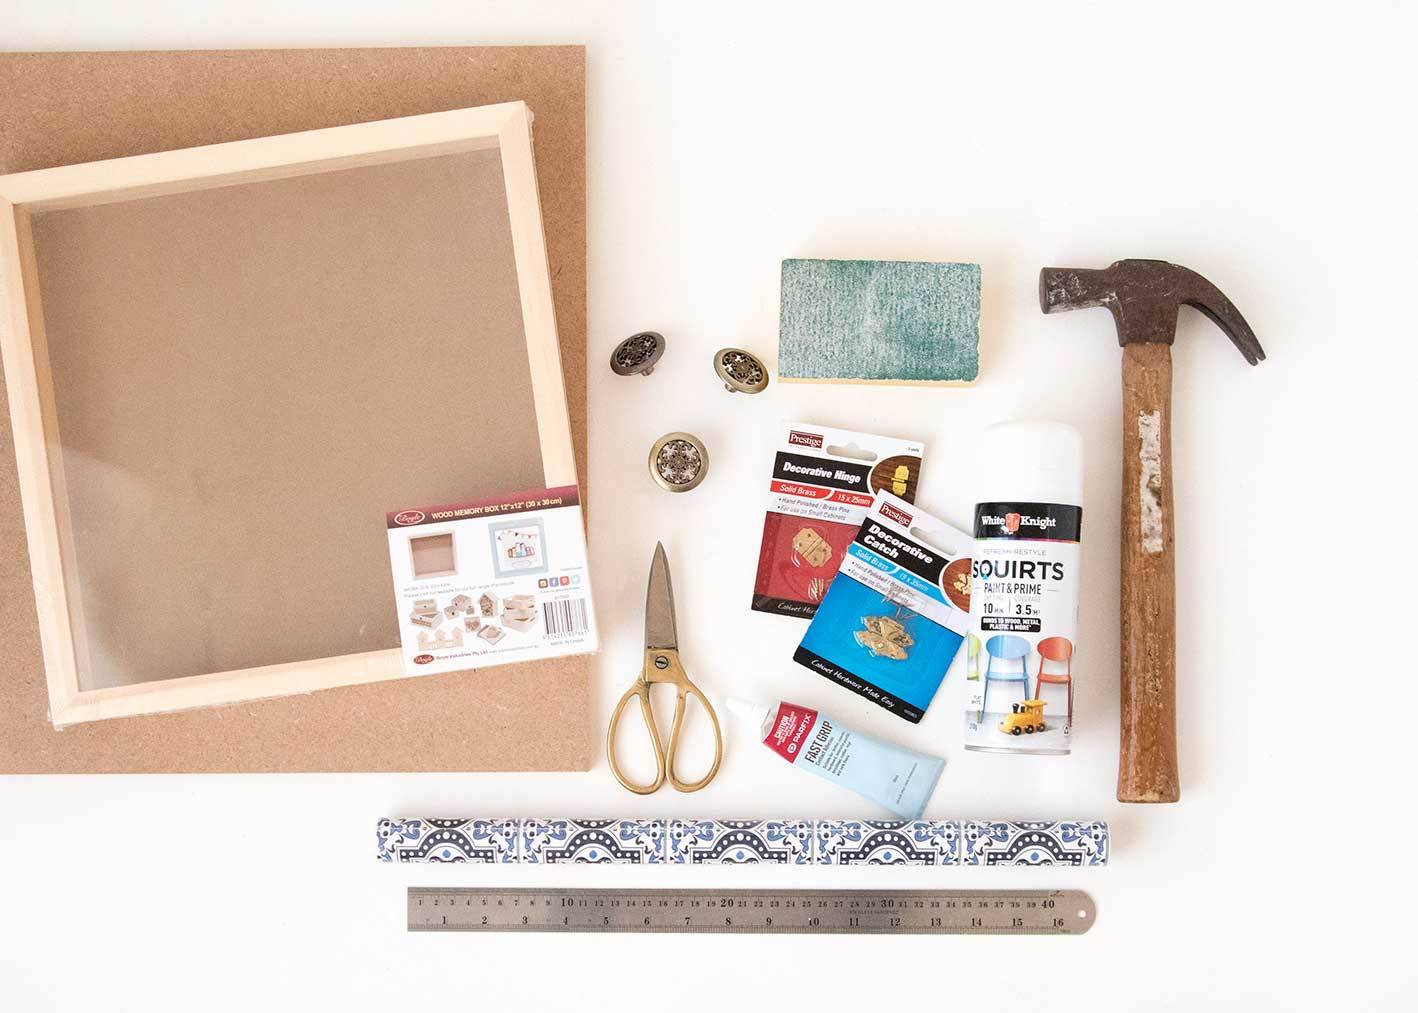
Materials You’ll Need
Wood shadow box frame
MDF board
Decorative contact paper or wallpaper
2 small hinges
Jewelry box clasp
Hooks or small decorative knobs
Primer and white paint
Sandpaper
Saw
Glue or strong adhesive
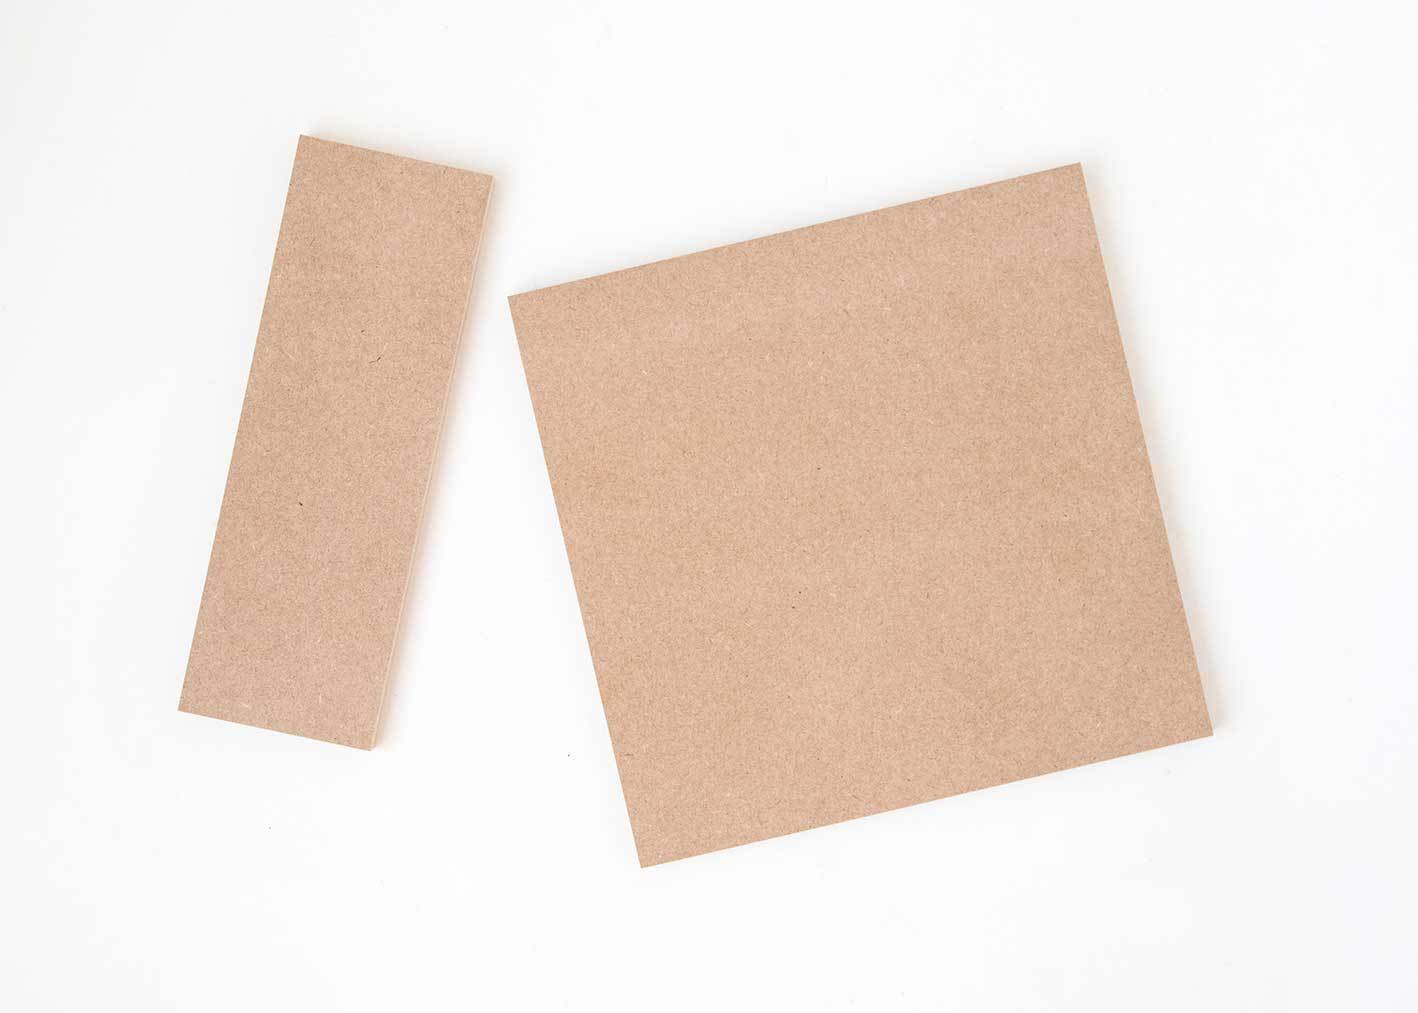
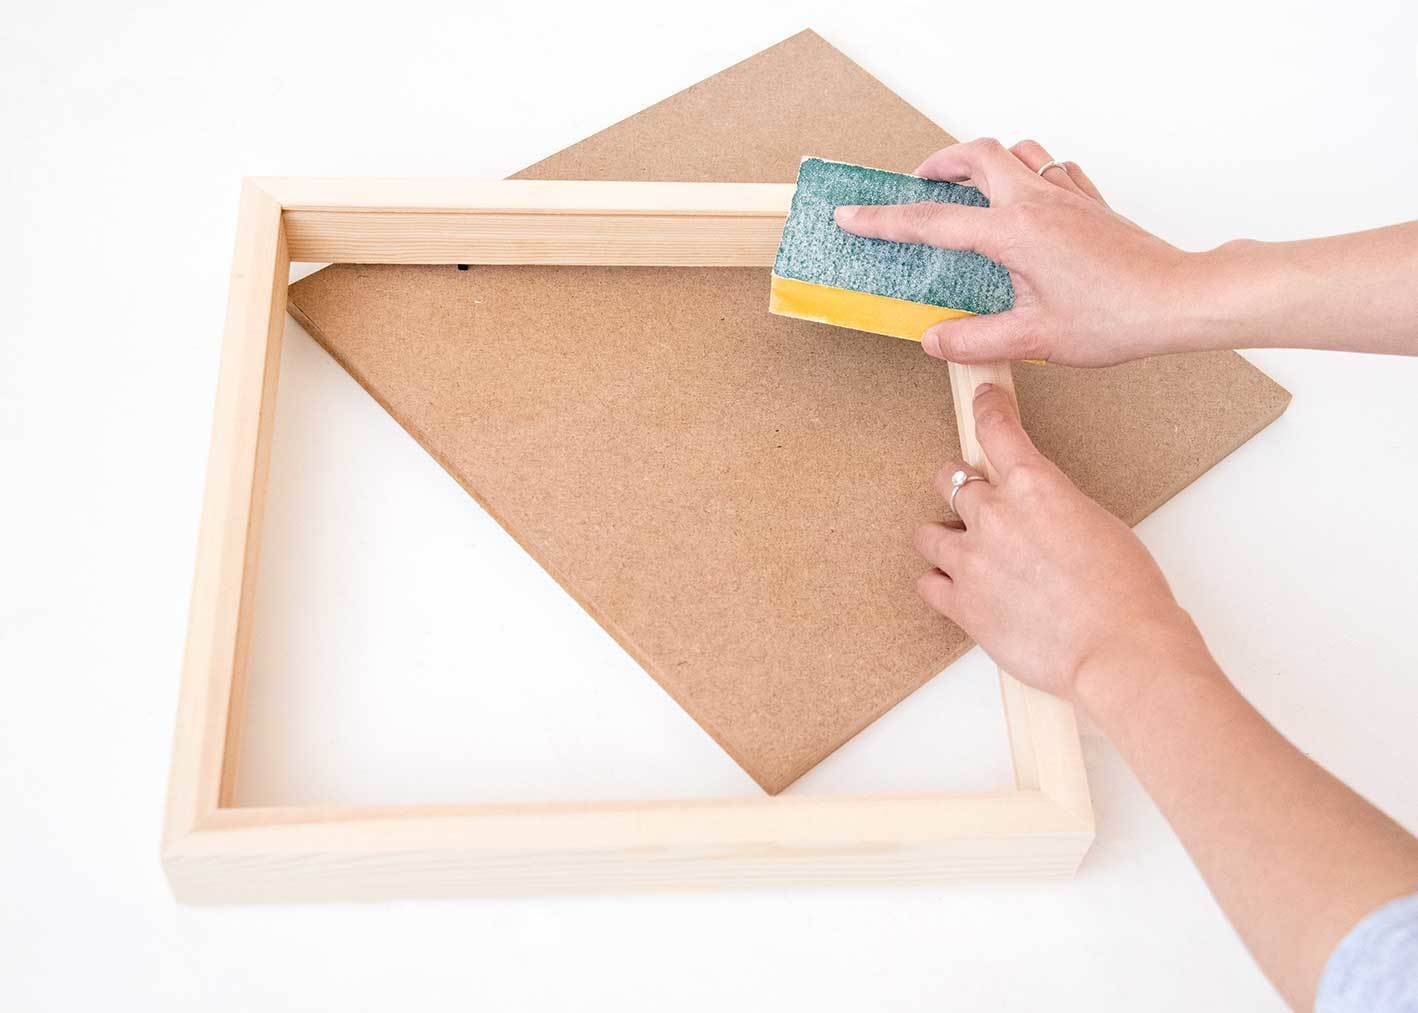
Cut and Prepare the MDF Door
Start by measuring your shadow box frame carefully. Cut the MDF board to match these exact dimensions—this piece will become the door that conceals your jewelry storage.
Remove the glass from the shadow box frame and set it aside (you can save it for another craft project!).
Sand both the frame and the MDF board until they’re smooth. This step is important because it helps the paint adhere better and gives you a professional-looking finish.
If you don’t have woodworking tools at home, don’t worry—most hardware stores offer free cutting services. Just bring your shadow box frame measurements with you, and they’ll cut the MDF to size.
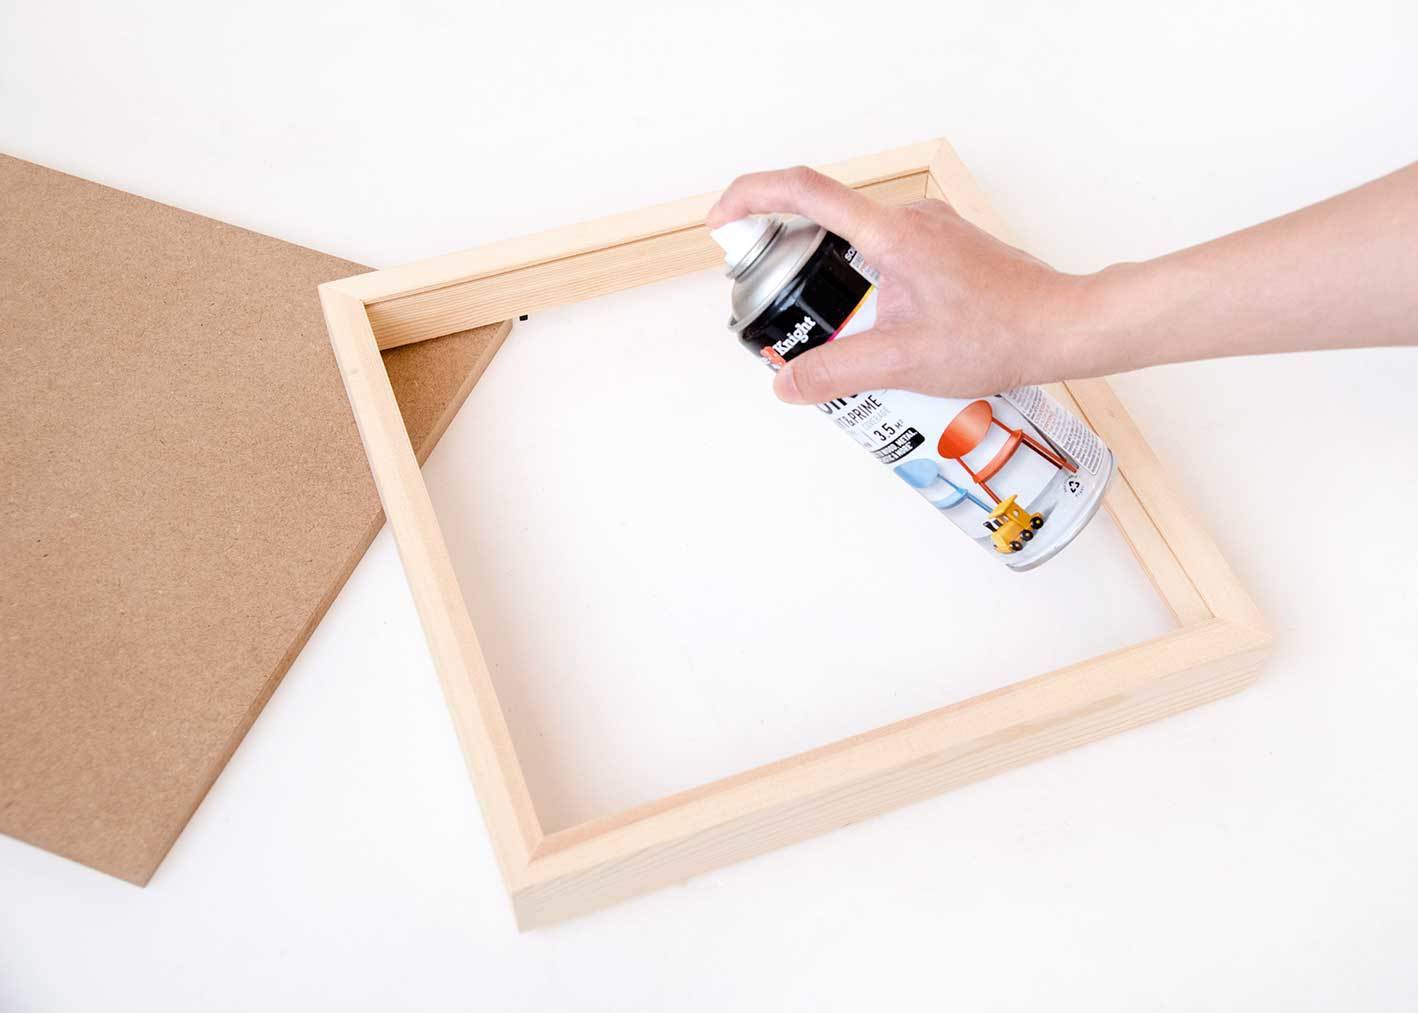
Prime and Paint
Apply a coat of primer to both the shadow box frame and the MDF board. Primer is especially important for MDF because it’s porous and can absorb paint unevenly without it.
Once the primer is dry, paint both pieces with your chosen color. White creates a classic, clean look that works with any decor, but you can absolutely choose any color that matches your room!
Let the paint dry completely between coats. If you want to add a vintage touch, you can lightly distress the edges with sandpaper after the final coat dries.
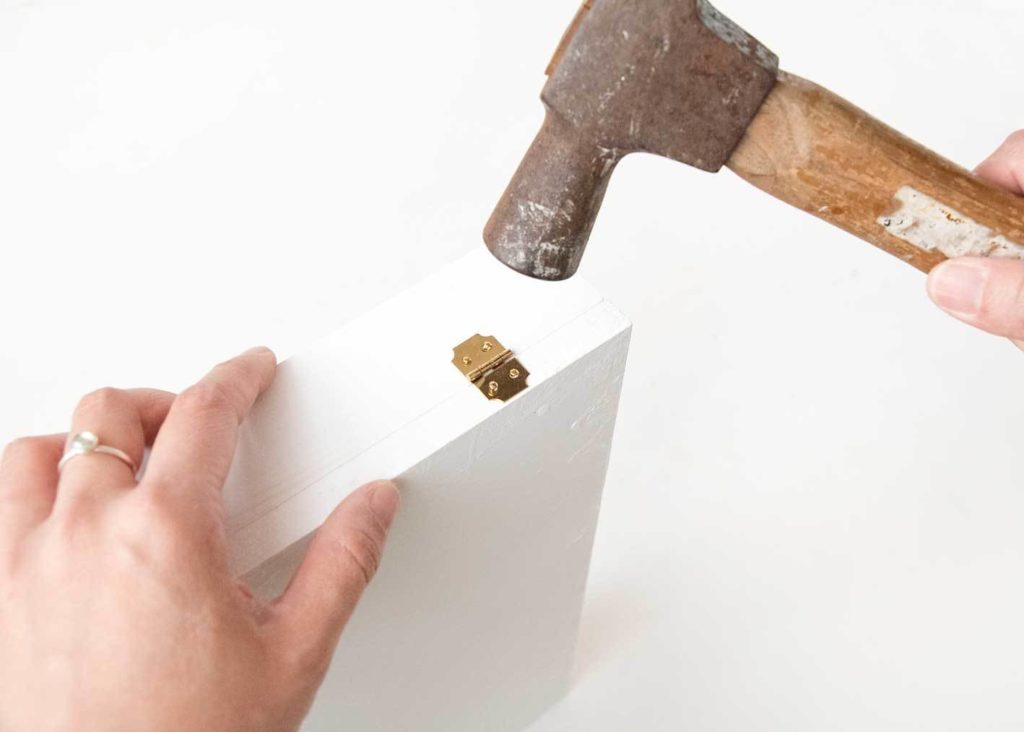
Attach the Hinges
Position two small hinges evenly spaced along one side of your shadow box frame. Before you attach them, it’s a good idea to pre-drill the screw holes to prevent the wood from splitting.
Carefully attach the MDF door to the frame using the hinges, then test that the door swings smoothly.
If your door sticks or doesn’t close evenly, try adjusting the hinge placement slightly. This is one of those steps where taking your time really pays off—you want your art wall organizer to open and close smoothly for years to come.
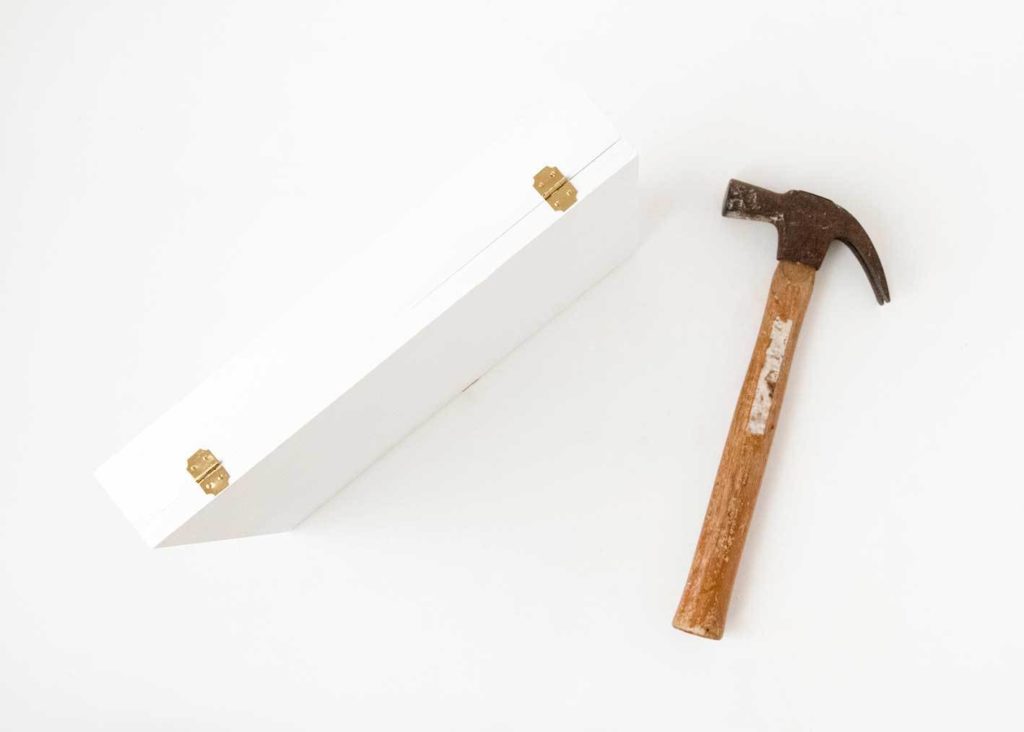
Add the Clasp
Install a jewelry box clasp on the opposite side from the hinges. Center the clasp so the door closes evenly and stays securely shut when filled with jewelry.
Magnetic clasps work great as an alternative if you prefer a cleaner look. Make sure whatever clasp you choose is strong enough to hold the door closed when it’s loaded with your jewelry collection.
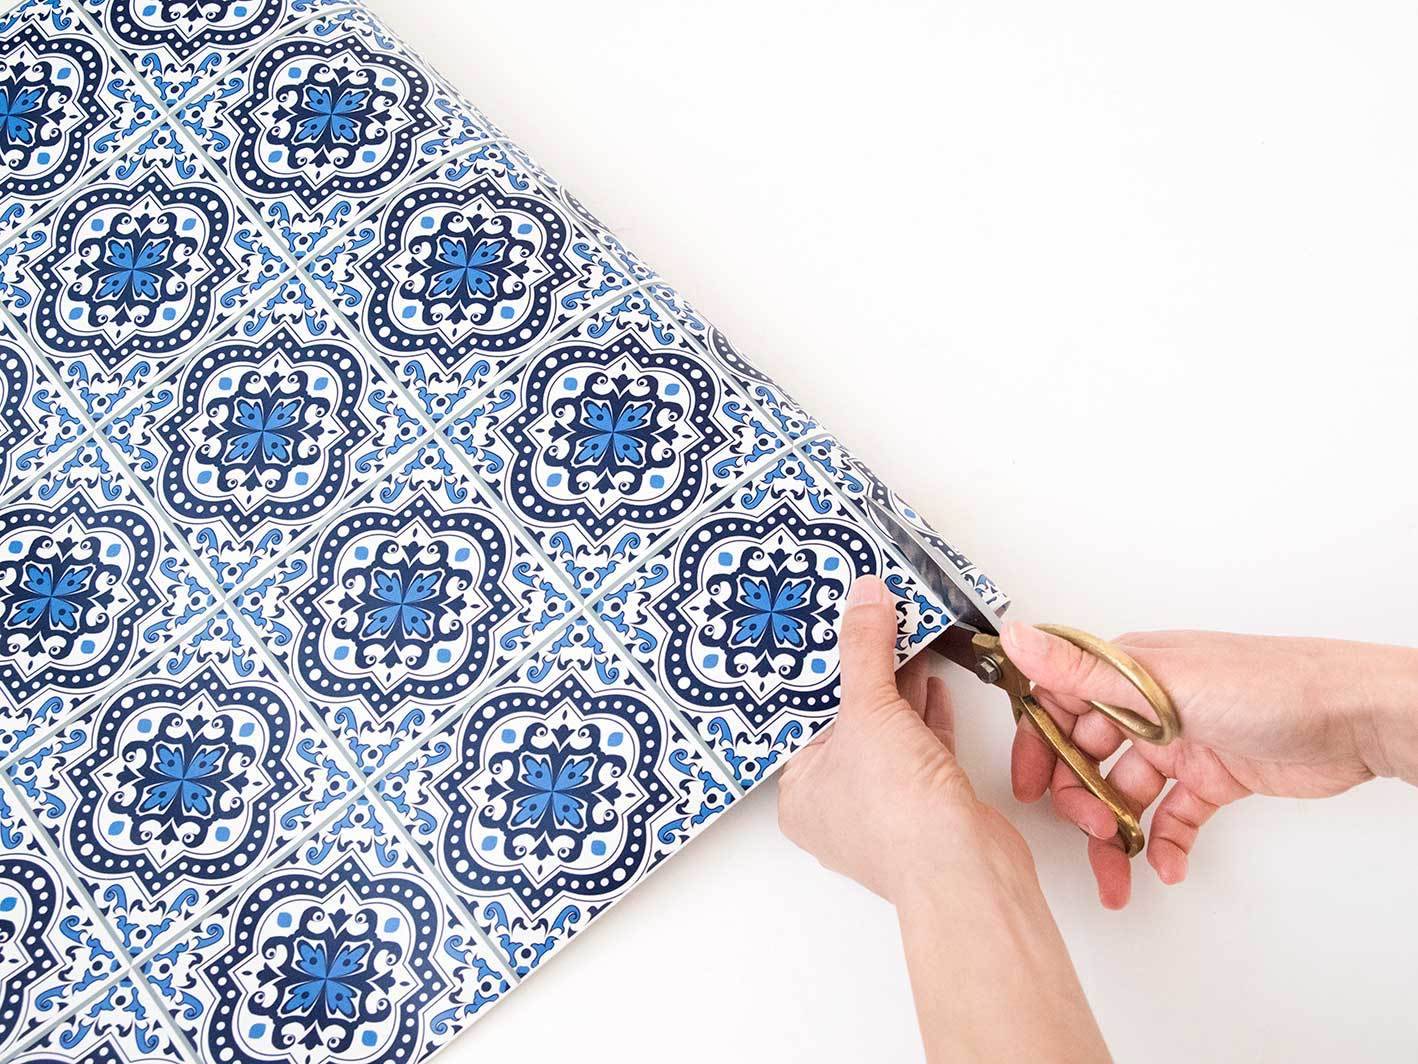
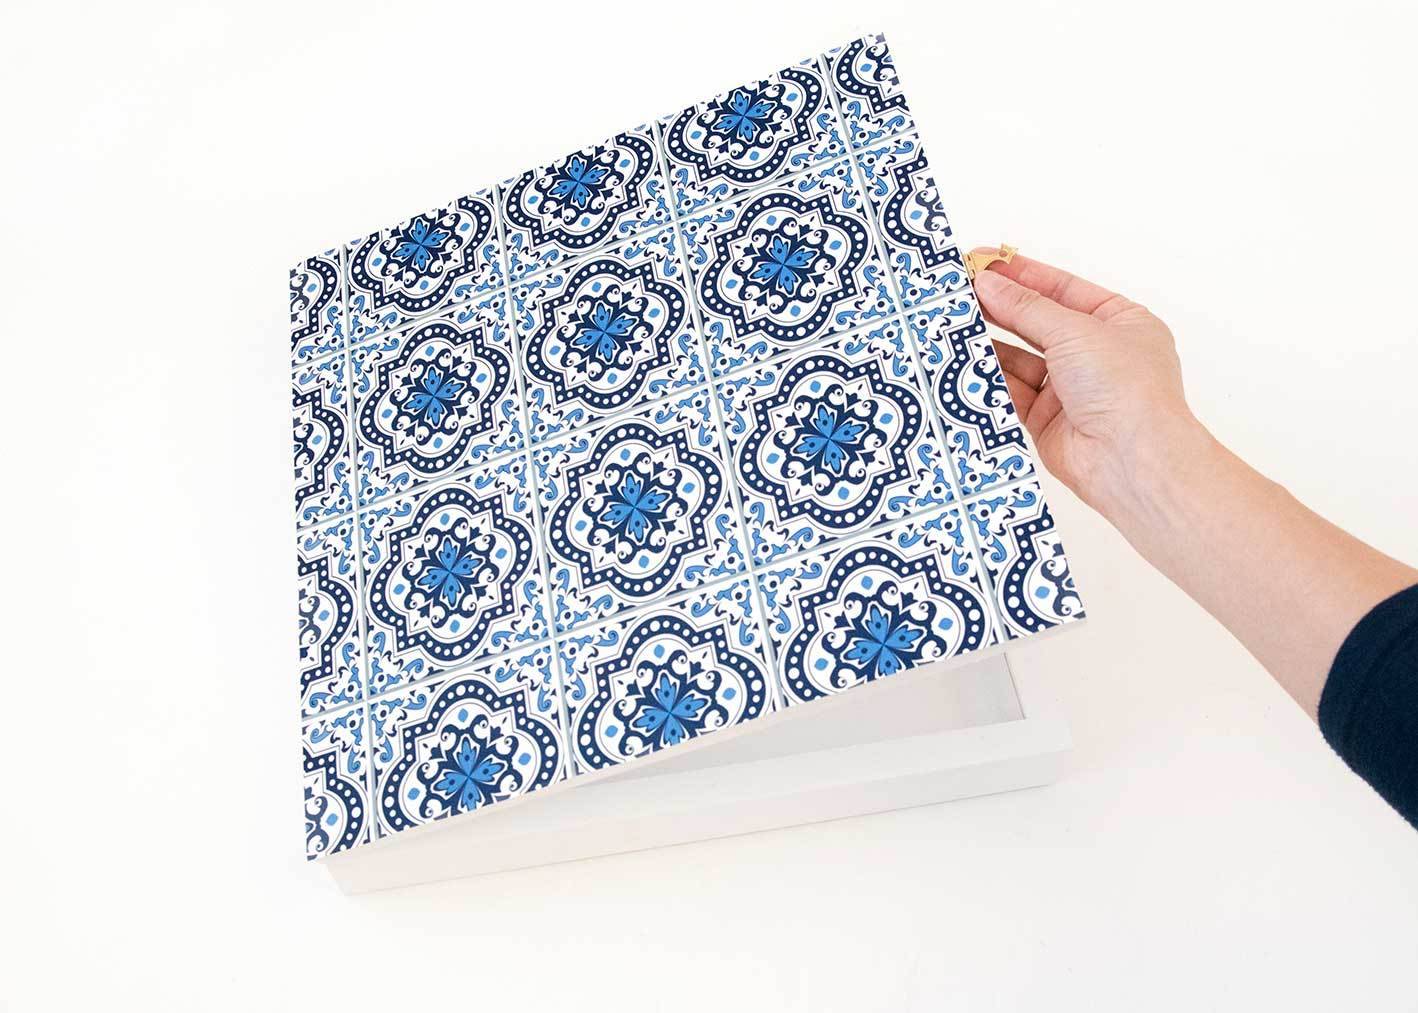
Decorate the Front
This is where your art wall organizer truly becomes a piece of art! Measure the front of your door and cut decorative contact paper or wallpaper to fit.
When you’re ready to apply it, measure twice and cut once—you want this to look perfect.
Apply the contact paper carefully to avoid bubbles. Start from one edge and smooth it down as you go, using a credit card or squeegee to push out any air pockets.
Your options here are endless: geometric patterns for a modern look, floral designs for something softer, or abstract art for a bold statement. Choose something that complements your bedroom’s aesthetic and makes you happy every time you see it.
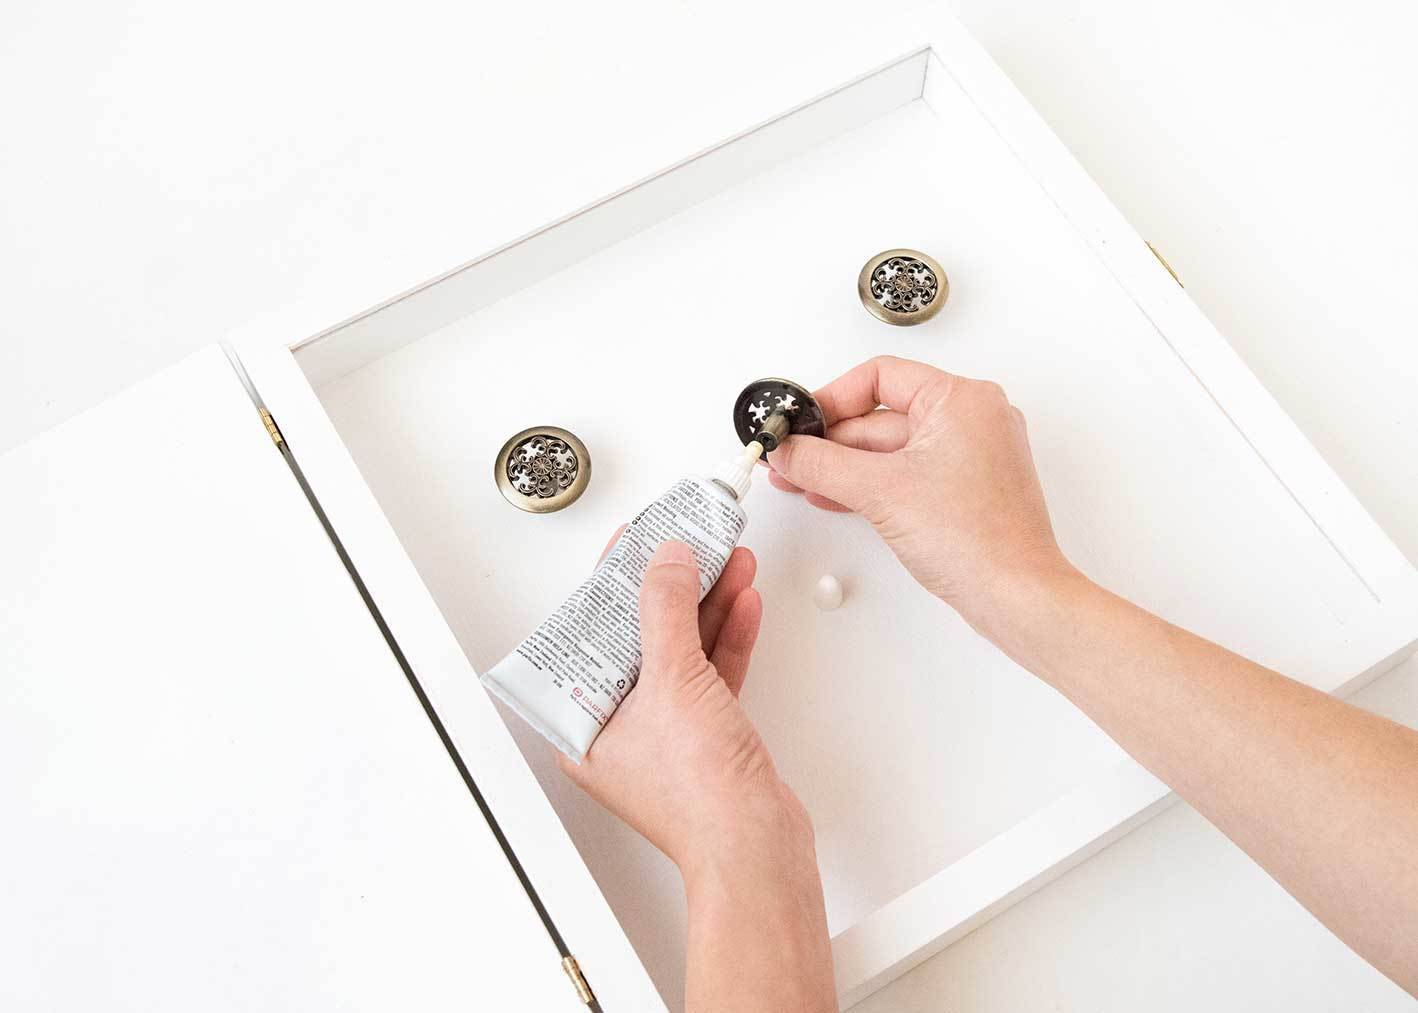
Install Interior Hooks
Now for the functional part! Space your hooks evenly inside the shadow box to accommodate different necklace lengths. Add decorative knobs near the top for shorter pieces like bracelets and chokers. Consider using different hook sizes for various jewelry types—some pieces might need larger, sturdier hooks.
Use strong adhesive or small screws to secure everything in place. Leave enough space at the bottom for longer necklaces to hang without getting tangled. Think about your jewelry collection as you plan the layout—if you have mostly long pendant necklaces, you’ll want to position hooks higher up.
Hang and Organize
Use picture hanging hardware that’s appropriate for the weight of your filled organizer. If you’re hanging it on drywall, wall anchors are essential for keeping everything secure. Hang your art wall organizer at a convenient height—eye level usually works well so you can easily see and access your jewelry.
Organize your jewelry by type or color, whatever makes the most sense for you. Hang your pieces, close the door, and step back to admire your handiwork. You’ve just created a beautiful piece of wall art that happens to be hiding all your jewelry!
Styling and Customization Ideas
Want to take this project even further? Match your contact paper to your bedroom’s color scheme for a cohesive look. You could create a whole gallery wall using multiple art wall organizers in different sizes—one for necklaces, one for bracelets, and another for rings and earrings.
Experiment with different frame styles to match your decor. A sleek modern frame works beautifully in contemporary spaces, while a distressed vintage frame adds charm to cottagecore or farmhouse bedrooms. For even more functionality, consider adding a cork backing where you can pin earrings, or line the interior with fabric to protect delicate pieces. You could even attach a small mirror to the inside of the door for a functional bonus.
The beauty of this project is that you can change the contact paper seasonally or whenever you want to refresh your look. It’s also a wonderful personalized gift for friends who love jewelry but struggle with storage.
Maintenance and Care Tips
Caring for your art wall organizer is simple. Dust the exterior just like you would any other wall art. Every few months, take a few minutes to reorganize the interior and untangle any pieces that might have gotten twisted together.
Over time, the hinges might loosen slightly from regular use, so keep a screwdriver handy to tighten them when needed. Clean the hooks occasionally to prevent any discoloration on your jewelry. If you have particularly delicate pieces, consider adding felt lining to the interior back panel for extra protection.
Frequently Asked Questions
What size shadow box frame works best?
An 8×10 or 11×14 frame works well for most jewelry collections. If you have an extensive necklace collection, go larger—or better yet, create multiple smaller organizers for different jewelry types. There’s no wrong size, as long as it fits your space and your collection.
Can I use this for earrings too?
Absolutely! To store earrings, add a piece of decorative mesh or cork to the interior back panel. You can hang stud earrings on the mesh or pin them to the cork. This works especially well if you create a dedicated earring organizer alongside your necklace storage.
Do I have to paint it white?
Not at all! Paint your art wall organizer any color that matches your decor. Metallics like gold, rose gold, or silver create a glamorous, jewelry-box feel. Deep jewel tones can make a bold statement, while soft pastels work beautifully in feminine spaces. This is your project—make it uniquely yours!
What if I don’t have woodworking tools?
Most hardware stores offer free cutting services for customers. Bring your shadow box frame and its measurements to the store, and they’ll cut the MDF to the perfect size. This makes the project accessible even if you’re working with a minimal tool collection.
How much weight can this hold?
A properly installed shadow box with quality hooks can comfortably hold several necklaces and bracelets. For heavier statement pieces, use stronger hooks and make sure you’ve mounted the organizer to wall studs or used appropriate wall anchors for durability. If you’re concerned about weight, test it before filling it completely.
Can I add a mirror inside?
That’s a brilliant idea! Attach a small mirror to the inside of the door using strong adhesive. This gives you a convenient spot to check how your jewelry looks before heading out. Just make sure the mirror isn’t too heavy for your hinges to support.
How to Make a Jewelry Organizer That’s Cleverly Disguised as Wall Art
Make this jewelry organizer that hides away as wall art! Stow away your necklaces and bracelets with the help of disguise.
Active Time3 hours
Total Time3 hours
DifficultyEasy
Materials
Wood shadow box frame
MDF board
Decorative contact paper or wallpaper
2 small hinges
Jewelry box clasp
Hooks or small decorative knobs
Primer and white paint
Sandpaper
Saw
Glue or strong adhesive
Instructions
Cut and Prepare the MDF Door
Cut MDF to match your shadow box frame dimensions. Remove the glass from the frame, then sand both the frame and MDF board smooth.
Prime and Paint
Apply primer to both the frame and MDF board, then paint with white paint (or your preferred color). Let dry completely.
Attach the Hinges
Connect the MDF board to the shadow box frame using two small hinges on one side to create a door that swings open.
Add the Clasp
Install a jewelry box clasp on the opposite side of the hinges to keep your art wall organizer securely closed.
Decorate the Front
Measure and cut decorative contact paper or wallpaper to fit the door. Apply it to create your “artwork” disguise.
Install Interior Hooks
Attach hooks or decorative knobs inside the shadow box to hold necklaces, bracelets, and other jewelry.
Hang and Organize
Mount your art wall organizer on the wall, fill it with jewelry, close the door, and enjoy your hidden storage!
Making Beautiful Storage Work for You
Creating this art wall organizer gives you the best of both worlds: beautiful art that enhances your space and practical storage that keeps your jewelry organized and protected. Whether you’re a beginner DIYer or someone with plenty of crafting experience, this project is completely customizable to match your style and skill level.
The hidden storage concept works beautifully for keeping your bedroom looking clean while ensuring your favorite pieces are always within reach. You’ve created something functional that also brings beauty to your walls—and that’s what great design is all about.
Ready to create your own hidden jewelry storage that looks straight from one of the great design studios? Gather your materials and give it a try this weekend. Your jewelry (and your bedroom) will thank you!
Ready to decorate your apartment for the holiday season? Don’t let worries about how you’ll make it work take away from the magic and wonder. While rentals may come with limitations like skipping nails for garland or avoiding a real tree, that doesn’t mean decorating has to be boring. Apartment Christmas decorations can still sparkle with plenty of charm, and the compact space can even make it feel even more inviting.
We’ve taken out the guesswork with some creative ideas we think you’ll love. So grab a hot chocolate, take notes, and get ready to turn your rental into a festive wonderland.
.tasty-pins-banner-container{display:block;margin-bottom:20px;position:relative;width:-moz-fit-content;width:fit-content}.tasty-pins-banner-container a{cursor:pointer;display:flex;font-size:14px;font-weight:700;letter-spacing:1px;line-height:1.8em;text-transform:uppercase}.tasty-pins-banner-container a:hover{opacity:1}.tasty-pins-banner-container .tasty-pins-banner{align-items:center;bottom:0;cursor:pointer;display:flex;justify-content:center;left:0;padding-bottom:1em;padding-top:1em;position:absolute;right:0}.tasty-pins-banner-container .tasty-pins-banner svg{margin-right:4px;width:32px}.tasty-pins-banner-container .tasty-pins-banner span{margin-top:4px}.tasty-pins-banner-container a.tasty-pins-banner{text-decoration:none}.tasty-pins-banner-container a.tasty-pins-banner:hover{opacity:.8}.tasty-pins-banner-container a.tasty-pins-banner-image-link{flex-direction:column}.tasty-pins-banner-container a img{margin-bottom:0}.entry-content .wp-block-image .tasty-pins-banner-container img{margin-bottom:0;padding-bottom:0}#et-boc .et-l div .et_pb_image_wrap .tasty-pins-banner-container .tasty-pins-banner{padding-bottom:1em!important;padding-top:1em;text-decoration:none}#et-boc .et-l div .et_pb_image_wrap .tasty-pins-banner-container a.tasty-pins-banner{cursor:pointer;display:flex;font-size:14px;font-weight:700;line-height:1.8em;text-transform:uppercase}#et-boc .et-l div .et_pb_image_wrap .tasty-pins-banner-container a.tasty-pins-banner span{letter-spacing:2px;margin-top:4px}.et-db #et-boc .et-l .et_pb_module .tasty-pins-banner-container a:not(.wc-forward){padding-bottom:0}Photo by Jasmin Ne
Apartment Christmas Decorations that Are Festive and Affordable
If you’re renting, you probably aren’t ready to invest in expensive holiday decor (yet). Maybe it’s not your vibe or you’re on a budget.
Whatever the reason, decor for small spaces allows you to decorate without worrying about breaking the bank. No, this doesn’t mean your place will be riddled with tacky plastic ornaments that say “Live, Laugh, Love,” but it does mean your hard-earned money can go towards smaller (and thus more affordable) apartment Christmas decorations.
Here are a few ideas for affordable and simple Christmas decorations that you can feel good about.
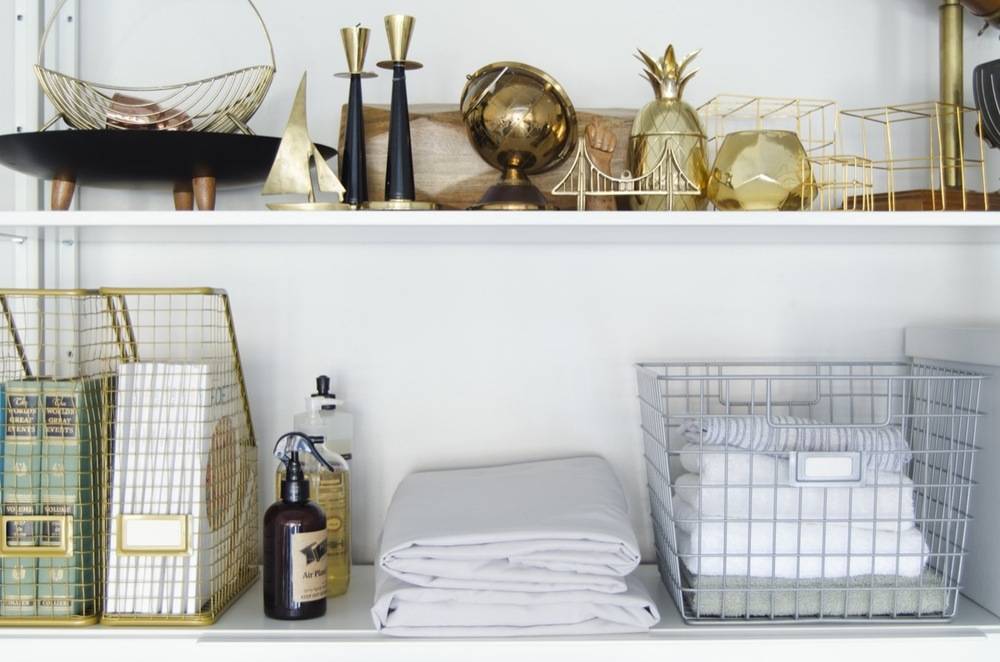
Turn your bar cart into a holiday spirit command station
More and more bar carts are being used as a platform for holiday decor. And why not? They’re affordable, stylish, and they hold alcohol – talk about the holiday spirit(s)! Hone in on a color scheme or theme, and use objects of varying heights to style the top of your bar cart.
Try candles, bottles of spiced booze, and small knick-knacks. Drape a garland or a festive banner over the railing, and style some mule mugs underneath.
Let your walls do the work
The easiest way to get the most bang for your buck with simple Christmas decorations is by using walls to your advantage.
And don’t worry, there are several hacks for hanging without creating a ton of holes (like Command hooks and strips, thumb tacks and a few more that we’ll suggest later, so yep, keep reading).
The best perk about vertical decor is it makes a small room appear taller – so look up to walls, windows, arches and door frames for inspiration.
Deck the walls, not the halls
Speaking of walls and windows…
Maybe you have space for a tree, but those faux gift boxes won’t work, or you have tabletop space for just a centerpiece but now the charging plates and holiday printed dishware look cluttered.
If you already have a decor theme, give it a festive twist by swapping out a few pieces. For instance, pillows with replaceable covers can be changed to match a holiday theme.
Throw blankets, napkins, placements and hand towels are also easily replaced without needing a lot of storage.
Make magic with existing furniture
If your apartment doesn’t include traditional railing or supportive structures like a mantel or a bannister, that’s ok! There are other ways to spread holiday cheer throughout your home, and all you need is your existing furniture.
Grouping decor pieces is a great way to make items feels more intentional, stylish and save on space. Consider tricks like adding a collection of vintage ceramics, a candle centerpiece, or even a bowl full of pinecones as a beautiful tabletop display or coffee table vignette to tie everything together.
Spend big on a dollar store budget
A dollar goes farther when you’re shopping at the dollar store, and just because it cost less doesn’t mean it won’t stand the test of time.
Whether it’s the dollar bin of your local Target or thrift store, or your favorite Dollar Store chain, there’s lots of affordable options. Since ornaments can add up quickly, we recommend starting here first.
How to Decorate (And Keep Your Security Deposit)
Living in a rental means there most likely was a security deposit paid at move-in. And of course, you want to get that money back when it’s time to move out.
You can still deck your place out with holiday flair by hanging decorations that won’t cause permanent damage. Let’s meet some of the other players in the nail-free game:
How to hang a stocking in a rental
For those lucky enough to have a mantel over a fireplace in your apartment, you can avoid adding nail holes by adding a sturdy stocking holder (like this one) to the top of your mantel.
You can also hang stockings with a dressmaker pin by lightly hammering them in place – they are heavy enough to hold lightweight stockings and light enough to avoid a giant hole in your wall.
Never underestimate the magic of this simple tool: tape! If you’re a stationery lover, chances are you already have washi tape tucked away in a drawer.
It’s easy to use and comes in playful patterns and colors you can mix and match to add personality to your holiday décor.
Washi tape can be used to hang holiday cards, make unique festive graphics, or frame and highlight existing apartment Christmas decorations.
The paper clip trick
Hanging decor doesn’t get easier than using a paper clip. All you need is a small magnet and a piece of masking tape – seriously, it’s that easy. Click here for the visual instructions.
What kind of Christmas tree should I get for my apartment?
Should you opt for the fresh pine scent of a real tree or opt for a fake one? Well, it could be dependent on the conditions of your lease. While some places don’t mind, others might have restrictions, so make sure to either ask your manager or review your leasing contract.
Space is one of the biggest considerations here. A faux tree is great to reuse year after year, but it could be a pain if you’re limited on space.
As you’re deciding, there are some smaller alternatives which could give you the best of both worlds: a super cute Christmas tree and space. There are a few solutions to consider, like mini tabletop tress (here’s a Charlie Brown version!), tree-alternatives, and half and quarter trees.
How to decorate an apartment door for Christmas
The easiest way to add holiday whimsy to your apartment is to start at the entrance. Decorating your apartment door is not only renter friendly, it spreads holiday cheer and your decor is safe from outdoor elements.
Or go traditional with a handmade wreath (using a Command hook to hang, of course!).
One Final Tip: Keep It Cozy
One of the best things about a small space is its cozy charm! Add warm touches like glowing candles and oil warmers with holiday scents such as vanilla, cinnamon, and citrus.
Layer in texture with soft furs and flannels, and sprinkle natural elements like branches, pinecones, and cranberries throughout your home for an affordable, festive feel. You don’t need to buy all-new decor to make your feel space merry.
Simply focus on creating a warm, inviting space you’ll enjoy all season long.
Share these simple Christmas decoration ideas on Pinterest!