Once again, the annual Color of the Year announcements have started rolling out VERY early. And once again, one has already come out before we could make our official guesses (it’s only August of 2026!). So we quickly made our picks this morning (Sherry just chose two she has been hoping would be chosen for many years). You can see them below in this post, and just like we’ve done for 2024, 2025, and 2026 – we’ll update this post every time a new one is announced so you can see all the COTY selections in one convenient place.
While color forecasting and design trends are serious business for these companies, we mostly enjoy the fun of guessing what will be picked and how people react to the choices. People were big mad at Pantone last year! You can see our predictions for this year at the bottom of this post.
What is the 2027 Color of the Year?
Each year, most major paint and color brands announce their “color of the year,” which is usually meant to encapsulate current or future design trends. So rather than having one official Color of the Year, you’ll see many selections from folks like Benjamin Moore, Sherwin-Williams, and Pantone. Some companies will also announce color collections or entire palettes. They act as commentary on both design trends and the world at large, while also helping laypeople pick trending hues. And of course, it’s all a good marketing gimmick or PR stunt for these brands… one we’re suckers for every year!
What Were Last Year’s Colors?
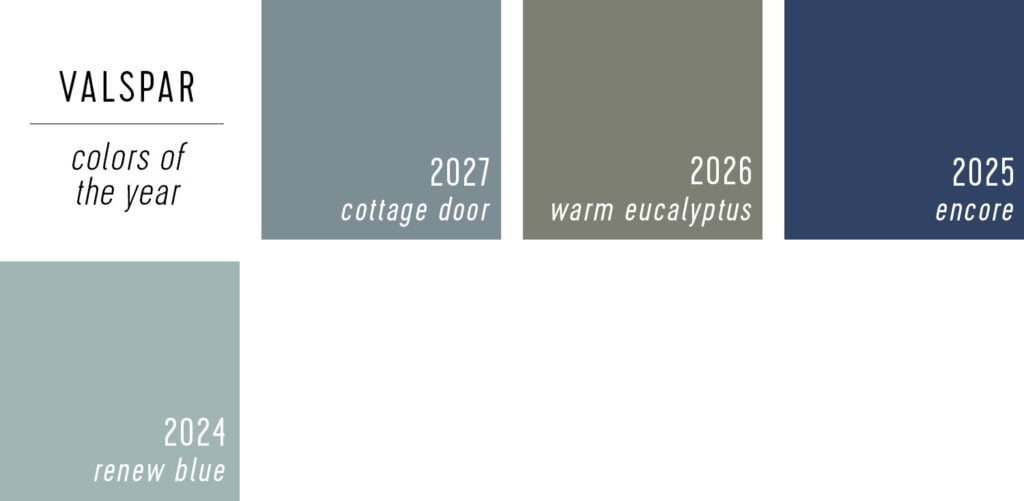
You can see a snapshot of the last 3 years’ COTY picks below, and find more details about each here: 2024 – 2025 – 2026.
Looking at them all together like this really gives you a sense of an overall trend for that year, as well as how things are shifting across time. 2025 was notably darker and more muted than 2024, with brands going heavy on deep browns and purples. 2026 saw more variety in the hues, but things were still fairly muted and neutral (we always hope for more color than the last two years have given us).
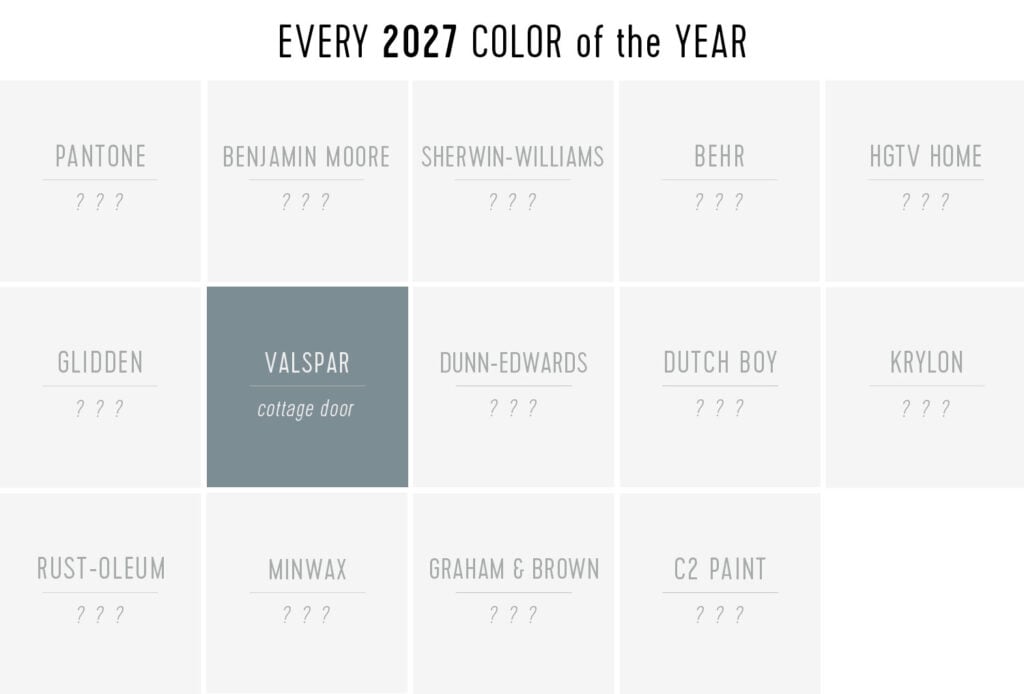
Every 2027 Color of the Year
We are tracking 14 brands this year, but are always on the lookout for others. As of August 14, 2026, only one has announced their 2027 Color of the Year. We’ll keep this list updated as more of them roll out.
Here’s a closer look at each color selected.
Valspar’s 2027 Color of the Year
Valspar kicked off this year’s COTY announcements with a steely blue called Cottage Door. They describe it as a “trans-seasonal color” for “thoughtful and introspective spaces,” which is a response to a cultural shift they see towards intentional, authentic, and heartfelt living. They suggest pairing it with a creamy pink and warm gray, as well as natural textures and playful patterns.
This is Valspar’s fourth year picking a Color of the Year, and you can see above that they love a blue. All of the choices are solid and reliable, but it will be interesting to see if they surprise us in 2028.
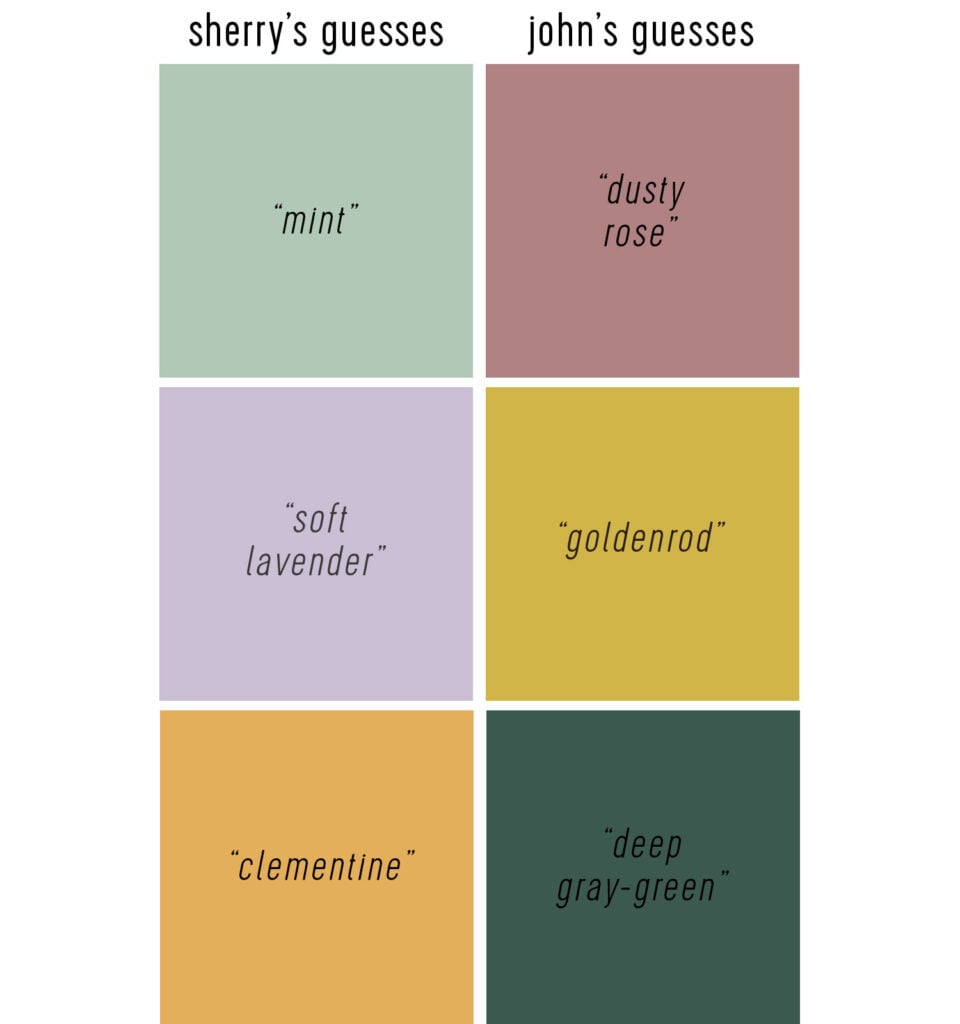
Our 2027 Color of the Year Predictions
Every year, Sherry and I like to guess 3 colors we think will show up on the list. It’s all in good fun, and you can tell below that we’re both hoping for a return to more color. In full disclosure, I saw the Valspar announcement before making my picks, but I kept Sherry in the dark so she could make her selections 100% blind.
We will update this graphic if any of our guesses are close.
More Paint Posts
If we want to see more of our favorite colors or nerd out on paint colors with us, be sure to check out these other posts below:
.tasty-pins-banner-container{display:block;margin-bottom:20px;position:relative;width:-moz-fit-content;width:fit-content}.tasty-pins-banner-container a{cursor:pointer;display:flex;font-size:14px;font-weight:700;letter-spacing:1px;line-height:1.8em;text-transform:uppercase}.tasty-pins-banner-container a:hover{opacity:1}.tasty-pins-banner-container .tasty-pins-banner{align-items:center;bottom:0;cursor:pointer;display:flex;justify-content:center;left:0;padding-bottom:1em;padding-top:1em;position:absolute;right:0}.tasty-pins-banner-container .tasty-pins-banner svg{margin-right:4px;width:32px}.tasty-pins-banner-container .tasty-pins-banner span{margin-top:4px}.tasty-pins-banner-container a.tasty-pins-banner{text-decoration:none}.tasty-pins-banner-container a.tasty-pins-banner:hover{opacity:.8}.tasty-pins-banner-container a.tasty-pins-banner-image-link{flex-direction:column}.tasty-pins-banner-container a img{margin-bottom:0}.entry-content .wp-block-image .tasty-pins-banner-container img{margin-bottom:0;padding-bottom:0}#et-boc .et-l div .et_pb_image_wrap .tasty-pins-banner-container .tasty-pins-banner{padding-bottom:1em!important;padding-top:1em;text-decoration:none}#et-boc .et-l div .et_pb_image_wrap .tasty-pins-banner-container a.tasty-pins-banner{cursor:pointer;display:flex;font-size:14px;font-weight:700;line-height:1.8em;text-transform:uppercase}#et-boc .et-l div .et_pb_image_wrap .tasty-pins-banner-container a.tasty-pins-banner span{letter-spacing:2px;margin-top:4px}.et-db #et-boc .et-l .et_pb_module .tasty-pins-banner-container a:not(.wc-forward){padding-bottom:0}
School starts in two days at my house and we’ve been running around getting ready for my son to start the third grade. Although it is not much, my son is becoming the age where homework and projects need to get done at home. My dining room table has been the landing zone for everything. After homework was finished, it continued to remain all over my dining room table, making it a mess. This year, I decided to make a fun and organized place for homework and craft projects so I could take my dining room table back!
Materials
The Desk
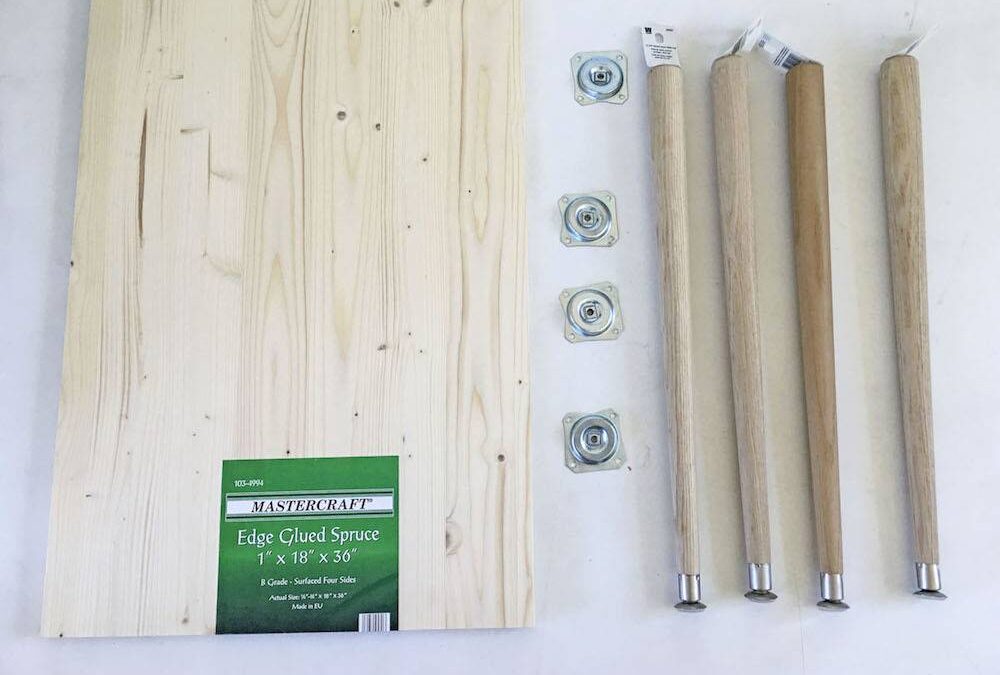
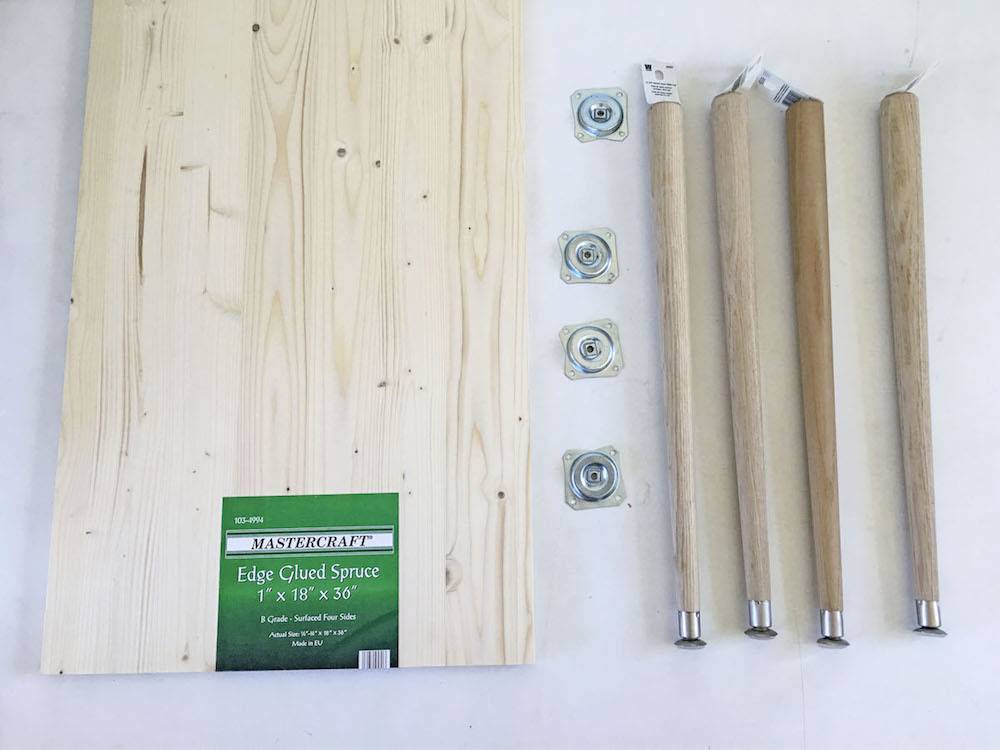
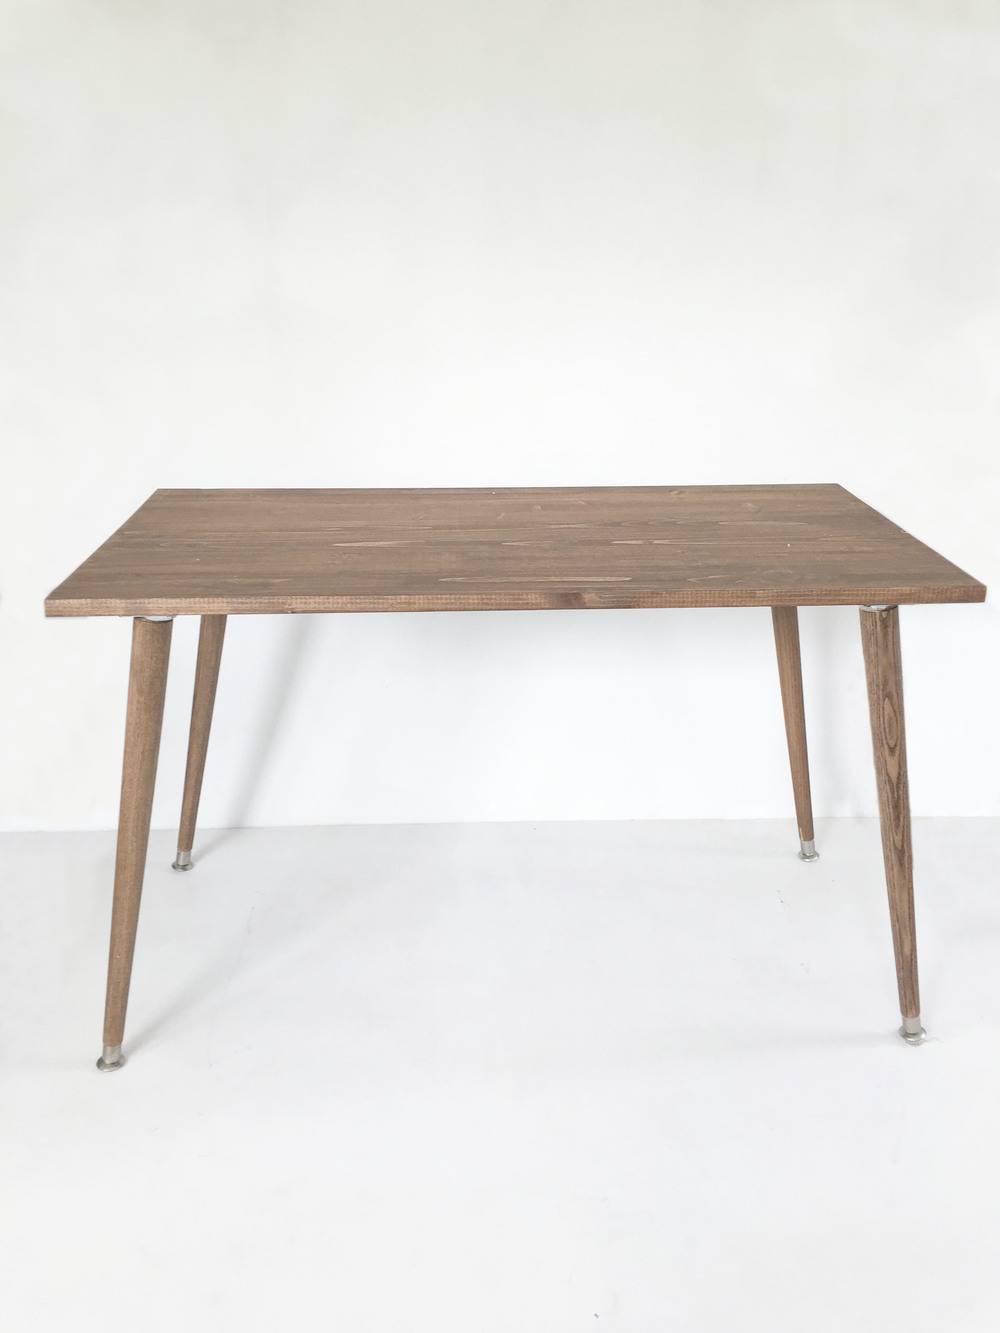
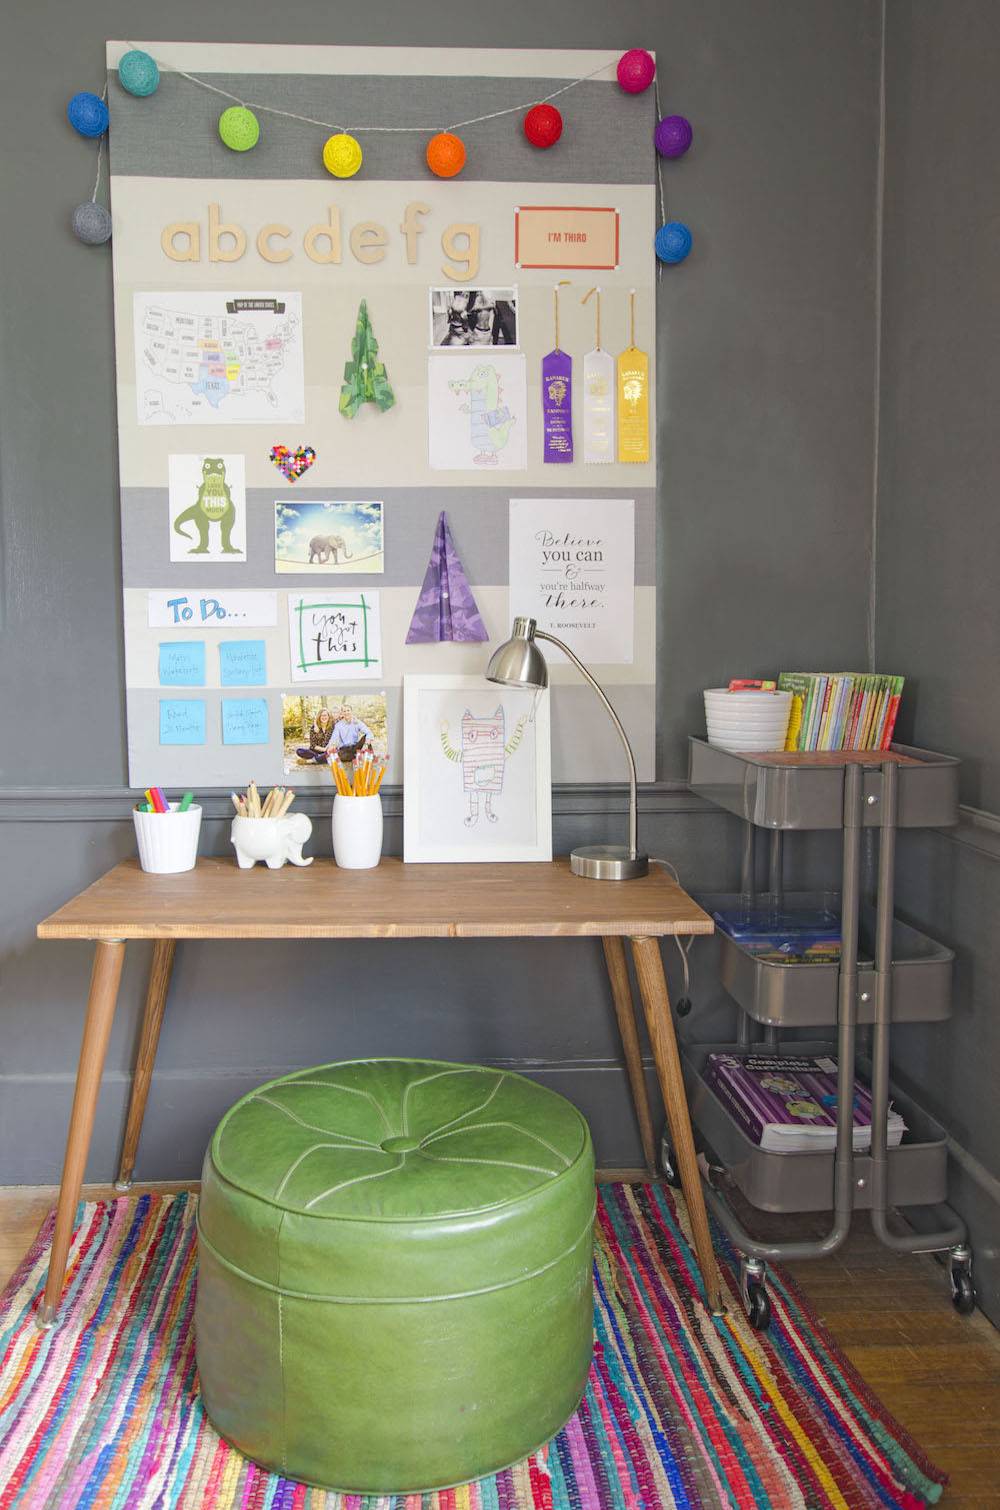
The most important piece of this project was the desk. I wanted a small child-sized desk the height of his desk at school so his feet could touch the ground while he worked. Here’s what I used:
A pre-treated board ready for table tops. (in lumber section at your local hardware store, usually by the trim) I paid about $5 more but it was worth not having to sand and plane it down to make it smooth for writing.
22-inch table legs. I buy minehere for less than $4 a leg.
4 table leg connectors
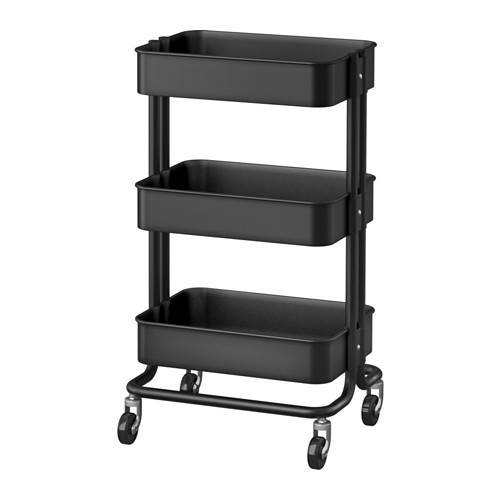
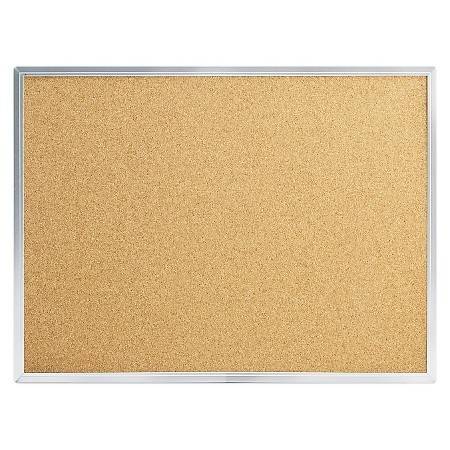
The rest of the materials I gathered were things I already had around the house. But, I did purchase a rolling cart from IKEA and a cork board to complete the station.
Step
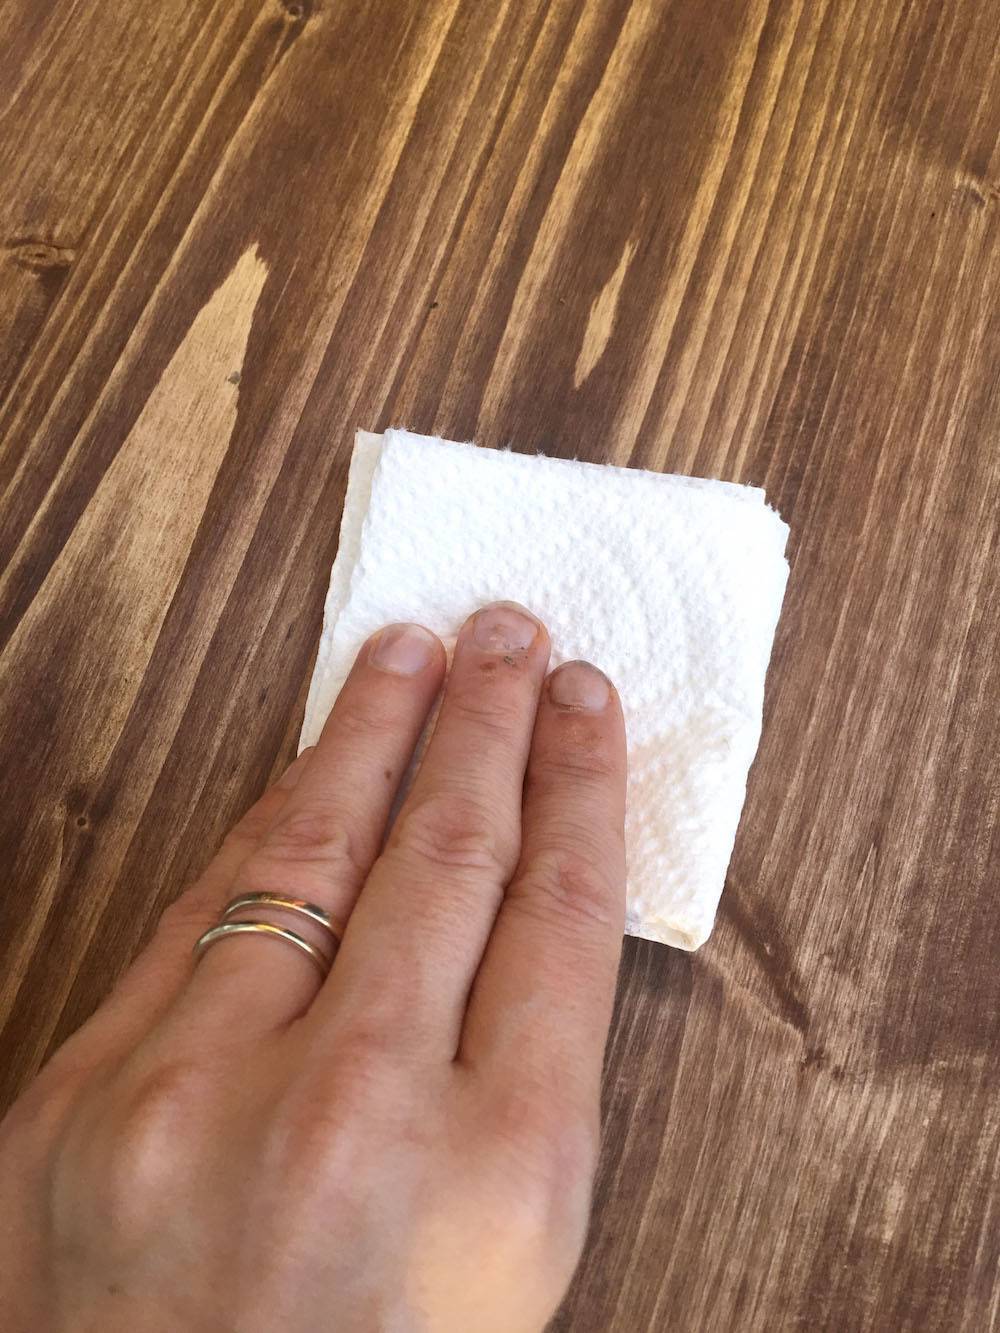
Assemble the desk and paint or stain.
Step
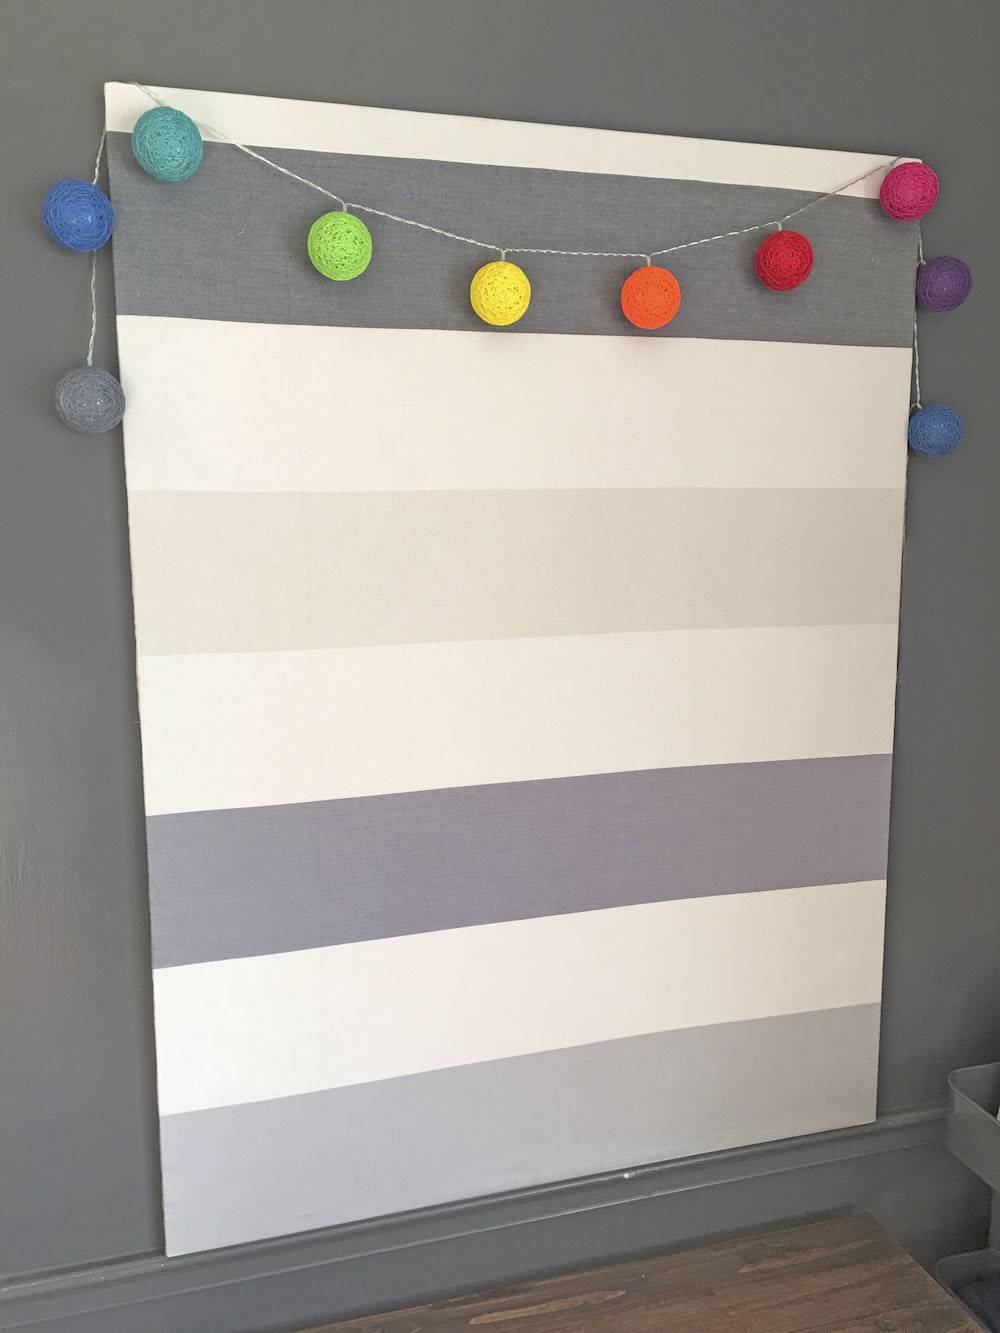
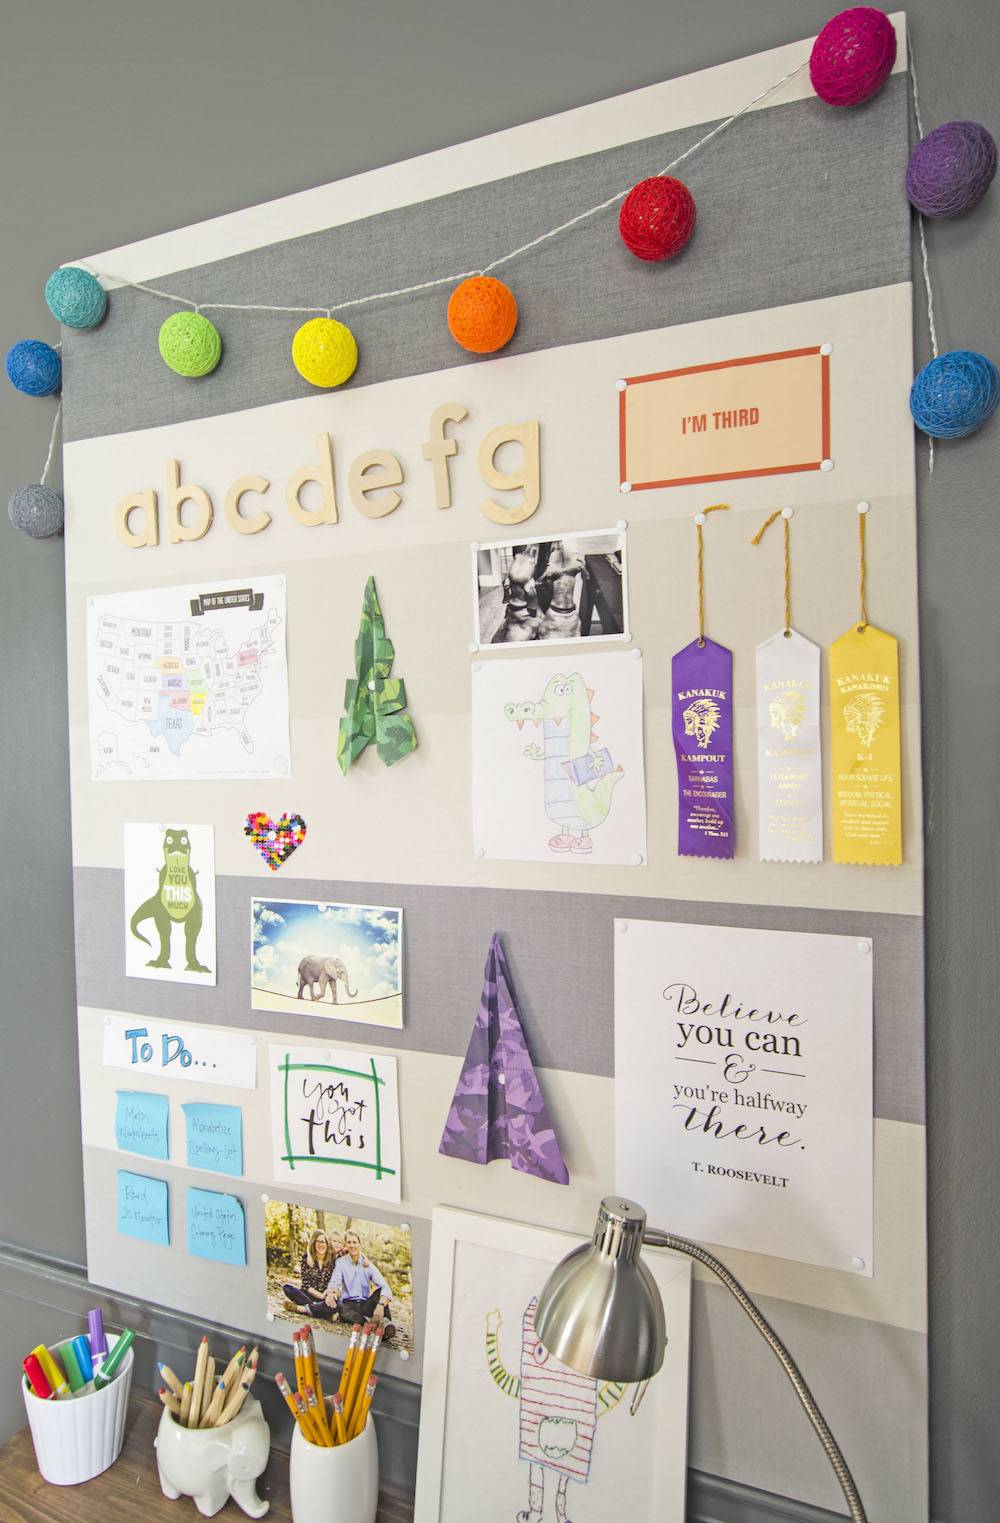
Recover the bulletin board with fabric.
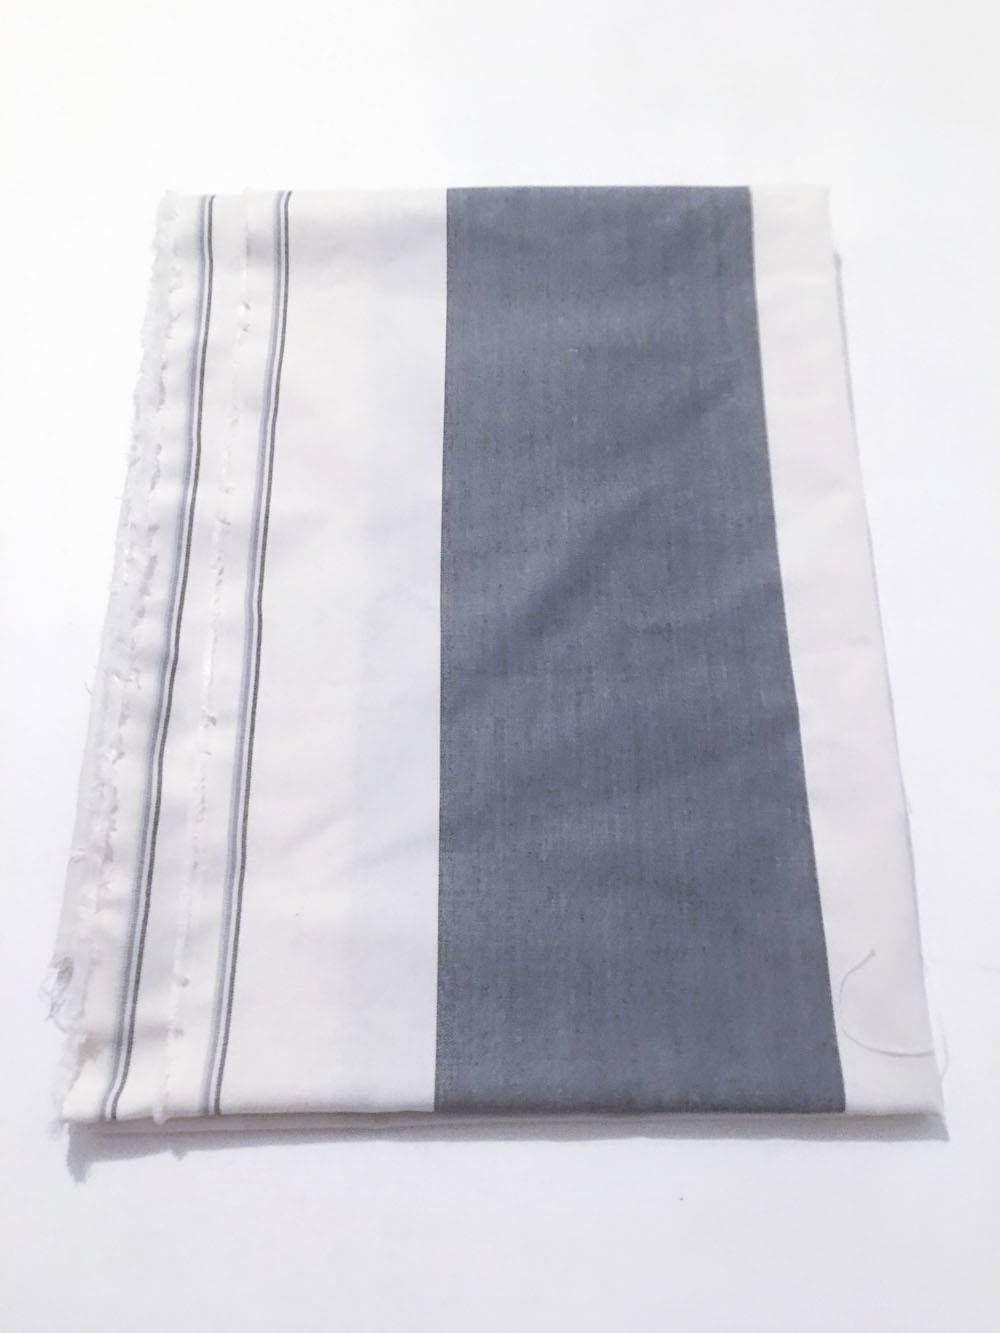
I decided to cover the badly painted bulletin board with a large fabric scrap. In these moments, I’m so glad I’m a little bit of a fabric hoarder! My bulletin board was so big I needed two yards of fabric to cover it.
To recover the bulletin board I needed:
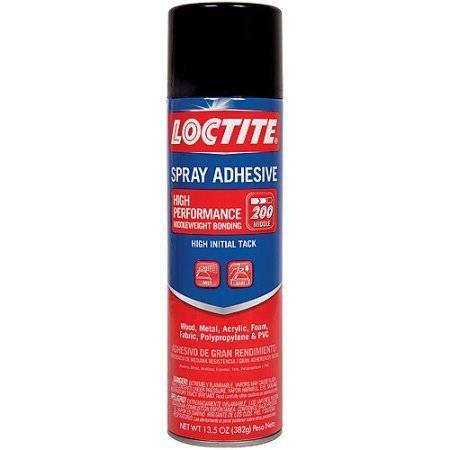
Spray adhesive
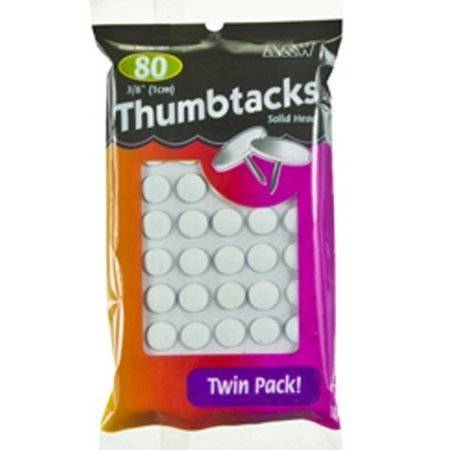
Thumbtacks
duck tape (not pictured)
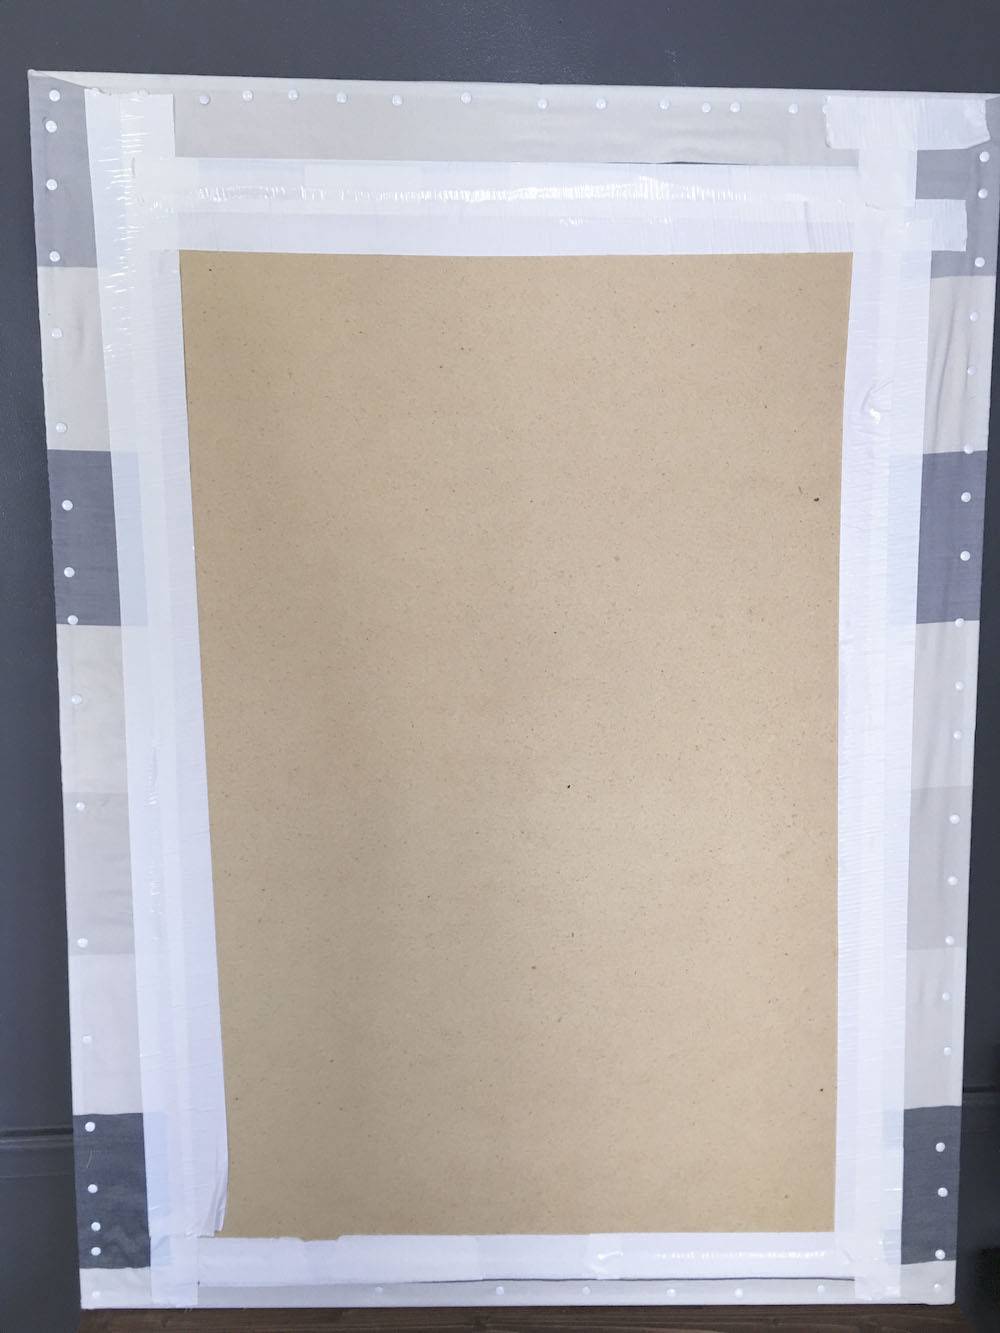
I ironed the fabric and then simply used spray adhesive on the front and folded the excess around the back.
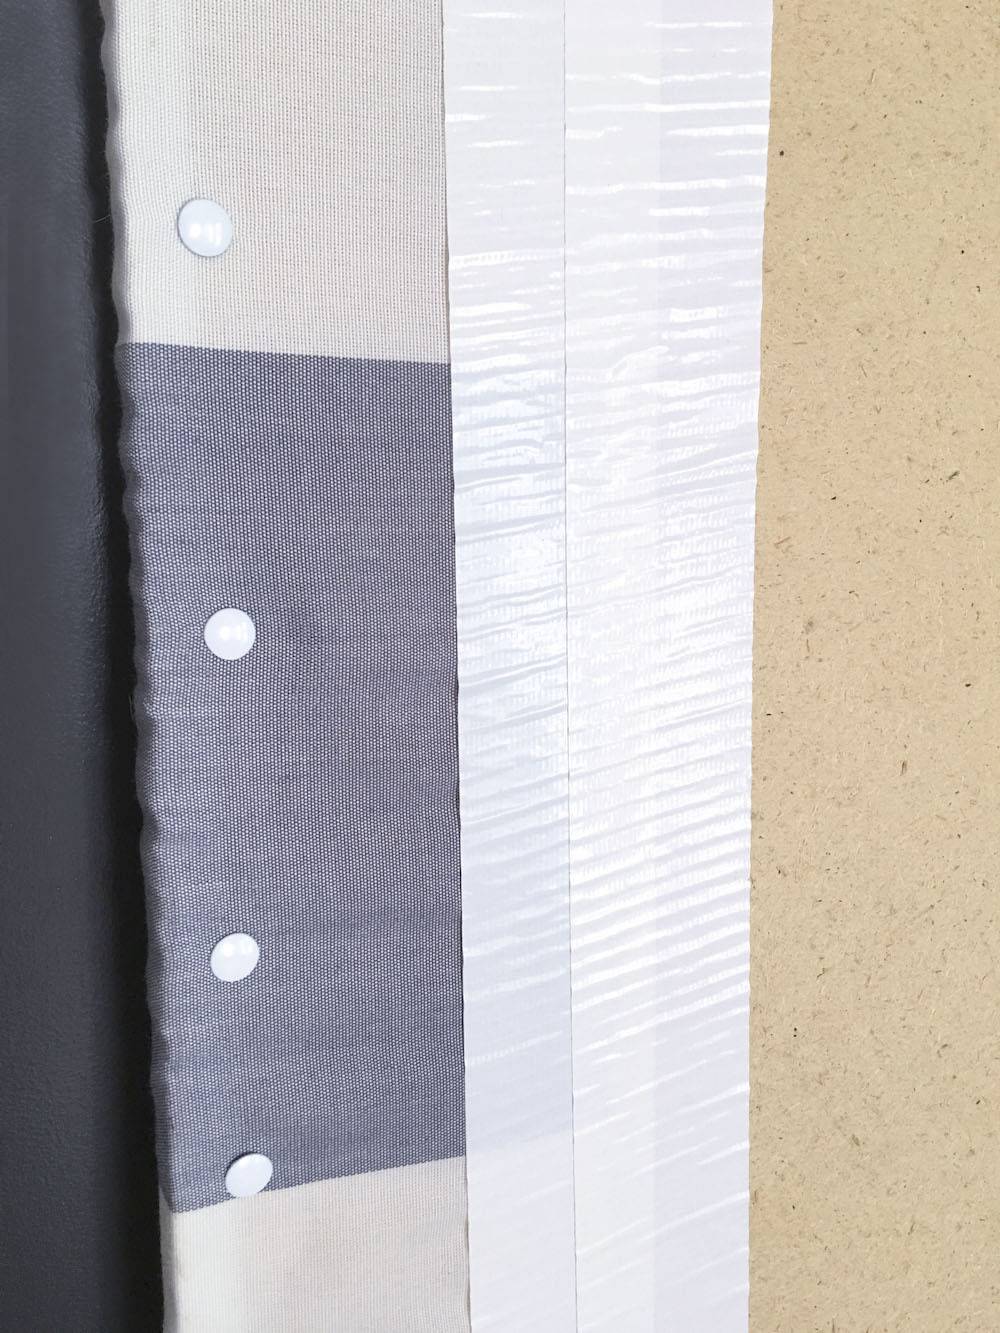
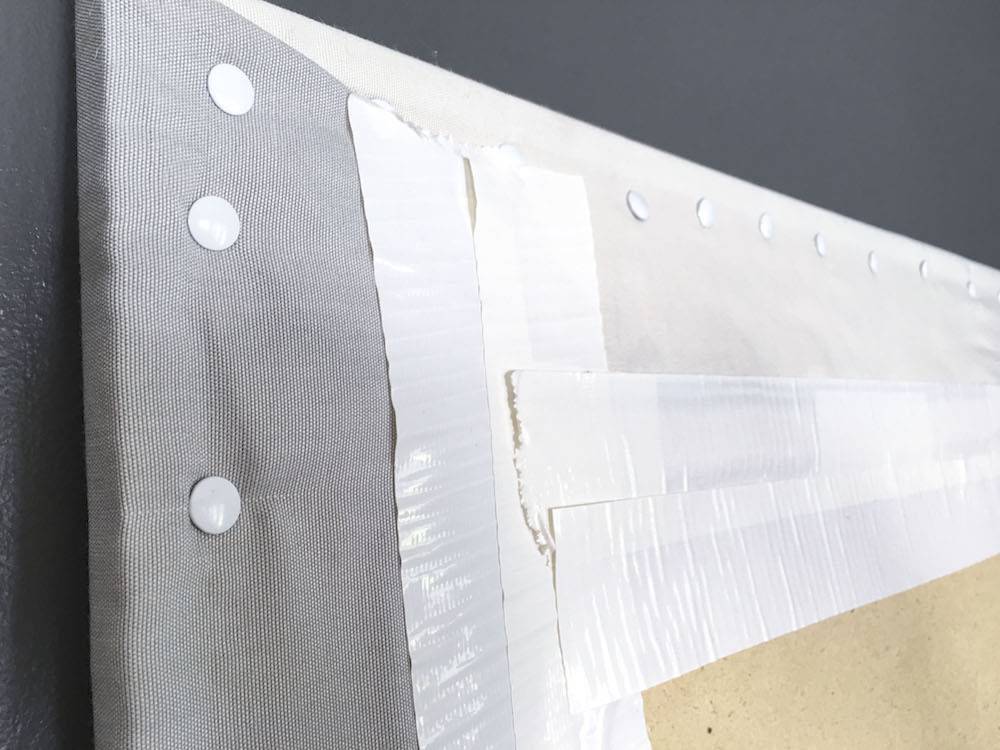
I suggest using a middle weight to heavy duty spray adhesive for this project. I lined up the top and tacked it down before I used the spray adhesive. After spraying and smoothing the front of the bulletin board, I wrapped the fabric around the sides and tacked it. The duck tape was simply to keep the edges nice and neat. You could also use a staple gun here.
Above is a look at how I folded the corners.
Step
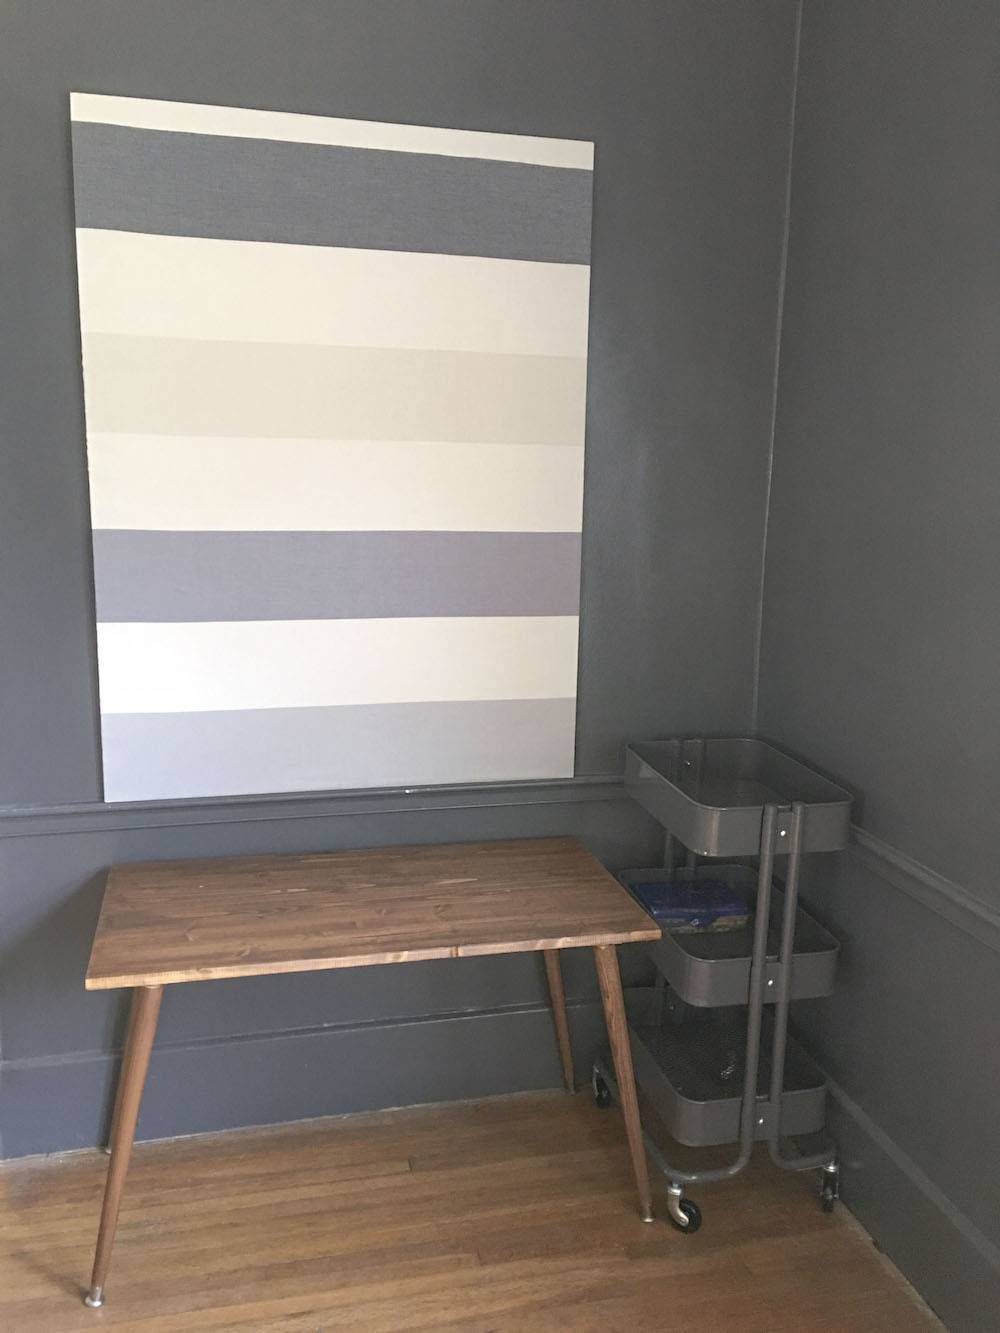
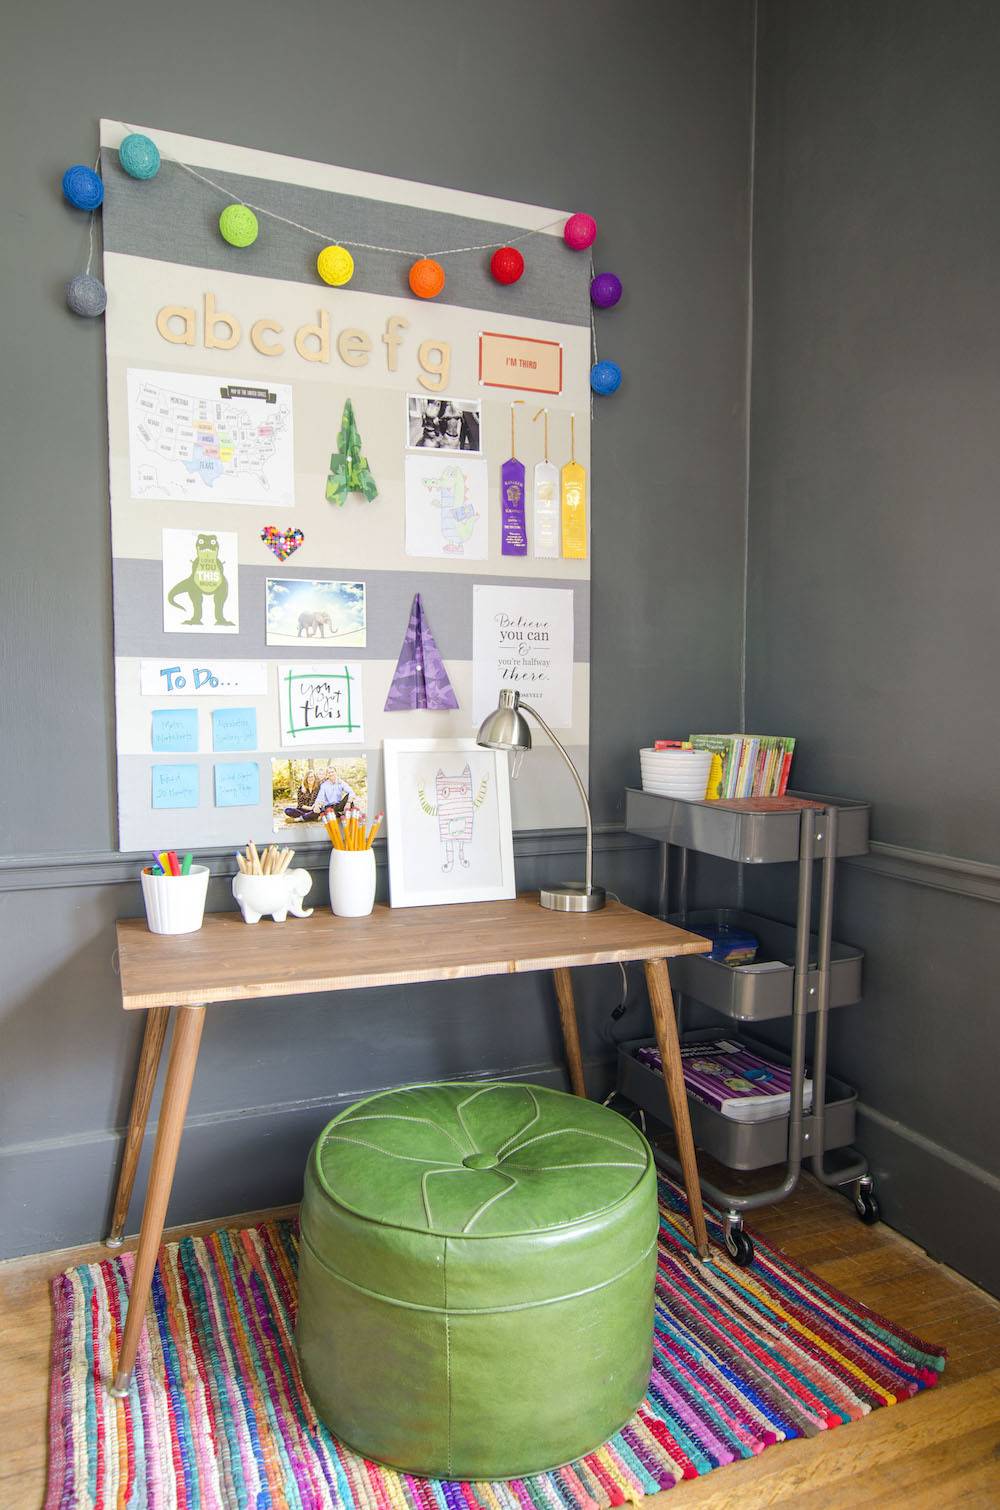
Hang your bulletin board and set up your area. I like how the varying color of stripes blend with my grey wall. This is pretty bland though… it’s time to brighten it up!
Step
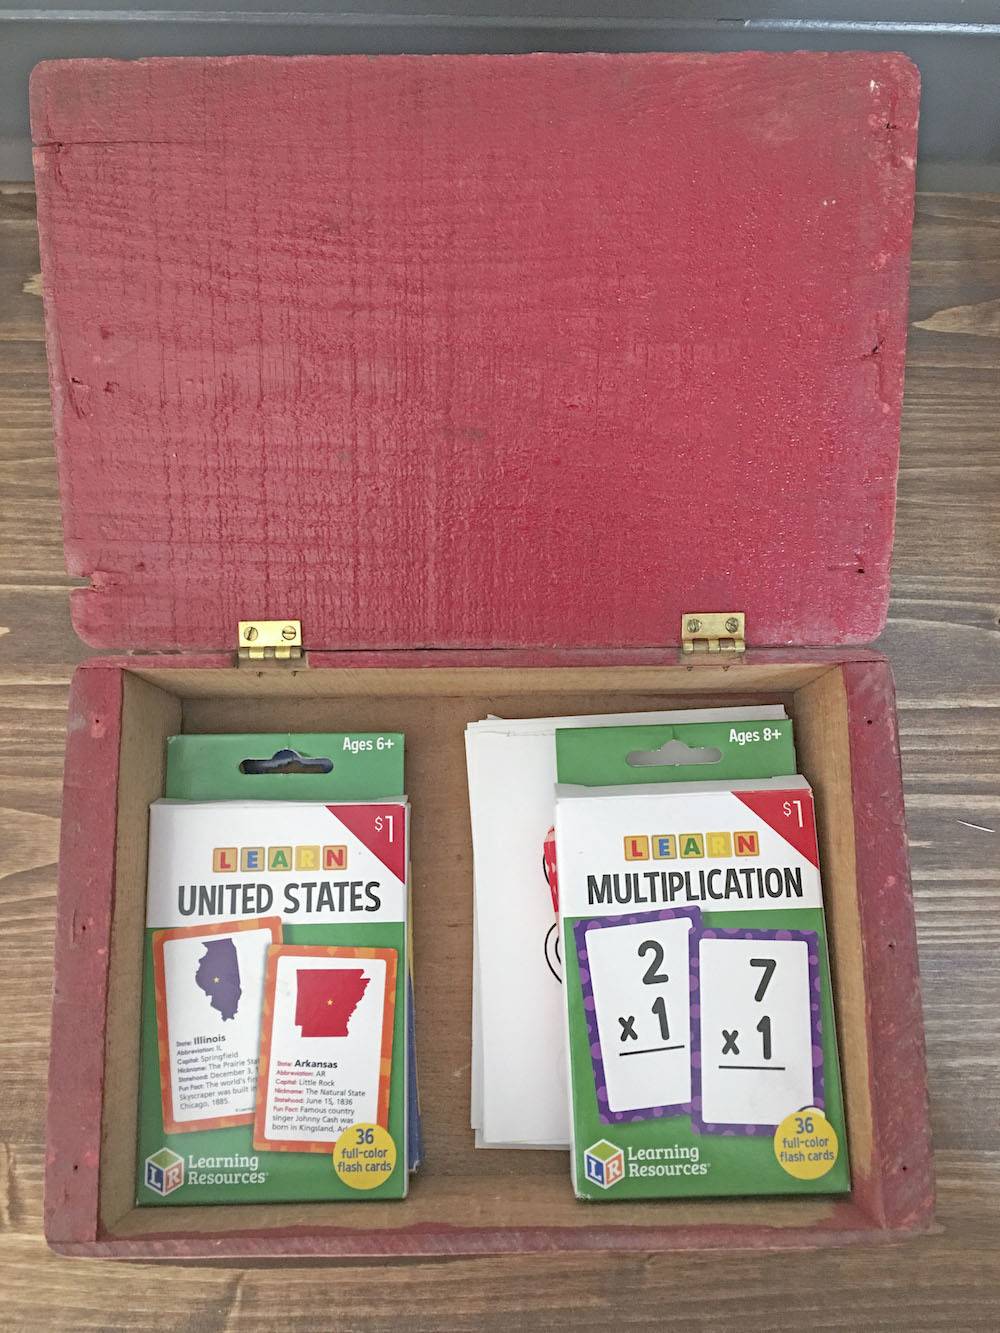
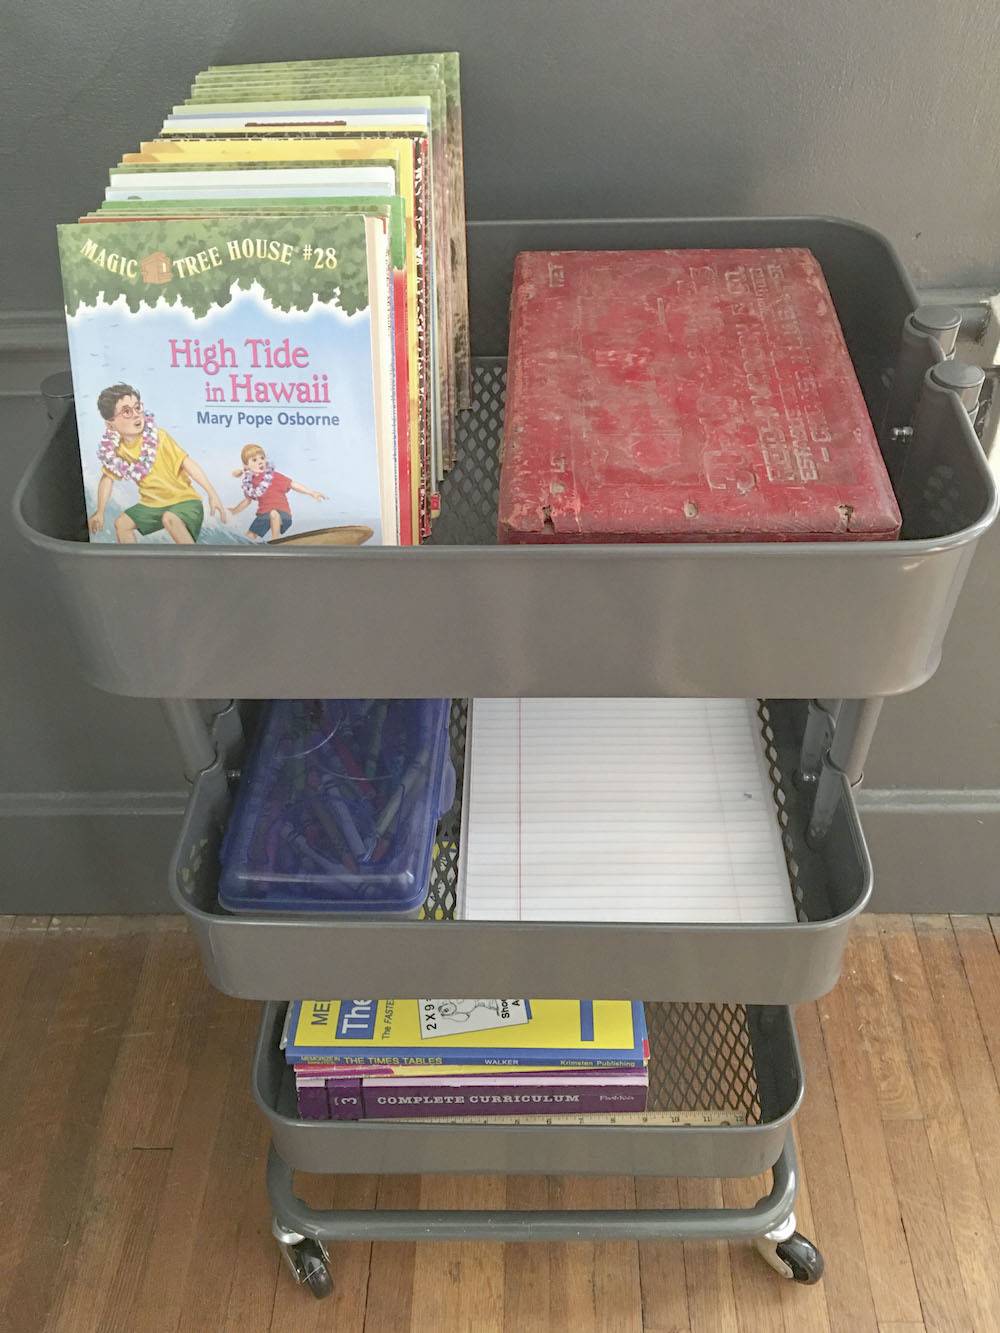
Start organizing. I grabbed all the things my son would need for his homework or studying and put it together. I grabbed boxes to store the items. I just simply thought through all the things he normally asks me for and put them right by his desk. He will probably still ask but at least they’re there!
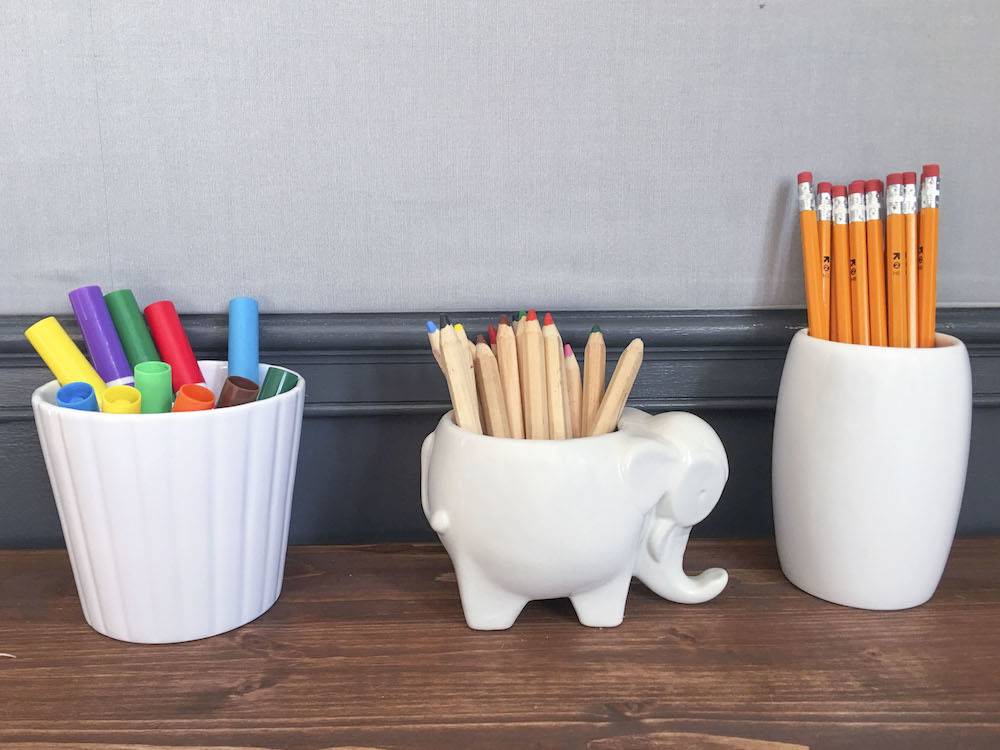
I stored his pencils, pens, and markers in little white containers.
Step
Make it fun. I found these battery operated lights at the Target dollar store section.
I love this Better Homes and Gardens rug from Walmart. The ottoman is an estate sale find. I wanted the homework station to feel different than school where my son has to sit in a chair. He likes to sit on his knees when he works. He can’t at school, but I don’t care at home.
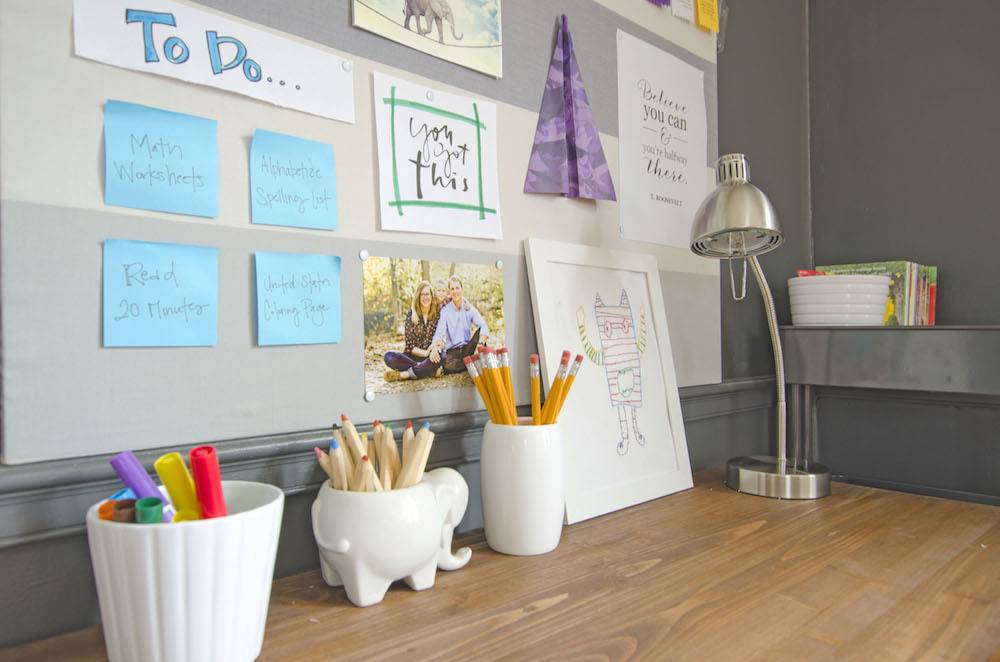
I always put my son’s “to do” list on sticky notes. He takes them off when he’s done and it helps him see all he has to do… or how much he has done. The little monster is my favorite. My son drew it on some tracing paper and I traced it onto some fabric. He learned to sew by stitching the lines.
My house is also a full blown paper aviation factory. My son loves to make paper airplanes so he made a few for his bulletin board. I call it motivation for what you get to do when you’re done with homework.
Now we are ready for school. Well…that depends on who you ask in my family.
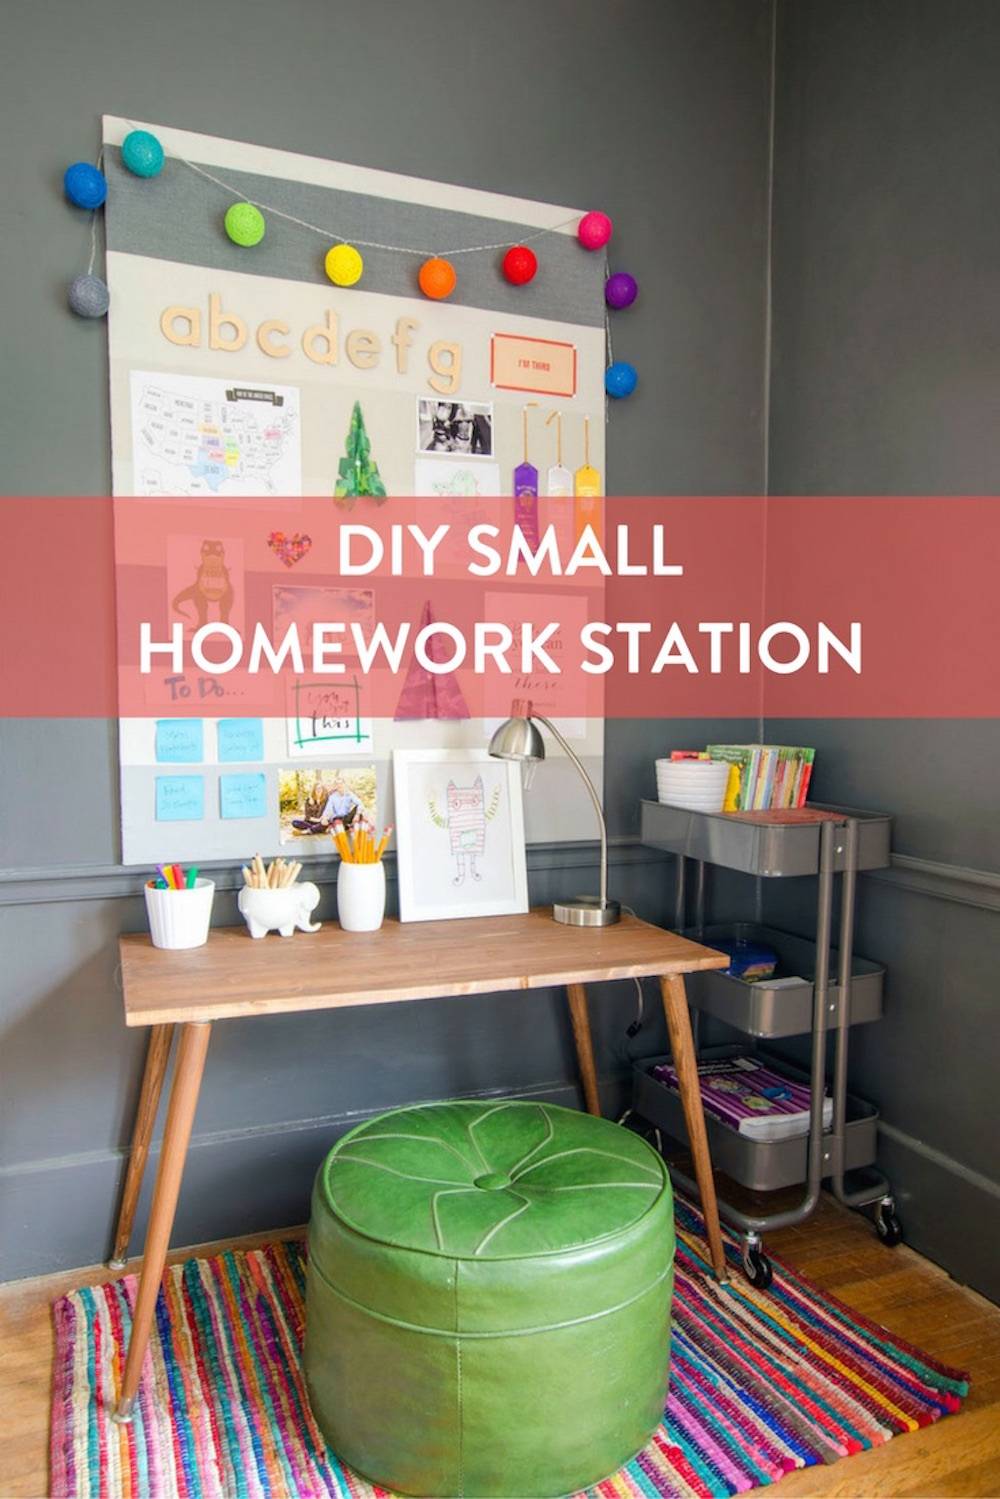
Pin It: DIY Small Homework Station
Need more organization for school. Check out these cool ways to organize your school stuff.
We independently select these products—if you buy from one of our links, we may earn a commission. All prices were accurate at the time of publishing.
When Amanda Oleri and Jason Staebler purchased their 1989 Nashville home, they set out to remodel the entire space, including the kitchen. But unlike most renovations, the couple tackled every one of the projects without hiring any professional help.
“Since we’re doing this all ourselves, we usually just start a project and design as we go,” Oleri explains. “It’s amazing because we’re always discovering new ideas or finding fresh inspiration that influences our work.”
The Kitchen Had Undesirable Elements That Didn’t Deter the Couple from Jumping Headfirst into the Renovation
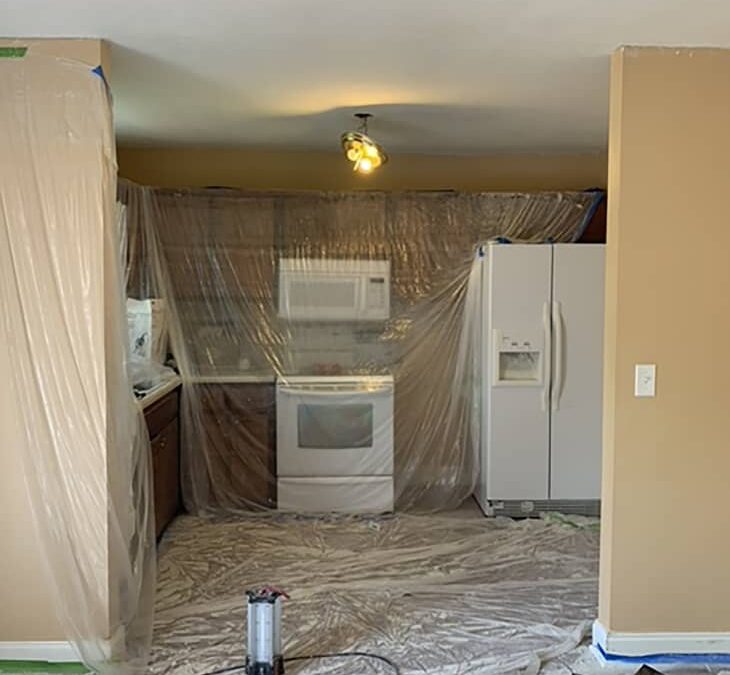
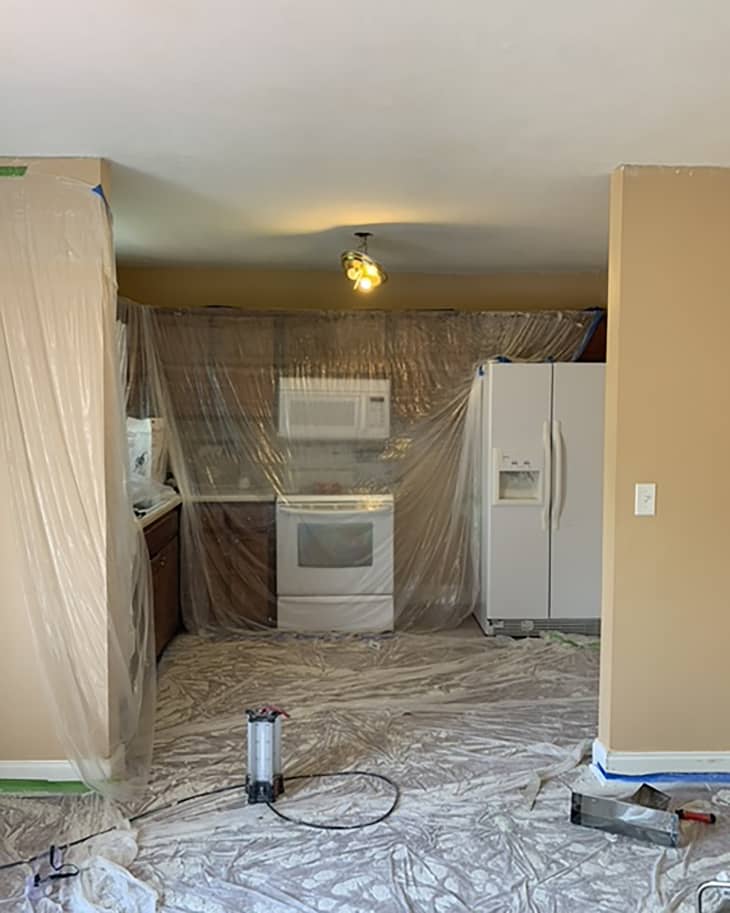
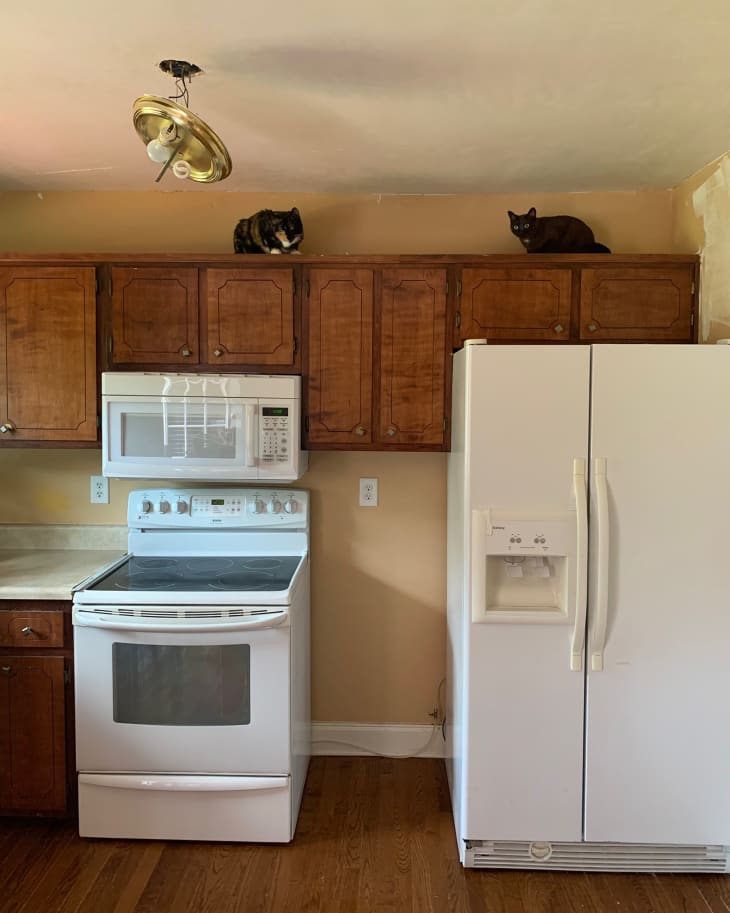
The original kitchen was “quite small” and had some undesirable elements. “The cabinets were dark wood, and mice had built a little castle inside the bottom ones,” Amanda admits. But these factors wouldn’t get in the way of creating their dream kitchen. The goal was to brighten and modernize the kitchen, and they got straight to it.
He Built Several Things for the Kitchen That Showcase the Couple’s Style and Collected Kitchenware
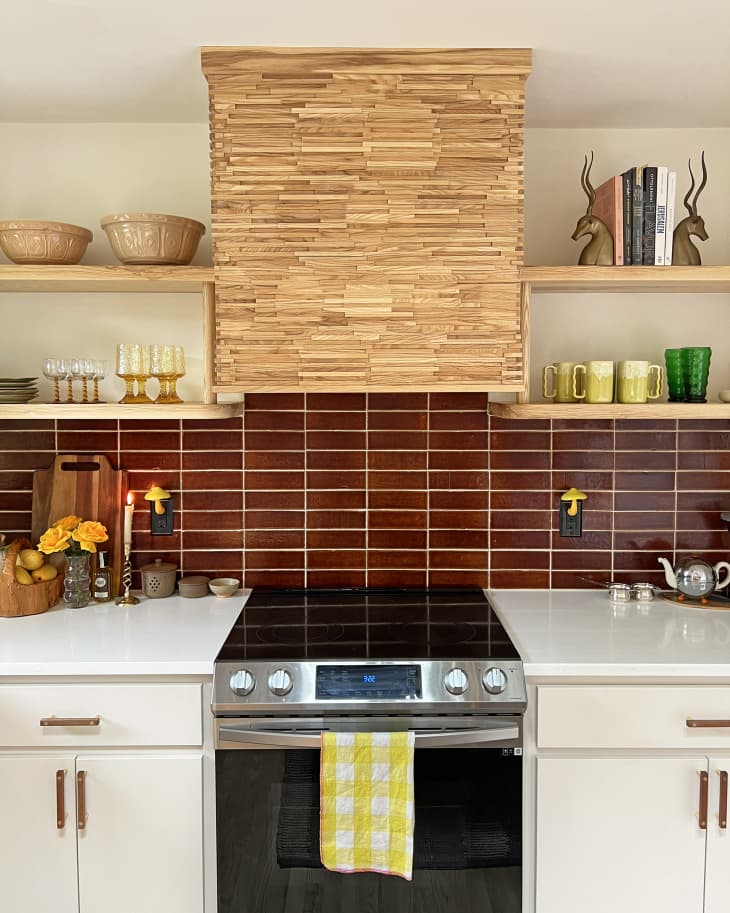
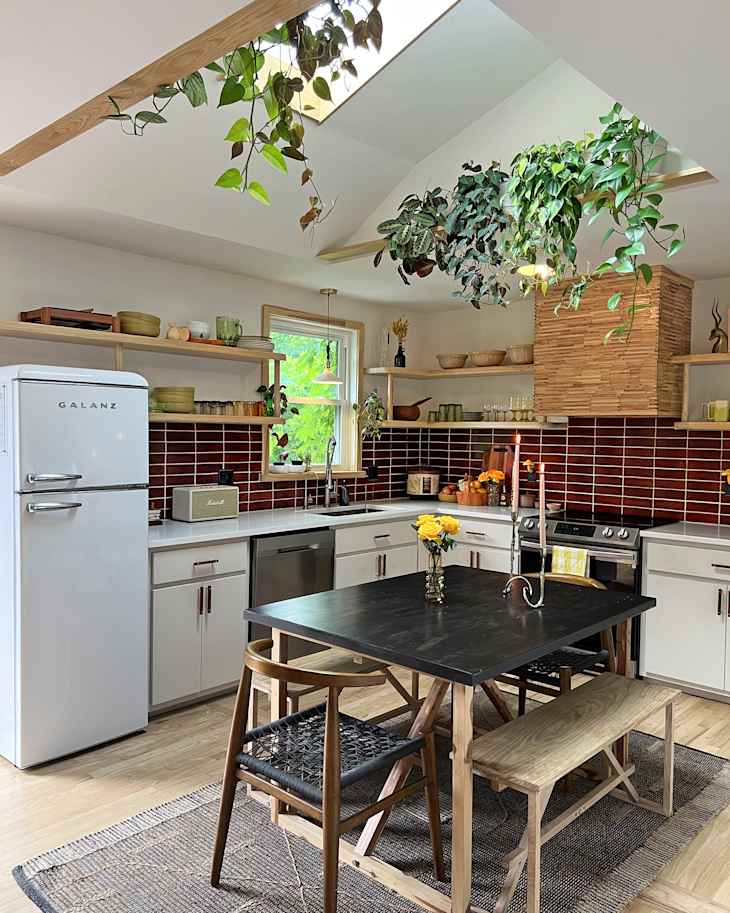
“The sky was the limit with our kitchen renovation. The first thing we chose was the reddish-brown handmade tile — we absolutely fell in love with it,” Amanda says. “We knew we wanted open shelving to showcase our collection of vintage glassware and kitchenware that we’ve gathered over the years.”
Thanks to the custom, rounded upper shelves crafted from ash wood that Jason DIYed, they could display their collection of kitchen items. They also added some other shelves to display their trailing plants close to the sunlight. (He also built their kitchen table the day before Thanksgiving 2022 using salvaged materials.)
The Custom Range Hood and Spice Cabinet Add Character, but Cost Them Nothing to Make
The stunning shelves weren’t the only clever addition to the kitchen. The focal point of the room is arguably the custom oven range hood. Several pieces of wood were cut into different sizes and “meticulously milled by hand” to create a striking, wavy design. But another standout element is the built-in spice cabinet, inspired by a project in their bathroom.
“One day, we were brainstorming and came up with the idea for this charming little spice rack. It was such a sweet and simple detail to execute,” Amanda shares. “We used scrap wood from other projects, so it cost us next to nothing to add. It brings so much character to the kitchen, and everyone always gravitates towards it when they first enter the space.”
Since They Did All of the Labor Themselves, the Entire Renovation Was Only $9,000
Amanda and Jason work full-time, so they only worked on the kitchen renovation on weekends, taking around six months from start to finish. The entire DIY remodel cost the couple around $9,000.
“We love everything about the kitchen and spend so much time in it! Every detail was designed and built by us, making it a true reflection of our passion and creativity,” Amanda says. “It’s the hub of the house and where everyone gravitates when we have guests over. From cooking together to sharing meals and conversations, the kitchen is the heart of our home.”
This wasn’t the only room in their home that received a facelift — if you’re interested in seeing more, visit the full home tour on Apartment Therapy.
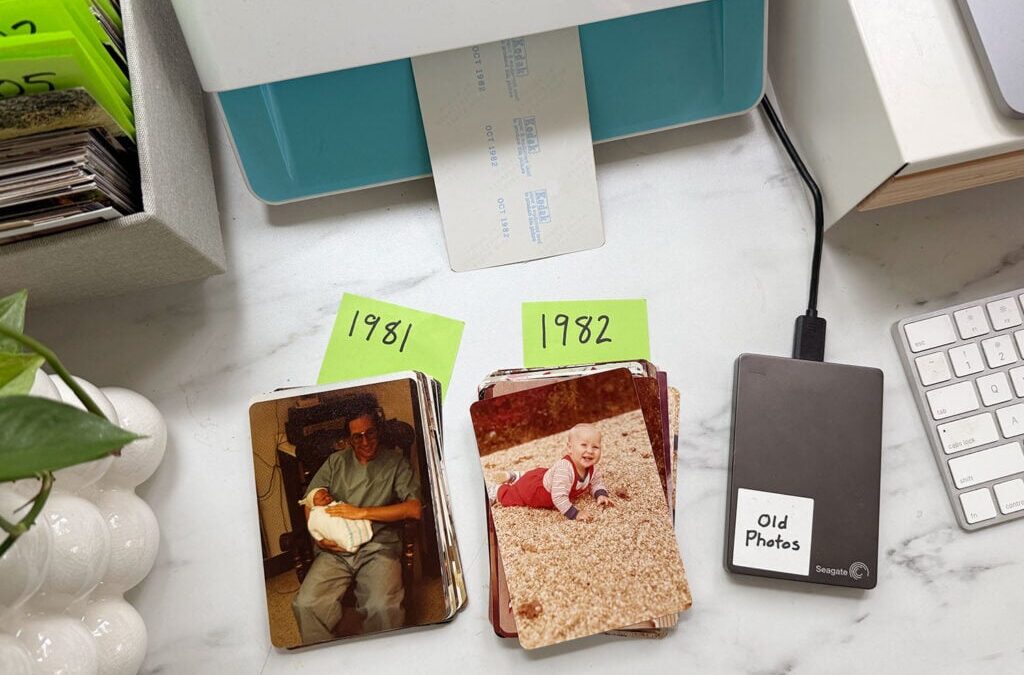
I’m honestly a little surprised by all the interest in my photo digitization project, but we continue to field questions about how I’ve organized our old family photos. So here are answers to the most often-asked burning questions about exactly how we sorted, organized, and backed up our photos throughout the digitizing process.
I won’t claim to have ALL of the answers (a photo-organizing expert like Miss Freddy might!), because there’s been some trial and error along the way for me. But below are the steps I wish I’d followed from the very beginning. There’s also a “rapid fire FAQ” at the end.
Why Digitize Your Old Photos
To recap, our goals for this project were threefold:
Safeguard memories: Create digital backups of photos to protect against loss or damage
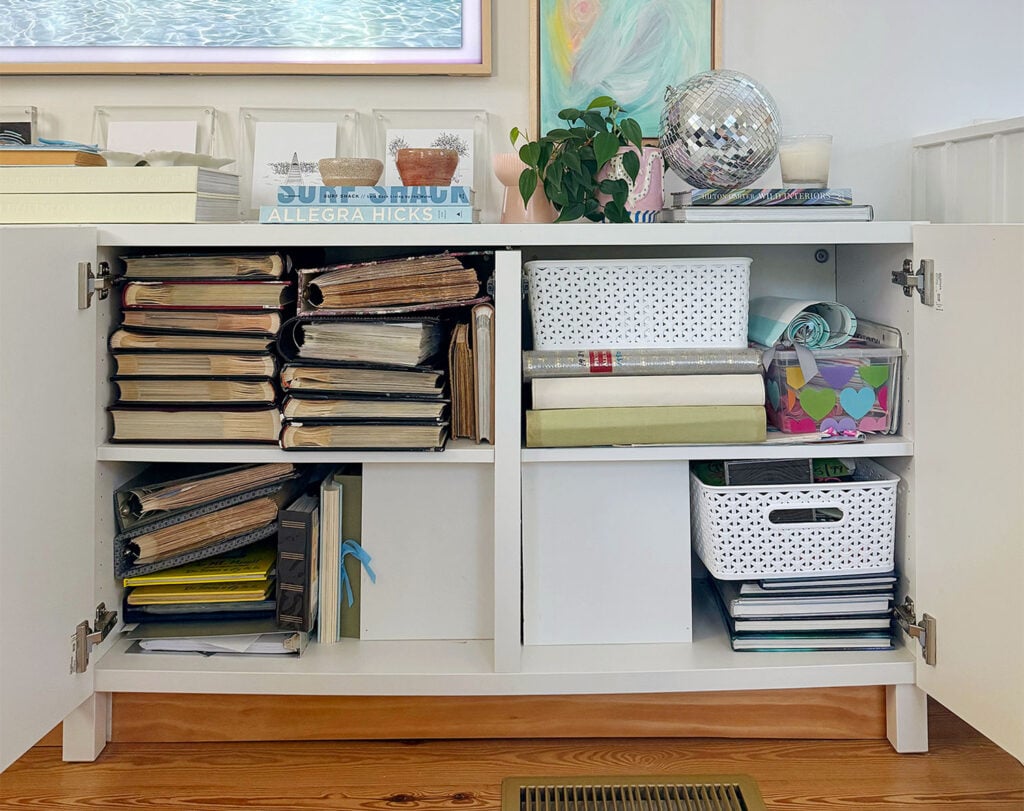
Free up space: Convert bulky old photo albums into slimmer photobooks (twice as many photos can be stored in literally 1/4 of the space)
Pare down photos: Get rid of pics that aren’t worth saving (doubles, blurry, etc)
We’ve definitely achieved all three of these goals, but this post primarily focuses on #1: the process of sorting, organizing, and backing things up. And hopefully Goals #2 and #3 are pretty self-explanatory!
Photo Digitization: A Step-By-Step Process
You might think: what could the steps possibly be? Just scan and save, right? That’s what I thought! But merging and organizing multiple albums, loose prints, and digital photos benefits from a more systematic approach. Here’s an overview:
Assess Your Stash
Define Your Scope
Buy Supplies
Create Main Backup Folders
Transfer Digital Photos
Sort Physical Photos
Scan & Save In Batches
Back Up To Another Location
Now let’s break these down so this goes from being ONE GIANT PROJECT to a few smaller and doable steps.
1. Assess Your Stash
To begin, take stock of where and in what format(s) your old photos currently exist. It may help to gather them all in one place or simply make a list on paper. Potential formats include:
Photo albums
Boxes or piles of loose photos
Photos on display (framed, pin boards, on the fridge)
Film negatives or slides
Digital photos saved on devices (your computer, phones, the cloud)
Digital photos saved on SD cards, CDs, flash drives, etc
Digital photos uploaded to sites like Facebook, Snapfish, etc
I started our project simply thinking about our physical albums, but realized we had many digital photos and loose photos that overlapped the same years. Locating them all and listing them before you start makes things a lot easier. And your new photobooks will be even more comprehensive than your old albums!
2. Define Your Scope
Step #1 might be overwhelming, so don’t be shy about limiting the scope of your project. Maybe start with just one album, one year, or one event (wedding, vacation, etc) for now. Starting small also lets you figure out your preferred workflow and organizational system on a smaller scale. You can also break down the project into bite-sized tasks, such as:
Getting all the photos into one location (Step #1 above) – be sure to check drawers and closets for old boxes, CDs, etc
Discarding unwanted photos – we flipped through our old albums and tossed extraneous or blurry photos (27 bad photos of fireworks do not need to be scanned!).
Sending out negatives, slides, and unscannable formats for digitization – try a service like this
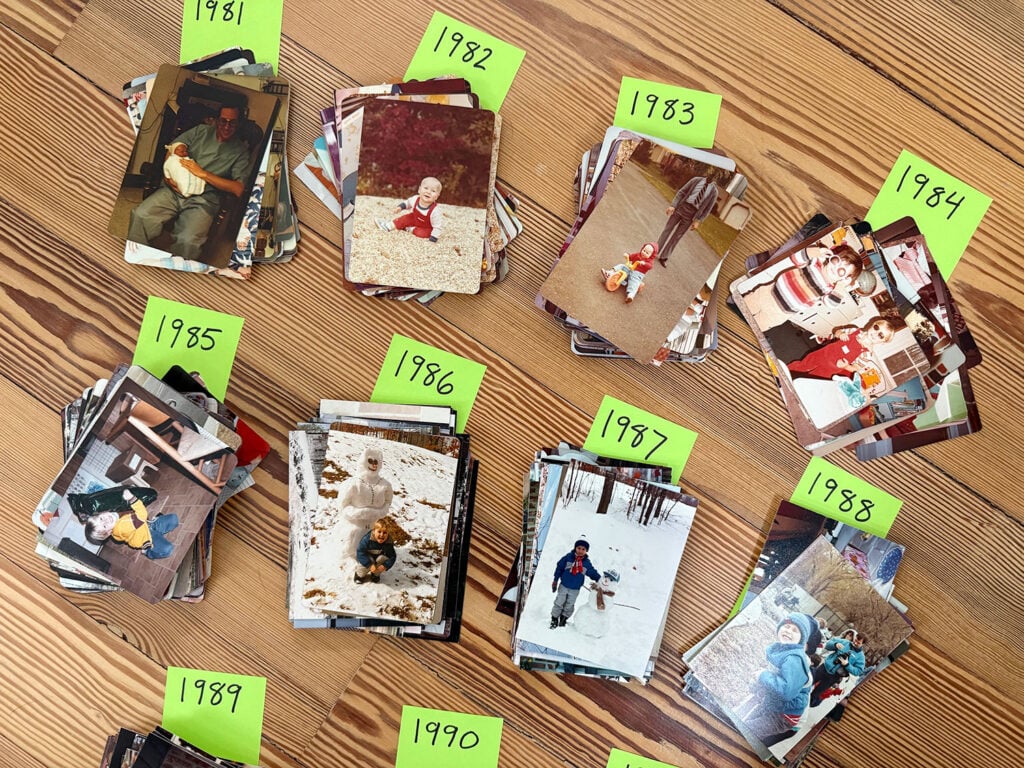
Sorting prints chronologically – there’s more about this in step #6 below
Scanning prints – and save the organizing for later
You can also limit your scope by excluding some photos entirely. For us, we limited our scope to photos taken before 2009, which is when we started printing annual photobooks.
3. Buy Supplies
Knowing the photos and formats you’re tackling will inform what supplies you may need. They might include some of the following:
If you have lots of film negatives or slides, you can purchase desktop scanners to digitize them at home. This Kodak scanner is under $200 and well-reviewed, but I have not personally used it. Services like LegacyBox also digitize these formats, which could be an easy option for a small batch of negatives (it gets expensive pretty quickly if you are doing large quantities).
CD or Memory Card Reader
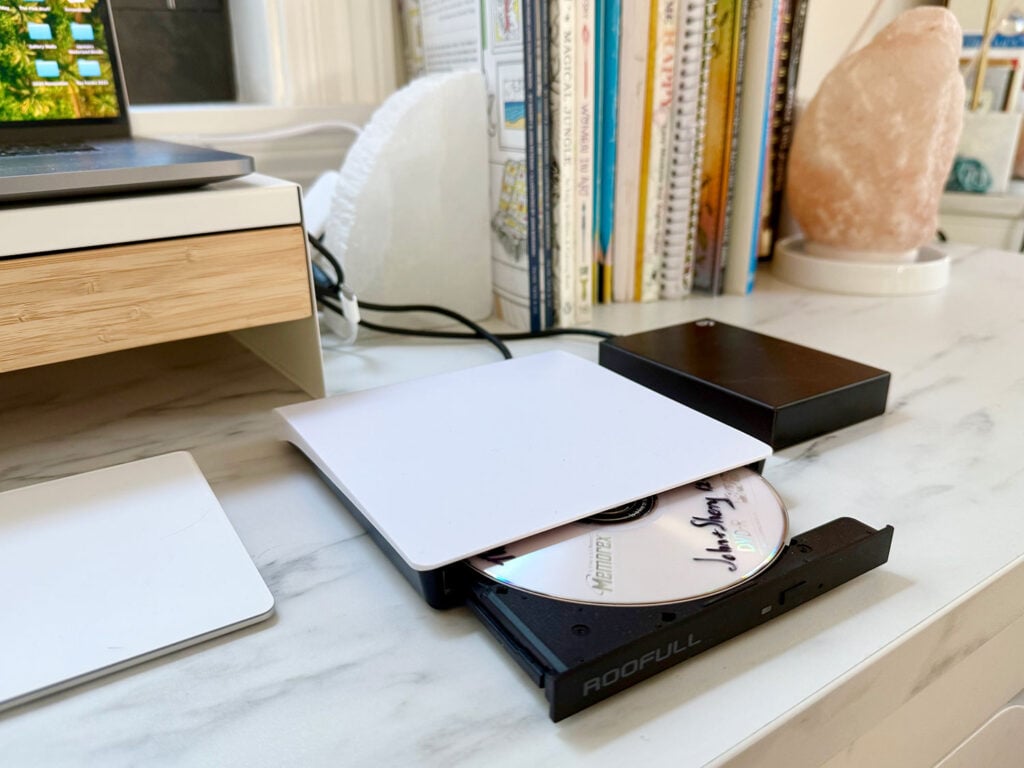
Retrieving photos from CDs, SD cards, flash drives, or other external storage may require purchasing a special reader or adapter. For example, none of our laptops can read CDs, so I purchased this external CD drive for $25. You can also get adapters for popular memory card sizes for less than $10.
External Storage
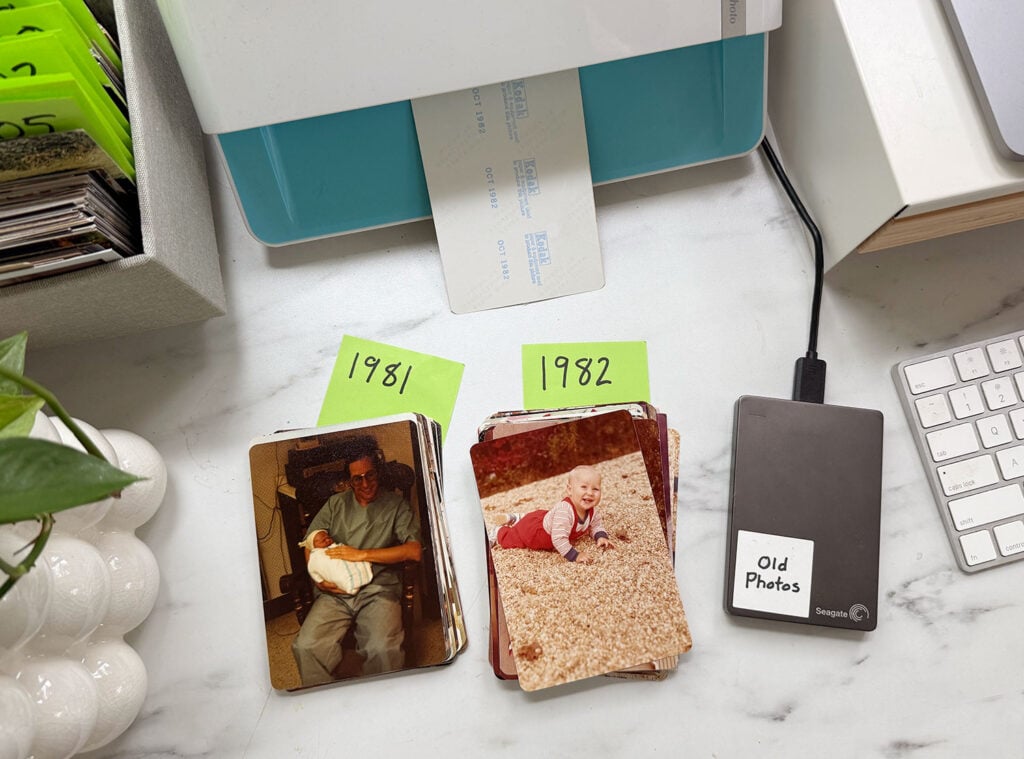
We suggest an external hard drive for backing up your files (in addition to cloud storage mentioned below). We already have a 2TB hard drive like this (seen above in black), but smaller & cheaper flash drives also work.
For reference, I currently have about 2,500 photos scanned. They only take up 3.5 GB of storage. By that math, a 128GB flash drive could hold over 90,000 photos!
Cloud Storage
You may also need to purchase or upgrade a cloud storage account, such as Google Drive, iCloud, or Dropbox. These are extremely helpful for peace of mind (in case your computer or hard drive becomes lost or damaged). Google offers 15GB for free and Apple gives you 5GB, which may be enough if you’re not using it for other storage (like Gmail). Plans for additional storage can run about $100-$200/year.
4. Create Your Main Backup Folders
One thing I wish I’d done differently was to establish main backup folders before scanning anything. Having one central spot for everything will make life easier as you lay out photobooks or create backups.
Setting up main backup folders is also a good time to decide how you want to organize your photos. Most people will sort by date, but you may want special folders for events (weddings, vacations), people (grandparents, newborns), or locations (first homes, time abroad).
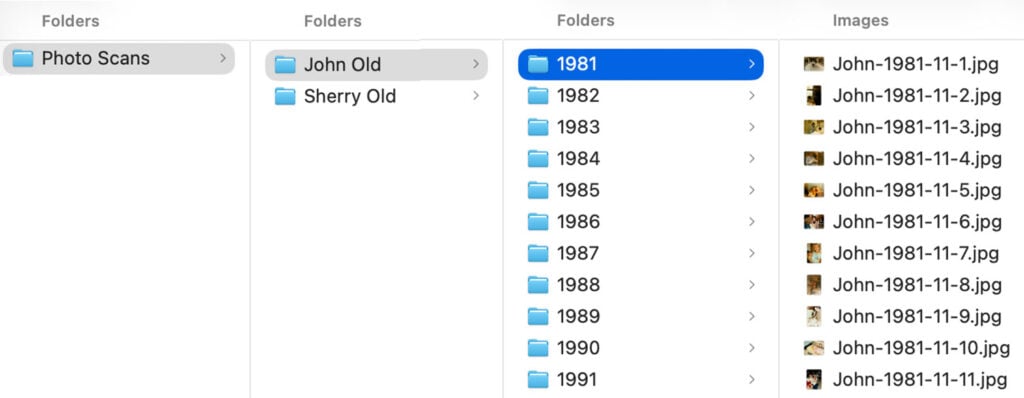
I eventually made a main backup folder on my computer, but you could also do this directly in a cloud account like iCloud or Google Drive. Here’s what mine looks like:
Mine is called “Photo Scans” because I wasn’t thinking about existing digital photos when I started. Because of that, my scans (i.e. ’80s and ’90s photos) ended up in different folders than my existing digital photos (i.e. early 2000s photos). By the time I realized my mistake, I’d already started making photobooks and couldn’t combine my folders without unlinking the file locations in my photobook software. Do as I say, not as I do!
A note about filenames
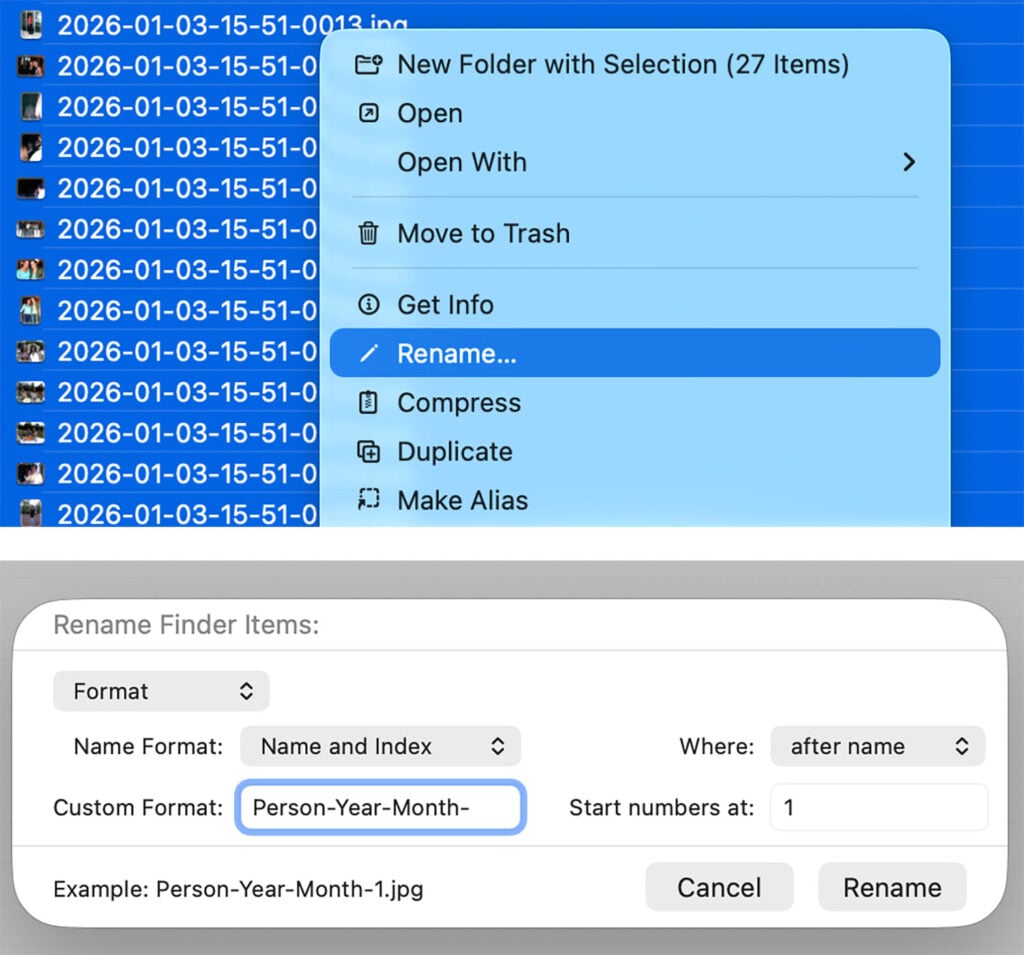
I also chose a consistent filename format for all photos in this project. This helped me quickly identify which files I’d processed and which I hadn’t. To do this, I used the “Rename” function on my MacBook to rename files in bulk. Just Ctrl + click on your Mac (right-click on a PC) to get the menu shown below. Fill in your preferred naming system (I used a Person-Year-Month– format, like John-1981-11) and hit enter.
We didn’t know the exact month for every photo, so we just used our best guess.
5. Transfer Digital Photos
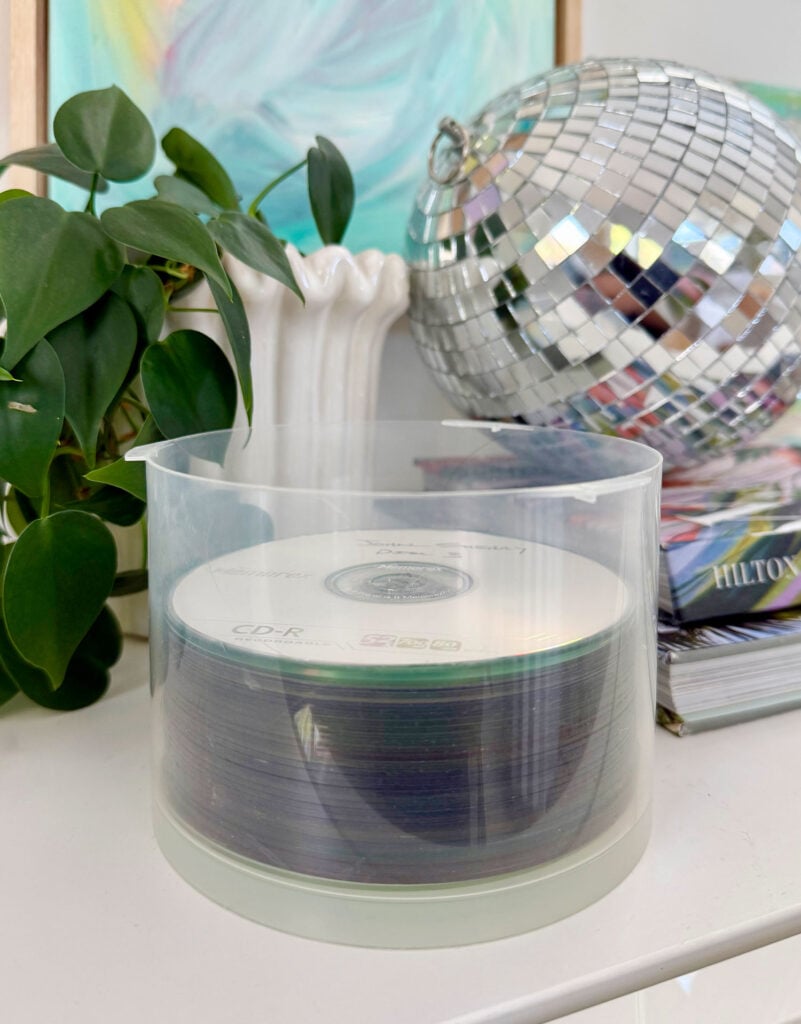
I know this project is primarily about scanning old photos, but hear me out: if any of those prints already exist digitally somewhere, transfer them to your main backup folders first! Think photos from those pre-smartphone early-2000s digital cameras that the kids now call “retro.” We found digital photo files on several CDs, on a backup drive, and even in an old Flickr account.
Those digital files will be better quality than your scans AND they should have the original metadata, which tells your computer the exact date the photo was taken. That makes sorting them into the correct folders faster and more precise.
Trust me, it stings to find these files after you just spent an hour scanning and sorting prints of the very same pictures… which happened to me. Lesson learned: look first, scan later.
5. Sort Physical Photos
Now let’s turn to your photo albums and loose photo prints. Before you fire up the scanner, here are some ways to prep your prints for faster and easier scanning:
Remove prints from albums
If you’re not keeping those old bulky albums, take the photos out and put them into a pile for speedier scanning. If you are planning to keep the album as is, just remove, scan, and immediately put photos back one at a time.
Copy captions
If the album has important dates, names, or locations written beside a photo, I suggest rewriting that info onto the back of the print. I’ll share how to use this later, but for now, this step allows you to discard the album without losing that info.
Pare down
Discard any unwanted or unneeded photos now (duplicates, poor quality, things you don’t care about, etc). You’ll have less to scan and fewer files to sort later. Win-win!
Put prints in order
Arrange your prints to match your main backup folders – such as chronologically. If you’re lucky, your albums are already sorted this way. If you’re like us, you also have a big pile of loose photos, many without dates on the back. *sigh*
It took me quite a while to sort our prints into a loose chronological order, but I still found it much easier to do before scanning. I made piles for each year on the floor (again, matching my main backup folders) and used whatever info I could to make my best guess about where each photo belonged in a timeline. Some had dates or captions on the back. Some I knew from memory (that trip was from 1998!). Some I tried to cross-reference haircuts or outfits to photos with known dates. It wasn’t perfect, but it was good enough for our purposes. Also, you kinda feel like a detective.
Doing all of this sorting and prep upfront left me with ready-to-scan piles that I could blaze through without much thought or effort. This meant I could even sneak in quick scanning sessions when I only had 10 or 15 minutes to spare.
6. Scan & Save In Batches
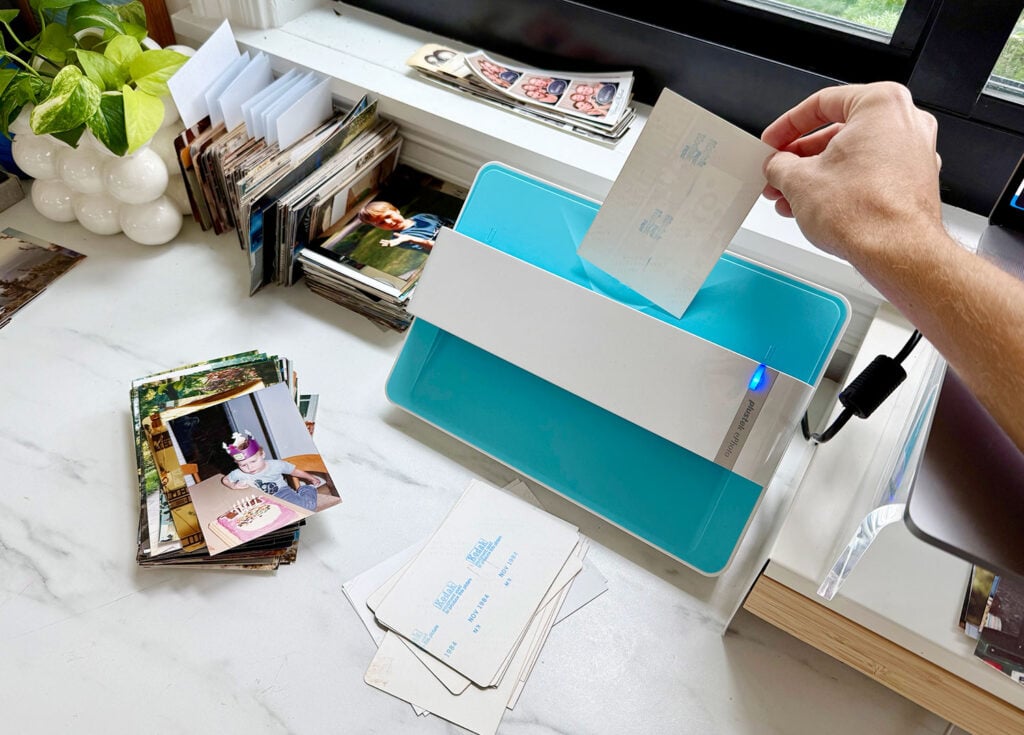
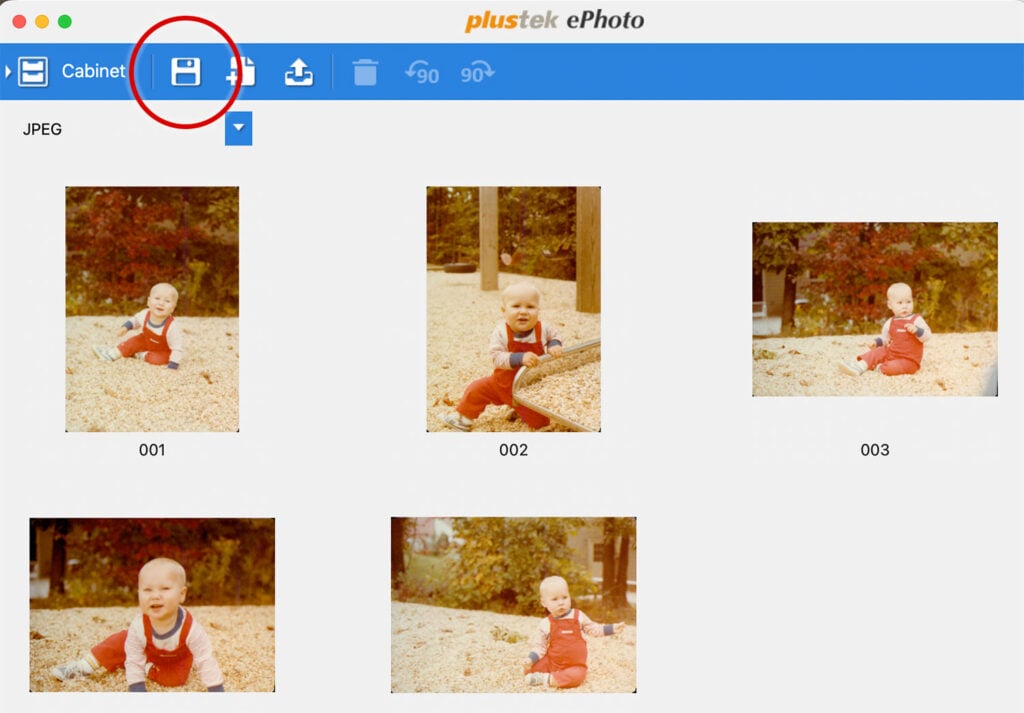
You can watch the video below to see how easy it is to scan with the Plustek ePhoto Scanner. Just be sure to adjust the ICC Profile in the Preferences menu first (as described in this post) to spare you from manually adjusting each scan for color & brightness. Trust me on this: it’s a very worthwhile detail!
The ePhoto software allows you to scan up to 60 photos before you must export/save and start a new batch. However, I preferred to export every time I finished a group from the same month or event. Even if a month only had 3 or 4 photos, I would export them as a “batch” because it makes file-naming easier.
To be clear, here’s what that process looks like:
Working through your chronological pile of photos, scan all the photos from a particular month, up to 60 (for example, all photos from March 1982).
Then, export those by clicking the disk icon in the ePhoto software (circled above).
You’ll be prompted to select an export destination. Select the appropriate year (1982) in your main backup folders. NOTE: It will NOT prompt you to provide a file name in this step, which is why I prefer to rename them in bulk after export.
Once exported, a window with those freshly saved files should pop up. Highlight those files and use the “Rename” tool (found by Ctrl + clicking on a Mac) to apply a better filename to the batch. Here’s where I used that Person-Year-Month format, like John-1982-03. Sometimes I added an event name too, like John-2000-06-Prom or John-2004-05-Graduation.
You’re done, move on to the next batch of photos!
Repeat this process until all of your old photo prints have been digitized and saved into their appropriate folders.
7. Back Up To Another Location
For files as important as these photos, I prefer to have them saved in multiple places. Maybe that’s overkill, but knowing that I have multiple backups made it easier to part with some of the physical copies. So for now, I’ve put my files in these 3 places:
On my laptop’s hard drive*
On an external hard drive
On the cloud, like iCloud, Google Drive, or Dropbox
*Keeping files on my laptop is mostly to make creating photobooks simpler. I find it easier when they’re saved on my computer. Once I print the photobooks, I’ll probably free up the laptop space since I’ll still have them on an external hard drive & on the cloud.
I don’t back up my files after every little scanned batch of photos. I usually wait for a natural stopping point – like when I’m done scanning for the day or have finished a whole year/album. Obviously, the goal here is to safeguard your efforts (and your memories!) in case of a computer crash, device loss, or cloud failure.
A More Visual Backup Option
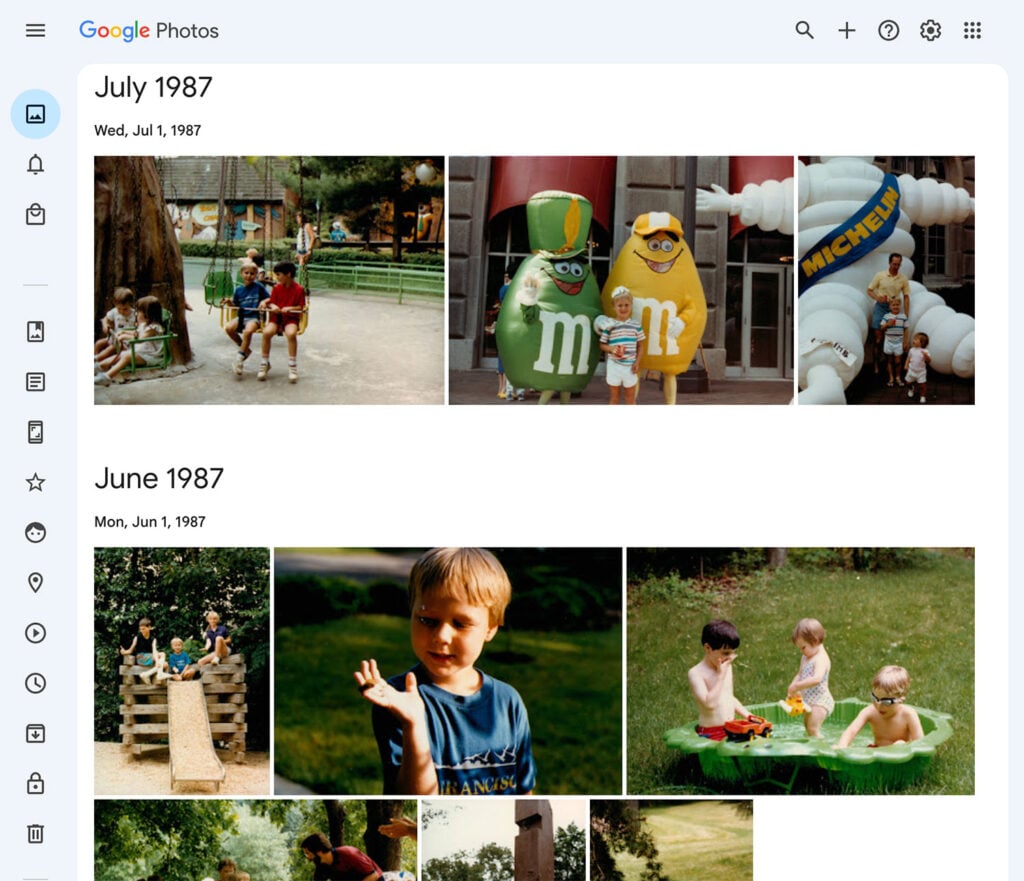
You may also want to upload your scans to an app like Apple Photos or Google Photos. You know, those places your phone is probably storing your current photos!
These apps make it easier to see and enjoy your old photos (imagine that!), even right from your phone. Plus, you can leverage their search tools (like facial, text, and object recognition) to, for example, search “dog” to find pics of your childhood pet.
However, I’ll offer two words of caution about using Apple or Google Photos for this type of digitization project.
Drawback #1: They aren’t great with dates
Both Apple and Google display photos chronologically using the “date taken” embedded in the file (aka: metadata). This works great for existing digital photos, but not scanned prints. Apple and Google have no way of knowing when it was originally photographed, and they also won’t care what folder or filename you saved it under. Instead, they will sort them by the date you scanned the print. That means all of your careful sorting may go right out the window when you upload to these services.
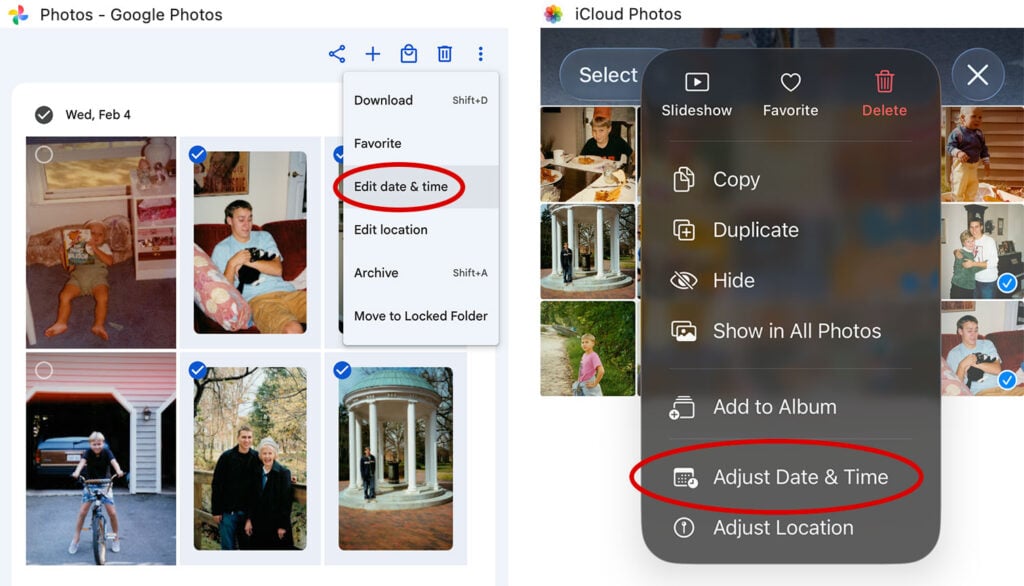
There is a solution, however. You can adjust the date of your uploads, even selecting multiple photos to fix at once. To do this, I suggest uploading scans in small batches (just like you scanned them) so you can move an entire month or event together. It can be a tedious process, depending on how precise you want the dates to be.
Just keep in mind that editing dates this way does NOT change the file’s metadata. So if you ever export these photos back to your computer (to make a photobook, for example), you’ll likely lose any sorting you did within Apple or Google Photos. Frustrating, I know! They will preserve filenames, though, which is why naming everything with a Year-Month-Event.jpg format can be useful.
Drawback #2: Old and new pics might get mixed
Because of the metadata issue described above, your uploaded scans can easily get mixed with your recent photos. You might find old baby photos right next to that picture of the dog that you took this morning or the funny raccoon videos you downloaded at midnight. So if you’re not diligent about adjusting dates as you upload, you can end up with a tangled, time-warped mess when you’re trying to fix dates or print photobooks later.
For this reason, we kept ours completely separate. Since we already use iCloud for our iPhone photos, we uploaded all of our old photos to Google Photos. We even used two separate Google Photos accounts: uploading my old photos to mine, and Sherry’s to hers. It might seem crazy to put photos in 3 separate places, but it has really helped as we’re assembling our separate childhood photobooks.
What’s Next For Our Photos?
After we scanned and sorted everything, we moved on to two final tasks – both of which we’ve nearly completed:
Making Photobooks
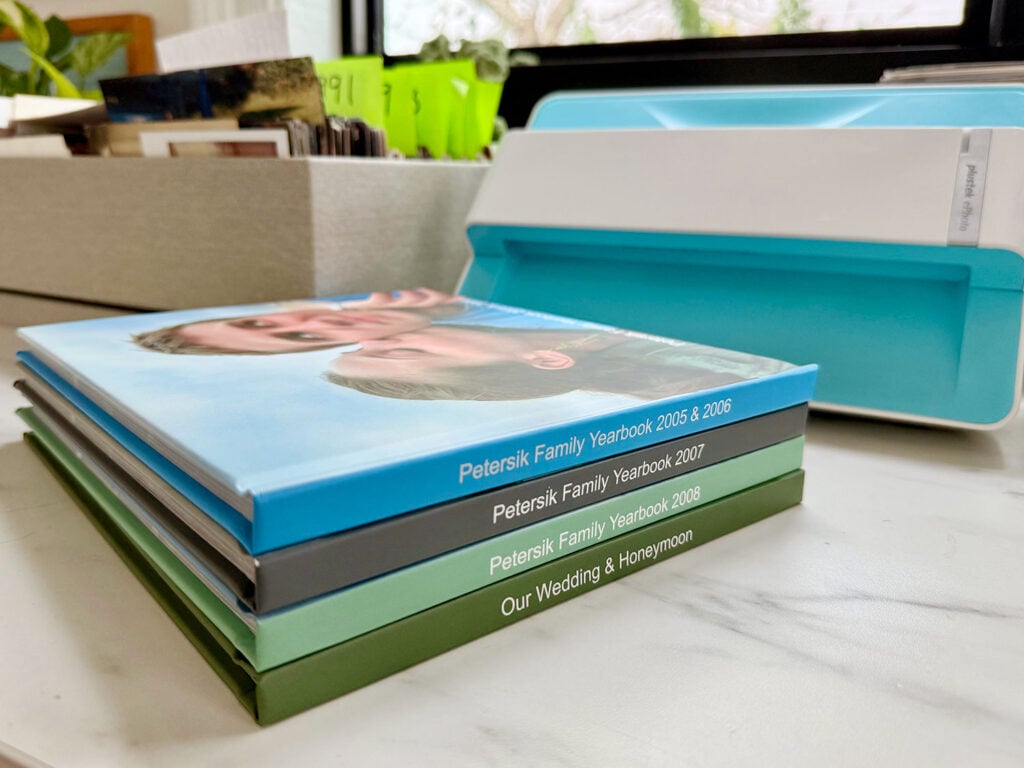
Remember how Goal #2 is to replace our bulky albums with slimmer photobooks? We’ve already printed a bunch of replacement photobooks, allowing us to discard over 8 puffy albums so far!
We started making annual “Family Yearbooks” in 2009, when Sherry was first pregnant. But now we’ve got them going back to 2005 when we started dating, along with a photobook that’s devoted to our wedding and honeymoon, as well as some childhood photobooks for each of us. It has been a long time coming, and seeing them all finished and printed (and freeing up all that space) feels great.
Paring Down Our Prints
We did discard many photos during the sorting and scanning process (mostly duds and duplicates), but we’re hanging on to everything else until we’ve finished printing our photobooks. That way, we can reference info on the backs (remember how we copied captions out of the albums?) and reference our physical piles for the chronological order.
Now that our photobooks are done, we plan to pare down some more. The goal is to end up with just one or two decorative boxes that we can stack on a bookshelf full of our favorite older photos. That way we have our favorite originals handy for display, passing down, or just as “historical artifacts” of sorts. But there’s no need to save 1000+ printed photos from 15 years ago when we now have them arranged in a photobook (which is much easier to look through than endless boxes of random photos from different eras).
Photo Digitization FAQs
If the steps above were a lot to take in (believe me, I understand), here are some rapid-fire responses to some popular questions:
How much storage do I need to save my photos?
The 2,500 photos I’ve scanned using the Plustek take up 3.3 GB of disk space. That is very little by file storage standards. For reference, basic flash drives start at 8GB, Apple gives users 5GB of free storage, and Google offers 15GB free. Obviously, your personal needs will depend on how many photos and what resolution you’re scanning (see below). Existing photo files straight from a digital camera (aka: not your scans) may also be larger.
Are the scanned photos good enough quality to print or project on a screen?
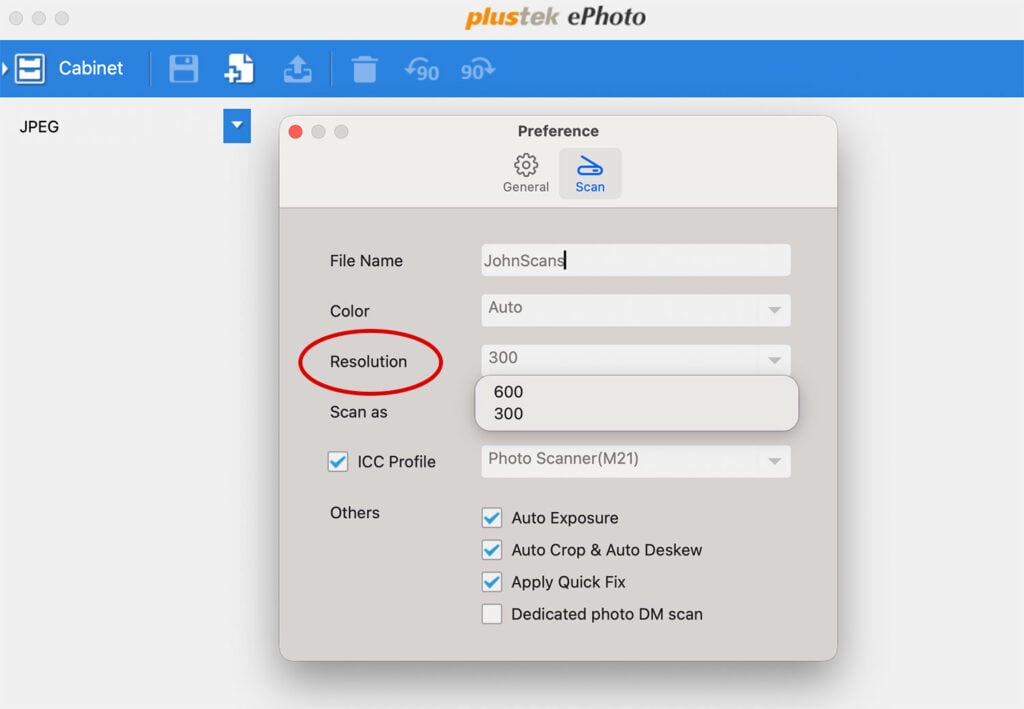
By default, Plustek scans everything at 300 dpi (dots per inch), meaning your scans should reprint clearly at their original size. If you plan to enlarge or project your photos, you can change the Plustek setting to 600 dpi. This will slow down the scanning process and increase file sizes, but it will keep them clearer at larger sizes.
Keep in mind that anytime an image changes format or medium, it can lose quality. And any reprints or enlargements you order may be a print of a scan of a print of a film negative.
How much will it cost to store my photos?
This depends on how much storage you need and what storage you already own or pay for. We incurred no additional storage costs for this project because we already own an external hard drive (~$70) and already pay for 100GB of Google storage ($20/year). But you can also purchase smaller flash drives for under $10 or choose Apple’s 50GB plan, which is $0.99/month.
Other Family Photo Posts
To catch up on this digitization project or other information about how we store family photos, be sure to check out these posts below:
*This post contains affiliate links, so we may earn a small commission when you make a purchase through links on our site at no additional cost to you.
.tasty-pins-banner-container{display:block;margin-bottom:20px;position:relative;width:-moz-fit-content;width:fit-content}.tasty-pins-banner-container a{cursor:pointer;display:flex;font-size:14px;font-weight:700;letter-spacing:1px;line-height:1.8em;text-transform:uppercase}.tasty-pins-banner-container a:hover{opacity:1}.tasty-pins-banner-container .tasty-pins-banner{align-items:center;bottom:0;cursor:pointer;display:flex;justify-content:center;left:0;padding-bottom:1em;padding-top:1em;position:absolute;right:0}.tasty-pins-banner-container .tasty-pins-banner svg{margin-right:4px;width:32px}.tasty-pins-banner-container .tasty-pins-banner span{margin-top:4px}.tasty-pins-banner-container a.tasty-pins-banner{text-decoration:none}.tasty-pins-banner-container a.tasty-pins-banner:hover{opacity:.8}.tasty-pins-banner-container a.tasty-pins-banner-image-link{flex-direction:column}.tasty-pins-banner-container a img{margin-bottom:0}.entry-content .wp-block-image .tasty-pins-banner-container img{margin-bottom:0;padding-bottom:0}#et-boc .et-l div .et_pb_image_wrap .tasty-pins-banner-container .tasty-pins-banner{padding-bottom:1em!important;padding-top:1em;text-decoration:none}#et-boc .et-l div .et_pb_image_wrap .tasty-pins-banner-container a.tasty-pins-banner{cursor:pointer;display:flex;font-size:14px;font-weight:700;line-height:1.8em;text-transform:uppercase}#et-boc .et-l div .et_pb_image_wrap .tasty-pins-banner-container a.tasty-pins-banner span{letter-spacing:2px;margin-top:4px}.et-db #et-boc .et-l .et_pb_module .tasty-pins-banner-container a:not(.wc-forward){padding-bottom:0}
I grew up as a Girl Scout and did my fair share of camping, and the s’mores were always my favorite part. Even as an adult, I would toast s’mores on my gas stove, but sadly my current home has an electric stove, leaving me without a makeshift campire to make s’mores. Rather than letting that stop me, I made this portable s’mores fire pot with Sterno ethanol gel canisters and a planter pot!
This is an incredibly easy project to whip up with a pot and rocks, but it’s the perfect way to enjoy homemade s’mores with the same feeling of a campfire. As long as you burn the gel in a safe environment, it’s completely safe and easy to use. Get ready to make a lot of s’mores!
Materials:
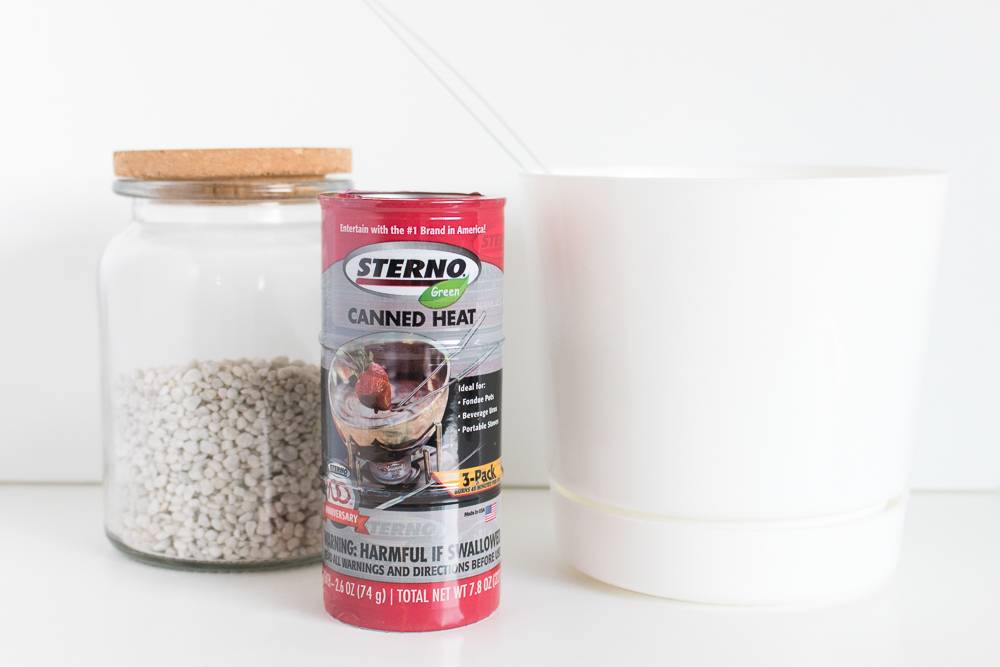
Sterno ethanol gel canisters
Ceramic pot, heat safe
Rocks
Step
Place any larger rocks at the bottom of the pot. Then add small rocks until it is about 3/4 full.
Step
Carefully insert a Sterno ethanol gel canister into the center of the rocks.
Step
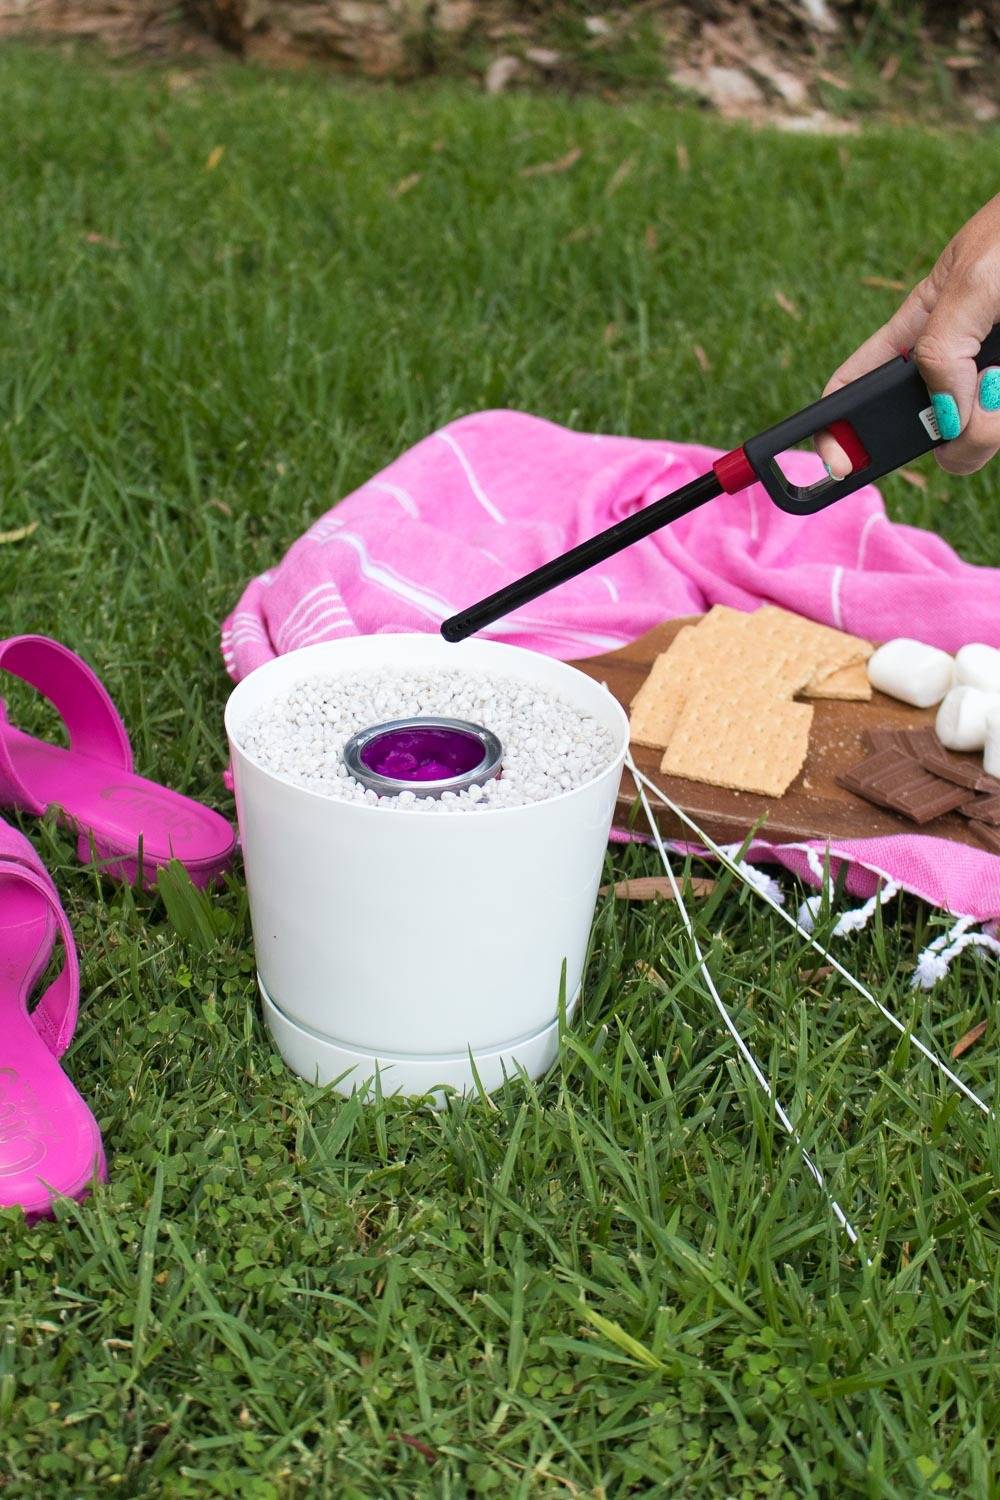
To use, carefully pry off the top of the canister with a screwdriver. Inside is a gel. When ready to toast marshmallows, light the gel with a long-stemmed lighter. The fire may not be easily visible because of the size. Stick marshmallows onto skewers and toast over the open flame just like a regular fire!
Step
To extinguish the flame, carefully place the lid back on top. This suffocates the fire and puts it out almost immediately. Note, Sterno canisters are intended for single-use.
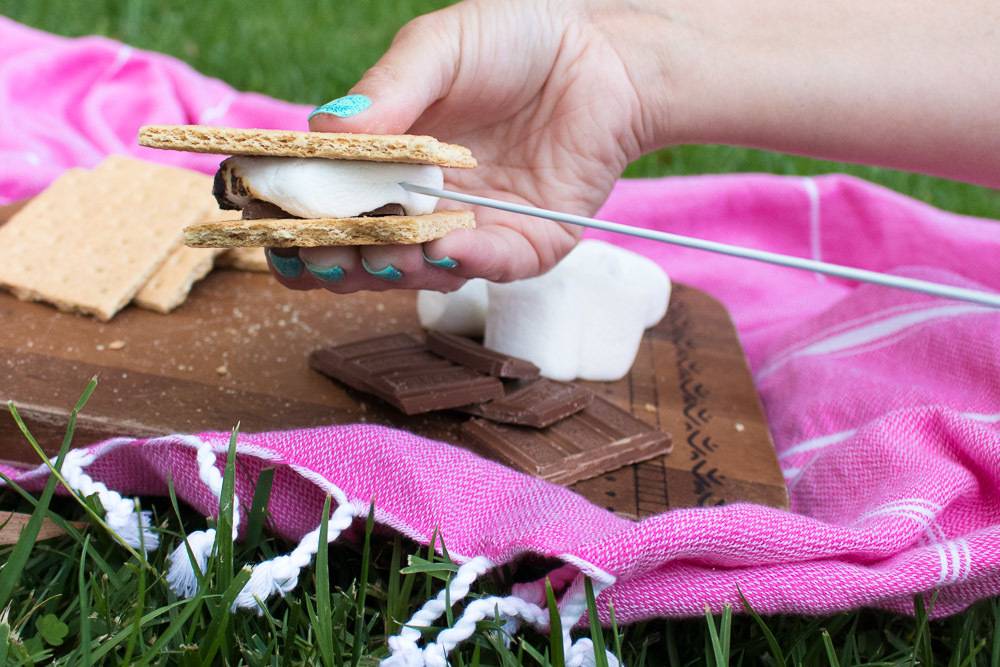
Sandwich the toasted marshmallows between chocolate and graham crackers and you can enjoy the best parts of camping right from your home!
.tasty-pins-banner-container{display:block;margin-bottom:20px;position:relative;width:-moz-fit-content;width:fit-content}.tasty-pins-banner-container a{cursor:pointer;display:flex;font-size:14px;font-weight:700;letter-spacing:1px;line-height:1.8em;text-transform:uppercase}.tasty-pins-banner-container a:hover{opacity:1}.tasty-pins-banner-container .tasty-pins-banner{align-items:center;bottom:0;cursor:pointer;display:flex;justify-content:center;left:0;padding-bottom:1em;padding-top:1em;position:absolute;right:0}.tasty-pins-banner-container .tasty-pins-banner svg{margin-right:4px;width:32px}.tasty-pins-banner-container .tasty-pins-banner span{margin-top:4px}.tasty-pins-banner-container a.tasty-pins-banner{text-decoration:none}.tasty-pins-banner-container a.tasty-pins-banner:hover{opacity:.8}.tasty-pins-banner-container a.tasty-pins-banner-image-link{flex-direction:column}.tasty-pins-banner-container a img{margin-bottom:0}.entry-content .wp-block-image .tasty-pins-banner-container img{margin-bottom:0;padding-bottom:0}#et-boc .et-l div .et_pb_image_wrap .tasty-pins-banner-container .tasty-pins-banner{padding-bottom:1em!important;padding-top:1em;text-decoration:none}#et-boc .et-l div .et_pb_image_wrap .tasty-pins-banner-container a.tasty-pins-banner{cursor:pointer;display:flex;font-size:14px;font-weight:700;line-height:1.8em;text-transform:uppercase}#et-boc .et-l div .et_pb_image_wrap .tasty-pins-banner-container a.tasty-pins-banner span{letter-spacing:2px;margin-top:4px}.et-db #et-boc .et-l .et_pb_module .tasty-pins-banner-container a:not(.wc-forward){padding-bottom:0}
If you’re planning on throwing a big bash this season, but don’t know where to start, we have you covered. Just read through these 7 tips for throwing the ultimate (DIY) summer party and you’ll be ready for outdoor entertaining in no time.
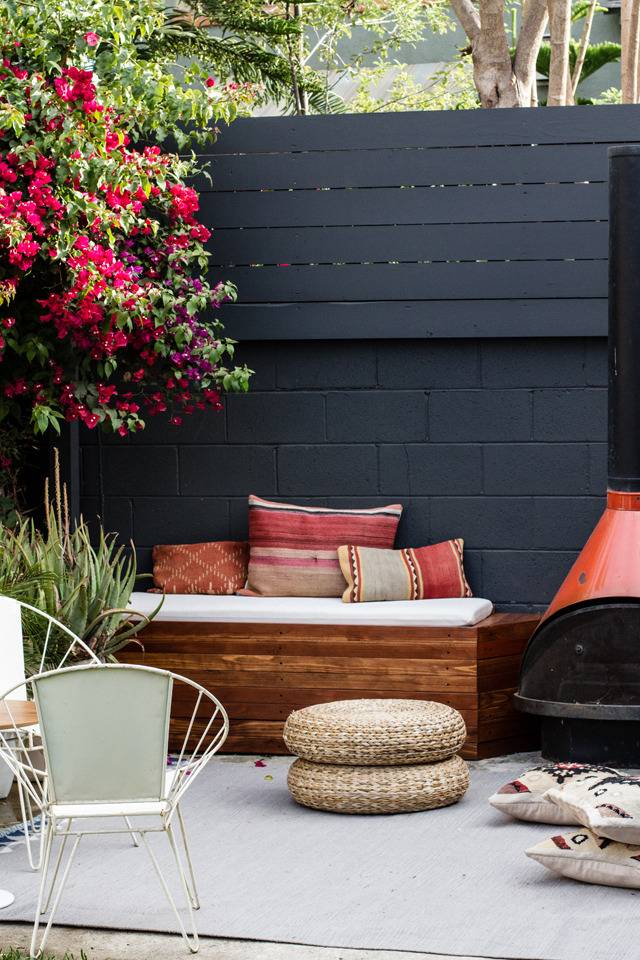
1. Have a seat. Having multiple seating options for guests, in different areas, both indoors and out, is a great way to encourage conversations and relaxation. No one wants to stand all day in the summer heat, right?
If you’re looking for a DIY seating option, try these DIY built-in benches on for size.
2. Made in the shade. Large patio umbrellas, like this setup from A Beautiful Mess, or a few lounge chairs underneath a shaded tree will help keep guests cool. Having space indoors for guests to hang out in an air conditioned space is a great option too.
3. Keep it cool. Given the rising temperatures, this one is an absolute must. Be sure to have a variety of offerings too (water, soda, beer, wine, etc).
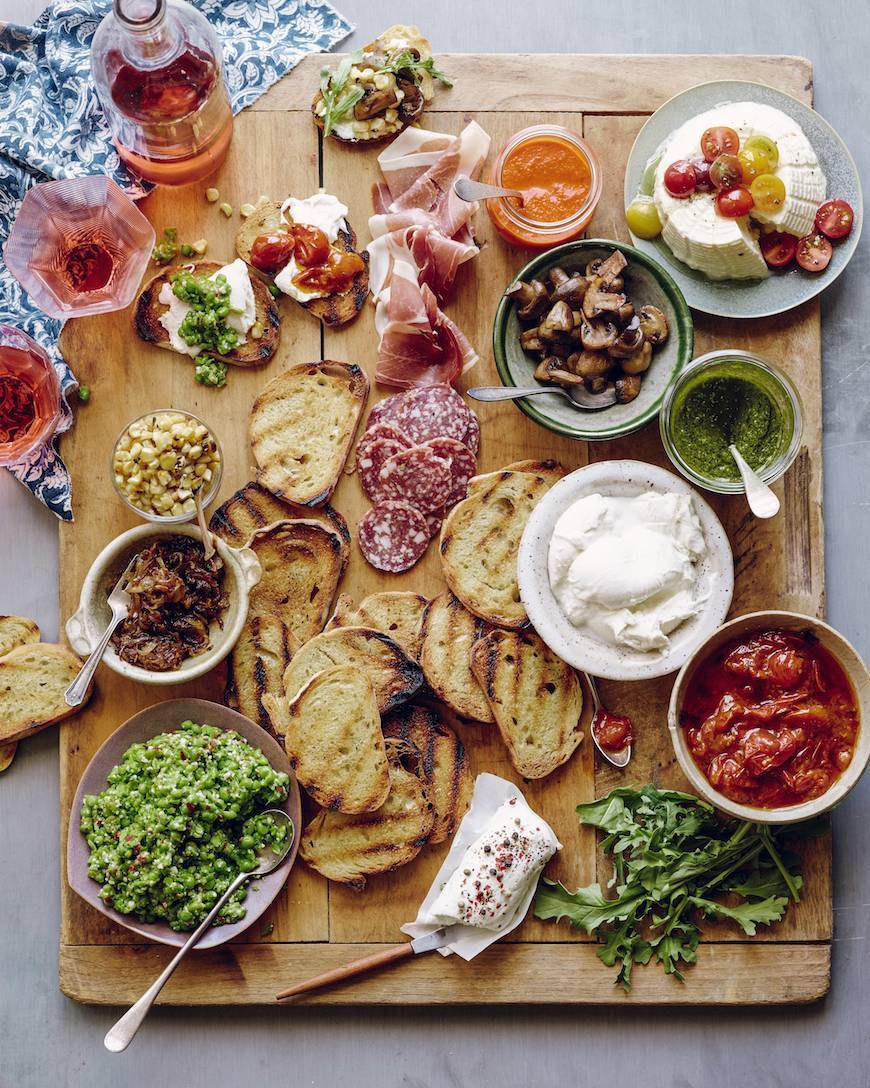
4. Food for all. Along those same lines, classic summer foods like watermelon and corn on the cob always go over well. And to add a little something unexpected in the food department, try a DIY bruschetta bar, with grilled breads, meats, cheeses, etc.
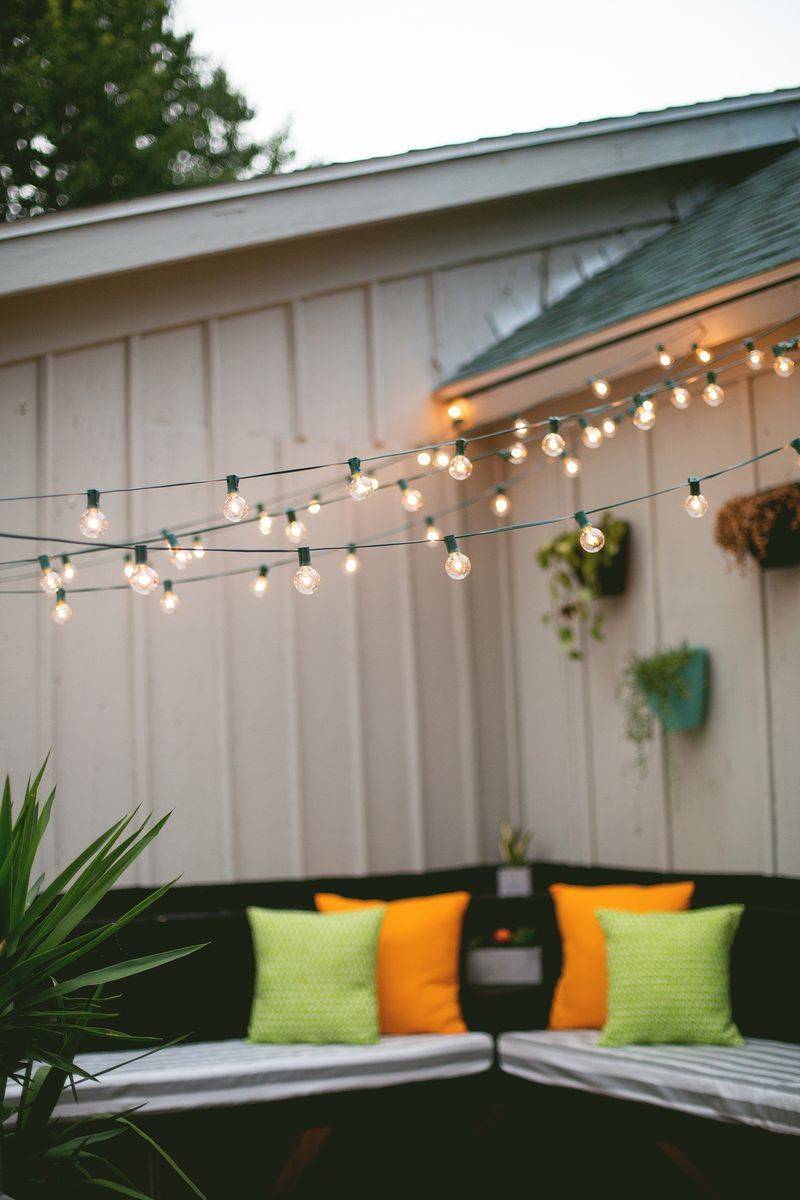
6. Let there be light. Citronella candles and/or string lights help the outdoors feel cozy and atmospheric once the sun goes down. Check out this tutorial for how to create a party alcove with string lights.