Discover essential tips and techniques to effectively clean and maintain your wood cutting boards, ensuring they stay durable, hygienic, and beautiful for years to come.
.tasty-pins-banner-container{display:block;margin-bottom:20px;position:relative;width:-moz-fit-content;width:fit-content}.tasty-pins-banner-container a{cursor:pointer;display:flex;font-size:14px;font-weight:700;letter-spacing:1px;line-height:1.8em;text-transform:uppercase}.tasty-pins-banner-container a:hover{opacity:1}.tasty-pins-banner-container .tasty-pins-banner{align-items:center;bottom:0;cursor:pointer;display:flex;justify-content:center;left:0;padding-bottom:1em;padding-top:1em;position:absolute;right:0}.tasty-pins-banner-container .tasty-pins-banner svg{margin-right:4px;width:32px}.tasty-pins-banner-container .tasty-pins-banner span{margin-top:4px}.tasty-pins-banner-container a.tasty-pins-banner{text-decoration:none}.tasty-pins-banner-container a.tasty-pins-banner:hover{opacity:.8}.tasty-pins-banner-container a.tasty-pins-banner-image-link{flex-direction:column}.tasty-pins-banner-container a img{margin-bottom:0}.entry-content .wp-block-image .tasty-pins-banner-container img{margin-bottom:0;padding-bottom:0}#et-boc .et-l div .et_pb_image_wrap .tasty-pins-banner-container .tasty-pins-banner{padding-bottom:1em!important;padding-top:1em;text-decoration:none}#et-boc .et-l div .et_pb_image_wrap .tasty-pins-banner-container a.tasty-pins-banner{cursor:pointer;display:flex;font-size:14px;font-weight:700;line-height:1.8em;text-transform:uppercase}#et-boc .et-l div .et_pb_image_wrap .tasty-pins-banner-container a.tasty-pins-banner span{letter-spacing:2px;margin-top:4px}.et-db #et-boc .et-l .et_pb_module .tasty-pins-banner-container a:not(.wc-forward){padding-bottom:0}
Importance of Cleaning and Maintaining Wood Cutting Boards
Let’s be honest, your wood cutting board has seen some things.
Sunday meal prep, midnight snack sessions, that ambitious sourdough phase. It’s one of the most-used surfaces in your kitchen, and if you’re not caring for it properly, it might not be doing you any favors when it comes to hygiene.
Wood cutting boards are an investment worth protecting. When maintained correctly, they can last for decades, and often get better looking with age.
Ignore them, though, and you’re looking at warped boards, deep cracks, funky odors, and a breeding ground for bacteria.
The good news? Caring for your board is surprisingly simple once you know what to do (and what to avoid).
Why Wood Cutting Boards Require Special Care
Wood is a natural, porous material, which is exactly why it performs so well as a cutting surface, and also why it needs more attention than a plastic board.
Unlike a plastic cutting board, wood has natural antimicrobial properties; bacteria that sink into the grain tend to die off rather than multiply. But that doesn’t mean you can skip cleaning. Wood items also absorb water, oils, and food particles, which means:
Excess moisture can cause warping, cracking, and splitting
Trapped food particles lead to odors and bacterial growth
Harsh cleaners strip the wood’s natural oils, making it dry and brittle
Dishwasher heat and soaking can destroy the board’s structure entirely
Wood cutting boards thrive with gentle, consistent care, not harsh scrubbing or neglect.
Daily Cleaning Tips for Wood Cutting Boards
After every use, your board will need cleaning, but keep it simple:
Wash by hand with warm (not hot) soapy water and a stiff-bristle brush or clean sponge
Clean both sides of the board to prevent uneven moisture absorption, which causes warping
Rinse thoroughly and dry immediately with a clean towel
Stand the board upright or prop it at an angle to allow airflow on both sides; don’t lay it flat on the counter
Never submerge your board in water, and absolutely never put it in the dishwasher, the combination of heat, prolonged moisture, and harsh detergents will cause it to swell, crack, and split, sometimes after just one cycle.
Also, alternate sides when cutting to distribute wear evenly.
Deep Cleaning Methods to Remove Stains and Odors
Even with daily washing, your board will eventually pick up stubborn stains and odors. Here are three tried-and-true methods:
Salt and Lemon Scrub
Sprinkle coarse salt over the surface, then scrub in circular motions using the cut side of a lemon half. The salt acts as a mild abrasive while the lemon juice deodorizes and lifts stains. Let the mixture sit for a few minutes, then scrape off and rinse.
Baking Soda Paste
Mix baking soda with just enough water to form a paste, spread the slurry over the stained area, let sit for 5 minutes, then scrub and rinse. It’s a natural deodorizer that’s gentle enough not to damage the wood.
White Vinegar or Hydrogen Peroxide
Spray undiluted white vinegar across the surface, let it sit for a few minutes, then rinse. For food safety after raw meat or poultry, use a 3% hydrogen peroxide spray instead, letting it sit several minutes before rinsing thoroughly.
Go easy on the vinegar. If used too frequently, its acidity can dry out the wood over time.
How to Properly Dry Wood Cutting Boards to Prevent Warping
Drying is arguably the most overlooked step in cutting board care, and it’s where many boards meet an early end. The goal is even, thorough drying with good airflow:
Pat the board dry with a clean dish towel right away after washing
Never lay a wet board flat; moisture gets trapped underneath
Stand it vertically in a dish rack or lean it against the backsplash
Keep it away from direct heat sources like burners or heating vents
When one side of the board dries faster than the other, the board warps into a curve — annoying and a safety hazard. In a humid kitchen, let the board air-dry for several hours to remove residual water, then store it flat.
Regular Maintenance: Oil and Condition Your Cutting Board
If daily cleaning is the baseline, oiling is the upgrade. Think of it like moisturizing — wood dries out over time, and regular oiling replenishes the natural oils that prevent cracking and splitting.
Food-grade mineral oil is the gold standard: affordable, odorless, flavorless, and it won’t go rancid.
Find it at most hardware stores or pharmacies.
Avoid vegetable, olive, or coconut oils; they’ll eventually go rancid inside the wood. Board cream (a blend of mineral oil and beeswax) is also excellent, offering both conditioning and a protective surface seal.
To oil your wooden cutting board, make sure it’s completely clean and dry, then apply a generous layer with a soft cloth, rubbing with the grain.
Let it soak in overnight, then wipe off any excess.
Repeat monthly, or whenever the wood looks dull.
Quick test: sprinkle a few drops of water on the surface — if they bead up, you’re good; if they soak in, it’s time to oil.
Tips to Prevent Cracks and Splits in Wood Cutting Boards
Cracks are the nemesis of a good cutting board. Once they form, they’re tough to reverse and can harbor bacteria.
Avoid thermal shock: don’t place a cold board on a hot stovetop or under a broiler
Never soak: prolonged moisture causes swelling, followed by cracking when it dries
Store in a cool, dry spot with good airflow — not wedged in a tight cabinet
Avoid the dishwasher: the heat and moisture cycle is devastating for wood boards
If you notice hairline cracks forming, act fast: sand the area lightly with fine-grit sandpaper (going with the grain), then immediately apply mineral oil.
Catching cracks early can stop them from deepening.
When to Replace Your Wood Cutting Board
Even the best-maintained board has a lifespan. It’s time for a new one if you notice:
Deep grooves or gouges that can no longer be sanded out
Persistent odors after deep cleaning — bacteria may have penetrated deep into the wood
Severe warping that makes the board unstable
Large cracks or splits running deep into the wood
Mold or dark discoloration that doesn’t respond to cleaning
Minor scratches are normal and can often be sanded smooth. But if the board feels unsafe for food prep, trust your instincts. When shopping for a replacement, look for end-grain or edge-grain hardwood in maple, walnut, or cherry — dense, durable, and gentle on knife edges.
The Ultimate Guide to Properly Clean and Maintain Your Wood Cutting Boards
Discover essential tips and techniques to effectively clean and maintain your wood cutting boards, ensuring they stay durable, hygienic, and beautiful for years to come.
Materials
Stiff-bristled brush or scrubbing sponge
Mild dish soap
Coarse salt (kosher or sea salt)
1 lemon, halved
Baking soda
White vinegar (in a spray bottle)
Hydrogen peroxide, 3% (in a spray bottle)
Clean dish towels or rags
Food-grade mineral oil or board cream
Fine-grit sandpaper (optional)
Instructions
DAILY CLEANING
Rinse with warm water immediately after use
Scrub both sides with soapy water and a stiff brush
Rinse thoroughly and pat dry right away
Stand upright or prop at an angle to air dry — never lay flat while wet
DEEP CLEANING
For stains: Sprinkle coarse salt on the surface and scrub with the cut side of a lemon half. Let sit a few minutes, then rinse.
For odors: Spread a baking soda and water paste over the surface. Let sit 5 minutes, then scrub and rinse.
For sanitizing: Spray undiluted white vinegar, let sit for a few minutes, then rinse. After raw meat, use 3% hydrogen peroxide instead.
OILING & CONDITIONING (Monthly)
Make sure the board is completely clean and dry
Rub food-grade mineral oil generously into the surface with the grain
Let soak overnight, then wipe off any excess
Repeat whenever water stops beading on the surface
CRACK PREVENTION
Oil regularly — dry wood cracks
Never soak or put in the dishwasher
Store in a cool, dry spot with airflow
Sand hairline cracks early, then oil immediately
NEVER DO THESE
Put the board in the dishwasher
Soak in water
Lay flat while wet
Use vegetable, olive, or coconut oil
WHEN TO REPLACE
Replace your board if you see deep gouges that can’t be sanded out, persistent odors after deep cleaning, severe warping, large cracks, or mold that won’t come clean.
Benefits of Proper Care for Longevity and Hygiene
A wood cutting board isn’t just a kitchen tool. It’s a surface you use every single day.
With a simple routine of gentle washing, proper drying, regular oiling, and occasional deep cleaning, your board can stay hygienic, beautiful, and functional for decades.
Proper maintenance also makes your kitchen safer. A clean, well-oiled board with a smooth surface is far less likely to harbor bacteria than a cracked, neglected one.
And once these habits become part of your routine, they take almost no extra effort: wash it after use, dry it standing up, oil it once a month.
Your cutting board has your back at every meal — a little regular care is the least you can do in return.
I’ve shared a lot of real-time renovation updates on Instagram Stories, but here’s a quick catch-up blog post for anyone thirsty for the longer format (we know we’ll love having these posts to look back on). We’re about 7 weeks into our biggest renovation in over 5 years, and the house pretty much looks as chaotic as expected. Who remembers our mantra from 2012: “the middle makes no sense“? Over the past month and a half, walls have been busted open, ceilings have been torn out, and entirely new rooms have been framed. So… lots of progress, but lots of dust… and a lot more to do. Did I mention it’s dusty?
The easiest way to catch up is to watch the video below, where you can hear me yapping about every space, what has been done, and what’s next on the agenda. If you can’t watch with sound right now, come back later for the info (it covers a lot more than I can in words, but the rest of this post will give you a quick status update in the meantime, plus tips for the dust & smaller house optimization ideas).
As a reminder, two sticking points emerged and slowly began to nag at us over the last half a decade of living here. They both felt important enough that we didn’t want to settle on just fixing one of them and thankfully, nothing felt urgent enough that we couldn’t wait for the right idea to come to us. It certainly wasn’t the first idea that we had. It took a few years, but we finally hit on a plan that would accomplish both goals while feeling a lot more exciting and less complicated than many of the other options we considered (no moving the kitchen, always having a working bathroom throughout the reno, no attempts to run plumbing upstairs, which would be extremely complicated in our house, etc). Plus the estimate came back under what we expected to pay, which never happens! So without further ado, our two main goals:
Enlarge our son’s small room (what’s great for a 6-year-old isn’t always great when they’re twice as big and very into every crafting project under the sun)
Get better access to & views of our backyard pool area (a long hidden hallway that felt detached from the main living area wasn’t ideal)
And one bonus thing we threw in “since it’s going to be extremely dusty anyway” was to add an ensuite bathroom to our bedroom. Surviving covid times with just one bathroom for the last almost-6 years truly showed us that we don’t NEED a second bathroom, but it made sense to add one while we were undergoing this renovation. Especially because our contractor pointed out how easy (and inexpensive) it would be to run all the plumbing under our raised deck.
Finishing The Porch
After many years of percolating and debating approximately 101 other options, one day we realized that if we just finished our covered front porch (seen in the old photo below) into a fully conditioned room, all of our goals would be accomplished in one fell swoop. Turning that into our daughter’s new bedroom (it’ll be slightly larger than her last one, but pretty similar) would allow us to open up her old bedroom to the kitchen and sitting area, which existed right behind it, creating a large L-shaped shared space that would lead to the pool with some giant glass doors. Plus we could absorb the old pool hallway into our son’s room to enlarge it (making it not only significantly wider, but also deeper). Definitely watch the video above – even without sound if you can’t listen to it – to see the stunning change that one move has made for us!
Here’s what the outside looks like now. They’ve fully built the new bedroom, but you can see in the video above that there’s still a lot to do to finish the interior of it. And of course it still needs to be fully painted.
That one patch of white paint was put on because we were originally told that our house’s electrical boxes had to be mounted there, but we figured out a way to relocate them on the fence that you see on the left of this photo instead, which hides them a lot more (both from the curb and the front porch). Now when you walk up the path to the door and stand on the porch, you won’t even see them (versus seeing three large metal boxes in that painted white square).
A Better View (And Access) To Our Pool
Moving back inside, this was the old “view” of our backyard pool from our downstairs living area. Notice how you can’t see it at all? Yup, that was the problem. It was fully blocked by the laundry room (behind those doors) and our daughter’s bedroom (behind the laundry).
And this is how it looks today! Hello new room full of light where we all can enjoy with the best view in the house! Hello easy pool access from the main living space, and getting to sit on a sofa overlooking it all when we entertain. Hello extra hangout spot with a TV that the kids negotiated (we’ve had just one TV in the house since we moved in) so they’re beyond excited too.
It’s incredible how much light this one renovation move has unleashed into our house (which was already the brightest home we’ve ever had!). It’s also wild how much bigger everything feels, which is like winning the lottery in a small home. Literally my goal is: less to clean, care for, and pay to heat/cool/furnish… but let’s make it feel as open and airy as possible!
And since the sitting area function that used to be in our kitchen will be moving into this newly adjoined space, our kitchen can stretch out a little more to include some extra cabinetry and a peninsula with some stools, and our dining table can float in the area that used to be the sitting area. That way it can seat 8 people instead of only 6 (it’s currently sandwiched in a narrower area between a fridge and a wall). We often have 10 people in this kitchen with friends over, so seating for 8 at the table and 3 at the peninsula would be amazing.
This new “lounge” area will be vaulted (like our daughter’s room was originally) which will also make the room feel bigger and airier. The photo below was taken from our bathroom and it shows how open this view has become. You can look at the framing on the floor to get a sense of where those light-blocking walls used to be:
This view also shows where the new laundry closet will go. There will be a door on that wall (under that header with the HVAC ducts) that will house our stacked washer and dryer. The closet itself recesses into our daughter’s room with her bedroom closets next to it, so it won’t take a weird bite out of her floor plan (her new room will be a very similar size and shape to her old room). I know it’s hard to picture how a laundry closet can recess into another room and fit together with a closet in that room, so watch the video for a better idea of how everything fits together if you can.
A Bigger Bedroom For Our Son
Since we’ll now access the pool via the lounge area, the old hallway that led to the backyard can become a part of our son’s room… widening it from a snug 7′ to a whopping 11′ feet! You can see from the mark on the floor (and where the ceiling planks end) how much narrower his room used to be – and it’s such a great change. We were also able to move the entry door to his room further back (again, stealing space from that hallway) to make his room deeper. Adding a window that’s twice as big as his old one was the icing on the cake. The difference is wild.
We were also able to vault his ceiling higher (since his room increased in depth, which means more of the highest peak of the house is included in his room). We’ve all been stunned by how these changes have come together to make a giant difference. This kid can’t wait to fill his new, bigger space with craft supplies and yarn galore.
Oh and this is also the room where we discovered a secret safe buried in the concrete foundation of the house! Don’t forget to check out “The Safe” archived circle on our Instagram if you missed that whole story. I’ve never felt more like Indiana Jones.
Our Ensuite Bathroom
Living with one bathroom really hasn’t been a huge headache (we thought we’d move in and immediately want to add one, and now it has been almost 6 years), but when we were planning this reno with our contractor, we all agreed it made sense to go for it while we’d have plumbers, electricians, and drywallers in the house. Running the plumbing over to this space couldn’t be easier because there’s a raised deck between this room and the new bedroom we made for our daughter (formerly the covered porch, under which all the house’s plumbing was housed!). So tapping into it took less than a day! Such a win.
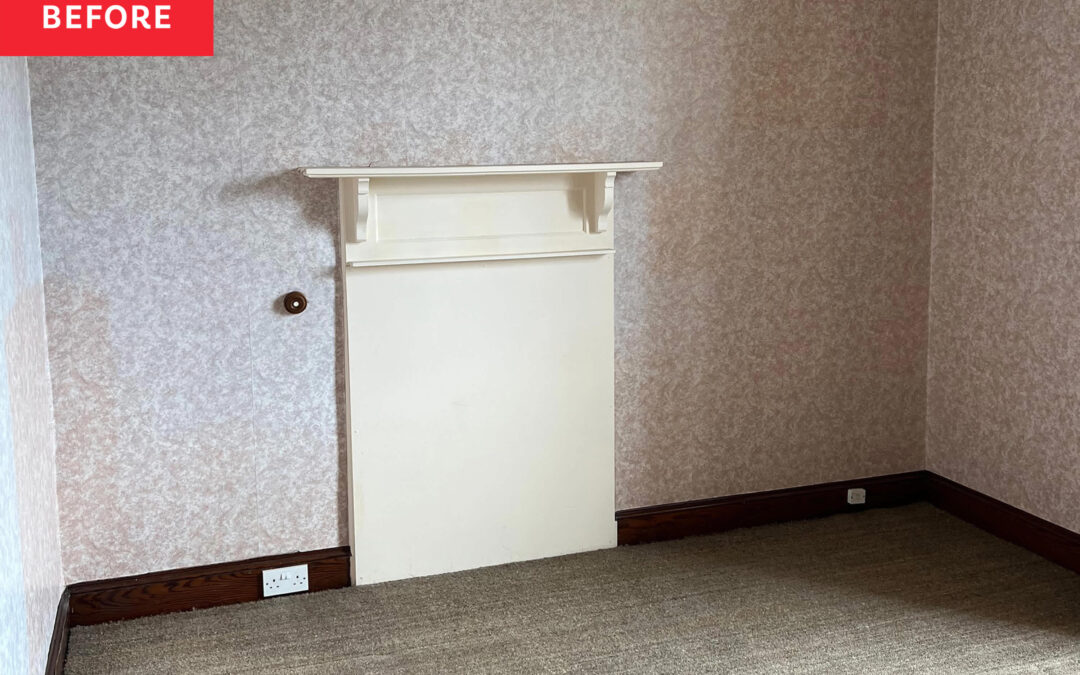
The new ensuite bathroom is taking over a nook in our bedroom where our floating shelves used to live (see below). The room used to be sort of an L shaped space, and now the bedroom will be a normal rectangle with an attached bathroom off of it.
Even though it’s far from finished, it already feels like it was meant to be this way!
Turning this corner into a bathroom required more maneuvering than just taking out those shelves. We had to relocate our bedroom door to our closet wall, which meant one of our wardrobes will now be placed to the left side of the door – where you see that lighter wood rectangle on the floor. We’re just waiting for drywall to go up on the wall behind it and we can place the wardrobe. Don’t worry, there’s a vision. We’ll also have a cabinet over the bedroom door, and actually, that entire side of the bedroom will appear to be seamless built-ins. It’s just hard to explain in words right now for you, so you’ll have to trust us 😉
Shifting the bedroom door into the large rectangular part of the room meant we could make the entire corner that made the room an L shape into our bathroom. Now we have the wall you see below (that used to be the doorway to our bedroom) to make a gorgeous floating bathroom vanity nook. Picture a huge gleaning mirror over it. I know, you have to squint very hard to picture it.
The bathroom won’t be huge by any stretch of the imagination, but it’ll provide plenty of function with a sink, a toilet, and a wall-to-wall zero-entry shower full of gleaming tile to the ceiling (that’ll be along the wall that’s opposite this nook – the one on the left in the photo below). You can see how the floor appears to dip down in that area, but once it’s all tiled, it’ll all be level and smooth. Zero entry excites us because I want to live in this house until I die, and then haunt it indefinitely.
Other Renovation To-Dos
Beyond those main changes that have been going on, there are several other little things we’ve had to figure out or shift along the way. For example, we’ll be rebuilding an outdoor shower on the back of the house (sort of where you can see the remnants of the old one). It’ll be accessed from the side facing the new french doors, so we’ll need to extend the patio slightly too. You can see from the color change in the roof (the new stuff will patina to look like the older stuff) how much interior space we gained, just by finishing off the front porch! It’s amazing.
Also, that random window you saw on the floor of our new bathroom a few photo up is actually going into our existing bathroom. That window used to be our son’s room, but rather than get rid of it, we’re swapping it with our current bathroom window, which is smaller and what I’d call “aggressively frosted.” We DIY frosted the old window that was in this bathroom, but when we replaced our windows and doors for hurricane-grade ones, we chose “factory frosted” for the new bathroom window. What arrived was a textured gray tone. It’s hard to see in photos, but it blocks SO MUCH LIGHT compared to the old one we had frosted ourselves (using our tried-and-true DIY method), which still provided complete privacy.
So we figured that reusing our son’s old window could correct a regret from the past, and not only let in more light because the frosting won’t be as dark, it’s actually about 6″ wider and taller, so it’ll be really great to make that room feel airier and lighter too. Gotta love using what you have.
How Are You Handling The Mess?
Yes, I mentioned dust several times. Renovations are messy. People are in and out all day, stuff gets tracked in, demo unleashes flying debris, things get cut and drilled, sawdust flies 20′ in the air. Heck, we haven’t even gotten to drywall yet, which is the dustiest part! So here’s what we’re doing to stay on top of the chaos while we’re living in our home during the renovation:
Drop Cloths – We use these to cover things like our sofa, our bed, and even to tape off entire doorways sometimes. You’d be amazed how they can be working around a corner or across the room, but dust can get literally everywhere.
Small Shop Vac – This is great for little piles of sawdust or debris that you encounter (random staples, etc). Our contractor is the most neat person we’ve ever worked with (he shop vacs and sweeps before leaving every day and even blows off our walkway for us) but stuff gets in weird spots that you miss, so we do another pass with our shop vac if we find a little pile of sawdust on a chair rail or in a corner.
Tineco Wet Vac – This has been the MVP, and we cannot believe we just bought it this January, because it’s making such a difference! It’s a vacuum mop, so it not only sucks up a ton of dust, it literally mops the floors for us in one pass of the vacuum, which means all the dried dust and chalky haze that would be left if we only vacuumed comes right up! Our feet and socks are clean when we walk through the house during this reno… which literally has never happened before with just sweeping and vacuuming.
The tip here? Do whatcha gotta do to stay sane during a reno. It gets old. And you’ll miss the days of a house that feels significantly less torn apart. This one isn’t even that bad because we haven’t ever lost our kitchen or bathroom (except for a few brief hours when the water had to be turned off). But even though renovations never feel like a walk in the park, they can be so exciting and full of possibility. We’ve been renovating houses for 20 years, and we’ve never regretted a single renovation after it’s done! (During… maybe. Ha!).
Our Tips For Living Large In A Smaller Home
Since this is a common question we get, so after almost 6 years of living here, here are some things we’ve learned in our downsizing journey:
make sure the bedrooms don’t feel cramped but aren’t ridiculously giant (our bedroom always felt too big and our son’s room felt too small – now both will be solved)
maximize sight lines and light that flows through shared living spaces (this feels more expansive) and vault the ceilings whenever possible (again, it just feels a lot less cramped)
furnish rooms, especially shared spaces, so you’ll actually use them, and not just for special occasions (if you don’t use your formal dining area much, maybe make it an art/homework room that gets tons of use)
take note of sticking points (this reno is solving two big ones, but we also get to address smaller things, like seating more people in our kitchen, adding a bathroom to our weirdly big bedroom to optimize how much that corner gets used, etc).
consider bigger furniture (often in a smaller house you think you need smaller furniture, but that can make it feel piddly. Think: two larger sofas instead of lots of small chairs and loveseats, maybe even a bigger bed in your room so you feel like you’re living large, etc).
remember that storage is king, and really brainstorm how to add it (from switching out a giant water heater for a tankless one to gain more space in a closet to building in some cabinetry along an entire bedroom wall, there are so many ways to make a smaller home more functional & efficient)
As a reminder, this house was 1400 square feet before this reno, and will end up being around 1520 square feet after converting the covered porch into interior space. So it’s definitely not a tiny house, but it was a big downsize for our family.
By comparison, our last house was 3150 square feet (plus a two-car garage, big detached shed, and a giant walk-up attic!).
When we started house hunting down here we thought 1900 square feet (like the pink house) would be ideal, but we went even smaller to be in this exact location. Our house is walkable to the beach and shops/restaurants in a tree-filled neighborhood that we fell in love with – so we chose location over square footage and we’re so glad we did.
The crazy thing is that everything in our neighborhood went crazy price-wise during and after covid, so it’s for sure much much much cheaper (like over 10X cheaper) to do this reno than attempt to buy a slightly larger house in our location. Plus we just love this exact lot, the pool we added, etc. So I guess another small space tip that I have is that it can be far more cost-effective to renovate than having to sell and buy and pay all the closing fees and have a whole new house you have to decorate and redo anyway.
It already feels like an embarrassment of riches (even in this very rough state) to have such beautiful views of the pool area from the front door and the downstairs living area now.
And having a bonus shared living space upstairs where the kids can get messy crafting, host sleepovers, or watch a loud movie with a bunch of their friends while we entertain the adults downstairs is such a great feeling. I talk more about that in the video, but I think two common areas that aren’t on top of each other = another way a small home can feel much larger and more flexible. This is an old picture of our upstairs room because it’s currently full of lots of things from downstairs – but we’ll have to snap some updated shots of this space after this reno, because we changed how the sofas are placed and it’s even more functional for us!
We’ll post another reno update after we’ve made more progress (next up: a few final electrical tweaks, insulation, drywall, tile, fixtures, and flooring). In other words, stay tuned to Instagram for more real-time updates, and we’ll be back here with another update, maybe sometime in March?
*This post contains affiliate links, so we may earn a small commission when you make a purchase through links on our site at no additional cost to you.
Planning a family spring break trip can be challenging – especially if you’re looking for somewhere warm, unique, and not overrun with other spring breakers. But ever since we moved full-time to the unofficial spring break capital of the United States (aka: Florida’s Emerald Coast), we’ve become well-practiced in finding unique spring break destinations. So here are 8 places that we have loved visiting for family vacations.
These are all places we’ve traveled to in the last 5 years, when our kids were between 8 and 15 years old. So we can personally vouch for how well they keep kids and teens entertained. We can’t speak specifically for toddlers, but they generally had a lot to see and do, and felt family-friendly.
1. New Orleans, Louisiana
New Orleans is a surprisingly kid-friendly city. It’s walkable, colorful, and brimming with equal parts history and quirk. Spring break can be a perfect time to visit “The Big Easy” because you’ll likely be there after Mardi Gras and before the summer heat moves in. We had a blast exploring the Garden District, taking a streetcar to the French Quarter, and shopping along Magazine Street. You can also check out the aquarium downtown or the zoo in Audubon Park. Next time we go, we’ve got City Park on our must-see list. It’s twice the size of New York’s Central Park and has a botanical garden, sculpture garden, and even a small amusement park.
Average March and April temperatures in New Orleans, LA are typically in the 50s (low) to 70s (high).
Another city our whole family enjoyed exploring was Charleston, SC. Like New Orleans, you’ll be catching a charming, walkable Southern city just as temperatures are warming up, but before the heat and humidity take over. Staying in or near the city itself helps you avoid the crowds that are beginning to flock to nearby beaches like Isle of Palms, Sullivan’s Island, or Folly Beach, which are just a short drive away if you really need some sand between your toes.
Average March and April temperatures in Charleston are typically in the 50s (low) to 70s (high).
Like these other destinations, Palm Springs has some of its best temperatures during the spring. It’s located in the California desert, meaning summer temps routinely hit triple digits! Plus, Palm Springs is more than just golf courses and mid-century architecture. We found kid-friendly attractions, like the Cabazon Dinosaurs (above) and nearby Joshua Tree National Park. You can also go on a waterfall hike or take a rotating aerial tram up the mountainside if you’re looking for more adventure. And since winter is peak visitor season for Palm Springs, we found it to be relatively quiet in early spring!
Average March and April temperatures in Palm Springs are typically in the 50s (low) to 80s (high).
Dallas surprised us with how much personality and how many activity options it has for our family – from charming neighborhoods and outdoor parks to sprawling museums and unique entertainment spots. We spent a surprising amount of time in the Dallas Museum of Art and thePerot Museum of Nature and Science, and could’ve spent even more time playing unlimited pinball at Cidercade (above). We felt like we barely scratched the surface of what Dallas has to offer, so we’ll definitely be back. Just be sure to check if you’re traveling when local schools are also on break, because it might be smart to avoid those crowds.
Average March and April temperatures in Dallas are typically in the 50s (low) to 70s (high).
Located about 45 minutes south of Atlanta, this small “new urban” town focuses on nature, wellness, and community. It was one of our most peaceful Spring Break trips ever, where the kids spent hours exploring the woods, playing in creeks, and forgetting about their devices. We also ate lots of good food, shopped at sweet local stores, Sherry and our daughter enjoyed a spa day, and we all rode horses to a waterfall!
Average March and April temperatures in Serenbe are typically in the 40s (low) to 70s (high).
It should be no surprise to see a Florida destination on a spring break list (our entire state is basically a tourist destination due to warmer weather than most of the country at that time of year). But choosing to stay closer to downtown St. Petersburg (instead of other nearby beaches like St. Pete Beach and Clearwater) can help you avoid some crowds and help you have a more unique Spring Break experience. The city of St. Petersburg is fun and colorful, with lots to explore – including The St. Pete Pier (above), the Grand Central District, and the impressive The Salvador Dalí Museum. We really liked this trip!
Average March and April temperatures in St. Petersburg, FL are typically in the 60s (low) to 80s (high).
Ocean Springs caught our eye on Southern Living’s 15 Most Adorable Small Towns and we had a great time exploring its throwback charm, fun shops, and enjoying some really nice weather. You’ve got cute ice cream and donut shops, trendy coffee spots, and more in a very walkable and golf-cart-able town. They also have a sandy beach that fronts the Biloxi Bay, which offers chill, calm waters for all ages to safely enjoy.
Average March and April temperatures in Ocean Springs, MS are typically in the 50s (low) to 70s (high).
One of the reasons we were so taken with Ocean Springs is because it reminded us of Cape Charles, Virginia – the historic Chesapeake Bay town where we used to own a beach house and our rental duplex. It too had a small, walkable downtown and bayfront beach that only really gets busy on holidays like Memorial Day and the Fourth of July. Cape Charles may not be warm enough for a dip in March or April, but there are museums, state parks (including wild horses at Chincoteague), and more in the surrounding area that’ll keep your family the perfect amount of busy. If you’re looking for a chill and charming spot, Cape Charles has it in spades.
Average March and April temperatures in Cape Charles, VA are typically in the 40s (low) to 60s (high).
I’m listing this as a “bonus” because this is the spot we’ve chosen for this year’s spring break vacation. So while I can’t name our favorite activities yet, I can tell you that we’ve got a full list of things we’re excited for – everything from Great Smoky Mountains National Park and Dollywood to the crazy Airbnb we booked with friends that has a game room, indoor mini golf course, movie room, and more! The rental houses there generally seem to be full of bells and whistles (more than one had a nerf room! like for shooting foam darts at each other). Should be a very entertaining town…
Average March and April temperatures in Gatlinburg are typically in the 30s (low) to 70s (high).
If you’ve been searching for the perfect hanging herb garden, let me introduce you to the DIY that will change how you cook: a wall-mounted IKEA herb garden that costs less than $30, takes under an hour to build, and delivers fresh basil, cilantro, and parsley right at your fingertips every single day.
.tasty-pins-banner-container{display:block;margin-bottom:20px;position:relative;width:-moz-fit-content;width:fit-content}.tasty-pins-banner-container a{cursor:pointer;display:flex;font-size:14px;font-weight:700;letter-spacing:1px;line-height:1.8em;text-transform:uppercase}.tasty-pins-banner-container a:hover{opacity:1}.tasty-pins-banner-container .tasty-pins-banner{align-items:center;bottom:0;cursor:pointer;display:flex;justify-content:center;left:0;padding-bottom:1em;padding-top:1em;position:absolute;right:0}.tasty-pins-banner-container .tasty-pins-banner svg{margin-right:4px;width:32px}.tasty-pins-banner-container .tasty-pins-banner span{margin-top:4px}.tasty-pins-banner-container a.tasty-pins-banner{text-decoration:none}.tasty-pins-banner-container a.tasty-pins-banner:hover{opacity:.8}.tasty-pins-banner-container a.tasty-pins-banner-image-link{flex-direction:column}.tasty-pins-banner-container a img{margin-bottom:0}.entry-content .wp-block-image .tasty-pins-banner-container img{margin-bottom:0;padding-bottom:0}#et-boc .et-l div .et_pb_image_wrap .tasty-pins-banner-container .tasty-pins-banner{padding-bottom:1em!important;padding-top:1em;text-decoration:none}#et-boc .et-l div .et_pb_image_wrap .tasty-pins-banner-container a.tasty-pins-banner{cursor:pointer;display:flex;font-size:14px;font-weight:700;line-height:1.8em;text-transform:uppercase}#et-boc .et-l div .et_pb_image_wrap .tasty-pins-banner-container a.tasty-pins-banner span{letter-spacing:2px;margin-top:4px}.et-db #et-boc .et-l .et_pb_module .tasty-pins-banner-container a:not(.wc-forward){padding-bottom:0}
This will become one of the most-visited corners of your kitchen.
Whether you’re working with a tiny apartment, a rental, or a full home kitchen, there are countless reasons and lots of good things about how a hanging herb garden changes the way you live — and IKEA gives you the plant pots, flexibility, and perfect add-ons to make it happen for less than you’d spend on a month of grocery store herbs.
The Real Benefits of a Hanging Herb Garden (Not Just “It Looks Pretty”)
Let’s talk about the number of unique benefits that make a hanging herb garden worth the effort, because there are more than you might expect.
A better life starts with better ingredients. Fresh herbs aren’t just tastier than their dried counterparts. They’re more nutritious, more aromatic, and more satisfying to cook with.
Having greenery literally on your wall means you’ll reach for it every time you cook, not just on special occasions.
It solves the “counter space” problem. If your kitchen counters are already at capacity, vertical growing is the answer. Hanging planters use outdoor space on your walls (and indoor space near your windows) that would otherwise go completely unused.
It’s significantly cheaper than buying fresh herbs at the store. A single basil plant from a nursery costs $3-5 and will give you fresh leaves for months if you care for it well. Compare that to buying cut basil at $2-3 per bunch, several times a month. The math makes the hanging herb garden a reason to DIY.
Pets and kids can’t reach it. If you share your home with curious pets or little hands that love to dig in soil, wall-mounting your herb garden is a practical safety solution.
It brings inspiration into your daily routine. There’s something quietly wonderful about having living greenery in your kitchen. It makes the space feel more alive, more intentional, and more like you.
The Best IKEA Products for a Hanging Herb Garden
IKEA’s flexibility as a brand is one of its greatest strengths — their products are designed for one purpose but work beautifully for others. Here are the standout options for building your IKEA hanging herb garden setup, from the classic hack to modern alternatives.
The IKEA Vurm Wine Rack (The OG Hack)
The IKEA Vurm is technically a wall-mounted wine bottle holder, but mounted horizontally, its cylindrical slots hold pint glasses — and those glasses hold herbs.
If you can get your hands on one, this is the original IKEA herb garden hack, and it remains one of the best because it’s inexpensive, wall-mounted, and holds four plants in a tidy, organized row.
The Vurm is discontinued in some markets, but it shows up regularly on Facebook Marketplace, OfferUp, and thrift stores. If you find one, grab it — it’s absolutely worth it.
ORDNING Utensil Holders + DIGNITET Curtain Wire
For a sleeker, more modern hanging herb garden, combine IKEA ORDNING stainless steel utensil holders with the DIGNITET curtain wire system.
Thread the wire through the holes in the holders, mount to a kitchen door or wall, and you have a stunning vertical garden that looks like something from a design magazine.
Mix the tall (7 1/8″) and shorter (5 3/8″) ORDNING versions for visual variety and flexibility in plant sizing.
Hanging Pot System
There are several IKEA hanging pots with hardware already included. This makes these options one of the most beginner-friendly options on this list.
Details to keep in mind: these plant pots can be on the heavier side when filled with soil, so check your wall anchor ratings before installing. For a lighter setup, swap the included pots for smaller plastic or metal containers that fit the same hanging hardware.
RÅSKOG Cart (The No-Drill Vertical Garden)
Not ready to commit to wall mounting, or renting, and need to avoid holes? The RÅSKOG utility cart could be your answer.
Three tiers of herbs on a rolling cart that you can wheel to the sunniest spot in your home is a genius solution — flexible, portable, durable, and genuinely stylish.
It’s less of a hanging garden and more of a vertical one, but it solves all the same plant needs with none of the permanence.
Tension Rod Method (Perfect for Renters)
IKEA tension rods placed inside a window frame let you hang planters from S-hooks with zero drilling required.
Position your tension rod at window height, hang planters or mason jars fitted with hooks, and you’ve got a floating herb garden living exactly where the light is best.
Special discounts on tension rods and hooks make this one of the most affordable setups of all.
Step-by-Step: How to Build the IKEA Vurm Hanging Herb Garden
Ready to build? Here’s the complete tutorial — including updates on drainage and plant care that will keep your herbs thriving long after the initial build.
What You’ll Need
IKEA Vurm wine rack (or similar rack with cylindrical openings)
4 pint glasses
4 small herb plants (basil, cilantro, parsley, thyme, mint — more on choosing below)
Drainage rocks or pebbles (Dollar Tree is a great source!)
Potting mix for herbs
Latex paint in any color (optional)
Americana Clear Chalkboard Coating (optional, for labels)
White chalk
Drill and wall anchors, or picture-hanging hardware rated for 20+ lbs
Stud finder
Decorate Your Glasses (Optional but Adorable)
Dip the bottom inch of each pint glass into latex paint. Let the excess drip off, set on wax paper to dry, and move each glass slightly after an hour so it doesn’t stick. Once the paint is completely dry, brush on a coat of Americana Clear Chalkboard Coating. Let it dry for an hour, add a second coat, then let the glasses dry overnight.
To “condition” the chalkboard surface so chalk wipes away cleanly: rub the flat side of a piece of chalk over the entire painted area, then wipe off with a dry paper towel. Your labels are ready to write.
If you prefer a minimalist look, skip the paint entirely — clear glass with colorful pebbles visible through the sides looks beautiful too.
Create Your Drainage Layer
Add rocks or pebbles to the bottom of each glass, filling about one-third full. This step is non-negotiable: pint glasses don’t have drainage holes, so without a rock layer, water has nowhere to go and root rot sets in quickly. The pebbles create a reservoir below the soil where excess water collects harmlessly.
Pro tip for better drainage: Place the small plastic nursery pot your herb came in directly inside the glass — water will drain through the pot’s holes into the rock layer below. Paint the glass fully to hide the plastic pot if you go this route.
Plant Your Herbs
Gently loosen the root ball of each plant. You may need to remove some soil from the sides so it fits inside the glass without forcing. Don’t damage the roots — just be patient and work slowly. Add fresh potting mix around the plant to fill gaps, leaving about half an inch of space at the top. Press lightly to remove air pockets, then water gently to settle the soil.
Mount the Vurm (The Right Way)
This is the most important step — a rack full of water-heavy plants is heavier than it looks. Do this correctly and your herb garden will be sturdy and safe for years.
If using the Vurm, rotate the Vurm horizontal (this is the hack — mounted sideways, the slots hold glasses rather than wine bottles).
Hold it against the wall in your chosen spot and mark the mounting holes with a pencil. Use a stud finder to locate studs. Mount at least one side of the rack into a stud; if that’s not possible at your preferred location, use drywall anchors rated for at least 20 lbs.
Drill pilot holes, insert anchors if needed, then screw in the mounting hardware. Hang the rack and give it a firm tug to confirm it’s secure before adding your plants.
Add Plants and Label
Slide each planted glass into a Vurm slot — they should fit snugly. If there’s any wobble, wrap a rubber band around the glass before inserting to create friction. Write herb names on the chalkboard bases with chalk. Done!
Choosing the Right Herbs: Which Plants Will Actually Survive Indoors?
Do herb plants need sunlight?
Yes. But not all herbs need the same amount, and understanding this makes the difference between a thriving garden and a sad, leggy tray of struggling plants.
Herbs for lower light (north-facing windows or spots a few feet from a window): Mint, parsley, chives, and cilantro are more forgiving in lower-light conditions. These are great starting points if your kitchen doesn’t get much direct sunlight.
Herbs that need bright, direct light (at least 6 hours of sun daily): Basil, rosemary, thyme, and oregano need the sunniest window you have.
If your kitchen doesn’t get enough natural light, a small LED grow light strip mounted above the rack is a perfect add-on that makes a huge difference.
Herbs to avoid in small indoor containers: Dill and fennel grow tall quickly and don’t do well confined in small glasses. Save these for outdoor space in larger pots or garden beds.
Can you grow herbs in a hydroponic bowl?
Yes, and it’s a great option if you want to skip soil entirely. Herbs like basil, mint, and cilantro grow very well in water with added nutrients.
Keeping Your Herbs Happy: Care Tips That Actually Work
Watering
The most common herb garden killer is overwatering.
Check soil moisture every 2-3 days by inserting your finger about an inch into the soil — water only when it feels dry at that depth.
If you see standing water above the rock layer and the soil is still wet, hold off completely until things dry out.
How does a plant do in water? Herbs in closed containers (like our pint glasses) can stay moist for longer than herbs in traditional pots with drainage holes, so err on the side of less water rather than more.
Light and Rotation
If your herbs get light from only one direction, rotate each glass weekly to prevent uneven, lopsided growth toward the light source.
Harvesting for Better Growth
Here’s the secret most people miss: the more you harvest, the more your herbs grow. Pinch stems from the top, never taking more than a third of the plant at once.
For basil especially, pinch off any flower buds the moment they appear — once basil bolts (flowers), it puts all energy into seeds, and the leaves turn bitter.
Regular harvesting keeps plants compact, bushy, and productive.
When Herbs Do Poorly: Troubleshooting
Leggy, reaching plants: Need more light. Move closer to a window or add a grow light.
Yellowing leaves: Usually overwatering or nutrient deficiency. Let soil dry out between waterings, and feed with diluted liquid fertilizer every 2-3 weeks.
Wobbly glasses: Add a rubber band or two around the glass before inserting into the slot.
Fruit flies: Almost always a sign of overwatering or decaying organic matter in the soil. Let the soil dry out and check the rock reservoir for debris.
Root binding: Pint glasses are small — fast-growing herbs like basil may become root-bound within a few months. If you notice stunted growth or roots circling the bottom, it’s time to repot or start fresh.
How Long Does a Leaf Plant Last?
Herb plant lifespans vary. Annuals like basil and cilantro typically last one growing season (3-5 months indoors) before going to seed and declining. Perennials like mint, thyme, rosemary, and chives can last for years with proper care.
Planning your hanging garden with a mix of annuals and perennials gives you both reliable, long-term greenery and seasonal variety.
How to Make an IKEA Hanging Herb Garden
Active Time1 hour
Total Time1 hour
Materials
IKEA Vurm wine rack
4 pint glasses
4 small herb plants
Drainage rocks or pebbles
Potting mix
Latex paint + Americana Clear Chalkboard Coating (optional)
White chalk
Drill, wall anchors, stud finder
Instructions
Step 1: Decorate Your Glasses (Optional)
Dip the bottom inch of each glass in latex paint and let dry. Apply two coats of chalkboard coating, drying one hour between coats. Condition by rubbing chalk over the surface, then wiping clean.
Step 2: Add a Drainage Layer
Fill each glass one-third full with rocks or pebbles. This prevents water from pooling at the roots.
Step 3: Plant Your Herbs
Loosen the root ball and place each herb in a glass. Fill gaps with fresh potting mix, leaving a half inch of space at the top. Water lightly to settle the soil.
Step 4: Mount the Vurm
Rotate the rack horizontally. Mark mounting holes on the wall, locate studs with a stud finder, and drill in. Use drywall anchors rated for 20+ lbs if you can’t hit a stud. Hang the rack and tug to confirm it’s secure.
Step 5: Add Plants and Label
Slide each glass into a slot. If it wobbles, wrap a rubber band around the glass for a snugger fit. Label with chalk.
No matter how you choose to implement your herb garden, it is the perfect addition to your kitchen and incorporating fresh ingredients into your meals.
I can’t give you 100 one-syllable girl names without a list for boys too! And, well, I did marry one of the most popular monosyllabic names of all time: John. Short boy names have been popular for centuries. Think Gods (Zeus), Gospels (Mark, Luke), Founding Fathers (George, James, Ben), all the way to modern TV characters (Ross, Zack, Bart). They can feel strong, timeless, charming, unique, or all of the above. So today I’m sharing 100 of my favorites.
This list can be useful if you’re trying to balance out a longer last name or simply seeking something easy for your child to spell and pronounce. This might also spark an idea for a middle name, or the nickname you’ll use instead of their longer, legal name (Ben instead of Benjamin).
Popular One-Syllable Boy Names
We scoured the annual list of Top Baby Names put out by the Social Security Administration (this is 2024 info, as 2025 hasn’t been released). Almost 15% of the Top 500 boys names were one syllable. That’s 3x as many on girls’ list! And that’s not to mention several top names that have common one-syllable nicknames (like Lucas, William, Daniel, etc).
Here are the Top 25 one-syllable baby boy names, along with their rank on the overall list:
James (#5)
Jack (#15)
John (#21)
Luke (#34)
Miles (#37, also see Myles below)
Reece (#45)
Brooks (#67)
Beau (#69)
Kai (#76)
Myles (#99, also see Miles above)
Jace (#114, also see Jayce below)
George (#124)
Graham (#129)
Juan (#137)
Dean (#142)
Jude (#156)
Hayes (#160)
Jett (#161)
Cole (#162)
Ace (#165)
Jayce (#169, also see Jace above)
Chase (#173)
Rhett (#174)
Max (#175)
Finn (#198)
And although they’re not in the Top 25, I have to give a shout-out to Zayn (#249), Zain (#306), and Zayne (#447) for appearing 3 times in the Top 500 under different spellings.
As for our favorite 100 options, here is the full list of 100 one-syllable names, sorted alphabetically. Personally, my favorites are Beau, Clark, Dean, Cal, George, Graham, Finn, Jack, Kent, Luke, and Wells.
Ace
Art
Banks
Beau
Beck
Bo
Blake
Briggs
Brooks
Bruce
Bryce
Burke
Cade (or Kade)
Cain (or Kane)
Cal
Cash
Chance
Charles
Chet
Chuck
Clark
Clay
Clint
Clive
Clyde
Cole
Crew
Cruz
Dale
Dash
Dax
Dean
Don
Duke
Drew
Finn
Flint
Flynn
Ford
Frank
Fred
George
Graham
Grant
Gray
Guy
Hank
Hayes
Heath
Hugh
Jace (or Jayce)
Jack
Jake
James
Jay
Jett
Joe
Joel
John
Juan
Jude
Kai
Keith
Kent
Kit
Knox
Kurt
Kyle
Lance
Lane
Lee
Lev
Lex
Luke
Mac
Mark
Max
Miles (or Myles)
Nash
Nate
Neil
Pete
Pierce
Quinn
Ralph
Ray
Reece (or Rhys)
Reed (or Reid)
Rex
Rhett
Rome
Royce
Saul (or Sol)
Scott
Sean (or Shawn)
Seth
Shane
Steve
Tate
Todd
Tom
Trace
Trent
Trey
Troy
Vic
Vince
Wade
Walt
Wells
Wes
Will
Wynn
Zane (or Zain or Zayne)
More Naming Resources
Need more name ideas? Maybe even some for your pets! Take a look at these other posts below for more names, including boys, dogs, and cats too.
When I hyper-focus on a task, I’m known to go ALL IN. And that’s exactly how I approached the giant job of digitizing all of our old photo albums. We crowdsourced suggestions, took some deep dives into message boards, and Googled the heck out of it. From there, I narrowed our options to 5 photo digitization methods that we tested for quality, price, and speed. There was one clear winner for us, but also lots of other good ways to go about it (even free ones!), depending on your personal priorities. So I’m going to lay out everything we tried, and why we had a clear favorite.
As always, none of the products or methods mentioned have been sponsored or paid for. Everything was bought and tested with our own money, and we’re sharing what we liked best for no other reason than: we really did like it best!
The Photo Digitization Methods We Tested
We tried to pick a range of tools and techniques. Some free, some pricier. Some suspiciously fast, some more intricate. They were:
My phone’s camera (simply taking photos of pictures)
*Our printer from 2018 is still going strong, so that link is the closest current model.
I also filmed a quick, 90-second video of how method #2 (the Photomyne app) and #4 (the Plustek scanner) operate, since they’re the more “new-fangled” techniques we tried.
In testing each of these, we paid close attention to the following criteria:
Cost
Quality
Speed
Ease
Overall convenience
That last one is important because, like most people, we have OVER 1,500 old photos to scan. So it’s easy to lose steam if digitizing them feels like a slog. So, for us, that became the deciding factor for the overall best method.
Our Test Photos
Fair warning: you’ll see these pics of young John and little Sherry A LOT in this post. I used them to get apples-to-apples comparisons on quality. I also chose this particular shot of Sherry because it’s a little dark, letting us see how these scanners handle poorly lit photos.
And unless otherwise noted, I’m showing these photos here WITHOUT EDITS or ADJUSTMENTS. This gives you an idea of what you’ll get straight out of the camera or scanner.
Best Price ($0): Your Phone’s Camera
Most of us already own a phone, so it’s hard to beat the $0 price tag for this method. So if cost is your #1 priority, you’ll be glad to know your phone’s camera is a good quality option (I’m using an iPhone 16 Pro). However, this approach takes time, patience, and some setup for the best results.
If you go this route, here’s how to get the highest quality photos of your photos:
Set your camera to its maximum resolution (mine is 48MP)
If possible, use a tripod and your camera’s timer to minimize blur
Arrange your photo(s) on a white background, like a piece of poster board
Shoot in a place with good, indirect lighting, like a sunroom or porch on a cloudy day. This will minimize glare.
Shooting a grouping of prints together (like shown above) can be efficient, but you’ll lose some quality. Notice how the left images are a little blurry? That’s because my camera is pulled back to capture the group. For the best result, photograph your photos one by one so you can be closer to each print.
Overall, this method was way too slow for me. Even though it only took me 4 minutes to photograph 50 photos, I spent nearly 30 mind-numbing minutes cropping each one into an individual file. So, despite its pros (zero dollars! zero special equipment!), this method was way too inefficient.
VERDICT: Best method for digitizing a small number of photos without spending any money, otherwise, skip this.
Best Quality: Flatbed Scanner
If quality is your top priority, I was most satisfied with the flatbed scanner in the HP Envy printer we already own… but only just by a hair. This method cost us $0 to try, but a new one sells for about $99. That’s about 1/2 the price of the special photo scanner I’ll discuss in a moment.
When I say “quality,” I mean that the scans were the clearest and most vibrant result without any edits or adjustments (see below). It also handled non-photo scans the best, like the greeting cards and letters I found in one of our albums. So if I were judging on versatility, this would probably win too.
I got similar results on the darker, indoor photo of Sherry. The files from my flatbed scanner were the most “ready to go” straight out of the camera/scanner. Again, the Plustek was a very close second.
Like the iPhone, the big drawback to this method is speed. I wasted a lot of time arranging photos on the glass, waiting for the scan, and then straightening & cropping the scans into individual photo files. This was the slowest method by far, so I wouldn’t recommend it if you have lots of photos.
VERDICT: Best for scanning a small number of photos you want at the highest quality.Likely will drive you crazy and you’ll never finish if you have a large amount of pictures.
Best For Speed: Plustek ePhoto Scanner
When we asked for photo scanner recommendations on Instagram, the Plustek ePhoto Scanner was the clear favorite – and we can see why! We were a little hesitant to spend $200 when we already owned a flatbed scanner, but over 1,000 people recommended it so we went for it… and I’m so glad we did. The speed and convenience it offers are lifesavers for an undertaking like this.
Just place a photo facedown into the scanner, and it automatically feeds through in seconds. A moment later, an already-cropped file appears in the accompanying software, ready to save. I breezed through 50 photos in less than 5 minutes, making it waaaaay faster than the two methods above. Plus, it was so simple I could’ve done it all day.
VERDICT: Best for fast & easy scanning of large batches of photoswithout sacrificing good, high-quality results.
Getting The Best Quality Out of Plustek
I was actually pretty unhappy with the quality of my first few Plustek scans. They were dark and took a lot of adjusting to look…just okay. But after playing with some settings in the “Preferences” menu, I solved my problem! So before you dive in, do a few test scans and noodle settings until you’re happy.
You can see my preferred settings below – the most important wasturning on the ICC Profile. I liked “Photo Scanner (M21)” the best.
Here’s an example of what my scans looked like at first (left) and after I turned on the ICC profile (right). You can see how much brighter and more vibrant they are on the right.
The ePhoto software that comes with the scanner also includes some built-in photo & color adjustment tools, but I find them to be a little clunky. Luckily, most of my scans come out just fine without extra work.
Best For Speed (Runner Up): Photomyne App
If buying an extra device is a non-starter for you, an app like Photomyne is a good alternative. It supercharges your phone’s camera by auto-cropping your photos (see below), making it much faster than your iPhone alone. It’s not free ($60/year) and some editing features are behind additional paywalls, but there is a 3-day free trial you can use to test drive it.
As I noted above with the iPhone Camera, shooting a big group at once can reduce the quality of the individual photographs – but you’ll also lose some of the “magic” the app offers by shooting pictures one-by-one.
I didn’t splurge for any of the paid editing features, but some of the free ones seemed more gimmicky than actually useful. For instance, an AI facial-sharpening tool tended to make everyone look just a little…. off. You can see what it did to teen Sherry below. Note from Sherry: “those are someone else’s teeth in my mouth.”
Overall, I thought Photomyne did a good, quick job of scanning – even a smidge faster than the Plustek. But the physical process of arranging & photographing things was more cumbersome and prone to error than simply feeding prints through a scanner. I also felt the quality left something to be desired (a little dull & blurry). So some of the efficiency would be lost in having to edit and adjust them all afterwards.
VERDICT: Second best for speed if you don’t want to purchase a scanner.
An Alternate Photo Scanning App
I chose to test Photomyne because of its ability to scan and crop multiple photographs at once. However, another popular digitizing app is PhotoScan by Google Photos. It only does 1 photo at a time, but uses an interesting technique to eliminate glare – even with the flash on! The app guides you to position a circle over four white dots on your screen, taking a scan at each corner. Then it stitches the multiple captures together seamlessly.
My results were mixed, however. Some attempts were blurry, and others still had glare. Plus, the process of taking multiple photos to get 1 scan was tedious. So I wouldn’t use this for bulk projects like mine. But it is free to use and links directly to a Google Photos account!
Best For Ease: LegacyBox
LegacyBox is a third-party scan-by-mail service that digitizes both photos and videos in a variety of formats (prints, 35mm negatives, slides, DVD, VHS, etc). They ship you a box, you send it back with photos inside, they digitize everything, and then return the originals to you. You can receive your final files via cloud download, thumb drive, or CD. My order is still processing, but it’s hard to imagine an easier, more hands-off process than this!
I will update this post once I’ve received my final files, so I can’t speak to quality yet. But I’m pretty certain LegacyBox will lose handily on both cost and speed (it’s expensive and takes a while).
I snagged a holiday discount to digitize 50 photos for $25, but after taxes, fees, shipping & handling, and shipping protection, my total was closer to $55. Sure, there would be economies of scale if I sent a bigger batch, but it quickly becomes the priciest option listed here (500 photos will set you back about $350).
As for speed, LegacyBox says standard processing takes 4-6 weeks, which doesn’t include the time to ship the box back and forth. So while it may not require a lot of your personal time, it’s not a great option if you’re in a hurry. And once you get the digital files, remember you still have to put them into a photobook and get that printed, so they don’t make the entire process hands-off.
VERDICT: Best if you have time and want an easy outsourced option to get the job done– especially if money is no object.
Our Final Verdict: The Best Photo Digitization Method
After all my testing, I’ve digitized hundreds of photos – but still have hundreds more to go. And the method I’ll be continuing with (if it wasn’t already obvious) is… the Plustek ePhoto Scanner!
It’s pretty much the ONLY method I can imagine using for such a large collection of photos. There’s no tripod, no shipping, no carefully arranging prints on a white backdrop or scanner pane. The Plustek is easy to set-up, simple to use, and even makes the process somewhat (dare I say?) relaxing. So if you can spare the $200ish to snag this scanner, I think you’ll be very glad that you did. I know we are! And now I know why over 1,000 people recommended it to us when Sherry asked for suggestions on Instagram.
What’s Next For Our Digitization Project?
I’m grateful we’ve landed a digitization method, but there’s still plenty of work ahead! In addition to scanning everything, we want to make sure everything is backed up (locally & on the cloud) and then print several photobooks to replace our bulky albums.
You can see below how photobooks can hold hundreds of photos in a MUCH thinner format than the old puffy albums above. Each of the thin books below holds about 450 photos while the puffy ones above hold about 225. To put it another way: that’s ten years of photos (around 4,500!) below in those much thinner books, and fewer than 5 years of photos (around 1,125) in those puffy albums above, which take up about 4X more space.
In summary, we’re thrilled to be reclaiming some extra storage space when we finish this project! And we’ll feel a lot more secure once we have all our photos securely stored in multiple places (many of the photos in our old puffy albums exist only there… so if something happened to our house, they’d be lost forever).
Once we’ve finished this entire photo digitizing journey (what is this, The Bachelor?) I plan to write a final post with all of our tips & lessons learned from this undertaking. And I’ll be sure to address what we’re doing with the old photos we are keeping. Don’t worry, we’re not throwing everything away!
*This post contains affiliate links, so we may earn a small commission when you make a purchase through links on our site at no additional cost to you.