Megan is a writer and editor who specializes in home upgrades, DIY projects, hacks, and design. Before Apartment Therapy, she was an editor at HGTV Magazine and This Old House Magazine. Megan has a degree in Magazine Journalism from Northwestern University’s Medill School of Journalism. She is a self-taught weighted blanket connoisseur.
We independently select these products—if you buy from one of our links, we may earn a commission. All prices were accurate at the time of publishing.
Name: Gretchen Raguse Location: SE Portland, Oregon Size: 615 square feet Type of Home: One-bedroom Apartment Years Lived In: 3 years, renting
For more content like this follow
“I fell in love with my apartment the second I saw it,” admits Gretchen Raguse, who’s been renting this 615-square-foot, one-bedroom apartment in Southeast Portland for three years. “Growing up in Portland, I feel the most connected with the character of the Eastside. I stumbled upon this spot during my daily Craigslist scroll and realized it was exactly where I wanted to be in the city. It checked all my boxes; it’s walking distance to my favorite park, close to great places to eat and shop, and it had the charm I was looking for.”
Gretchen says she loves the architectural details like hardwood floors, arches, and the 1920s-era elements, but the apartment’s layout and large amounts of storage were also big selling points. “It has its quirks, but I enjoy making the most of the ‘landlord special’ and I’ve been grateful to give this blank canvas my personal touch,” describes Gretchen. Some of those changes have been small DIYs like renter-friendly fabric wallpaper accent walls, to significant add-ons to the small kitchen to make it much more functional.
Apartment Therapy Survey:
My Style: Eclectic, Curated, Repurposed, Functional, Maximalist
Favorite Element: I love using vintage fabric as wallpaper. I came across this idea on Apartment Therapy a few years ago, and knew I needed to try it out in my own space. For me, the application is much easier and more affordable than that of traditional wallpaper or peel and stick. The added texture of the fabric feels high-end, contemporary, and gives the space a unique personality.
I started with an accent wall in my kitchen, meant to visually divide the area for my office. Repurposing a dress my mom made in the ’70s, I cut and pasted the fabric together to form a repeating pattern. I only had enough to cover a small section, so I added trim and beadboard to fill out the wall. Fabric as wallpaper quickly became an obsession of mine and made its way through my apartment. After the accent wall, I added it to my hallway ceiling and bedroom. Even my friend’s place got a fabric makeover!
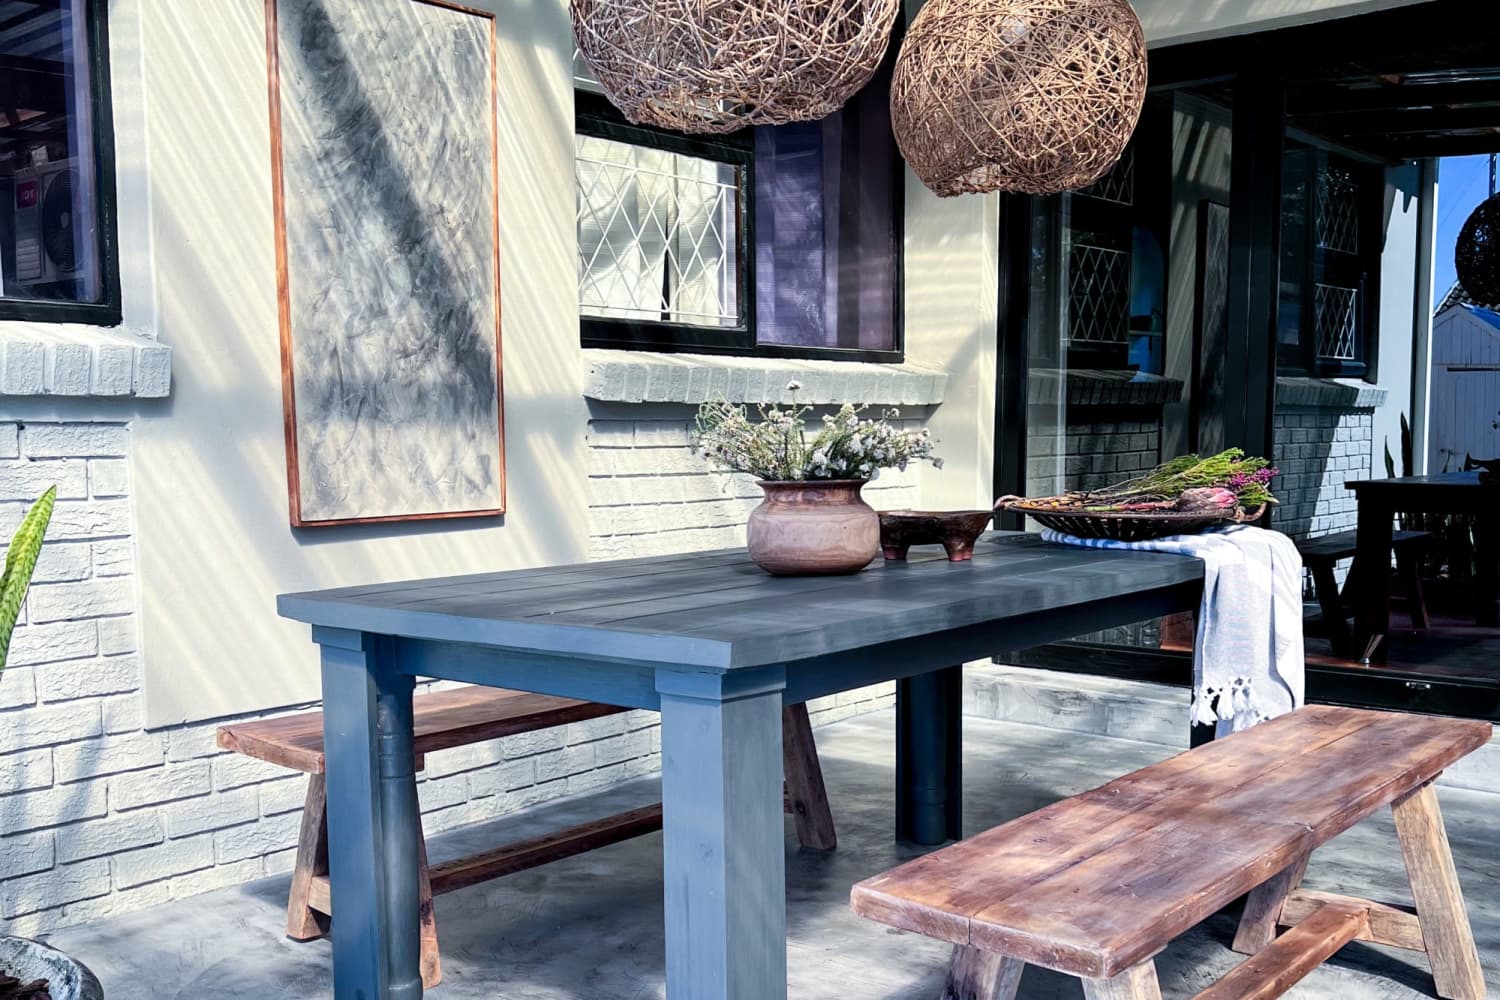
Biggest Challenge: Incorporating my ugly 1950s brown, beat-up, floor-to-ceiling wall heater was definitely my biggest challenge. As soon as I moved in, I knew I needed to get creative with how I would conceal this eyesore. I contracted a friend of mine to build a custom heater cover, complete with three raw-edge walnut shelves. I envisioned this design to resemble a mantel, providing space for decor and other seasonal tchotchkes, while still factoring in the functionality of the heater behind it. Once the cover was built, I painted the main structure to blend in with my apartment walls. I’m very pleased with how it turned out and it’s been a wonderful solution to an unsightly problem.
Proudest DIY: The kitchen was lackluster to begin with. The original cupboards and countertops only lined one side of the room, leaving just a stove and a small set of recessed shelves on the opposite wall. I wanted the stove to feel more integrated and needed more storage in general, so I built a series of freestanding kitchen cabinets and counters using mostly secondhand materials.
I rehabilitated a discarded lower cabinet to function as my coffee bar, food prep area, and home for my microwave. This floor unit is tucked into the right side corner and gives the stove a built-in feel.
On the left side of the stove, I sourced an old dining room buffet, which I purchased at an estate sale. By turning this piece sideways, and aligning it to the recessed wall shelves, I created a small kitchen peninsula. This added counter space and divided the kitchen into a cooking area on the right and a small office area on the left. Unfortunately, this orientation exposed the buffet’s unfinished backside near the stove and required extensive cosmetic work. When finished, this gave me a convenient place to hang my cutting boards.
The front side of the buffet has two doors giving me easy access to ample storage for office supplies. With a little more effort, I also replaced the top and added lift-up hinges to create an optional standing desk.
To complete the kitchen design, I repurposed an old bathroom storage cupboard, salvaged from a remodel, and secured it to the wall directly above the stove. It was shallow enough to allow room for cooking to happen underneath, and its extra height mimicked the original built-ins. I then used a variety of open air shelving to fill out the remaining wall space. With all of these upgrades, my kitchen now shines and the space feels functional, dual-purpose, and complete.
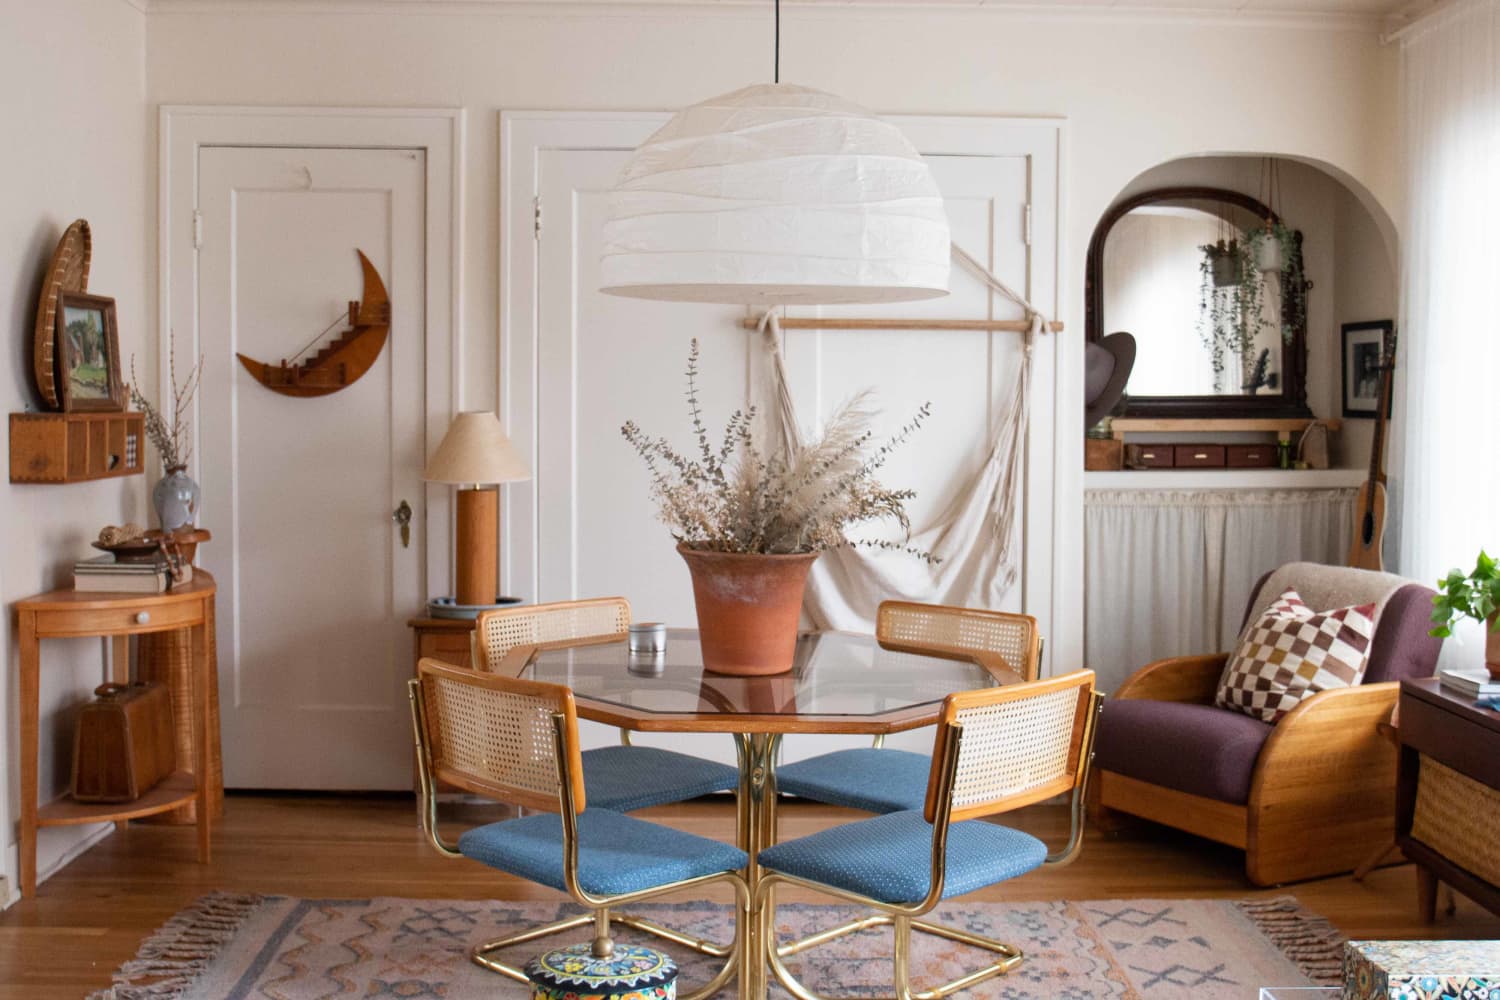
Budget: I’m a frugal girl, so budget is always a priority when decorating. I’m also a thrifting expert and pride myself on finding killer deals. For instance, I found the round, blue corner chair in my living room online for just $20. This same chair is often listed at upwards of $2k. Finding deals like this is part of my process and it’s how I furnished my apartment while keeping my budget incredibly low.
Is there something unique about your home or the way you use it? Apart from an office in the kitchen, I’ve carved out a number of dual-purpose spots in my home by utilizing a strategic layout and every inch of storage available. I worked hard to maximize my square footage through creating intentional and inventive solutions to make my space multifunctional.
I have a makeshift yoga studio stored in my living room credenza. When the motivation strikes, I can easily grab what I need to work out and set up in front of the mirror I installed on the back of my bathroom door. In my main closet, I have a fold-down ironing board and drying rack attached to the inside of each door. When they’re open, my laundry station is ready to go. In my front doorway I added an eye hook to hang a hammock chair on nice days. It captures the feeling of having a sunroom and extends my living space into a shared courtyard. All of this easily tucks away, but gives me options, and makes my small home more enjoyable!
Please describe any helpful, inspiring, brilliant, or just plain useful small space maximizing and/or organizing tips you have: Buy a label maker and get obsessed with it! It’s my favorite way to create order in the home. Other than that, the rest comes with a lot of trial and error. I have moved the dishes in my kitchen from one cabinet to another, too many times to count. I keep going until I have a system in place that functions smoothly with my lifestyle and makes the most sense spatially.
Finally, what’s your absolute best home secret or decorating advice? ABT. Always Be Thrifting. Most everything can be sourced secondhand or made yourself. Thrift often and think outside the box. Check out resale and secondhand shops, online marketplaces, estate sales, and friends’ throwaways. Then take your time making the space feel good for you. Start with the things you love, and see what develops. Don’t be constrained to a certain style or design, because sometimes the best solutions are discovered in the process. The worth becomes what you create from what you find. Best of all, you save a lot of money!
This week, hear how to replace rotten soffit and keep an old paint color from showing through. (LindaCharlton, Getty Images Signature/georgejportfolio, Canva)
Hour 1
Hear how to keep an old paint color from showing through, what to do about peeling paint on a bathtub and more.
Covering Old Paint Color
Proper prepwork and the right primer is key to making sure the old paint color won’t show through the new. (georgejportfolio, Canva)
A homeowner is trying to change the paint color in a room, but the old color keeps coming back.
“I have now put three coats of primer on the walls, and the old color is still shining through. Is there anything I can do to cover up that paint successfully?”
There are a few steps you can take to try to improve the coverage of the primer:
Sand the walls: Sanding the walls will create a rough surface for the primer to adhere to, which may improve its coverage. Be sure to wipe down the walls with a damp cloth to remove any dust after sanding.
Use a high-quality, high-adhesion primer: Some primers are specifically formulated to adhere to difficult surfaces, such as glossy paint or oil-based paint. Using a high-quality, high-adhesion primer may improve the coverage of the old paint.
Use bonding primer: Bonding primer, also known as adhesion primer or glue primer, is a type of primer that is specifically formulated to adhere to difficult surfaces. It is designed to bond to surfaces that are otherwise hard for paint to stick to, such as glossy paint, metal, or plastic. Be sure to allow each coat to dry thoroughly before applying the next.
Tint the primer: This type of primer has been mixed with a small amount of paint pigment to give it a slight color. Tinted primer can be used to help cover up dark colors or imperfections on a surface, or to improve the overall appearance of the finished paint job.
If the paint is still showing through, you may need to paint the walls a dark color to conceal the old paint.
Peeling Paint on a Tub
Cracking paint on a cast iron tub can be caused by a variety of factors, including age, wear and tear, and exposure to water and other elements. (Hemera Technologies, Photo Images)
The paint is peeling like crazy in a new homeowner’s bathtub.
She says, “It has been like this since they moved in, and we’re wondering if it’s okay to take it all off.”
It is generally not a good idea to remove all of the paint from a bathtub. If the paint is peeling, it is likely that the underlying layer is not well adhered to the tub surface, which could cause further peeling and damage.
One option is to remove loose and flaking paint using a scraper or wire brush. Then, sand the surface to create a rough, porous surface for the new paint to adhere to. The tub should then be thoroughly cleaned and dried before applying a new coat of paint.
If the paint is in poor condition and cannot be salvaged, remove all of the paint and start fresh. However, this can be a time-consuming and labor-intensive process. It’s also important to be aware that the underlying surface may not be in good condition.
Before beginning any work on the tub, it is important to protect yourself and the surrounding area. Wear protective gear and cover any nearby surfaces with drop cloths.
If you are not comfortable refinishing the tub on your own, you may want to consider hiring a professional to refinish the tub for you.
Hour 2
Listen to learn the pros and cons of tankless water heaters, how to repair rotten soffit, how to keep snow from getting into ridge vents and more.
Pros and Cons of Tankless Water Heaters
Tankless water heaters are much more compact than traditional tank water heaters, making them a good choice for small homes or apartments. (djedzura, Getty Images)
A homeowner is thinking about replacing his standard water heater with an electric tankless water heater and wants to know the pros and cons.
Pros of tankless water heaters:
They can provide an endless supply of hot water: Because tankless water heaters heat water on demand, you’ll never run out of hot water.
They’re more energy efficient: Tankless water heaters only heat water when you need it, so they’re more energy efficient than traditional tank water heaters. This can result in energy savings of up to 40 percent.
They have a longer lifespan: Tankless water heaters have a longer lifespan than traditional tank water heaters because they don’t have a tank that can rust or corrode.
They’re more compact: Tankless water heaters are much more compact than traditional tank water heaters, making them a good choice for small homes or apartments.
Cons of tankless water heaters:
They have a higher upfront cost: Tankless water heaters have a higher upfront cost than traditional tank water heaters. However, the energy savings over time can offset this initial investment.
They require more maintenance: Tankless water heaters require more frequent maintenance than traditional tank water heaters. This includes cleaning the burners and replacing the filter.
They may not be suitable for large households: Tankless water heaters may not be able to provide enough hot water for large households with multiple showers and appliances running simultaneously.
They may not be suitable for homes with low water pressure: Tankless water heaters require a certain minimum water flow rate to operate effectively. If your home has low water pressure, a tankless water heater may not be a good choice.
Replacing Rotten Soffits
Left unrepaired, a rotten soffit can lead to further damage to the roof and the structure of the house. (LindaCharlton, Getty Images Signature)
A homeowner’s soffits are bowing downward and rotting. He asks: “I’m not sure what to replace them with. What do you suggest?”
It sounds like you may have an issue with the structural integrity of your soffits. Bowing and rotting soffits can be a sign of water damage or poor ventilation. If the damage is extensive, it may be necessary to replace the soffits entirely.
There are several options for replacing soffits:
Wood: Wood is a traditional material for soffits, but it requires regular painting or staining to maintain its appearance. It can also rot or become infested with pests if not properly maintained.
Vinyl: Vinyl soffits are low maintenance and resist rotting, but they may become brittle over time and can be prone to cracking in extreme temperatures.
Aluminum: Aluminum soffits are durable and resist rust, but they can be prone to dents and may require periodic painting.
Fiber cement: Fiber cement soffits are a more expensive option, but they are extremely durable and resist rotting, warping, and insect infestations.
Preventing Snow from Entering Ridge Vents
A ridge vent is designed to allow hot air and moisture to escape from the attic, helping to regulate the temperature and humidity inside the home. (skhoward, Getty Images Signature)
Snow keeps getting into a homeowner’s attic space through the ridge vents every time there is a blizzard with strong winds.
He says, “There is enough snow that I have to use a shovel to remove it. Snow gathers on the beam under the ridge vent where light bulbs are affixed. How do I alleviate this problem?”
There are a few steps you can take to prevent snow from entering your attic through the ridge vents:
Install snow guards: Snow guards are devices that are installed on the roof to prevent snow and ice from sliding off and accumulating at the eaves.
Install heat cables: Heat cables, also known as roof de-icing cables, can be installed along the eaves and the ridge to prevent snow and ice from accumulating. The cables use electricity to generate heat, which melts the snow and ice on contact.
Install a snow fence: A snow fence is a physical barrier that is installed on the roof to block the wind and prevent snow from blowing into the attic through the ridge vents.
Insulate the attic: Proper insulation in the attic can help prevent snow from melting and refreezing at the eaves, which can cause ice dams.
It may also be helpful to have a professional inspect your roof to ensure that it is properly sealed and in good condition. If the snow is entering through gaps or openings in the roof, these issues will need to be addressed in order to prevent future snow accumulation in the attic.
Best New Products
Whether you need to store frozen foods, produce, or beverages, the Vissani convertible freezer/refrigerator can handle it all. Learn more >>
Simple Solutions
Whether you need to tighten or loosen nuts or bolts, here’s the Simple Solution. (3 Echoes Content Studio)
Wrong Size Wrench? No Problem! — What do you do when an open-end wrench is a bit too large for the nut or bolt you’re trying to loosen or tighten? This happens when working on a metric fastener and you’ve only got a standard-size wrench or visa versa.
Well, you may have heard of the trick of using metal washer or coin to fill the gap in the wrench. And while that does work — sometimes — here’s a better solution:
Place the too-large wrench onto the nut or bolt and then jam a slotted screwdriver into the gap between the fastener and wrench.
The wedge-shaped tip of the screwdriver tightens up the fit and really locks the wrench in place.
To easily clean a microwave, pour 1 cup of water and 1 cup of vinegar into a bowl. (3 Echoes Content Studio)
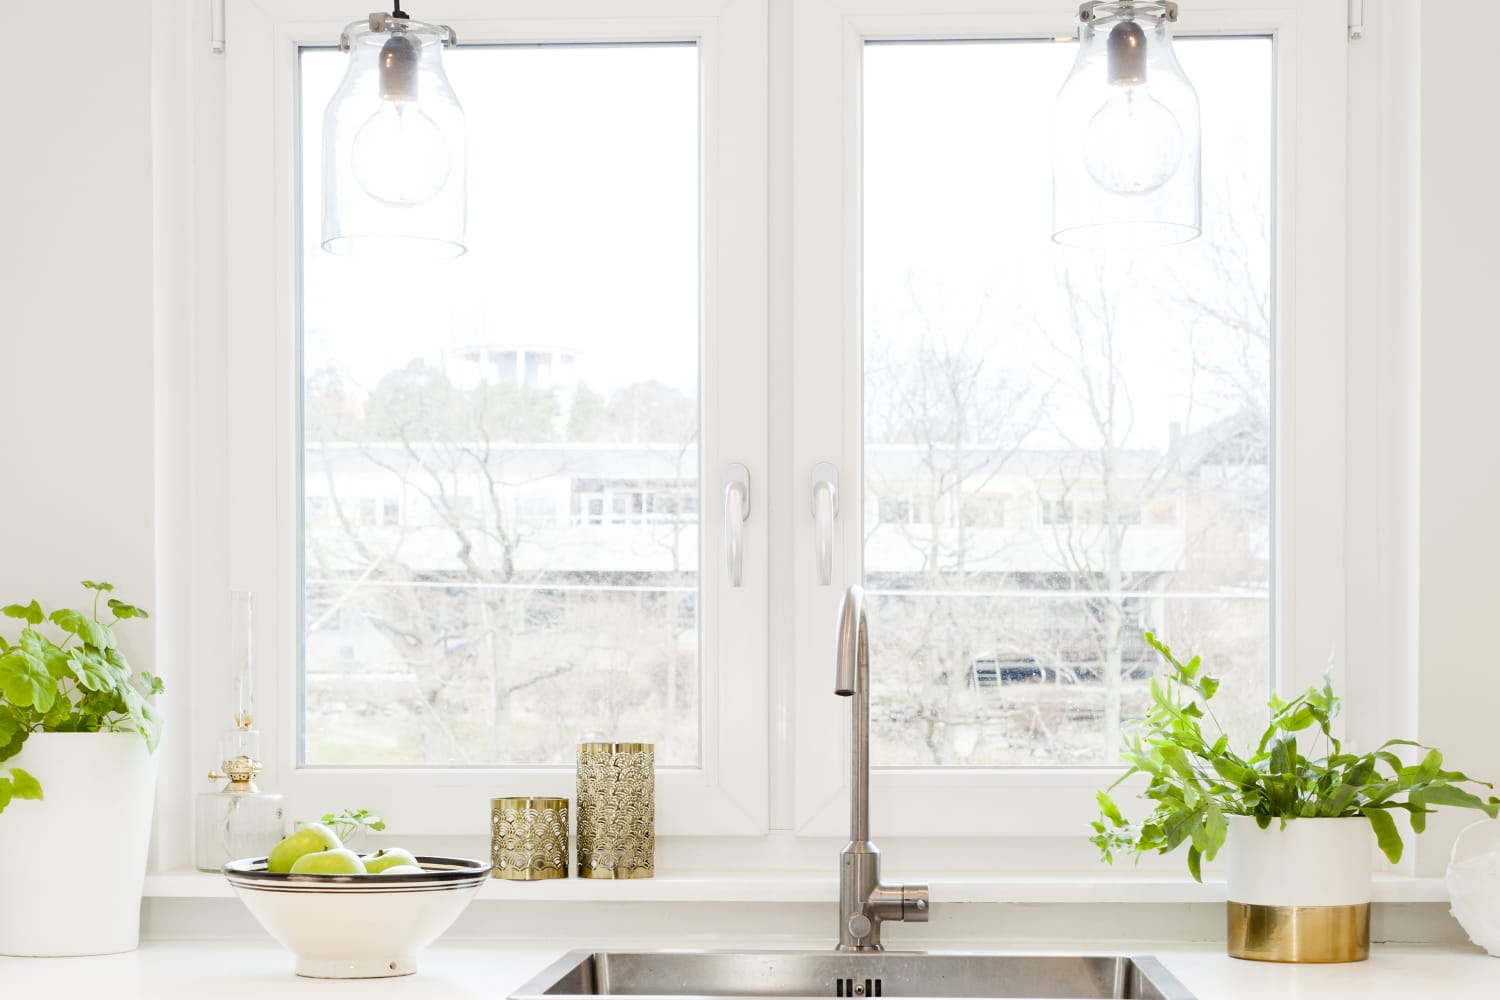
Steam Clean Your Microwave Oven — Here’s an easy, effortless way to clean the inside of your microwave oven:
Pour a 50/50 solution of water and white vinegar into a glass bowl.
Set the bowl in the oven and microwave on high for several minutes.
Carefully remove the bowl, then scrub the inside of the oven with a scouring sponge. The steam created by the water and vinegar will loosen even the most stubborn, caked-on stains.
Whether you’re looking out for your pets or simply don’t want to worry about extensive plant upkeep, faux plants can be a great solution for anyone who wants to add some greenery to their home without having to worry about keeping it alive. Still, finding suitably life-like fake plants for your space can be tricky — but there are easy steps you can take to make them look even more like the real deal.
For more content like this follow
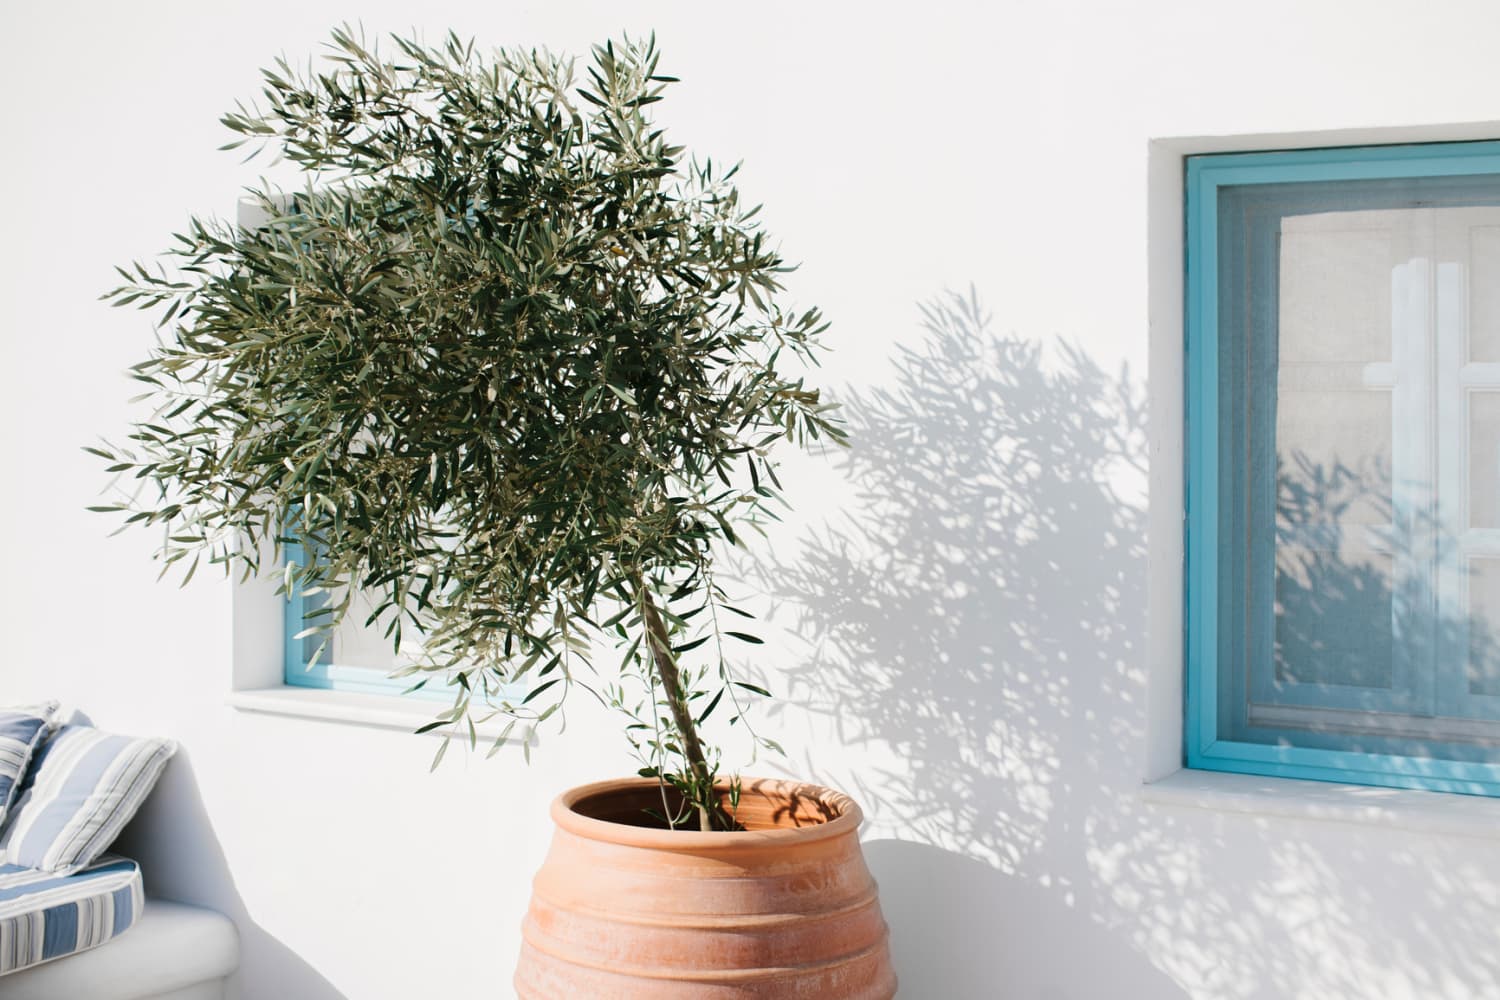
Unsurprisingly, TikTok has you covered in this regard. Recently, TikToker Meriam Pulles (@meriampulles) posted a video sharing how she used leftover packing materials to make her fake olive tree look strikingly real.
First, Pulled and her partner placed the faux tree on top of several broken-down cardboard boxes. Next, they surrounded it with packing peanuts to keep it stable, before adding leftover foam at the top. Finally, they covered the packing materials with faux Spanish moss, and voila! A convincingly real olive tree for their apartment living room.
“One of the many little hacks we pulled off when we first moved into our apt,” Pulles captioned the video.
Clearly, plenty of fellow TikTokers were also taken with her simple DIY solution. At the time of writing, Pulles’ video has racked up over 452,500 likes and 4.3 million views in just three days.
“This is so smart and it looks so good!” one user commented.
Another TikToker provided a suggestion for people who prefer the look of stones to Spanish moss: “Fill the pot with foam or something and then mix stones and glue together and put them on top, it looks really nice. We do this at work.”
Arielle Tschinkel is a freelance pop culture and lifestyle writer whose work has appeared on Shape.com, WomansWorld.com, FirstforWomen.com, Insider, HelloGiggles, and more. She loves all things Disney and is making her way to every park around the world, and is a die-hard Britney Spears fan for life. She’s also obsessed with her Bernedoodle, Bruce Wayne.