If you’ve been noticing a shift in interiors lately, you’re not imagining it. Straight edges are stepping aside to make room for softer, sculptural curves. Arch mirrors in particular are taking over, and for good reason. They make your home feel bigger, brighter, and instantly more stylish, all while adding elegance. The best part? You don’t need to splurge. Every pick here is under $150.
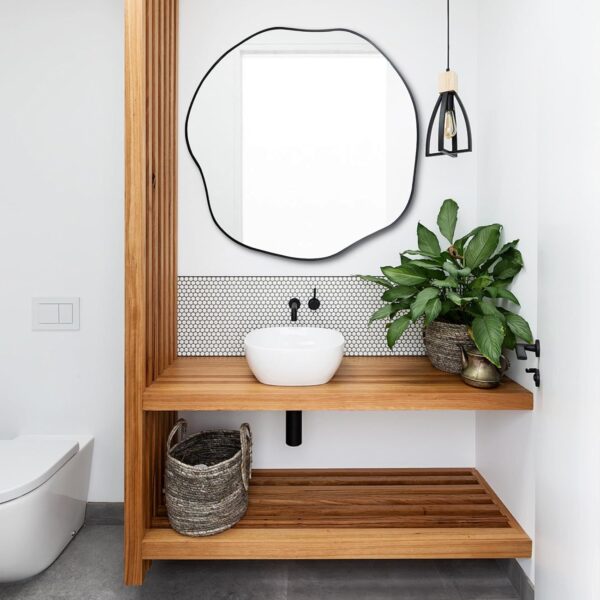
This scalloped design feels organic without being over the top. Perfect above a bathroom vanity or as an accent in a hallway. The irregular shape makes it feel more like art than just a mirror.
Mid-century modern lovers, this one’s for you. The black wood frame grounds the mirror’s freeform shape, making it a statement piece without clashing with the rest of your decor.
Adding gold accents to your home instantly elevates the vibe. This asymmetrical gold frame looks luxe and chic on a vanity or entryway, but the price tag keeps it firmly in the “budget win” category.
For a timeless look, you can’t go wrong with a clean-lined arch! This 20×30 option works in bathrooms, bedrooms, or as a graceful accent over a console table. Minimal, versatile, and so elegant.
I’ve been trying out Tefal’s brand new self-sharpening knife block, the EverSharp, to see if it’s really the solution to the issue of kitchen knives that go blunt in too-short of a time.
Crafted from German stainless steel, I think this product, vying for the title of one of the best knife sets, is certainly a contender to options from Ninja and Joseph and Joseph. Here’s how.
Tefal
EverSharp Knife Block
This set features 5 knives and a set of scissors, all of which can be sharpened within four slots in the block.
I’ve been testing out this knife block for a few weeks now, using the knives as I cook day to day. The thing that has impressed me most is the sheer sharpness of each one, which is helped by the integrated sharpeners.
Opposed to the Ninja knife block (which will set you back £179.99 via Ninja comparably), which has one sharpening slot that you manually operate, the Tefal version takes the hard work out of your hands.
Here, there are four sharpening slots and as soon as you slide each blade into one of these gaps, the process will occur automatically via the ‘patented dual pivot sharpening’ mechanism. That means that each knife gets directed into the ‘perfect angle’ to be sharpened, according to Tefal, so it’s foolproof. It also makes the process safe from the risk of accidentally over-sharpening.
(Image credit: Future)
The knives gleam every time you ease them out of the block. And the selection of blades itself is great. My favourite is the Santoku blade, which is so well-balanced for even delicate cutting jobs, and sits alongside a chef’s knife, paring knife, bread knife and utility knife.
Sign up to our newsletter for style inspiration, real homes, project and garden advice and shopping know-how
The set I tried, which you can buy directly from Tefal for £149.99, just has five knives but the Amazon set also features a pair of kitchen scissors.
(Image credit: Future)
The handles to the knives feel extremely premium, while the block makes for a streamlined addition to my worktop. A feature I really like is the grippy feet on the bottom of the unit, which makes it feel properly weighty and not possible to be knocked out of place. It also comes with a ten year guarantee.
I’ve been mightily impressed by the quality of this set so far. I also think its slim profile will fit a little easier into most kitchens. Could you be swayed to invest in a self-sharpening set like this for your kitchen?
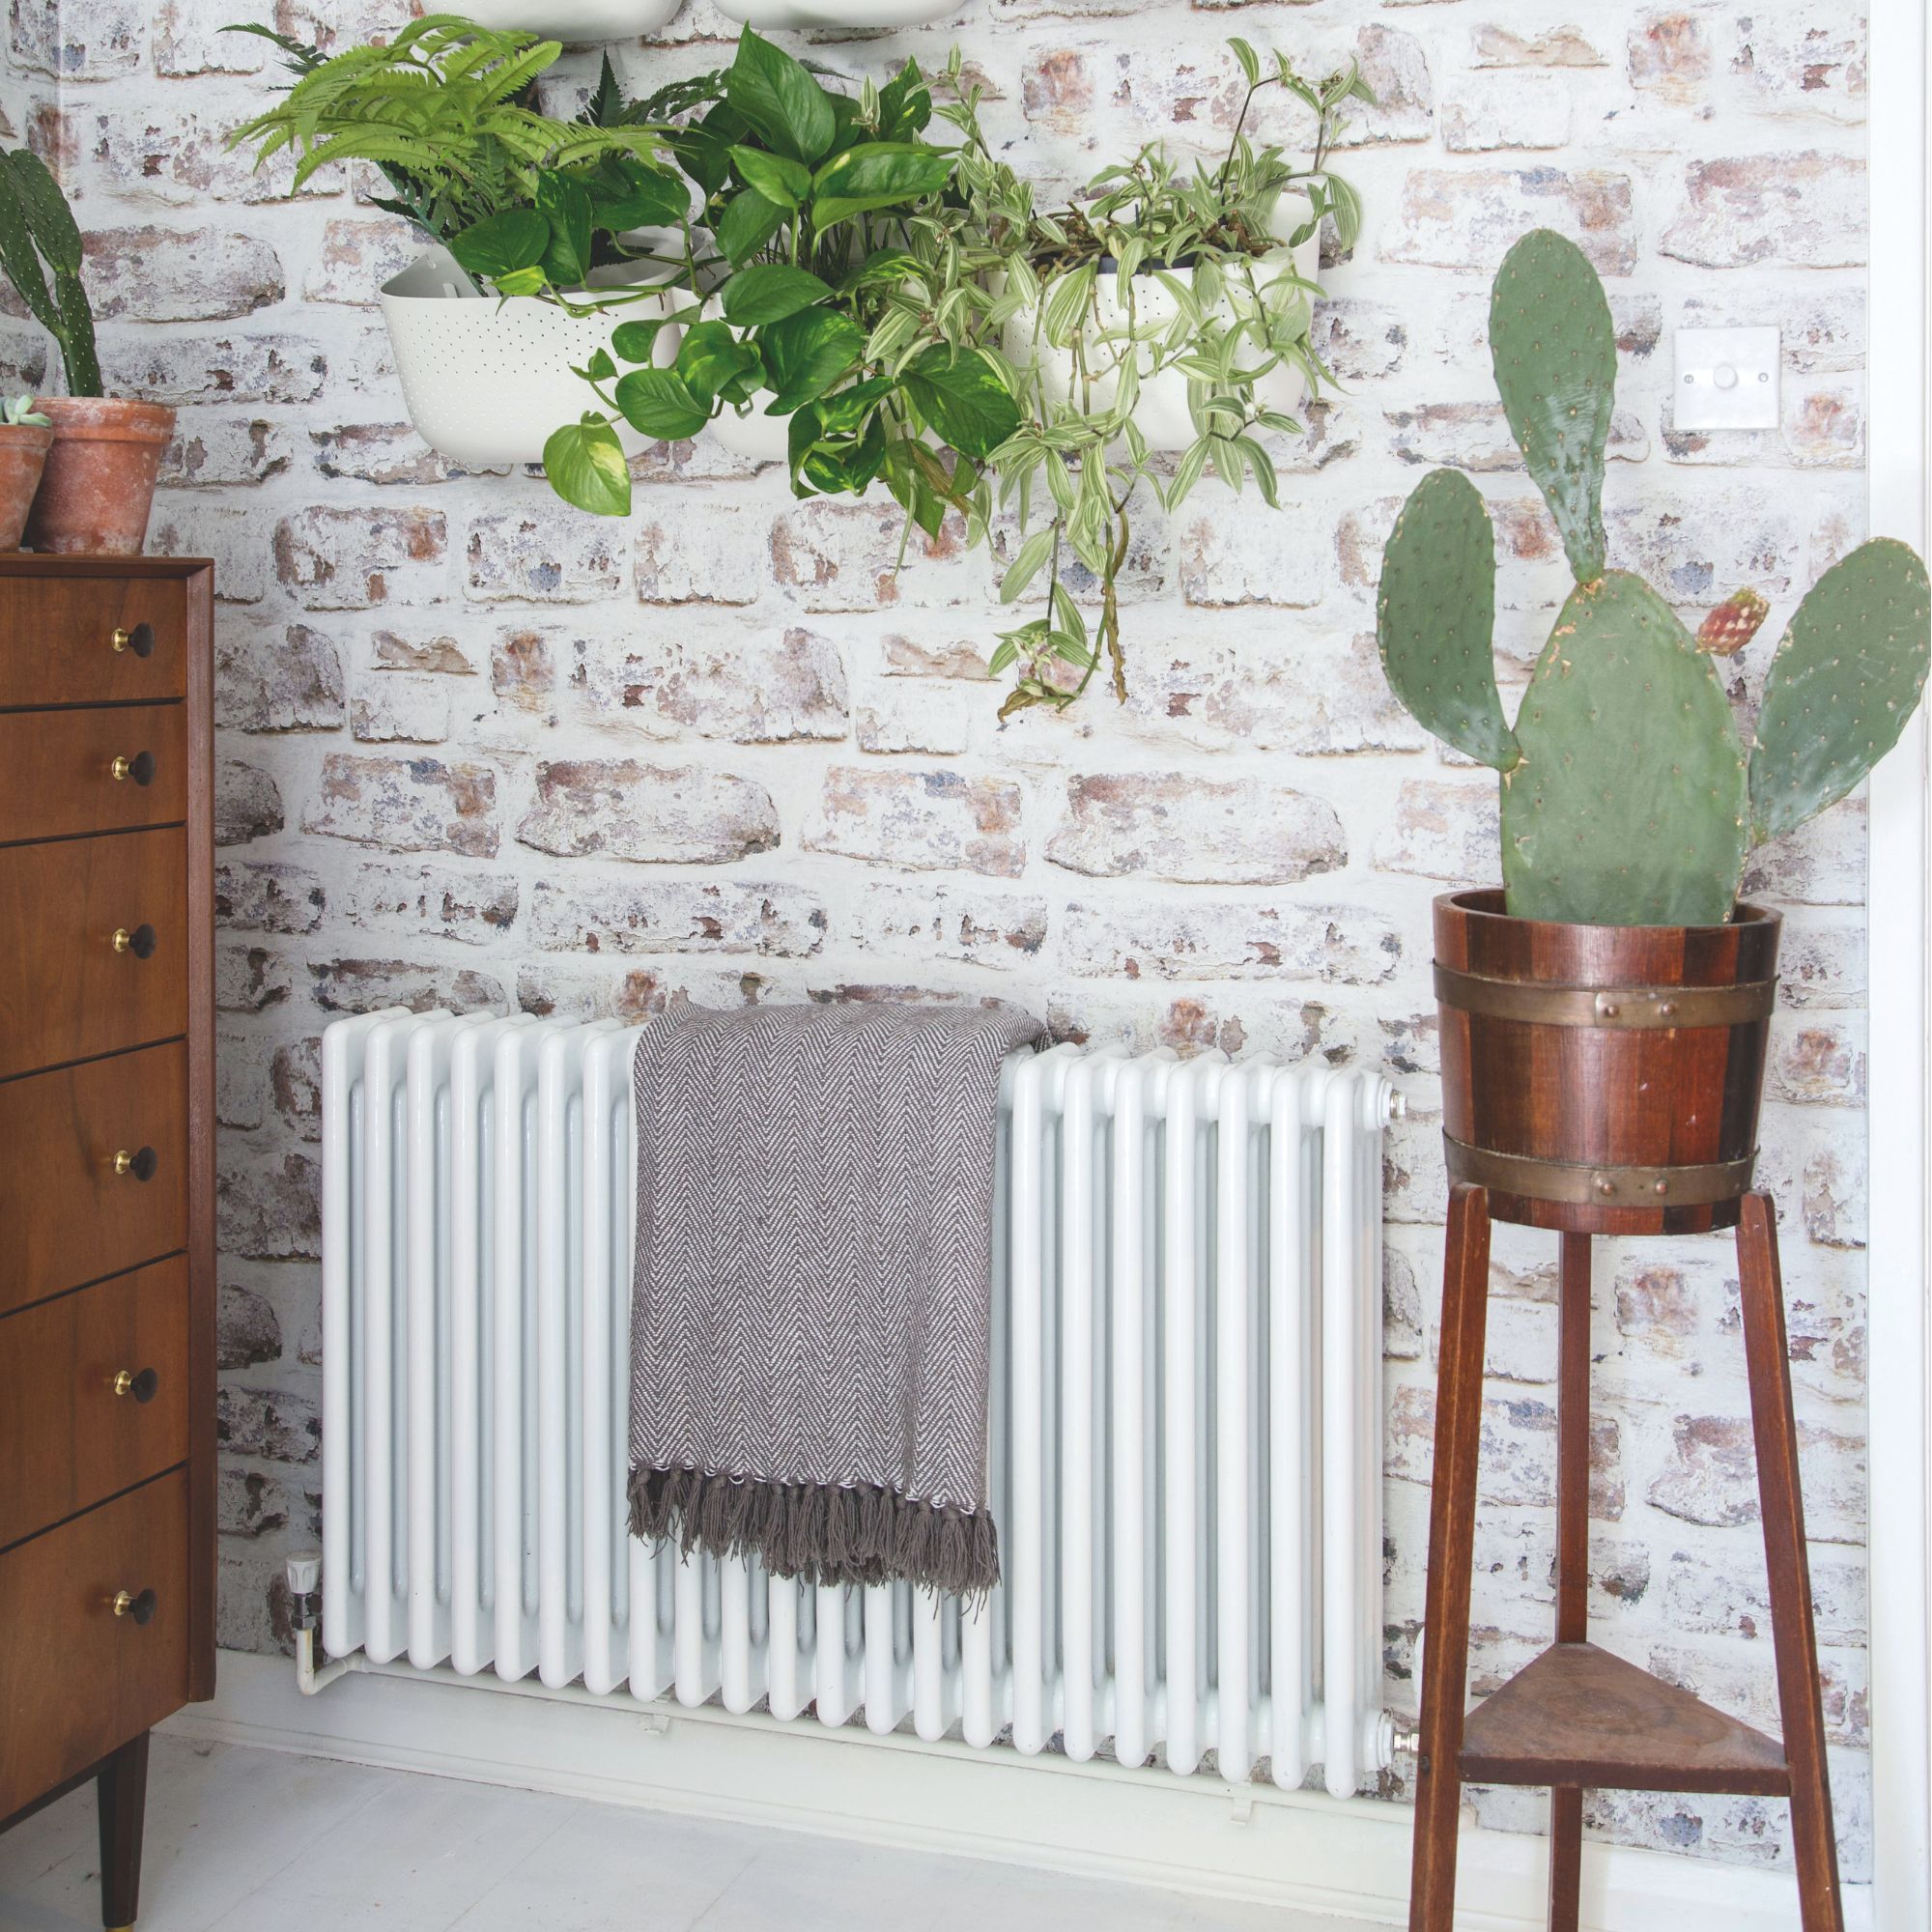
It feels like as soon as we head into the ‘-ber’ months, the debate starts about when it’s time to turn our thermostats on. And while it’s common sense that you put the heating on when you’re cold, I wanted to find out whether the exact date mattered.
The general rule of thumb is that when temperatures drop below 15 degrees, you should turn your heating on. But with the current weather bringing a peculiar mix of sunshine and storms, I wanted to narrow this down to an exact date, if possible!
While there’s no special formula to determine the ‘best’ day to turn your heating on, heating experts have said that between the 13th and 17th of October is the best time to switch your heating on in 2025. This is why.
When to turn your heating on in 2025
To determine when to turn the heating on in 2025, we need to look at the weather forecast first.
BBC Weather says that October temperatures are likely to be average, even a little above, with some risk of fog and frost – but no particularly cold spells.
(Image credit: Future)
‘Forecasts show temperatures dipping to 15°C from October 13th, which matches NHS guidance that homes should be heated once outdoor temperatures fall below this point,’ says Les Roberts, energy expert at Bionic.
‘That makes the 13th an important marker – the point where the cold begins to affect not just comfort, but also health and the condition of your home.’
Sign up to our newsletter for style inspiration, real homes, project and garden advice and shopping know-how
For vulnerable people, such as the elderly and those with a serious illness, the NHS recommends turning the heating on when it drops below 18ºC.
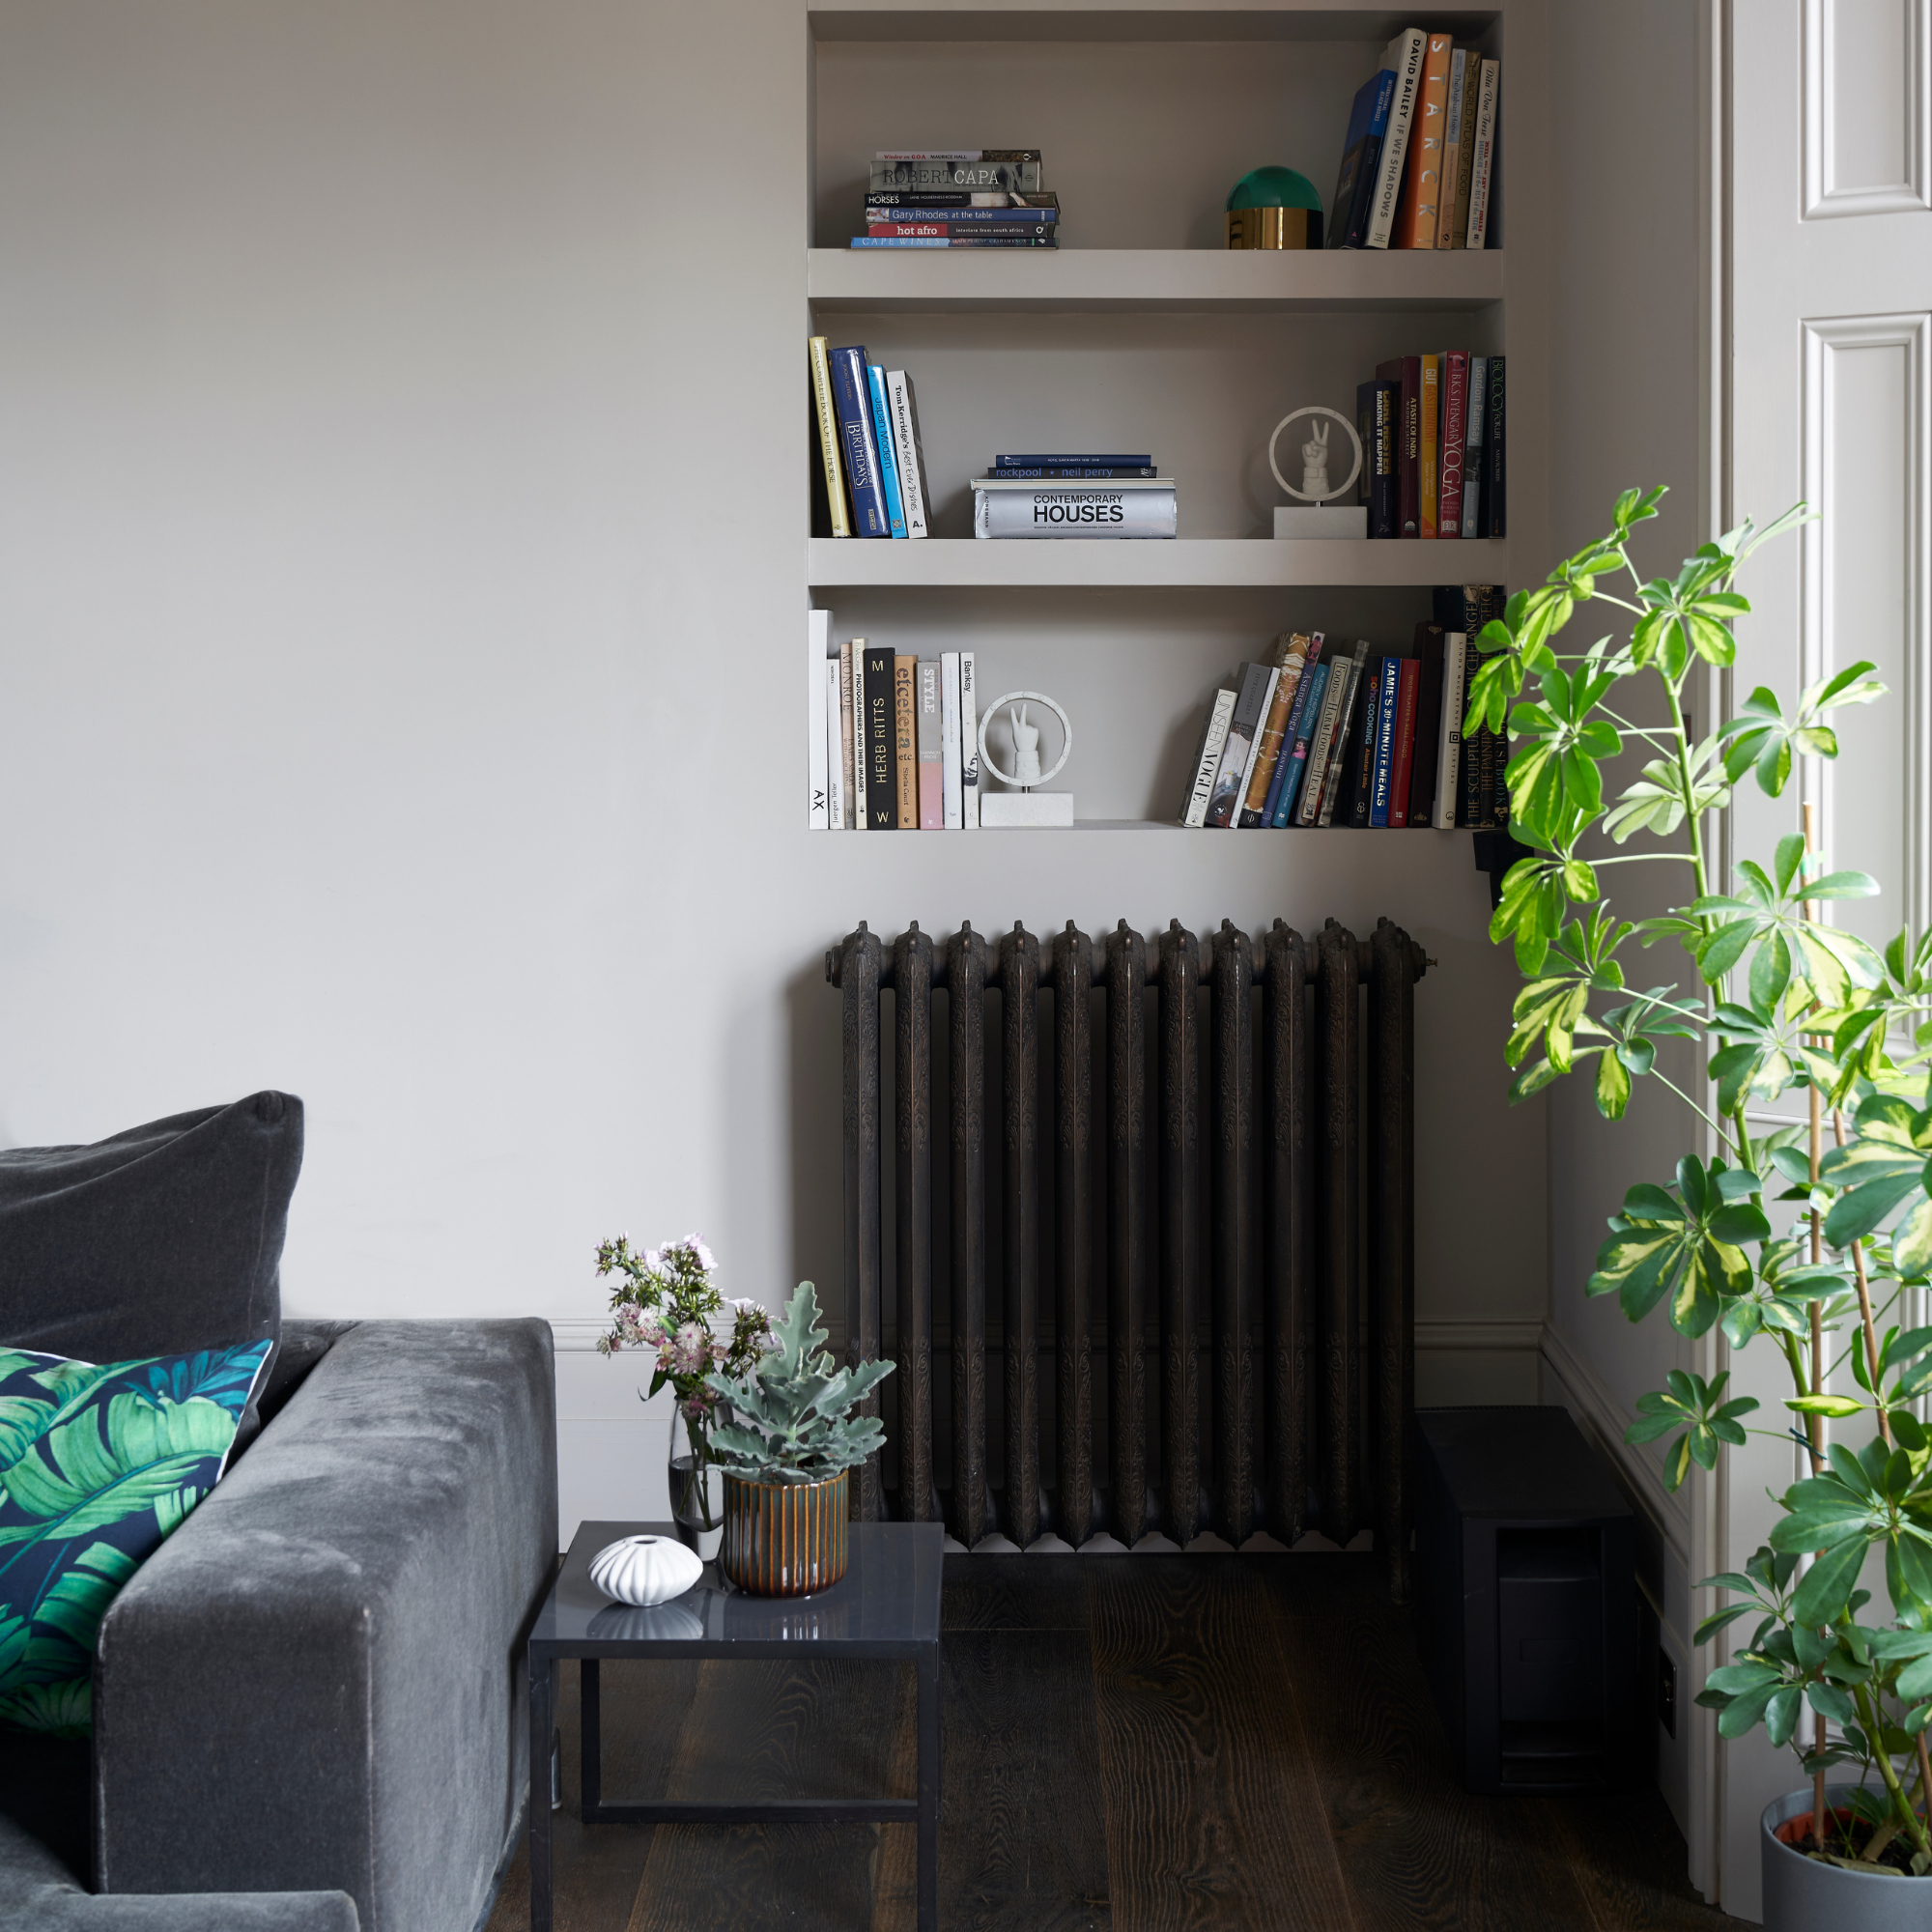
However, John Klee, heating technology expert at BestHeating, argues that the 17th is a better time to switch your heating on. ‘After analysing Met Office average temperature data from the past few years, I can reveal that the 13th of October is a tad too early to put the heating back on.’
‘The NHS advises that once temperatures drop below 15°C, people should put the heating on for health reasons, and when looking at recorded averages between September and December in recent years, temperatures are consistently below 15 degrees from the 17th of October.’
(Image credit: Future PLC/ James Merrell)
So, while that’s not given me the exact date, it has given me the best week to turn my healing on, and shows how you can decide, too. By keeping an eye on outside temperatures, you can spot when temperatures dip below 15ºC and stay there.
‘With many worried about their finances, it can be tempting to hold off putting the heating on, but be careful delaying this too long, as it can cause more issues than it’s worth,’ cautions John.
‘For those struggling, we recommend contacting your local council or energy supplier as there are often grants and help available to keep you safe throughout winter.’
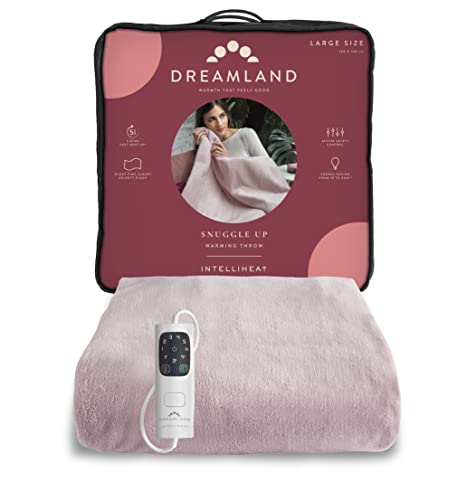
Dreamland Snuggle Up Electric Throw
Radiator Bleed Key – pack of 2
Bleeding your radiators before switching your heating on allows any trapped air to escape, which could be stopping your radiator getting as hot as it should be.
Hive Thermostat Mini
Smart heating controls allow you to control your heating at the touch of a button, making it easier to ensure it’s only on when needed.
Whether you choose the 13th or 17th, there are plenty of options to save money on your heating bills this year. Which day are you choosing, or have you already switched your heating?
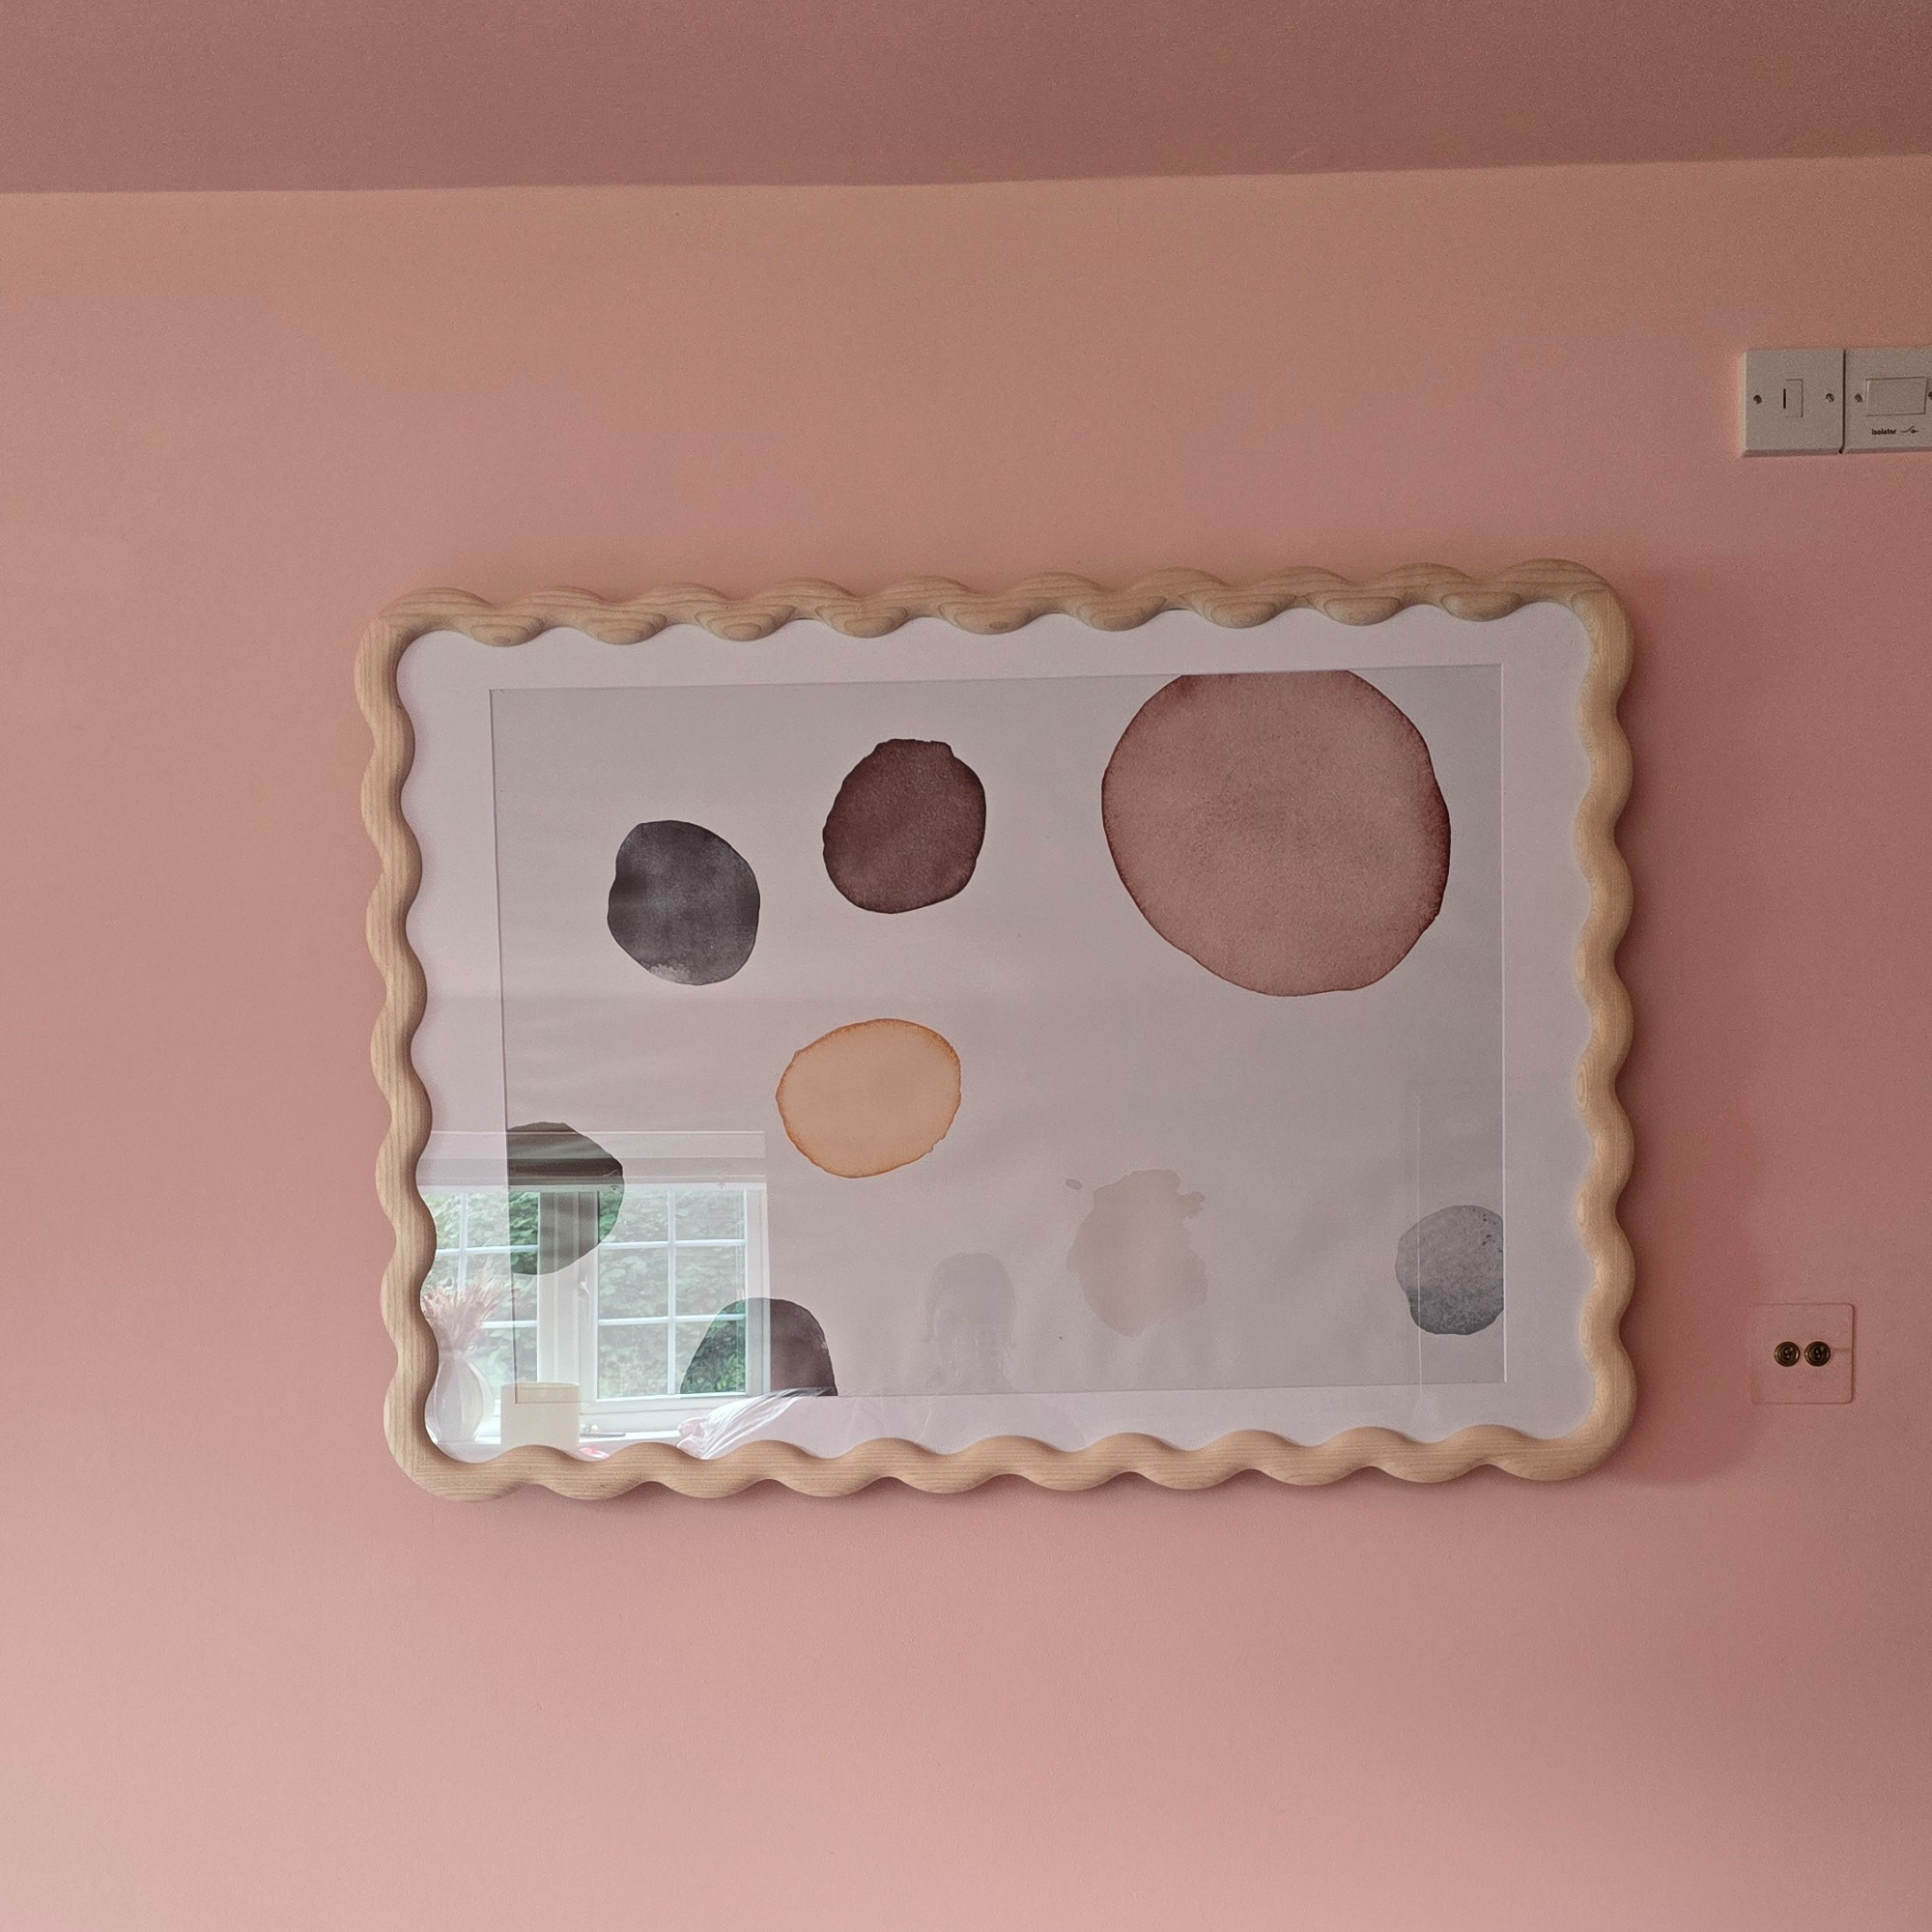
As much as we all love snuggling up in front of the telly, there’s no denying that when a TV isn’t in use, it can be a bit of an eyesore. This is where a genius frame hack comes into play, stylishly covering the TV screen; it’s one of the best ways to hide a TV.
This clever and creative hack comes courtesy of DIY, interiors and lifestyle influencer, Charlotte Coleman (@wiltshirewonderland), whose viral video depicting her using a frame to hide her TV has amassed over 6,000 likes on Instagram. And now she’s revealing how you can do it, too.
Using Habitat’s A1 Wavy Wooden Picture Frame (£80), Charlotte expertly used artwork to cover her TV, and she’s now shared with us her step-by-step guide as well as the inspiration behind the project. Although she is keen to point out that ‘this is not a tutorial’!
Now, hiding a TV using artwork isn’t exactly a new concept. Not only is it a chic step up from nineties TV cupboards, but at the start of the year, we were swooning over Stacey Dooley’s Movingframe to hide her TV.
However, Stacey’s set-up will cost you around £1599, which is by no means cheap. What I love about Charlotte’s method is that it provides a more accessible and affordable way to hide your TV and elevate your living room ideas.
‘I put the TV in the bedroom when I had the flu and was stuck in bed for a few days. We decided to keep the TV in the bedroom, but I hate looking at it when it’s off. I don’t like it being the first thing I see when I wake up, so I decided to hide it. I hid the TV in my sitting room behind art, so was inspired to try something similar,’ Charlotte said, explaining the inspiration behind her project.
And if you want to do it too, here’s everything Charlotte recommends to hide your TV with artwork.
Sign up to our newsletter for style inspiration, real homes, project and garden advice and shopping know-how
What you need
(Image credit: Charlotte Coleman/ @wiltshirewonderer)
Method
Follow Charlotte’s step-by-step guide to complete the hack.
1. Plan and measure carefully
Measure your TV and wall mount. The picture frame needs to be larger than the TV to fully conceal it when closed. Allow extra clearance for the thickness of the TV and mount – the biggest challenge is getting these measurements right.
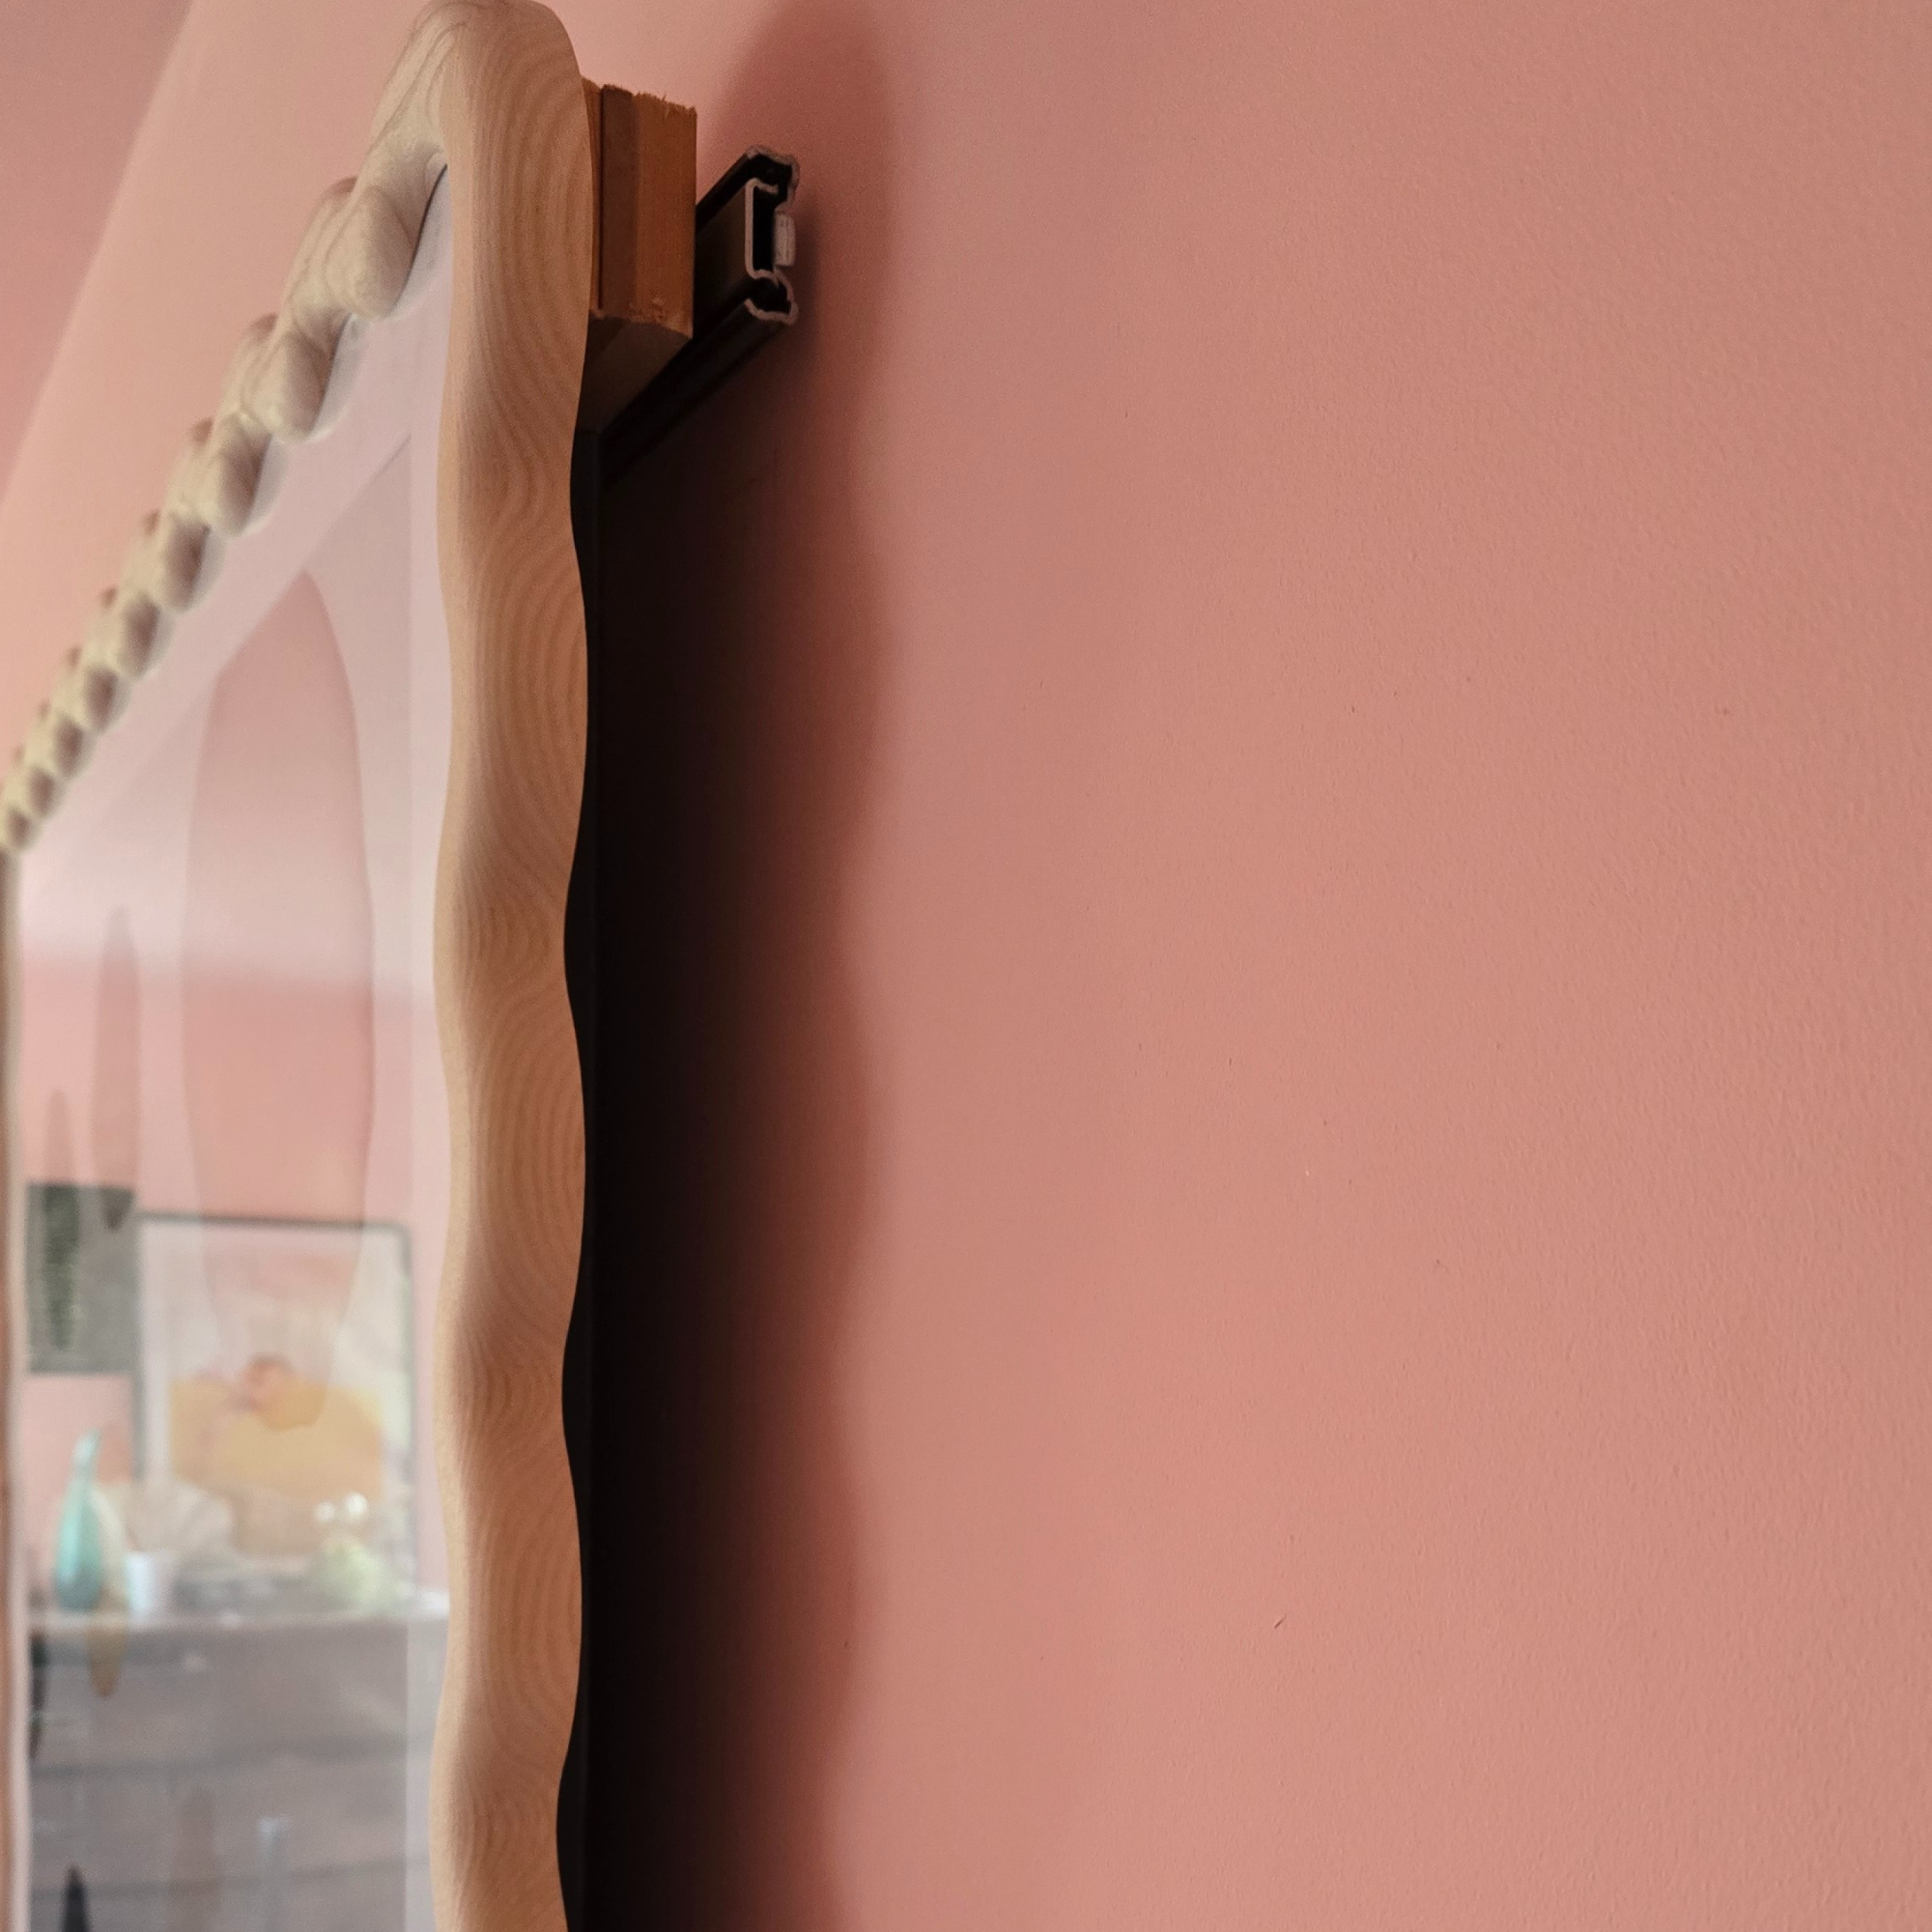
2. Prepare the frame
Attach wooden blocks around the back of the frame – Charlottw used extra strong wood. These give the frame the extra depth it needs to clear the TV when sliding and provide fixing points for the drawer sliders.
If your frame has clips to open and change the artwork, glue small wooden blocks between the clips so you can still access them, allowing you to swap out art later.
(Image credit: Charlotte Coleman/ @wiltshirewonderer)
3. Fit the drawer sliders to the wall
Mark where the sliders will sit, making sure they are level and positioned to fully cover the TV when closed. Secure them directly to the wall using heavy-duty wall plugs and screws.
Always drill into studs or use robust fixings, the frame is heavy and needs proper support!
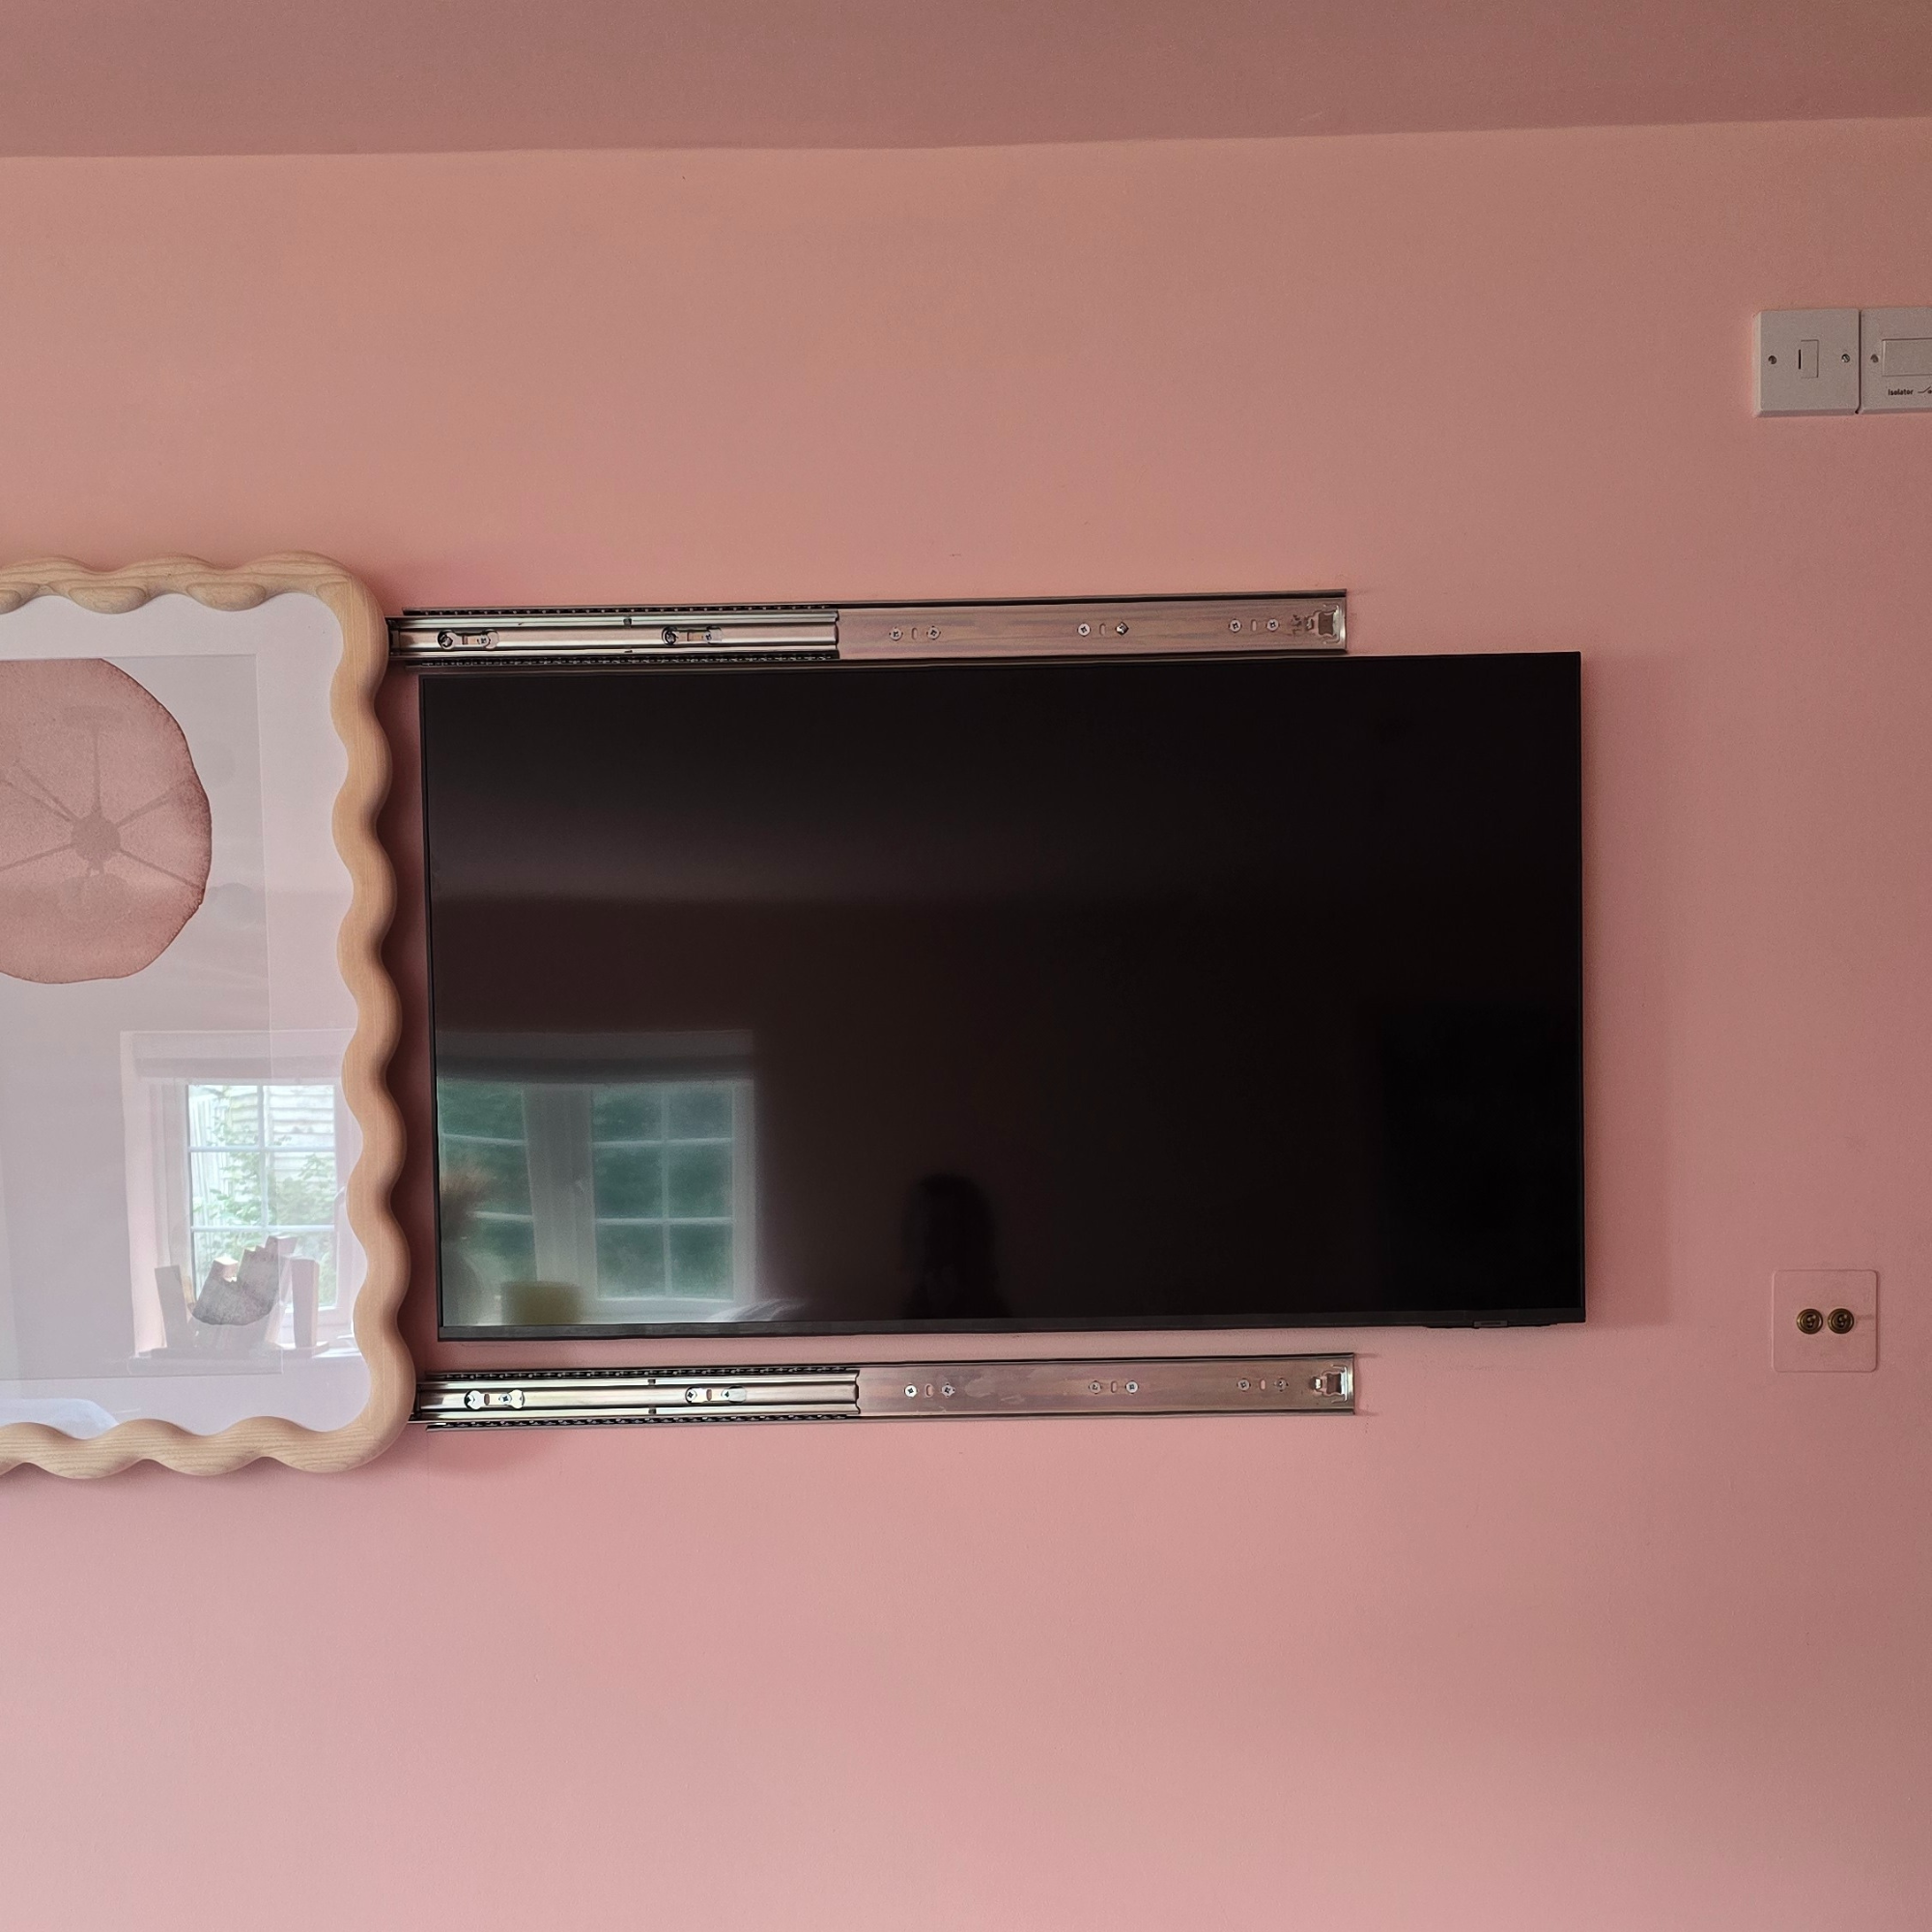
4. Attach the frame to the sliders
Screw the frame’s wooden blocks onto the moving sections of the drawer sliders. Double-check that the frame can glide smoothly without catching on the TV or wall.
5. Finish and style
Add your chosen artwork to the frame. When the TV is hidden, it looks like a gallery piece; when open, your TV is ready for use.
(Image credit: Charlotte Coleman/@wiltshirewonderer)
For optimum success, Charlotte recommends you don’t skimp on materials – especially your fixings. After all, this has to support the weight of your frame for long periods of time, so it needs to be strong.
‘I am over the moon with how it turned out. I wasn’t sure it would work – it turned out even better than I thought!’ she concluded.
Choose a print
Perhaps the most fun part – chose a fun new print for your frame!
Desenio
Shapes of Red Print
Rich red hues will be the ‘it’ colours of autumn 2025 and continue to define 2026. This print will create a cosy, yet on-trend look.
Desenio
Bauhaus Capsules Print
Simple yet bold, I love this print. It’s an ideal choice for those with a passion for this German design style.
Desenio
La Poire – Wisterias Print
If you’re a fan of more natural designs, this wisteria print is stunning, a great choice for more neutral colour schemes.
Hiding your TV with artwork is a great way to conceal an ugly television, while injecting more of your style and personality to a room without breaking the bank. And with the frame in place, you can swap out artwork as much as you want. Are you tempted to give it a try?
We independently select these products—if you buy from one of our links, we may earn a commission. All prices were accurate at the time of publishing.
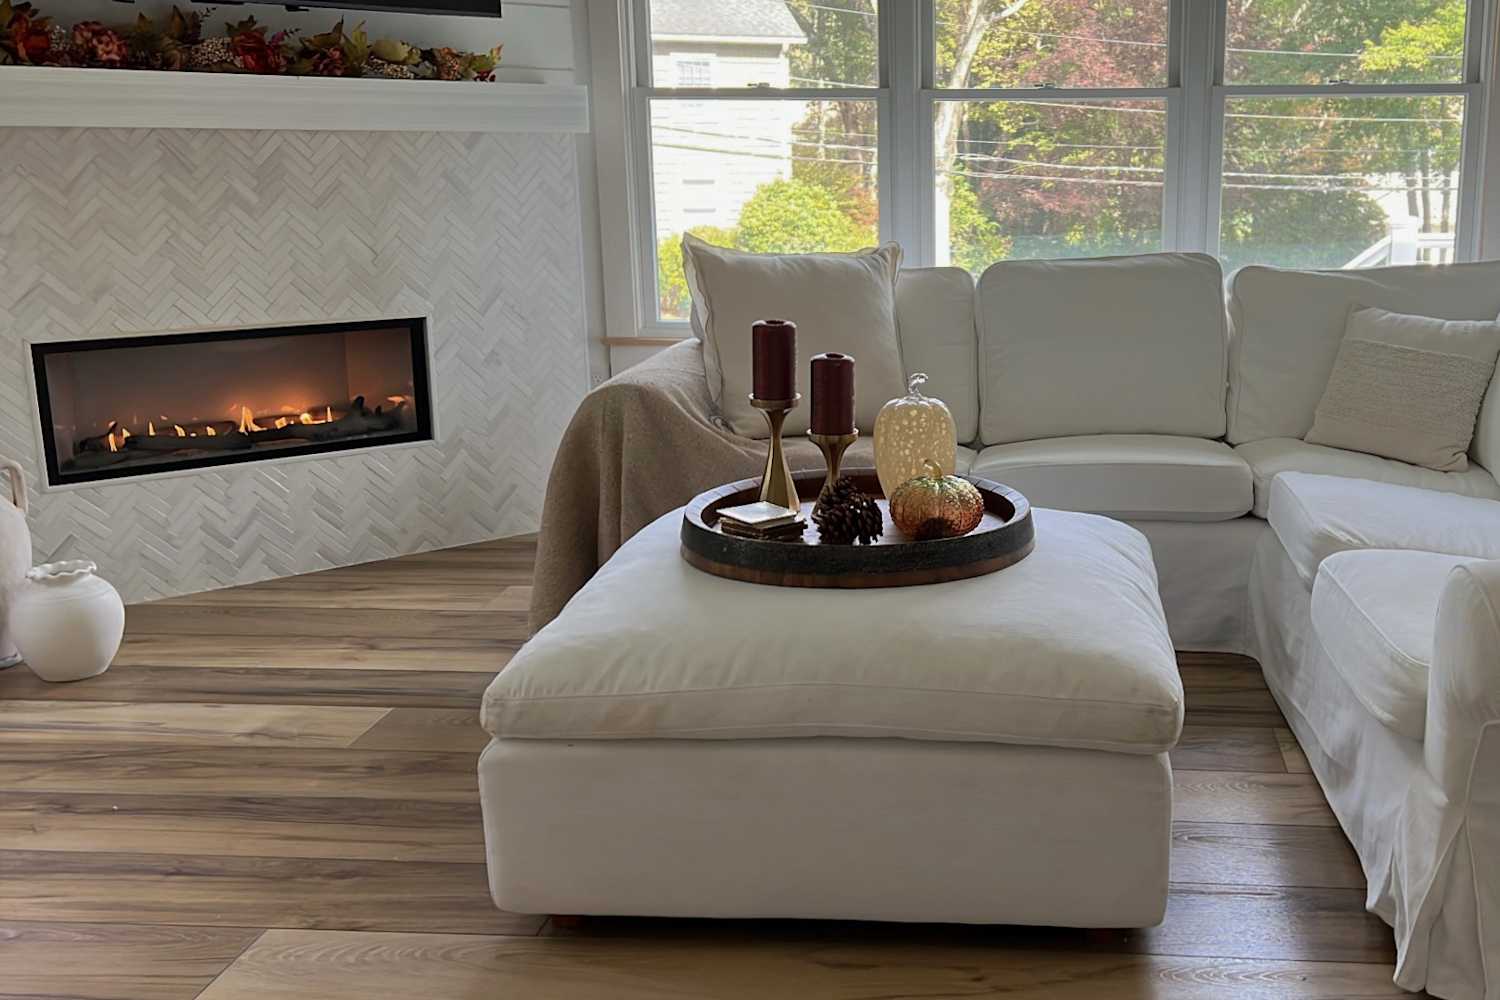
There’s something special about stepping into an IKEA. I always leave with plenty of design inspiration — and a cinnamon roll, of course. It’s also where I scored my most-loved piece of furniture: the EKTORP sofa.
The EKTORP has survived three moves with me thus far and is still living its best life. Over the years, I’ve sat on countless couches and scoured plenty of pricey furniture stores, contemplating an upgrade — but honestly, none held a candle to EKTORP. Even after six years of sleepovers and full-on couch potato days, the cushions are still so plush and comfy.
Why I Love My IKEA EKTORP Sofa
I’m a firm believer that your sofa can make or break a room. Too big and bulky, and it’s overwhelming; too small, and it doesn’t make enough of a statement. The perfect sofa should be aesthetically pleasing, but also comfortable enough for movie nights, wine and chill sessions, and the occasional afternoon nap. The EKTORP checks all of those boxes and more, hence why I won’t be trading her in any time soon.
The best part, though? EKTORP’s slipcovers are machine washable, so my most-used room is always extra fresh and crisp. Since I work from home and the couch is essentially my “office,” this is essential. While most might shy away from a white couch, I welcome it with open arms. The color is bright and inviting, providing a neutral palette that enables me to swap out my throw pillows each season for a fun new look, while still sticking with my overall cottage-coastal style.
My EKTORP has always looked beautiful and right on trend in each place I’ve lived in — but its spot in my newest space is my favorite one yet. It’s situated in my sun-drenched family room and faces my white marble fireplace, which provides a warm and cozy ambience throughout the winter. The kitchen and family room have an inviting open-concept layout, so the sofa truly sets the tone of both spaces.
IKEA EKTORP Alternatives to Shop
While IKEA has unfortunately since discontinued the EKTORP, there are other just-as-good options to consider. The UPPLAND sofa is IKEA’s closest alternative. Almost identical, the three-seater sofa comes in 12 colors — including Blekinge White, like my EKTORP — and starts at just $899, a major steal for such a timeless sofa.
If you’re not an IKEA shopper, though, we also found this similar version from Wayfair. The classic rolled arm looks similar to both EKTORP and UPPLAND, and it comes in a wide variety of colors, too.
For those who, like me, already have and love the EKTORP, Amazon also sells slipcovers in a variety of colors for both the three-seater and sectional to give your look a total refresh.
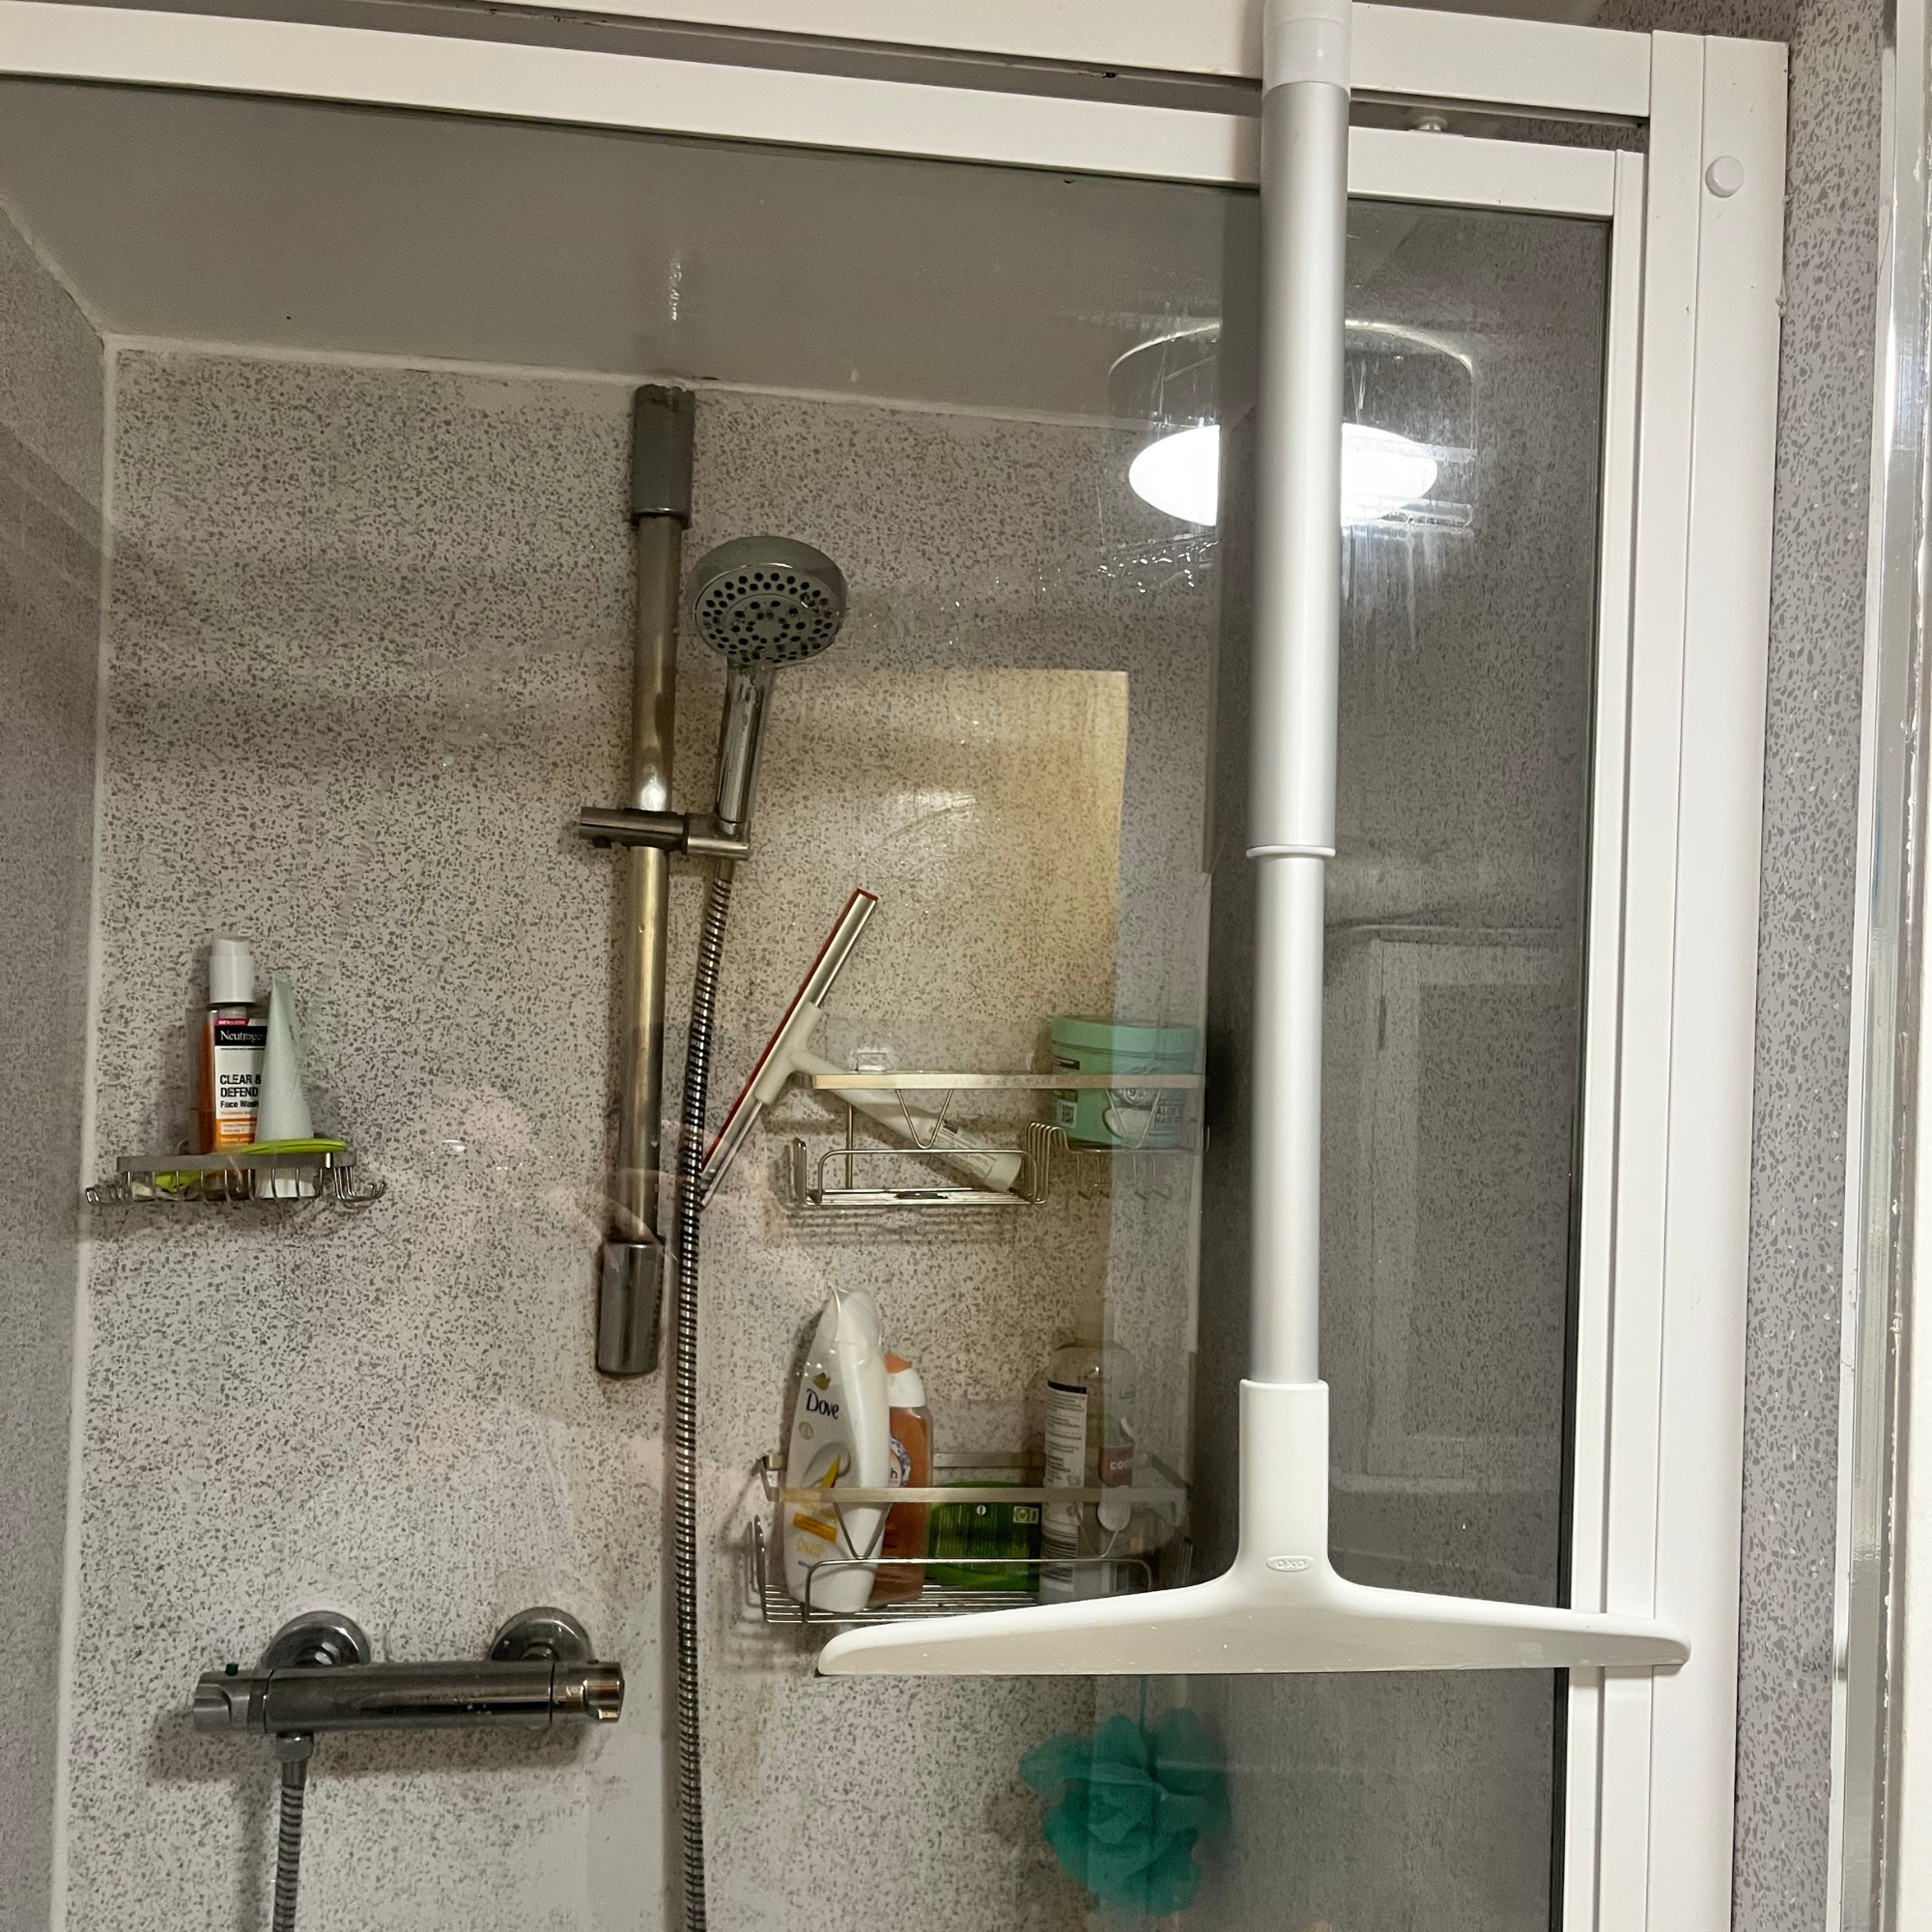
A squeegee is something I keep on hand in my bathroom, so I can use it to clean while I’m in the shower. It may sound slightly OTT, but it’s actually a great lazy girl hack – doing a little every day means I don’t have a huge job on my hands when it comes to cleaning my bathroom.
Up until recently, I had been using a £2 IKEA squeegee I’d picked up by tills, but having tried OXO’s extendable squeegee, I now believe it’s worth investing in. Here’s why.
Oxo Good Grips Aluminium Extendable Squeegee
I loved how this squeegee slid across my shower with ease. Plus, the handy extendable feature meant I barely had to bend down!
What drew me to the squeegee in the first place was its extendable feature, which extends from 39.4 cm to 58.4 cm. Now, as someone who wants to build on her ‘lazy’ bathroom cleaning hacks, I liked the concept of not having to crouch down when squeegeeing.
And I have to say, I was impressed. Not only was squeegeeing a little faster than using my small IKEA one, but I barely had to bend down at all. Because of this, I think it’s a really tactical choice for elderly people and those with reduced mobility.
Testing the OXO Good Grips Aluminium Extendable Squeegee
(Image credit: Future PLC/ Kezia Reynolds)
I used the squeegee to remove excess water from the shower screen after I finished, and then as part of a deeper shower clean. I use Method’s Daily Shower Spray (£3.75 at Amazon) every day, after I’ve finished in the shower, and I found the squeegee was great for distributing the cleaner across my walls and door.
I then scrubbed my shower walls with the Flash bathroom cleaner (£8.50 at Amazon) and a microfibre cloth, before using the squeegee again to get rid of any excess cleaner.
Sign up to our newsletter for style inspiration, real homes, project and garden advice and shopping know-how
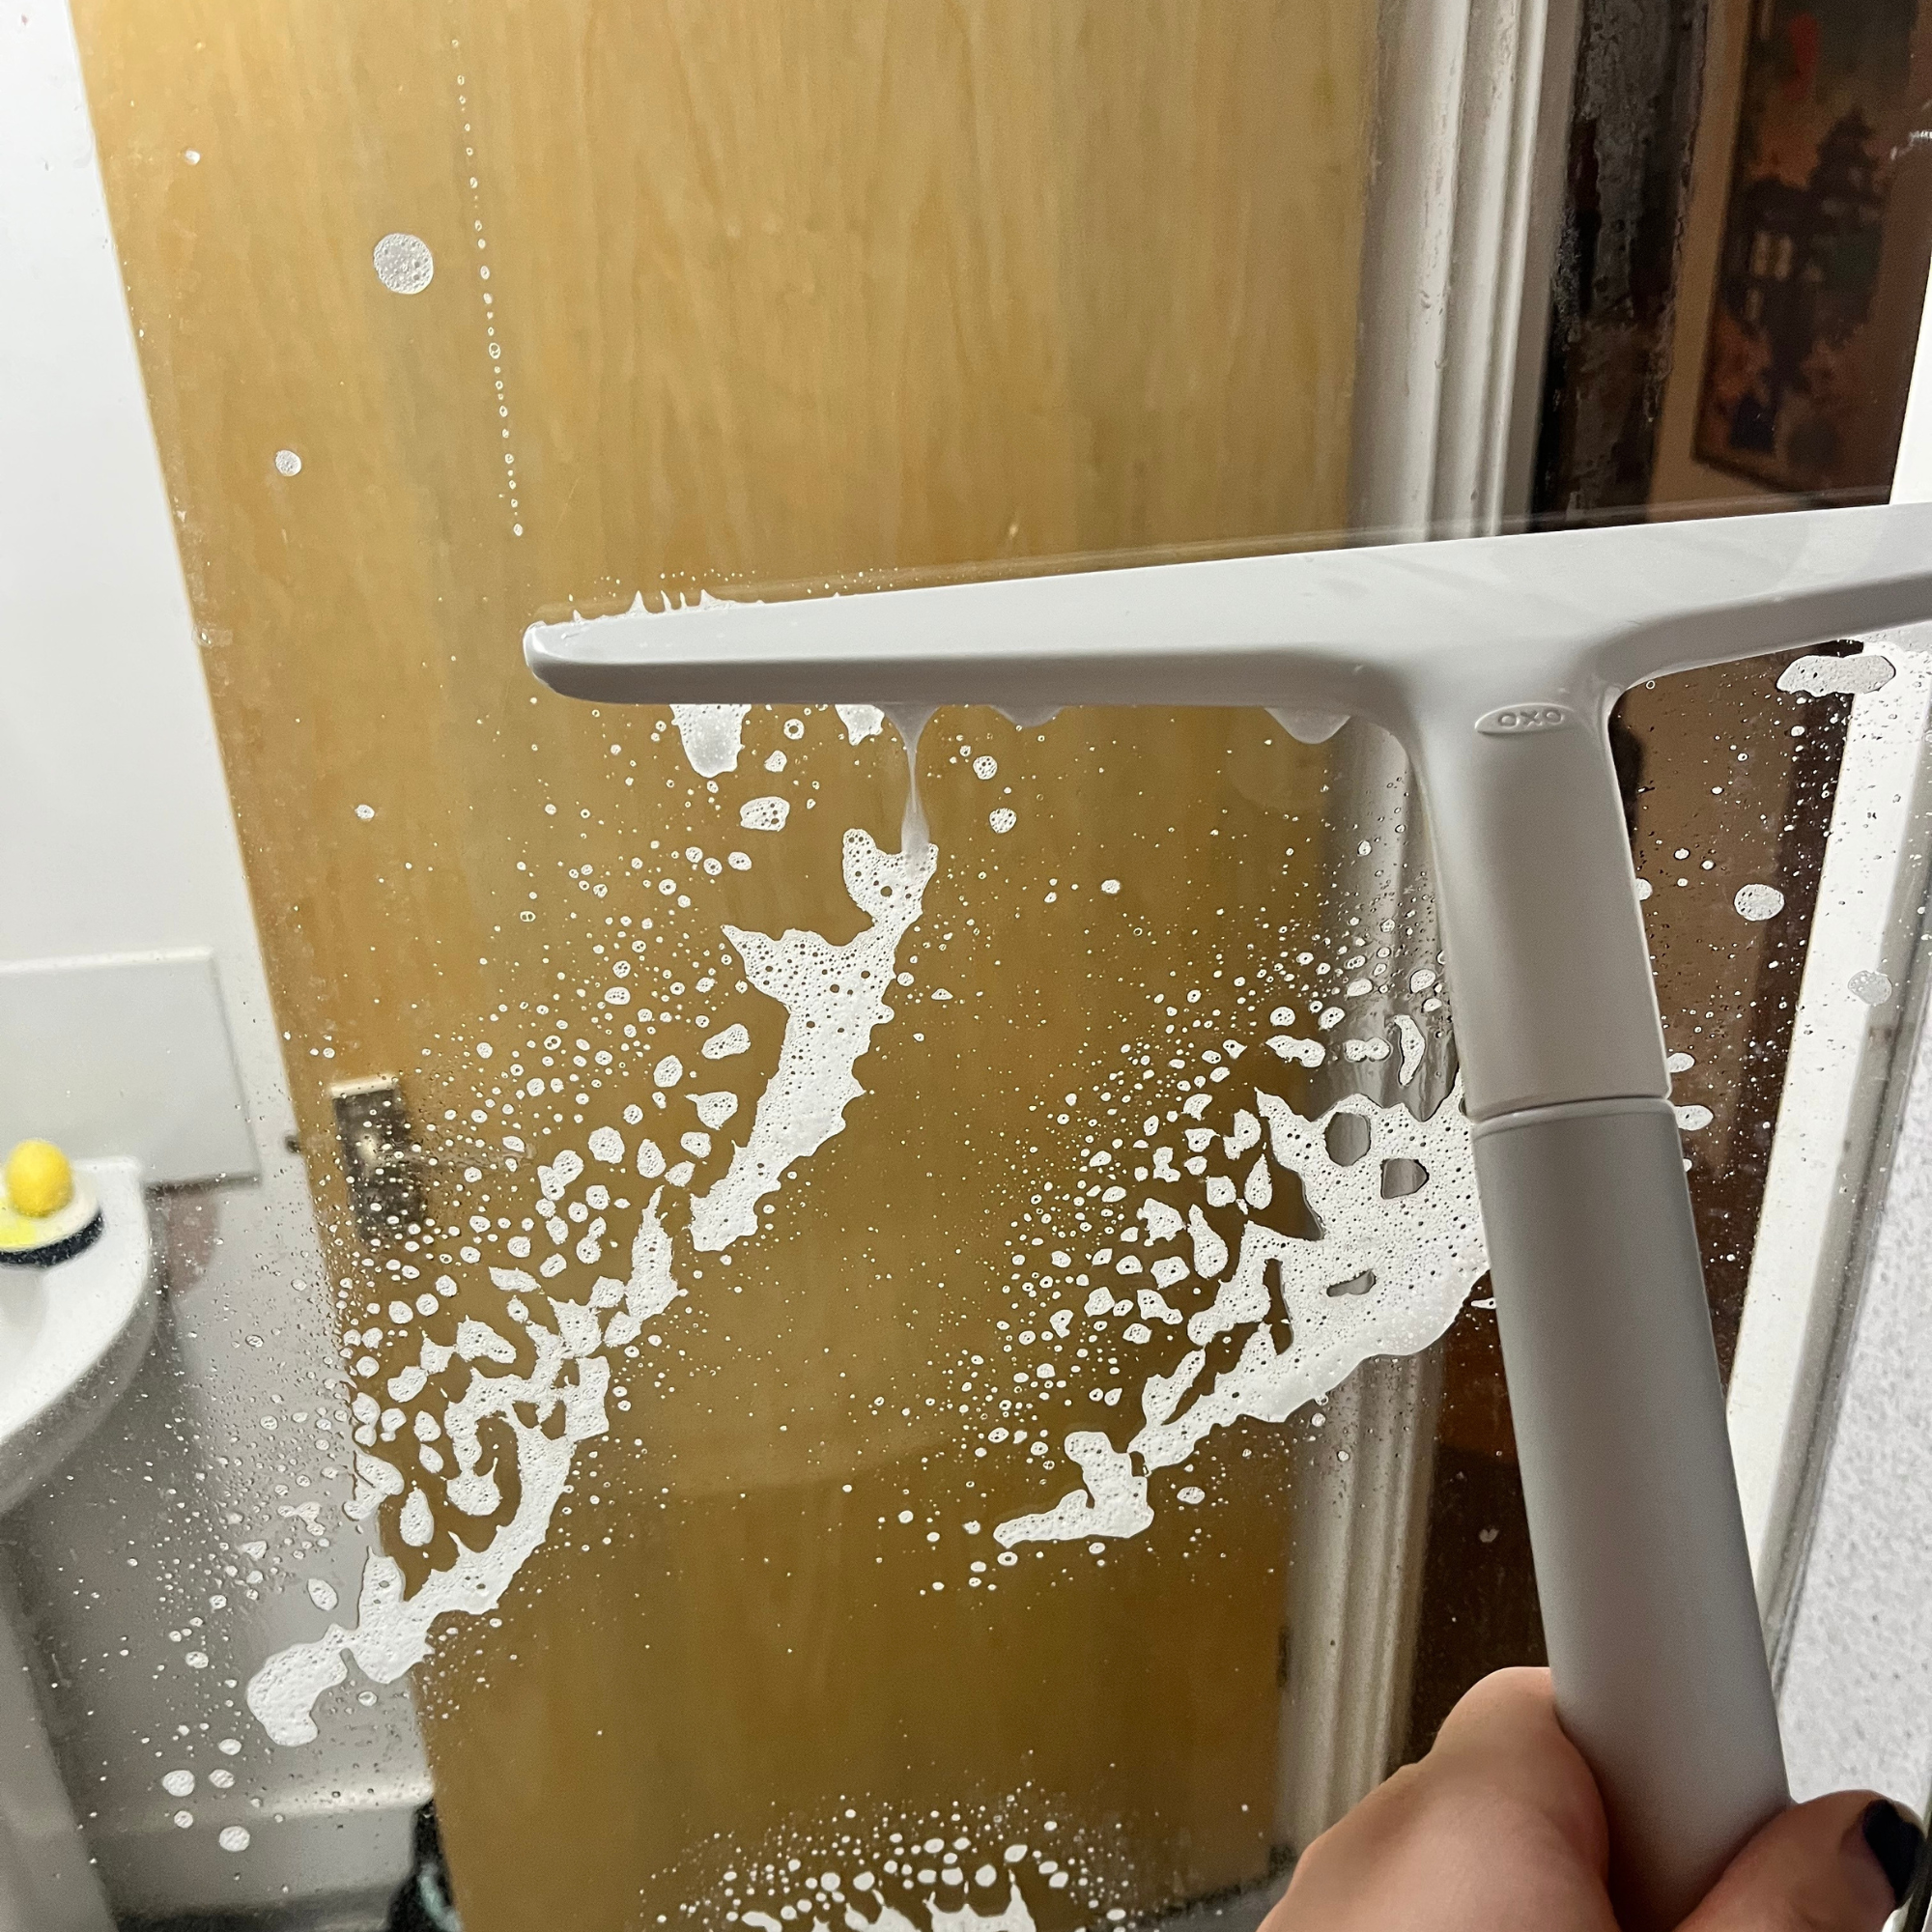
Finally, I used Method’s Glass Cleaner (£3.75 at Amazon) along with the OXO squeegee to polish my shower door. I was impressed with the results. The squeegee was easy to use and effective.
My shower after using the OXO Good Grips Aluminium Extendable Squeegee
(Image credit: Future PLC/ Kezia Reynolds)
The silicone blade practically glided down the glass, and the squeegee is weightier than other plastic options, which made it easier to control. The handy hook made it super easy to store, too.
The squeegee is made from aluminium and is rust-free, so you don’t have to worry about replacing it any time soon. Plus, it was inspired by windscreen wipers to ensure a smooth, low-friction swipe with minimal effort on your part.
The OXO Good Grips Aluminium Extendable Squeegee is now one of my best cleaning products, and while more expensive than I’d usually spend on a squeegee, I can’t deny how good it is. If you’re looking to make your cleaning jobs easier, or if your knees aren’t what they used to be, it’s a worthy investment.
When deciding who to trust with a major building project, most people instinctively compare experience, past work, and cost. Those factors matter, of course, but there is another detail that often goes unnoticed and yet makes an enormous difference, and that is whether the architect on the job is also a licensed builder. That combination of skills reshapes the entire project, from the first sketches to the moment the keys are handed over.
Within the world of design and build architects, this dual role bridges creativity with practical know-how, turning an idea into a structure that is both beautiful and workable. It is a rare overlap that streamlines every stage of the process.
Why Dual Qualifications Give a Distinct Advantage
Architects who hold a builder’s licence bring something extra to the table. Their drawings are not just abstract plans, they’re grounded in a clear understanding of what can be achieved on site. This perspective helps close the gap that so often appears between design intent and construction reality.
By weaving construction insight into the design stage, these professionals can flag potential issues early, refine details to suit real-world conditions, and provide documentation that matches the way things will actually be built. The flow-on effect is less rework, fewer surprises, and a smoother progression from paper to project.
Clearer Communication and Project Control
Construction often stumbles when messages are lost between architect and builder. Misunderstandings can mean delays, costly corrections, and a great deal of frustration. A professional who is both architect and builder sidesteps this problem entirely. They take on the role of single point of responsibility, answering questions directly and managing challenges without needing to translate between two separate teams.
For clients, this makes the journey easier. Instead of waiting for answers to filter back and forth, they receive immediate clarity from someone who grasps both the design’s intent and the realities of construction.
Greater Buildability and Practicality in Design
The real strength of a dual-qualified professional lies in how they approach design. A pure architect might focus on form, while a builder prioritises practicality. Someone who embodies both viewpoints creates designs that strike the right balance.
These plans don’t just look impressive but are also feasible, efficient, and cost-conscious. Common pitfalls, like overly complex details that inflate labour costs or slow progress, are avoided. Instead, materials are used wisely, site conditions are carefully considered, and execution on the ground becomes more straightforward.
Reducing Cost Overruns and Project Delays
Anyone who has been through a construction project knows how easily budgets and schedules can unravel. When the architect also has building experience, estimates tend to be more accurate from the outset. They know how choices about materials or staging affect both cost and time, and they design with that in mind.
This does not mean cutting corners but rather creating plans that are realistic and aligned with what can actually be delivered, reducing the chance of expensive mid-project revisions or lengthy delays.
The Value of Experience Backed by Licensure
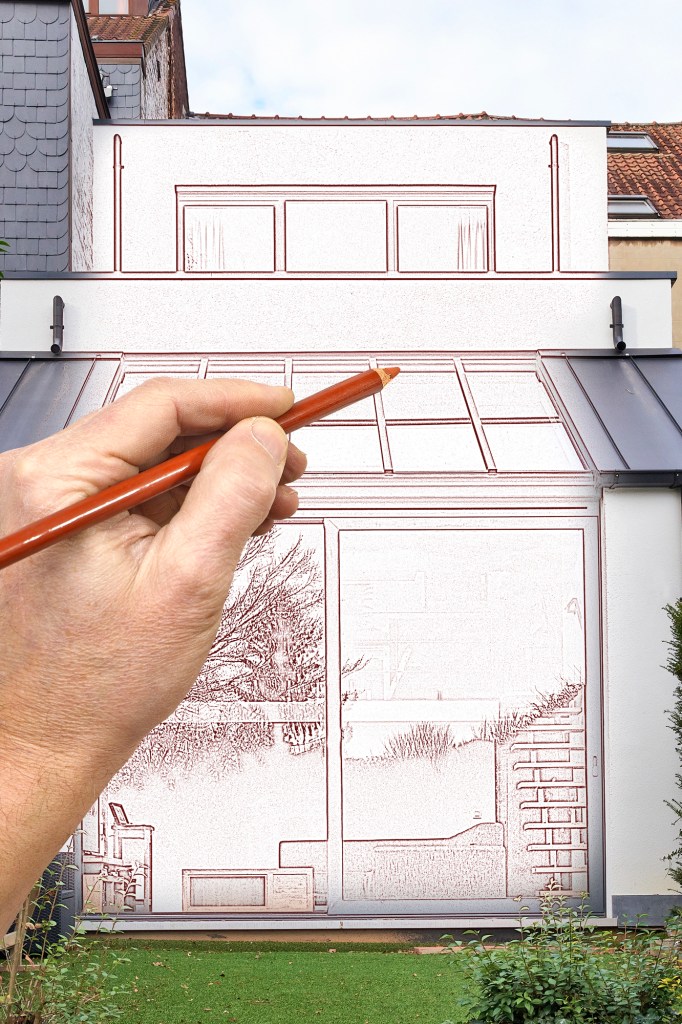
Image: Shutterstock
Earning accreditation in both architecture and building is no easy feat. It reflects years of study, rigorous training, and commitment to high professional standards. Firms that employ such individuals usually demonstrate an ability to handle complex, bespoke projects where precision and attention to detail matter most.
Dual qualifications go beyond convenience. They signify a depth of knowledge and a professional maturity that benefit every client.
Final Thoughts
Be it a custom home, a renovation, or a large-scale development, working with an architect who also builds delivers clear advantages. It means designs that are imaginative yet practical, timelines that hold firm, and budgets that stay on track.
For anyone weighing up their options, choosing a firm with this combined expertise is a smart step toward a better outcome.
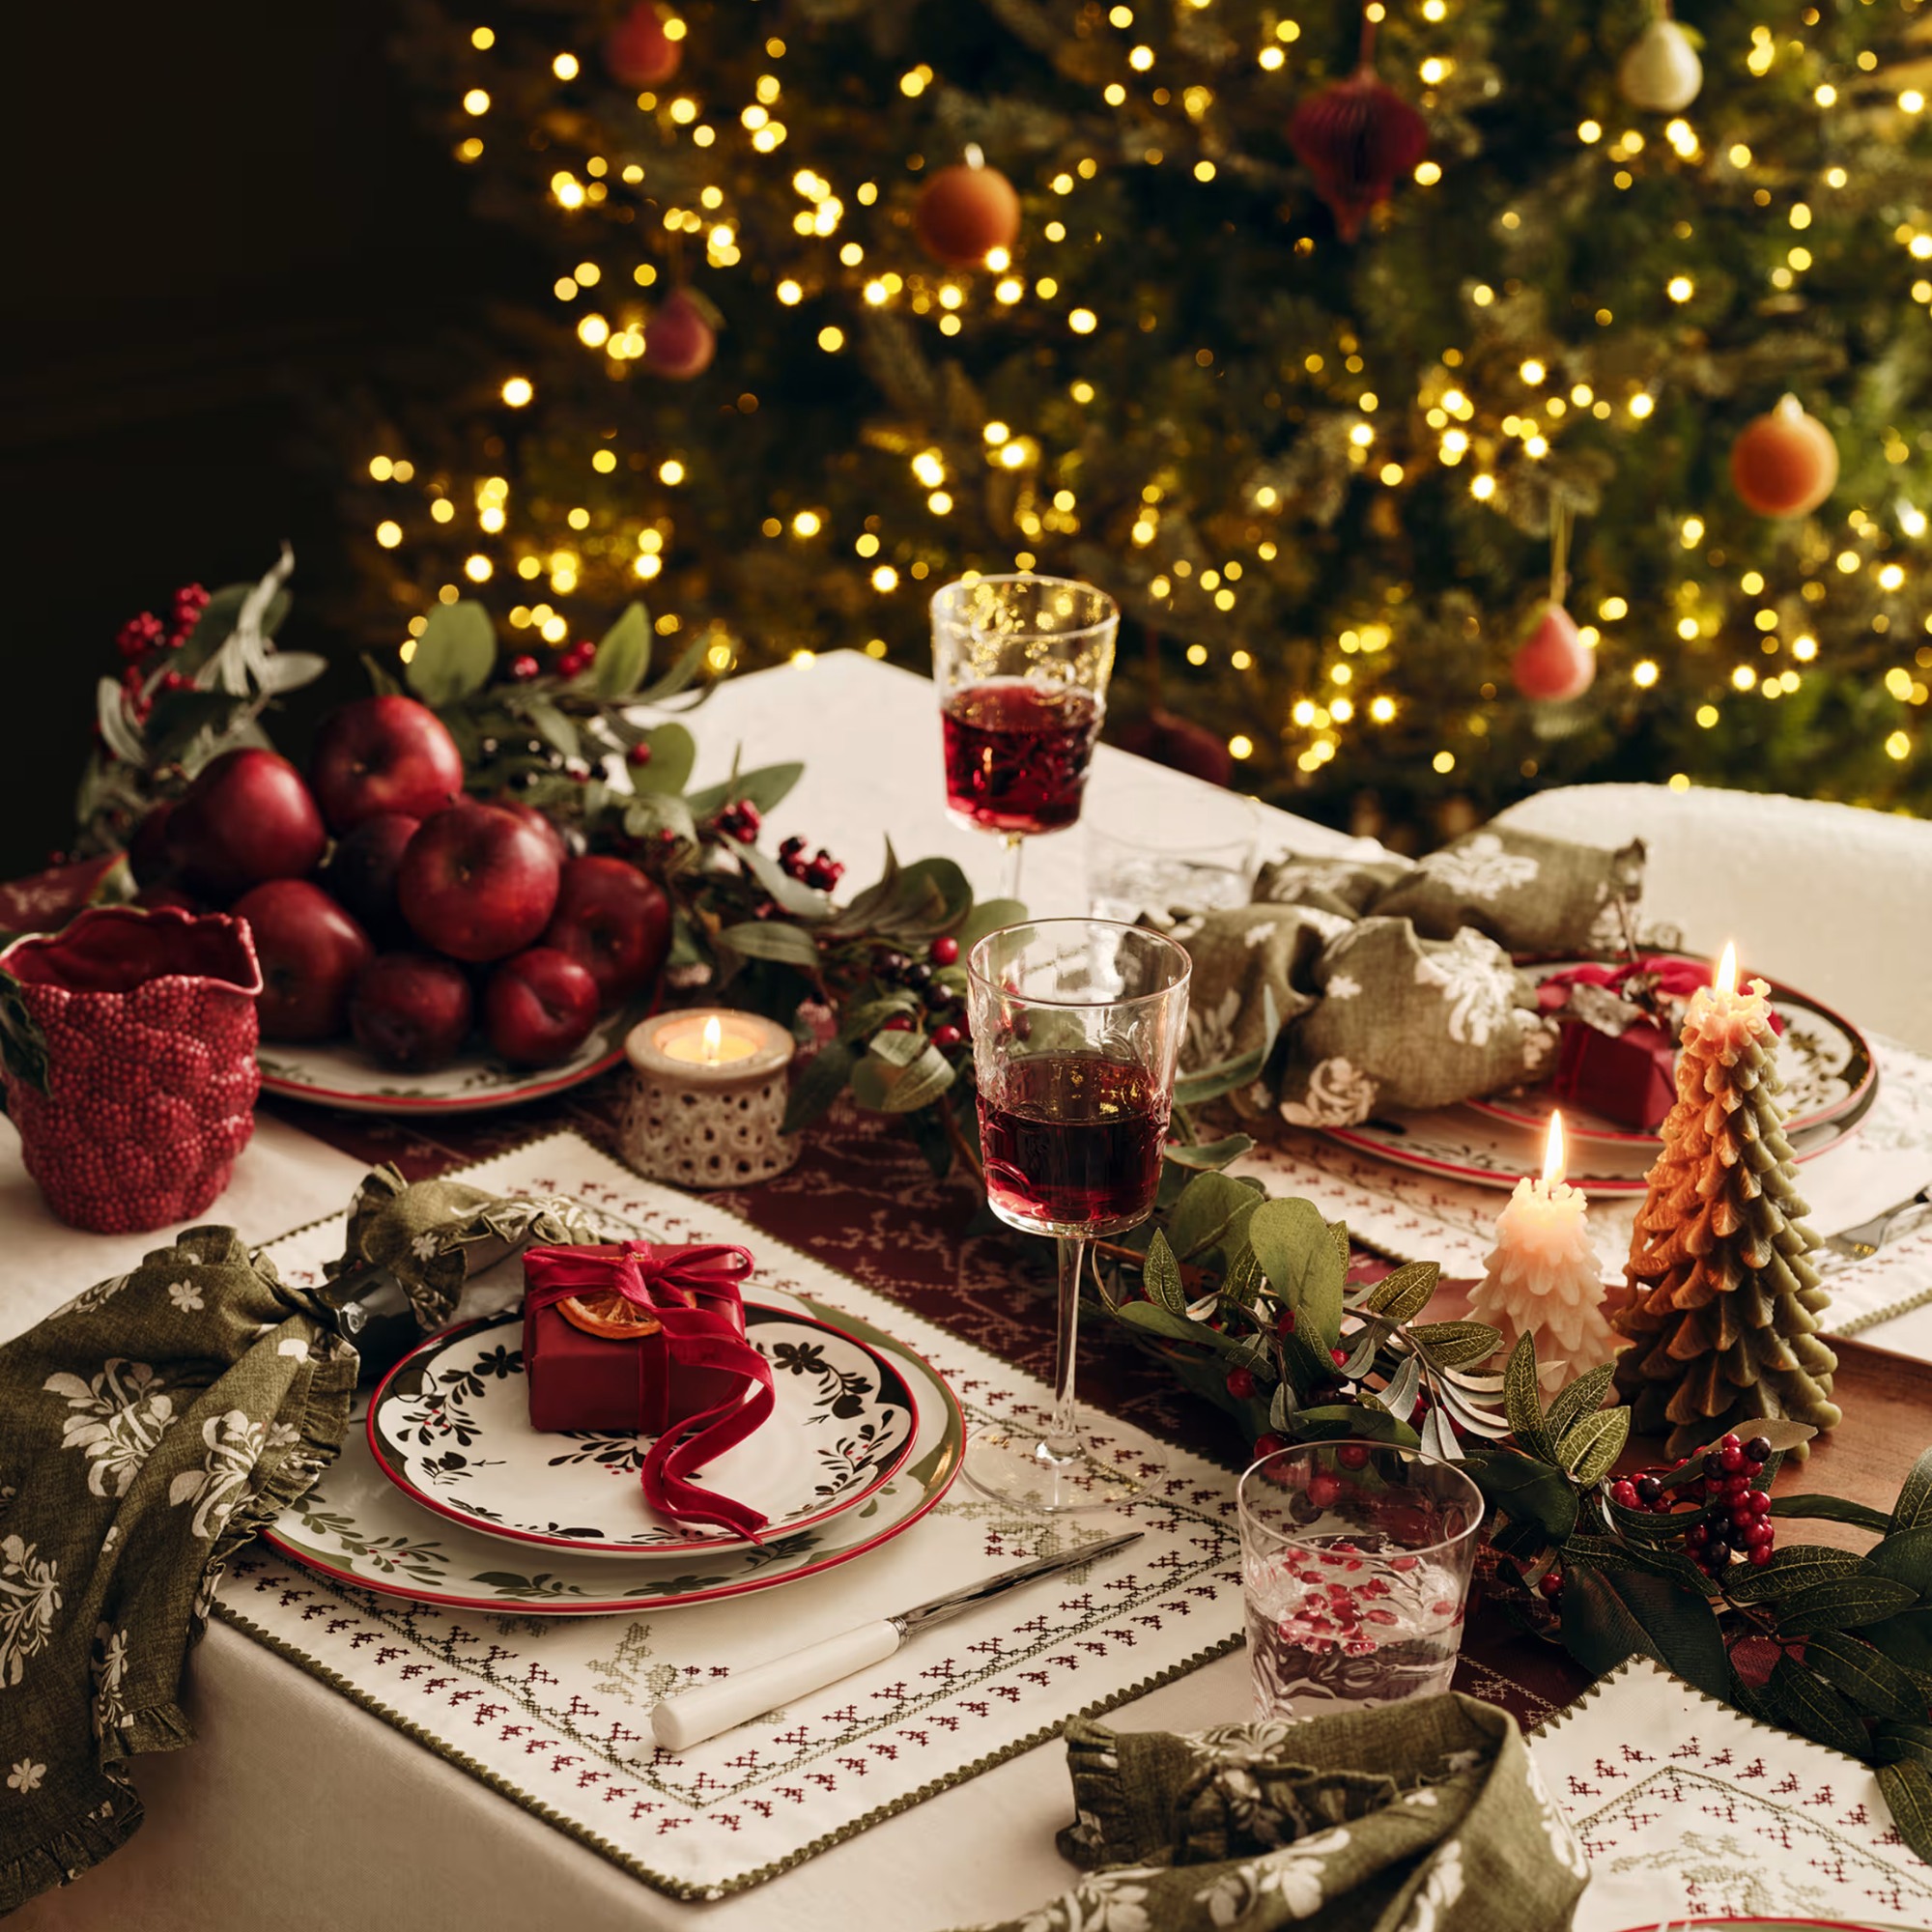
During my time at Ideal Home, I’ve developed an increasing obsession with pretty tableware, and M&S’s new brambleware collection is the latest set I can’t stop thinking about. I’m now even asking the question, ‘is brambleware the new cabbageware?’
Despite launching part of M&S’s Christmas shop, the assortment of bramble jugs, butter dishes, plates, and sugar pots is perfect for autumn and beyond, with their rich berry tone reflective of the home decor trends we can expect to see way into 2026. Let this be a PSA to get ahead of the curve now!
The new tableware reminds me of the cabbageware boom we saw earlier this year. Still, it’s a fruity twist that makes it a worthy trend in its own right – so hang onto your Bordallo Pinheiro serving dish, as the two styles complement each other perfectly.
M&S brambleware
M&S Collection
Bramble Sugar Pot
This little sugar pot is absolutely gorgeous, and could be just as easily used out of the kitchen as in!
M&S Collection
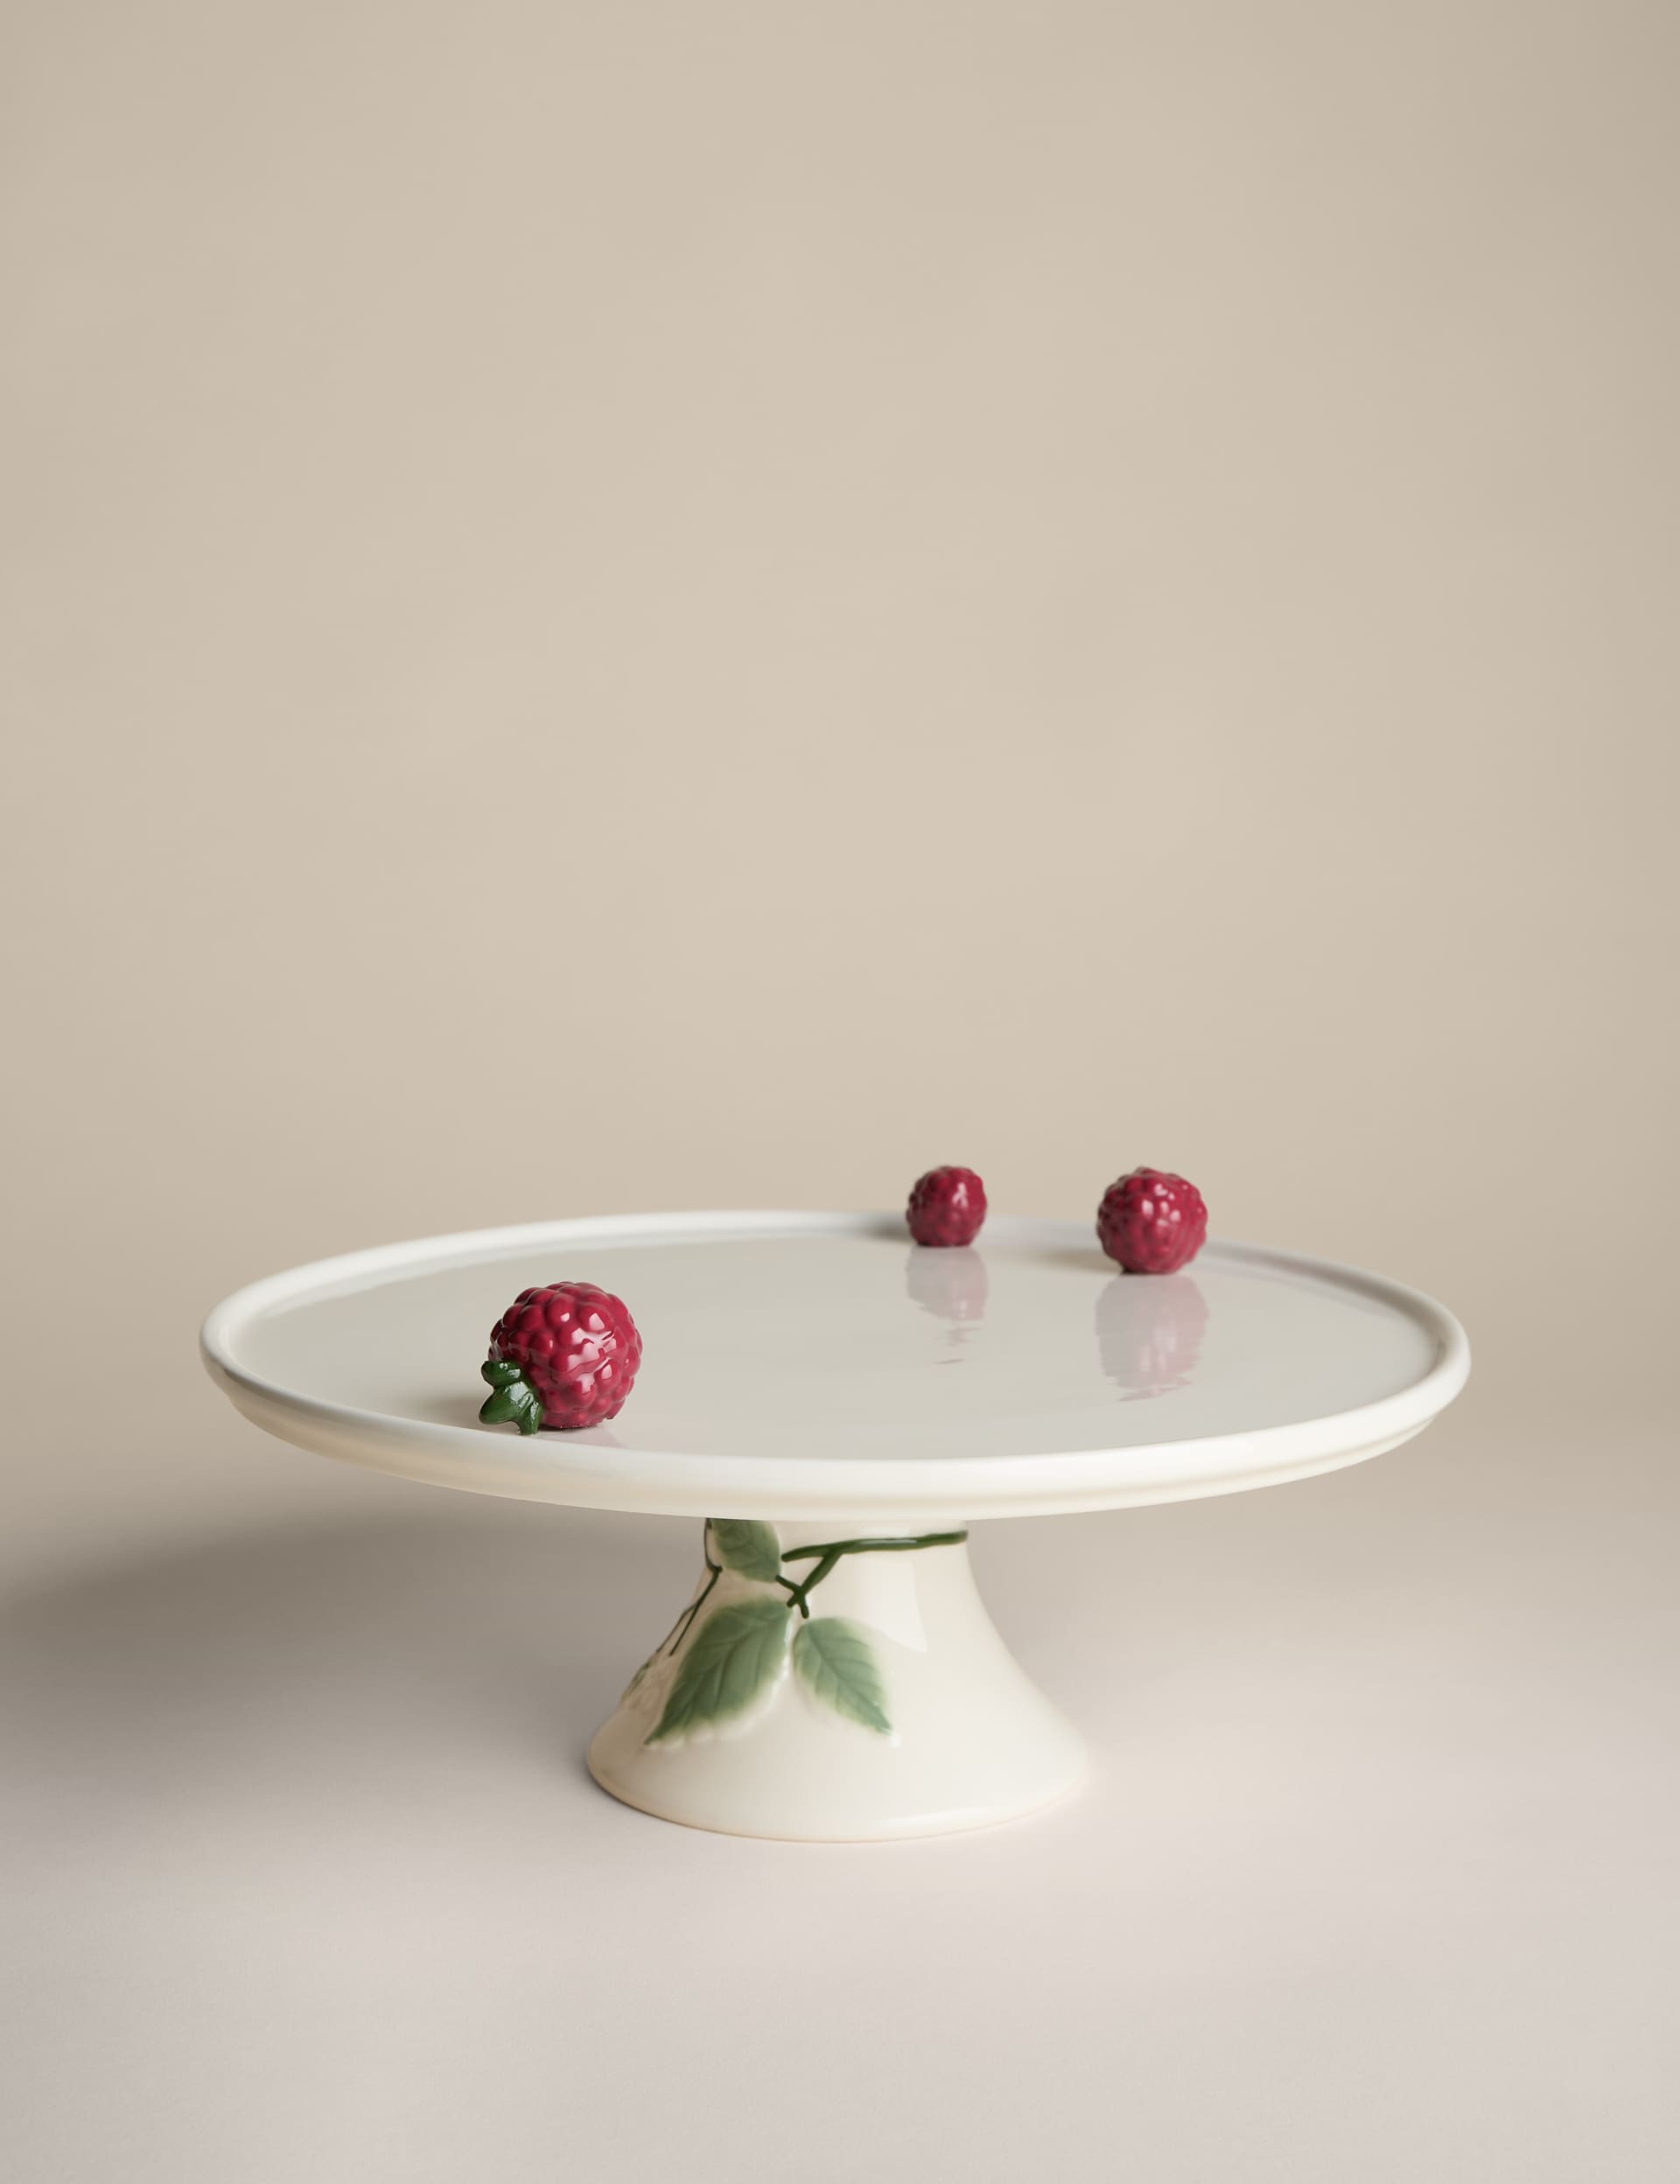
Bramble Cake Stand
This elegant cake stand will take pride of place on any table, I especially love the expensive-looking 3D elements.
M&S Collection
Bramble Milk Jug
This quirky milk jug feels made for pouring cream over autumnal crumbles.
M&S Collection
Bramble Teapot
This stunning tea pot is an easy way to impress your guests. The stalk detail around the spout and handle are everything.
M&S Collection
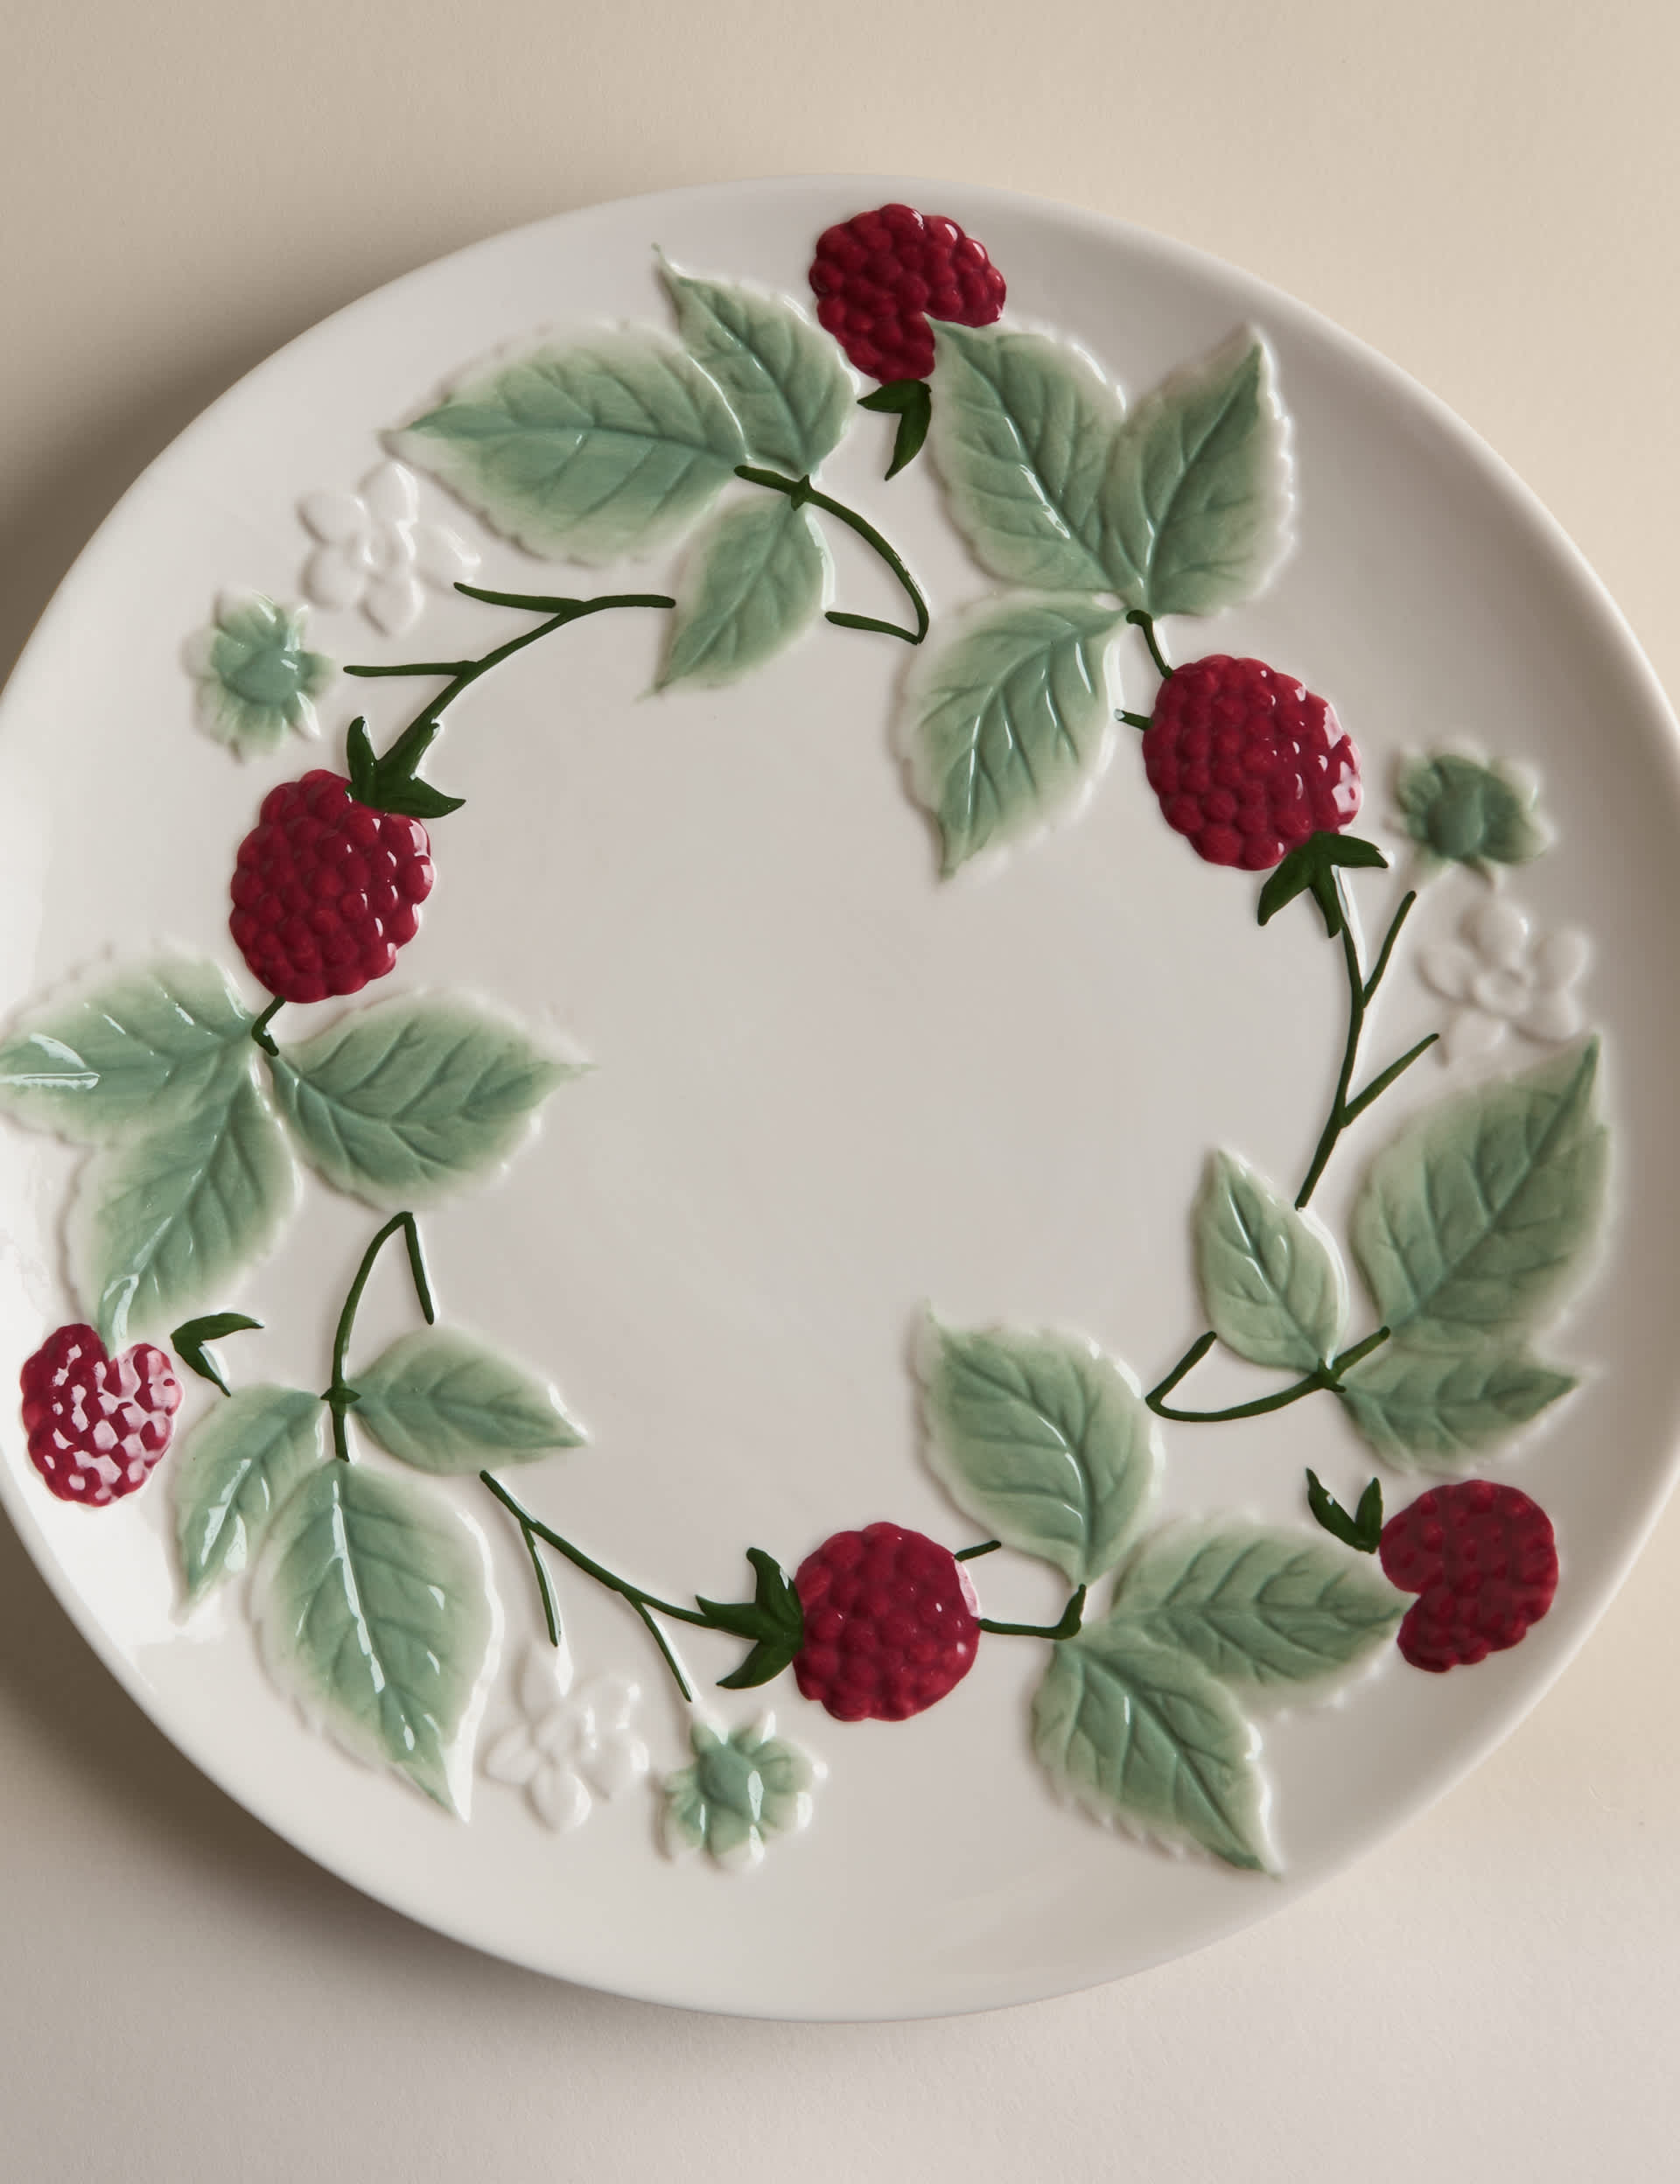
Bramble Platter
This beautiful platter has wonderful nostalgic value and will add a touch of cottagecore charm to your space.
M&S Collection
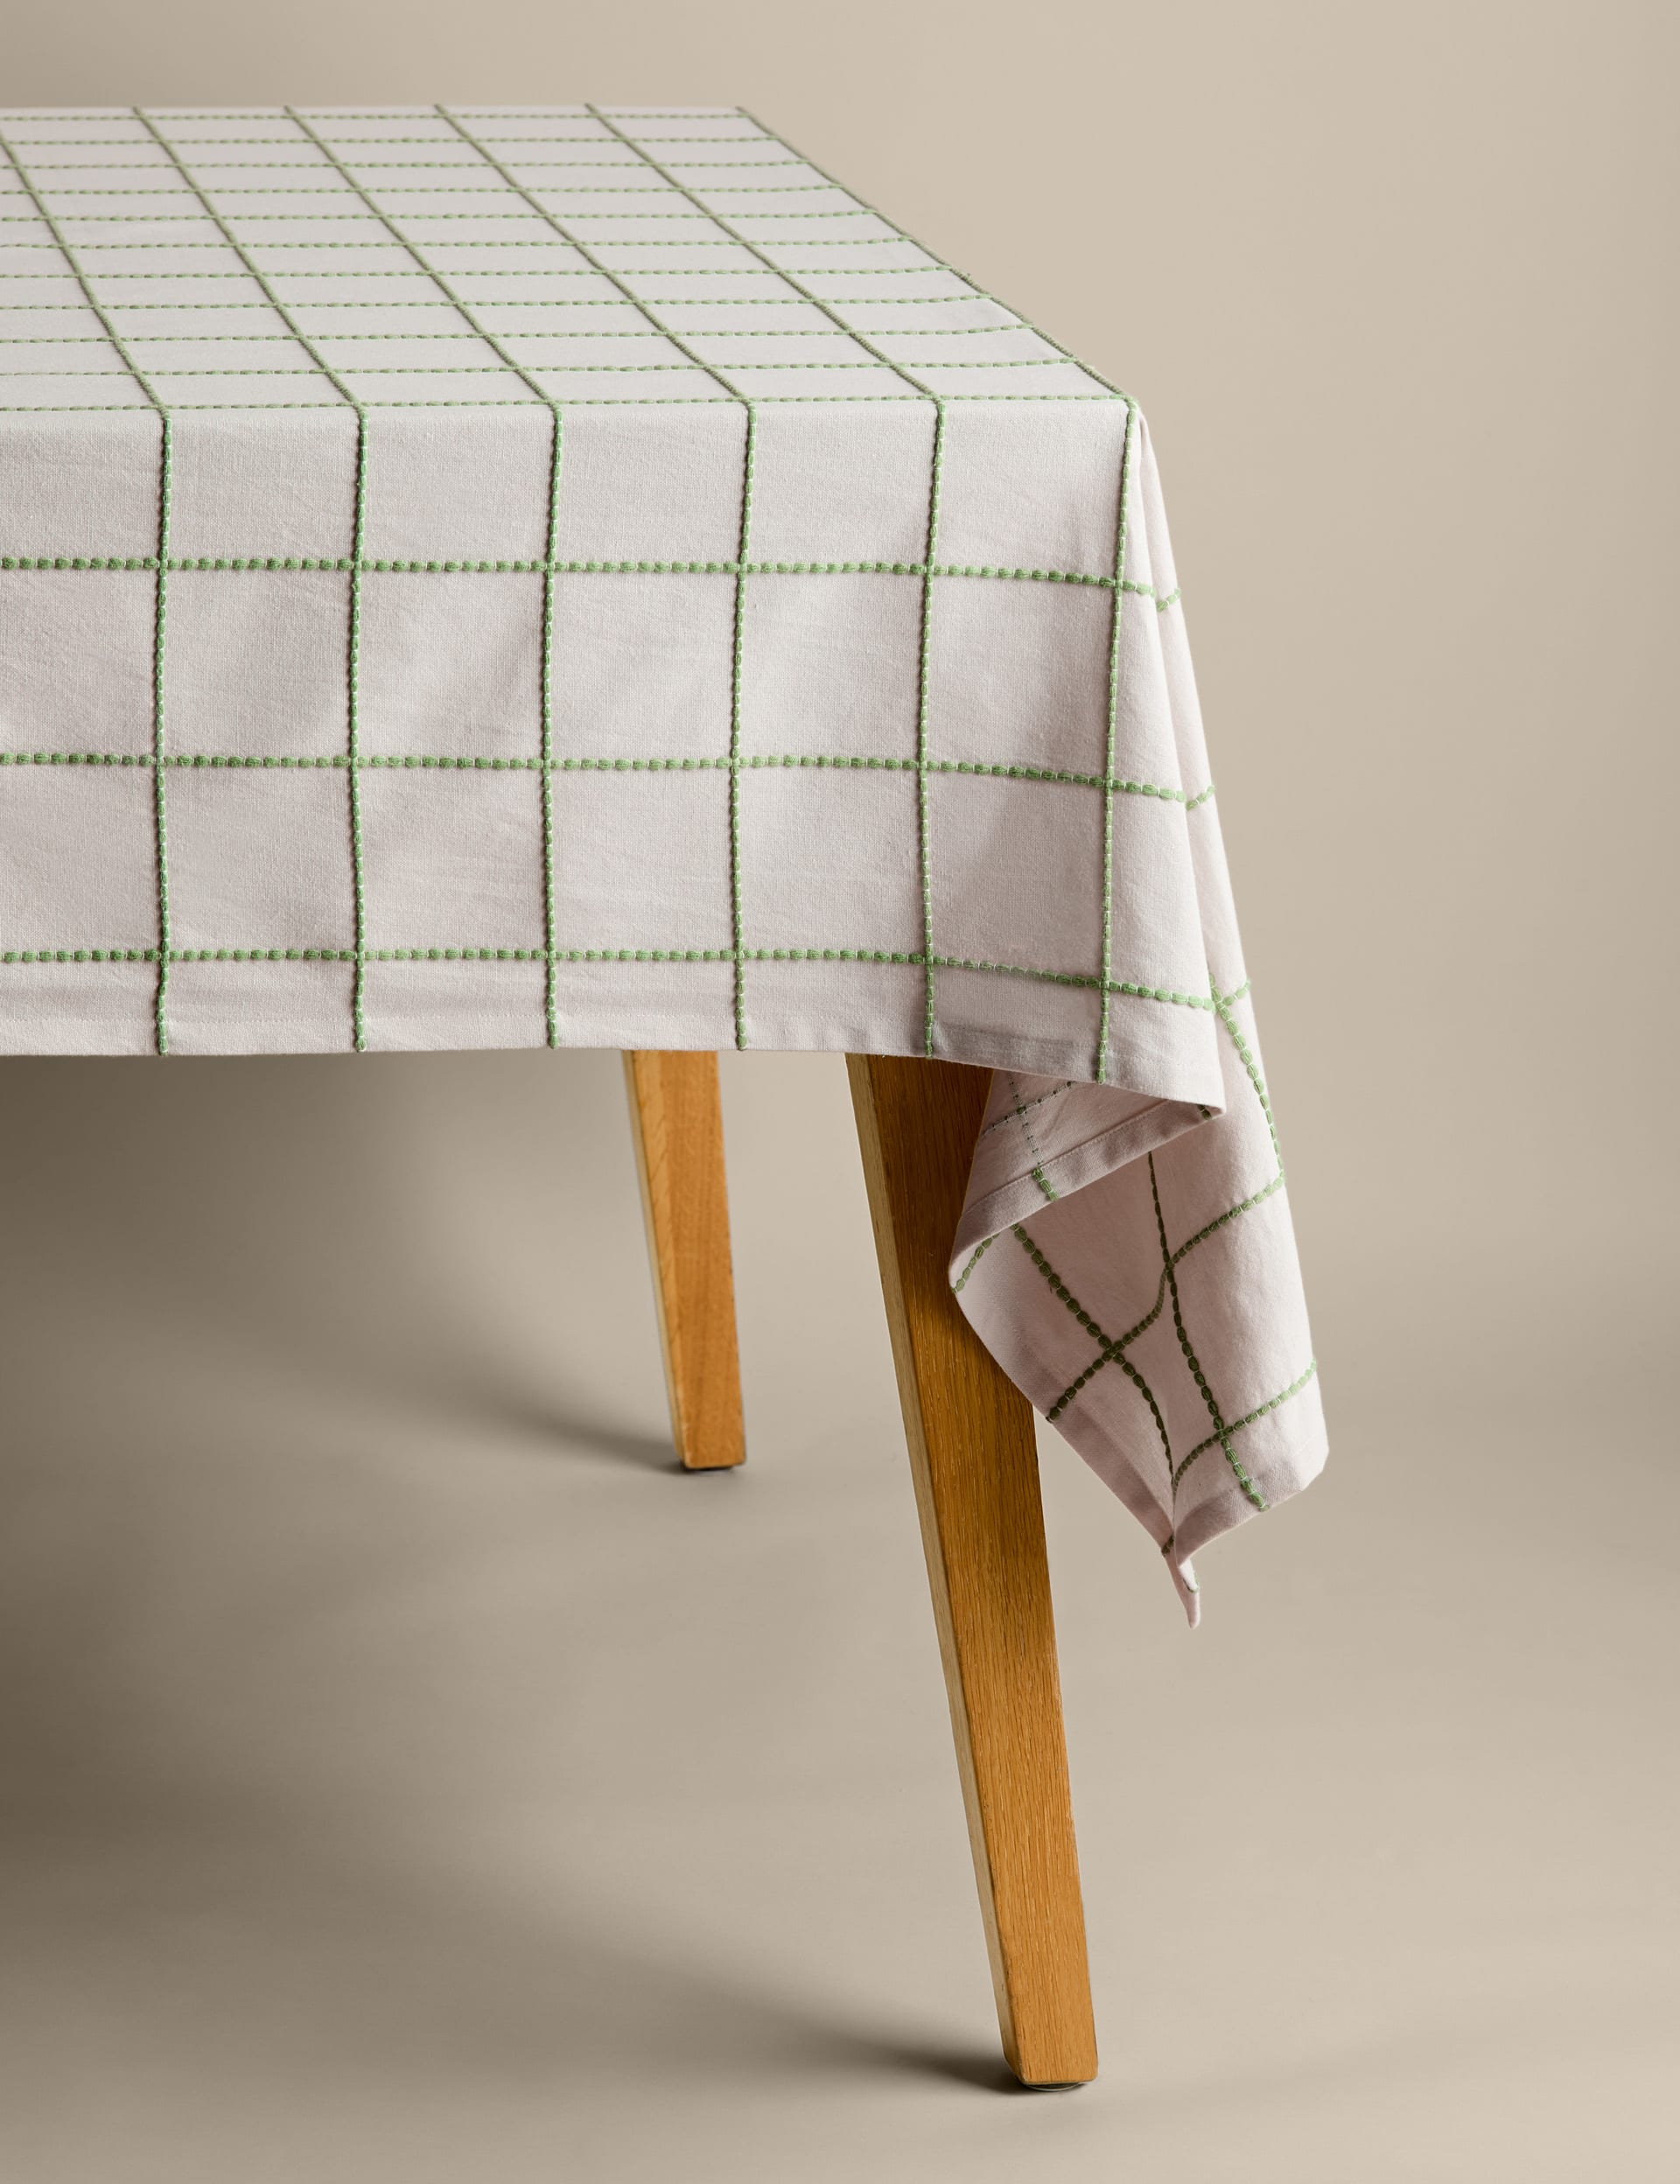
Pure Cotton Woven Checked Tablecloth
Pair your brambleware with a green-hued tablecloth to create a relaxing and natural look.
The piece to catch my eye was the Bramble Sugar Pot (£10), and honestly, I’ve thought about not much else since. It’s adorable and an easy way to give your farmhouse kitchen an easy upgrade. Forming the cutest berry when the lid is on, this little pot is packed with character and charm.
Berries are a quintessential part of the British countryside, and it is this familiarity that makes this tableware so charming. It’s not quite as nostalgic as the cabbageware trend, but it does have a homely, comforting look that we can’t get enough of.
We independently select these products—if you buy from one of our links, we may earn a commission. All prices were accurate at the time of publishing.
As a professional designer, I love to transform spaces — both my own and my clients’ — but I am determined to do it without spending a fortune. It’s a learned skill: I started out with limited resources and had to get creative, and my clients don’t have sky-high budgets, either. (Before I was a professional designer and an antiques dealer, I worked in theater as a prop man and set dresser, so I have 35 years of experience in hunting for bargain-priced gems.)
Over time, I developed what has become my signature rule for creating beautiful spaces: the TGIF Rule, which stands for thrifted, gifted, invented, and found. This rule helps me skip buying things straight from retail stores and instead get more creative with my shopping. Here’s how I use the TGIF rule to create spaces that are super homey (and very affordable).
My TGIF rule started as a shorthand I used to keep myself from impulse buying during the early days of my design business. To help myself use items that were budget-friendly, I used the adage thrifted, gifted, invented, and found.
Over time, the TGIF rule evolved from a budgeting trick into a full-blown design philosophy. I realized these four categories were the building blocks of my favorite spaces — not just because they saved money, but because they helped me fill spaces with unique items that told a story.
In my work, I start every design process by taking stock of what a client already has, what can be obtained on the secondhand market, and what we can invent together — and I do the same thing in my own home (most recently, when transformed my bare patio into my own cheap slice of paradise). Here’s how I use each piece of the TGIF rule.
Thrifted: To get thrifted items, I might hunt for pieces at a local vintage shop, flea market, estate sale, or online listings.
If you’re thrifting, focus on pieces with good bones that just need some love or a fresh idea to transform them. While some thrifted items will be ready to use immediately, most are diamonds in the rough.
Gifted: “Gifted” items are things like family heirlooms or secondhand pieces from friends. Not everyone has gifted items on hand, but when possible, I like to showcase these things! For example, I pulled out a quilt a client’s grandmother made that had been tucked away in a closet so it could be put on display at the foot of their bed.
Found: To get my found items, I keep an eye out for natural or unexpected treasures like branches, stones, sea glass, driftwood, or even old bricks. And I’m always cruising swanky neighborhoods to see what the well-to-dos have put out on their curbs. It’s honestly incredible what people throw away!
What I Love About the TGIF Rule
What sets TGIF apart from most design advice I’ve learned over the years is that it’s super adaptable to any style and any project. It’s not about trends — it’s about following curiosity and experimenting with new ways to decorate.
I’ve used the TGIF rule in my own home, I’ve used it for clients I’ve worked with, I’ve taught it to design students, and I’m even writing a book about the philosophy. No matter where you use it, TGIF gives people permission to be creative with what they have and do more with less. And personally, it keeps me inspired, and always on the lookout for the next beautiful surprise.
We independently select these products—if you buy from one of our links, we may earn a commission. All prices were accurate at the time of publishing.
When you go grocery shopping, you’re usually looking for items to put in your refrigerator. It’s hard to imagine a kitchen without one, which means it’s easy to forget that those chilly chambers had to come from somewhere. But sometimes life gives you a clear reminder — maybe your fridge breaks, or starts to feel far too small for your family. Or maybe you move somewhere with a garage and can finally get a second fridge just like your grandparents always had. Whatever the circumstances, sometimes you just need to upgrade your fridge, and this cool (sorry, I had to) new Costco convertible freezer may be just what you’re looking for.
What Is the Costco HiSense Frost Free Convertible Upright Freezer?
Available now at Costco, the HiSense Frost Free Convertible Upright Freezer is a slender, tall appliance that can function as either a refrigerator or a freezer. It retails for $549.99 online (and $429.99 in-store, according to the Instagram account @costco.twins) and measures approximately 22 inches wide, 25 inches deep, and 68 inches tall.
It’s Energy Star-certified, has “no-frost technology,” and contains three shelves and three drawers, all of equal size. It’s also “garage ready,” which essentially means it can operate safely in a wide range of outside temperatures — 0 to 110 degrees Fahrenheit, to be specific. The fridge door is reversible, so you can open it to the left or to the right, depending on your preference. This may seem like a small thing, but it could also be the customization you didn’t know you needed in your life.
On the Costco website, reviews are generally positive: “I am so happy with this freezer,” one customer wrote this week. “It is tall and thin and industrial looking … I am happy with all the drawers to departmentalize my food plus enough shelves too. Perfect in every way for me!”
An Alternative to Shop if You Don’t Have a Costco Membership
Costco is popular, but not everyone lives near one or has a membership. If you’re one of these people, that’s OK, because you can still get your hands on a slim, cool, freezer-fridge. Over at The Home Depot, the stainless steel Vissani Convertible Upright Freezer checks a lot of the same boxes. It’s about the same size, garage-ready, and can be either a fridge or freezer. Online it retails for $649, but is currently 26% off, which brings the price down to a comparable $479.