If you’ve noticed the temperature is about to spike once again at the end of the week, don’t panic. Experts have revealed six jobs to prepare your kitchen in time for the July heatwave.
While the last heatwave left us desperately seeking ways to cool a home, purchasing the best fans and desperately checking to see if the best portable air conditioners were back in stock, this time around, it pays to be prepared.
When you’re hot and bothered, the last thing you want to do is clean a kitchen. So, experts recommend completing these six kitchen tasks now before the weather heats up. You’ll thank yourself later!
Latest Videos From
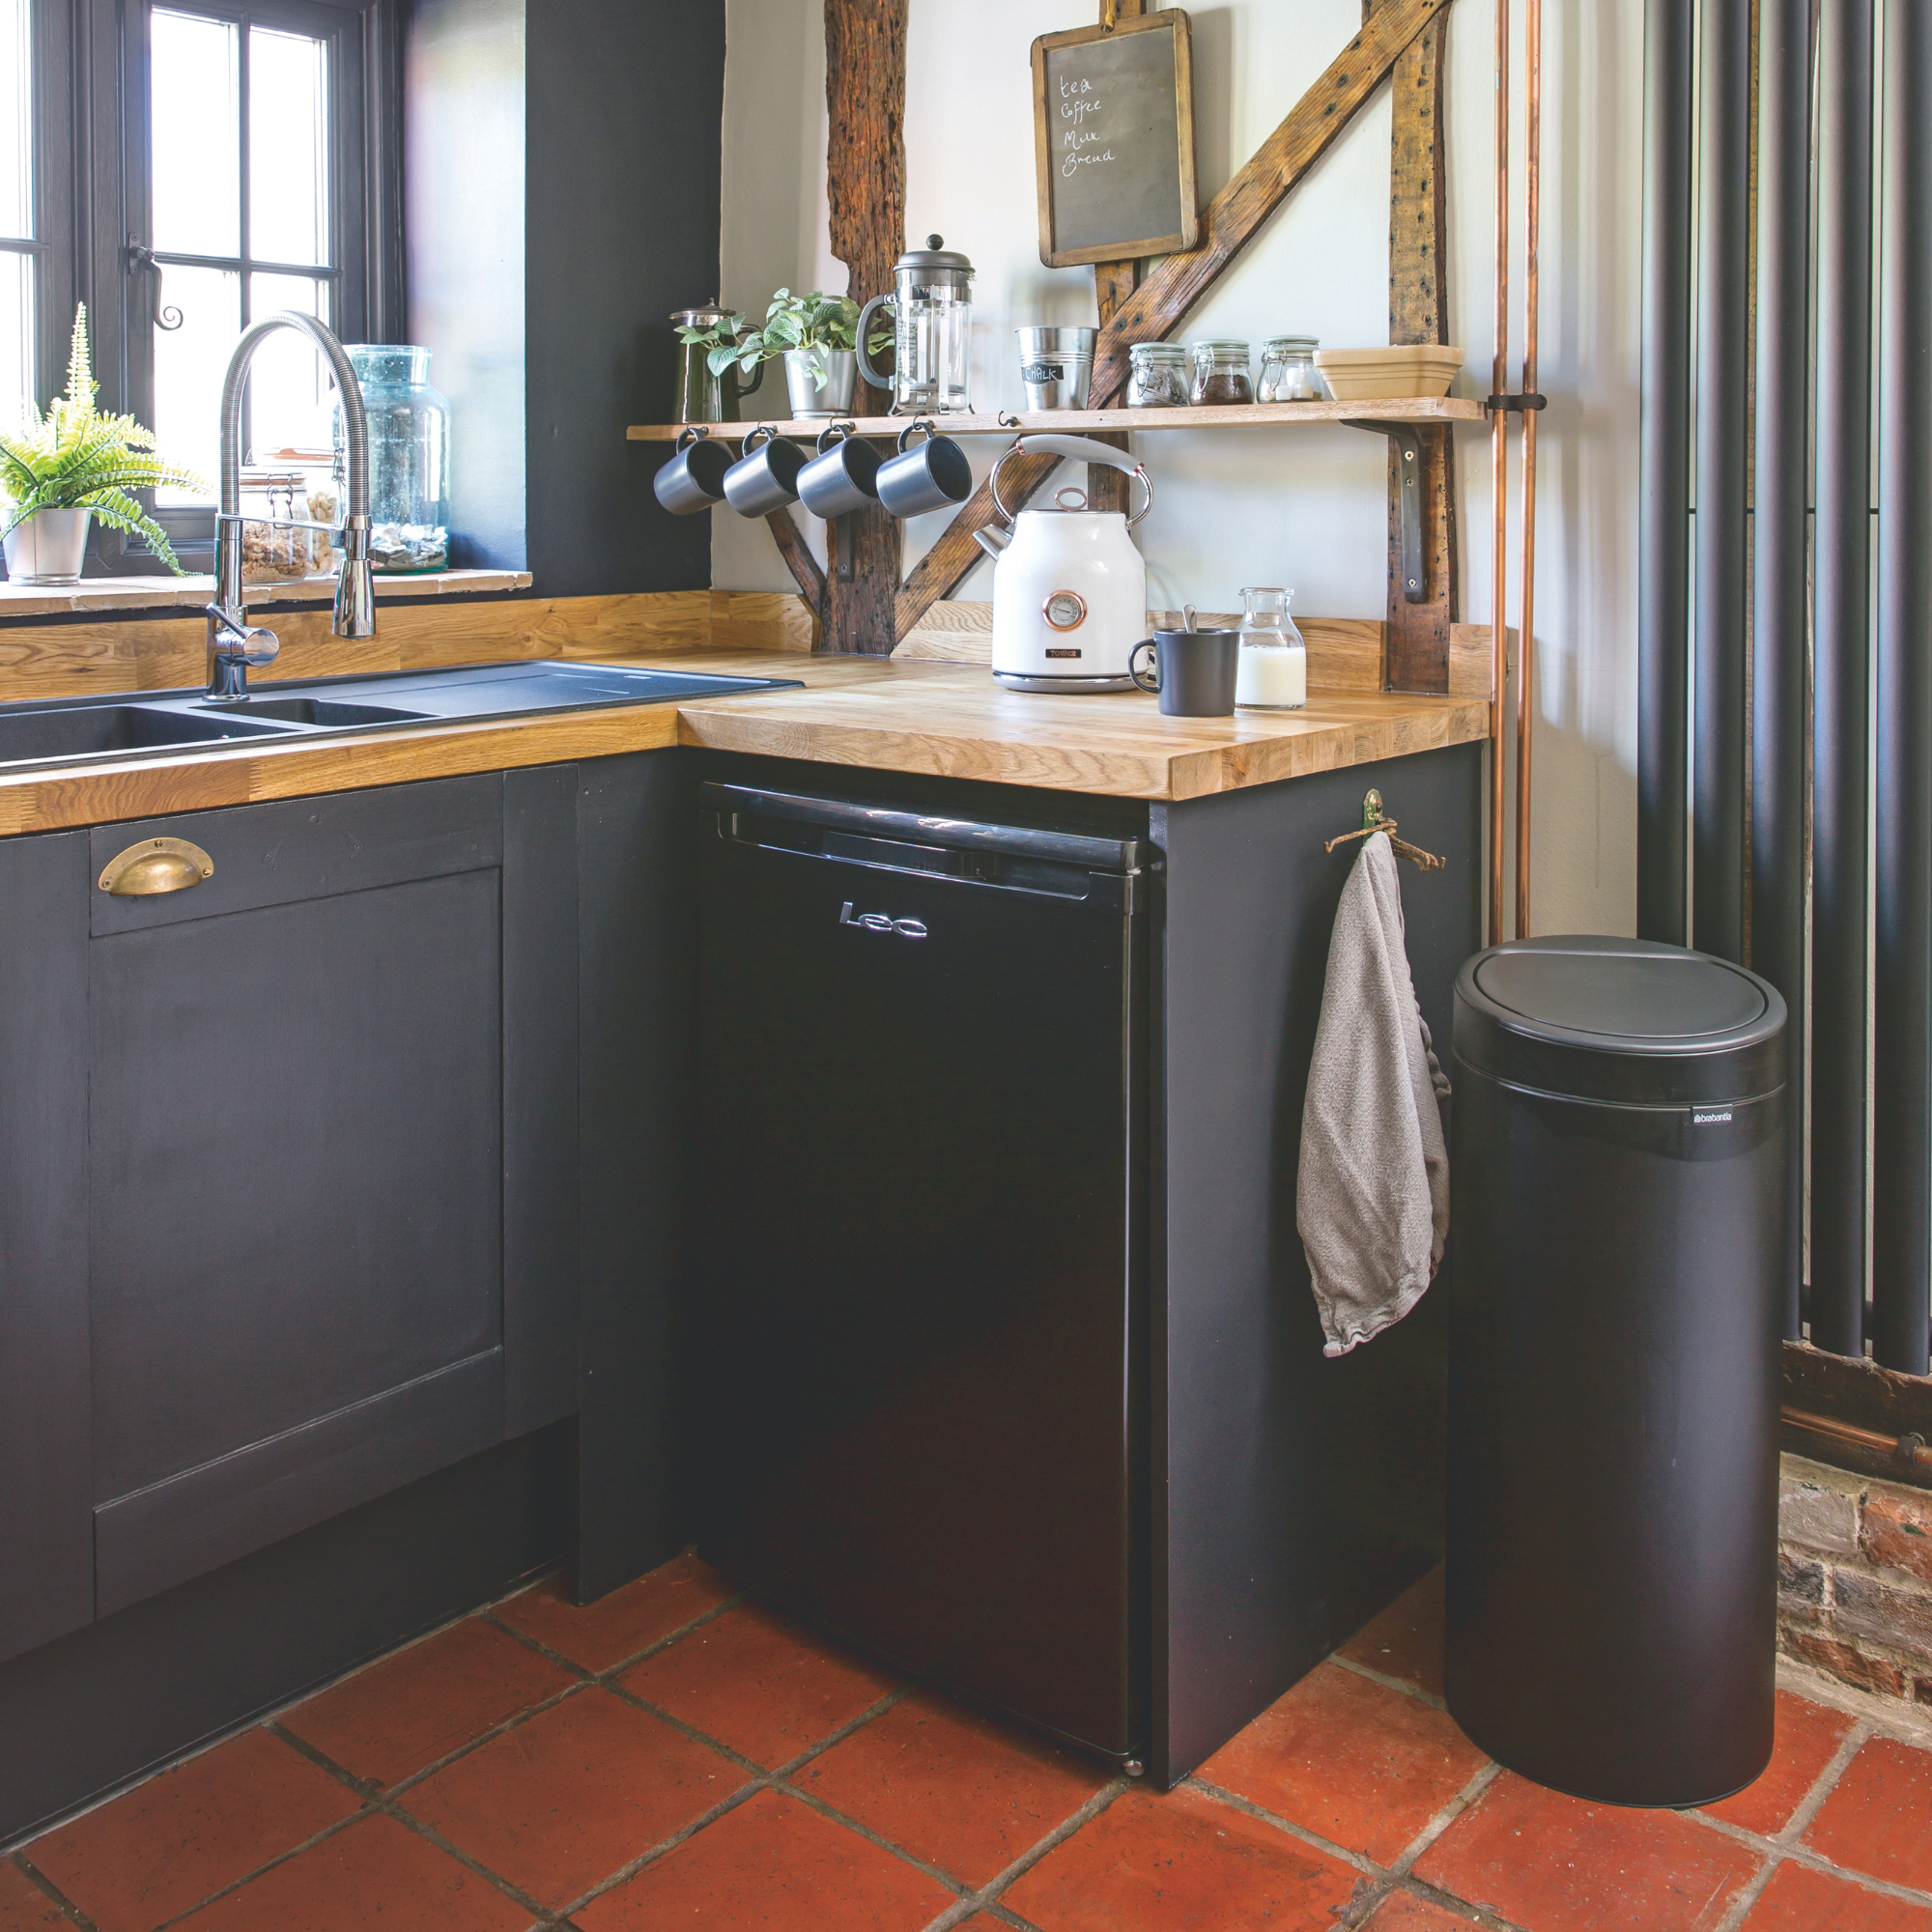
1. Clean your kitchen bins
Unfortunately, stinky bins are often synonymous with hot weather. Heat speeds up the process of decay, which can cause some pretty funky smells. So, it’s really important to keep on top of bin hygiene when the weather heats up to avoid attracting flies and making your kitchen stink.
(Image credit: Future PLC/ Lizzie Orme)
‘The warm weather provides the ideal conditions for bacterial growth and the breakdown of food, which is why kitchen bins are often the biggest culprits for unpleasant smells in the summer,’ explains Heather Nixon, sustainability manager at Bio-D.
‘Giving your kitchen bin a thorough wash before temperatures rise removes food residue that causes the odours. It’s also worth emptying food waste more regularly during hot spells as this reduces the window of opportunity for odours and bacteria to develop.’
Sign up to our newsletter for style inspiration, real homes, project and garden advice and shopping know-how
2. Clean and check your extrator fan
Do you remember the last time you cleaned your extractor fan? Well, now is as good a time as any, as these fans can be really helpful when your kitchen feels too hot.
(Image credit: Future PLC/ Lizzie Orme)
‘Extractor fans can be your friends in heatwaves as they pull warm, humid air out of the kitchen, especially when you’re cooking or doing the washing up. Before the heat arrives, give the fan and filter a deep clean to make sure it’s working as efficiently as possible, so it can help stop hot, stuffy air sitting in the room,’ says Angus Struthers, Managing Director at BOXT, heating and cooling specialists.
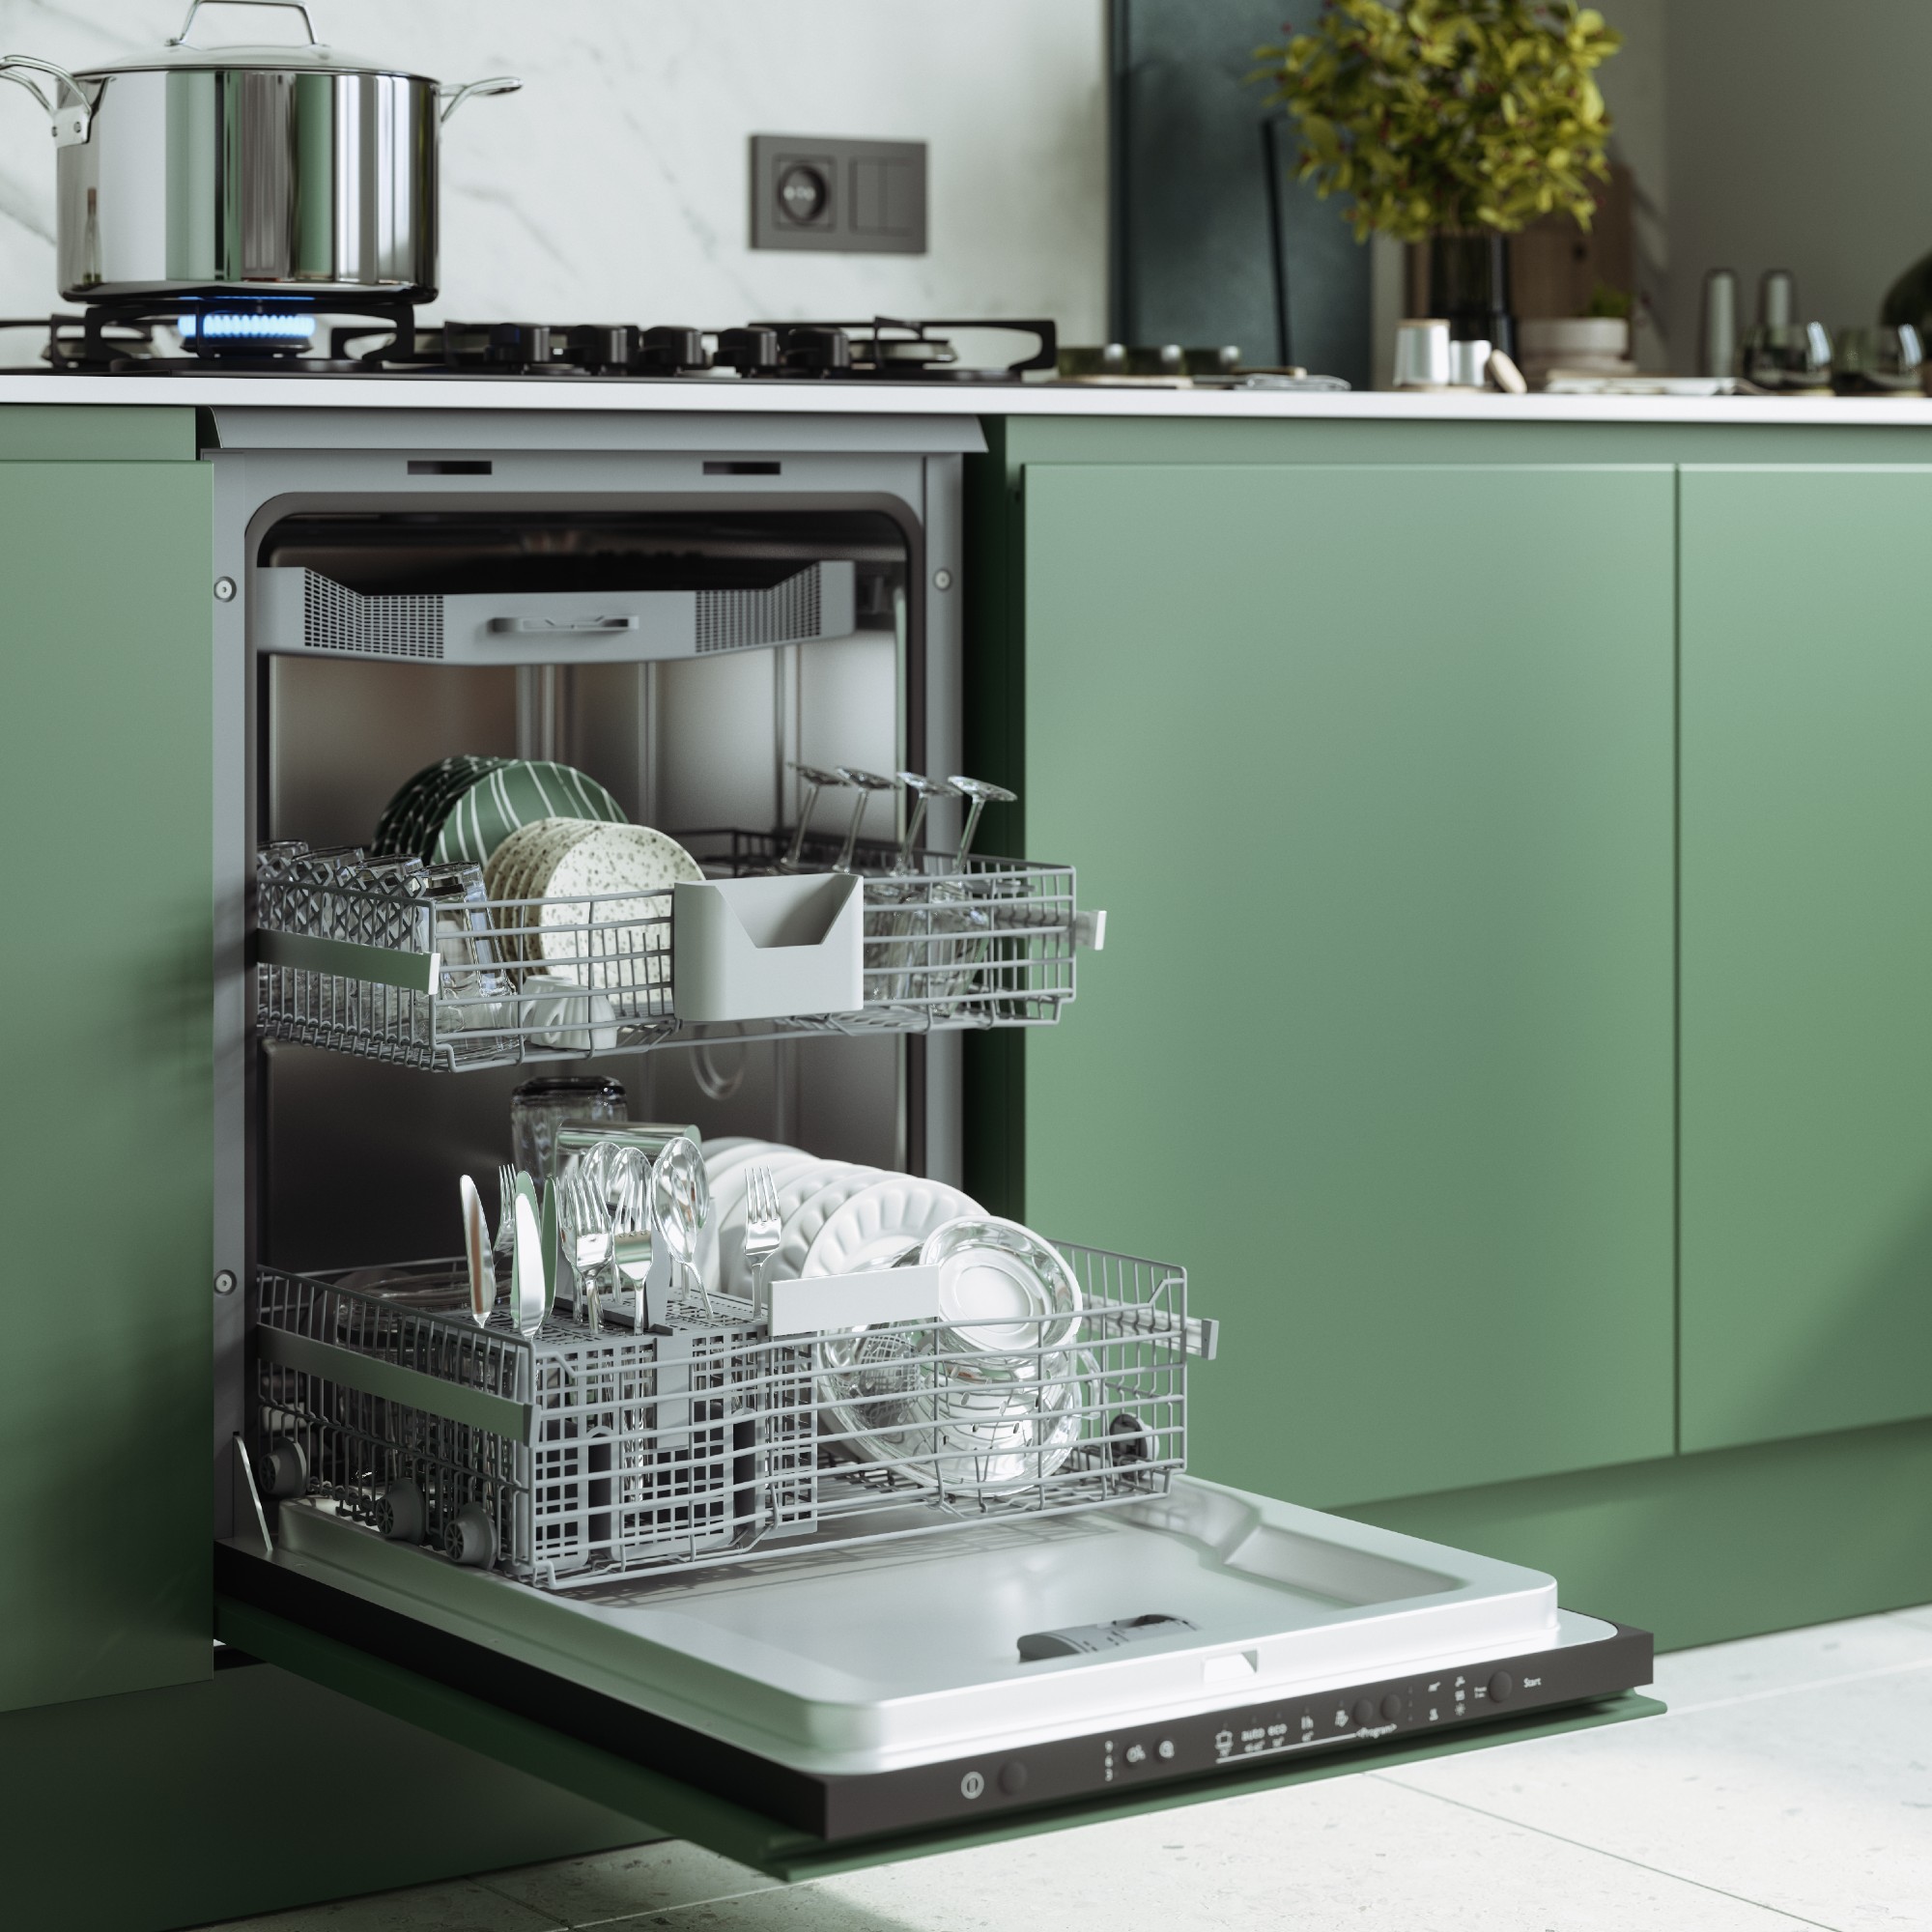
3. Clean the dishwasher
While your dishwasher is likely to be your best friend during a heatwave, it’s a good idea to give it a clean before the heat hits, particularly if you want to reduce the risk of bad smells.
(Image credit: Getty Images)
‘Dishwashers can easily become a hidden source of unpleasant odours during hot weather. The remaining food particles, grease, and moisture from previous cycles can build up around the filter and door seals and combined with higher temperatures, it can make smells that usually go undetected much more noticeable,’ says Heather.
‘Pre-empting this before a heatwave begins by removing the dishwasher filter, wiping around the rubber seals and running an empty maintenance cycle with some rinse aid is an easy way of reducing odours and preventing homes from becoming even more uncomfortable with the heat.’
4. Plan no-oven meals
During a heatwave, my kitchen is a firm no-oven zone. I normally opt for plenty of salads (MOB Fresh has some delicious non-boring salads) during the summer, so I don’t have to use my hob or oven. This helps reduce the amount of excess heat in my kitchen.
In the meantime, it’s a good idea to degrease your oven and give the inside a clean to remove any food residue before the heat hits (and causes potential odour), and so it is lovely and clean when the time comes to return to heart
(Image credit: Future PLC/Caroline Mardon)
‘We all love a home-cooked meal, but this can actually turn your kitchen into a furnace without you realising. Ovens and hobs are some of the biggest culprits in the kitchen. We’ve all got to eat, but if you can plan a few meals that don’t need the oven, or can be cooked earlier in the day or later in the evening, it can help stop the kitchen from becoming unbearably hot during the afternoon,’ says Angus.
5. Wash cleaning cloths
Lastly, you’ll need to clean your kitchen cleaning cloths ahead of the temperature increase. Not only do they become smelly, but they can harbour bacteria, too. Two things that contradict the whole point of a cleaning cloth!
(Image credit: Future PLC/James French)
‘Damp dishcloths and cleaning cloths can quickly become a breeding ground for bacteria, and this is sped up when temperatures rise. Before a heatwave arrives, give your kitchen cloths a thorough wash and make sure they’re able to dry completely between uses, rather than leaving them scrunched up beside the sink. This is a simple yet effective preventative habit to get into to stop further bacterial and odour build-up,’ says Heather.
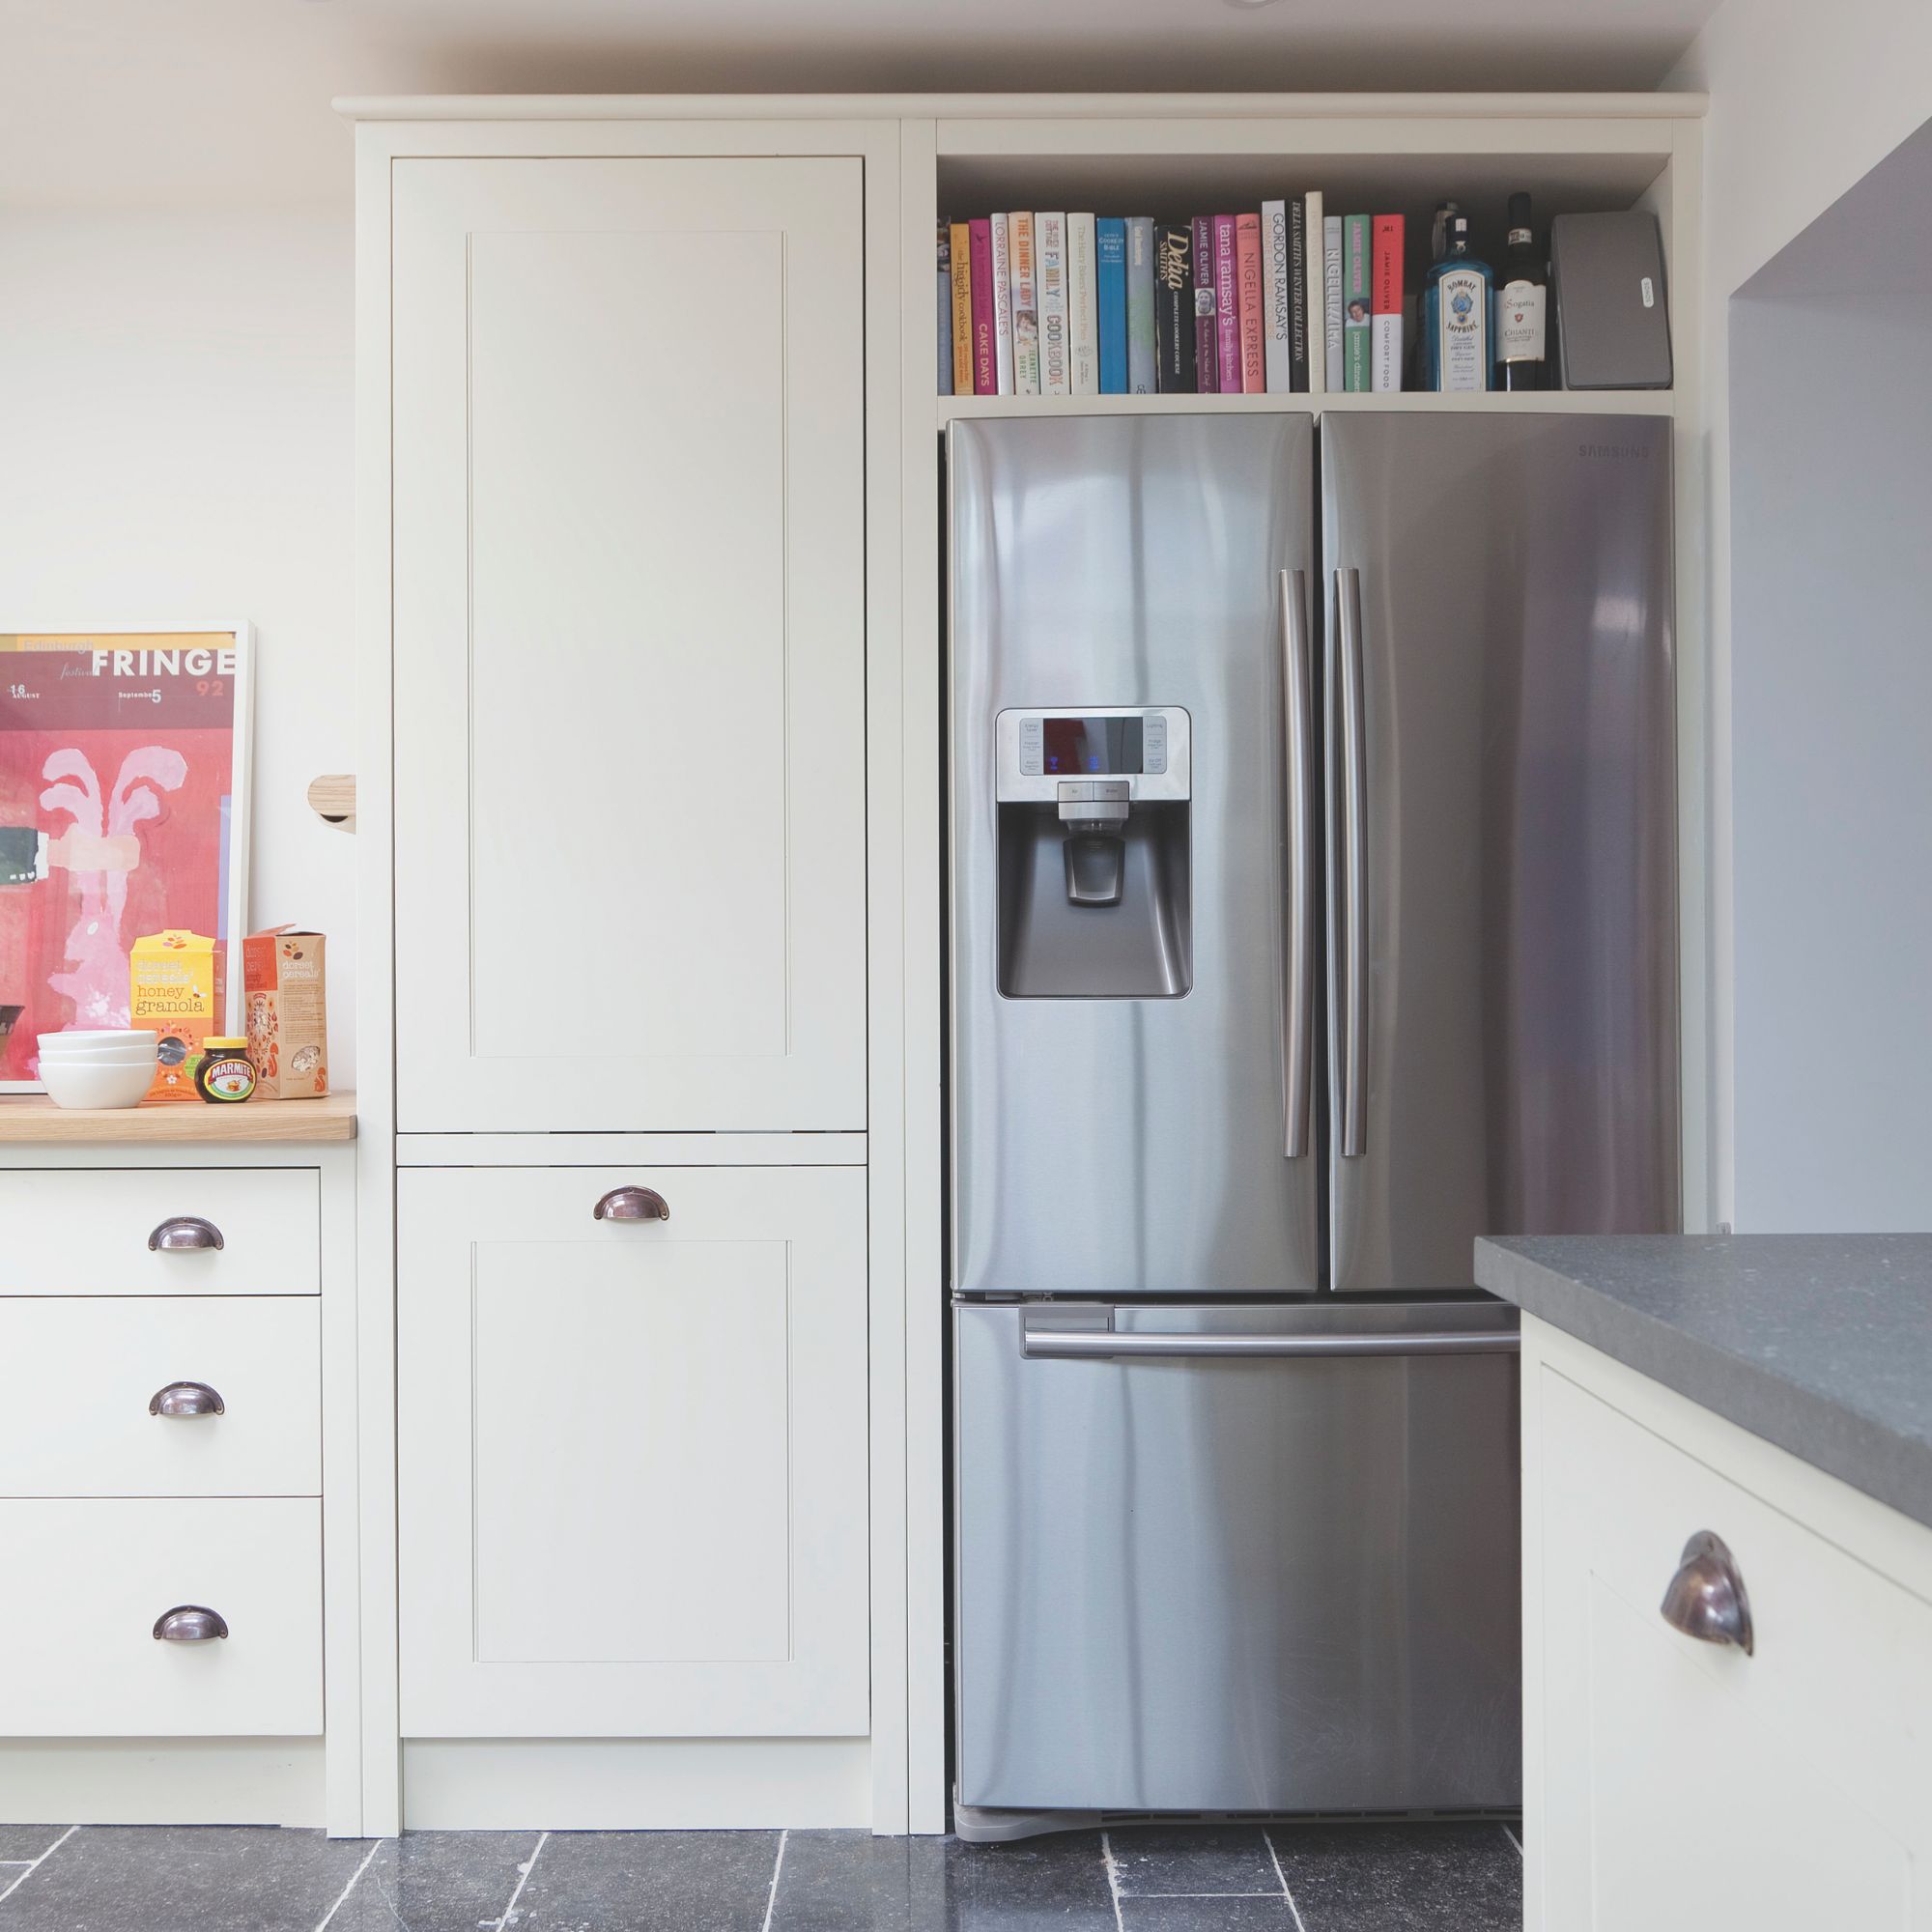
6. Give your fridge and freezer a clean and clear out
Now is also the perfect time to clean your fridge and freezer. Bin any old food, and ensure you wipe away any stains or spillages. This helps reduce smells and helps your appliance work more efficiently.
(Image credit: Future PLC)
‘The warmer it gets, the more strain is put on your fridge-freezer, so getting a few small jobs done before the hot weather hits can help prevent it from breaking down just as you need to stock up on ice cream,’ says Nathan Blackler, home insurance expert at Go.Compare.
‘First, give your fridge and freezer a quick clear-out. Throw away any out-of-date food, nearly empty jars or gone-off vegetables, and make sure you’re not overpacking shelves or blocking the air vents. While a reasonably full fridge and freezer can help maintain a stable temperature, good airflow is key to keeping the appliance running efficiently during hot weather.
‘It is also worth giving the fridge-freezer a quick maintenance check. Pull it slightly away from the wall if you can, so there is enough ventilation around the back, and try to keep it out of direct sunlight. Wiping up spills, checking the door seals and making sure nothing is blocking the vents can all help the appliance cope better when the kitchen is warm.’
What you need
Ezebesta
Compost Bin Filters
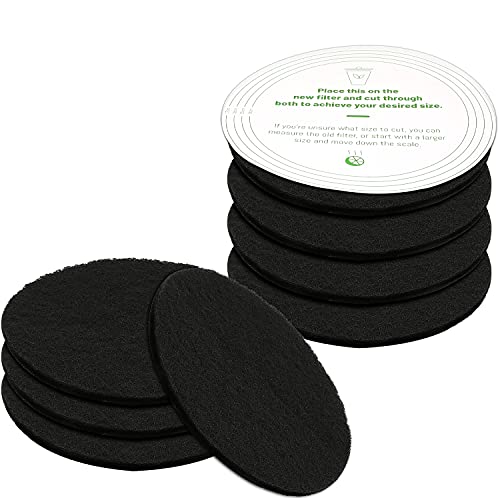
<aside data-block-layout="hero" data-block-type="featured-product" data-editorial-currency="GBP" data-editorial-price="9.99" data-hawk-json="{"product":{"variants":{"Default":{"image":{"copyright":"","height":500,"id":"bF8meGzUPvi2sQgTQUwQx6","mimeType":"image\/jpeg","mos":"https:\/\/cdn.mos.cms.futurecdn.net\/bF8meGzUPvi2sQgTQUwQx6.jpg","role":"","width":500,"credit":"Ezebesta","alt":"Compost Bin Filters Extra Thick Round Food Waste Caddy Odour Filter Refill Activated Charcoal Filters Universal Size Fits All Compost Bins Up to 17cm (pack of 8)","caption":""},"strapline":"
These filters stick to the lid of your bin and absorbs and neutralises bad smells.","brand":"Ezebesta","name":"Compost Bin Filters","urlStyle":"","retailer":"","layout":"hero","linkText":"","noFollow":false,"noAffiliateTracking":false,"promoLabel":"","price":9.99,"salePrice":null,"currency":"GBP","linkLayout":"text","sponsored":false,"hawkProductNameMatchedCode":"","review":{"cons":[],"id":"","name":"","pros":[],"rating":0,"strapline":"","url":""},"id":"","externalId":"1009244a3d381408806096bd1260a22110d2ec54","lastCheckedPriceDate":"","link":{"url":"https:\/\/target.georiot.com\/Proxy.ashx?tsid=107653&GR_URL=https%3A%2F%2Famazon.co.uk%2FCompost-Filters-Activated-Charcoal-Universal%2Fdp%2FB09F65PNL3%2Fref%3Dsr_1_3_sspa%3Ftag%3Dftr-idealhome-gb-21%26ascsubtag%3Dhawk-custom-tracking-21","merchantName":"Amazon UK","merchantId":1027,"merchantNetwork":"Amazonuk","merchantUrl":"amazon.co.uk"}}}}}” data-link=”https://target.georiot.com/Proxy.ashx?tsid=107653&GR_URL=https%3A%2F%2Famazon.co.uk%2FCompost-Filters-Activated-Charcoal-Universal%2Fdp%2FB09F65PNL3%2Fref%3Dsr_1_3_sspa%3Ftag%3Dftr-idealhome-gb-21%26ascsubtag%3Dhawk-custom-tracking-21″ data-link-merchant=”Amazon UK” data-merchant-id=”1027″ data-merchant-name=”Amazon UK” data-merchant-network=”Amazonuk” data-merchant-url=”amazon.co.uk” data-model-brand=”Ezebesta” data-model-name=”Ezebesta Compost Bin Filters” data-name=”Product Block merchantlink widget” data-render-type=”fte” data-show-fallback=”button” data-widget-type=”merchantlink” class=”hawk-root”>
These filters stick to the lid of your bin and absorbs and neutralises bad smells.
Hamlyn
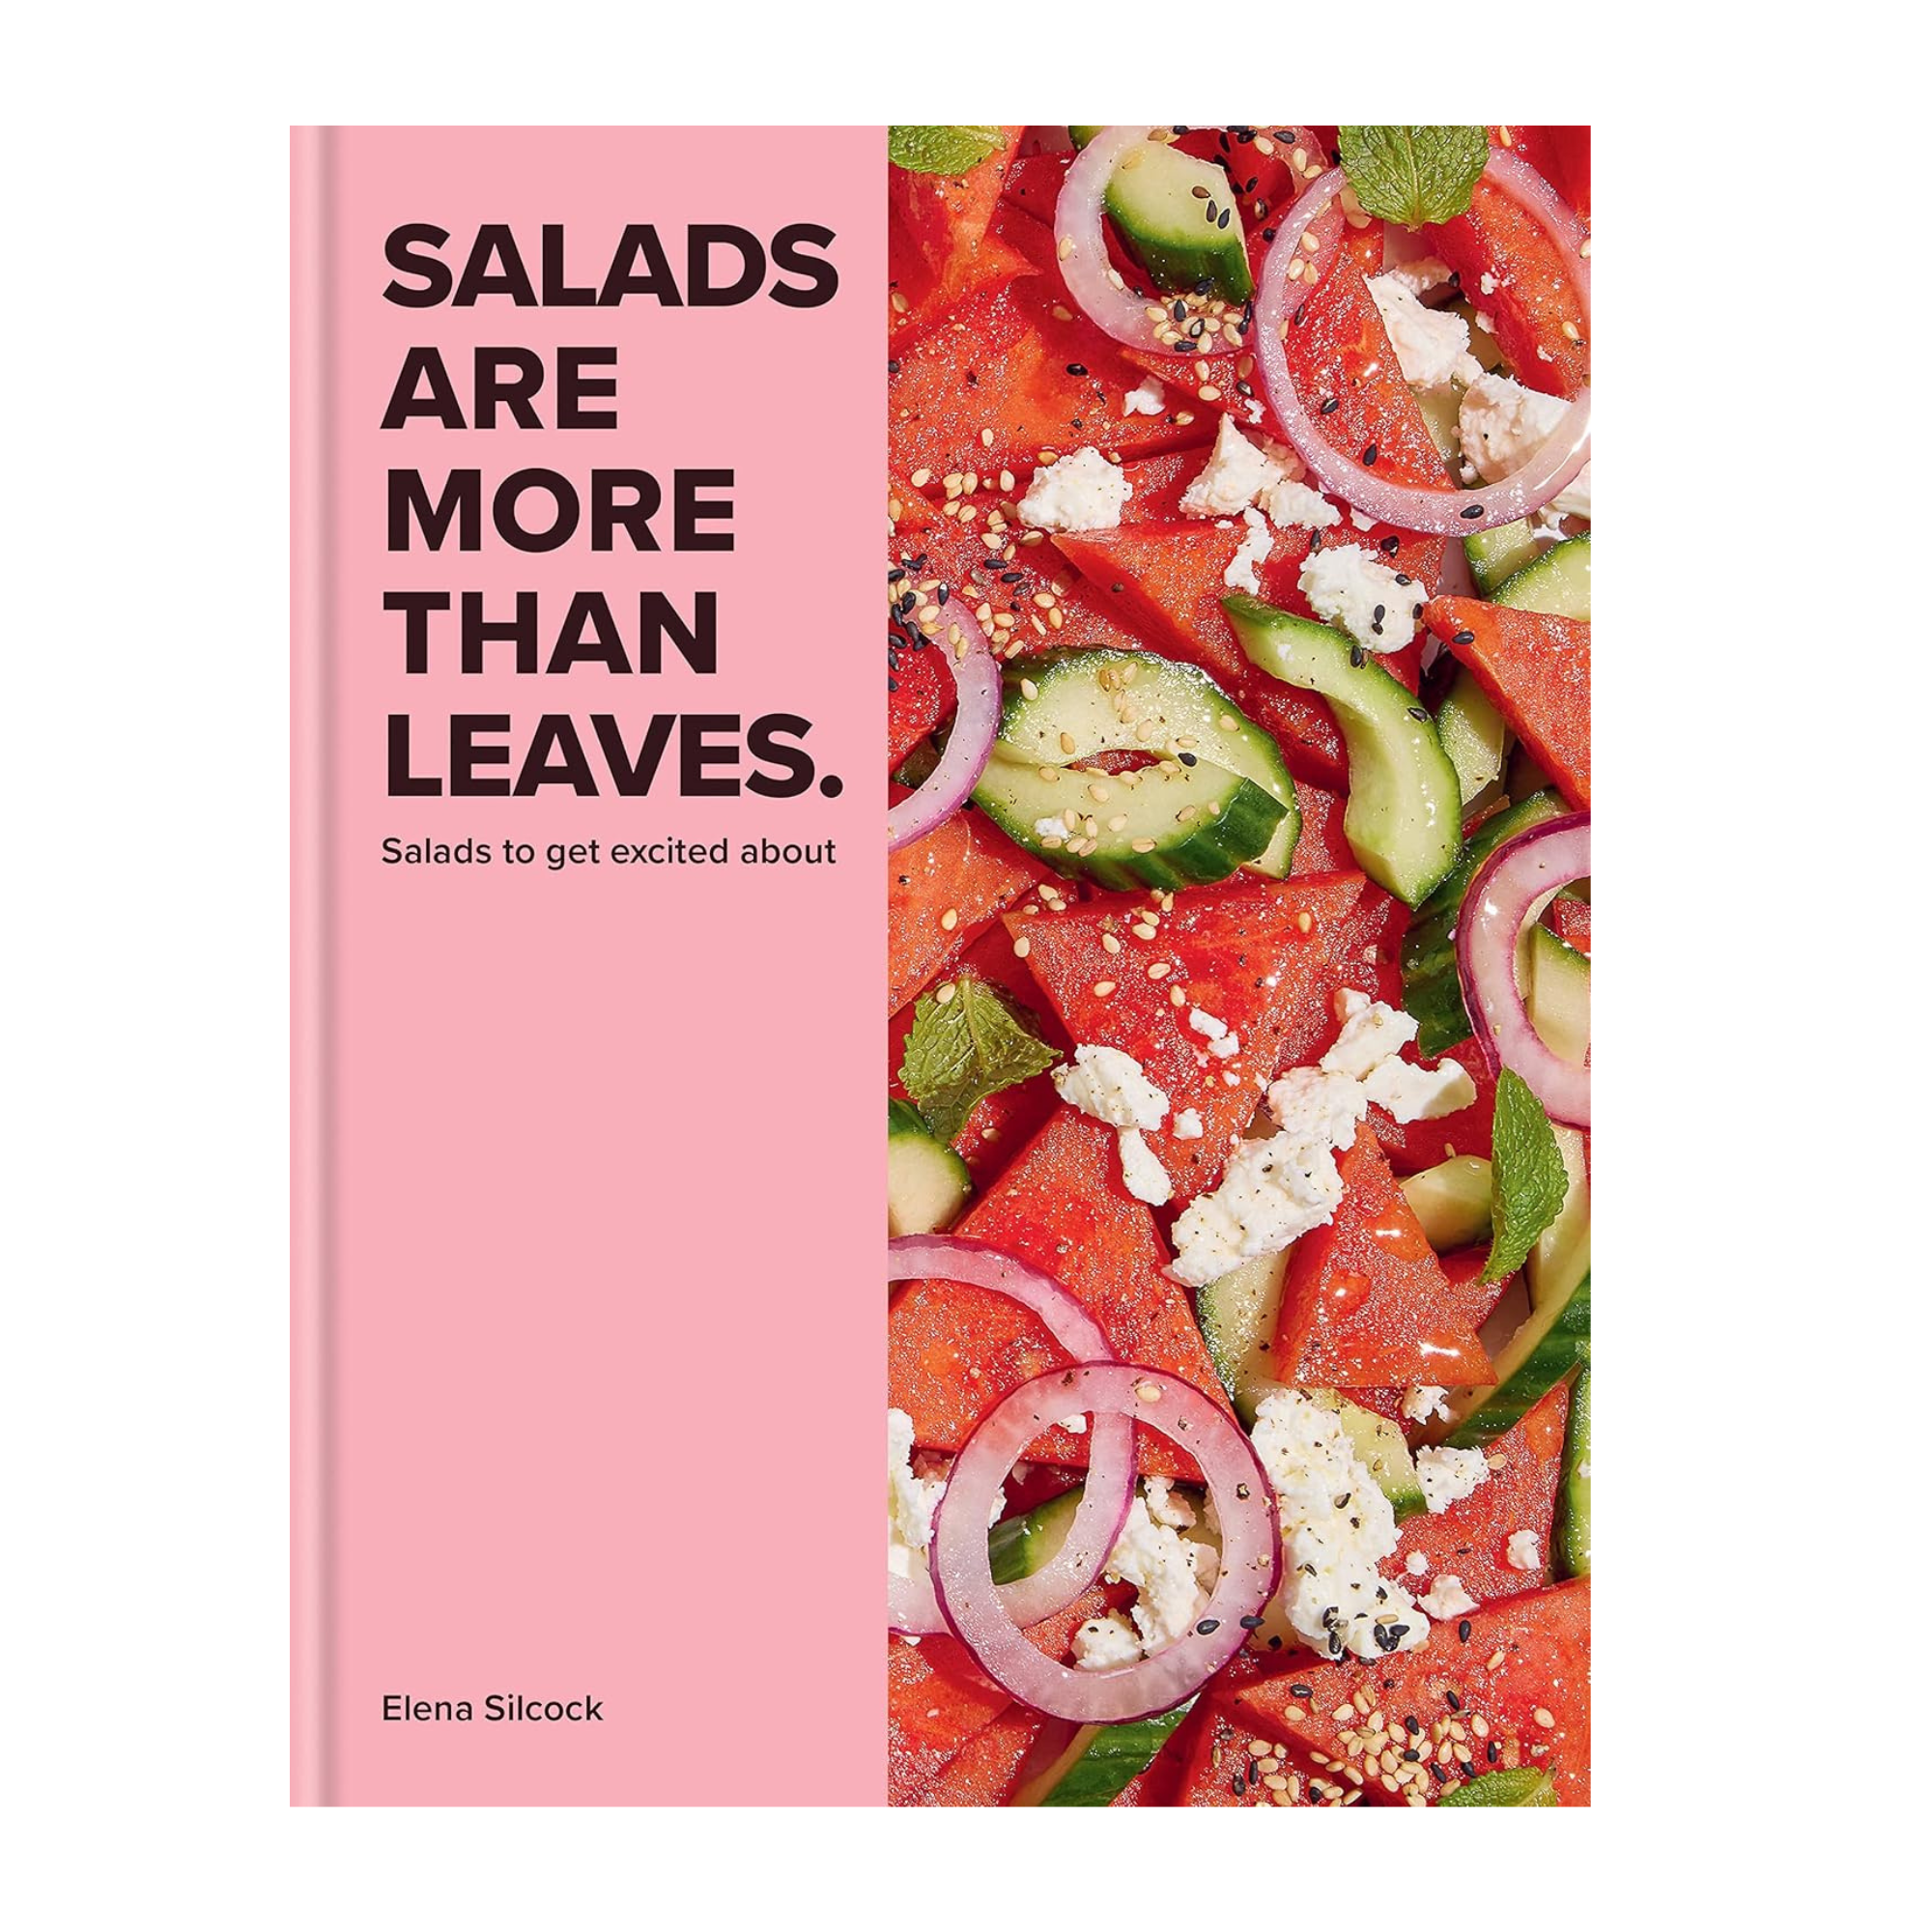
Salads Are More Than Leaves: Salads to Get Excited About
<aside data-block-layout="hero" data-block-type="featured-product" data-editorial-currency="GBP" data-editorial-price="18.63" data-editorial-was-price="22" data-hawk-json="{"product":{"variants":{"Default":{"image":{"copyright":"","height":2000,"id":"gjj9Laap2Ep8c6bY3v5QsU","mimeType":"image\/png","mos":"https:\/\/cdn.mos.cms.futurecdn.net\/gjj9Laap2Ep8c6bY3v5QsU.png","role":"","width":2000,"credit":"Hamlyn","alt":"Salads Are More Than Leaves: Salads to Get Excited About","caption":""},"strapline":"
If you’re saying goodbye to the oven in hot weather, you’ll need some delicous salads to fill you up. I’ve added this to my cart already.","brand":"Hamlyn","name":"Salads Are More Than Leaves: Salads to Get Excited About","urlStyle":"","retailer":"","layout":"hero","linkText":"","noFollow":false,"noAffiliateTracking":false,"promoLabel":"","price":22,"salePrice":18.63,"currency":"GBP","linkLayout":"text","sponsored":false,"hawkProductNameMatchedCode":"","review":{"cons":[],"id":"","name":"","pros":[],"rating":0,"strapline":"","url":""},"id":"","externalId":"b6d289afd0e177f9678f54c198c73bbe2c11b90b","lastCheckedPriceDate":"","link":{"url":"https:\/\/target.georiot.com\/Proxy.ashx?tsid=107653&GR_URL=https%3A%2F%2Famazon.co.uk%2FSalads-are-More-Than-Leaves%2Fdp%2F0600637425%2Fref%3Dsxin_17_pa_sp_search_thematic_sspa%3Ftag%3Dftr-idealhome-gb-21%26ascsubtag%3Dhawk-custom-tracking-21","merchantName":"Amazon UK","merchantId":1027,"merchantNetwork":"Amazonuk","merchantUrl":"amazon.co.uk"}}}}}” data-link=”https://target.georiot.com/Proxy.ashx?tsid=107653&GR_URL=https%3A%2F%2Famazon.co.uk%2FSalads-are-More-Than-Leaves%2Fdp%2F0600637425%2Fref%3Dsxin_17_pa_sp_search_thematic_sspa%3Ftag%3Dftr-idealhome-gb-21%26ascsubtag%3Dhawk-custom-tracking-21″ data-link-merchant=”Amazon UK” data-merchant-id=”1027″ data-merchant-name=”Amazon UK” data-merchant-network=”Amazonuk” data-merchant-url=”amazon.co.uk” data-model-brand=”Hamlyn” data-model-name=”Hamlyn Salads Are More Than Leaves: Salads to Get Excited About” data-name=”Product Block merchantlink widget” data-render-type=”fte” data-show-fallback=”button” data-widget-type=”merchantlink” class=”hawk-root”>
If you’re saying goodbye to the oven in hot weather, you’ll need some delicous salads to fill you up. I’ve added this to my cart already.
Miniml
Miniml Eco White Vinegar Cleaning Sorrento Lemon Scented
.tasty-pins-banner-container{display:block;margin-bottom:20px;position:relative;width:-moz-fit-content;width:fit-content}.tasty-pins-banner-container a{cursor:pointer;display:flex;font-size:14px;font-weight:700;letter-spacing:1px;line-height:1.8em;text-transform:uppercase}.tasty-pins-banner-container a:hover{opacity:1}.tasty-pins-banner-container .tasty-pins-banner{align-items:center;bottom:0;cursor:pointer;display:flex;justify-content:center;left:0;padding-bottom:1em;padding-top:1em;position:absolute;right:0}.tasty-pins-banner-container .tasty-pins-banner svg{margin-right:4px;width:32px}.tasty-pins-banner-container .tasty-pins-banner span{margin-top:4px}.tasty-pins-banner-container a.tasty-pins-banner{text-decoration:none}.tasty-pins-banner-container a.tasty-pins-banner:hover{opacity:.8}.tasty-pins-banner-container a.tasty-pins-banner-image-link{flex-direction:column}.tasty-pins-banner-container a img{margin-bottom:0}.entry-content .wp-block-image .tasty-pins-banner-container img{margin-bottom:0;padding-bottom:0}#et-boc .et-l div .et_pb_image_wrap .tasty-pins-banner-container .tasty-pins-banner{padding-bottom:1em!important;padding-top:1em;text-decoration:none}#et-boc .et-l div .et_pb_image_wrap .tasty-pins-banner-container a.tasty-pins-banner{cursor:pointer;display:flex;font-size:14px;font-weight:700;line-height:1.8em;text-transform:uppercase}#et-boc .et-l div .et_pb_image_wrap .tasty-pins-banner-container a.tasty-pins-banner span{letter-spacing:2px;margin-top:4px}.et-db #et-boc .et-l .et_pb_module .tasty-pins-banner-container a:not(.wc-forward){padding-bottom:0}
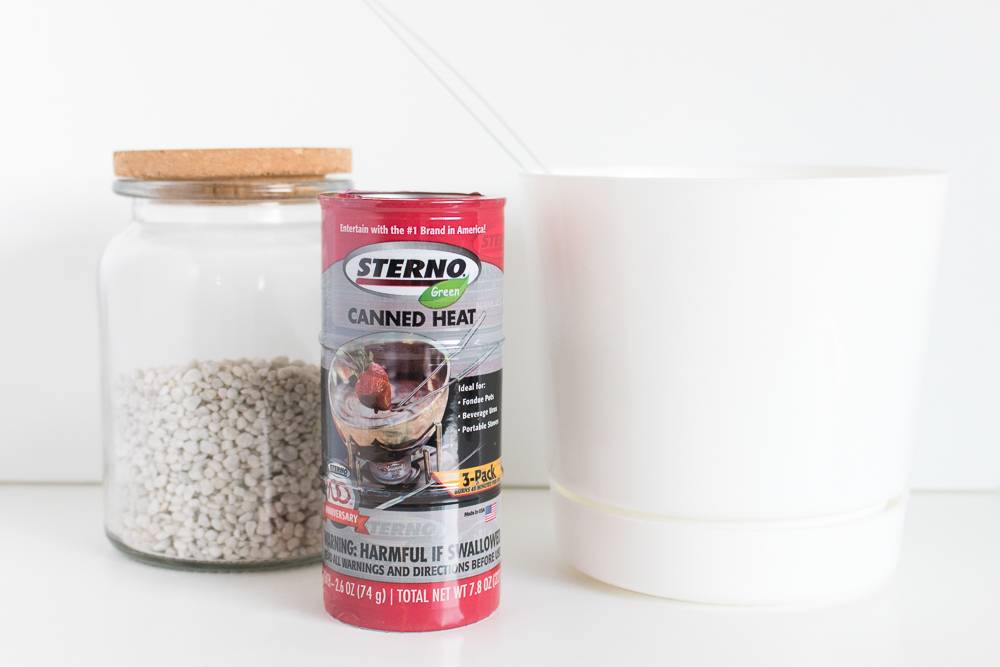
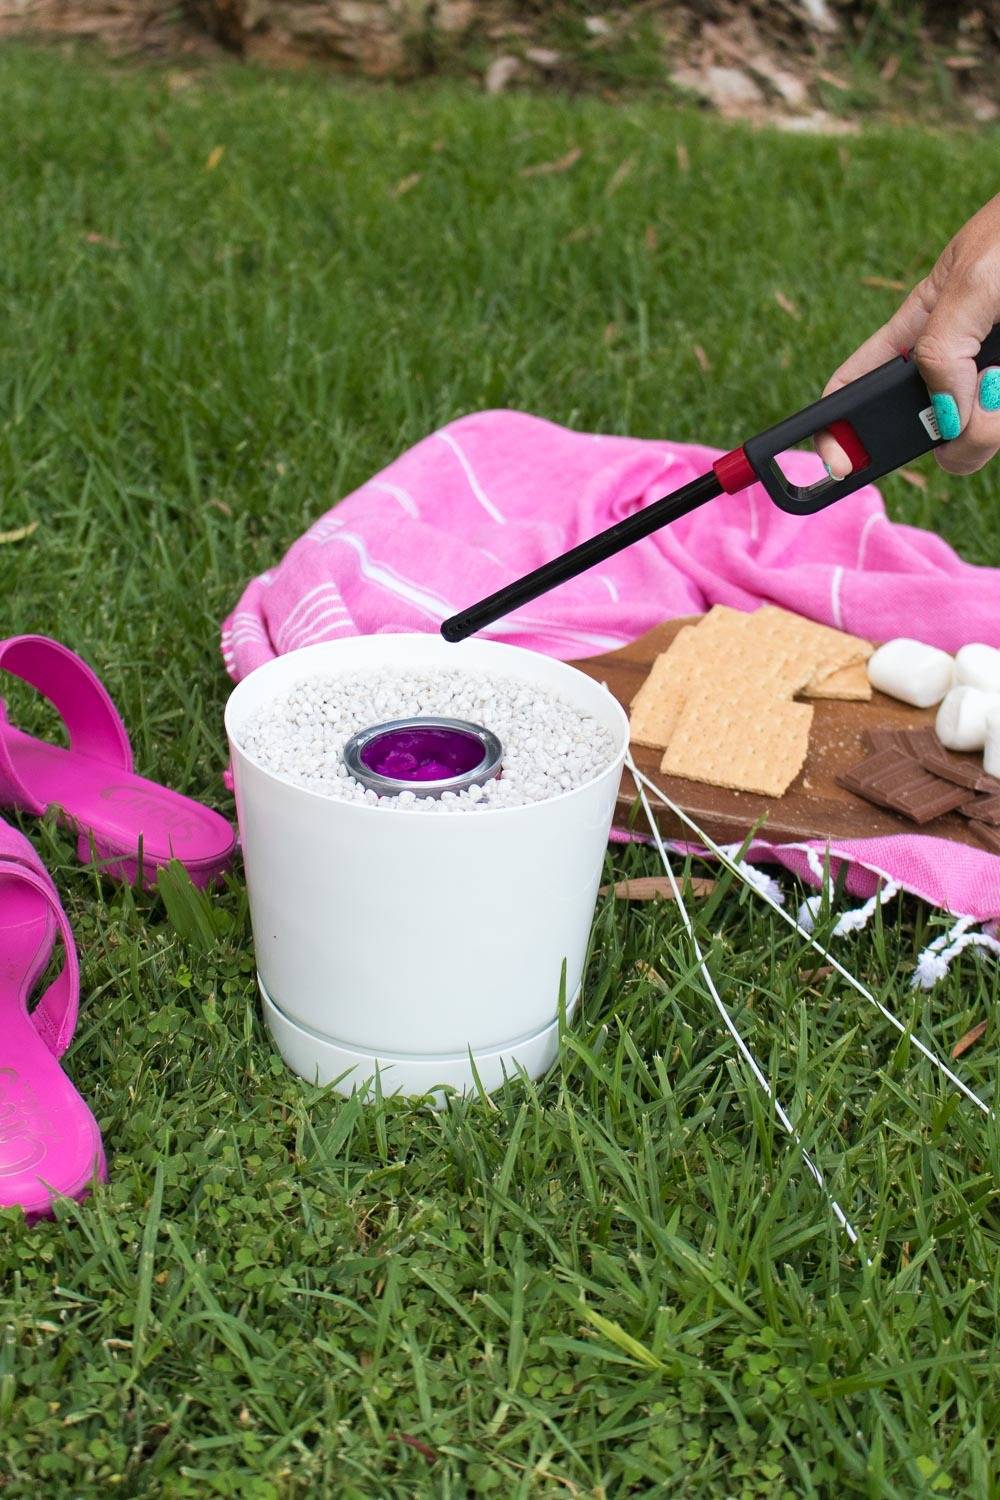
I grew up as a Girl Scout and did my fair share of camping, and the s’mores were always my favorite part. Even as an adult, I would toast s’mores on my gas stove, but sadly my current home has an electric stove, leaving me without a makeshift campire to make s’mores. Rather than letting that stop me, I made this portable s’mores fire pot with Sterno ethanol gel canisters and a planter pot!
This is an incredibly easy project to whip up with a pot and rocks, but it’s the perfect way to enjoy homemade s’mores with the same feeling of a campfire. As long as you burn the gel in a safe environment, it’s completely safe and easy to use. Get ready to make a lot of s’mores!
Materials:
Sterno ethanol gel canisters
Ceramic pot, heat safe
Rocks
Step
Place any larger rocks at the bottom of the pot. Then add small rocks until it is about 3/4 full.
Step
Carefully insert a Sterno ethanol gel canister into the center of the rocks.
Step
To use, carefully pry off the top of the canister with a screwdriver. Inside is a gel. When ready to toast marshmallows, light the gel with a long-stemmed lighter. The fire may not be easily visible because of the size. Stick marshmallows onto skewers and toast over the open flame just like a regular fire!
Step
To extinguish the flame, carefully place the lid back on top. This suffocates the fire and puts it out almost immediately. Note, Sterno canisters are intended for single-use.
Sandwich the toasted marshmallows between chocolate and graham crackers and you can enjoy the best parts of camping right from your home!
.tasty-pins-banner-container{display:block;margin-bottom:20px;position:relative;width:-moz-fit-content;width:fit-content}.tasty-pins-banner-container a{cursor:pointer;display:flex;font-size:14px;font-weight:700;letter-spacing:1px;line-height:1.8em;text-transform:uppercase}.tasty-pins-banner-container a:hover{opacity:1}.tasty-pins-banner-container .tasty-pins-banner{align-items:center;bottom:0;cursor:pointer;display:flex;justify-content:center;left:0;padding-bottom:1em;padding-top:1em;position:absolute;right:0}.tasty-pins-banner-container .tasty-pins-banner svg{margin-right:4px;width:32px}.tasty-pins-banner-container .tasty-pins-banner span{margin-top:4px}.tasty-pins-banner-container a.tasty-pins-banner{text-decoration:none}.tasty-pins-banner-container a.tasty-pins-banner:hover{opacity:.8}.tasty-pins-banner-container a.tasty-pins-banner-image-link{flex-direction:column}.tasty-pins-banner-container a img{margin-bottom:0}.entry-content .wp-block-image .tasty-pins-banner-container img{margin-bottom:0;padding-bottom:0}#et-boc .et-l div .et_pb_image_wrap .tasty-pins-banner-container .tasty-pins-banner{padding-bottom:1em!important;padding-top:1em;text-decoration:none}#et-boc .et-l div .et_pb_image_wrap .tasty-pins-banner-container a.tasty-pins-banner{cursor:pointer;display:flex;font-size:14px;font-weight:700;line-height:1.8em;text-transform:uppercase}#et-boc .et-l div .et_pb_image_wrap .tasty-pins-banner-container a.tasty-pins-banner span{letter-spacing:2px;margin-top:4px}.et-db #et-boc .et-l .et_pb_module .tasty-pins-banner-container a:not(.wc-forward){padding-bottom:0}
If you’re planning on throwing a big bash this season, but don’t know where to start, we have you covered. Just read through these 7 tips for throwing the ultimate (DIY) summer party and you’ll be ready for outdoor entertaining in no time.
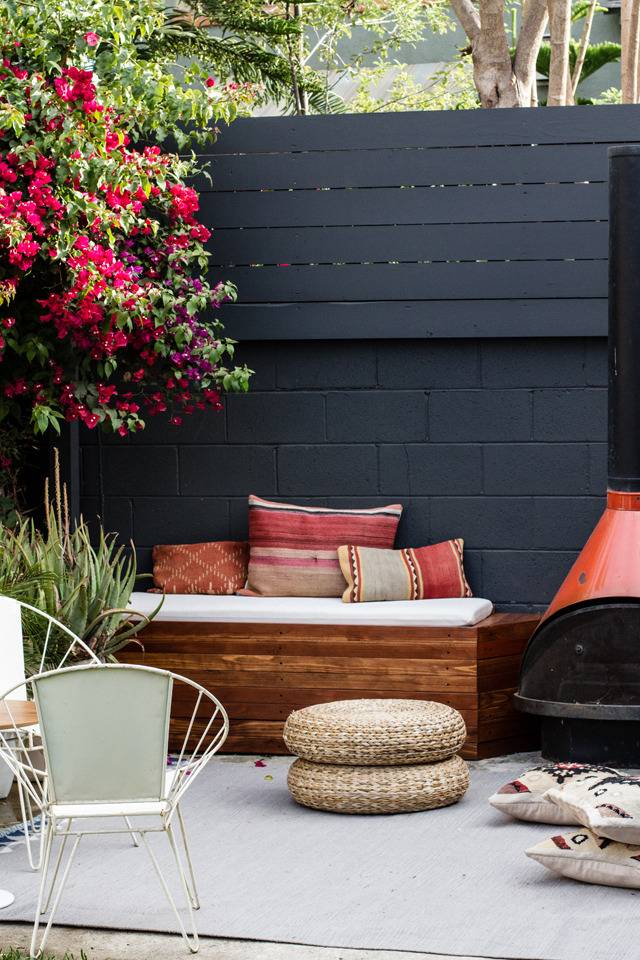
1. Have a seat. Having multiple seating options for guests, in different areas, both indoors and out, is a great way to encourage conversations and relaxation. No one wants to stand all day in the summer heat, right?
If you’re looking for a DIY seating option, try these DIY built-in benches on for size.
2. Made in the shade. Large patio umbrellas, like this setup from A Beautiful Mess, or a few lounge chairs underneath a shaded tree will help keep guests cool. Having space indoors for guests to hang out in an air conditioned space is a great option too.
3. Keep it cool. Given the rising temperatures, this one is an absolute must. Be sure to have a variety of offerings too (water, soda, beer, wine, etc).
4. Food for all. Along those same lines, classic summer foods like watermelon and corn on the cob always go over well. And to add a little something unexpected in the food department, try a DIY bruschetta bar, with grilled breads, meats, cheeses, etc.
6. Let there be light. Citronella candles and/or string lights help the outdoors feel cozy and atmospheric once the sun goes down. Check out this tutorial for how to create a party alcove with string lights.
Since buying my first home with a tiny outdoor space, I’ve become obsessed with outdoor hosting. This week, I’m plotting a weekend BBQ to take advantage of the weather, and I’ve already made plans for a few other gatherings later this month. However, entertaining in a petite outdoor space can be challenging, so I have to be very selective about the things I choose to invest in for my garden, but I’ve spotted some outdoor hosting gems at Argos.
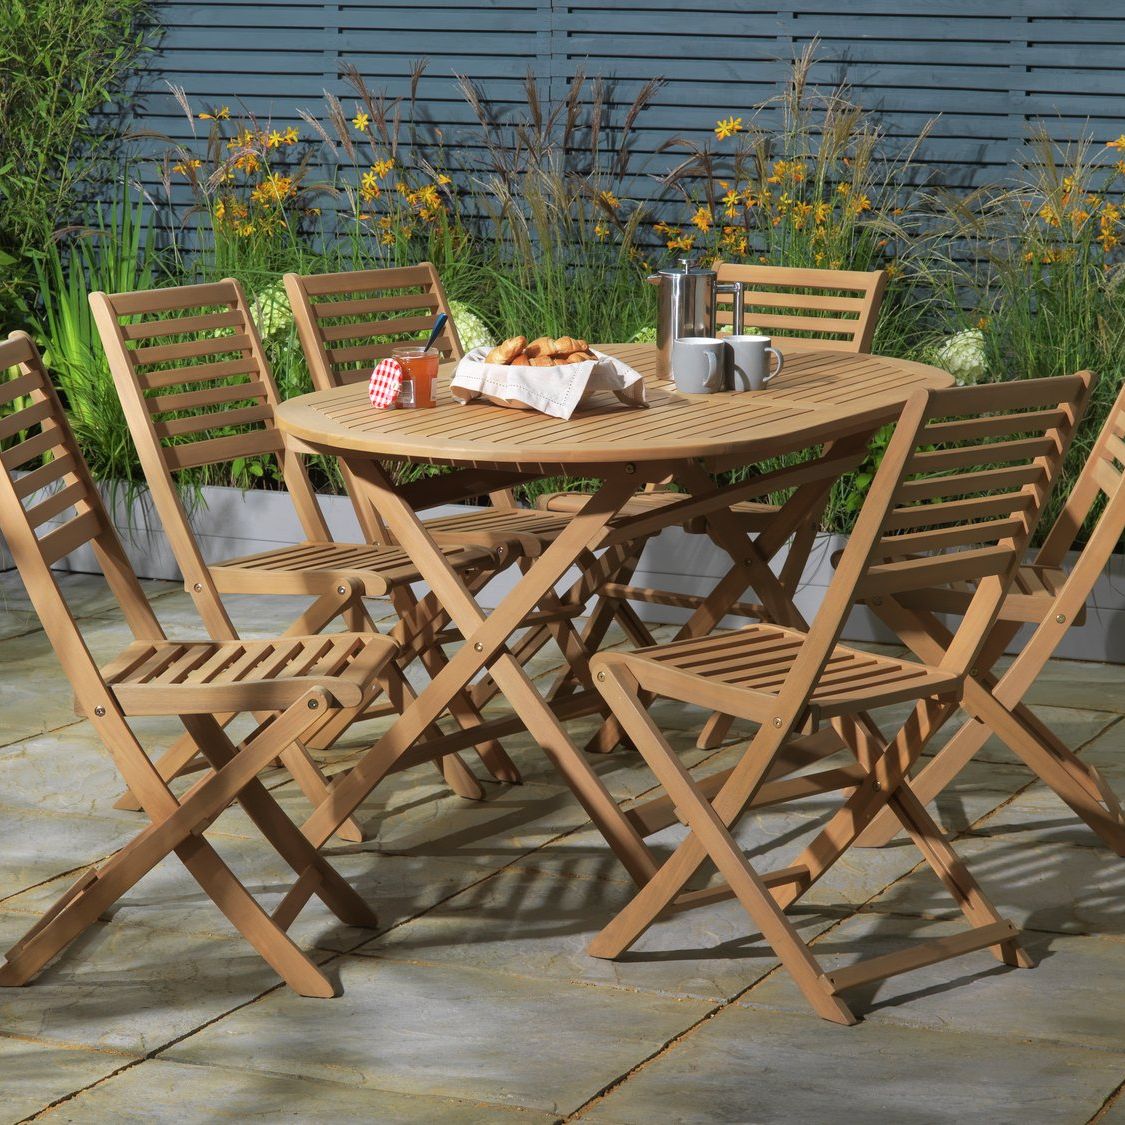
I’ve also been eyeing up the Argos Home folding patio set to give me a little more space for people to sit when entertaining, but I can easily fold it away when it’s not in use.
Latest Videos From
(Image credit: Argos Home)
Over the past few months of gathering friends in my garden, I’ve realised that it’s also the small things that make a difference, a little Bluetooth speaker to have music bubbling in the background or some chic glasses that make my little courtyard feel like a chic restaurant. If you’re looking to elevate your next outdoor gathering, I thought I’d share my wishlist of hosting essentials I’m snapping up this summer at Argos.
I only discovered the wonders of folding tables this year, and I love the look of this six-seater wooden table. I have it up in the centre of my tiny garden when guests are around, but fold it down and tuck it next to a garden storage box when not in use.","brand":"Argos Home","name":"Newbury 6 Seater Folding Wooden Patio Set","urlStyle":"","retailer":"","layout":"hero","linkText":"","noFollow":true,"noAffiliateTracking":false,"promoLabel":"","price":280,"salePrice":null,"currency":"GBP","linkLayout":"text","sponsored":false,"hawkProductNameMatchedCode":"","review":{"cons":[],"id":"","name":"","pros":[],"rating":0,"strapline":"","url":""},"id":"","externalId":"a556cc11a5ff4ca71c3d76e1bb25b1f9d2fe0667","lastCheckedPriceDate":"","link":{"url":"https:\/\/go.linkby.com\/ASQIXSQT\/product\/3287930?clickPR=plp:31:205","merchantName":"go.linkby.com"}}}}}” data-link=”https://go.linkby.com/ASQIXSQT/product/3287930?clickPR=plp:31:205″ data-link-merchant=”go.linkby.com” data-merchant-name=”go.linkby.com” data-model-brand=”Argos Home” data-model-name=”Argos Home Newbury 6 Seater Folding Wooden Patio Set” data-name=”Product Block merchantlink widget” data-render-type=”fte” data-show-fallback=”button” data-widget-type=”merchantlink” class=”hawk-root”>
I only discovered the wonders of folding tables this year, and I love the look of this six-seater wooden table. I have it up in the centre of my tiny garden when guests are around, but fold it down and tuck it next to a garden storage box when not in use.
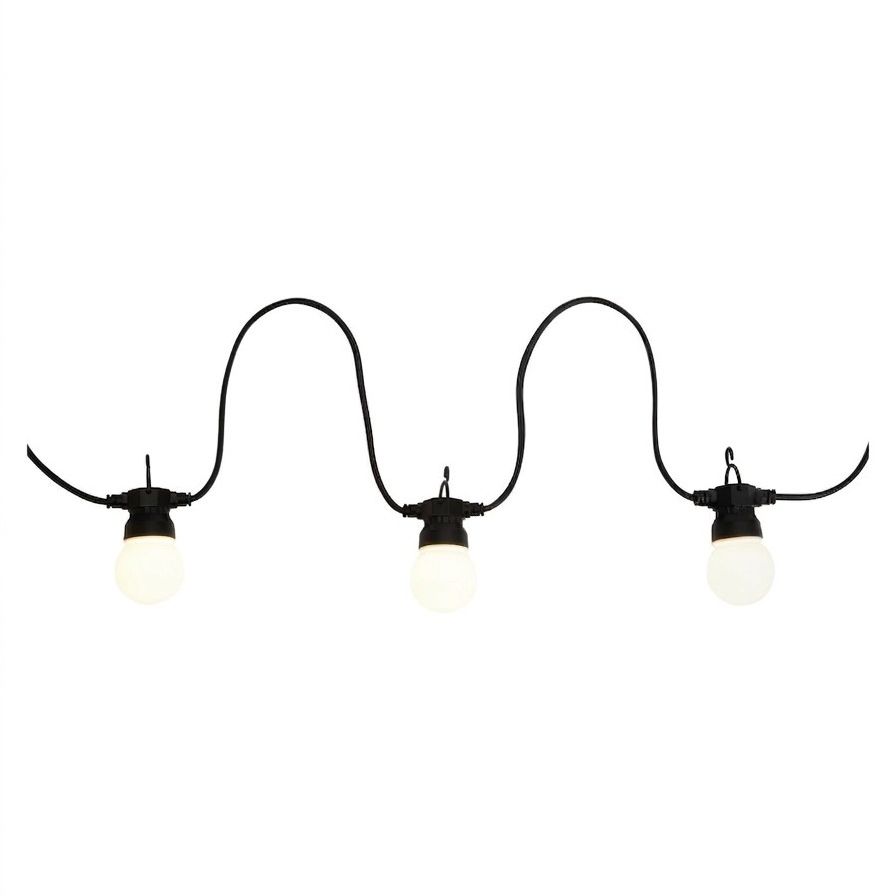
Garden lighting ideas are essential for outdoor hosting, and I’ve been desperate to drape some festoon lights along my garden fence to create a bistro outdoor dining effect. This set has a lovely warm glow that will feel cosy on a summer evening.
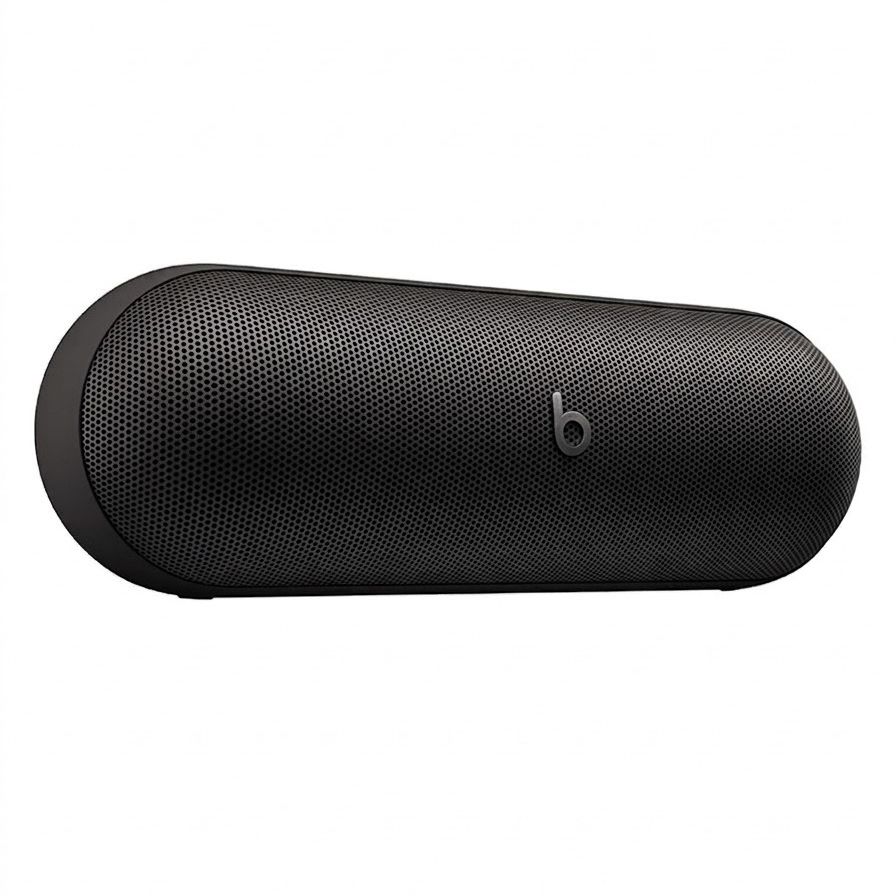
Beats
Beats Pill Portable Wireless Bluetooth Speaker – Matte Black
I don’t want to be an obnoxious neighbour blasting music, but I’d like some music playing softly in the background or hooked up with a projector to screen a big game outdoors or even one of the summer festivals during a garden party. ","brand":"Beats","name":"Beats Pill Portable Wireless Bluetooth Speaker – Matte Black","urlStyle":"","retailer":"","layout":"hero","linkText":"","noFollow":true,"noAffiliateTracking":false,"promoLabel":"","price":149.99,"salePrice":null,"currency":"GBP","linkLayout":"text","sponsored":false,"hawkProductNameMatchedCode":"","review":{"cons":[],"id":"","name":"","pros":[],"rating":0,"strapline":"","url":""},"id":"","externalId":"bf82393a5402a0e9d18ff857ce3dd479f75a471e","lastCheckedPriceDate":"","link":{"url":"https:\/\/go.linkby.com\/ASQIXSQT\/product\/2656005","merchantName":"go.linkby.com"}}}}}” data-link=”https://go.linkby.com/ASQIXSQT/product/2656005″ data-link-merchant=”go.linkby.com” data-merchant-name=”go.linkby.com” data-model-brand=”Beats” data-model-name=”Beats Beats Pill Portable Wireless Bluetooth Speaker – Matte Black” data-name=”Product Block merchantlink widget” data-render-type=”fte” data-show-fallback=”button” data-widget-type=”merchantlink” class=”hawk-root”>
I don’t want to be an obnoxious neighbour blasting music, but I’d like some music playing softly in the background or hooked up with a projector to screen a big game outdoors or even one of the summer festivals during a garden party.
A little flair goes along way when hosting outdoors, I’ve found. I plan to use this serving tray indoors and outdoors to circulate bowls of olives and crisps. You honestly can never have enough trays.","brand":"Habitat","name":"Habitat Scalloped Serving Tray","urlStyle":"","retailer":"","layout":"hero","linkText":"","noFollow":true,"noAffiliateTracking":false,"promoLabel":"","price":13.4,"salePrice":null,"currency":"GBP","linkLayout":"text","sponsored":false,"hawkProductNameMatchedCode":"","review":{"cons":[],"id":"","name":"","pros":[],"rating":0,"strapline":"","url":""},"id":"","externalId":"5aa35a378cba40a72b5b9a252d4526324147bfd2","lastCheckedPriceDate":"","link":{"url":"https:\/\/go.linkby.com\/ASQIXSQT\/product\/7839669","merchantName":"go.linkby.com"}}}}}” data-link=”https://go.linkby.com/ASQIXSQT/product/7839669″ data-link-merchant=”go.linkby.com” data-merchant-name=”go.linkby.com” data-model-brand=”Habitat” data-model-name=”Habitat Habitat Scalloped Serving Tray” data-name=”Product Block merchantlink widget” data-render-type=”fte” data-show-fallback=”button” data-widget-type=”merchantlink” class=”hawk-root”>
A little flair goes along way when hosting outdoors, I’ve found. I plan to use this serving tray indoors and outdoors to circulate bowls of olives and crisps. You honestly can never have enough trays.
Habitat
Habitat Set of 3 Reactive Stoneware Nibble Bowl – Navy
<aside data-block-layout="hero" data-block-type="featured-product" data-editorial-currency="GBP" data-editorial-price="10" data-hawk-json="{"product":{"variants":{"Default":{"image":{"copyright":"","height":1195,"id":"Ug6RGNe4NiMGAJZYpUTSHL","mimeType":"image\/jpeg","mos":"https:\/\/cdn.mos.cms.futurecdn.net\/v2\/t:103,l:0,cw:896,ch:896,q:80\/Ug6RGNe4NiMGAJZYpUTSHL.jpg","role":"","width":896,"credit":"Habitat","alt":"Habitat, Habitat Set of 3 Reactive Stoneware Nibble Bowl – Navy","caption":"","crop":{"top":103,"left":0,"cropWidth":896,"cropHeight":896,"quality":80}},"strapline":"
No garden party would be complete without nibble bowls. I love the reactive glaze on this set of three, which looks so much more expensive than it’s \u00a310 price point.","brand":"Habitat","name":"Habitat Set of 3 Reactive Stoneware Nibble Bowl – Navy","urlStyle":"","retailer":"","layout":"hero","linkText":"","noFollow":true,"noAffiliateTracking":false,"promoLabel":"","price":10,"salePrice":null,"currency":"GBP","linkLayout":"text","sponsored":false,"hawkProductNameMatchedCode":"","review":{"cons":[],"id":"","name":"","pros":[],"rating":0,"strapline":"","url":""},"id":"","externalId":"8bb6a99b5425962a1c229a7278dcf9b11d6473ba","lastCheckedPriceDate":"","link":{"url":"https:\/\/go.linkby.com\/ASQIXSQT\/product\/2020150","merchantName":"go.linkby.com"}}}}}” data-link=”https://go.linkby.com/ASQIXSQT/product/2020150″ data-link-merchant=”go.linkby.com” data-merchant-name=”go.linkby.com” data-model-brand=”Habitat” data-model-name=”Habitat Habitat Set of 3 Reactive Stoneware Nibble Bowl – Navy” data-name=”Product Block merchantlink widget” data-render-type=”fte” data-show-fallback=”button” data-widget-type=”merchantlink” class=”hawk-root”>
No garden party would be complete without nibble bowls. I love the reactive glaze on this set of three, which looks so much more expensive than it’s £10 price point.
Habitat
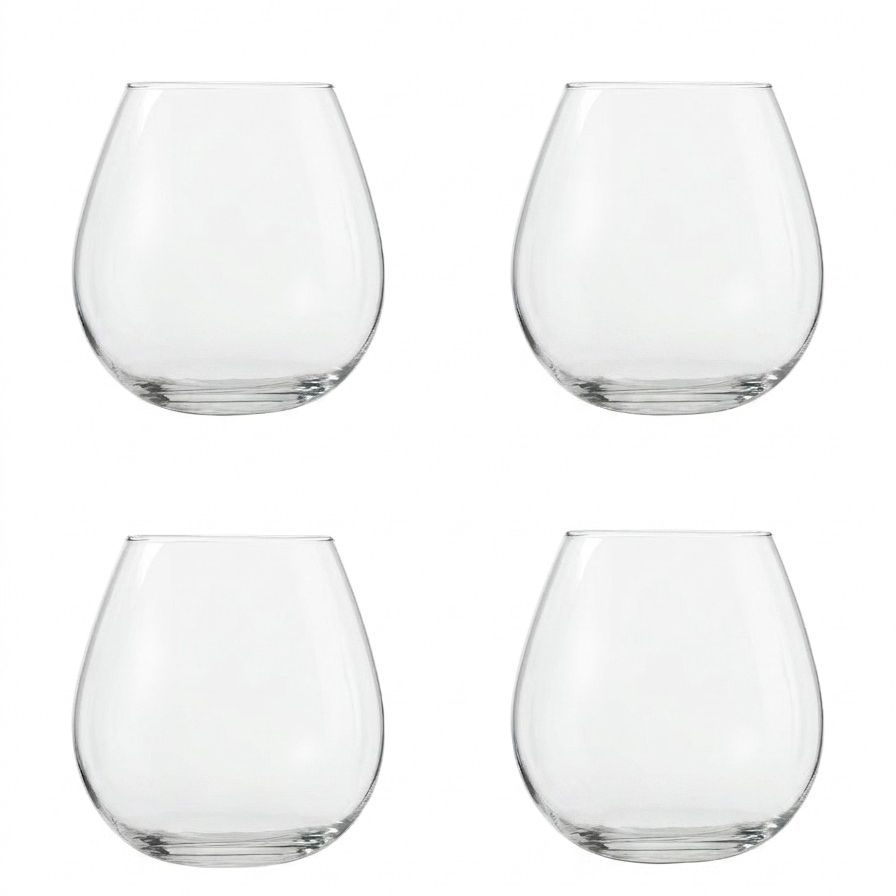
Habitat Portofino Set of 4 Stemless Wine Glasses
<aside data-block-layout="hero" data-block-type="featured-product" data-editorial-currency="GBP" data-editorial-price="9.5" data-hawk-json="{"product":{"variants":{"Default":{"image":{"copyright":"","height":1195,"id":"BkswgC62hWbbfoApwAiQtP","mimeType":"image\/jpeg","mos":"https:\/\/cdn.mos.cms.futurecdn.net\/v2\/t:121,l:0,cw:896,ch:896,q:80\/BkswgC62hWbbfoApwAiQtP.jpg","role":"","width":896,"credit":"Habitat","alt":"Habitat, Habitat Portofino Set of 4 Stemless Wine Glasses","caption":"","crop":{"top":121,"left":0,"cropWidth":896,"cropHeight":896,"quality":80}},"strapline":"
Stemmed glasses make me nervous outdoors, but I still want to use smart glassware to impress my guests and this set of stemless wine glasses is the perfect solution whether you’re serving up an aperol or rose. ","brand":"Habitat","name":"Habitat Portofino Set of 4 Stemless Wine Glasses","urlStyle":"","retailer":"","layout":"hero","linkText":"","noFollow":true,"noAffiliateTracking":false,"promoLabel":"","price":9.5,"salePrice":null,"currency":"GBP","linkLayout":"text","sponsored":false,"hawkProductNameMatchedCode":"","review":{"cons":[],"id":"","name":"","pros":[],"rating":0,"strapline":"","url":""},"id":"","externalId":"b0a82e80a4fe3f65de704574dda14932c02d2980","lastCheckedPriceDate":"","link":{"url":"https:\/\/go.linkby.com\/ASQIXSQT\/product\/9625998","merchantName":"go.linkby.com"}}}}}” data-link=”https://go.linkby.com/ASQIXSQT/product/9625998″ data-link-merchant=”go.linkby.com” data-merchant-name=”go.linkby.com” data-model-brand=”Habitat” data-model-name=”Habitat Habitat Portofino Set of 4 Stemless Wine Glasses” data-name=”Product Block merchantlink widget” data-render-type=”fte” data-show-fallback=”button” data-widget-type=”merchantlink” class=”hawk-root”>
Stemmed glasses make me nervous outdoors, but I still want to use smart glassware to impress my guests and this set of stemless wine glasses is the perfect solution whether you’re serving up an aperol or rose.
Ninja
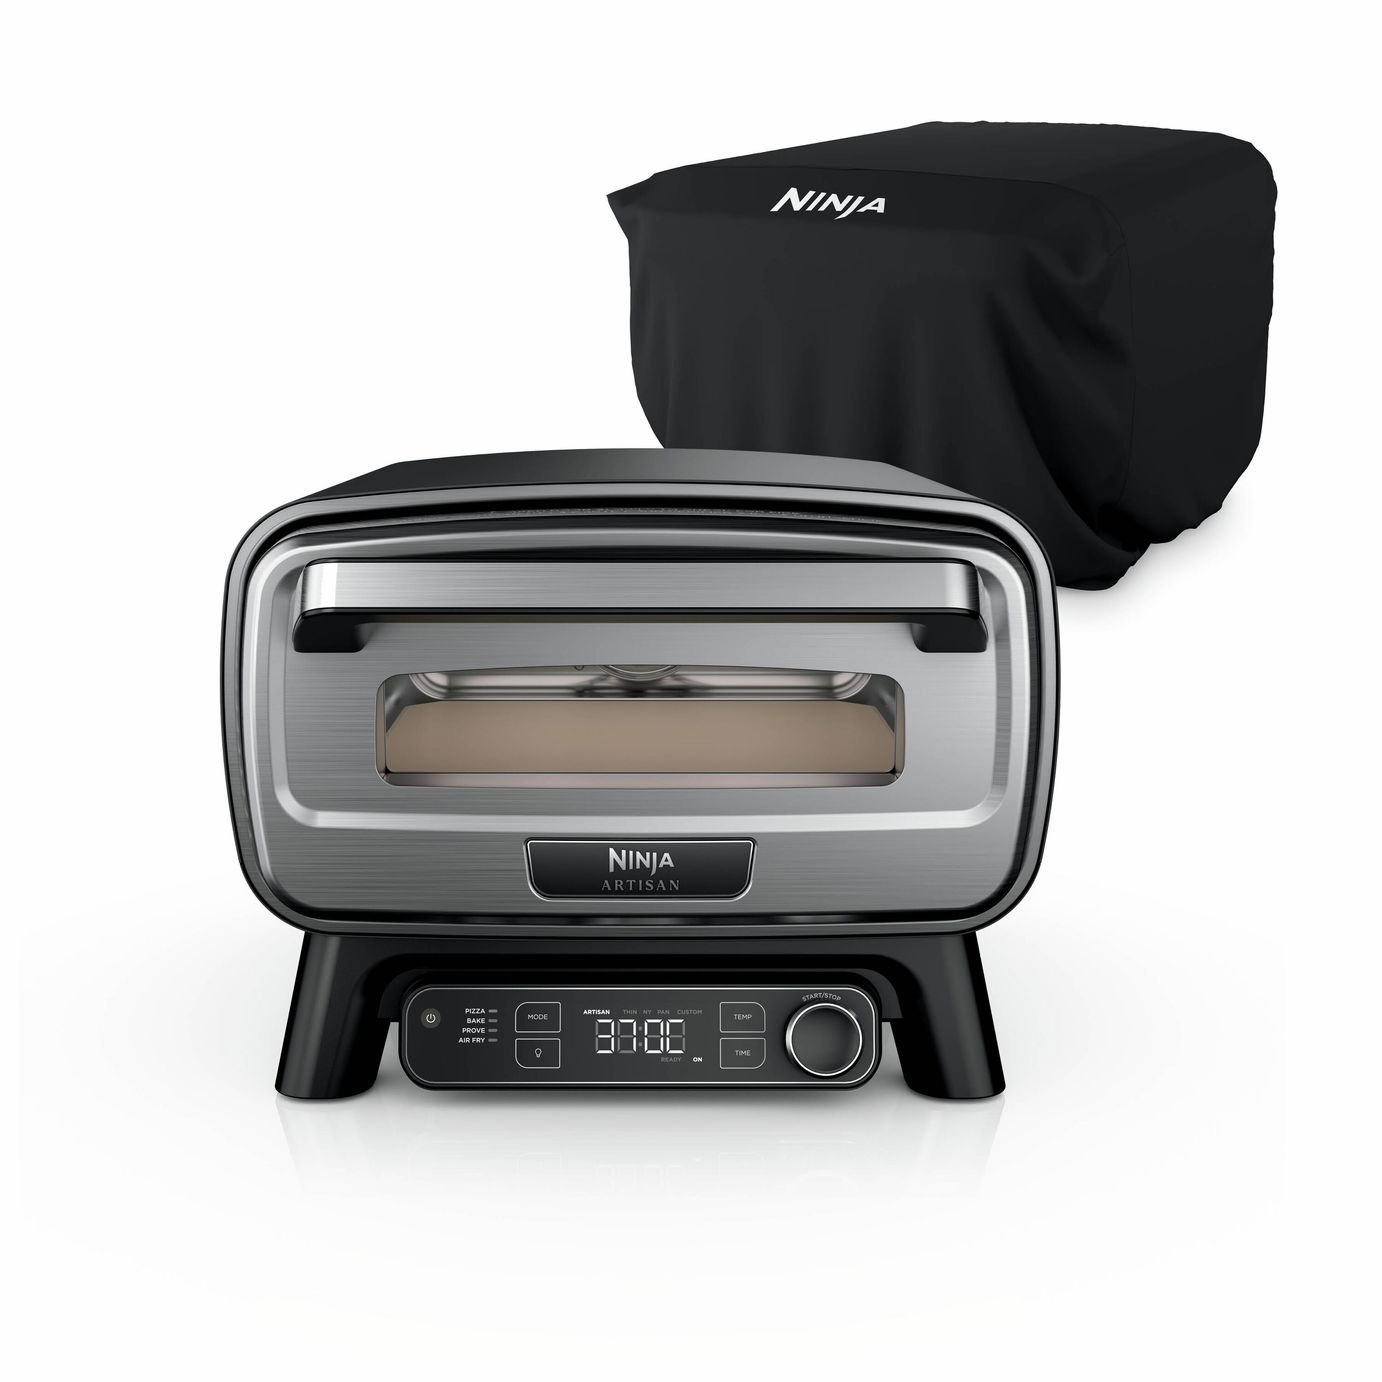
Ninja Artisan Electric Outdoor Pizza & Air Fry Oven With Cover – Black
<aside data-block-layout="horizontal" data-block-type="featured-product" data-editorial-currency="GBP" data-editorial-price="319.99" data-hawk-json="{"product":{"variants":{"Default":{"image":{"copyright":"","height":1382,"id":"8rP4ynVbSXfKEFeQLcu6ZK","mimeType":"image\/jpeg","mos":"https:\/\/cdn.mos.cms.futurecdn.net\/8rP4ynVbSXfKEFeQLcu6ZK.jpg","role":"","width":1382,"credit":"Ninja","alt":"Ninja Artisan Electric Outdoor Pizza & Air Fry Oven With Cover – Black","caption":""},"strapline":"
I tested the Ninja Outdoor Pizza oven last year and was impressed with how easy to use and how practical it was for entertaining in a tiny outdoor space. I could whip up pizzas in record time and had a handy automatic timer to make sure I didn’t burn any. It’s also reduced by 20% with code ELEC20 right now at Argos.
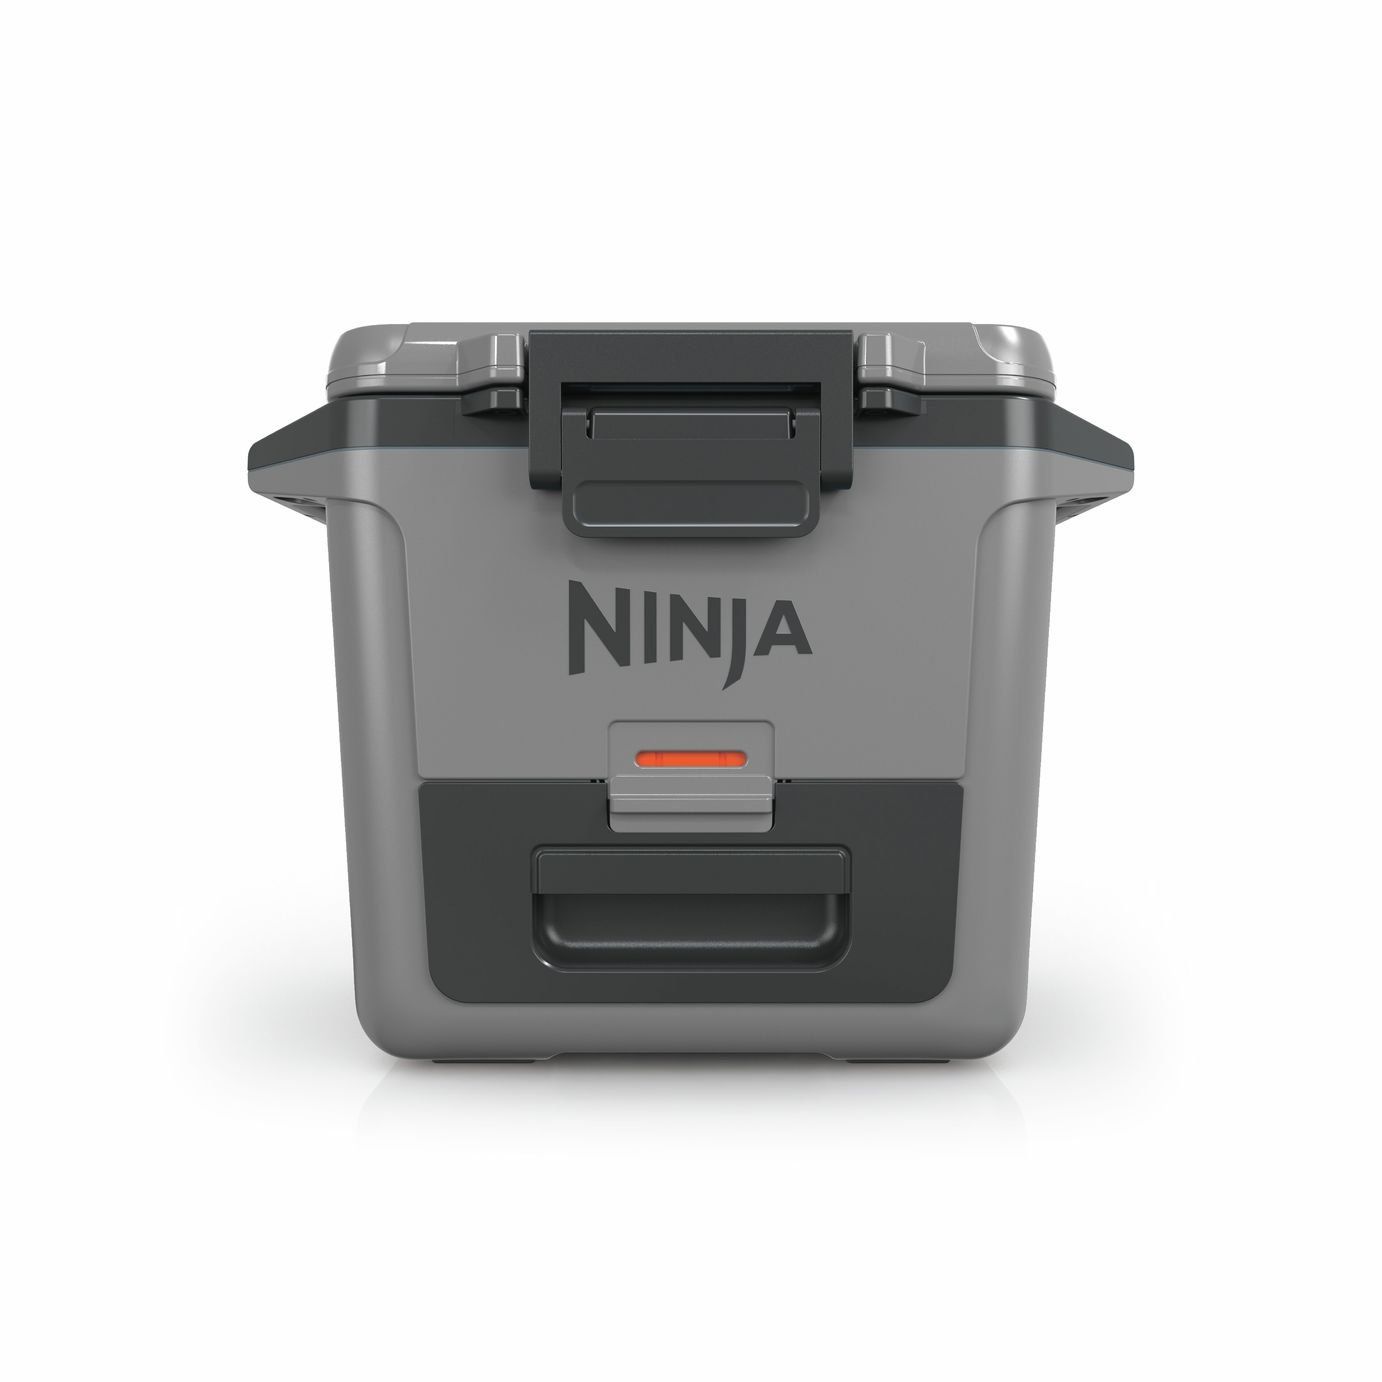
I wish I had space for a mini fridge in my garden, but this impressive hard cooler will do the job just as well to make it easier for guests to help themselves to an ice-cold drink. It’s also reduced by 20% with code NINJA20, making it a more enticing pricepoint.","brand":"Ninja","name":"Ninja Frostvault Hard Cooler – 30qt \/ 28l \/ Slate Grey","urlStyle":"","retailer":"","layout":"hero","noFollow":true,"noAffiliateTracking":false,"promoLabel":"","price":200,"salePrice":null,"currency":"GBP","linkLayout":"text","sponsored":false,"hawkProductNameMatchedCode":"","review":{"cons":[],"id":"","name":"","pros":[],"rating":0,"strapline":"","url":""},"id":"","externalId":"385ee0193881396997d26d2dc6fcd067204203d2","lastCheckedPriceDate":"","link":{"url":"https:\/\/go.linkby.com\/ASQIXSQT\/product\/8027195","linkText":"Was \u00a3200, Now \u00a3160 at Argos","merchantName":"go.linkby.com"}}}}}” data-link=”https://go.linkby.com/ASQIXSQT/product/8027195″ data-link-merchant=”go.linkby.com” data-link-text=”Was £200, Now £160 at Argos” data-merchant-name=”go.linkby.com” data-model-brand=”Ninja” data-model-name=”Ninja Ninja Frostvault Hard Cooler – 30qt / 28l / Slate Grey” data-name=”Product Block merchantlink widget” data-render-type=”fte” data-show-fallback=”button” data-widget-type=”merchantlink” class=”hawk-root”>
I wish I had space for a mini fridge in my garden, but this impressive hard cooler will do the job just as well to make it easier for guests to help themselves to an ice-cold drink. It’s also reduced by 20% with code NINJA20, making it a more enticing pricepoint.
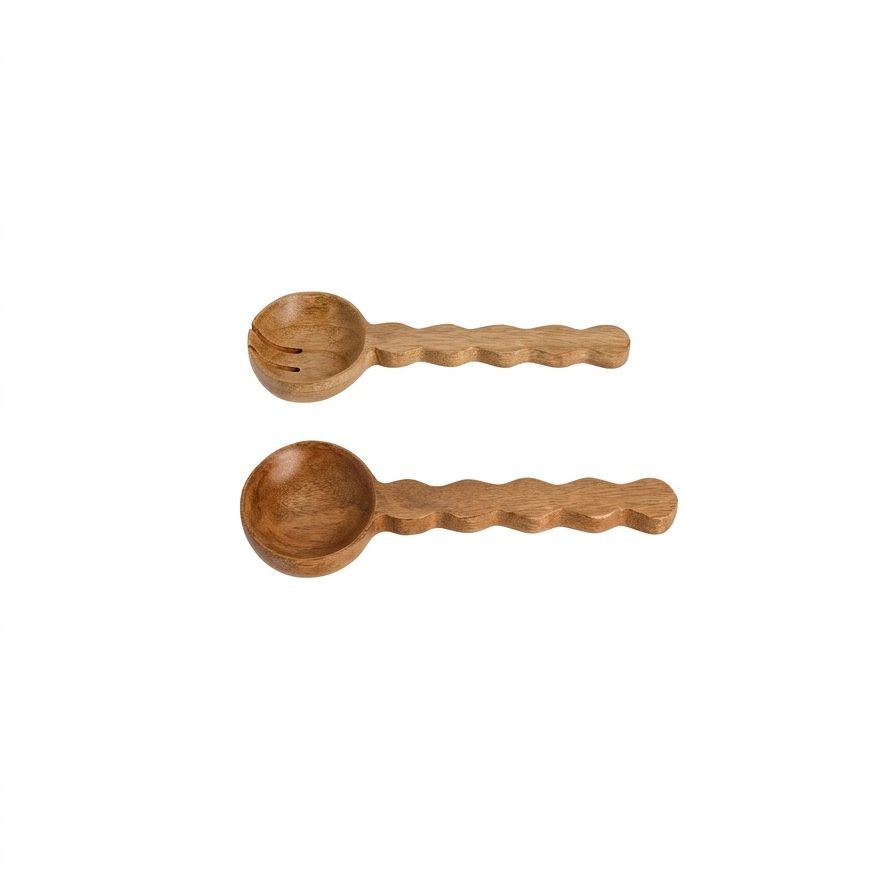
These wiggle salad servers are another clever way I’m planning to add some flair to my outdoor table without taking up to much space. Who said practical items couldn’t be pretty too?","brand":"Habitat","name":"Habitat Wooden Salad Servers","urlStyle":"","retailer":"","layout":"hero","linkText":"","noFollow":true,"noAffiliateTracking":false,"promoLabel":"","price":12,"salePrice":null,"currency":"GBP","linkLayout":"text","sponsored":false,"hawkProductNameMatchedCode":"","review":{"cons":[],"id":"","name":"","pros":[],"rating":0,"strapline":"","url":""},"id":"","externalId":"a31744ead33ef169ef5ef4b83be83e243ff647d9","lastCheckedPriceDate":"","link":{"url":"https:\/\/go.linkby.com\/ASQIXSQT\/product\/7845471","merchantName":"go.linkby.com"}}}}}” data-link=”https://go.linkby.com/ASQIXSQT/product/7845471″ data-link-merchant=”go.linkby.com” data-merchant-name=”go.linkby.com” data-model-brand=”Habitat” data-model-name=”Habitat Habitat Wooden Salad Servers” data-name=”Product Block merchantlink widget” data-render-type=”fte” data-show-fallback=”button” data-widget-type=”merchantlink” class=”hawk-root”>
These wiggle salad servers are another clever way I’m planning to add some flair to my outdoor table without taking up to much space. Who said practical items couldn’t be pretty too?
There are so many reasons to celebrate outdoors this summer and I can’t wait to make the most of my tiny garden.
Sign up to our newsletter for style inspiration, real homes, project and garden advice and shopping know-how
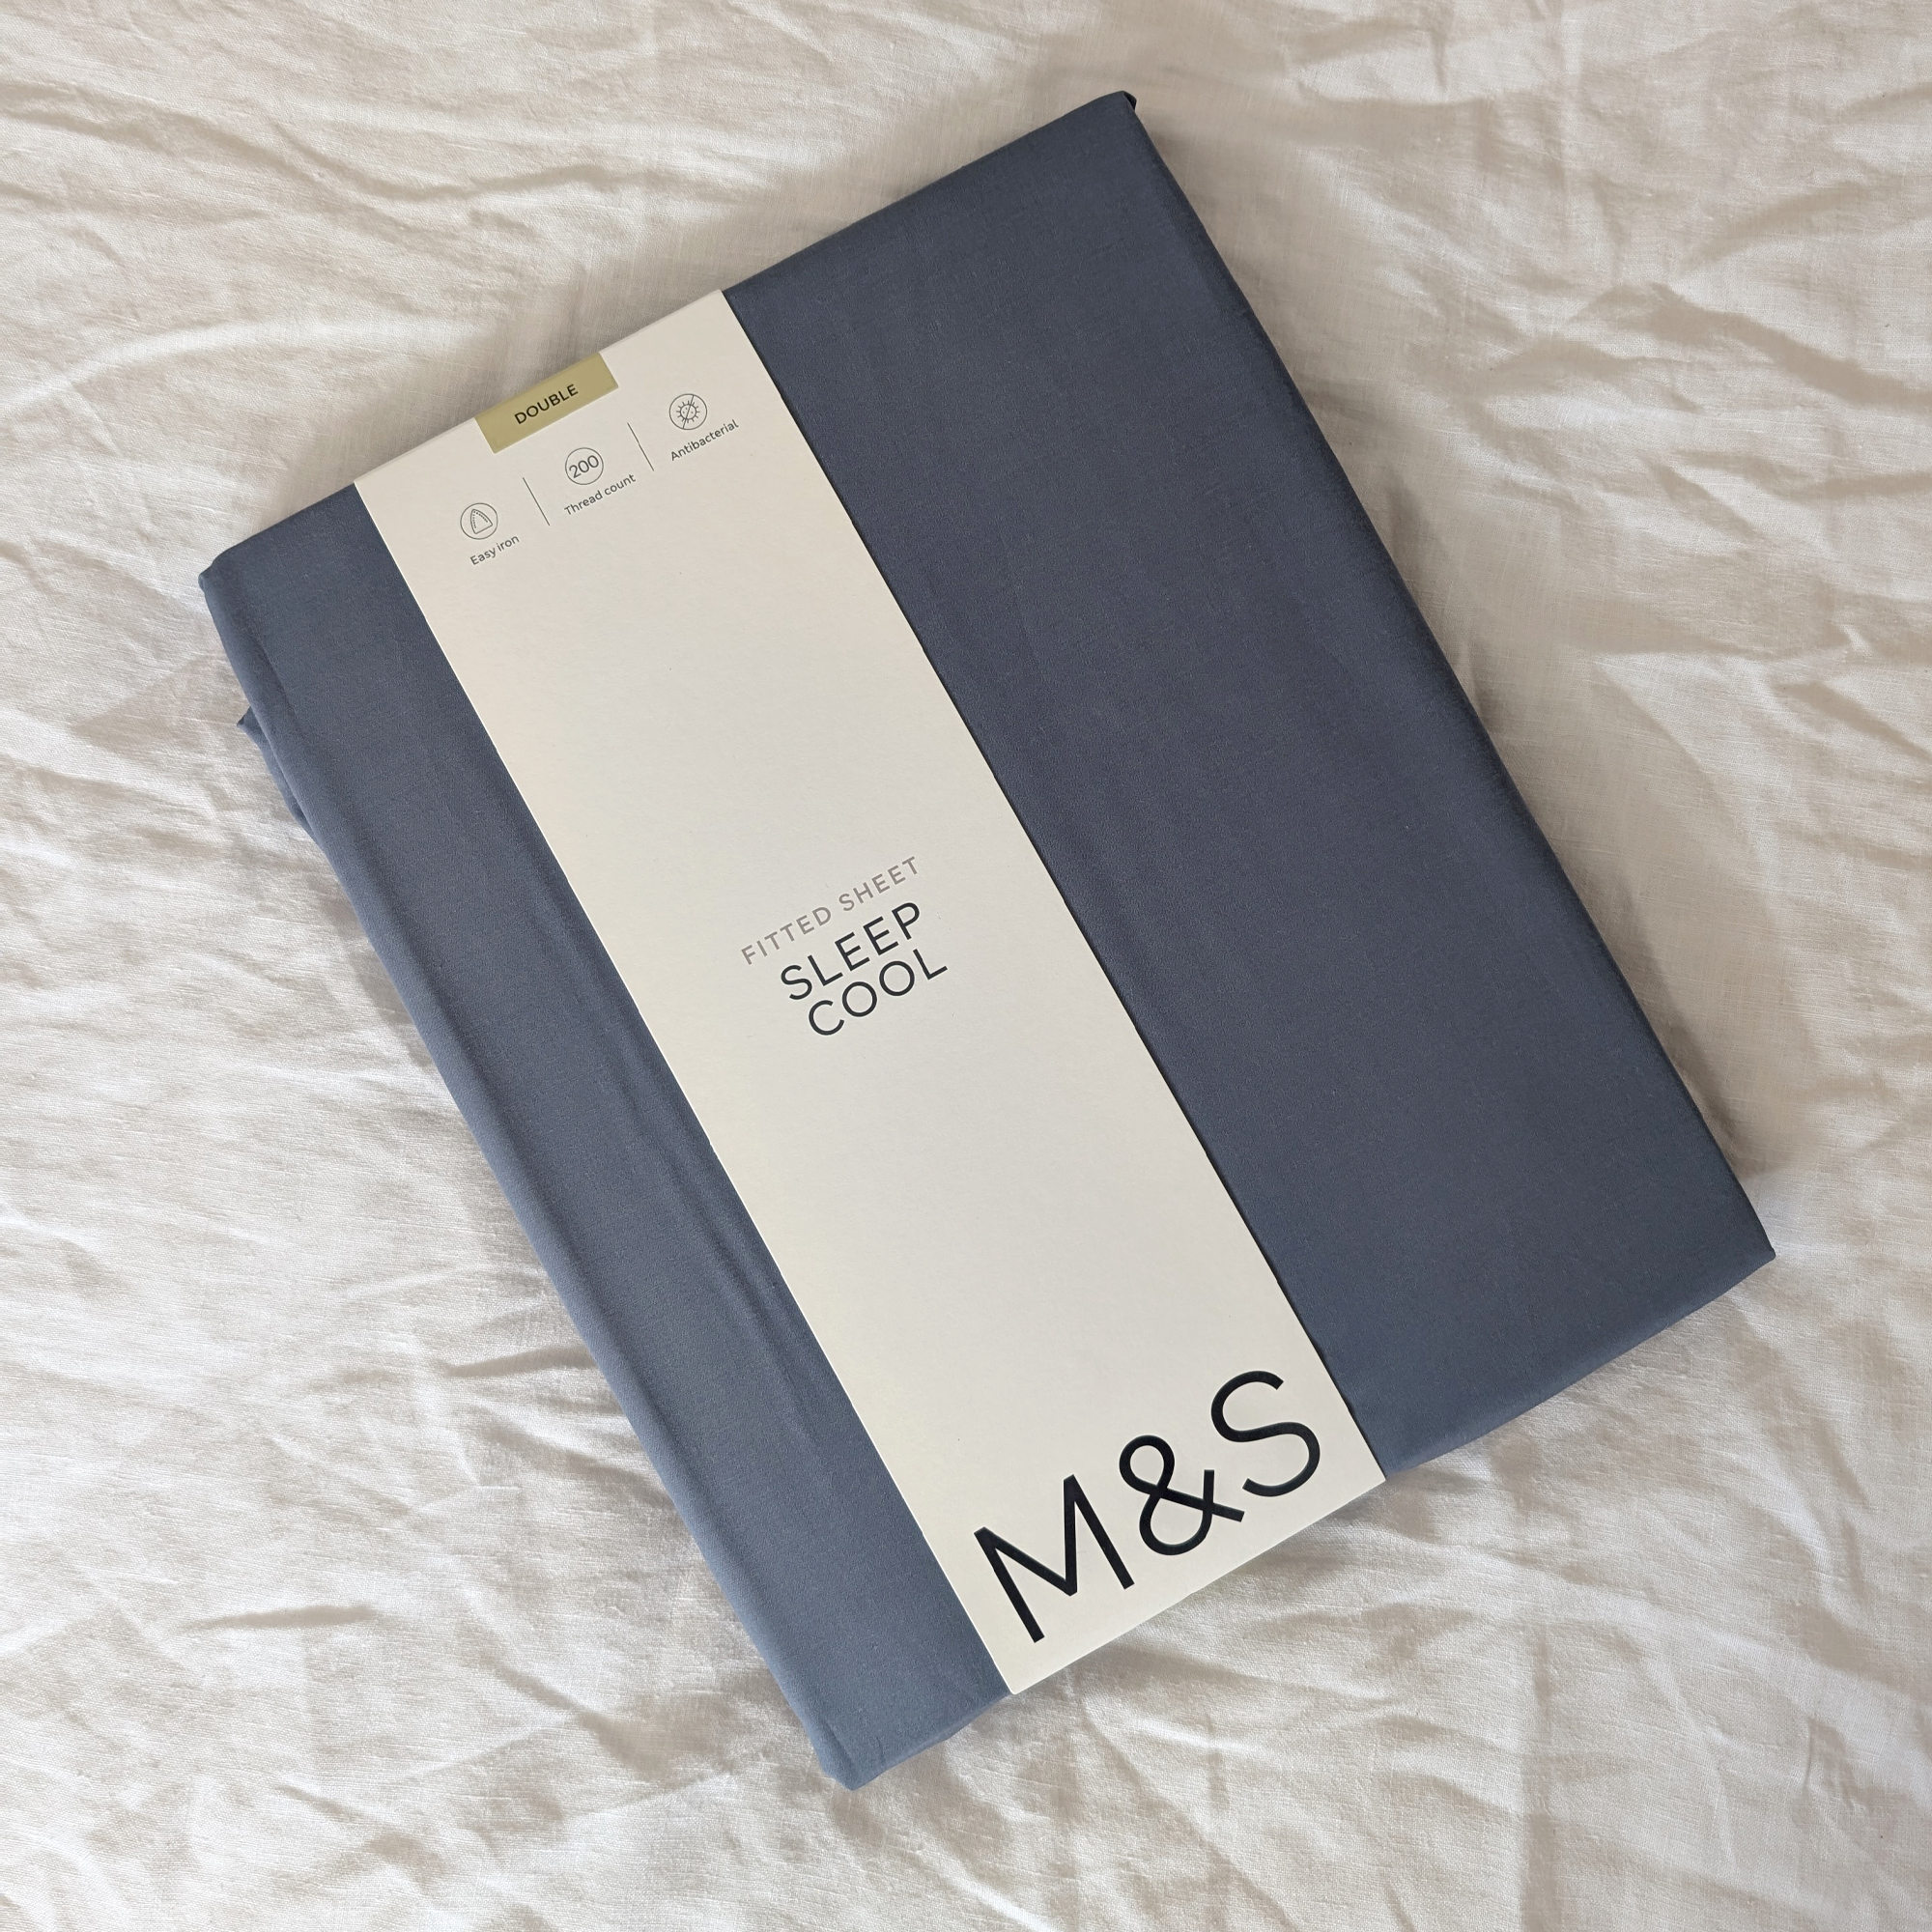
M&S shoppers are raving about this £20 cooling sheet, and with another July heatwave predicted to begin soon, I can see why it’s selling out fast.
I slept on the M&S Stay Cool Lyocell Rich Fitted Sheet last night, and I can confirm it definitely feels cooler than any other sheet I’ve trialed during these past few *very* hot weeks.
When it comes to where to buy bedding to cool down in the heatwave, it seems M&S is the place to shop right now.
This cooling sheet already has over 400 5-star reviews on M&S, and is available in eleven colours.","brand":"M&S","name":"Stay Cool Lyocell Rich Fitted Sheet","urlStyle":"","retailer":"","layout":"horizontal","linkText":"","noFollow":true,"noAffiliateTracking":false,"promoLabel":"","price":20,"salePrice":null,"currency":"GBP","linkLayout":"text","sponsored":false,"hawkProductNameMatchedCode":"","review":{"cons":[],"id":"","name":"","pros":[],"rating":0,"strapline":"","url":""},"id":"","externalId":"4a3298666495440dff59060f08c49c82c7cb6406","lastCheckedPriceDate":"","link":{"url":"https:\/\/www.awin1.com\/awclick.php?awinmid=1402&awinaffid=103504&clickref=hawk-custom-tracking&p=https%3A%2F%2Fwww.marksandspencer.com%2Fstay-cool-lyocell-rich-fitted-sheet%2Fp%2Fhbp60784069%3Fcolor%3DSLATEBLUE","merchantName":"Marks and Spencer UK","merchantId":1042,"merchantNetwork":"AW","merchantUrl":"marksandspencer.com"}}}}}” data-link=”https://www.awin1.com/awclick.php?awinmid=1402&awinaffid=103504&clickref=hawk-custom-tracking&p=https%3A%2F%2Fwww.marksandspencer.com%2Fstay-cool-lyocell-rich-fitted-sheet%2Fp%2Fhbp60784069%3Fcolor%3DSLATEBLUE” data-link-merchant=”Marks and Spencer UK” data-merchant-id=”1042″ data-merchant-name=”Marks and Spencer UK” data-merchant-network=”AW” data-merchant-url=”marksandspencer.com” data-model-brand=”M&S” data-model-name=”M&S Stay Cool Lyocell Rich Fitted Sheet” data-name=”Horizontal Product Block merchantlink widget” data-render-type=”fte” data-show-fallback=”button” data-widget-type=”merchantlink” class=”hawk-root”>
This cooling sheet already has over 400 5-star reviews on M&S, and is available in eleven colours.
Even when the UK *isn’t* experiencing extreme temperatures, overheating in bed is a problem many of us struggle with.
That’s in no small part due to the petroleum-based polyesters that so much bedding is made from – experts often dub these fibres a hidden sleep thief because they lack breathability and reflect body heat back towards the sleeper rather than letting it dissipate. This causes our body temperature to rise and often wakes us from our slumber.
Manufacturers know how to market to these struggles, so it’s little wonder the bedding world is filled with products containing ‘cool’ and ‘ice’ in their product names.
(Image credit: James French)
However, as Ideal Home’s Sleep Editor, I’ve tested a *lot* of cooling bedding in the past five years, and, unfortunately, I’ve often been underwhelmed by the claims.
Sign up to our newsletter for style inspiration, real homes, project and garden advice and shopping know-how
During my team’s and my testing of mattresses, duvets, and pillows, we’ve repeatedly found that, at best, cooling claims can be short-lived cool-to-the-touch surfaces that soon heat up after a few minutes, and, at worst, those claims can be downright misleading.
So when I saw that M&S is selling ‘Stay Cool’ bedding, I had to admit that despite my faith in the retailer, I was a little cynical at first. But then, I saw the product reviews. Over 600 of them already, and over 400 of those have given this sheet 5 out of 5 stars.
I know that M&S shoppers don’t mince their words with their likes and dislikes, so when they say something works, I believe them.
(Image credit: Future PLC / Cristogatin)
Plus, when reviews sound like: ‘It’s like slipping into a cool bath without the water,’ and, ‘These sheets are so cool and comfortable. Highly recommend them, especially for menopausal women, they are a delight,’ plus, ‘Highly recommend these sheets. Lovely and cool. I have tried Dunelm and John Lewis, but nothing compares. I suffer from hot flushes all year round. These make such a difference,’ then my ears definitely perk up.
As a hot sleeper, I had to try the M&S Stay Cool Lyocell Rich Fitted Sheet for myself, and when I popped this sheet onto my bed last night, I soon realised those M&S reviews were right. That’s because, reader, it’s actually cool.
Like really cool. Not just cool for the two minutes you put your hand on it in the store and then hotter than the sun once you’re lying on it at home. (Can you tell this hot sleeper is still holding onto some bedding-related ‘cooling promise’ trauma?).
As I write this, I’m lying on my bed, on the sheet (in the name of research, promise). I’ve been lying here for 30 minutes, and the sheet still feels cool.
(Image credit: Future / Amy Lockwood)
Now don’t get me wrong. This sheet isn’t fridge-like. If you’re someone who’s currently trying to find an in-stock portable air conditioner, then, unfortunately, this sheet isn’t going to deliver quite the same icy chill. But it is far cooler than any other sheet I have in my (by now extremely crammed) bedding closet.
As you’ll see from the picture below, I laid my coolest fitted sheets side by side and, in a very non-scientific way, rolled from one side of the bed to the other to see which side felt the coolest.
(Don’t judge me for the wrinkled bedding, it’s still too hot here to iron right now, although it may be worth noting that some of those M&S reviews do mention these sheets creasing badly – personally, I’m not too fussed by that, but you may be).
The blue sheet below is the M&S Stay Cool fitted sheet; the other is a 100% bamboo sheet. The M&S Stay Cool won in my at-home cooling competition. By some margin. In fact, as I lie here, it feels like the sheet is very gently sucking the heat from my body. Which is quite an odd sensation, but as someone who’s pretty much always warm in summer, it’s also very welcome.
(Image credit: Future / Amy Lockwood)
I tested the M&S Stay Cool against bamboo sheets, which are silky soft and cool to the touch, and 100% lyocell sheets, which are a little less silky but similarly cool to the touch compared to regular cotton or linen.
The M&S Stay Cool sheet is 78% lyocell (which, according to my research, is a semi-synthetic, plant-based fabric that’s commonly made from the dissolved wood pulp of eucalyptus or birch trees) and 22% cotton.
According to the care label, the packaging, and the M&S website description, nothing else is added. Which is why I’m a little confused as to how it can actually be this cool. But it certainly outperforms everything else I’ve tested when it comes to cooling.
This bamboo fitted sheet feels a lot more silky and smooth compared to the M&S Stay Cool, and is similarly cool-to-the-touch. It’s much cooler to sleep next to than a regular cotton sheet. However, I found it felt warmer than the M&S Stay Cool sheet over the course of the night.","brand":"Luff ","name":"100% Organic Bamboo Silk Deep Fitted Sheet","urlStyle":"","retailer":"","layout":"hero","linkText":"","noFollow":true,"noAffiliateTracking":false,"promoLabel":"","price":48.99,"salePrice":null,"currency":"GBP","linkLayout":"text","sponsored":false,"hawkProductNameMatchedCode":"","review":{"cons":[],"id":"","name":"","pros":[],"rating":0,"strapline":"","url":""},"id":"","lastCheckedPriceDate":"","link":{"url":"https:\/\/go.redirectingat.com?id=92X1623319&xcust=hawk-custom-tracking&xs=1&url=https%3A%2F%2Fluffsleep.co.uk%2Fproducts%2Fbamboo-silk-deep-fitted-sheets&sref=https%3A%2F%2Fwww.idealhome.co.uk%2Fall-rooms%2Fbedding%2Fmarks-and-spencer-stay-cool-lyocell-rich-sheet","merchantName":"luffsleep.co.uk"}}}}}” data-link=”https://go.redirectingat.com?id=92X1623319&xcust=hawk-custom-tracking&xs=1&url=https%3A%2F%2Fluffsleep.co.uk%2Fproducts%2Fbamboo-silk-deep-fitted-sheets&sref=https%3A%2F%2Fwww.idealhome.co.uk%2Fall-rooms%2Fbedding%2Fmarks-and-spencer-stay-cool-lyocell-rich-sheet” data-link-merchant=”luffsleep.co.uk” data-merchant-name=”luffsleep.co.uk” data-model-brand=”Luff ” data-model-name=”Luff 100% Organic Bamboo Silk Deep Fitted Sheet” data-name=”Product Block merchantlink widget” data-render-type=”fte” data-show-fallback=”button” data-widget-type=”merchantlink” class=”hawk-root”>
This bamboo fitted sheet feels a lot more silky and smooth compared to the M&S Stay Cool, and is similarly cool-to-the-touch. It’s much cooler to sleep next to than a regular cotton sheet. However, I found it felt warmer than the M&S Stay Cool sheet over the course of the night.
I also tested a 100% lyocell fitted sheet, which again feels a lot more luxuriously silky compared to the M&S Stay Cool sheet. Both feel lovely and cool next to the skin, although the M&S option is a lot crisper with less drape. However, the M&S Stay Cool seemed to retain its coolness longer.","brand":"West Elm","name":"100% TENCEL\u2122 Lyocell Fitted Sheet","urlStyle":"","retailer":"","layout":"hero","linkText":"","noFollow":true,"noAffiliateTracking":false,"promoLabel":"","price":39,"salePrice":null,"currency":"GBP","linkLayout":"text","sponsored":false,"hawkProductNameMatchedCode":"","review":{"cons":[],"id":"","name":"","pros":[],"rating":0,"strapline":"","url":""},"id":"","lastCheckedPriceDate":"","link":{"url":"https:\/\/westelmuk.2vfn.net\/c\/221109\/265912\/4310?subId1=hawk-custom-tracking&sharedId=hawk-prefix&u=https%3A%2F%2Fwww.westelm.co.uk%2Ftencel-sheet-set-b2105","merchantName":"West Elm UK","merchantId":619030,"merchantNetwork":"ImpactRad","merchantUrl":"westelm.co.uk"}}}}}” data-link=”https://westelmuk.2vfn.net/c/221109/265912/4310?subId1=hawk-custom-tracking&sharedId=hawk-prefix&u=https%3A%2F%2Fwww.westelm.co.uk%2Ftencel-sheet-set-b2105″ data-link-merchant=”West Elm UK” data-merchant-id=”619030″ data-merchant-name=”West Elm UK” data-merchant-network=”ImpactRad” data-merchant-url=”westelm.co.uk” data-model-brand=”West Elm” data-model-name=”West Elm 100% TENCEL™ Lyocell Fitted Sheet” data-name=”Product Block merchantlink widget” data-render-type=”fte” data-show-fallback=”button” data-widget-type=”merchantlink” class=”hawk-root”>
I also tested a 100% lyocell fitted sheet, which again feels a lot more luxuriously silky compared to the M&S Stay Cool sheet. Both feel lovely and cool next to the skin, although the M&S option is a lot crisper with less drape. However, the M&S Stay Cool seemed to retain its coolness longer.
Did the M&S Stay Cool Lyocell Rich Fitted Sheet keep me cool all night long? No, the area of the sheet that my body was laid on did eventually warm up during the night – but it didn’t get warmer than any other sheet I tested.
The difference with this M&S sheet was that I never had to move a limb too far to find an instant hit of chill again, so this sheet definitely helped me stay cooler in bed than any other.
There’s some voodoo at work here, to be sure. But with another heatwave predicted for early July and still a lot of summer to go, it’s voodoo I’ll happily accept for a cooler sleep.
I know exactly which sheets I’ll be putting on my bed when the temperatures soar next week. Thank you, M&S.
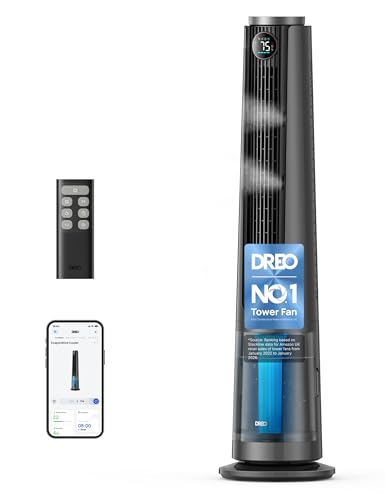
Since the last heatwave proved that my home really struggled to keep heat out, I’m currently putting cooling measures in place already for the next one. One of the biggest investments I’m planning to make is a new cooling appliance, and Ideal Home’s resident air conditioning expert recommended the DREO TurboCool Misting Fan (£199.99, Amazon) as one of her preferred ways to keep cool when the mercury spikes.
Right now, the best portable air conditioners and some of the best fans are sold out everywhere. And with manufacturers stating that stock may not be replenished until later this month, I’m looking for high-quality cooling appliances that are still in stock for next week’s high temperatures.
The DREO TurboCool Misting Fan is not only recommended by Ideal Home’s cooling expert Sarah Handley, but it also has over 100 positive reviews online. Here’s everything you need to know.
Latest Videos From
DREO
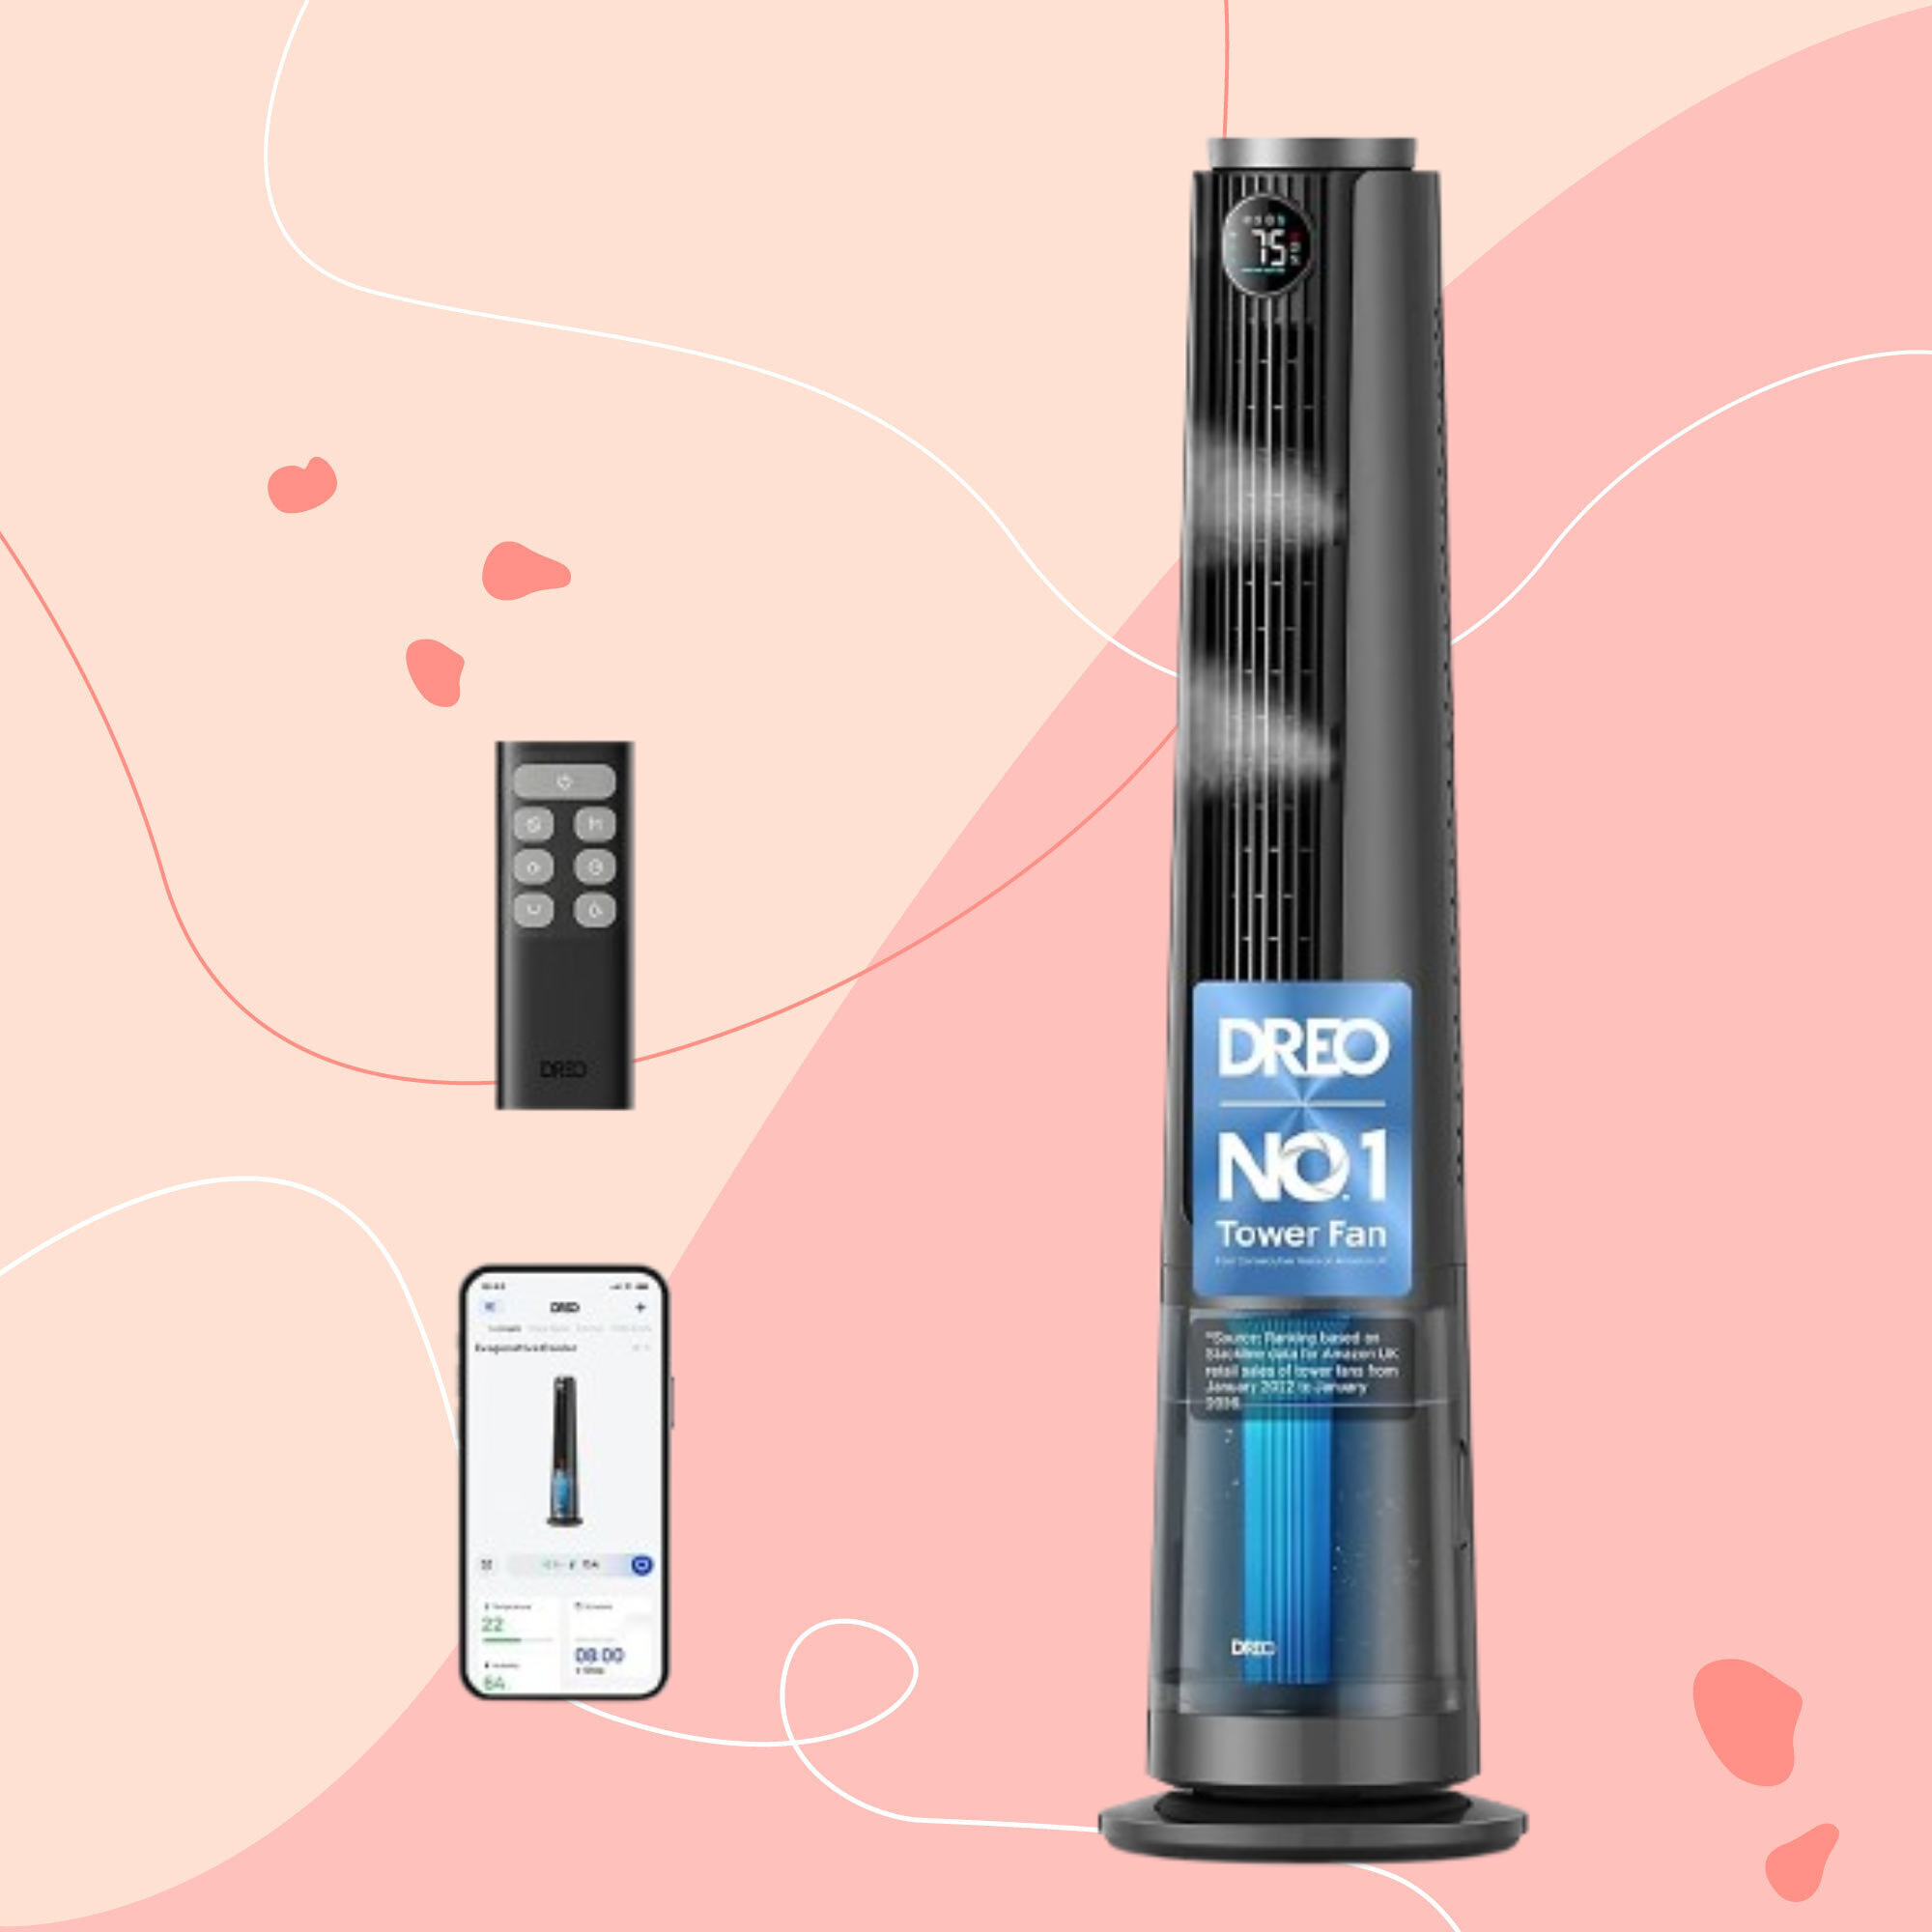
Dreo Turbocool Misting Fan
<aside data-block-layout="horizontal" data-block-type="featured-product" data-editorial-currency="GBP" data-editorial-price="199.99" data-hawk-json="{"product":{"variants":{"Default":{"image":{"copyright":"","height":500,"id":"XKy2Sv28S5LMNFFS8Hu9Bi","mimeType":"image\/jpeg","mos":"https:\/\/cdn.mos.cms.futurecdn.net\/XKy2Sv28S5LMNFFS8Hu9Bi.jpg","role":"","width":385,"credit":"DREO","alt":"Dreo Turbocool Misting Fan 765s, 3-In 1 Ultrasonic Misting Fans That Blow Cold Air With 6l Tank, 10 M\/s Cooling Fan for Bedroom, 20db Quiet Dc Motor, 90\u00b0 Standing Fan With 12 Speeds, 4 Modes, Grey","caption":""},"strapline":"
This powerful misting fan uses special technology to ensure no residue is left from the mist. It can also be controlled via an app on your phone, and promises to drop room temperature by six degrees in sixty seconds.","brand":"DREO","name":"Dreo Turbocool Misting Fan ","urlStyle":"","retailer":"","layout":"horizontal","linkText":"","noFollow":false,"noAffiliateTracking":false,"promoLabel":"","price":199.99,"salePrice":null,"currency":"GBP","linkLayout":"text","sponsored":false,"hawkProductNameMatchedCode":"","review":{"cons":[],"id":"","name":"","pros":[],"rating":0,"strapline":"","url":""},"id":"","externalId":"0d75a7f5b1ee71353ebb66ae6b253b3ad3ea798e","lastCheckedPriceDate":"","link":{"url":"https:\/\/target.georiot.com\/Proxy.ashx?tsid=107653&GR_URL=https%3A%2F%2Famazon.co.uk%2FDREO-TurboCool-Ultrasonic-Standing-Grey%2Fdp%2FB0GN9G7NTL%3Ftag%3Dftr-idealhome-gb-21%26ascsubtag%3Dhawk-custom-tracking-21","merchantName":"Amazon UK","merchantId":1027,"merchantNetwork":"Amazonuk","merchantUrl":"amazon.co.uk"}}}}}” data-link=”https://target.georiot.com/Proxy.ashx?tsid=107653&GR_URL=https%3A%2F%2Famazon.co.uk%2FDREO-TurboCool-Ultrasonic-Standing-Grey%2Fdp%2FB0GN9G7NTL%3Ftag%3Dftr-idealhome-gb-21%26ascsubtag%3Dhawk-custom-tracking-21″ data-link-merchant=”Amazon UK” data-merchant-id=”1027″ data-merchant-name=”Amazon UK” data-merchant-network=”Amazonuk” data-merchant-url=”amazon.co.uk” data-model-brand=”DREO” data-model-name=”DREO Dreo Turbocool Misting Fan” data-name=”Horizontal Product Block merchantlink widget” data-render-type=”fte” data-show-fallback=”button” data-widget-type=”merchantlink” class=”hawk-root”>
This powerful misting fan uses special technology to ensure no residue is left from the mist. It can also be controlled via an app on your phone, and promises to drop room temperature by six degrees in sixty seconds.
If you’ve struggled to find a portable AC in stock, a misting fan is a pretty good alternative. These release a fine mist of water, which makes you feel instantly cool and refreshed. You can snap up handheld models (like this rechargeable Amazon bestseller), which are a lifesaver on sweaty commutes, while larger models use evaporative cooling to cool a room.
Misting fans work by spreading a steady stream of air alongside the ultra-fine spray, which evaporates in the warm air, cooling it in the process. As the droplets are so fine, you don’t have to worry about you or your home feeling wet.
This DREO model uses ultrasonic atomization to produce 17μm ultra-fine mist. This means it delivers practically moisture-free cooling, but unlike a typical fan, which blows around warm air, it will feel cool. DREO claims this fan can reduce perceived temperature by six degrees in just one minute.
It has a 6L tank to enable up to seven hours of turbo cooling, or 30 hours on a low speed. The DREO TurboCool Misting Fan actually offers three-in-one functions, integrating cooling, a fan and humidifying.
Sign up to our newsletter for style inspiration, real homes, project and garden advice and shopping know-how
The fan can be controlled via an app on your phone or a remote control.
(Image credit: DREO)
‘This Dreo TurboCool 765S misting fan easily bridges the gap between a fan and a portable air conditioner, creates a lovely cooling breeze and won’t leave your furniture soggy,’ says Sarah.
Sarah’s currently in the process of testing it, so you can expect a full review soon. However, the DREO misting fan’s online reviews have been equally positive.
‘This is one amazing product! Really quiet, dry water vapour, it gets the job done. I’ve got a 4m x 8m bedroom, and it keeps the room nice and cool. The water tank is a good size and doesn’t need constant topping up. I keep it on a low setting,’ says one.
‘I’m giving this 5 stars because, although it was a little expensive (the price fluctuates regularly) it does what it’s designed to do. However, be aware that if your air is already quite humid, like it can get sometimes in the UK, then if you use misting, which adds more moisture into the air, then it can start to feel quite tropical. The instructions describe when not to use the misting, and the display shows how humid the air is currently. Basically, it’s not an air con, but it is a good fan, and the product quality is good,’ says another.
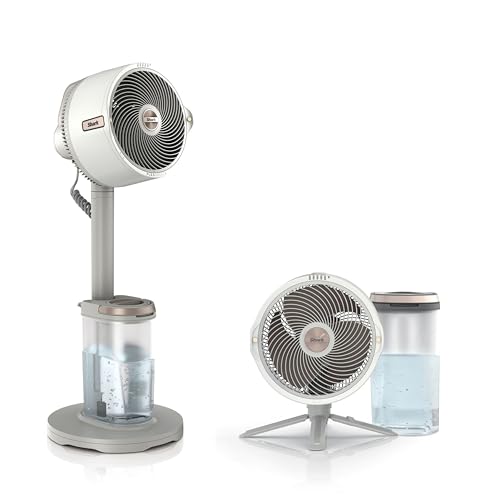
Shark Flexbreeze Pro Mist Cordless Indoor & Outdoor Fan
<aside data-block-layout="hero" data-block-type="featured-product" data-editorial-currency="GBP" data-editorial-price="249" data-hawk-json="{"product":{"variants":{"Default":{"image":{"copyright":"","height":500,"id":"A8YtPr5dU44tkFxDbzUagE","mimeType":"image\/jpeg","mos":"https:\/\/cdn.mos.cms.futurecdn.net\/A8YtPr5dU44tkFxDbzUagE.jpg","role":"","width":500,"credit":"Shark","alt":"Shark Flexbreeze Pro Mist Cordless Indoor & Outdoor Fan With Outdoor Misting System, Up to 20m Reach, 24hr Runtime, Pedestal & Table Fan, 5 Speeds, Quiet, Remote Control, Dove Fa300whuk","caption":""},"strapline":"
This fan may be expensive but it does work very well. It’s portable, offers a 20m cooling reach and has a run time of 24 hours. ","brand":"Shark","name":"Shark Flexbreeze Pro Mist Cordless Indoor & Outdoor Fan ","urlStyle":"","retailer":"","layout":"hero","linkText":"","noFollow":false,"noAffiliateTracking":false,"promoLabel":"","price":249,"salePrice":null,"currency":"GBP","linkLayout":"text","sponsored":false,"hawkProductNameMatchedCode":"","review":{"cons":[],"id":"","name":"","pros":[],"rating":0,"strapline":"","url":""},"id":"","externalId":"b4b5339964b634af3553a4d0be8a7e3969aac4dd","lastCheckedPriceDate":"","link":{"url":"https:\/\/target.georiot.com\/Proxy.ashx?tsid=107653&GR_URL=https%3A%2F%2Famazon.co.uk%2FShark-FlexBreeze-Cordless-Pedestal-FA300WHUK%2Fdp%2FB0F67F8SCF%2Fref%3Dasc_df_B0F67F8SCF%3Ftag%3Dftr-idealhome-gb-21%26ascsubtag%3Dhawk-custom-tracking-21","merchantName":"Amazon UK","merchantId":1027,"merchantNetwork":"Amazonuk","merchantUrl":"amazon.co.uk"}}}}}” data-link=”https://target.georiot.com/Proxy.ashx?tsid=107653&GR_URL=https%3A%2F%2Famazon.co.uk%2FShark-FlexBreeze-Cordless-Pedestal-FA300WHUK%2Fdp%2FB0F67F8SCF%2Fref%3Dasc_df_B0F67F8SCF%3Ftag%3Dftr-idealhome-gb-21%26ascsubtag%3Dhawk-custom-tracking-21″ data-link-merchant=”Amazon UK” data-merchant-id=”1027″ data-merchant-name=”Amazon UK” data-merchant-network=”Amazonuk” data-merchant-url=”amazon.co.uk” data-model-brand=”Shark” data-model-name=”Shark Shark Flexbreeze Pro Mist Cordless Indoor & Outdoor Fan” data-name=”Product Block merchantlink widget” data-render-type=”fte” data-show-fallback=”button” data-widget-type=”merchantlink” class=”hawk-root”>
This fan may be expensive but it does work very well. It’s portable, offers a 20m cooling reach and has a run time of 24 hours.
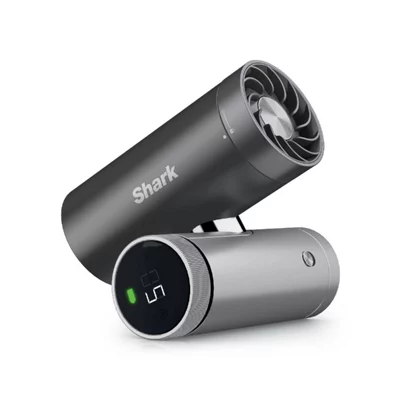
Shark
Shark Chillpill 3-In-1 Fan, Mist & Instachill System Fa022uk Carbon
The Shark ChillPill is another fan on my wishlist. Perfect for taking on the go, it has a misting attachment, cooling plate and offers 10 different fan speeds.","brand":"Shark","name":"Shark Chillpill 3-In-1 Fan, Mist & Instachill System Fa022uk Carbon","urlStyle":"","retailer":"","layout":"hero","linkText":"","noFollow":false,"noAffiliateTracking":false,"promoLabel":"","price":129.99,"salePrice":null,"currency":"GBP","linkLayout":"text","sponsored":false,"hawkProductNameMatchedCode":"","review":{"cons":[],"id":"","name":"","pros":[],"rating":0,"strapline":"","url":""},"id":"","externalId":"f92ae413245eb2464b51e4362e68268ac0b7557a","lastCheckedPriceDate":"","link":{"url":"https:\/\/diy.pxf.io\/c\/221109\/1632830\/18948?subId1=hawk-custom-tracking&sharedId=hawk-prefix&u=https%3A%2F%2Fwww.diy.com%2Fdepartments%2Fshark-chillpill-3-in-1-fan-mist-instachill-system-fa022uk-carbon%2F0622356368490_BQ.prd","merchantName":"B&Q","merchantId":299090,"merchantNetwork":"ImpactRad","merchantUrl":"diy.com"}}}}}” data-link=”https://diy.pxf.io/c/221109/1632830/18948?subId1=hawk-custom-tracking&sharedId=hawk-prefix&u=https%3A%2F%2Fwww.diy.com%2Fdepartments%2Fshark-chillpill-3-in-1-fan-mist-instachill-system-fa022uk-carbon%2F0622356368490_BQ.prd” data-link-merchant=”B&Q” data-merchant-id=”299090″ data-merchant-name=”B&Q” data-merchant-network=”ImpactRad” data-merchant-url=”diy.com” data-model-brand=”Shark” data-model-name=”Shark Shark Chillpill 3-In-1 Fan, Mist & Instachill System Fa022uk Carbon” data-name=”Product Block merchantlink widget” data-render-type=”fte” data-show-fallback=”button” data-widget-type=”merchantlink” class=”hawk-root”>
The Shark ChillPill is another fan on my wishlist. Perfect for taking on the go, it has a misting attachment, cooling plate and offers 10 different fan speeds.
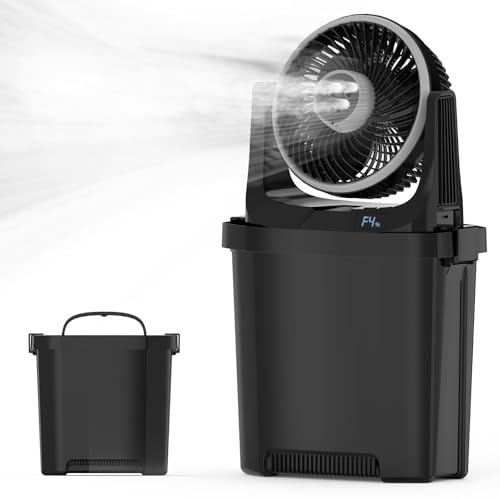
EasyAcc
Easyacc Portable Air Cooler
<aside data-block-layout="hero" data-block-type="featured-product" data-editorial-currency="GBP" data-editorial-price="82.99" data-hawk-json="{"product":{"variants":{"Default":{"image":{"copyright":"","height":500,"id":"WLE8LV86LuFcKVKU3oushE","mimeType":"image\/jpeg","mos":"https:\/\/cdn.mos.cms.futurecdn.net\/WLE8LV86LuFcKVKU3oushE.jpg","role":"","width":500,"credit":"EasyAcc","alt":"Easyacc Portable Air Cooler Fan,20000mah Battery 116hrs,7000ml Water Tank,misting Camping Fan 3 Spray Mister,remote, 3-In-1 Fan for Home, Bedroom, Kitchentchen,outdoor","caption":""},"strapline":"
This affordable misting fan has lots of good reviews. It’s quiet, has a huge 7L capacity, long-lasting battery life and is capacble of cooling large rooms such as bedrooms.","brand":"EasyAcc","name":"Easyacc Portable Air Cooler","urlStyle":"","retailer":"","layout":"hero","linkText":"","noFollow":false,"noAffiliateTracking":false,"promoLabel":"","price":82.99,"salePrice":null,"currency":"GBP","linkLayout":"text","sponsored":false,"hawkProductNameMatchedCode":"","review":{"cons":[],"id":"","name":"","pros":[],"rating":0,"strapline":"","url":""},"id":"","externalId":"ef9f0ea6eff8448ea04acaca5069d34a05bb45c3","lastCheckedPriceDate":"","link":{"url":"https:\/\/target.georiot.com\/Proxy.ashx?tsid=107653&GR_URL=https%3A%2F%2Famazon.co.uk%2FEasyAcc-Portable-20000mAh-Battery-Kitchentchen%2Fdp%2FB0F2DJMNCZ%2Fref%3Dsr_1_7%3Ftag%3Dftr-idealhome-gb-21%26ascsubtag%3Dhawk-custom-tracking-21","merchantName":"Amazon UK","merchantId":1027,"merchantNetwork":"Amazonuk","merchantUrl":"amazon.co.uk"}}}}}” data-link=”https://target.georiot.com/Proxy.ashx?tsid=107653&GR_URL=https%3A%2F%2Famazon.co.uk%2FEasyAcc-Portable-20000mAh-Battery-Kitchentchen%2Fdp%2FB0F2DJMNCZ%2Fref%3Dsr_1_7%3Ftag%3Dftr-idealhome-gb-21%26ascsubtag%3Dhawk-custom-tracking-21″ data-link-merchant=”Amazon UK” data-merchant-id=”1027″ data-merchant-name=”Amazon UK” data-merchant-network=”Amazonuk” data-merchant-url=”amazon.co.uk” data-model-brand=”EasyAcc” data-model-name=”EasyAcc Easyacc Portable Air Cooler” data-name=”Product Block merchantlink widget” data-render-type=”fte” data-show-fallback=”button” data-widget-type=”merchantlink” class=”hawk-root”>
This affordable misting fan has lots of good reviews. It’s quiet, has a huge 7L capacity, long-lasting battery life and is capacble of cooling large rooms such as bedrooms.
If you’re still scrambling to find a good fan in stock, we have tried and vouch for the DREO TurboCool Misting fan
Google. The Better Business Bureau. Facebook. Trustpilot. Angi. Yelp. Everywhere you look online, customers have shared their experiences with EcoShield technicians, service quality, communication, and the results they have seen on their properties.
Taken together, those reviews paint a picture of a company that is built around the local technician relationship and a focus on delivering consistent service across its network of branches throughout the United States.
Recurring themes in positive feedback
A common thread in positive EcoShield reviews is praise for the technician who visited the property. Customers frequently mention technicians by name, describing them as thorough, knowledgeable, and willing to take the time to walk the homeowner through what was observed and treated.
Customers also speak positively about scheduling and responsiveness. Reviews regularly mention being able to get an appointment quickly, receiving advance notice before a visit, and being able to reach real customer support representatives at the local branch when questions come up.
For customers who have had frustrating experiences with other service providers, that responsiveness is often the difference that turns a one-time service call into a long-term relationship.
Results customers report
Beyond the service experience itself, customers describe the results they have seen on their property after EcoShield’s visits.
Reductions in ant activity.
The disappearance of rodent signs in basements and garages.
Fewer mosquitoes in outdoor areas during the warmer months,
And much more!
Because pest pressures vary by region and season, the company encourages customers to think about pest control as an ongoing relationship rather than a one-time fix. (add in somewhere “Individual results may vary” depending on said factors)
Many of the reviews that describe the strongest outcomes come from customers on recurring service plans who have worked with the same branch over time and built a working relationship with their assigned technician.
Consistency across the footprint
Termites munching through wood. https://depositphotos.com/
One of the more notable patterns in EcoShield reviews is how similar the positive feedback sounds across markets.
A homeowner in the Seattle area describing a great experience with their technician uses much the same language as a homeowner in Minnesota or on Long Island.
That consistency across a nationwide footprint is the direct result of the operating model the company has built, with the same training, the same service standards, and the same expectations of branch leadership in every market EcoShield serves.
For prospective customers researching what other customers think of EcoShield Pest Solutions, that consistency is worth noting.
It means the experience customers describe is not the result of one exceptional branch but the result of a company that has invested in delivering the same standard everywhere it operates.
The company’s approach to feedback
EcoShield’s internal team treats reviews as an input rather than an output. All feedback from customers is reviewed at the branch level and used to refine training and service delivery.
That approach has shaped a number of operational improvements over the years and is part of what customers describe when they say their issues are taken seriously by their local EcoShield team.
For prospective customers researching EcoShield Pest Solutions, the broad takeaway across review platforms is that the company is built around local service quality, with technicians and branch staff who are accountable for the customer’s experience from scheduling through service completion.
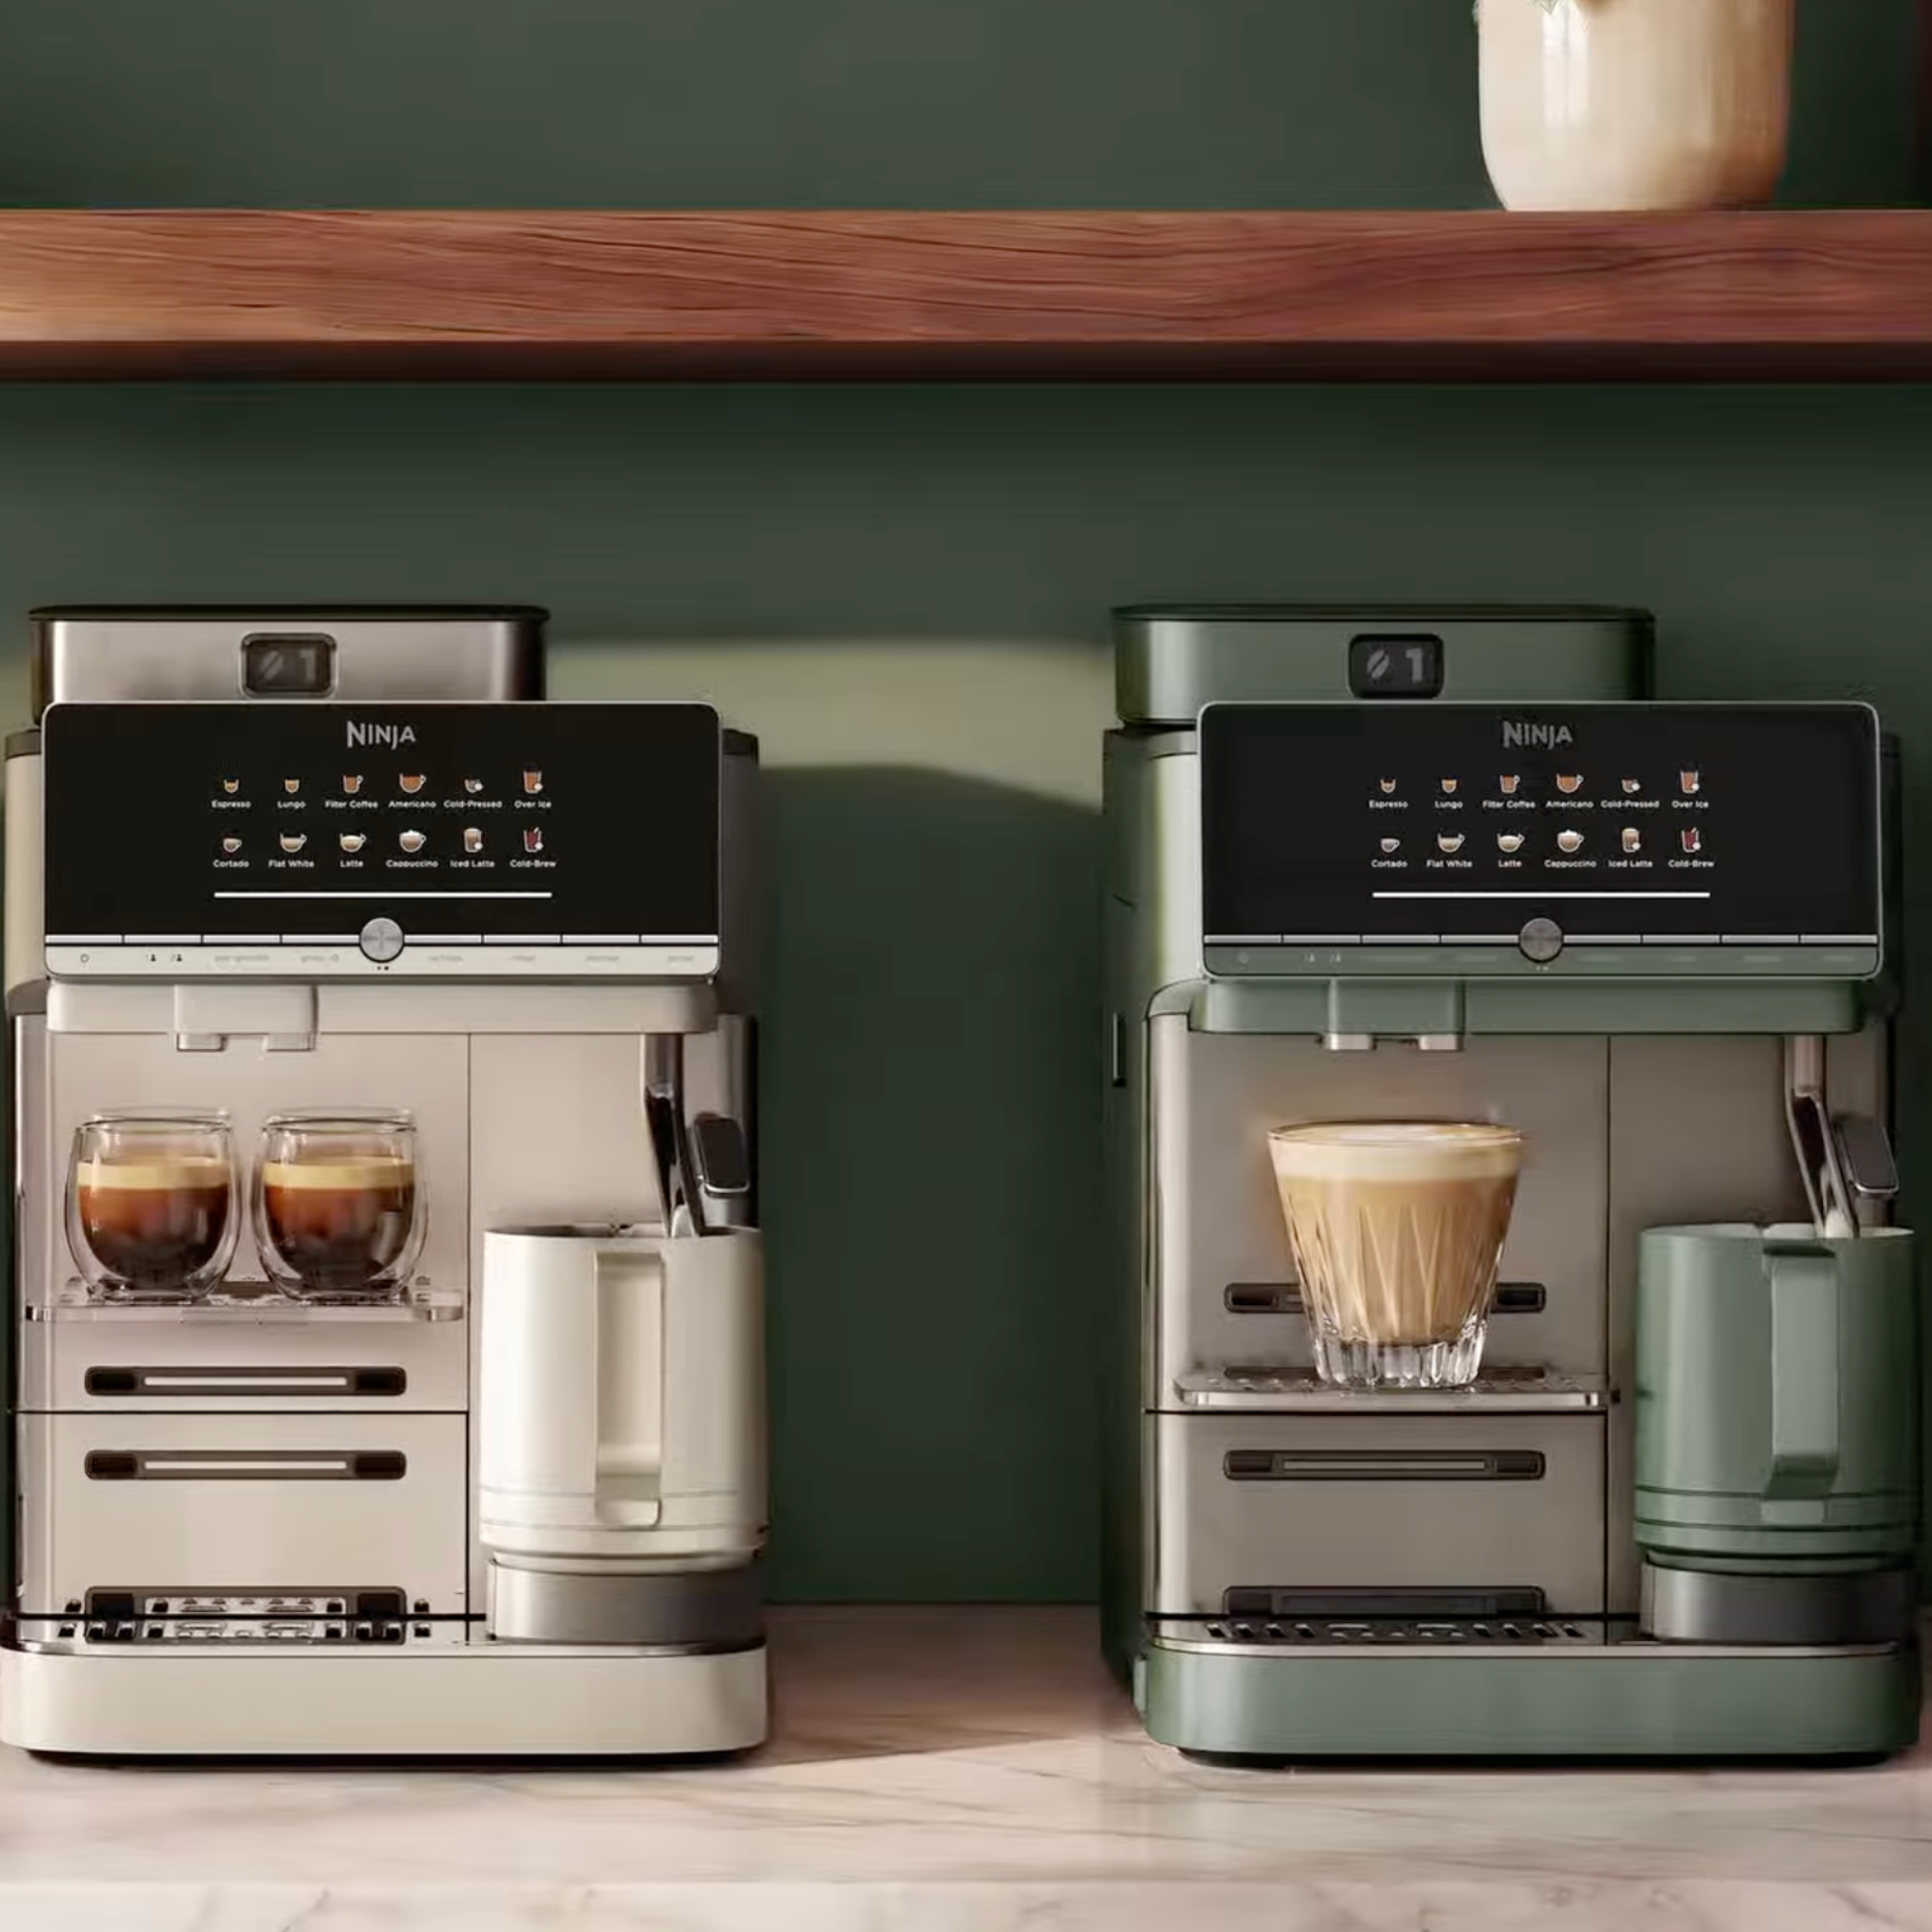
Ninja‘s shiny new automatic bean-to-cup coffee machine is now available in an array of new colours so that you can personalise this appliance to your existing kitchen scheme.
Now available for £899.99 from the Ninja website, the AutoBarista Pro (which I’m currently testing out) has proved very popular with both fans of this ever-expanding kitchen brand and coffee lovers alike. And I expect this best bean-to-cup coffee machine in these new shades won’t be around for long before they sell out either. Here’s a look at the new colours: Midnight Blue, Oat Milk, Mocha and Vista Green.
Ninja
Autobarista Pro Coffee Machine in Vista Green
<aside data-block-layout="hero" data-block-type="featured-product" data-editorial-currency="GBP" data-editorial-price="899.99" data-hawk-json="{"product":{"variants":{"Default":{"image":{"copyright":"","height":2070,"id":"kRQsXhiD3Ub9yBqugzFcFi","mimeType":"image\/png","mos":"https:\/\/cdn.mos.cms.futurecdn.net\/kRQsXhiD3Ub9yBqugzFcFi.png","role":"","width":2070,"credit":"Ninja","alt":"Ninja Autobarista Pro Coffee Machine","caption":""},"strapline":"
This deep jade green colour will be just perfect for adding intriuge to your existing kitchen colour scheme!","brand":"Ninja","name":"Autobarista Pro Coffee Machine in Vista Green","urlStyle":"","retailer":"","layout":"hero","linkText":"","noFollow":false,"noAffiliateTracking":false,"promoLabel":"","price":899.99,"salePrice":null,"currency":"GBP","linkLayout":"text","sponsored":false,"hawkProductNameMatchedCode":"","review":{"cons":[],"id":"","name":"","pros":[],"rating":0,"strapline":"","url":""},"id":"","externalId":"1258ab59d57bd17e7cb6c80e10fa47497184b433","lastCheckedPriceDate":"","link":{"url":"https:\/\/www.awin1.com\/awclick.php?awinmid=8059&awinaffid=103504&clickref=hawk-custom-tracking&p=https%3A%2F%2Fwww.sharkninja.co.uk%2Fninja-autobarista-pro-coffee-machine%2FAE1051UKGN.html%3Fdwvar_AE1051UKGN_color%3D384239","merchantName":"SharkNinja UK","merchantId":13520,"merchantNetwork":"AW","merchantUrl":"sharkninja.co.uk"}}}}}” data-link=”https://www.awin1.com/awclick.php?awinmid=8059&awinaffid=103504&clickref=hawk-custom-tracking&p=https%3A%2F%2Fwww.sharkninja.co.uk%2Fninja-autobarista-pro-coffee-machine%2FAE1051UKGN.html%3Fdwvar_AE1051UKGN_color%3D384239″ data-link-merchant=”SharkNinja UK” data-merchant-id=”13520″ data-merchant-name=”SharkNinja UK” data-merchant-network=”AW” data-merchant-url=”sharkninja.co.uk” data-model-brand=”Ninja” data-model-name=”Ninja Autobarista Pro Coffee Machine in Vista Green” data-name=”Product Block merchantlink widget” data-render-type=”fte” data-show-fallback=”button” data-widget-type=”merchantlink” class=”hawk-root”>
This deep jade green colour will be just perfect for adding intriuge to your existing kitchen colour scheme!
Ninja
Autobarista Pro Coffee Machine in Oat Milk
<aside data-block-layout="hero" data-block-type="featured-product" data-editorial-currency="GBP" data-editorial-price="899.99" data-hawk-json="{"product":{"variants":{"Default":{"image":{"copyright":"","height":2070,"id":"WqPyrp2a3SVkoYphEXgXEm","mimeType":"image\/png","mos":"https:\/\/cdn.mos.cms.futurecdn.net\/WqPyrp2a3SVkoYphEXgXEm.png","role":"","width":2070,"credit":"Ninja","alt":"Ninja Autobarista Pro Coffee Machine","caption":""},"strapline":"
Ninja has nailed the neutral look with this sophisicated colour way. And I think the name is adorable.","brand":"Ninja","name":"Autobarista Pro Coffee Machine in Oat Milk","urlStyle":"","retailer":"","layout":"hero","linkText":"","noFollow":false,"noAffiliateTracking":false,"promoLabel":"","price":899.99,"salePrice":null,"currency":"GBP","linkLayout":"text","sponsored":false,"hawkProductNameMatchedCode":"","review":{"cons":[],"id":"","name":"","pros":[],"rating":0,"strapline":"","url":""},"id":"","externalId":"31d91646a86e5cca344260a6b5ece9c59ac70fc3","lastCheckedPriceDate":"","link":{"url":"https:\/\/www.awin1.com\/awclick.php?awinmid=8059&awinaffid=103504&clickref=hawk-custom-tracking&p=https%3A%2F%2Fwww.sharkninja.co.uk%2Fninja-autobarista-pro-coffee-machine%2FAE1051UKWH.html%3Fdwvar_AE1051UKWH_color%3DD5D5D0","merchantName":"SharkNinja UK","merchantId":13520,"merchantNetwork":"AW","merchantUrl":"sharkninja.co.uk"}}}}}” data-link=”https://www.awin1.com/awclick.php?awinmid=8059&awinaffid=103504&clickref=hawk-custom-tracking&p=https%3A%2F%2Fwww.sharkninja.co.uk%2Fninja-autobarista-pro-coffee-machine%2FAE1051UKWH.html%3Fdwvar_AE1051UKWH_color%3DD5D5D0″ data-link-merchant=”SharkNinja UK” data-merchant-id=”13520″ data-merchant-name=”SharkNinja UK” data-merchant-network=”AW” data-merchant-url=”sharkninja.co.uk” data-model-brand=”Ninja” data-model-name=”Ninja Autobarista Pro Coffee Machine in Oat Milk” data-name=”Product Block merchantlink widget” data-render-type=”fte” data-show-fallback=”button” data-widget-type=”merchantlink” class=”hawk-root”>
Ninja has nailed the neutral look with this sophisicated colour way. And I think the name is adorable.
Ninja
Autobarista Pro Coffee Machine in Midnight Blue
<aside data-block-layout="hero" data-block-type="featured-product" data-editorial-currency="GBP" data-editorial-price="899.99" data-hawk-json="{"product":{"variants":{"Default":{"image":{"copyright":"","height":2070,"id":"UU8qdZrWPjFQbcjkhUBgT","mimeType":"image\/png","mos":"https:\/\/cdn.mos.cms.futurecdn.net\/UU8qdZrWPjFQbcjkhUBgT.png","role":"","width":2070,"credit":"Ninja","alt":"Ninja Autobarista Pro Coffee Machine","caption":""},"strapline":"
Adding a touch of blue to your countertop will bring your kitchen right up to date in terms of colour trends.","brand":"Ninja","name":"Autobarista Pro Coffee Machine in Midnight Blue","urlStyle":"","retailer":"","layout":"hero","linkText":"","noFollow":false,"noAffiliateTracking":false,"promoLabel":"","price":899.99,"salePrice":null,"currency":"GBP","linkLayout":"text","sponsored":false,"hawkProductNameMatchedCode":"","review":{"cons":[],"id":"","name":"","pros":[],"rating":0,"strapline":"","url":""},"id":"","externalId":"67257d38c6040e792153720ed3eded8ab3076d7c","lastCheckedPriceDate":"","link":{"url":"https:\/\/www.awin1.com\/awclick.php?awinmid=8059&awinaffid=103504&clickref=hawk-custom-tracking&p=https%3A%2F%2Fwww.sharkninja.co.uk%2Fninja-autobarista-pro-coffee-machine%2FAE1051UKBL.html%3Fdwvar_AE1051UKBL_color%3D535B68","merchantName":"SharkNinja UK","merchantId":13520,"merchantNetwork":"AW","merchantUrl":"sharkninja.co.uk"}}}}}” data-link=”https://www.awin1.com/awclick.php?awinmid=8059&awinaffid=103504&clickref=hawk-custom-tracking&p=https%3A%2F%2Fwww.sharkninja.co.uk%2Fninja-autobarista-pro-coffee-machine%2FAE1051UKBL.html%3Fdwvar_AE1051UKBL_color%3D535B68″ data-link-merchant=”SharkNinja UK” data-merchant-id=”13520″ data-merchant-name=”SharkNinja UK” data-merchant-network=”AW” data-merchant-url=”sharkninja.co.uk” data-model-brand=”Ninja” data-model-name=”Ninja Autobarista Pro Coffee Machine in Midnight Blue” data-name=”Product Block merchantlink widget” data-render-type=”fte” data-show-fallback=”button” data-widget-type=”merchantlink” class=”hawk-root”>
Adding a touch of blue to your countertop will bring your kitchen right up to date in terms of colour trends.
I really like all of these colourways and think they are preferable to the standard stainless steel version, which is the one I currently have in my kitchen for testing. I find that the metal is prone to holding onto marks and fingerprints, and is more difficult to match into an existing kitchen colour scheme.
Latest Videos From
I’m not just looking into a crystal ball when I predict these shades will be popular, either. One of the colours, Mocha, is already sold out. It’s a super delicate neutral shade that would look lovely in a black or white kitchen, so it’s no surprise it’s already been snapped up.
Ninja’s new coffee machine in stainless steel and green.
(Image credit: Ninja)
If I was choosing, I wouldn’t be able to resist this machine in Vista Green as I’ve always loved the idea of a coffee machine in an eye-catching colour. I have long pined after the De’Longhi Rivelia, which is one of the best coffee machines out there, in Jade Green. It’s an exclusive shade that you can buy directly from De’Longhi’s website for £699.99.
With these new shades, Ninja has really gone all out to colour drench the entire machine, with even the all-important milk jug and bean hopper covers available in the pastel shade of your choice. This is something we’ve seen with other Ninja colour releases recently too, including with David Beckham’s special Cotswolds-inspired machine.
(Image credit: Future)
In terms of performance, I’ve been nothing but impressed with the AutoBarista so far. The choice to keep the automatic milk frothing jug over a system that uses tubes and internal systems is a good one for me and means I have the chance to practice my latte art. The hands-free nature of the coffee making process for black drinks has been a huge help for me on busy mornings too.
Sign up to our newsletter for style inspiration, real homes, project and garden advice and shopping know-how
My full review of this ultra-capable machine is coming very soon but in the meantime I’d seriously recommend you check out the new range of colours available if you’ve been waiting to make a coffee investment for your kitchen!
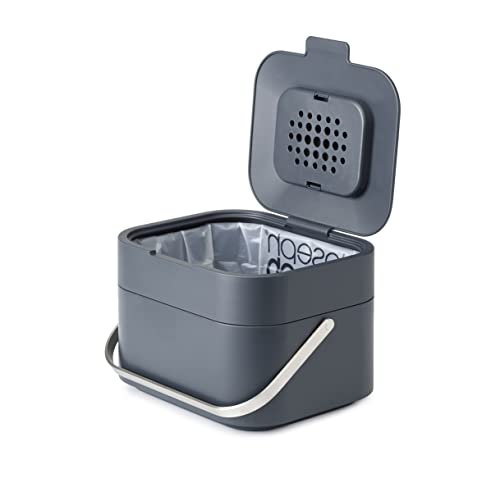
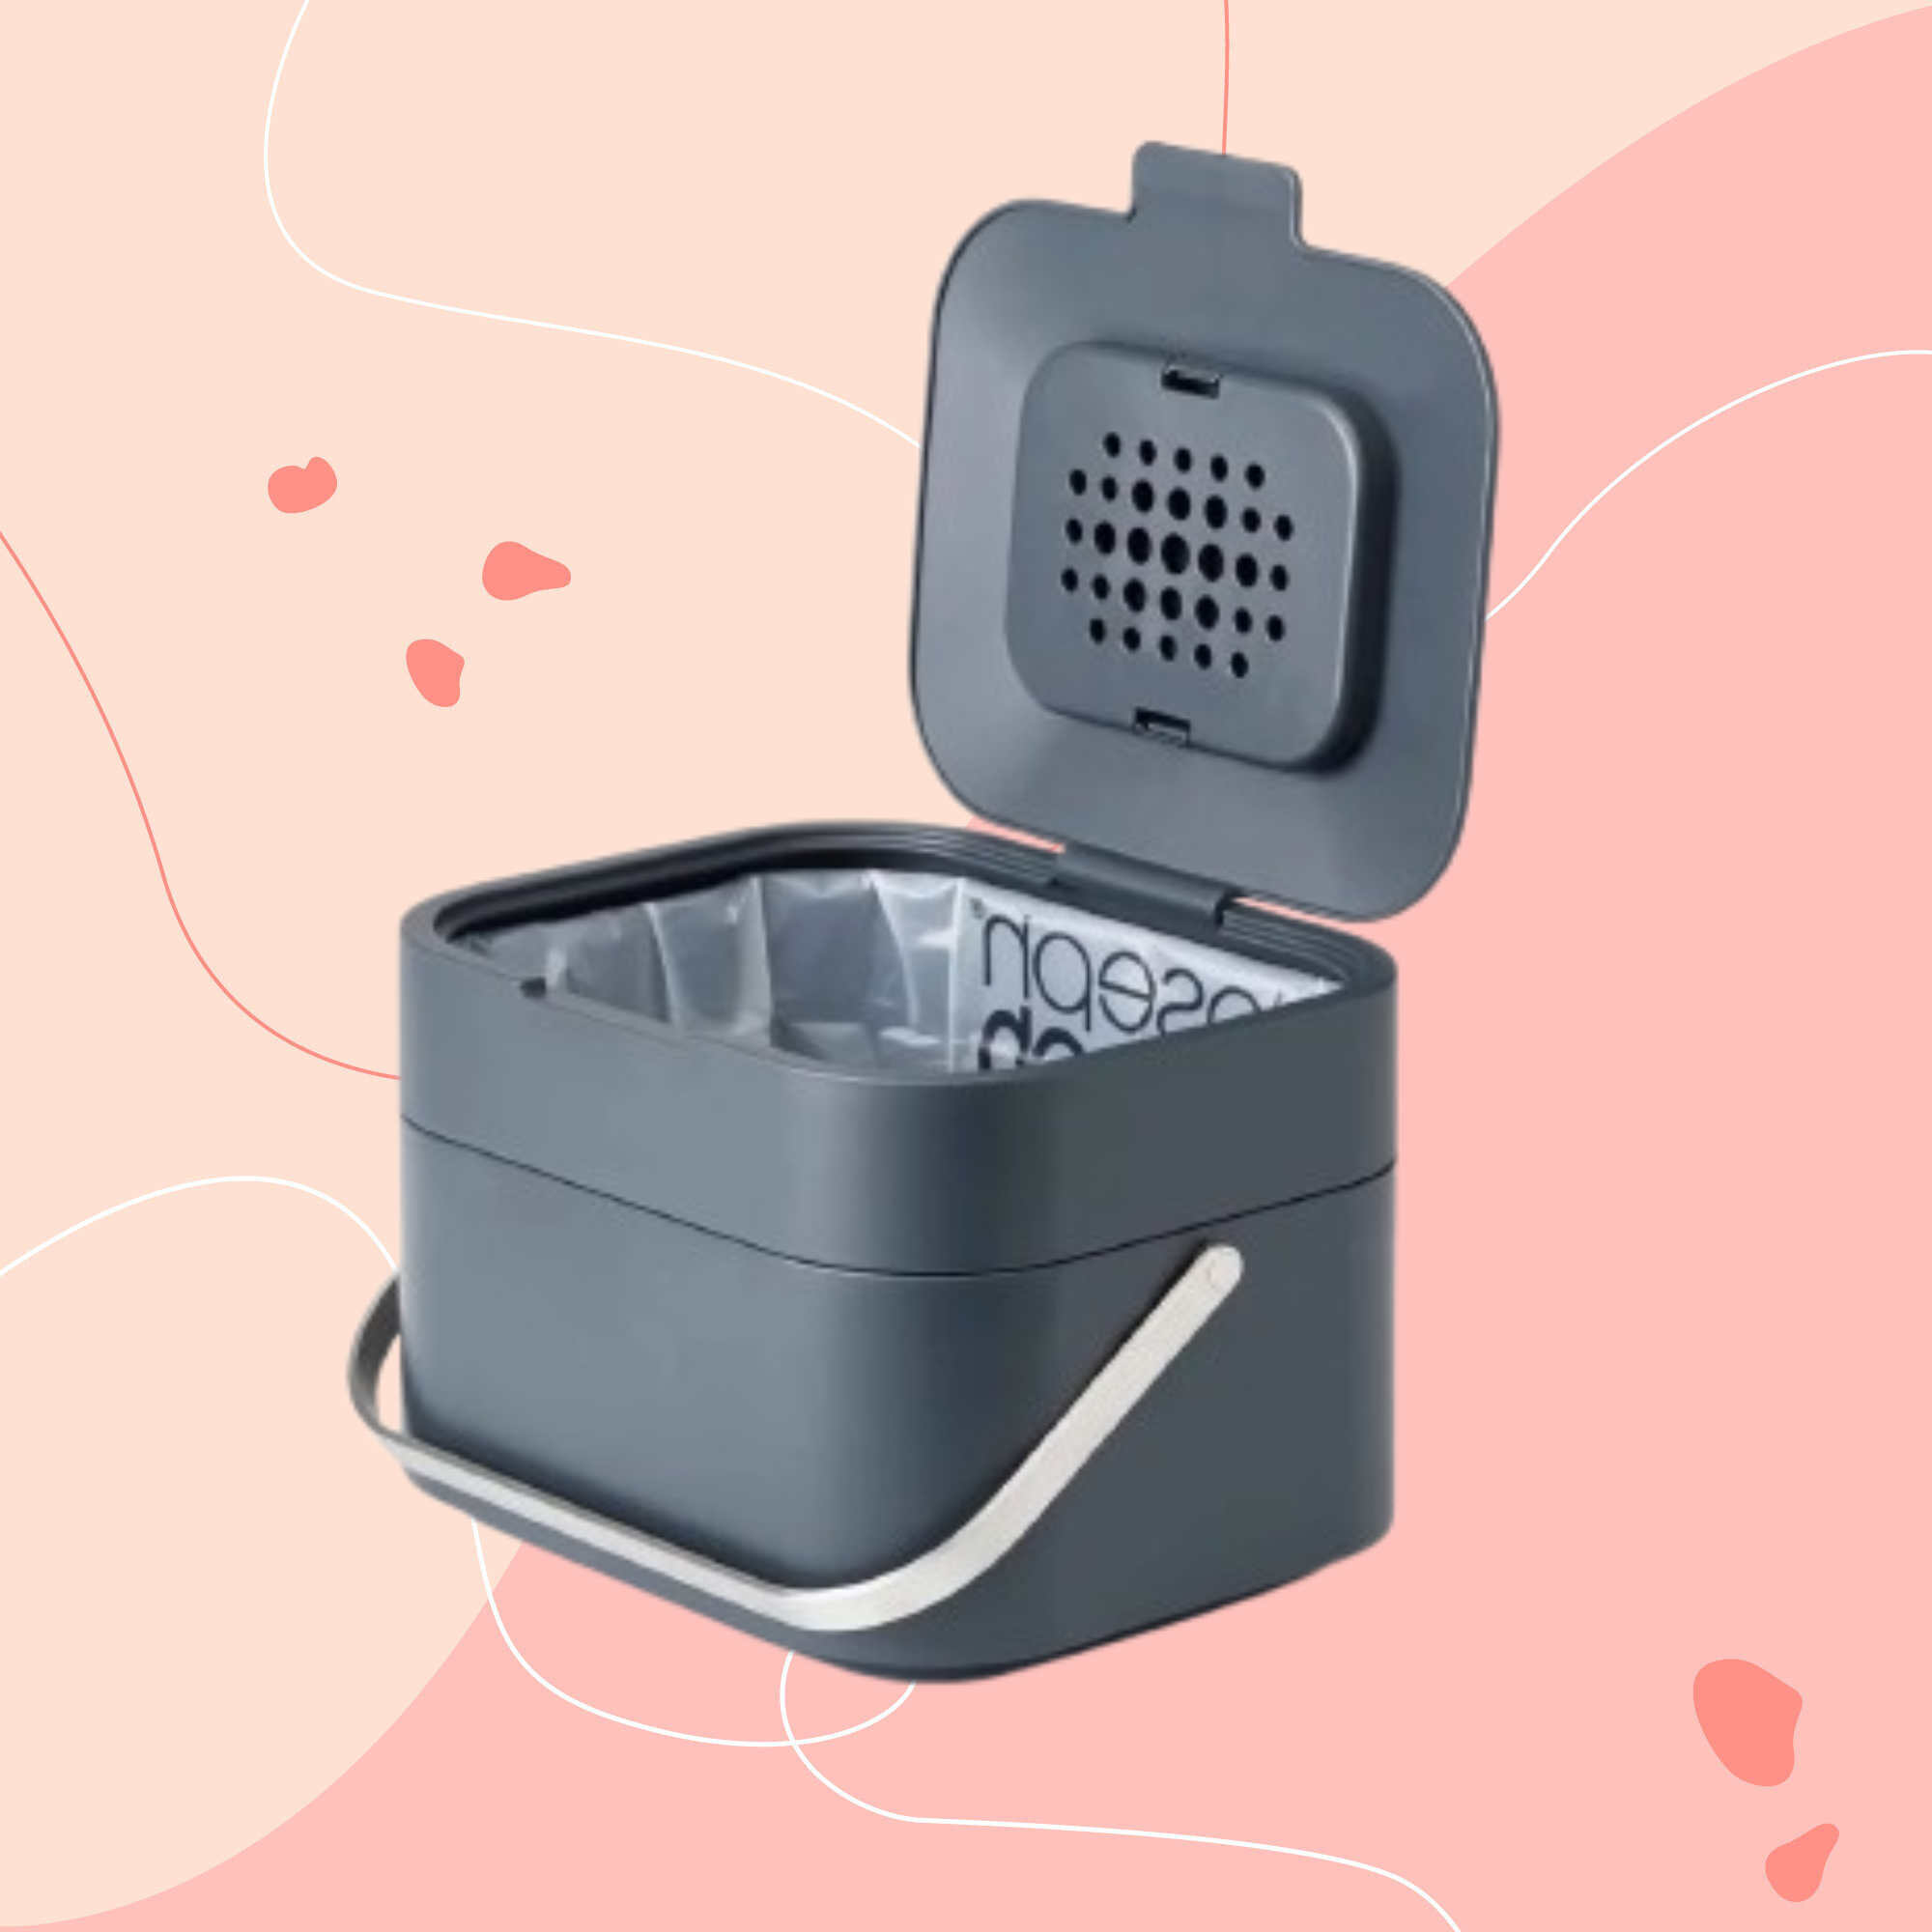
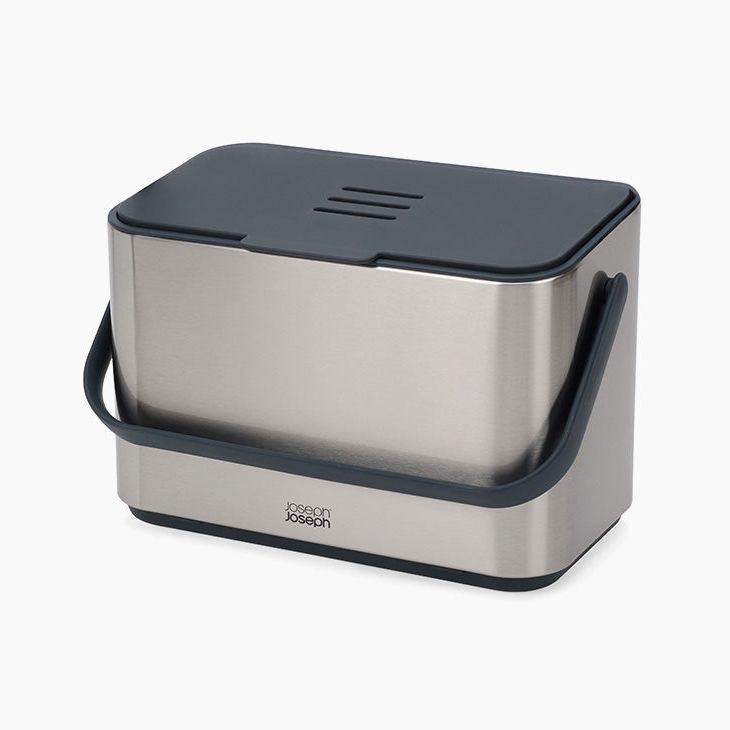
The recent heatwave has reminded me that food waste bins really can stink, and if you’re keen to reduce odour and discourage flies from your kitchen, the Joseph Joseph Intelligent Waste Caddy (£29, Amazon) does just that.
The Simpler Recycling rules that were introduced earlier this year have meant that every household in England has been (or is in the process of being) issued a food waste bin and caddy. The plastic caddy is used for transporting food waste from your kitchen to the outdoor food waste bin, and is a brown plastic tub that is small enough to sit on a countertop.
However, I’ve found that my council-issued caddy does practically nothing to mask smells – especially during hot weather. And in my effort to get rid of flies from my kitchen, I’m investing in the Joseph Joseph Intelligent Waste Caddy. Here’s why.
Latest Videos From
Joseph Joseph
Joseph Joseph Intelligent Waste Caddy
<aside data-block-layout="versus" data-block-type="featured-product" data-editorial-currency="GBP" data-editorial-price="16" data-editorial-was-price="34" data-hawk-json="{"product":{"variants":{"Default":{"image":{"copyright":"","height":478,"id":"jgn6Y4oV5k5yn9t9ZWcPxG","mimeType":"image\/jpeg","mos":"https:\/\/cdn.mos.cms.futurecdn.net\/jgn6Y4oV5k5yn9t9ZWcPxG.jpg","role":"","width":500,"credit":"Joseph Joseph","alt":"Joseph Joseph Intelligent Waste, Stack 4 Kitchen Food Waste Compost Caddy Recycling Bin With Odour Filter, 4 Litres \/ 1 Gallon- Graphite","caption":""},"strapline":"
I’ve had my eye on this bin for a while. It’s compact, much smarter looking than my current brown caddy and most importantly, has a clever built-in filter that absorbs bad smells!","brand":"Joseph Joseph","name":"Joseph Joseph Intelligent Waste Caddy","urlStyle":"","retailer":"","layout":"versus","linkText":"","noFollow":false,"noAffiliateTracking":false,"promoLabel":"","price":34,"salePrice":16,"currency":"GBP","linkLayout":"text","sponsored":false,"hawkProductNameMatchedCode":"Joseph Joseph Joseph Joseph Intelligent Waste Caddy","review":{"cons":[],"id":"","name":"","pros":[],"rating":0,"strapline":"","url":""},"hawk":{"attributes":{"data-widget-type":"merchantlink","data-model-name":"Joseph Joseph Joseph Joseph Intelligent Waste Caddy"}},"id":"","externalId":"acbda7836c606f46e1020706a783b8a9a75bc391","lastCheckedPriceDate":"","link":{"url":"https:\/\/target.georiot.com\/Proxy.ashx?tsid=107653&GR_URL=https%3A%2F%2Famazon.co.uk%2FJoseph-Intelligent-Waste-Stack-Filter%2Fdp%2FB01BPDY092%2Fref%3Dasc_df_B01BPDY092%3Ftag%3Dftr-idealhome-gb-21%26ascsubtag%3Dhawk-custom-tracking-21","merchantName":"Amazon UK","merchantId":1027,"merchantNetwork":"Amazonuk","merchantUrl":"amazon.co.uk"}}}}}” data-link=”https://target.georiot.com/Proxy.ashx?tsid=107653&GR_URL=https%3A%2F%2Famazon.co.uk%2FJoseph-Intelligent-Waste-Stack-Filter%2Fdp%2FB01BPDY092%2Fref%3Dasc_df_B01BPDY092%3Ftag%3Dftr-idealhome-gb-21%26ascsubtag%3Dhawk-custom-tracking-21″ data-link-merchant=”Amazon UK” data-merchant-id=”1027″ data-merchant-name=”Amazon UK” data-merchant-network=”Amazonuk” data-merchant-url=”amazon.co.uk” data-model-brand=”Joseph Joseph” data-model-name=”Joseph Joseph Joseph Joseph Intelligent Waste Caddy” data-name=”Product Block merchantlink widget” data-render-type=”editorial” data-show-fallback=”button” data-widget-type=”merchantlink” class=”hawk-root”>
I’ve had my eye on this bin for a while. It’s compact, much smarter looking than my current brown caddy and most importantly, has a clever built-in filter that absorbs bad smells!
Joseph Joseph
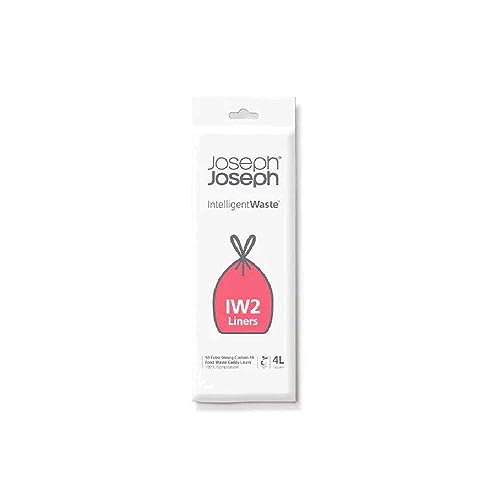
Joseph Joseph Iw2 Biodegradable, Compostable Bags, Pack of 50
<aside data-block-layout="versus" data-block-type="featured-product" data-editorial-currency="GBP" data-editorial-price="8.8" data-hawk-json="{"product":{"variants":{"Default":{"image":{"copyright":"","height":500,"id":"ocgrSKXh9vNVWYAMBwRxzE","mimeType":"image\/jpeg","mos":"https:\/\/cdn.mos.cms.futurecdn.net\/ocgrSKXh9vNVWYAMBwRxzE.jpg","role":"","width":500,"credit":"Joseph Joseph","alt":"Joseph Joseph Iw2 Biodegradable, Compostable Bags, Pack of 50 Food Waste Bin Liners, White, Small, 4 Litres","caption":""},"strapline":"
These bags fit the Joseph Joseph Intelligent Waste Caddy best, so are worth buying alongside the bin.","brand":"Joseph Joseph","name":"Joseph Joseph Iw2 Biodegradable, Compostable Bags, Pack of 50 ","urlStyle":"","retailer":"","layout":"versus","linkText":"","noFollow":false,"noAffiliateTracking":false,"promoLabel":"","price":8.8,"salePrice":null,"currency":"GBP","linkLayout":"text","sponsored":false,"hawkProductNameMatchedCode":"","review":{"cons":[],"id":"","name":"","pros":[],"rating":0,"strapline":"","url":""},"id":"","externalId":"4fac4ce6eaa4bc7aa870579de1cb7b2b59307db6","lastCheckedPriceDate":"","link":{"url":"https:\/\/target.georiot.com\/Proxy.ashx?tsid=107653&GR_URL=https%3A%2F%2Famazon.co.uk%2FJoseph-Compostable-Bags-Pack-White%2Fdp%2FB00UYAN0DA%2Fref%3Dasc_df_B00UYAN0DA%3Ftag%3Dftr-idealhome-gb-21%26ascsubtag%3Dhawk-custom-tracking-21","merchantName":"Amazon UK","merchantId":1027,"merchantNetwork":"Amazonuk","merchantUrl":"amazon.co.uk"}}}}}” data-link=”https://target.georiot.com/Proxy.ashx?tsid=107653&GR_URL=https%3A%2F%2Famazon.co.uk%2FJoseph-Compostable-Bags-Pack-White%2Fdp%2FB00UYAN0DA%2Fref%3Dasc_df_B00UYAN0DA%3Ftag%3Dftr-idealhome-gb-21%26ascsubtag%3Dhawk-custom-tracking-21″ data-link-merchant=”Amazon UK” data-merchant-id=”1027″ data-merchant-name=”Amazon UK” data-merchant-network=”Amazonuk” data-merchant-url=”amazon.co.uk” data-model-brand=”Joseph Joseph” data-model-name=”Joseph Joseph Joseph Joseph Iw2 Biodegradable, Compostable Bags, Pack of 50″ data-name=”Product Block merchantlink widget” data-render-type=”fte” data-show-fallback=”button” data-widget-type=”merchantlink” class=”hawk-root”>
These bags fit the Joseph Joseph Intelligent Waste Caddy best, so are worth buying alongside the bin.
Unfortunately for you and me, a stinky food waste bin is like ambrosia for flies. Flies – particularly vinegar flies – are attracted to the smell of decaying food, in particular fruit, which releases a particularly attractive smell when it begins to overferment.
Of course, you should regularly clean your food waste bin to deter flies. By keeping it clean, it is less smelly and therefore less attractive to flies. I find that placing bicarbonate of soda (£2, Amazon) in the base of my bin is a handy trick for absorbing and neutralising bad odours. You can also purchase charcoal bin filters (£10.20, Amazon), which work similarly to absorb odour. Plus, you can even add a few drops of your favourite essential oil to some kitchen roll and place it in the bottom of a bin. Choose a scent that flies don’t like, such as lavender or peppermint.
But considering it’s meant to be a scorching summer this year, I want a bin that works as hard as I do. This is why I’ve been considering the Joseph Joseph Intelligent Waste Caddy. Although the Joseph Joseph caddy is a little more than I’d typically spend on a food waste bin, especially as I do get one for free from my local council, its clever design features have convinced me to make the splurge.
(Image credit: Joseph Joseph)
The caddy has a four-litre capacity, easily handling the food waste of a busy household. It has a tight-lipped lid, which makes it harder for flies to access the inside because it seals shut. Plus, there is a built-in odour filter in the lid, which helps reduce odour and moisture, making it a less friendly environment for pests. It’s also easy to clean, with the manufacturers stating it’s easy to clean with hot soapy water, then wipe dry with a soft cloth.
Sign up to our newsletter for style inspiration, real homes, project and garden advice and shopping know-how
What’s more, the Joseph Joseph Intelligent Waste Caddy has over 10,000 positive reviews to back it up.
‘Solved the issues I had with throwing food waste into my normal bin. It used to really smell. This container uses a filter to aid with smell. I can tie bags of food up and throw them away separately. The build is pretty good. The lid opens easily. There is a handle to carry it with. It is small enough to barely take up space on my kitchen counter. No complaints. I would recommend it,’ said one.
‘Was more than I planned to spend, but worth it for the quality. The lid sits firmly over the base – and on hotter days, I have peace of mind that flies won’t get into it. There is no smell of food inside either when it’s closed,’ said another.
Alternatives
Kazai. Compost Bin ‘elin’
<aside data-block-layout="hero" data-block-type="featured-product" data-editorial-currency="GBP" data-editorial-price="41.95" data-hawk-json="{"product":{"variants":{"Default":{"image":{"copyright":"","height":500,"id":"o3GrgVdcWswcE2K8uaybki","mimeType":"image\/jpeg","mos":"https:\/\/cdn.mos.cms.futurecdn.net\/v2\/t:58,l:0,cw:435,ch:435,q:80\/o3GrgVdcWswcE2K8uaybki.jpg","role":"","width":435,"credit":"Kazai.","alt":"Kazai. Compost Bin 'elin' | 4.5l Small Kitchen Bin With Wooden Lid & Filter | Food Waste Container, Odour-Free, Dishwasher Safe, With Inner Caddy | Caddy for Kitchen Counter Top | Off-White\/bamboo","caption":"","crop":{"top":58,"left":0,"cropWidth":435,"cropHeight":435,"quality":80}},"strapline":"
This bin looks far too good to be handling food waste. It has an activated charcoal filter\u00a0to neutralise bad smells, and the caddy itself is safe to go in the dishwasher.","brand":"","name":"Kazai. Compost Bin ‘elin’ ","urlStyle":"","retailer":"","layout":"hero","linkText":"","noFollow":false,"noAffiliateTracking":false,"promoLabel":"","price":41.95,"salePrice":null,"currency":"GBP","linkLayout":"text","sponsored":false,"hawkProductNameMatchedCode":"","review":{"cons":[],"id":"","name":"","pros":[],"rating":0,"strapline":"","url":""},"id":"","externalId":"0951320f37d85c863e114855a1114c56da7e55ed","lastCheckedPriceDate":"","link":{"url":"https:\/\/target.georiot.com\/Proxy.ashx?tsid=107653&GR_URL=https%3A%2F%2Famazon.co.uk%2FKAZAI-%25C2%25AE-Container-Odour-Free-Dishwasher-Recycling%2Fdp%2FB0D8CMP3XR%3Ftag%3Dftr-idealhome-gb-21%26ascsubtag%3Dhawk-custom-tracking-21","merchantName":"Amazon UK","merchantId":1027,"merchantNetwork":"Amazonuk","merchantUrl":"amazon.co.uk"}}}}}” data-link=”https://target.georiot.com/Proxy.ashx?tsid=107653&GR_URL=https%3A%2F%2Famazon.co.uk%2FKAZAI-%25C2%25AE-Container-Odour-Free-Dishwasher-Recycling%2Fdp%2FB0D8CMP3XR%3Ftag%3Dftr-idealhome-gb-21%26ascsubtag%3Dhawk-custom-tracking-21″ data-link-merchant=”Amazon UK” data-merchant-id=”1027″ data-merchant-name=”Amazon UK” data-merchant-network=”Amazonuk” data-merchant-url=”amazon.co.uk” data-model-name=”Kazai. Compost Bin ‘elin'” data-name=”Product Block merchantlink widget” data-render-type=”fte” data-show-fallback=”button” data-widget-type=”merchantlink” class=”hawk-root”>
This bin looks far too good to be handling food waste. It has an activated charcoal filter to neutralise bad smells, and the caddy itself is safe to go in the dishwasher.
Another sleek, steel choice, this bin has a magnetic docking system to keep the lid firmly shut. It has been specially designed to keep odours in and flies out.","brand":"","name":"Simplehuman 4L Compost Caddy","urlStyle":"","retailer":"","layout":"hero","linkText":"","noFollow":false,"noAffiliateTracking":false,"promoLabel":"","price":49.95,"salePrice":39.99,"currency":"GBP","linkLayout":"text","sponsored":false,"hawkProductNameMatchedCode":"","review":{"cons":[],"id":"","name":"","pros":[],"rating":0,"strapline":"","url":""},"id":"","externalId":"2e656d67abb6c3794e69b8adf4ad6a5d170df6c4","lastCheckedPriceDate":"","link":{"url":"https:\/\/target.georiot.com\/Proxy.ashx?tsid=107653&GR_URL=https%3A%2F%2Famazon.co.uk%2Fsimplehuman-Compost-Fingerprint-Proof-Brushed-Stainless%2Fdp%2FB08S2P53GD%2Fref%3Dasc_df_B08S2P53GD%3Ftag%3Dftr-idealhome-gb-21%26ascsubtag%3Dhawk-custom-tracking-21","merchantName":"Amazon UK","merchantId":1027,"merchantNetwork":"Amazonuk","merchantUrl":"amazon.co.uk"}}}}}” data-link=”https://target.georiot.com/Proxy.ashx?tsid=107653&GR_URL=https%3A%2F%2Famazon.co.uk%2Fsimplehuman-Compost-Fingerprint-Proof-Brushed-Stainless%2Fdp%2FB08S2P53GD%2Fref%3Dasc_df_B08S2P53GD%3Ftag%3Dftr-idealhome-gb-21%26ascsubtag%3Dhawk-custom-tracking-21″ data-link-merchant=”Amazon UK” data-merchant-id=”1027″ data-merchant-name=”Amazon UK” data-merchant-network=”Amazonuk” data-merchant-url=”amazon.co.uk” data-model-name=”Simplehuman 4L Compost Caddy” data-name=”Product Block merchantlink widget” data-render-type=”fte” data-show-fallback=”button” data-widget-type=”merchantlink” class=”hawk-root”>
Another sleek, steel choice, this bin has a magnetic docking system to keep the lid firmly shut. It has been specially designed to keep odours in and flies out.
Bad bin smells, and fruit flies are enough to put most of us in a grump. But ensuring you have the right products and practises in place, this grievance can be a thing of the past.
There’s a new Mediterranean garden star on the horizon, and it’s a surprising one for the UK: lemon trees.
They’re far easier to grow here than you’d think – I recently talked about citrus trees as one of the best Mediterranean plants for pots, and many lemon tree varieties do unexpectedly well in containers on a patio. According to TikTok Shop gardening business YouGarden, lemon tree sales have increased by 613% this year – which means they’re definitely becoming more mainstream in UK gardens.
Here’s why you should consider growing a lemon tree in your garden, no matter its size.
<aside data-block-layout="hero" data-block-type="featured-product" data-editorial-currency="GBP" data-editorial-price="32.99" data-hawk-json="{"product":{"variants":{"Default":{"image":{"copyright":"","height":1000,"id":"6tnbvmwzdYEMvJVaD3uuMS","mimeType":"image\/jpeg","mos":"https:\/\/cdn.mos.cms.futurecdn.net\/6tnbvmwzdYEMvJVaD3uuMS.jpg","role":"","width":1000,"credit":"Crocus","alt":"Siena Ribbed Italian Terracotta Pot","caption":""},"strapline":"
A lemon tree would look beautiful in one of these ribbed terracotta pots. They’re ideal for a Mediterranean-style garden.","brand":"Crocus","name":"Siena Ribbed Italian Terracotta Pot","urlStyle":"","retailer":"","layout":"hero","noFollow":true,"noAffiliateTracking":false,"promoLabel":"","price":32.99,"salePrice":null,"currency":"GBP","linkLayout":"text","sponsored":false,"hawkProductNameMatchedCode":"","review":{"cons":[],"id":"","name":"","pros":[],"rating":0,"strapline":"","url":""},"id":"","externalId":"5c4b293ca31532b4eafaf66921a9e11f32b7e236","lastCheckedPriceDate":"","link":{"url":"https:\/\/www.awin1.com\/awclick.php?awinmid=7833&awinaffid=103504&clickref=hawk-custom-tracking&p=https%3A%2F%2Fwww.crocus.co.uk%2Fproduct%2F_%2Fsiena-ribbed-italian-terracotta-pot%2Fclassid.2000031985%2F","linkText":"\u00a332.99 at Crocus","merchantName":"Crocus","merchantId":24321,"merchantNetwork":"AW","merchantUrl":"crocus.co.uk"}}}}}” data-link=”https://www.awin1.com/awclick.php?awinmid=7833&awinaffid=103504&clickref=hawk-custom-tracking&p=https%3A%2F%2Fwww.crocus.co.uk%2Fproduct%2F_%2Fsiena-ribbed-italian-terracotta-pot%2Fclassid.2000031985%2F” data-link-merchant=”Crocus” data-link-text=”£32.99 at Crocus” data-merchant-id=”24321″ data-merchant-name=”Crocus” data-merchant-network=”AW” data-merchant-url=”crocus.co.uk” data-model-brand=”Crocus” data-model-name=”Crocus Siena Ribbed Italian Terracotta Pot” data-name=”Product Block merchantlink widget” data-render-type=”fte” data-show-fallback=”button” data-widget-type=”merchantlink” class=”hawk-root”>
A lemon tree would look beautiful in one of these ribbed terracotta pots. They’re ideal for a Mediterranean-style garden.
For TikTok Shop gardening business YouGarden, lemon trees have been a standout garden trend for 2026. The business has noticed a pattern of more and more gardeners embracing Mediterranean-inspired planting, and lemons are among the most popular choices.
‘We’re seeing customers inspired by holidays abroad, Mediterranean planting and alfresco living, while warmer summers are giving people more confidence to try varieties that might once have felt a little ambitious for UK gardens,’ says Peter McDermott, founder of YouGarden.
‘In fact, this has been our strongest-ever year for citrus tree sales since launching in 2011, with lemon trees proving the standout favourite. We’ve seen lemon tree sales increase by 613% year-on-year on TikTok Shop, which suggests more people are looking to recreate that Mediterranean feel at home.’
Sign up to our newsletter for style inspiration, real homes, project and garden advice and shopping know-how
(Image credit: Getty Images / Westend61)
Plus, lemon trees are much lower maintenance than I ever thought they were. You’ll just need to find the right spot for them.
‘A sunny, sheltered spot and regular water through summer are all a lemon tree asks for,’ Says Jo Lambell, founder of Beards & Daisies. ‘Bring it inside over winter, and it’ll keep going year after year. The fruit is genuinely excellent in a gin and tonic, by the way.’
So, if you’re looking for fruits to grow in pots and want to nail the Mediterranean garden look, lemon trees are the ideal candidates.
Better yet? Plant one up in a terracotta pot, like these whitewashed classic Italian terracotta pots from Crocus. They come in a range of sizes, so make sure you check the measurements of your lemon tree before you buy one.
‘Container-grown citrus trees, figs and bay trees are brilliant for adding fragrance, texture and a real Mediterranean atmosphere,’ adds Peter from YouGarden. ‘They work particularly well on terraces and patios where people can enjoy them up close.’
Lemon trees are a staple Mediterranean garden idea now, so they’re definitely worth adding to your list if you want to feel like you’re on holiday at home.