.tasty-pins-banner-container{display:block;margin-bottom:20px;position:relative;width:-moz-fit-content;width:fit-content}.tasty-pins-banner-container a{cursor:pointer;display:flex;font-size:14px;font-weight:700;letter-spacing:1px;line-height:1.8em;text-transform:uppercase}.tasty-pins-banner-container a:hover{opacity:1}.tasty-pins-banner-container .tasty-pins-banner{align-items:center;bottom:0;cursor:pointer;display:flex;justify-content:center;left:0;padding-bottom:1em;padding-top:1em;position:absolute;right:0}.tasty-pins-banner-container .tasty-pins-banner svg{margin-right:4px;width:32px}.tasty-pins-banner-container .tasty-pins-banner span{margin-top:4px}.tasty-pins-banner-container a.tasty-pins-banner{text-decoration:none}.tasty-pins-banner-container a.tasty-pins-banner:hover{opacity:.8}.tasty-pins-banner-container a.tasty-pins-banner-image-link{flex-direction:column}.tasty-pins-banner-container a img{margin-bottom:0}.entry-content .wp-block-image .tasty-pins-banner-container img{margin-bottom:0;padding-bottom:0}#et-boc .et-l div .et_pb_image_wrap .tasty-pins-banner-container .tasty-pins-banner{padding-bottom:1em!important;padding-top:1em;text-decoration:none}#et-boc .et-l div .et_pb_image_wrap .tasty-pins-banner-container a.tasty-pins-banner{cursor:pointer;display:flex;font-size:14px;font-weight:700;line-height:1.8em;text-transform:uppercase}#et-boc .et-l div .et_pb_image_wrap .tasty-pins-banner-container a.tasty-pins-banner span{letter-spacing:2px;margin-top:4px}.et-db #et-boc .et-l .et_pb_module .tasty-pins-banner-container a:not(.wc-forward){padding-bottom:0}
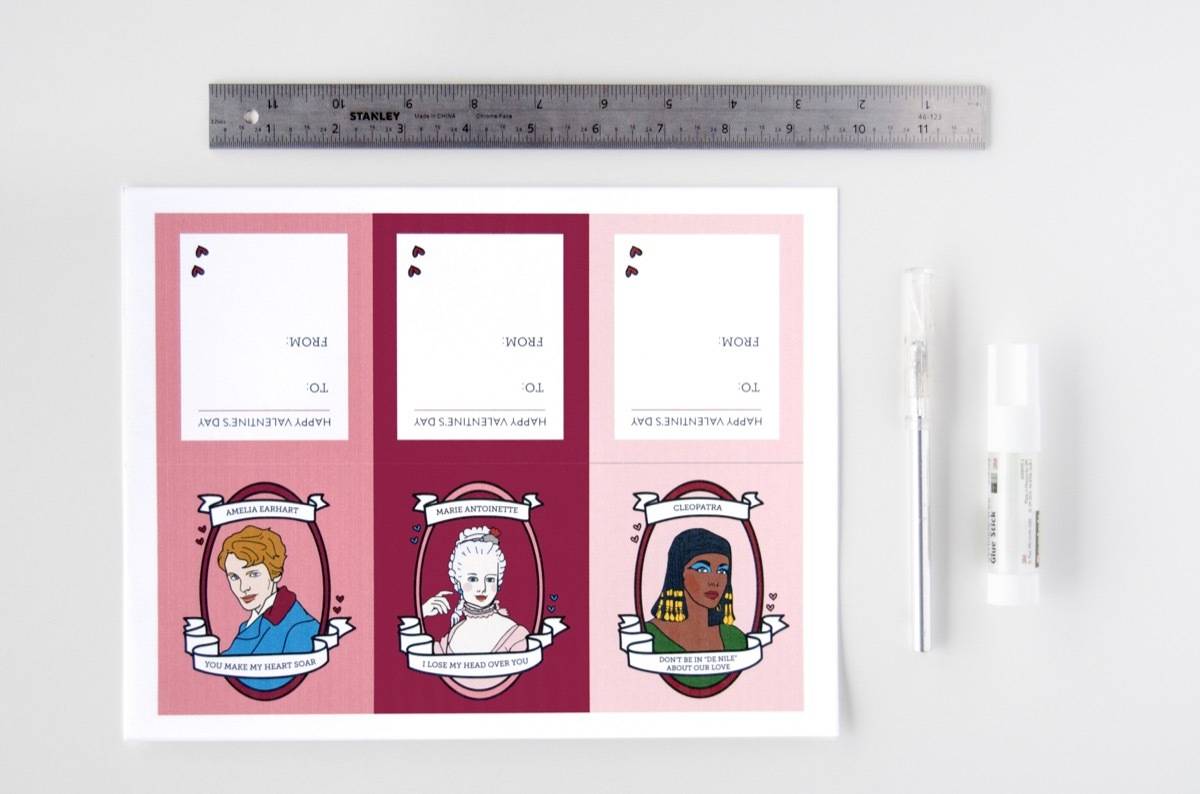
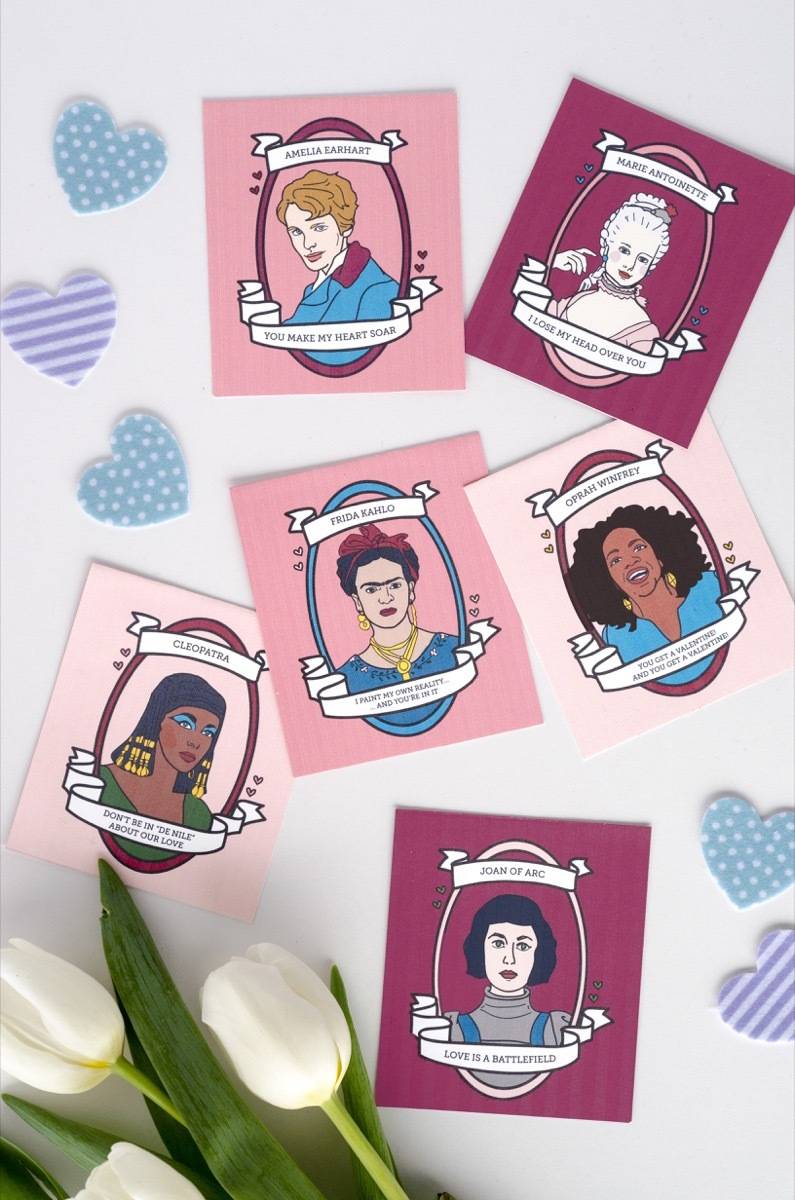
Hello, and happy Valentine’s Day! Okay, it’s not quite the big day yet, but February 14th is just weeks away, and I’m totally ready to celebrate. Ever since the Christmas holiday ended, I’ve been itching for an excuse to decorate, party, craft – whatever! I wanted to make some cards featuring some of my favorite gals throughout history (some are good, some are bad!), and the captions kind of wrote themselves after that. Click through for these printable valentines!
Materials
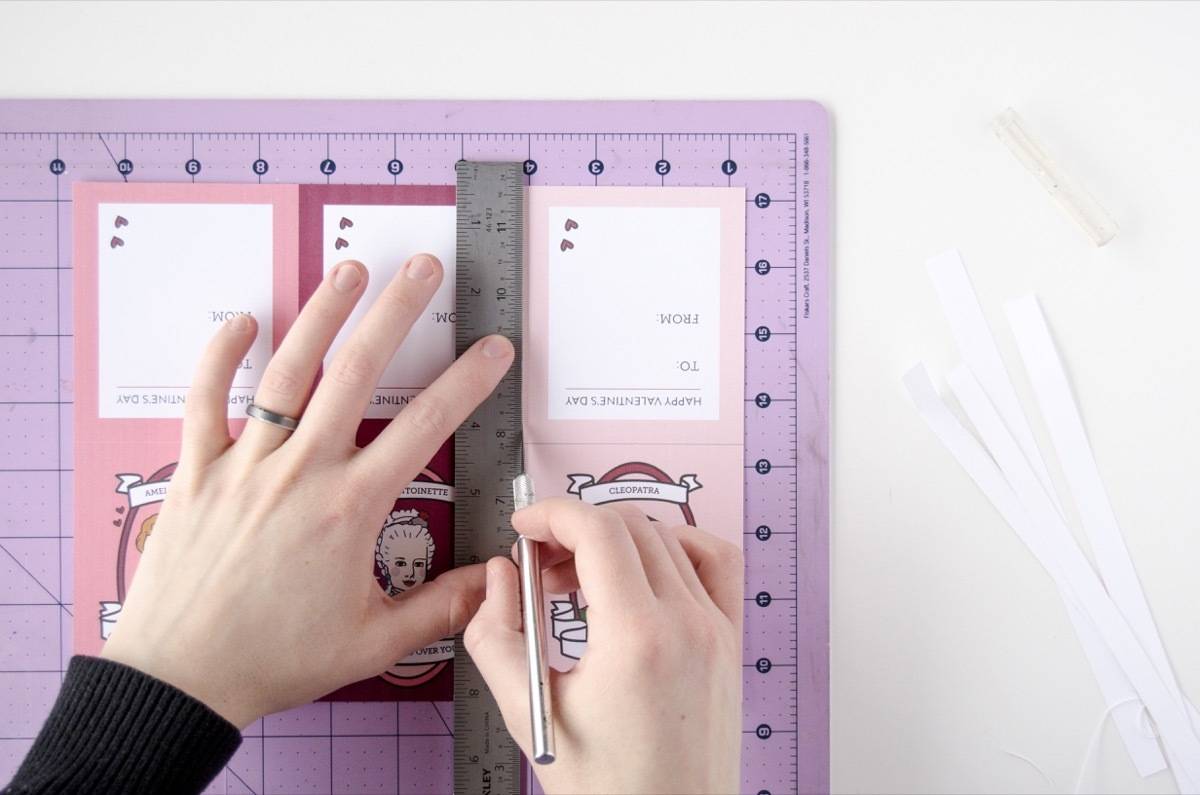
Step 1
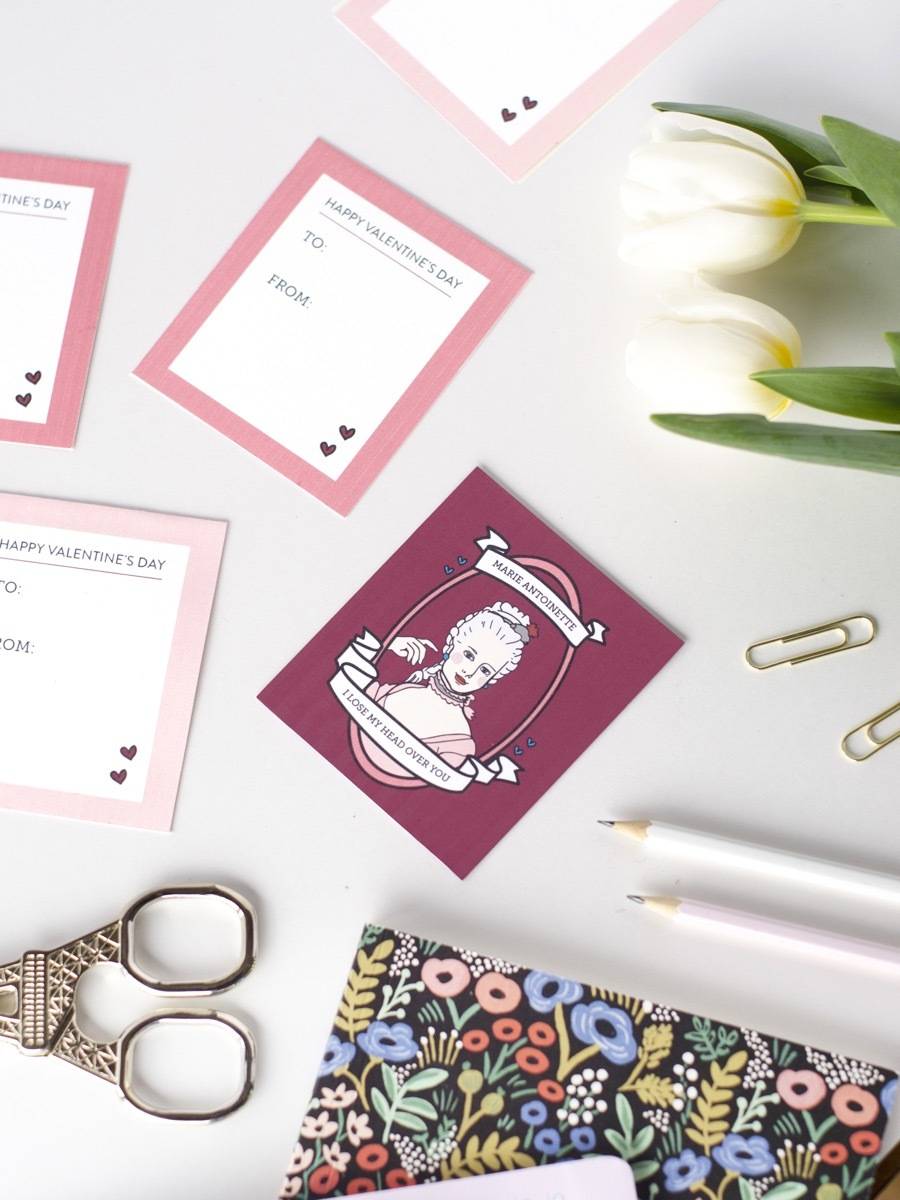
Print both pages of the printable valentines in full color. Cut each of the printable valentines apart using a craft knife and a ruler (a metal ruler works best) on a surface you can cut into (like a cutting board or a piece of cardboard). Line the ruler up with the edge of the valentine, and press down firmly on the ruler so it doesn’t move. Use the ruler as a guide for the blade, and cut along the ruler.
If you have a paper cutter, you can cut apart your printable valentines using that tool instead!
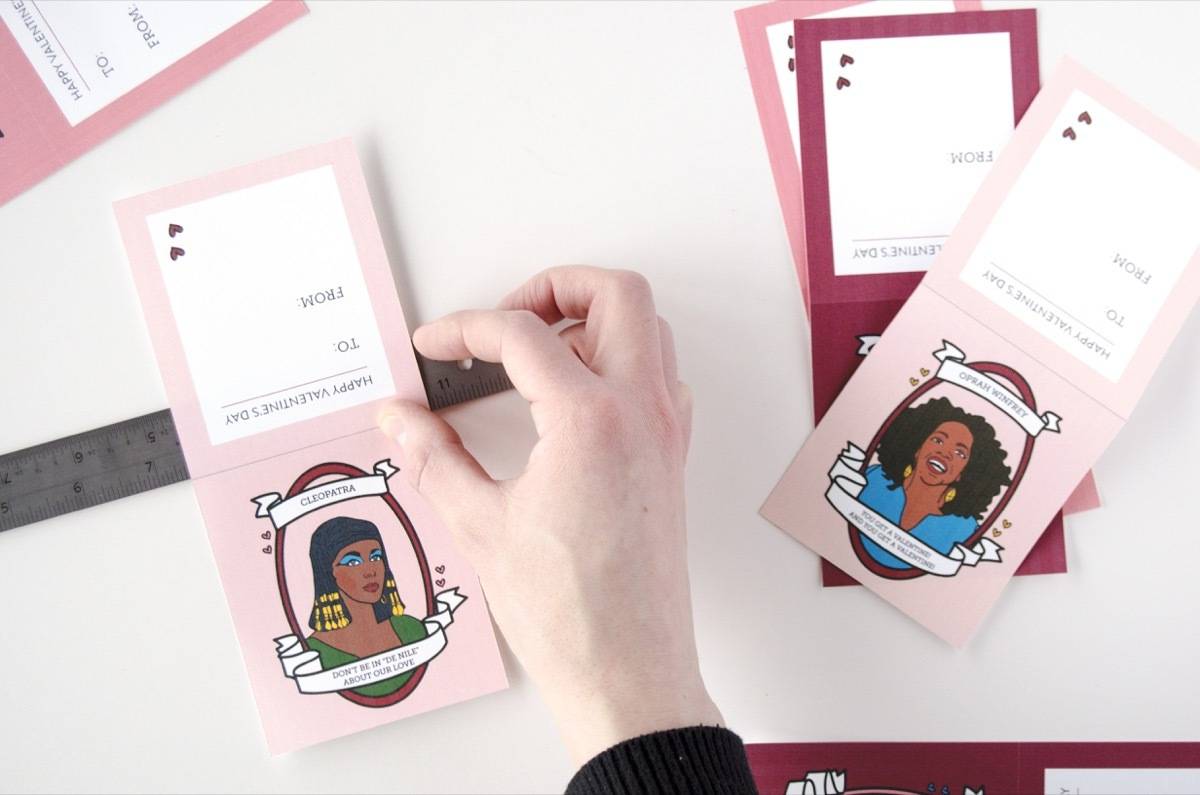
Step 2
Fold each card in half. To insure you get a nice, crisp fold, lay the halfway point of each card along the hard edge of your ruler. Fold the card over the edge of the ruler, creasing it from the back.
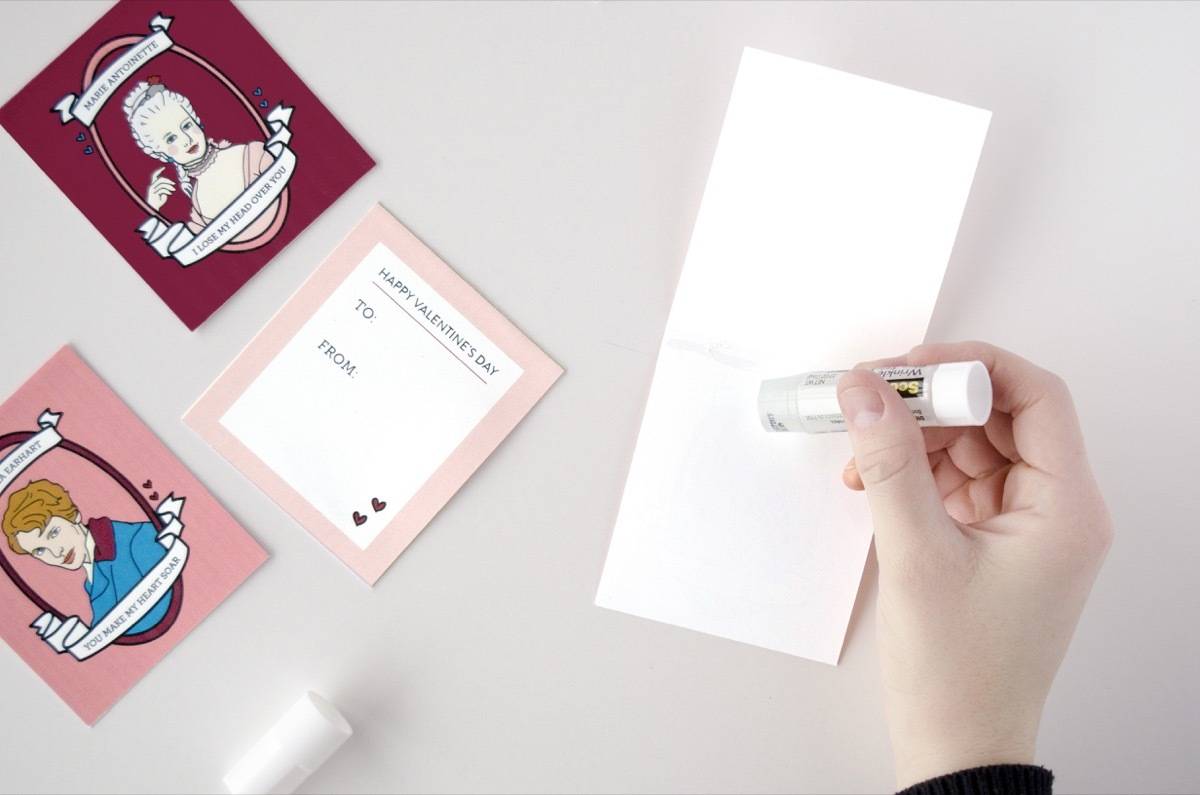
Step 3
Add a bit of glue along the back of each printable valentine, and fold the card shut. Done!
Share this project on Pinterest!
I think my favorite gal in this bunch is Amelia Earhart. I was torn between having her caption read, “You make my heart soar,” and the much, much darker, “I want to get lost with you.” Oh, Amelia. You were a legend.
.tasty-pins-banner-container{display:block;margin-bottom:20px;position:relative;width:-moz-fit-content;width:fit-content}.tasty-pins-banner-container a{cursor:pointer;display:flex;font-size:14px;font-weight:700;letter-spacing:1px;line-height:1.8em;text-transform:uppercase}.tasty-pins-banner-container a:hover{opacity:1}.tasty-pins-banner-container .tasty-pins-banner{align-items:center;bottom:0;cursor:pointer;display:flex;justify-content:center;left:0;padding-bottom:1em;padding-top:1em;position:absolute;right:0}.tasty-pins-banner-container .tasty-pins-banner svg{margin-right:4px;width:32px}.tasty-pins-banner-container .tasty-pins-banner span{margin-top:4px}.tasty-pins-banner-container a.tasty-pins-banner{text-decoration:none}.tasty-pins-banner-container a.tasty-pins-banner:hover{opacity:.8}.tasty-pins-banner-container a.tasty-pins-banner-image-link{flex-direction:column}.tasty-pins-banner-container a img{margin-bottom:0}.entry-content .wp-block-image .tasty-pins-banner-container img{margin-bottom:0;padding-bottom:0}#et-boc .et-l div .et_pb_image_wrap .tasty-pins-banner-container .tasty-pins-banner{padding-bottom:1em!important;padding-top:1em;text-decoration:none}#et-boc .et-l div .et_pb_image_wrap .tasty-pins-banner-container a.tasty-pins-banner{cursor:pointer;display:flex;font-size:14px;font-weight:700;line-height:1.8em;text-transform:uppercase}#et-boc .et-l div .et_pb_image_wrap .tasty-pins-banner-container a.tasty-pins-banner span{letter-spacing:2px;margin-top:4px}.et-db #et-boc .et-l .et_pb_module .tasty-pins-banner-container a:not(.wc-forward){padding-bottom:0}
It’s almost Valentine’s Day! I love this holiday because: A. love is a lovely thing, B. exchanging cards or little gifts is always fun, and C. chocolate! What’s not to enjoy? You know what else I’m totally loving right now? Enamel pins (hello 90s fashion – it’s nice to see you again!). If you’re looking for a cute gift to give to your friends, coworkers, or gal-pals, these faux enamel pins are quick and easy to make.
Watch our video tutorial for the walkthrough, or follow the steps below. The fun part about this DIY project is that there is lots of room for creativity. You can personalize these Valentine’s pins any way you want, or you can use the printable template available below!
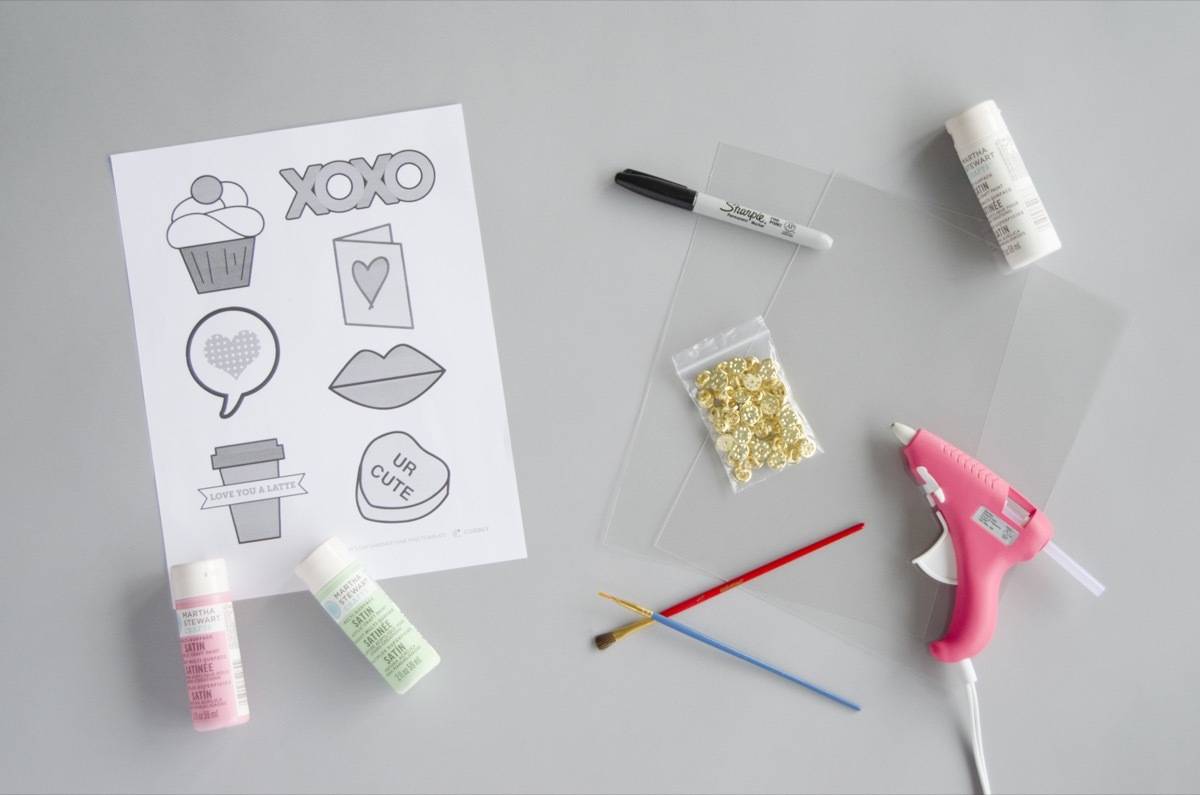
Materials
If you want to make these faux enamel pins in even less time, you can purchase printable shrink filmand print these designs directly onto the shrink paper!
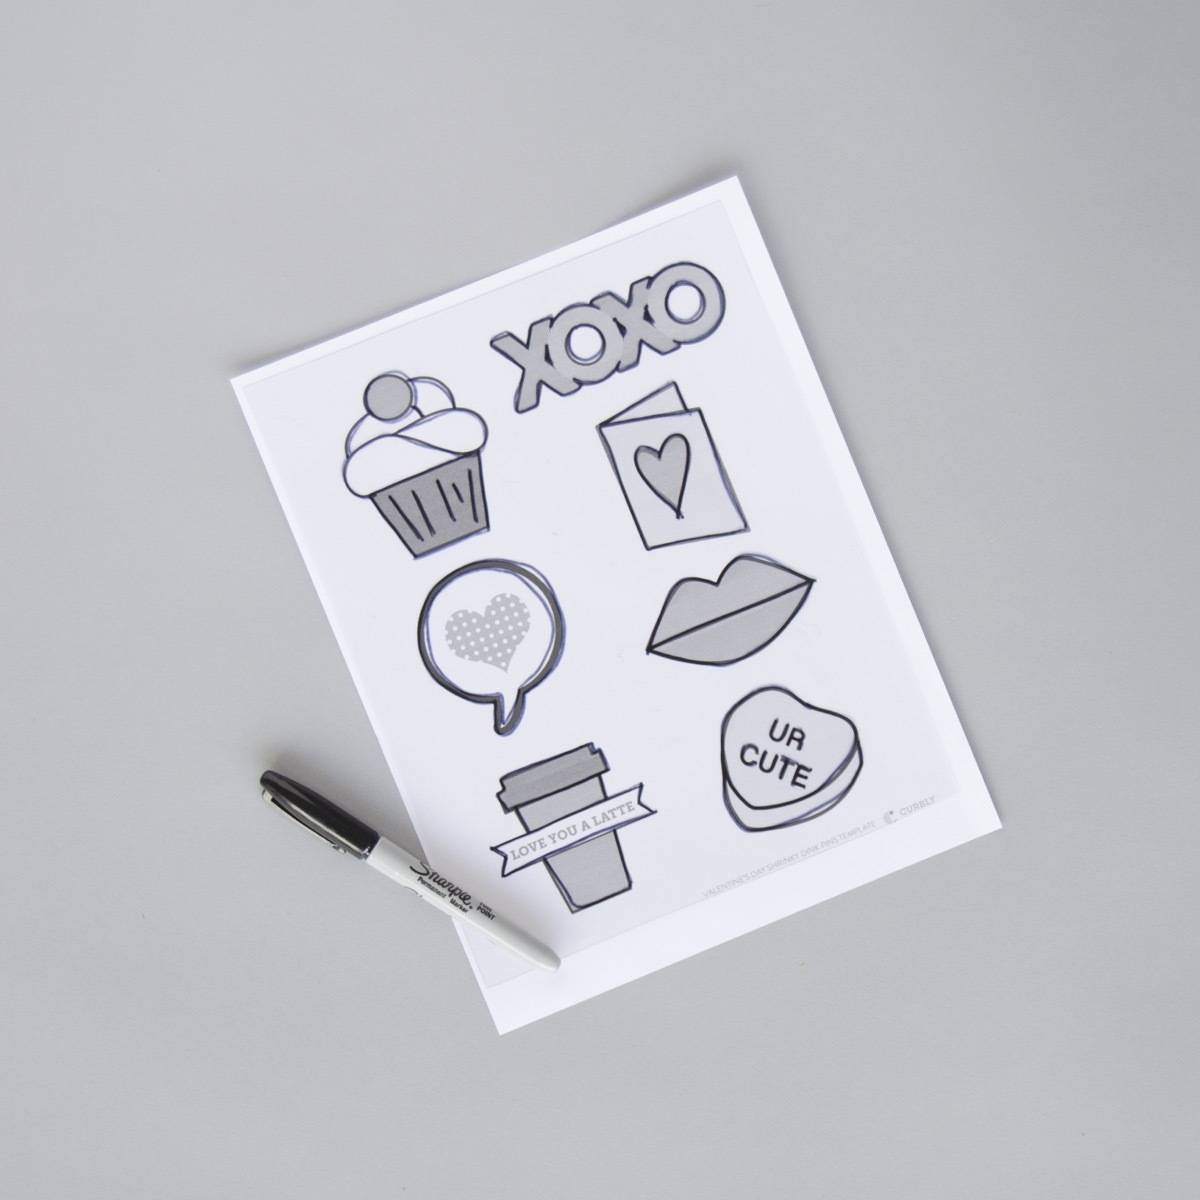
Step 1
Print out the Valentine’s Day pins template. Lay a piece of shrink paper over the template, and with a marker, trace each shape onto the shrink paper.
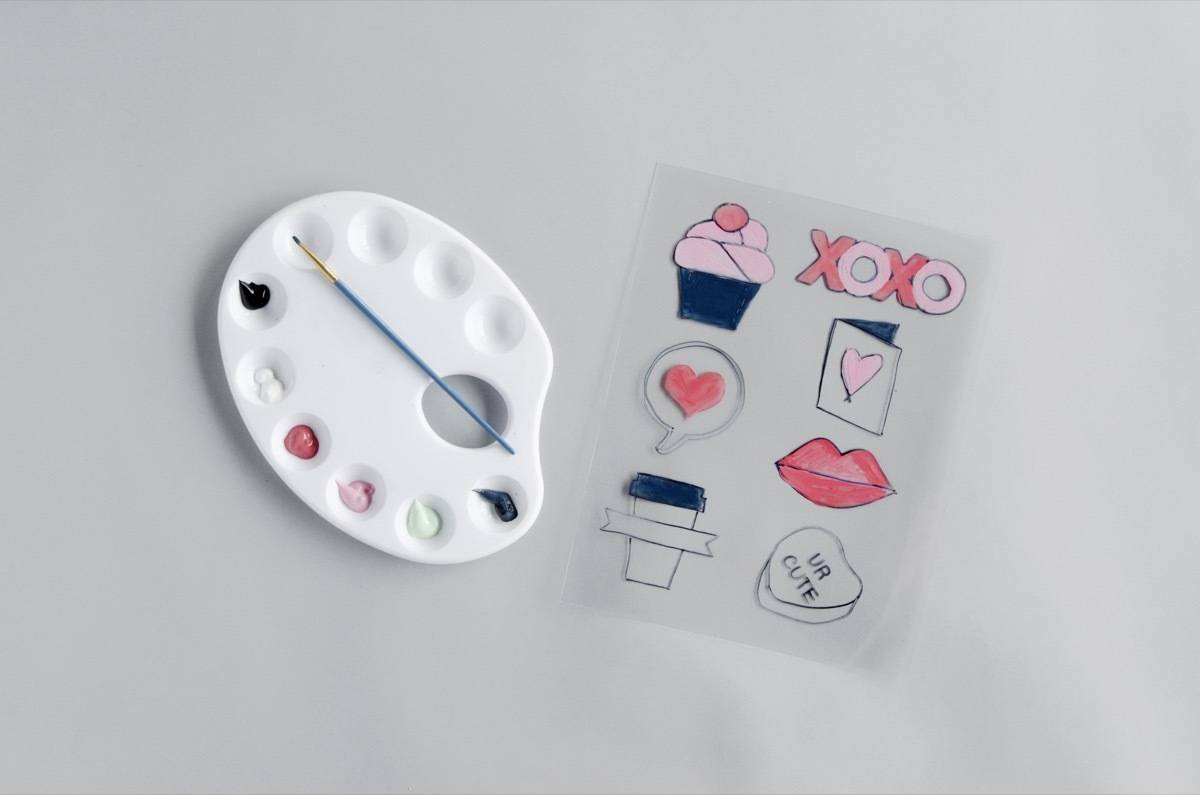
Step 2
Fill in the designs with a thin layer of acrylic paint. The more paint you apply, the “rougher” the pins will look once they shrink, so keep it light. I recommend using high-quality paints, as cheaper paints require multiple layers to get richer color.
Step 3
Once the paint has dried, go over the lines of the designs again to redefine any hard edges. Add any lettering over the paint.
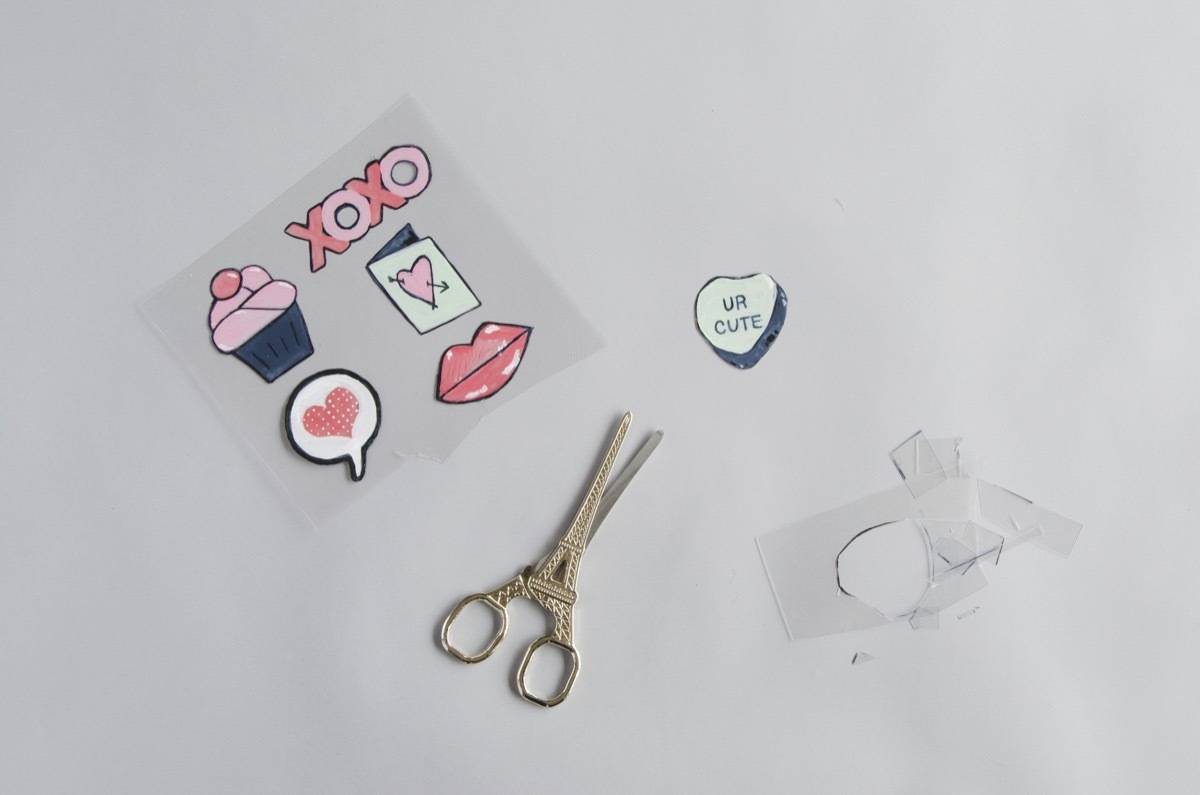
Step 4
Cut out each design. Take your time with this step, as the shrink paper can rip easily.
Step 5
Preheat the oven to 325º F. Line a cookie sheet with aluminum foil. Lay the designs on the pan so they are not overlapping. Bake for 1-3 minutes. The shrink paper will initially curl while baking – once the paper has curled it will shrink to 1/3 its original size, and become remarkably thicker.
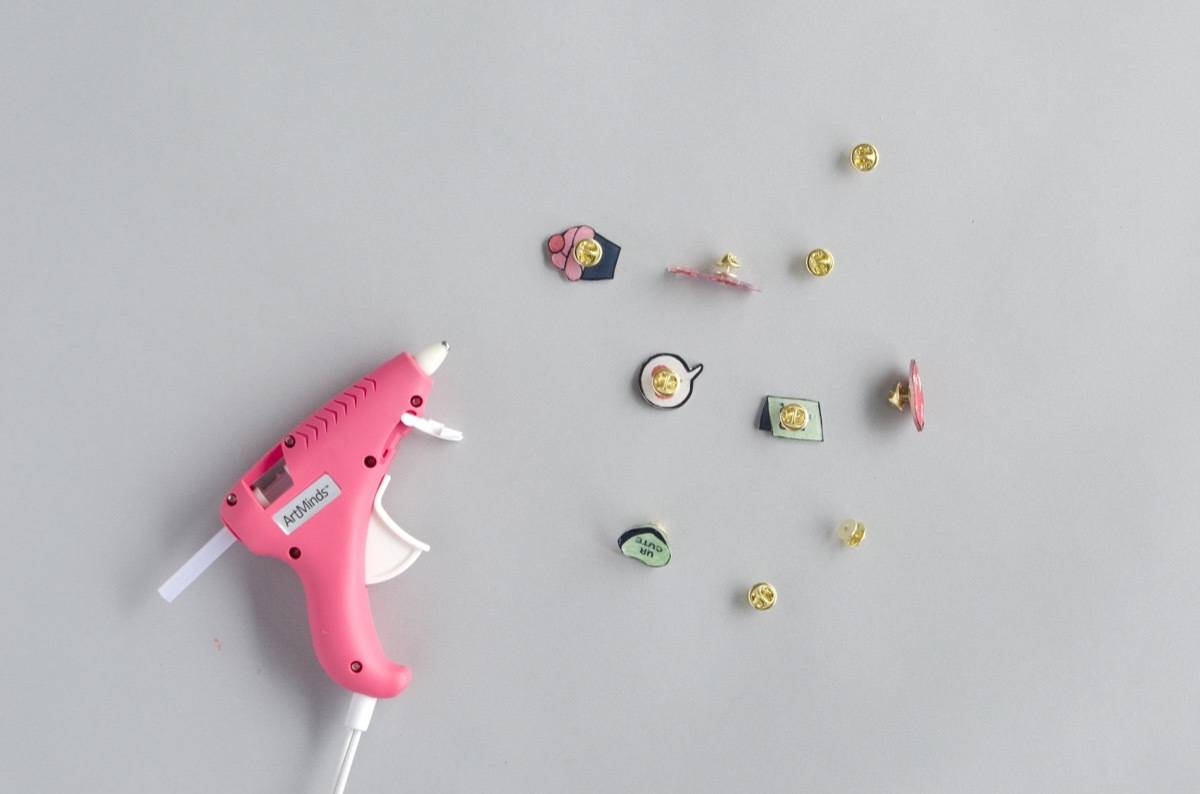
Step 6
After the designs have cooled, use hot glue to apply the pin backs. If you want to give your pin designs some added protection, you can seal them with a finisher spray. Done!
Share this project on Pinterest!
Side note: Like I said earlier, I love enamel pins. That being said, watching fashion come full circle and recognizing the decade this fad came from because I lived through it has me feeling super old! I’ll let it slide though, because 90s fashion really was the best (#DENIM4LIFE).
.tasty-pins-banner-container{display:block;margin-bottom:20px;position:relative;width:-moz-fit-content;width:fit-content}.tasty-pins-banner-container a{cursor:pointer;display:flex;font-size:14px;font-weight:700;letter-spacing:1px;line-height:1.8em;text-transform:uppercase}.tasty-pins-banner-container a:hover{opacity:1}.tasty-pins-banner-container .tasty-pins-banner{align-items:center;bottom:0;cursor:pointer;display:flex;justify-content:center;left:0;padding-bottom:1em;padding-top:1em;position:absolute;right:0}.tasty-pins-banner-container .tasty-pins-banner svg{margin-right:4px;width:32px}.tasty-pins-banner-container .tasty-pins-banner span{margin-top:4px}.tasty-pins-banner-container a.tasty-pins-banner{text-decoration:none}.tasty-pins-banner-container a.tasty-pins-banner:hover{opacity:.8}.tasty-pins-banner-container a.tasty-pins-banner-image-link{flex-direction:column}.tasty-pins-banner-container a img{margin-bottom:0}.entry-content .wp-block-image .tasty-pins-banner-container img{margin-bottom:0;padding-bottom:0}#et-boc .et-l div .et_pb_image_wrap .tasty-pins-banner-container .tasty-pins-banner{padding-bottom:1em!important;padding-top:1em;text-decoration:none}#et-boc .et-l div .et_pb_image_wrap .tasty-pins-banner-container a.tasty-pins-banner{cursor:pointer;display:flex;font-size:14px;font-weight:700;line-height:1.8em;text-transform:uppercase}#et-boc .et-l div .et_pb_image_wrap .tasty-pins-banner-container a.tasty-pins-banner span{letter-spacing:2px;margin-top:4px}.et-db #et-boc .et-l .et_pb_module .tasty-pins-banner-container a:not(.wc-forward){padding-bottom:0}
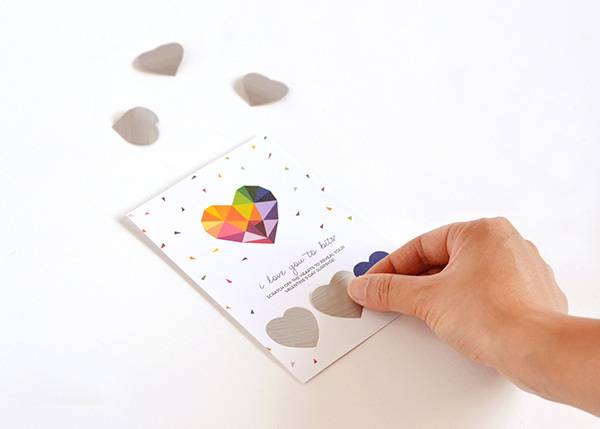
I love a good interactive greeting card and scratch-off cards are amongst my favourites. It’s so much fun watching the suspense and surprise on your loved one’s face when they get a card that asks them to scratch off key parts to reveal a gift; I think it speaks to the little kid in all of us don’t you? 🙂
And best of all, this kind of card comes in super handy if you’re giving your Valentine an experience (like breakfast in bed) rather than a physical present; you can still make the gift exciting and keep them guessing up until the very last minute!
Materials
Step 1
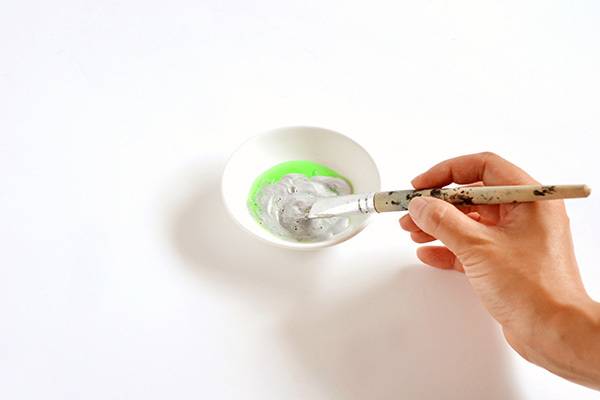
In a small container, combine two parts acrylic paint with one part dishwashing liquid. This mixture will become the ‘scratch-off’ paint for your Valentine’s card.
Step 2
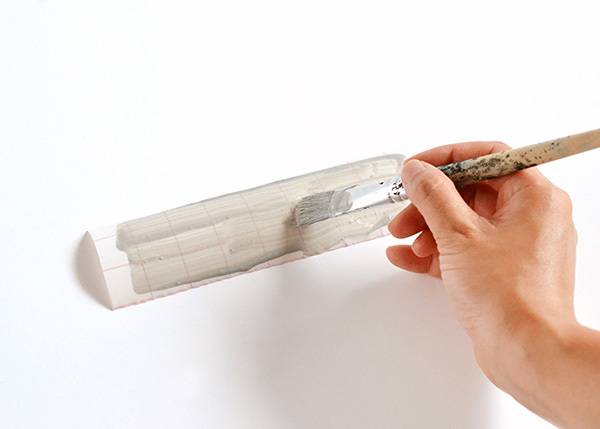
Cut a strip of clear contact paper and, using a paintbrush, cover the contact with your metallic paint and dishwashing liquid mixture.
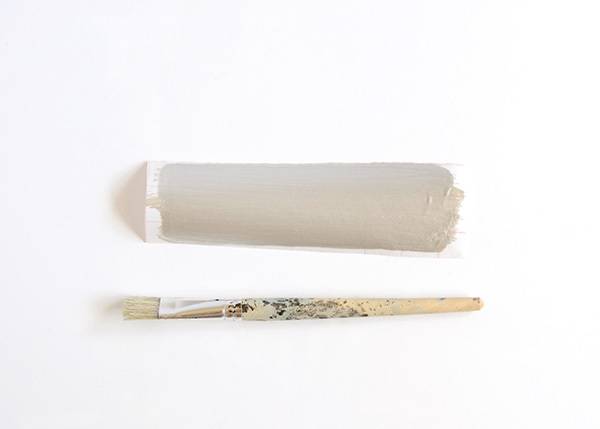
Leave the contact paper to dry, then repeat this process with more coats until the area you’ve painted is completely opaque. Wait for the paint to dry completely before moving onto Step 3.
Step 3
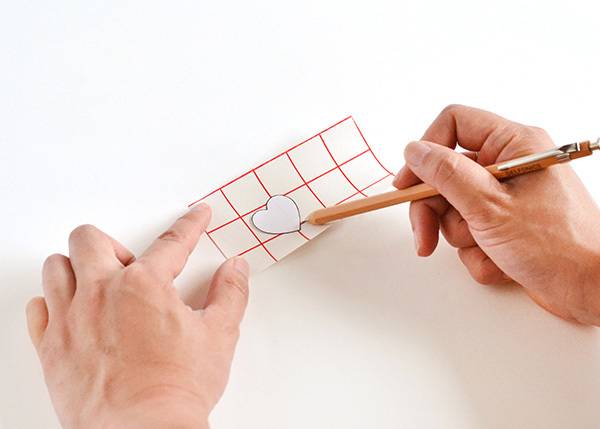
Download the heart template, print it out onto a sheet of cardboard and cut out one of the hearts with a pair of scissors.
Turn your contact paper strip over so that the painted side is face-down. Using your cardboard heart as a guide, trace heart shapes onto the backing of the contact paper strip.
Cut each of the hearts out with a pair of scissors. When you flip them over again, you’ll see you have silver scratch off heart stickers!
Step 4
Download the printable Valentine’s Day card file. This file has sections where you can enter in the gifts you’ll be giving to your loved one this Valentine’s Day – simply open the file in Adobe Acrobat Reader or a similar program and type in the highlighted sections.
Once you’ve finished filling in your gifts, print the card onto a sheet of white letter-sized cardboard and cut it out with a pair of scissors.
Step 5
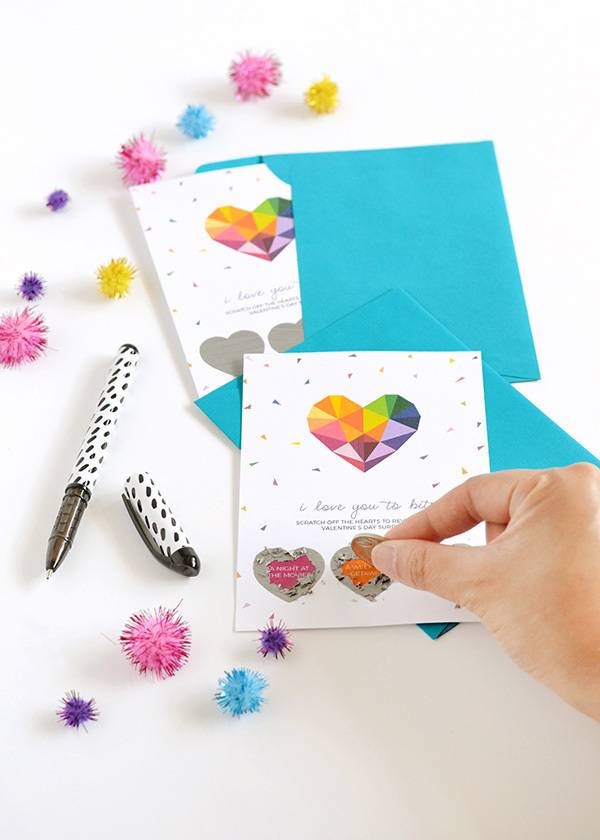
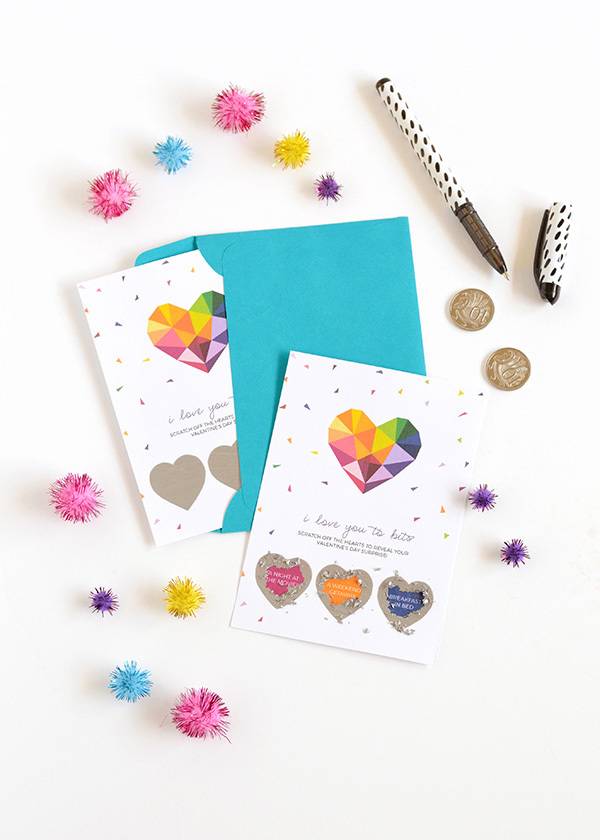
Remove the backing paper from the silver hearts you cut out in Step 3 and stick them on top of the three hearts at the bottom of the printed card (this will hide your gifts and make them a surprise for your Valentine to scratch off!).
Then all that’s left to do is package your card in a nice envelope! Don’t forget to include a couple of coins so your loved one can scratch off the hearts to reveal their surprise gifts. 🙂
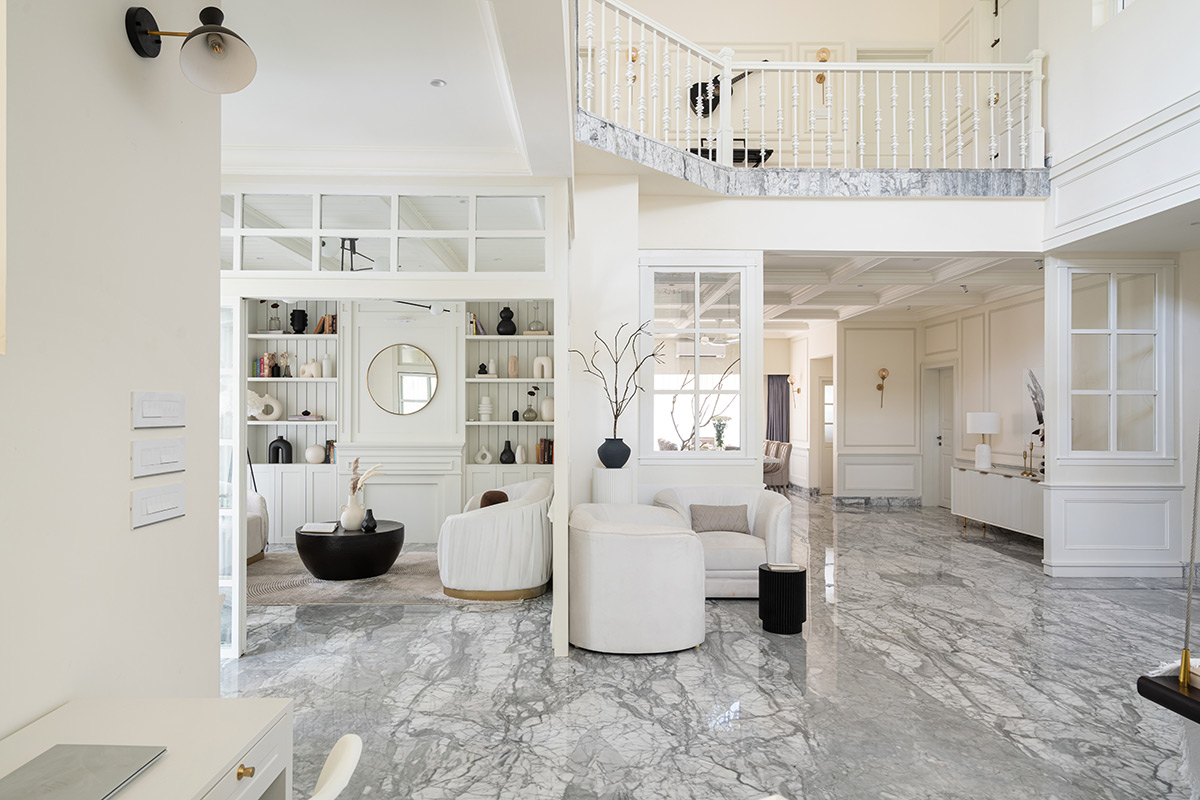
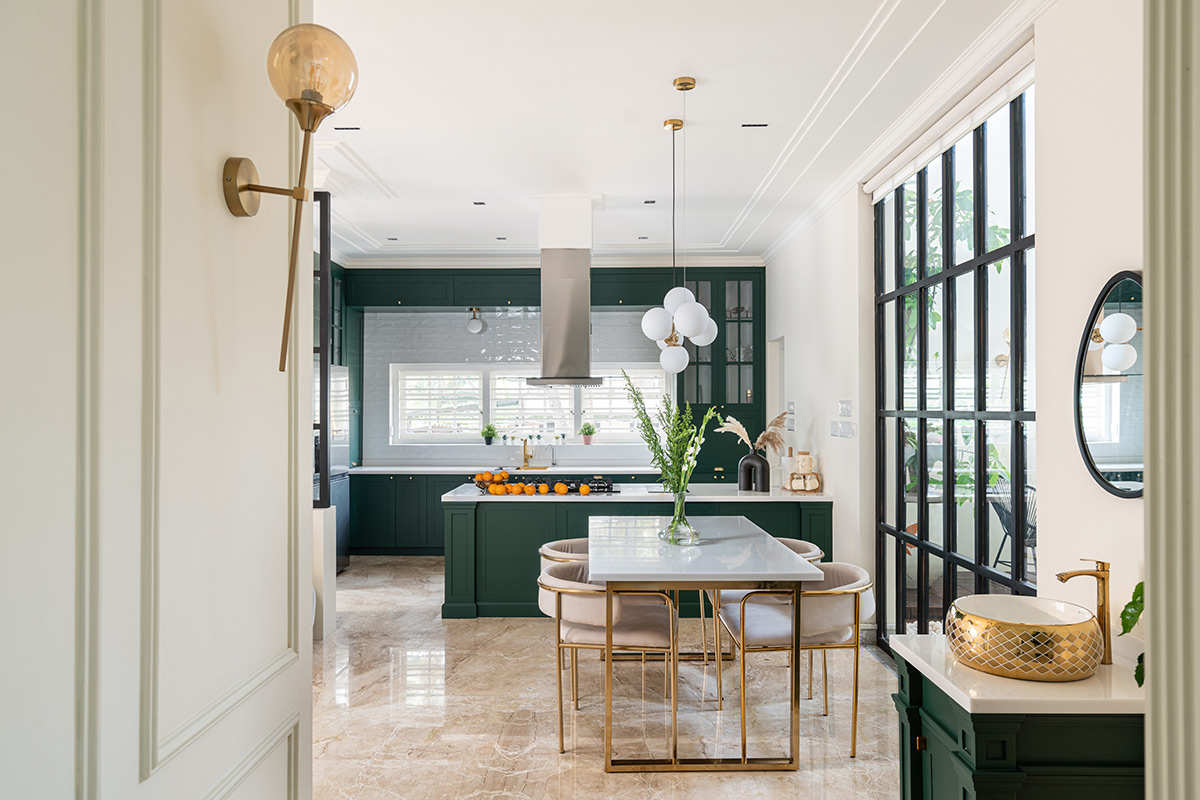
The Blanc project combines the colonial style with a modern open-plan layout. At the request of the client, pockets of privacy were achieved with the implementation of light-permeable partitions. Designed by Dematrix, this distinctive home holds an ethereal interior aesthetic with a fresh neutral color palette. The unique scheme conveys a positive vibe that feels alive. It communicates peace, elegance, and restful luxury. The kitchen springs to life under a bold dark green color scheme, which highlights this hub above the rest of the sociable living spaces. Contemporary furniture and 3d relief art lightly meld into pale backdrops. Lighting installations are special and interesting, adorning each room like jewelry.
A wide, paved driveway sweeps toward the grand front entry porch of this colonial-style home. The black paving stones complement stark black accents across the facade.
Potted plants smartly flank the front entryway. Exterior wall sconces light up a warm welcome.
Advertisement
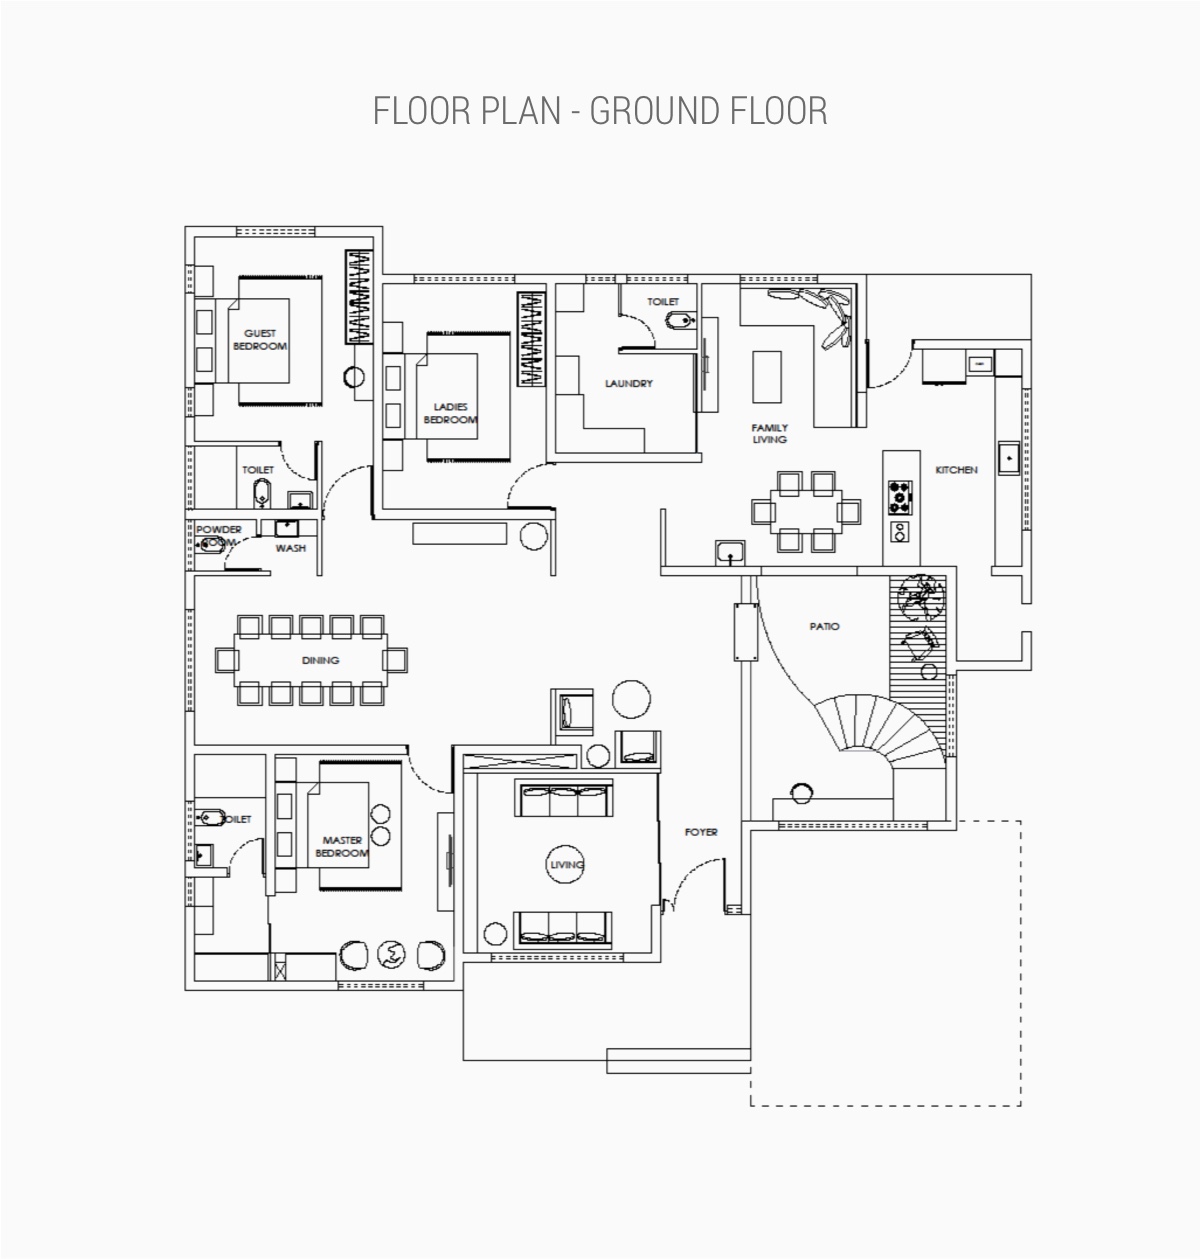
The house contains five bedrooms, a sociable reception room, an open-plan dining room, a family living room, a study area, an open kitchen, a laundry room, and an upper living area.
The pale decor palette communicates a sense of minimalism, whilst upmarket materials convey comfort and luxury.
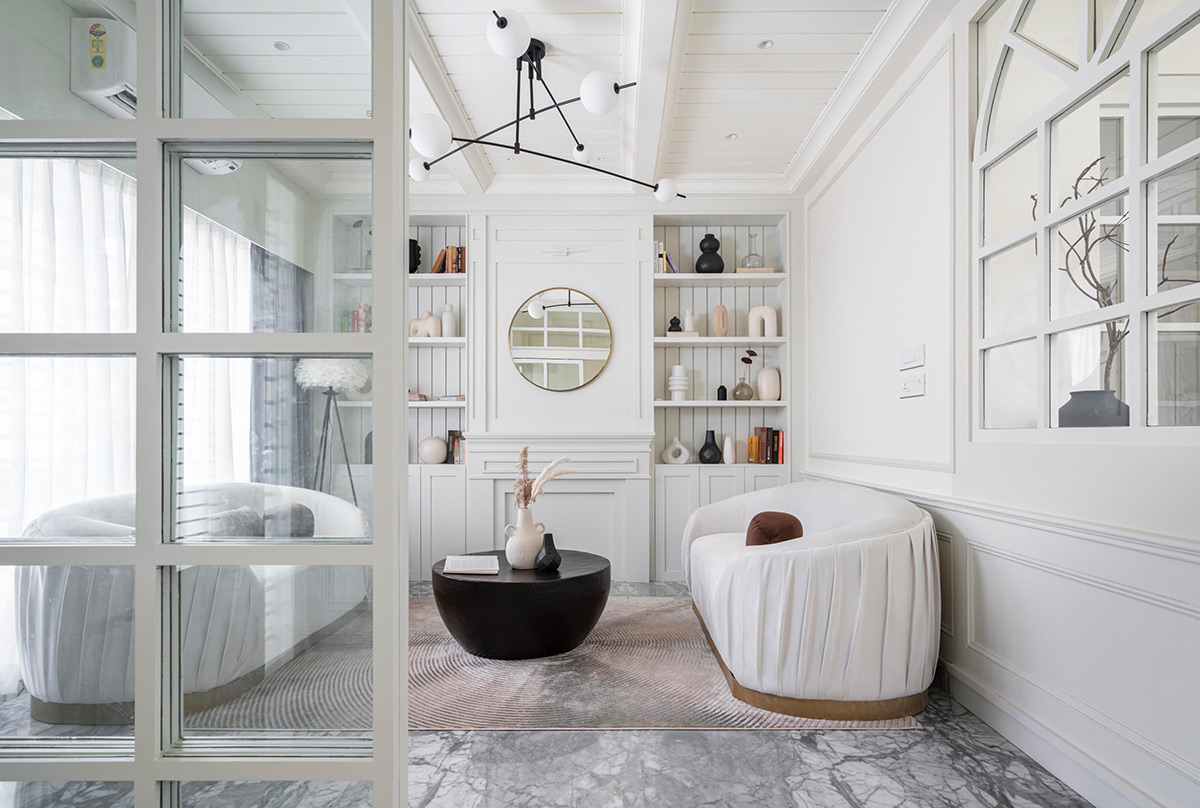
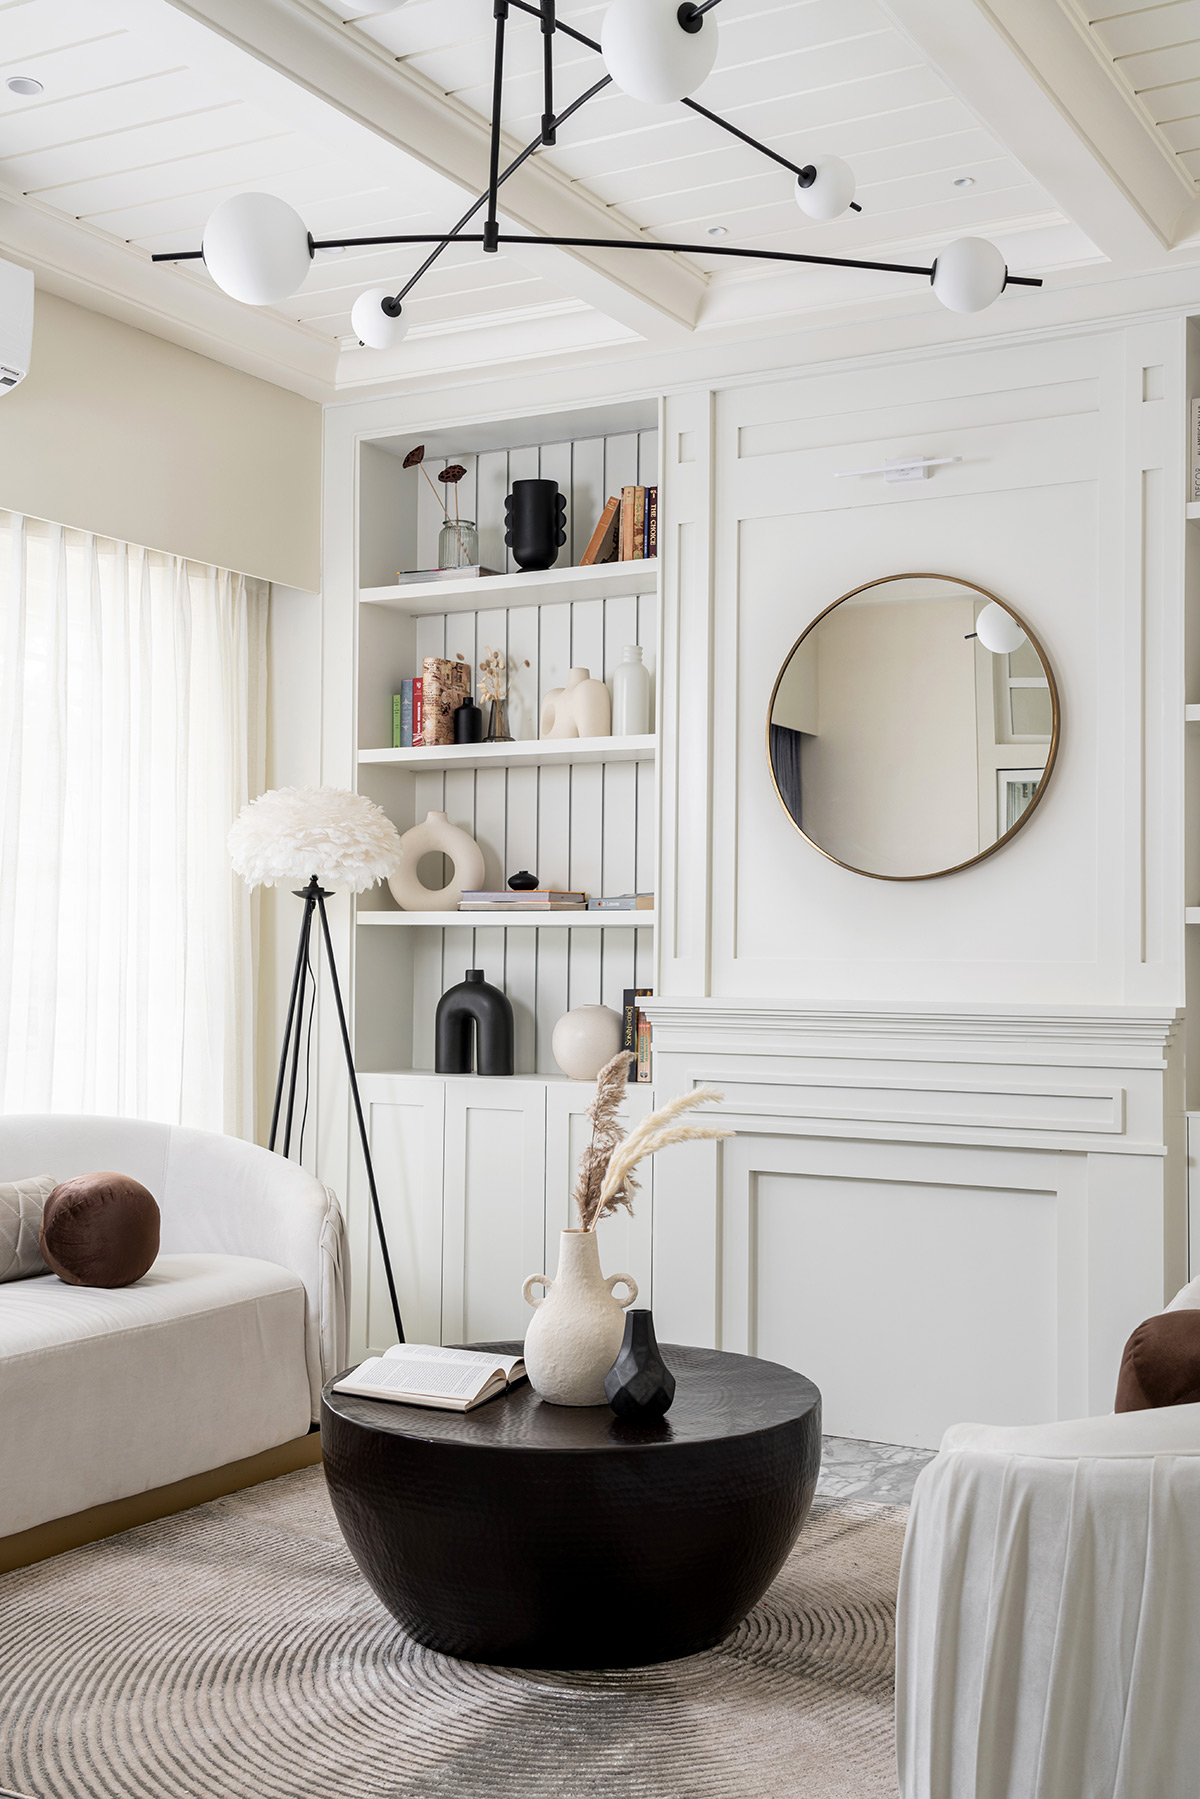
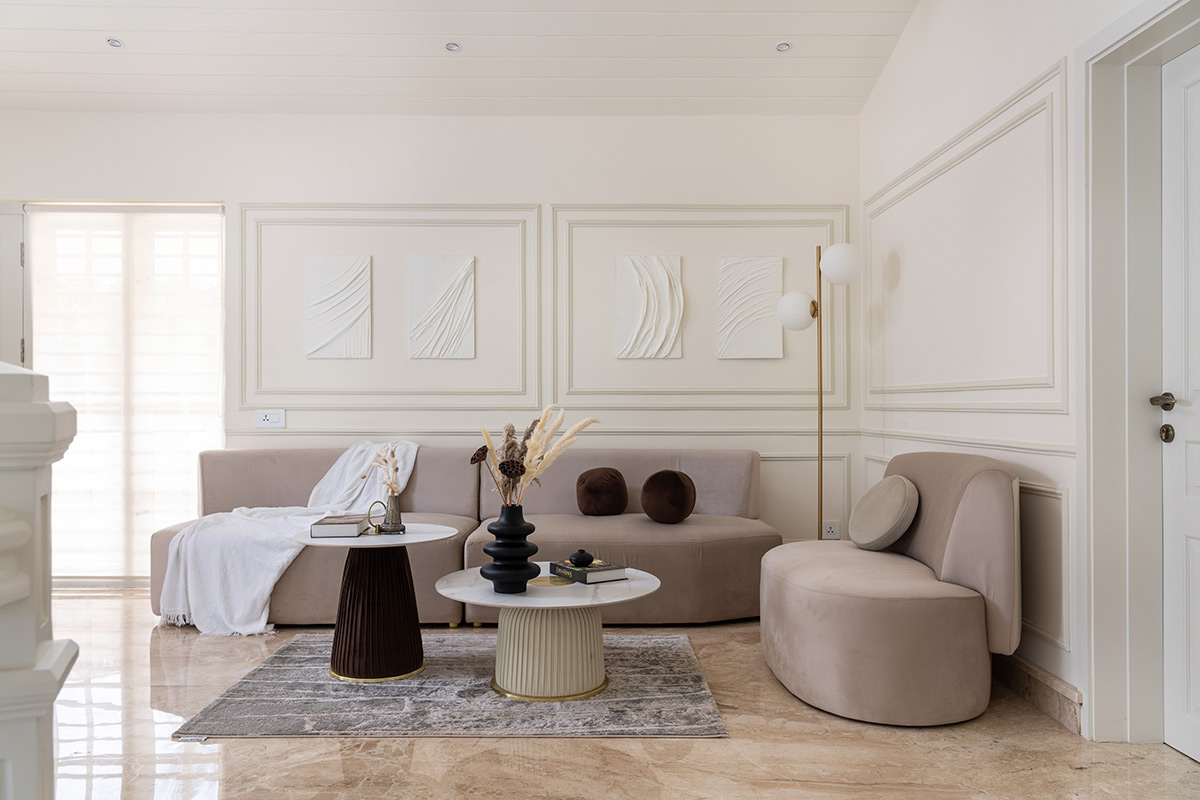
In the public reception room, a sputnik chandelier and a modern round coffee table place contrasting black accents into a predominantly white room palette. A wood-slatted ceiling and wood-backed display shelving units share a classic colonial aesthetic.
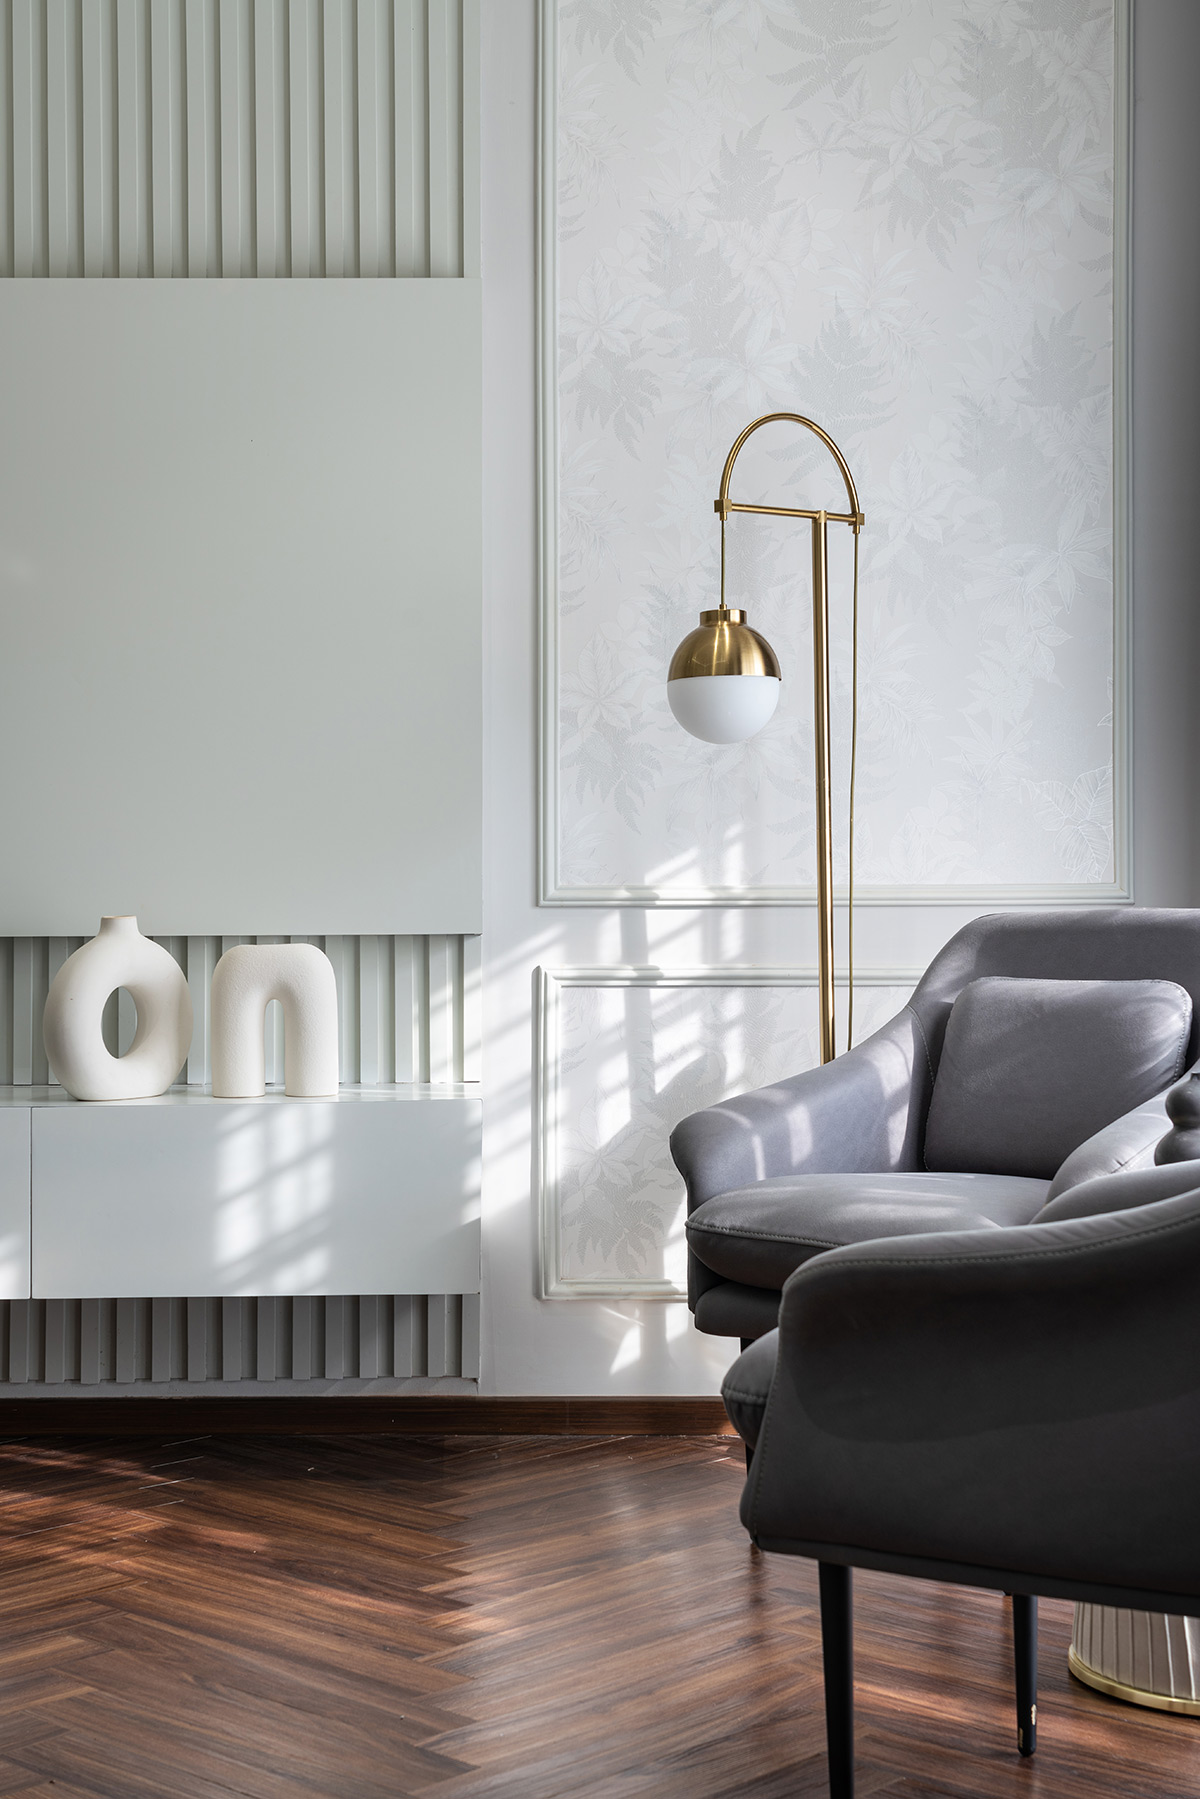
An assortment of decorative vases and a collection of books fill the built-in shelving units with interesting silhouettes and splashes of color. A feathered tripod floor lamp introduces a dash of whimsy to the room.
A blocked fireplace is paneled to complement the shaker-style storage cabinets that flank it. Matching wall molding makes an attractive frame around a modern gold mirror.
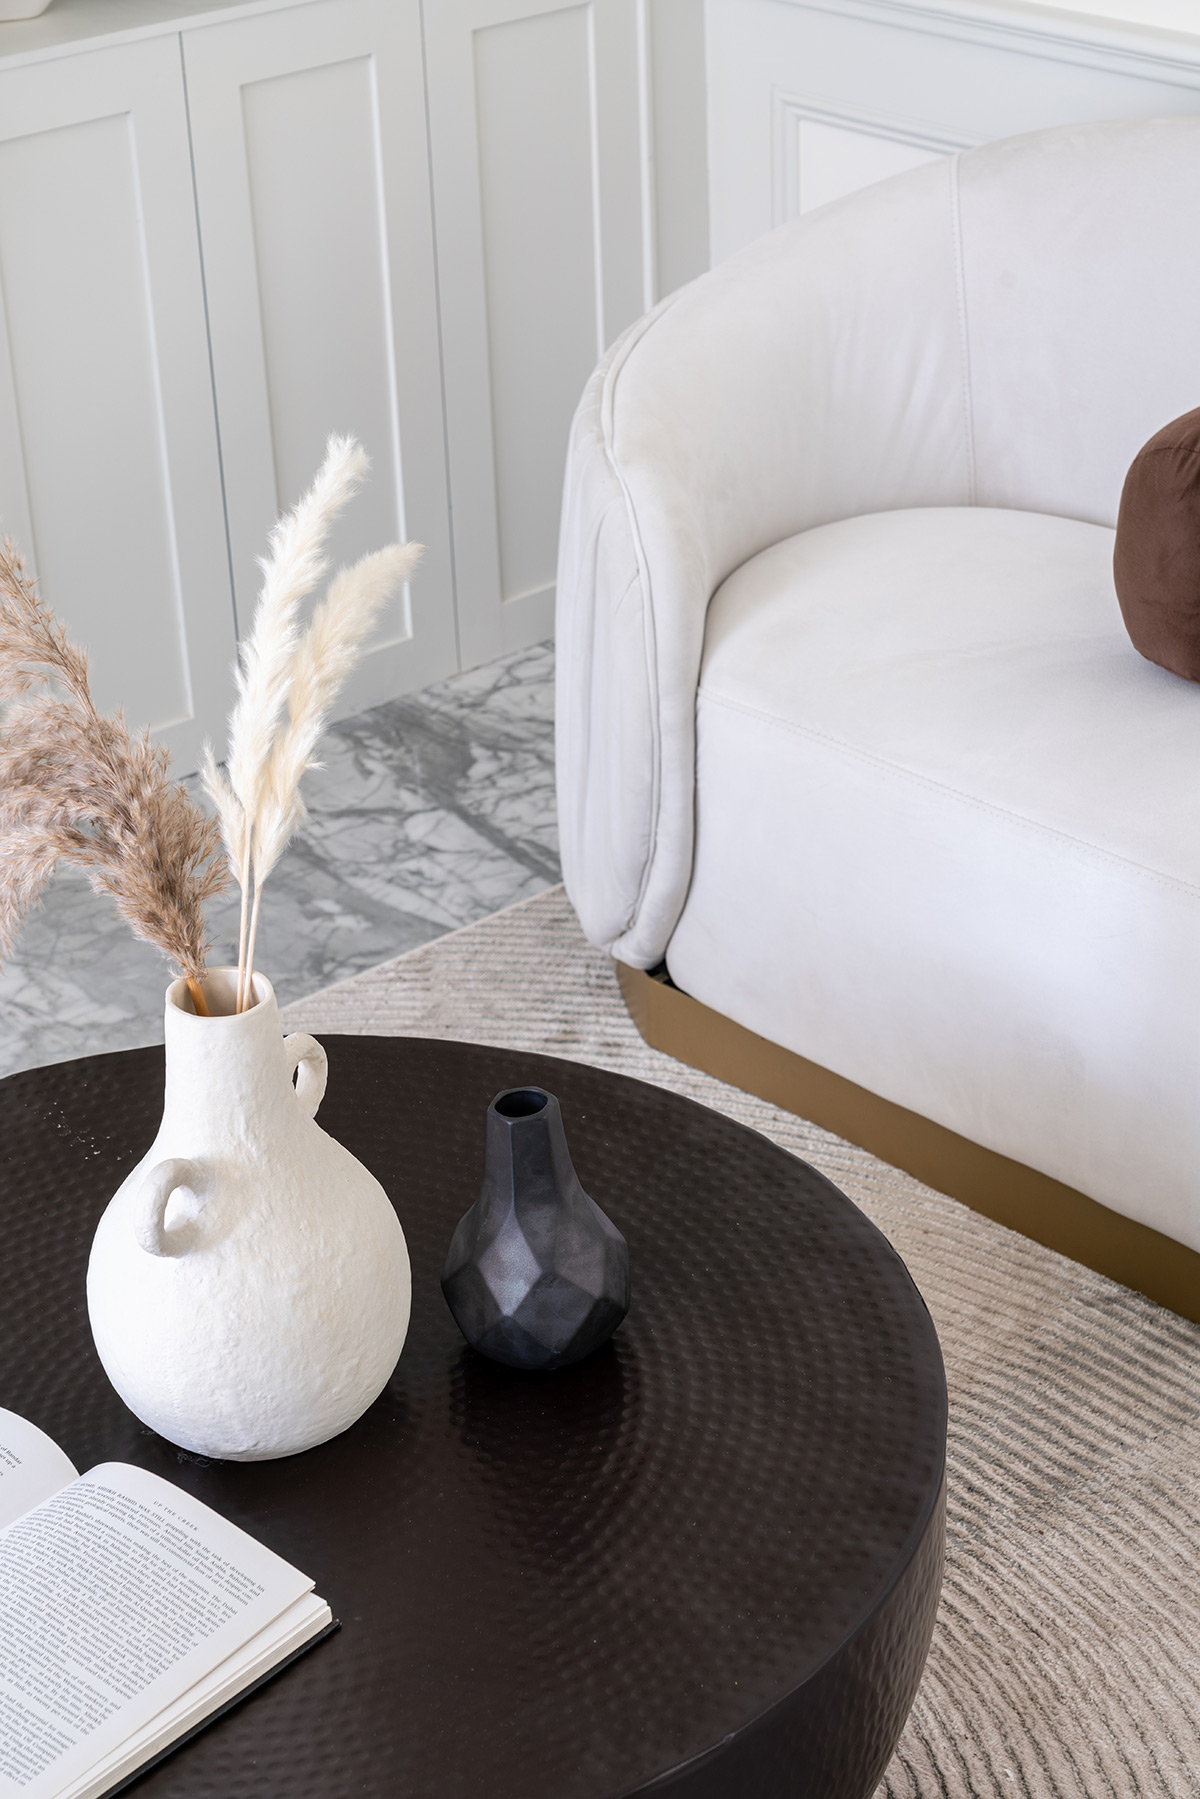
More textural decorative vases adorn the round coffee table in the center of the room.
Advertisement
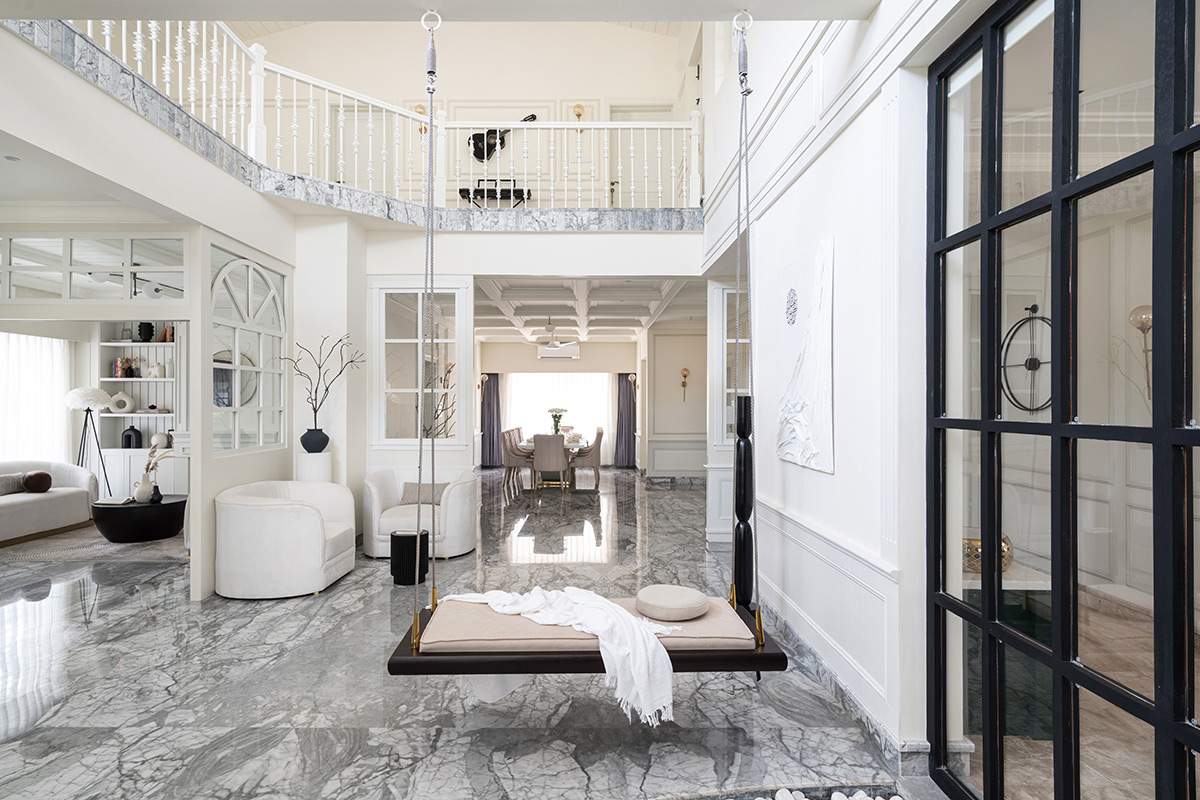
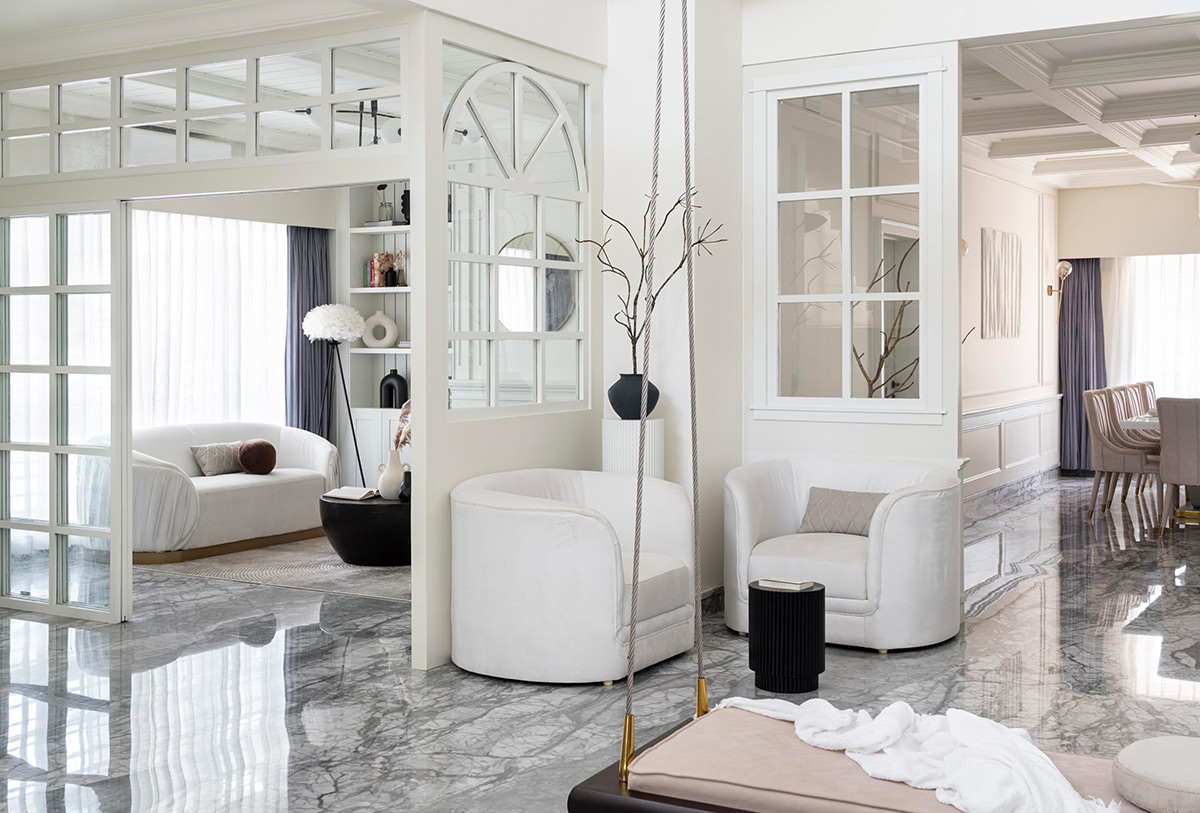
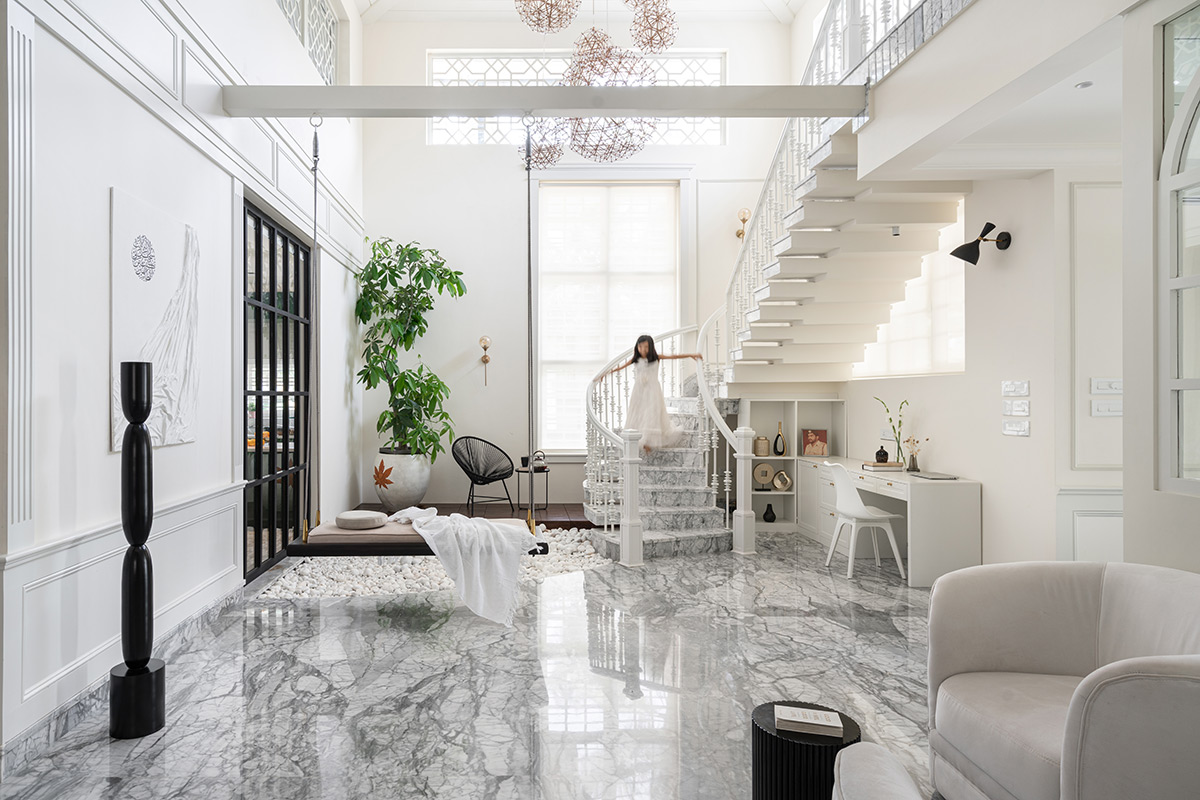
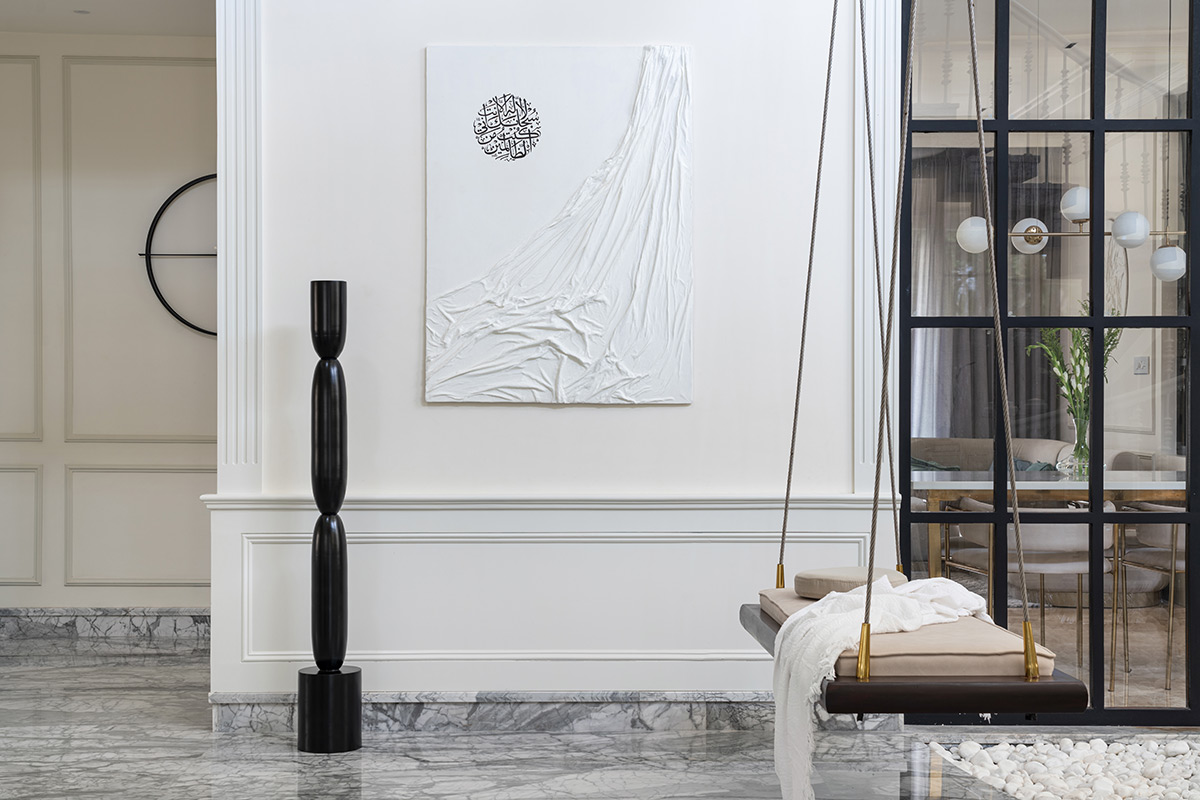
Glass partitions divide the modestly proportioned reception room from a much larger, open-plan living space. The triple slide glass door grants the reception room privacy as well as airflow. In the larger, free-flowing sociable space, a playful swing seat hangs from a support beam.
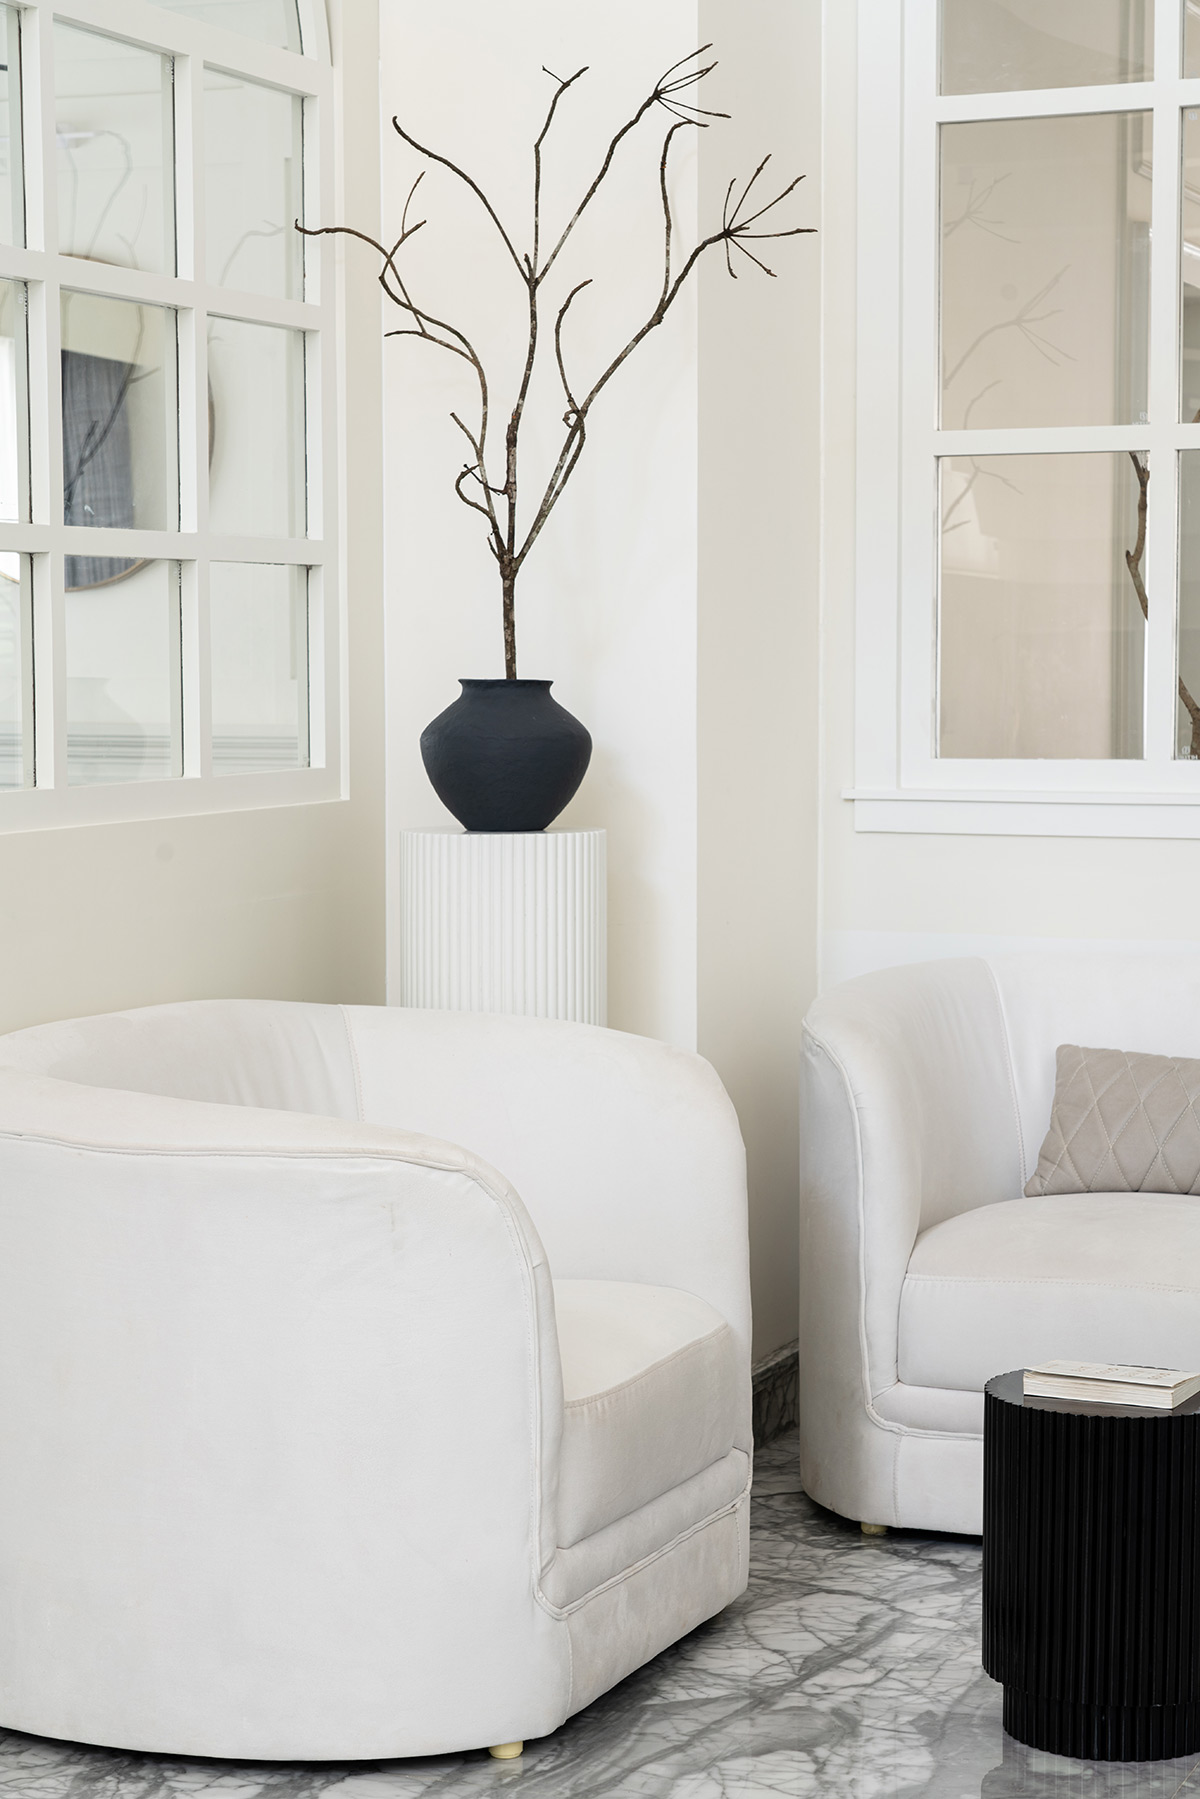
A deep corner is transformed into a small lounge area. The cozy corner is perfect for impromptu conversations or to utilize as a bright and airy reading nook.
A small side table and a modern planter add points of black contrast between the white lounge chairs and wall decor.
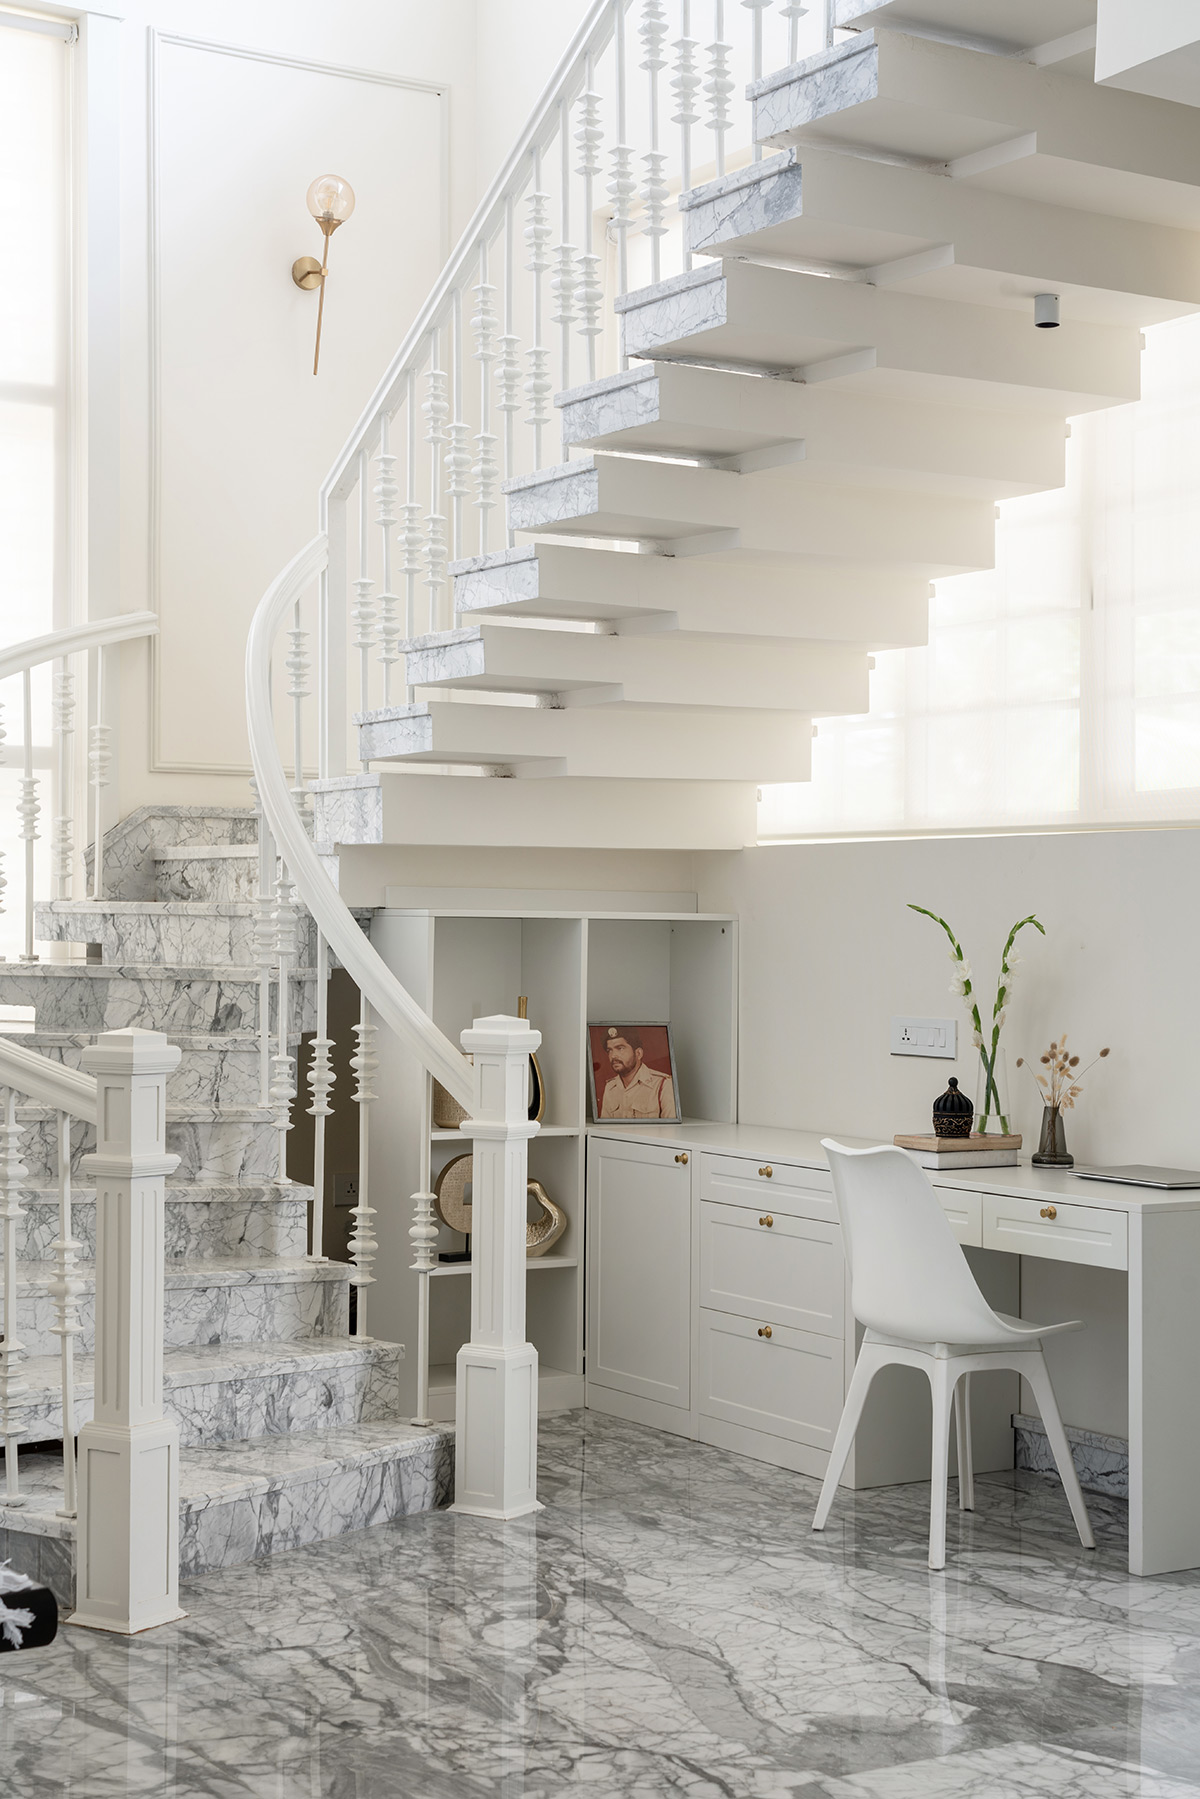
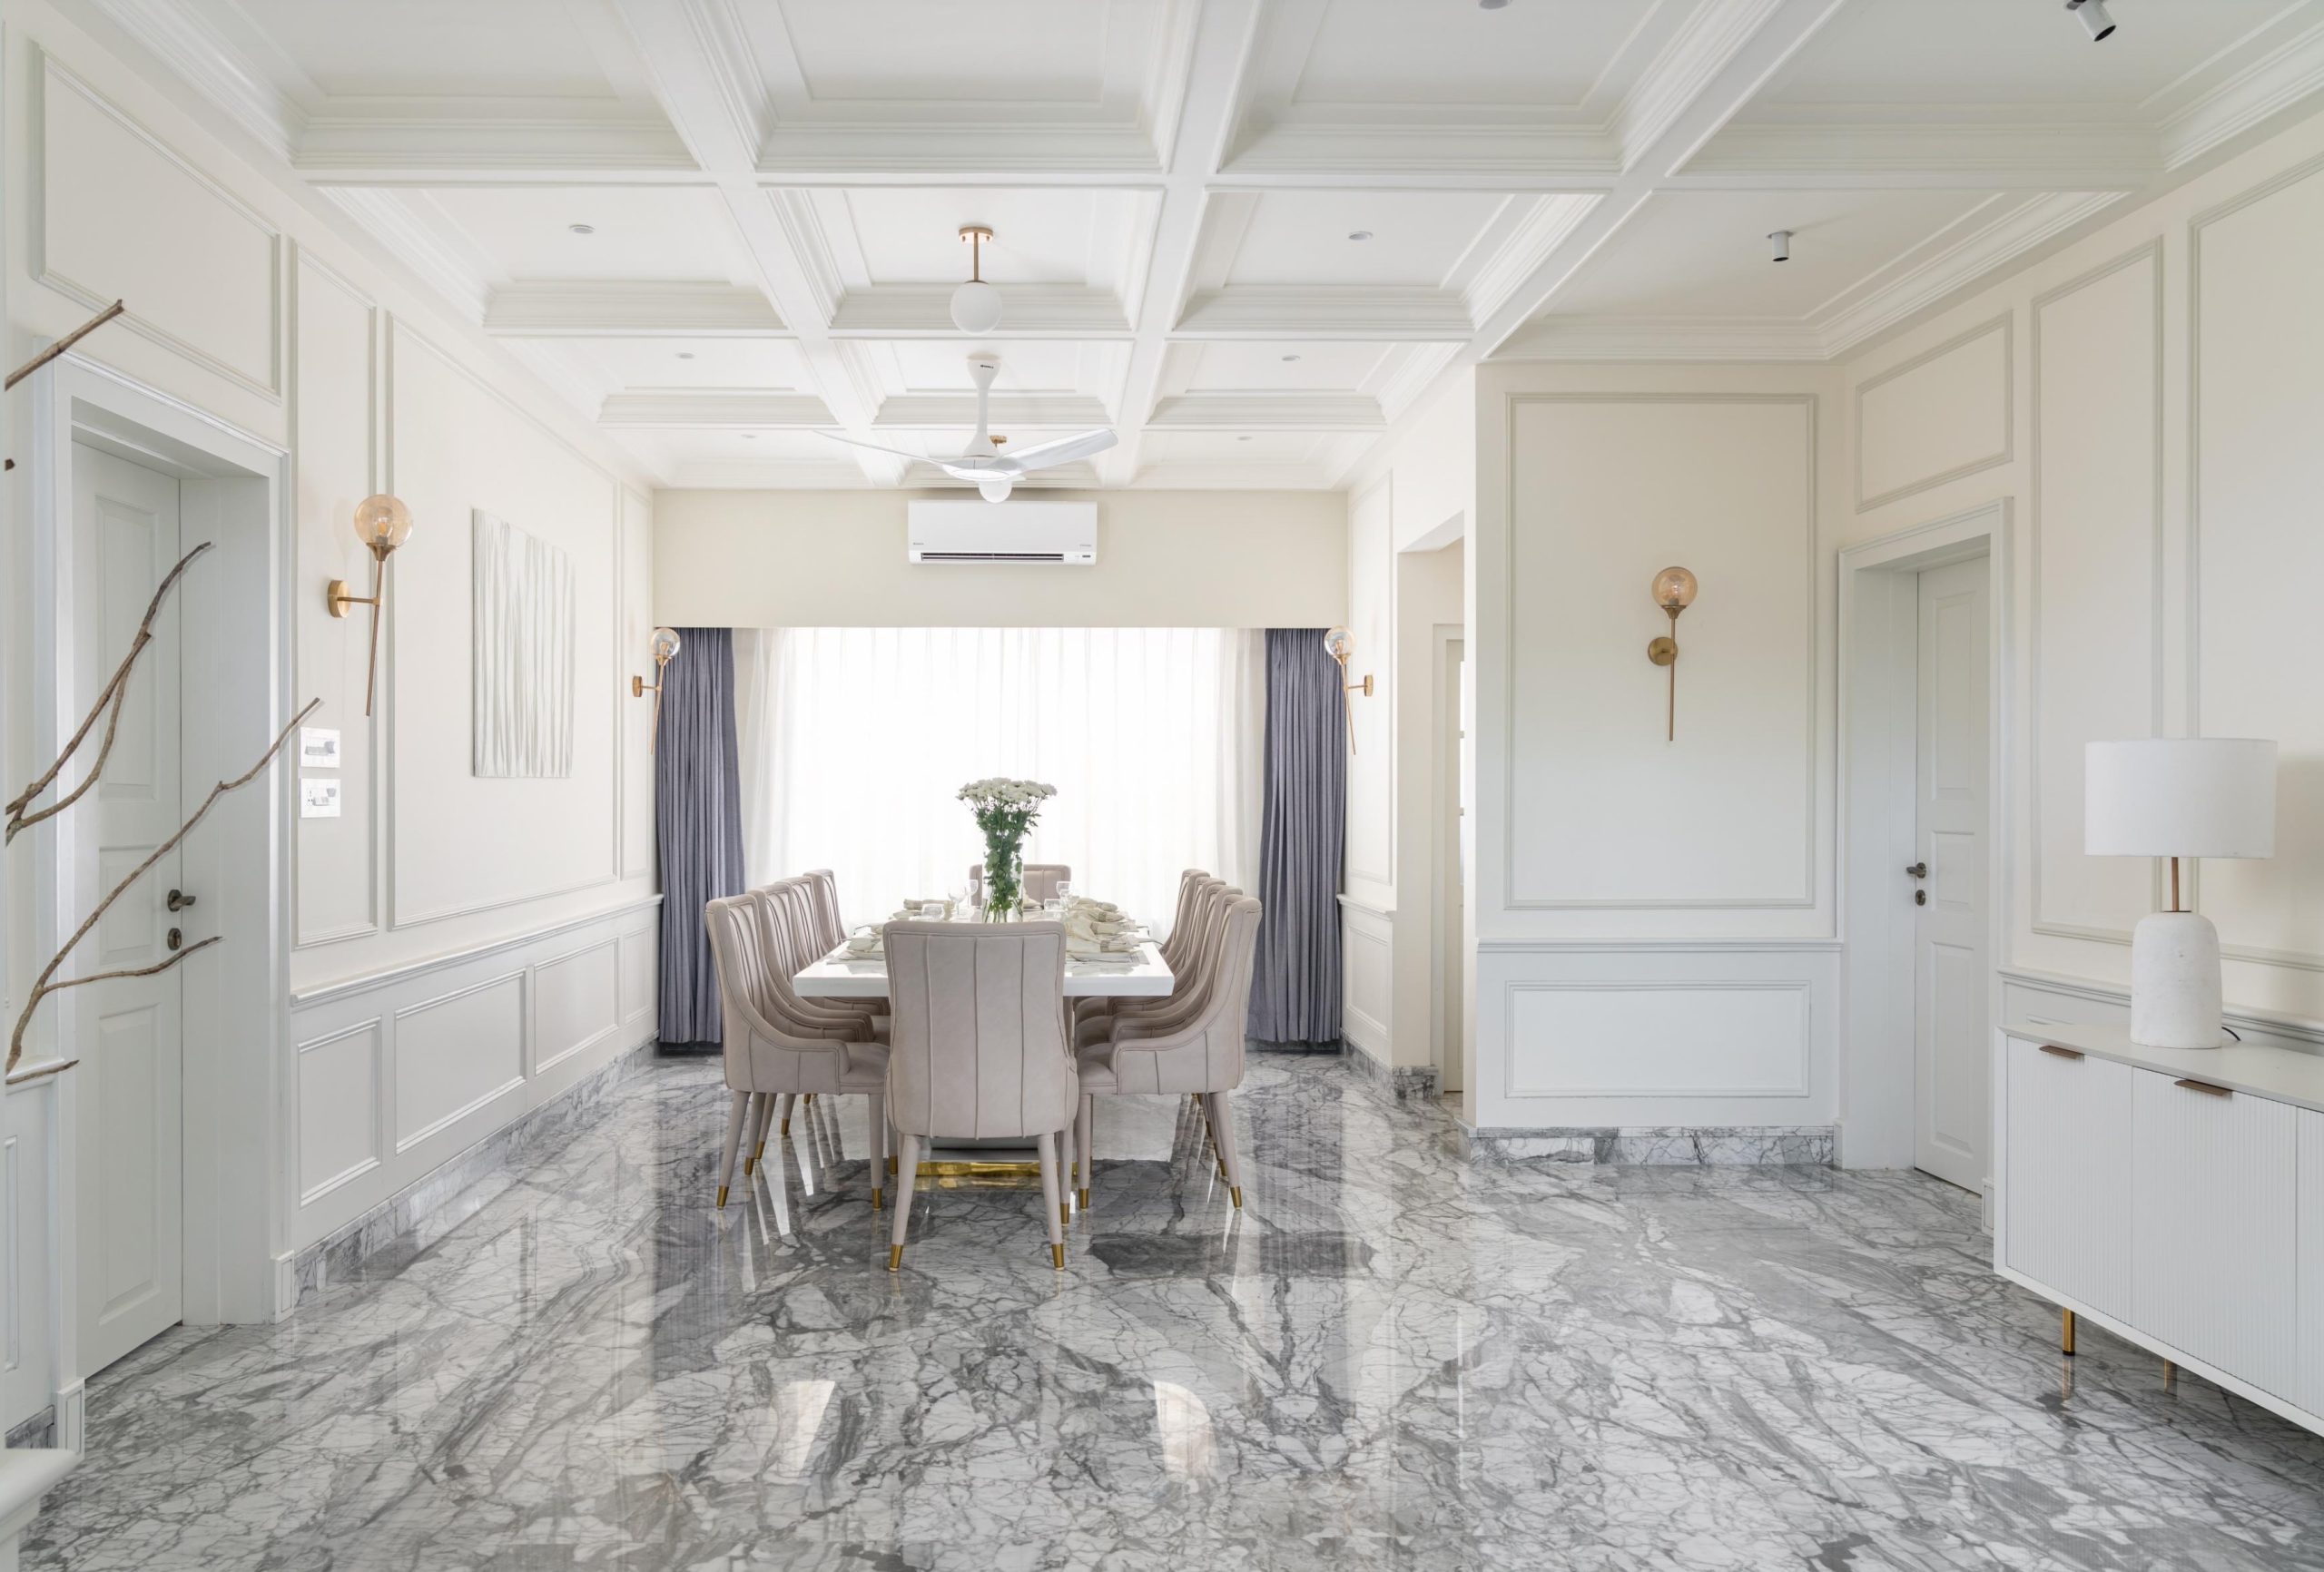
The flooring in the open-plan living space is stunning gray and white Italian Statuario marble. The marble has a fabulous, dramatic vein and a glossy, light-reflective quality.
A small work area is tucked into the corner of the living space.
3D relief wall art adds textural interludes onto the ethereal white perimeter.
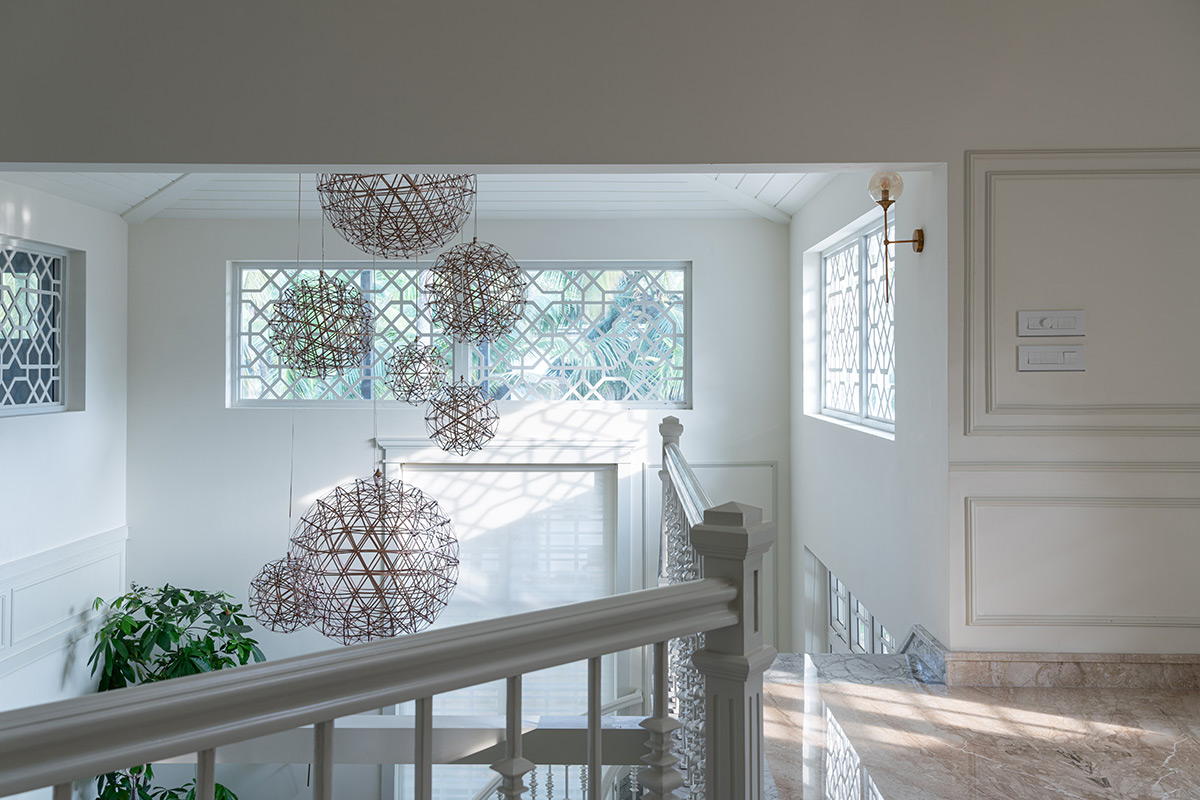
A sweeping staircase design features spaced marble treads, which allow natural sunlight to filter through. Unique decorative balustrades create a sculptural appeal.
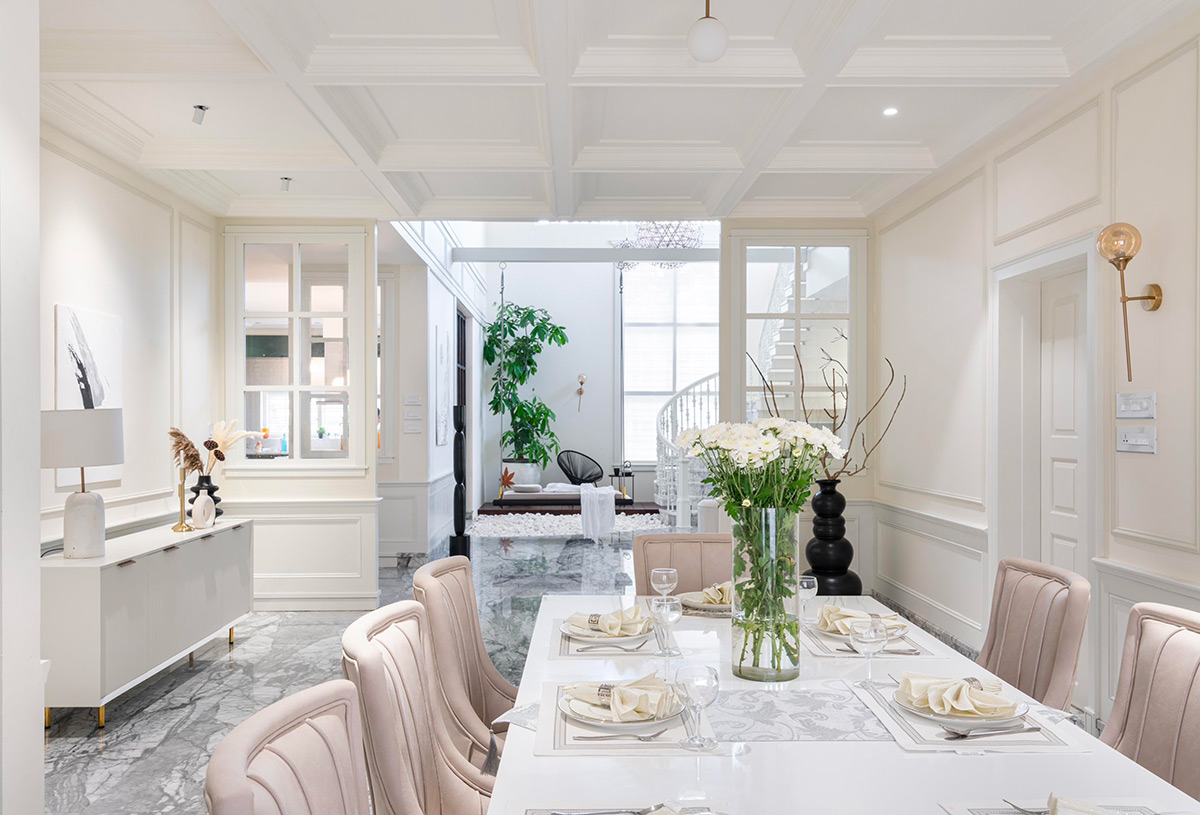
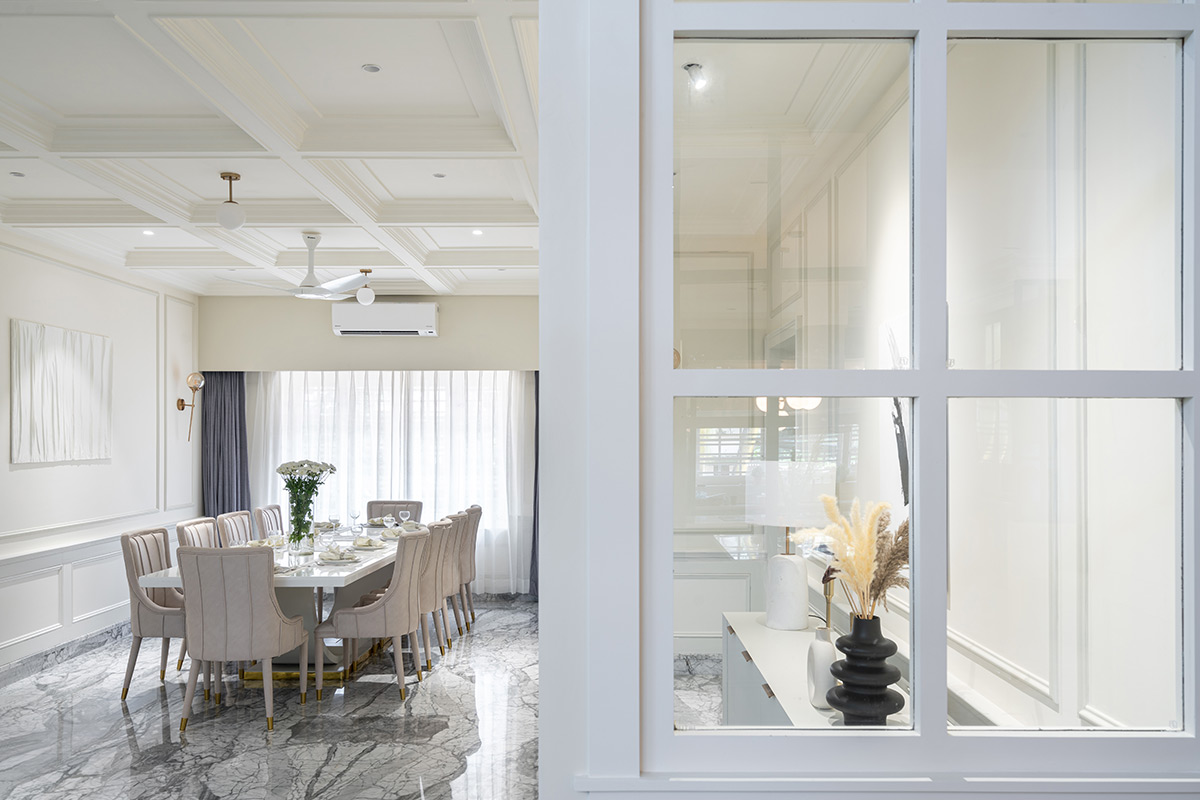
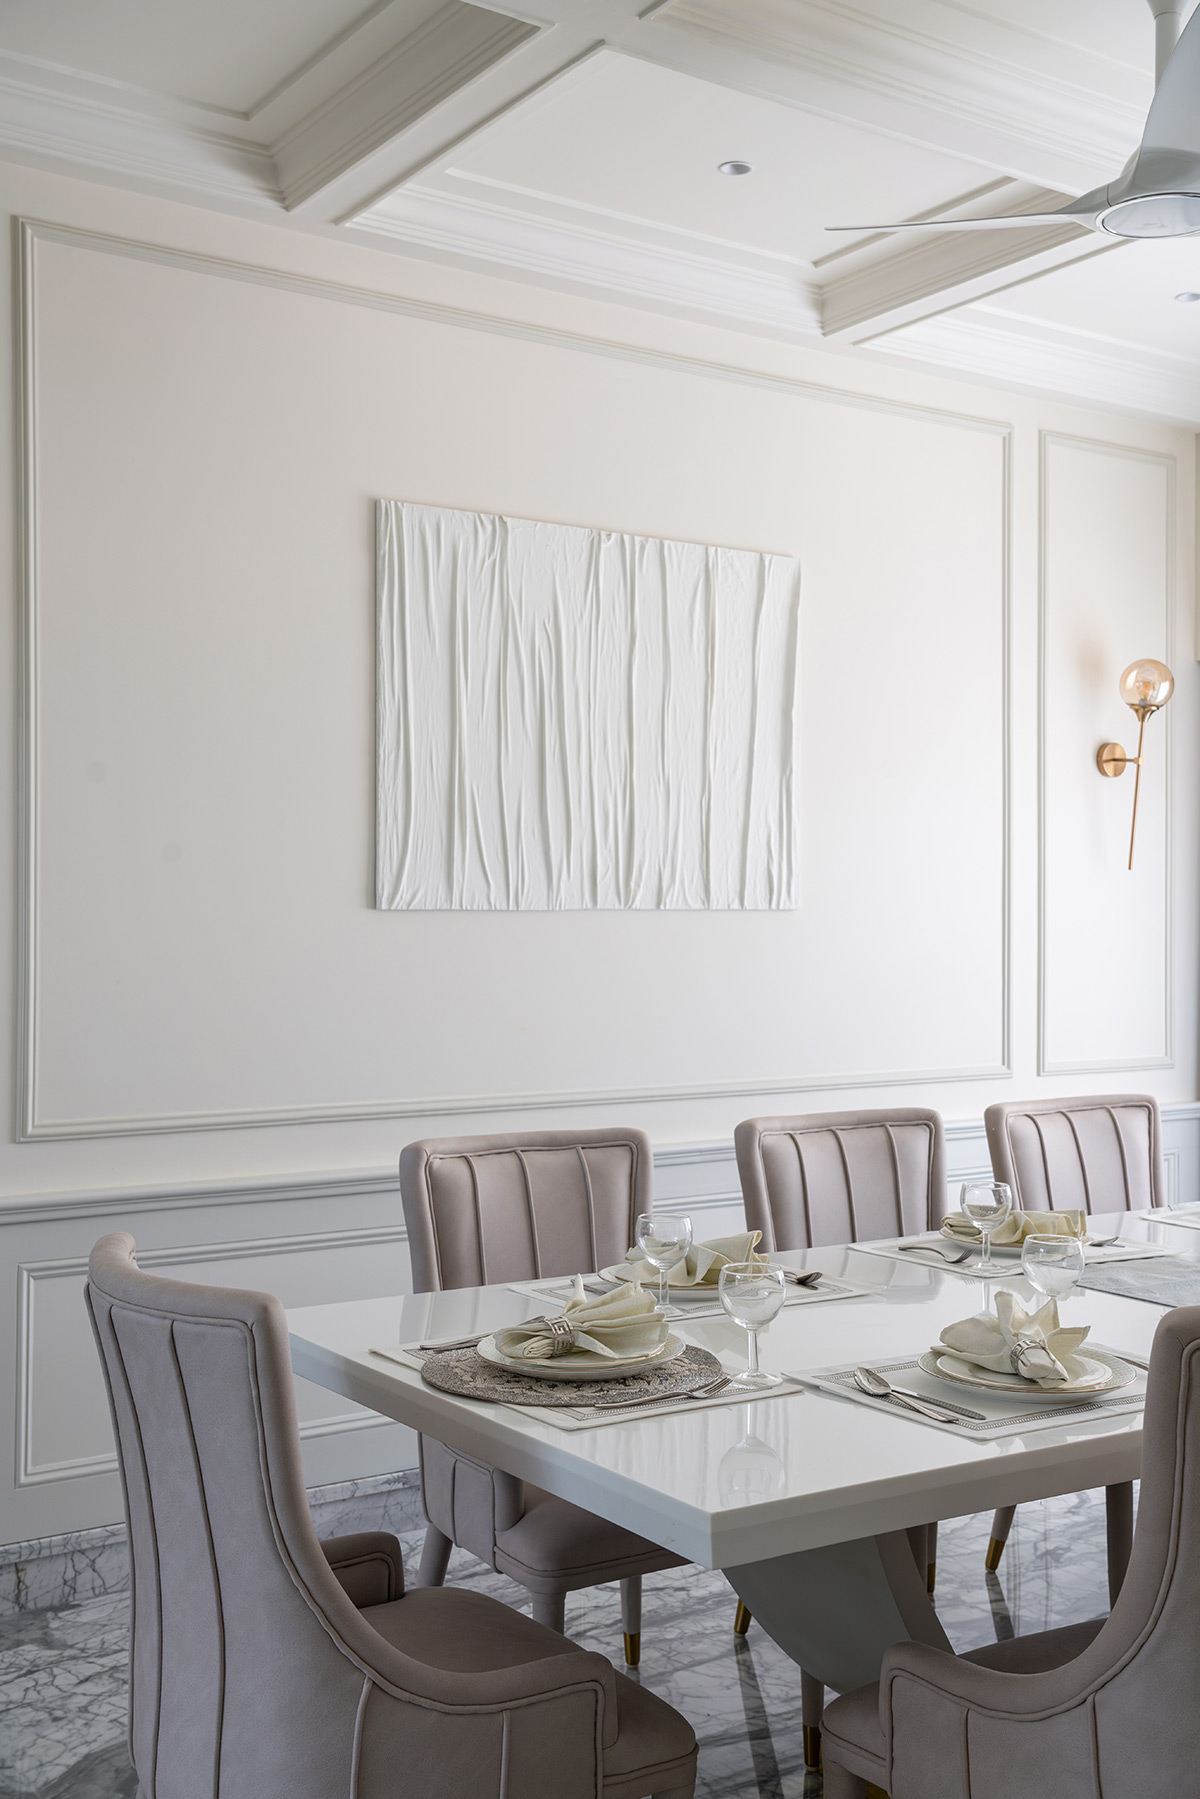
The dining room scheme features a coffered ceiling treatment, which elevates the formal aesthetic.
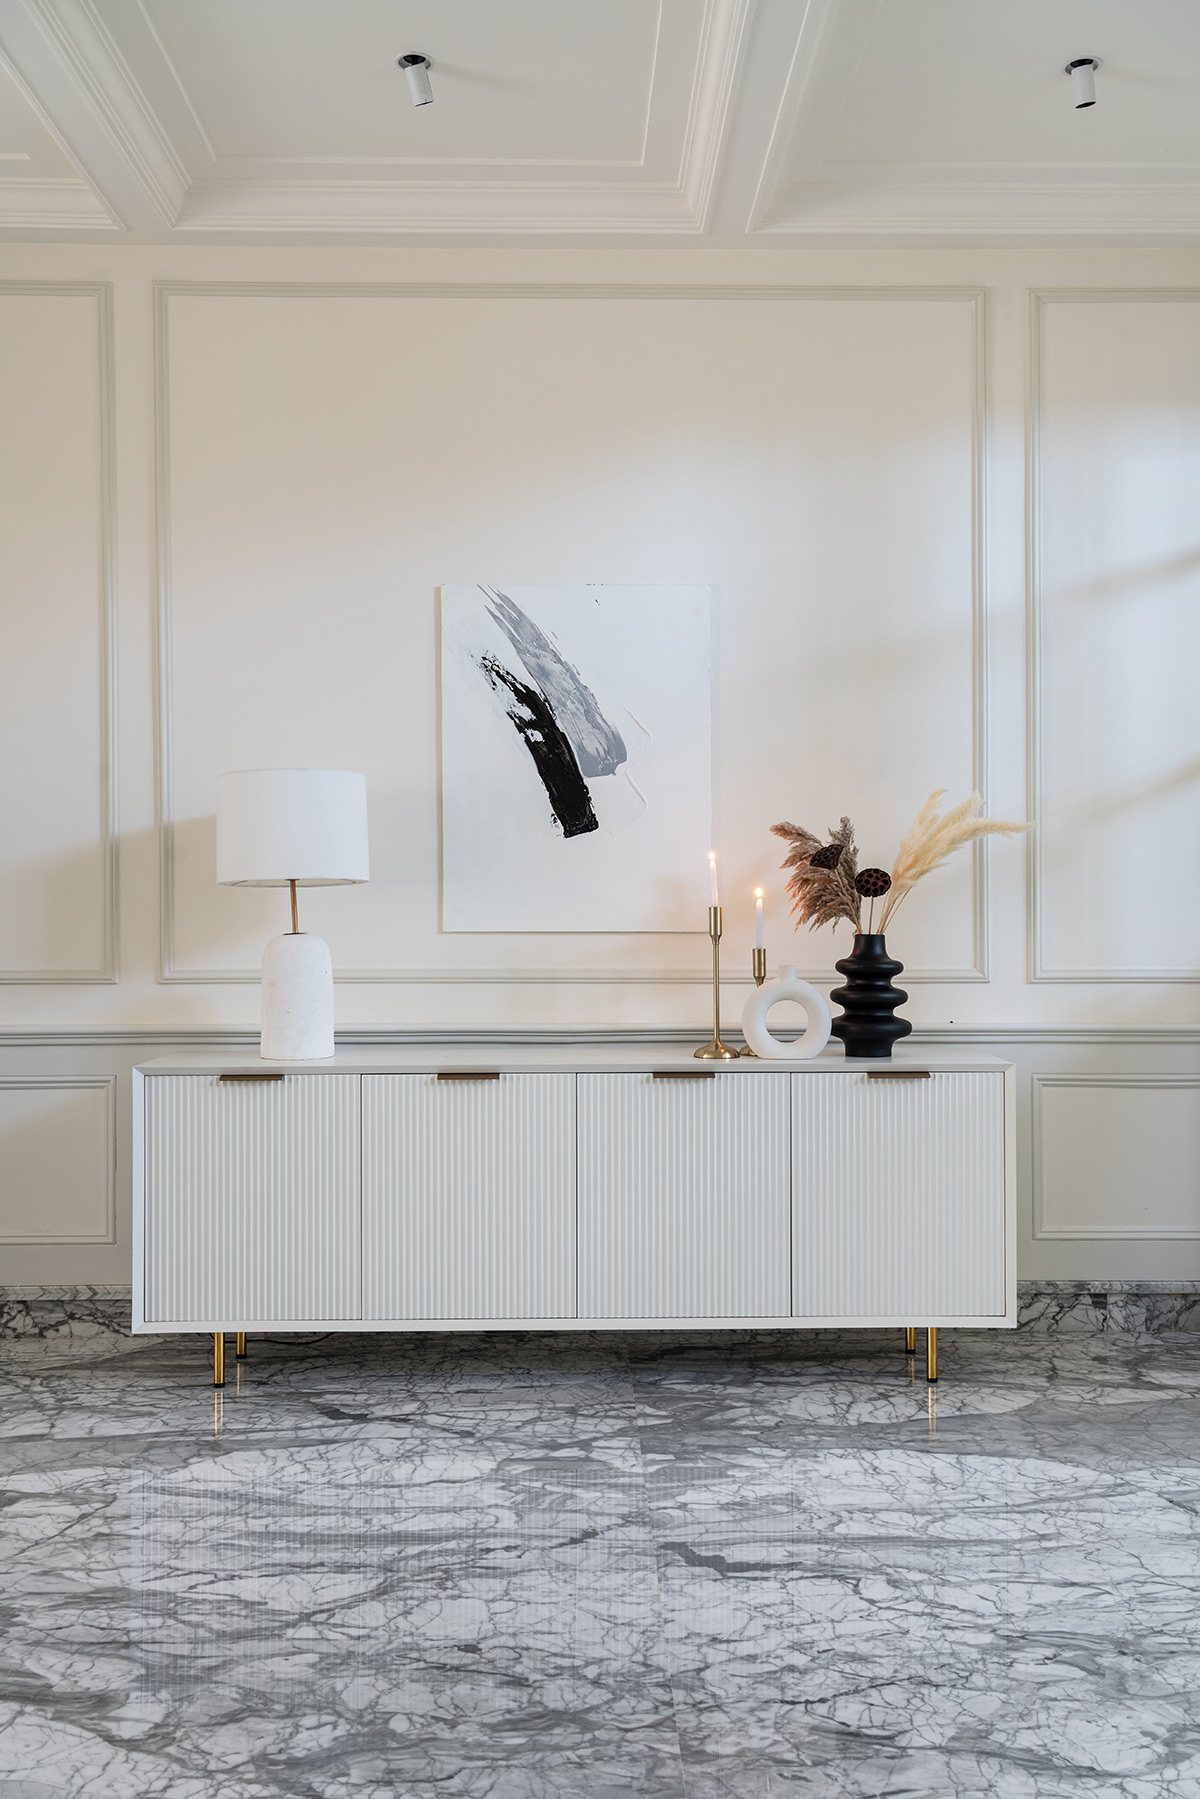
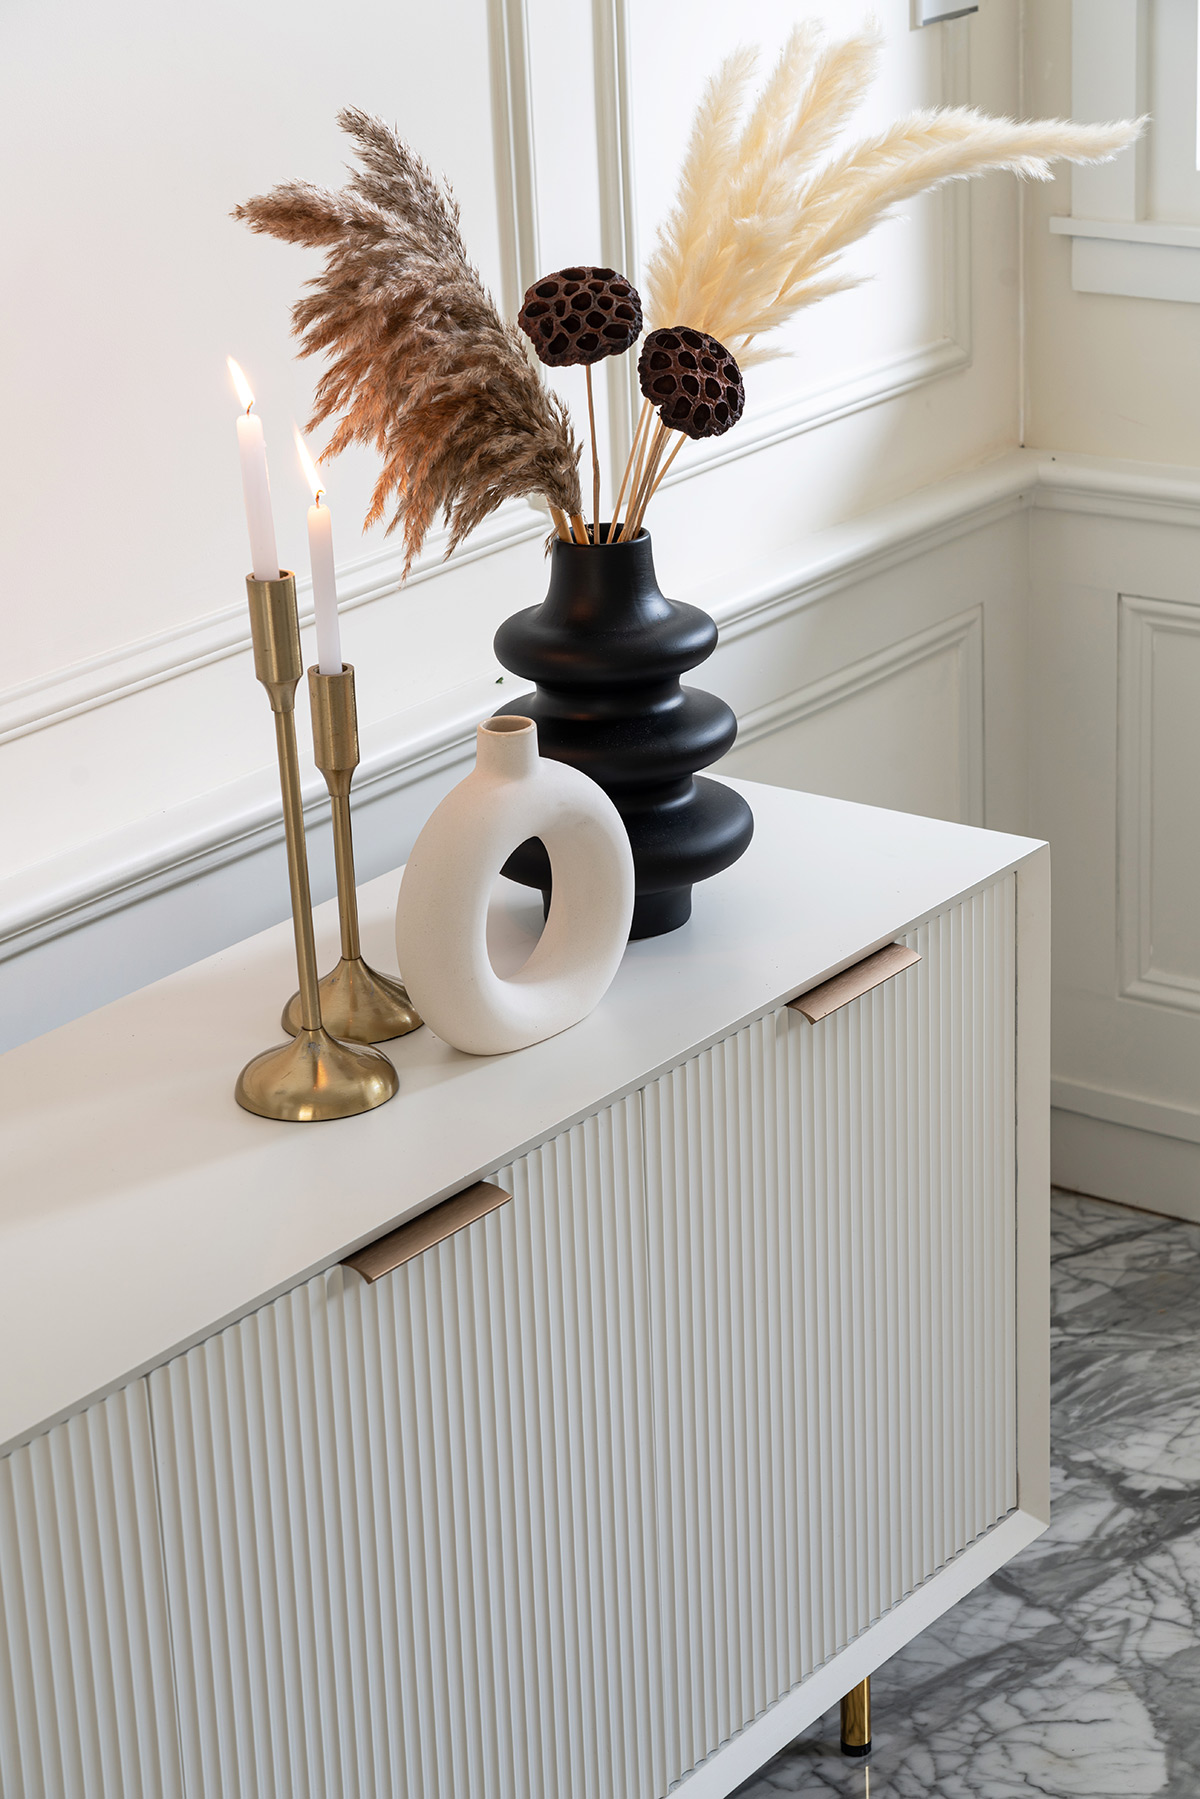
The dining room console table is fashionably textured with fluted doors.
Golden accessories and fixtures deliver elegant luster.
Glass partitions achieve a sense of separation whilst maintaining the open flow.
Modern wall sconces bejewel the white walls with golden accents.
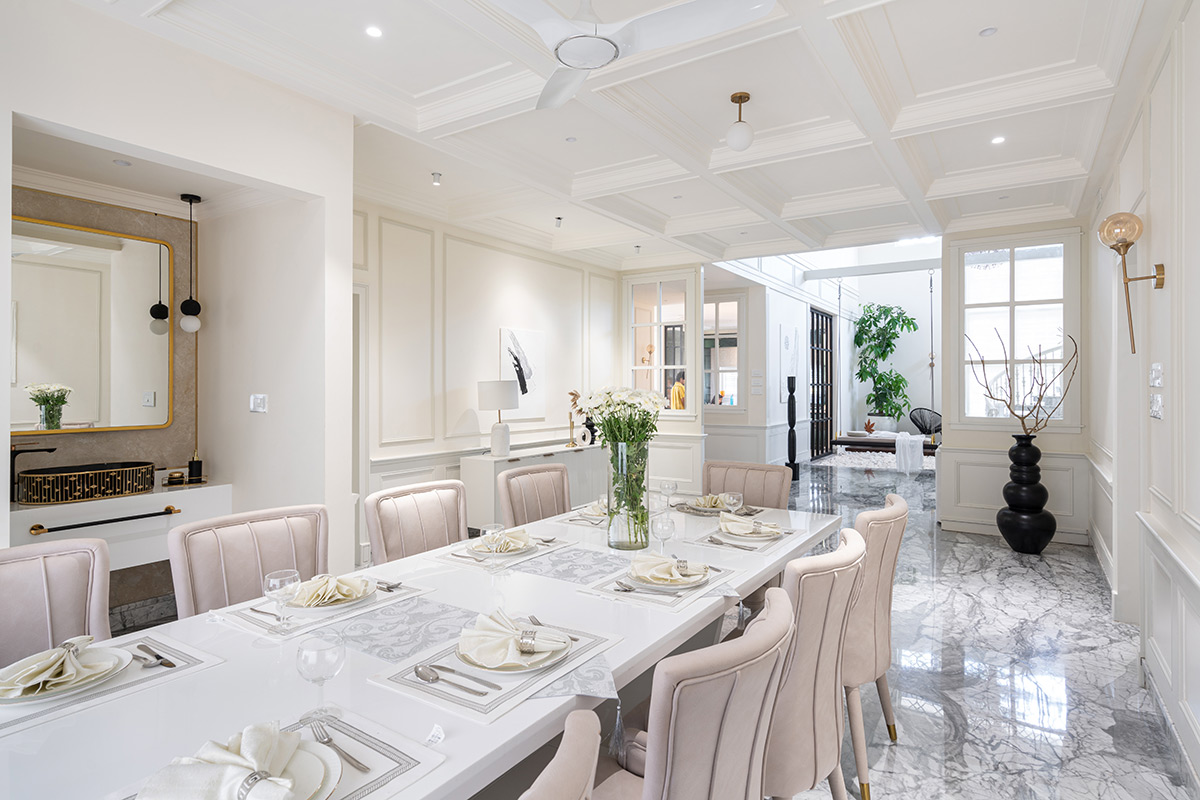
A vase of flowers makes an uplifting dining table centerpiece.
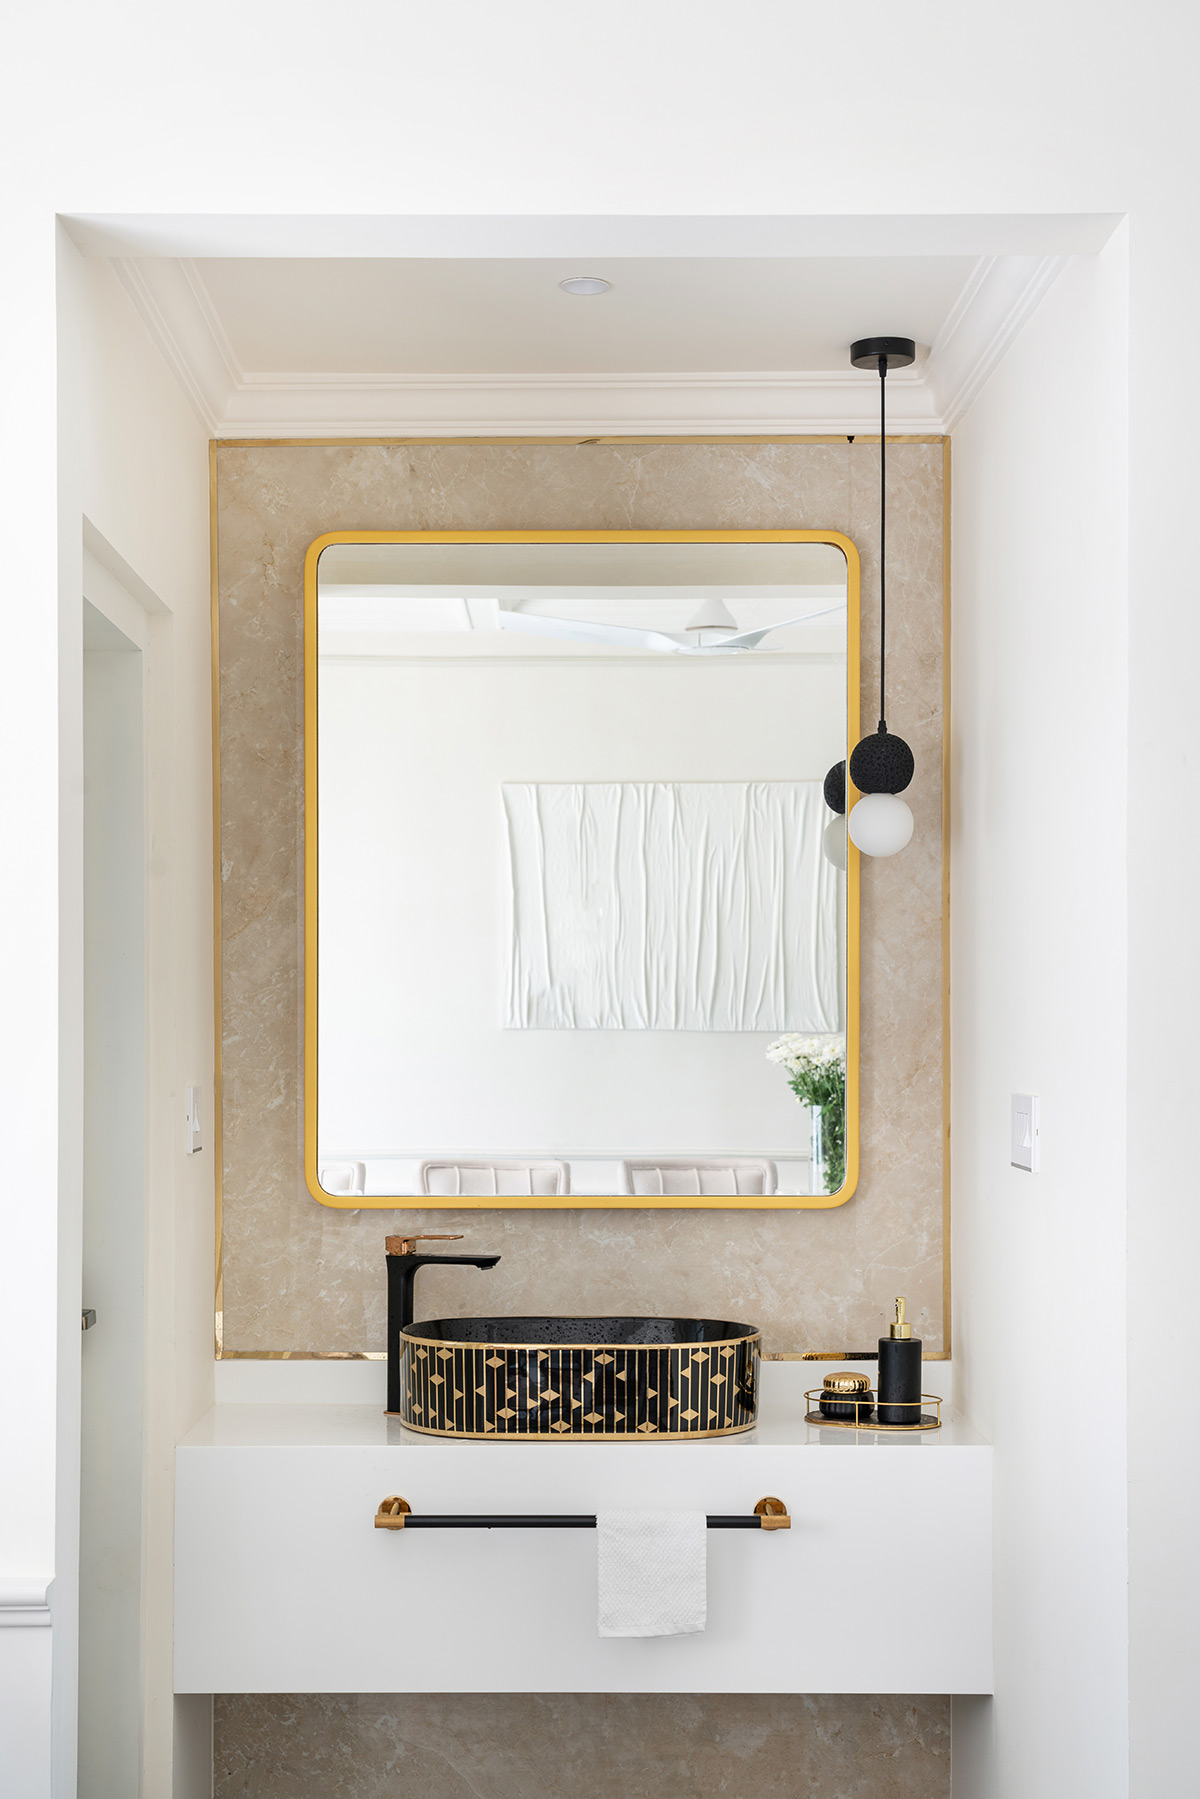
On one side of the dining room, a convenient hand-washing area features a unique bathroom sink. The black and PVD gold detailing on the wash basin is complemented by a matching black and gold tap and towel rail.
Plush upholstered dining chairs seat up to twelve people at the long rectangle dining table. Their ribbed upholstery is complemented by a piece of ridged relief art. All murals and artwork in the home have been customized to the space with a Duco finish.
A cluster of globe pendants descends the double-height void above the open-plan living space. Visual interest is created with different sized pieces, suspended at varying heights.
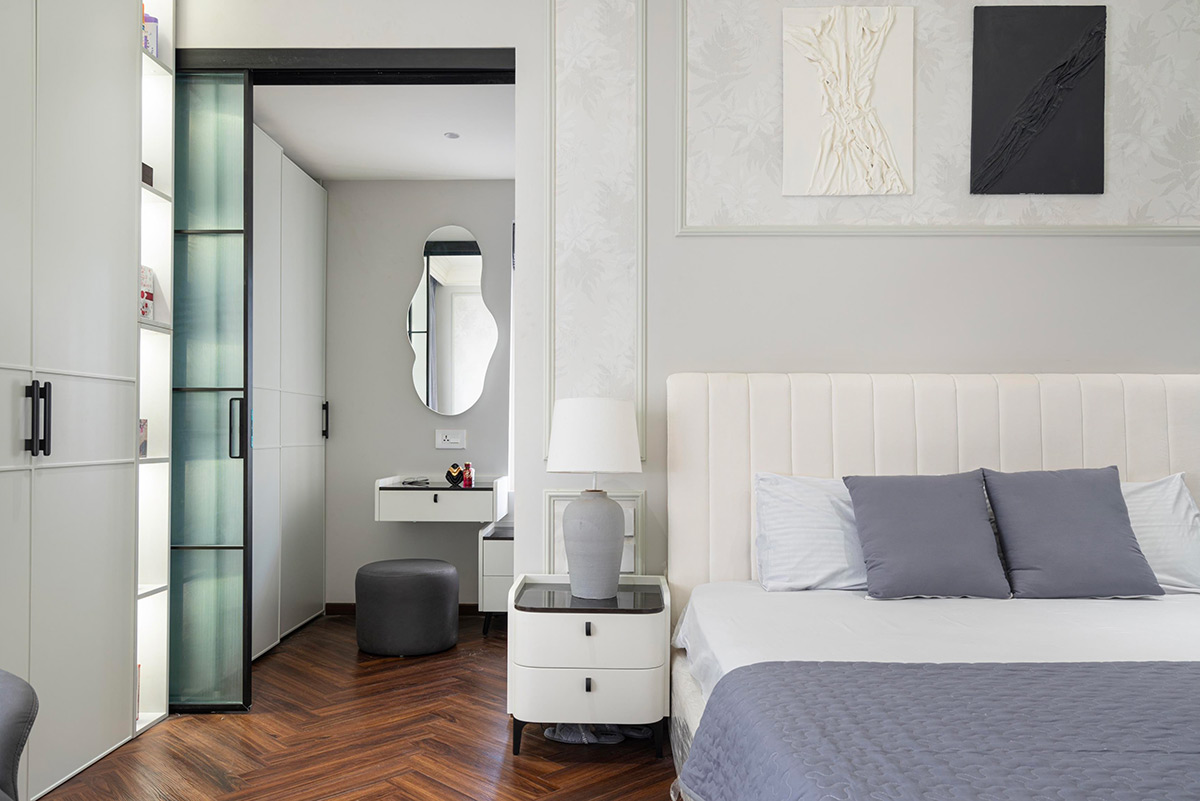
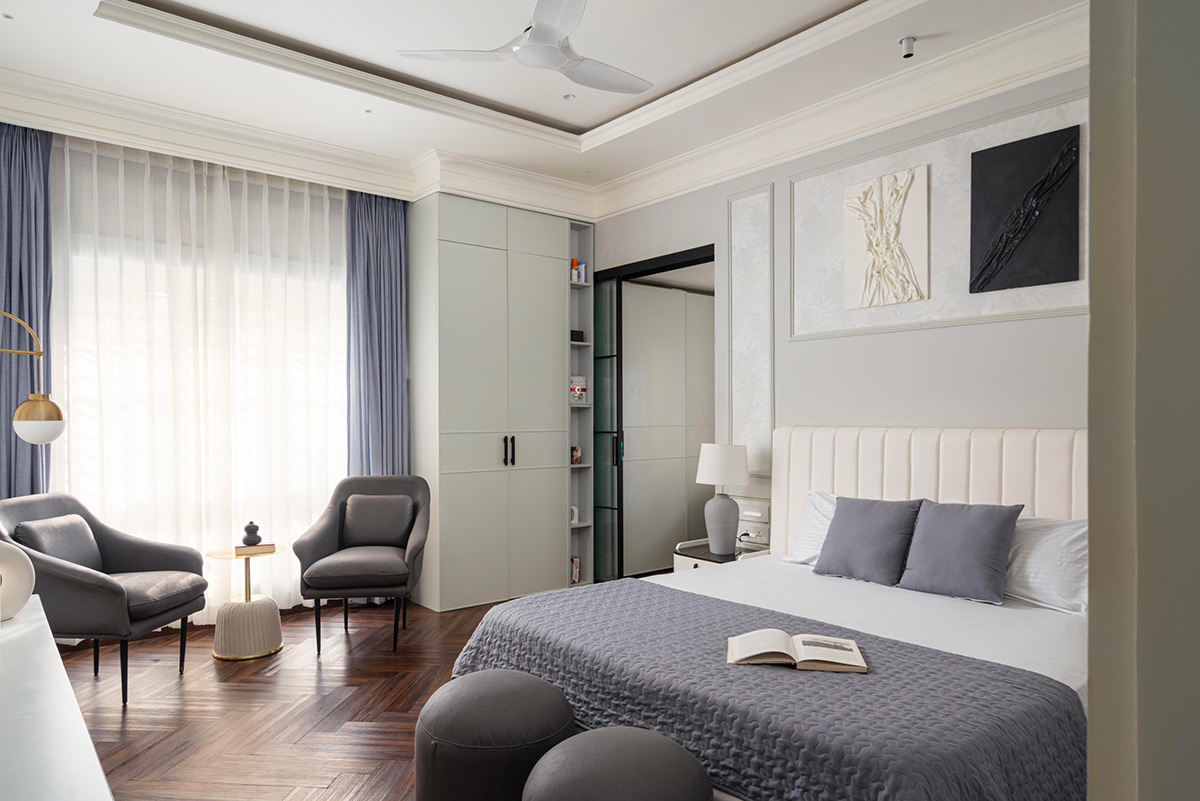
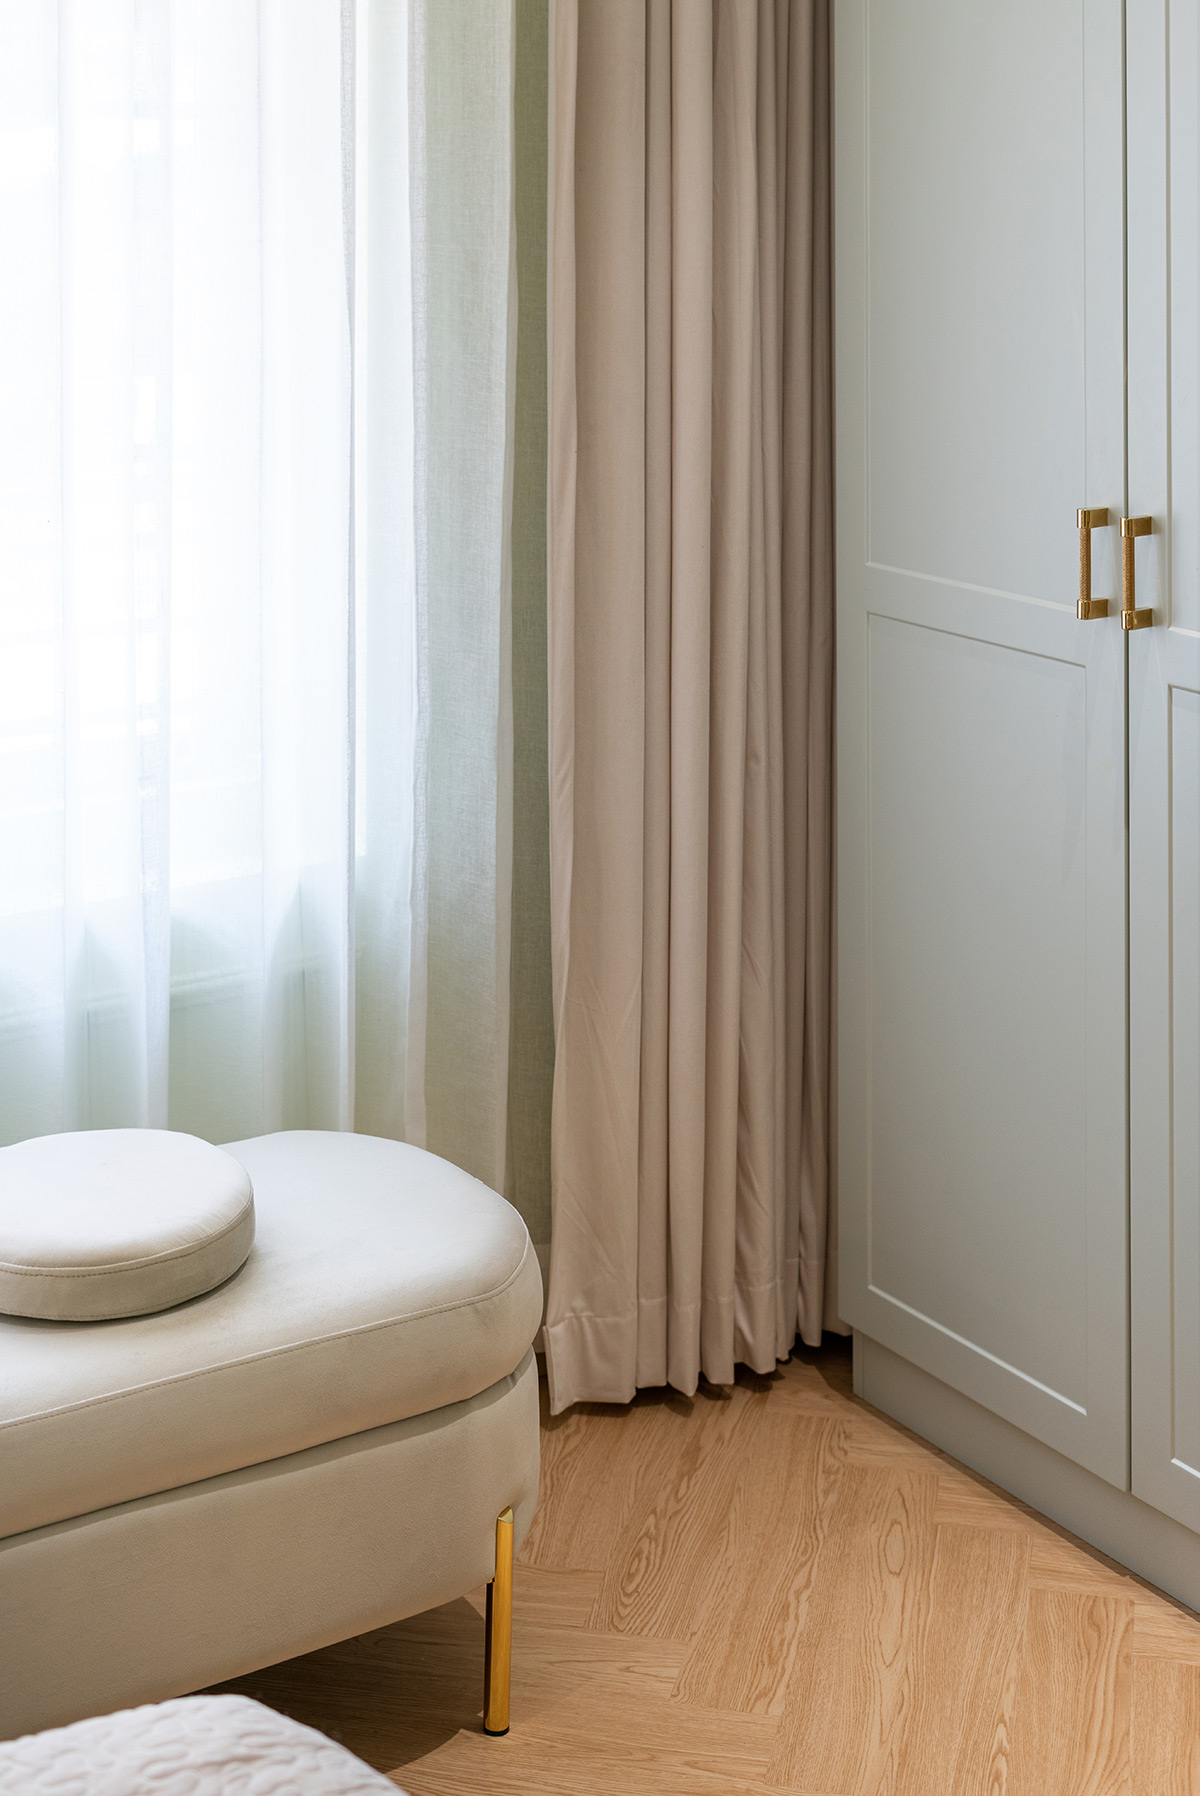
The master bedroom is accessed just off the formal dining room. Cool gray and white tones create a soothing setting. SPC wooden flooring delivers a rich herringbone design.
A sliding glass door gives access to an ensuite dressing room. Two comfortable chairs and a small side table fashion a bedroom lounge area.
A gold floor lamp adds an elegant touch to the bedroom lounge. Decorative panel molding is filled with a delicate botanical wallpaper print. All of the wall and ceiling moldings were custom-made for the project to emphasize the scale and proportions of each room.
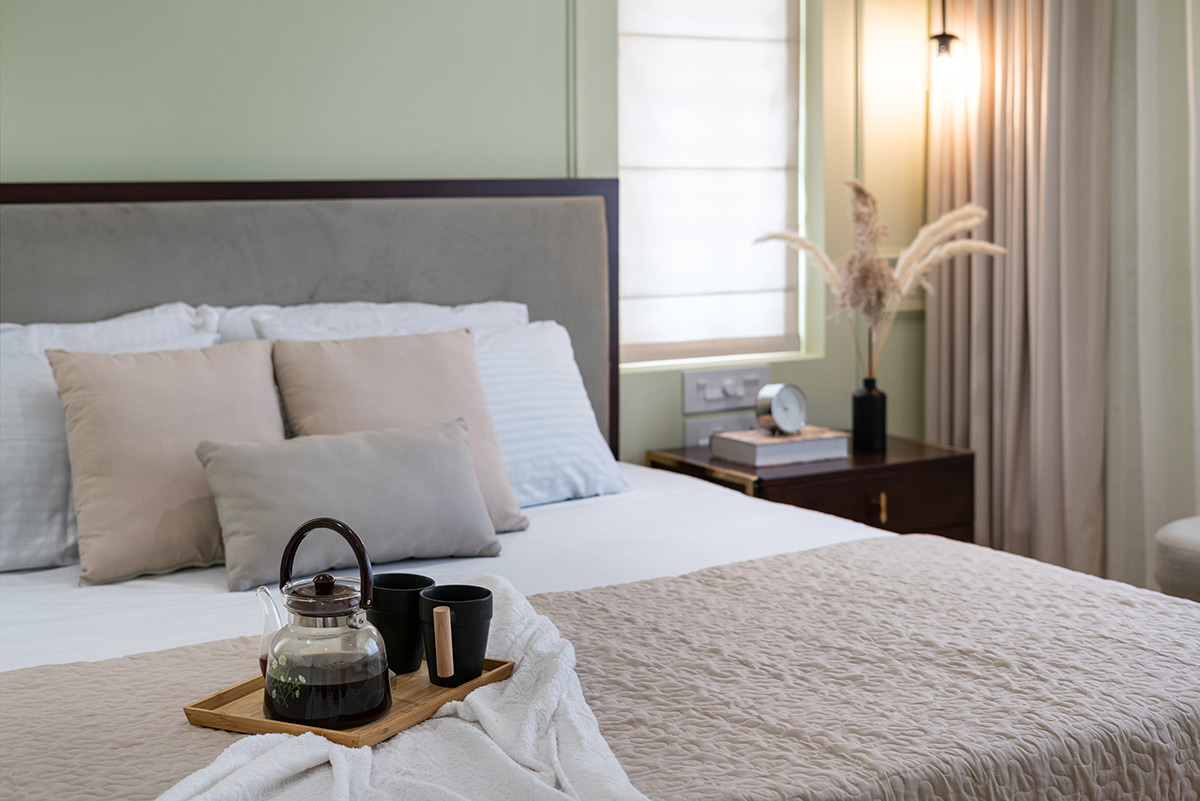
In the guest bedroom, the color scheme is switched up with a fresh green palette. Dark furniture provides weighty visual anchors.
The room has a contemporary yet colonial feel.
Beige bedclothes and white sheets create a layered look on the gray upholstered bed.
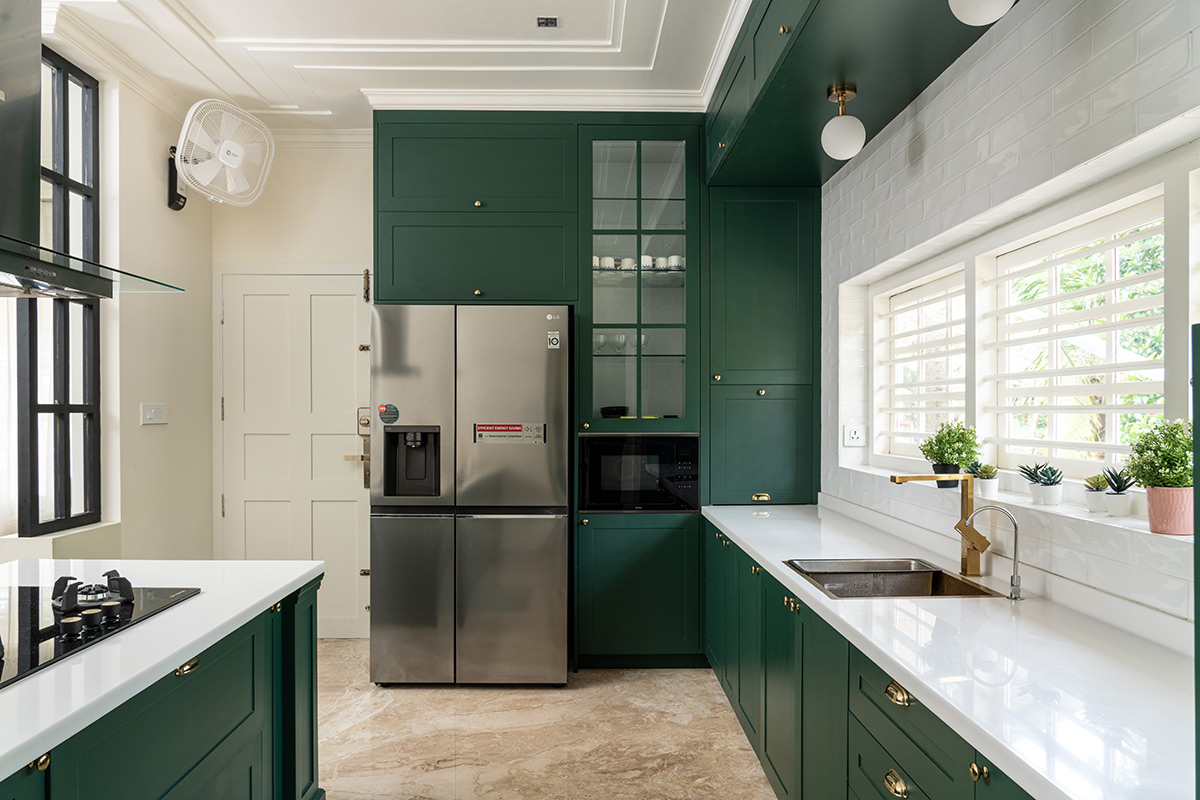
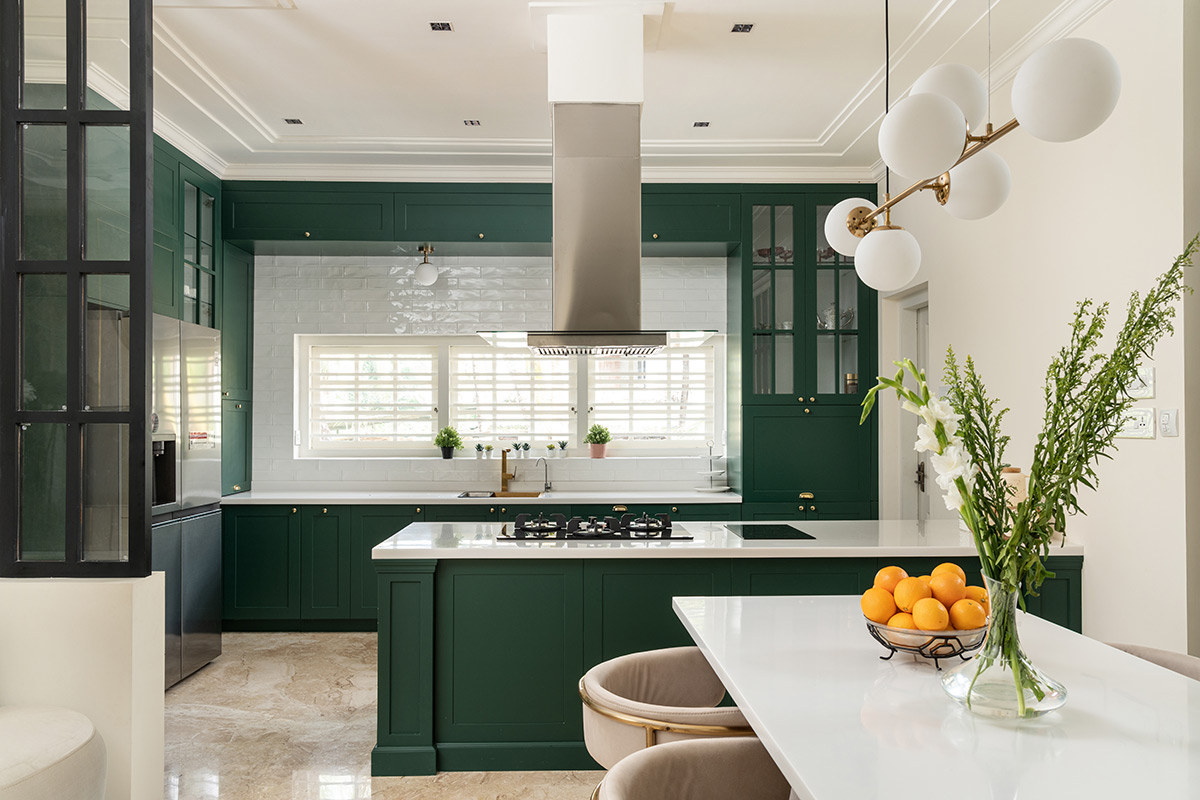
The kitchen features the boldest and darkest colorway in the house. A dark green cabinet finish gives the space a regal look.
A small dining area provides a convenient breakfast spot.
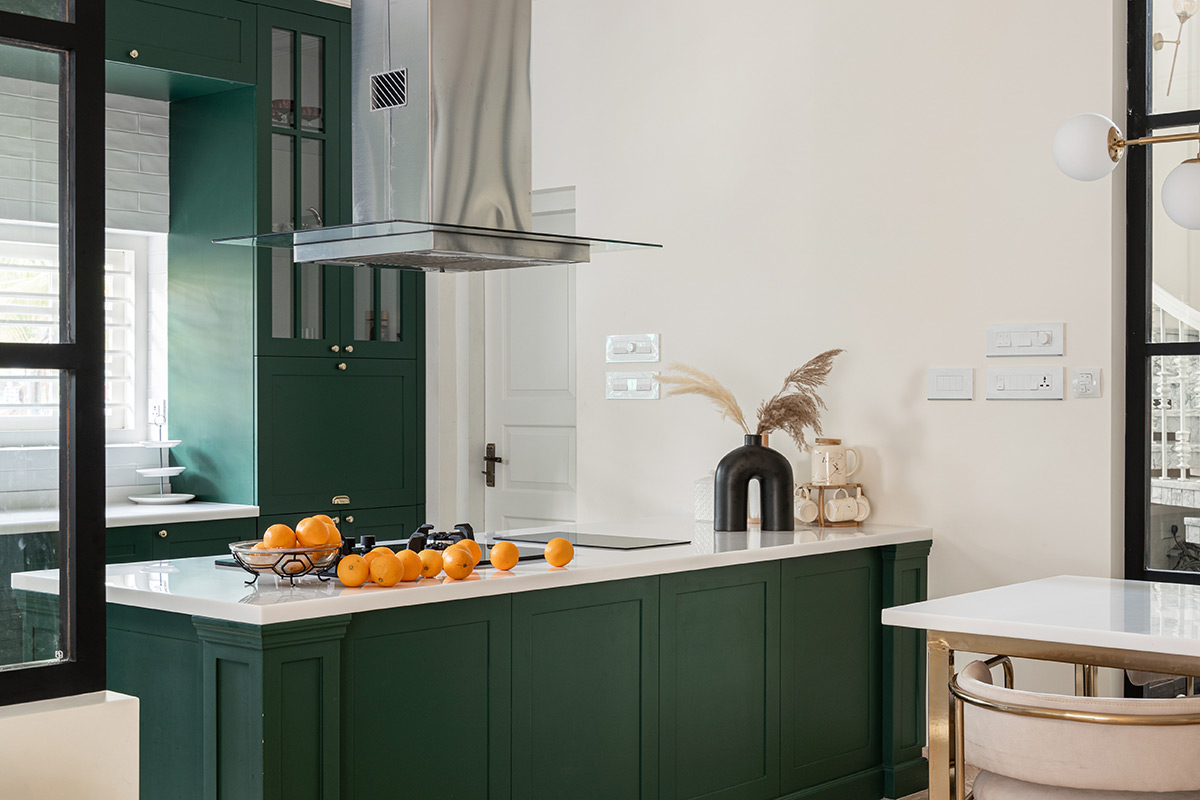
Gold hardware luxuriously complements the deep green kitchen units.
The hob is situated in the kitchen peninsula. This allows the cook to look out over the dining area and be sociable whilst preparing meals.
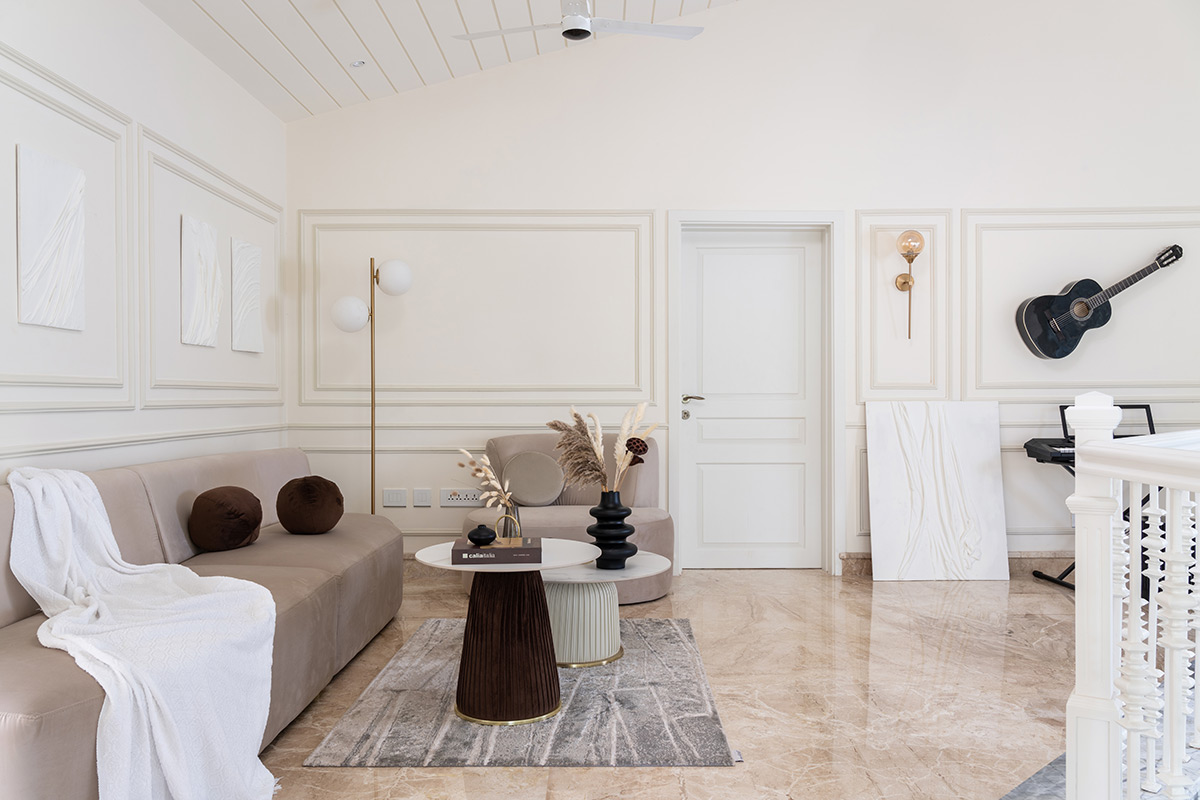
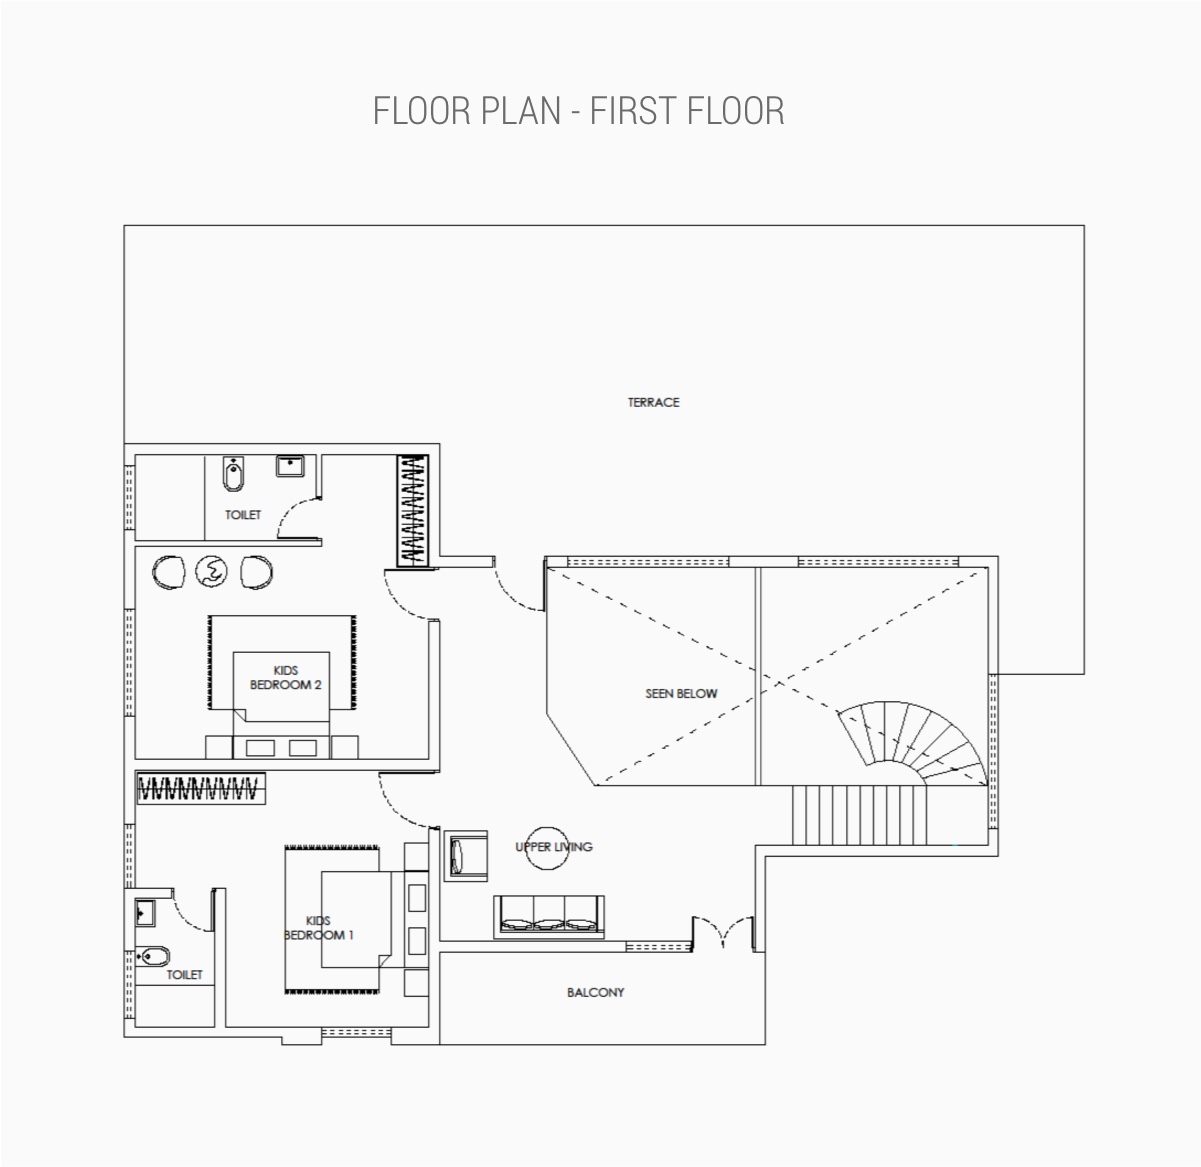
The upper living area provides a getaway from the main sociable spaces downstairs.
Two kids’ bedrooms are located on either side of the space.
The moldings on the walls, furniture, and staircase railing are a neutral Duco finish.
.tasty-pins-banner-container{display:block;margin-bottom:20px;position:relative;width:-moz-fit-content;width:fit-content}.tasty-pins-banner-container a{cursor:pointer;display:flex;font-size:14px;font-weight:700;letter-spacing:1px;line-height:1.8em;text-transform:uppercase}.tasty-pins-banner-container a:hover{opacity:1}.tasty-pins-banner-container .tasty-pins-banner{align-items:center;bottom:0;cursor:pointer;display:flex;justify-content:center;left:0;padding-bottom:1em;padding-top:1em;position:absolute;right:0}.tasty-pins-banner-container .tasty-pins-banner svg{margin-right:4px;width:32px}.tasty-pins-banner-container .tasty-pins-banner span{margin-top:4px}.tasty-pins-banner-container a.tasty-pins-banner{text-decoration:none}.tasty-pins-banner-container a.tasty-pins-banner:hover{opacity:.8}.tasty-pins-banner-container a.tasty-pins-banner-image-link{flex-direction:column}.tasty-pins-banner-container a img{margin-bottom:0}.entry-content .wp-block-image .tasty-pins-banner-container img{margin-bottom:0;padding-bottom:0}#et-boc .et-l div .et_pb_image_wrap .tasty-pins-banner-container .tasty-pins-banner{padding-bottom:1em!important;padding-top:1em;text-decoration:none}#et-boc .et-l div .et_pb_image_wrap .tasty-pins-banner-container a.tasty-pins-banner{cursor:pointer;display:flex;font-size:14px;font-weight:700;line-height:1.8em;text-transform:uppercase}#et-boc .et-l div .et_pb_image_wrap .tasty-pins-banner-container a.tasty-pins-banner span{letter-spacing:2px;margin-top:4px}.et-db #et-boc .et-l .et_pb_module .tasty-pins-banner-container a:not(.wc-forward){padding-bottom:0}Photo by Svitlana on Unsplash
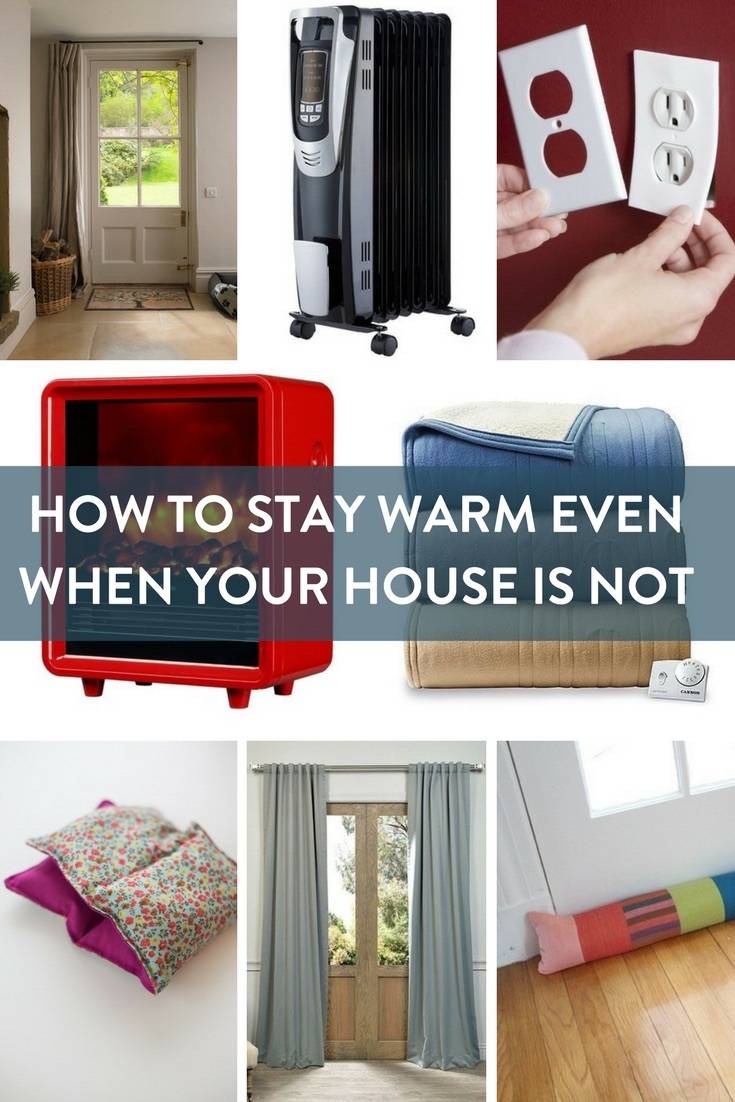
Those of us who live in cold weather environments know the challenge of staying cozy without having to pay astronomical bills in the winter. Yes, there are a thousand ways you can renovate your home to help make your heating more efficient, but that doesn’t help you right now. This post is about practical tips and small purchases that can help you stay warm today without a renovation.
If you live in one of those places where the weather is 80 degrees all year you might want to skip this post. Better yet, read it so you can survive when the weather drops to 65 degrees. We kid, warm weather dwellers. Believe me, all of us want to be you right now (and all year long).
Read on for our best tips are keeping cozy this winter season.
1. Wrap up in a heated blanket
Don’t knock it ’til you’ve tried it!
I am always cold so my family purchased me the above heated blanket for Christmas. I use it every day. Modern day heated blankets have shutoff timers and overheat limits so they are totally safe. I use my heated blanket to keep warm while I am snuggled up on the sofa or sitting at my desk. The heated blanket keeps you from knowing really your furnace is turned down.
2. Shut doors in your house to create zone heating
Make sure you keep the doors shut to rooms you do not use during the day or night. This will help your heating source focus on the areas where you are spending time. This is called zone heating. Zoned heating is your friend in the winter because it maximizes the heat where you are.
3. Shut vents in unused rooms
There is no need to heat your guest bedroom or unfinished basement if the rooms are not being used. This will force all the heat into the rooms that you do use.
If you really want to be proactive, shut the vents to your bedroom during the day and open it back up about an hour before you go to bed. At bedtime, shut your living and kitchen area vents.
For extra coverage, magnetic vent covers can work well to cover floor vents. Ceiling and wall vent covers tend to come off but do work better if the vent is closed.
4. Use an oil-filled space heater
Oil-filled heaters are the safer version of space heaters to use in your home. They do take a little while to heat up but they do warm up a space effectively, especially if you shut doors to maximize the space. Even though they are the “safer version,” you still need to be careful. Make sure you spend a little extra money for one with a timer and an overheat shutoff for safety reasons. You do not want to leave them on overnight or while you are away from home. They can be warm to the touch so like any space heater, it may not be good with little kids.
These type of heaters are really great for helping your pipes not freeze under a sink. Open your sink cabinet doors and place it next to the cabinet periodically throughout the day when its below freezing.
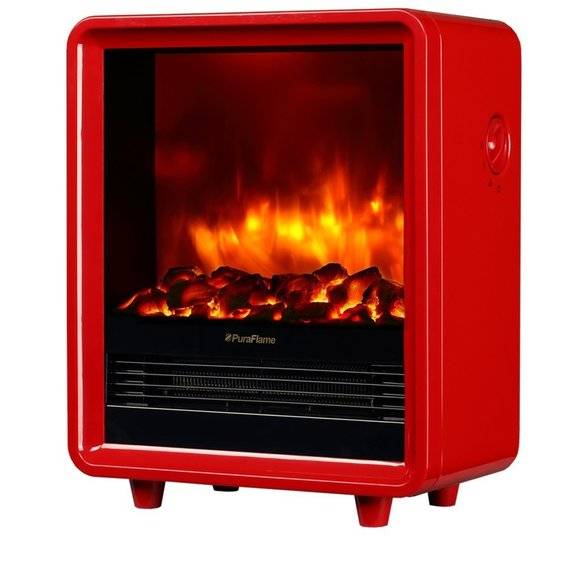
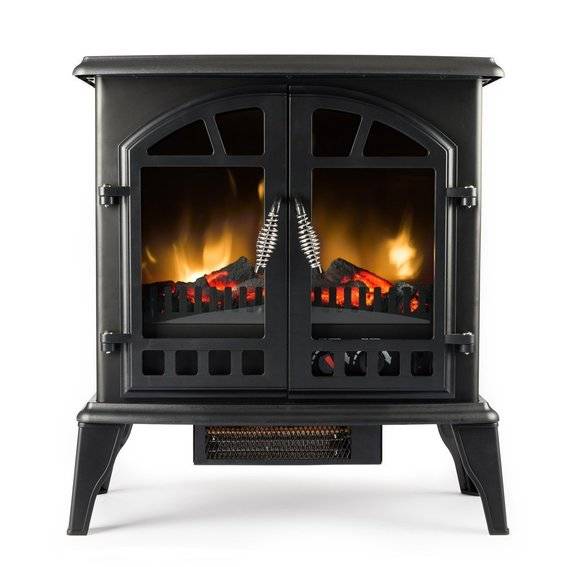
5. Purchase a portable electric fireplace
An electric fireplace with high BTUs can really warm up a space. These are more expensive than space heaters, but most are safe to touch for the littles in your home. They are also very safe and efficient to run for long periods of time. I am getting impressed with the stylish options available these days.
If you have a non working fireplace you can tuck one of these into your fireplace like Megan Pflug did in her basement makeover.
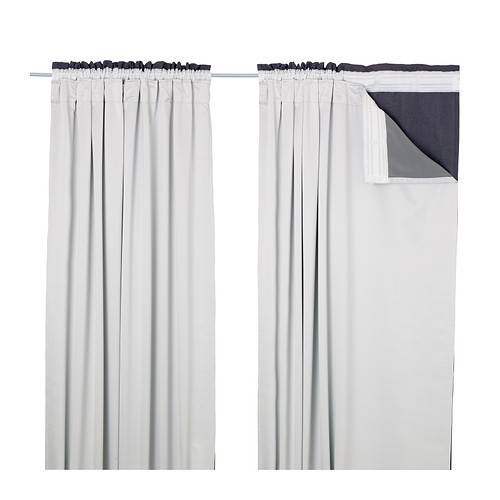
6. Switch out window treatments for thermal curtains / add thermal curtain liners
Switch out curtains with thermal curtains or attach thermal curtain liners to your existing curtains. Windows can be the largest source of cold air entering into your home. Thermal curtains can help keep the cold air insulated.
Hanging a curtain over your exterior doors can be stylish and help your house feel warmer in the winter.
8. Open curtains during the day and close them at night
During a sunny winter day, let the sun in to warm your home. When the sun is down, shut them to insulate the cold air.
Dandelion Discoveries
9. Hang a curtain at the top of your stairwell
If you have a two-story home use a thermal curtain and tension rod at the top of your stairs. Close the curtain the times of the day when you spend most of your time downstairs. Why? It is simple, hot air rises and the closed curtain can keep the hot air downstairs.
The top of my stairwell is a doorway sized opening so I can use a shower curtain tension rod to hang a thermal curtain. The above stairway curtain “how to” is over at Dandelion Discoveries.
10. After using your oven, keep the door open while it cools down
Maximize the usage of your oven as long as you can. After you use your oven, keep the door open while the oven cools down. Of course, not the best thing to do if you have little kiddos hanging around.
12. Add insulated covers to your outlets and light sockets
Your outlets and light switches can be a source for cold air to get into your home. This is true especially if you live in an old home where the walls are not insulated. If you live in an old home with original plaster walls…this applies to you. This fix requires no rewiring or electrician skills. You just need a screwdriver to take off the face plate.
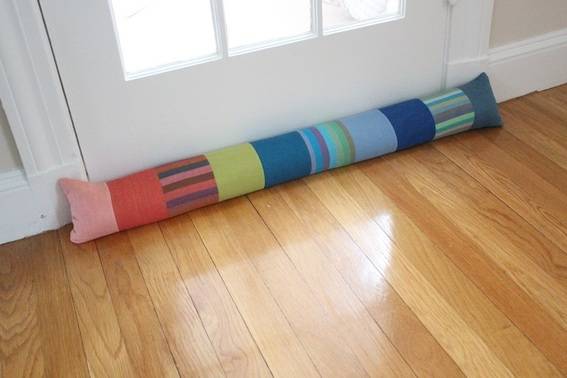
13. Cover your home with window sill and door draft stoppers
Use rice and fabric remnants to create a cute insulated window sill or door draft stopper
14. Lay down a rug or two
If you have hardwood floors, rugs can help with cold floors. Check your local carpet store for remnants if you are on a budget. If there is no room in the budget for a rug, lay a blanket on the floor while you are hanging out in your living room.
15. Wear a winter hat around the house
Heat exits your body from your head so keep yourself warm by keeping a cute winter hat on your head while you are home.
16. Wear warm slippers
Like your head, heat exits your body from your feet so keep them insulated.
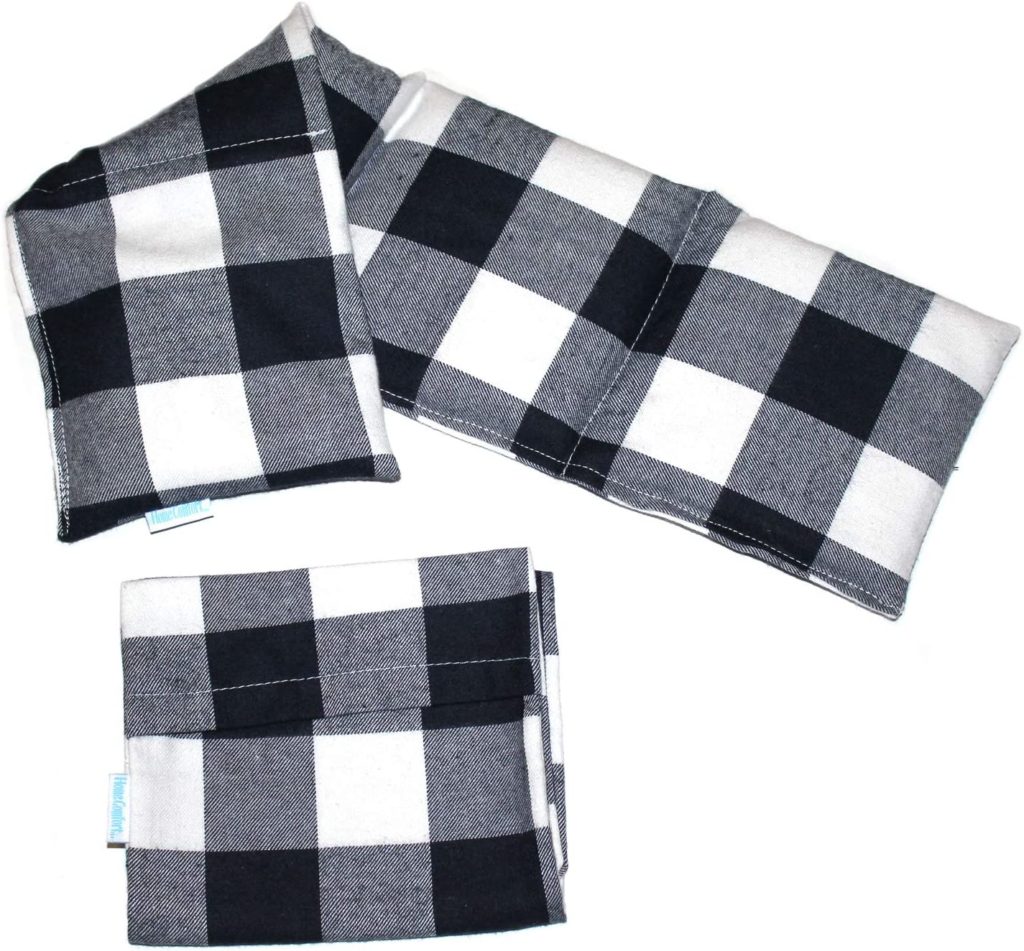
17. Warm your towels with a towel warmer
Fight the cold in the bathroom by warming up your towels while you shower. They also work for bathrobes.
Give your living room a fresh look by rearranging your furniture away from your windows. If the furniture in front of your window only fits one way, move your seating away from the window a least 6 inches and execute tips 6, 8, 13, and 20.
19. Unblock heater vents
Don’t sacrifice your coziness for a piece of furniture over a vent. Rearrange your furniture to unblock the vent. Not possible? Purchase a vent attachment or extender.
Amazon
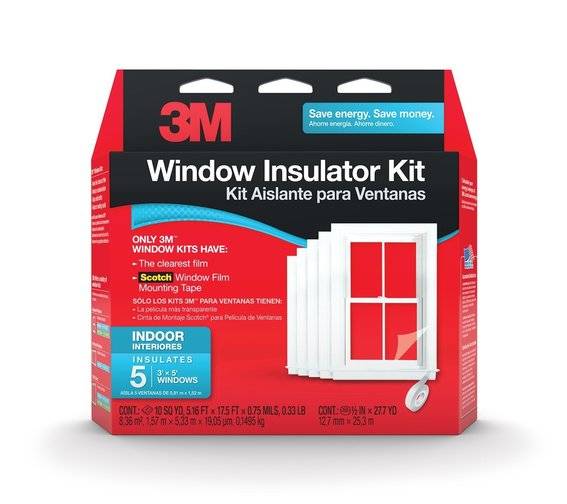
20. Install plastic window insulators
These plastic window insulators can help your windows feel like a more expensive window. If done well, the insulator really isn’t super noticeable. They are easy to install and remove. All you need is scissors and a hair dryer. Most of the instructions tell you to install the plastic over your outer trim. I was able to install the plastic on the inside of the window trim behind my window treatments. These are a great solution for large windows with no window treatments.
Sometimes just thinking warmer thoughts can get you feeling cozier. Cuddle up and get some inspiration for you outdoor spaces this summer and tell yourself you are almost there!
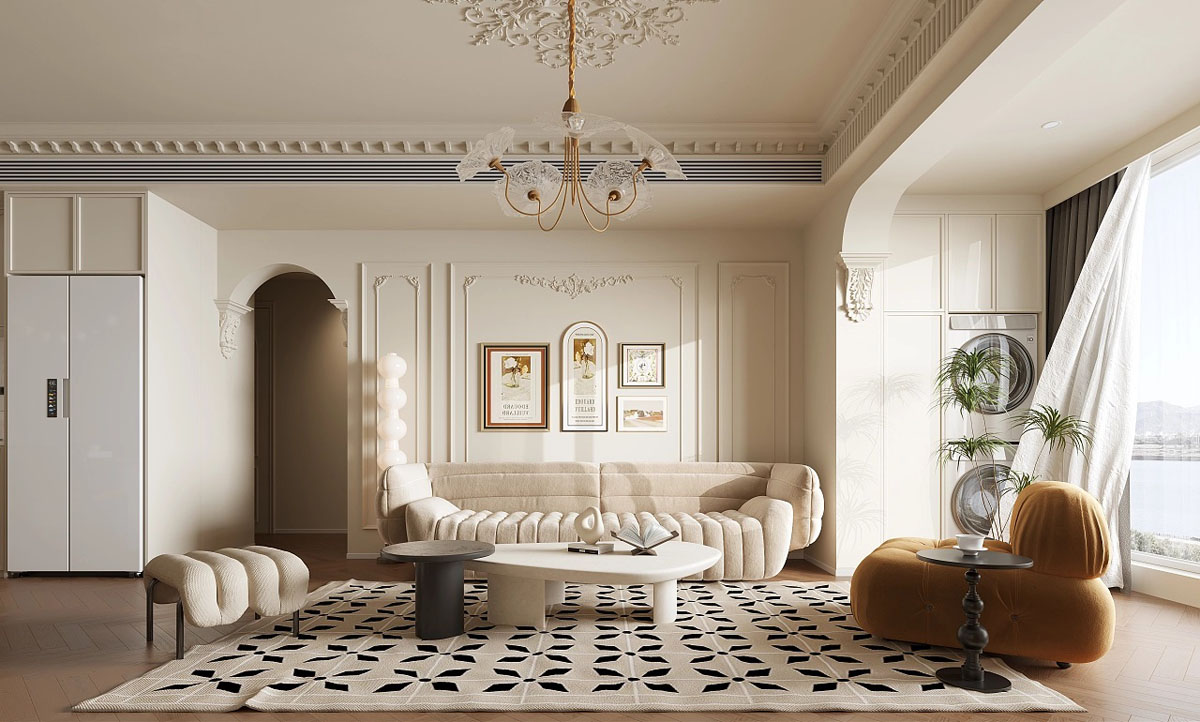
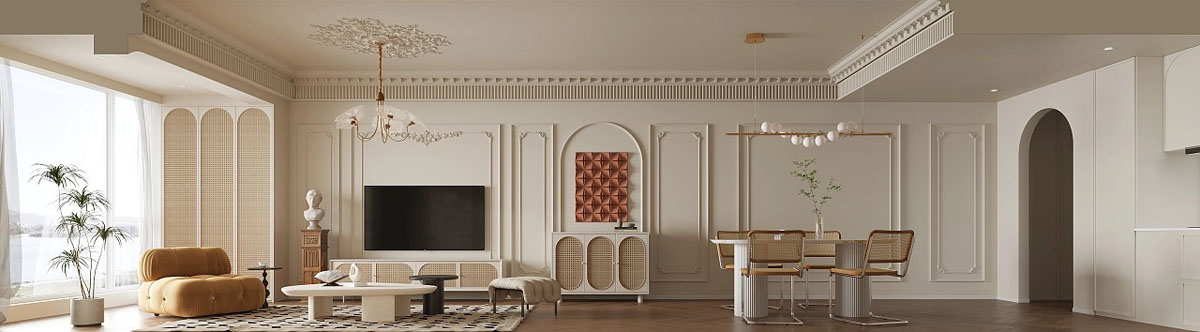
A smooth beige palette is a safe jumping-off point for a decor scheme… Sometimes a little too safe. Without good styling choices, a basic beige colour scheme can appear bland. This collection of three unique home interiors is packed with ideas to help create interesting neutral interiors. Home design number one is a sumptuous, neoclassical space. Delightfully decorative boiserie and crown moulding enrich the beige backdrop. Modern furniture arrangements have a sculptural essence. Tour number two takes place in an apartment with a chic, modern approach and eye-catching accessories. Finally, we’ll round up the selection with a green and red accented scheme and an elegant arch theme.
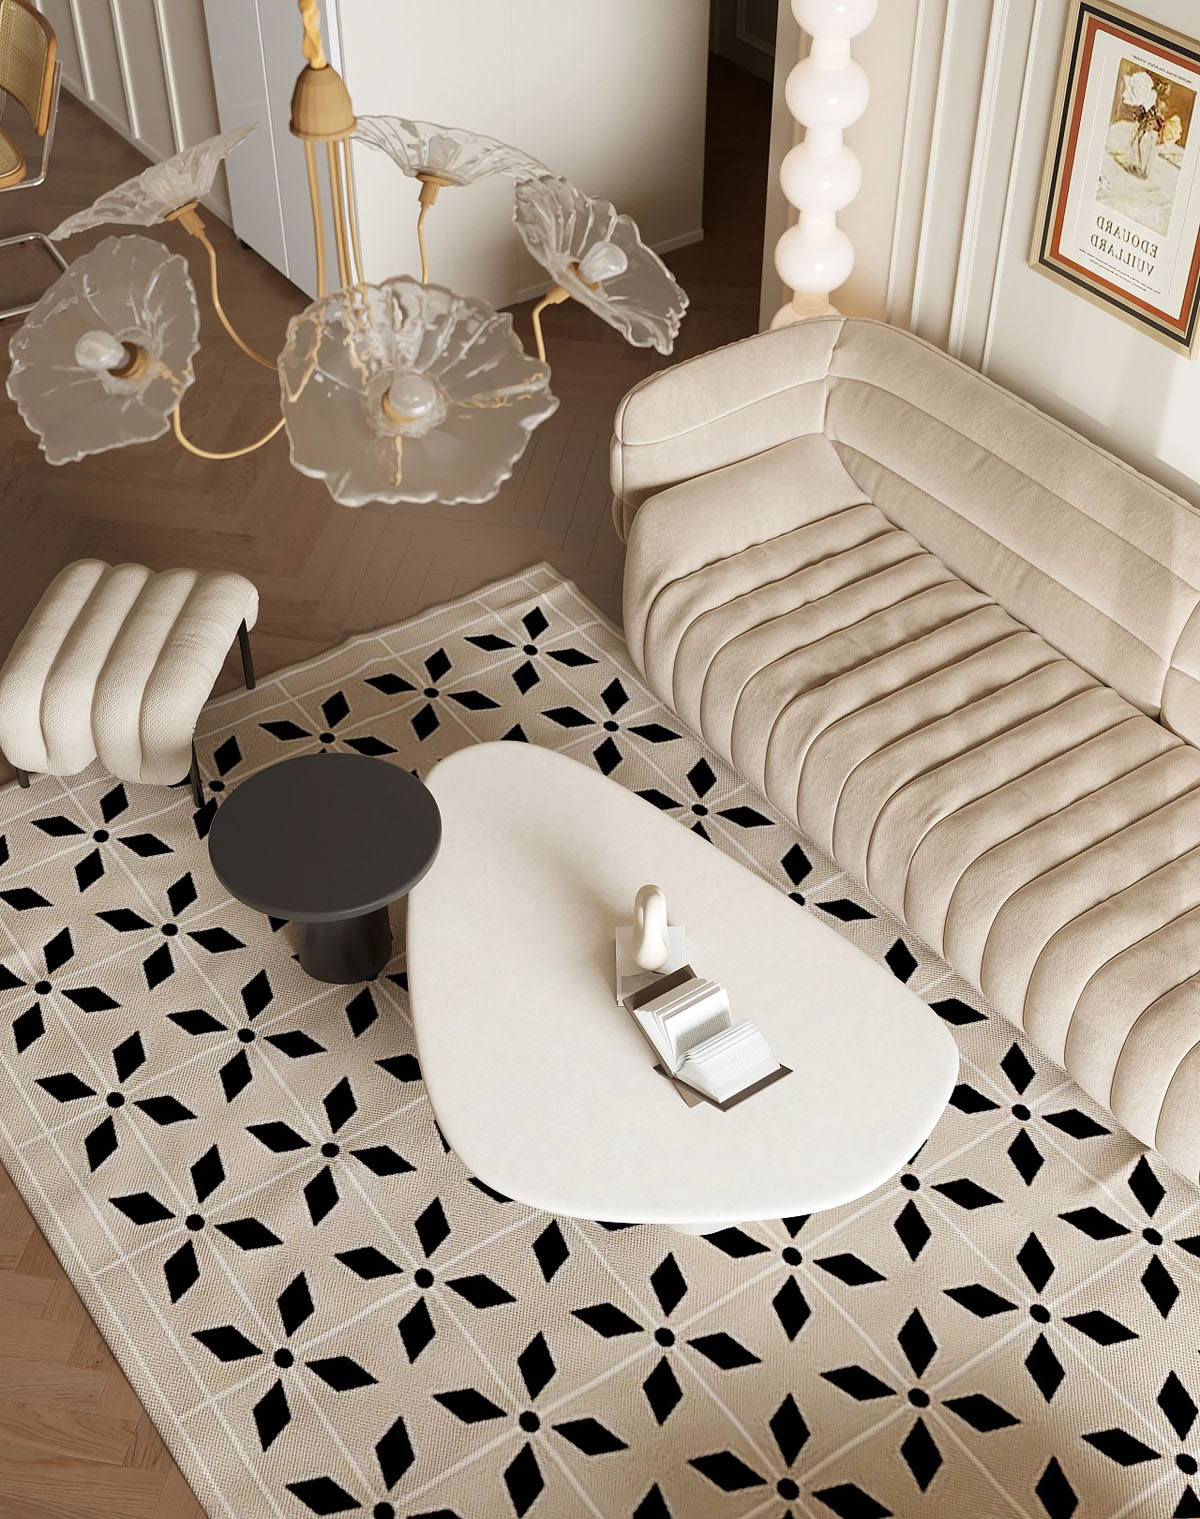
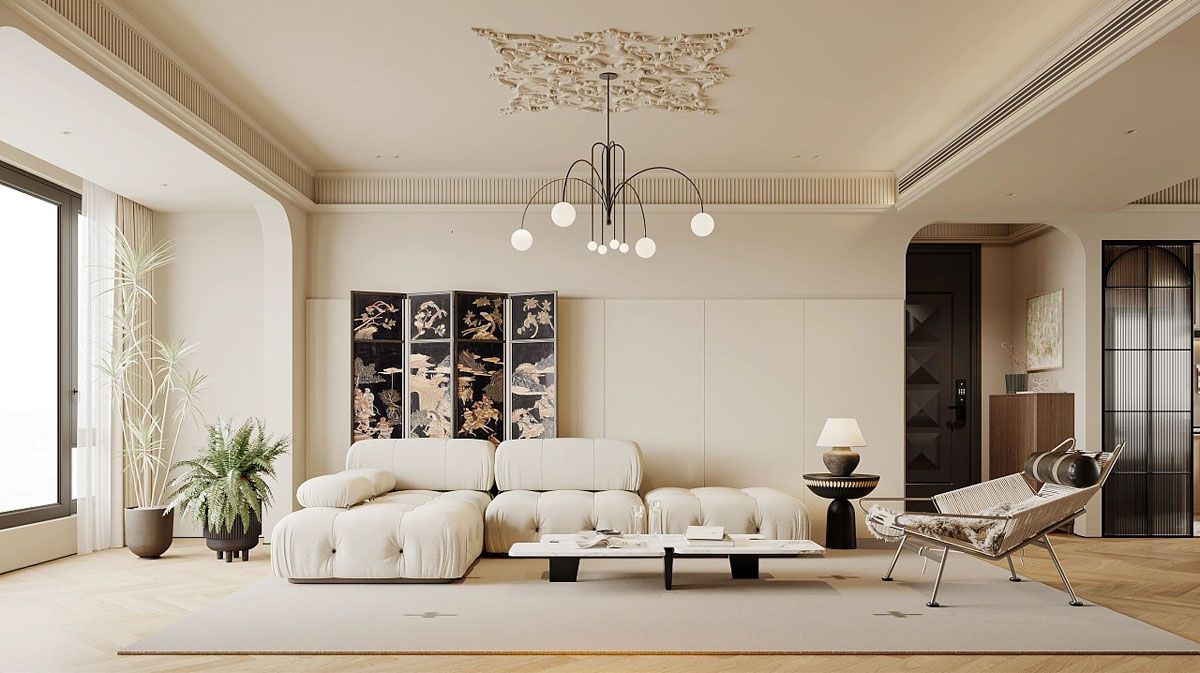
As we enter the living room of our first home, we’re met with a warm feeling of calm and tranquillity. A soft, modern tufted sofa design is set against a beige backdrop of classical boiserie. A striking black and beige rug design softens the room’s acoustics and the feeling underfoot.
A set of black and beige nesting coffee tables break up the bold pattern on the living room rug. A channel-tufted stool neatly extends the seating plan.
Advertisement
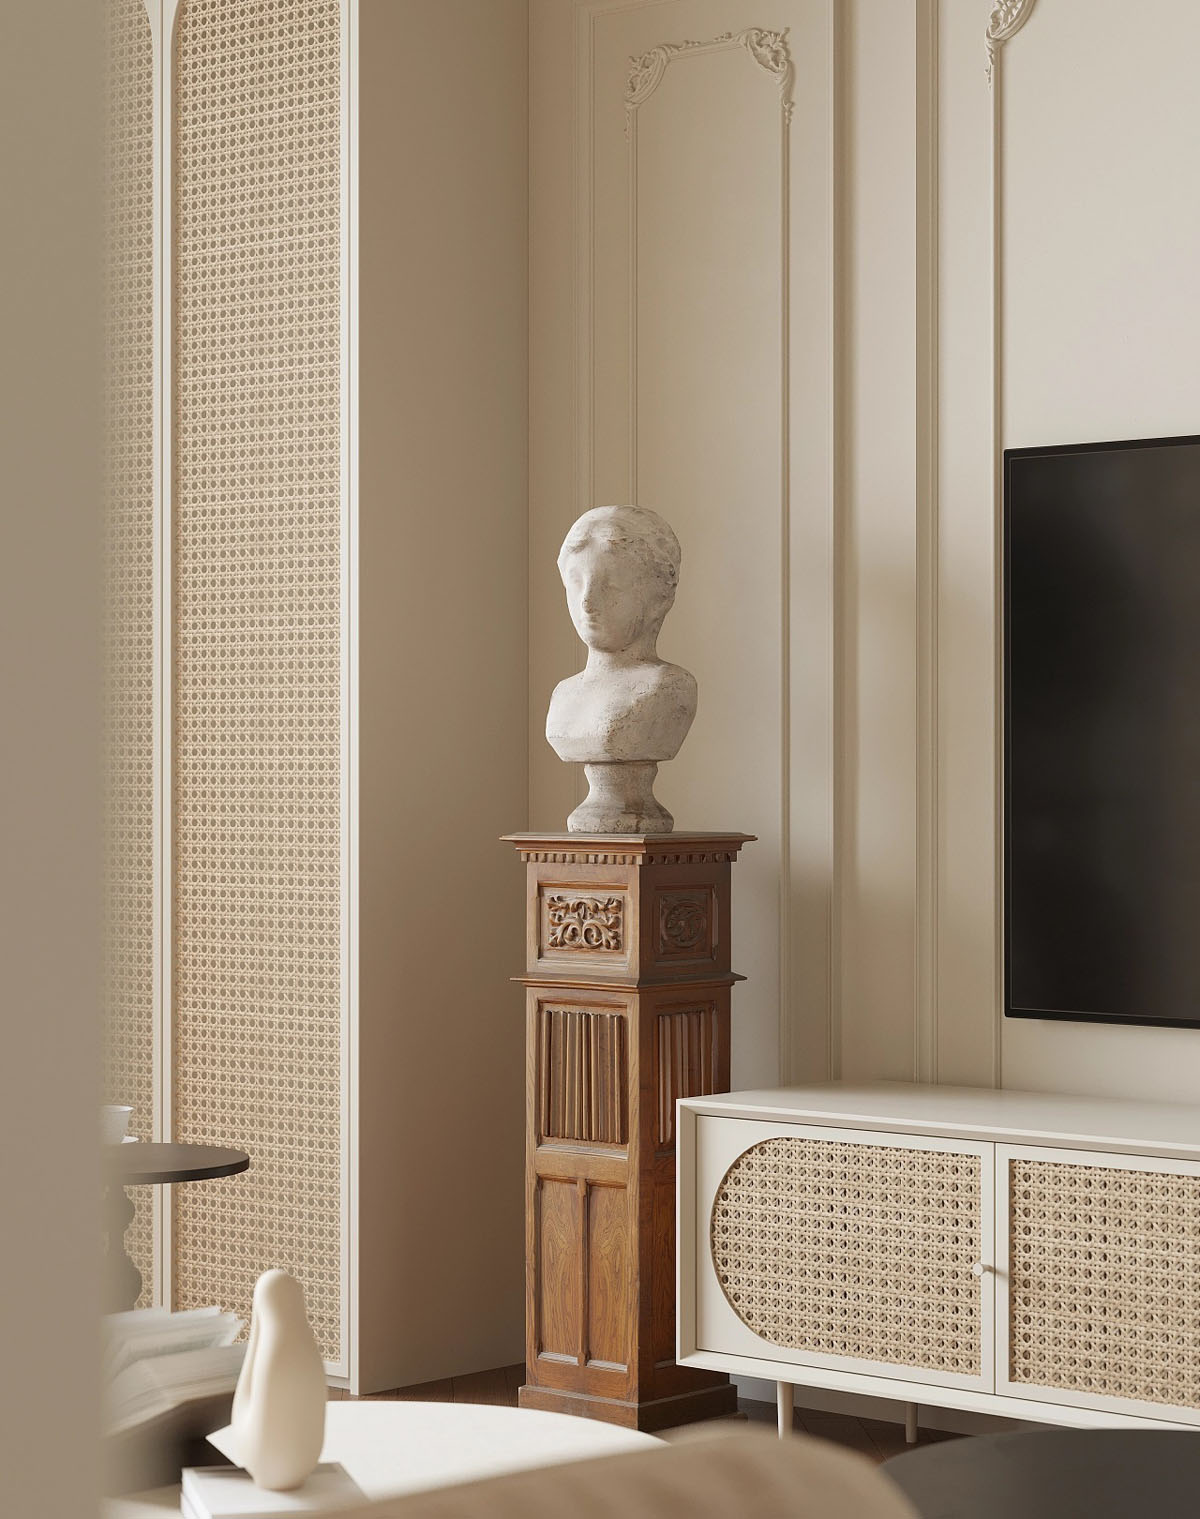
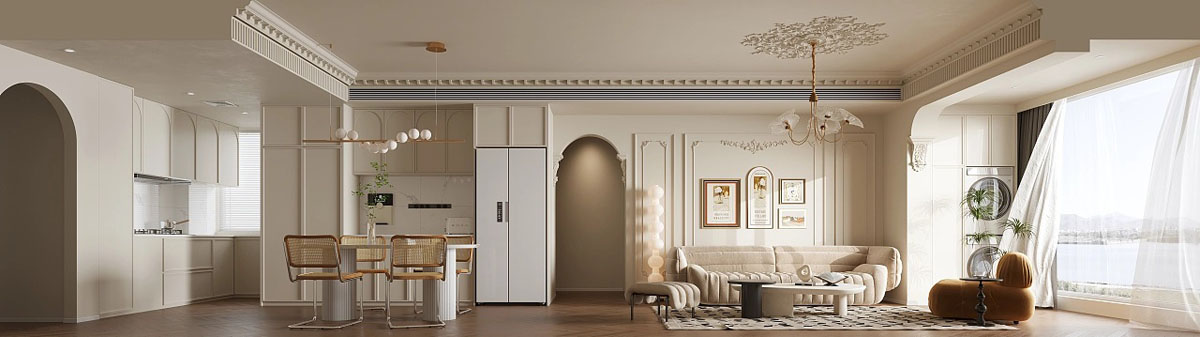
Wall moulding makes a cohesive link across the open-plan living room dining room combo. One larger panel frames the TV wall in the lounge, whilst a second wide panel defines the dining area.
The rattan media console is matched by a set of rattan-fronted storage units beside the window. The natural texture and tone make wonderful accompaniments to the subtle beige background.
A beige kitchen winds around the dining area. White marble backsplashes add a light, luxe touch.
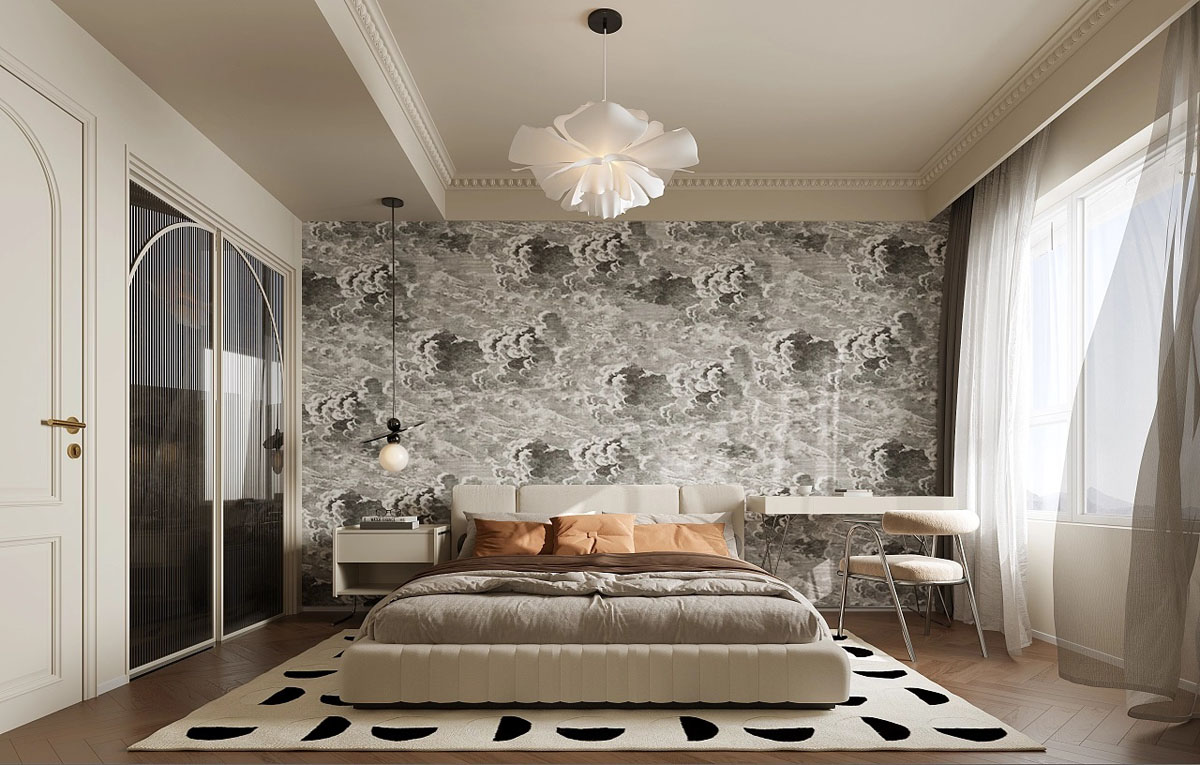
In the master bedroom, a beige upholstered bed creates a moment of visual rest between a patterned headboard wall and a bold rug.
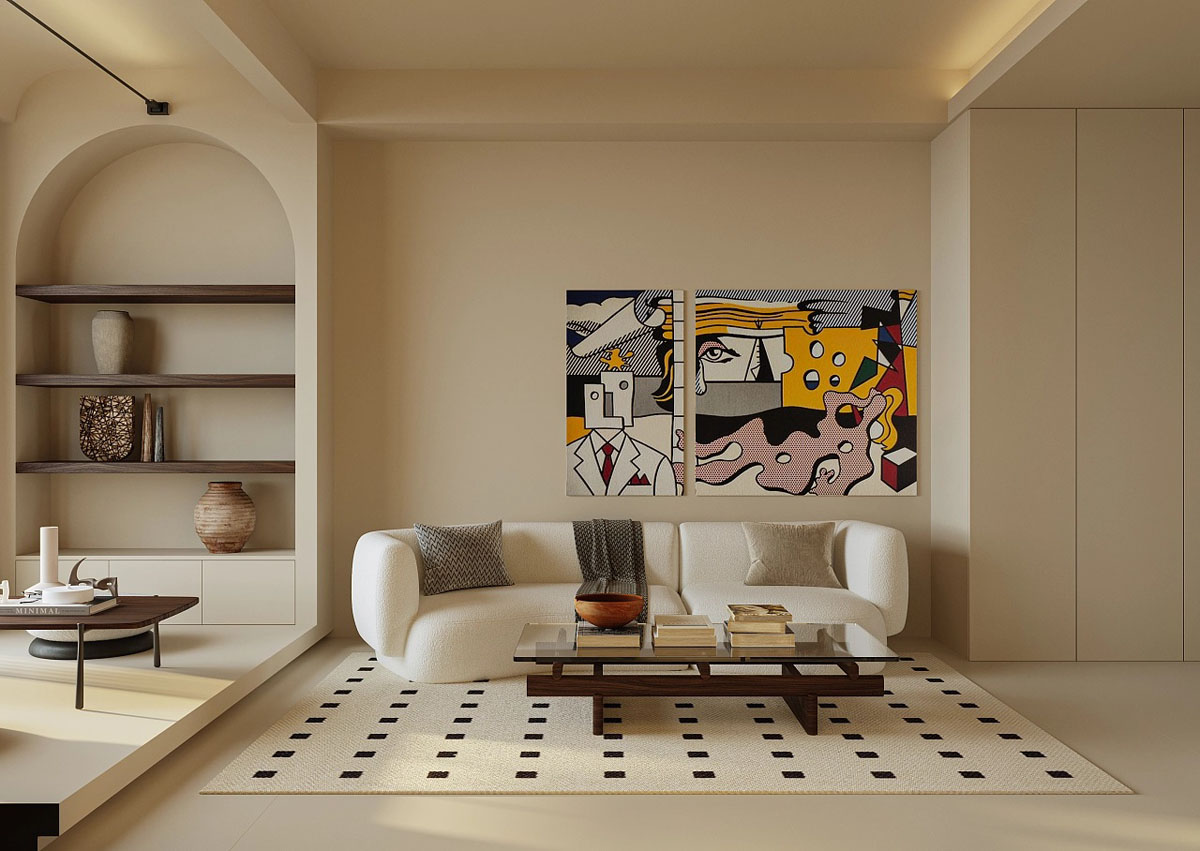
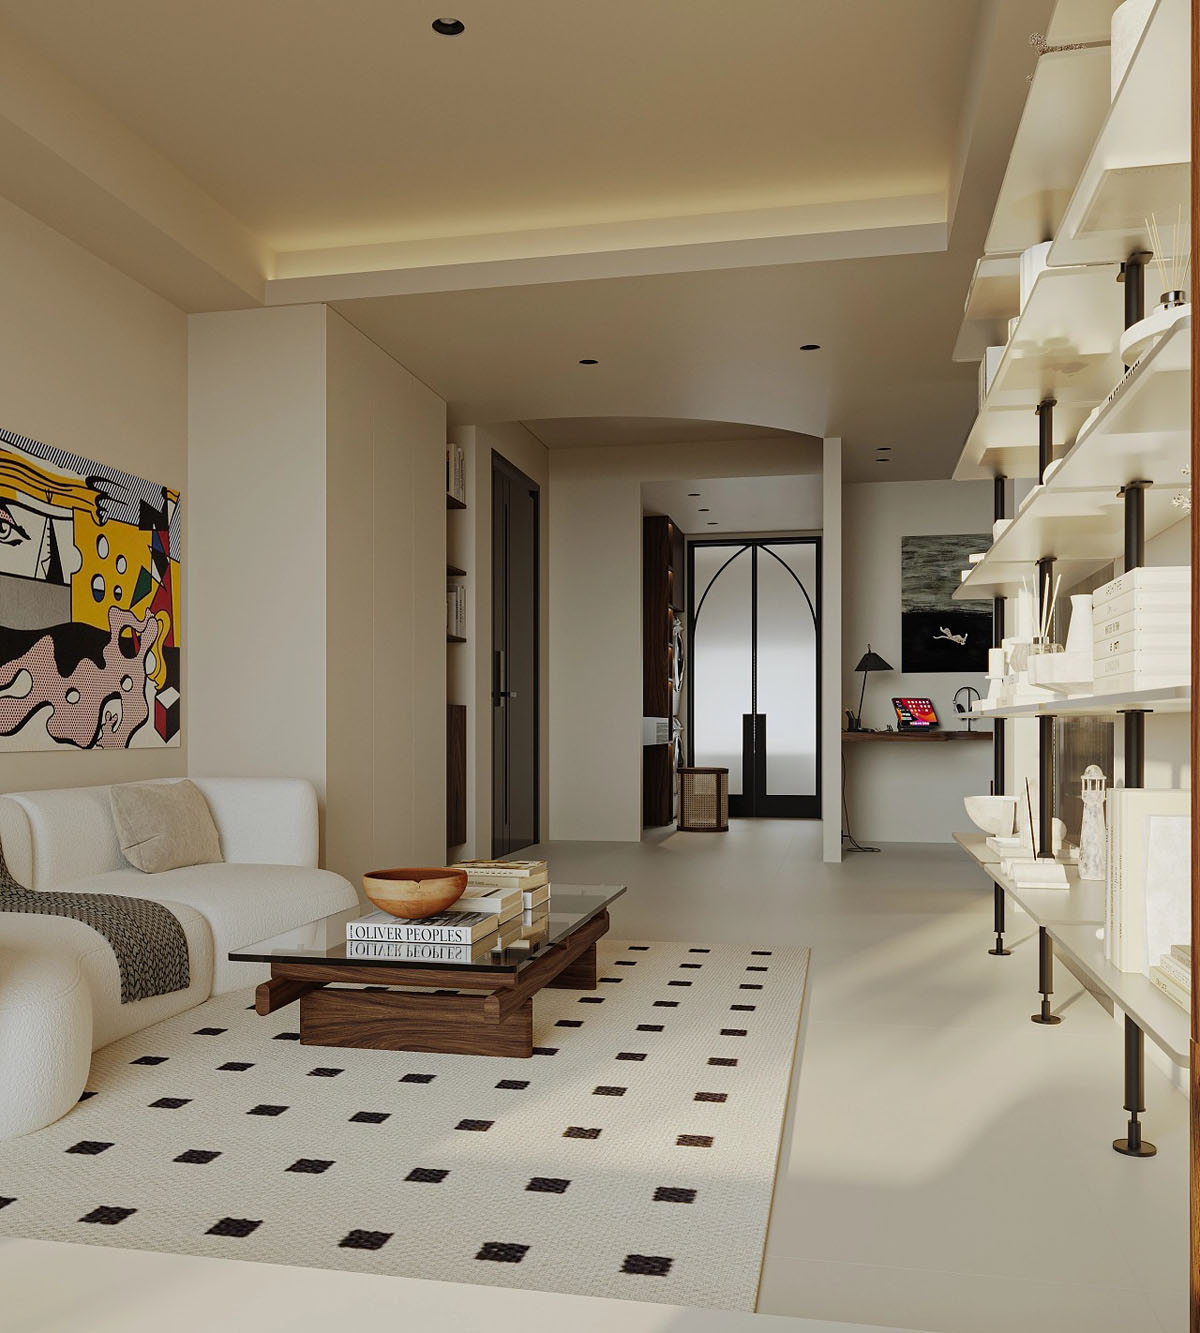
In this chic, modern apartment, a brightly coloured diptych is hung above an understated pale couch. In crisp contrast to the curves of the sofa, a glass coffee table sets down a sharp silhouette.
Advertisement
A black and beige rug design complements the coffee table with a squared pattern. A monochrome throw and cushions accent the couch.
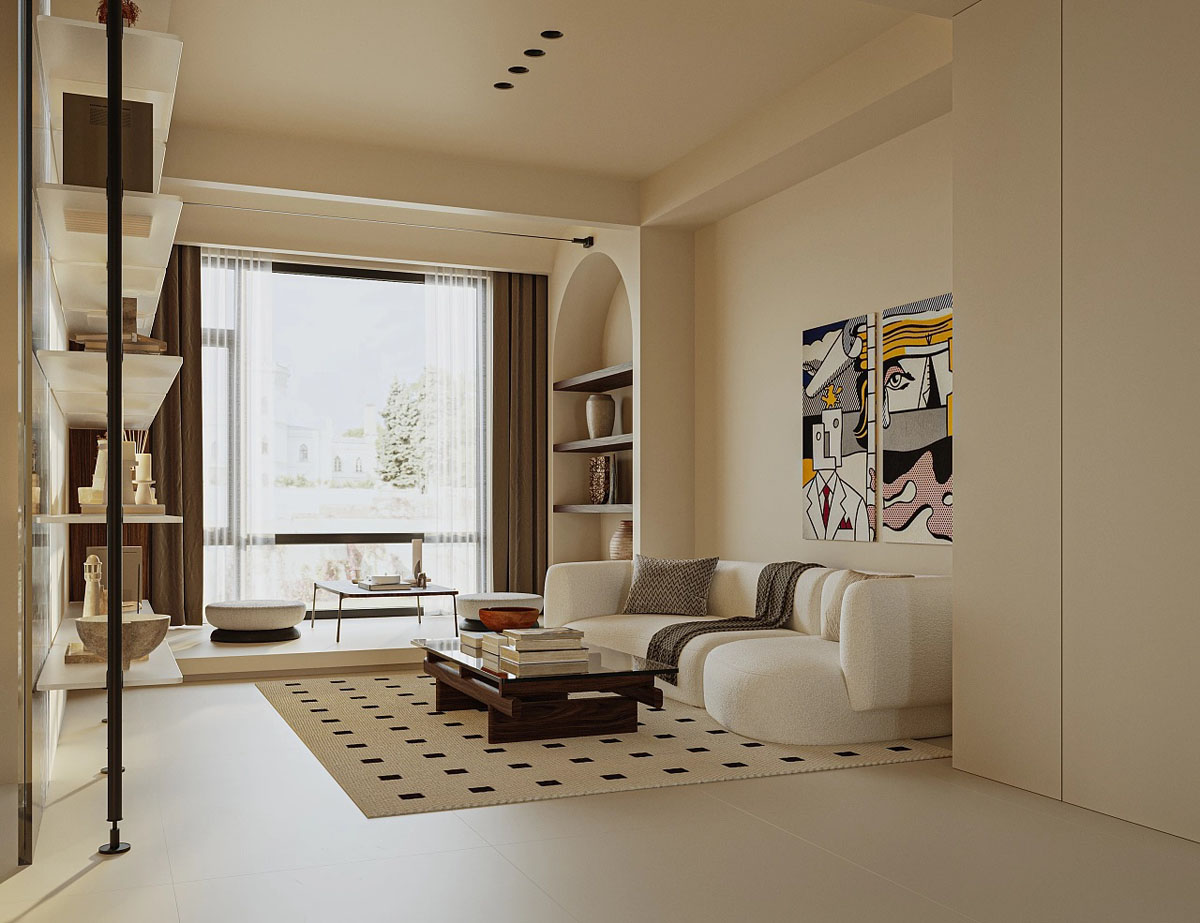
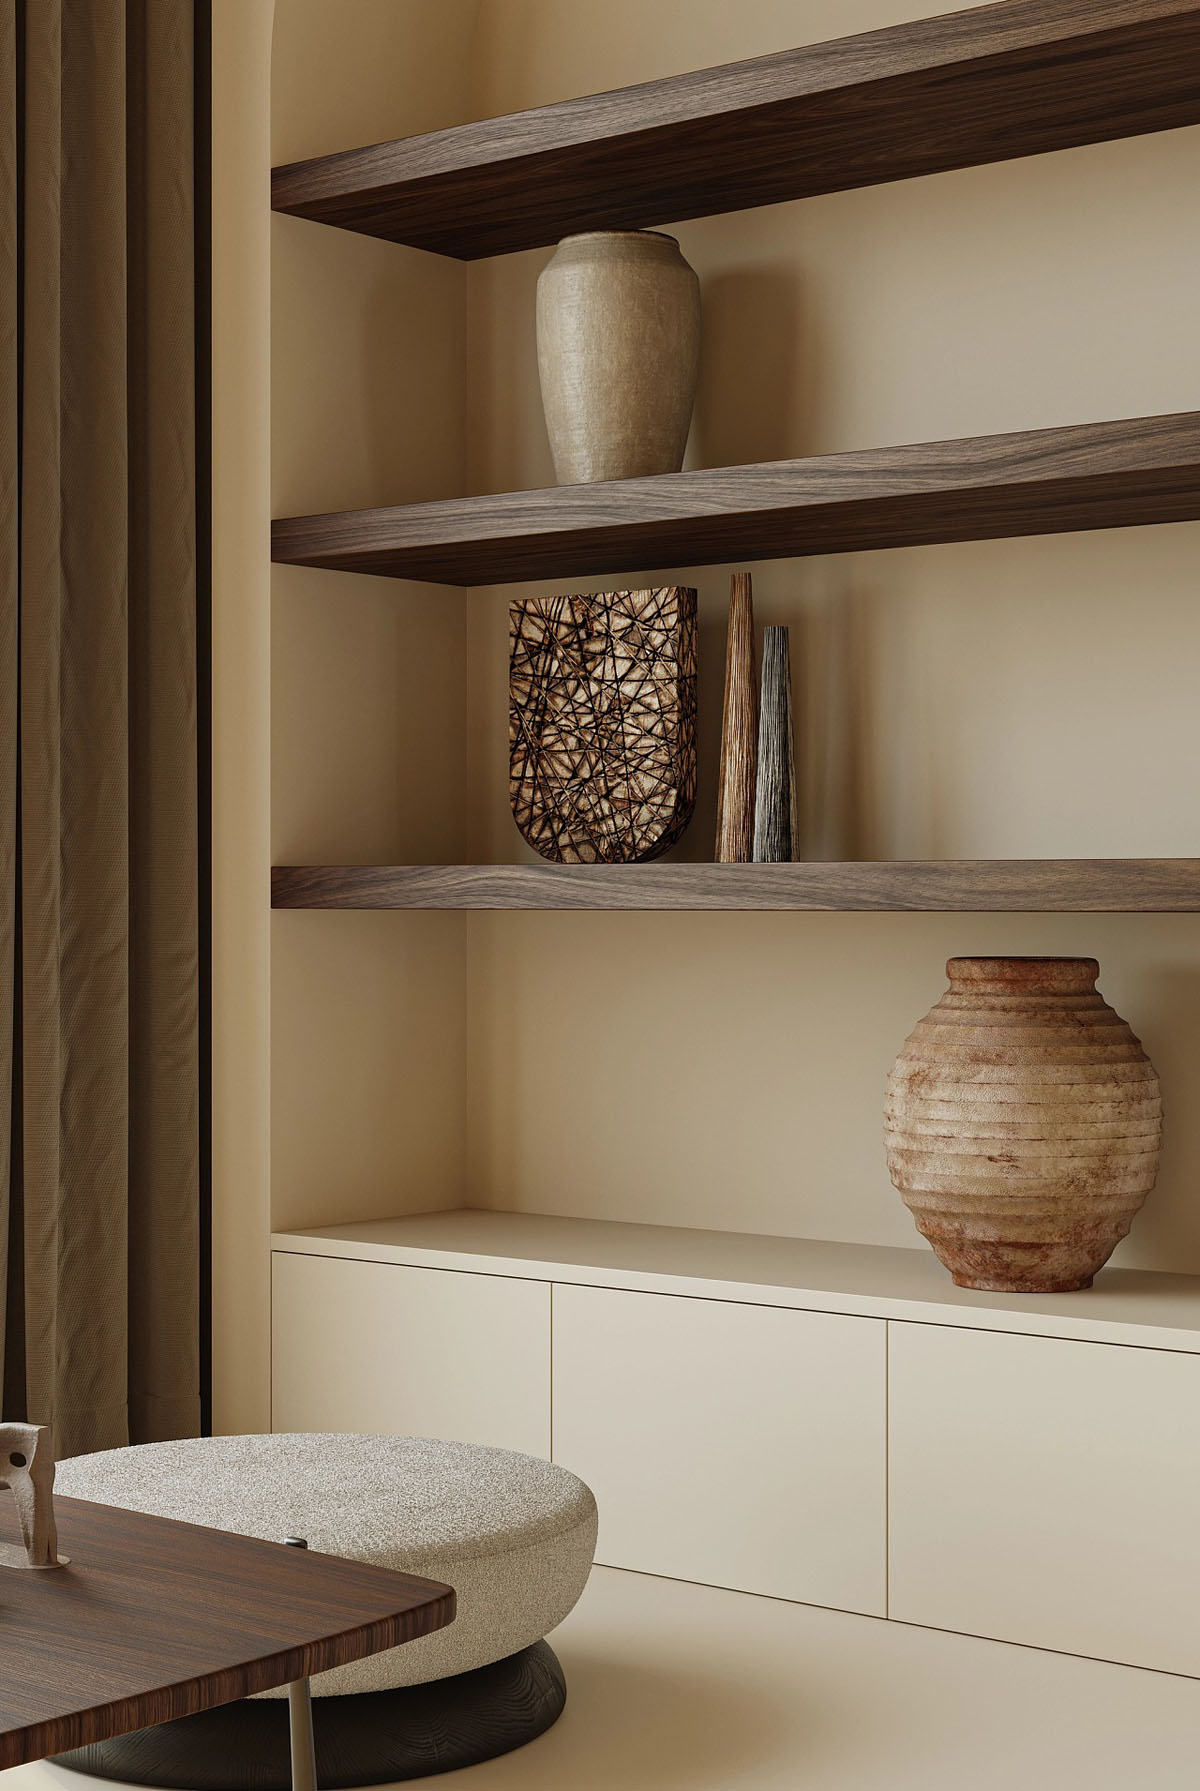
In the window area, a platform floor is employed to mark a separate function. A small stool and a coffee table are paired to fashion a reading area. A display shelf is built into an archway, adorned with decorative vases.
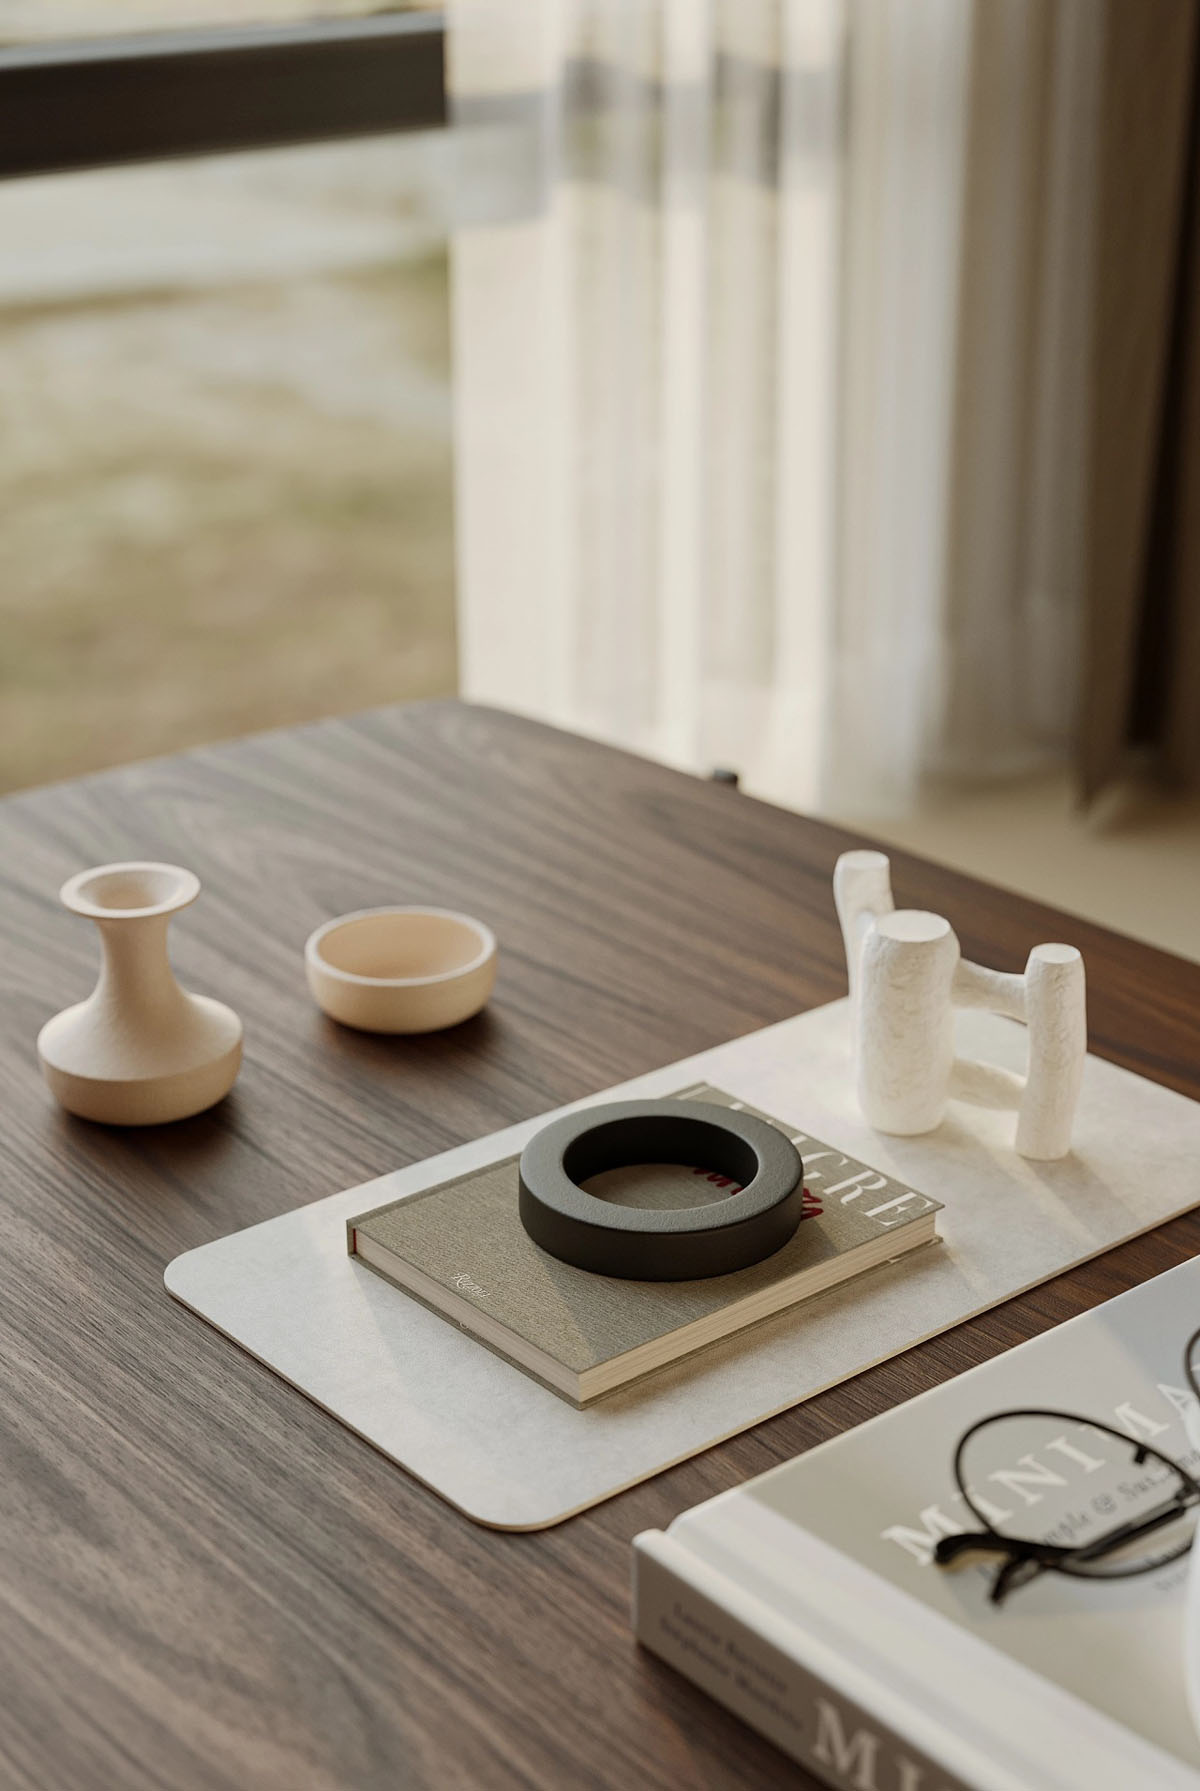
Coffee table books and small ornaments create a low-key centrepiece.
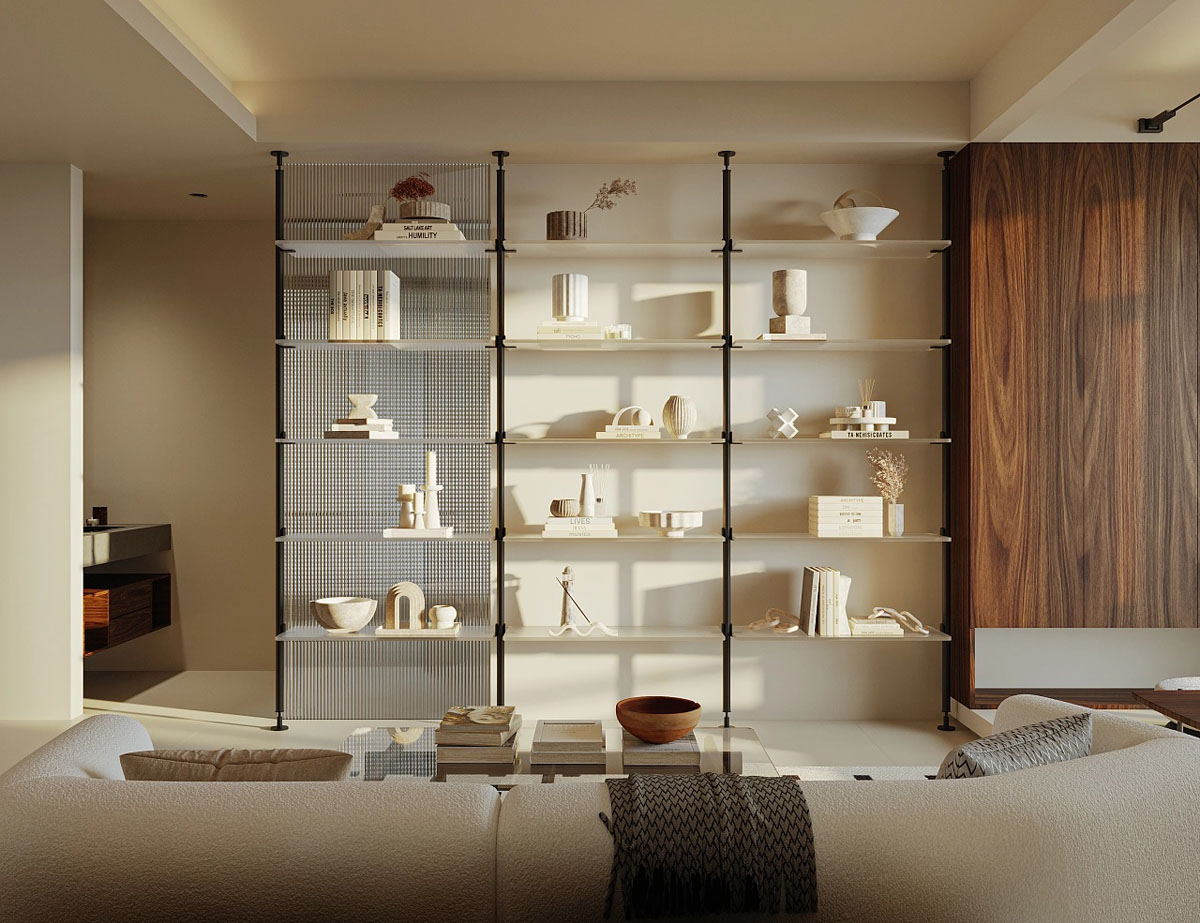
A tensioned shelving unit takes the place of a TV wall opposite the sofa.
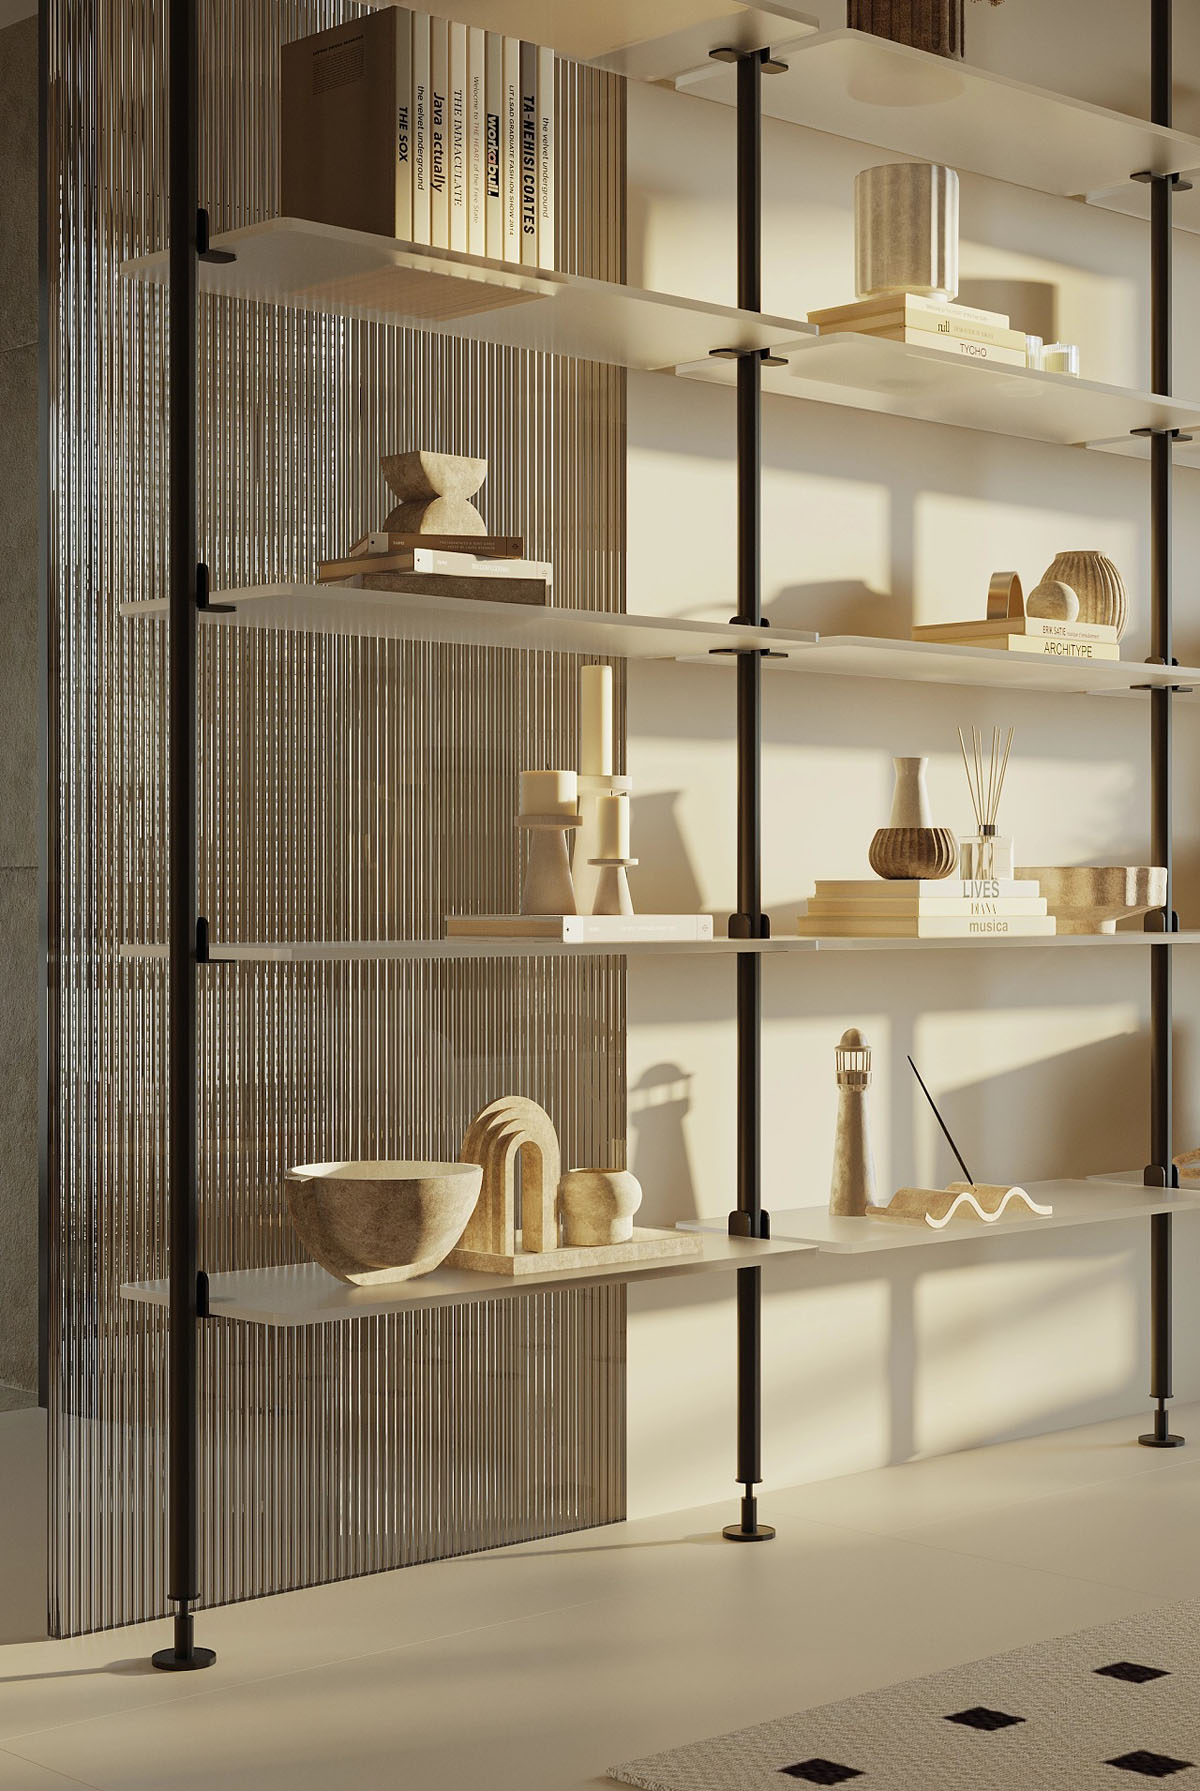
The wall shelves are decorated with an array of books, vases, and sculptures.
Textured glass adds a decorative panel behind the shelves.
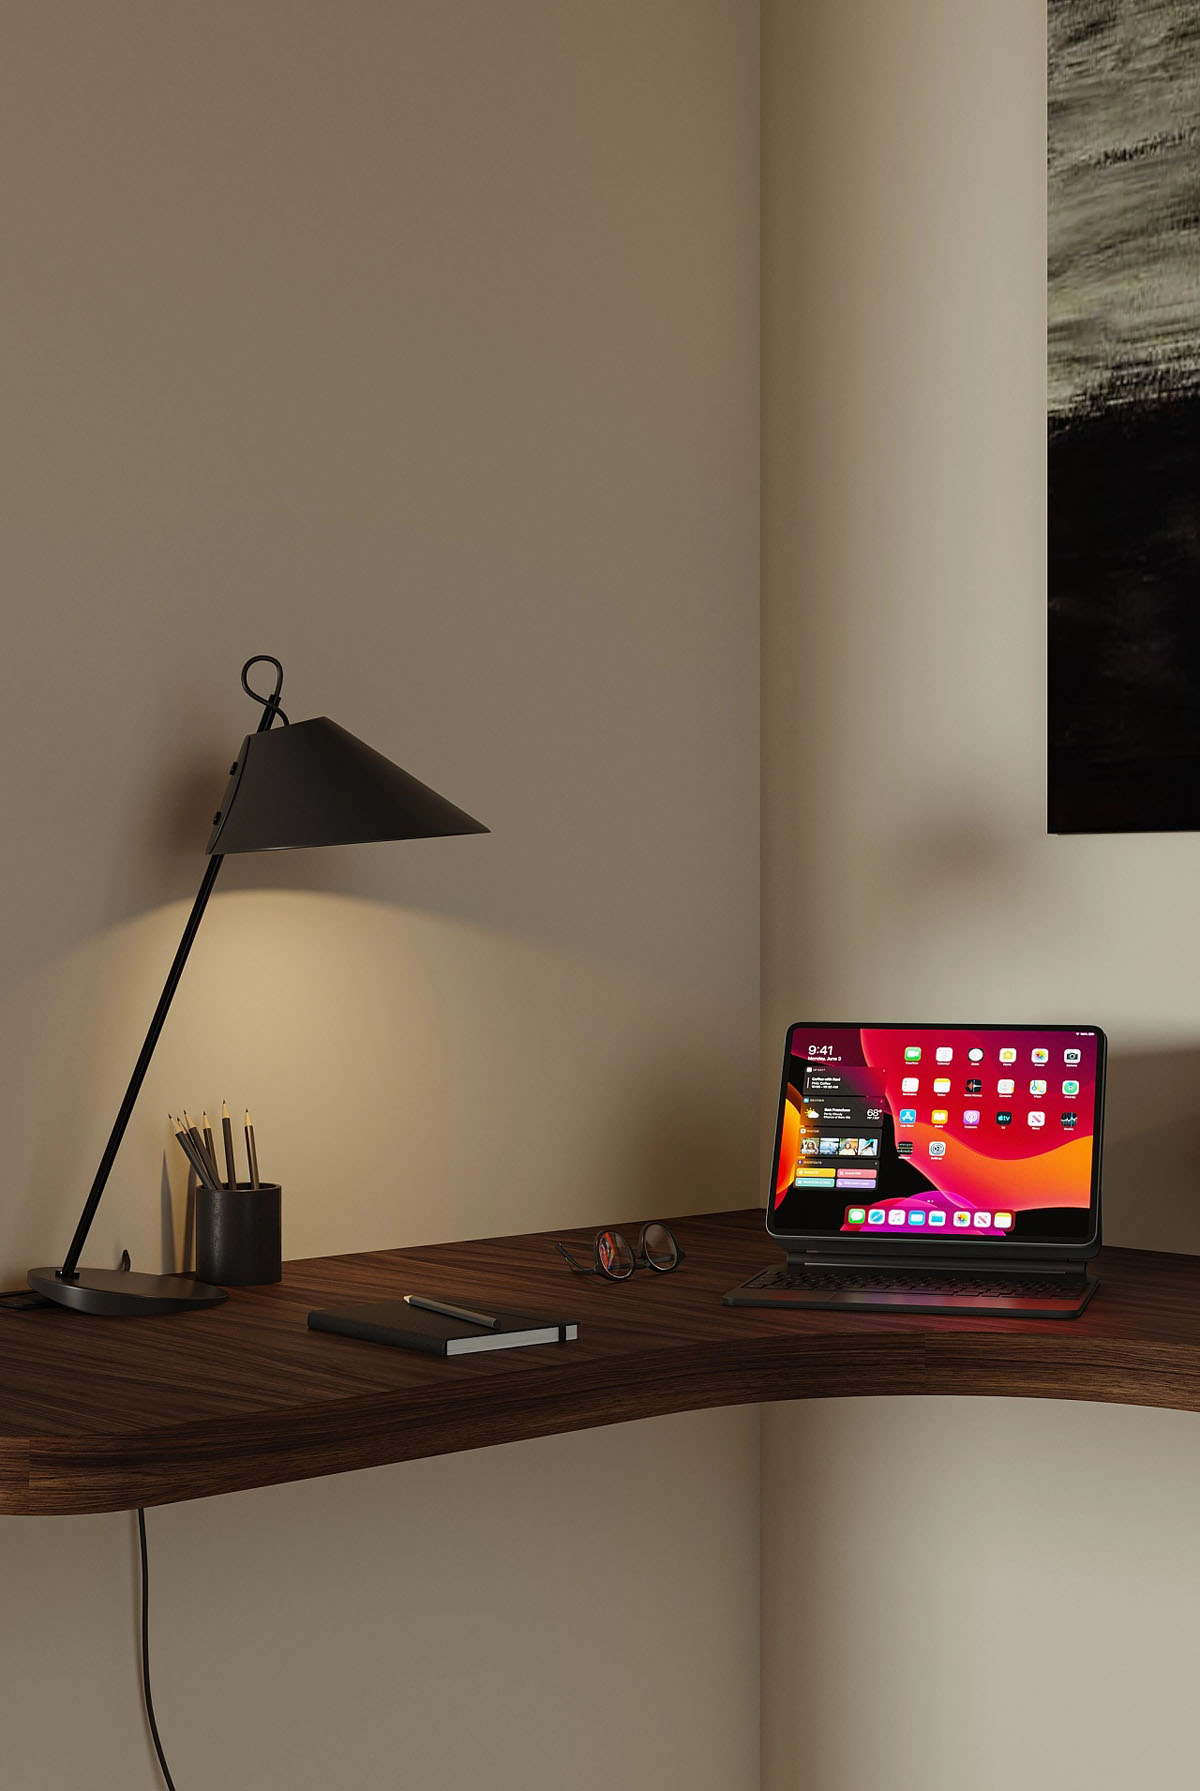
A floating desk wraps around the corner of the room, adding rich wood tone to the scheme.
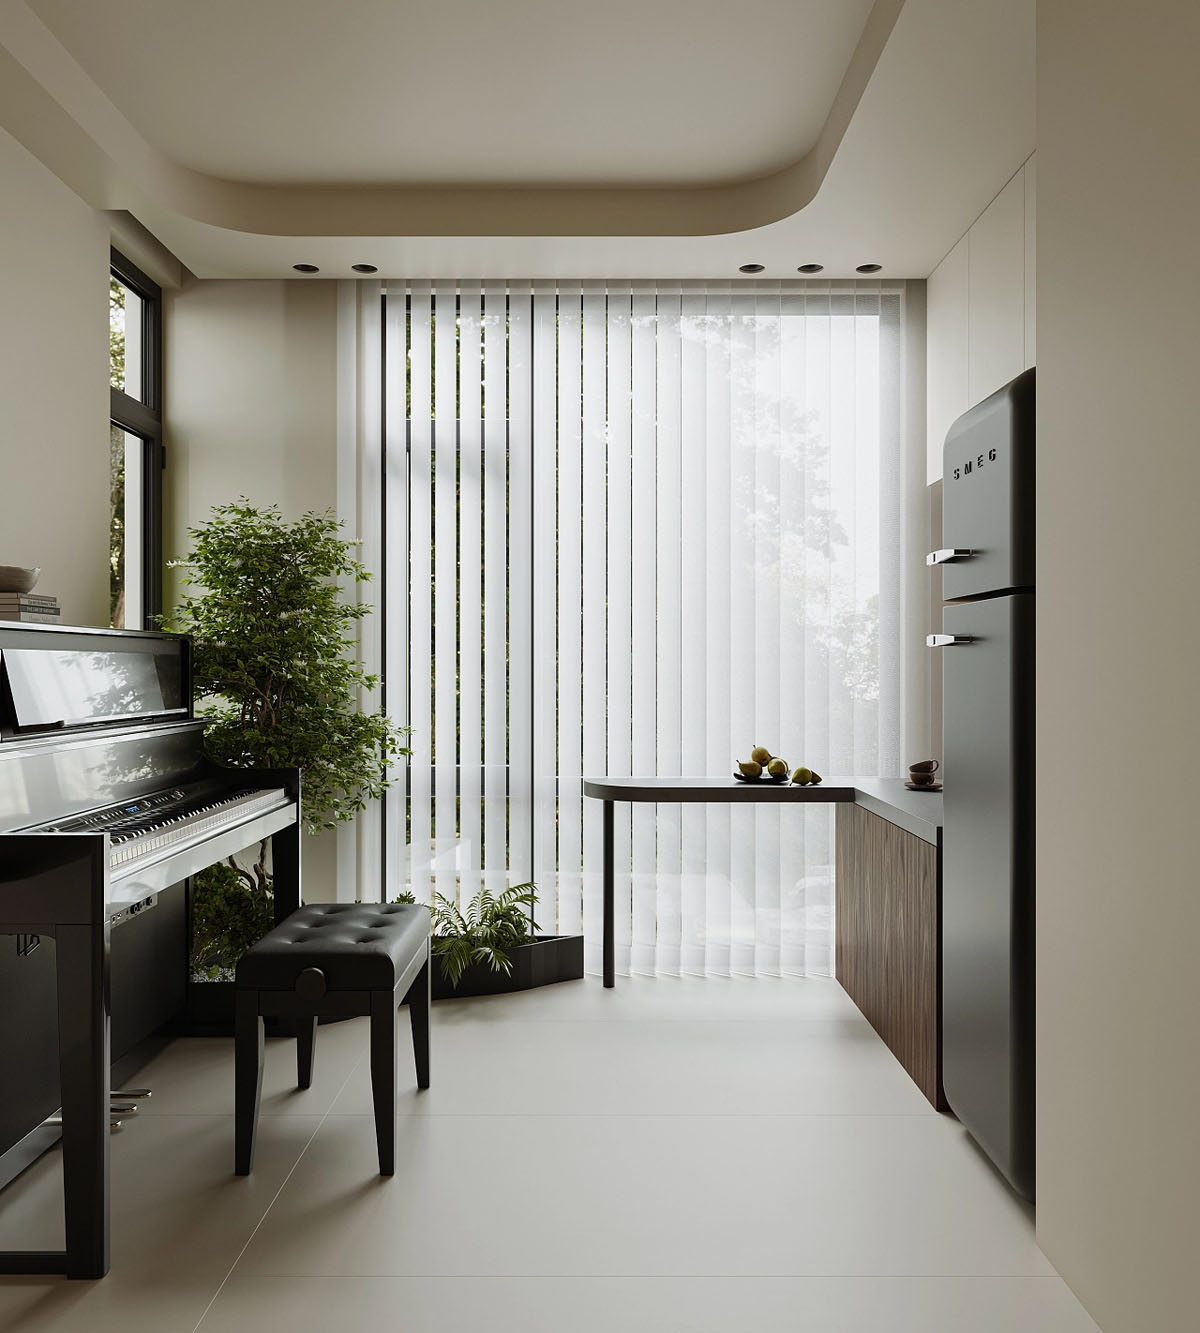
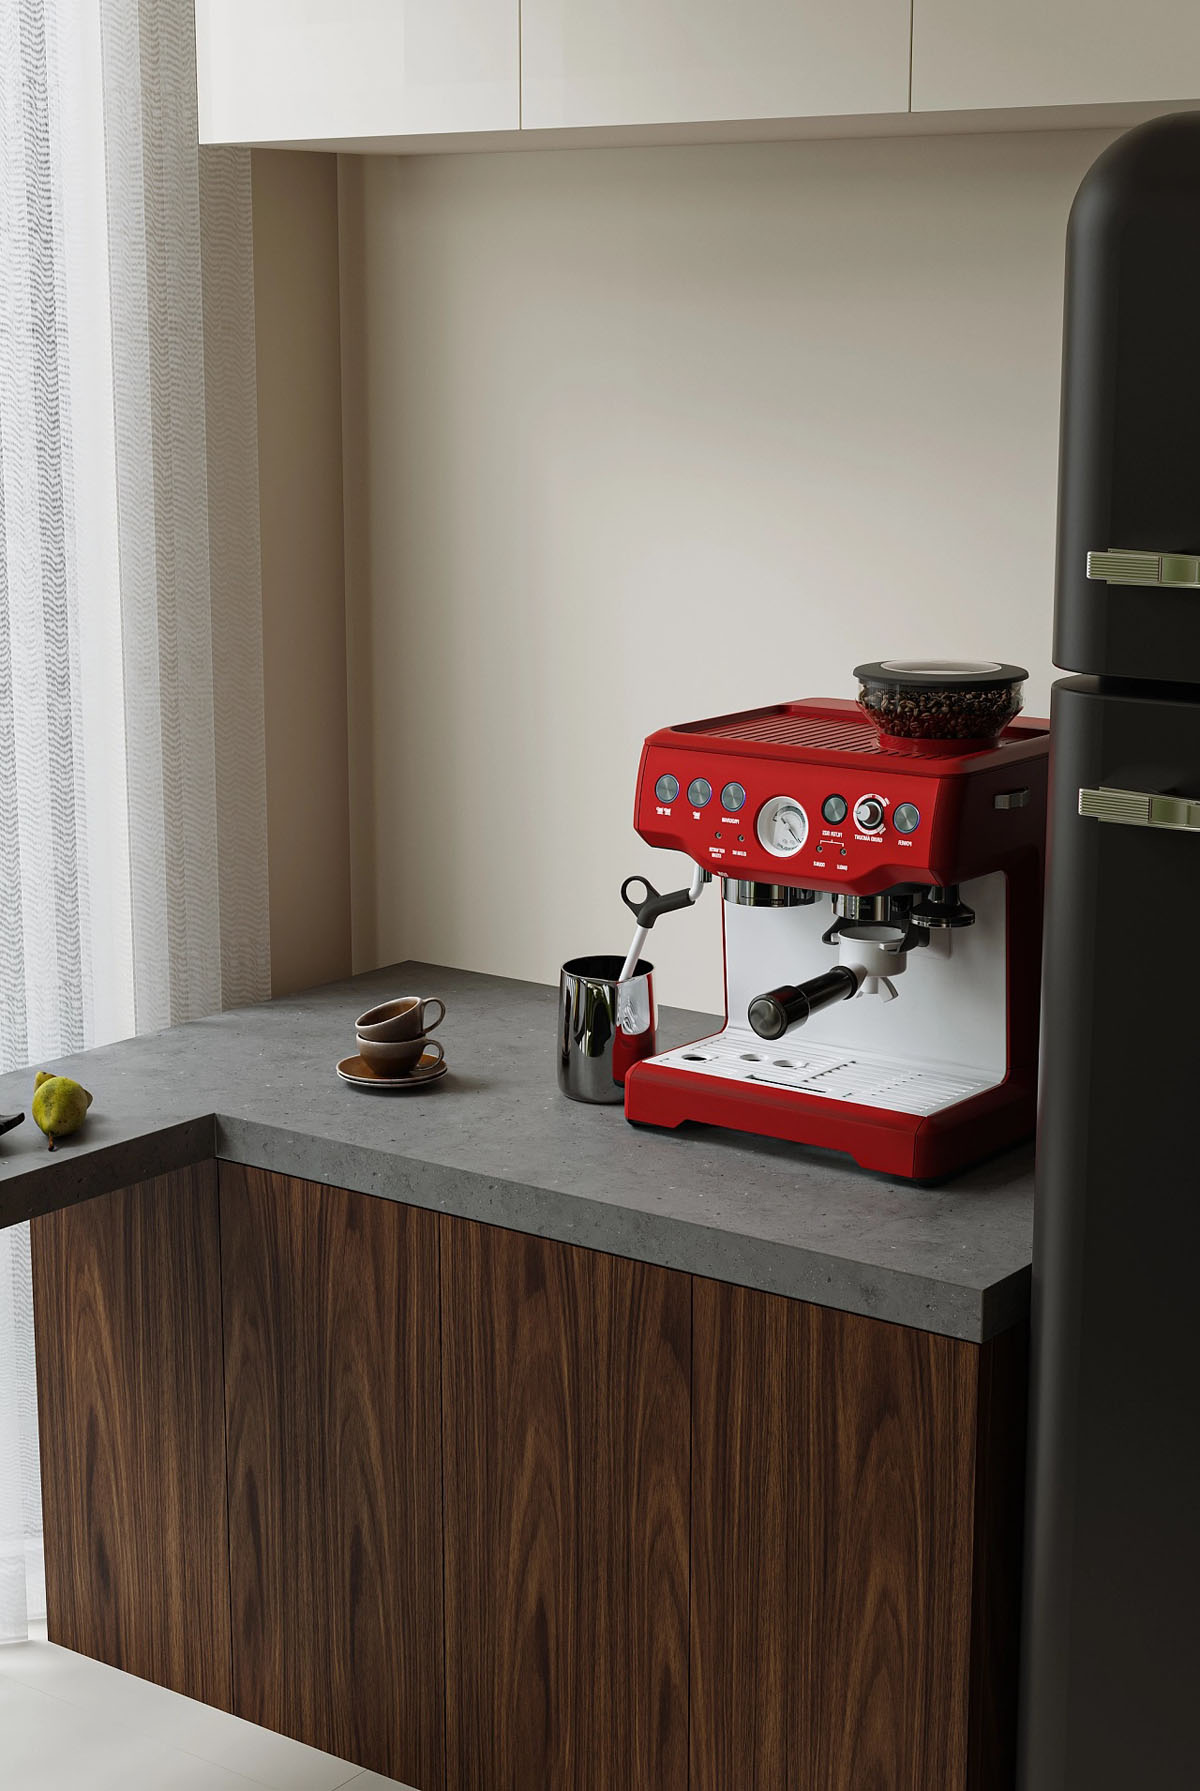
On the opposite side of the room, an L-shaped kitchen area is illuminated in natural light from a floor-to-ceiling window. Rich wood grain cabinets and a black fridge contrast with the light beige room decor.
A convenient coffee machine adds a bright red accent.
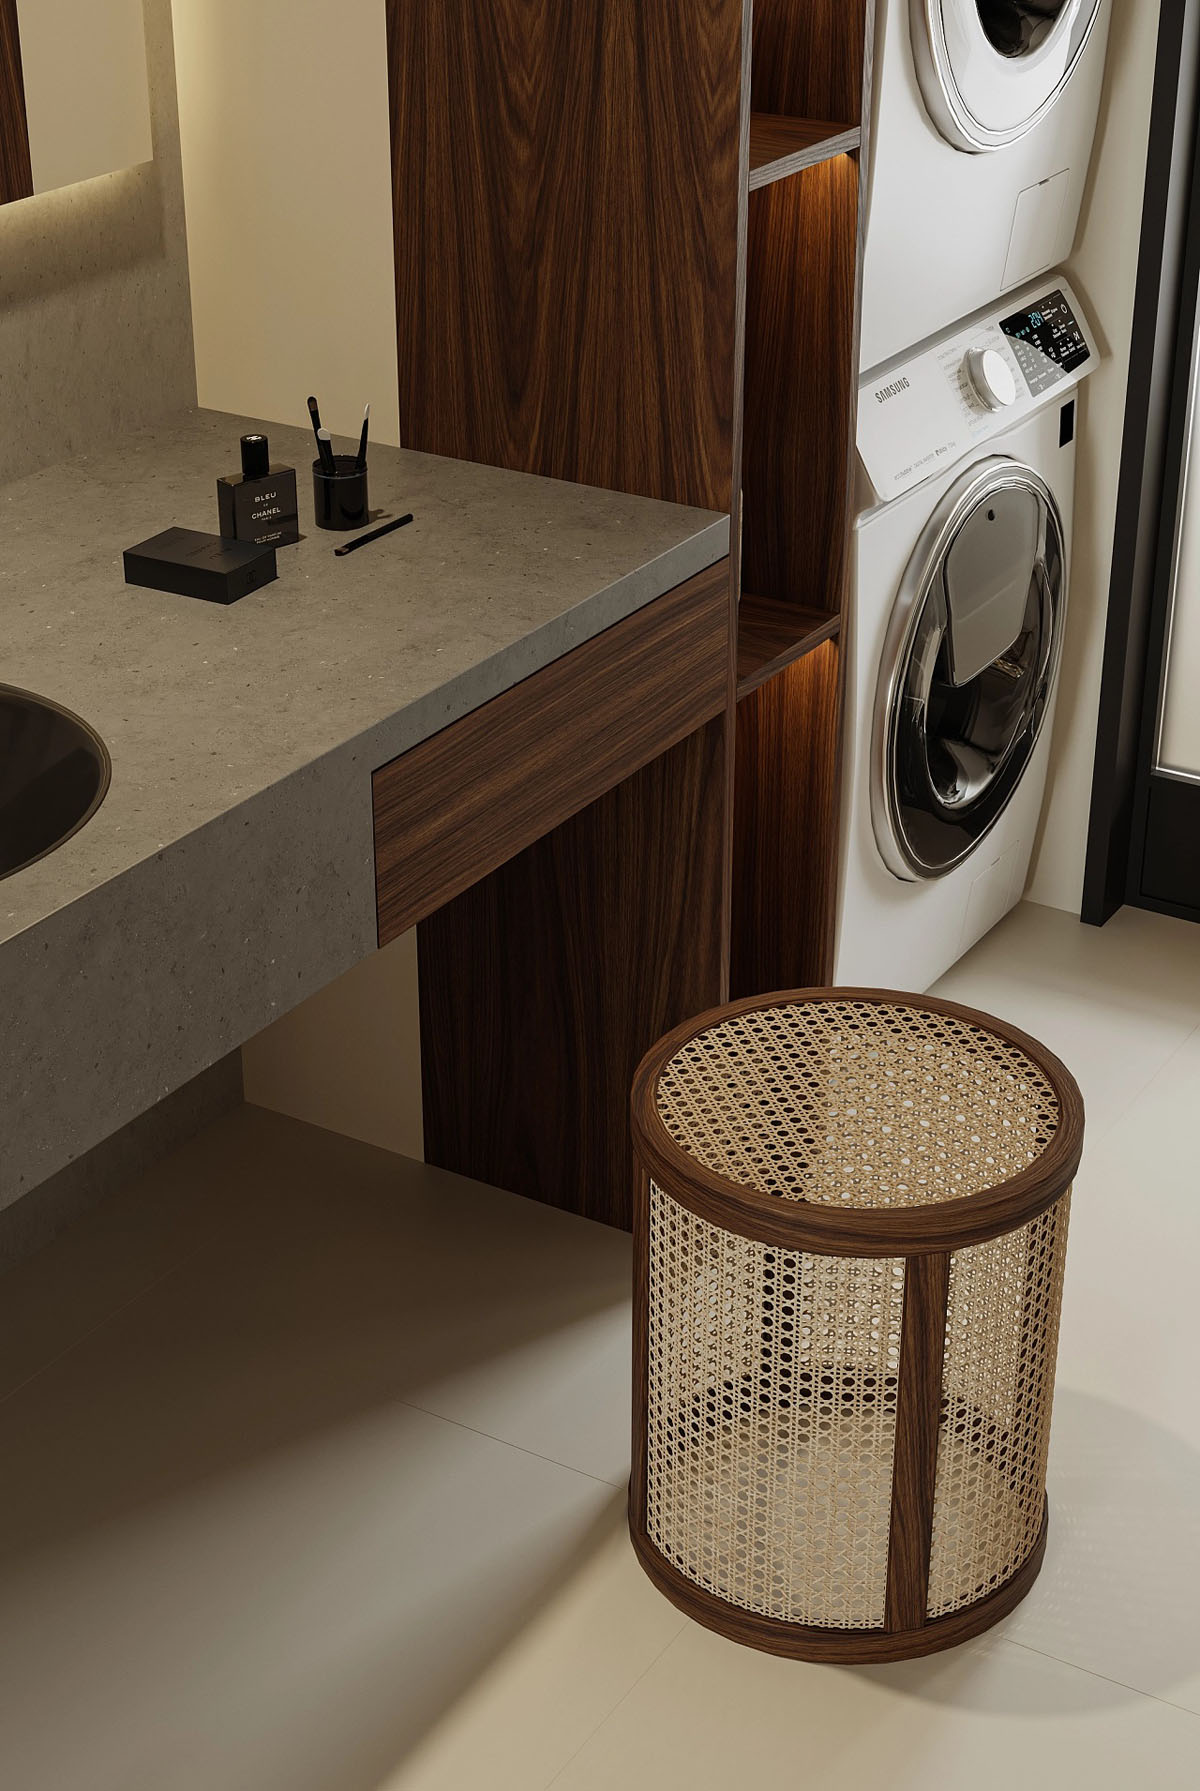
A small laundry room is situated just off the front entry door. A narrow shelving tower creates a visual pause between the tower of laundry machines and a stylish sink area.
The concrete and wood sink unit is accessorised with a rattan stool, accomplishing an attractive textural ensemble.
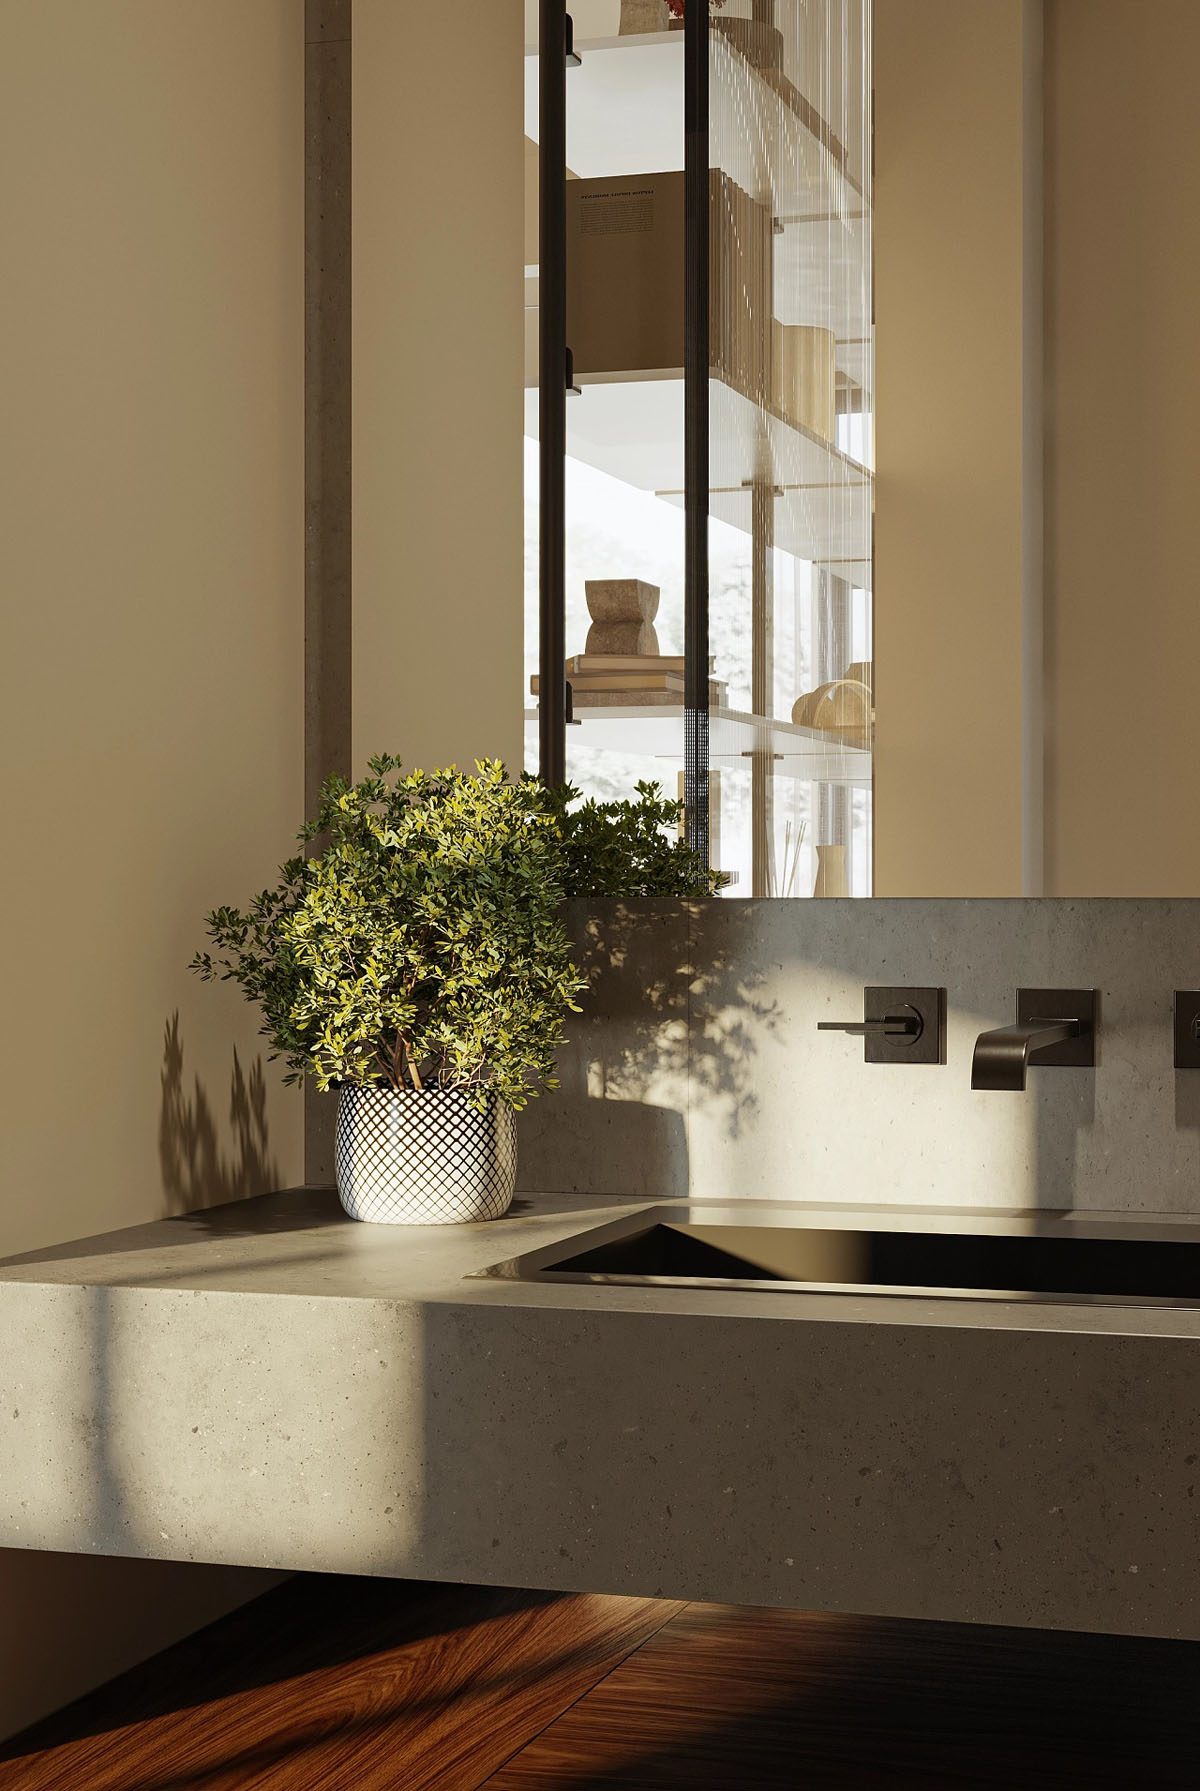
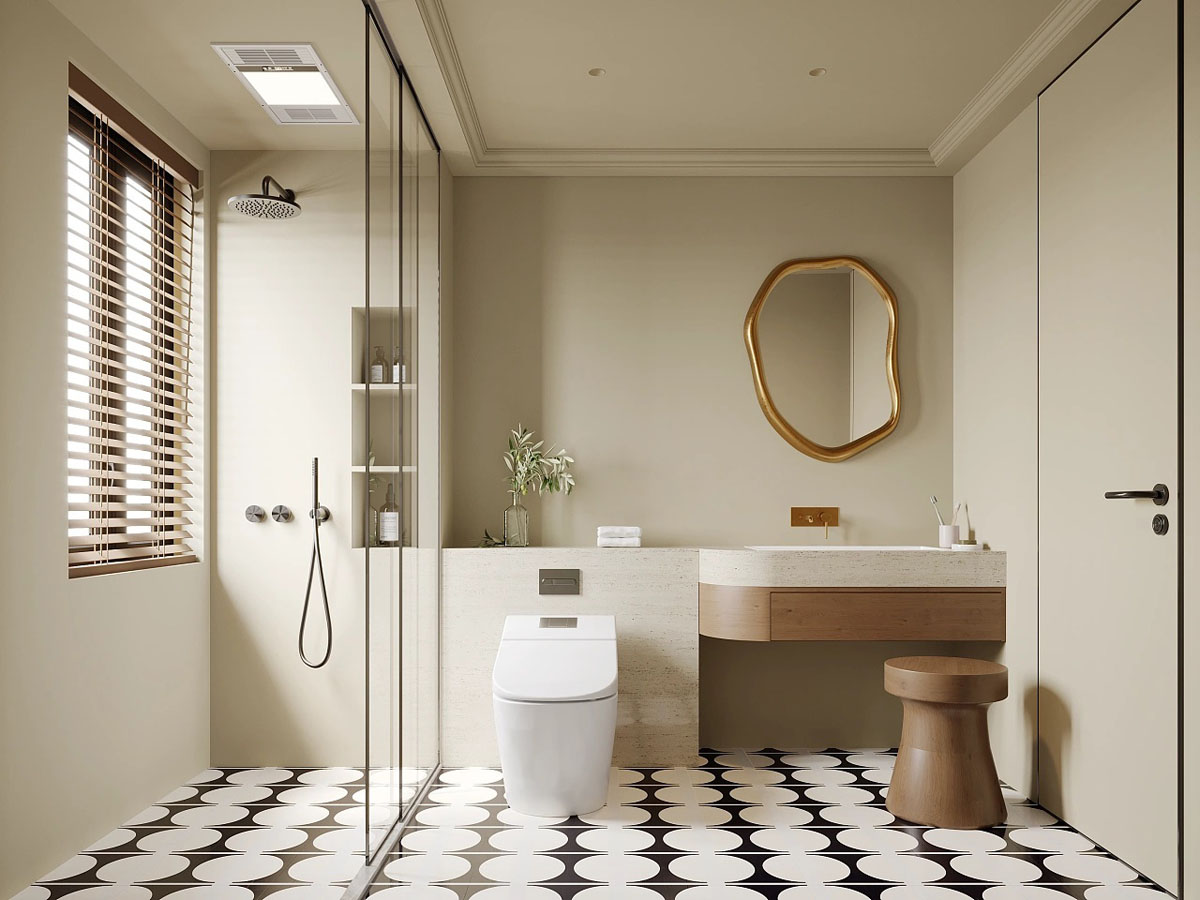
The bathroom has a fragmented layout with a large shower space design at the back. A privacy wall divides the WC from a chic vanity area by the door.
The bathroom vanity area receives natural sunlight via the textured glass living room wall.
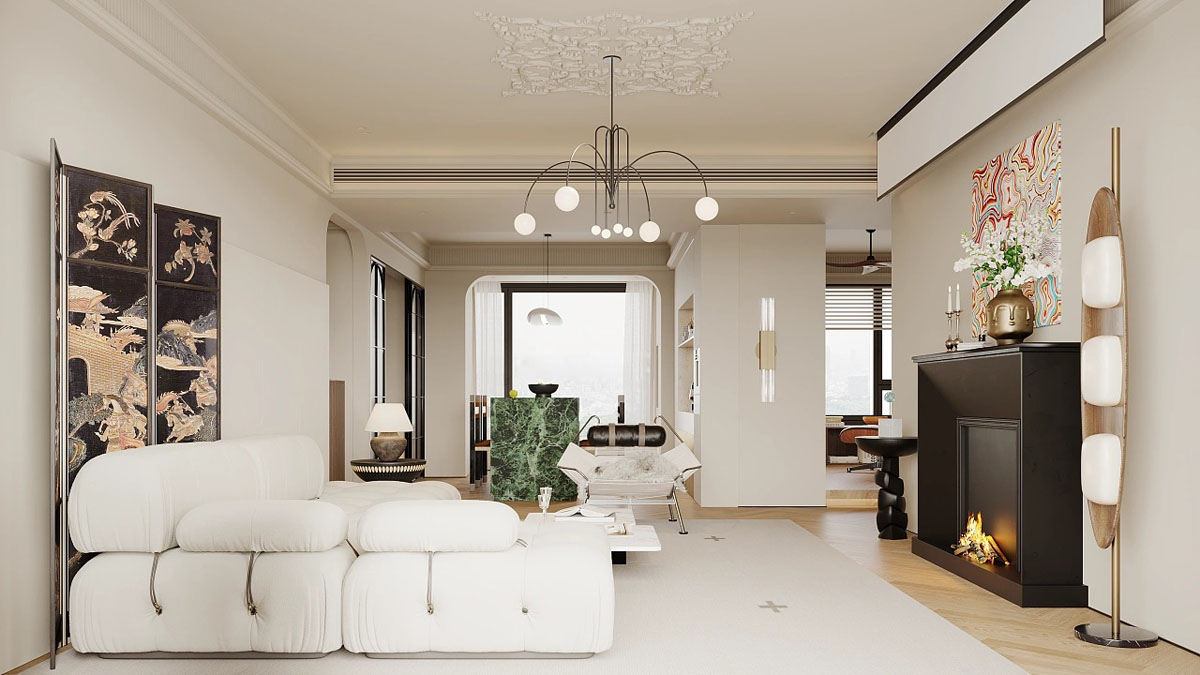
The final home in this collection features a graceful, arched decor theme. A modern arched chandelier hangs from an exquisite ceiling rose. Architectural arches elegantly frame the window area and the front entryway.
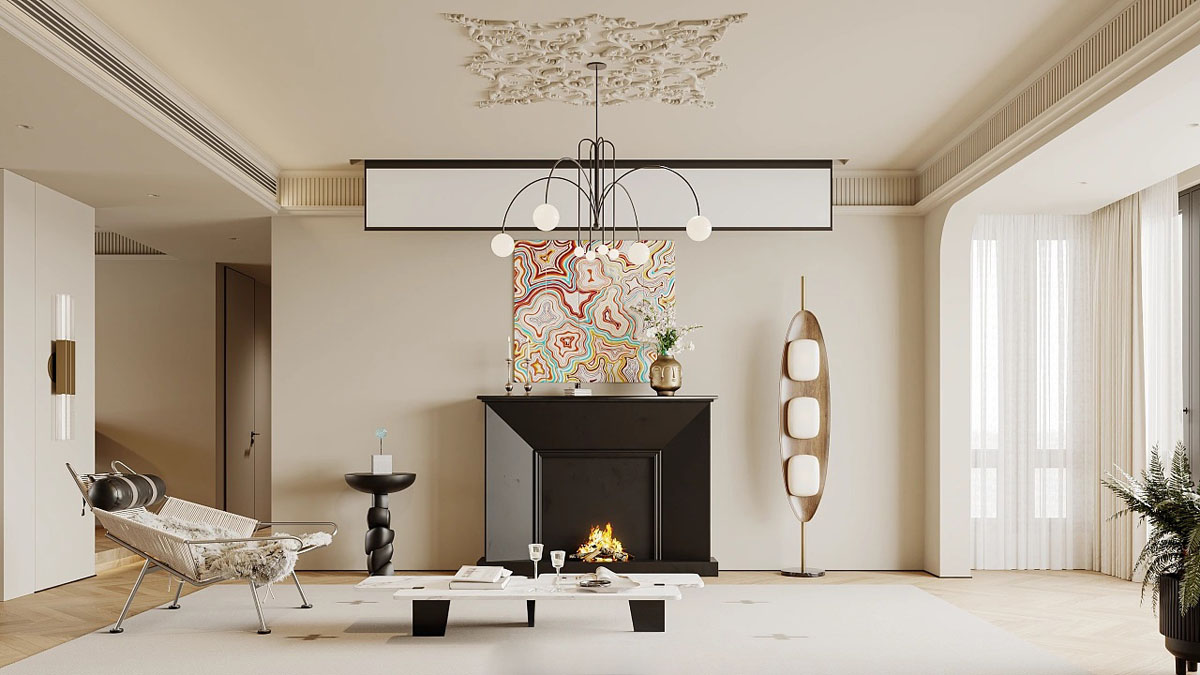
Green and red accents pepper this beige interior with moments of vibrancy. A piece of modern art colours the fireplace wall. A living room floor lamp adds a sculptural brass element alongside it.
The black fireplace is complemented by a stylish black side table. They each make stark contrast with the pale beige wall.
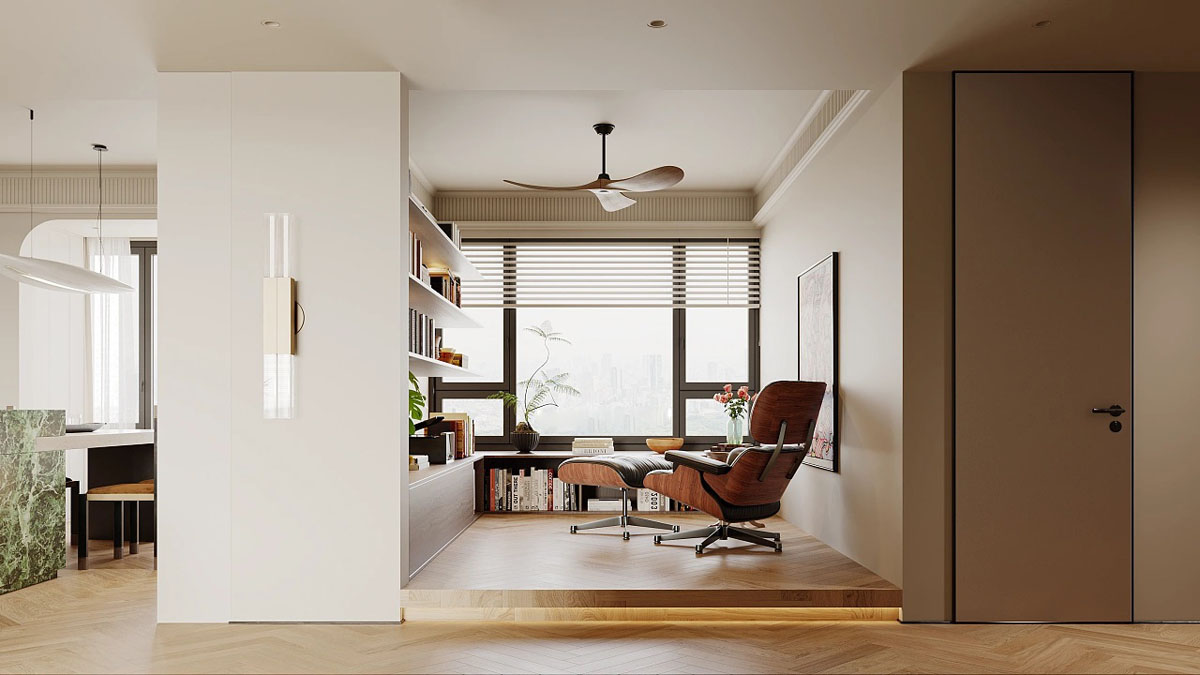
A home library slots into a cosy, light-filled nook. An elevated floor gives the space great definition from the rest of the open-plan layout.
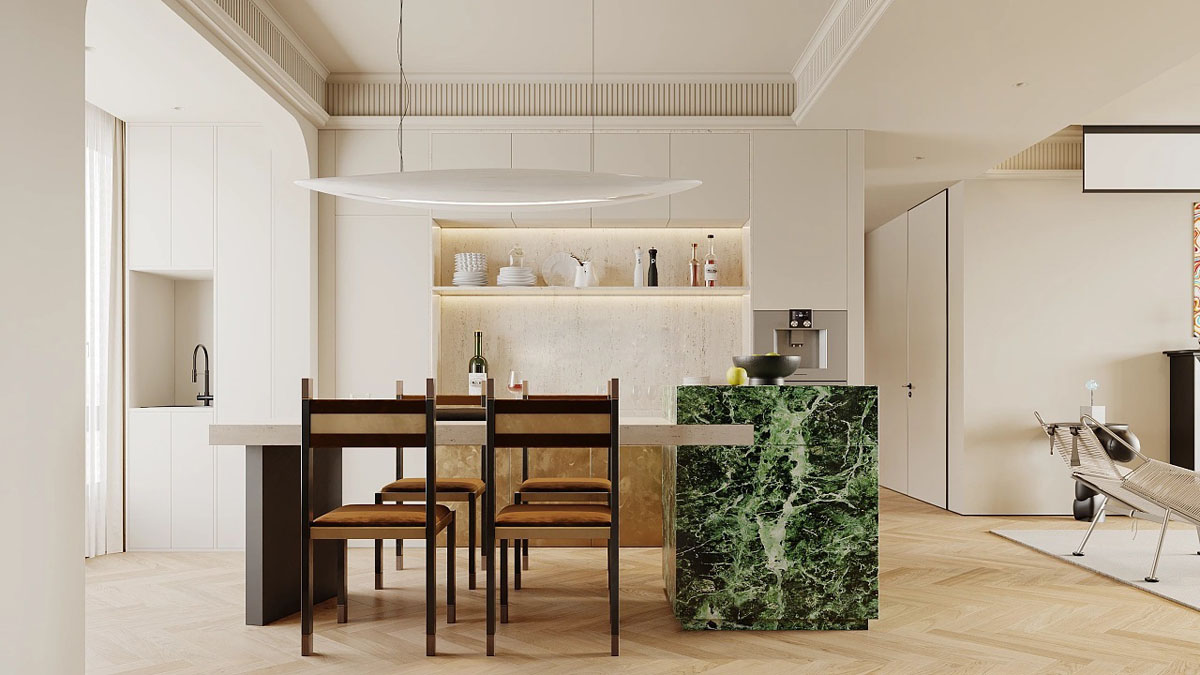
A kitchen dining area stands adjacent to the open lounge.
The dining island features a striking green marble volume, which draws the eye.
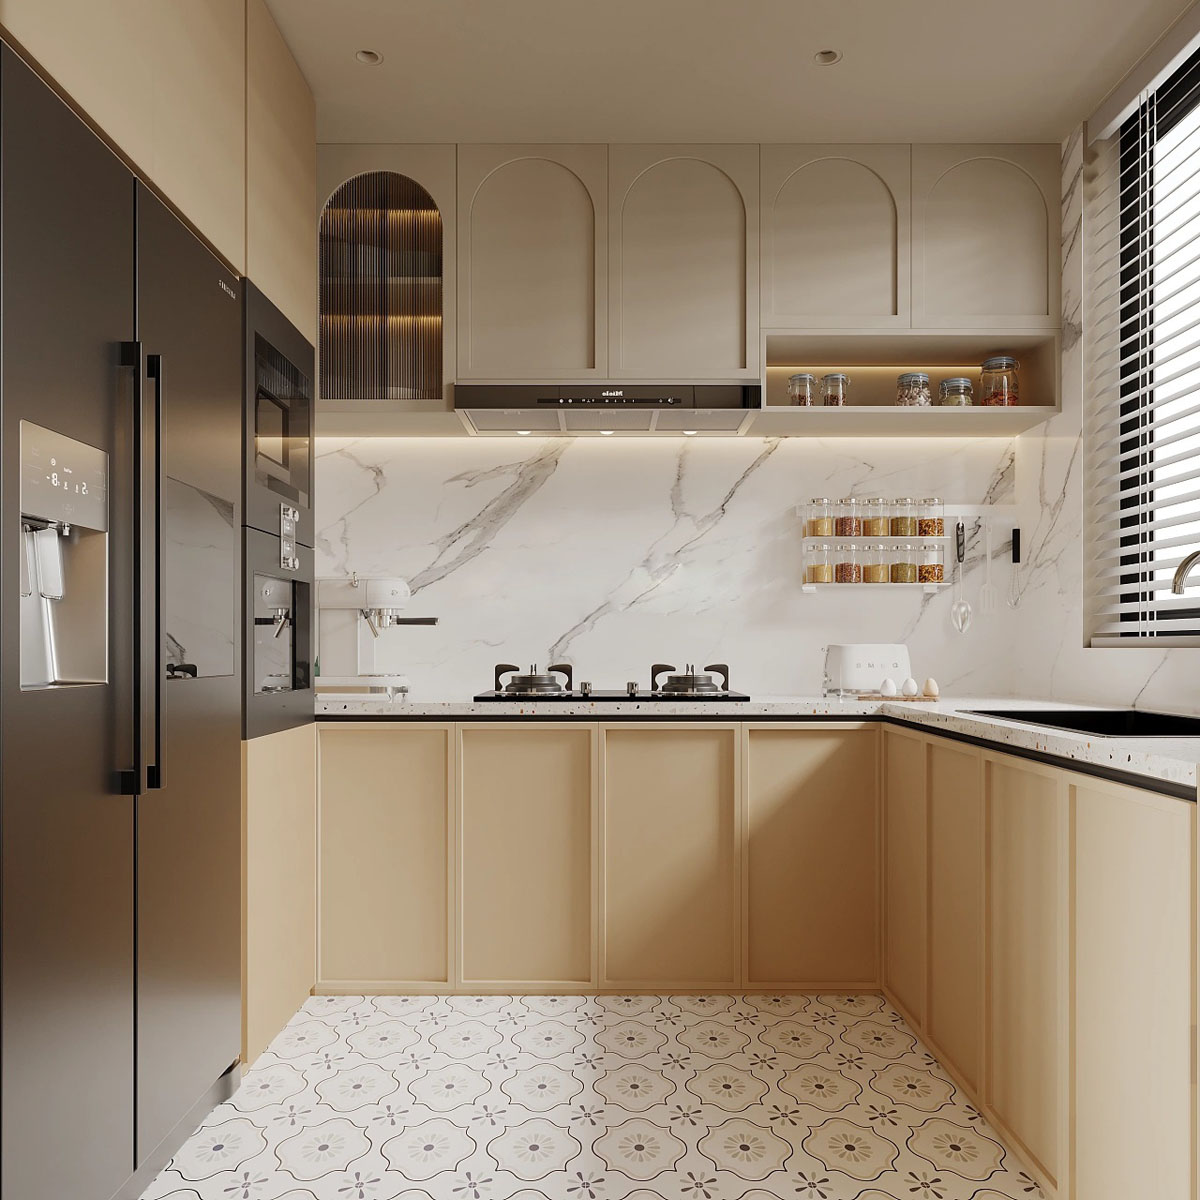
The main work area is a small U-shaped kitchen layout, which can be shut away behind two sliding glass doors. The wall cabinets feature a subtle arch motif.
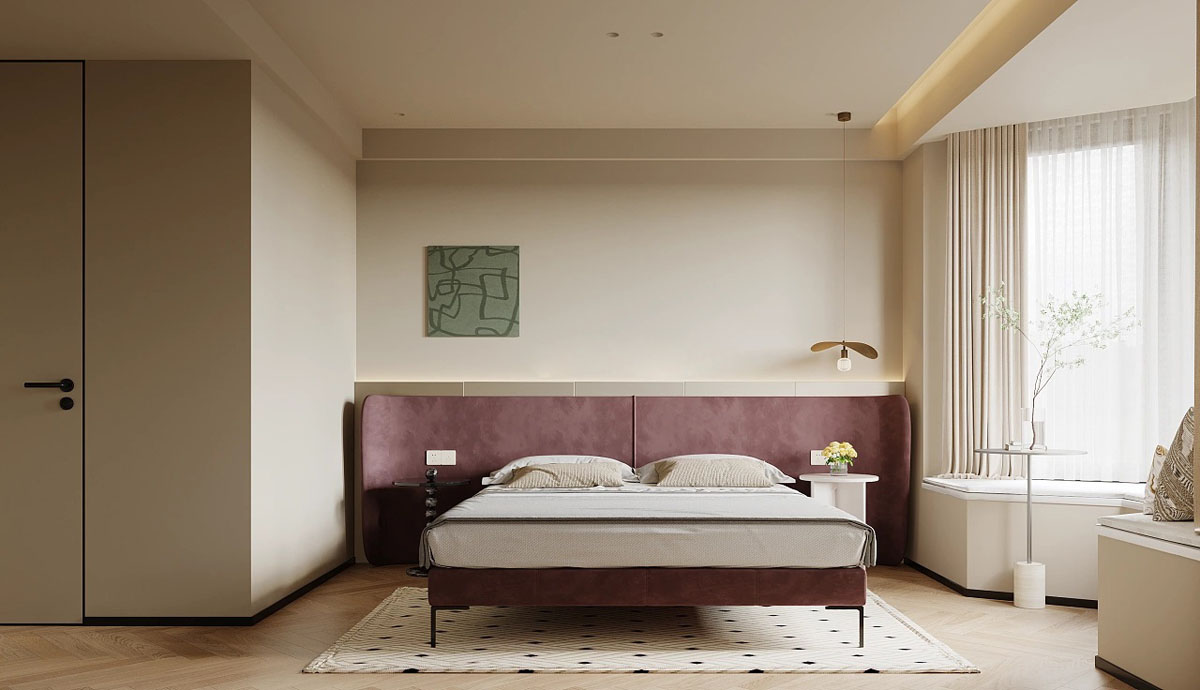
Inside the master bedroom, an upholstered bed stands out from the rest of the beige decor scheme with a deep, muted red colourway. Muted green wall art adds a pop of contrast above the curved red headboard.
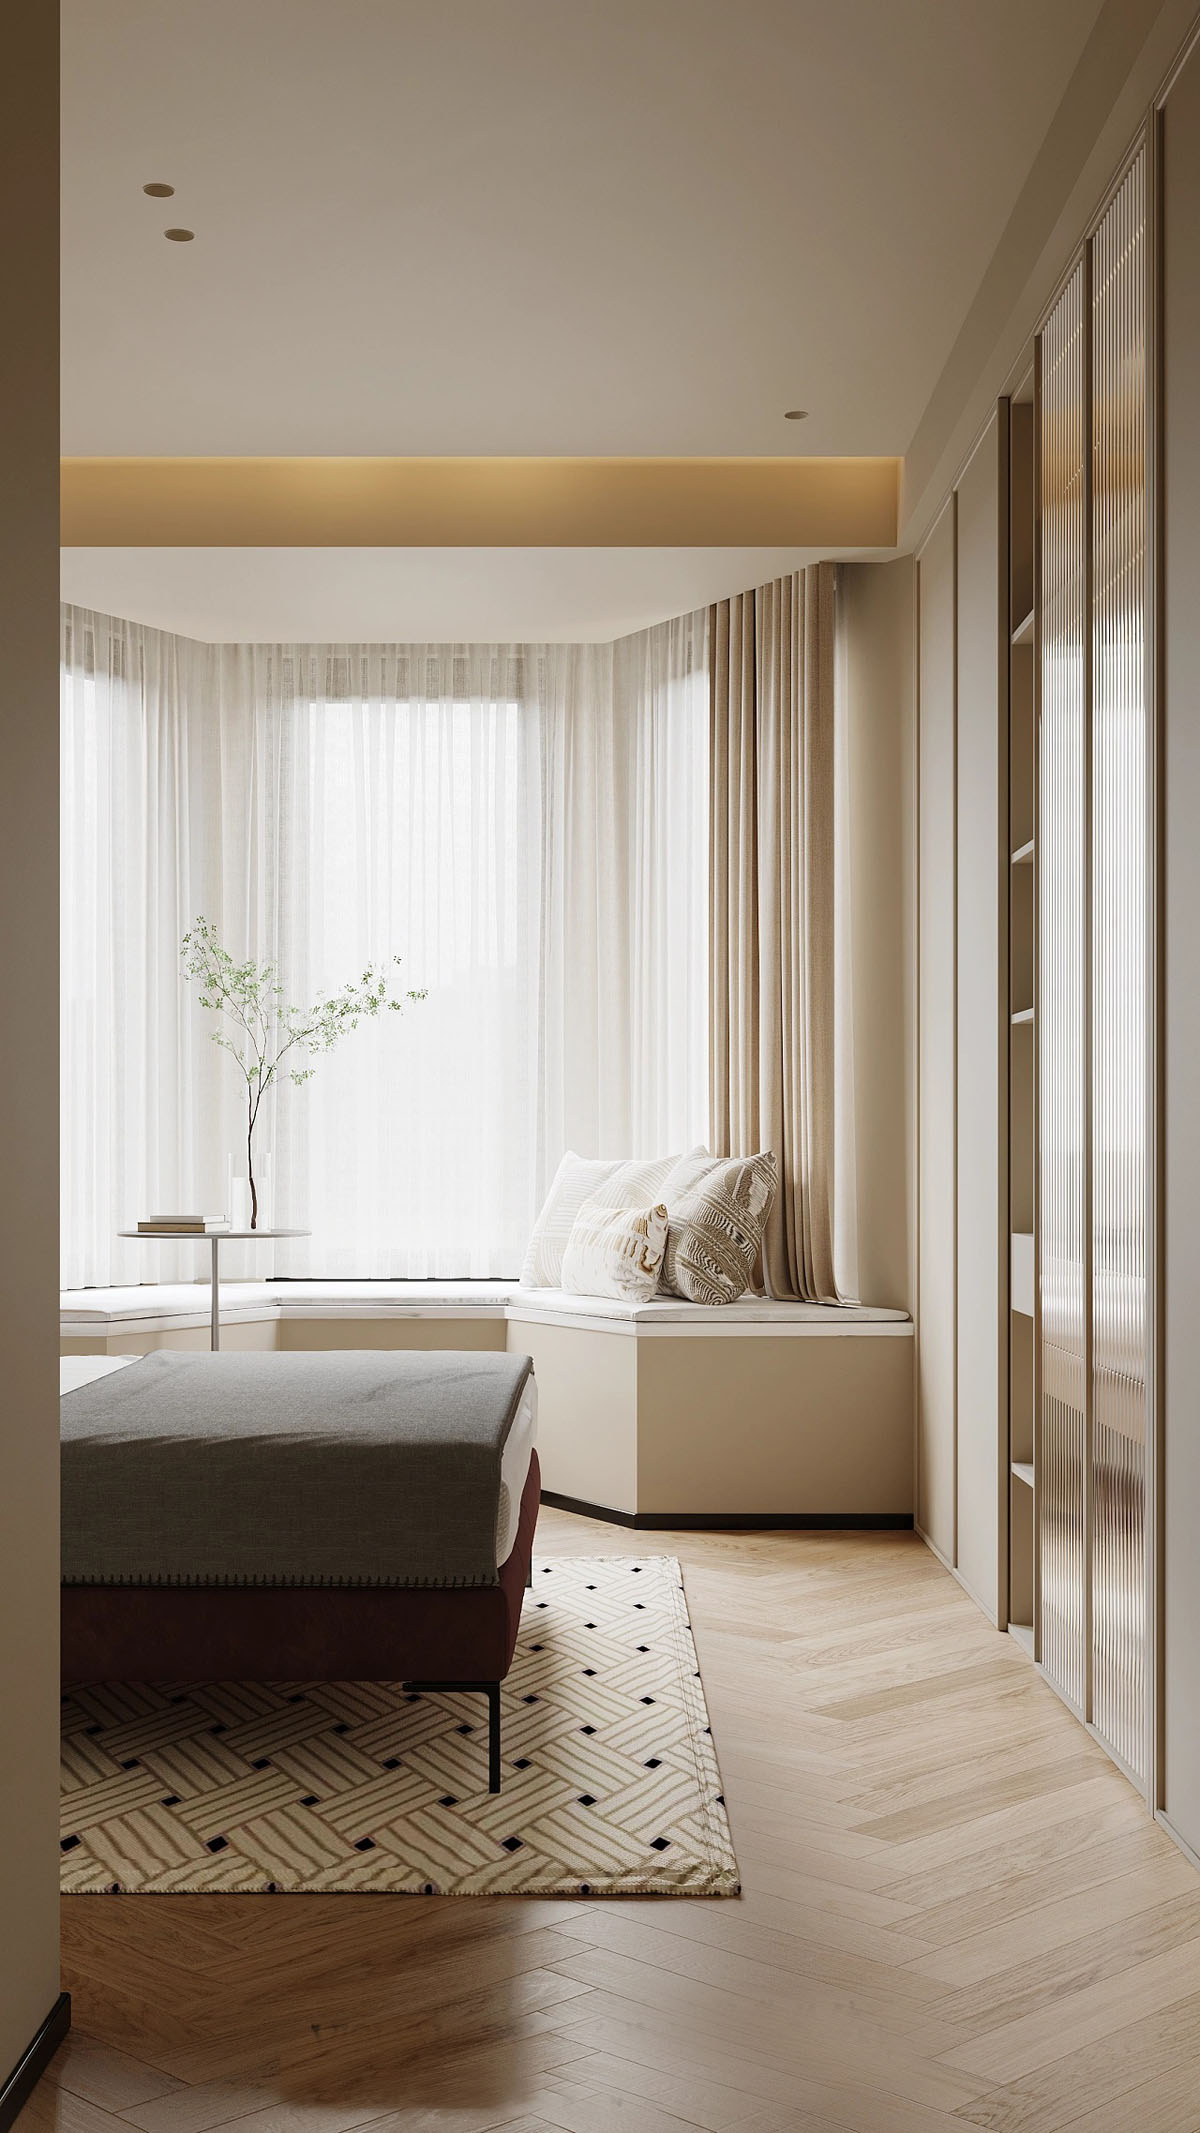
A window seat is built into the bay window. Fitted wardrobes complete the perimeter.
The second bedroom features a flat beige headboard panel upon a concrete foundation. A graceful pendant light descends in front. See more ideas for bedroom pendant lights.
Backlit glass wardrobes emit an atmospheric glow.
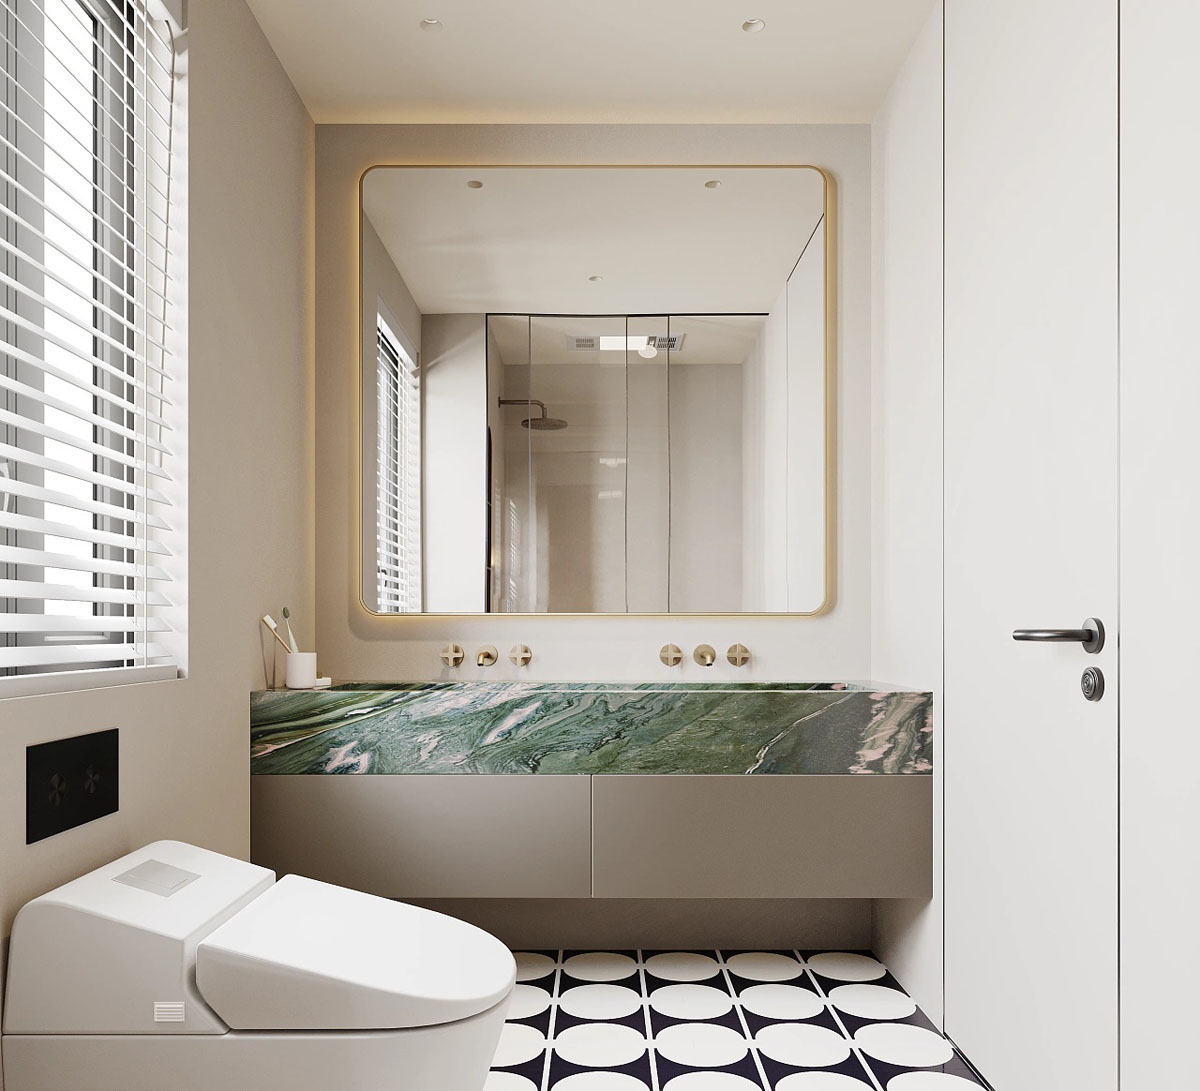
Mesmerising monochrome floor tiles shake up a beige bathroom scheme. A freeform bathroom mirror loosens up the modern vanity area.
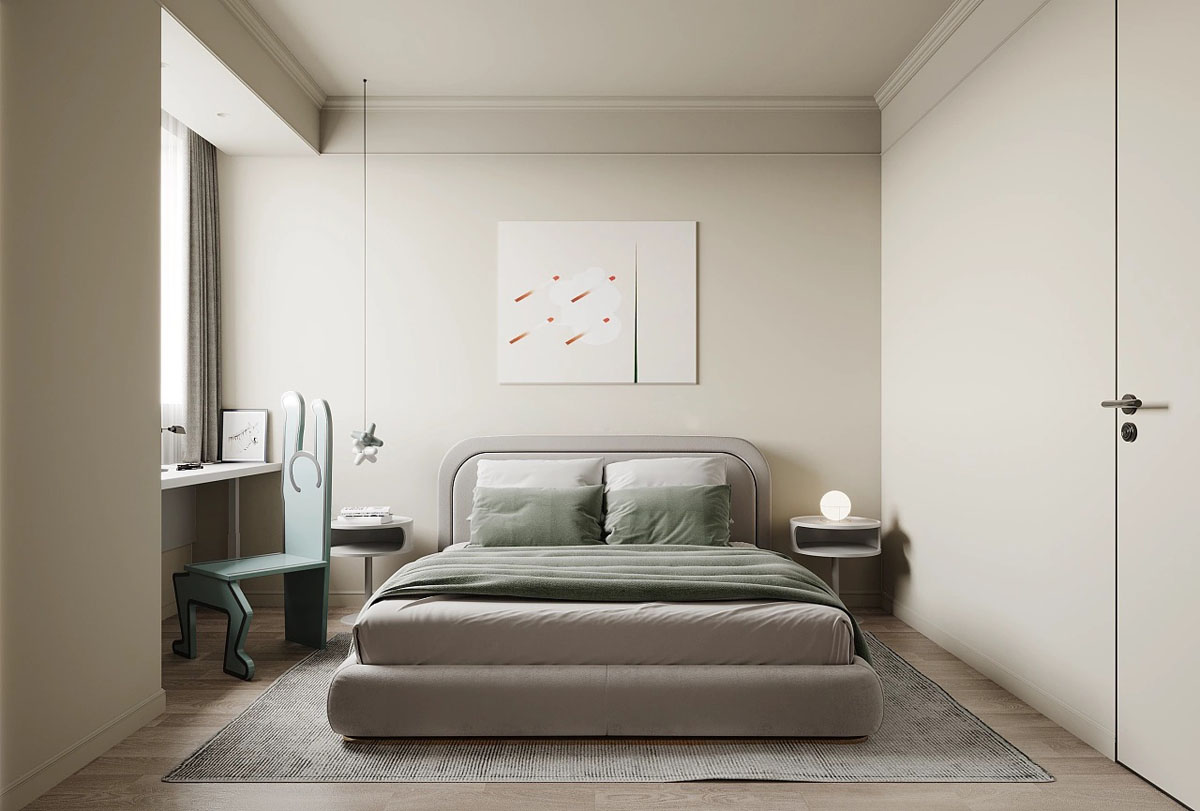
The final beige bedroom features fresh green accents.
Green accented wardrobes complement a green bed set and a unique desk chair.