A fire pit is a great way to put some of your outdoor space to use. It’s a cosy place to share a drink, tell a scary story, make s’mores, and grow friendship on warm summer nights and cool autumnal evenings. You can make family memories around your fire pit, unwind after a long week, and host the best parties of anyone in your social group.
Building a fire pit doesn’t have to be expensive or elaborate. A fire pit can be as simple as a ring of rocks in the backyard. But if you want to make your fire pit as inviting as any other part of your living space, you should put in the effort to make it look nice. Whether you’re using a portable fire pit or building one of your own, use these tips to make your outdoor fire pit area look as comfortable and cosy as any other part of your home.
Lay Some Flagstones
Image credit: Firepits UK
Whether your fire pit is a permanent structure or a portable one, a stone patio provides the perfect surroundings. With a flagstone patio surrounding your fire pit, you won’t have to worry about sparks and embers flying out and setting the grass on fire. You won’t have to worry about setting a root fire by lighting your fire directly on the ground, since there will be sand and flagstones under the fire pit to act as a fire block. You’ll also have a firm, smooth surface for chairs and benches. You can lay a flagstone patio under your fire pit yourself. For a more rustic look, you could opt for a gravel patio instead.
Get Creative with Seating
There’s no end to the fun you can have with seating around your fire pit. Go for upholstered outdoor chairs and benches with fun fabrics and colourful throw pillows. Mix and match different coloured chairs and even chairs in different styles. Pull up an air mattress made up with soft blankets and pillows for summertime sleepovers. Create a more relaxed, laid-back look with butterfly chairs, or a more rustic, campground look with log benches. Keep blankets handy for cool-weather hangouts in an outdoor storage ottoman.
Make Some Privacy
Image: Shutterstock
If there’s one thing you definitely need when you’re sitting around the fire with friends, it’s some privacy. You can put up a fence when you build your outdoor fire pit area, and decorate it however you want. You can hang potted flowers from the fence, or even train vines to climb it. A fence will keep the neighbours from peering at you, and it will also block gusts of wind from stirring up embers and sparks from the fire.
Tall hedges can also add privacy around the fire pit without the need to erect a fence. Simply plant some hedges around your fire pit area to gain all the benefits of a fence from a natural barrier. The foliage will protect your fire pit from gusts of wind, and block the view from prying eyes. Hedges are great for marking out a curved boundary and you can prune them into interesting shapes or decorate them with ornaments.
Erect a Gazebo or Pergola
Erecting an open-air shelter above or near your fire pit can make it feel more permanent and cozy. Parties will gravitate to the outdoor shelter, and with a roof over your fire pit, you’ll be able to celebrate even when it’s rainy. Pergolas and gazebos also provide a handy structure for vining plants or for hanging string lights.
Add Some Lighting
Credit: Von Haus
Sure, your fire pit will produce some amount of light, but that doesn’t mean you can’t spruce the fire pit area up with some well-chosen additional light sources. Hang some string lights from your privacy hedges or fence or from nearby trees and shrubs. String lights can make any spot look more magical, romantic, and rustic, no matter where you are.
String lights aren’t the only option for decorating around your outdoor fire pit and making sure everyone has enough light to see by. You can also use camping lanterns, tiki torches, tree spotlights, or solar lights around the fire pit.
An outdoor fire pit can be a great place for relaxing and socializing on nice evenings. With a little creativity, you can make your outdoor fire pit look every bit as inviting as your living room inside the house, so that friends and family members alike will look forward to spending time there.
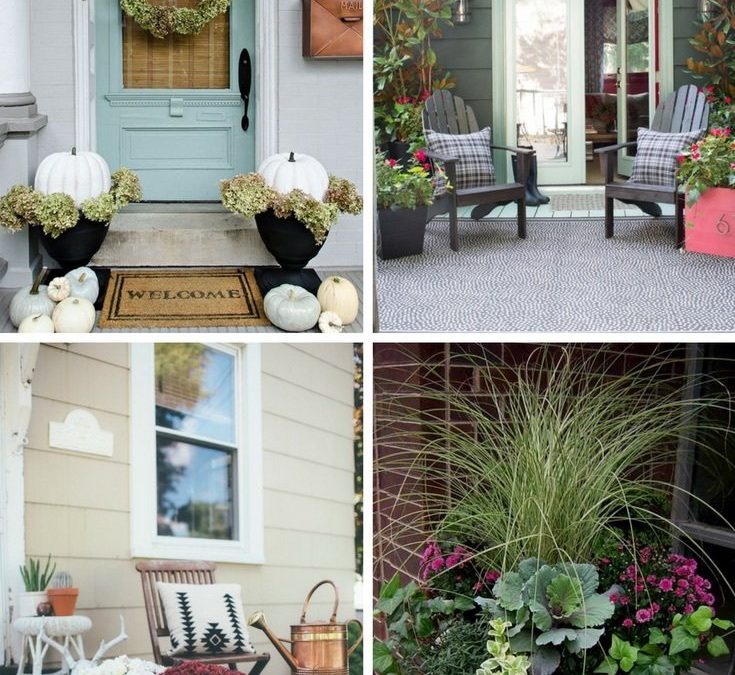
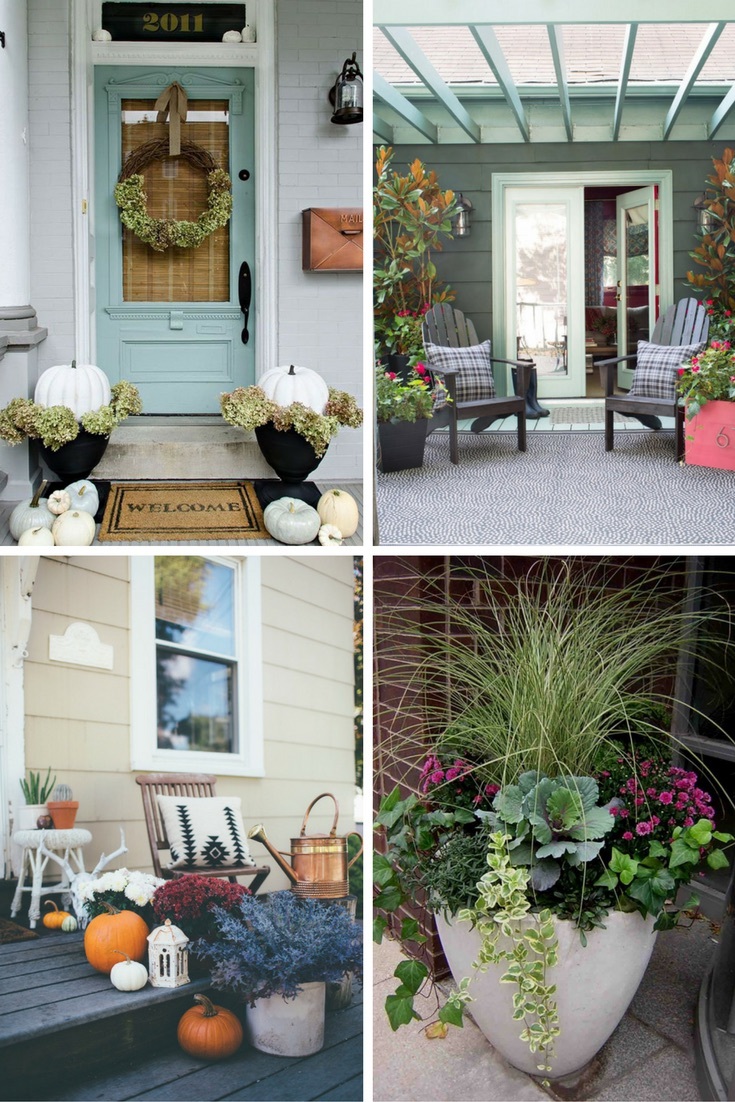
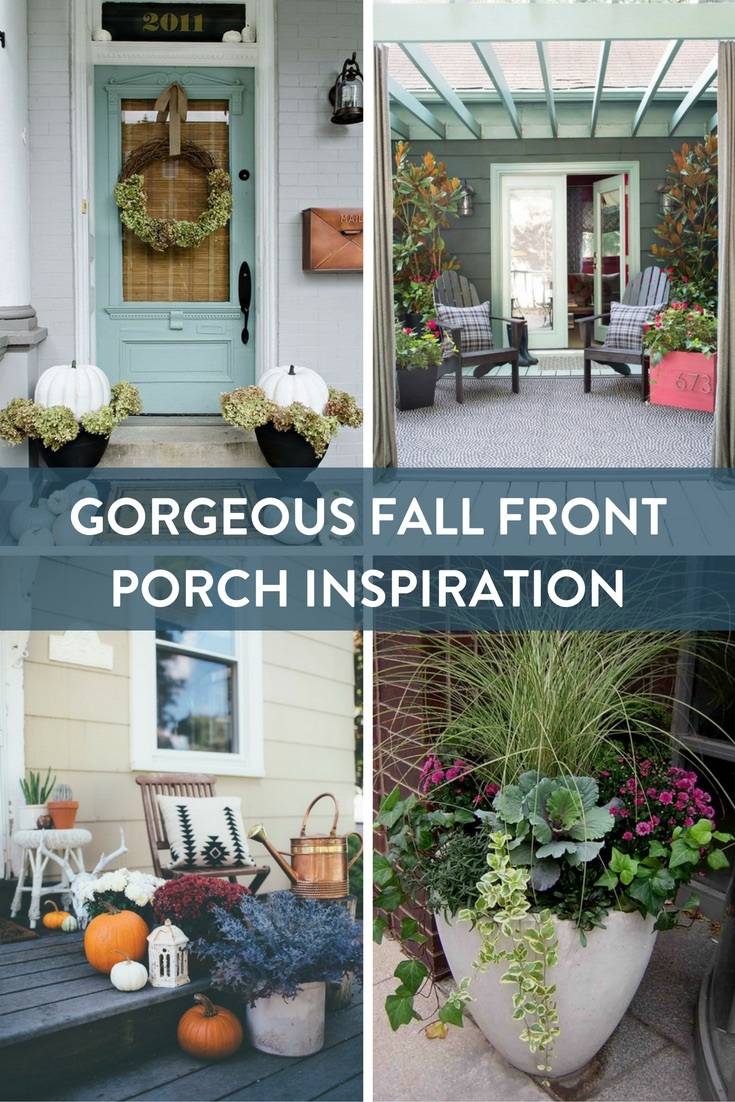
The leaves are falling, the temperature’s dropping, and the weather is perfect for spending some time outdoors. If you’re like me, you want your porch to be as inviting as the weather around you. Here are some of my favorite fall porch decorations to help get you in the season.
1. This Boho Fall Porch is simple and not over the top orange.
2. I love the mixture of colors on these steps, including the fall lettuce plants. I have to admit I am kind of obsessed with fall lettuce plants.
3. If you don’t love fall colors then this “cool color” fall porch might be the inspiration you’re looking for.
4. This mixture of greenery and draping vines is a modern inspiration for your fall porch planters.
5. This porch is simple and rustic. It’s a good reminder that you don’t have to go over the top to be inviting.
6. If you have a wrap around porch with seating, the ladder with blankets is stylish and functional. Can’t you just see yourself “cozying” up in a blanket, drinking some cider, on a brisk fall night? Also: those window wreaths! Fantastic!
7. This is a bright modern take on a fall porch. I love the plant stand instead of a planter!
8. This porch proves that fall doesn’t have to be rustic. I love the potted magnolia trees.
9. If your porch doesn’t lead to the front door…no problem. Hang a large wreath on the exterior wall or window at the top of your steps.
10. This is seriously a fall porch dream. I would never go inside if I lived here.
Pin It: Fall Front Porch Inspiration
Ready to make your fall porch decor happen? Here’s a simple DIY Halloween doormat for your front porch decor.
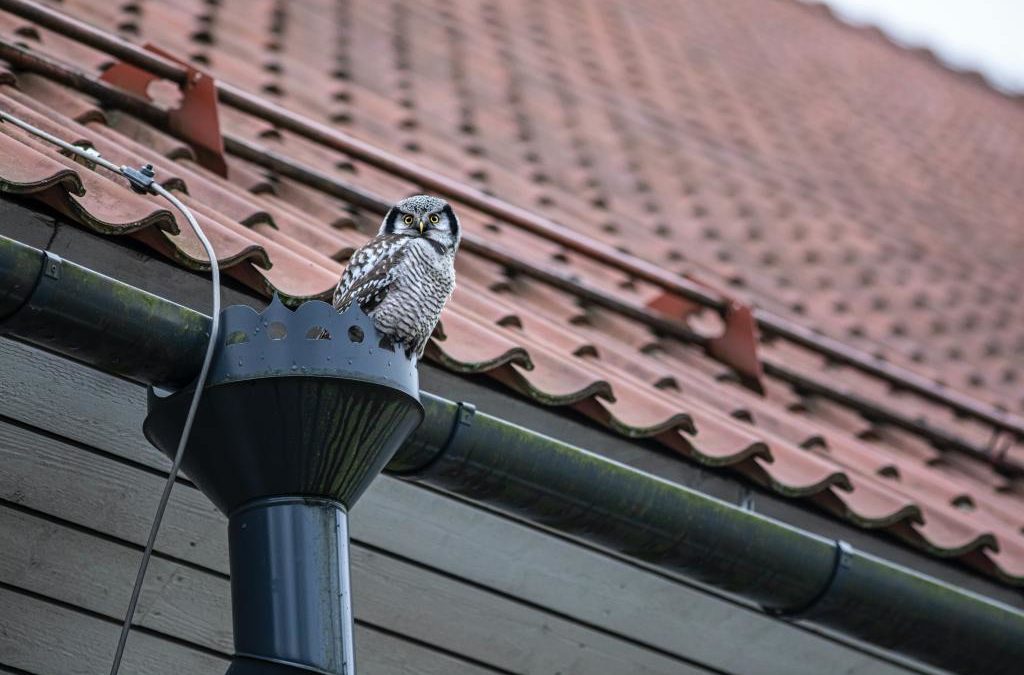
Gutters are a vital system of any home so it’s important that gutter installation mistakes aren’t made when they’re put in. Gutters shield your property from water damage by collecting rainwater and redirecting it away from your home’s foundation. Since gutter installation isn’t a complicated construction project, homeowners may sometimes take the project themselves or hire an inexperienced gutter contractor. However, as with any home project, many mistakes are likely to occur during installation, some of which can make the whole gutter system useless. Here are some of the most common mistakes you should avoid during gutter installation.
1. Gutter installation mistakes: Choosing the wrong gutter type
Photo by Erik Karits, Pexels
When it comes to choosing the right gutter, one of the common gutter installation mistakes involves choosing the wrong one. Gutters come in many different sizes, shapes, and materials. However, most homeowners find it confusing and difficult to decide which type of gutter is best for their home. This poses the risk of choosing the wrong gutter type, which could render the installation and system futile. For instance, if your gutters are too small, the system can be overburdened when it rains heavily, leading to poor drainage.
Before making any purchase, carefully research the different types of gutters available and consider factors such as your roof pitch, home size, and the amount of rainfall your area generally receives. Use this Gutter Sizing Guide or consult your roof contractor or supplier to help determine your home’s most appropriate dimensions.
2. Using too many seams
Seams hold different gutter parts together, but they are the weakest point of any guttering system. Too many seam weldings can make your gutter prone to cracks or leakage, so installing gutters with as few seams possible is your best bet. It’s worth choosing seamless gutters to avoid this if you can afford it.
3. Gutter installation mistakes: Calculating the wrong roof pitch
Your gutters should have a fairly steep pitch to allow easy flow of rainwater to the downspouts. If your roof pitch is too steep, rainwater will travel too quickly into the downspouts and likely overflow, while water may pool in parts of the gutter if the angle is too low. Both of these gutter installation mistakes can cause damage to your gutter and other issues around your home’s exterior.
Generally, a quarter of an inch slope towards the downspouts is required for every 10 feet of your gutter. This way, no rainwater will spill to the side or collect within your gutters.
There is a common misconception that gutters should be placed at the roof edge, which is wrong. Gutters generally need to be installed a few inches below the roof edge to collect water that flows down its backside due to capillary action.
5. Wrong installation of downspouts
Downspouts direct water away from your home. However, if they aren’t correctly installed or are placed in the wrong location, rainwater may leak into the foundation or even damage your façade. Ideally, install your downspouts such that they divert water 8 to 10 feet away from your house foundation.
Endnote
Gutters are your roof’s first line of defence against rain, so any gutter installation mistake, including a DIY project, can leave your roof prone to moisture damage. If you are inexperienced with home improvements, consider hiring a professional to avoid all the hassle and get the most out of your money. A reliable gutter contractor will advise you on which type of gutter best suits your home and won’t make any of these mistakes.
Landscaping can be pricey, but there are ways to lessen the expense if you exert a bit of extra effort and some ingenuity. Here are our favorite ways to landscape on a budget.
1. Choose plants with bright colored blooms for big impact.
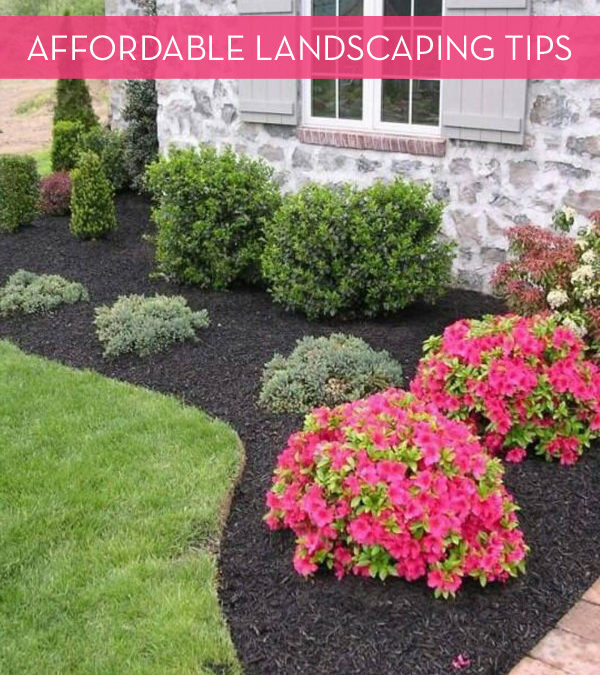
Flowering plants with big, bright blooms (as shown in the first image above) help fill space and draw the eye in. Look for colors that complement or offset the shades of your home’s siding or stucco.
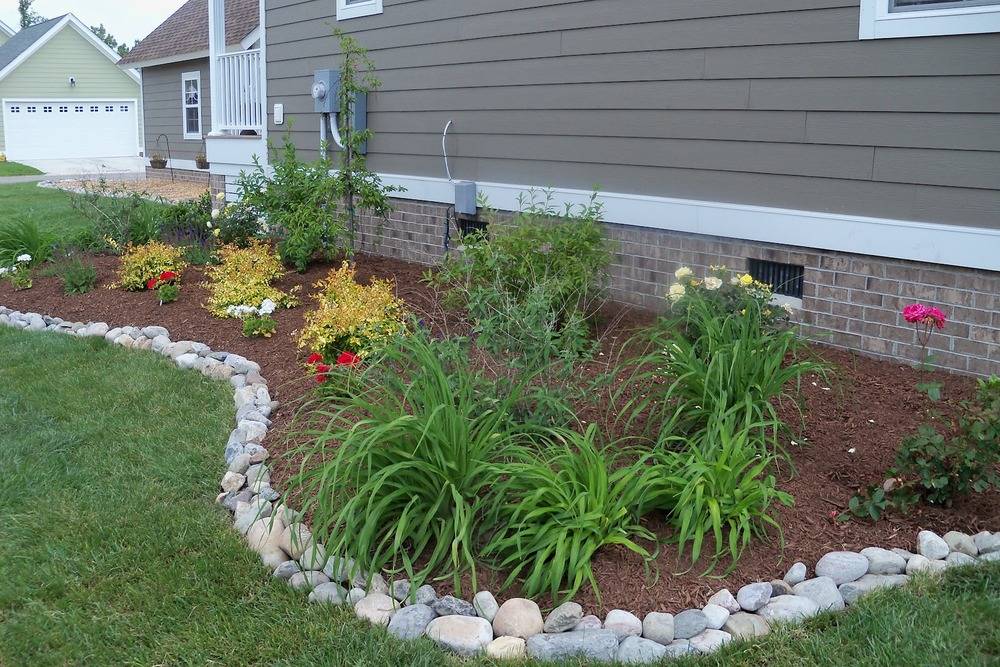
Rather than buying brick or other garden border materials, find stones for free and use them to create an attractive divider between the garden and the lawn.
3. Instead of buying 5 plants, buy one and divide it.
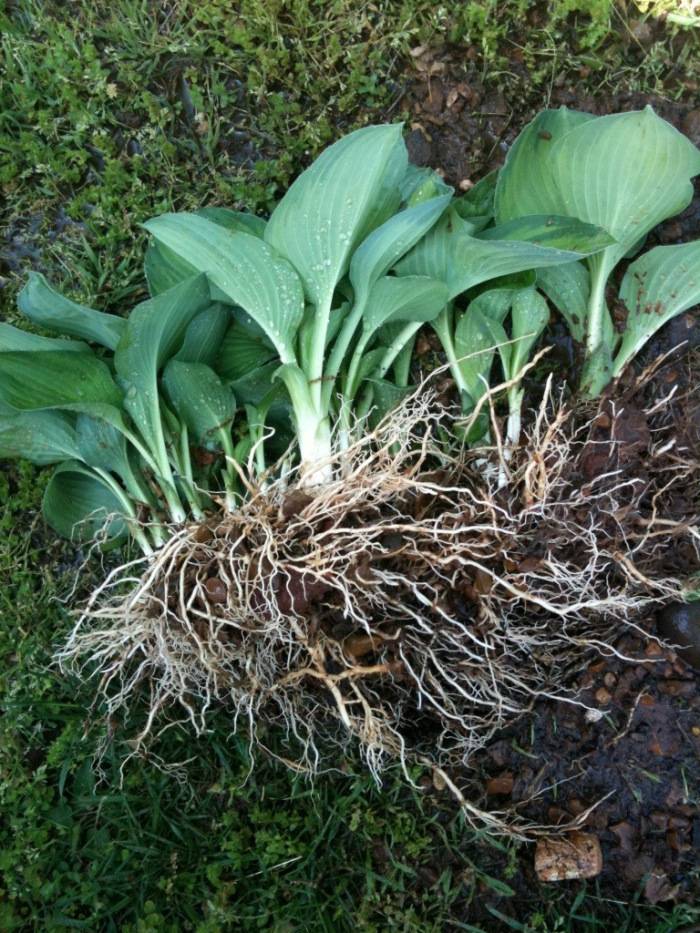
Divide plants, like hostas or lillies, and spread them throughout your yard. You’ll save money by turning one plant into several. Dividing plants is pretty easy; just dig up the entire plant, making sure to keep the root-ball intact. Then carefully split up the roots and stems until you have separated the plant into several chunks. Each group can be re-planted, and should continue to grow if watered and maintained appropriately. Read more here.
Tool sharing is a gray way to save money. Rent a wood chippers or soil aerator, and split the costs with friends. You can also split seed packs, plant packs, and more.
9. Buy pots and planters used or on sale.
Yard sales, flea markets, and Craigslist are all great resources for finding really affordable pots and plant containers.
10. Construct a rain barrel to collect rain to water your garden and lawn.
This will lower your water bills (and help the environment too!). Get the rain barrel tutorial here. Use a downspout adapter to direct water flow.
Painting bricks can add a pop of color and style.
11. Add some color by painting rocks, bricks, or landscaping pavers.
You know how sometimes you just get tired of looking at boring, plain, red bricks? Well, guess what? Other people do to! Which is why those materials can often be found for cheap, or free. But with a fresh coat of paint, you can turn them into something special.
Try painting river rocks white for a clean, modern-looking ground cover option. Or add pops of bright color to an old brick wall. Here’s a good primer on how to correctly paint these type of materials so that the top coat will last.
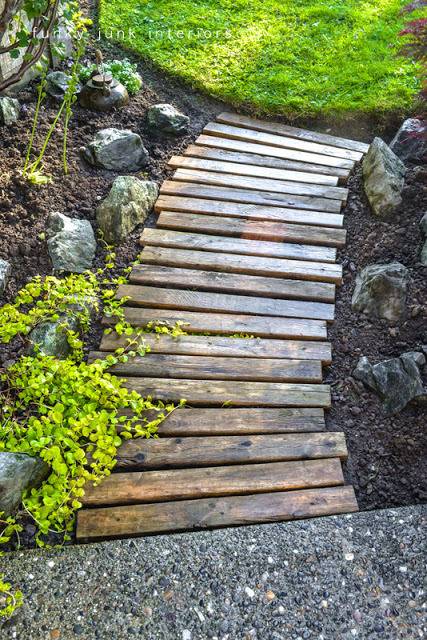
Wood shipping pallets can be found for free almost anytime (or bought for cheap). Look for them by the side of the road, or at warehouse loading docks (make sure to ask before you take them; usually people will be happy to let you have them). These wood structures are built to be used outside, and can easily be turned into simple pathways (as above) or other outdoor landscaping features.
Simple, carefully-placed lighting can make even the most ordinary yard look amazing. And the best thing? Lights have gotten really affordable over the last ten years, thanks in part to the advancement of LED technology. In many cases, you may not even need additional electrical wiring, because LEDs use such little electricity that they can be solar powers. Try a rope light along the edge of a garden, or spot lights to feature large plants or trees.
As a gardener and urban farmer you come to appreciate and treasure compost, or as I affectionately call it, “Black Gold”.
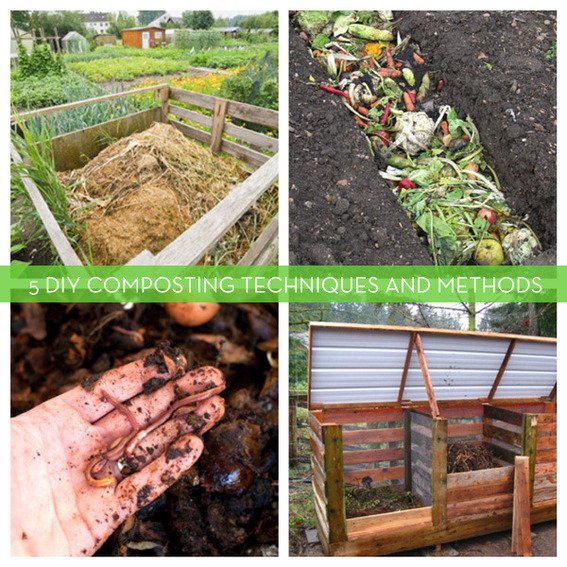
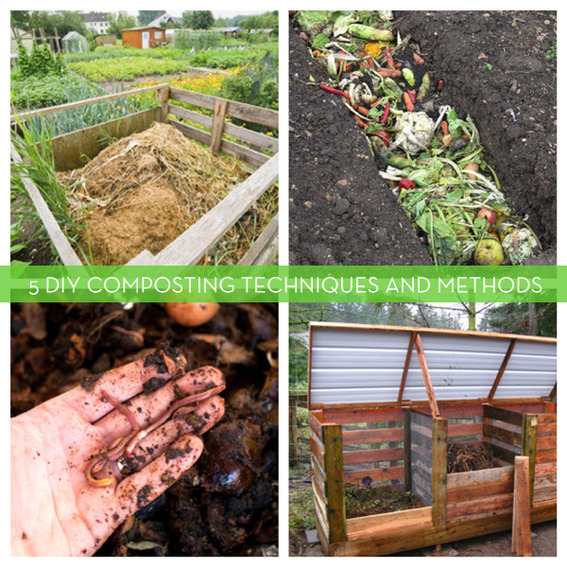
Composting itself is actually pretty easy and there are several methods and solutions. Whether you own a full-on farm, or live in a tiny apartment, there is no reason you can’t or shouldn’t be composting.
In a world obsessed with “greening,” it’s scary to think about how much food we throw away. A friend of mine started a small scale composting business last year by collecting food scraps from local restaurants and was able to save 111.3 tons of food waste from ending up in the dump and turned it into glorious, nitrogen rich compost. If that’s not motivation to start composting, I don’t know what is!
Here a few of the options available when composting.
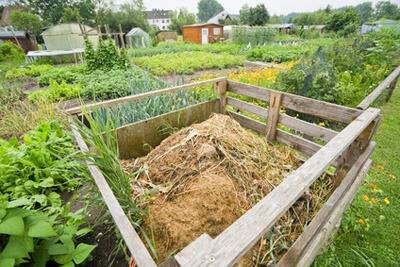
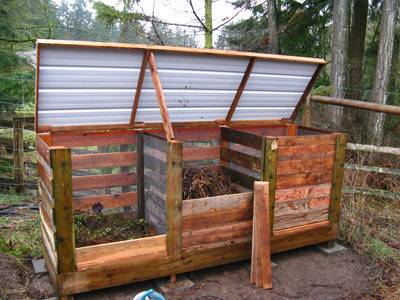
The most straightforward way of composting involves dedicating an area, usually 25 sq. ft or so to being a compost pit, any larger and it makes it pretty difficult to aerate. You start by adding layers of organic material, usually browns (old leaves, bark, etc) followed by greens (grass cuttings and vegetable scraps) topped by soil. Continue on building the layers until it’s around 4 to 5 ft high and then turn it every 2-3 days with a fork for the first month, keeping it moist, but not wet. After the first month taper off till you’re turning once or twice a month and in 3-4 months you’ll have a soil-ready compost, less if you decide to add a commercially available compost activator. See more at Nature Hacks.
Bin Composting
Also known as the “no turn” method. It’s similar to the layered method above, but the idea is you have three bins, you keep adding to the first until it’s full, then move to the next bin. While it’s the most effortless method, it’s also the longest and it can take as long as 3 years to decompose! See more at Backyard Feast
Quick Composting
If, like me, you don’t have three years to wait around you can combine the first two methods together, turning twice a week and making sure that the heap remains warm.
Trench Composting
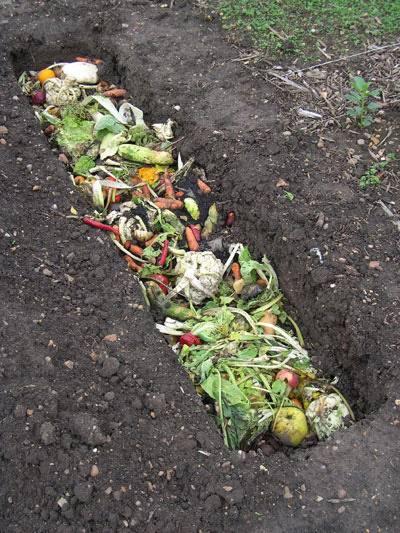
Trenching, as discussed in our DIY garden beds post, trenching is a way of composting by digging a trench roughly 3-feet deep and filling it with compostable scraps, covering them with alternate layers of soil. Once completed leave them for 2-3months to break down and then plant your vegetables directly into the bed. See more at Good Life Garden
Worm Composting
Worm Composting, and vermicomposting yield nutrient-rich castings, and probably the most fertile soil of the above methods, the downside is that it’s not as scalable as the above methods, but perfect for small gardens and apartment dwellers. Red wriggler earthworms are used to break down kitchen scraps into these castings and nutrient-rich worm tea, which can be used as an organic fertilizer. The downside is that the worms don’t have a large appetite so you can’t feed them a lot of food at once, you should also avoid all types of citrus, meat, or onions when feeding them. The plus side is that it’s also one of the least odorous methods of composting and why it’s become popular with many apartment dwellers using it to clear off kitchen scraps.
When it comes to choosing materials for outdoor use, stainless steel is often a top contender. It is durable, weather-resistant and easy to clean, making it a popular choice for everything from patio furniture to grill covers. But is it really the best option? We asked The Engraving People for their views on the benefits and drawbacks of this material.
What is Stainless Steel?
Stainless steel is a type of steel that’s mixed with chromium and other metals to make it resistant to rusting and staining. It is often used for outdoor furniture, appliances, and other objects that may come into contact with water or other liquids. Stainless steel is also very durable and can withstand a lot of wear and tear.
Stainless steel is a great choice for outdoor use in many situations. It is durable, weather-resistant and easy to clean, making it a low-maintenance option that will last for years to come. However, it is important to keep in mind that it may require more care than other materials and may not be the best choice for every outdoor application.
There are a number of factors to consider when deciding whether or not stainless steel is the right material for your needs. Let’s take a look at some of the pros and cons of using this versatile metal outdoors.
Stainless steel is a great material for outdoor use because it is durable and easy to clean. To clean your stainless steel, simply wipe it down with a damp cloth and dry it off with a soft towel. If you have any tough spots or stains, you can use a mild soap and water solution to remove them. Be sure to rinse the area well afterwards to remove any soap residue. For best results, follow these cleaning tips:
Wipe up spills immediately to prevent staining.
Avoid using harsh chemicals or abrasive cleaners.
Use warm water and a mild soap solution for tough spots or stains.
Rinse the area well afterwards to remove any soap residue.
Dry the area with a soft towel to prevent water spots.
With proper care, your stainless steel will look great for many years.
Conclusion
Stainless steel is an ideal material for many outdoor applications because it is durable, easy to clean, and rust-resistant. It can be used for a variety of purposes such as deck railings, gates, fences, and furniture. While stainless steel may be more expensive than some other materials, its long life span and low maintenance requirements make it a wise investment.