You’ve spent weeks planning your garden redesign. You’ve compared paving slabs, researched soil types, and measured the patio area more times than you can count. But there’s one thing you probably haven’t checked: what’s buried beneath the soil.
Gas pipes, water mains, electric cables, and fibre optic lines sit just inches below the surface of most properties. A single misplaced shovel can turn a weekend project into a serious emergency. In the UK, the safe digging industry handled 3.9 million underground asset searches in 2024, or one every 21 seconds during the working day. More homeowners are catching on to the risks, but many still don’t realise how close they are to a costly mistake.
This article covers why knowing what’s underground should be the very first step in any garden or renovation project, and how to check before you dig.
Why Property Owners Need to Know What’s Underground
Ilustration showing how many pipes can be hidden underground.
Every property sits on a hidden network of service lines. Your gas pipe enters the house from a main buried somewhere beneath the street. Electric cables feed your home from the same underground grid. Water pipes, sewer connections, and fibre broadband cables all share the same shallow band of soil.
Most homeowners have no real idea where these lines are. A common assumption is that utilities are buried several feet down, safe from any surface-level digging. The reality is different. Many service lines sit just 15 to 30 centimetres below ground. A garden spade can reach that depth in one push.
If you’re planning a major landscaping project or a home extension, you need a clear picture of what’s underground before any earthmoving starts. For homeowners who need more detail than basic utility markings provide, working with utility locating services Phoenix AZ can fill in the gaps by mapping private lines, older infrastructure, and everything between the meter and your property.
The scale of what sits beneath our feet is hard to grasp. The LSBUD network in the UK maps over 1.6 million kilometres of gas pipes and electricity cables, according to their Digging Up Britain 2025 report. That’s enough pipe and cable to wrap around the Earth 40 times. A record 3.9 million proactive searches were submitted in 2024 alone, with 44,273 new users registering, a 38.1 percent rise over four years, as reported by Electrical Times.
Common Projects That Hit Buried Utilities
Certain garden and home improvement projects carry a much higher risk of hitting underground utilities than others. Industry data from the Common Ground Alliance DIRT Report (2025) shows that fence installation accounts for 23 percent of residential utility strikes, making it the single most common cause. Landscaping and general gardening work comes next at 19 percent, followed by tree planting, deck and patio construction, and sprinkler system installation.
In the United States, underground utilities are damaged roughly once every three minutes. That adds up to nearly 190,000 incidents each year and costs an estimated $30 billion annually, according to the Common Ground Alliance. Across the border in Ontario, homeowners reported striking underground infrastructure 3,900 times per year, or about 17 incidents every workday, based on 2025 research from Ontario One Call.
These are not abstract numbers. A sprinkler trench dug through a buried cable or a fence post driven into a gas line can stop a project cold. If you’re upgrading your garden irrigation system, check what lies beneath before you trench. The same goes for planting a tree, installing a pergola, or laying a new path.
The Real Cost of Skipping This Step
The financial consequences of hitting a buried utility line are severe. According to a PG&E press release from April 2026, the average repair cost for a damaged line is $3,500. In 89 percent of homeowner incidents where underground lines were damaged, no locate request had been made beforehand.
The human cost is higher. In the UK, 70 people per year suffer serious injuries from contact with underground electricity cables. The Energy Networks Association reports that electric cable strikes have increased 46 percent since the end of lockdown, a trend that safety organisations find deeply worrying.
Beyond repair bills and injury, there are consequences many homeowners never consider. A gas line strike can force an entire neighbourhood to evacuate. A severed fibre cable can knock out internet service for blocks. Your home insurance may not cover damage caused by digging without a locate request, leaving you to foot the full bill. And any project that hits a utility line faces significant delays while emergency repairs are made.
The official HSG47 safety guidance from the UK Health and Safety Executive sets out the standards for avoiding underground services during excavation. Anyone planning work that involves digging should read it.
A Safer Approach for Property Owners
The universal colour code helps homeowners identify which utilities lie beneath marked areas before they dig
The good news is that checking what’s underground is straightforward. Every homeowner should follow these steps.
Request a locate. In the UK, submit a free asset search through LSBUD (Linesearch BeforeUdig). In the US, dialling 811 connects you to your local one-call centre. Submit your request at least two to five working days before you plan to dig.
Understand what gets marked. The locate service marks public utility lines from the street to your meter or property boundary. Private lines beyond that point, such as irrigation pipes, outdoor lighting cables, or old septic systems, are not covered. For those, you may need to hire a private locator.
Learn the colour code. Utility markings use a standardised system: red means electric, yellow means gas, blue means water, green means sewer, and orange means communications. White marks outline the planned excavation area.
Dig by hand near marked lines. Always hand-dig within 60 centimetres of any marked utility. Power tools or machinery near buried lines cause the majority of serious strikes.
If you’re new to home renovation, these steps fit naturally alongside other safety checks for your renovation. The same caution you apply to structural walls and electrical systems should extend to the ground beneath your property.
Making Underground Checks Part of Your Project Planning
Underground checks should sit alongside the other planning steps that responsible homeowners already take. When you plan a garden or renovation, you set a budget, assess the space, and choose materials. Checking the ground beneath should be part of that same process.
Planning your garden layout and design naturally includes site assessment. Understanding the ground is a fundamental part of garden design, and what lies under the soil matters just as much as what grows in it.
The Royal Horticultural Society offers soil and drainage guidance that reminds us of this core principle: a successful garden starts with understanding the ground itself.
Adding utility locating to your pre-project checklist protects every other part of the job. A new patio is only as good as the ground it sits on. A tree planted without checking for cables can’t be moved once it’s in. A fence post driven through a gas line becomes a disaster that no amount of careful design can fix.
Think of it as four planning stages for any garden or renovation project: design, safety checks, waste management, and underground checks. Skip the last one and you risk undoing everything you put into the first three.
Planning Starts with the Ground Beneath Your Feet
The best garden or renovation project doesn’t start with a mood board or a trip to the garden centre. It starts with knowing what’s already underground.
A free asset search or a quick call to your local one-call service takes minutes. It prevents damage that costs thousands of pounds to repair and can cause serious injury. Planning is not just about design and materials. It’s about understanding the ground you’re working with. Make the underground check your first step, and everything else gets easier.
.tasty-pins-banner-container{display:block;margin-bottom:20px;position:relative;width:-moz-fit-content;width:fit-content}.tasty-pins-banner-container a{cursor:pointer;display:flex;font-size:14px;font-weight:700;letter-spacing:1px;line-height:1.8em;text-transform:uppercase}.tasty-pins-banner-container a:hover{opacity:1}.tasty-pins-banner-container .tasty-pins-banner{align-items:center;bottom:0;cursor:pointer;display:flex;justify-content:center;left:0;padding-bottom:1em;padding-top:1em;position:absolute;right:0}.tasty-pins-banner-container .tasty-pins-banner svg{margin-right:4px;width:32px}.tasty-pins-banner-container .tasty-pins-banner span{margin-top:4px}.tasty-pins-banner-container a.tasty-pins-banner{text-decoration:none}.tasty-pins-banner-container a.tasty-pins-banner:hover{opacity:.8}.tasty-pins-banner-container a.tasty-pins-banner-image-link{flex-direction:column}.tasty-pins-banner-container a img{margin-bottom:0}.entry-content .wp-block-image .tasty-pins-banner-container img{margin-bottom:0;padding-bottom:0}#et-boc .et-l div .et_pb_image_wrap .tasty-pins-banner-container .tasty-pins-banner{padding-bottom:1em!important;padding-top:1em;text-decoration:none}#et-boc .et-l div .et_pb_image_wrap .tasty-pins-banner-container a.tasty-pins-banner{cursor:pointer;display:flex;font-size:14px;font-weight:700;line-height:1.8em;text-transform:uppercase}#et-boc .et-l div .et_pb_image_wrap .tasty-pins-banner-container a.tasty-pins-banner span{letter-spacing:2px;margin-top:4px}.et-db #et-boc .et-l .et_pb_module .tasty-pins-banner-container a:not(.wc-forward){padding-bottom:0}Photo: The Crafted Life
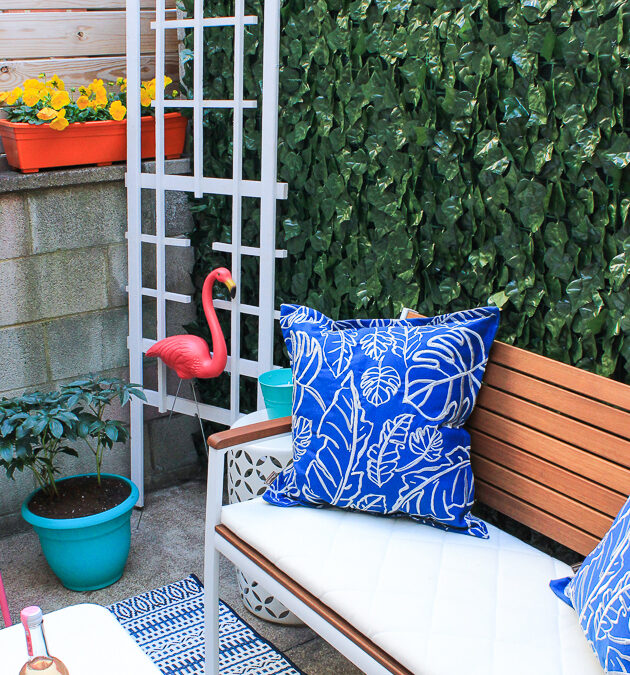
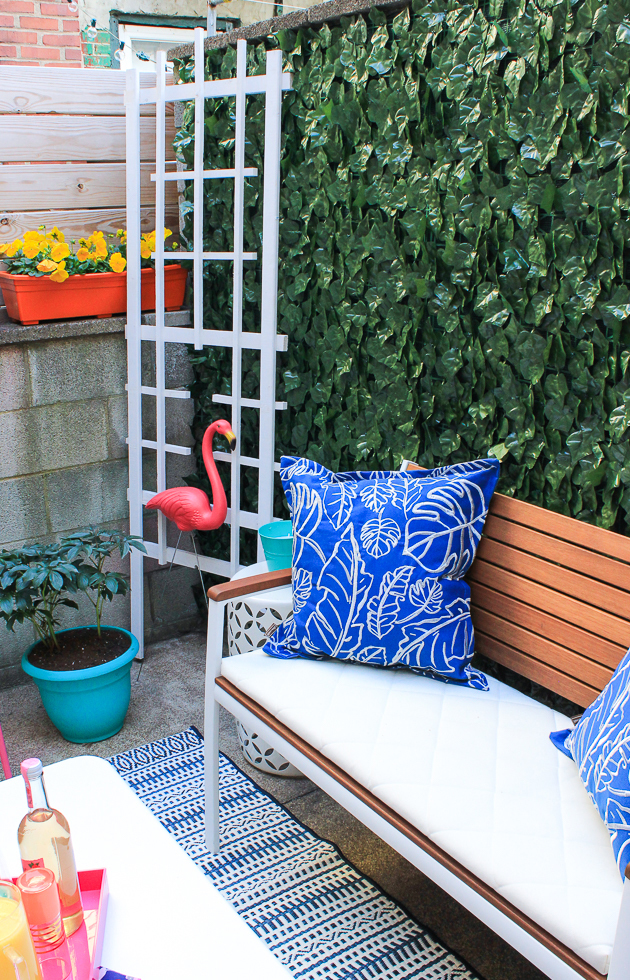
If you’ve ever lived in an apartment or a really tiny house, you probably understand the struggle of a tiny outdoor space. Generally, tiny porches are the only type of porches you’ll find with an apartment. While a tiny porch is better than no porch at all, sometimes you have to get creative with the small space you have with small balcony furniture and space saving solutions. Luckily, I’ve rounded up a bunch of ways to make the most of your tiny porch this summer, including DIYs, storage solutions and just plain cute pieces to add to your porch.
1. First of all, covering up ugly walls with faux ivy will make your porch look like a whole new space and adds lots of pretty green before even adding real plants! Plus, it’s renter friendly and easy to maintain. (above)
2. Build a DIY murphy bar to maximize space on the wall, so it folds down for a table or prep space. You’ll need it for making cocktails on your porch this summer!
3. A half circle table like this one is perfect for creating a small seating table on your tiny porch.
4. Leave space! In a small space, sometimes a bit of modern minimalism is the best way to embrace it. A couple chairs and plants may be all you need.
5. A vertical planter with multiple pots is a great space saver on a tiny porch! Hang it in a corner and you can have multiple pots in a smaller space.
6. Try something daring, like adding a little canopy on your porch and incorporating lots of colorful pieces. Why not?!
7. Decorate your porch with chalk for a non-permanent way to makeover unslightly walls and floors. Although it’s a temporary solution, it can last throughout the summer if you’re in a location that gets little rain.
8. Try incorporating bench seating as a space-saving way to seat multiple people. This way you have less pieces of furniture taking up space but can still seat the same amount of guests!
9. Who says your tiny porch can’t be comfortable? Lots of cushions and a well-placed hammock could create the perfect place to relax this summer.
10. Lights and plants make a HUGE difference in your outdoor space. Hang lights on your porch high enough that they don’t impact your vision, and incorporate plants throughout to make the space more homey. You’ll never know it’s a small space!
Sometimes small changes make a big impact when it comes to your tiny outdoor space. No matter the size or your porch or patio or whether you own or rent, these small porch ideas prove there are inspiring ways to makeover your space this summer (without breaking the bank).
For a lot of homeowners, the pool is a part of a general home improvement project, but it doesn’t always fit in the decor of the property. In fact, more often than not, the addition of a pool can clash with the whole look and feel of your garden. So, instead of increasing your home value, it can have no effect at all, despite the investment cost.
If you are worried about how your pool impact your value of your property, it’s time to think about how to create a coherent and consistent style for your outdoors. Here is how you can make your pool feel more at home.
Elevate The Liner
Did you know that your pool liner doesn’t have to be boring? Romans have exquisitely decorated baths, so why couldn’t your pool be like that too?
There are plenty of stylish liner options, including above ground pool liners, so you are not limited in the look you can achieve. There’s a common misconception that only in ground pools can have visually appealing liners, but nowadays, pool owners can create the decor they want, no matter whether in or above ground.
This may not seem like much, but changing the overall visual from plain blue to something more elegant can already make your pool area appear more sophisticated and intentional.
Inflatable Pool Fun
Small pools are designed to provide a refreshing zone in the warm weather. They are not made for athletic performances because they are neither deep nor long enough for swimming. As a result, they often feel like an awkward, space-demanding addition to the garden.
So, if you start framing your pool as an outdoor water lounge, rather than a tiny swimming space, it instantly becomes more interesting and inviting. For example, there are plenty of stylish inflatable additions you could bring, such as an inflatable pool chair, which will make pool days a lot more entertaining. This will remove the risk of comparing your garden pool with an actual swimming pool.
The Area Around the Pool
In the summer, the pool can become the centre of your outdoor gathering spot. So, why not design an outdoor area where you and your family can spend time comfortably, even when you are not in the pool?
That’s precisely where looking for garden furniture that matches your taste and decor can be a game-changer. Granted, this means moving away from the typical plastic chairs and table ensemble, but contemporary furniture that is designed to inject sophisticated elegance into your garden will transform the space dramatically.
Nighttime Lighting
One of the main reasons why the pool looks out of place in the garden is the lack of practical features around it. So, using quality furniture to frame the shape of the pool will help create a sense of inclusion. But you can also make it more intentional with dedicated lighting solutions, such as sensor-based switch-controlled systems, that can illuminate your path to the pool at night.
Lighting is also a great way to create interesting shapes that can paint the pool area in a different light at night.
Can the addition of a pool become synonymous with increased property value for homeowners? More often than not, a thoughtful decor that brings the pool area to life can contribute not only to your enjoyment of the outdoor space but also to a return on investment when you sell the property.
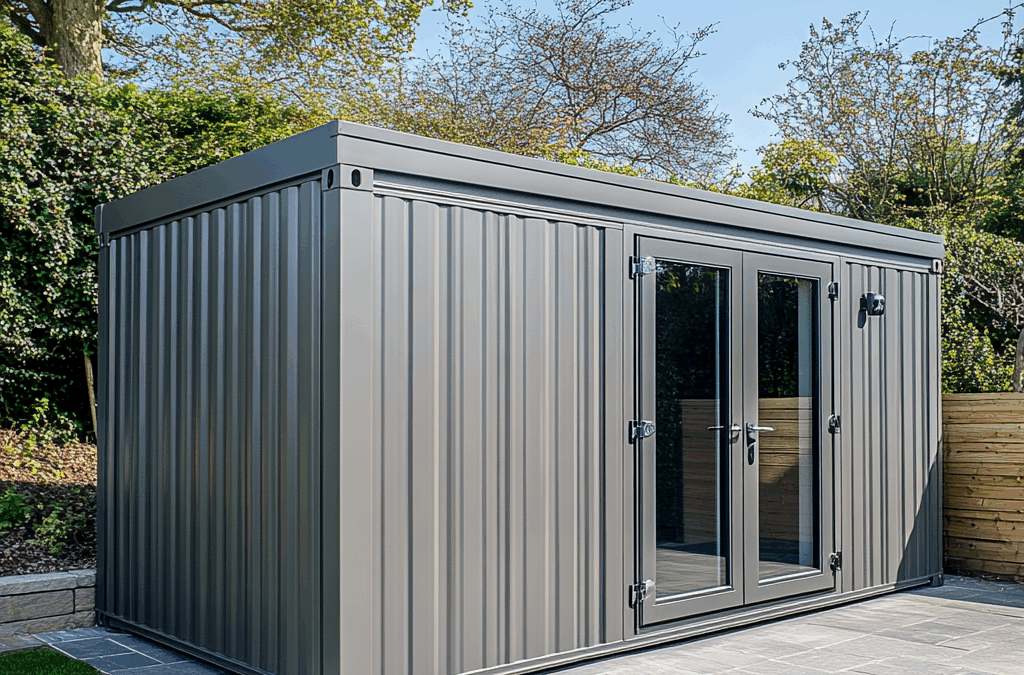
A steel utility building is one of the most practical and cost-effective structures a property owner can invest in. Whether used for storage, workshops, equipment housing, hobby spaces, or small business operations, a steel building offers unmatched flexibility and long-term value. The challenge for many homeowners and small business owners is achieving this versatility without overspending. Thanks to efficient engineering and customizable design options from companies like US Patriot Steel, it’s entirely possible to build a multi-purpose steel utility structure that meets several needs while staying within a manageable budget.
Below are the key strategies for creating a functional, flexible steel utility building without unnecessary costs.
Start With a Clear Plan for Multi-Use Functionality
The first step to building on a budget is knowing exactly how the space will be used. A steel utility building can serve as a workshop, equipment shed, storage area, small office, vehicle garage, or livestock shelter, but not all purposes require the same features.
Before ordering a building, outline the primary and secondary uses:
Do you need climate control?
Will heavy equipment be stored inside?
Is a workshop section necessary?
Should future expansion be considered?
Planning ahead prevents costly modifications later. Steel structures are incredibly flexible, but adding doors, height, insulation, or new sections after construction is always more expensive than including them upfront.
Choose the Right Size, Not the Biggest Size
One of the most common budget mistakes is overbuilding. Steel buildings scale in cost with width, height, and length. A slight increase in size can dramatically impact both materials and engineering requirements.
Instead of choosing the largest possible footprint, select the smallest size that comfortably meets your needs. Prioritize organizational features, such as shelving, vertical storage, or lean-to additions, before increasing overall square footage. Many owners are surprised by how efficient a thoughtfully planned steel building can be, even at a modest size.
Use a Simple Roof Style and Standard Dimensions
Customizations add cost quickly. To stay on budget, focus on features that increase function rather than aesthetics.
The most budget-friendly choices include:
Regular or A-frame roof styles instead of complex rooflines
Standard leg and wall heights unless taller clearance is required
Rectangular layouts rather than irregular shapes
Steel buildings become more expensive when designs deviate from standard engineering templates. If your goal is multi-purpose affordability, keep the structure simple and let interior organization do the heavy lifting.
Add Multi-Use Features That Maximize Value
A steel utility building can serve several purposes at once when designed strategically. Consider features such as:
Double doors or a large roll-up door for equipment access
A small enclosed room for an office, tool storage, or climate-controlled space
A lean-to extension for low-cost additional covered space
Clear-span interior for maximum layout flexibility
These upgrades improve usability without inflating the budget dramatically. Lean-tos are particularly efficient as they provide shaded storage or workspace at a fraction of the cost of expanding the main structure.
Insulate Only the Areas That Truly Need It
Insulation is a major cost variable. Rather than insulating the entire building, focus only on areas that require temperature control.
For example:
Insulate the workshop section
Leave tractor or equipment bays uninsulated
Add radiant barriers to reduce heat gain without full insulation coverage
Targeted insulation creates a comfortable workspace while keeping budget impact low.
Prepare the Site Efficiently to Avoid Hidden Costs
Site preparation can significantly influence the overall price. Budget-friendly tips include:
Choosing a location with natural drainage
Keeping the pad level small and simple
Avoiding unnecessary excavation
Using gravel instead of full concrete if the building’s purpose allows
A solid foundation doesn’t have to be expensive, as long as it is properly prepared for the load of a steel structure.
Plan for Future Expansion
One of the biggest advantages of steel buildings is their expandability. If you anticipate future needs – a larger workshop, more storage, or an added bay – plan for it now, even if you don’t build it yet.
Simple design decisions like placing doors on nonexpanding sides or keeping end walls clear make future additions affordable and easy.
Conclusion
Building a multi-purpose steel utility building on a budget is not only possible—it’s one of the smartest investments a property owner can make. By planning ahead, choosing cost-efficient design features, and focusing on flexible functionality, you can create a building that meets several needs without financial strain. With the strength, durability, and adaptability of steel, your utility building becomes a long-term asset capable of growing and evolving with your goals.
When it rains, it pours! So when you’ve just finished up work on a new garden project, you want to make sure it’s protected against the wet and damp that could ruin all your hard work.
You don’t want that new shed rotting over time, or for that concrete patio you just laid to become slimy and discolored. You want your garden efforts to pay off year after year, so you can keep on enjoying your outdoor space without any more effort.
That’s why you might want to invest in exterior waterproofing. When your surface materials are properly sealed and coated, bad weather won’t ruin the view!
And if you’re looking for an experienced professional to weatherproof your garden for you, we’ve got just the company: Capital Deck & Stair Waterproofing.
Here’s an honest review of their waterproofing services in 2025.
Capital Deck & Stair: A Waterproofing Company with Over 40 Years Experience
Serving an area that’s about 50 miles wide around LA, their portfolio has grown extensively at this point.
They’ve been in the business for over 4 decades now, and their team has a wealth of skill and knowledge that’s hard to find in other outdoor contractors.
They offer a lot of quality in their waterproofing services, and it’s not hard to see this quality come through in their project images alone.
Their Waterproofing Services
As the namesake of Capital Deck & Stair Waterproofing, the amount of waterproofing services on offer shouldn’t come as a surprise!
Here are the kind of projects they specialise in:
Decks
From the deck outside your back door to your front porch, as well as any walking decks that cover ground across greater areas of your garden, deck projects form the bulk of the company’s waterproofing.
After all, most decks are made of wood or wood composites. If they’re not properly waterproofed, the material is going to break down through damp, water logging, and even a bit of rotting!
Pool decks
Speaking of decks, this is another speciality in Capital Deck & Stair Waterproofing’s arsenal!
If you’ve just had a pool put in your back yard, make sure the deck around it has been properly protected against the sloshing and splashing it’s likely to see!
Even just walking on a pool deck with wet feet can cause damage. If you want your summer addition to last a whole lot longer (even up to 5 extra years or more), get some sealant applied.
Balconies
Balconies can easily become filled with water, especially if the railings don’t allow anything to escape.
Indeed, if you’ve got brick walling around the edge, the water is going to sit and hopefully evaporate over the next couple of hours.
But there’s no guarantee, especially if the whole day has been mild, wet, and chilly.
Staircases
Exterior staircases take a pounding over time, and not just from the feet that go up and down them!
The wind and rain is going to cause a lot of water damage to them when there’s no proofing coated on top.
Outdoor stairs need to be safe, slip resistant areas. With waterproofing, not only will your steps be abrasive enough to prevent accidents, but the water is going to run right off as well.
Landings
Exterior landings are more common in commercial properties, and Capital Deck & Stair Waterproofing do cover both residential and commercial clients.
But outdoor landings can exist in homes too, particularly in properties that have a detached garage or other kind of outbuilding.
Get your landing waterproofed for safe traversal at all times.
What We Really Like
Exterior weatherproofing is an in-demand service, and there are quite a few waterproofing providers out there.
So what is it about Capital Deck & Stair Waterproofing that actually sets them apart?
Well, here are the benefits we really like:
Family owned and run
You always get an extra special service when the company is family owned and operated. And if it’s been that way since it first began, you know you’re going to be treated like one of the family when you get in touch!
Capital Deck & Stair Waterproofing is a full family team, and they’re all trained experts when it comes to exterior home improvements.
An 8 year long warranty
You want to know you’re getting good value for money, especially if you’re hiring someone to apply waterproofing to a sensitive material like wood or concrete.
The warranty available at Capital Deck & Stair Waterproofing goes the extra mile here, as it lasts for up to 8 years.
That’s nearly a full decade’s guarantee that your outdoor weather proofing is going to stay in good condition.
Free estimates
It’s never a good sign when a company is a bit ‘wishy washy’ about their quotes. But that’s not the case at Capital Deck & Stair Waterproofing.
They offer free estimates to all customers, so you can find out what your waterproofing project would cost before you have to put any cash on the table.
When you’ve just completed a full garden upgrade or home renovation, it’s good to know you can scope out how far your leftover budget will go!
Rated 4.8 on Google
And finally, we’re also happy to see that Capital Deck & Stair Waterproofing is highly rated on Google.
Plenty of previous customers have left glowing reviews for the team, and time and time again there’s mention of how experienced and informative they all are.
So, Do We Recommend Capital Deck & Stair Waterproofing?
Absolutely! Capital Deck & Stair Waterproofing is a great choice for exterior surface weather protection. No matter what you need coating, their family-run service will come up with the goods.
Plus, it won’t cost you anything to simply ask how they can help. And if you have an issue, their 8-year warranty will get a repair out to fix things ASAP.
All in all, if your new deck needs waterproofing, feel free to give them a call.
First impressions happen in seconds, and at 35 mph, you’ve got even less time. A driver sees your sign for maybe three seconds before it’s gone from their view. That’s your entire window to communicate something worth remembering. Poor layout kills even the best message because no matter how brilliant your offer is, if people can’t read it fast, they won’t bother trying.
Design rules exist because human eyes work the same way across the board. People scan left to right, notice contrast before they notice subtle colors and read big text before small text. These aren’t guidelines to stifle creativity, they’re shortcuts to how brains actually process visual information. Ignoring them doesn’t make your sign unique, it just makes it invisible.
Four proven yard design rules separate signs that convert from signs that get ignored. These aren’t suggestions or best practices that might help. They’re non-negotiable fundamentals for yard sign design that actually works.
Rule 1: Less Text, Bigger Fonts
Legibility beats cleverness every single time. People aren’t going to pull over to read your sign. They’re not going to squint and strain to figure out what you’re saying. If they can’t read it instantly, they won’t read it at all. Your core message should be consumable in the time it takes someone to drive past your property once. That usually means five to seven words maximum for your main message, with everything else supporting that core idea.
Font size is your secret weapon. A good rule of thumb is using letters at least six inches tall for signs positioned near roads where people are driving past. The bigger the letter, the farther away someone can read it with clarity. Don’t get creative with tiny decorative fonts that look nice when printed but become unreadable from a distance. The hierarchy should go big headline, medium secondary info, small details like phone numbers or websites. Everything builds down from your main point.
White space isn’t wasted space. It’s breathing room that actually makes your sign easier to read. Cramming every inch with text creates visual noise and exhaustion. People’s brains appreciate simplicity. When you leave room around your message, the text pops more, contrast improves, and the whole thing feels intentional rather than desperate. Less text means bigger fonts, which means people actually read what you’re saying from a distance.
Rule 2: Contrast Rules Everything
High visibility between your text and background is the difference between a sign people notice and a sign that blurs into the scenery. Dark text on a light background works. Light text on a dark background works. What doesn’t work is red text on a dark background, yellow text on a light background, or any combination where the contrast is so low that your message disappears. Test your color combinations by stepping back and squinting. If you still see the words clearly, you’ve got contrast.
Color psychology matters, but only if people can actually see your message first. Blue builds trust, red creates urgency, yellow grabs attention. Those emotional associations only work if your text is readable. Avoid combinations that technically clash but create poor readability. Pink on white might look trendy but becomes unreadable from 50 feet away. Stick with color pairs that have genuine contrast and let your message land clearly before worrying about psychological associations.
Your brand colors might be subtle and sophisticated, but your sign isn’t the place to prove that point. Yard signs demand boldness. If your brand uses pastels, your sign probably needs a darker or brighter accent to maintain readability. This doesn’t mean abandoning your brand identity, it means adapting it for the medium. Your sign represents you, but it serves a specific function first. Get people to read it, build familiarity with your name, and reinforce brand association once the message actually lands.
Rule 3: Information Hierarchy Done Right
Brand name, core message, call to action. That’s your hierarchy from most to least important. Your name should be biggest because that’s what sticks in people’s minds. Your message should be clear and prominent but slightly smaller because it supports your brand. Your call to action or contact info should be readable but smallest because people already know to call or visit after they’ve identified who you are and what you’re offering.
Visual flow guides the eye naturally from one element to the next without confusion. Left to right, top to bottom, that’s how English readers scan information. Use that pattern intentionally. Put your strongest element at the top, guide eyes through your secondary message, land on your call to action at the bottom. Whitespace creates that flow by separating elements so they don’t compete for attention all at once. Each piece of information gets its moment before the eye moves to the next.
Balance matters but doesn’t mean everything has to be centered. Alignment creates order. Whether you choose left-aligned, centered, or asymmetrical, make the choice intentional and stick with it throughout the design. Random placement feels chaotic and erodes trust. People assume that if your sign looks sloppy, your business probably is too. Clean alignment signals professionalism without requiring a complicated design.
Rule 4: Materials and Finishes That Last
Gloss finishes catch light and pop from a distance, which is why they’re popular for signs in shaded areas. Matte finishes reduce glare and perform better in direct sunlight where glossy surfaces can create reflections that make text hard to read. Think about where your sign will live and choose accordingly. A sign getting hammered by afternoon sun needs matte. A sign in a shadier spot can leverage gloss for extra visual punch.
Durability matters because a faded or peeling sign hurts your brand. UV-resistant materials keep colors bright through months of sun exposure. Weather-resistant inks prevent fading and bleeding. Cheap materials might save money upfront but your sign looks weathered and abandoned within a few months. People notice that deterioration and it signals the opposite of what you’re trying to communicate. Your sign is telling a story about your business whether you intend it or not.
Corrugated plastic handles most weather scenarios well and works for short-term campaigns. Aluminum or PVC works for permanent installations that need to last years. The investment in better materials compounds when your sign stays readable and professional looking throughout its entire lifespan. You’re not just printing once, you’re building an asset that works for you repeatedly.
Conclusion
These four rules aren’t complicated, but they’re non-negotiable. Less text, bigger fonts, high contrast, clear hierarchy, and durable materials create signs that people actually see and remember. Skip any one of these rules and your sign immediately becomes less effective regardless of how good your offer actually is.
Every detail from your font choice to your material selection sends a message. These rules exist because they work, not because designers are gatekeeping secrets. Apply them and your sign performs. Ignore them and you’re just decorating a lawn with wasted money.
Design rules make the difference between a sign people glance at and forget versus a sign that builds familiarity and drives action. Stop fighting the fundamentals and use them to your advantage.