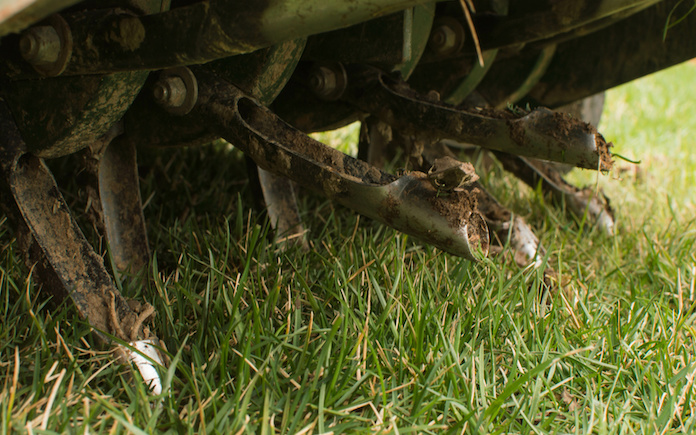
Lawn plug aerators are a great way to give your yard some breathing room, but they damage sprinkler heads. (stock.adobe.com)
A lawn plug aerator is an efficient tool to keep your lawn healthy and looking great. But before you start poking holes to give your grass some breathing room, it’s important to protect your sprinklers.
About Lawn Plug Aerators
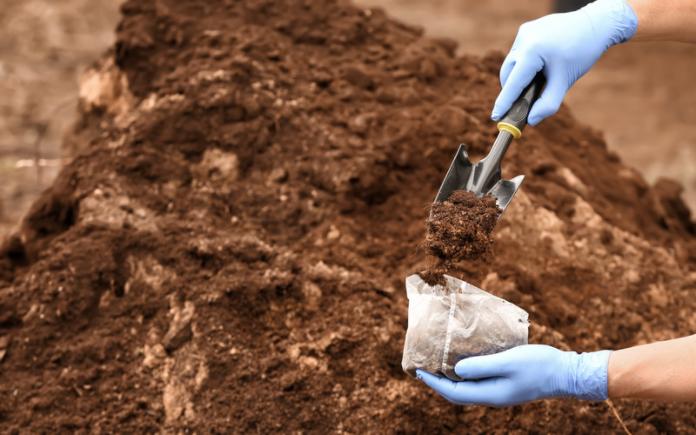
A lawn plug aerator penetrates the lawn’s surface and removes a core (or plug) of grass and soil. This loosens up the soil and allows the grassroots to breathe. The tool is also used for fertilizing and seeding.
These kinds of aerators are great for large yards with highly compacted soil. For smaller lawns, a spike aerator is the best option.
Despite their high performance with one job (aeration), lawn plug aerators have one big downside. If you’re not careful, they can easily tear up your underground sprinkler system.
How to Protect Sprinklers from Aerators
Before you use a lawn plug aerator, go to the home center and buy some flags.
Then, turn on your sprinkler system and find all the sprinkler heads throughout the yard. Mark them with the flags so you know which areas to avoid while aerating.
Lawn plug aerators typically don’t penetrate far into the soil — they usually just go about three inches deep.
Most irrigation lines are at least 5-6 inches deep. To be sure you don’t do any damage, you can dig around a sprinkler head until you reach the drainage line and measure the depth.
Finally, while aerating, be cautious and leave plenty of room around the sprinkler heads.
Skip to [21:27]for the full segment on the Today’s Homeowner Podcast.
Also on this episode:
Best New Product
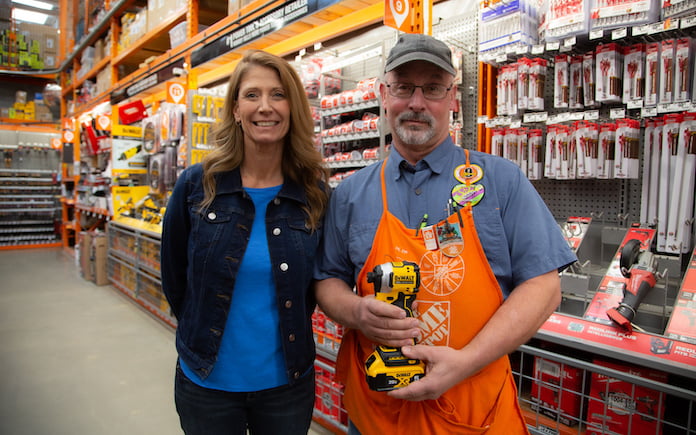
This DeWalt Compact Impact Driver makes working in cramped spaces easy! Learn more>>
Simple Solutions
Fast Fix for Stripped Screw Holes — Here’s a quick and clever way to fix a stripped screw hole using a cable tie (a.k.a.: zip-tie).
First, remove the screw from the stripped hole, then snip off the end of a cable tie, which is smooth. For this tip, you need to use the ridged part of the cable tie.
Press the snipped end of the cable tie into the hole until it bottoms out.
Then, cut the cable tie to length, matching the depth of the screw hole. Put the piece of cable tie into the stripped screw hole, then drive in the screw.
The ridges in the cable tie give the screw something to bite into, securely holding the screw in place.
Homemade furniture polish — Make an affordable, nontoxic furniture polish by mixing 1 cup white vinegar, 1/4 cup olive oil, and 1/8 cup of lemon juice.
Pour the solution into a plant mister and spray it onto wood surfaces. Rub in circles with a dry cotton cloth to remove dust, dirt and grime.
Then, use a second cloth to polish the surface in straight lines parallel with the direction of the wood grain.
Q:I’m installing a new mailbox. How deep and wide should I dig the hole, and how do I mix the concrete for it?
A: For a mailbox post, you’ll typically use a 4-by-4 or 6-by-6 post. You should dig the hole at least three times wider than the post and at least two feet deep.
At least a third of the post should be below ground. The United States Postal Service requires mailboxes to be 41-45 inches above the ground, so take this into consideration when buying the post.
To set the post with concrete, use a bag of Quikrete Fast-Setting Concrete Mix. Just pour the dry concrete mix into the hole and pour water on top until the mix is saturated. Watch how to do this here.
You can also try Sika PostFix. It’s a two-part expanding polyurethane foam that fills the post hole and hardens in three minutes. All you have to do is roll the bag to mix up the foam, snip off the corner, and pour it into the hole.
Skip to [29:20]for the full segment on the Today’s Homeowner Podcast.
Other Products and Links Mentioned
Further Reading
Ask a Question! (Podcast)
Ask a question and we could answer it on the “Today’s Homeowner Podcast!” We also may use it on our nationally syndicated radio broadcast or on todayshomeowner.com.
This compact impact driver’s tool head is only 3.97 inches long, which is 29 percent shorter than DeWalt’s DCF885 Impact Driver.
Because this impact driver is shorter, it’s great for a contractor working in tight areas like cabinetry or framing. The tool length from head to back is only 3.97 inches long, so you can get into those tight spaces.
It’s lightweight, but just because it’s small, that doesn’t mean it’s not powerful. It has over 3200 RPM and more than 1800 inch-pounds of torque to power through tough applications.
The DEWALT brushless motor delivers up to 57 percent more run time over brushed motors.
With three-speed settings, you can effortlessly handle every job.
Plus, this compact impact driver’s battery has no memory and virtually no self-discharge for maximum productivity and less downtime.
This page contains affiliate links. If you purchase a product from these links, we will earn a small commission at no additional cost to you.
With three LED onboard lights instead of one, you’ll be able to clearly see in dim spaces.
The DeWalt compact impact driver also has a 3-LED onboard work light, instead of just one on a regular impact driver. When you pull the trigger, it instantly lights up so you have increased visibility in dim workspaces.
These bright lights will keep your workflow consistent, so your project is completed better and faster.
The DeWalt compact impact driver comes with a three-year limited warranty, one year of free service and a 90-day money-back guarantee.
Watch the video to learn all about this Best New Product!
Keep your metal roof in prime condition with a good spring cleaning.
A good spring cleaning can up your home’s curb appeal and prepare it for the coming summer season.
Many projects that make the biggest impact are easy enough for homeowners to tackle themselves. That’s especially true for homes with metal roofs.
Asphalt roofs can be prone to moss, mildew and fungus and require harsh chemicals to treat and clean. Cleaning a quality metal roof is often as simple and inexpensive as using plain water.
A simple rinse with plain water oftentimes is enough to clean a metal roof. If it’s been a while since you’ve cleaned your metal roof, try this non-toxic solution.
How to Spring Clean a Metal Roof
Clean your metal roof yourself in five simple steps with this non-toxic recipe.
Clear Gutters
Clean out all gutters and downspouts and remove any large rooftop debris, like branches.
Rinse Away Debris
Before you mix up a cleaning solution, try a garden hose attachment to spray away dirt and debris.
Never use a power washer to clean a metal roof, because the pressure could damage the metal roof’s protective coating.
Mix Cleaning Solution
If water alone isn’t enough to remove dirt and debris, mix a quarter cup of detergent per gallon of water. You can use a mild laundry detergent, car washing soap or mild dish soap.
Don’t add too much detergent to the mix, or it could damage your metal roof.
As always, follow your metal roof manufacturer’s specific instructions to help protect and maintain roof warranties.
Clean Your Metal Roof
Apply the solution to the roof using a washcloth, sponge, soft bristle brush and/or non-abrasive pad. The goal is to use the lightest touch that will effectively do the job.
Never use steel wool, wire brushes, scouring powders, paint removers or thinners on a metal roof.
Rinse Cleaning Solution
Let the solution stand for five to 10 minutes, before thoroughly rinsing the surface with plain water.
Remember, safety is always the most important step for any type of roof maintenance, no matter what the material. Don’t get on ladders or rooftops if you are not comfortable, equipped or well-prepared to take the proper precautions.
The Metal Roofing Alliance is a nonprofit trade association that helps homeowners make educated roofing decisions and connects them with expert metal roofing professionals.
If you’re ready to upgrade to a metal roof, or just want more questions answered when it comes to a metal roof, check out metalroofing.com.
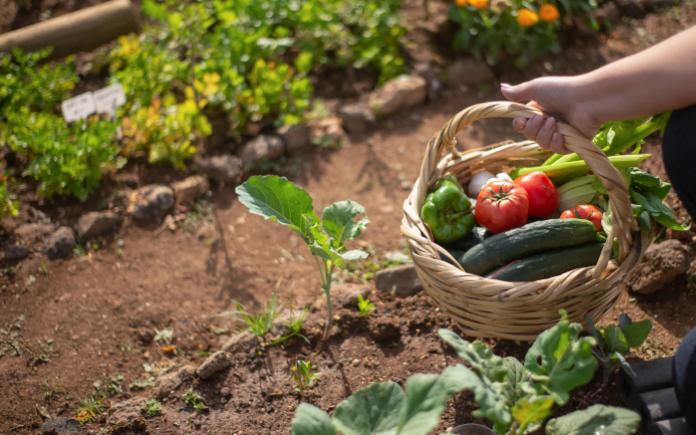
Modern-day victory gardens are a way for people to become more self-sufficient. (Kampus Production/Pexels)
Victory gardens are experiencing a resurgence as the effects of the COVID-19 pandemic are still lingering two years on.
The renewed interest in victory gardens began at the onset of the COVID-19 pandemic. Online searches for victory gardens surged in April 2020, the start of lockdown. As people were quarantined, they were looking for ways to channel emotional energy in a positive way, while also securing a safe source of fresh produce.
Now, victory gardens are experiencing a second wave of popularity. Supply chain issues and food shortages have more people than ever unsure if they will be able to purchase their food when they need it.
A woman tends to a victory garden in New York City in June 1944. (Farm Security Administration – Office of War Information photograph collection/Library of Congress)
History of Victory Gardens
Victory gardens were vegetable gardens planted during World War II in order to ensure an adequate food supply for civilians and troops.
The goal of the Victory Garden Program, which started in 1942, was to reduce demand for commercially grown vegetables by encouraging Americans to grow their own produce and preserve and can their surplus harvest. By empowering people to grow their own food, victory gardens made Americans feel part of a greater cause.
Victory gardens supplied 40 percent of the nation’s produce by 1944. By the time the war ended the next year, American families had grown about 8 million tons of food.
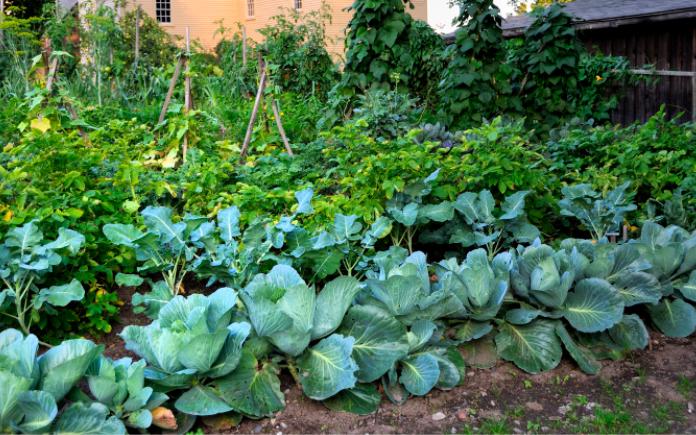
With the preparations, you can have your own bountiful victory garden. (MikeCheram/Getty Images Signature)
Starting a Victory Garden
With proper planning and regular maintenance, you too can have a bountiful victory garden.
Choose a place where your plants can get at least six full hours of sun. Don’t plant your victory garden near trees or shrubs, as those can compete for nutrients and water.
Also, make sure you will have easy access to water. Consider a raised bed or container gardening if you don’t have much space.
Browse through garden catalogs and check out garden stores to help you choose what you want to plant.
Because what you can grow is highly dependent on the climate where you live, refer to the USDA Plant Hardiness Zone Map to find what vegetables are good to grow in your environment.
Historically, some of the most popular produce grown in victory gardens included beans, beets, cabbage, carrots, kale, kohlrabi, lettuce, peas, tomatoes, turnips, squash and Swiss chard.
To ensure your victory garden plants grow at their best, do a soil test and amend it to suit your crops. (pixelshot)
Prepping for Your Garden
Remove grass and sod and till the upper layers of soil in your garden area.
Then, be sure to add four to eight inches of organic matter for the first year or two in new gardens if the soil is of poor quality. Home-made or store-bought compost provides good options for adding organic matter.
Perform a soil test to provide information about the pH (acidity and alkalinity) and available nutrients in your soil. A soil test also provides recommendations on how to amend your soil to better support plant growth.
Add compost as top-dressing or mulch throughout the growing season but incorporate it lightly to keep it from washing away. Add 1-2 inches of compost each year after you’ve started your garden.
Gardens that have yearly additions of organic matter may have enough nutrients to grow most crops without the need for supplemental fertilizer.
When transplanting plants, handle them carefully so you don’t bruise the stems or damage the roots. (Eva-Foreman/Getty Images)
Planting a Victory Garden
Plant your seeds according to the instructions on the packet. Firm the soil over your seeds to increase soil contact and speed up germination.
If you don’t want to start your victory garden from seed, buy transplants from a garden center. Choose vegetable plants that are stocky, disease-free, insect-free, and have good roots.
Plant transplants on a cloudy, windless day in the late afternoon or early evening to prevent wilting. Water the plants several hours before transplanting so the roots won’t dry out.
Dig a hole large enough to hold the roots and set the plant just slightly deeper than previously planted.
One exception is tomatoes. They should be planted deep enough to leave only two or three sets or leaves exposed because they will develop new roots along the stems.
Press the soil firmly around the roots of the transplant. Water, then pour starter solution around the roots per instructions on the starter solution label.
Plant the remaining plants, and keep them spread apart according to their recommended spacing.
To protect the new plants from wind and direct sun, cover them with a plastic jug for a few days. Make sure there is adequate ventilation so the plants do not overheat.
Pickling is one method of preserving vegetables harvested from a victory garden. (Nahhan/Getty Images)
Preserving Your Victory Garden Produce
If you’ve properly cared for the plants in your victory garden, you might find you have too big of a harvest to eat before it goes bad. Here are some ways to preserve your produce:
Canning: Canned vegetables are heated hot enough and long enough in a jar to destroy organisms that can make people sick and spoil food quality.
Pressure canning is the only safe method of canning all vegetables, except tomatoes. Jars of food are placed in a pressure canner which is heated to an internal temperature of at least 240°F. This temperature can be reached only in a pressure canner.
Drying: The University of Georgia rates carrots, sweet corn, garlic, mushrooms, onions, parsley, parsnips, peppers and potatoes as “excellent” or “good” for their quality after drying.
You can dry out these vegetables in the oven or a food dehydrator. Before drying, blanch the vegetables in boiling water to destroy enzymes that can cause color and flavor issues.
Properly stored, dried vegetables keep well for six to 12 months, and a great to use in soups, stews, sauces and dips.
Pickling: Pickling uses vinegar and other acids to preserve food. Mix in some herbs and spices to add extra flavor.
No matter what mood Mother Nature is in, metal roofing offers your home protection.
Crazy snow and ice storms, monster hurricanes, golf ball-sized hail, extreme heat and torrential downpours. Homeowners everywhere face unique climate challenges.
In this special Today’s Homeowner podcast, I’m talking with Renee Ramey, Executive Director of the Metal Roofing Alliance. We’re setting the record straight on how metal roofs hold up in extreme weather.
Metal roofing can withstand winds up to 140 mph — that’s the windspeed of a low category 4 hurricane! (Pgiam/Getty Images Signature)
‘Will a Metal Roof Easily Blow Away in High Winds?’
Extreme winds during hurricanes and tornados can literally tear off weaker, sub-quality roofs. Choosing stronger materials like metal roofs can improve the chances of riding out storms unscathed.
Metal roofing can better withstand driving rain and extreme winds including F-2 tornado force winds of up to 140 mph. Since roofs take the brunt of monster storms, an investment in a higher quality roof can help save homes from sustaining major damage and will hold up better over time.
Some metal roofing manufacturers and installers place foam under each shingle, which can help further guard against water seepage.
Metal roofs often earn a Class 4 impact-resistance rating, which is the highest possible level of protection against hail damage. (soupstock)
‘Won’t Hail Damage Metal Roofs More Easily Than Shingle Roofs?’
Quality metal roofs often earn a Class 4 impact-resistance rating — the highest level of protection against hail damage available. That means, installing a metal roof can help reduce hailstorm damage, thus preventing costly repairs and replacement.
All roof types can sustain some cosmetic damage during a hailstorm, but studies show metal roofing performs best and is much less likely to puncture as compared to asphalt.
Some finishes of metal roofing offer a rougher texture to keep snow from sliding off. (Garrett Aitken/Getty Images)
‘Does Snow Easily Slide Off a Metal Roof?’
Finishes such as stone-coated metal roofs have a rougher surface texture. This works to reduce the danger of rooftop “avalanching” by preventing snow from releasing in large, heavy and damaging sheets.
Smooth metal roofing panels, whether painted or left unfinished, have much slicker surfaces and may require quality snow guards. Snow guards are designed to hold back rooftop snow and allow it to melt more gradually.
Some metal roofs have a cool coating that actually helps emit heat gain. (sarajlic/Getty Images)
Basic, unpainted metal roofs will reflect more solar radiation than asphalt roofs. By choosing the proper colors and coatings, low-glare metal roofs reflect mostly non-visible, infrared and UV rays.
Modern high-performance metal roofing paints and stone-coated materials increase energy efficiency. Plus, darker colors reduce heat gain.
Cool metal roofs offer high solar reflectance and help emit heat gain. This reduces the amount of air conditioning needed by as much as 10-15 percent.
The Environmental Protection Agency estimates that an ENERGY STAR-qualified roof can lower roof temperatures by as much as 50 degrees.
The Metal Roofing Alliance is a nonprofit trade association that helps homeowners make educated roofing decisions and connects them with expert metal roofing professionals.
If you’re ready to upgrade to a metal roof, or just want more questions answered when it comes to a metal roof, check out metalroofing.com.
Poison-free rat control is possible. You can keep those pests out and pets safe with this Simple Solution.
Rats can get into holes as small as the size of their heads. Not only can they fit into tiny holes, but they also chew open smaller holes to fit inside them.
Rats chew constantly because their teeth are constantly growing. And with this constant chewing, their teeth become sharp enough to gnaw through some unexpected material.
You can seal up holes around your home with an expanding foam sealant. However, this is only a temporary solution. The rats can easily chew through and re-invade your precious space.
Reinforce the foam by adding something that will be more difficult for the pesky critters to chew through.
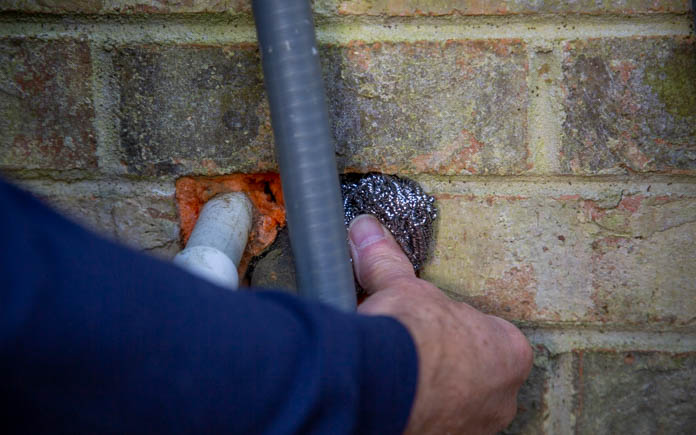
Plug holes outside your home with some stainless steel wool before you seal them off. There is a stainless steel mesh specially made for rodent control, but you can also use a stainless steel wool scrubbing pad that you use to clean pots and pans.
Just stretch out the scrubbing pad so it fills all around the hole. Press the stainless steel wool about an inch into the hole.
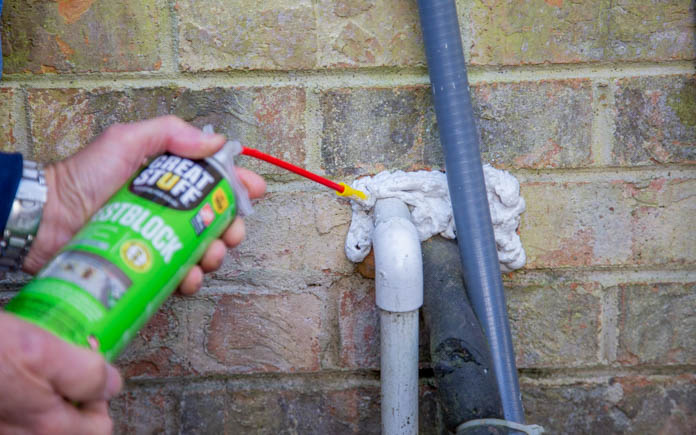
After you’ve plugged the hole, you’ll need to spray more expanding foam to seal it up. Instead of a regular expanding foam sealant, pick a pest-blocking foam sealant specially made to deter rats.
The main ingredient that deters rats in pest-blocking foam sealants is capsaicin. Capsaicin is the active compound in hot peppers that makes them spicy. Also, it’s used in muscle pain-relieving lotions like Bengay and Icy Hot.
If you do, however, have one determined rat that chews through the pest-blocking foam sealant, the steel wool acts as an extra barrier to keep that rat out.