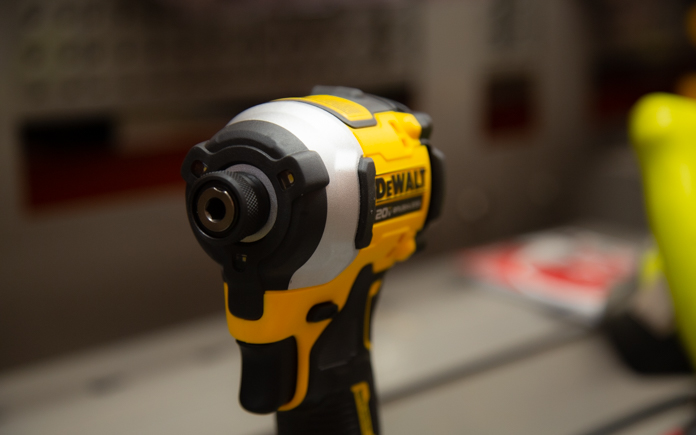
This compact impact driver’s tool head is only 3.97 inches long, which is 29 percent shorter than DeWalt’s DCF885 Impact Driver.
Because this impact driver is shorter, it’s great for a contractor working in tight areas like cabinetry or framing. The tool length from head to back is only 3.97 inches long, so you can get into those tight spaces.
It’s lightweight, but just because it’s small, that doesn’t mean it’s not powerful. It has over 3200 RPM and more than 1800 inch-pounds of torque to power through tough applications.
The DEWALT brushless motor delivers up to 57 percent more run time over brushed motors.
With three-speed settings, you can effortlessly handle every job.
Plus, this compact impact driver’s battery has no memory and virtually no self-discharge for maximum productivity and less downtime.
This page contains affiliate links. If you purchase a product from these links, we will earn a small commission at no additional cost to you.
With three LED onboard lights instead of one, you’ll be able to clearly see in dim spaces.
The DeWalt compact impact driver also has a 3-LED onboard work light, instead of just one on a regular impact driver. When you pull the trigger, it instantly lights up so you have increased visibility in dim workspaces.
These bright lights will keep your workflow consistent, so your project is completed better and faster.
The DeWalt compact impact driver comes with a three-year limited warranty, one year of free service and a 90-day money-back guarantee.
Watch the video to learn all about this Best New Product!
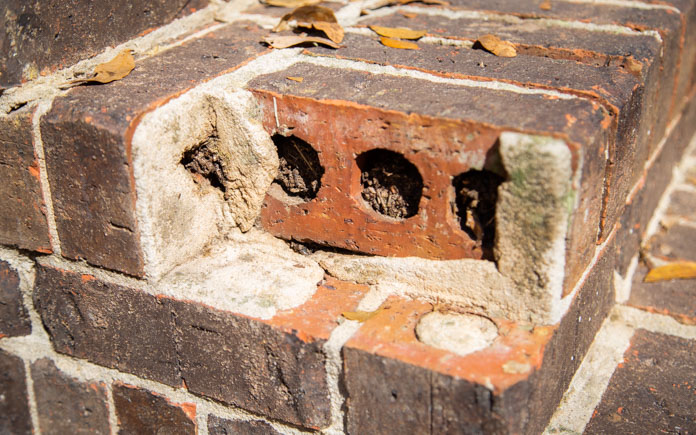
Repairing a missing brick doesn’t just up your home’s curb appeal — it also eliminates a safety issue.
If a brick is missing on a step, it could be a tripping hazard.
It’s easy to repair a missing brick if you use the right material.
Before repairing a missing brick, be sure to chip away the old mortar and clear away debris.
Chip away old mortar. The first step to repairing a missing brick is chipping away whatever remains of the old mortar to make way for the new mortar.
Clean surface. After you’ve gotten rid of the old mortar, clear the area of any dust and dirt before you mix up the mortar.
Mix mortar. A 10-pound back of Quikrete Mortar Mix is perfect for a small repair. Simply add water and stir until the mortar is the consistency of thick cake batter. Be sure to wear impervious nitrile gloves when you’re mixing the mortar mix.
Apply mortar. With a trowel, apply a mortar base that’s about a half-inch to three-quarter-inch thick. Make sure the thickness matches the surrounding bricks.
Press brick into position. Push the brick down into the mortar bed and sideways against the adjacent brick with a slight twisting motion. It may take some tapping and pressure to get the brick aligned with the ones around it.
Clean mortar joints. Finally, clean off the excess mortar to match the old mortar joints around the new ones.
Mortar typically will dry in 24 hours and reach its full strength in 28 days. However, environmental factors like temperature and humidity will affect drying time.
In this week’s show, we give advice on fixing an old door frame, how to repair a shifting concrete landing and what to do to get rid of pet stains on a hardwood floor.
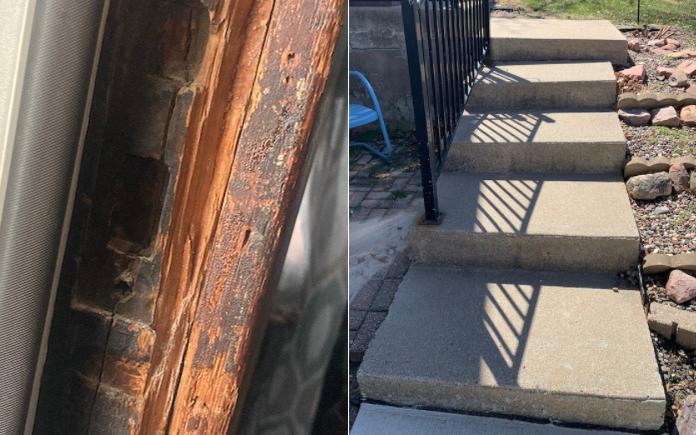
A burglar caused this damage to James Myers’ door, and now he’s wondering how he can fix this without replacing it. (Photo by James Myers)
How Can I Fix My Century-Old Door Frame?
The door frame on James Myers’ 100-year-old home was damaged during a break-in. The latch area on the stained wood frame is split, and he’s wondering what he can do to fix it.
The challenge in repairing stained wood is getting the new stain to match the original. You can use auto body repair to sculpt around the latch to match the missing wood.
The problem then is you have a material that’s paintable and not stainable. You could just paint that area with a color that matches the tone of the stained wood.
Otherwise, you will need to replace those pieces of wood and match the stain.
Get a chisel and saw, and square up the area where the door is damaged. Then, cut a piece of wood to fit it and glue it in.
For a split jamb, take a screwdriver and wedge it in to open it up. Squeeze in as much wood glue as you can, and plug it. Get a wooden T or a wooden doll, plug the screw holes and cut it off flush. Drill in some screw shank clearance holes, and drive in some three-inch screws.
Skip to [47:41]for the full segment on the Today’s Homeowner Radio Show.
Photos by Sandra Marn
How to Fix This Concrete Landing
Sandra Marn from Iowa is asking wants to know the most cost-effective way to fix the concrete steps and landing leading up to her front door? Is there a way to repair it or does she need to tear it out?
This home’s main landing is in good shape, but the problem is with the steps. With the shifting steps and how they have settled, especially with the handrails attached, it would be difficult to level them.
There are too many cracks and separations to pull it back together for long-term use and still have the steps look nice.
Plus, with the contour of the yard, you would need to remove the areas up to the main landing and bring the sidewalk out more.
There are ways to put a coating over the cracks, but I don’t think this is a candidate for that.
Unfortunately, there is no quick repair. You would need a contractor to come in. With the concrete blocks, poured concrete and concrete sludge, this is not a DIY project.
A contractor could give you a nice entrance with fewer steps.
Skip to [57:54]for the full segment on the Today’s Homeowner Radio Show.
Accidents happen, but it’s not impossible to remove pet urine stains from a hardwood floor. (Pixelshot)
Removing Pet Stains From Hardwood
After removing some old wall-to-wall carpeting, David Ackerman found hardwood floor underneath that had some pet stains. What’s the best to bring this floor back to life?
Pet stains can penetrate deep into the pores of the wood. You can refinish the floor and sand down some of the finish.
Ammonia should kill the stains, but that has varying degrees of success. It depends on how long the stain has been there and how far it’s been soaked into the wood.
To bring it back, you have to sand the whole thing. For any visible stains, try cleaning and bleaching them out and staining the spots to match the floor.
Skip to [1:04:16]for the full segment on the Today’s Homeowner Radio Show.
Around the Yard
This time of year we’re all looking forward to hours spent outside enjoying our yards.
For many of us, that acts as a reminder that our lawns don’t look too good and hopefully motivation to get busy changing that.
Before you decide to till it all under and start a new lawn from scratch, which takes a ton of work and a lot of money, check out these tips.
If you’re looking at a few too many weeds, your first step may be applying a pre-emergent weed killer when you fertilize this spring.
The products that combine these elements are commonly called “weed and feed” products and are usually specific to certain types of grass and/or climate.
Check with the pro at your local garden center to find out what your grass needs in your area.
But that’s just the first step, so don’t stop there. Healthy grass is the best deterrent to weeds, so this is where the work begins.
Begin by mowing regularly. Each mowing should take one-third or less of the grass blade to keep the lawn healthy, so start doing it more frequently to keep weeds at bay.
If your lawn hasn’t gotten rain in a while and you plan to water it, give it a big gulp, not just a sip. Deep watering encourages the roots to grow deep too, so water less frequently for long periods of time.
Around The Yard is brought to you by Pavestone.
Skip to [56:22]for the full segment on the Today’s Homeowner Radio Show.
Also on this episode:
Removing Kitchen Soffit
Flooring Choice for a Florida Condo
Retiling a Bathroom Floor
Adding a Mantel to a Stone Fireplace
Resurfacing a Basement
Backsplashes for a Country Kitchen
Killing Mold Under a House
Best New Product
The Hampton Smart Fan not only lets you control the breeze but lighting as well! Learn more>>
Other Products and Links Mentioned
Further Reading
Radio Show: Send us your question!
If you have a comment, general question about home improvement, or something we’ve featured on Today’s Homeowner, please fill in this form:
We’ve mentioned how we use our pressure washer to revive various things around the house – like outdoor furniture and even an indoor rug – but we still hear from people who fear that it’s complicated to set up or expensive to buy or hard to control… and the good news is that it’s none of those things. So this post is a comprehensive start-to-finish guide for anyone who’s finally ready to get their pressure washing feet wet (maybe even literally).
Pressure washing is an easy, affordable, and TOTALLY AWESOME way to keep your outdoor spaces looking fresh. So I’m walking you through everything from setting it up and turning it on, to where and how we use ours. It makes such an insane difference every spring, I’d even call it a DIY VIP.
We were a bit intimidated the first time we tried pressure washing nearly 10 years ago. The cumbersome gas-powered machine we rented for a day was so big it didn’t even fit in our car! So I TOTALLY understand anyone with PWH (pressure washing hesitation).
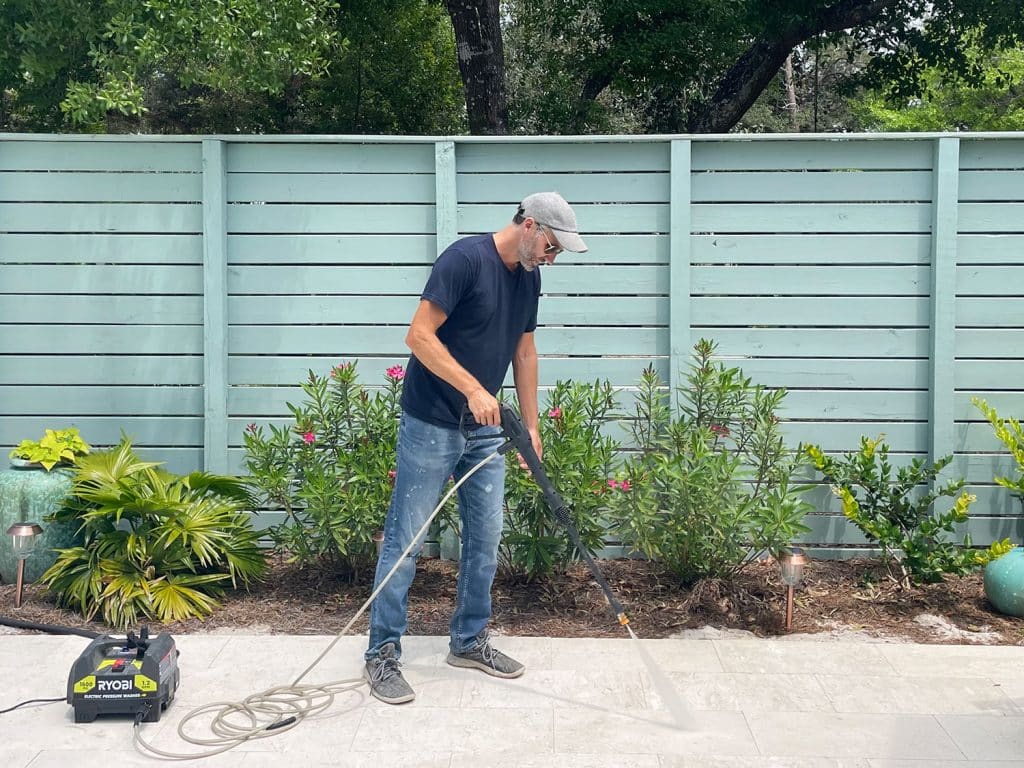
But that all changed when we found a GREAT pressure washer that’s super compact and easy to use – this $99 Electric Pressure Washer from Ryobi. Both Sherry and I use it regularly – and neither of us have any issues controlling it or having enough power to get every single task on our list done. It’ll make a pressure washing convert out of just about anyone. We bought it many years ago with our own money and love it – so nothing about this glowing review is sponsored in any way.
A Beginner’s Video Guide To Pressure Washing
We’ll cover all three of those topics in text & photos below, but if you want to see ALL of it in action and in real-time, the video below is for you. Oh yeah and there’s lots of that sweet sweet pressure washing footage that everyone’s eyeballs can’t help but love. And more importantly, several cameos by our dog Penny.
Again, we currently own this $99 Electric Pressure Washer from Ryobi. We bought it for our beach house in 2018, and when we moved we opted to bring it with us instead of an older/larger version we had before – just because this one is so compact and reliable and (most importantly) GOOD AT CLEANING. There are definitely more powerful (and more expensive) options out there, but this pressure washer has always met our needs. Always. In fact, we don’t even use it on it’s highest setting. That’s how adequately powerful it is. Plus it’s pretty much the most affordable option out there and we especially love that it’s compact and easy to use. So unless you have a special need for something more intense, this is a fantastic option.
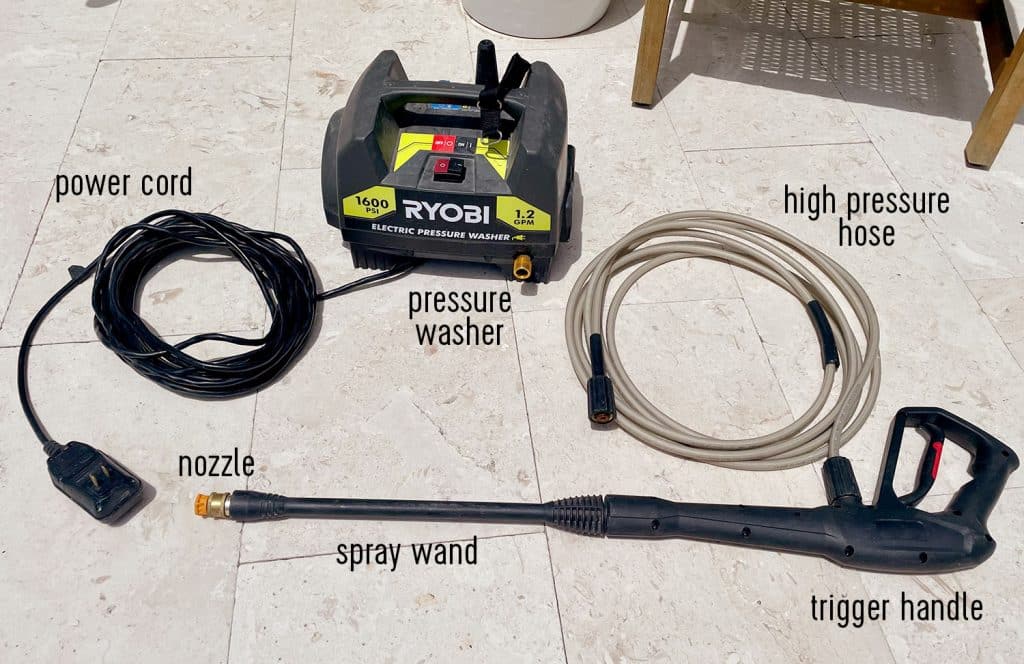
The box includes everything shown above, you just need to supply water (via a garden hose) and power. And, as we show in the video, set-up is pretty much as easy as just connecting those two things!
Step 1: Assemble Your Wand
We typically store our wand and trigger handle assembled, but coming fresh out of the box you’ll need to lock these two pieces together with a simple twist.
Step 2: Connect Your High-Pressure Hose
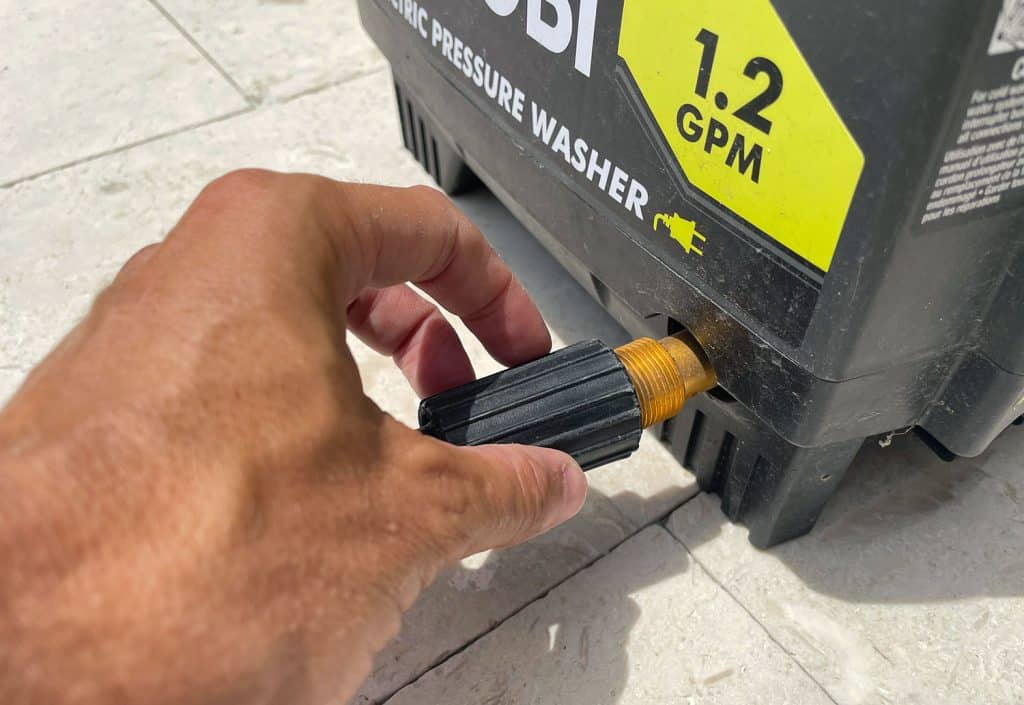
The high-pressure hose is what carries the pressurized water from the machine to the spray wand. Each end has an identical black threaded collar. One end connects to your trigger handle, the other to the brass connection on the pressure washer. Just hand tighten until they’re both secure.
Step 3: Connect Your Garden Hose
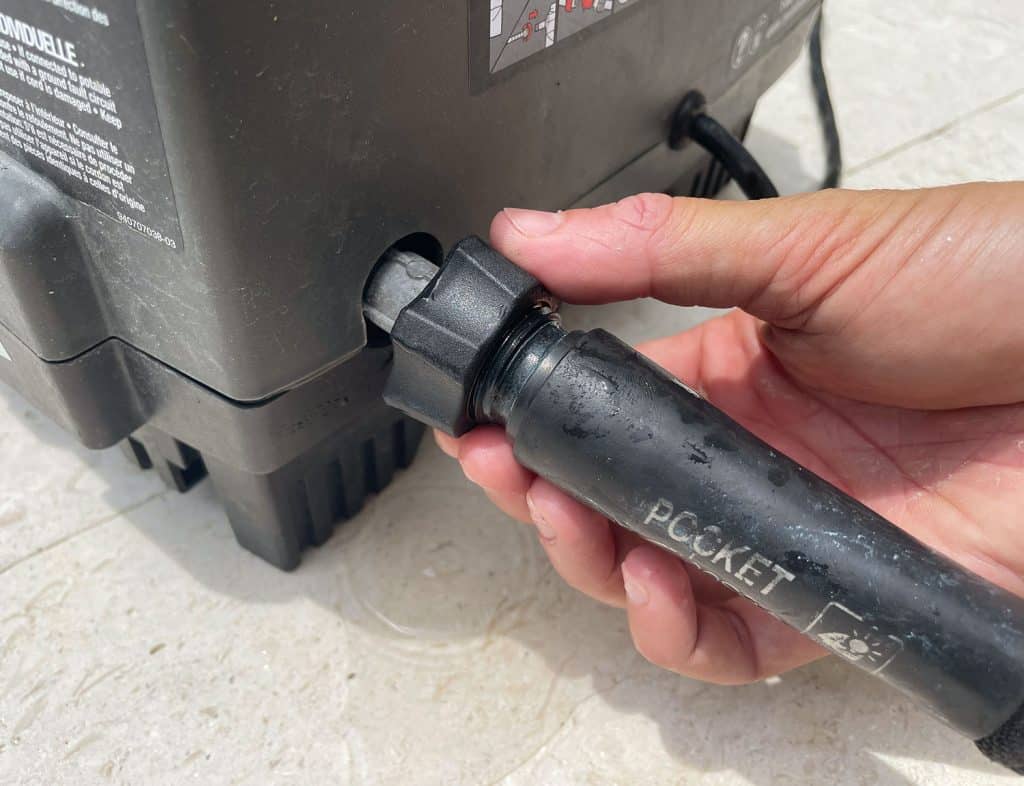
On the opposite side of the pressure washer, there’s a black threaded connection that fits a regular garden hose. Attach your hose tightly just like you would screw it onto your home’s hose bib.
Step 4: Select & Attach Your Nozzle
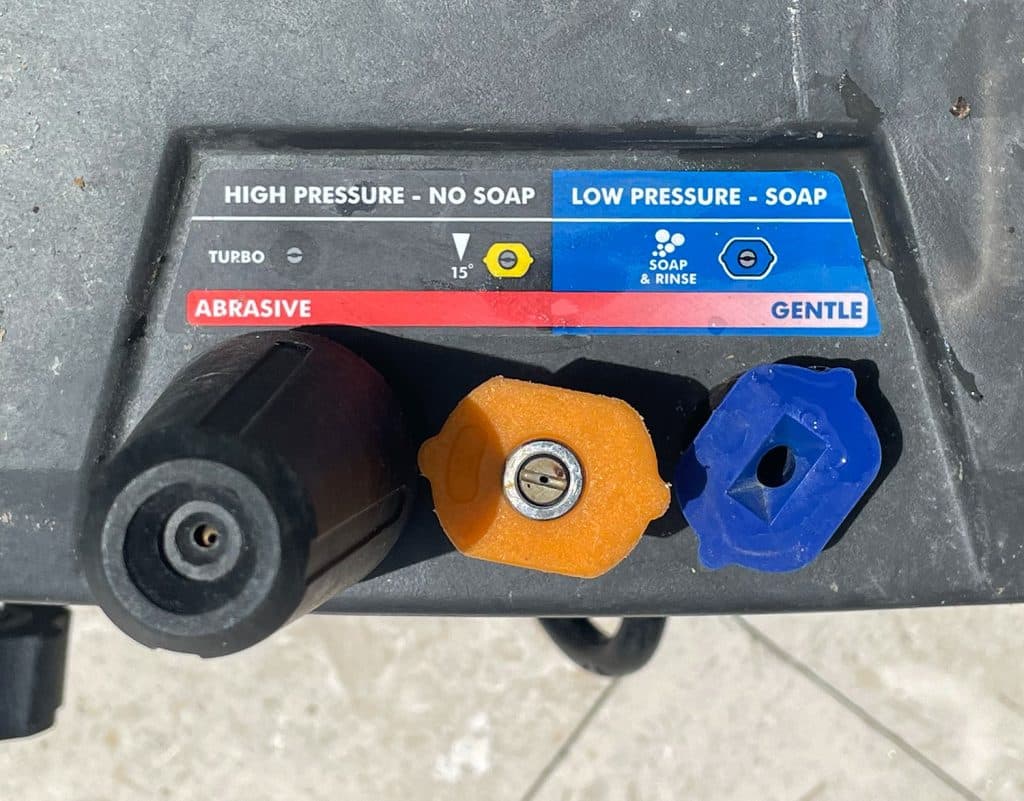
This pressure washer comes with 3 nozzle options that offer different levels of pressure for different applications (you can also purchase others as needed). There’s a handy guide on the top of the device that explains the differences between the three, along with holes to store them in.
As we describe in the video, we almost EXCLUSIVELY use the middle (medium pressure) orange nozzle. It’s kind of the Goldilocks of options, giving us the “just right” amount of pressure for cleaning patios, decking, outdoor fabrics, and more. Plus, you can always adjust the pressure you’re applying by simply holding your wand closer or farther from the surface you’re cleaning.
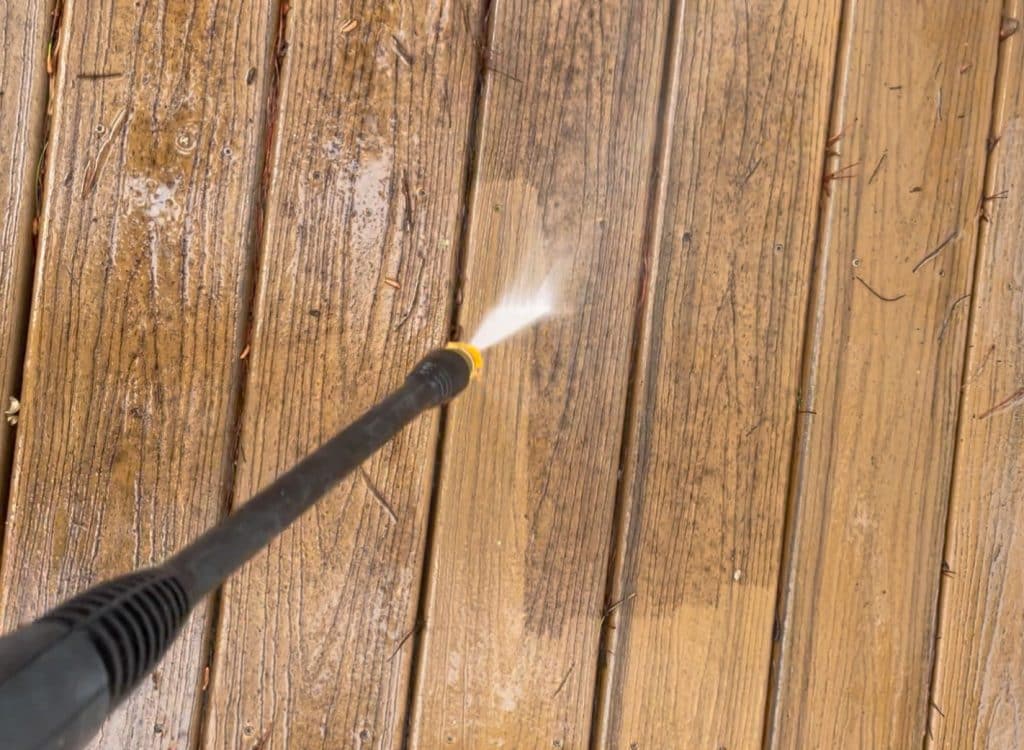
The distance matters – so try to watch the video above whenever you can to see more of what we mean. Held too close to something, even the medium pressure nozzle can strip paint or stain off of wood – but spraying with adequate distance can mean zero removal of anything but dirt and grime – which is SO satisfying, and leaves lots of surfaces outside looking like new.
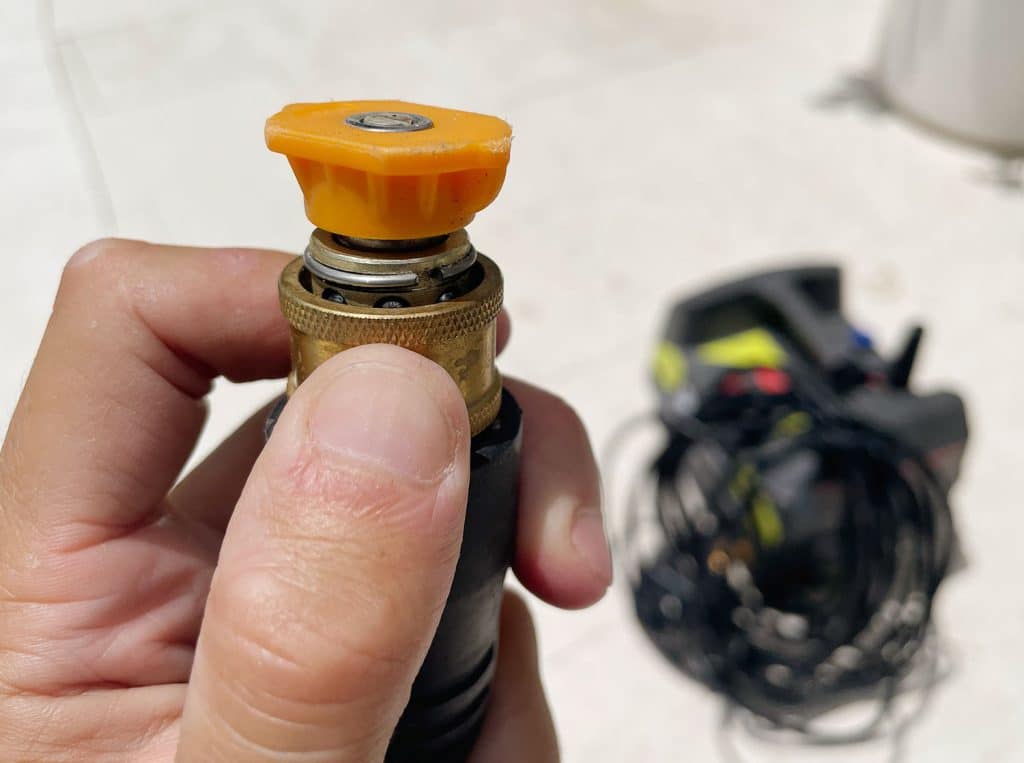
To attach your selected nozzle at the end of the wand, you just pull down on the brass collar and place the nozzle into the opening. Releasing the collar locks it into place.
This completes all of the water connections you need to make, which means you can now…
Step 4: Turn On Your Hose
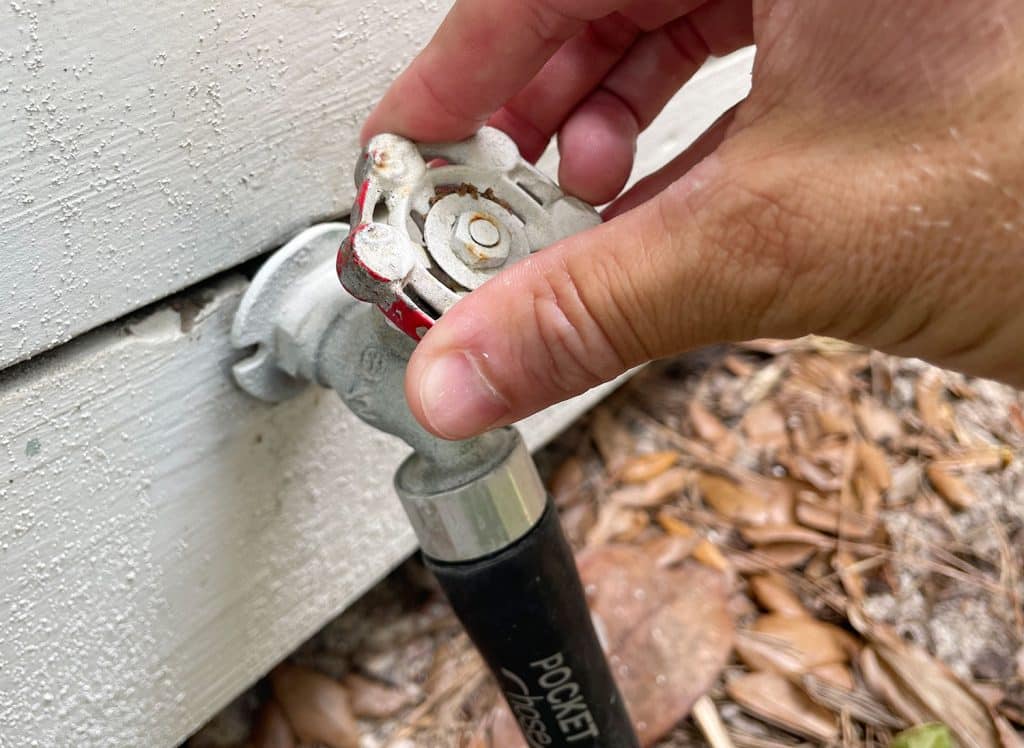
With your water connections secure, you can now turn on the water at your hose bib. It’s a good idea to open that sucker ALLLLLLLL the way to be sure you’re getting the fullest flow possible from the hose.
You also want to check your hose for any kinks, leaks, or other knots that might prevent the water from flowing freely to your pressure washer. It’s also a good idea to squeeze the trigger on your pressure washer for several seconds to make sure the water is coming out steadily before proceeding.
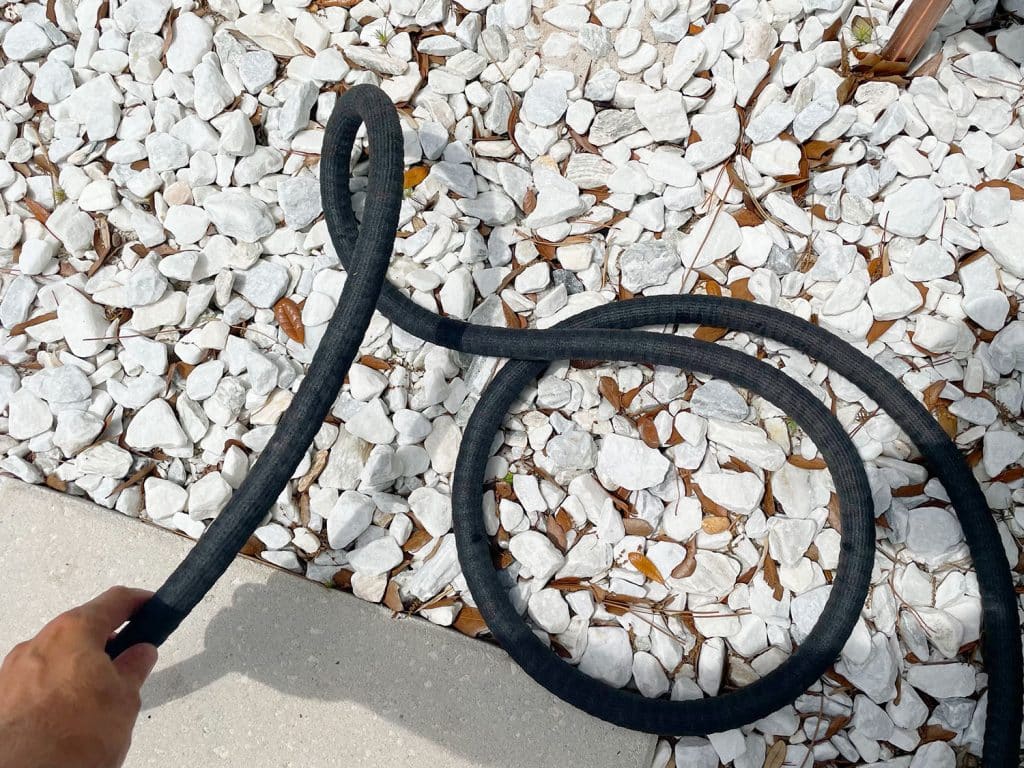
You may notice that we’re using one of those expandable “pocket hoses” that shrink up when it’s not full of water. We love these hoses because they’re less bulky and cumbersome than traditional hoses, but some may dissuade you from using them with certain pressure washers (we’ve personally never had any issue using ours).
Step 5: Connect Your Power
With your water good to go, now you can plug in your pressure washer. Ours comes with a SUPER long cord, so you probably won’t need an extension cord, but you can always use one if necessary.
If you are connecting an extension cord, just be sure to elevate the connection point of the two plugs (like on a table, chair, or bucket) to prevent water from dripping toward the plugs.
Step 6: Turn On Your Pressure Washer
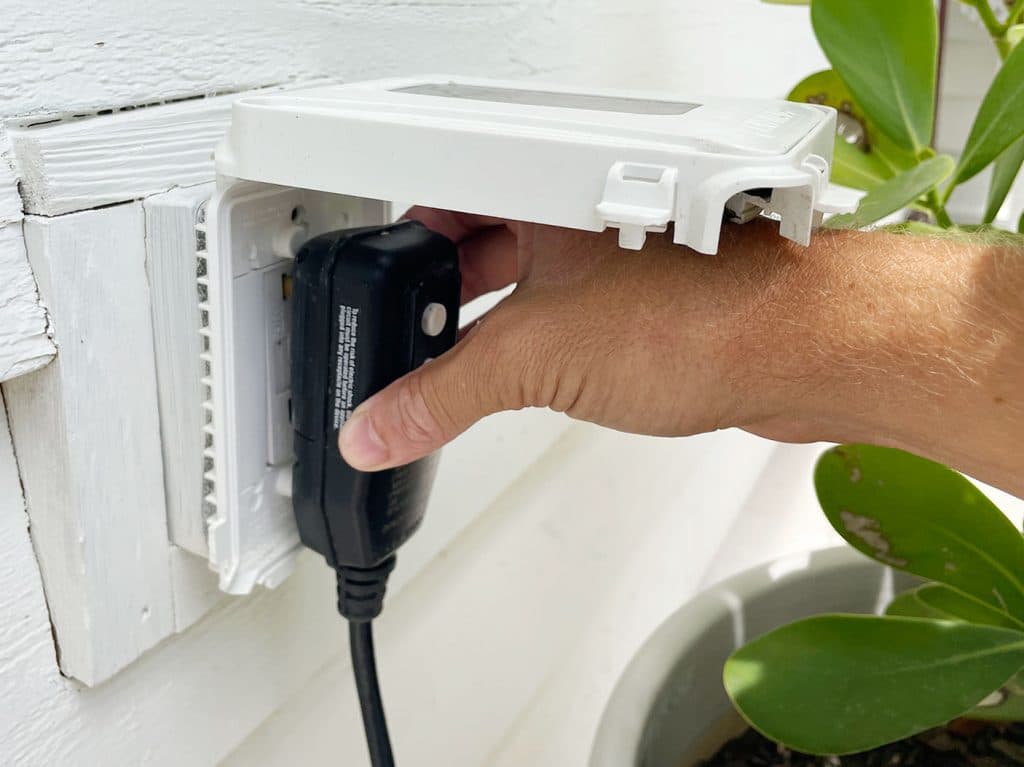
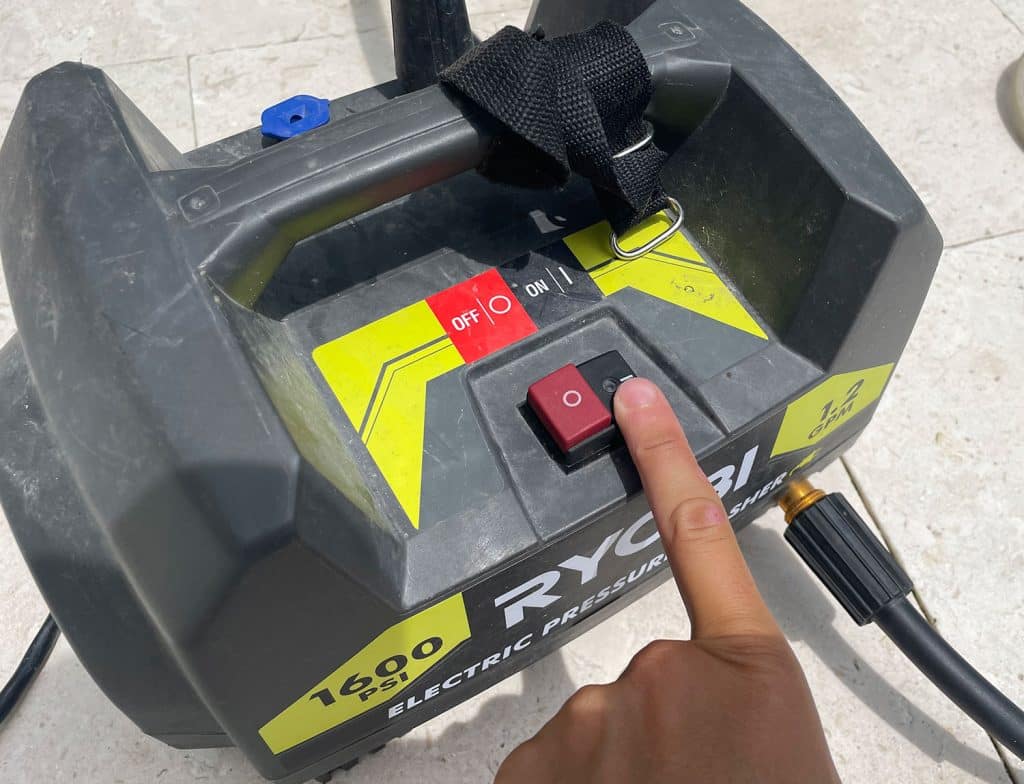
Turn on the pressure washer using the black button on the top of the machine. You will immediately hear the device engage and you may see your high-pressure hose stiffen as pressurized water fills it up. If this does not happen, try pressing the test & reset buttons on the plug or on your GFI outlet. Those can be common culprits for your power not working.
Now your pressure washer is set up and ready for use!
Before You Start Cleaning With Your Pressure Washer
We cover a lot of tips along the way during the video (watching that is truly the best way to get a full primer on pressure washing), but here are a handful of things to keep in mind before you start your first pressure washing adventure.
Wear close-toed shoes and pants to help protect your feet and lower legs from any accidental pressurized spray. A direct, close-range spray can sting or even break the skin.
Clean top to bottom. If your to-do list includes multiple surfaces, start with the higher ones (railings, patio umbrellas, etc) and work down to lower ones (decks, patios).
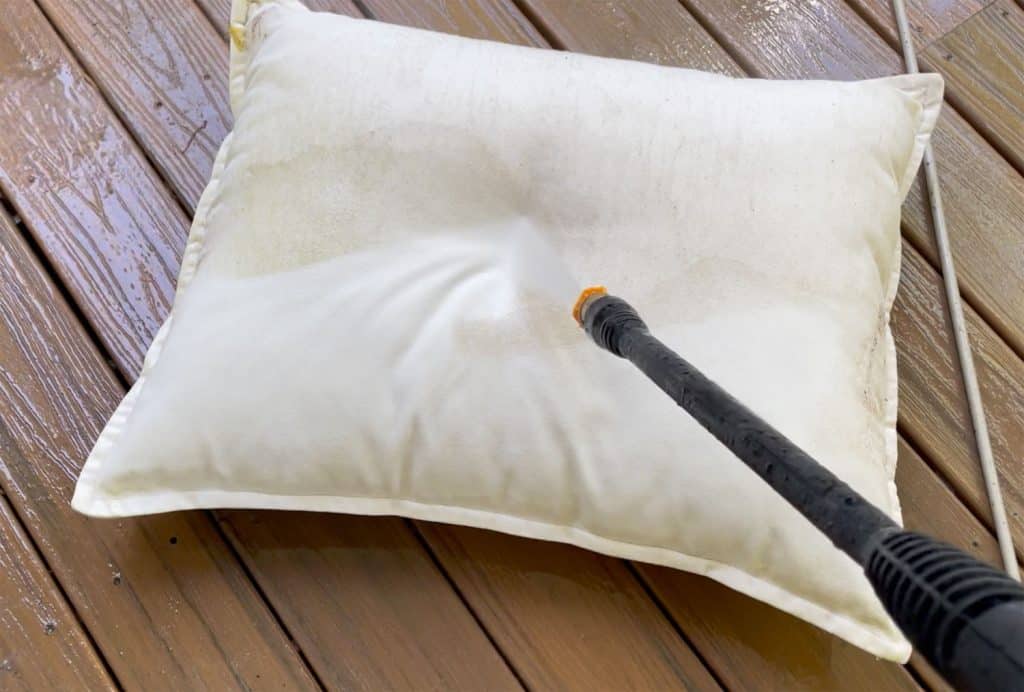
Start slow and test in an inconspicuous spot first. It’s always good to start in a hidden spot (like the back of a pillow or the area of your deck that’s under your outdoor sofa). If it’s your first time pressure washing a particular material or surface, start with low pressure and gradually increase it as needed (by bringing your wand closer or changing nozzles) to make sure you’re not damaging the surface. Don’t start by blasting something with the nozzle mere inches away ever.
Beware of sensitive materials like windows, soft woods, & vinyl siding that can be easily broken or damaged with too much pressure. We generally tend to stick to cleaning concrete, outdoor stone or tile, Trex or wood decking, brick paths or patios, wood or metal railings, and outdoor furniture/pillows as well as outdoor AND indoor rugs (more on that here). You obviously want the nozzle further away from fabric than, say, concrete.
Mind your cords. This pressure washer is super light and portable, but keep an eye on your power cord and water hoses as you move it to make sure you’re not kinking anything or creating tripping hazards.
What We Clean With Our Pressure Washer
We typically break out our pressure washer 2-3 times a year to keep our various outdoor spaces looking fresh and clean. Between all of our trees, our clay/sand road, and the salty beach air, things can get grimy – so we usually do a pretty thorough cleaning in the spring to wash off the dirt, pollen, or mildew that collected on things over the winter. Then we might do some quicker “touch up” cleanings as needed in the summer and fall.
We use it on a variety of surfaces, but here are the primary ones that we’ll cover today:
Composite Decking
Painted Railings
Outdoor Fabrics
Stone Patios
Composite Decking
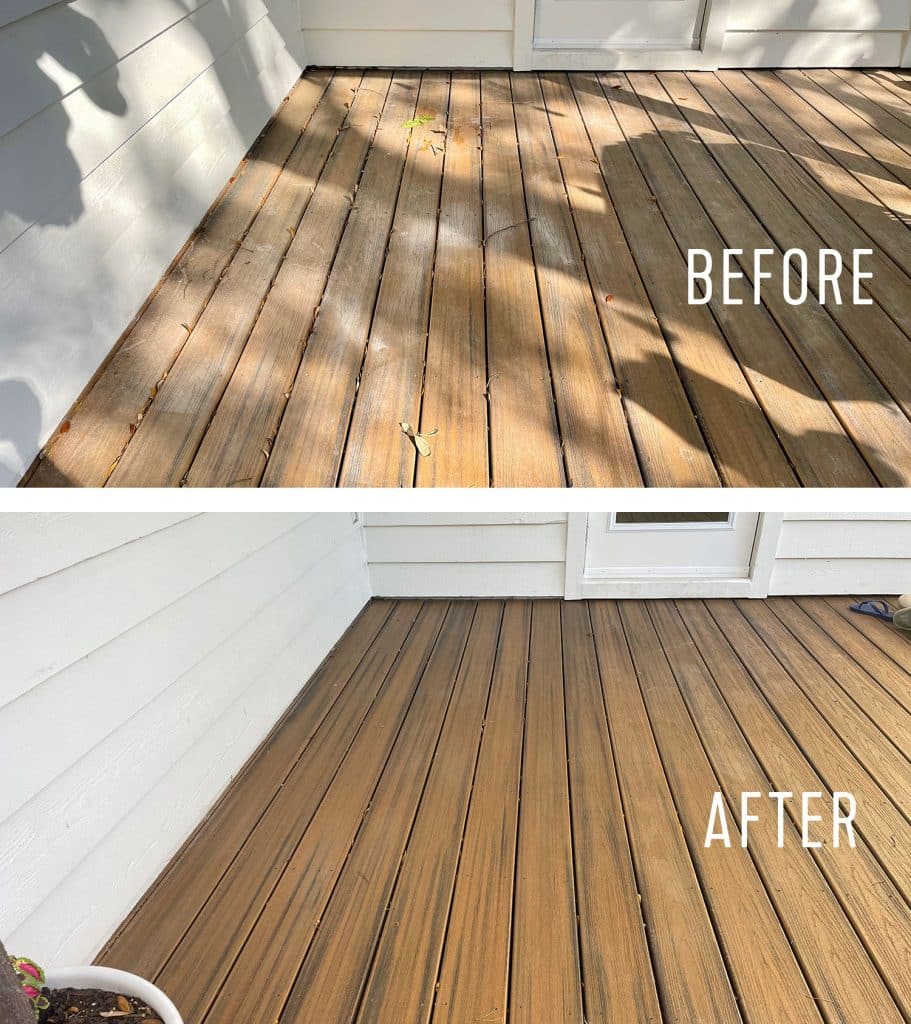
We have Trex decking on our porches and we’ve found the pressure washer to be a great way to get dirt, dust, and sand build-up off of them. The woodgrain texture on the Trex catches a lot of grime and we hadn’t cleaned our upstairs deck in a while, so it had quite the layer of black tree dirt. That made the job super satisfying though…
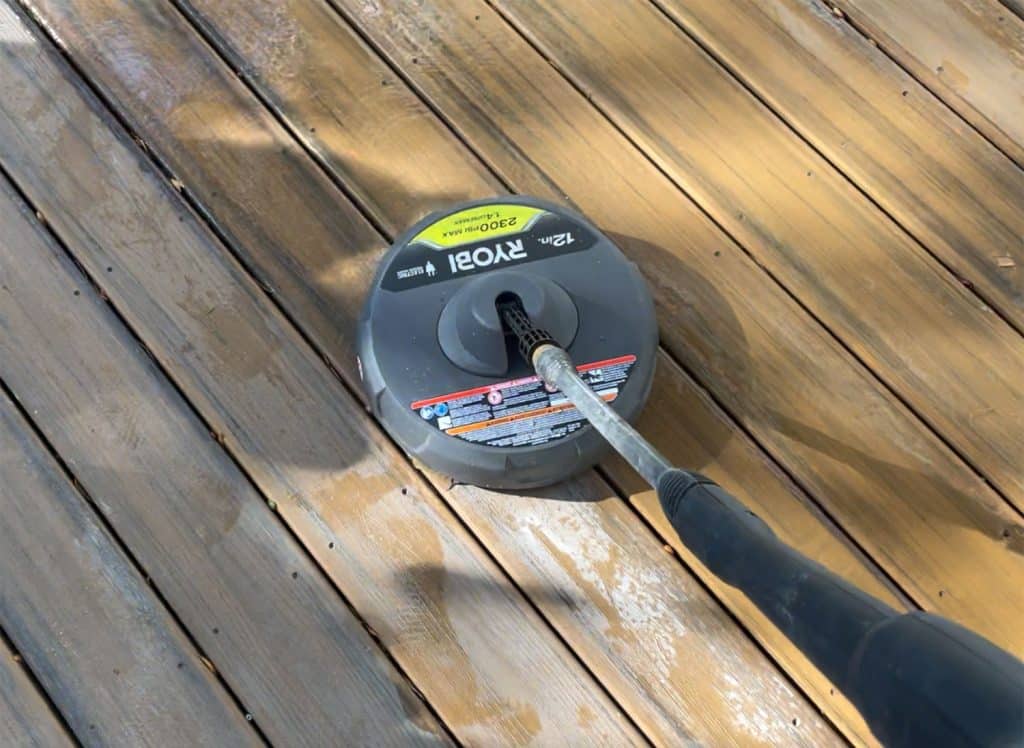
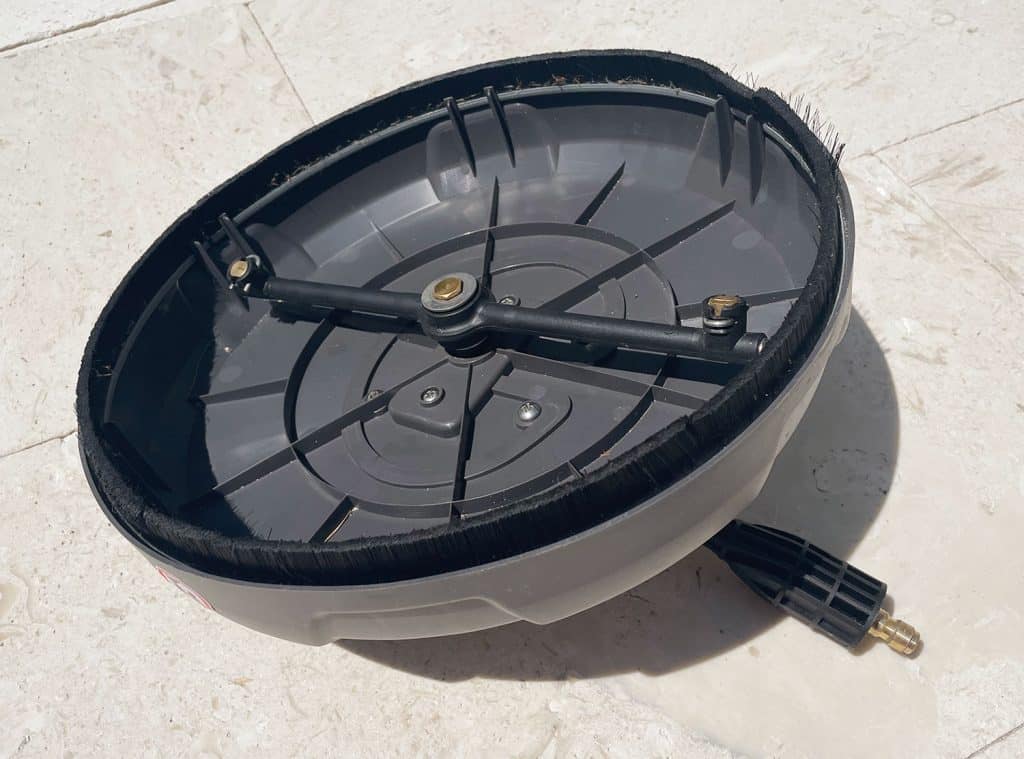
Doing that large upstairs deck was pretty tedious because we had to be slow & systematic so we didn’t miss any boards (sometimes it’s hard to see what’s still dirty once everything has gotten wet). So before doing my downstairs decks I bought this $40 surface cleaning attachment for electric pressure washers that a bunch of you have recommended for doing larger “floor” surfaces faster. Boy was it a game-changer!
It attaches to my spray wand just like any other nozzle does, but provides a much larger 12″ cleaning surface, which made pressure washing my decks SO. MUCH. FASTER.
Not only was it faster, but I didn’t worry as much about leaving “streaks” if I missed a spot or only cleaned part of a particular board. You can see below that our decks can get a lot of sandy footprints and settled sand on them. But they look much fresher now!
Railings
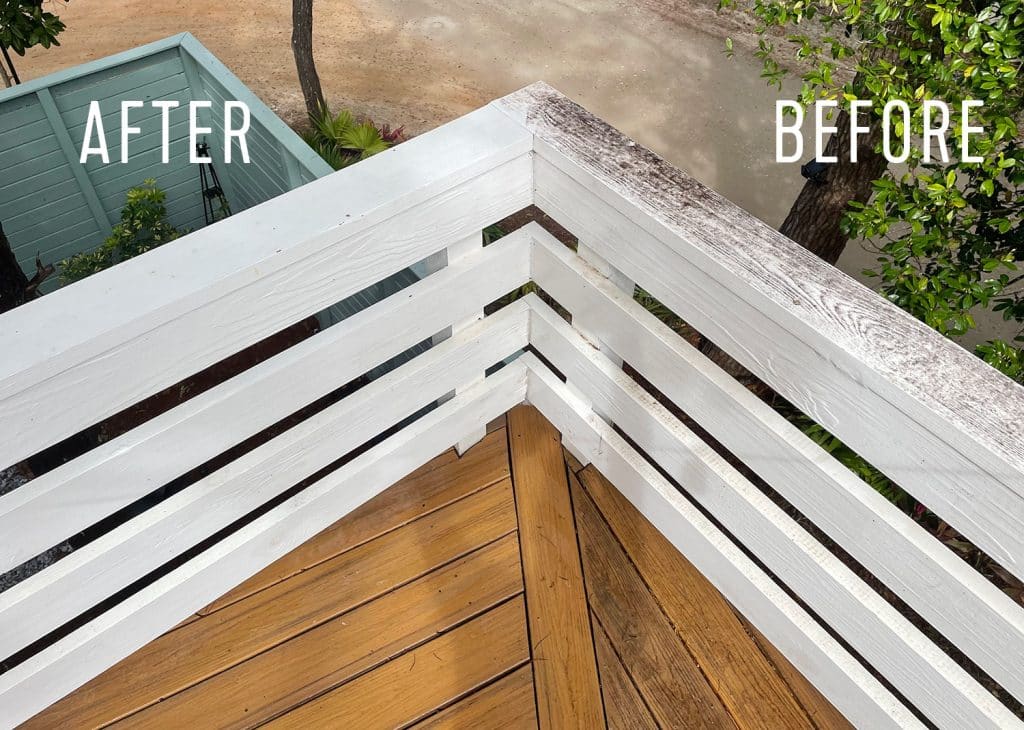
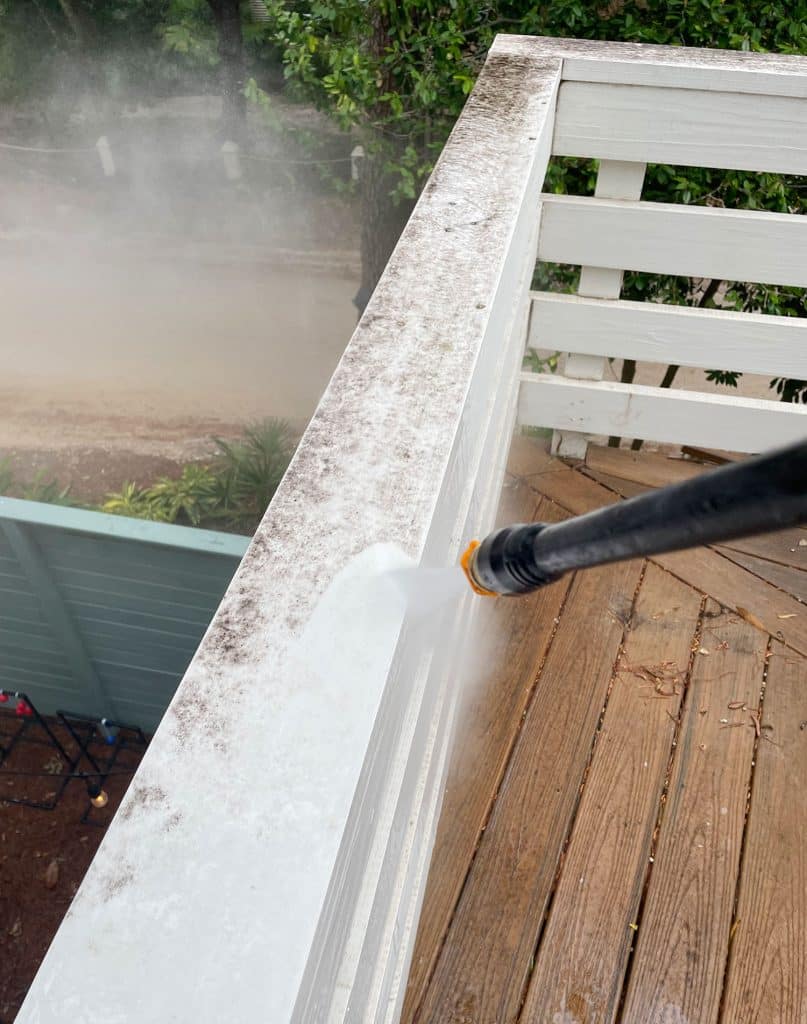
Another area that we hadn’t cleaned in a while was the upstairs deck railings, which had a build-up of tree dirt on them just like the Trex decking.
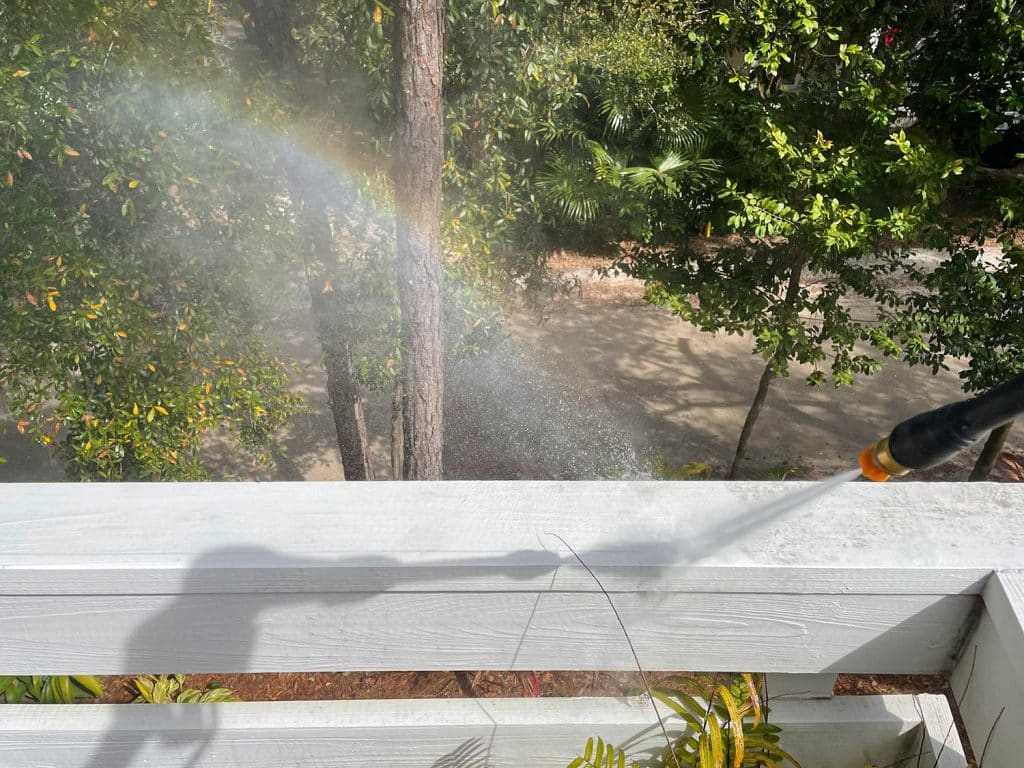
These railings are painted wood, and you should always use a bit of caution when pressure washing painted surfaces because the pressure can cause the paint to chip or flake. Also, if any areas have started to rot beneath the paint, the pressure washer can make the situation worse.
We just always keep a close eye on the surface as we clean, and lessen the pressure (step back!) or skip a particular spot if the paint isn’t holding up. If your biggest nightmare is some flaked paint, I’m also here to assure you that a few paint touch-ups aren’t a big deal. We’ve done them and they’re never detectible once it’s dry.
Outdoor Fabrics
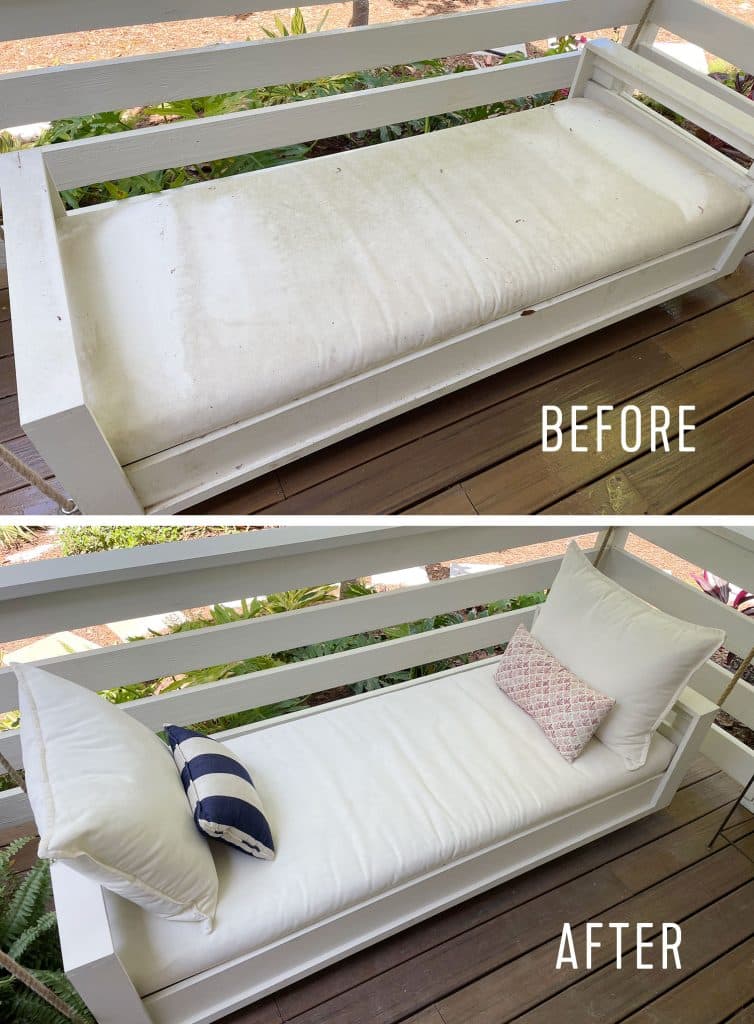
We’ve definitely extended the life of more than a few outdoor pillows and cushions thanks to our pressure washer. It’s just especially important with fabrics to take it slow because too much pressure can cause the fabric to tear or fray. So start on the back and with low pressure, especially if it’s the first time you’re cleaning that material.
Also, keep in mind that the process may not be perfect. Some stains may only get lighter, not disappear entirely. So you may need to attack certain spots with an outdoor cleaner or fabric cleaner to finish the job. But for us, we find the pressure washer does the bulk of the work getting our outdoor fabrics ready for spring. Hot tip: put them in the sun to dry. That does a great job of lightly bleaching some more stubborn stains than if you set them out to dry in the shade.
Stone Patio
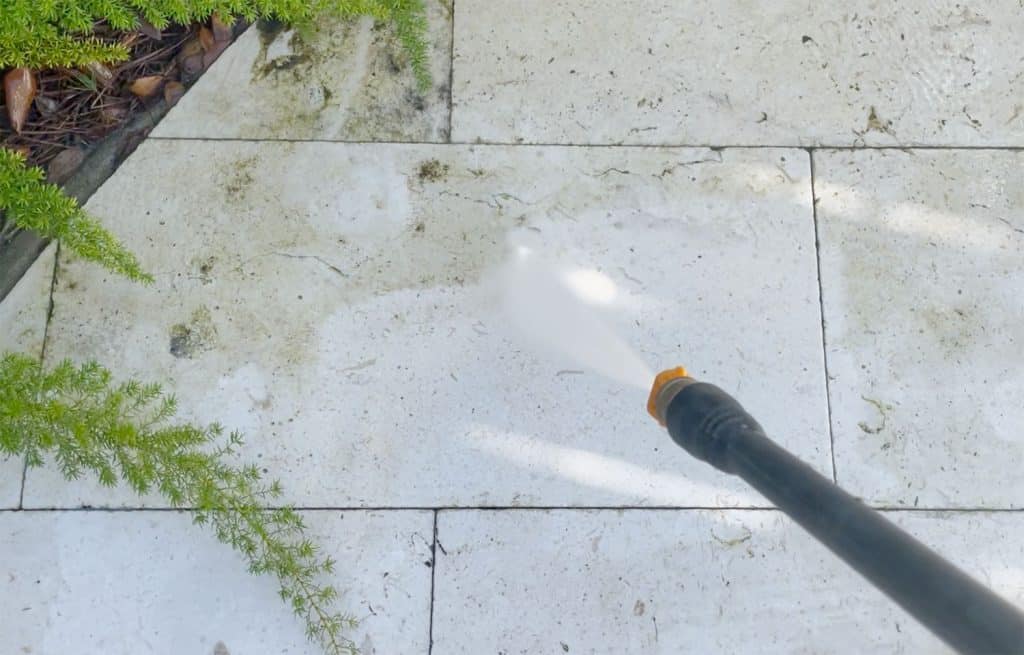
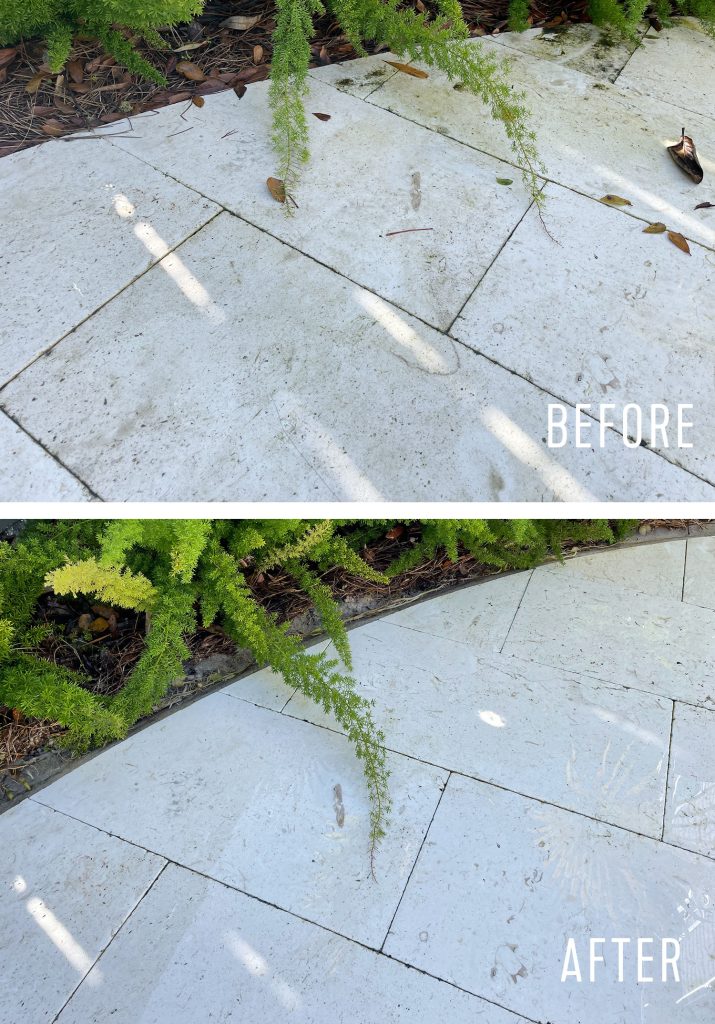
Pressure washing is a great way to get patios, driveways, sidewalks, and even some decking to look new again. This was the first season we used it to clean the stone patio around our pool, which had collected a lot of green scum in some of the more shaded areas of the yard (under and behind the lounge chairs for example).
The video shows how satisfying this really was, but the before & afters below give you an idea as well. It’s a bit hard to tell because the stone itself has some darker shell “spots” in it (and the surface is wet in the after shot), but this whole area looks totally redeemed.
*Everything except the left corner of the patio was cleaned in the photo above – see that line of darker scum? Such a difference.
When you’re cleaning patios or other stone surfaces, just be mindful of any polymeric sand (or regular sand) that you may have between the cracks. The pressure washer may blow that loose and you’ll need to refill it.
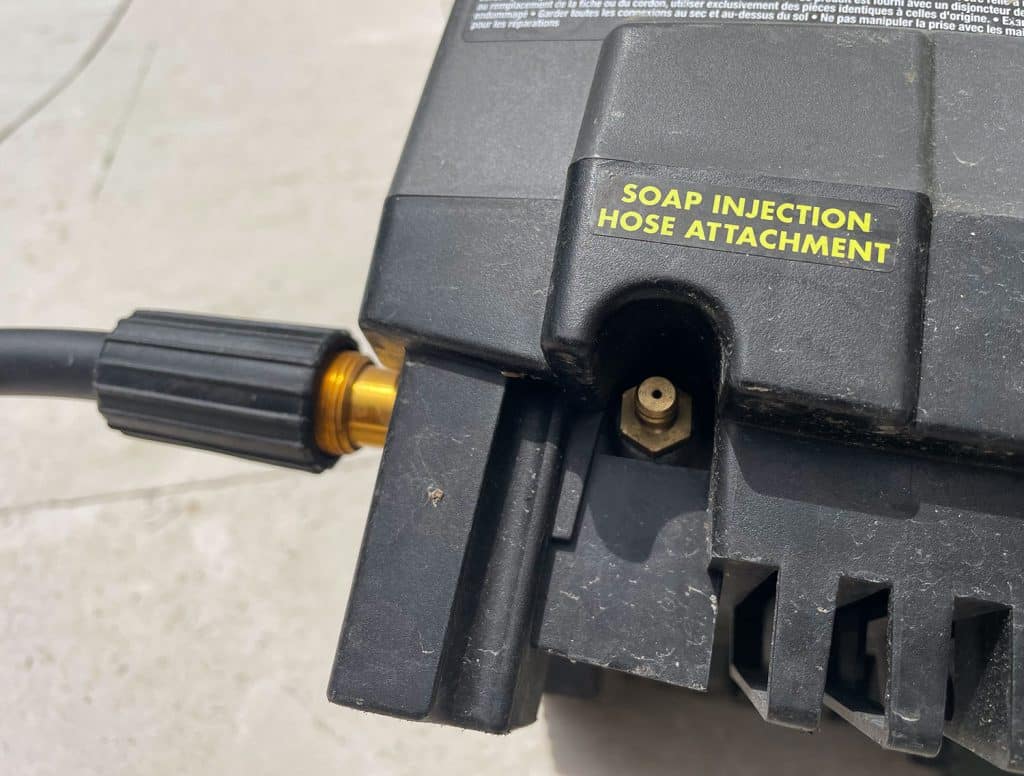
We also get asked very often about whether or not we add some sort of soap or cleaner to our pressure washer. While the machine DOES come with a way to wash with soap (it includes a hose that you can attach and connect to your bottle of soap), honestly, we’ve never used it. We just spray outdoor cleaners on certain items (mainly stubborn fabric stains – for example, we use this fabric cleaner) by hand and then pressure wash them to move those suds all around and rinse them away.
The last thing to keep in mind when cleaning outdoor fabrics is to make sure you have a sunny spot to let them FULLY dry. Otherwise, you may just encourage more mildew build-up.
Other Uses For Your Pressure Washer
While those are the ways that we currently use our pressure washer, there a TONS of other ways they can be useful around the house. Here are some previous posts we’ve written about other pressure washing adventures:
Putting Your Pressure Washer Away
Once you’ve finished your cleaning, disconnecting and storing your pressure washer is even easier than setting it up. You’re basically reversing the steps:
Turn it off and unplug it
Turn off your water
Spray the wand for several seconds to release the water pressure (it will make disconnecting the hoses easier)
Disconnect your garden hose
Disconnect your high-pressure hose from the pressure washer (we leave it attached to our spray wand, but you can disconnect that end too)
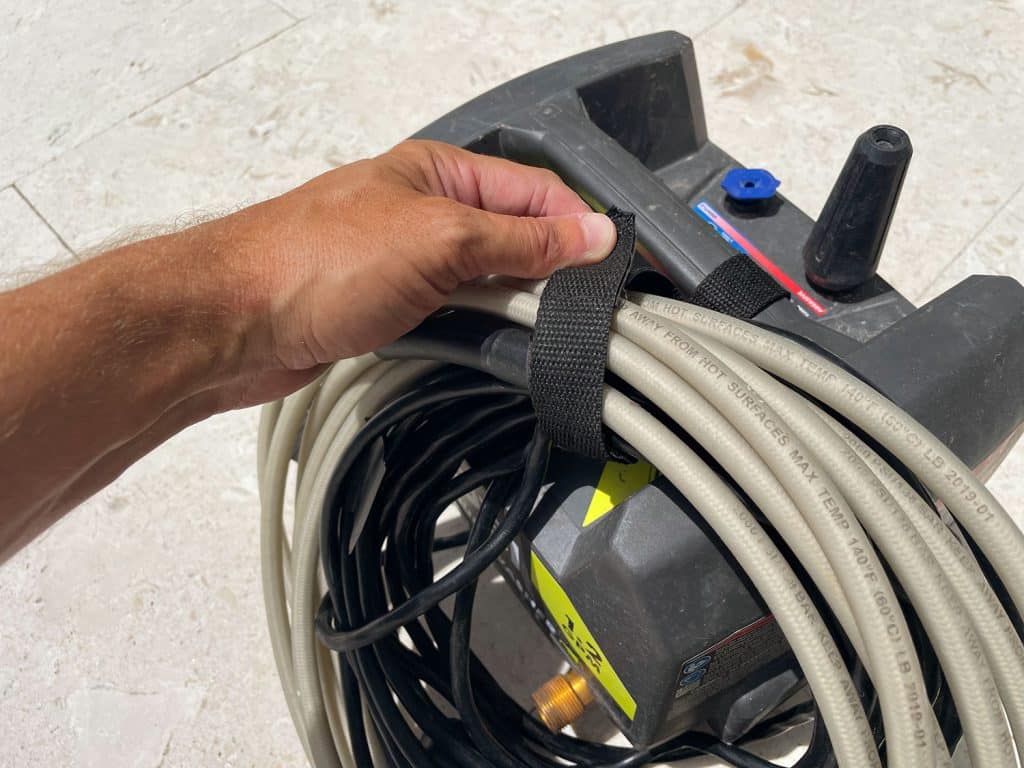
Once everything is disconnected, there’s a handy velcro strap on the handle of the machine to help you wrangle all of your cords and hoses. It’s one of our favorite features because it makes storing it so much easier! You can see it in action in the video 😉
So, there you have it. All the info I can possibly think of on the topic of pressure washing. I hope it leaves you feeling confident that you can tackle this project yourself (you can!). I’m ridiculously glad that we tried one out many years ago and have never regretted owning one since!
Sidenote: we finally better-categorized and updated our Amazon shop to include a lot of the more recent things we have been loving – like Sherry’s beloved robot vacuum, some new favorite family board games, our tried and true beach gear, favorite recent reads, etc – so that’s all right here.
*This post contains affiliate links, so we may earn a small commission when you make a purchase through links on our site at no additional cost to you.
This week we’re helping a young couple, who both work from home, create some separation between work and home life.
Rachael and Brian Ledbetter recently returned to their hometown of Mobile, Ala., and bought their dream home. The house is a perfect fit for them except one small thing is missing — a second home office.
In the post-COVID era, this couple is both working from home. Rachael has taken over a sitting area in the master bedroom as her makeshift office, but she wants something a little more private and Zoom meeting friendly.
Building a non-load-bearing wall is easy than you think!
Build the Wall
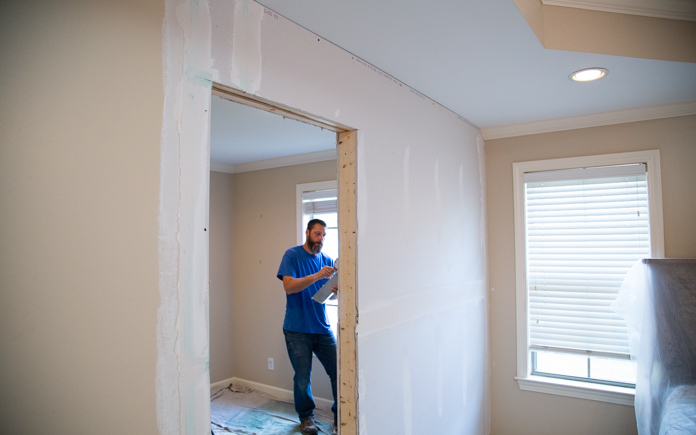
First, we remove the trim from around the space we want to build the wall.
Next, we take out the drywall from where our new wall will intersect it. This includes removing the corner bead from the corner drywall on the opposite side of where our wall will be for a smooth transition.
Corner bead is a material installed under drywall to make the corners crisp and neat and prevent them from damage. Sometimes the drywall compound is built up around the corner bead, so removing ensures you get a better smooth wall.
We install a two-by-four top plate and bottom plate. After that, we lay out the locations of the studs.
When installing the studs, we work from the doorway entry out, using a level to make sure each stud is perfectly plumb. To effectively join the studs to the stud plate, we “toe nail” them. This means we nail at an angle.
Once we install the header over the doorway, we hang the drywall. Watch this video to see how it’s done.
These bookshelves up this office’s visual appeal and storage space.
Build Bookshelves
These step bookshelves will add some interest to the wall and provide some much-needed storage space.
We cut the boards to the proper measurements to fit against the new office’s wall. Before we nail the shelf boards together, we used wood glue to keep them in place.
When we start to install the unit, we discover a problem. The bookcase intersects the electrical outlet.
So we cut a new hole for the outlet, turn off the power and disconnect the outlet so we can move the wire into the new box and reconnect it to the outlet there. Then, we patch the hole from the old outlet box as well as one from an unneeded phone jack.
Finally, we are able to install the shelves.
A functioning door makes this office much more private and work-friendly.
Install Office Door
For the office door, we use a split-jamb or sandwich jamb pre-hung door. This type of door allows you to adjust to the thickness of the wall.
Before we nail the frame into the drywall, we make sure our margins are correct and the door is level.
With this brick-patterned wallpaper, there’s no need for a digital Zoom background!
Install Wallpaper
This patterned wallpaper gives the illusion of real, distressed brick. It comes prepasted, so you don’t need to buy any glue! To activate the paste, we use a paint roller and water.
Using a smoother to apply the wallpaper eliminates any air bubbles. We also make sure to line up the pattern between each sheet of wallpaper.
Wealso:
Painted the walls and trim
Installed crown and base molding
Installed a new hanging light
Post-Production Thoughts
Rachael’s home office had plenty of space, but it had very little privacy and almost no separation from the bedroom. Aside from those issues, it was functional enough but very plain.
Now, it’s a whole different space. The wall and the doorway have created the privacy and separation Rachael and Brian needed. And because of the way we built it and the materials we used, it looks like it was built that way from the start.
The built-in bookshelves offer plenty of storage and add a cool look to the most prominent wall in the space. Plus, that brick pattern wallpaper is sure to make Rachael’s Zoom calls a lot more visually pleasing.
Other Tips From This Episode
Products Featured in This Episode
This page contains affiliate links. If you purchase a product from these links, we will earn a small commission at no additional cost to you.
This week we’re helping a young couple, who both work from home, create some separation between work and home life.
Rachael and Brian Ledbetter recently returned to their hometown of Mobile, Ala., and bought their dream home. The house is a perfect fit for them except one small thing is missing — a second home office.
In the post-COVID era, this couple is both working from home. Rachael has taken over a sitting area in the master bedroom as her makeshift office, but she wants something a little more private and Zoom meeting friendly.
Building a non-load-bearing wall is easy than you think!
Build the Wall
First, we remove the trim from around the space we want to build the wall.
Next, we take out the drywall from where our new wall will intersect it. This includes removing the corner bead from the corner drywall on the opposite side of where our wall will be for a smooth transition.
Corner bead is a material installed under drywall to make the corners crisp and neat and prevent them from damage. Sometimes the drywall compound is built up around the corner bead, so removing ensures you get a better smooth wall.
We install a two-by-four top plate and bottom plate. After that, we lay out the locations of the studs.
When installing the studs, we work from the doorway entry out, using a level to make sure each stud is perfectly plumb. To effectively join the studs to the stud plate, we “toe nail” them. This means we nail at an angle.
Once we install the header over the doorway, we hang the drywall. Watch this video to see how it’s done.
These bookshelves up this office’s visual appeal and storage space.
Build Bookshelves
These step bookshelves will add some interest to the wall and provide some much-needed storage space.
We cut the boards to the proper measurements to fit against the new office’s wall. Before we nail the shelf boards together, we used wood glue to keep them in place.
When we start to install the unit, we discover a problem. The bookcase intersects the electrical outlet.
So we cut a new hole for the outlet, turn off the power and disconnect the outlet so we can move the wire into the new box and reconnect it to the outlet there. Then, we patch the hole from the old outlet box as well as one from an unneeded phone jack.
Finally, we are able to install the shelves.
A functioning door makes this office much more private and work-friendly.
Install Office Door
For the office door, we use a split-jamb or sandwich jamb pre-hung door. This type of door allows you to adjust to the thickness of the wall.
Before we nail the frame into the drywall, we make sure our margins are correct and the door is level.
With this brick-patterned wallpaper, there’s no need for a digital Zoom background!
Install Wallpaper
This patterned wallpaper gives the illusion of real, distressed brick. It comes prepasted, so you don’t need to buy any glue! To activate the paste, we use a paint roller and water.
Using a smoother to apply the wallpaper eliminates any air bubbles. We also make sure to line up the pattern between each sheet of wallpaper.
Wealso:
Painted the walls and trim
Installed crown and base molding
Installed a new hanging light
Post-Production Thoughts
Rachael’s home office had plenty of space, but it had very little privacy and almost no separation from the bedroom. Aside from those issues, it was functional enough but very plain.
Now, it’s a whole different space. The wall and the doorway have created the privacy and separation Rachael and Brian needed. And because of the way we built it and the materials we used, it looks like it was built that way from the start.
The built-in bookshelves offer plenty of storage and add a cool look to the most prominent wall in the space. Plus, that brick pattern wallpaper is sure to make Rachael’s Zoom calls a lot more visually pleasing.
Other Tips From This Episode
Products Featured in This Episode
This page contains affiliate links. If you purchase a product from these links, we will earn a small commission at no additional cost to you.