A plant shelf is great for displaying potted flowers and herbs.
Potted plants can quickly clutter up your patio or deck space. Building shelves for them not only frees up valuable floor space but also perfectly displays your plants for all to see.
Adding a shelf to a home with wood siding is easy to do. But what if your home has vinyl siding? Screw holes damage the vinyl and can be hard to repair if you decide to take down the shelves later on.
Hanging a plant shelf on vinyl siding can be done without doing any damage. These simple plant shelves hang on the outside of the house using a small hook designed specifically for vinyl siding.
Here’s how to do it.
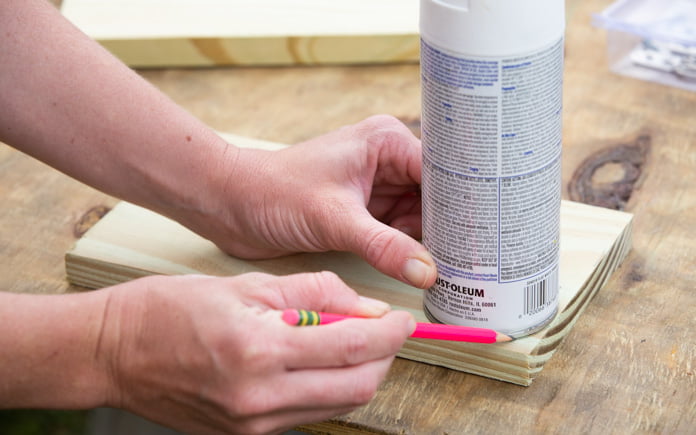
Start your shelf with a piece of 1×6 wood. Use a can or another round bottom object as a guide to cut the corner for a round edge.
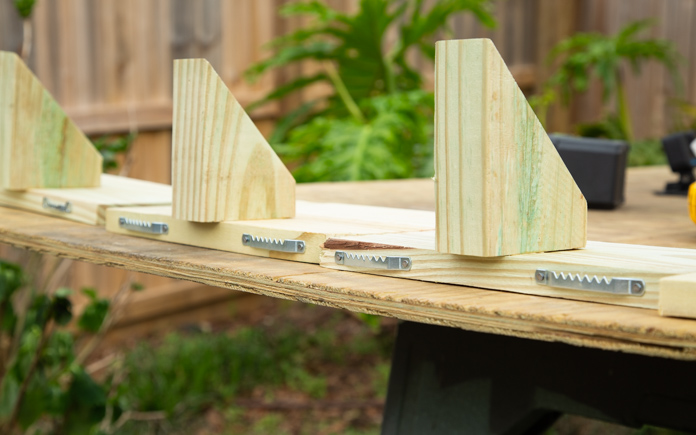
On the back of each shelf, nail two sawtooth picture hangers.
To keep the plant shelf hanging in a horizontal position, build a small trapezoid corbel from 2×4 material. To do this, make a 45-degree diagonal cut and then a 90-degree cut, one inch from the diagonal.
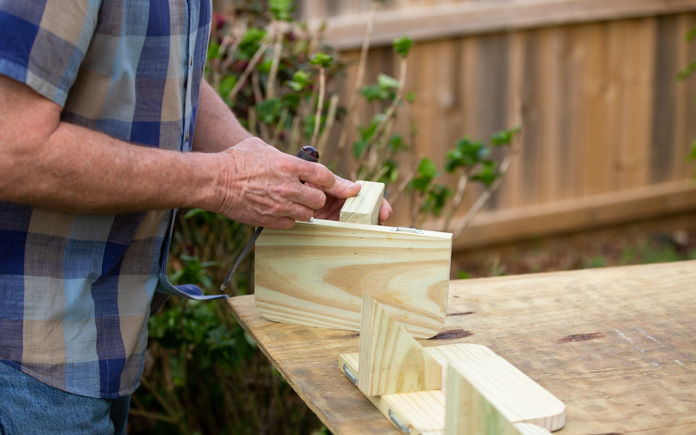
Attach the corbel to the shelf with its longest edge facing the wall and slightly offset to the back. The offset accommodates the angle of the siding.
To hang the shelf, thread the siding hooks through the sawtooth hangers before slipping the hooks under a row of siding on the wall.
Because the hooks attach beneath the vinyl siding, there won’t be any damage left behind if you decide to move your plant shelves!
Seed starting kits are available for purchase, but why not make starting your summer vegetable garden a fun family activity?
Starting seeds indoors is less expensive than buying mature plants. Plus, you can grow as many varieties as you’d like. It also gives you maximum control over growing conditions and planting time.
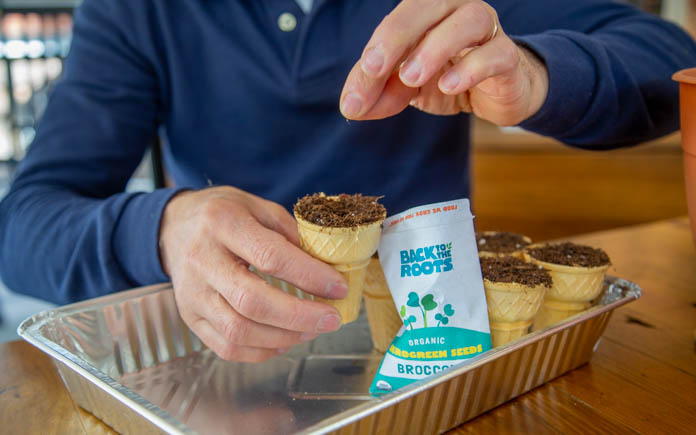
Ice cream cones are great for starting seeds because they are biodegradable and you can easily transplant them into containers once the seedlings have sprouted.
Using these as seed starters is also a great opportunity to teach children about the science of gardening. Here’s how to do it.
Use flat-bottom wafer ice cream cones.
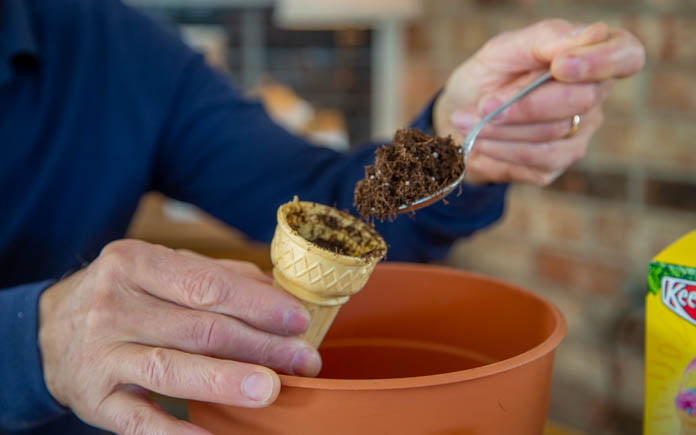
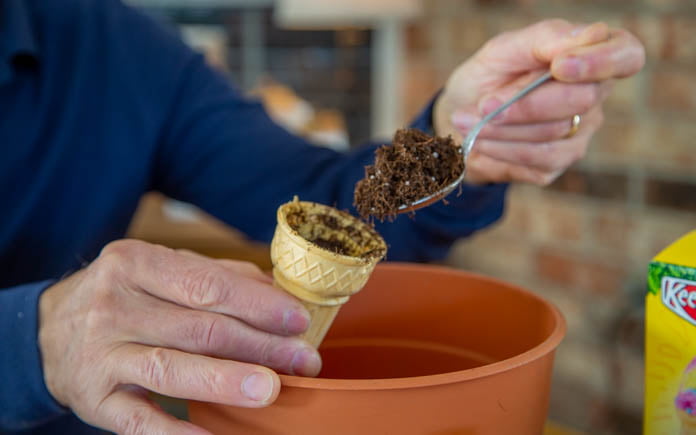
Fill the cones up with potting soil.
Use a pencil to poke a hole for your seeds. Plant the seeds in the recommended depth according to the packet.
Cover the seeds with more topsoil.
Place your ice cream cones in an aluminum baking pan.
After you plant your seeds in the ice cream cone, mist them regularly to keep the soil moist. Once the seeds germinate, place the pan in a south-facing window so the seedlings get 16 hours of light. The sunlight will dry the soil out, so be sure to regularly spray the seedlings with water.
Once they’re grown enough to transplant, you can pick up the seedling in the ice cream cone and plant the whole thing in a larger container.
Plant the seedlings at the same depth they were in the ice cream cone. However, some plants, such as tomatoes, squash, and cucumbers, can be re-potted up to the leaves to encourage additional rooting along the buried stem.
When you move your seedlings outdoors, place them in a shaded area for about a week so they can adjust to the outdoors. To protect your seedlings from colder night temperatures, use a soda bottle as a mini-greenhouse.
After a week, move them to a sunny spot and watch them grow!
Seed starting kits are available for purchase, but why not make starting your summer vegetable garden a fun family activity?
Starting seeds indoors is less expensive than buying mature plants. Plus, you can grow as many varieties as you’d like. It also gives you maximum control over growing conditions and planting time.
Ice cream cones are great for starting seeds because they are biodegradable and you can easily transplant them into containers once the seedlings have sprouted.
Using these as seed starters is also a great opportunity to teach children about the science of gardening. Here’s how to do it.
Use flat-bottom wafer ice cream cones.
Fill the cones up with potting soil.
Use a pencil to poke a hole for your seeds. Plant the seeds in the recommended depth according to the packet.
Cover the seeds with more topsoil.
Place your ice cream cones in an aluminum baking pan.
After you plant your seeds in the ice cream cone, mist them regularly to keep the soil moist. Once the seeds germinate, place the pan in a south-facing window so the seedlings get 16 hours of light. The sunlight will dry the soil out, so be sure to regularly spray the seedlings with water.
Once they’re grown enough to transplant, you can pick up the seedling in the ice cream cone and plant the whole thing in a larger container.
Plant the seedlings at the same depth they were in the ice cream cone. However, some plants, such as tomatoes, squash, and cucumbers, can be re-potted up to the leaves to encourage additional rooting along the buried stem.
When you move your seedlings outdoors, place them in a shaded area for about a week so they can adjust to the outdoors. To protect your seedlings from colder night temperatures, use a soda bottle as a mini-greenhouse.
After a week, move them to a sunny spot and watch them grow!
In this special Today’s Homeowner Podcast, we’re discussing drywall with Matt Gallagher, the Product Manager of Gypsum Systems.
When renovating or building a home, you tend to think about the finished product — what you see once the project is complete. But what’s inside your walls is just as important as the paint color and fixtures.
So, don’t overlook those all-important foundational elements of your home.
And remember: Not all drywall is created equal. Different areas of your home require different types of drywall. In this podcast, we’ll break down the best types of drywall for each area of your home.
XP Gypsum Board
If you’re looking for extra protection against mold and mildew, consider Gold Bond XP Gypsum Board. This drywall can be used in any room, but it’s especially useful in high-moisture areas like your bathroom.
That’s because Gold Bond’s core and paper are specially designed to fight the effects of moisture before any damage can occur.
High-Impact Gypsum Board
Let’s face it, in high-traffic areas like garages and hallways it’s easy to bump into the wall when moving items throughout your home.
Gold Bond XP Hi-Impact Gypsum Board resists impact because it has fiberglass mesh embedded into its core. Plus, it’s scratch- and scuff-resistant.
However, this noise-reducing drywall isn’t just for people who need privacy for productivity.
With its gel membrane, you can reduce the washing machine and dryer noise, and reduce disturbance for the rest of the house.
Soundbreak XP Wallboard features GridMarX guide marks on the board to allow for faster and more accurate installation, which saves you time and money.
Best of all, you don’t need to be in the middle of a home renovation to get this sound-reduction technology.
With Gold Bond SoundBreak Retrofit XP Board, you can turn a standard wall into a SoundBreak wall without having to remove any panels — it can be installed over an existing wall.
This podcast is sponsored by National Gypsum, a private manufacturing company that produces drywall gypsum boards.
Its products include Purple XP, which includes interior finishing products, cement boards and roof boards, as well as a variety of products that protect against mildew, mold and moisture.
In this week’s radio show, we’re talking about painting galvanized metal trim, waterproofing a low-level concrete garage and the right way to dust and vacuum.
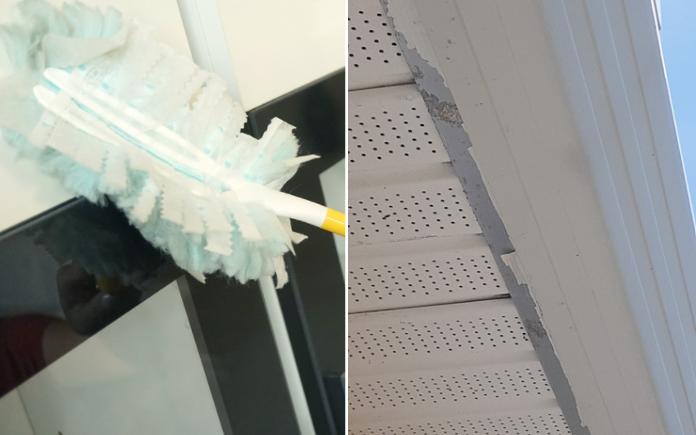
This metal trim is most likely made from galvanized metal that wasn’t properly prepped for painting. (Photo by Todd Jacquin)
Todd Jacquin, from Elizabeth City, N.C., has paint peeling on the metal soffit around his gutters. What’s the best way to fix this?
The soffit itself is aluminum but the trim around it appears to be galvanized metal.
Paint doesn’t stick well to galvanized metal if it’s not prepped properly. To paint it, you’ll need to scrape off any loose paint and caulk to get it down to the bare metal. Leave any paint that is not peeling.
To prep the galvanized metal for painting, wipe it down with some white vinegar to etch it. Use cleaner concentrate vinegar, or garden vinegar, to do this. This type of vinegar is 30 percent more concentrated than regular household and cooking vinegar.
Let it dry, then brush on a two-in-one paint and primer that’s designed to work on metal. Start with a small portion of the metal first to make sure the paint will stick to it.
Another thing to do is check out vinyl siding manufacturers and buy trim pieces that will slide over it. A J-channel could work well on this soffit siding. The J part of this trim piece is about half an inch or so thick, so it might not cover all the metal. You could get a flat stock of vinyl to slip over it to cover the rest of the exposed metal.
Skip to [12:15] for the full segment on the Today’s Homeowner Radio Show.
Vacuum First or Last When Dusting?
Which comes first: dusting or vacuuming? (Kameleon007/Getty Images Signature)
Here’s a question from the Today’s Homeowner Radio Show Hotline: “When cleaning my house, is it better to dust the furniture first and then vacuum? Or vice versa?”
Logic would tell me that you would start from the top down. If you’re cleaning a room, start with the crown molding, window sills and furniture before vacuuming.
The reason is if you vacuum and then dust the dust will fall back on the surfaces and you’ll have to vacuum again. Dust first, and don’t just brush the dust off. Use something with moisture in it to trap some of that dust. Capture any dust you can before dispersing it across the room, especially from the tops of cabinets and ceiling fan blades.
Skip to [1:02:55] for the full segment on the Today’s Homeowner Radio Show.
Waterproofing a Concrete Block Wall Garage
Every spring, melting snow leaks into this concrete block wall garage. (Photo by Gary Buss)
Gary Buss in Conover, Wis., has an underground concrete block wall garage with a Spancrete roof. Above the garage are a living area and a deck.
When the snow melts in the spring, water drips from the roof and seeps through the cracks on the deck above the garage.
What’s the best way to waterproof and insulate his garage?
A lot of hydrostatic pressure is pushing that water up against the walls. If the walls haven’t been adequately waterproofed on the outside, it can be a challenge to seal them off and waterproof them from the inside. But it’s worth a try — you’ll be surprised what putting a coating on the inside can do.
For the garage ceiling, seal up the cracks with a flexible caulk like Titebond WeatherMaster Sealant. Because this sealant expands and contracts, it will seal up those cracks that are leaking water.
Skip to [1:07:54] for the full segment on the Today’s Homeowner Radio Show.
Things that are constant in life: death, taxes… and crabgrass. (Yesim Shin/Getty Images)
Dealing with Weeds
No matter how much you pamper your lawn, at some point, you’ll have to deal with weeds.
The best way to control weeds is by having a healthy lawn. So focus on improving your soil and getting your grass healthy, and many of the weeds will disappear on their own.
Here are a few things to try:
Test your soil regularly. You can’t add the right amendments to your soil if you don’t know what it needs and a good soil test will tell you.
Be sure the grass has room to grow. Core aeration loosens up compacted soil to allow room for roots to grow while it opens the soil up to more water, nutrients and oxygen. You can rent an aerator yourself or hire a local lawn service to do the job.
When watering is required, do it right. Frequent light waterings don’t encourage roots to grow deep. So water less frequently for longer periods of time.
Finally, mow with the grass in mind. Mowing more frequently requires extra effort on your part, but it’s healthier for the lawn.
For more lawn tips ideas and inspiration for your outdoors, visit exmark.com/backyard.
Also on this episode:
Best New Product
This DeWalt Compact Impact Driver makes working in cramped spaces easy! Learn more>>
Other Products and Links Mentioned
Further Reading
Radio Show: Send us your question!
If you have a comment, general question about home improvement, or something we’ve featured on Today’s Homeowner, please fill in this form:
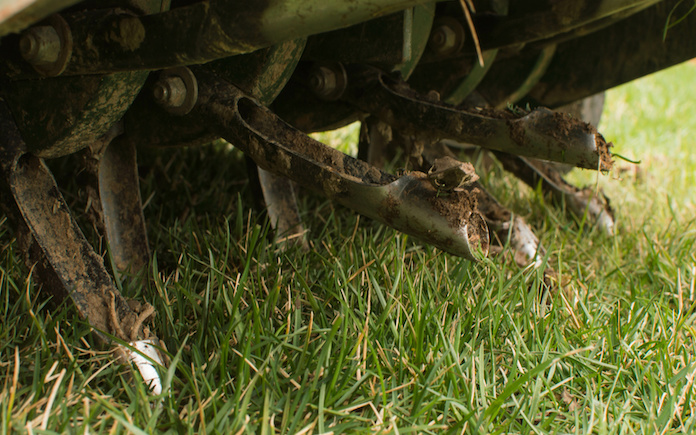
Lawn plug aerators are a great way to give your yard some breathing room, but they damage sprinkler heads. (stock.adobe.com)
Lawn plug aerators are a great tool to get your yard looking its best. But before you start giving your lawn some breathing room, make sure your sprinklers won’t get damaged.
A lawn plug aerator injects plugs into the lawn’s surface and removes a core (or plug) of grass and soil. This loosens up the soil and allows the grassroots to breathe. It’s also used for fertilizing and seeding.
These kinds of aerators are great for large yards with highly compacted soil. For smaller lawns, a spike aerator is best.
Lawn plug aerators can easily tear up your underground sprinkler system, so before you use this aerator, go to the home center and buy some flags.
Turn on your sprinkler system and find all the sprinkler heads throughout the yard. Mark them with the flags so you know the areas to avoid while aerating.
Lawn plug aerators typically don’t penetrate far into the soil — usually about three inches deep.
Most irrigation lines are at least 5-6 inches deep. To be sure you don’t do any damage, you can dig around a sprinkler head until you reach the drainage line and measure the depth.
While aerating, be cautious and leave plenty of room around the sprinkler heads.
Skip to [21:27]for the full segment on the Today’s Homeowner Podcast.
Also on this episode:
Best New Product
This DeWalt Compact Impact Driver makes working in cramped spaces easy! Learn more>>
Simple Solutions
Fast Fix for Stripped Screw Holes — Here’s a quick and clever way to fix a stripped screw hole using a cable tie (a.k.a.: zip-tie).
First, remove the screw from the stripped hole, then snip off the end of a cable tie, which is smooth. For this tip, you need to use the ridged part of the cable tie.
Press the snipped end of the cable tie into the hole until it bottoms out.
Then, cut the cable tie to length, matching the depth of the screw hole. Put the piece of cable tie into the stripped screw hole, then drive in the screw.
The ridges in the cable tie give the screw something to bite into, securely holding the screw in place.
Homemade furniture polish — Make an affordable, nontoxic furniture polish by mixing 1 cup white vinegar, 1/4 cup olive oil, and 1/8 cup of lemon juice.
Pour the solution into a plant mister and spray it onto wood surfaces. Rub in circles with a dry cotton cloth to remove dust, dirt and grime.
Then, use a second cloth to polish the surface in straight lines parallel with the direction of the wood grain.
Q:I’m installing a new mailbox. How deep and wide should I dig the hole, and how do I mix the concrete for it?
A: For a mailbox post, you’ll typically use a 4-by-4 or 6-by-6 post. You should dig the hole at least three times wider than the post and at least two feet deep.
At least a third of the post should be below ground. The United States Postal Service requires mailboxes to be 41-45 inches above the ground, so take this into consideration when buying the post.
To set the post with concrete, use a bag of Quikrete Fast-Setting Concrete Mix. Just pour the dry concrete mix into the hole and pour water on top until the mix is saturated. Watch how to do this here.
You can also try Sika PostFix. It’s a two-part expanding polyurethane foam that fills the post hole and hardens in three minutes. All you have to do is roll the bag to mix up the foam, snip off the corner, and pour it into the hole.
Skip to [29:20]for the full segment on the Today’s Homeowner Podcast.
Other Products and Links Mentioned
Further Reading
Ask a Question! (Podcast)
Ask a question and we could answer it on the “Today’s Homeowner Podcast!” We also may use it on our nationally syndicated radio broadcast or on todayshomeowner.com.