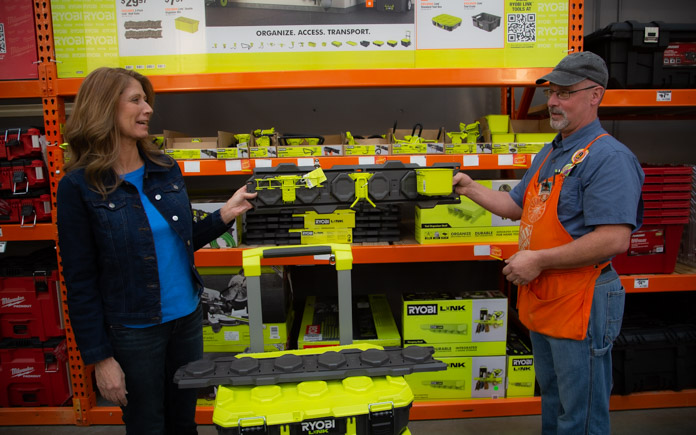
Easily detach the crate from the wall rails to take any tools you need on the go.
Link Rolling Tool Box
Ever heard the phrase, “Messy bed, messy head?” The same applies to your garage. Having all your tools and equipment where you can find them is key to being productive.
The Ryobi Link Rolling Tool Box keeps all your tools and parts organized with its integrated accessory bit storage and a double organizer bin. No more digging to the bottom of the box to find the part you need!
It’s designed with impact-resistant material to handle the toughest of situations and protects your tools from water and dust.
This rolling toolbox has a wide, steel telescoping handle and nine-inch all-terrain wheels that support a 200-pound load capacity. You’ll be able to get all the materials you’ll need in one trip to the most rugged project sites.
This toolbox has secure locking points, tie-down anchors and impact-resistant latches so your tools are safe and sound.
Best of all, it is part of the Ryobi Link Modular Storage System, so it will seamlessly connect your stationary storage.
The Ryobi Link Modular Storage System can be configured any way you need it!
About the Ryobi Link Modular Storage System
The Ryobi Link Modular Storage System allows you to easily organize, access and transport the tools you need for your job. The interlocking modular pieces allow you to customize your storage space for optimum organization.
This storage system is available for purchase in starter kits, or you can build your own at your own pace by purchasing single pieces.
The seven-piece wall storage kit provides you with the foundation to organize your life and easily expand with a full range of storage solutions.
This page contains affiliate links. If you purchase a product from these links, we will earn a small commission at no additional cost to you.
Watch the video to learn all about this Best New Product!
This week, we’re giving home improvement tips from floor to ceiling! (David Shao/Getty Images/Adobe Stock Photo)
In this week’s radio show, we’re talking about painting hot water baseboard heaters, adding outlets in a garage workshop and filling gaps in crown molding.
Shed Book Giveaway
Painting Hot Water Baseboard Heaters
Hot water baseboard heaters can rust in high-humidity areas like the bathroom. (Adobe Stock Photo)
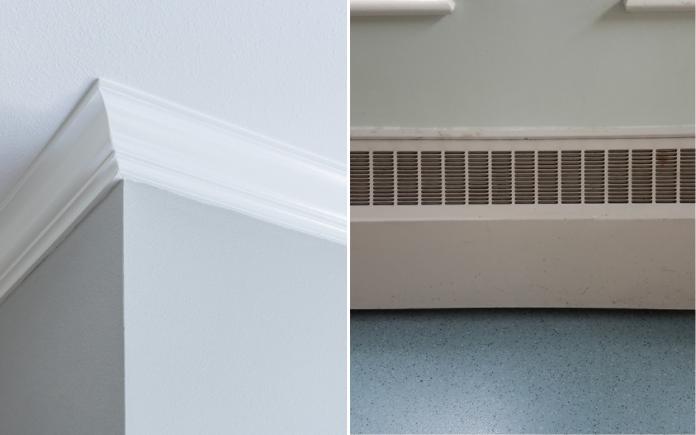
Maryann Pivonka from Tolland, Conn., wants to repaint her rusted hot-water baseboard heaters. She’s a senior citizen who wants to do this herself and wants to know the best way to do this.
Hot water baseboard heaters channel hot water through pipes inside baseboard heating units. They’re rare in the South but common in the Northeast.
These heating units can easily get damaged while vacuuming or being exposed to moisture.
To paint these, you need to take off the front panel and the louvered damper on the baseboard heating unit. These should easily come off without needing any tools.
Use a scraper or sandpaper to remove the rust, sand it, prime it and paint it and reassemble it. If it’s rusted bad enough you can replace it.
You don’t need to remove the back panel of the heating unit to paint it because most of it is hidden behind the heating element. Just paint the top inch or so that’s visible.
Pro tip: You’ll be kneeling on the ground frequently to remove the panels, so buy some inexpensive knee pads to protect those kneecaps!
Skip to [30:37] for the full segment on the Today’s Homeowner Radio Show.
Adding Outlets in a Garage Workshop
Old kitchen cabinets work great for workshop storage. (Nicholas Free/Getty Images Signature)
Steve Sorbo in Plant City, Fla., got a deal on some oak kitchen cabinets at a garage sale and now wants to install them in his garage. The problem is, once the cabinets are in the garage, the electrical outlets are hidden inside them. He has to reach into the cabinet to plug anything up. What’s the solution for this?
Most of the time when you use your garage for a workshop, there are never enough outlets. Getting more outlets is an advantage, but you might not want to spend money on an electrician to install those additional outlets.
You can route an extension power strip to the outside of the cabinet. Drill a hole through the side of the cabinet that has the outlet inside. Plug the power strip cord into the outlet and attach it to the side of the cabinet or on the wall. Now, you’ve doubled your outlets, plus you have easier access to them.
If you don’t like this idea, hire an electrician to relocate the outlet. That person will cap off the existing outlet inside the wall and drop down a new electrical line to the height above the cabinets.
Either way, you should have good access to the walls and maneuver that.
Skip to [54:16] for the full segment on the Today’s Homeowner Radio Show.
Filling Gaps in Crown Molding
Changing temperatures in the attic can cause crown molding to swell and contract. (David Shao/Getty Images)
The crown molding in Judy McLeod’s Mississippi home is separating from the ceiling. The caulking swells and contracts and has made the popcorn ceiling come loose. How can she fix this without scraping the rest of the ceiling?
Expanding and contracting are common for ceiling crown molding because it’s close to the attic, where the temperature fluctuates more drastically than in the rest of the home.
One thing you can do is carefully use an acrylic latex caulk and barely feed it into the cracked area, so when it does close back it remains flexible. The gap will appear but it won’t be as deep or as noticeable.
This would be a wasted effort if the trim isn’t installed correctly. Sometimes the nails don’t penetrate deep enough into the molding to reach the wall, so make sure the molding is properly nailed.
Skip to [1:03:18]for the full segment on the Today’s Homeowner Radio Show.
Question: “I’m getting ready to build a privacy fence around my backyard and I’m getting mixed information about how to set the fence posts. I’ve seen people just mix the concrete in the post hole, but my neighbor says that makes the concrete weaker so I shouldn’t do it that way… which is it? I want to do it right, but I’d like to make it as simple as possible.” — Kevin from Nashville
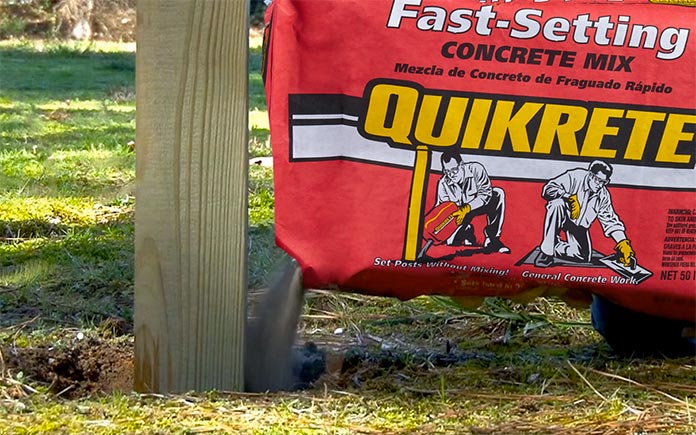
Answer: Actually Kevin, they’re both right… sort of. Most normal concrete mix is not designed to be mixed in the hole that way so it’s not a great idea to try it if you want maximum strength. However, there is a specific type of concrete mix that is designed to be mixed in the hole and still achieve full strength.
Quikrete Fast-Setting Concrete Mix, in the red bag, is made for exactly the kind of job you’re doing. Once you plumb the post in the hole all you have to do is pour the red bag mix into the hole and top it with the appropriate amount of water per the instructions on the bag.
Depending on the temperature, within about 20 to 40 minutes the concrete will be dry enough to hold the post still and within a few hours, it will be completely set.
Moving to a new place can be exciting and feel a little overwhelming at times, but with the right amount of preparation, the whole process can be more streamlined and a lot less stressful.
The Home Depot has all your moving supplies and offers an online Moving Hub that features tips, tricks, guides and lists to help plan, prepare and organize a move.
Use the moving calculator to help create an itemized list of the supplies needed and help take the guesswork out of figuring out which supplies will be needed.
Need to rent a truck or a tool? The Home Depot also offers an online reservation and in-store fulfillment program so you can reserve tools to help settle in after you move.
Watch Homeowner 101 livestream workshops to make your new place feel like home. Or, save time and money by hiring a Home Depot certified Home Services professional.
The Home Depot Home Services partners with local, licensed and insured pros and contractors offering over 400 services in your community to help get the job you need done right.
Best New Product
The Defiant Wi-Fi and Bluetooth-enabled outdoor smart plug gives you the same wireless control you have with indoor smart devices. Learn more>>
Other Products and Links Mentioned
This page contains affiliate links. If you purchase a product from these links, we will earn a small commission at no additional cost to you.
Further Reading
Radio Show: Send us your question!
If you have a comment, general question about home improvement, or something we’ve featured on Today’s Homeowner, please fill in this form:
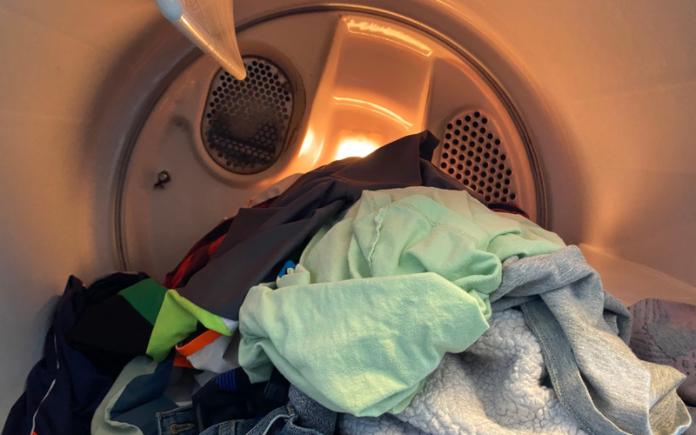
Shorten your dry cycle and save energy with a dryer vent booster fan. (Kameleon007/Getty Images Signature)
A dryer vent booster fan on a roof vent can save you money and time when doing laundry.
I’ll tell you from my personal experience how.
In my previous house, the piping for the dryer was about 35 feet long and went down through the slab and to the outside. I rerouted the exhaust through the roof and used a dryer vent booster fan. It drastically improved the performance of my dryer and lowered my utility bills. Here’s why:
Any time you’re venting anything, the shortest distance on your vent makes it more effective. In my situation, going through the roof was the shortest distance.
Hot air does rise, but it’s heavy and takes some extra energy to exhaust it out. This is where the inline booster fan comes in to save the day. For my home, I used a Fantech Dryer Booster Fan System.
It helps get the air out faster, plus it doesn’t turn on until the dryer is running and the air is moving through the vent. When it senses that hot, moist air, it boosts it to the outside then turns itself off.
Before installing the dryer booster fan, the drying cycle for my laundry was usually an hour and a half. After, it only took about 45 minutes, which saved me a significant amount on my utility bill.
Also remember, whenever you’re running a dryer vent through the roof, the vent hood is important. You want to create as little air resistance as possible for that roof dryer vent.
I recommend the DryerJack Vent Hood. This vent is curved, so it creates much less resistance.
You’ll find that over time, you’ll recoup the costs of the inline dryer vent booster fan and the DryerJack Vent Hood with reduced utility bills.
Skip to [28:44]for the full segment on the Today’s Homeowner Podcast.
Also on this episode:
Best New Product
The Defiant Wi-Fi and Bluetooth-enabled outdoor smart plug gives you the same wireless control you have with indoor smart devices. Learn more>>
Simple Solutions
Safe, Effective Way to Block Out Pests — Here’s an effective way to seal up holes around your home to ensure no pests crawl in.
First, stuff some stainless steel wool into the holes.
Then, spray in some expanding foam sealant. Instead of using regular expanding foam sealant, use pest-blocking foam that’s specially made to deter rodents and other critters. The foam contains capsaicin, which is the active compound that makes hot peppers spicy.
Now, if a pest manages to chew through the foam, it’ll hit the steel wool, which will act as an extra barrier.
Tip for Cleaning Shower Walls and Doors — Whether they are made of porcelain, acrylic, ceramic tile or glass, shower walls and doors are notoriously difficult to keep clean. But here’s how to effectively clean any shower:
Fill a soap-dispensing dish scrubber with half grease-cutting dish detergent and half white vinegar.
Then, simply scrub the surface to remove soap scum, caked-on dirt and water spots.
And, we recently heard from a listener that suggested using a glass-cooktop cleanser to clean glass shower doors.
Question of the Week
Q:I converted my two-car garage into a family room, and I want to install vinyl plank flooring over the concrete slab. The problem is that the slab is very wavy and uneven. What’s the best way to level the surface for the new vinyl flooring?
A: Concrete slabs in garages usually have a grade towards the doors to allow water to roll away from them.
To get the slab even for installing vinyl plank flooring, use a self-leveling underlayment to even out the floors, like LevelQuik Rapid Setting Self-Leveling Underlayment from Custom Building Products. Prime the slab with LevelQuik Advanced Acrylic Primer. Then, pour the self-leveling underlayment and smooth it out for an even surface.
Let the underlayment cure for at least 16 hours before installing the flooring.
Skip to [39:14]for the full segment on the Today’s Homeowner Podcast.
Other Products and Links Mentioned
This page contains affiliate links. If you purchase a product from these links, we will earn a small commission at no additional cost to you.
Further Reading
Ask a Question! (Podcast)
Ask a question and we could answer it on the “Today’s Homeowner Podcast!” We also may use it on our nationally syndicated radio broadcast or on todayshomeowner.com.
Retractable screens let your home breathe in the outdoors — but not the bugs.
Imagine a screen door that disappears when you don’t need it. One that protects you from bugs without downgrading your home’s appearance. Well, you no longer need to imagine; it exists.
A retractable screen door blurs the line between indoors and outdoors, seamlessly letting fresh air in and keeping insects out.
Retractable screen doors neatly tuck away when you’re not using them.
What is a Retractable Screen Door?
A retractable screen door is essentially a frame with a roll of screen mesh on one side and tracks on the top and bottom.
The system mounts onto the door frame and differs from traditional hinged screen doors. When you need the screen, you pull it out; when you don’t, it rolls up out of sight.
Retractable screens seamlessly unify outdoor and indoor living spaces, making them ideal for house parties, family gatherings, or just catching a spring breeze in the kitchen without walking onto the patio.
Traditional screen doors take up valuable space and take away curb appeal. (Adobe Stock photo)
The Trouble with Traditional Screen Doors
Traditional screen doors also let in fresh air, but hinged options require opening and closing whenever you enter or leave your home, even when you’re not using them for their intended purpose. This is inefficient, and unnecessary, especially when hauling in groceries.
Traditional screen doors are always in the way, even if you only use them a few months out of the year. Plus, a sliding screen door’s metal frame is always exposed to the elements, making it vulnerable to rust, and difficult to open and close.
It’s not just function that presents problems; it’s also the door’s form.
Traditional screen doors often negatively affect an exterior door’s appearance.
It’s difficult to find one that matches your home’s style, and these doors — which often look like a throwback to another era — can take away from a home’s curb appeal.
Retractable screen doors easily glide open and shut.
Advantages of a Retractable Screen Door
Retractable screen doors eliminate the problems associated with traditional screen doors.
For instance, RetractaView by Wizard Screens features a sleek, modern design that complements today’s homes. Wizard’s GlideSmooth Technology enables effortless one-handed operation along the low-profile upper and lower tracks. And, when needed, the screen conveniently retracts and stores out of sight in the side housing.
It’s made for single in-swing or out-swing, sliding, and French doors, and comes in a variety of colors, styles, and solar and insect mesh types. So, homeowners don’t have to choose between an unsightly traditional screen or not screening the door at all.
The system also is safe to use, with a magnetic catch that holds the screen in place when in use and releases should a pet or person run into the screen.
How is a Retractable Screen Door installed?
Retractable screen doors mount to the side of the door frame with a track at the top and bottom to guide the rolled screen. However, this is not a do-it-yourself job.
For optimal results and to ensure the screen’s proper installation, you’ll want professional installation. There are hundreds of Wizard Screens dealers in North America — here’s how to find one near you.
Once installed, operation is easy. Just pull the screen door out to allow fresh air into your home when needed and roll it back out of the way when not in use.
Retractable screen doors are weather-resistant and last for years.
Frequently Asked Questions
Do retractable screen doors last?
Quality retractable screen doors, with proper use and care, will provide many years of service. Because they retract when not in use, they completely avoid the elements, unlike traditional screen doors.
RetractaView’s rugged construction is weather, wear and UV-resistant, and the screen can absorb impact from people and pets without tearing or sagging.
In addition, all retractable screen systems from Wizard Screens come with a limited lifetime warranty, providing peace of mind. The housing is guaranteed to not warp, crack or fade and authorized dealers are available nationwide for service calls.
Are retractable screen doors worth it?
Retractable screen doors’ out-of-sight, out-of-mind style don’t block the beauty of your exterior doors, whether they’re French doors or custom-stained mahogany. Plus, they are attractive to home buyers, should you decide to sell. These features make them attractive to an increasing number of homeowners.
The Defiant Wi-Fi and Bluetooth-enabled outdoor smart plug gives you the same wireless control you have with indoor smart devices.
A smart Wi-Fi plug can make any outdoor device a smart device.
Now more than ever, people want to boost their backyard life. A true backyard paradise includes features that allow you to entertain and relax, like outdoor kitchens, dining areas, water features and landscape lighting.
Keeping up with all of these features can be a handful. For instance, remembering to turn off landscape lighting and a water feature can turn your backyard oasis into another mundane household task.
Get your outdoor devices in sync with your smart house by using a smart Wi-Fi plug.
The plug is available with two outlets, so you can manage each one individually or control them together.
So you can keep your patio bug zapper on past sundown and turn off your water feature at the same time.
No hub is required and compatible with Amazon Alexa and Google Assistant.
The Defiant outdoor smart plug allows you to use your voice to turn on or off the device of your choice. Pre-set on and off schedules through the Hubspace app for Android or iPhone.
Plus, if your Wi-Fi network is down, you can still control this smart plug with Bluetooth.
The Defiant Smart Wi-Fi Plug is suitable for outdoor and damp applications under IP64 rating and has a 15 amp power consumption limit.
This page contains affiliate links. If you purchase a product from these links, we will earn a small commission at no additional cost to you.
This week we’re helping a blended family expand their patio to better meet their needs.
Eric and Corrina love spending time outdoors with their children, but their patio space just wasn’t enough to make their family feel together during “get-togethers”
Their grill is separated from the main seating area, and Corrina’s container plants make the limited patio space feel cluttered.
Pea gravel is an excellent alternative to pavers for expanding patio space.
Expand Patio with Pea Gravel
To double the size of this patio without using concrete or pavers, we use pea gravel.
The existing patio is slanted downward away from the home for drainage, so with our pea gravel landing, we can make it almost level with the ground. The pea gravel will hold the drainage water well. Plus, the water will be moving slowly, so it will prevent any erosion.
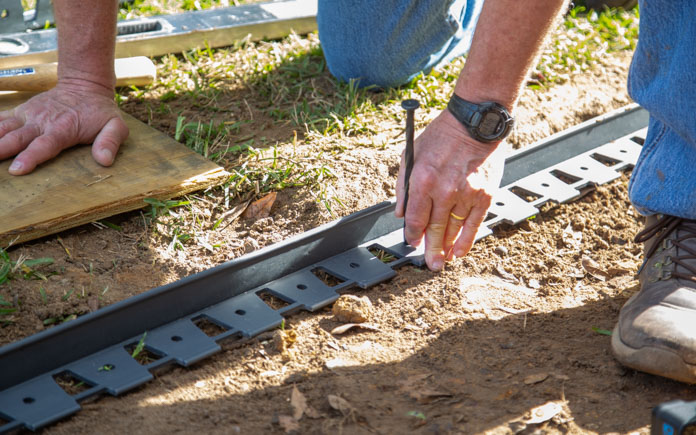
This plastic edging will keep our pea gravel in place.
First, we lay plastic edging to frame our expanded patio area. This plastic edging is usually used with pavers, but we’re switching it up to work with our pea gravel. The smooth ridge will keep the pea gravel in place so it won’t spill out into the yard.
We use a mallet to drive landscaping spikes into the edging to keep it in place.
Once the edging is in place, we fill the space with Pavestone paver base and tamp it down.
We then sprinkle the pea gravel across the paver base so we can create a uniform surface. The pea gravel is part of the decorative feature of this patio, so we don’t want to rush it.
Once we have an even spread of pea gravel, we tamp it down into the paver base.
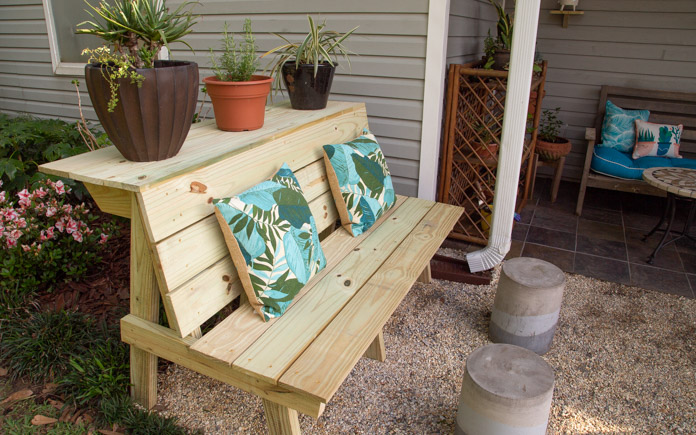
This combination planter bench provides sitting space for people and plants!
Build Plant Shelf Bench
To create more seating and also more space for Corrina’s plants, we build a custom plant shelf bench.
The bench is constructed like a regular wood bench, but we add a shelf to the back for container plants.
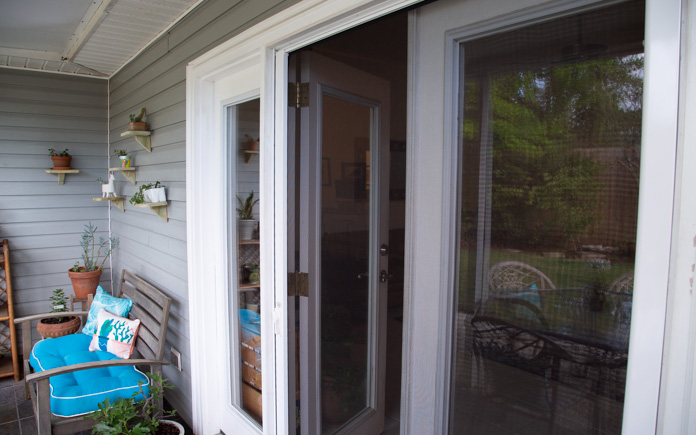
Retractable screen doors neatly tuck away when not in use.
Install Retractable Screen Door
Our solution to Eric’s aversion to bugs is installing a retractable screen door from Wizard Screens on the French doors.
Retractable screen doors mount to the side of a door frame with a track at the top and bottom to guide the rolled screen. The screen door can be pulled out to allow fresh air into your home when needed, and then rolled back out of the way when not in use.
These screens keep mosquitoes away without obstructing the outside view.
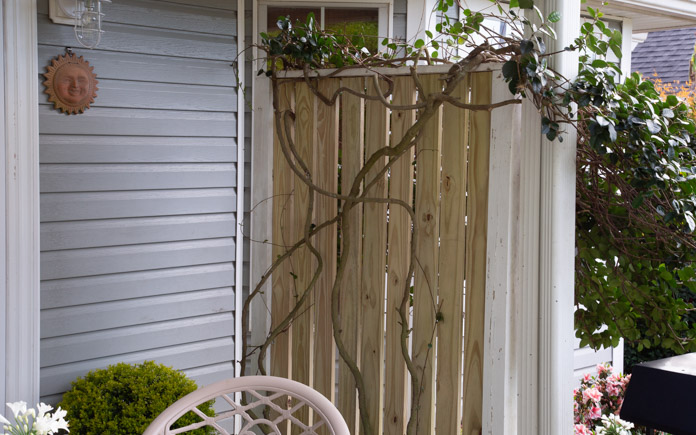
Vertical wood slats add more privacy than lattice.
Replace Lattice
The jasmine growing around the lattice on the patio no longer needs the lattice for support, so we replace it with vertical wood slats to add more visual appeal and privacy.
We also:
Cleaned existing patio tiles
Replaced the ceiling fan and light fixture
Diverted the downspouts away from the patio
Planted flowering plants near the house from Southern Patio
Now, there’s room for all on this expanded patio!
Post-Production Thoughts
Eric and Corrina’s backyard is beautifully accented with all kinds of plants. But they couldn’t fully enjoy it because their patio was cramped and cluttered, to the point that the grill had to be moved out into the yard. They rarely opened the french doors because it invited in the bugs, and everything was a little dated.
But now, we’ve doubled the size of their patio with a unique drainable surface. Plus, we maximized the space by relocating Corrina’s container plants to a new combination bench and plant shelf. More shelves on the wall display the smaller pots and the new vertical slat trellis provides privacy and support for Corrina’s jasmine vine.
Plus, Eric and Corrina can enjoy their patio from the inside “mosquito-free” thanks to their new retractable screen.