When David and Ruby LeBlanc starred on a Today’s Homeowner television episode that featured an exterior renovation and metal re-roofing on their Cut Off, Louisiana home, they had no idea it would become the best insurance for Hurricane Ida, which would arrive shortly later.
The re-roofing project — and episode — was completed just weeks before Ida hit. The Category 4 storm lashed David and Ruby’s neighborhood for seven long hours, with torrential rain and wind gusts exceeding 180 miles per hour. Country-wide, Ida lasted from Aug. 26–Sept. 4, 2021.
David and Ruby evacuated before Ida hit, but they were on pins and needles waiting to find out how their home had fared. They soon learned that the destruction to the area was devastating. But their new metal roof remained virtually unscathed from Ida’s tremendous force. It saved their home.
“Our neighbor’s garage had exploded. Boats were flung up on the road. It took two hours to clear our driveway alone. All over our neighborhood, homes with tarpaper roofs suffered complete losses,” said David. “But our new metal roof performed wonderfully. There was no structural or wind damage and not a drop of water inside from the roof.
“If we hadn’t replaced our roof when we did, we probably would still be gutting the house all the way down to the framing.”
David and Ruby’s old asphalt shingle roof had mismatched shingles from quick repairs over the years.
The Challenge
David and Ruby’s 70-year-old home, located on the Bayou, had been hit by hurricanes before. As a result, the old roof was a hodgepodge of repairs and tarpaper (asphalt) material that suffered leaks and damage.
So, when it was time to re-roof, the owners wanted a change. Metal was the ultimate choice, and as highlighted on the Today’s Homeowner episode, special attention was paid to quality installation for maximum wind-resistance performance and longevity.
“Going with a quality metal roof was more expensive initially, but when you look at how well it performed, the damage it saved our home from and the long-lasting reliability, it was absolutely worth it,” said David.
Workers from Middle South Systems install a metal roof.
The Solution
David and Ruby selected Classic Metal Roofing’s Rustic Shingle steel in Shake Gray for their re-roofing project. Installers placed the new roof right over the old roof, using a quality underlayment and foam under each shingle, which lock into place to give the roof superior performance and hurricane resistance.
Installer Middle South Systems reinforced the new roof’s strength by securing each 2-foot shingle with three hurricane clips.
The homeowners were delighted to learn that the beautiful style of their new roof is matched only by its long-lasting reliability, as proven by standing up to Hurricane Ida.
For more information:
Representing the residential metal roofing industry in the United States and Canada, the Metal Roofing Alliance was formed to help educate consumers about the many benefits of metal roofing.
MRA’s main objective is to increase awareness of the beauty, durability and money-saving advantages of quality metal roofing among homeowners, as well as to provide support to the residential metal roofing industry.
Garages make for great storage space, but they can quickly become cluttered.
Russ and Raelyn Watkins have a spacious two-car garage, but the space has filled up over time. Walking from their car to the door has become an obstacle.
The garage is the most-used entrance in their home, so making sure the pathway is clear for the family and visitors is a top priority.
The space between the two garage doors is perfect for stacking storage totes.
Build Storage Shelf for Plastic Totes
The space between the two garage doors is perfect for a shelf to hold some plastic storage totes.
We start designing the shelf to custom fit the space, which is about two feet wide between the doors. We measure out the shelves to fit the height of the storage totes. The shelf is long enough to fit five storage totes long and two stacks high. This two-tote height is perfect for adding a counter on top to provide a surface for extra workspace.
To build this storage shelf, it’s essentially just building a frame to fit the totes and then putting the plywood on top of it. We measure the legs to space it up properly, so the totes can easily be taken in and out.
After it’s assembled, we give it a nice coat of paint with a paint sprayer.
We place the wall shelf at just the right height to fit an extra tote on top of the fridge.
Build Shelf Above Fridge
Next, we add some storage space up high with a wall shelf. We mark on the wall how high we need our shelf to be so we can accommodate some storage space on top of the fridge.
Next, we mark our studs for attaching the shelf. Almost every wall on a home has 16-inch centers — so the 2-by-4 studs are spaced 16 inches apart.
We find the first stud and use this formula as a guide to mark the rest of the studs. This speeds up the process because we don’t have to use a stud finder to find each one.
These custom corbels are easy to make and look better than standard metal shelf brackets.
Instead of using metal shelf brackets to install our shelf, we take a 1×12 and cut it at a 45-degree where the grain is vertical to make a triangle corbel.
To give the shelf and corbels extra support, we add a 1×4 cleat. We leave some space at the top of the corbels so the cleat will slide under the trim beneath the shelf.
The corbels slide neatly into the trim underneath the shelf.
After the shelf is assembled, we paint it to match the plastic storage tote shelf.
Although these J-hooks are meant for plumbing, they’re a perfect fit for storing tailgating chairs and brooms!
Utilize Wall Space
The hooks on the walls came with the house when the Watkins family bought it. They don’t work with their family’s storage needs, so we create a new system that’s perfectly tailored for them.
Use a level to make sure the J-hooks are even.
Our solution for storing the Watkins’ tailgating chairs is hanging them on the wall with J-hooks. These hooks are actually meant for hanging pipes, and you can find them on the plumbing aisle.
To get more chairs on the wall and also add some visual variety, we staggered them on the wall.
We also:
Painted the walls
Changed the opening direction of the door
Moved the refrigerator
Restored garage floor
Removed blinds and installed window film
Post-Production Thoughts
Russ and Raelyn’s garage was like many people’s — a place where things got dropped when there was nowhere else for them. Without adequate shelving, the floor filled up fast, and walking through the garage was a little like an obstacle course. And, the dingy walls and cobweb-covered windows didn’t make the chore any easier.
Now, the garage is light and bright thanks to the great new color on the walls and the crisp, clean window film on the windows.
The freestanding shelf between the doors holds tons of smaller items, thanks to the transparent storage bins, while the long shelf on the wall is ready to handle lots of long-term storage.
The camping chairs now have their own designated spot, off the floor so there’s no more obstacle course.
In fact, the new arrangement freed up so much space that Raelyn can park closer to the door to the house and still leave room for the mower.
Other Tips From This Episode
Products Featured in This Episode
This page contains affiliate links. If you purchase a product from these links, we will earn a small commission at no additional cost to you.
Frosted window film provides the privacy you need and the natural light you want.
It mimics the look of specialty glass without the added cost and is a perfect solution for spaces where blinds aren’t ideal, like in garage and bathroom windows.
Most of the time, blinds in garage windows are rarely opened. Because of this, they create a perfect environment for dust to collect, and even worse, for spiders to nest.
In a bathroom, moist air can morphe blinds, plus you don’t want to forget to close them when you hop into the shower.
Applying this is easy — here’s how to do it:
First, thoroughly clean the window.
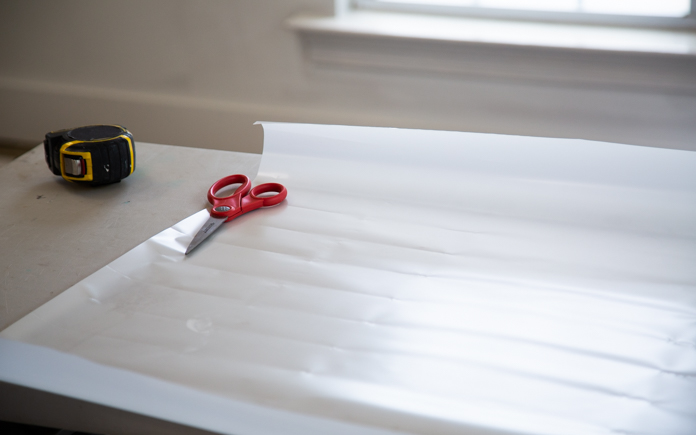
Next, measure the windows and cut the frosted window film slightly larger than the window’s dimensions.
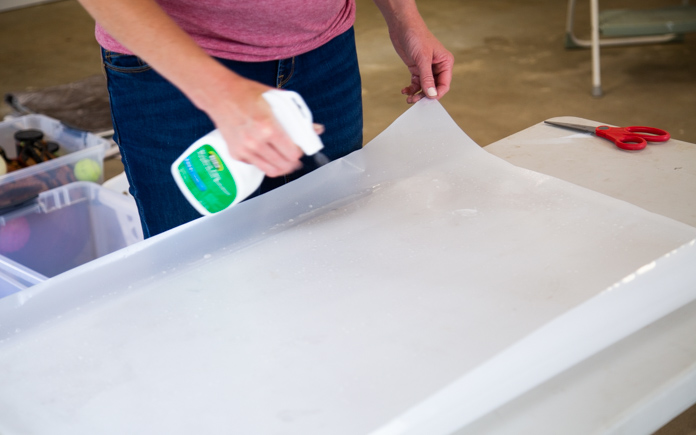
Remove the liner and spray the surface of the film and the window itself with the application solution.
Now, place the film on the window.
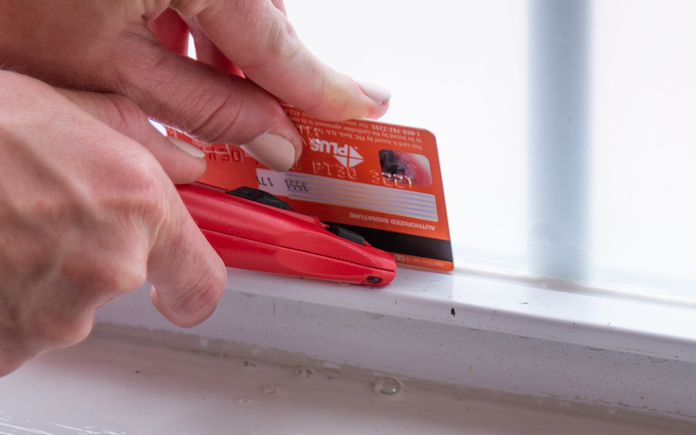
The window film solution allows it to be adjusted to fit in the center of the pane. When the position is right, use a small squeegee or a credit card to force out the application solution and any small air bubbles.
Tip: Work from the center outward in all four directions. This will push the air bubbles out faster.
Finally, use a razor knife to trim the overhanging edges flush with the edges of the window.
Now, not only do you have privacy and natural light, but you also have. protection from harmful UV rays that can fade interior surfaces.
NOTE: Frosted window film may cause problems on insulated glass and could void the warranty on windows or doors.
This page contains affiliate links. If you purchase a product from these links, we will earn a small commission at no additional cost to you.
A stop block makes cutting multiple pieces of wood on a miter saw faster and easy.
A stop block is a simple reusable jig used in woodworking to mark an edge so multiple pieces of wood can be cut quickly and uniformly.
It can get tiresome to stop and measure each piece before you cut it, so built-in stop blocks keep you working at a steady and fast pace.
The hold-down clamps that come with most power miter saws are useful for securing a stop block when making repetitive cuts. But they’re only useful for cutting short pieces because it limits the length of board you can cut.
For bigger projects like decks and railing, long cuts of wood typically won’t fit within a standard stop block. Cutting these pieces shouldn’t take up the majority of your time. This time is better spent on getting these pieces together and your project complete.
However, you can make an extended stop block using a framing square. This technique works well for making repetitive cuts between about 16 inches and 23 inches long.
Here’s how you do it:
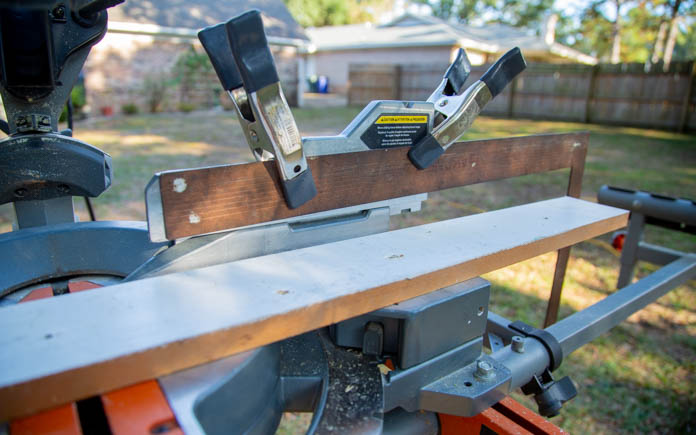
First, use two spring clamps or short bar clamps to secure the framing square to the saw’s fence. Extend it out to the length you need the board to be.
Check to confirm the distance from the blade to the vertical tongue of the framing square equals the desired length of the pieces you’re cutting.
Then, carefully slide the board up against the edge of the square’s tongue and make the cut.
Repeat to make repetitive cuts to produce pieces of all the same exact length.
A stop block makes cutting multiple pieces of wood on a miter saw faster and easy.
A stop block is a simple reusable jig used in woodworking to mark an edge so multiple pieces of wood can be cut quickly and uniformly.
It can get tiresome to stop and measure each piece before you cut it, so built-in stop blocks keep you working at a steady and fast pace.
The hold-down clamps that come with most power miter saws are useful for securing a stop block when making repetitive cuts. But they’re only useful for cutting short pieces because it limits the length of board you can cut.
For bigger projects like decks and railing, long cuts of wood typically won’t fit within a standard stop block. Cutting these pieces shouldn’t take up the majority of your time. This time is better spent on getting these pieces together and your project complete.
However, you can make an extended stop block using a framing square. This technique works well for making repetitive cuts between about 16 inches and 23 inches long.
Here’s how you do it:
First, use two spring clamps or short bar clamps to secure the framing square to the saw’s fence. Extend it out to the length you need the board to be.
Check to confirm the distance from the blade to the vertical tongue of the framing square equals the desired length of the pieces you’re cutting.
Then, carefully slide the board up against the edge of the square’s tongue and make the cut.
Repeat to make repetitive cuts to produce pieces of all the same exact length.
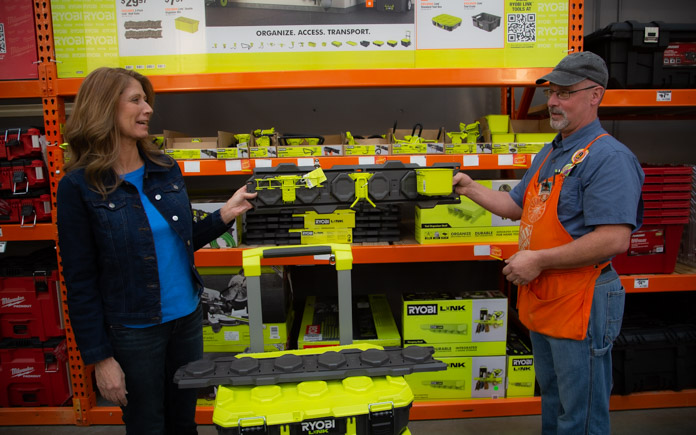
Easily detach the crate from the wall rails to take any tools you need on the go.
Link Rolling Tool Box
Ever heard the phrase, “Messy bed, messy head?” The same applies to your garage. Having all your tools and equipment where you can find them is key to being productive.
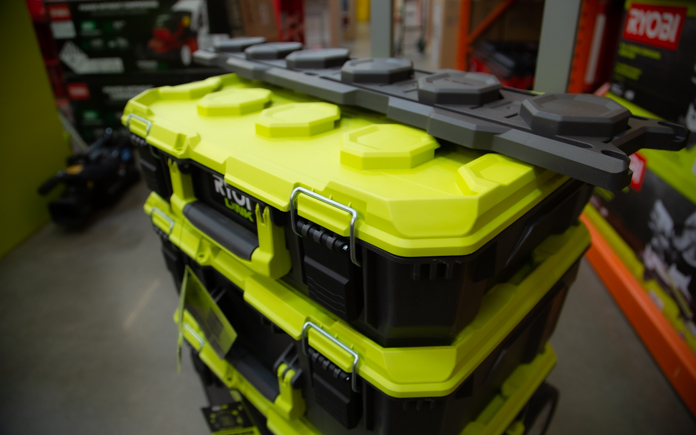
The Ryobi Link Rolling Tool Box keeps all your tools and parts organized with its integrated accessory bit storage and a double organizer bin. No more digging to the bottom of the box to find the part you need!
It’s designed with impact-resistant material to handle the toughest of situations and protects your tools from water and dust.
This rolling toolbox has a wide, steel telescoping handle and nine-inch all-terrain wheels that support a 200-pound load capacity. You’ll be able to get all the materials you’ll need in one trip to the most rugged project sites.
This toolbox has secure locking points, tie-down anchors and impact-resistant latches so your tools are safe and sound.
Best of all, it is part of the Ryobi Link Modular Storage System, so it will seamlessly connect your stationary storage.
The Ryobi Link Modular Storage System can be configured any way you need it!
About the Ryobi Link Modular Storage System
The Ryobi Link Modular Storage System allows you to easily organize, access and transport the tools you need for your job. The interlocking modular pieces allow you to customize your storage space for optimum organization.
This storage system is available for purchase in starter kits, or you can build your own at your own pace by purchasing single pieces.
The seven-piece wall storage kit provides you with the foundation to organize your life and easily expand with a full range of storage solutions.
This page contains affiliate links. If you purchase a product from these links, we will earn a small commission at no additional cost to you.
Watch the video to learn all about this Best New Product!