Stone-coated metal roofing, left, offers the look of traditional shingles with the durability of metal. A painted metal roof provides a pop of color with long-lasting protection.
Interested in replacing your roof or looking to choose a roof for a new home? Stone-coated metal roofing offers the look of shingles with the benefit of metal’s superior protection.
Or do you want to add a pop of color with a durable finish? High-performance metal roofing paint systems add character and boost any home’s curb appeal.
Read on to learn more about these two coating options and decide which is best for your home.
Painted metal roofs come in a wider variety of colors than any other type of material. (Photo by Aleksandr_Kendenkov/Getty Images)
To step up your home’s style and make a statement, high-performance metal roofing paint systems can provide a durable coating with improved gloss retention, superior weather resistance, and reduced color fading. In addition, they can substantially increase the roof’s energy efficiency and longevity.
Quality metal roofs come with a factory-applied, low-maintenance finish. Most manufacturers recommend just rinsing them with a hose and mixing gentle soap and water to clean them.
A quality, long-lasting painted finish should be applied to a metal substrate at 0.2 to 0.3 millimeters thick for the prime coat, and 0.7-1.2 millimeters thick for the topcoat. Style options also include sophisticated paint finishes that closely mimic the multi-toned appearance of natural stone, such as slate.
Whichever option you choose, a painted metal roof offers beautiful style matched with steel’s strength and lightweight benefits.
A stone-coated metal roof looks just like a shingle roof. (Photo courtesy Metal Roofing Alliance)
Stone-Coated Panels: The Traditional Look
If you love the look of a traditional shingled roof, yet want the longevity and performance benefits of metal, consider a stone-coated metal roof.
Stone-coated metal roofing can look like asphalt shingles, tiles or cedar shake and can be a great solution for homeowners who live in areas with certain design standards or face regional threats such as high winds and wildfire.
(Always check with your homeowners association before installing any roof).
These specially primed roofing panels — made of metal; often steel — are coated with an acrylic polymer adhesive before a granular stone coating is applied, bonding the two. Finally, a clear-coat sealer is applied over the top for extra protection.
This type of finish offers homeowners all the benefits of metal roofing, in addition to a unique curb appeal option.
No matter what your style preference, all quality metal roofs offer longer-lasting and increased protection and performance, especially when compared to asphalt.
Modern stone-coated metal roofing can seamlessly match an older home’s architectural style. (Photo courtesy Metal Roofing Alliance member Unified Steel™, Westlake Royal Roofing)
Retrofitting Older Homes
Metal roofing is an ideal option, regardless of a home’s age, due to its long lifespan and low maintenance.
Style and performance benefits are key reasons why more homeowners and property owners are choosing metal roofing.
For example, at theAudubon Sanctuary in Trabuco Canyon, Calif., the organization chose to re-roof using a high-quality stone-coated metal roof to replace the 90-year-old building’s asphalt roof, which had suffered decades of wear and tear. Much of the damage came from woodpeckers that stored pounds of acorns in the deteriorating roof, compromising the building’s structure and making it vulnerable to seasonal wildfires.
The new metal roof met two key priorities by offering long-lasting, low maintenance performance and strong protection against wind and fire. Protection from the elements is particularly important in Trabuco Canyon, where dry Santa Ana winds create dangerous wildfire conditions.
Unified Steel™, Westlake Royal Roofing andMcCormack Roofing installed a stone-coated metal roof that checked off all the boxes. The replacement matched the historical building’s style and offered all the long-lasting, strong performance capabilities of quality metal roofing. Its Class A, fire-resistant rating — the highest possible — was especially important.
This new roof is lightweight, strong and impervious, installed tightly with few penetrations to prevent woodpeckers from using it for storage.
Plus, the stone-coating provides a beautiful complement to the structure’s historic, rustic feel, lending a natural charm.
Quality metal roofing can last 50-plus years. (Photo courtesy Metal Roofing Alliance)
Benefits of Metal Roofing
If you’re looking to stretch your dollar and boost your home’s value, choosing a quality metal roof is a worthwhile investment as it can last 50+ years (up to three times longer than most asphalt roofs), offer strong performance and can help with energy efficiency. A properly installed quality metal roof can withstand severe weather such as wind, hail, and snow, providing you peace of mind.
Plus, having a metal roof can even lower your homeowner’s insurance premiums in some states.
(Check with your homeowners’ insurance company for specific policy information.)
To learn more about the benefits of metal roofing, visit the Metal Roofing Alliancewebsite.
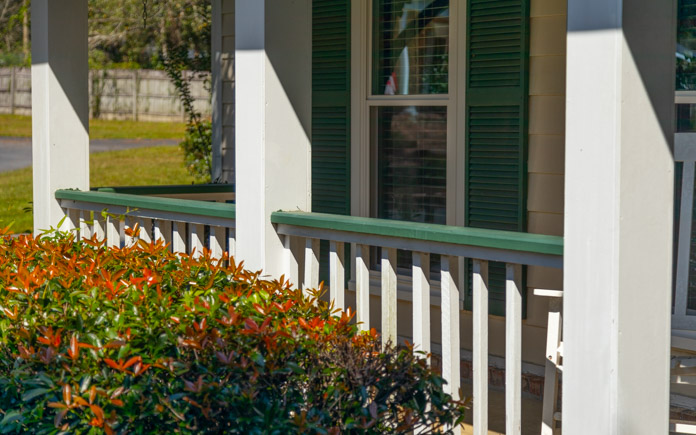
Front porch railing — some homeowners love it, some hate it, and some absolutely need it.
This railing can make your front porch feel cozy or claustrophobic. Whether or not you need it is up to you and your style.
There are four basic components of front porch railing.
What are the Parts in Front Porch Railing?
A front porch railing has four basic components: posts, a top rail, a bottom (base) rail and balusters.
The posts are the thickest vertical planks of wood that hold your horizontal top and bottom rails.
The balusters are the vertical slats of wood between the top and bottom rails.
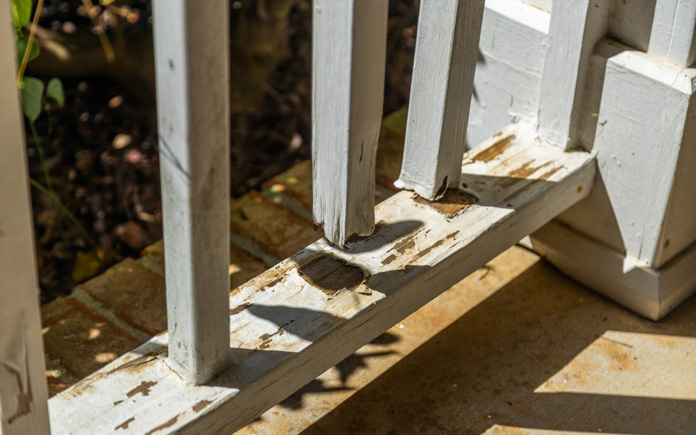
If your wood railing is rotting, you can remove it, or repair it.
Removing Railing
If your front porch railing seems more like confinement than a retreat, you can remove it to have a clear and open view of your yard.
Also, if your railing is rotting, that’s even more reason to get rid of it. The most common cause for a rail to rot is the bottom of the railing not being painted while it’s being built.
Even though the bottoms of the balusters aren’t visible, it’s still vital to paint them. The unpainted wood will soak up water like a paper towel and accelerate rot.
Also, if the railing is made with untreated wood, this could further accelerate rotting.
First, you’ll need a mallet or hammer. Knock out the balusters down one by one, and then remove the top and bottom railings.
After removing the front porch railing, apply putty and sand the columns so it’s like they were never there, to begin with.
This railing was easier to remove because the base railing was a few inches off of the ground. If you don’t have a base railing and your balusters are embedded in the concrete, you’ll need to get a utility knife to dig out the wood railing within the concrete, then patch the hole with a concrete patcher.
This method for repairing front porch railing will also strengthen the balusters.
Repair Front Porch Railing
One thing to consider if you are thinking about removing front porch railing is safety. Does the railing keep children out of harm’s way?
If safety is your concern, you need to make sure your rails are functional. The purpose of front porch railing is to be held onto, so it should be able to hold your weight.
Also, what if you need it in the future?
Now more than ever, people are desiring to age in place, so will this railing be useful later on? Or, do you have an aging relative who could be living with you sometime in the future?
Keep railing height in mind. To be compliant with the American Disabilities Act, the front porch railing must be 34-38 inches high.
If you want to keep the railing for these reasons but it’s in bad condition, you can repair it.
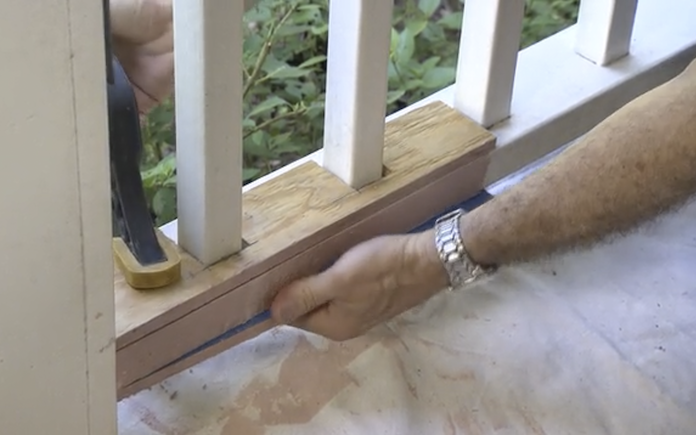
Create two plywood forms and clamp them on the top and bottom of the rail. Then, use a plastic putty knife, and apply auto body filler to the front of the rail. Paint the forms to match your railing.
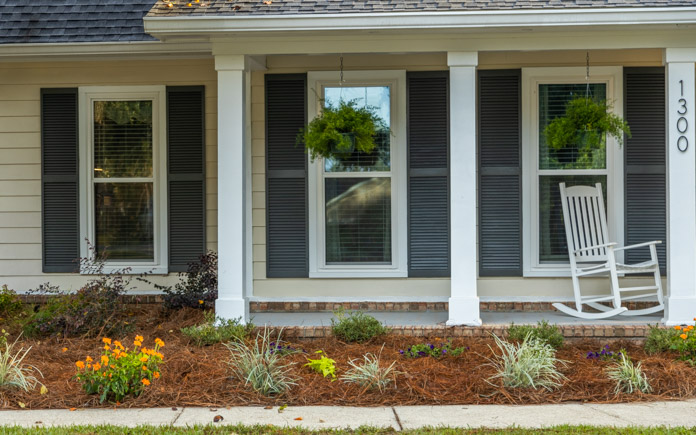
Having the right type of plants can transform the look of your front porch.
Other Ways to Add Front Porch Curb Appeal
Whether you decide to ditch the railing or keep it for safety reasons, there are more ways to add some curb appeal to your front porch.
Change up the color scheme. A new paint color can elevate your home’s exterior. Paint shutters and the front door for a punch of fresh color.
If the concrete floor of your porch is looking a little dull, add some character to it with a paint stencil. Watch ‘How to Stencil a Pattern on a Concrete Porch‘ to learn how to do it.
Finally, replace overgrown shrubs with lower plants spread out in a larger bed to cover a wider area.
Watch the video above to see what a difference these changes make!
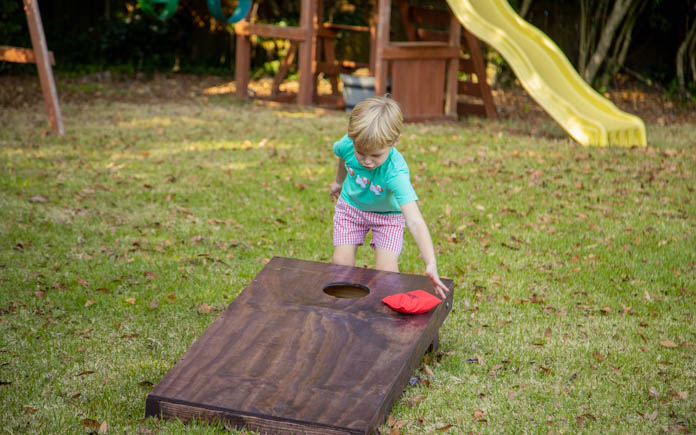
Cornhole, a game that’s been around for centuries, is a popular pastime for tailgate entertainment or backyard fun. You just need a cornhole board and some bags — and a free afternoon with family or friends!
As the story goes, Matthias Kuepermann found a group of boys throwing stones into groundhog holes for fun. Worried for their safety, he crafted the cornhole board, replacing groundhog holes with wooden boxes with round holes and stones with bags filled with dried corn.
Because of its simplicity, the game hasn’t evolved much. These days, the corn-filled bags are sometimes replaced with plastic and resin beads. But some die-hard cornhole enthusiasts insist on using real corn kernels.
Players in the United States even compete at state and national levels. And now, there are efforts to make the cornhole game an Olympic sport.
You can build a cornhole board for your backyard. The process is simple, but it might require a few specialty tools if you don’t already have them on hand!
Whether you’re passing time in the backyard or competing for bragging rights, the cornhole game is a fun activity for all ages.
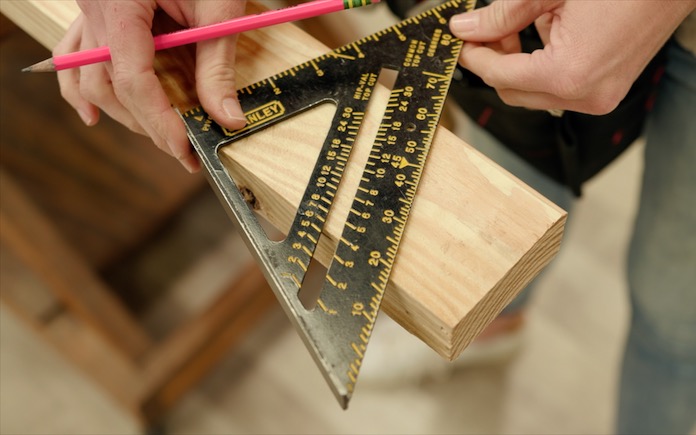
Use a carpenter square to get accurate angles for your cornhole game’s leg pieces.
Cut the Cornhole Board’s Wood Pieces
Using a carpenter or speed square, mark 25 degrees and cut along that angle. Then mark a straight line 12-and-1/4 inches from the angle’s long side. Repeat this three more times to create your boards’ legs.
For the frames, you’ll need four straight cuts at 21 inches and four straight cuts at 48 inches.
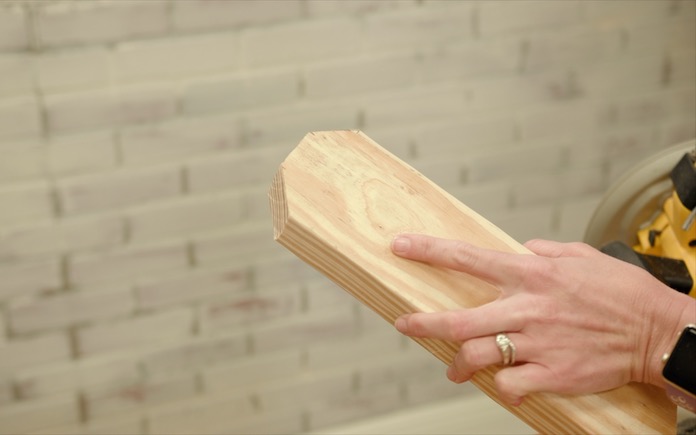
The 45-degree cuts on the leg pieces will make them easier to fold
Now back to your leg pieces. You need to cut them on the square side to make them easier to fold and unfold. Mark 1 inch in from each side and 1 inch down on each side. Connect those marks with a straight edge to draw a 45-degree angle on each corner. Cut the two triangles on each leg.
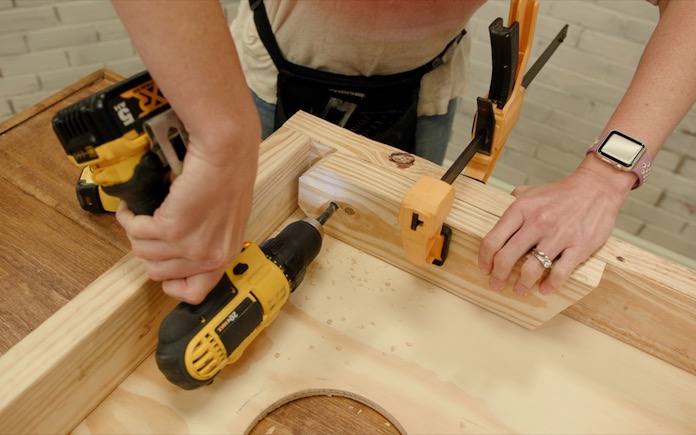
Lay your cornhole game frame on a waist-high table for easy drilling.
Assemble the Frame
To mark the hole for the legs to attach to your frame, measure 1 and 3/4 inches from one side and 1 and 3/4 inches from the short end. Drill all the way through with a 3/8-inch drill bit. Then set aside.
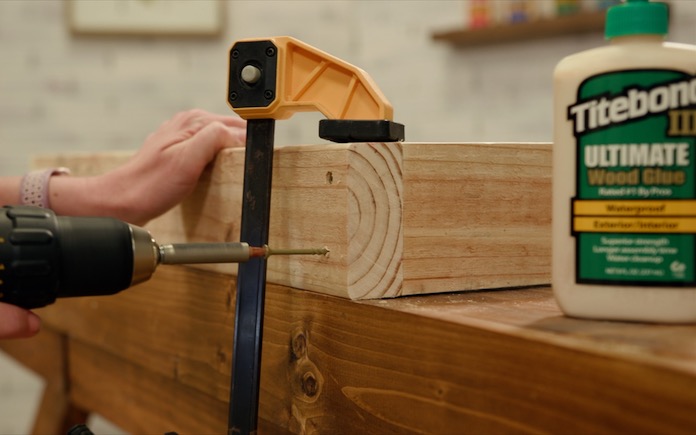
Titebond III Ultimate Wood Glue will keep your frame in place and add some waterproofing to your cornhole game.
To lay out your frames, lay two 48-inch pieces parallel to one another and set the 21-inch pieces at the ends, between them. Apply a bead of wood glue rated for exterior use, like Titebond III Ultimate Wood Glue, and attach the pieces together with 3-inch screws.
Apply more wood glue around the top of your new frame, and set the 2-by-4 sheet of plywood in place. Attach it with 1-and-1/2-inch screws through the plywood into the frame below.
To create the hole for the bean bags, mark 9 inches from one end, then measure and mark the center of the board near that 9-inch mark.
Using a 6-inch hole saw, cut a hole with your mark at the center. A hole saw this large can be a little tricky, so take your time!
Flip the board over to attach the legs.
Folding legs will save storage space.
Attach the Legs
On the end of your board with the hole, set your legs in either corner with the longer part of the angle on top. Clamp the leg half an inch from the end and use the existing hole in the leg to drill a 3/8-inch hole through the frame. Then sand the ends of the legs to round the cut angles.
Next, slide a carriage bolt through the hole from the outside, then one washer, a wood leg, another washer and finally the nut. Hand tighten.
Repeat as necessary until both of your cornhole boards are assembled!
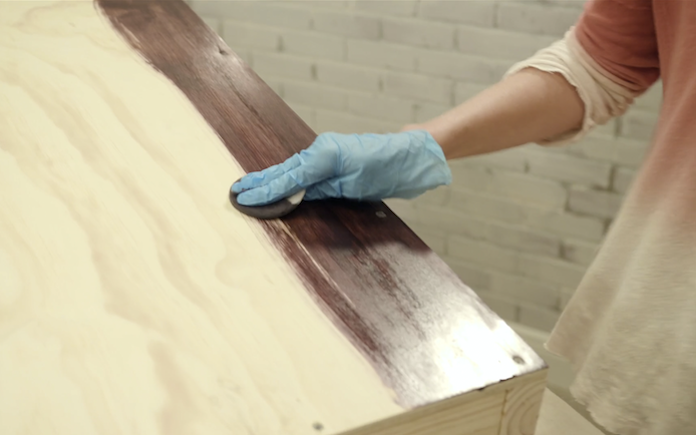
Stain your cornhole game for a finished look or customize it by painting it with your team colors.
Start with 150- or 180-grit sandpaper. Once you’ve sanded all of the surfaces, step it up to a 220- or 300-grit sandpaper to create that smooth, slick surface that’s synonymous with cornhole boards!
Staining: In long, even strokes rub your wood stain with the grain of the wood. Follow with a clean rag to wipe up the excess stain. Once it has dried for a few hours, start applying a clear topcoat, like spar varnish, that is safe for outdoor use.
Let the coat completely dry before sanding with 220-grit sandpaper, wiping clean and applying another clear coat. Repeat for a third time.
Painting: If you’re choosing to paint your boards, select an exterior semi-gloss paint and make sure your design covers all the wood on the top so the surface will be appropriately slick. Several coats might be required.
Once your topcoat or paint is dry, you’re ready to start keeping score!
To get your backyard ready for more summer fun, add some hanging string lights. Use planters or shepherd’s hooks to keep the good times going past sundown.
A Bluetooth bathroom speaker fan can completely reshape your morning routine and make it more efficient.
You already have to turn on the vent fan while showering to reduce humidity and improve indoor air quality — why not enjoy relaxing music during a scrub-down? Plan your day? Check voicemail?
This newest addition to your smart home can do that and much more.
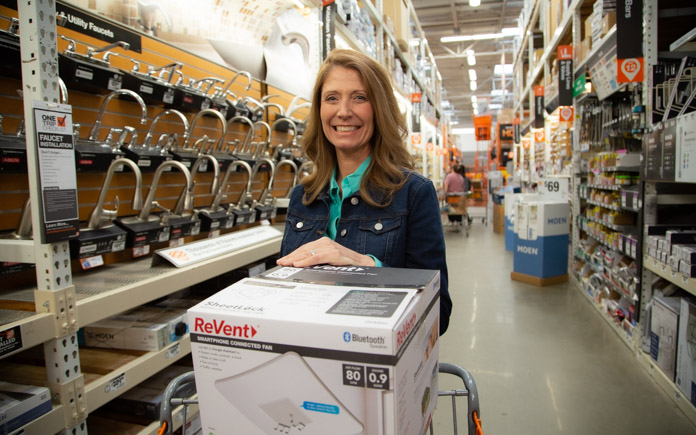
Jodi Marks, pictured with a ReVent Smartphone Connected fan, at The Home Depot.
This page contains affiliate links. If you purchase a product from these links, we will earn a small commission at no additional cost to you.
The ReVent Smartphone Connected Fan includes a music control and works with Apple and Android phones. It has dual-microphone technology and is Bluetooth-connected — so it acts as your phone away from your phone!
Here are some other features:
Use Siri or Google Assistant to stream some tunes while you get ready for the day.
If someone calls while you’re shaving, easily answer it and talk through the smart speaker fan.
Wondering if you need to bring an umbrella with you? Ask about the weather while you’re getting ready.
Not sure if you have time to make an extra cup of coffee? Ask how long the drive to work is.
In addition to its convenience, don’t forget this Bluetooth bathroom speaker fan also improves your indoor air quality.
In fact, that’s its most important feature.
Ventilation in the bathroom is a must to keep moist air outside your home so mold and mildew won’t grow. This fan vents humid air quietly at just .8 sones — about the same level of noise as a kitchen refrigerator.
The designer shield cover adds a modern look and it’s easy to clean. Plus, it’s paintable, so you can customize it to match your bathroom style.
And you don’t have to climb into the attic to install it. Handle the job from inside the bathroom using ReVent’s Sheet Locks that attach directly to the ceiling drywall.
Watch the video to learn all about this Best New Product!
In this week’s radio show, we’re sharing quick tips for building a wooden ramp; thoughts on white rings that drinks without coasters leave on furniture; and an easy way to install a backsplash.
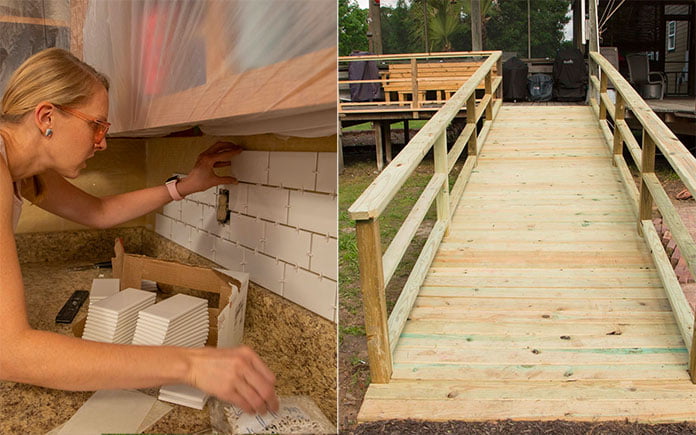
Danny and Chelsea build a wooden ramp for an episode of the Today’s Homeowner TV show.
Pro Tips for Building a Wooden Wheelchair Ramp
Shirley Dawson, of Aberdeen, Mississippi, wants to do something special for her husband, but she needs some advice.
“My husband of 52 years now has lost almost all ability to walk due to ALZ and cancer,” she says. “I need to build a wheelchair ramp for me to make it easier for me to get him in and out of the house.”
Shirley wouldn’t mind tackling the project herself, but she just needs help with the logistics.
“We have a 24-inch rise for the steps on the porch,” she says. “If I can do this, how long do I need to make it? I’m thinking a 2-by-4 frame and then deck boards for the ramp.”
Skip to [1:07:10] for the full segment on the Today’s Homeowner Radio Show.
Shed Book Giveaway
The Truth About Ring Stains on Furniture
Who doesn’t enjoy a hot, or cold, beverage outside the kitchen? But sweating cups or mugs can leave white rings on furniture — if you don’t place a coaster under your drinks.
That brings us to a question someone asked on the Today’s Homeowner Hotline: “When leaving a cup on the wooden end table, it leaves a white ring, but when I leave it on our wooden kitchen table it doesn’t. Why is that?”
Skip to [41:12] for the full segment on the Today’s Homeowner Radio Show.
The Simple Way to Install a Backsplash
Steven From Minnesota says, “I’m converting my basement into a man cave and I want to put a cool tile backsplash behind the bar. I’m already over budget and my wife is getting tense. Can you help me with the basics of tile-setting so I don’t have to get a contractor involved?”
Steven, you’re on your own as far as justifying the expense of your project with your wife. But, I can help you make the project easy enough to tackle yourself.
The most complicated skill in tile-setting is applying adhesive with a notched trowel. It’s also pretty messy.
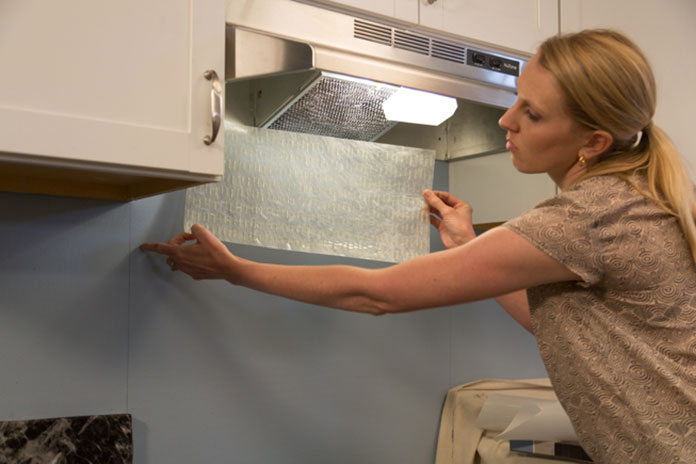
But you don’t have to do that anymore if you use SimpleMat from Custom Building Products. It’s a self-adhesive sheet that sticks to the wall. Then you peel off the protective layer and you’re ready to set the tile.
The real good news is that you can start grouting as soon as the tiles are in place because you don’t have to wait for tile adhesive to dry overnight. You could finish the whole thing on a Saturday.
The bad news is that once your wife sees that backsplash, I’m betting she’ll want one in the kitchen!
The Ryobi Link Modular Storage System revolutionizes how you store your tools and equipment, and the Ryobi Link Rolling Tool Box lets you take that storage technology on the go. Learn more>>
Other Products and Links Mentioned
This page contains affiliate links. If you purchase a product from these links, we will earn a small commission at no additional cost to you.
Further Reading
Radio Show: Send us your question!
If you have a comment, general question about home improvement, or something we’ve featured on Today’s Homeowner, please fill in this form:
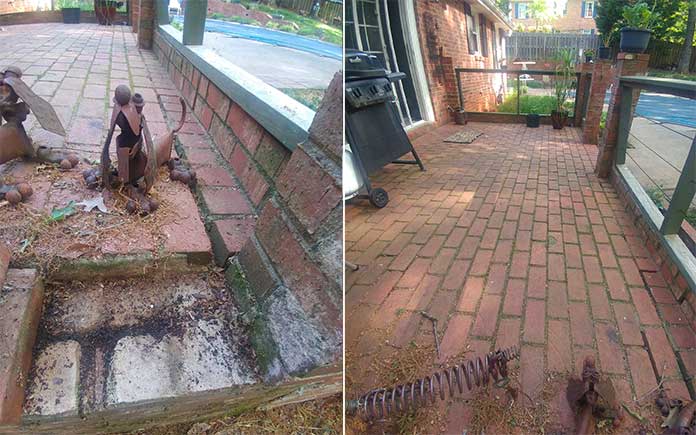
This brick paver patio can be easily repaired — or it can be the construction site of a patio upgrade.
Homeowners have plenty of options to create their own backyard paradise. A traditional concrete patio or wooden deck is simple and functional, or you can show off your style with something like a brick paver patio.
But styles and trends change as the years go by, and nothing lasts forever.
That’s the concern for Vic, who lives in a 1970s home in Hickory, North Carolina.
He says, “I have an aging brick paver patio, roughly 9 feet by 20 feet — there are some loose bricks and separating brick posts. It appears pavers are laid on a solid concrete base that is raised and brick-faced.”
Vic wants to expand the area’s footprint for decking, but he’s not keen on jackhammering all the current building materials and starting over again.
So, he wonders, “Can I, or should I, remove the pavers to the concrete base and use that to build a composite deck? The paver removal would allow for stepdown relief at the slider.”
Here’s our advice: If you like the look of the brick, and you’re just frustrated by, say, 20 percent of the bricks coming loose, clean them and stick them back into place with mortar. It’s an easy do-it-yourself project and it won’t cost more than a couple of hundred dollars.
If you want a bigger-budget remodel, we noticed that this patio is low to the ground, and we think decks look better when they’re higher off the ground.
How about this: cover the brick paver patio with an exterior floor-leveling compound. Then, extend the footprint by adding paver base out in the yard and pack it in place.
You can glue new, perhaps large (and modern-looking) 12-by-24-inch pavers on top of the leveled bricks.
That would be one stylish upgrade — perfect for large outdoor gatherings.
Skip to [8:10]for the full segment on the Today’s Homeowner Podcast.
Pro Tips on Replacing Asphalt Shingles with Metal Roofing
Best New Product
The Ryobi Link Modular Storage System revolutionizes how you store your tools and equipment, and the Ryobi Link Rolling Tool Box lets you take that storage technology on the go. Learn more>>
Simple Solutions
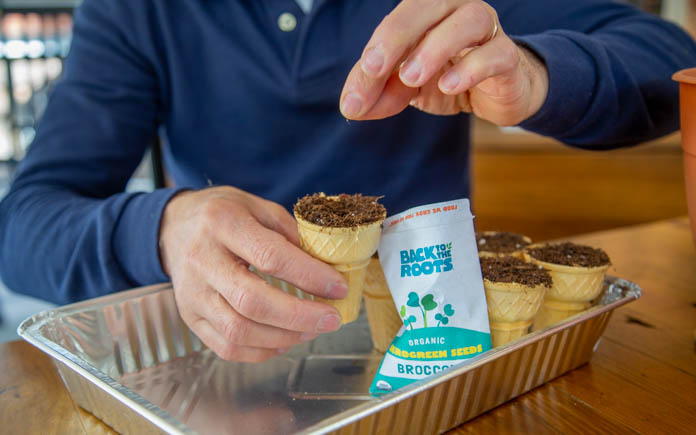
Ice-Cream Cone Seed Starters—Starting plants from seeds indoors is a great way to get a jump start on summer planting.
But, instead of using small plastic pots, try making seed starters out of flat-bottom wafer ice cream cones.
Just fill the cones with potting soil, poke a hole in the soil with a pencil and drop in the seeds. Cover the seeds with soil and place the cones in an aluminum baking pan. Mist the soil in each cone with water and place them in a sunny window.
Once the seeds have sprouted and the weather is consistently warm enough, plant the seedling—ice-cream cone and all—right into your garden. The cones are biodegradable and will decompose into the garden soil within a week or so.
Add Accent Lighting to Kitchen—Here’s how to add subtle accent lighting in your kitchen, without having to call an electrician.
For a nice, warm glow, place two strands of LED battery-powered lights on top of the kitchen cabinets, one near the wall and one closer to the front edge of the cabinets.
And if you get the lights with a built-in six-hour timer, the lights will automatically turn on each afternoon and off each evening.
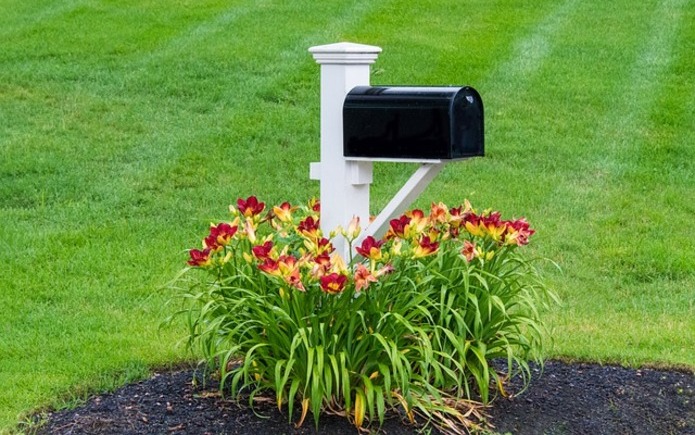
Q: I’m installing a new mailbox and want to set the post in the hole and then pour concrete around it. How deep and wide should I dig the hole?
Also, I was planning to mix the concrete with water and then pour it into the hole. However, my neighbor said that I can just dump in the dry concrete mix and then add water.
Is that right? How does the concrete harden if it’s not mixed with water?
Skip to [32:35]for the full segment on the Today’s Homeowner Podcast.
Other Products and Links Mentioned
This page contains affiliate links. If you purchase a product from these links, we will earn a small commission at no additional cost to you.
Further Reading
Ask a Question! (Podcast)
Ask a question and we could answer it on the “Today’s Homeowner Podcast!” We also may use it on our nationally syndicated radio broadcast or on todayshomeowner.com.