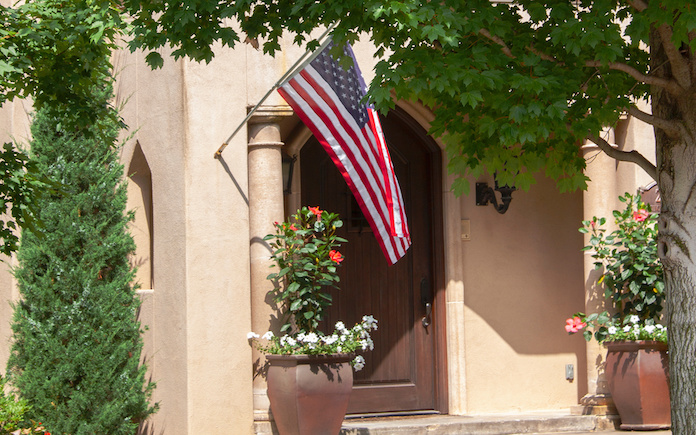
Boosting your home’s curb appeal doesn’t require a massive amount of time and effort.
Here are five modern front porch ideas — best of all, you can tackle all of these projects in just one weekend.
This front porch is low to the ground, and the homeowners don’t have special accessibility needs, so we removed the railing.
1. Remove the Porch Railing
Modern front porches have clean lines and no clutter, so here’s an idea for folks with ground-level porches: remove the railing.
Elevated front porches need railing for people’s safety. However, if the railing on your low-lying front porch is more of a barrier than a safety feature, get rid of it!
You can easily remove wood front porch railing with a sledgehammer. Just knock the balusters out one by one, then remove the top and bottom rails.
If your railing runs between columns, use wood putty to fill holes on the columns. Once it’s dry, lightly sand it and paint to match.
Tall bushes block the view from your front porch — so lose them.
2. Take Out Overgrown Shrubs
Tall, out-of-control shrubs make your front porch feel claustrophobic. Plus, they block the view.
Modern front porches are easy on the eyes, so here’s an idea: Dig up those shrubs’ roots with a garden shovel and remove them. A quality garden shovel should be sharp enough to cut through the roots so you can remove them by hand.
If you have a truck with a trailer hitch, here’s a fast way to tackle the job: First, wrap a tie-down strap around the shrub and attach the other end to the trailer hitch. Then, slowly press the gas to drag the shrub out by its roots.
But before you do this, loosen up the dirt around the shrub so you don’t take a huge chunk of soil out and are left with a deep hole to fill.
Gray — or any neutral, timeless color — will give your shutters an instant modern update.
3. Paint Shutters a Modern Color
Modern front porches feature contemporary colors, so here’s an idea: head to the home center and pick out paint that will stand the test of time. Just changing the color of your shutters can have the same impact as a whole-house paint job.
Switch out a distracting or dated shutter color with gray. This modern, neutral color will blend the look of the shutters seamlessly with the rest of your home.
Of these five modern front porch ideas, this one is probably the easiest. You don’t have to remove the shutters to paint them.
Just clean the shutters with soapy water and a rag and wipe them dry with a microfiber cloth. Then, line the edges with painter’s tape and start painting.
A stenciled pattern hides imperfections and gives your porch a new feel.
4. Paint a Fun Pattern on the Floor
Does your front porch floor look dull and plain? Make it pop with a pattern!
Painting a pattern on your concrete floor will add character and hide any imperfections. The design you pick can also make a drastic difference, so choose carefully. A zigzag pattern adds visual variety and vertical lines give the illusion of elongating your porch.
All you need is a stencil pattern, some painter’s tape, a brush and your favorite paint color.
Spread-out, low-growing plants extend the porch area to make it feel larger.
5. Replace Tall Bushes With Low Plants
Tall bushes can make your front porch feel more like confinement than a retreat. Modern front porches have a streamlined appearance. So, if you want to keep some green along your porch, here’s an idea: plant some low-growing plants.
Short perennials like geraniums and violets stay low to the ground and will add a splash of color along your front porch.
For green foliage all year long, plant hostas and monkey grass. Both plants don’t grow too tall, plus they’ll display colorful blooms during the summer.
Spread these low-growing plants out for a more open feel and extra impact. Fill in the space between each plant with some pine straw bedding.
Want to extend your modern front porch update to your backyard? Exmark Backyard Smart answers the lawn-and-garden questions homeowners are looking for. Find projects and inspiration to help you live your best backyard life.
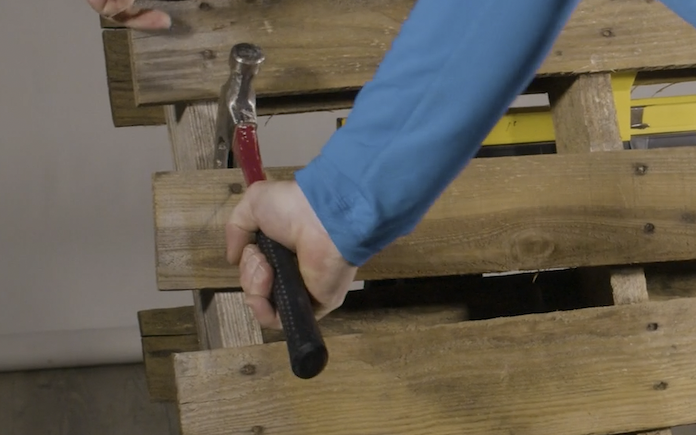
Using a crowbar and hammer, remove every other horizontal pallet board to provide access, and equal spacing, between the remaining boards.
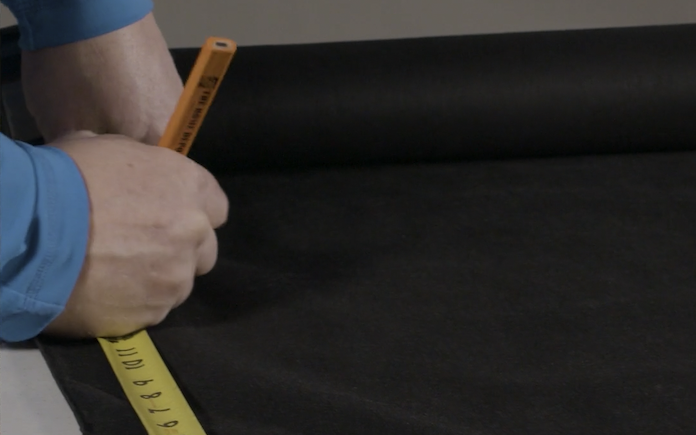
Measure spaces between the uprights for width. Then, measure the fabric height, allowing the fabric to be attached on the top of a board, down the length of that board and to the back, and back up the length of the adjacent board on the backside.
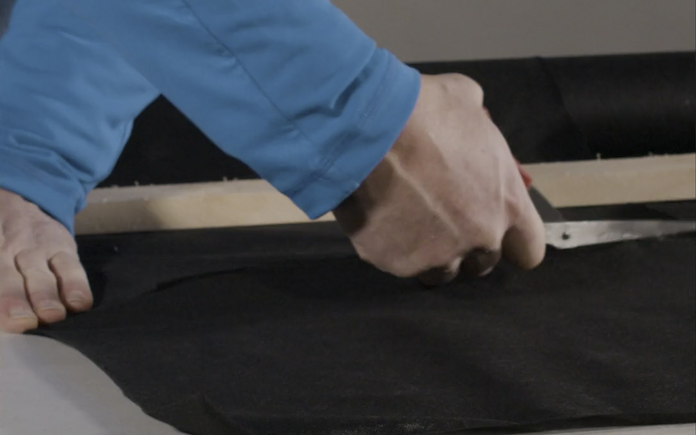
Cut the landscape fabric to the length and width of each section.
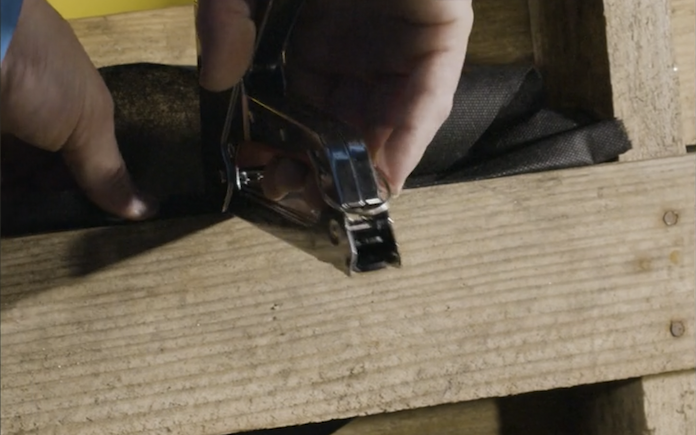
Use the staple gun to attach the fabric to the top of the frontside board —folding the fabric 1/2-inch and stapling through the fold for added strength.
Then, attach the fabric to the back of the backside board—running it along the side and over the top of the board, leaving enough fabric to create a trough between the boards.
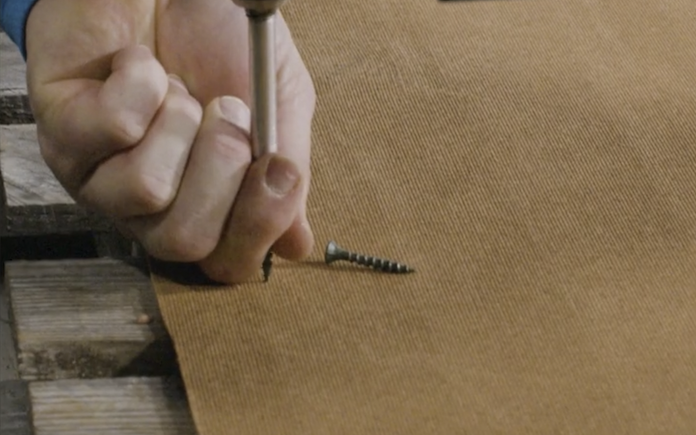
Take the backer board, line it up with the corners of the back of the pallet, then screw it into place.
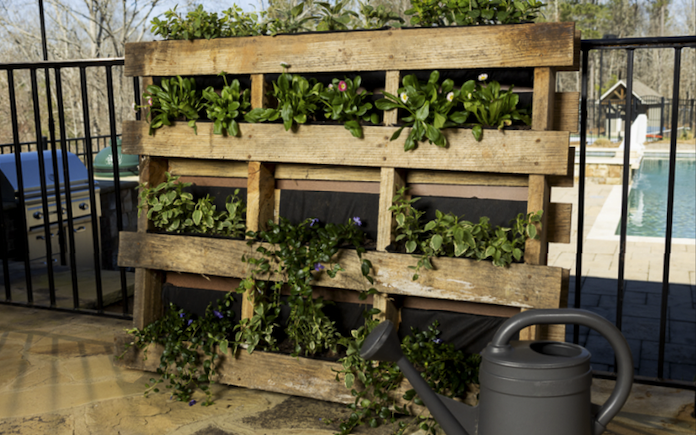
That’s all there is to it! This quick and easy build is a great way to provide some depth and breadth to your garden, as well as grow fresh herbs in unexpected spaces.
Looking to breathe new life into your outdoor spaces? Then, look no further than simple, cost-effective DIY projects. Exmark’s Done-In-A-Weekend project series will help you enjoy a better backyard life!
For this bench, I used five 80-pound bags of Quikrete Concrete Mix. Here are the dimensions:
Bench seat: 48 inches long by 16-1/2 inches wide
Legs: 16 inches tall and 15-1/2 inches wide
2. Build the Forms
Next, build forms for your concrete garden bench with pieces of melamine.
Melamine is an ideal material for concrete forms because it’s slick, releases well from concrete and leaves a smooth surface.
Cut the melamine to the dimensions you want for your concrete garden bench.
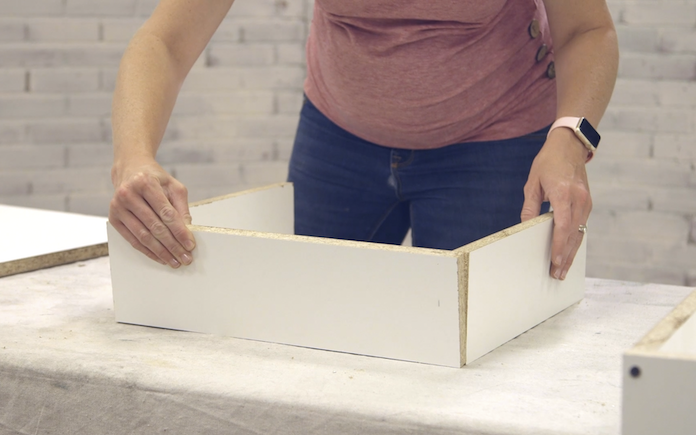
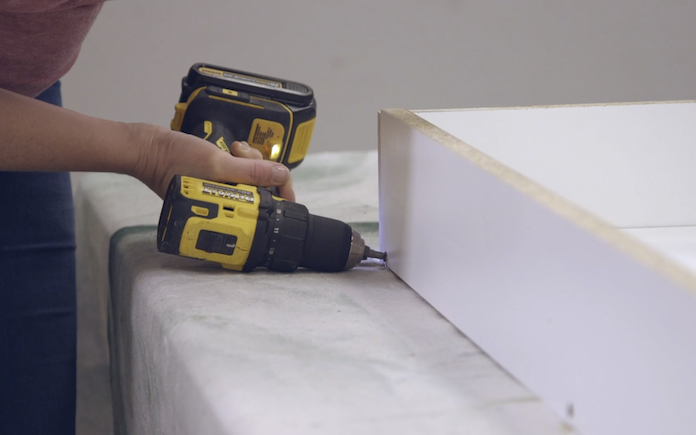
Use drywall screws to attach the sides of each form to the base. Your forms should look like an open box — the large piece will form the seat while the two smaller pieces will form the legs.
Next, seal the inside seams with caulk, cut reinforcement wire to fit into each form, and set the forms aside.
3. Mix the Concrete
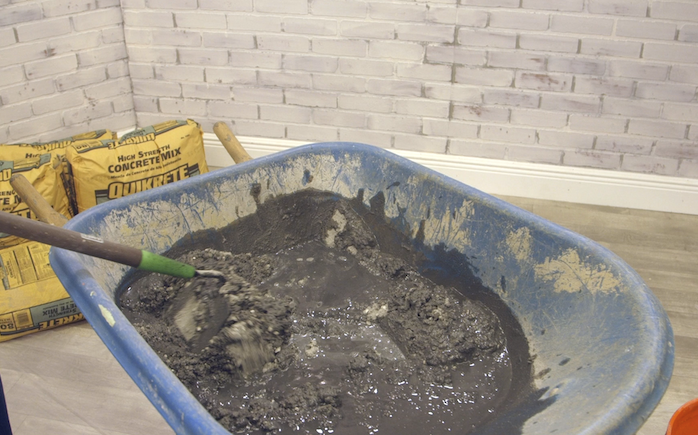
For this amount of concrete, use a wheelbarrow and a garden hoe for mixing. Mixing in a wheelbarrow also makes it easier to pour the cement into the forms.
To get a deep gray finish for the concrete garden bench, add a 10-ounce bottle of Quikrete Liquid Cement Color in Charcoal to the water before mixing.
When mixing concrete, always use impervious gloves to protect your hands.
For each 80-pound bag of Quikrete Concrete Mix, add about 6 pints of clean water. Work the mix with the garden hoe and add water until it’s a stiff, moldable consistency.
Be sure there are no dry pockets of material and don’t leave standing puddles of water.
4. Pour Concrete Mix into the Forms
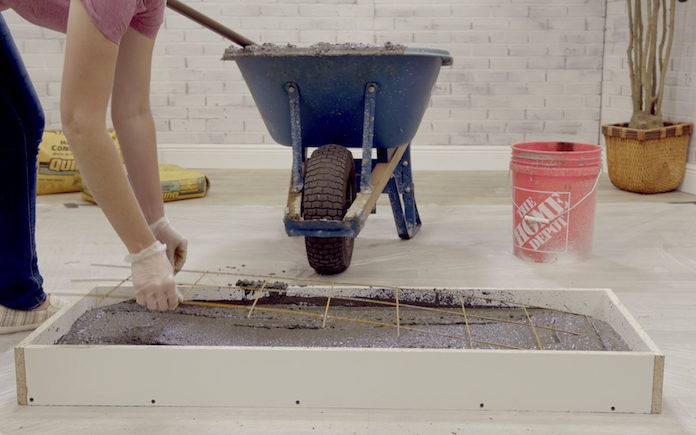
Pour the concrete mix into the melamine forms until half-full, and then add the reinforcement wire.
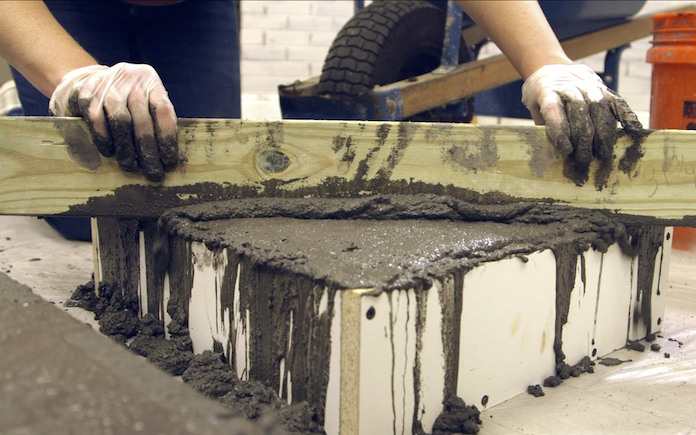
Fill the forms and screed off the excess with a 2-by-4 piece of wood.
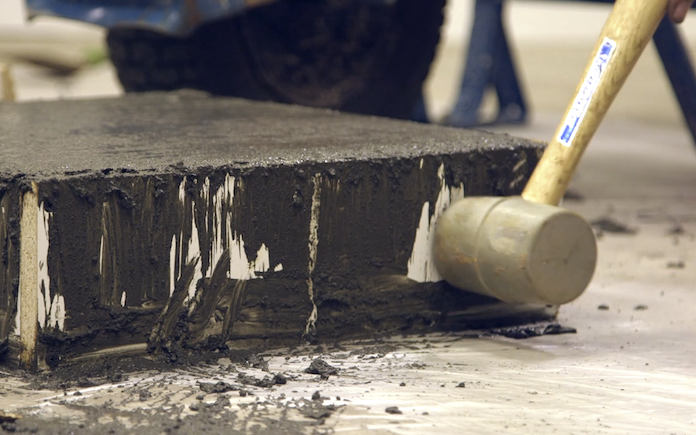
Tap the forms on all sides to release air bubbles from the mix. Air bubbles would make the surface of your concrete bench look foamy once it’s dry, and nobody wants that!
Let your concrete dry for at least five days in warm weather at 70 degrees Fahrenheit or higher or seven days in colder weather at 50-70 degrees Fahrenheit.
5. Remove the Forms and Assemble
Unscrew the drywall screws from the melamine forms to remove them once they’re dry.
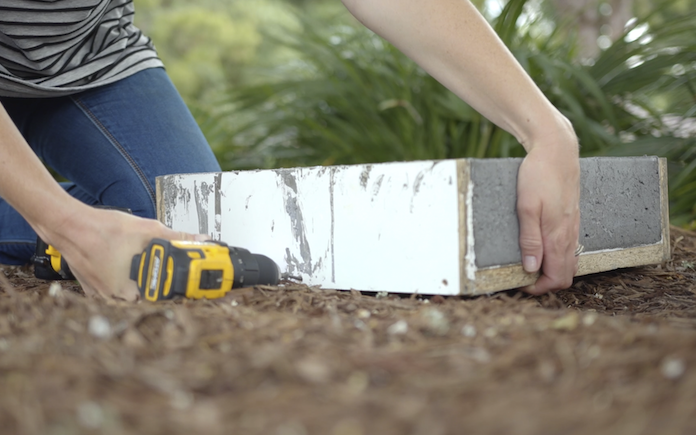
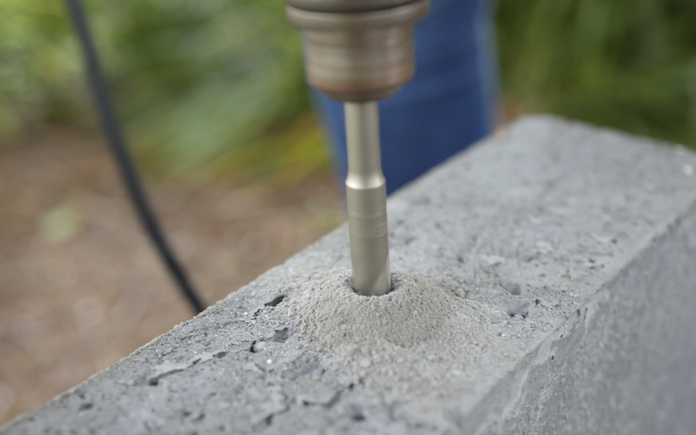
Set the legs upright and drill a hole in the top center of each leg. Then, drill two holes in the middle of the concrete seat to match the legs.
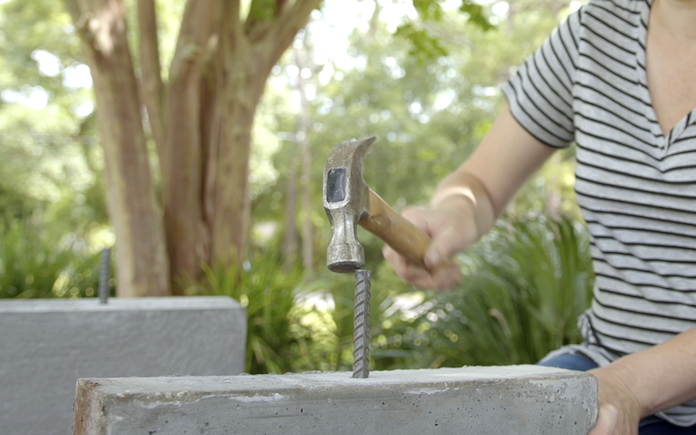
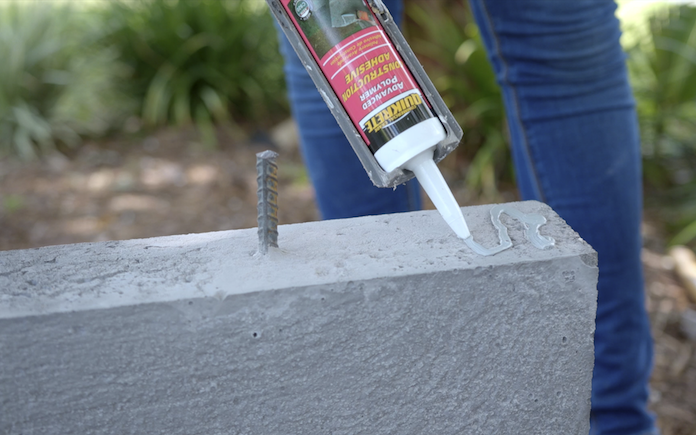
To secure the seat to the legs, hammer steel rebar pins into the leg holes and add Quikrete Advanced Polymer Construction Adhesive to the surface. This adhesive will keep the seat in place and prevent wobbling.
Now, attach the seat by lining up the pins with the holes in the seat. Use a level to make sure the bench is even.
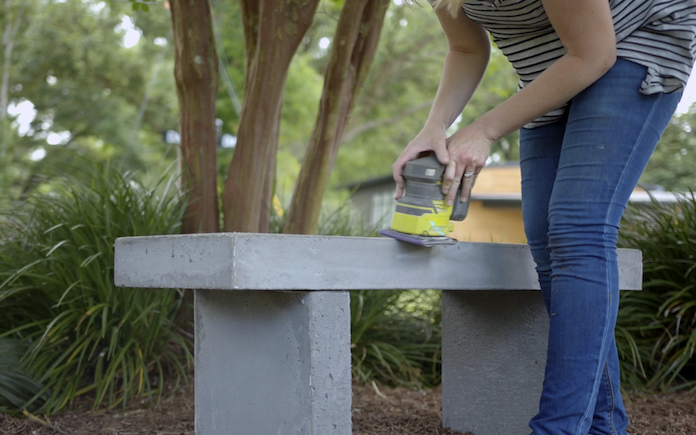
Use a sander with 120-grit sandpaper to smooth out any rough edges.
Finally (and this is my favorite part) enjoy your new concrete garden bench!
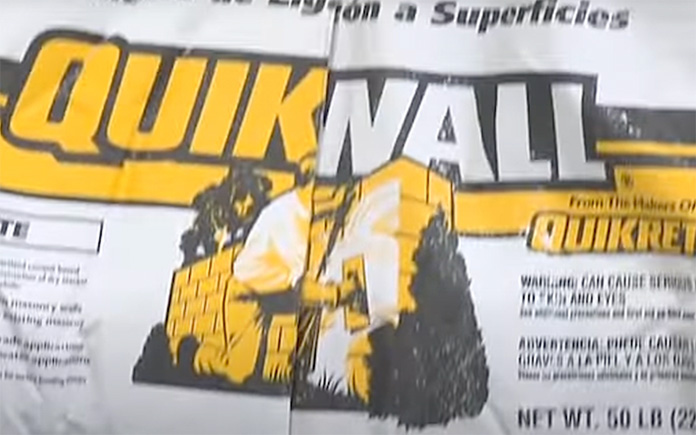
Whether it’s for a retaining wall or a patio expansion, you can build a concrete wall without using mortar. The secret ingredient is Quikrete Quikwall Surface Bonding Cement.
Concrete block walls have many uses, ranging from residential to commercial.
Want to introduce texture and unique design elements outside your home? Consider using concrete blocks for an accent or garden wall.
You also can use large concrete blocks to build retaining walls, security barriers or massive bins for products and materials.
Regardless of the project, if the thought of tackling a block-and-mortar wall project seems daunting, there’s an easier solution.
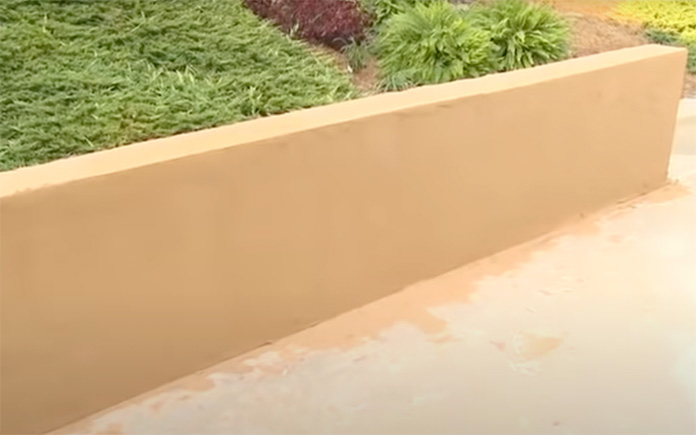
Using dry-stacked concrete blocks and surface-bonding cement, it can be easier than you may think to build a low-maintenance, affordable accent wall.
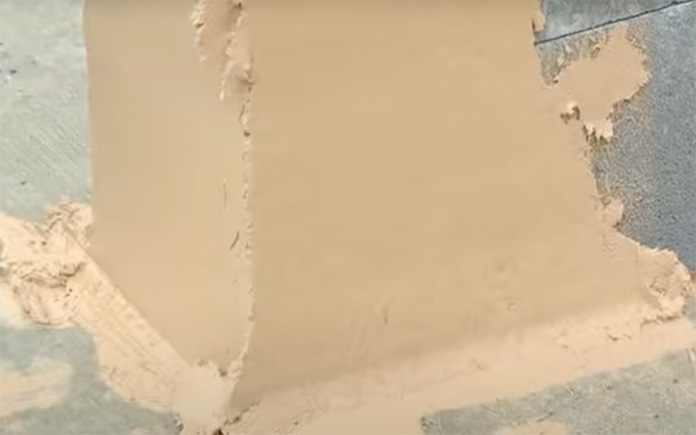
The one-coat application of Quikrete Quikwall Surface Bonding Cement provides structural strength and a textured “stucco” finish. It’s also excellent for rehabilitating and waterproofing unpainted concrete walls.
Here’s how to build a concrete wall.
Materials
How to Build a Wall with Quikrete Quikwall
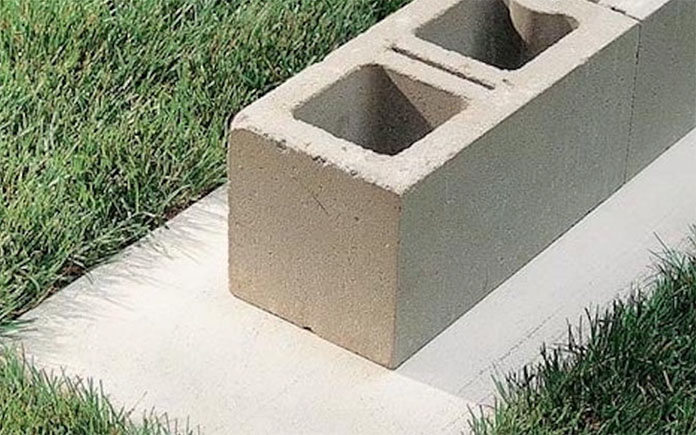
All concrete block walls — both structural and non-structural — require a solid, poured concrete footing. Use Quikrete 5000 for footing construction because of its high strength and quickly it strengthens.
Poured concrete footings should be at least twice the width of the concrete blocks you’ll use for the wall. Standard 8-by-8-by-16-inch blocks would require a 16-inch-wide footing.
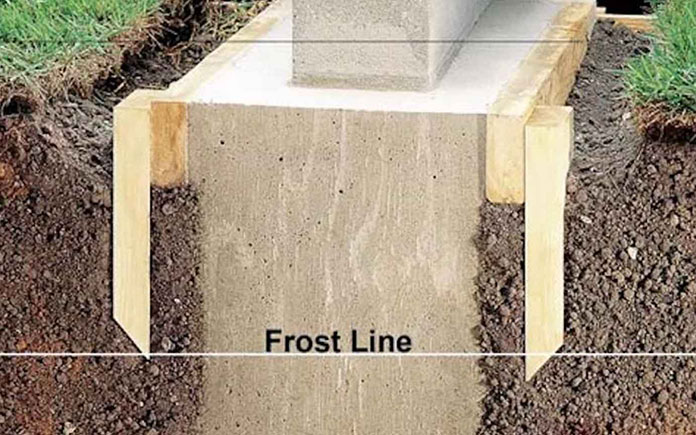
Make sure the footing depth extends below the frost line; this is the depth where groundwater in the soil is expected to freeze. If you don’t extend footings below the frost line, your concrete foundation could shift after frozen groundwater thaws.
In addition, check local building codes for construction requirements.
2. Lay the First Course of Blocks
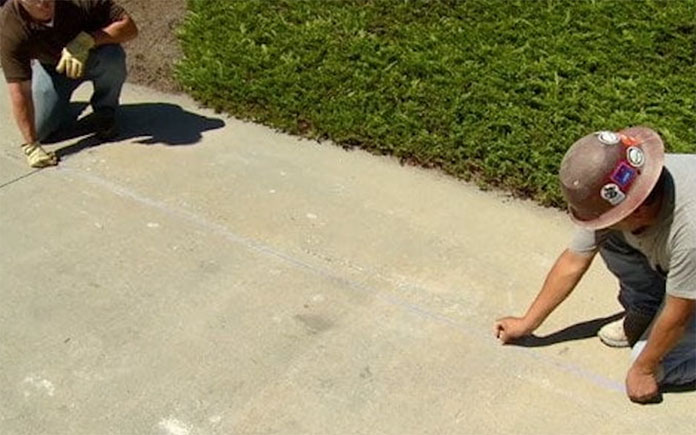
Once the footing has cured, dry-lay the first row of blocks on top of the footing and chalk-mark the block positions using a level and mason’s line for accuracy.
3. Add the Quikwall Bed
Remove the blocks and lay a ⅛-inch bed of Quikwall on the footing. The Quikwall mix should be workable but firm enough to support the weight of the first course.
You can mix it by hand or machine; the size of your project will determine which method you choose. Hand mixing can be done in a mortar tub or a wheelbarrow with a mixing hoe.
One 50-pound bag of Quickwall will cover about 50 square feet at about ⅛-inch thick. Coverage may vary based on the texture and thickness of your final application.
Each bag requires a gallon of water; you can add more water in small amounts, as needed, to get a workable mix.
Add liquid cement color if you want a decorative stucco finish. Half of a 10-ounce bottle of Quikrete liquid cement color should color one bag of 50-pound Quikwall.
To get a consistent color throughout the mix, blend the liquid cement color into the mixing water before adding it to the Quikwall mix. Using the same color-to-water ratio will maintain color uniformity from batch to batch.
4. Lay the Bottom Course
Set the bottom course of concrete blocks. Using a level, check your alignment every three to four blocks.
5. Dry-Stack the Remaining Blocks
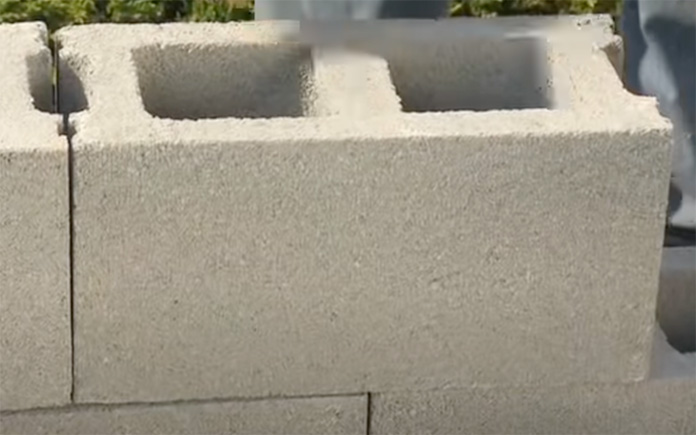
Once you’ve set the first course of blocks, dry-stack the remaining blocks in a running-bond pattern to the desired height — all corners should use an interlocking pattern.
6. Dampen the Blocks
Thoroughly dampen the block wall with water. This is important because dry blocks will draw water from the mix, making it difficult to finish. This also can cause inconsistent color and cracking, especially in hot temperatures.
7. Apply the Quikwall
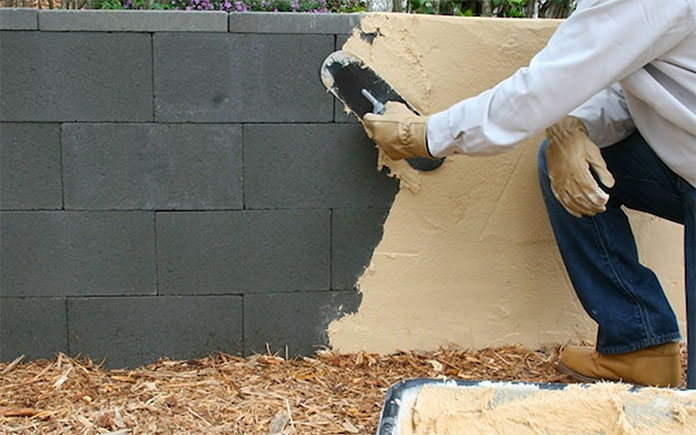
Apply a consistent ⅛- to ¼-inch coat of Quikwall to both sides of the block. Use a square finishing trowel held at a 45-degree angle and work from the bottom of the wall to the top, covering the wall’s entire surface.
To texture your concrete wall, use a bristle-brush broom. Practice on a block or sheet of cement board to perfect your technique.
8. Cure the Surface
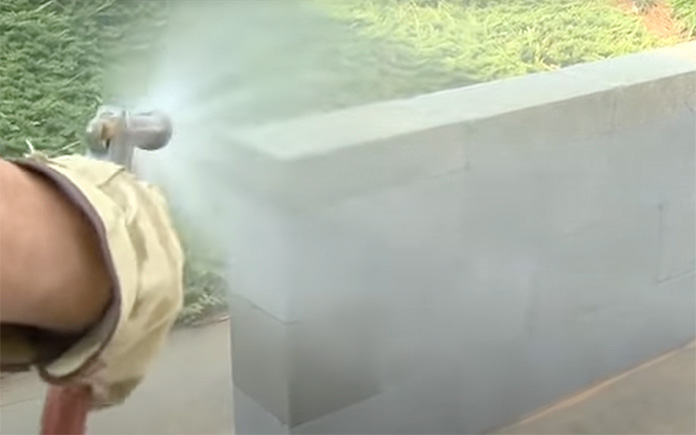
Moist-cure the wall after eight hours by dampening it with a fine spray. Repeat spraying several times daily for three days. This is crucial to achieve color consistency and prevent surface cracks.
Watch a video on how to build a dry-stack concrete block wall here.
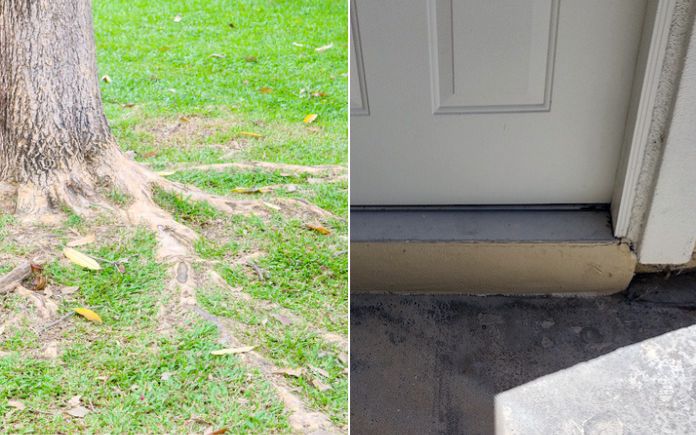
Wandering tree roots can cause problems when lawnmowing and a steep threshold like this is an accident waiting to happen. Photo credit: Siriporn Pintunun/Getty Images (left) and photo by Thomas Boyd (right)
In this week’s radio show, we’re giving advice on how to eliminate a tripping hazard, deal with mason bees and tackle tree root problems.
Removing a Tall Concrete Threshold
This tall concrete threshold, or stem wall, is a serious tripping hazard. (Photo by Thomas Boyd)
The attached garage in Thomas Boyd’s Dimond Bar, Calif., home was built with a stem wall, which makes the threshold at the door too tall. To enter, a person has to step up and over the almost six-inch threshold.
He wants to know the best way to remove this tripping hazard.
I’ve seen situations like this before made a lot better by building a ramp. Pour concrete on the outside of the stem wall for a four or five-foot ramp. But that’s not helping if the inside steps back down.
The stem wall can be cut out. I would remove the door and the frame then use a side grinder to cut on each side to extend the jamb down. Then, score the bottom of the stem wall to make it easier to hammer out.
Finally, take a sledgehammer to break off the stem wall at the slab. As long as there isn’t any rebar going through that, it should be easy to remove.
If you use the same door, there’ll be about a six-inch void on the top of the door frame. To fill that space, put decorative crown molding on top of the door, both inside and out. This will make it look intentional. Or, you could order a custom door, but that will be a pricier option.
Skip to [21:25] for the full segment on the Today’s Homeowner Radio Show.
Shed Book Giveaway
Dealing With Mason Bees
Nesting mason bees can cause homeowners problems, but they shouldn’t be eliminated altogether. (Antony Cooper/Getty Images)
A caller says mason bees are eating the brick mortar of her home and nesting inside. She wants to know how to evict them once and for all.
First of all, the mason bees aren’t actually eating the mortar. They’re nesting inside cracks and crevices that are already in the mortar.
They’re called mason bees because they’re cavity-nesting bees. They’ll make their homes in any little hole, crevice, crack, or tunnel.
For the bees to be nesting inside her brick mortar, the cracks were already there in the first place. The long-term solution will be to fill any spots in the mortar that are open.
Don’t use any pesticides to try to eliminate them. These bees are beneficial to your garden because they are pollinators.
Mason bees look like honey bees but they don’t produce honey. And unlike honey bees, they don’t live in colonies.
Having a mason bee house close by will distract them from nesting in your home. (Mason Vranish/Getty Images)
To keep the bees from nesting in your brick mortar, you can build a bamboo mason bee house. Glue pieces of bamboo together in a frame and hang them in a tree next to your home.
Skip to [44:05] for the full segment on the Today’s Homeowner Radio Show.
Tackling Tree Root Problems
Exposed tree roots can cause crooked pavers and damage a lawnmower. (Siriporn Pintunun/Getty Images)
Tree roots are interrupting a caller’s mowing routine and pushing pavers out of place. Here’s what she needs to do.
If the grade of your property allows, put a couple of inches of soil on top of the roots and plant some grass seed so you can mow over it.
If the roots are protruding too high for grass to grow over it, plant some groundcover plants or spread mulch around them. That way, you won’t need to worry about mowing that area.
For the roots near the pavers, call an arborist before you cut them. Some trees can tolerate their roots being cut, but it can kill others.
If the roots can be cut, pull up the pavers, cut the root out, then backfill it and replace the pavers.
Skip to [1:07:04]for the full segment on the Today’s Homeowner Radio Show.
Also on this episode:
Best New Product
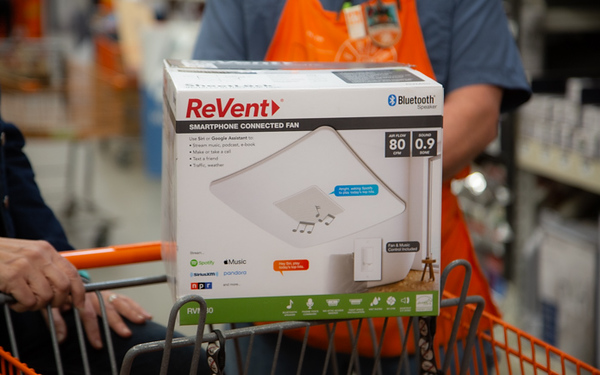
ReVent has created its first smart speaker fan — a bathroom exhaust fan with dual microphone technology and Bluetooth connection. Learn more>>
Other Products and Links Mentioned
Further Reading
Radio Show: Send us your question!
If you have a comment, general question about home improvement, or something we’ve featured on Today’s Homeowner, please fill in this form:
Epoxy keeps a flag holder installed in stucco secure. (Adobe Stock)
Want to display your patriotism, team pride, or personality? Fly a flag on the front of your home! But first, you’ll need to install a flag holder.
If you live in a house with wood siding, it’s pretty straightforward to do. But what about stucco homes?
Bob DeHuff, in Reno, Nev., wants to do just that at his stucco home. He’s wondering if he could just use adhesive, not screws, to attach it.
To install a flag holder on stucco, you’ll need to use both.
First, drill lead anchors into the stucco.
Next, put two-part epoxy on the back surface of the flag holder and in the anchors.
Then, screw the flag holder into the anchors.
Use some painter’s tape to keep the flag holder in place while the epoxy dries overnight.
Because it’s stucco, you’ll want to caulk around the flange of the holder to reduce any chance of water getting into the anchor holes.
I recommend getting a good-quality metal flag holder and not a plastic one. The plastic flag holders I’ve had in the past have gone with the wind.
With a higher quality flag holder, you’ll have more surface that attaches to the wall. So, you’ll have more space to apply epoxy.
A marine supply house should have a nice brass flag holder that will hold up to strong winds.
Skip to [6:19] for the full segment on the Today’s Homeowner Podcast.
Also on this episode:
Best New Product
ReVent has created its first smart speaker fan — a bathroom exhaust fan with dual microphone technology and Bluetooth connection. Learn more>>
Simple Solutions
Make longer cuts on a miter saw with this Simple Solution.
Framing Square Stop Block — A power miter saw is ideally suited for making accurate repetitive cuts to all the same exact length. All you need to do is position a stop block at the desired distance from the saw blade and then clamp it to the saw’s fence.
The only drawback is that miter saws have relatively short fences, so you can only make repetitive cuts that are 8 to 10 inches long.
Here’s how to use a framing square to extend the repetitive-cutting capacity of the saw.
Use two spring clamps or short bar clamps to secure the framing square to the saw’s fence.
Position the square with its narrow tongue facing down.
Extend the square out to the length of the desired cut and clamp it to the saw fence. With this technique, you can make repetitive cuts ranging from about 16 to 23 inches long.
Once the square is clamped in place, carefully slide the board up against the square’s tongue and make the cut.
Repeat to make repetitive cuts of all the same exact length.
Droughts can severely damage grass, but there are precautions you can take to salvage it. (Supersmario/Getty Images Signature)
Question of the Week
Q: Last summer, we had one of the longest droughts on record, and our lawn got burnt to a crisp. What can we do to help our lawn survive this summer?
A: The first step to protecting your lawn during a drought is to install an efficient home irrigation system.
Efficiency is key here. Many people set their sprinklers to turn on early in the morning, so they don’t see where the water is spraying. Make sure they’re spraying only your lawn, not the street and driveway.
Here’s what else you need to do during a drought:
Dethatch your lawn
Aerate
Continue to mow as necessary (Don’t bag clippings — this will give your lawn extra moisture and nutrition.)
Stay off the lawn as much as possible
Skip to [26:36] for the full segment on the Today’s Homeowner Podcast.
Other Products and Links Mentioned
This page contains affiliate links. If you purchase a product from these links, we will earn a small commission at no additional cost to you.
Further Reading
Ask a Question! (Podcast)
Ask a question and we could answer it on the “Today’s Homeowner Podcast!” We also may use it on our nationally syndicated radio broadcast or on todayshomeowner.com.