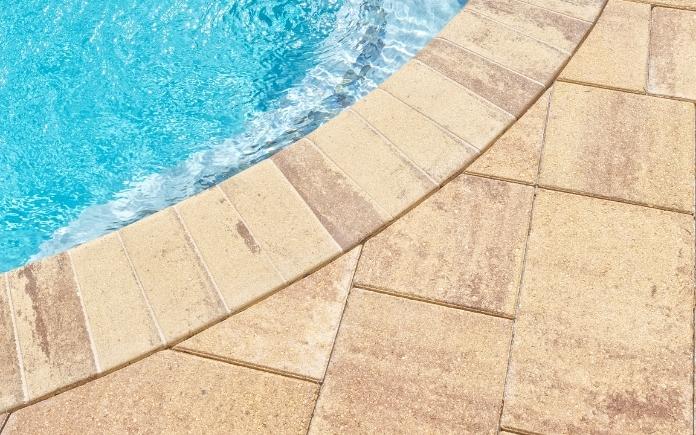
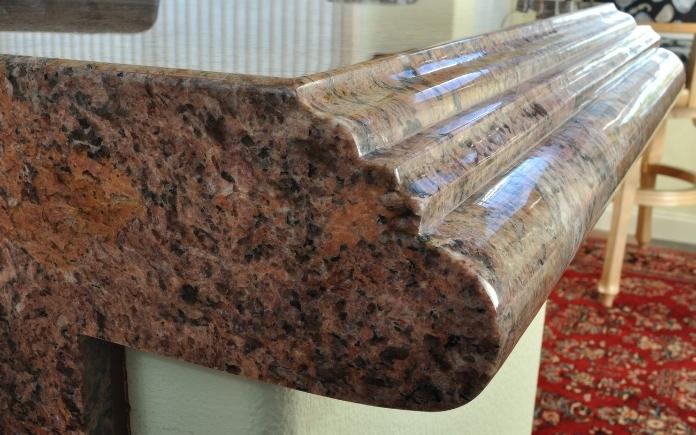
Pumice stone: To clean the buildup without using chemicals, use a pumice stone to scrub the calcium deposits away. It won’t harm pool water and its soft stone surface won’t scratch the pool coping.
Once the calcium build-up is gone, use a clear sealer to prevent it from coming back.
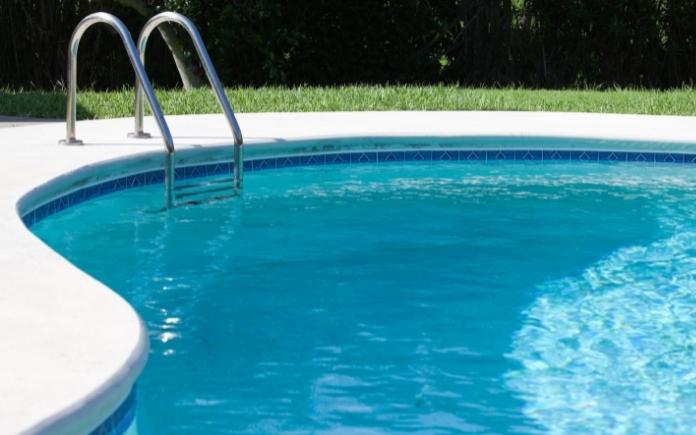
Concrete is the most cost-friendly material for pool coping. (edenexposed, Getty Images Signature)
FAQ About Pool Coping
What is the best coping to put around a pool?
Tile, brick, stone, concrete, composite, or even wood are used for pool coping. The most commonly used material is sandstone because of its non-slip properties.
Is pool coping expensive?
Pricing depends on the material used. Sandstone, the most common pool coping material, costs $40–$55 per linear foot. Conversely, cantilevered concrete coping typically costs $6–$10 per linear foot.
What goes between pool coping and concrete/pavers?
Whatever material you choose for your pool coping, the installation is basically the same. The coping is caulked or filled with elastomeric sealant onto the concrete surrounding the pool. An elastomeric sealant allows for some expansion and contraction, so the pool coping won’t crack during temperature shifts.
Skip to [25:05]for the full segment on the Today’s Homeowner Podcast.
Also on this episode:
Best New Product
Samsung’s new Smart Washer learns your laundry routine and washes clothes faster than ever! Learn more>>
Simple Solutions
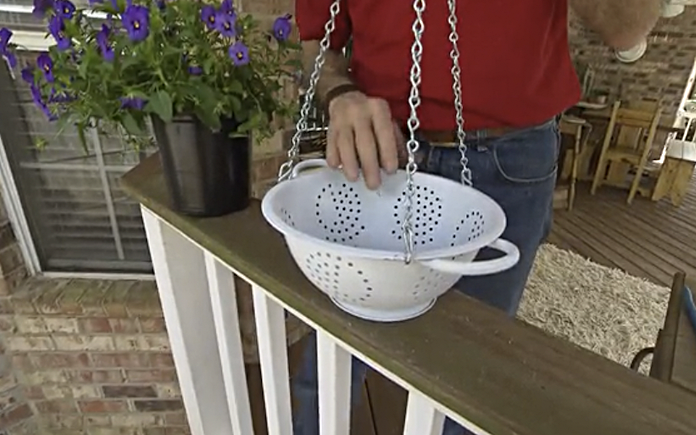
Give an old metal colander a new purpose by turning it into a hanging planter.
Hanging Colander Planter — Make a unique hanging planter out of a metal colander!
Start by drilling three holes evenly spaced around the rim of the colander.
Next, spray paint the colander to match the house trim.
Then, hang it with three 16-inch chains and S-hooks.
Line the colander with landscaping fabric or coffee filters before adding soil and plants.
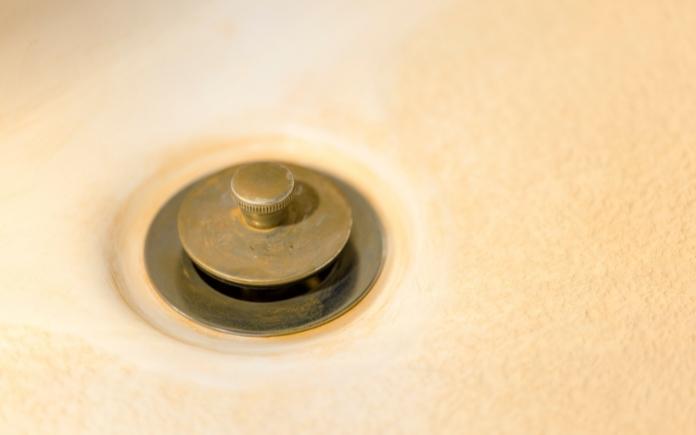
Remove hard water stains with household items you have on hand. (skhoward, Getty Images Signature)
Tub-Stain Remover — This recipe is great for removing stains from tubs, sinks and toilets.
Mix equal amounts of cream of tartar and baking soda with enough lemon juice to make a paste.
Rub the mixture into the stain with your fingers or a soft cloth.
Let sit for a half-hour, then rinse with water.
Other Products and Links Mentioned
This page contains affiliate links. If you purchase a product from these links, we will earn a small commission at no additional cost to you.
Further Reading
Ask a Question! (Podcast)
Ask a question and we could answer it on the “Today’s Homeowner Podcast!” We also may use it on our nationally syndicated radio broadcast or on todayshomeowner.com.
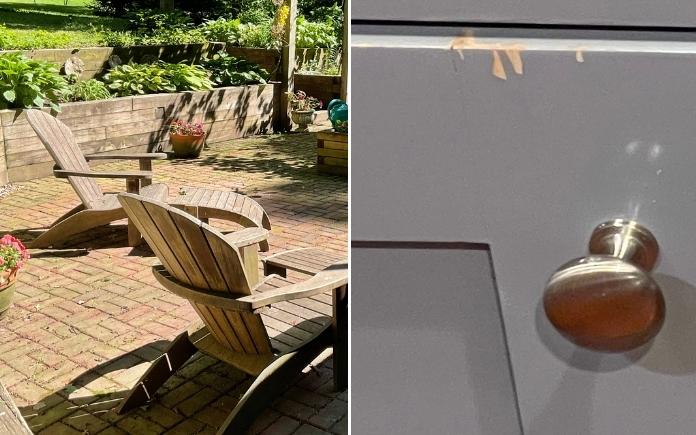
This week, we’re talking about making this old patio look new and repairing a chipped painted cabinet. (Photos by Nancy Kelly, Chris Hartsfield)
This week, we’re giving tips on how to refresh an old brick patio, repair chipped painted cabinets and remove shelf liner adhesive.
New Life for an Old Patio
Nancy Kelly is looking for advice on how to keep weeds from creeping up on her brick paver patio. (Nancy Kelly)
Nancy Kelly installed a brick paver patio outside her Pennsylvania home over 20 years ago. Nowadays, constant weeds have turned it into just a glorified walkway. How can she bring this patio back to its glory days?
First, kill the weeds in between the pavers. There are many ways to get rid of them:
Chemical weed control: Herbicides kill weeds fast, but they’re potent and can be hazardous to your health if you’re not careful. When applying herbicide, wear a long-sleeved shirt, long pants, boots, rubber gloves and protective eyewear to prevent any contact with your skin or eyes.
Boiling water:Pour boiling water directly on the weeds to kill them immediately.
Iodized salt: Spreading iodized salt on the gravel will kill weeds, but it will sterilize the ground for years to come, so use it sparingly.
Gardening vinegar: Spray weeds with gardening vinegar. Because it’s 30 percent more concentrated than regular household and cooking vinegar, it will wilt the weeds.
Once the weeds are dead, clear them out from in between the bricks and pack in some polymeric sand. Much like putting mulch in a flowerbed, the polymeric sand will block the weeds from sprouting up between the bricks.
Sweep the sand into the cracks and mist it. Once you mist it, the polymeric sand will bind together to form a weed-protective barrier.
After the polymeric sand has set, apply a sealer over the whole patio. This will bring out the color and character of the bricks. Put at least two coats on and let it dry for 24 hours.
Skip to [11:08] for the full segment on the Today’s Homeowner Radio Show.
Correcting Chipped Paint on Kitchen Cabinets
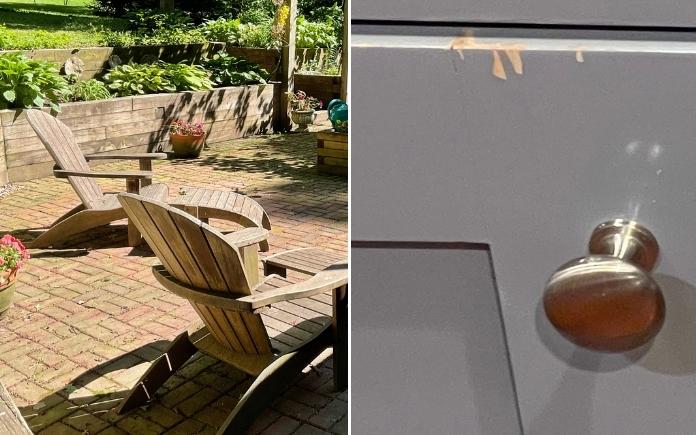
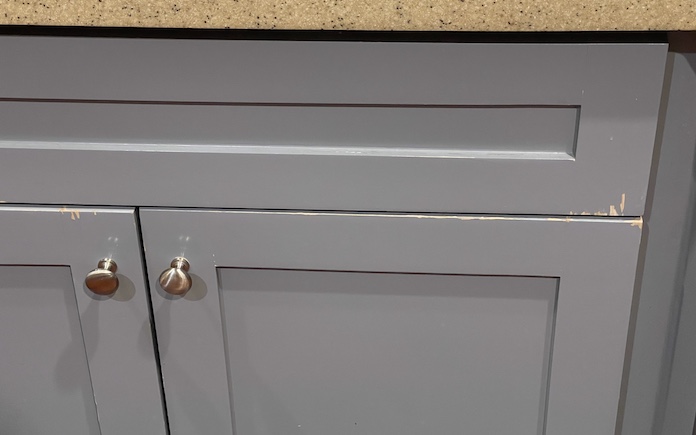
Everyday wear and tear can cause painted cabinets to chip. (Chris Hartsfield)
Chris Hartsfield in Texas refaced and spray-painted his kitchen cabinets a few years ago, but now, some of the paint has chipped off. What’s the best way to fix this?
With frequent and repetitive use, a fingernail or ring can easily chip some paint off a cabinet door.
It’s difficult to match a sprayed finish using a paintbrush. Try sanding the chipped area with a fine 220-grit sandpaper, then paint it.
The chip won’t be blended completely into the rest of the cabinet, but it won’t be as noticeable.
For a seamless repair, you’ll need to contact the professional who refaced the cabinets.
Skip to [59:15] for the full segment on the Today’s Homeowner Radio Show.
Solving a Sticky Problem
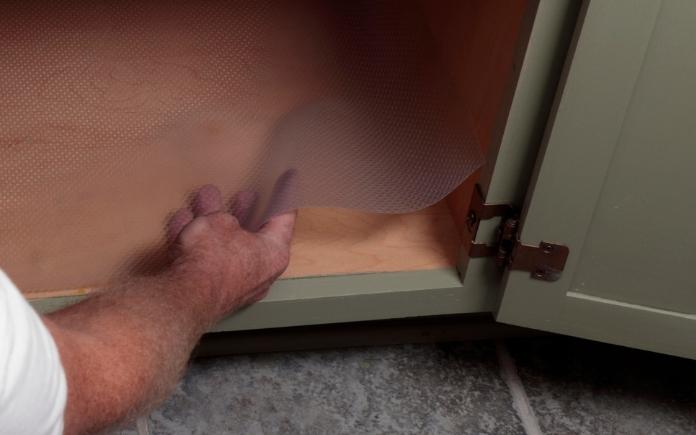
Self-adhesive shelf liner stays put when you need it but leaves behind a sticky mess. (Serenethos, Getty Images)
Heidi in Georgia moved into a house less than a year ago, and every kitchen and bathroom cabinet had white spongy shelf liners. She’s removed the old liners from the painted shelves, but the surfaces are still sticky. She’s wondering if she should just repaint the shelves.
In order to repaint the shelves, you must remove the old adhesive or the paint won’t stick.
Skip to [1:10:25] for the full segment on the Today’s Homeowner Radio Show.
In the Aisles of The Home Depot
This Father’s Day, buy dad a new toolset! (The Home Depot)
Father’s Day is just around the corner, so now’s the time to start thinking about the perfect gift. From smart home to tools to grilling, The Home Depot has a wide variety of products you need to make this Father’s Day the best one yet.
Tools: Gear up dad for his next home project by gifting him the tools he needs to get the job done. Help Dad update his power tool game or start from scratch with something simple.
Smart Home: Whether dad is dabbling in some new tech tools to upgrade his home or is a smart home pro, The Home Depot has products to meet his needs.
Grilling: Whether your dad is a grilling apprentice or an absolute pro, The Home Depot offers the latest in all-things-grilling — from the grill itself to essential accessories.
DIY Projects: For the more hands-on dad, The Home Depot has a wide variety of projects that are perfect to complete together this Father’s Day.
Skip to [1:06:51]for the full segment on the Today’s Homeowner Radio Show.
Samsung’s new smart washer has a huge drum and can clean an eight-pound load in less than half an hour. (Photo via The Home Depot)
The new Samsung Smart Washer makes your laundry routine more efficient and faster.
With an AI-Powered Smart Dial, Samsung’s simple-to-use Smart Washer learns and recommends your favorite wash cycles and lets you customize your cycle list.
With its Wi-Fi connection, receive end-of-cycle alerts and schedule cycles on your time right from your smartphone with the SmartThings App.
This page contains affiliate links. If you purchase a product from these links, we will earn a small commission at no additional cost to you.
Need clean clothes fast? No problem! With the Samsung Smart Washer, you can wash an eight-pound load of laundry at full performance in just 28-minutes!
Plus, if you need to do your laundry late at night, Innovative Vibration Reduction Technology+ reduces noise and vibration for quiet washing. So, you won’t disturb anyone!
Its large 4.5 cubic-foot capacity also means fewer loads and less time in the laundry room.
The AI-powered Smart Dial learns your most-used cycles, so your laundry routine is a breeze. (Photo via The Home Depot)
With this Samsung Smart Washer, you won’t have to wait on time-consuming pretreatment to get rid of stains. This washer uses the power of steam to gently remove stains.
The drum releases steam, saturating every item in the load and ensuring a deep clean.
And, with a new improved drum pattern, more water is extracted faster during the rinsing cycle.
This Samsung Smart Washer makes maintenance easy. You’ll no longer worry about when you need to clean your washer. The Self-Clean+ feature notifies you every 40 wash cycles when it is time for a cleaning.
You’ll also have peace of mind in between cleanings. High-touch areas and the washer drum are treated with antimicrobial technology to give long-lasting protection and keep the drum and bottom detergent drawer smelling fresh.
With an AI-Powered Smart Dial, Samsung’s simple-to-use Smart Washer learns and recommends your favorite wash cycles and lets you customize your cycle list.
With its Wi-Fi connection, you can receive end-of-cycle alerts and schedule cycles on your time right from your smartphone with the SmartThings App.
This page contains affiliate links. If you purchase a product from these links, we will earn a small commission at no additional cost to you.
Need clean clothes fast? No problem! With the Samsung Smart Washer, you can wash an 8-pound load of laundry at full performance in just 28 minutes!
Plus, if you need to do your laundry late at night, Innovative Vibration Reduction Technology+ reduces noise and vibration for quiet washing. So, you won’t disturb anyone!
Its large 4.5 cubic-foot capacity also means fewer loads and less time in the laundry room.
The AI-powered Smart Dial learns your most-used cycles, so your laundry routine is a breeze. (Photo via The Home Depot)
Samsung Smart Washer’s Easy Maintenance
With this Samsung Smart Washer, you won’t have to wait on time-consuming pretreatment to get rid of stains. This washer uses the power of steam to gently remove them.
The drum releases steam, saturating every item in the load and ensuring a deep clean.
And, with a new improved drum pattern, more water is extracted faster during the rinsing cycle.
This Samsung Smart Washer makes maintenance easy. You’ll no longer worry about when you need to clean your washer. The Self-Clean+ feature notifies you every 40 wash cycles when it is time for a cleaning.
You’ll also have peace of mind in between cleanings. High-touch areas and the washer drum are treated with antimicrobial technology to give long-lasting protection and keep the drum and bottom detergent drawer smelling fresh.
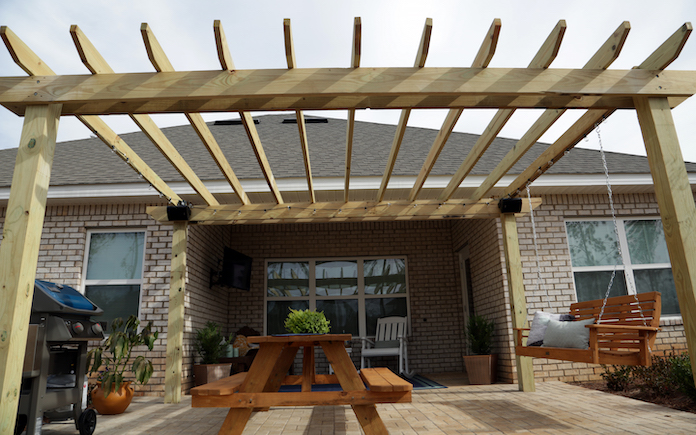
You can use your outdoor space even when it’s raining by adding a roof to a pergola.
A pergola roof protects you from pop-up storms, so you can extend your time outdoors.
Tyler Schwall in Mobile, Ala., wants to install a tin roof over his pergola. But before he does this, he wants to know the best way to put the roof so it has a pitch for rainwater.
First, buy some pressure-treated 2-by-4s to cover each slat on the pergola. Make sure these boards are the same length as the ones on the pergola.
Then, rip each 2-by-4 at a slight angle from its full width down to nothing. Ripping a board means cutting it along its length. This will create a tapered strip. Make sure the pitch of the roof is at least two inches so the rain will properly flow off of it.
Next, apply some construction adhesive on the slats and place the ripped boards on top of them. This will add some extra waterproofing protection and keep them secure when you’re installing the tin roof.
After you’ve placed the ripped boards on the pergola, secure them with wood screws. To keep the tin roof from sagging, lay some 2-by-4s perpendicular to those.
Once all the boards are secure, install the tin roof.
Now, you can sit outside under your covered pergola and enjoy the sound of the rain dancing on the tin roof.
Skip to [21:58]for the full segment on the Today’s Homeowner Podcast.
Also in this episode:
Best New Product
Whether you want to protect your lawn from pets digging or create a space for them to roam, Lifeproof Premium Pet Turf has you covered. Learn more>>
Simple Solutions
This Simple Solution levels patio furniture and helps prevent wood rot.
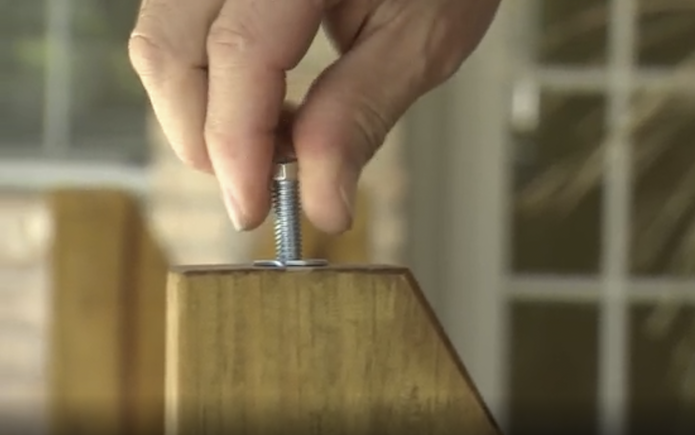
Leveling Wood Patio Furniture — Start by boring a 3/8-inch diameter hole into the bottom of each table or bench leg.
Then, use a hammer to tap a T-nut into each hole.
Thread a hex-head machine bolt into each T-nut.
The bolts lift the bench off the patio to prevent rot, and they are adjustable to ensure the bench is level.
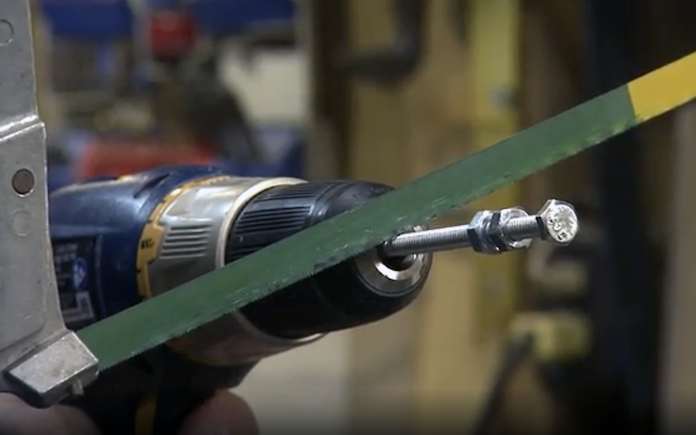
If you need to cut a bolt to size, let a cordless drill do most of the work for you.
Clean-Cut Bolts — Here’s how to shorten a machine bolt — threaded rod or carriage bolt — without messing up the threads.
First, thread two hex nuts onto the bolt, then make the cut using a hacksaw or jigsaw with a metal-cutting blade.
Then, spin off the nuts, one at a time, using a wrench if necessary.
When the nuts come off the end of the bolt, they’ll re-cut and straighten out any threads that were damaged by the saw, making it easy to thread the nut back on.
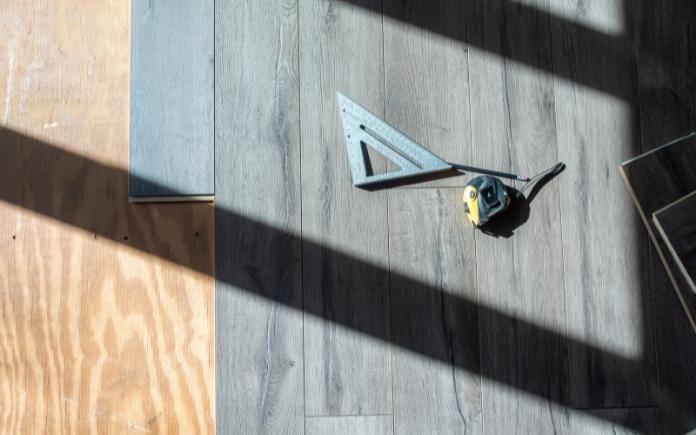
Engineered wood flooring drastically changes the look of the room, but you must have the right plank size before you begin. (digidreamgrafix, Getty Images)
Question of the Week
Q: I just bought my first house and I’m about to install some engineered wood flooring.
According to the installation instructions, the last row of flooring must not be less than half the width of the planks. (The planks are five inches wide.) But the instructions don’t tell you how to determine the width of the last row.
Can you please tell me how to figure that out?
A: When installing flooring, the initial layout is going to define the success of the project. Don’t start with a full-width plank and hope the last row is wide enough.
First, measure the width of the room and divide by five, the width of the plank. That will give you the number of full-width planks plus any fractions.
If the last row is less than 2½ inches, reduce the width of the first plank.
Skip to [36:22]for the full segment on the Today’s Homeowner Podcast.
Other Products and Links Mentioned
Further Reading
Ask a Question! (Podcast)
Ask a question and we could answer it on the “Today’s Homeowner Podcast!” We also may use it on our nationally syndicated radio broadcast or on todayshomeowner.com.
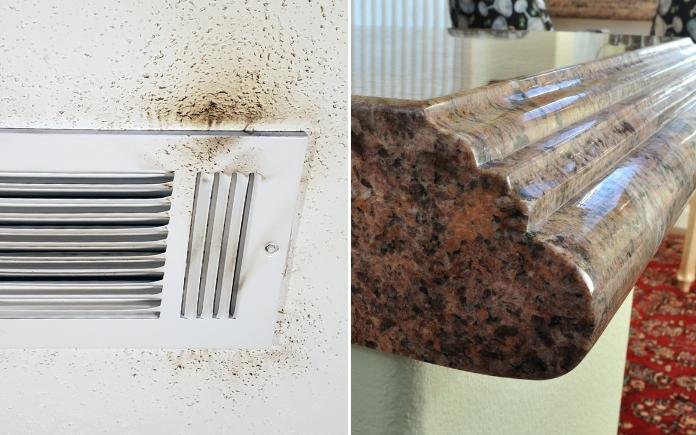
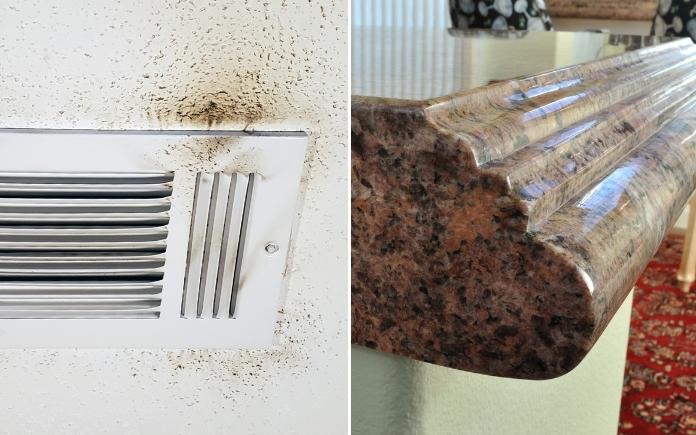
Dirty ceiling vents can cause health problems. Also: You don’t need a pro to fix a chip on a granite countertop. (Photos from Donna De Cant and MichaelRLong, Getty Images)
This week, we’re giving advice on how to repair a cracked sloped ceiling, how to clean a popcorn ceiling around a vent and how to fix a chipped granite countertop.
A Solution to a Cracking Sloped Ceiling
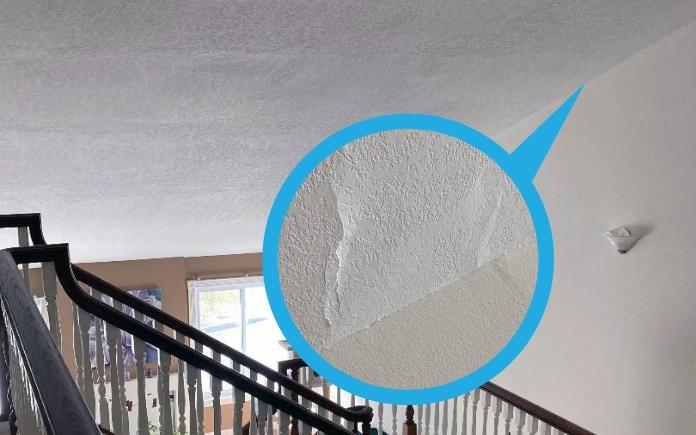
This sloped vaulted ceiling is starting to bubble and crack. (Photo illustration using images from Jim Marsh)
The sloped vaulted ceiling in Jim Marsh’s Thousand Oaks, Calif., townhome is loosening from the rafter and starting to bubble and crack.
Contractors have advised him against patching the problem areas because of how big the ceiling is (it’s 17 feet wide by 53 feet long!). He wants to know if it’s structurally sound to place drywall over existing drywall.
First off, we agree with what the contractors are telling Jim. With such a large ceiling, if you were to try to scrape the spots and blend them in with a knockdown finish, they would still stand out.
Also, more cracks could pop up.
And yes, you can put drywall over existing drywall. The process of doing that is called veneering, and quarter-inch drywall is available for this.
You’ll need to identify where each ceiling joist is and pop chalk lines on each one. Then, insist on using screws, not nails, so they’ll stay in place and won’t pop out.
Another option is to tear out the ceiling and start from scratch. The bubbling could be caused by a moisture problem, so doing this will expose if that is the case.
Skip to [10:52] for the full segment on the Today’s Homeowner Radio Show.
Cleaning a Popcorn Ceiling
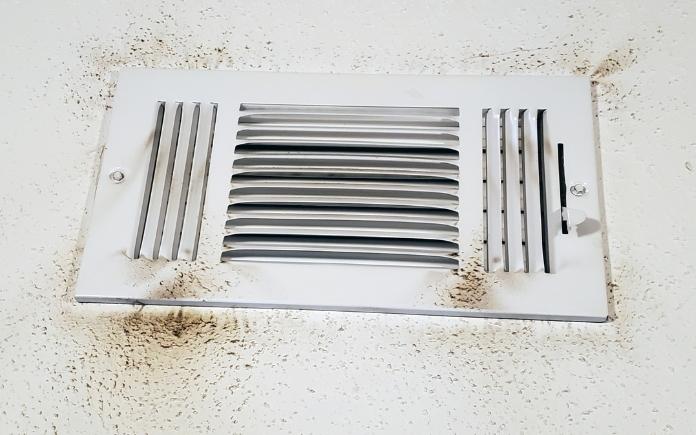
If you have a dirty A/C ceiling vent like this, you may need to replace more than just the air filter. (Photo by Donna De Cant)
Dirt is accumulating outside the ceiling vent in Donna De Cant’s home in Live Oak, Fla. She’s tried to clean the ceiling, but only the popcorn texture comes off, not the dirt.
To clean a popcorn ceiling, use the upholstery brush on your vacuum cleaner to remove the dust. Unscrew the vent from the ceiling and clean the grill with oxygen bleach or another cleaning agent. Oil up the moving parts with machine oil
If the dirt has stained it, mix some warm water and oxygen bleach in a spray container, and carefully spray the ceiling. Don’t oversaturate it or the popcorn ceiling will come loose.
Once it’s dry, go over it with a stain-blocking primer and paint it.
So what’s causing this? The vent is blowing air out, and in that air are dust particles. Anytime you’re changing your A/C filter, vacuum out the space behind the return air vent.
Also, moisture in the air can make those dust particles stain the ceiling. Moisture could come from the air or you could have leaky ductwork. Make sure the humidity in your home isn’t too high, and have an air conditioner technician check your ductwork to make sure it’s sealed properly.
Skip to [22:17] for the full segment on the Today’s Homeowner Radio Show.
Repairing Chips on a Granite Countertop
There is a quick fix for repairing chips in granite countertops. (MichaelRLong, Getty Images)
Granite is a natural material, so there are different layers of stone that can loosen up. This, in turn, can make them susceptible to chipping.
Simply dropping a can from a cabinet can cause a knick on the surface.
To repair chips in granite, you can use epoxy glue. It dries a cloudy gray color so it will blend in with darker-colored countertops.
It can be tough to blend it to match since each granite countertop has a unique color texture.
For a more precise repair that won’t stand out, buy a ProCaliber Granite Repair Kit. No color matching is necessary for this kit.
Skip to [56:24] for the full segment on the Today’s Homeowner Radio Show.
Also in this episode:
Best New Product
Whether you want to protect your lawn from pets digging or create a space for them to roam, Lifeproof Premium Pet Turf has you covered. Learn more>>
Other Products and Links Mentioned
Further Reading
Radio Show: Send us your question!
If you have a comment, general question about home improvement, or something we’ve featured on Today’s Homeowner, please fill in this form: