Touchless faucets are nothing new, but Kohler is bringing that technology to your home bathroom.
You’ve seen them in airports, arenas, restaurants and more. Touchless technology unquestionably prevents the spread of germs and limits water use.
Kohler’s touchless bathroom faucet gives you those touchless faucet benefits in the privacy of your home bathroom.
This post is sponsored by The Home Depot, and this page contains affiliate links. If you purchase a product from these links, we will earn a small commission at no additional cost to you.
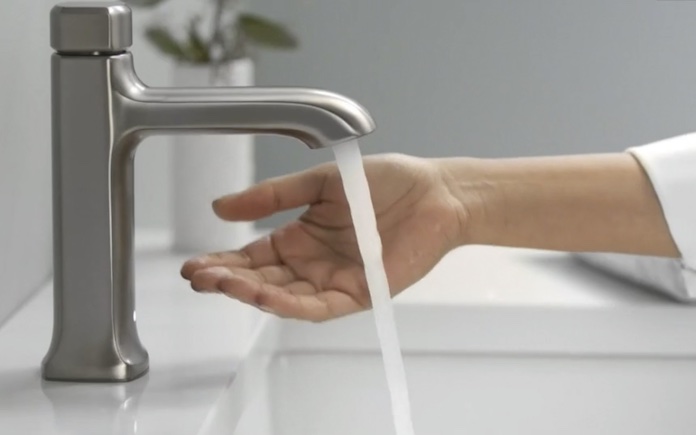
This Kohler touchless bathroom faucet doesn’t need any knobs, so it opens up valuable countertop space. (3 Echoes Content Studio)
This touchless water faucet not only helps to limit water waste, but it’ll also save on your utility bill. You’ll be doing your part to conserve this precious resource while saving yourself a few dollars.
Because it’s touchless, that means fewer fingerprints. Plus, this Kohler touchless bathroom faucet has Spot Repel finish, so it resists fingerprints, smudges and water spots.
Kohler’s response technology uses a state-of-the-art motion sensor for reliable touchless activation. Just wave your hand to turn the water on and off.
The only time you need to touch the faucet is to adjust the temperature. Twist the temperature regulator at the top to customize how hot or cold you want your water.
You don’t need to buy any special batteries for this faucet — it’s powered by AA batteries. (3 Echoes Content Studio)
Installing this touchless water faucet is quick and easy. The kit comes with supply lines, a plate, and a drain. The motion sensor is powered by six AA batteries, which are also included in the kit.
Watch the video to learn all about this Best New Product!
In this week’s show, learn how to attach wood railing to brick and remove wax from laminate flooring. (split photos: 3 Echoes Content Studio/Anatoliy Sadovskiy)
Hour 1
In Hour 1 of the Today’s Homeowner Radio Podcast, Today’s Homeowner TV heads to L.A.! Plus, an exciting announcement about our new podcast. Also, drainage options for container pots and how to attach wood railing to brick.
Listen to Hour 2 to learn how to paint dark wood paneling, remove wax from laminate flooring and more.
Danny Lipford and Chelsea Lipford Wolf walk the red carpet at the 49th Annual Daytime Emmy Awards’ Creative Arts and Lifestyle Emmy ceremony. (3 Echoes Content Studio)
Today’s Homeowner Heads to LA
Two weeks ago, I traveled to Pasadena, Calif., to attend the 49th Annual Daytime Emmy Awards’ Creative Arts and Lifestyle Emmy ceremony.
Today’s Homeowner was nominated in the Outstanding Multiple Camera Editing Category. While we didn’t win the Emmy, I had a great time with Chelsea and my longtime friends and employees Brad Rodgers and Scott Gardner.
Our friends at “This Old House” were honored with a Lifetime Achievement Award, and I ran into Richard Trethewey and Tom Silva on the red carpet.
Even though we came home empty-handed, we did make some fantastic memories.
New Podcast!
We just launched a new podcast called “Ask Danny.”
Each week, I invite an expert guest to answer frequently asked questions in their niche, give suggestions, and swap humorous, scary or unusual stories that will help you tackle your next project.
Think of it as me sitting on the tailgate on a job site talking to another home improvement expert.
Listen to the first episode now and follow for upcoming episodes.
Not only does gravel leave less room for soil, it also makes your container pots heavier, thus hard to move.(DepositPhotos)
Drainage Options for Container Pots
I just read your article about putting gravel in planting pots. What do you put in the bottom of a pot that has drainage holes to keep the potting soil from sifting out?
Line the bottom of the pot with a small piece of landscape fabric. Use some glue to keep the fabric in place. This will allow water to drain through and still keep the soil in place. You can also use coffee filters, a piece of screen, or a shard of pottery over the holes before adding dirt.
Frances in Georgia wants to know, “In the Today’s Homeowner TV episode “Insuring an Easy Future,” how was the new railing attached to the brick?”
The key to attaching this wood railing to brick is Tapcon screws. Here’s how we did it:
First, we measured the height and lineup of the 2×2 spindles.
Then, drilled a countersink hole into the brick with a pilot drill bit.
Before we attached the spindles to the brick, we applied construction adhesive to them for extra support and waterproofing.
Next, we drilled the Tapcon screws through the 2×2 spindles, deep into the brick and about a quarter-inch into the spindle.
After drilling the spindles into the brick, we patched over the screws with wood putty and painted the railing.
Hour 2
In Hour 2 of the Today’s Homeowner Radio Podcast, learn how to paint dark wood paneling, remove wax from laminate flooring and more.
Dated dark wood paneling can be updated with a coat of paint. (KSKImaging, Getty Images)
Painting Dark Wood Paneling
Betty Leach in Bettendorf, Iowa, wants to know: “Is it possible to paint dark wood paneling?”
The answer is yes! It’s a five-step process:
Clean: Clean the paneling to remove any dirt or grease.
Patch: Putty any nail holes and caulk any cracks, then allow to dry.
Sand: Lightly sand the surface of the paneling with 100 grit sandpaper to allow the primer to adhere.
Prime: Paint the paneling using a stain-blocking 100-percent latex primer tinted to match the wall color. Oil-based primer can also be used if desired.
Paint: Finally, roll the walls with two topcoats of latex wall paint.
A vinegar solution will remove waxy film from laminate flooring. (Anatoliy Sadovskiy)
How to Remove Wax from Laminate Flooring
Michelle Brown in Cleveland Heights, Ohio, has a plastic laminate kitchen floor. Recently, her husband waxed the floor, but now she learned that laminate floors shouldn’t be waxed.
What’s the best way to remove the wax?
Laminate floors have a factory finish that does not absorb wax. If you wax this kind of floor, it will give it a cloudy appearance.
To remove the wax without damaging the laminate flooring, mix a 50-50 solution of water and vinegar. Use cooking vinegar, because garden vinegar is too acidic and could damage the finish.
Start on a small spot in an inconspicuous area to see how it reacts. If it doesn’t do much, increase the vinegar by 25 percent.
Best New Products
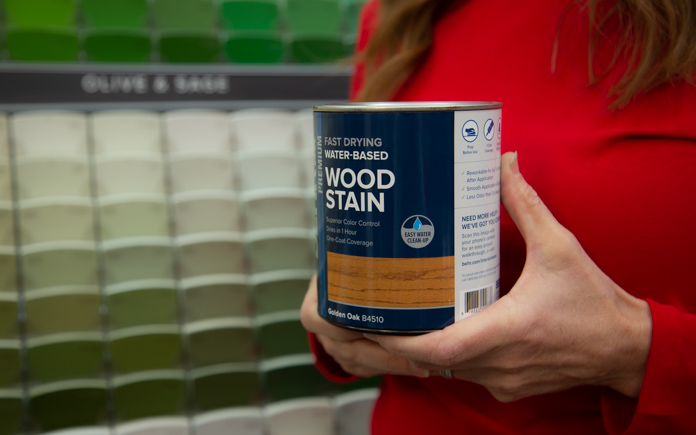
Staining wood? Behr Premium Fast Drying Water-Based Wood Stain provides rich color and dries in an hour. Learn more >>
Simple Solutions
Have a wind-damaged shingle? Repair it, don’t replace it. (Vitaliy Halenov, Getty Images)
Roof Shingle Repair — When you have an asphalt roof shingle that’s been punctured or ripped by the wind, you don’t need to replace it.
More often than not you can repair it in just a couple of minutes.
First, cut a piece of galvanized metal flashing a half-inch narrower and four inches longer than the damaged shingle tab.
Then, use a flat bar to pry up the entire damaged shingle and pry up about three inches of the shingles on either side.
Next, apply a thick bead of roofing cement along the top edge of the flashing, and a narrower one along the bottom edge.
Slip the flashing under the damaged shingle — with the roofing cement beads facing down.
Position it all the way up beyond the course above and on either side, covering the entire tab.
Press down, then lift up the damaged shingle and apply two more beads of roof cement to the top surface of the flashing.
Making Large Holes in Tile — There are many situations when it’s necessary to drill a large diameter hole into an existing ceramic wall, such as to accommodate a protruding water-supply line, drainpipe, or shower valve.
You can buy a carbide-tipped hole saw, but they’re really expensive, so try this Simple Solution instead:
Start by marking the outline of the hole on the tile, and then use a nail set to punch a series of pivots along the outline.
Next, take a quarter-inch-diameter masonry drill bit and drill a hole through the tile at each divot created by the nail set.
Now use a hammer and cold chisel to chip out the glazing between each hole.
Then use your hammer to tap around the hole’s perimeter and knock out the plug of tile.
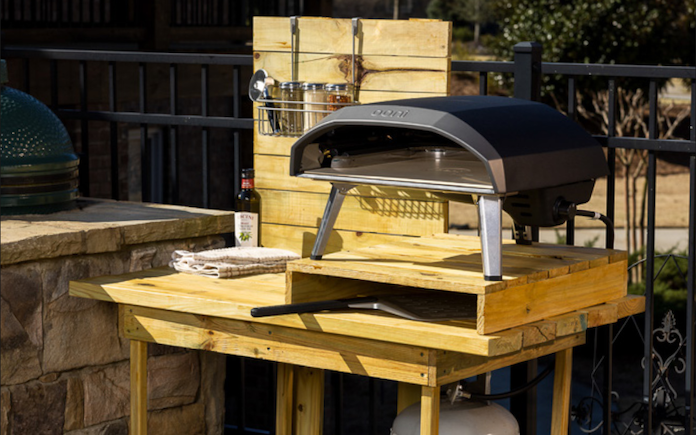
Enjoy a perfect slice of backyard life by making a DIY pizza oven stand.
No day full of family, friends, and fun is complete without a great dinner to close out the night — and pizza makes for the perfect topping to any backyard party.
Follow along with Doug Scott, landscape designer and host of Exmark’s Done-In-A-Weekend project series, to learn how to build a DIY pizza oven station.
This DIY outdoor pizza oven stand will complement any grilling area. (Exmark)
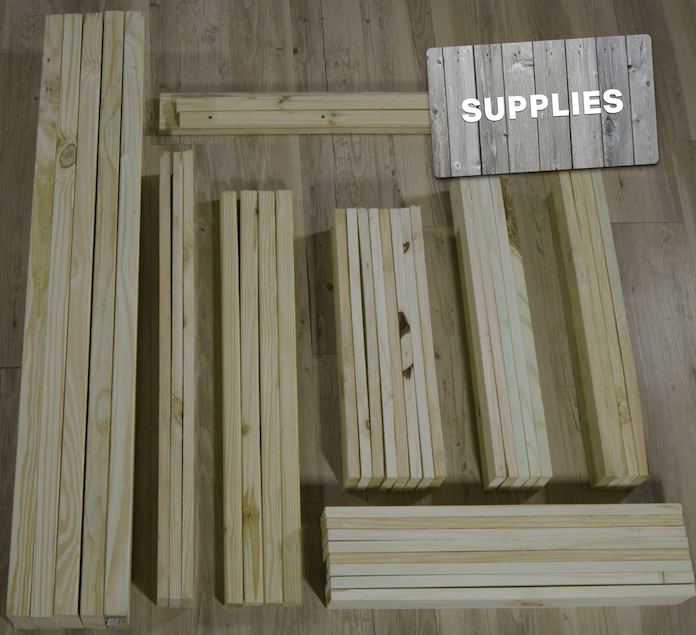
Pressure-treated boards will stand up to the outdoor elements. (Exmark)
Materials
Legs
(4) 2 inch x 2 inch x 32 inch pressure-treated boards
Frames
(4) 1-inch x 4-inch x 26 1/4 in. pressure-treated boards
(4) 1 in. x 4 in. x 34 1/2 in. pressure-treated boards
(1) 1 in. x 4 in. x 24 1/2 in. pressure-treated board
Cleats
(2) 1 in. x 2 in. x 31 1/2 in. pressure-treated boards
(2) 2 in. x 2 in. x 21 3/4 in. pressure-treated boards
Top
(5) 2 in. x 6 in. x 48 in. pressure-treated boards
Shelf
(10) 1 in. x 4 in. x 24 1/2 in. pressure-treated boards
Riser
(7) 1 in. x 4 in. x 21 in. pressure-treated boards
(2) 1 in. x 4 in. x 24 1/2 in. pressure-treated boards
Backboard
(9) 1 in. x 4 in. x 24 in. pressure-treated boards
(2) 1 in. x 4 in. x 53 1/2 in. pressure-treated boards
How to Build a Pizza Oven Station
The two 1-inch x 4-inch boards give the legs extra support. (Exmark)
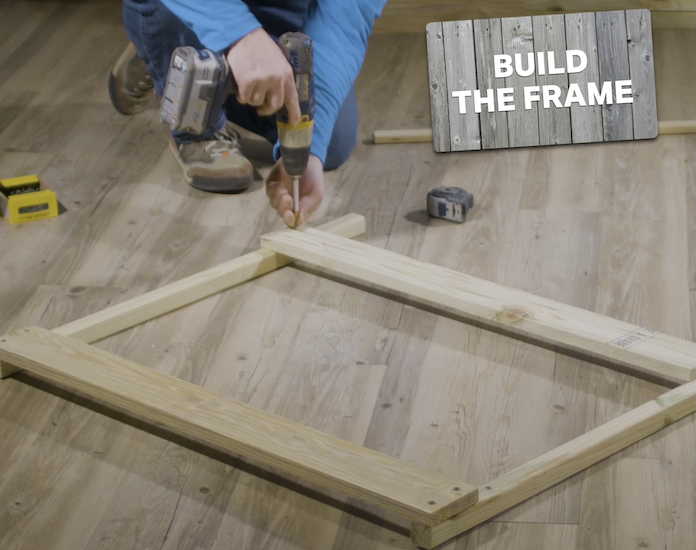
1. Take two of the 2-inch x 2-inch leg boards and one of the 1-inch x 4-inch x 34 1/2-inch frame boards. Place the 2-inch x 2-inch boards on both ends of the 1-inch x 4-inch board, making sure to align the edges and corners.
Then, take the other 1-inch x 4-inch board and repeat the step above for the other end of the 2-inch x 2-inch leg boards, but instead align it about five inches from the end of the leg board.
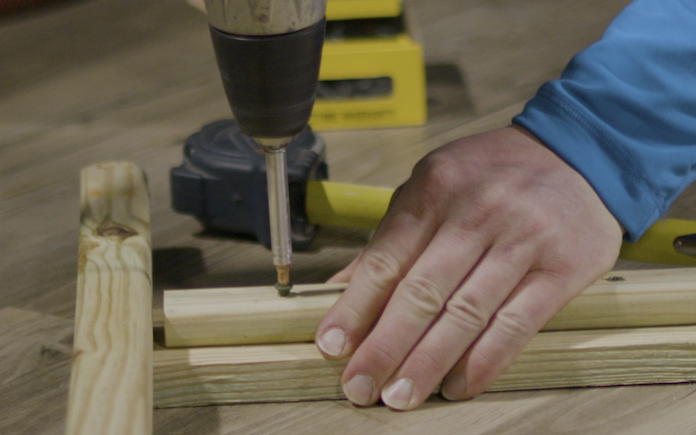
This 1-inch x 2-inch cleat will hold up the bottom shelf boards. (Exmark)
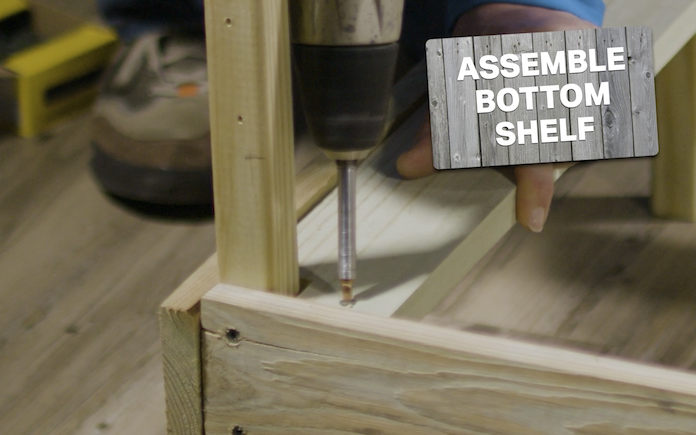
2. Screw a 1-inch x 2-inch cleat horizontally along this second 1-inch x 4-inch board, making sure it’s aligned between the 2-inch x 2-inch leg boards.
3. Repeat steps 1 and 2 for the second pair of legs.
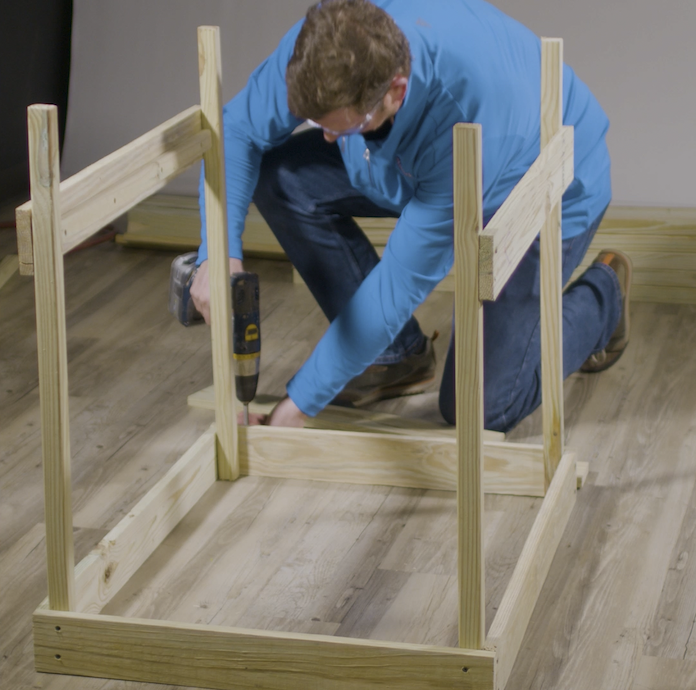
The 1-inch x 4-inch x 26 1/4-inch frame boards complete the frame for the top. (Exmark)
4. Stand up both sets of legs, making sure the ends with the 1-inch x 4-inch boards are flush with the ground, and that the sides with the cleats are pointed inwards. Take the 1-inch x 4-inch x 26 1/4-inch frame boards and use them to connect the two sets of legs, screwing them into the corners of all four frame boards.
5. Flip the build over.
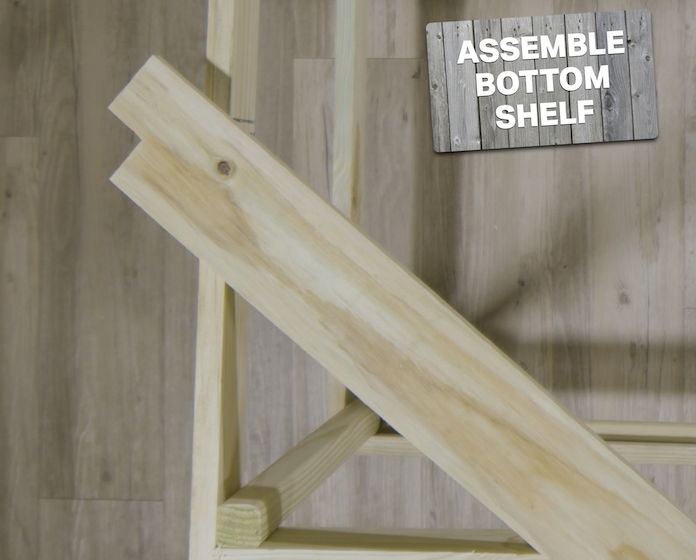
These notches make the bottom shelf line up flush with the frame boards (Exmark)
6. Next, take two of the 1-inch x 4-inch shelf boards and cut out a 2-inch x 2-inch square on the corner of each end of both boards. These squares should be on the same side of the boards.
Screw the newly cut board onto the cleat. (Exmark)
7. Take your newly cut boards and nest them in between the top frame boards, making sure the square you just cut out is flush with the leg boards, and screwing them into the 1-inch x 2-inch cleats.
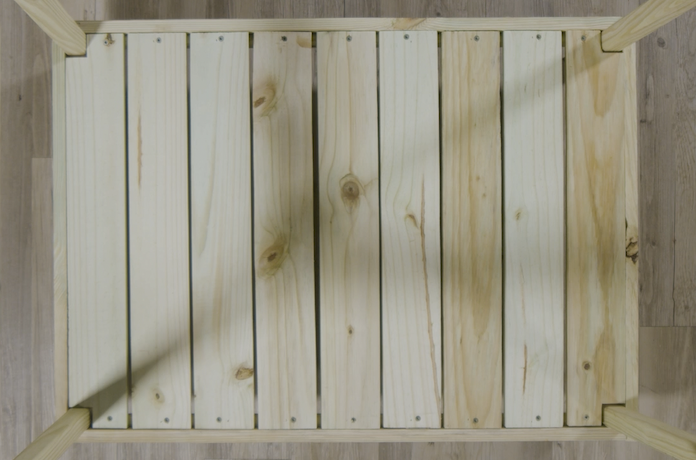
The bottom boards should be spaces enough for water to drain. (Exmark)
8. Then, take the remainder of the shelf boards and screw them in between the two you just placed.
This middle board gives the top more support. (Exmark)
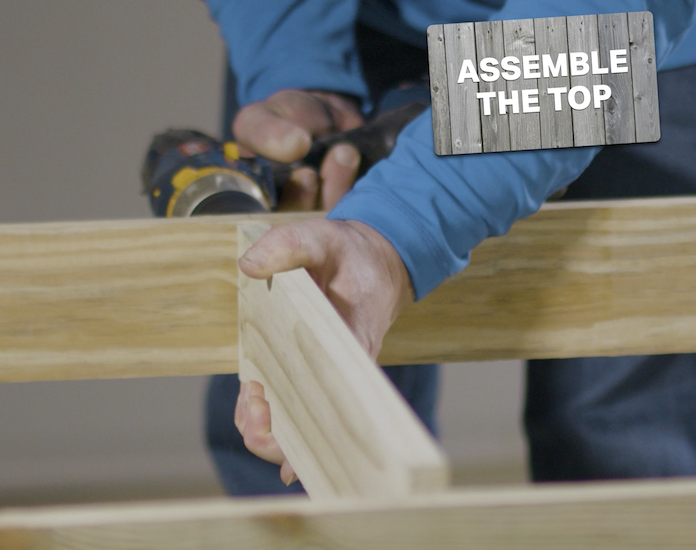
9. Screw the 1-inch x 4-inch x 24 1/2-inch frame board, aligned horizontally, into the middle of the top 1-inch x 4-inch x 34 1/2-inch boards.
The top boards will be screwed into these front and back cleat boards. (Exmark)
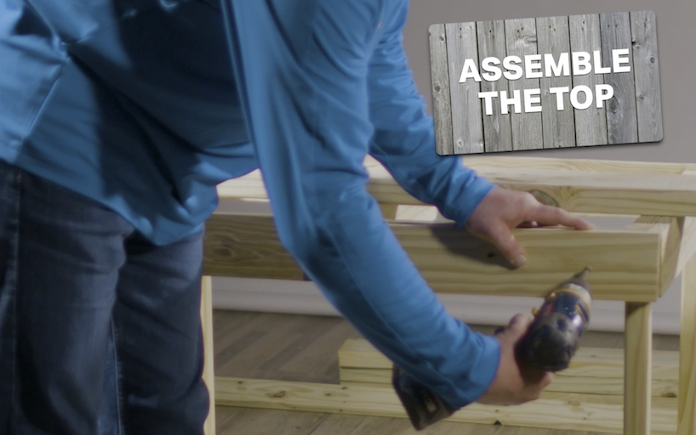
10. Screw 1-inch x 2-inch cleat boards on the front and back of the very top of the build.
Just like on the bottom shelf, the top shelf boards should have some space between them. (Exmark)
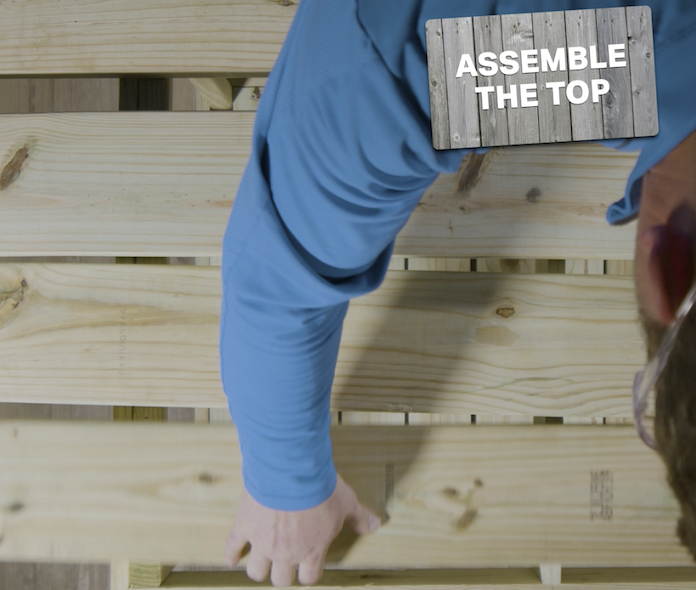
11. Take all five of the top boards and screw them into place, using the cleats you just installed.
The backboard support boards should be spaced about 5 or 6 inches apart. (Exmark)
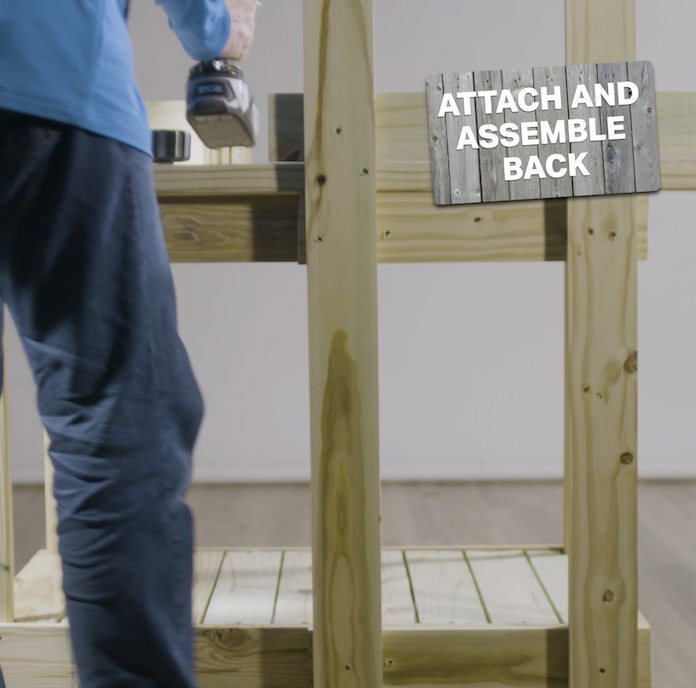
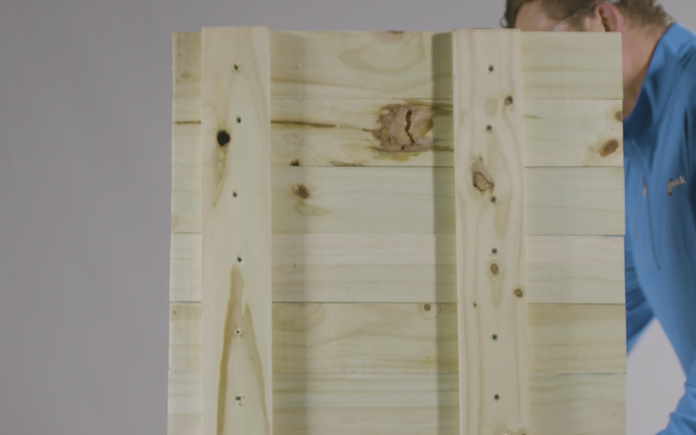
12. Take the 1-inch x 4-inch x 53 1/2-inch backboards and screw one to line up vertically with the back left corner of the build. Screw the next board in, spaced out about five or six inches to the right of the first.
The riser boards should extend 1 inch off of the inner backboard. (Exmark)
13. Take the other 1-inch x 4-inch x 21-inch riser boards and screw them horizontally in front of the vertical boards you just installed, aligning them so the right vertical support is one inch off the end of the 1-inch x 4-inch x 24-inch boards.
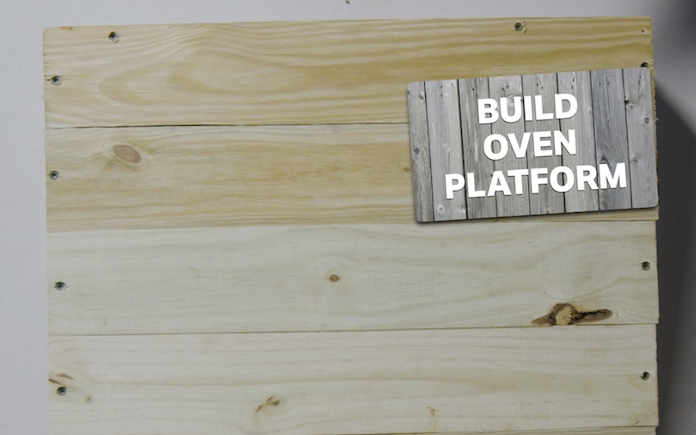
The oven platform creates space for utensils under the pizza oven. (Exmark)
14. Finally, put together the oven platform by placing the 1-inch x 4-inch x 24 1/2-inch boards on their sides (long ways) and screwing the 1-inch x 4-inch x 21-inch boards to adjoin them, making sure all the corners are flush.
Watch the video to see how it’s built!
Of course, no build is complete without the paint or stain to match your backyard aesthetic, and the necessary sealer to help it withstand everything Mother Nature will throw at it.
Once your DIY outdoor pizza oven stand is assembled, all that’s left to do is invite your friends and family over, buy the ingredients and bake away!
Looking to breathe new life into your outdoor spaces? Look no further than simple, cost-effective DIY projects. Exmark’s Done-In-A-Weekend project series will help you enjoy a better backyard life!
This week’s “Ask Danny” guest is lawn expert Sid Sexton.
Welcome to the first episode of Today’s Homeowner’s new podcast, “Ask Danny.”
Each week, I chat with an industry friend to tackle your home improvement questions. We’ll share pro tips and practical advice to help you succeed! Plus, there’s always a unique or funny story along the way.
Today we are talking about lawn care and sodding, with Sid Sexton. Sid is the founder of Sexton Lawn & Landscape in Daphne, Ala., and is licensed in turf and ornament spraying, landscape design, and setting of landscape plants.
As the founder of Sexton Lawn & Landscape, Sid is a down-to-earth, honest businessman with a love for lawn care, landscape design, and delivering the best products to his clients.
Starting at age 16, Sid spent his summers working for a local landscape company and the local country club and golf course in his hometown of Muskogee, Okla.
After earning his bachelor’s degree in business administration with a minor in horticulture, Sid joined the U.S. Coast Guard and was stationed in Hawaii, where he met his future wife, Jourdan.
He was honorably discharged after two years and began working as an account manager for a landscape company. In January 2004, he founded Sexton Lawn & Landscape.
Sid is licensed in turf and ornament spraying, landscape design, and setting of landscape plants. He is also a Certified Landscape Professional and continues his education through workshops, online courses and other events several times throughout the year.
Keep reading for his advice on common lawn problems.
Out-of-control clover weeds are a sign that your lawn isn’t healthy. (LeslieLauren, Getty Images Signature)
Controlling Weeds
“We laid sod in our yard a few years ago and it’s held up well until recently. We’re starting to notice a lot more weeds than normal. What should we do?”
Sid: The best weed control is a healthy lawn. Grass needs three major things to thrive — sunlight, water and nutrients, and in that order.
See if the sod is getting enough sunlight. Trim any branches that could be casting too much shadow onto the grass.
Also, think about the type of grass. Some types of grass thrive in one location and fail in another. The type of sod could not be shade-tolerant. There’s no real shade-loving turf, but there are some that tolerate a certain amount of shade.
Next, consider irrigation. Are you watering too much or too little? The right balance depends on the type of turf you have.
The last step should be fertilization and weed control. If weeds are the issue and you feel like you have enough sun, water and nutrients, contact a professional for a weed control program.
A core aerator only needs to be used on highly-compacted lawns. (stock.adobe.com)
Lawn Aeration
“Should everybody aerate a lawn, or is that in a situation when you suspect the ground has gotten more compacted?”
Sid: The answer depends on how much traffic you have on your lawn.
Do you have some mature trees and are those roots are getting larger and larger and taking up more space below the grass. Do you have dogs or kids? Is there a soccer match in the backyard every weekend? This will cause compaction.
If this is the case, you should core aerate. If it’s a sports turf, you should core aerate twice a year.
For typical homeowners, once a year, if that, is sufficient.
And before you aerate, mark the locations of your sprinkler heads.
To lay the best groundwork for sod, till up the soil and vegetation. (3 Echoes Content Studio)
Prepping for Sod
“What should you do before sodding your lawn?”
Sid: Before laying sod, take five or six soil samples from the front and backyard.
Label them so you’ll know what area of your yard needs soil amendment. Consult with your local extension office to see what remedies you should do.
After your soil is amended and you’re ready to lay the sod, start prepping. There’s no need to eliminate all vegetation, but you do need to get rid of the weeds.
Before laying the sod, break up the soil with a till. This will create a soft transition layer of soil that will make it easier for the grass roots to take hold.
Then, add some organic matter to create a living soil for your sod to thrive, like Black Cow. (This is an affiliate link. If you purchase this product, we will earn a small commission at no additional cost to you.)
Change up your mowing pattern every so often. (MariusBlach/Getty Images)
Sid Sexton’s Mowing Tips
Sharpen your lawn mower blade at least once per season. A sharp blade will make a nice clean cut and won’t tear the grass blades.
Change up mowing patterns. Don’t mow in the same direction every time every year. It helps the grass to grow a different way and lessens the likelihood of ruts in your yard.
Make sure you know the mowing height for your turf type. Different grasses grow best when at certain heights. For example, the recommended height for St. Augustine grass is 3-4 inches, whereas Bermuda grass needs to be cut at an inch and a half.
A bad lawn might not be caused by the soil itself, but by what critters are inside of it. (Smaglov, Getty Images)
Sid’s Encounter with the Elusive Ground Pearl
During the course of his horticulture studies in college, Sid learned about an insect called a ground pearl. Ground pearls live in the soil, feed on turf roots and look like a pearl, as their name suggests.
Over the years, he’s heard about ground pearls in seminars and read about them in textbooks, but he had never seen one in real life.
“I thought it was the Loch Ness monster — something you said when you couldn’t figure out what was wrong with a lawn,” Sid says.
This changed, though, when he bought a house in 2012. For nine months, he struggled to find the cause of why the grass’ health was declining. The answer became clear when he was digging to plant a tree and pulled out a big wad of soil.
There were white and pink dots everywhere! Lo and behold, it was the elusive ground pearl.
Now, he sees them everywhere!
New episodes of “Ask Danny” drop Fridays — subscribe here.
Ask a Question! (Podcast)
Ask a question and we could answer it on the “Today’s Homeowner Podcast!” We also may use it on our nationally syndicated radio broadcast or on todayshomeowner.com.
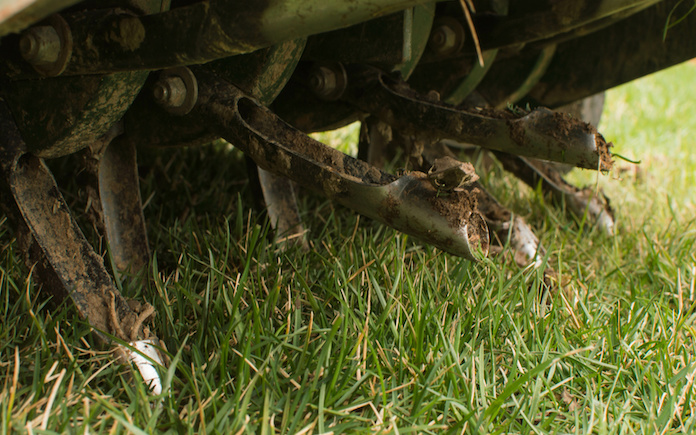
Snakes often turn to pool noodles for shelter from the heat. (Deposit Photos)
Pool noodles are popular foam flotation devices for swimmers of all ages, and they come in handy outside the water, too.
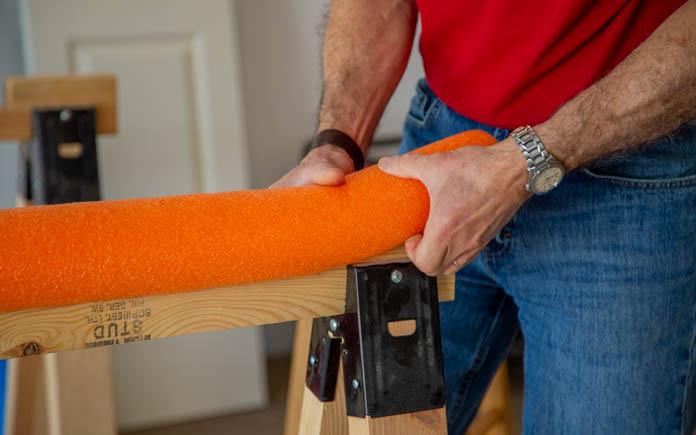
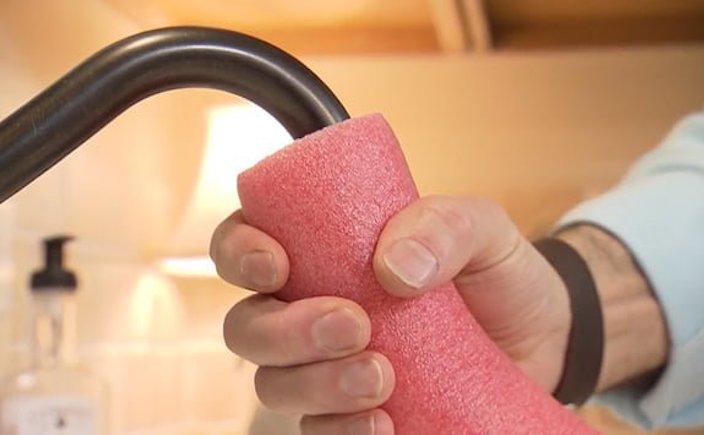
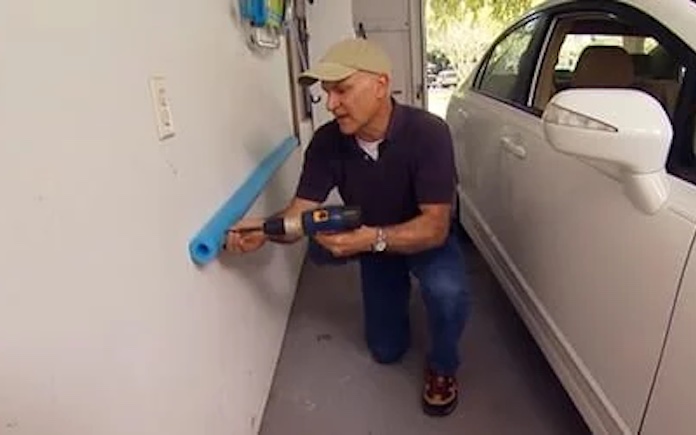
For instance, woodworkers can protect saw horses with one, families with small garages can make car door bumpers to prevent accidents, and you can even turn one into a kitchen faucet extension to fill buckets of water.
No matter how you use pool noodles, be careful because snakes sometimes find shelter from heat in their holes. The dark, cool environment inside these foam tubes is ideal for small reptiles and other creepy crawlies as temperatures rise.
A Salado, Texas, resident learned that after finding an adult rattlesnake and several baby snakes inside a pool noodle, according to USA Today.
Following that incident, the Salado Volunteer Fire Department immediately issued a statement to the public, advising people to store pool noodles in elevated, sealed locations to prevent rattlesnakes, water moccasins and other venomous snakes from using them as habitat.
However you use a pool noodle, here are some tips to keep you safe.
Snakes can find their way into pool noodles such as these.
Pool Noodle Sawhorse Protection
If you use pool noodles to protect sawhorses, make sure there is a firm seal between the foam and wood so snakes can’t slither in.
Inspect the noodles and confirm that nothing will crawl out while you’re working. If the noodle isn’t secure, tighten it down with electrical tape or duct tape, filling any gaps.
If possible, store your protected sawhorses in a garage, shed, or indoors to limit exposure to the elements and unwanted inhabitants.
After using a pool noodle as a hose extension, make sure it dries completely before being put into storage.
Pool Noodle Hose Extension
If you’ve used a pool noodle as a hose to fill buckets from your kitchen sink, be sure the inside of the noodle is dry before you store it. Moisture inside the noodle creates cooler temperatures, making it an ideal space for snakes.
Snakes seek shelter from the heat in cool garages.
Pool Noodle Car Door Bumper
Using pool noodles as car door bumpers in your garage can be an effective, inexpensive way to protect your car’s paint, but it could also provide a perfect home for snakes.
Close off the noodle’s ends so nothing can find its way inside, and avoid leaving your garage door open for long periods to limit access for snakes and other animals.
Your garage’s cool pavement is also an ideal spot for snakes to cool off and hide from the sun.
If you see a snake, stay calm and call your local animal control office; some police or fire departments also respond to snake sightings. Don’t gesture toward the snake and, remember, the snake likely won’t bite you if you leave it alone.
What to Do If a Snake Bites You
If the snake does bite you, stay calm and call 9-1-1. Try to remember everything you can about the snake’s features such as color, patterns, head shape and size, and tell the operator.
If possible, have someone take a picture of the snake from a safe distance. This will help medical staff treat you when you arrive at the hospital.
Remember, you aren’t a cowboy, and this isn’t the Wild West. Never cut into a snake bite or suck out venom with your mouth, as infection and dental problems could worsen your condition.
Advances in modern medicine have improved treatment for snake venom, so bites increasingly are less deadly, but you should always see a doctor right away.
This week, we’re transforming a dull dining room into a diva den.
Homeowner Robin Stafford hasn’t used this room for dining since she moved into her home, so we’re going to turn it into a unique space for her to relax and unwind with her daughter.
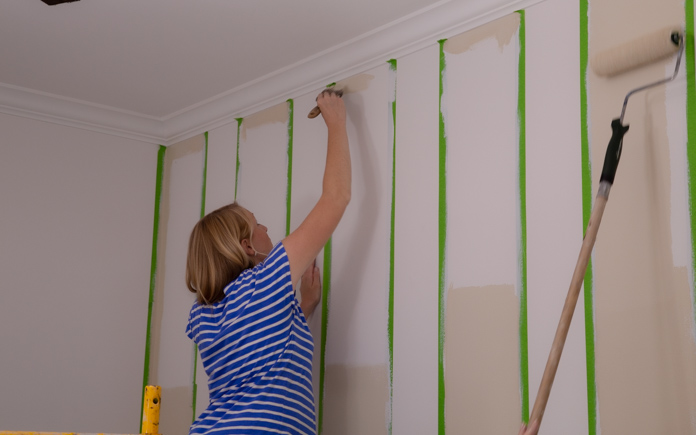
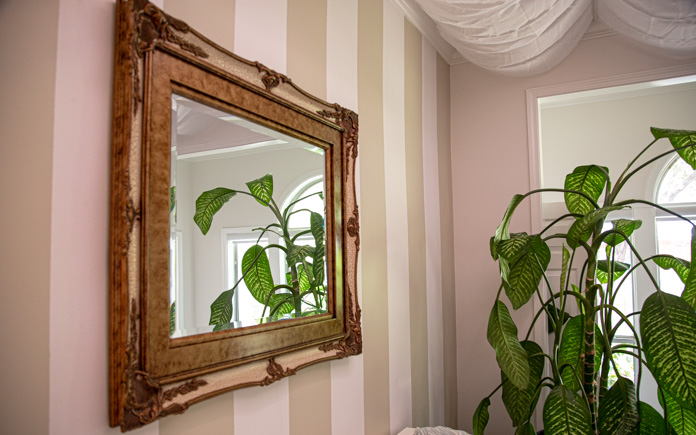
Vertical stripes draw the eye up and highlight the room’s tall ceilings. (3 Echoes ContentStudio)
Paint Accent Wall
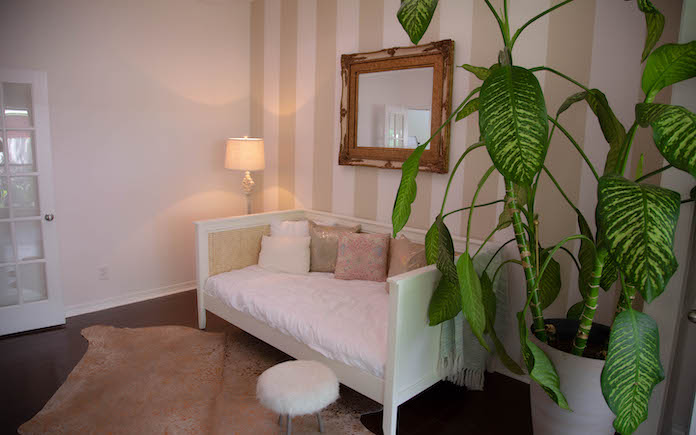
To create a focal point for the room, we paint a vertical striped accent wall. The vertical stripes draw your eyes up the wall and call attention to the tall ceiling.
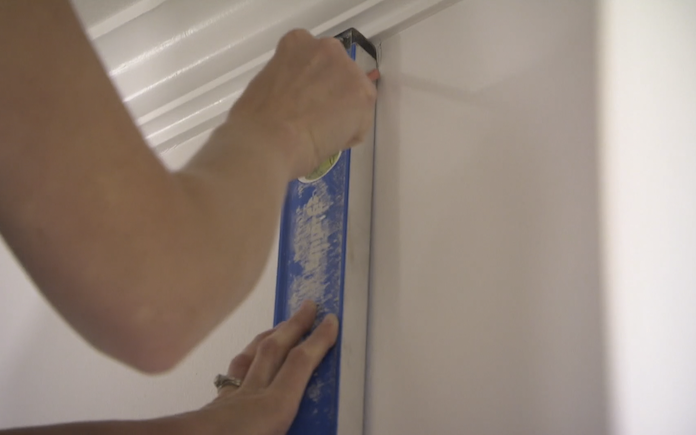
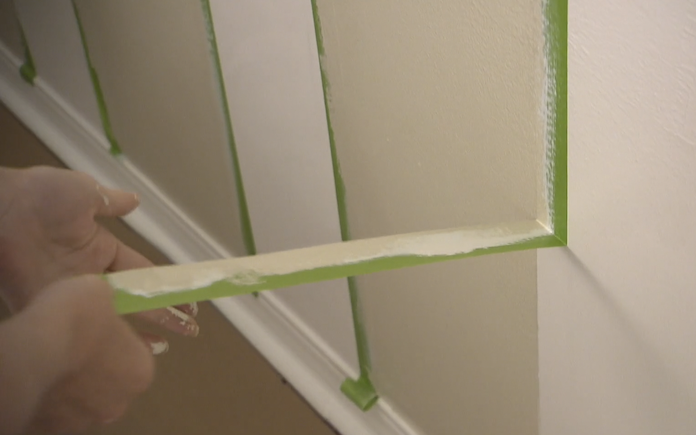
Next, we measure out the width of our stripes and mark the lines with a pencil. Then, we use a level to create straight vertical lines for the tape to go over. we tape our vertical stripes on the wall.
For the stripe colors, we’re going with tan and white. To make painting easier, we mark the slats for the tan stripes with an “x.”
Pulling the tape while the second coat of paint is still wet makes for clean lines. (3 Echoes Content Studio)
We use painter’s tape to mark off the stripes on the wall. After the tape is in place, we use the wall color to seal off the tape so none of our stripe color gets underneath.
We then apply two coats of our stripe color and remove the painter’s tape.
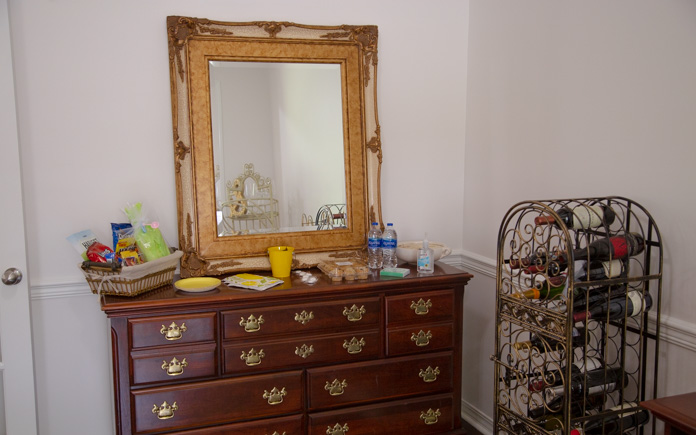
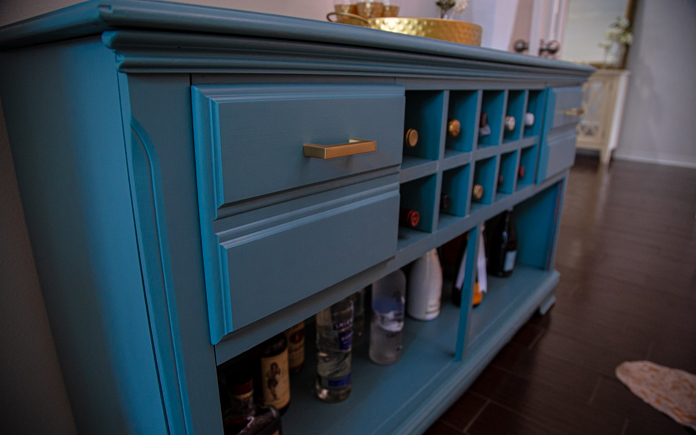
Robin has a dresser she inherited from her mother that we’re able to reuse and reconfigure for a bar.
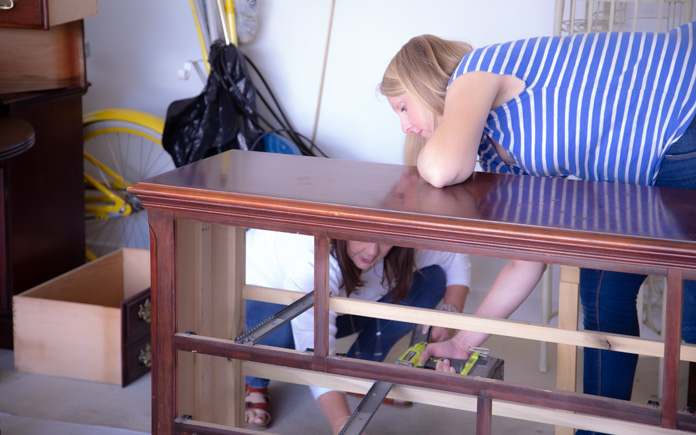
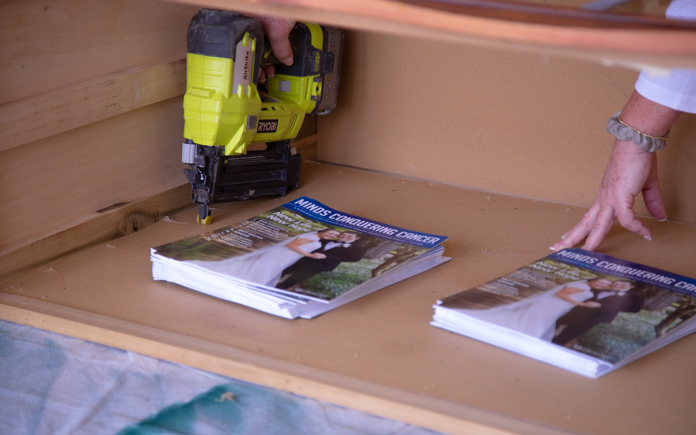
We remove the bottom two drawers to create a large bottom shelf for bottles. Then, we take out the large top middle drawer and convert that space into a wine rack.
Robin’s formal dining room had great natural light, tall ceilings and plenty of space, but it had no real purpose. So, it became a catch-all for furniture that had no other home. Because it was right next to the front door, it was the very first thing her guests saw.
But now, the room has a purpose and personality.
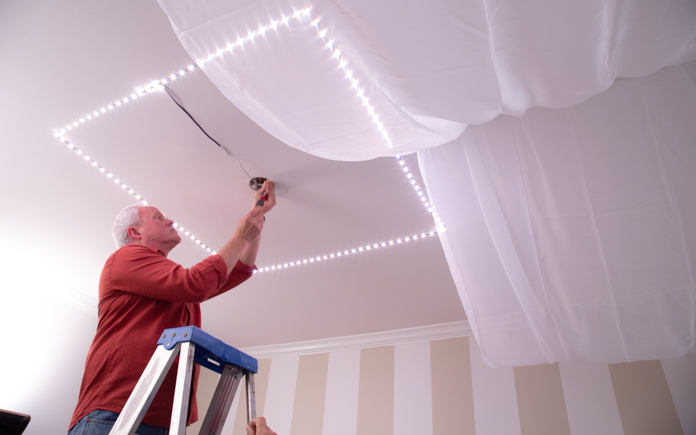
The bold stripes on the accent walls draw you in and accentuate the height of the ceiling, which makes a statement of its own with the soft LED lights filtering through the sheer drapes. This ceiling makes it clear this room is designed for relaxation.
Of course, the custom day bed fits in perfectly with that scheme. It’s simple, comfortable, and complements the striped wall behind it. The dresser-turned-bar adds a pop of color to the room and pays homage to Robin’s mother while it serves a very practical purpose.
Other Tips From This Episode
Products Featured in This Episode
Materials for Day Bed
This page contains affiliate links. If you purchase a product from these links, we will earn a small commission at no additional cost to you.