In Hour 1 of the Today’s Homeowner Radio Podcast, we’re giving warning signs of a home improvement scam. Plus, we’re tackling some common home projects, solving a garage door mystery and more!
Listen to Hour 2 to learn how to install tile without mortar, clean soot from a fireplace and more.
Hour 1
BOLO for These Home Improvement Scams
Home improvement scammers are active during the summer season. (Graphic using photos by welcomia and Gwengoat, Getty Images Signature)
That number is far lower than the actual number of scams that happen every year. Many more go unreported because some people are too embarrassed to report them or they feel like doing so won’t do any good.
Home improvement scammers are usually out during the summer. Many people are outside and already working on their homes, so it’s an opportunity for them to approach you.
Here are a few red flags to look out for:
Door-to-door sales: Don’t be trusting of someone who knocks on your door to offer you a service. Check their credentials and be sure they work for a reputable company.
The contractor wants the project paid up front: If you pay all at once at the beginning, the contractor could drag out the project, or worse, take the money and run.
“Special deals” with an expiration date that rapidly approaching: Thoroughly research the person and company offering you this deal and make sure they’re legitimate. Trust your instinct: if something doesn’t feel right, walk away. If you ask to take time to think about it, you’ll probably never see that person again.
Driveway sealing scam: A scammer will approach you about sealing your asphalt driveway on the spot. Often coating it down with a watered-down sealant or, even worse, motor oil! The next time it rains, the sealing with wash away.
Advice on Common Projects
Decks and bathrooms top the list of popular home improvement projects. (Photos by Ann Peterson)
Ann Peterson, of Poland, Ohio, is seeking advice on these common home improvement projects:
Refinishing a tub: There are three options — install a shell over the existing tub, have a professional refinish it or refinish it yourself — here’s how.
Repairing bathroom tile: If the tile is coming loose, laying new tile over it won’t solve the problem. Because it’s such a small room, go ahead and take out the tile.
The issue could be with the subflooring. Often, water seeps through and damages it, so you need to replace it before installing new tile.
Adding tile on top of the old tile, even if it’s a sound surface, will create height problems.
Repainting a deck: We don’t recommend painting decks, but since this deck is already painted, here’s what you need to do: Use a chemical stripper or a citrus-based stripper to remove the existing paint. Scrape it off with a putty knife, then lightly sand the deck. Instead of adding another coat of paint, seal it with a tinted stain. To save time, hire a professional painter to do this.
Garage Door Mystery Solved
If the light beam on your garage door’s safety device is broken, the door reverses. (BanksPhotos, Getty Images Signature)
Craig Walker from Illinois says, “Our two garage doors face the east. In the past year or so, they have become very touchy and won’t go down if it’s sunny or bright outside. We have to get out of the car and manually release the doors and then go out another door. If we come into the house we can get them to close by holding down the door opener button located on the wall.”
This is a phenomenon caused by infrared light. Garage door sensors use infrared light. This safety device beams light across the opening, and if the light is broken the door reverses.
Sunlight has a certain amount of infrared light. If the sensor is exposed to a lot of sunlight, it can break the beam.
Manufacturers make a device called a sunshield that covers part of the sensor but doesn’t block the electric eye.
You can also use a paper towel or toilet paper roll to block the sunlight from striking the sensor. Cut it down to two to four inches so the roll doesn’t block the electric eye.
Hour 2
In Hour 2 of the Today’s Homeowner Radio Podcast, learn how to install tile without mortar, clean soot from a fireplace and more.
Installing Tile Without Mortar
You CAN install a tile backsplash without using mortar. (Maria Konosky, Getty Images)
A listener wants to know: Instead of mortar, can you use glue to install tile around the edge of a countertop?
If you’re not using mortar, you need a strong construction adhesive like Titebond.
Anything installed on a vertical surface has a tendency to slide down, so to keep the tile in place, position a strip of wood at the bottom and insert wood spacers in between each tile. Use painter’s tape to keep them in position while the adhesive dries.
For an extra-strong hold, try a technique I call “burp the glue.” Here’s how to do it:
Apply the adhesive to the back of the tile
Place the tile on the wall.
After a few seconds, pull it away to expose more of the adhesive to the air.
Finally, simply push it back into place.
Burping the glue exposes more of it to the air, so it dries more evenly for a stronger bond.
Cleaning Soot From a Fireplace
Easily remove unsightly soot with some TSP and water. (Juan Pablo Arenas, Pexels)
Last year, Drew Lipinski converted his old wood-burning fireplace to gas.
He says it kept him warm all winter — and he didn’t even have to chop a single stick of wood!
The downside, though, is he noticed that the white bricks above the fireplace were stained with black soot. He asks, “How can I clean off the sooty stains?
If the gas fireplace is not adjusted to the right mixture of air, you’ll end up with a soot situation.
Here are the options for cleaning:
Make a paste from TSP and water and scrub the stain with a sponge. Watch this video to see how to do it.
Use a storebought cleaner like Sentinel Smoke and Soot Cleaner
If you don’t want to use harsh chemicals, mix equal parts water and baking soda to make a paste. Smear it on the bricks, and let it sit for a few minutes. Spray it with water to keep it moist. Finally, scrub off the paste.
Best New Products
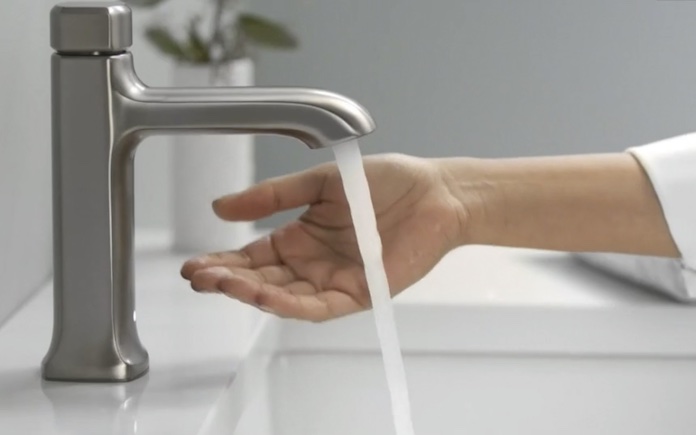
Touchless faucets are nothing new, but now Kohler is bringing that technology to your home bathroom. Learn more >>
Simple Solutions
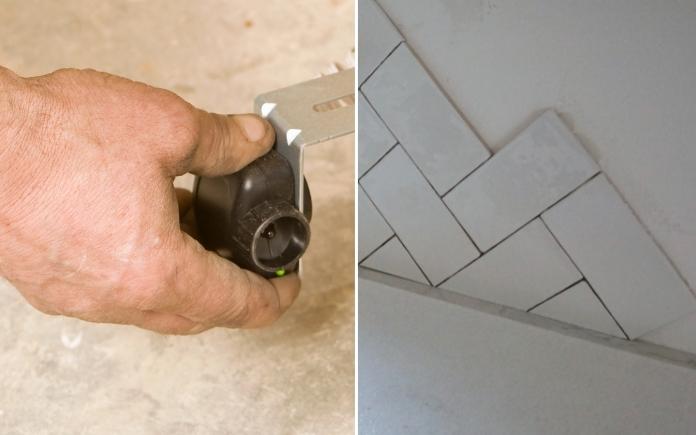
Use a speed square to get straight cuts while using an oscillating tool. (3 Echoes Content Studio)
Perfectly Straight Cuts with an Oscillating Multi-Tool — An oscillating tool is a compact, portable power tool that accepts a wide range of interchangeable blades.
It can sand, cut, scrape, grind and polish a wide variety of building materials.
It’s called an oscillating tool because the blade oscillates back and forth.
While this tool cuts great and is very versatile, the high-speed oscillating vibrations make it a little hard to control.
To make perfectly straight cuts, get a little assistance from your speed square.
Securely hold the speed square in place right on the cut line.
Then, simply guide the multi-tool’s blade along the edge of the square, producing a perfectly straight, smooth cut.
This technique works great when trimming baseboard or chair rail moldings, cutting house siding, notching deck boards, or anywhere else you need straight accurate cuts.
Tree-Trunk Protector — The bark of a tree is the tree’s first line of defense against bacterial diseases and boring insects.
To protect the trees in your yard, paint the trunk white to help prevent something called, sunscald. This happens in winter when extreme temperature fluctuations cause tree bark to crack.
Then, when summer rolls around, the tree is susceptible to harmful infections and bugs.
Mix equal parts water and white latex paint.
Brush the diluted paint onto the lower three to four feet of the trunk.
The light paint color keeps the wood from overheating and prevents future splits and cracks. Repeat once a year.
Other Products & Links Mentioned
This page contains affiliate links. If you purchase a product from these links, we will earn a small commission at no additional cost to you.
In Episode 2 of “Ask Danny,” metal roofing expert Todd Miller gives us some insider tips and information about installation, energy efficiency and style options.
Todd Miller, president of Isaiah Industries, has more than 40 years of experience in the metal roofing industry. (Photo courtesy Todd Miller)
About Todd Miller
Todd Miller is president of Isaiah Industries, a manufacturer of residential metal roofing.
With 40 years of industry experience, Todd has worked with property owners and contractors on projects worldwide.
In addition to roofing, he is often sought after for his expertise with condensation and ventilation.
Todd Miller poses for a picture with Chelsea Lipford Wolf and Danny Lipford in Cut Off, La.(3 Echoes Content Studio)
Working with Todd in Louisiana
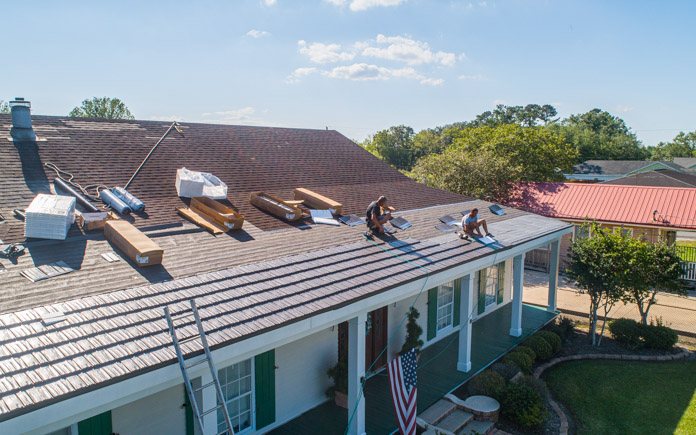
I met Todd while shooting a Today’s Homeowner TV episode in Cut Off, La., in 2020. Hurricane Zeta had majorly damaged David and Ruby LeBlanc’s roof, so we installed a new metal roof for them.
For David and Ruby’s metal roof, we used an aluminum product called rustic shingle.
They live on the Gulf Coast, so aluminum is ideal for their environment because it resists corrosion. Plus, the shingles interlock on all sides, giving it strong wind resistance with an added old-world shake look.
Workers install a new aluminum roof on David and Ruby LeBlanc’s home. (3 Echoes Content Studio)
Less than a year later, their metal roof was put to the test during Hurricane Ida.
“As I watched that storm track, I was sweating bullets,” Todd says. “You always believe in your product, you know it can do well, but on the other hand, storms like that can be unpredictable. You can end up with a lot of wind-blown debris that oftentimes can cause damage.”
Ida brought on wind speeds of up to 200 miles per hour and also destroyed the neighbor’s garage.
David and Ruby’s metal roof came through in shining colors. The only damage was one detached hip cap on the side closest to their neighbor’s garage.
“Their fairly old home has endured damage and hardships from storms in the past, but you would never know it,” Todd says. “They’re delightful people and determined to protect this home for the next generation.”
Do you have to remove all the existing shingles from the roof before you install a metal roof?
Todd: While every house is different, the short answer is no. If you only have a single layer of shingles, most building codes allow for a second layer of roofing.
It’s pretty common for metal roofs, especially shingled and corrugated metal, to be installed over an existing layer of shingles. However, if you want a standing seam metal roof, you’ll need to have a smooth surface for installation. If you don’t, you’ll end up with oil canning, or ripples in the panels.
No matter what type of metal roof you want, always have an attic inspection before installation. Look closely at the underside of the roof deck for signs of rot, water infiltration and high moisture levels that need to be addressed.
Strapping can be put down to install a metal roof, but it’s not always necessary. (Getty Images)
Do you recommend a roofer put down strapping before the roof goes on?
Todd: Usually I don’t. For most products, it’s not required.
If you have proper attic ventilation, there aren’t any concerns from a condensation standpoint.
Strapping or batten can be used, but ultimately it will make the roof harder to walk on, more prone to wind uplift, and you may find yourself having to raise your gutters. This is why we generally promote direct-to-deck installation.
Even with direct-to-deck installation, if it’s over the old singles, we will put a layer of underlayment over the existing shingles.
Most times, the building code requires it, but it also makes good sense. You don’t want the old shingles’ abrasive top surface rubbing against the back of the metal panels.
How long does it take to install a metal roof?
Todd: Of course, every house is different, but one- to three-day installations are not uncommon.
This is another great benefit of metal roofing — minimal disruption to your routine during installation.
Modular metal products, or metal shingles, are becoming more popular. (3 Echoes Content Studio)
Style Options
What types of metal roofing are becoming more popular?
Traditionally, corrugated and shiplap metal roofs are the most popular, but that’s starting to change.
Many homeowners associations and architectural review boards won’t allow metal roofing. Plus, it can be hard for some homeowners to imagine a roof that’s not asphalt shingles.
But now, there are metal roofing options that look like a traditional roof. They’re called modular metal products, which are basically metal shingles.
They’re produced from steel, aluminum and even copper. These panels are formed in a variety of ways, and can look like existing asphalt shingles, wood shake, high-end slate or barrel tile.
With this type of metal roofing, you can get the look of more traditional high-end roofing with the durability, energy efficiency and sustainability of metal roofing.
Metal roofs with a cool coating deflect the sun’s infrared energy to keep your home cooler. (Metal Roofing Alliance)
Energy Efficiency
Are darker metal roofs less energy-efficient than lighter ones?
Todd: Generally, when we talk about metal roofing’s energy efficiency, it’s in terms of solar reflection.
The more solar energy your roof absorbs, the hotter your home will be. This results in your air conditioner working harder to keep your home cool.
Typically, lighter metal roofs reflect more sunlight than darker ones.
White naturally has a high solar reflection of about 65 percent, but you don’t necessarily have to get a white roof to have an energy-efficient roof.
There are now cool roof coatings with pigments that reflect infrared energy from the sun and keep the roof cool.
Without this cool roof coating, a darker roof only reflects about 3-4 percent of the sun’s infrared energy. With these new pigments, the roof reflects up to 25-30 percent.
Find a metal roof product that complements your home’s architecture. (Metal Roofing Alliance)
Todd’s Tips
Choose the product first. Ultimately, you’re going to live with the looks of that product for a long time. If you don’t love the look and it doesn’t fit your home, you won’t be happy with it. The Metal Roofing Alliance has a visualizer to help you see how a metal roof will look on your home.
When you choose your product, find an installer through the manufacturer. They’ll know the product through and through.
Think long-term. The upfront cost of installing metal roofing is more expensive than a traditional roof, but you’ll save over time. Look at it on a cost-by-year basis. If you intend to stay in your home for a number of years, you can see good payback over time with lower utility bills and fewer repairs.
Just when you think you’ve seen it all, forget about it — you haven’t seen anything yet.
Years ago, a woman in upstate New York wanted a metal roof installed on a small bungalow. She owned a fairly high-end magazine and website and wanted to work out a deal where Todd would help her get a roof and, in turn, she would promote Todd’s business.
It seemed like a win-win for Todd. As part of the deal, he sent a crew from Ohio to install the roof — free of charge.
Four years later, an upset woman called Todd. She said “You put a roof on my house and I don’t know why!”
Turns out, the woman who contacted Todd was not the owner. She was the renter.
“We put a roof on someone’s house who didn’t know it and didn’t even want it!”
All’s well that ends well, she turned out to be delightful, and she and Todd became great friends.
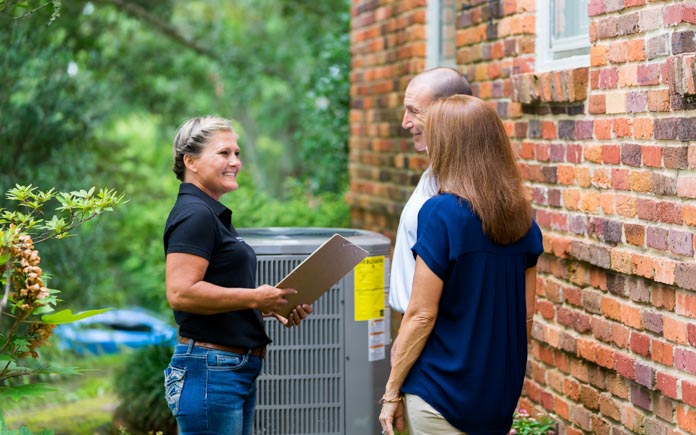
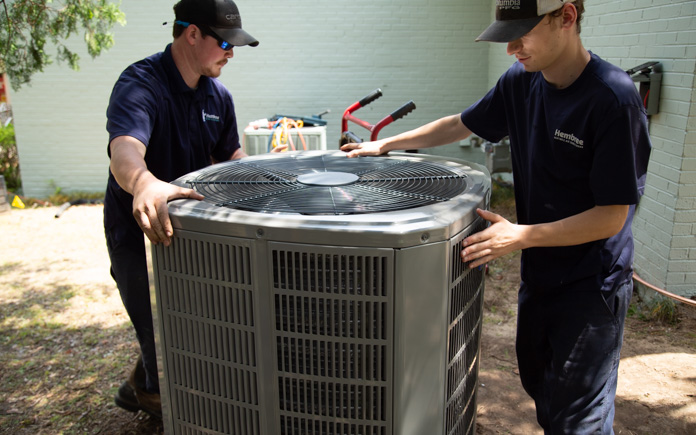
Staying comfortable is essential during the hottest months, so we teamed up with American Standard Heating and Air Conditioning to share these tips on whether to maintain or replace your AC.
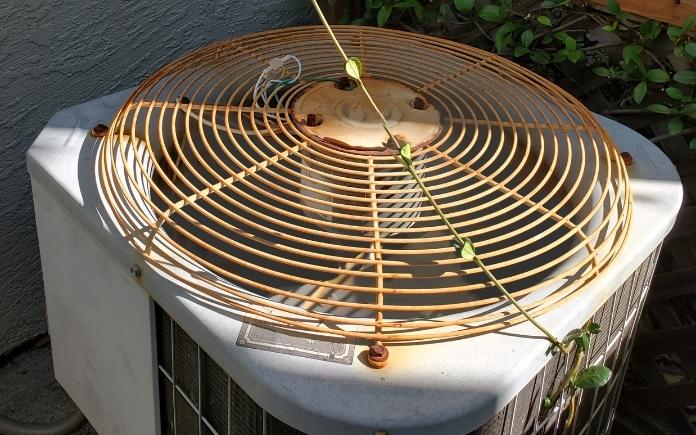
Plants growing on your AC’s condenser unit block airflow, which can lead to cooling problems. (TomSmith585, Getty Images Signature)
DIY Maintenance
If your air conditioner is less than 10 years old, then some do-it-yourself maintenance can help improve its efficiency.
These are some things you can do to keep your home air conditioner running smoothly.
Replace the air filter every month to avoid unnecessary calls to a heating, ventilation and air conditioning technician. After you remove the old filter, vacuum or wipe off the grill that holds the filter in place and insert the new filter. Then close the cover.
Make sure the heating and cooling system’s ductwork is insulated. If your home and its ductwork are air-sealed properly, your home can cool much faster, and maintain that temperature much longer.
Remove any debris and vegetation from around the outside condenser unit to maximize airflow.
If your best efforts to maintain your AC aren’t enough to keep your home cool, call a professional. (American Standard)
When to Call a Professional
If you’ve performed seasonal maintenance on your home’s air conditioner and it’s still not functioning properly, it’s time to call a professional.
Also, if your home air conditioner malfunctions, or has damaged ductwork or exposed electrical connections, don’t try to fix this yourself.
These issues must be addressed by a trained technician who can evaluate your system and make the best recommendation based on your needs.
When the cost to repair exceeds the cost of a new home air conditioner, it’s time to replace it. (3 Echoes Content Studio)
Time to Replace Your Home Air Conditioner
Choosing to repair or replace your home air conditioner both cost. By weighing the options, you can determine what gives you the biggest return on your investment.
If you have an older system, it may cost more to operate and/or repair, because it is not as energy efficient, and manufacturing for some of its parts may have been discontinued.
Most older units use the outdated refrigerant Freon, so eventually, you’ll have to upgrade to equipment that uses the latest refrigerant.
Does your unit frequently break down? Does it make odd noises or take a long time to reach the cooling set point? If so, you may need to seriously consider a replacement.
A good rule of thumb for determining whether to repair or replace a home air conditioner is to use the $5,000 rule. Just multiply the age of your equipment by the estimated repair cost. If the number you get is more than $5,000, consider a replacement. If less, repair it.
In the market for a new air conditioner? Local rebates or tax credits may be available for purchasing an energy-efficient system.
First, call a professional to do a free in-home visit and learn about your options. To find your local American Standard Customer Care Dealer, visit their website at americanstandardair.com.
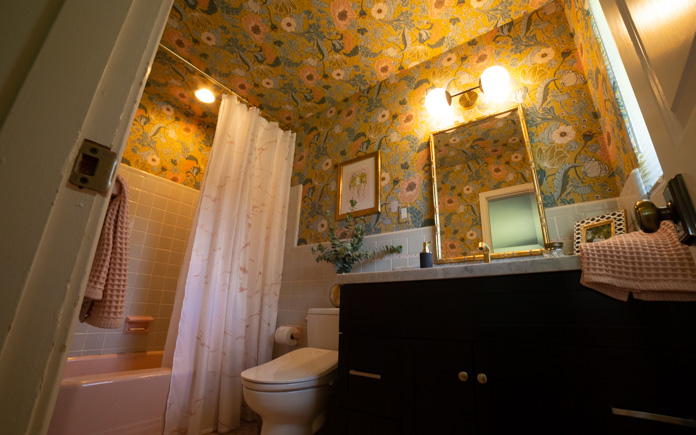
This week, we’re creating a grandmillenial-style bathroom by incorporating modern elements to Chelsea’s mid-century main bathroom.
Chelsea plans to do a primary bathroom addition in the future, so for now, we’re updating this bathroom to accommodate her and her husband, Brandon, while keeping in mind its future use for her daughters.
For this reason, we’re keeping the pink bathtub and tile but introducing some new elements that will tie in well to this grandmillenial-style bathroom.
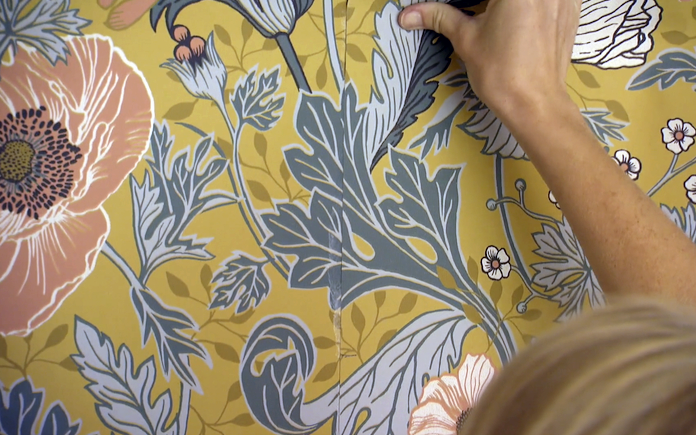
This granny-chic wallpaper pattern is perfect for this grandmillenial style bathroom. (3 Echoes Content Studio)
Hang Wallpaper
When Chelsea first moved into her home, she removed dated the wallpaper in the bathroom. And now, we’ve come full circle and are applying a new, modern-printed paper that will complement the bathroom’s retro elements and complete this bathroom’s modern grandmillenial design.
We’re encasing this bathroom with literal wall-to-wall wallpaper, including the ceiling. This will give this future girl’s bathroom a jewelry-box feel.
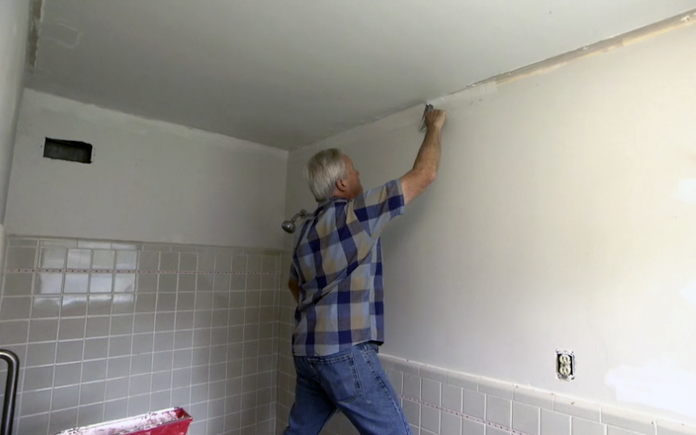
Patching the wall where the ceiling trim once was gives us an even surface for our wallpaper. (3 Echoes Content Studio)
First, we remove the ceiling trim so our wallpaper runs seamlessly onto the ceiling. To fill the spots behind the trim, we apply drywall mud with a putty knife to fill in the gaps left behind.
Next, we clean the ceiling and walls with a mold killer so we have a fresh slate for the new wallpaper.
Then, we hang the wallpaper. Here’s a step-by-step guide (link) on how to do it.
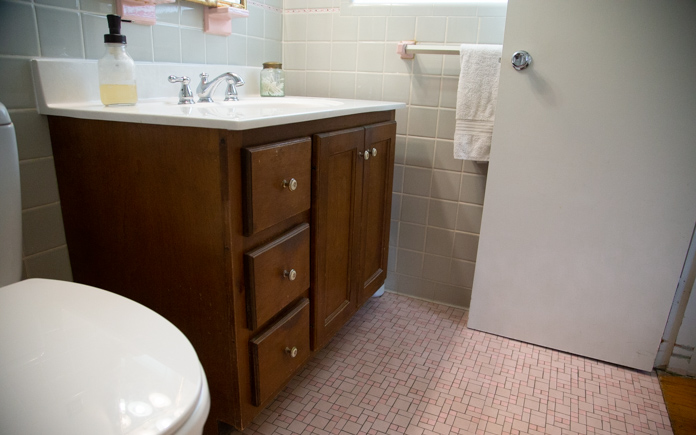
Encasing the bathroom with wallpaper creat a jewelry box feel. (3 Echoes Content Studio)This outdated vanity offers little storage space and stands out in a bad way. (3 Echoes Content Studio)
Replace Vanity
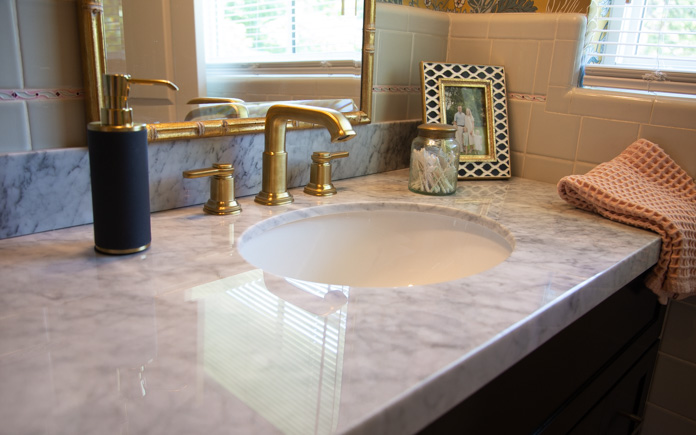
This vanity isn’t original to the house, so it looks out of place in this bathroom. Plus, it’s a little too short and narrow. So we’re replacing it with a more functional, modern one that still works with our grandmillenial style.
To replace the vanity, we remove the toiletries stored inside and disconnect the sink plumbing. This old vanity wasn’t connected to the wall, so a firm tug is all that’s needed to detach it.
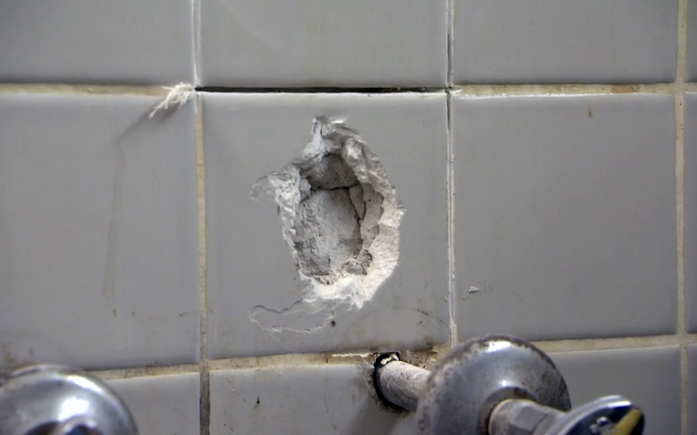
The wall tile fused to the wall underneath, making it impossible to remove whole pieces. (3 Echoes Content Studio)
Before we install the new vanity, we try to salvage some of the wall tiles behind it to use for replacement tiles on the wall behind the ceramic towel holder. Unfortunately, the tile is not coming off in one whole piece.
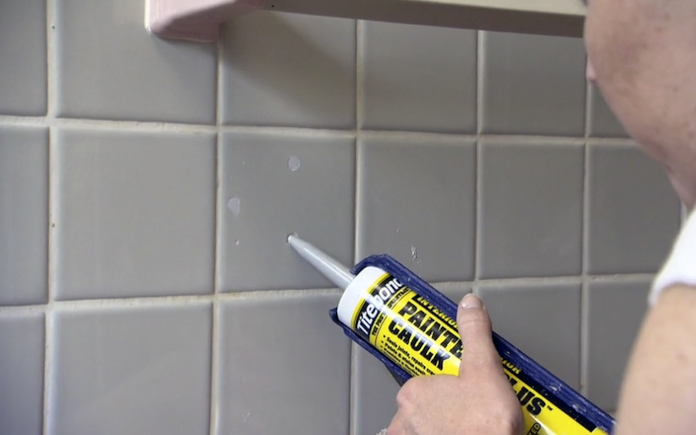
Grey painter’s caulk camouflages the holes left behind from the grab bar. (3 Echoes Content Studio)
We’re disappointed we can’t remove the towel bar, but when in the end, it’s still functional. The metal grab bars, however, can be removed. We remove the screws and fill the holes with grey caulk that’s a near match to the tile color.
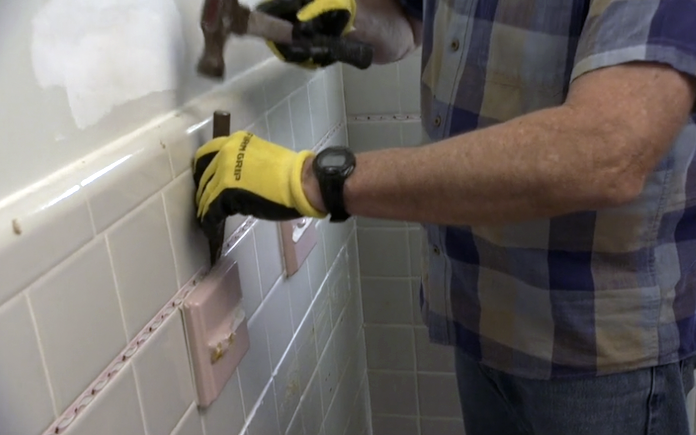
A chisel and hammer easily knock off these ceramic holders so we have a flush surface for our vanity mirror. (3 Echoes Content Studio)
We knock off the ceramic soap and toothbrush holders above the sink so the mirror can lay flush above the vanity.
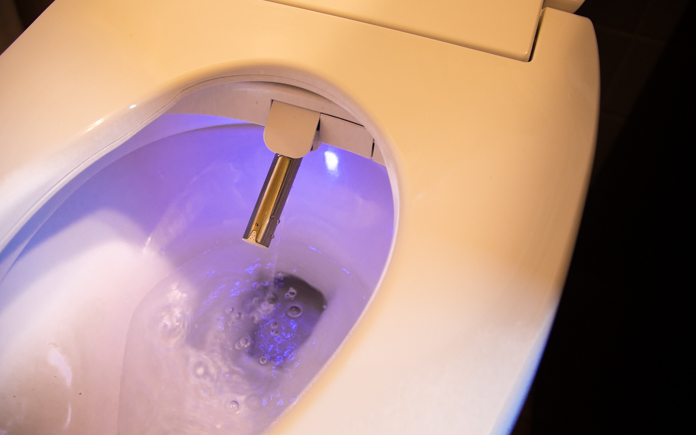
The toilet in the bathroom is the only thing that’s been updated this century, so we keep it. However, to add some extra pizzazz, we install a bidet.
This page contains affiliate links. If you purchase a product from these links, we will earn a small commission at no additional cost to you.
We chose theFluidmaster Soft Spa Electronic Bidet Toilet Seat. It features an integrated water heater, adjustable water pressure and wand positioning, as well as a heated seat and warm air-dryer. Plus, it has a remote, so you can face forward to use it, instead of reaching behind to make adjustments.
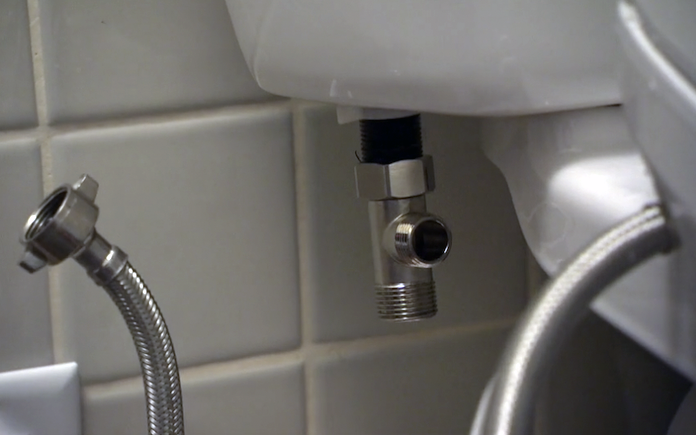
A T-valve connects to the existing water line that supplies the water to your bidet toilet seat. (3 Echoes Content Studio)
The bidet requires a water line, so we shut off the water at the toilet to install a T-valve so both the toilet and the seat can get water from the same source.
Chelsea and Brandon’s bathroom is 65 years old. At that age, there’s some baggage like the pink tub and the lack of ventilation.
The vanity was newer than that, but it really didn’t fit the style of the room and it lacked character.
But now, the room is overflowing with character and grandmillenial style. The wraparound wallpaper not only creates the jewelry box feel that Chelsea was after it also makes the pink tub look intentional.
The vent fan makes the space more functional, and the larger vanity makes it easier to use. Plus, its black finish complements the room style, and the new bidet toilet seat elevates the whole room to a spa-like experience.
Want to incorporate a creative pattern to a room? Hang wallpaper!
Pick a bold pattern for an accent wall or encase a whole room for an almost instant transformation.
There are two types of wallpaper: Pre-pasted and unpasted.
Pre-pasted wallpaper has adhesive applied to the back of it. To activate, simply wet the back and begin to apply the wallpaper to the wall once it’s sticky.
Unpasted wallpaper requires you to add the adhesive to the back in order to paper to the wall (or in this case the wall) in order for the wallpaper to stick.
Before you begin hanging wallpaper you’ll want to establish a plumb line adjacent to a corner. This straight, vertical line marks where the ends of two pieces of wallpaper will meet. Mark this line in an inconspicuous spot so the transition from one sheet of paper to the next is not as noticeable.
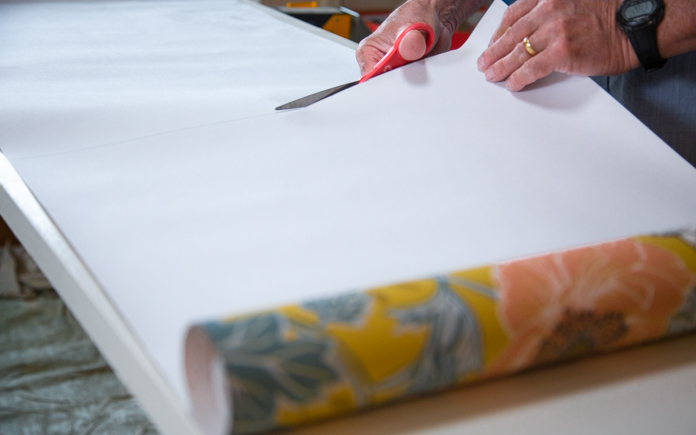
Cutting wallpaper is much like cutting gift wrap. You’ll need a sharp pair of scissors. (3 Echoes Content Studio)
2. Prep Wallpaper
Cut the paper itself an inch or so longer than the vertical dimension so it can be cut top and bottom.
Tip: Roll the paper backward before you hang it so it lays more flat on the wall.
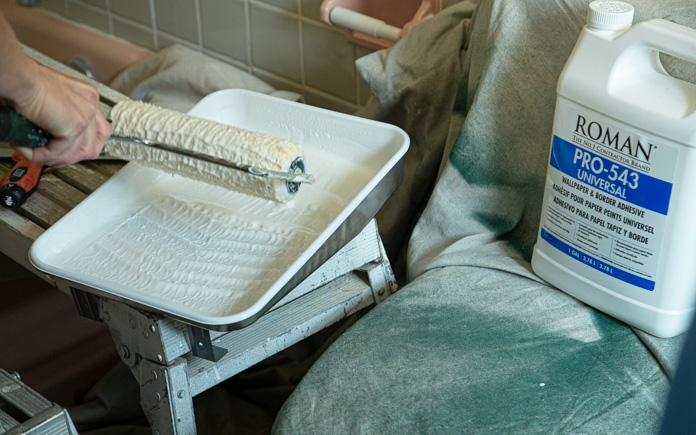
Some wallpaper has self-adhesion and others require you to put the glue on the paper or wall while installing. This wallpaper specifies for the glue to be applied to the wall, rather than the paper, before hanging.
Use a paint roller to roll the glue onto the wall, and apply the first sheet of wallpaper.
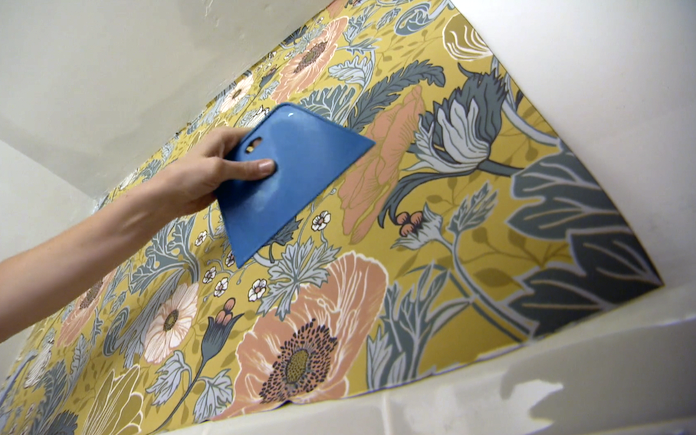
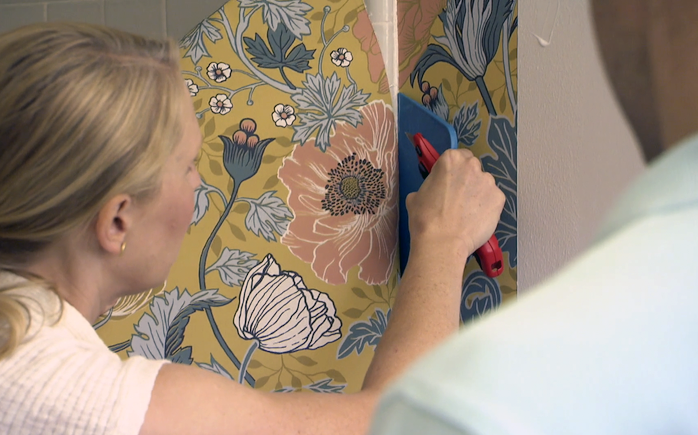
A smoother removes air bubbles and keeps the wallpaper surface even. (3 Echoes Content Studio)
4. Remove Bubbles
To remove air bubbles while you’re hanging the wallpaper, use a smoothing tool.
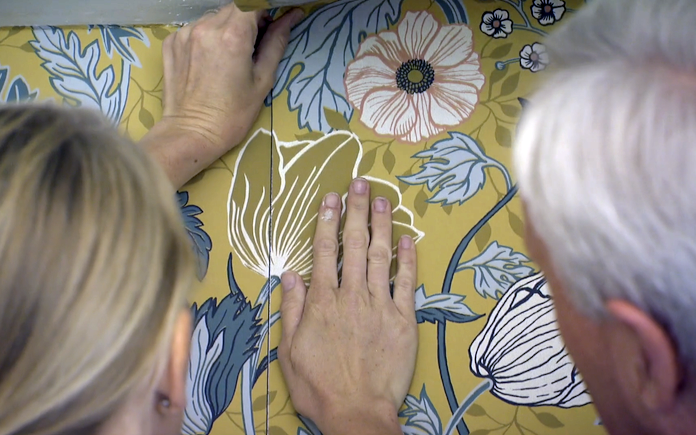
Pay close attention to the pattern so you’ll have a seamless transition from one sheet to the next. (3 Echoes Content Studio)
5. Match Pattern
Because there’s a pattern on this paper, we have to match up the pattern for each new piece. We line it up and mark the point where the top meets the ceiling so we can cut it to the proper length.
A slight overlap will accommodate any shrinkage after the glue dries. (3 Echoes Content Studio)
6. Overlap Seams
Overlap the seams by a little less than an eighth of an inch. This will eliminate any gaps if the wallpaper shrinks as the glue dries.
To trim any excess wallpaper, use the smoothing tool as a straight edge along the top and bottom of each piece. This gives the paper a clean, sharp look to complete the installation.
Over the years, I’ve shared more than 500 Simple Solutions — many of them have to do with painting specifically painting neatly.
And over time, many Today’s Homeowner fans have shared their own solutions on how to make painting easier.
This tip from John from Clancy, Montana, will help you paint neatly from a can using a paintbrush.
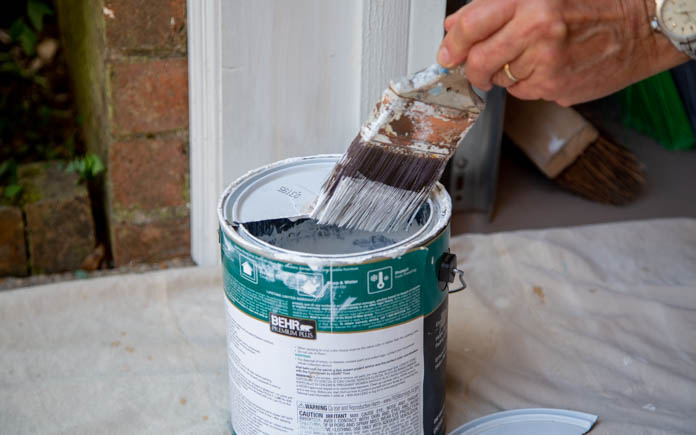
The challenge when dipping a paintbrush in a can is how to keep the paint from dripping around the rim. Not only do you waste paint, but you also make a mess on the outside of the paint can and the surface underneath it.
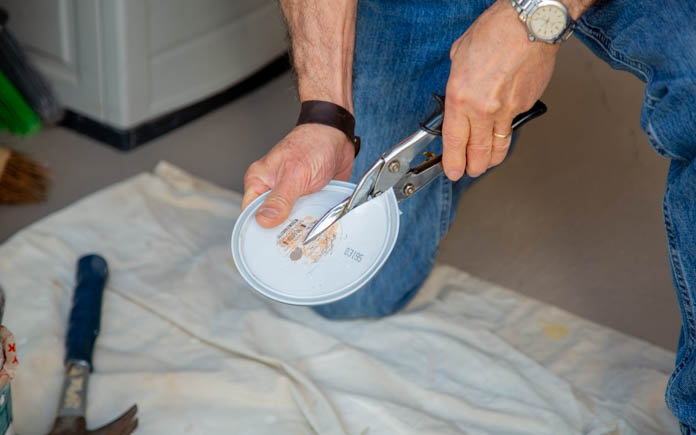
To prevent any paint from dripping down the side of the can, create a built-in paint scraper in the center of the can. Here’s how to do it: