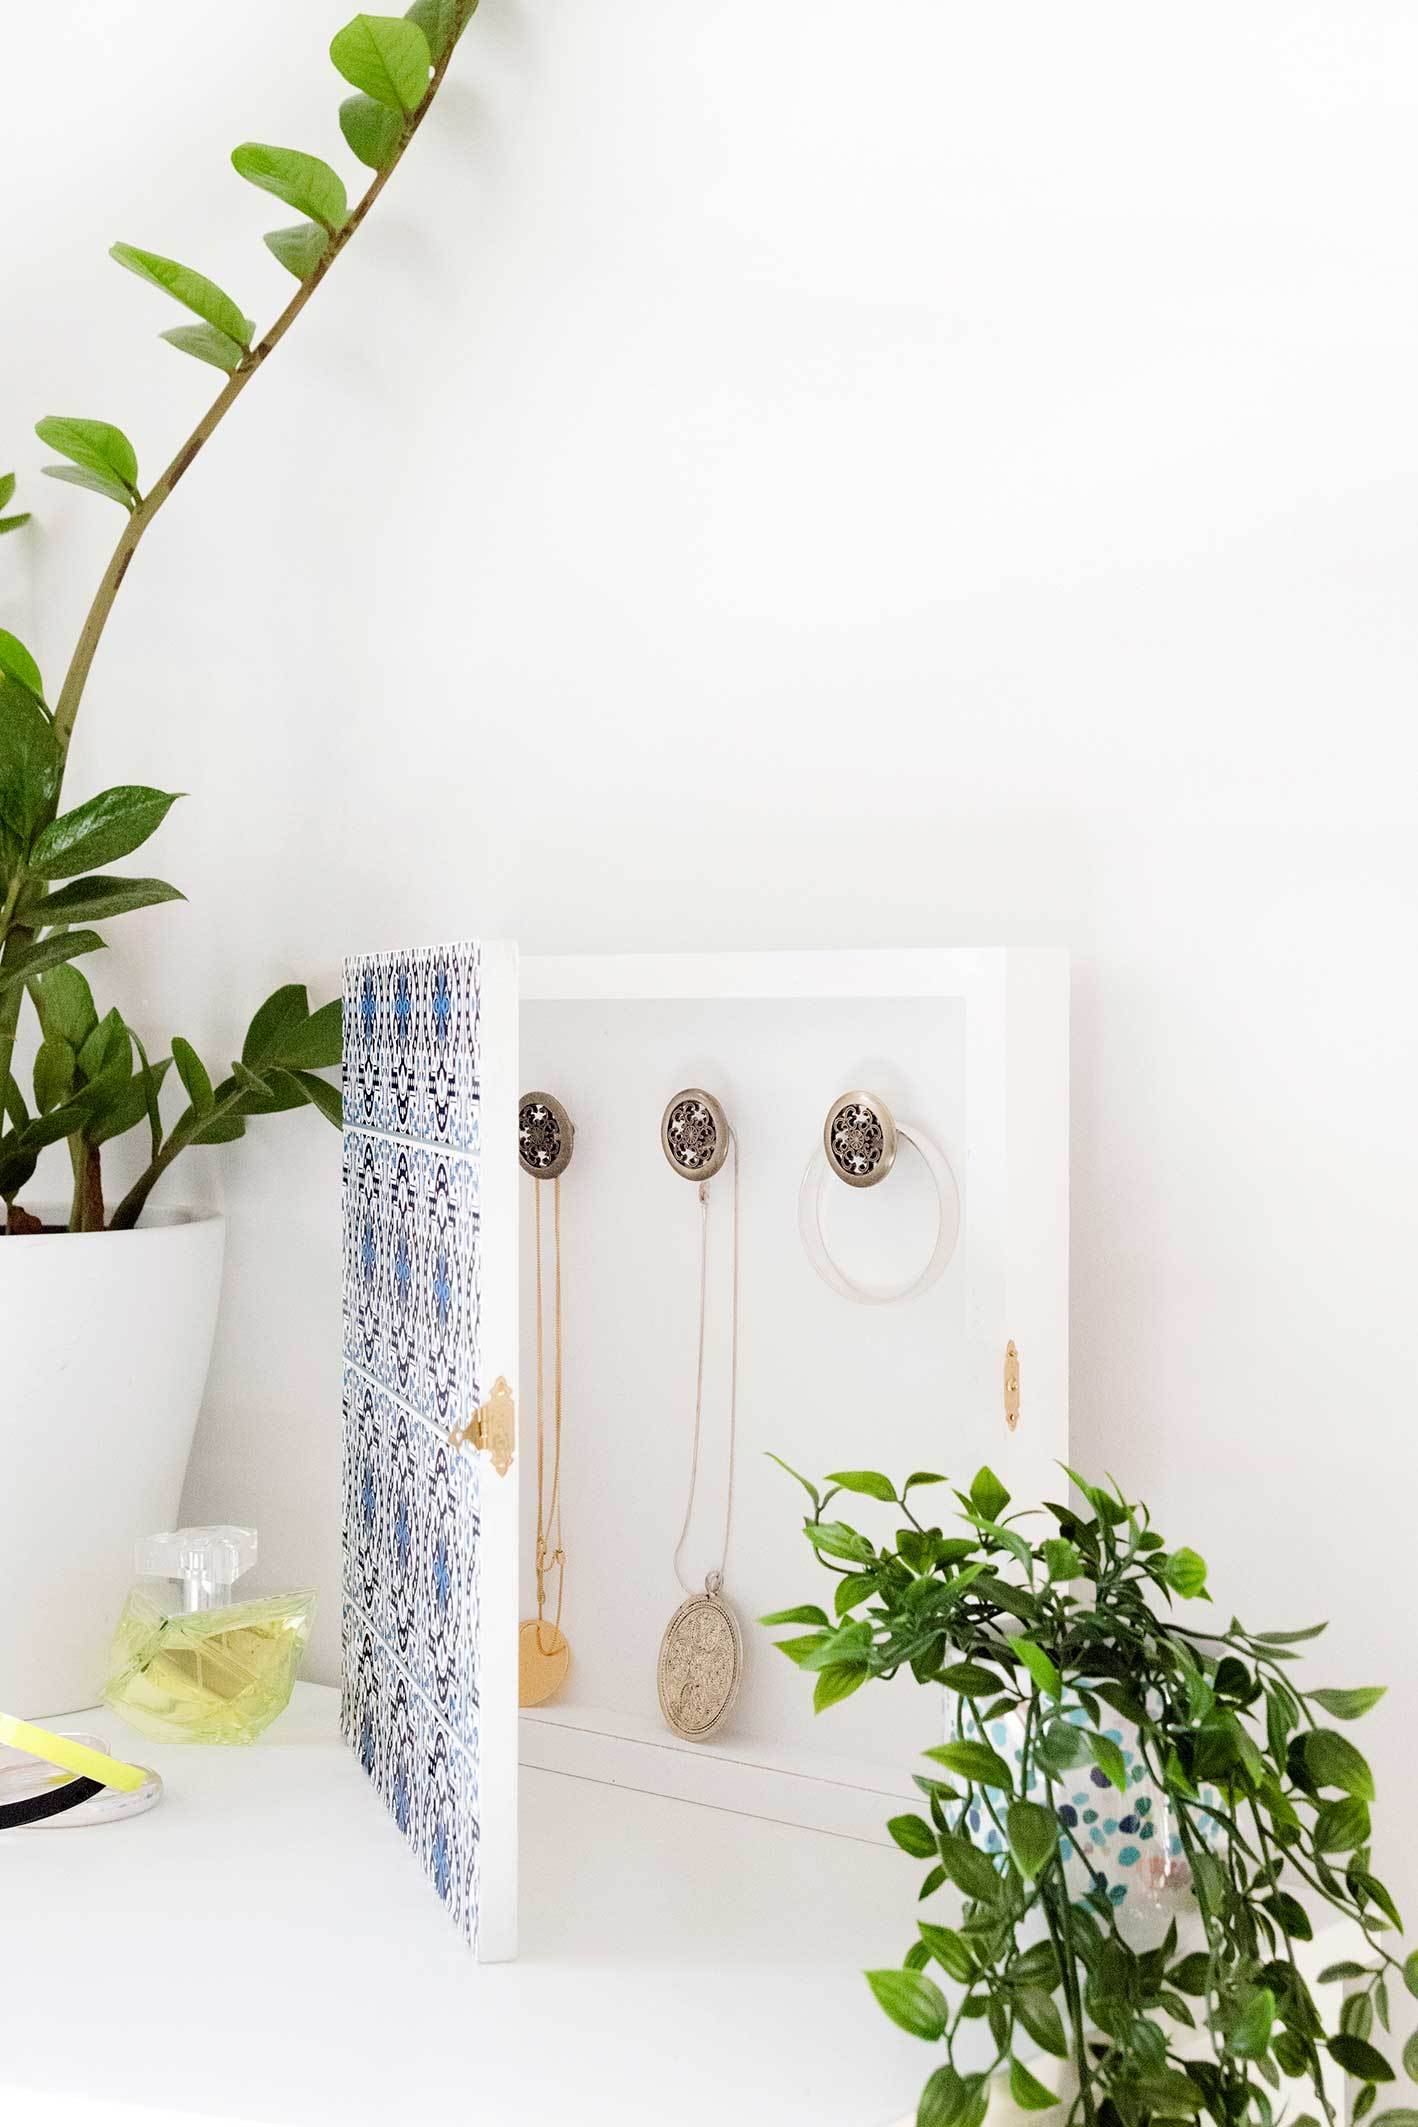
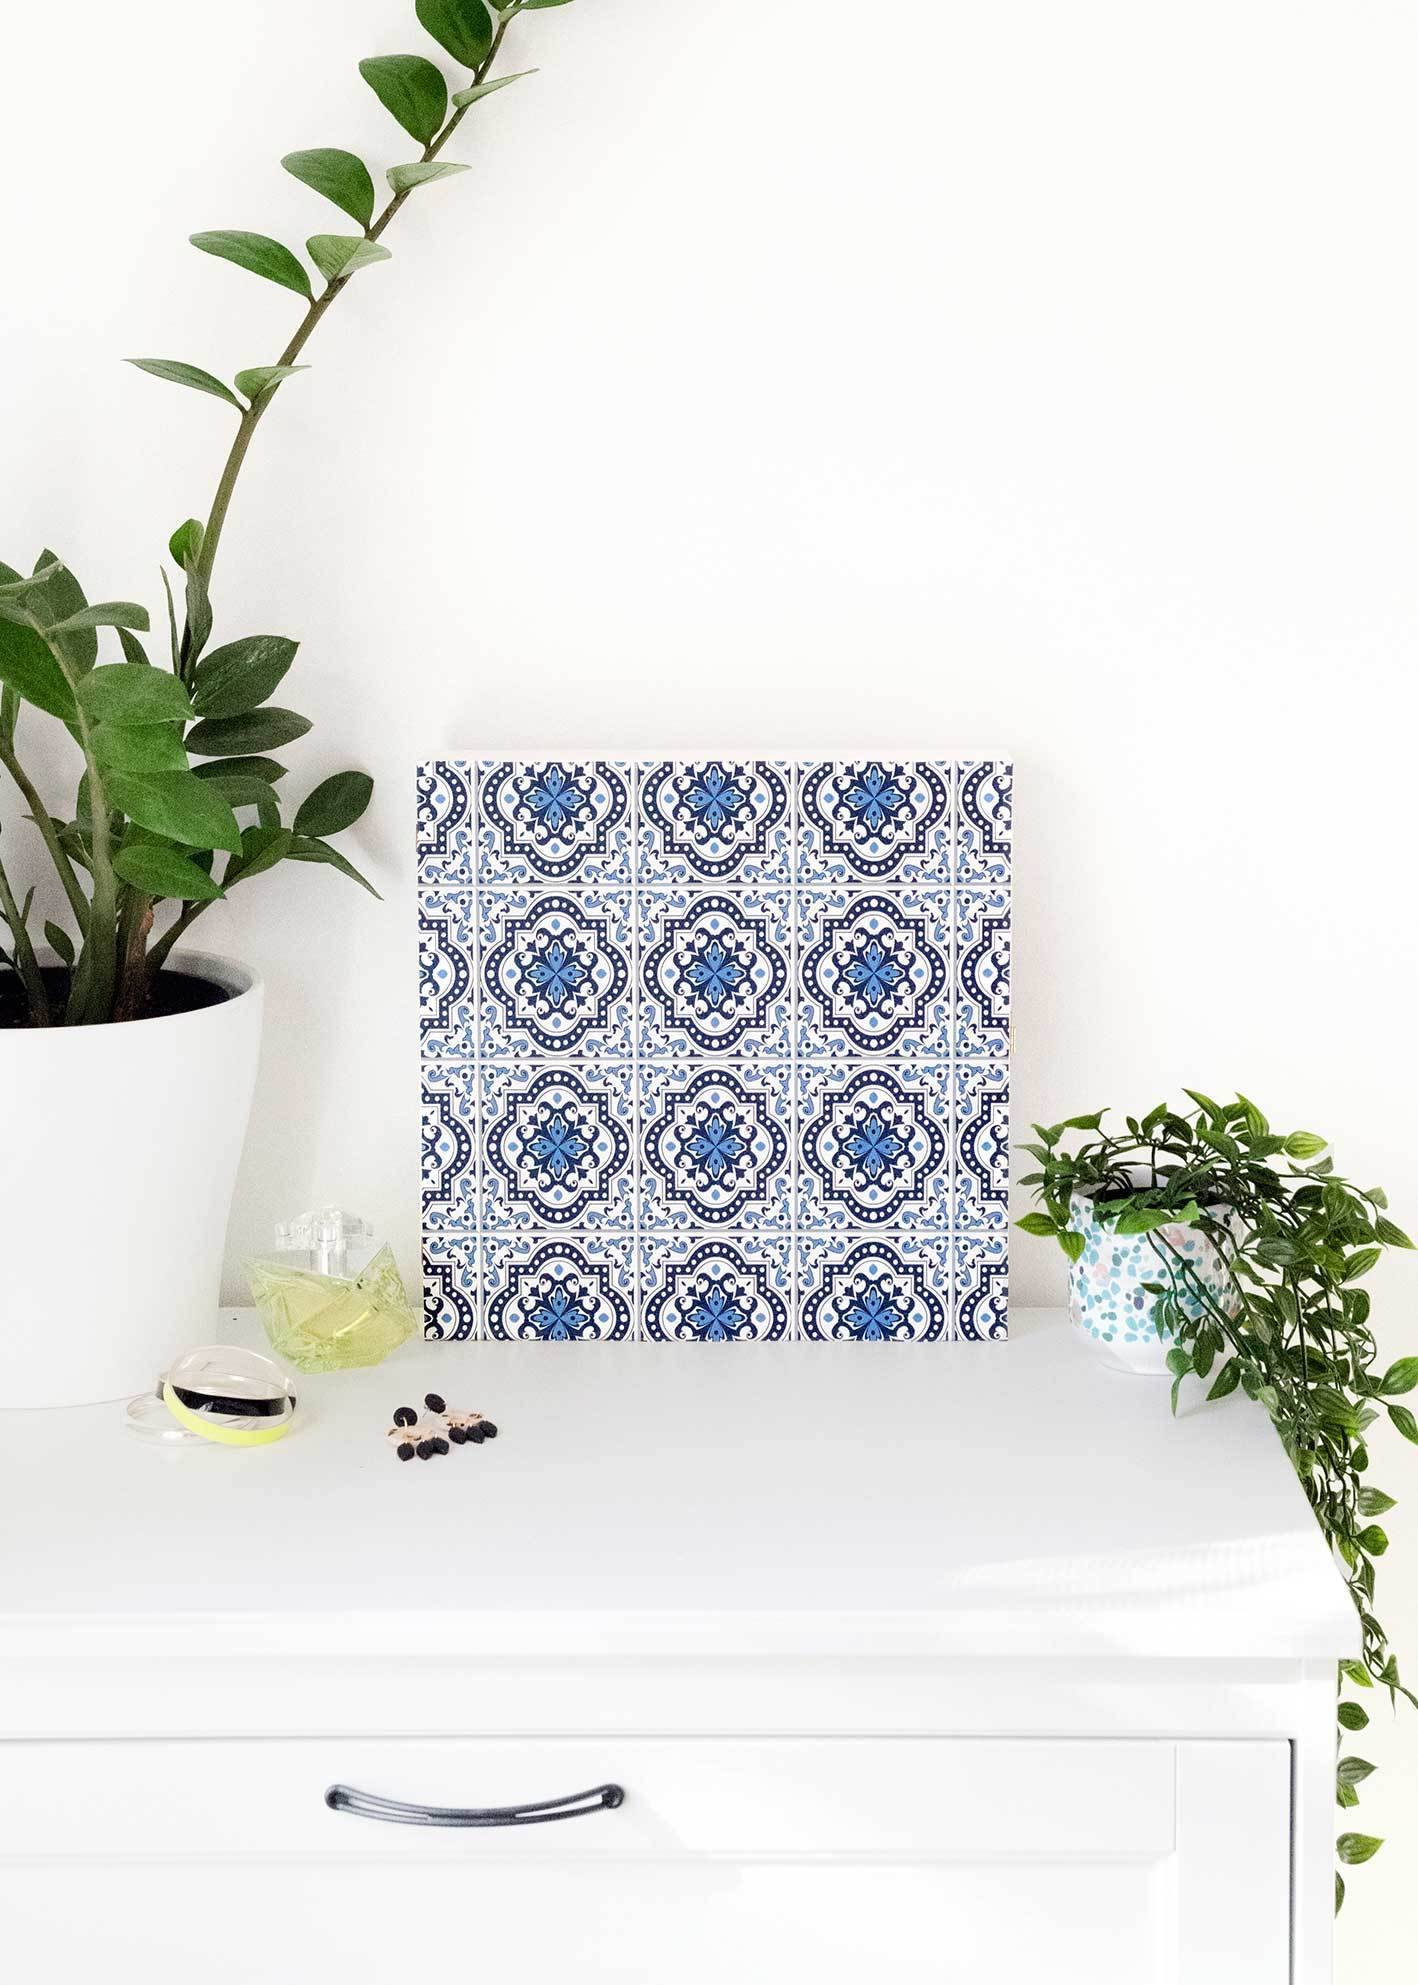
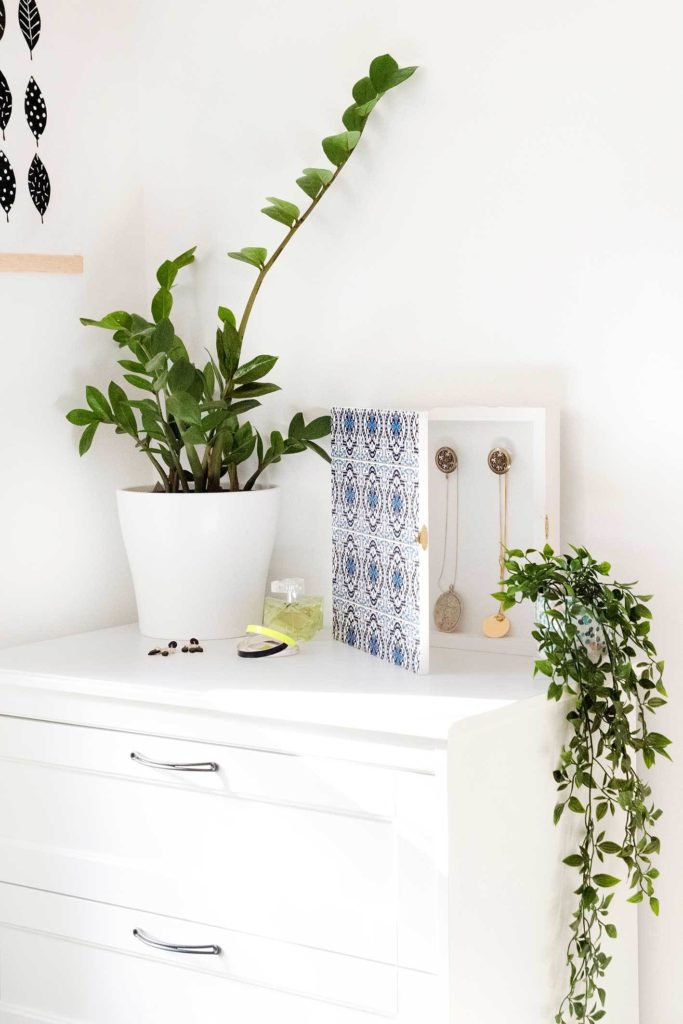
This art wall organizer provides functional storage while adding a beautiful decorative element to your walls. It’s the perfect solution for keeping your bedroom looking polished while keeping all your jewelry organized and accessible.
.tasty-pins-banner-container{display:block;margin-bottom:20px;position:relative;width:-moz-fit-content;width:fit-content}.tasty-pins-banner-container a{cursor:pointer;display:flex;font-size:14px;font-weight:700;letter-spacing:1px;line-height:1.8em;text-transform:uppercase}.tasty-pins-banner-container a:hover{opacity:1}.tasty-pins-banner-container .tasty-pins-banner{align-items:center;bottom:0;cursor:pointer;display:flex;justify-content:center;left:0;padding-bottom:1em;padding-top:1em;position:absolute;right:0}.tasty-pins-banner-container .tasty-pins-banner svg{margin-right:4px;width:32px}.tasty-pins-banner-container .tasty-pins-banner span{margin-top:4px}.tasty-pins-banner-container a.tasty-pins-banner{text-decoration:none}.tasty-pins-banner-container a.tasty-pins-banner:hover{opacity:.8}.tasty-pins-banner-container a.tasty-pins-banner-image-link{flex-direction:column}.tasty-pins-banner-container a img{margin-bottom:0}.entry-content .wp-block-image .tasty-pins-banner-container img{margin-bottom:0;padding-bottom:0}#et-boc .et-l div .et_pb_image_wrap .tasty-pins-banner-container .tasty-pins-banner{padding-bottom:1em!important;padding-top:1em;text-decoration:none}#et-boc .et-l div .et_pb_image_wrap .tasty-pins-banner-container a.tasty-pins-banner{cursor:pointer;display:flex;font-size:14px;font-weight:700;line-height:1.8em;text-transform:uppercase}#et-boc .et-l div .et_pb_image_wrap .tasty-pins-banner-container a.tasty-pins-banner span{letter-spacing:2px;margin-top:4px}.et-db #et-boc .et-l .et_pb_module .tasty-pins-banner-container a:not(.wc-forward){padding-bottom:0}
Those adorable little jewelry holders shaped like cacti and porcelain animals are undeniably cute, but let’s be honest, they don’t always hold much.
If you’ve got more than a handful of necklaces, you probably know the struggle of watching your favorite pieces overflow onto your dresser, getting tangled and covered in dust.
Why This Art Wall Organizer Works
This clever DIY project solves multiple problems at once.
The hidden storage keeps your bedroom looking clean and clutter-free, while the shadow box design protects your jewelry from dust and tangles.
You can customize the front to match any decor style, from modern geometric patterns to vintage florals.
It’s perfect for small spaces where every square inch counts, and it’s a budget-friendly alternative to those expensive jewelry armoires that take up valuable floor space. Best of all, when the door is closed, no one will know it’s anything more than a pretty piece of wall art!
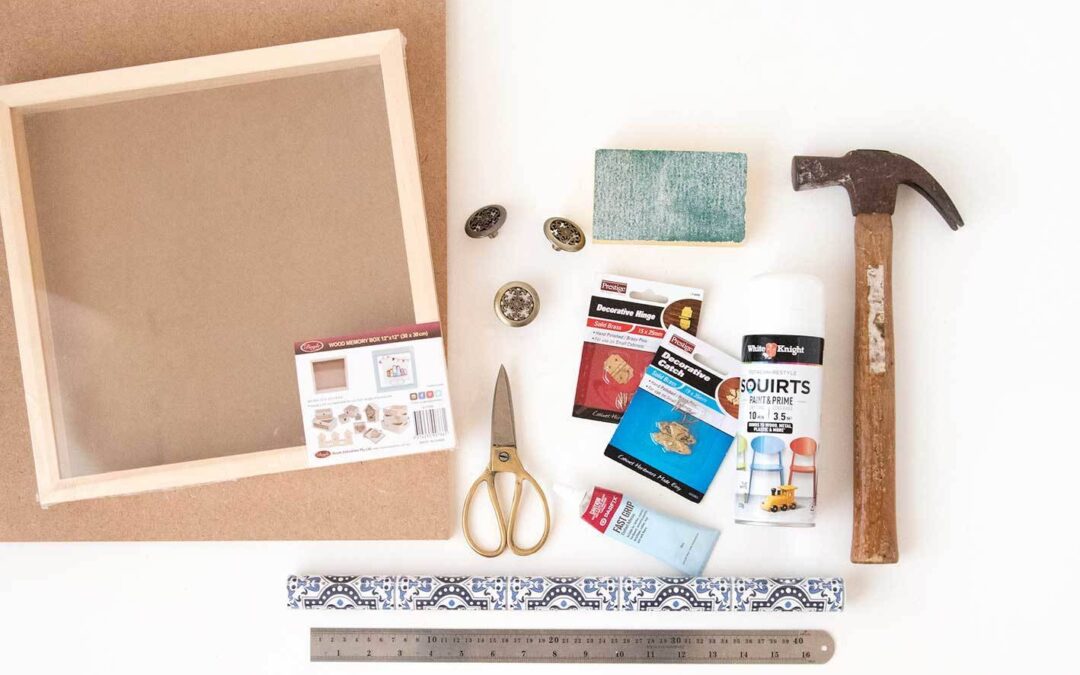
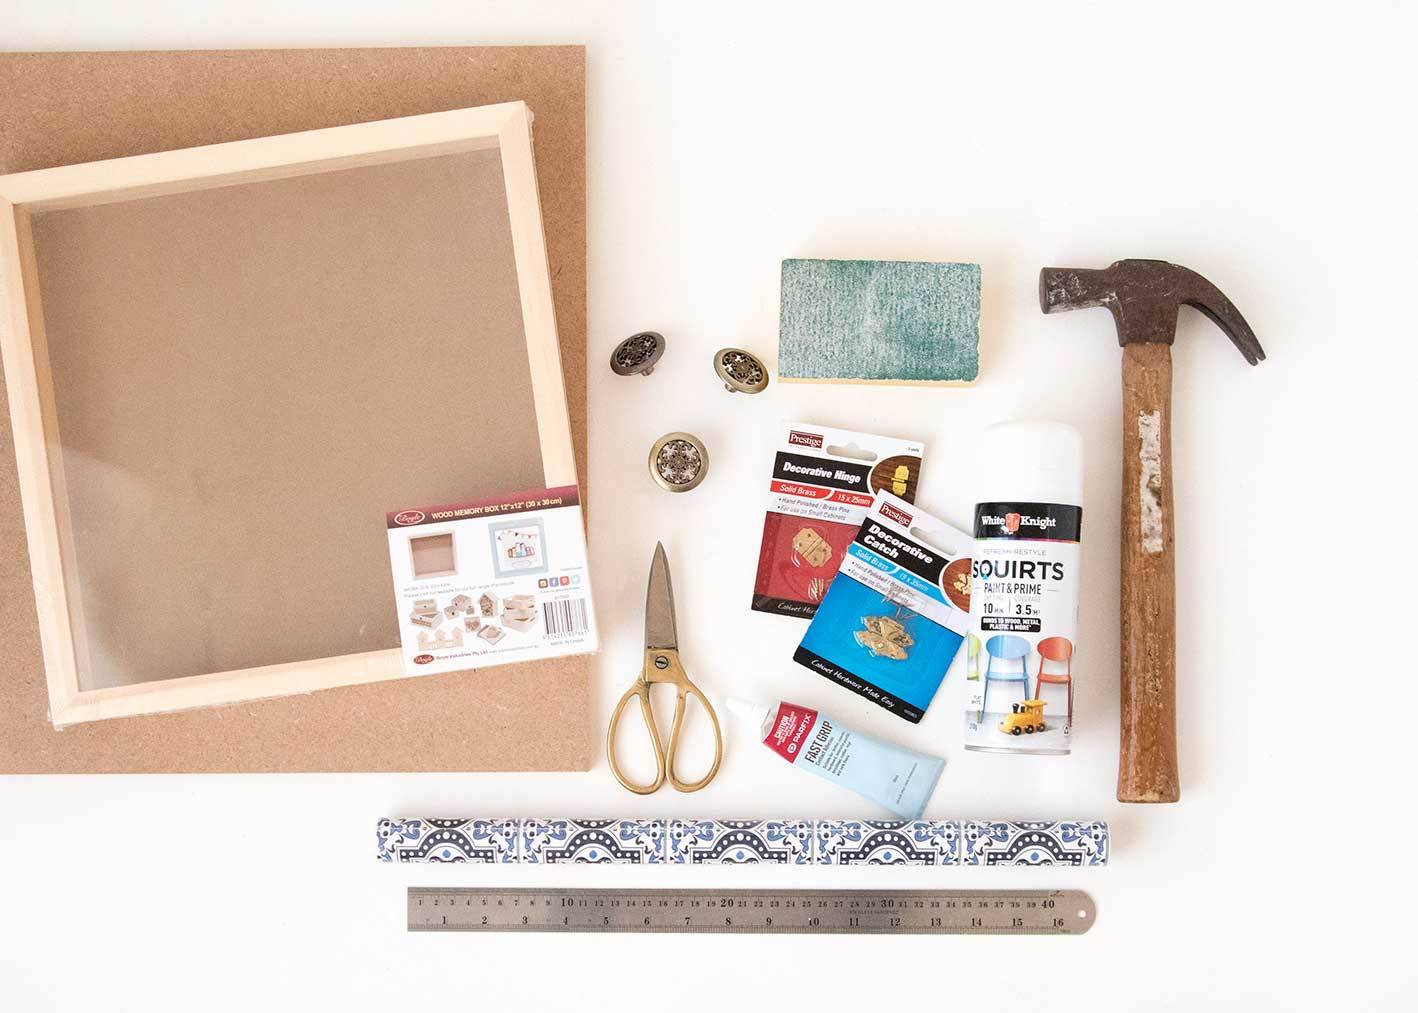
Materials You’ll Need
Wood shadow box frame
MDF board
Decorative contact paper or wallpaper
2 small hinges
Jewelry box clasp
Hooks or small decorative knobs
Primer and white paint
Sandpaper
Saw
Glue or strong adhesive
Cut and Prepare the MDF Door
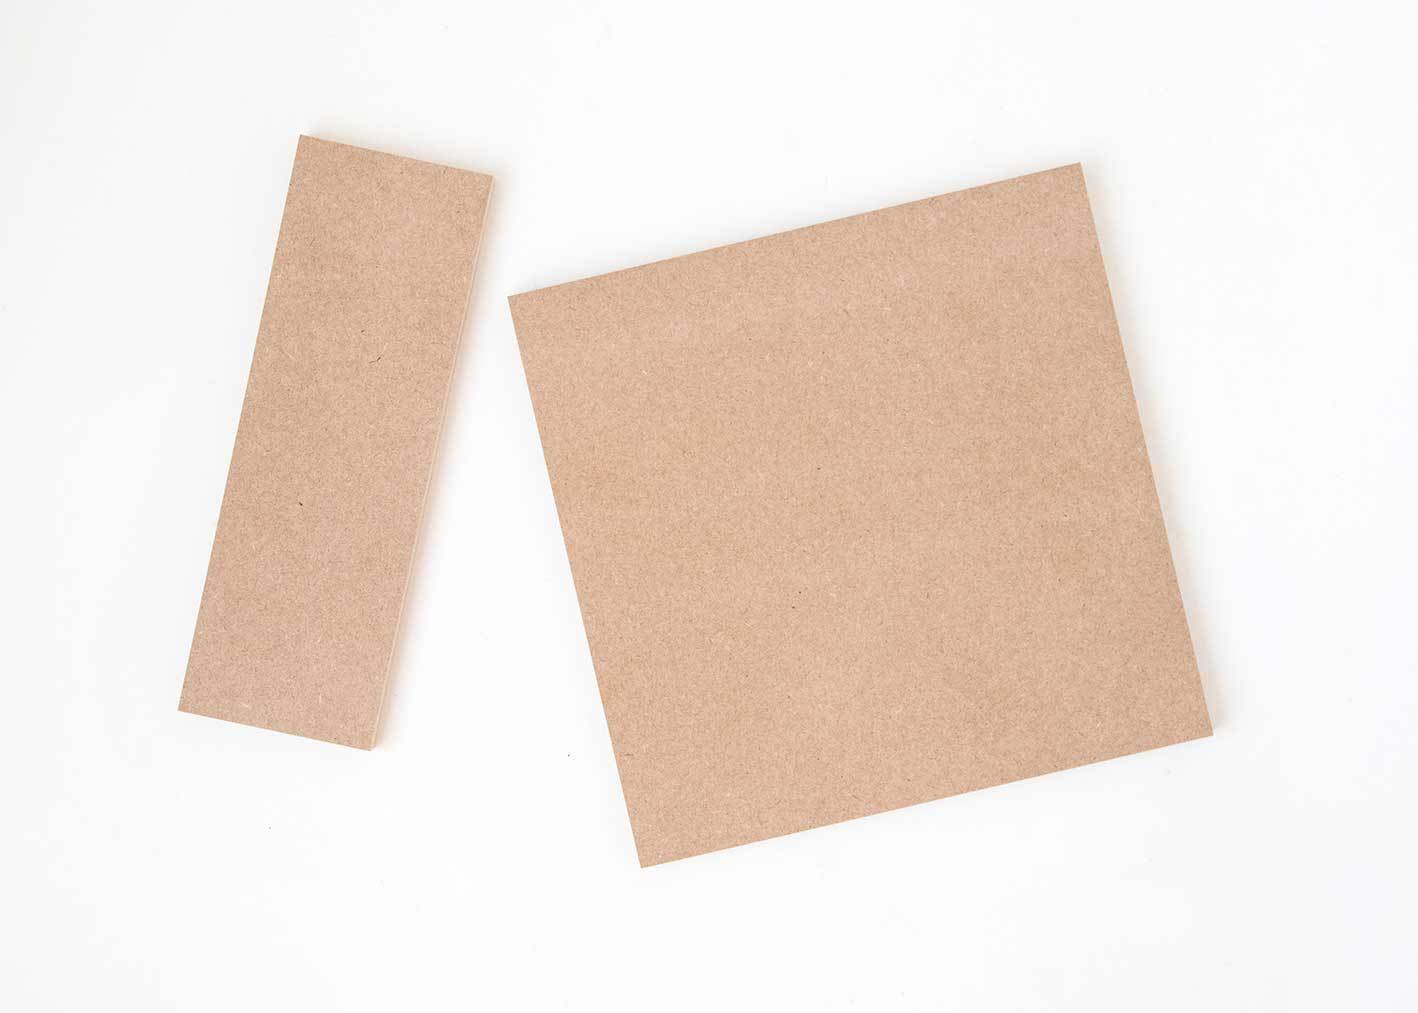
Start by measuring your shadow box frame carefully. Cut the MDF board to match these exact dimensions—this piece will become the door that conceals your jewelry storage.
Remove the glass from the shadow box frame and set it aside (you can save it for another craft project!).
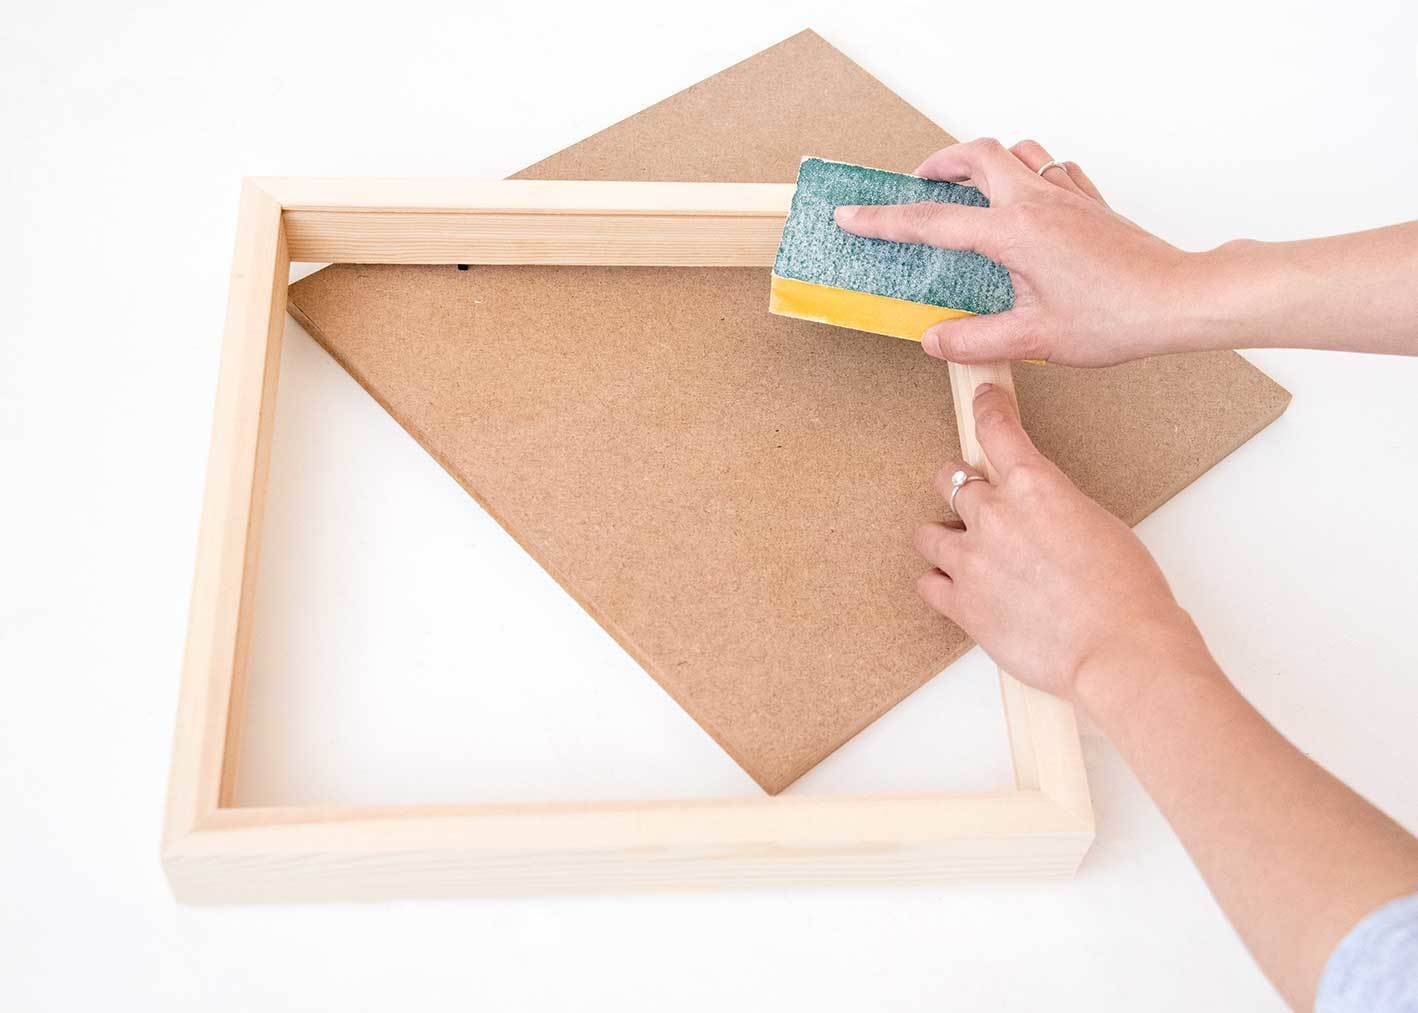
Sand both the frame and the MDF board until they’re smooth. This step is important because it helps the paint adhere better and gives you a professional-looking finish.
If you don’t have woodworking tools at home, don’t worry—most hardware stores offer free cutting services. Just bring your shadow box frame measurements with you, and they’ll cut the MDF to size.
Prime and Paint
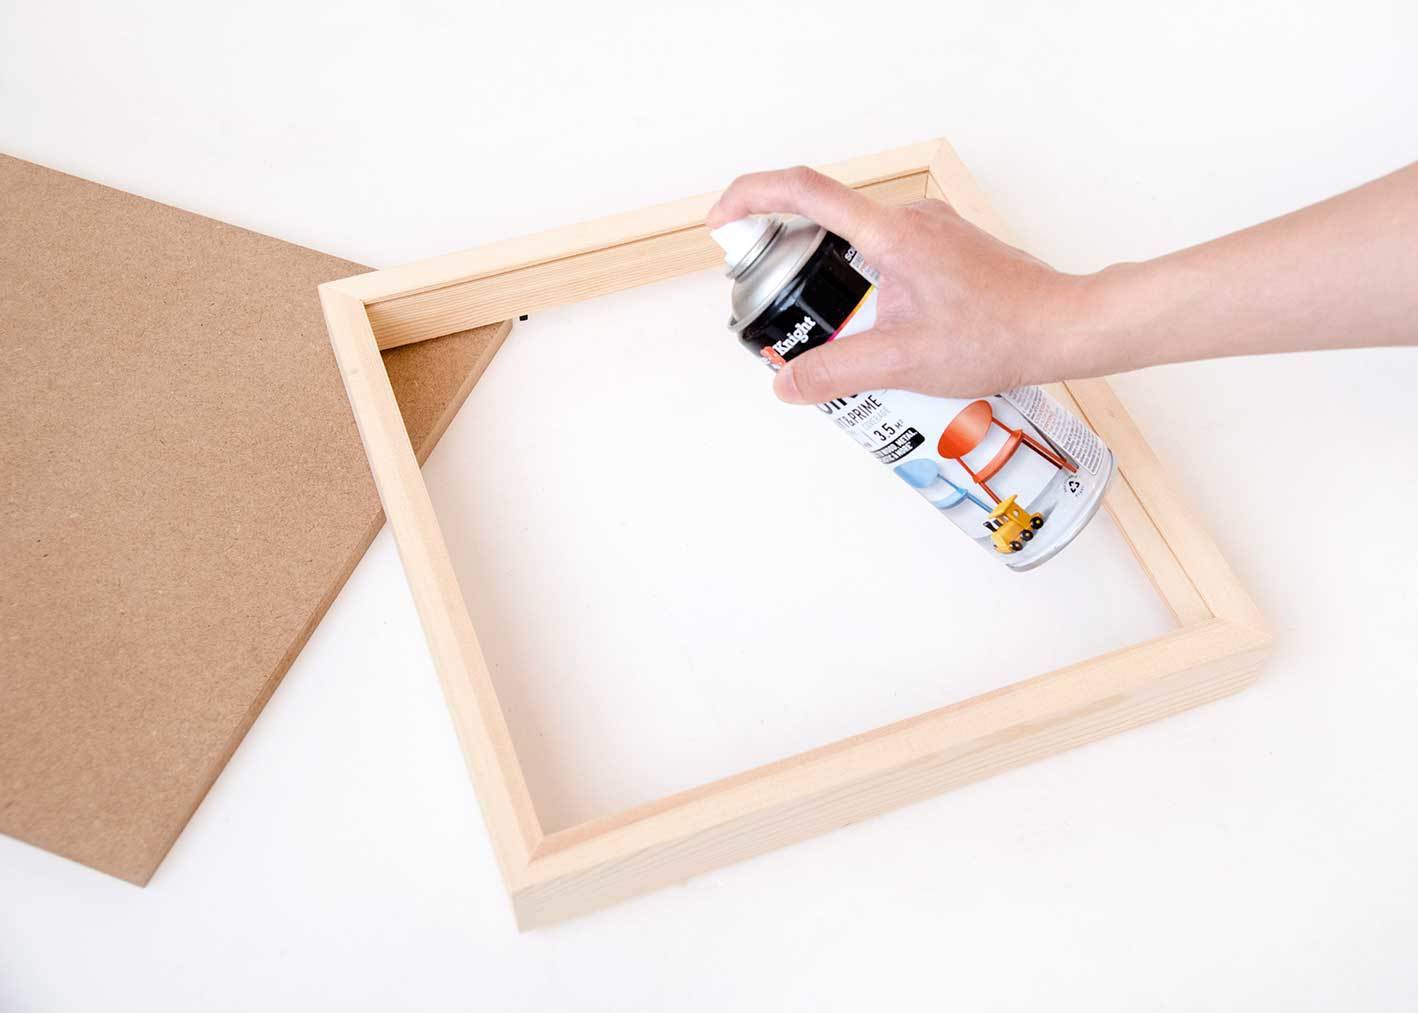
Apply a coat of primer to both the shadow box frame and the MDF board. Primer is especially important for MDF because it’s porous and can absorb paint unevenly without it.
Once the primer is dry, paint both pieces with your chosen color. White creates a classic, clean look that works with any decor, but you can absolutely choose any color that matches your room!
Let the paint dry completely between coats. If you want to add a vintage touch, you can lightly distress the edges with sandpaper after the final coat dries.
Attach the Hinges
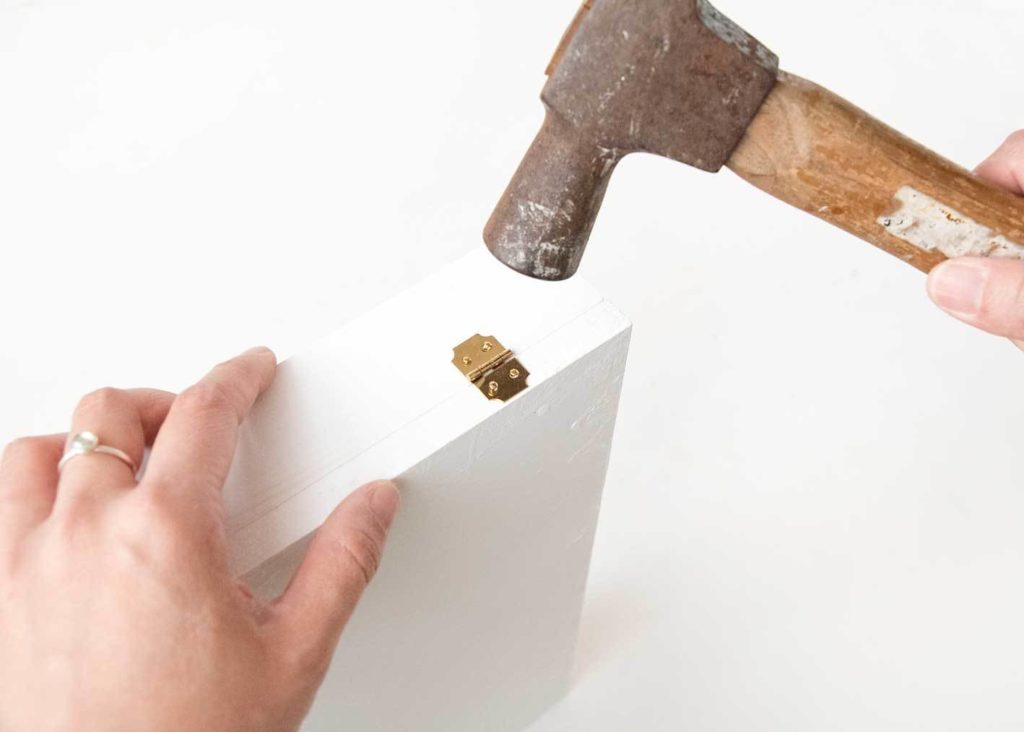
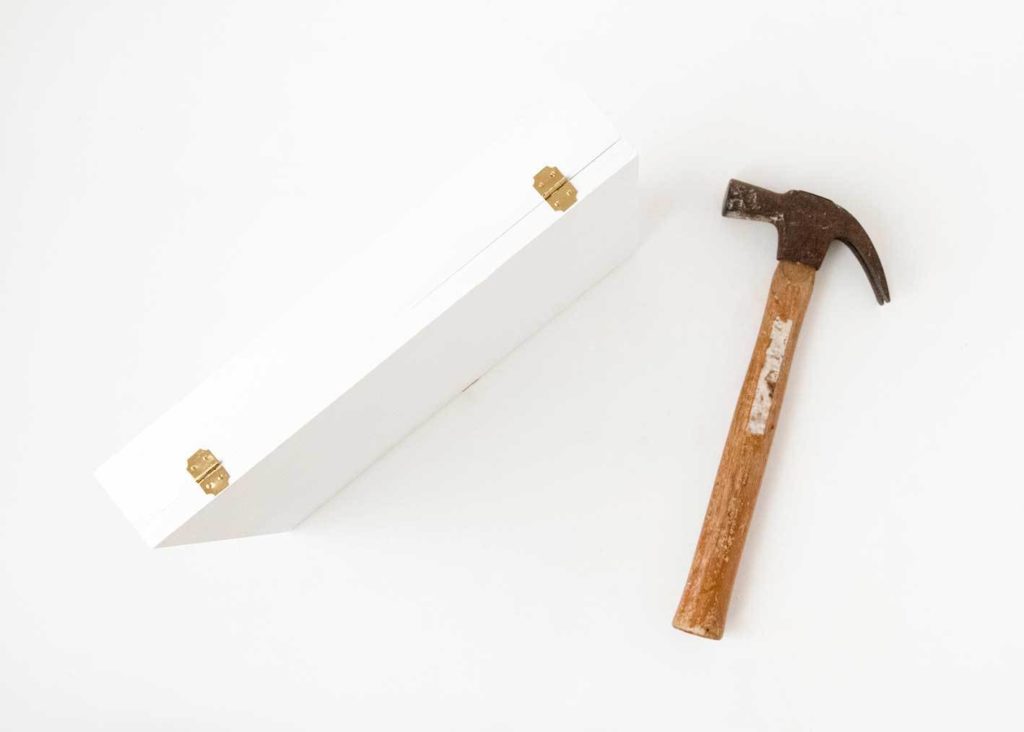
Position two small hinges evenly spaced along one side of your shadow box frame. Before you attach them, it’s a good idea to pre-drill the screw holes to prevent the wood from splitting.
Carefully attach the MDF door to the frame using the hinges, then test that the door swings smoothly.
If your door sticks or doesn’t close evenly, try adjusting the hinge placement slightly. This is one of those steps where taking your time really pays off—you want your art wall organizer to open and close smoothly for years to come.
Add the Clasp
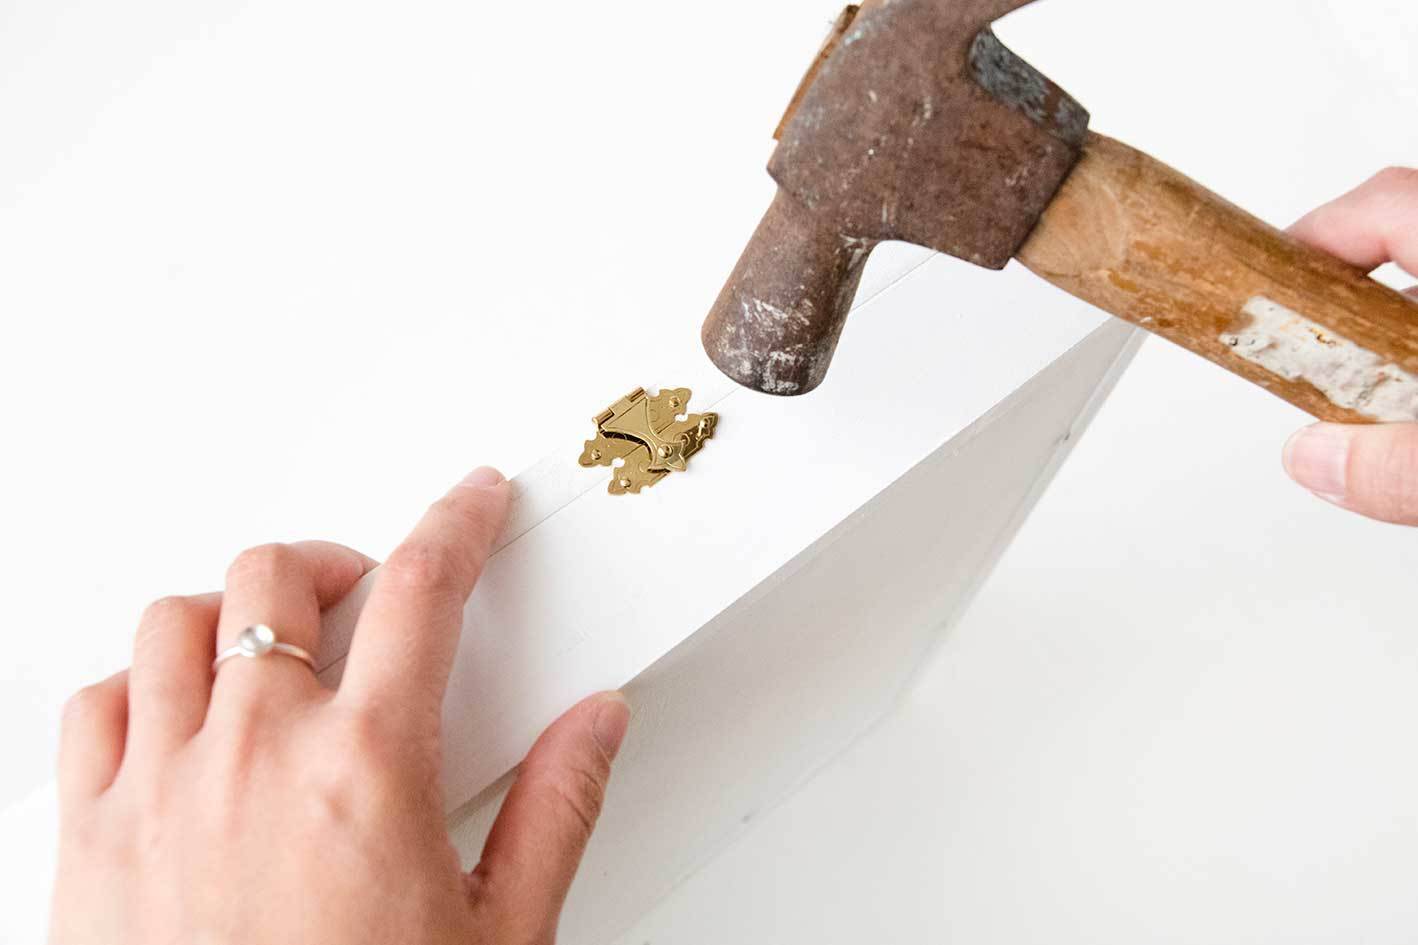
Install a jewelry box clasp on the opposite side from the hinges. Center the clasp so the door closes evenly and stays securely shut when filled with jewelry.
Magnetic clasps work great as an alternative if you prefer a cleaner look. Make sure whatever clasp you choose is strong enough to hold the door closed when it’s loaded with your jewelry collection.
Decorate the Front
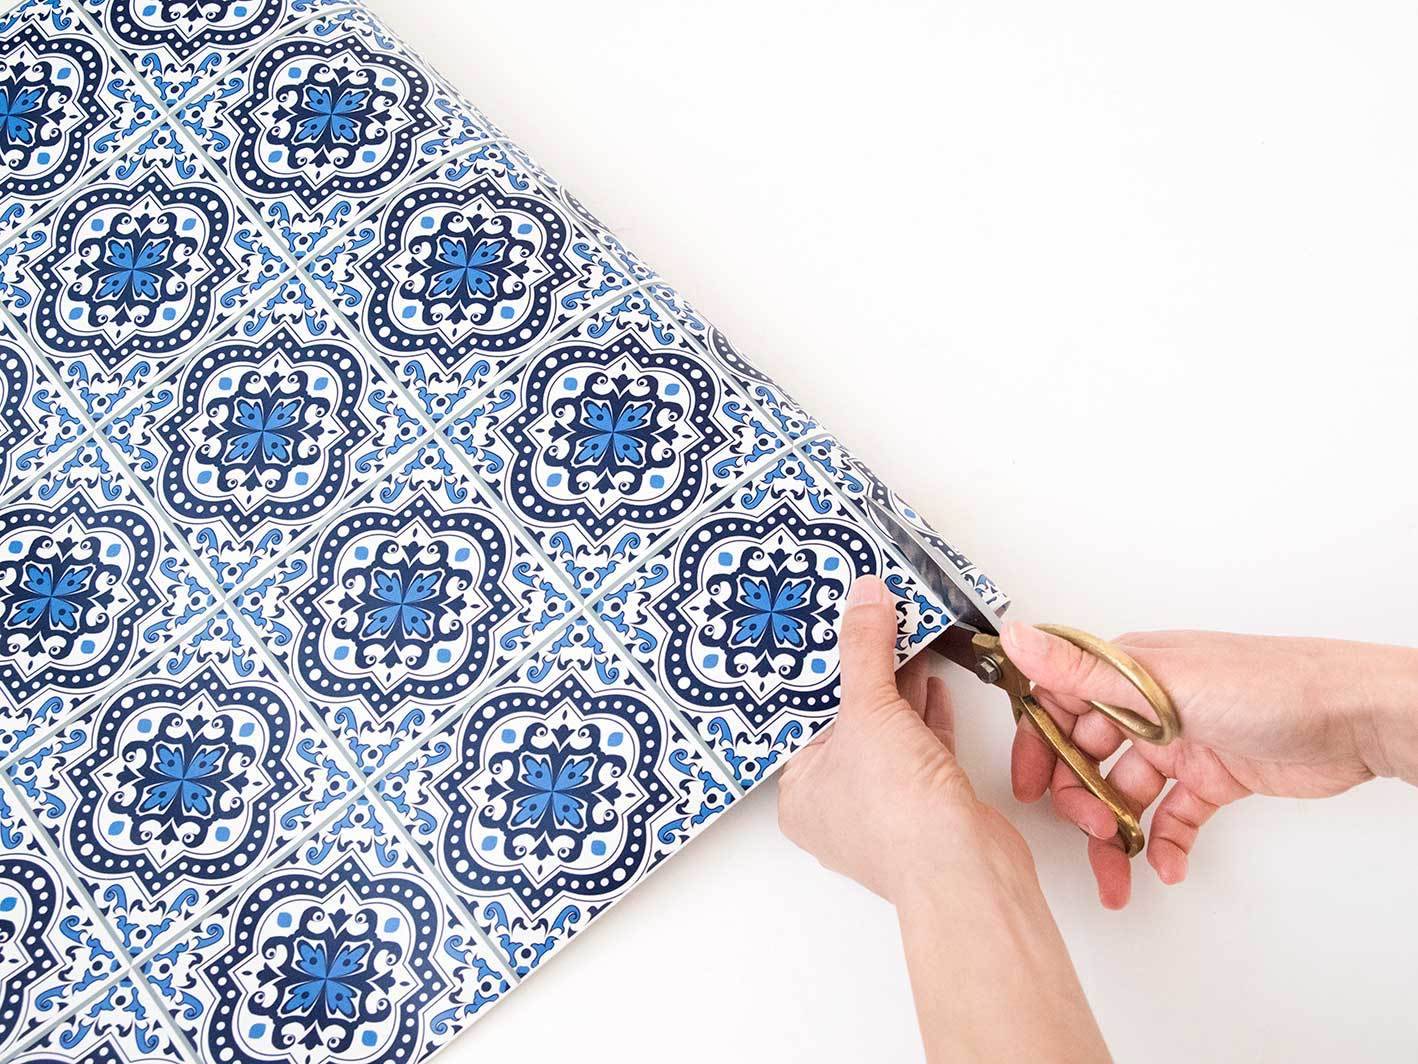
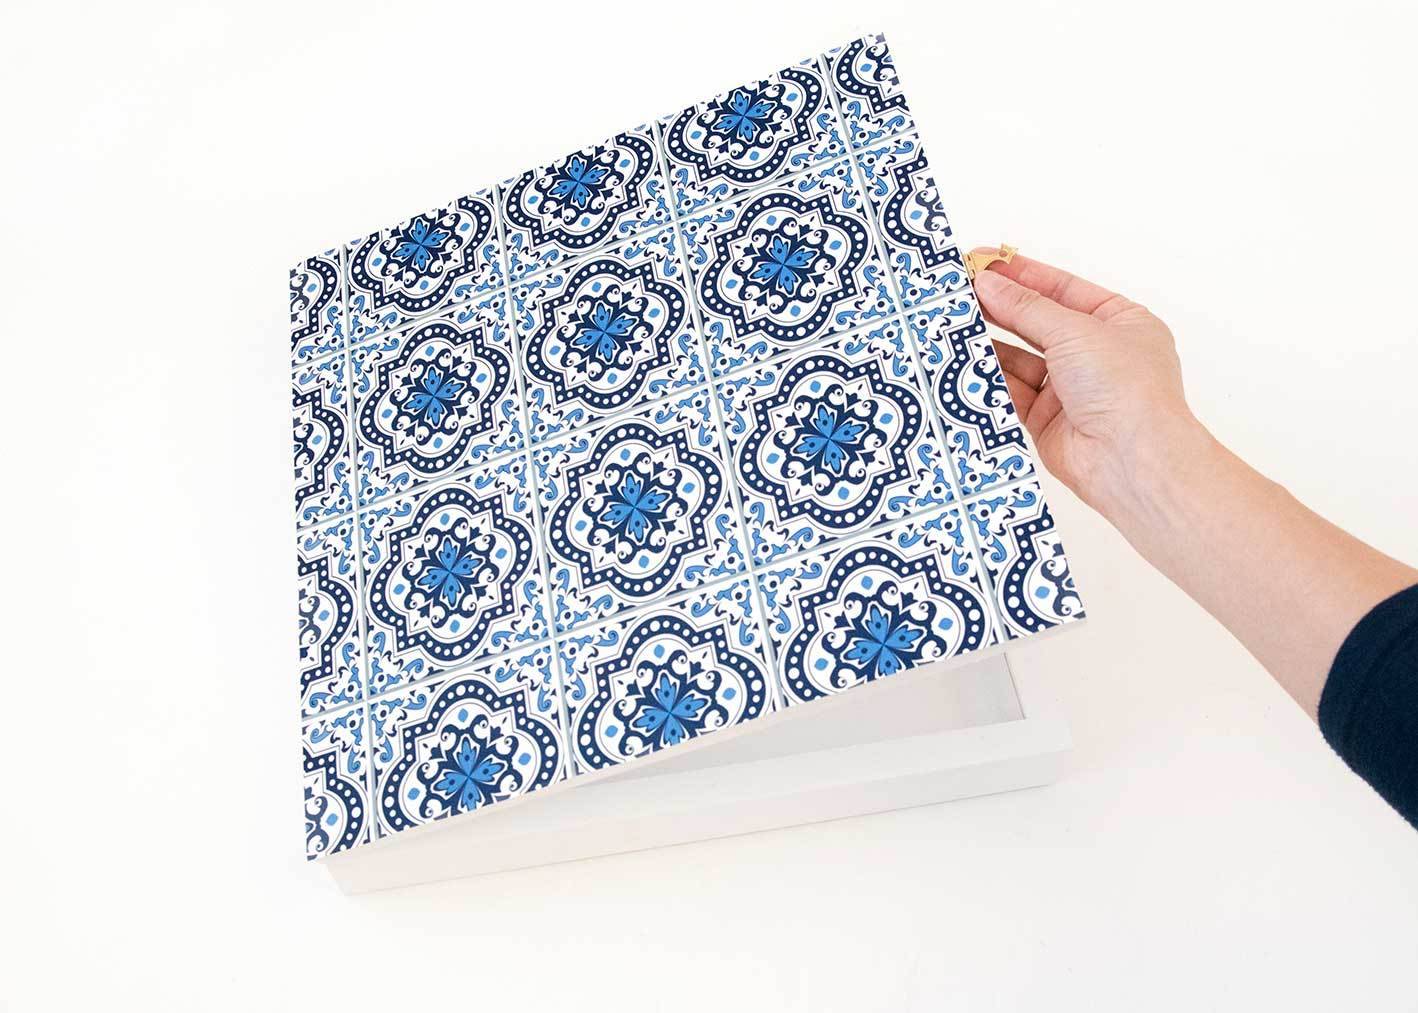
This is where your art wall organizer truly becomes a piece of art! Measure the front of your door and cut decorative contact paper or wallpaper to fit.
When you’re ready to apply it, measure twice and cut once—you want this to look perfect.
Apply the contact paper carefully to avoid bubbles. Start from one edge and smooth it down as you go, using a credit card or squeegee to push out any air pockets.
Your options here are endless: geometric patterns for a modern look, floral designs for something softer, or abstract art for a bold statement. Choose something that complements your bedroom’s aesthetic and makes you happy every time you see it.
Install Interior Hooks
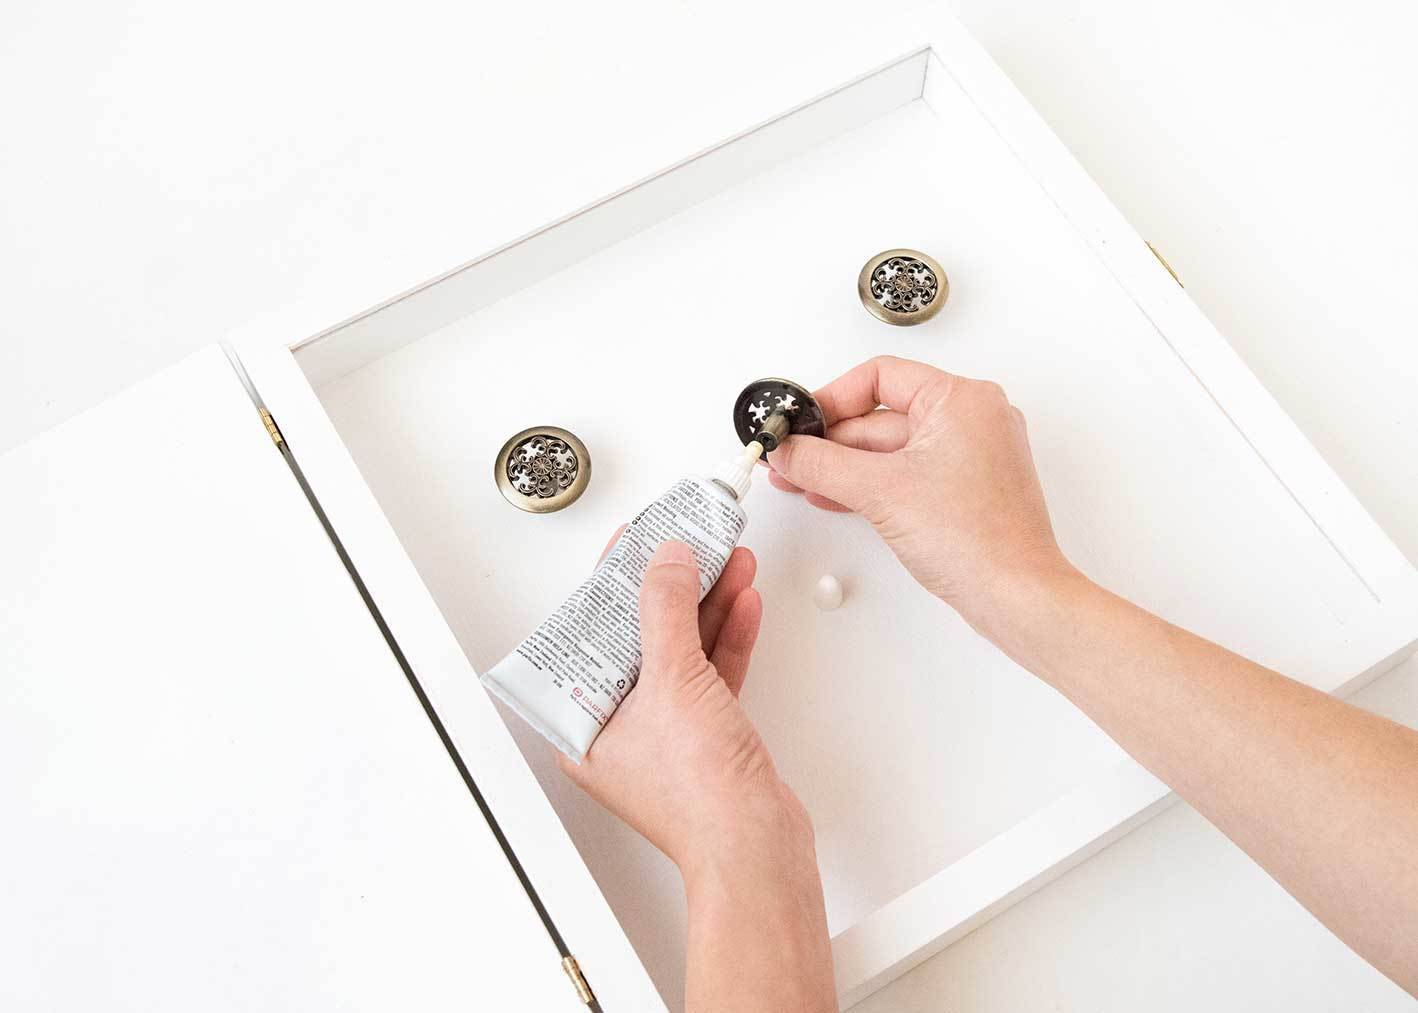
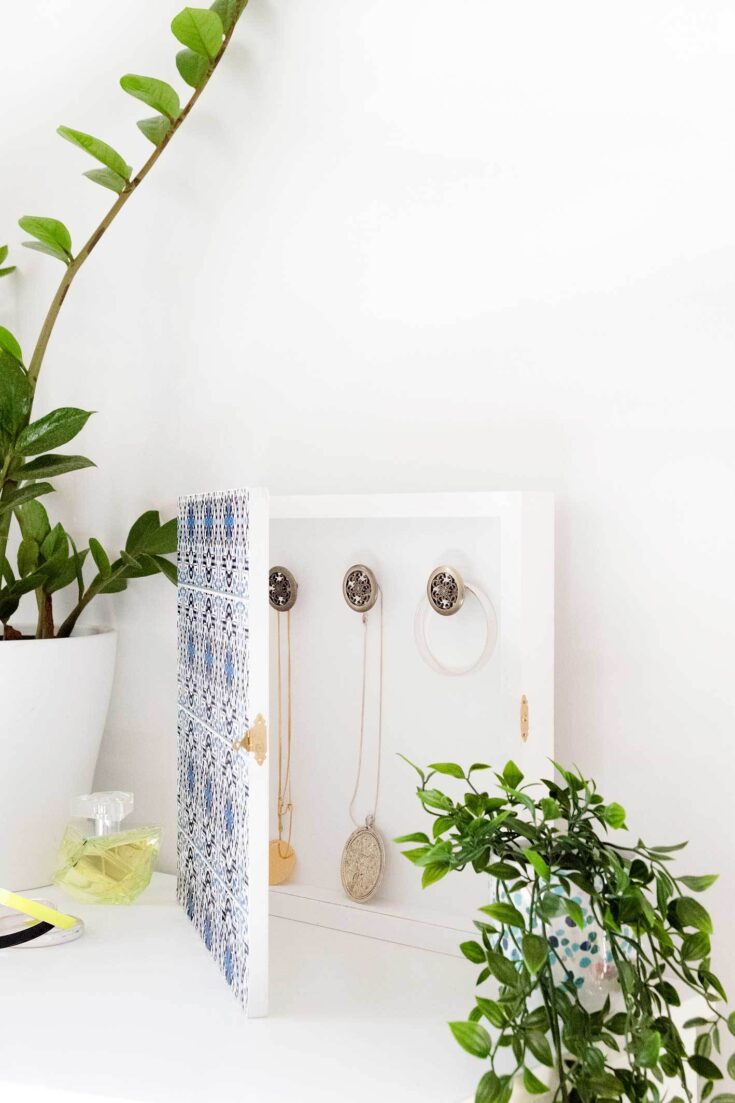
Now for the functional part! Space your hooks evenly inside the shadow box to accommodate different necklace lengths. Add decorative knobs near the top for shorter pieces like bracelets and chokers. Consider using different hook sizes for various jewelry types—some pieces might need larger, sturdier hooks.
Use strong adhesive or small screws to secure everything in place. Leave enough space at the bottom for longer necklaces to hang without getting tangled. Think about your jewelry collection as you plan the layout—if you have mostly long pendant necklaces, you’ll want to position hooks higher up.
Hang and Organize
Use picture hanging hardware that’s appropriate for the weight of your filled organizer. If you’re hanging it on drywall, wall anchors are essential for keeping everything secure. Hang your art wall organizer at a convenient height—eye level usually works well so you can easily see and access your jewelry.
Organize your jewelry by type or color, whatever makes the most sense for you. Hang your pieces, close the door, and step back to admire your handiwork. You’ve just created a beautiful piece of wall art that happens to be hiding all your jewelry!
Styling and Customization Ideas
Want to take this project even further? Match your contact paper to your bedroom’s color scheme for a cohesive look. You could create a whole gallery wall using multiple art wall organizers in different sizes—one for necklaces, one for bracelets, and another for rings and earrings.
Experiment with different frame styles to match your decor. A sleek modern frame works beautifully in contemporary spaces, while a distressed vintage frame adds charm to cottagecore or farmhouse bedrooms. For even more functionality, consider adding a cork backing where you can pin earrings, or line the interior with fabric to protect delicate pieces. You could even attach a small mirror to the inside of the door for a functional bonus.
The beauty of this project is that you can change the contact paper seasonally or whenever you want to refresh your look. It’s also a wonderful personalized gift for friends who love jewelry but struggle with storage.
Maintenance and Care Tips
Caring for your art wall organizer is simple. Dust the exterior just like you would any other wall art. Every few months, take a few minutes to reorganize the interior and untangle any pieces that might have gotten twisted together.
Over time, the hinges might loosen slightly from regular use, so keep a screwdriver handy to tighten them when needed. Clean the hooks occasionally to prevent any discoloration on your jewelry. If you have particularly delicate pieces, consider adding felt lining to the interior back panel for extra protection.
Frequently Asked Questions
What size shadow box frame works best?
An 8×10 or 11×14 frame works well for most jewelry collections. If you have an extensive necklace collection, go larger—or better yet, create multiple smaller organizers for different jewelry types. There’s no wrong size, as long as it fits your space and your collection.
Can I use this for earrings too?
Absolutely! To store earrings, add a piece of decorative mesh or cork to the interior back panel. You can hang stud earrings on the mesh or pin them to the cork. This works especially well if you create a dedicated earring organizer alongside your necklace storage.
Do I have to paint it white?
Not at all! Paint your art wall organizer any color that matches your decor. Metallics like gold, rose gold, or silver create a glamorous, jewelry-box feel. Deep jewel tones can make a bold statement, while soft pastels work beautifully in feminine spaces. This is your project—make it uniquely yours!
What if I don’t have woodworking tools?
Most hardware stores offer free cutting services for customers. Bring your shadow box frame and its measurements to the store, and they’ll cut the MDF to the perfect size. This makes the project accessible even if you’re working with a minimal tool collection.
How much weight can this hold?
A properly installed shadow box with quality hooks can comfortably hold several necklaces and bracelets. For heavier statement pieces, use stronger hooks and make sure you’ve mounted the organizer to wall studs or used appropriate wall anchors for durability. If you’re concerned about weight, test it before filling it completely.
Can I add a mirror inside?
That’s a brilliant idea! Attach a small mirror to the inside of the door using strong adhesive. This gives you a convenient spot to check how your jewelry looks before heading out. Just make sure the mirror isn’t too heavy for your hinges to support.
How to Make a Jewelry Organizer That’s Cleverly Disguised as Wall Art
Make this jewelry organizer that hides away as wall art! Stow away your necklaces and bracelets with the help of disguise.
Active Time3 hours
Total Time3 hours
DifficultyEasy
Materials
Wood shadow box frame
MDF board
Decorative contact paper or wallpaper
2 small hinges
Jewelry box clasp
Hooks or small decorative knobs
Primer and white paint
Sandpaper
Saw
Glue or strong adhesive
Instructions
Cut and Prepare the MDF Door
Cut MDF to match your shadow box frame dimensions. Remove the glass from the frame, then sand both the frame and MDF board smooth.
Prime and Paint
Apply primer to both the frame and MDF board, then paint with white paint (or your preferred color). Let dry completely.
Attach the Hinges
Connect the MDF board to the shadow box frame using two small hinges on one side to create a door that swings open.
Add the Clasp
Install a jewelry box clasp on the opposite side of the hinges to keep your art wall organizer securely closed.
Decorate the Front
Measure and cut decorative contact paper or wallpaper to fit the door. Apply it to create your “artwork” disguise.
Install Interior Hooks
Attach hooks or decorative knobs inside the shadow box to hold necklaces, bracelets, and other jewelry.
Hang and Organize
Mount your art wall organizer on the wall, fill it with jewelry, close the door, and enjoy your hidden storage!
Making Beautiful Storage Work for You
Creating this art wall organizer gives you the best of both worlds: beautiful art that enhances your space and practical storage that keeps your jewelry organized and protected. Whether you’re a beginner DIYer or someone with plenty of crafting experience, this project is completely customizable to match your style and skill level.
The hidden storage concept works beautifully for keeping your bedroom looking clean while ensuring your favorite pieces are always within reach. You’ve created something functional that also brings beauty to your walls—and that’s what great design is all about.
Ready to create your own hidden jewelry storage that looks straight from one of the great design studios? Gather your materials and give it a try this weekend. Your jewelry (and your bedroom) will thank you!
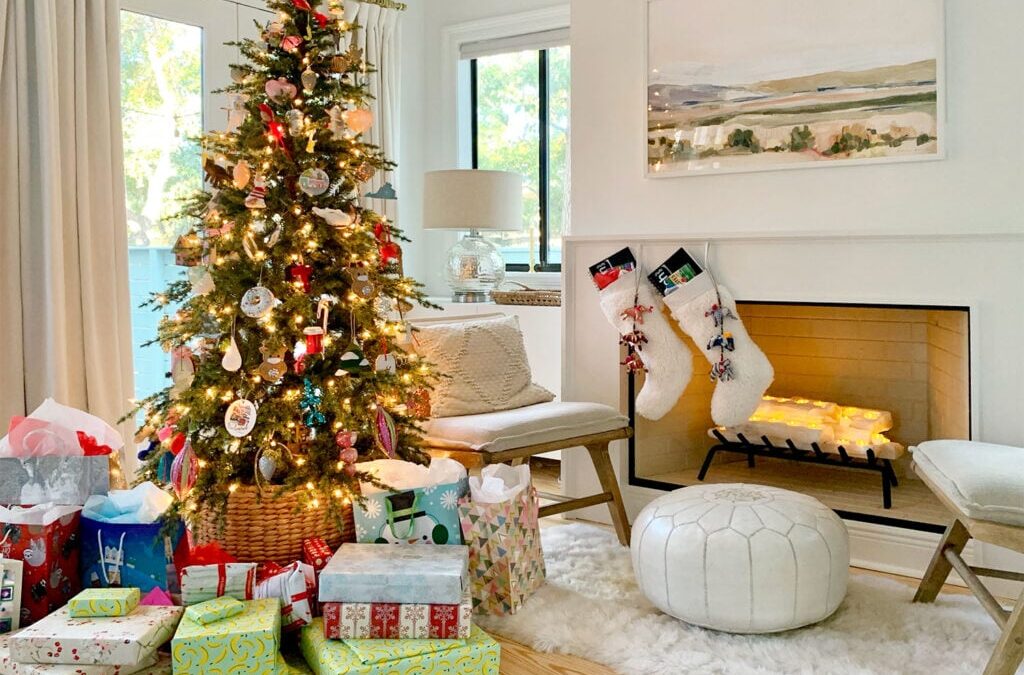
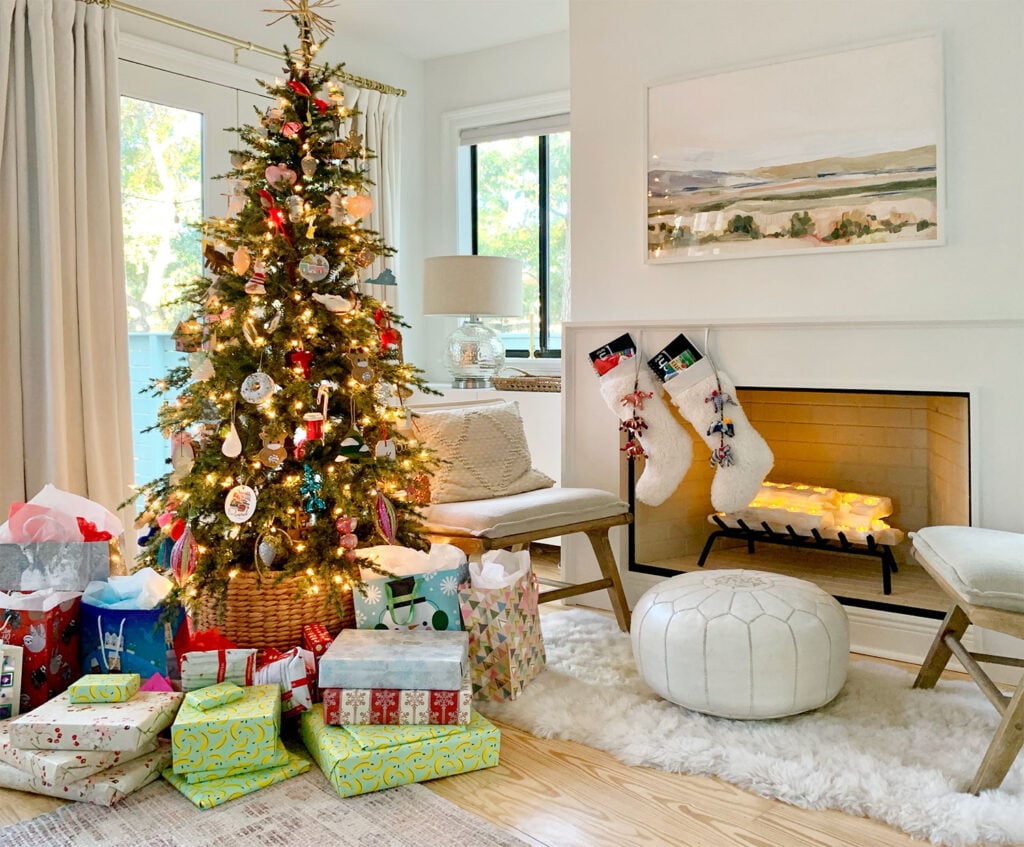
Ready to decorate your apartment for the holiday season? Don’t let worries about how you’ll make it work take away from the magic and wonder. While rentals may come with limitations like skipping nails for garland or avoiding a real tree, that doesn’t mean decorating has to be boring. Apartment Christmas decorations can still sparkle with plenty of charm, and the compact space can even make it feel even more inviting.
We’ve taken out the guesswork with some creative ideas we think you’ll love. So grab a hot chocolate, take notes, and get ready to turn your rental into a festive wonderland.
.tasty-pins-banner-container{display:block;margin-bottom:20px;position:relative;width:-moz-fit-content;width:fit-content}.tasty-pins-banner-container a{cursor:pointer;display:flex;font-size:14px;font-weight:700;letter-spacing:1px;line-height:1.8em;text-transform:uppercase}.tasty-pins-banner-container a:hover{opacity:1}.tasty-pins-banner-container .tasty-pins-banner{align-items:center;bottom:0;cursor:pointer;display:flex;justify-content:center;left:0;padding-bottom:1em;padding-top:1em;position:absolute;right:0}.tasty-pins-banner-container .tasty-pins-banner svg{margin-right:4px;width:32px}.tasty-pins-banner-container .tasty-pins-banner span{margin-top:4px}.tasty-pins-banner-container a.tasty-pins-banner{text-decoration:none}.tasty-pins-banner-container a.tasty-pins-banner:hover{opacity:.8}.tasty-pins-banner-container a.tasty-pins-banner-image-link{flex-direction:column}.tasty-pins-banner-container a img{margin-bottom:0}.entry-content .wp-block-image .tasty-pins-banner-container img{margin-bottom:0;padding-bottom:0}#et-boc .et-l div .et_pb_image_wrap .tasty-pins-banner-container .tasty-pins-banner{padding-bottom:1em!important;padding-top:1em;text-decoration:none}#et-boc .et-l div .et_pb_image_wrap .tasty-pins-banner-container a.tasty-pins-banner{cursor:pointer;display:flex;font-size:14px;font-weight:700;line-height:1.8em;text-transform:uppercase}#et-boc .et-l div .et_pb_image_wrap .tasty-pins-banner-container a.tasty-pins-banner span{letter-spacing:2px;margin-top:4px}.et-db #et-boc .et-l .et_pb_module .tasty-pins-banner-container a:not(.wc-forward){padding-bottom:0}Photo by Jasmin Ne
Apartment Christmas Decorations that Are Festive and Affordable
If you’re renting, you probably aren’t ready to invest in expensive holiday decor (yet). Maybe it’s not your vibe or you’re on a budget.
Whatever the reason, decor for small spaces allows you to decorate without worrying about breaking the bank. No, this doesn’t mean your place will be riddled with tacky plastic ornaments that say “Live, Laugh, Love,” but it does mean your hard-earned money can go towards smaller (and thus more affordable) apartment Christmas decorations.
Here are a few ideas for affordable and simple Christmas decorations that you can feel good about.
Turn your bar cart into a holiday spirit command station
More and more bar carts are being used as a platform for holiday decor. And why not? They’re affordable, stylish, and they hold alcohol – talk about the holiday spirit(s)! Hone in on a color scheme or theme, and use objects of varying heights to style the top of your bar cart.
Try candles, bottles of spiced booze, and small knick-knacks. Drape a garland or a festive banner over the railing, and style some mule mugs underneath.
Let your walls do the work
The easiest way to get the most bang for your buck with simple Christmas decorations is by using walls to your advantage.
And don’t worry, there are several hacks for hanging without creating a ton of holes (like Command hooks and strips, thumb tacks and a few more that we’ll suggest later, so yep, keep reading).
The best perk about vertical decor is it makes a small room appear taller – so look up to walls, windows, arches and door frames for inspiration.
Deck the walls, not the halls
Speaking of walls and windows…
Maybe you have space for a tree, but those faux gift boxes won’t work, or you have tabletop space for just a centerpiece but now the charging plates and holiday printed dishware look cluttered.
If you already have a decor theme, give it a festive twist by swapping out a few pieces. For instance, pillows with replaceable covers can be changed to match a holiday theme.
Throw blankets, napkins, placements and hand towels are also easily replaced without needing a lot of storage.
Make magic with existing furniture
If your apartment doesn’t include traditional railing or supportive structures like a mantel or a bannister, that’s ok! There are other ways to spread holiday cheer throughout your home, and all you need is your existing furniture.
Grouping decor pieces is a great way to make items feels more intentional, stylish and save on space. Consider tricks like adding a collection of vintage ceramics, a candle centerpiece, or even a bowl full of pinecones as a beautiful tabletop display or coffee table vignette to tie everything together.
Spend big on a dollar store budget
A dollar goes farther when you’re shopping at the dollar store, and just because it cost less doesn’t mean it won’t stand the test of time.
Whether it’s the dollar bin of your local Target or thrift store, or your favorite Dollar Store chain, there’s lots of affordable options. Since ornaments can add up quickly, we recommend starting here first.
How to Decorate (And Keep Your Security Deposit)
Living in a rental means there most likely was a security deposit paid at move-in. And of course, you want to get that money back when it’s time to move out.
You can still deck your place out with holiday flair by hanging decorations that won’t cause permanent damage. Let’s meet some of the other players in the nail-free game:
How to hang a stocking in a rental
For those lucky enough to have a mantel over a fireplace in your apartment, you can avoid adding nail holes by adding a sturdy stocking holder (like this one) to the top of your mantel.
You can also hang stockings with a dressmaker pin by lightly hammering them in place – they are heavy enough to hold lightweight stockings and light enough to avoid a giant hole in your wall.
Never underestimate the magic of this simple tool: tape! If you’re a stationery lover, chances are you already have washi tape tucked away in a drawer.
It’s easy to use and comes in playful patterns and colors you can mix and match to add personality to your holiday décor.
Washi tape can be used to hang holiday cards, make unique festive graphics, or frame and highlight existing apartment Christmas decorations.
The paper clip trick
Hanging decor doesn’t get easier than using a paper clip. All you need is a small magnet and a piece of masking tape – seriously, it’s that easy. Click here for the visual instructions.
What kind of Christmas tree should I get for my apartment?
Should you opt for the fresh pine scent of a real tree or opt for a fake one? Well, it could be dependent on the conditions of your lease. While some places don’t mind, others might have restrictions, so make sure to either ask your manager or review your leasing contract.
Space is one of the biggest considerations here. A faux tree is great to reuse year after year, but it could be a pain if you’re limited on space.
As you’re deciding, there are some smaller alternatives which could give you the best of both worlds: a super cute Christmas tree and space. There are a few solutions to consider, like mini tabletop tress (here’s a Charlie Brown version!), tree-alternatives, and half and quarter trees.
How to decorate an apartment door for Christmas
The easiest way to add holiday whimsy to your apartment is to start at the entrance. Decorating your apartment door is not only renter friendly, it spreads holiday cheer and your decor is safe from outdoor elements.
Or go traditional with a handmade wreath (using a Command hook to hang, of course!).
One Final Tip: Keep It Cozy
One of the best things about a small space is its cozy charm! Add warm touches like glowing candles and oil warmers with holiday scents such as vanilla, cinnamon, and citrus.
Layer in texture with soft furs and flannels, and sprinkle natural elements like branches, pinecones, and cranberries throughout your home for an affordable, festive feel. You don’t need to buy all-new decor to make your feel space merry.
Simply focus on creating a warm, inviting space you’ll enjoy all season long.
Share these simple Christmas decoration ideas on Pinterest!
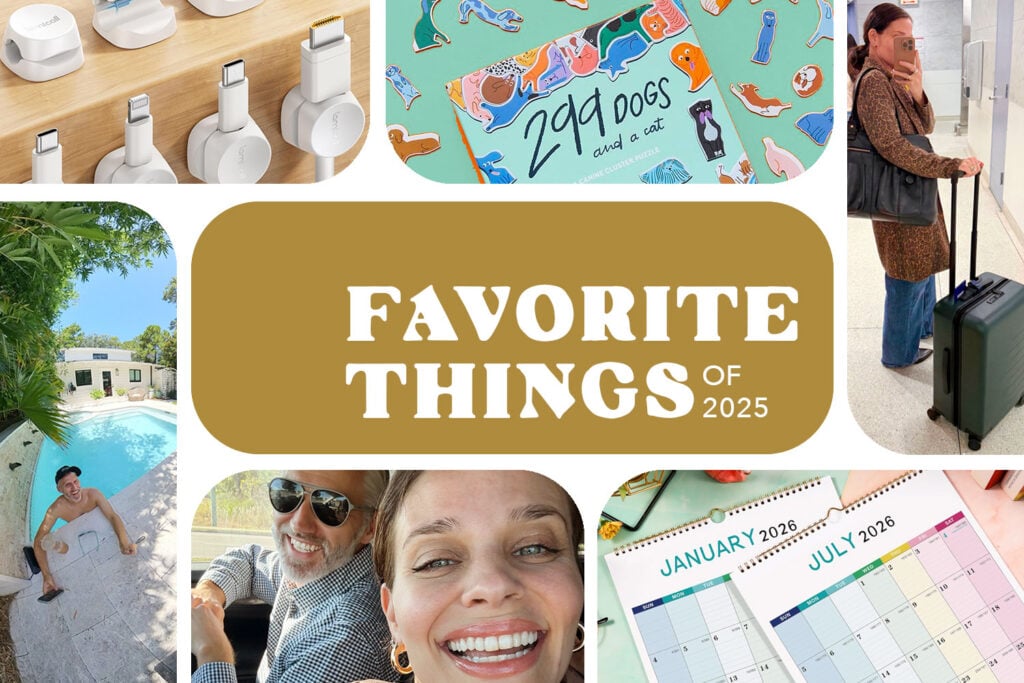
You asked and we answered! Yes, due to popular demand, we have put on our Oprah hats (are they berets? fedoras? what would Oprah wear?), and made a list of our favorite home/life/everything purchases from the past year. These are all items we bought with our own money and loved in 2025… so much so that when we took a look back, they stood out as some of our best buys and favorite additions to our life. So you’re still searching for holiday gifts (or struggling to tell someone what you want), this post might help.
There are already dozens of ideas on our Holiday Gift Guides, but we’re getting extra personal here, including everything from travel and beauty to tools and home organization that we bought in 2025 and liked most of all. If nothing else, it’s a random little peek into what makes us happy (hint: a lot of them are not expensive at all!). We arranged things as “superlatives” like Favorite Splurge, Favorite Sanity Saver, etc – and didn’t pick things with gifting in mind (hence light switches and cord organizers being on there!). Really, our only parameter was that it was something we spent money on in 2025 and when we looked back, it was one of our favorite buys that makes life easier, prettier, simpler, happier, more organized, etc.
Sherry’s Favorite Things
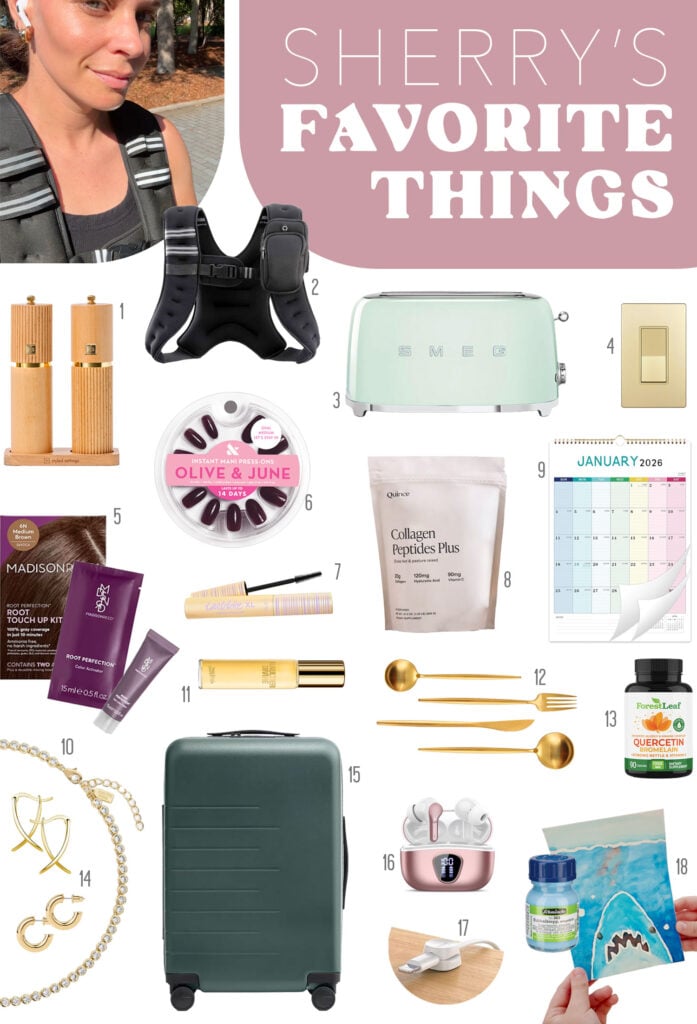
It took me a while to settle on these as my top 18 items of the last 365 days. From items that were surprisingly joy-inducing and nice to use everyday (sometimes it really is the little things!) to one splurge that still makes me feel fancy every time I use it. There are also a few items that help with efficiency & organization (let’s face it, life is busy and little hacks or upgrades can make you feel great).
Let’s get a little closer and break down why I love each item on the list:
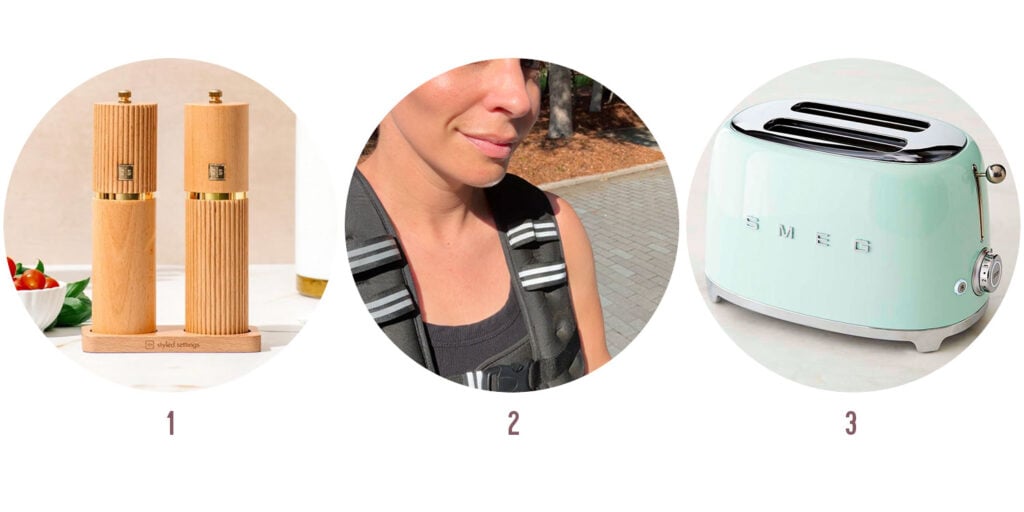
1. Favorite Housewarming Gift
Salt & Pepper Shakers: I got these beautiful salt and pepper shakers for myself in early January of 2025 (as part of a small kitchen refresh that was so affordable and so satisfying) and I loved that everyday use of these made me so happy all year long. And when our friends were over they noticed them and complimented them too… so when they bought a new house and moved later this year we gifted them these as a hosewarming gift! They’re lovely and functional and really do show how upgrading some small everyday item can make such a difference!
2. Favorite New Habit
Weighted Vest: Listen, if you’re a perimenopausal woman on this planet, you have heard people extoll the benefits of a weighted vest. I will say, that as someone who doesn’t do any weight training (and I know I should) but who loves to walk… this is just such an easy addition to the same daily walks I’m already taking. Does it make me a muscle-bound beast with 50% denser bones? No it does not. Does it add a little extra challenge to my walk so I return home a little sweatier and work a bit harder than I would without it. For sure. So if you’re looking for added efficiency and already someone who walks, I’d definitely recommend adding one in! I definitely feel my body working harder but I can still talk and listen to audio books or podcasts as I go. Which is just my speed.
3. Favorite Splurge
Smeg Toaster: Here is the aforementioned splurge item that I almost can’t believe I bought. Who spends that much for a toaster?! But then I got to thinking about how many people spend two or three times that much for a fancy coffee maker (and I have a cheap pour-over that lives in a drawer). Suddenly it made sense to spend this much on a toaster that lives on the counter 24/7 and makes me smile every day when I look over at it (or use it to make seriously perfect toast). I’m also happy to report that literally everyone else who has one has told me they’re so well made and last for so many years. So I’m hoping to have it on my counter for a very very long time.
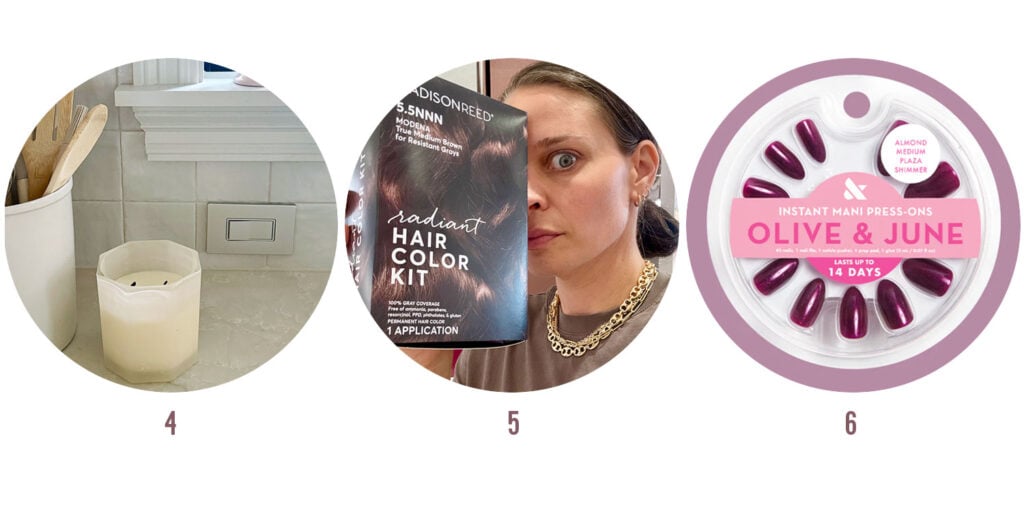
4. Favorite Easy Upgrade
Metallic Switch & Outlets: This might seem random, but I’d literally put this upgrade into my top five of everything here. Mainly because it was so affordable and so easy to switch the outlet covers and switchplates on my tiled backsplash in the kitchen, and they suddenly blend in SO MUCH BETTER! No longer do I see these big white boxes among the shiny tile. Instead these well desiged, clean-lined silver switch and outlet covers just live among the tile like they were always meant to be there. If you have big white outlets among tile in your bathroom or kitchen, this is such an easy upgrade! Highly recommend.
5. Favorite Hair Product
Madison Reed Hair Dye and Root Touch Up: Ok, as a lady who has chopped her hair super short, had it long (and even had it blonde as a teen), I seem to like to keep changing things up when it comes to my hair. So after a few years of fully growing out my grays, I couldn’t resist the siren call of a “fresh look” with this highly recommended dye (it’s definitely more pure than others I’ve used, which cause me varying degrees of eye-swelling allergic reactions). For sure it made my hair texture a lot softer (my gray hairs were much more wiry and textured before the dye) and it was super affordable and very easy to achieve a natural looking color that I love. Over time my gray hairs peek through a bit, which I don’t mind – and when my roots are too different looking as they grow out, the convenient root touch up kit is brilliant and takes literally 10 minutes.
6. Favorite Nail Product:
Olive & June Press-On Nails: I will Stan these $10 press-ons forever, because when I’m out in person and someone says “Oh I love your nails” I am always met with the wildest surprise in their eyes (and out of their mouths) when I tell them they’re press ons. They have come such a long way, with fun effects like luminescence or even cat eye – and you can choose the length and the shape. They take about 10 minutes to apply, and cost just a fraction of a salon visit. I just love everything about them and never want them to stop making these.
7. Favorite Makeup
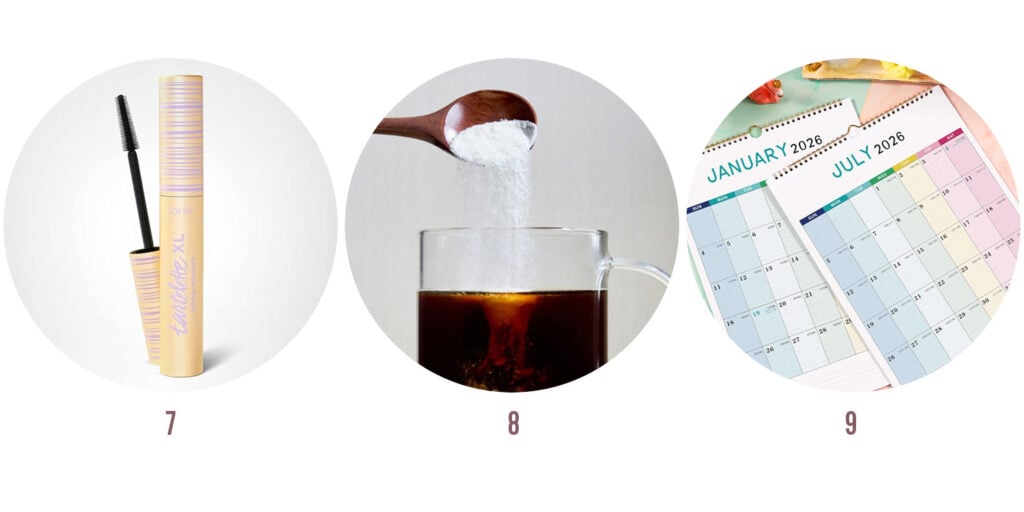
Tubing Mascara: I don’t wear mascara often, but my daughter is in love with this tubing mascara, and I’ve tried it a few times and literally don’t ever want to use any other brand. It’s so lengthening, easy to apply, and easy to get off at the end of the day. Just a perfect update on the waxy clumpy eyelashes of the past. Definitely try it and see the difference!
8. Favorite Skin Product
Collagen Powder: As a person who literally thought I was allergic to collagen (I tried Vital Proteins and a mail order option before and both made my tongue and throat itchy and irritated) I was hesitant to give this a try, but my friend had some and added it to a coffee that she made me… and I had no reaction! So I went all in on a bag of my own (I mix a scoop with my hot coffee and add a splash of coconut creamer) and I’ve been loving it. Not going to tell you my hair grew ten inches overnight and I have no wrinkles, but I definitely think it agrees with me, and I feel like I rarely get it from food, so it’s a nice easy addition to my morning routine.
9. Favorite Sanity Saver:
Family Wall Calendar: This was a whole family upgrade that we made earlier this year, and it has worked so well for our family. We wanted a public paper calendar that everyone could see (and add things to) so the kids could feel fully in the loop about what we all have going on during any given day. We hung it up in the kitchen on the door to the utility closet and it has been awesome to keep us all posted on the goings-on of the family, and also to write things we’re all looking forward to and fun activites that we have coming up. It feels like a nice step towards our kids being more organized about their events because they’re consulting the calendar and contributing notes about their activities. Definitely a great “getting them more ready for the real world” addition.
10. Favorite Necklace
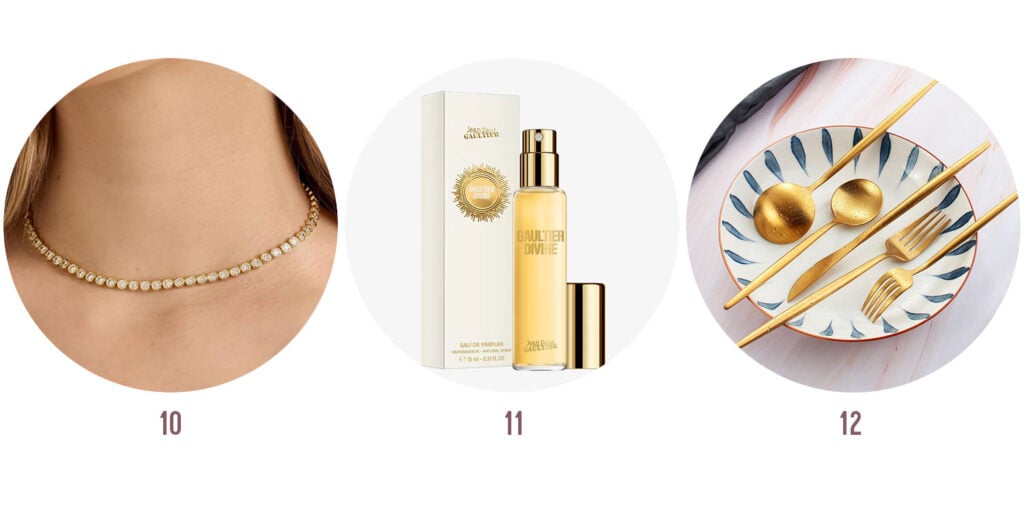
Tennis Necklace: Ok, I wanted to wear this for a while to make sure I still loved it, and it didn’t get weird and turn colors or break and it has surpassed my expectations. As someone who was almost influenced about 45 times to buy the Dorsey tennis necklace (which is $705 dollars!!), I’m so glad I resisted. I actually saw a friend wearing this and assumed it was the spendy Dorsey one, but she said it was $98 and I was like… I literally cannot believe that. Sure enough I ordered my own, and it is so legit! It’s well made, comfortable to wear, doesn’t flip upside down, and looks so good layered with other necklaces that I have (like this 18K gold vermeil paperclip necklace). I had a cheap $24 version from Marshalls that got cloudy over time, but this feels like the absolute best mid-priced option out there. Literally looks exactly the same as the Dorsey one to me!
11. Favorite Fragrance
Gautier Divine: I smelled this on a friend at a Halloween party, asked her what it was, texted myself so I wouldn’t forget, and literally ran out and bought it within 48 hours. It’s expensive for a giant bottle, so I just went with this smaller–sized spray bottle and I basically wear it all the time. Yes, I was 43 when I found my “signature scent.” It’s not overly feminine or masculine, and just feels like nothing else I’ve smelled. Love it, and have already been asked what I’m wearing like I did to my friend – so I’m paying that knowledge forward.
12. Favorite Kitchen Item:
Brass Flatware: Back in May we ordered this to replace the flatware we’ve had since our wedding (some cheap stuff we got back in 2007 that had seen much better days). We were dining at a friend’s house and loved her flatware so much I literally asked her to text me the link to the exact ones she bought. We also had the benefit of asking her how they have held up over the last 3 years that she’s had them, and she reported they’re all still looking great (the ones we all ate with looked like new). So we pulled the ripcord and ordered a set of 12 of them, and LOVE the upgrade. Dumb little activites like buttering bread make me so happy. This is totally one of those everyday upgrades that don’t have to cost an arm and a leg, but elevate basically every meal. The wildest part is the price. We can’t believe we got 12 sets of these for $70!!
13. Favorite Allergy Helper
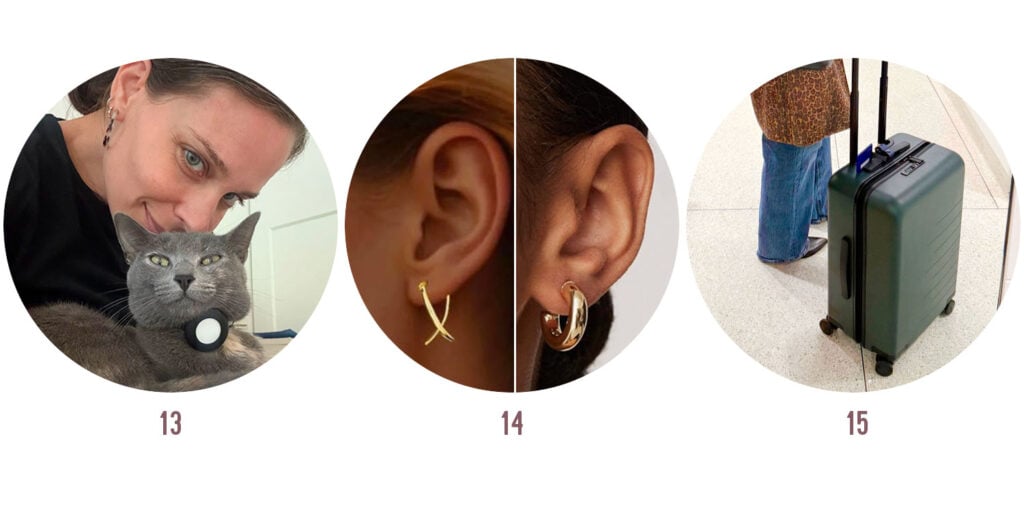
Quercetin: This is easily the most random thing on the list, but every single day I’m grateful for this supplement that has made my formerly severe cat allergies… completely disappear! I used to use it in combination with a powder you add to the cat’s food called Pacagen (more on that here) but lately I’ve just been using this once a day (two capsules every am) and it is absolutely wild how I’m symptom free. And the cat sleeps on my neck like a scarf! As a person who used to have really bad congestion, itchy eyes, and even welts when she would put her head on my head, it is absolutely bonkers that I’m totally fine as long as I take two of these every morning. I hear they’re great for seasonal allergies too!
14. Favorite Earrings (TIE)
X earrrings and these chunky hoops: Don’t make me pick between these two pairs of earrings because I basically wear one or the other approximatly 85% of the time. The x-earrings are edgy and thin and cool, especially with my other smaller huggies (I have 6 ear piercings) – and the chunky gold hoops are so polished and pretty looking. I feel instantly pulled together whenever I put either of them on, and they definitely are easy on the budget as well as the eyes, yet they don’t irritate my sensitive ears.
15. Favorite Travel Item:
Carry-On Suitcase: You know those purchases that make you feel like a full grown adult? Matching hard cased suitcase was what did that for us, and we were 43 years old when we finally hit that milestone and bought three of these. The hype is real. They’re THE BEST! We love that they’re such a good carry on size (no issues, even on international flights) and they roll well, I never have to wrestle the handle to get it to pop up or down, and they look so good too!
16. Favorite Re-Buy
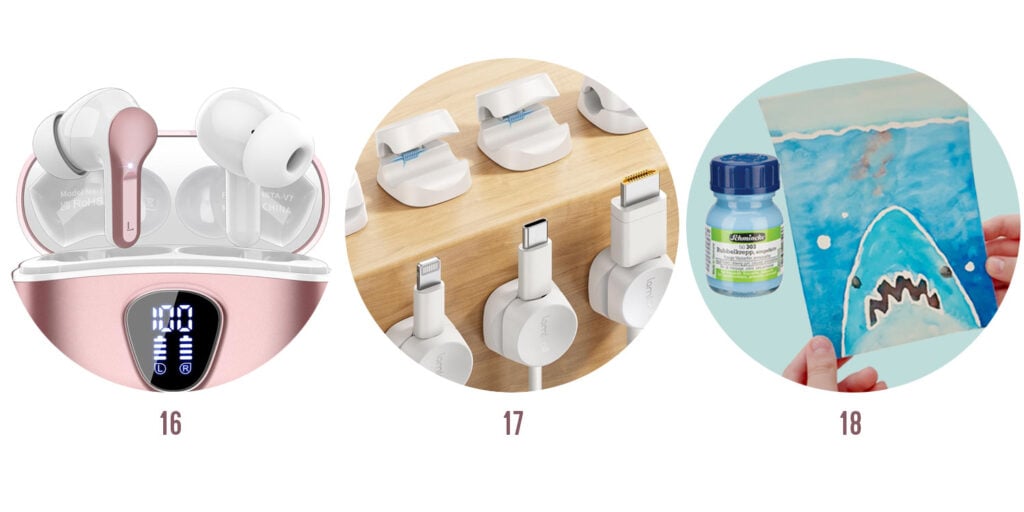
Affordable Headphones: We got our teen these $22 wirleless headphones so we wouldn’t worry about more expensive models getting lost or broken and they were so great and held up perfectly until she finally lost one of them. So we happily rebought them (two pairs a year are much less than the name brand alternative) and we’re so grateful that something that’s so much cheaper is really comparable when it comes to the functionality. She also loves that they’re rose gold.
17. Favorite Organizing Item
Cord Clips: At just about $1 a piece, this 8-pack of charging cord clips has been the cheapest, easiest life improvement. Literally if you have cords snaking all over your nightstands or your desk at home (or at work) these just stick to the back of the nighstand or the desk or wherever else you need them, and they can completely tame all the cluttered knotted cords everywhere. We have them on our night stands at home as well as in our laundry closet (where we charge alllll the kids devices) and they’re such an easy and affordable update.
18. Favorite Art & Craft:
Frisket Masking Liquid: When it comes to having a novel craft item around for our two creative kids, this has been so much fun for both of them. This is essentially a masking glue-like product. It’s a thin white rubbery “paint” – and everywhere you paint it, will be masked from watercolor paint. Meaning when you watercolor over the paper you used this on, and let it all dry, you can rub off the masking “paint” and reveal clean white paper below it. So the effect is super cool and graphic – plus it’s really fun for kids to rub it off when it’s dry! Think: when you coated your hands with Elmer’s glue, waited for it to dry, and peeled it off.
And now I’m going to hand this post over to John so he can give you his picks.
John’s Favorite Things
Hey there! John here now to take you through my top purchases of 2025. I don’t tend to buy much stuff unless something needs replacing, so this list was a little hard for me at first. But the more I thought about it, the things below really stood out as MVPs of the past year for me.
Here’s a closer look at why each is my favorite:
1. Favorite New Clothes
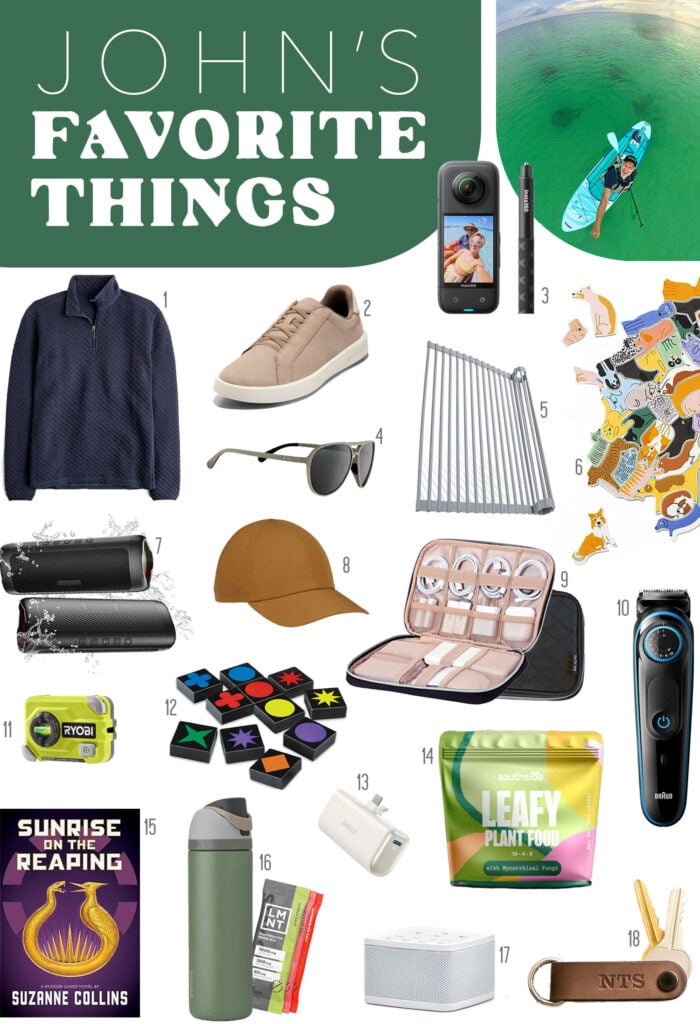
Quilted Half-Zip Sweater: I don’t love shopping for clothes, so a lot of my closet is quite old (I’m talking 10 or even 20 years old). But I recently dedicated some time to updating some wardrobe staples and this pullover sweater was an immediately favorite. Soft, comfortable, and works equally good in casual or dressy situations. Ladies and gentlemen, he’s a fashionista.
2. Favorite New Shoes
Slip-On Sneaker: These have quickly replaced my “dad shoes” as my everyday, go-to pair of sneakers. They slip on with ease, are great to walk in, and can be worn with everything from shorts to jeans to dress pants.
3. Favorite Splurge:
Insta360 Camera: I finally treated myself to this 360-degree camera so I could capture better footage when I paddleboard. I bought a kit with an “invisible seflie stick” (the software automatically erases it from your footage!). I wish I had bought it sooner, and even influenced a dad up the street to get one for his nature runs and real-estate business.
4. Favorite Sunglasses
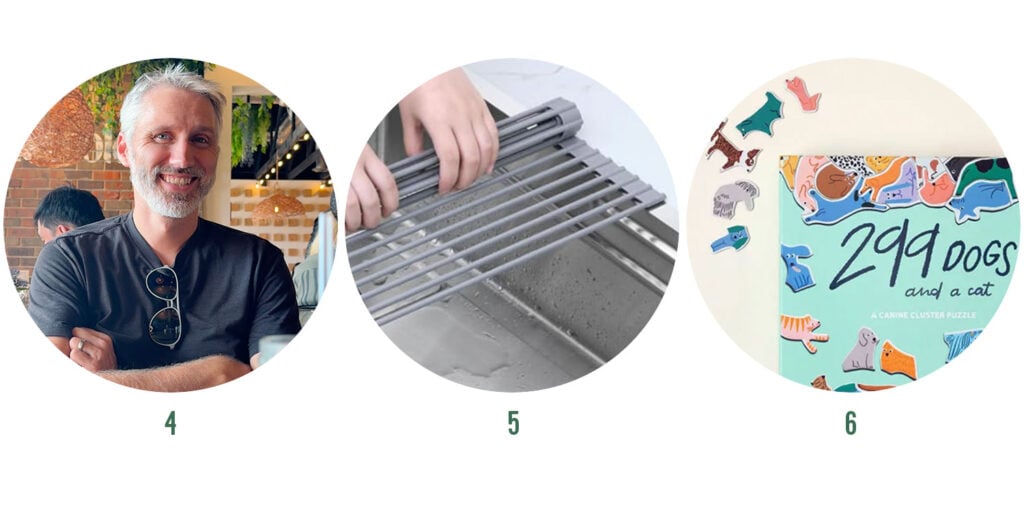
Goodr: As a chronic sunglasses-misplacer, I love an affordable durable pair of specs. Which is why I finally jumped on the Goodr bandwagon this year! I’ve got a pair in the car, one in the junk drawer, one in my workout drawer, and a couple of back-ups in my closet. They have a boatload of styles and colors, but this type and this type are my favorites.
5. Favorite Kitchen Item
Roll-Up Drying Rack: Call it a simple pleasure, but this compact drying rack has been a game-changer for our evening kitchen clean-up. It frees up counter space, keeps water in the sink, and rolls up and fits neatly under the sink when not in use.
6. Favorite Rainy Day Activity:
299 Dogs & A Cat Puzzle: We didn’t think a 300-piece puzzle sounded like much fun, but I’m so glad we bought this animal-shaped one. The illustrations are charming and it’s honestly the first puzzle my kids have been excited to help with in a while. Instead of having the traditional puzzle piece shapes, it literally features a dog for each piece – so it’s harder to see how they fit together (especially if you don’t look at the box, which makes it an extra hard challenge). We loved it so much, we also did the 299 Fish puzzle, but have (shockingly) not attempted 299 Cats yet! That’s definitely on the agenda for 2026…
7. Favorite Tech Toy
Pairable Bluetooth Speaker: I could easily put all of our outdoor movie equipment on this list, but the “breakout star” of that group are these 2 bluetooth speakers. They’re the first Bluetooth speakers we’ve ever owned that easily pair together, allowing you to quickly create a surround-sound effect (seriously we have had a Bose speaker and like these more). I originally planned to only use them with our projector, but they’ve been too good not to use anytime we need music outside by the pool or firepit.
8. Favorite Workout Item
Sport Cap: I’ve already raved about these affordable lightweight hats on our email newsletter but I had to have them on this list because I really really like them. I bought three different colors to replace all of my falling-apart workout hats earlier this year (back when they were $16 each) and even though they’re currently $20, I think they’re totally worth it.
9. Favorite Travel Item:
Cord Organizer: Looks like Sherry and I are both crushing on cord organizers this year (#17 on her list). Hashtag soul mates. We bought this zippered pouch to wrangle all of the chargers that we keep with our suitcase, and it makes things so much easier. Sure, it requires a little more tidyness than just throwing cables into your suitcase all willy nilly, but it has kept us sane knowing each family member has a charger packed and is ready to go whenever we travel.
10. Favorite Grooming Item
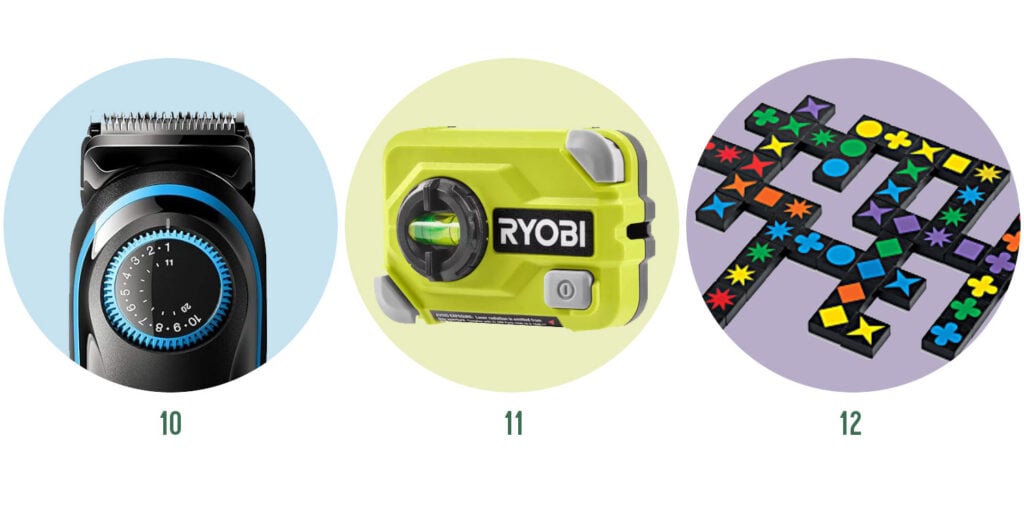
Beard Trimmer: My who-knows-how-old beard trimmer finally bit the dust this year. I had loved how compact & straightforward it was (no mess of cords or extra guards) so I was glad to find one that met my same keep-it-simple criteria.
11. Favorite Tool
Small Laser Level: I loaned my nearly 20-year-old laser level to a neighbor earlier this year and, well, it lives with him now. So I treated myself to a newer, smaller, and less annoying version that – unlike my old one – doesn’t constantly come apart or stab me with its pin.
12. Favorite Family Game
Qwirkle: We’ve played a lot of new games this year, and when Sherry challenged me to pick my #1, I landed on this colorful tile game that’s always a crowd-pleaser and scratches my brain just right. The whole family loves how graphic and visual it is – and you really can use a fair amount of strategy, so it feels like you’re a smartie pants when you win, which is satisfying for all of us every time. This card game was a very close 2nd, btw.
13. Favorite Lifesaver
Wireless Charger: As our family gradually updated to devices with USB-C charging ports this year, we were quick to buy compatible versions of our favorite wireless chargers. We’ve actually purchased 3 of these in 3 different colors and they often save the day on trips, at school, and those oh-crap-I-forgot-to-charge-overnight days. They recharge a phone pretty fast, aren’t too big or unweildy, and you can even use the phone while you charge (so they work if you’re trying to navigate google maps while walking around an unfamiliar city as your battery threatens to die, for example).
14. Favorite Chore Helper
Plant Food: We finally incorporated plant food into our plant watering routine and it has been so easy and all of our plants look like 80’s hair band rockstars now. We just scoop this powder into our watering can and water as normal. It’s been such a simple way to feel like we’re being good plant parents, and literally leaves all of our plants perkier and happier.
15. Favorite Book
Sunrise on the Reaping: Sherry and I have talked at length about our mutual favorite book of the year (she loves talking about it on Instagram). But when I tried to name a different personal favorite from this year, it was this next prequel in The Hunger Games series. The book is not without its faults, but it was a lot of fun seeing Suzanne Collins piece together the origin story of Haymitch and connect it to the 4 other books.
16. Favorite Beverage
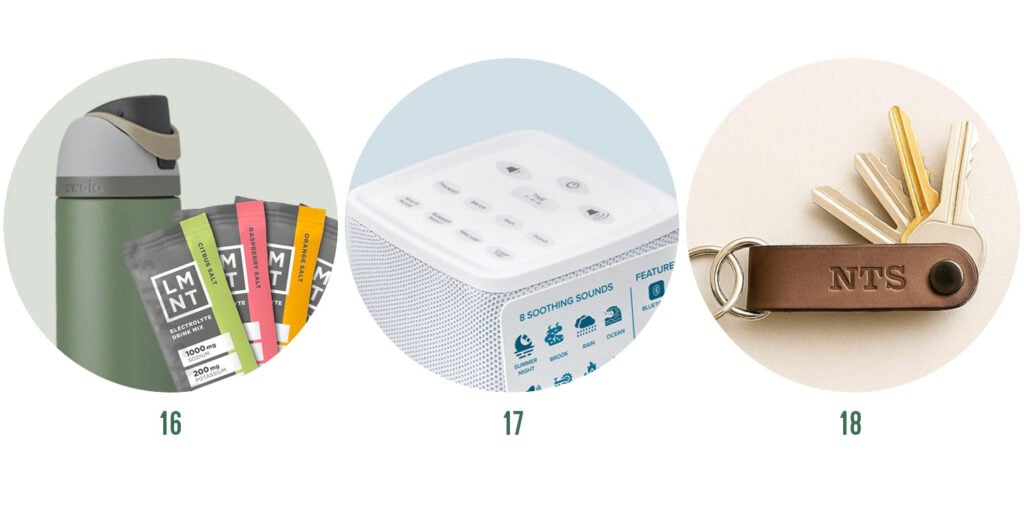
LMNT: A podcast ad convinced me (hashtag influenced) to try these electrolyte packets and now they’re my go-to when I want some flavor in my drink without the sugar. I promise this is not sponsored – none of these are. I just dump one packet in my 24oz Owala. Citrus and Orange are my faves because they remind me of yellow and orange Gatorade. They’re very salty, so it may take some getting used to (or diluting) but now I crave them and have at least five a week. They’re epecially refreshing after I work out or go for a run.
17. Favorite Re-Buy
Compact Sound Machine: The sound machines in our bedrooms are almost 8 years old and the buttons on our daughter’s finally wore out. When we went to reorder, we saw there’s a new model – same price, same small size, but now more sounds – and it connect to your phone via Bluetooth! Very happy with them, both the old ones we have had for almost a decade, and the new one we recently got.
18. Favorite Didn’t Need To Re-Buy
Leather Key Ring: Okay, maybe this last one is a cop out because I didn’t actually buy it in 2025. But given how many of my picks are items I had to replace, I wanted to shout out one item that is still going strong. I spent $20 on it in 2018 (!!!) and after years of going in-and-out of pockets & drawers, it has been absolutely awesome and still works as well as the day I got it. And in 2025 dollars you can still get it for just $5 more! Definitely still affordable for something that works so well and lasts.
More Gift Ideas
If you’re still on the lookout for extra ideas, you can check out the guides below that we’ve put together (many things on our guides from previous years are still sold):
*This post contains affiliate links, so we may earn a small commission when you make a purchase through links on our site at no additional cost to you.
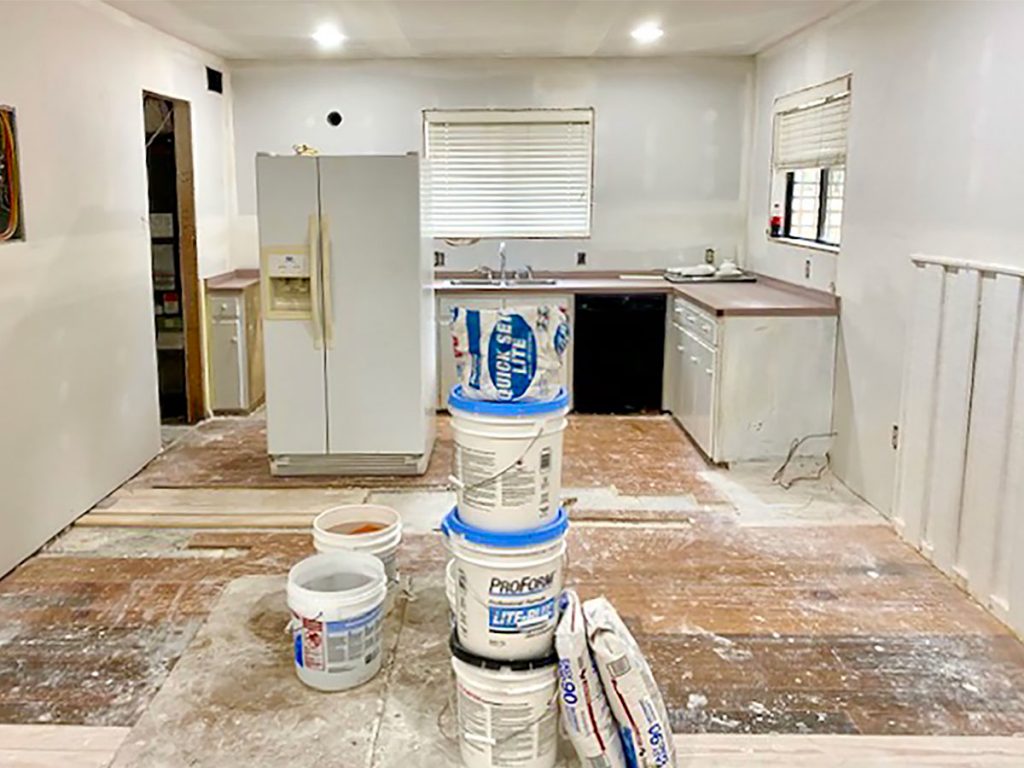
Cue the demo dust! After 5+ years of living in this house, we’re embarking on a renovation! Of course over the holidays (because we are nothing if not consistent). We’ve tackled some sizable projects over the last five years here, like adding a pool in 2021, gutting & rebuilding our kitchen in 2022, and replacing all of our windows & doors with hurricane grade ones two years ago… but this is the first time since we moved in that we’re removing walls and changing rooms.
The chaos you see above is from early 2020, but actually some of those walls being open is a preview of the new view we’ll gain from our kitchen and living area downstairs! We are VERY EXCITED.
So I’m just going to share a little reno overview here, since a lot of this is already on Instagram (I’ve been sharing in IG Stories – so you can see my Reno 2025 highlight for that).
Why This Reno? And Why Now?
The best way to describe the impetus for this reno is that when we moved in, we expected to add a second bathroom because we thought we couldn’t live without one. Now it has been five years (the first of which we were all at home almost all the time due to at-home-learning in Covid) and somehow we all have been just fine with one bathroom.
Over the last five years of living here, two OTHER things have nagged at us far more than having just one bathroom (remember we also have an outdoor shower, which definitely takes the pressure off just one bathroom inside).
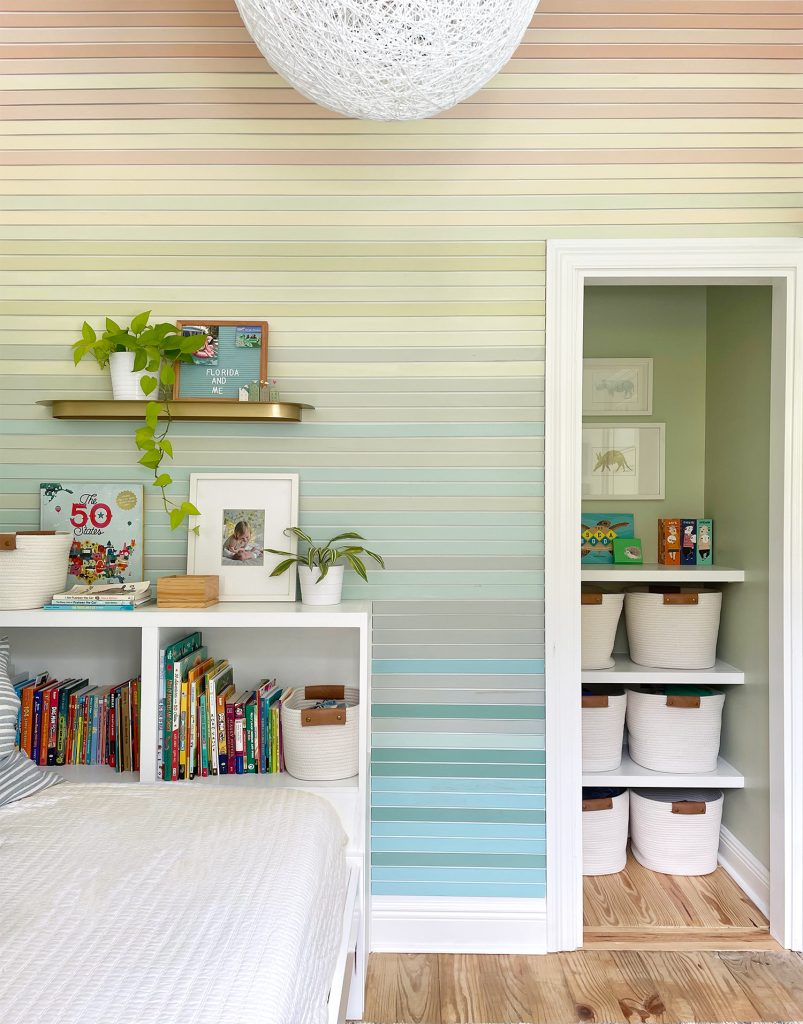
The first thing we have always had in mind to update at some point is that we know our son will need a bigger room as he grows (his used to be a laundry room. It’s very cute but very small). He and multiple friends can hang out in here for hours, but it’s a tight fit, and he won’t be 11-years-old forever! So ever since we made this his bedroom (he was 6 when we moved here) we knew we’d eventually want to figure out a way to give him more space in his tween/teen years.
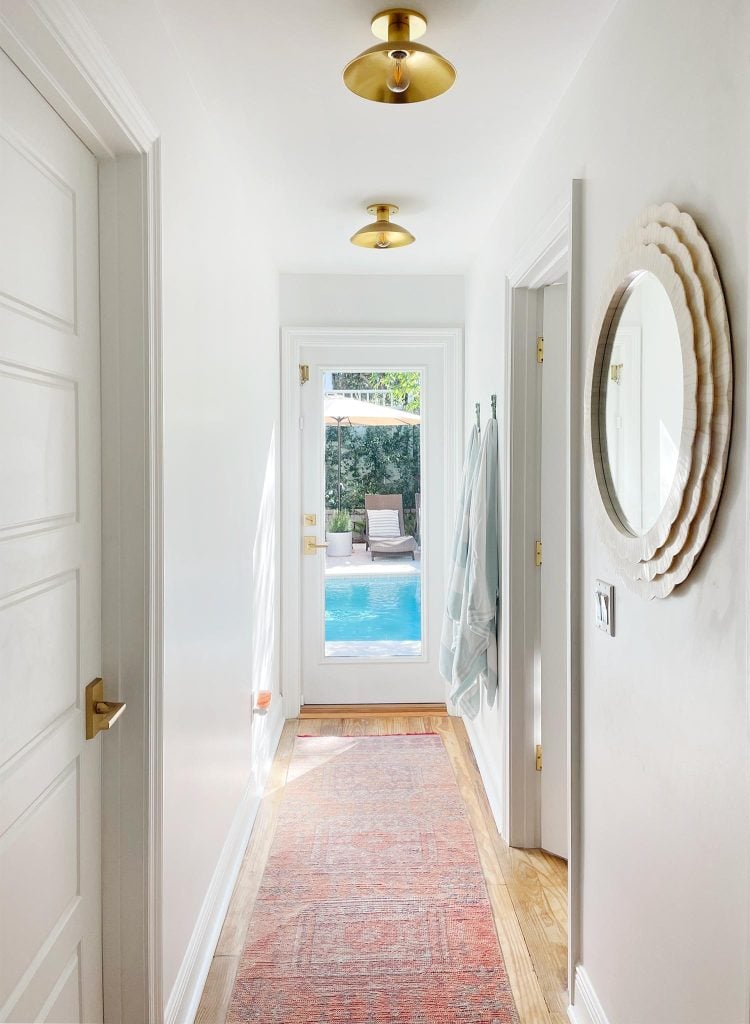
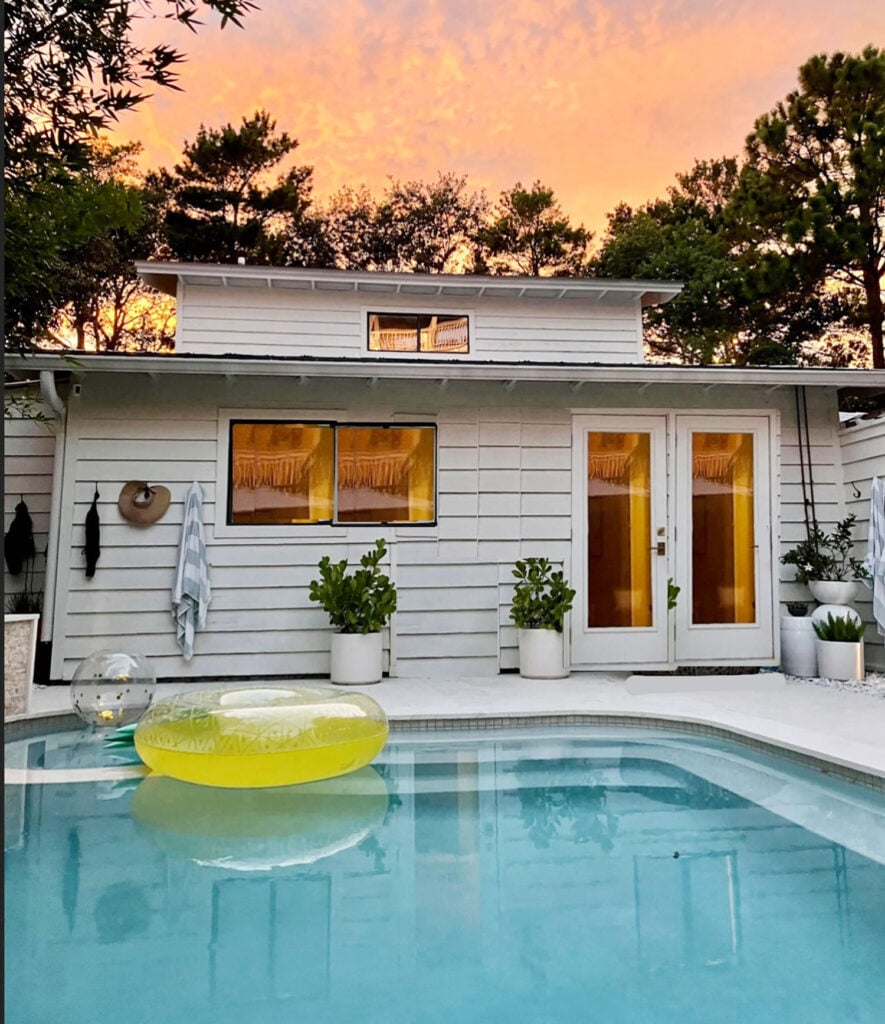
The other thing that has nagged at us is that the pool feels very detached from the house. You go down a long hallway access it, but can’t see it from any of our living spaces at all. It’s just such a beautiful view, and we wish we could look out at it from the kitchen or sitting area and not feel so disconnected from it.
We knew there had to be a smart reno move that would come to us over time that might make those two “that would be so nice” ideas come together. And let me tell you, it took MANY YEARS of marinating.
Then one afternoon John was like “I have THE idea.” And within about three hours of sketching it out on graph paper and taping things out on the floor, we knew it would work. So we called a contractor that one of our friends has loved working with, and he came over and worked up a quote for us.
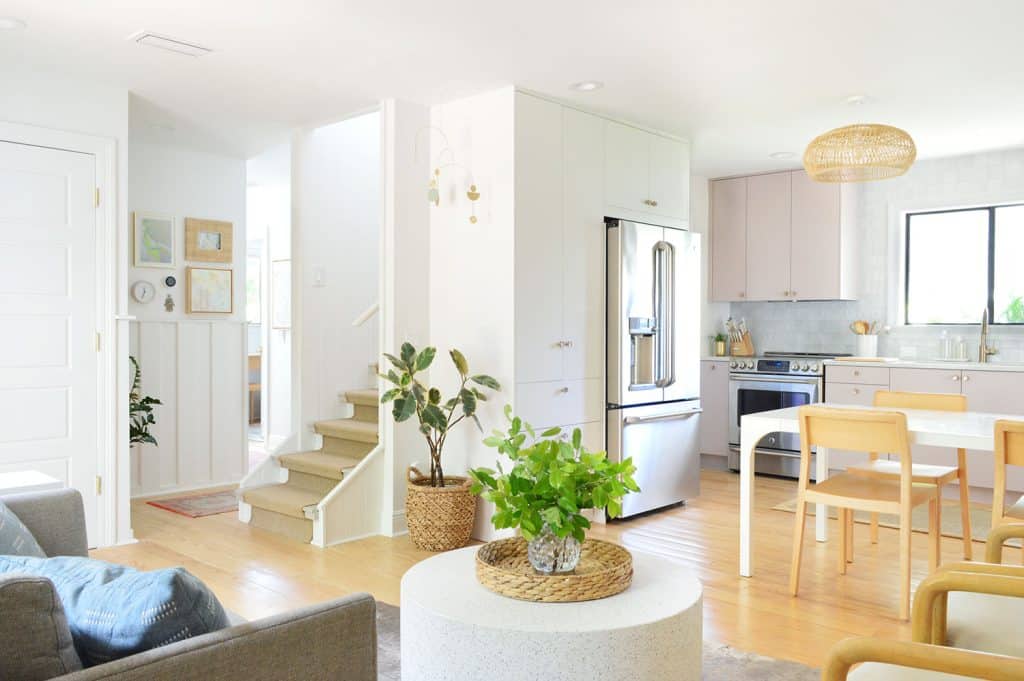
We don’t share floor plans of our house anymore, but essentially all it takes to accomplish 1) a larger room for our son and 2) a more open living space on the first floor that feels connected to the pool is…
(drumroll please)
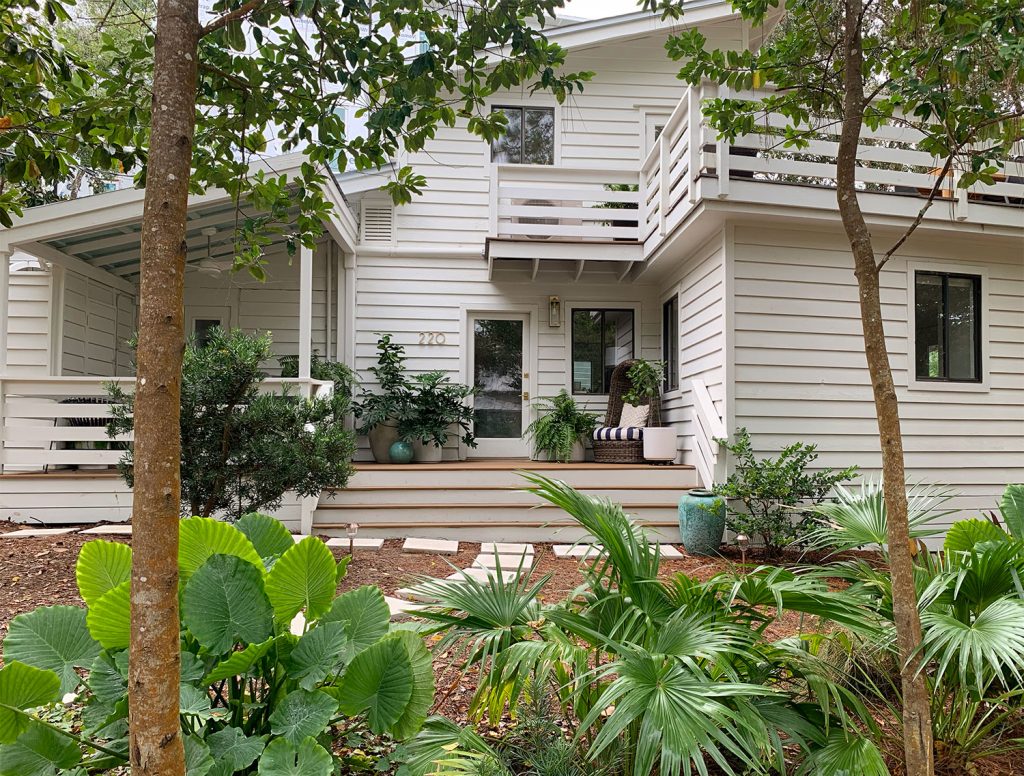
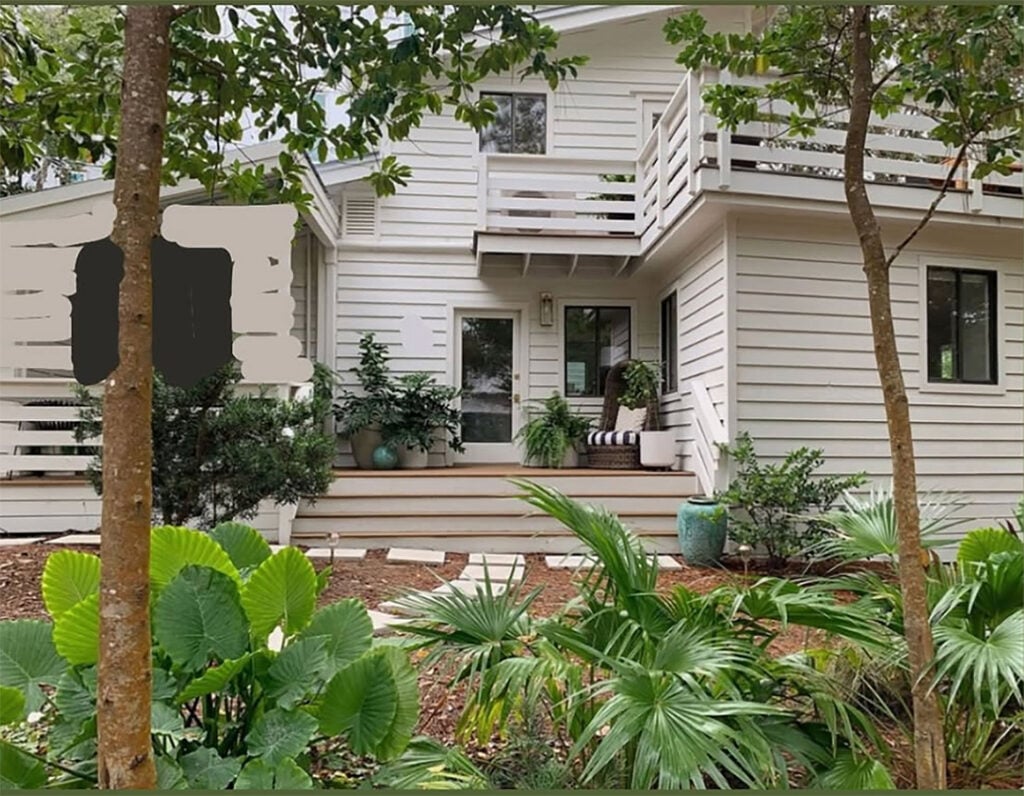
… finishing the covered section of our front porch. Many other houses near us have done that to gain extra interior space, and as much as we like our covered front porch, we also have a covered side porch, a giant upper deck, and the uncovered area of this front porch that will remain. So we’re not lacking in outdoor space (we also have our side yard with the hammock and of course our pool area with a firepit area and deck with a dining table). And converting that covered porch into an interior room will essentially take the house from this…
… to this (yes, I colored that on Instagram Stories with the marker tool):
It actually feels nice and balanced for the front porch to be sort of tucked into two finished areas (instead of having one side that’s a finished bedroom and one side that’s an open porch). Also I know that gap to the left of the second floor railing looks weird. This is an old photo and I now have a giant fiddle leaf fig in there and all is right with the world.
But back to converting the covered porch into an interior room. What that’ll get us is a larger bedroom for our son, a big L shaped kitchen and lounge area instead of the i-shaped one that we have that’s not overlooking the pool in any way… and it’s actually going to gain us an ensuite bathroom, because we figure while we’re making our house more open and functional for our fam, it would be nice to have a bathroom attached to our bedroom, just because… less walking in the middle of the night when I have to pee.
Plus let’s be real, I get to pick some pretty bathroom tile now. And I found the coolest sink vanity! I’m even into the toilet. It’s a whole exciting thing for us.
How Exactly Will You Gain A Bigger Living Area?
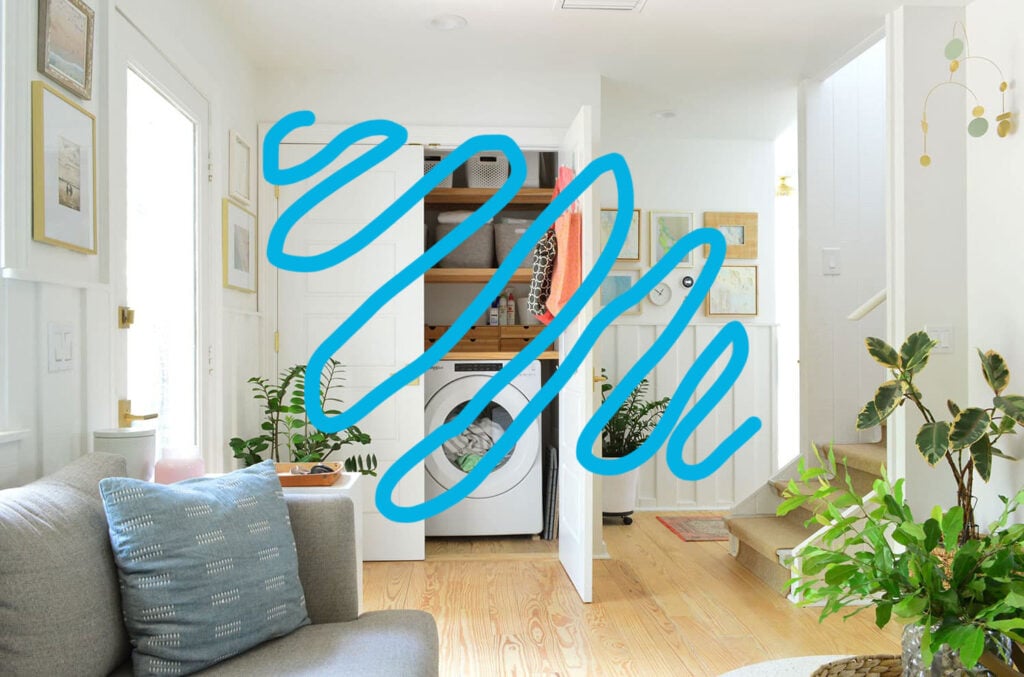
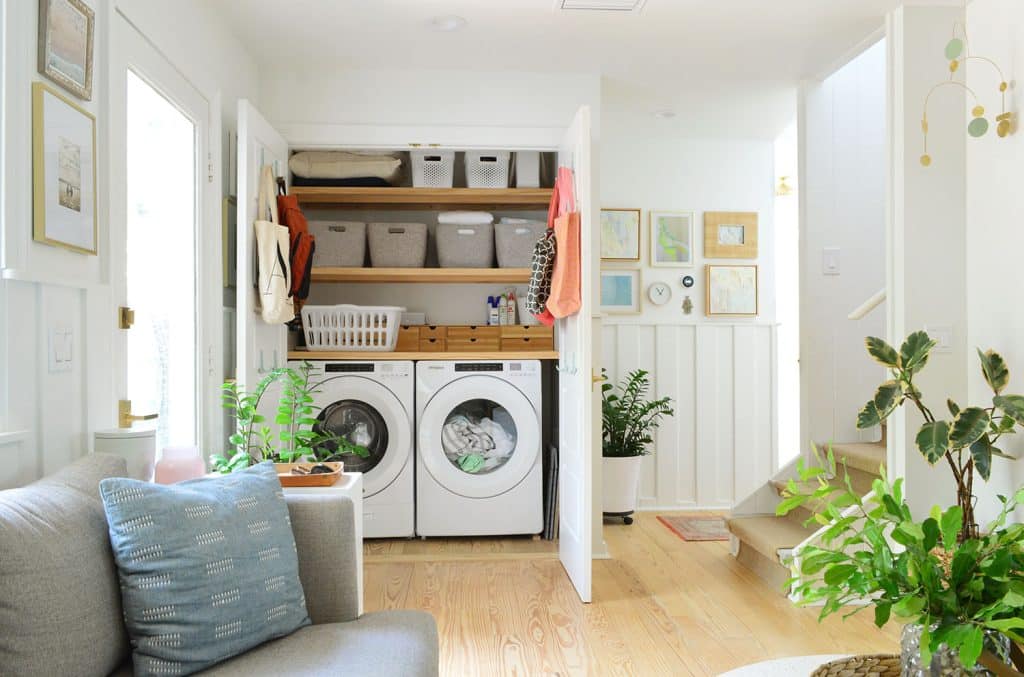
This was how the big idea came to us… John literally said “if we enclose the covered porch and move our daughter’s room there (it’ll be slightly bigger than her room now, but otherwise almost exactly the same), we could knock down the wall with the laundry closet that backs up to her existing room and make it one big L-shaped kitchen and family room setup.” Literally we’d just move her existing windows to her freshly built bedroom and only have to buy a big glass door leading to the pool for the new lounge space.
Shifting her room over to the front porch area (and turning her old room into a family room/lounge that overlooks the pool and connects to our current kitchen) means the sitting area that’s in the corner of the kitchen now will be able to shift into that new lounge area by the pool that we’re creating. So overall this one move will gain us so much! Like:
more space to share as a family on the first floor overall
a ton more light streaming into the kitchen from the left side of the room
more room for kitchen cabinetry (since the kitchen will no longer have a sitting area)
more chairs around a floating dining table with a proper chandelier overhead
maybe even a little work island
sight lines to the pool from the kitchen
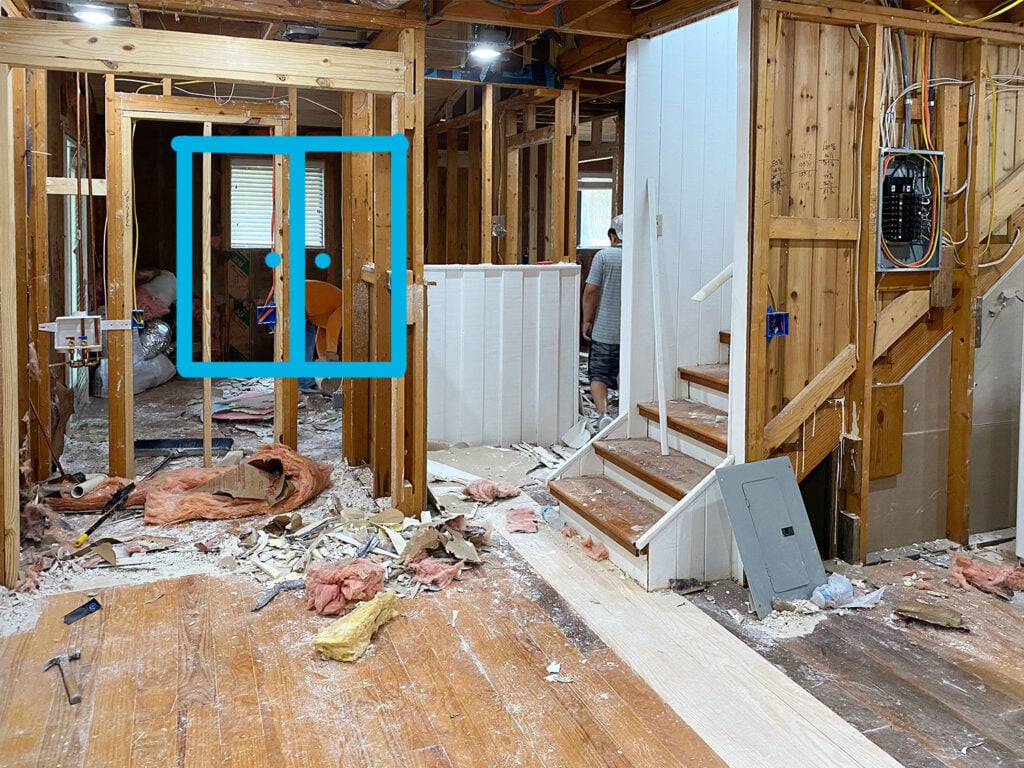
You can see below how removing that whole wall will REALLY open things up! The wall can literally be opened to the corner where you see that man walking below. It’s about a 10 foot expanse of wall that will come down, and all that light and the view of the pool will suddenly be visible from the kitchen and even from the moment you step in the front door.
Please enjoy that badly drawn glass sliding door (which I realize will be much bigger). That will overlook the pool. And that hammer on the floor in the photo above is where you stand when you step in the front door, so you’ll literally be able to look straight and see a big dining area and kitchen, and look left and see a vaulted light-filled lounge area.
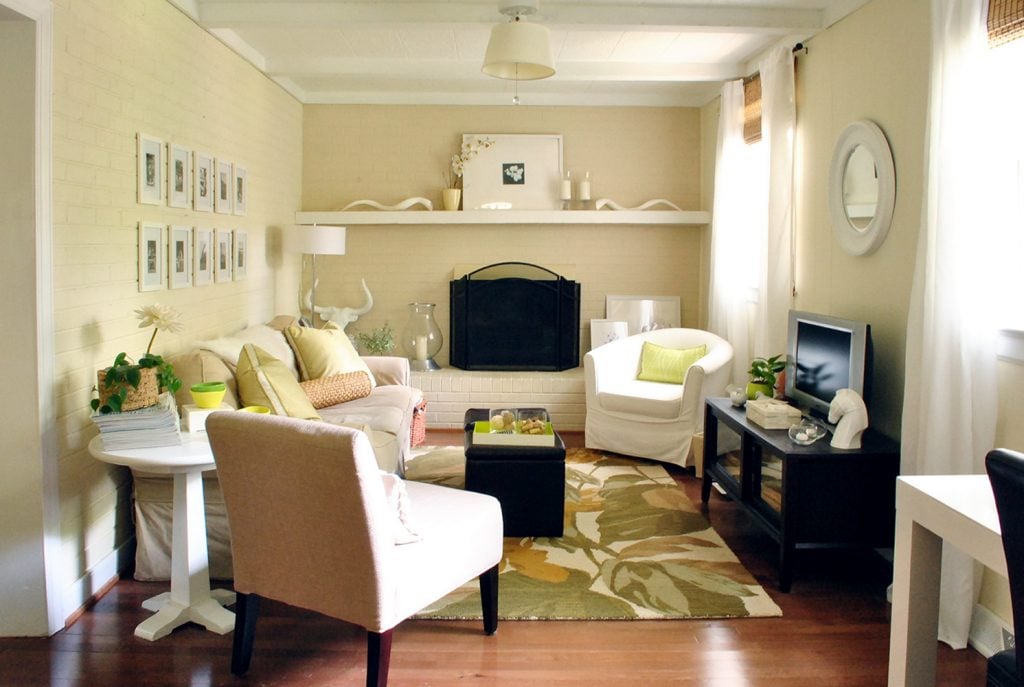
The kids are highly into this reno, and both would like to have a TV in the new lounge area that we’re gaining (we currently just have one upstairs) so we think one side of the room will likely have a media cabinet with a TV hanging over it on the wall – and the opposite wall will have a sofa or a sectional for hanging out. It actually won’t be too dissimilar to the layout of this living room from our first house – just picture a big glass french door overlooking a pool where the fireplace is. And the ceiling will be vaulted!
It’s hard to show you just how open and great the new L shaped room is going to be as a common area for all of us to hang out in, but the photo below sort of helps you imagine how nice it would be to have a whole room to the left of the space (behind that wall of frames and laundry closet).
How Does Your Son’s Room Get Bigger?
It’s extremely hard to show without a floor plan, but once things get framed and moved, it’ll be easier to understand everything. Essentially his room gets to absorb this hallway to the pool (and the ceiling gets vaulted to match his room), and that door to the pool becomes a big window. There is also space behind this photo (where the person taking the photo was standing) that becomes his room – and some of a hidden closet that you can’t see from this angle or photo. His room will get about 30% bigger – and will almost be the same size as his sister’s room. It’ll be a really nice upgrade!
Where Will The Second Bathroom Go?
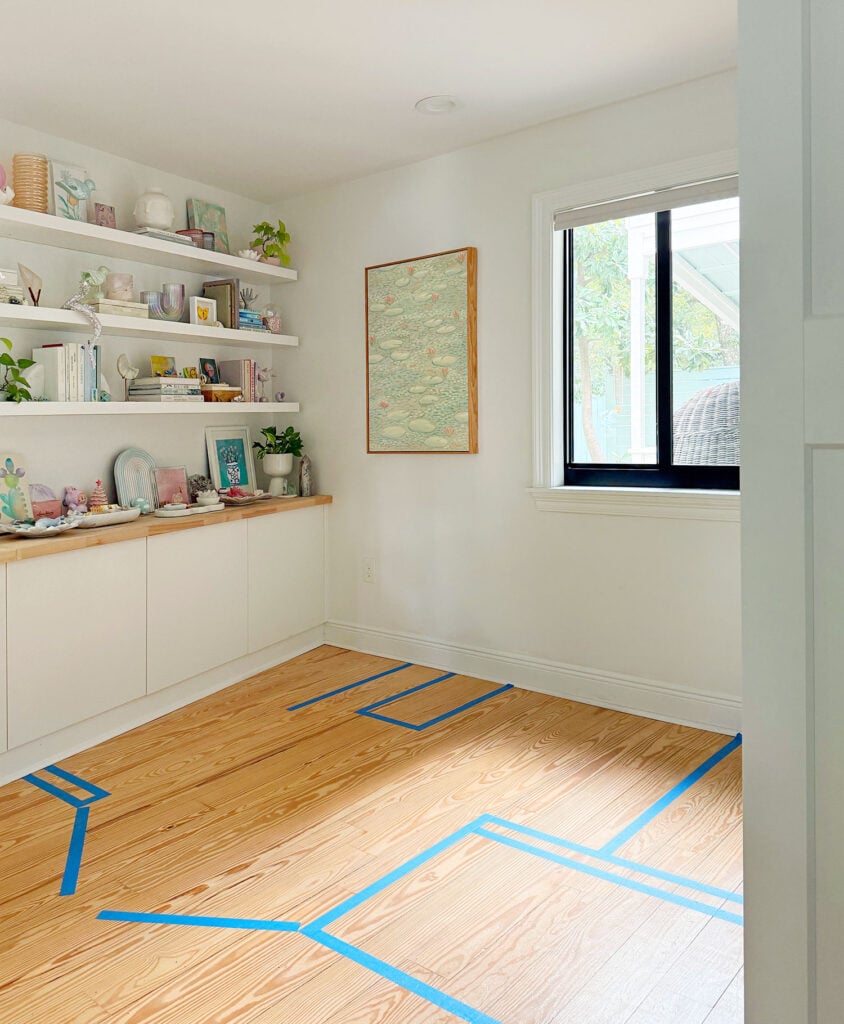
Our bedroom is a pretty large L shaped room, so we’re essentially stealing a corner of it, which will turn our room into a still-sizeable rectangle. And the corner that made it an L will become the bathroom. To plan the layout, we worked carefully with our contractor to not only sketch everything out digitally in CAD (to ensure we meet codes) but also to tape off a floor plan of the space too.
I won’t go into the nitty gritty of it now (please hold any questions about the specific floor plan and what each taped off object is). We’ll definitely share more about this down the line. The main point I’m trying to make is that this taping step was SO HELPFUL. It was like our own bootleg (but free!) version of Walk Your Plans.
It helped us make a couple of critical adjustments that will make the room feel bigger than it is. Don’t get me wrong, it’ll still be cozy, but taping things out unlocked a better plan that earned us a bigger wall-to-wall shower and we didn’t have to lose any of our closet space (one has to move over for the door to the bedroom to shift). See, it’s so confusing to try to describe in words! But I promise you’ll totally get it as we go. My main point here is: when in doubt… tape stuff out and walk around it.
Where Will The Laundry Go? (Or: I Have A Question About X!)
As we learned when sharing some of these details on IG stories, you will definitely be left with some questions about the floor plan, where the laundry room is going, etc, etc. Over the years we’ve learned that some things are much more easily shown and answered once a project is underway. So I promise, all shall be revealed. And also I promise we aren’t renovating without remembering that we need to have a spot to do laundry.
How Will The Exterior Change By The Pool?
We like to overplan whenever we can, and we try to think of literally everything from every angle. For example, when planning the window for our son’s expanded room, I wanted to make sure it would look good from the pool, so I badly photoshopped this, just to see how it might look from outside after our reno:
We intentionally chose a window proportion that ties into the window on the second floor, which we think is going to look really nice. And those badly photoshopped glass doors on the right will lead into the lounge/hangout space that’s open to the kitchen and dining area. Can’t wait!!
Why This Plan And Not X, Y, Z?
We’ve considered dozens of possibilities over the last 5 years, from adding rooms above our kids rooms & redoing the entire roofline, to finishing the upper deck as enclosed rooms, and nothing came close to feeling like it made as much sense for our family and the way we live in this house.
This is why I shared those two “things that nagged at us” – in the hopes that it helps you when you’re debating possible renovation options. There are an infinite amount of ways you can renovate a house, so you have to keep in mind what YOU want it to do for YOUR FAMILY. Nothing else we considered felt even remotely worth the trouble or like it would get us what we really wanted from a reno.
So we waited and didn’t settle. Just saving up and considering more and more options until we landed on the one that felt right. This update is going to be so nice, feels relatively simple (especially compared to other things we debated) and ticks three boxes. The house will work better for our family, and the quote came in lower than we expected – which never happens!
What If It Takes Longer, Is More Expensive, & Stuff Goes Wrong?
We’ve been doing this long enough to know that it won’t all be sunshine and roses – but we’re hopeful that the uncomfy middle will be worth the finished result. Will we all get tired of this reno, especially if it takes longer and costs more with some unexpected (but really we expect them) curveballs? I’d bet $100 that we will.
Timeline issues, budgets being blown, and unexpected reno roadblocks are always potentially in the mix, so we just plan to do our best to handle everything as it comes. One tip for cutting down stress about the budget is that we like to save 20-30% more than we think we need before starting something like this, just in case. It really makes it less stressful to assume it could happen and be prepared for it. And it doesn’t hurt that it took us years to come up with this plan… so we had a while to save while we waited for “The Idea” to strike.
Do All Big Projects Feel Scary At The Beginning?
That is totally normal. Especially if you are newer to renovating. It’s a lot of money and time and it’s your actual home you’re taking apart! So it’s really understanable to have any range of emotions (and probably more than one at the same time). Right now, we’re full of giddy enthusiasm and excitement. I think the beginning of a project is so much fun because you’re living in the “possibility” stage – and it’s really just exciting and full of happy anticipation. But renovations are a marathon and and not a sprint.
We definitely were ready to be done after adding the pool, gutting & rebuilding our kitchen, and again after we replaced all of our doors and windows 2 years ago. So we’re absolutely expecting for the excitement honeymoon to end. But then when you’re done, there’s the “we’re finished” elation. So we’re comforted knowing that’s ahead of us too. And thank goodness we have a finished kitchen and a finished bathroom that we can use throughout this entire process. That’Il make this much easier than some other renovations of yore.
How Long Will It Take?
Our contractor has estimated 3-4 months (there will also be some breaks for the holidays, etc) but a lot of the work will be finishing the front porch, which can be done complely from outside until they join it to our existing house. We definitely think if it’s done (or even mostly done) by my birthday (March 19th) that would be a huge win. But we think it’ll likely be more like the end of April after you factor in the holiday break, various curveballs we expect will pop up, etc.
How Will Your Home’s Square Footage Change?
Our house is currently around 1,400 square feet and it’ll be around 1,500 square feet when we convert the covered porch to livable interior square footage.
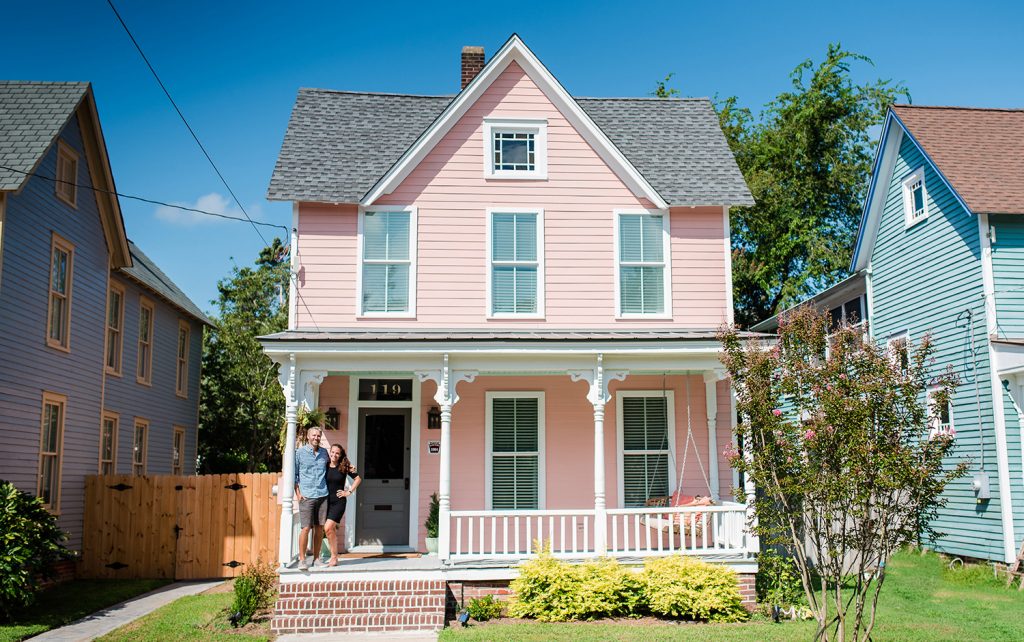
For reference, our last house was 3150 square feet, but living in the pink beach house for the summer (which was 1,900 square feet, shown below) taught us that we didn’t need anything nearly as big – especially if there’s functional outdoor space, nice weather for most of the year, and walkability.
When we saw this house at 1,400 square feet, we knew it was even smaller than anything we initially imagined getting… but the location is PERFECT for us. So we went for it. And for the last five years it has been great.
Adding just a little more space feels like it’ll still be easy to clean and care for, while gaining more function for our kids as they grow and for us to all enjoy these shared spaces togehter. A house that’s 1,500 square feet still feels like a giant downsize from the 3,150 square foot house we used to have! But I am going to have to get used to cleaning two toilets (only cleaning one has been nothing short of amazing).
When Does It Start?
We should be getting our permit any day now, and are told that it’ll hopefully start the week after Thanksgiving. Here’s hoping! You know we’ll keep you posted. The best spot to see updates is definitely Instagram Stories, and then things will eventually make it to the blog in a more thorough and easily digestible format. Thanks for coming along on this adventure with us.
Other Posts You Might Enjoy
If you want to read more about our journey with this house, check out some of these posts below:
Don’t let a small space or a small budget get you down. You can actually make small rooms feel big with a few creative ideas. Don’t worry, this doesn’t require you to gut everything or buy new furniture. Tricks like intentional furniture placement and bed storage solutions can breathe life into a tiny room, making it feel more spacious.
As you read, start taking a mental inventory of your space. Are you working with a bedroom, living room, or kitchen? What current furnishings do you have? What shelving or storage do you already own?
Then start to notice as you read which ideas stand out. Start with the easiest changes and see how they make a big impact.
.tasty-pins-banner-container{display:block;margin-bottom:20px;position:relative;width:-moz-fit-content;width:fit-content}.tasty-pins-banner-container a{cursor:pointer;display:flex;font-size:14px;font-weight:700;letter-spacing:1px;line-height:1.8em;text-transform:uppercase}.tasty-pins-banner-container a:hover{opacity:1}.tasty-pins-banner-container .tasty-pins-banner{align-items:center;bottom:0;cursor:pointer;display:flex;justify-content:center;left:0;padding-bottom:1em;padding-top:1em;position:absolute;right:0}.tasty-pins-banner-container .tasty-pins-banner svg{margin-right:4px;width:32px}.tasty-pins-banner-container .tasty-pins-banner span{margin-top:4px}.tasty-pins-banner-container a.tasty-pins-banner{text-decoration:none}.tasty-pins-banner-container a.tasty-pins-banner:hover{opacity:.8}.tasty-pins-banner-container a.tasty-pins-banner-image-link{flex-direction:column}.tasty-pins-banner-container a img{margin-bottom:0}.entry-content .wp-block-image .tasty-pins-banner-container img{margin-bottom:0;padding-bottom:0}#et-boc .et-l div .et_pb_image_wrap .tasty-pins-banner-container .tasty-pins-banner{padding-bottom:1em!important;padding-top:1em;text-decoration:none}#et-boc .et-l div .et_pb_image_wrap .tasty-pins-banner-container a.tasty-pins-banner{cursor:pointer;display:flex;font-size:14px;font-weight:700;line-height:1.8em;text-transform:uppercase}#et-boc .et-l div .et_pb_image_wrap .tasty-pins-banner-container a.tasty-pins-banner span{letter-spacing:2px;margin-top:4px}.et-db #et-boc .et-l .et_pb_module .tasty-pins-banner-container a:not(.wc-forward){padding-bottom:0}Photo by Albert Vincent Wu
Declutter And Organize
First things first: get rid of the clutter. Having too much stuff can automatically make your space feel cramped.
Even if the room is beautifully decorated, more will not make the space feel merrier – it will actually do the complete opposite (and maybe even trigger some anxiety) if the room is small. So what’s the solution?
• Keep it or toss it: If you haven’t used an item in six months, donate or toss it.
• Contain the chaos: Make use of extra baskets and bins to store items that are lying around.
• Open up the entryway: A messy entryway instantly shrinks your home before you’re even fully inside. This is a great place to start with organization, with simple wall hooks or a slim console table to keep shoes, keys, and other items out of the way.
Use Light, Neutral Colors
Don’t underestimate the power of color. Certain colors can make a room feel tall and wide, while others can make it feel tight and small.
To expand the feel of your space, choose light, neutral tones. Changing the colors of your walls is budget-friendly, and for decor, think of simple swaps like changing pillow covers or duvets.
• Use colors like white, soft grays, and beige: They reflect light and bring in more openness to the space.
• Monochromatic to add seamless flow: Stick to one color family for walls, furniture, and accents.
• Play with subtle patterns: Vertical stripes on curtains or wallpaper to make the ceilings look higher.
Utilize Natural Light
One of the most affordable ways to make small rooms feel bigger is to use natural light.
The more sun you let in, the bigger your room will feel. Natural light can be incorporated by moving furniture around (yep, time for some rearranging magic) or trying these tips:
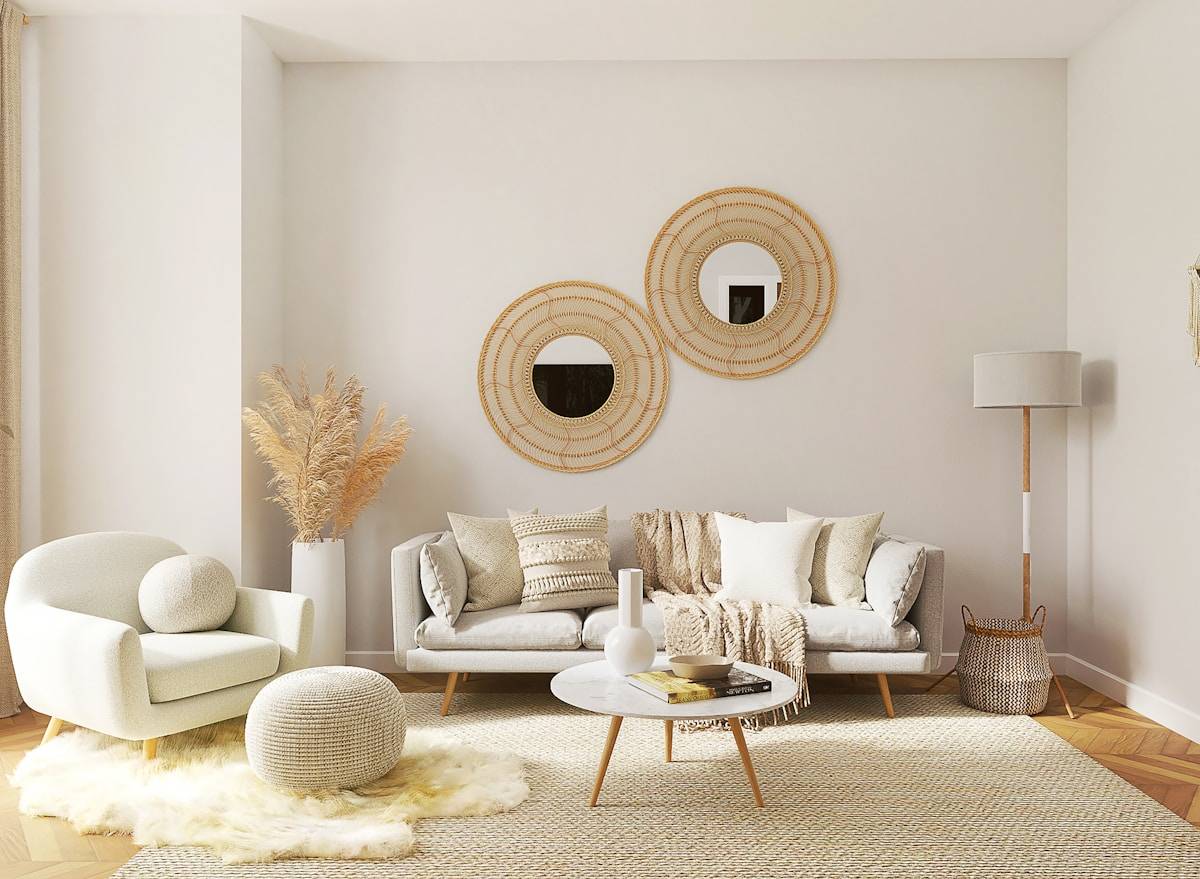
• Use light drapes: Dark drapes tend to block light and make the room feel heavy.
• Try sheer curtains or light shades: Not only do they bring in more light, but they still provide much-needed privacy.
• Mirror trick: Time for an experiment! Place a mirror opposite a window and watch the light bounce around the room.
If natural light is limited, you can also use soft lighting, such as sconces and table lamps, for a warm glow.
Hang Mirrors
Mirrors are a small room’s best friend. They’re great for vlogging your really stylish outfit, and also serve as decorative pieces that help expand the feel of a room.
Mirrors reflect light and, depending on the size, can also increase perceived depth and height.
• Go big: An oversized mirror can make a room feel twice its size.
• Strategic placement: Hang mirrors behind lamps to expand light. Lean tall mirrors against the wall to increase depth.
• Gallery wall twist: Mix mirrored accents with art for a stylish and airy display.
Add Vertical Storage
When you don’t have much floor space to work with, aim high.
By using vertical space to your advantage, you can add more storage without using up too much available space in the room.
• Tall bookshelves or ladder shelves: Shelving helps to draw the eye up, adding to the height of the space.
• Built-ins: Maximize storage (and clear up free space) by building shelves on walls.
• Hooks and pegboards: These are an organizational dream. Great for kids’ rooms, offices, or kitchens to keep essentials off counters.
You can even consider painting crown moldings lighter than your walls can make ceilings feel higher.
Choose Furniture Wisely
Bulky furniture can eat away at square footage in small spaces. If you are considering any swaps, keep pieces that are slim and sleek and choose the same style for new purchases.
Even playing around with the placement of current pieces can make a big difference.
• Acrylic or glass tables: A great option to keep the visual flow open.
• Loveseats or modular sofas: Go small and skip the oversized couch.
• Console tables: They are typically narrower and offer a more streamlined look.
Use Multi-Functional Pieces
We love one piece that can do multiple things – like allowing you to sit comfortably while also storing your favorite cozy blankets?
A win!
Multi-functional pieces offer built-in storage on top of their intended use, so you’re basically getting two for one.
• Storage ottomans: Extra seating, hidden storage, and easy to hide (like underneath a coffee table) for extra space.
• Nesting tables: Easily tuck them away when you don’t need them.
• Sleeper sofas: Perfect for guests.
For a no-to-low buy option, consider adding wicker baskets underneath coffee tables or near couches for chic and quick storage.
Create The Illusion Of Space With Curtains
Curtains are a budget-friendly way to bring in more light into a room. With lighter curtains, you allow more natural light and make the room feel more open. It’s simple and effective.
• Hang rods high: Mount them closer to the ceiling to make the room look taller.
• Go floor-length: Choose curtains that are a little longer than typical to help further elongate the walls.
• Stick to light fabrics: Sheer or neutral curtains will keep the look airy.
Utilize Under Bed Storage
Your bed isn’t just for sleeping; it’s also the perfect spot for storage. Under your bed is an ideal spot to store linens and other items that you don’t want taking up space in a small room.
• Rolling bins or drawers: Perfect for shoes and linens.
• Vacuum-sealed bags: These save space and are great for seasonal clothing items.
• Bed frames with built-in storage: If you plan to upgrade soon, choose a bed with built-in drawers.
Extra Space-Boosting Tips
Although there are several options for making your small room feel larger without spending much money, consider a few additional ideas:
• Layered textures: Rugs, throws, and cushions add depth and style without adding more furniture.
• Lucite furniture: Transparent pieces are great decor options for an open feel.
If you’re living in a small home or apartment, or one of your spaces is smaller than the others, you don’t have to buy new furniture and overhaul everything to make it look bigger.
To avoid feeling like things are cramped or chaotic, simply try a few of the tips we shared and see what works. It’s all about making smart choices, and starting small: light colors, storage, and creativity go a long way.
So get ready to stretch out, your tiny room just got bigger.
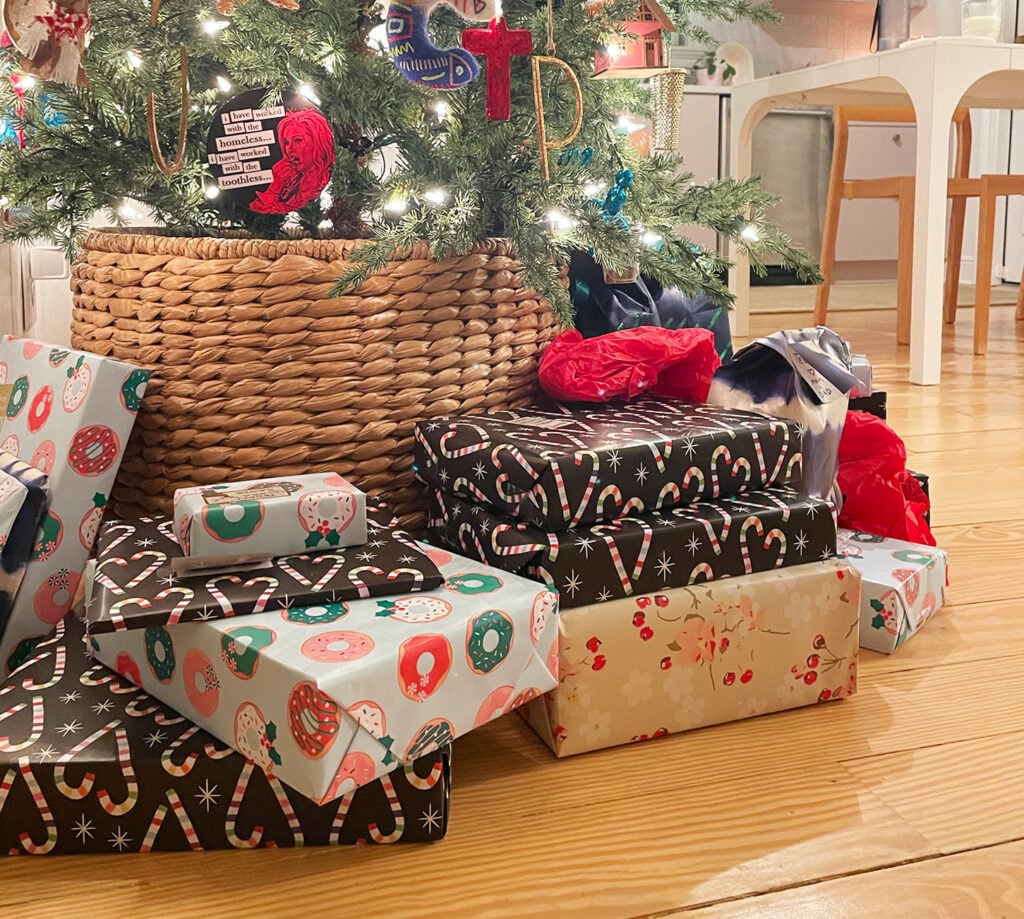
Every year, people ask us for theme ideas from my family’s annual Christmas gift exchange. We first mentioned this tradition on a podcast episode in 2016 and now, nearly a decade later, we’re putting the full, updated list in an easy-to-reference blog post. So if you or your family are feeling stuck or overwhelmed by your holiday shopping list, see why introducing a theme might do the trick!
How Our Gift Exchange Works
For as long as I can remember, my extended family has organized a gift exchange to lighten our collective holiday shopping load. Instead of buying gifts for EVERY SINGLE cousin, aunt, & uncle (there were 22 of us growing up!) we would draw a JUST ONE name at random from a hat.
The only rules are:
It can’t be the same person you had last year
It can’t be an immediate family member (sibling, parent)
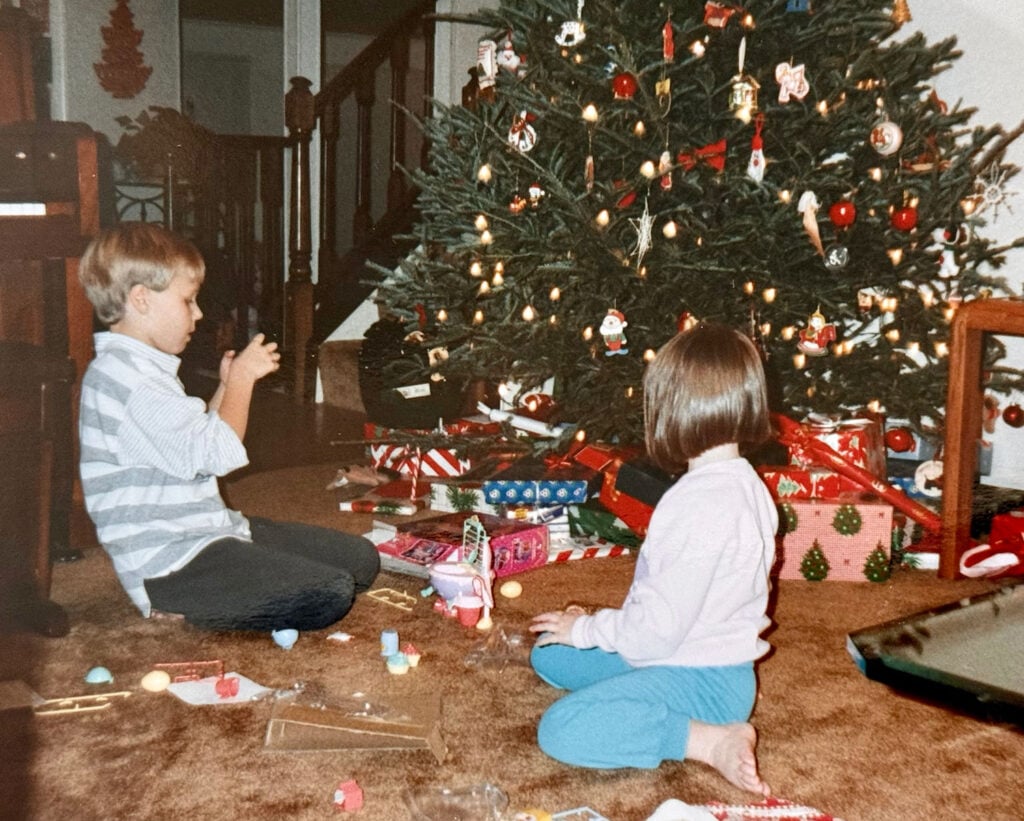
We built traditions around this exchange. On Christmas morning, we’d take a special moment to go around the room and watch each person unwrap their “exchange gift.” After Christmas dinner, we’d fold up little strips of paper and draw names for the next year. I’d describe it as a huge part of my core Christmas memories.
We’ve adapted the exchange over the years too. As more cousins got married and had kids, we condensed the list from individuals to family groups (ex: me + Sherry + our kids = 1 unit). And as my immediate family grew, we instituted secondary exchanges between my siblings & our spouses and another between our kids & their cousins. All of these gift exchanges help reduce the stress & cost of holiday shopping, and allow people to focus on fewer, more meaningful and specialized gifts.
Why Holiday Gift Themes Help
At some point, we added a theme to our Christmas gift exchange. I don’t remember why or who suggested it, but it’s been another fun and helpful part of our tradition. Plus, it has lead to some interesting and creative gifts over the years too!
They started off simple (ex: Food & Drink) but have gotten quirkier over time (ex: What’s That Smell?) since we try not to repeat a theme. Whatever you choose, I’d argue a theme makes gifting more fun for both the giver and recipient – especially in exchanges where you might not know the person super well (think workplaces, neighborhoods, that cousin you don’t see very often, etc).
Gift themes are like a writing prompt. They can narrow your focus, spark an idea, or point you in a more specific shopping direction than “find something Great Aunt Barb might like.”
Sure, everyone still wants to give and get things that are well-liked. But we find that with a theme, we care less about getting stuff that matches our personal interests, and mostly enjoy things that are a clever, thoughtful, or interesting interpretation of the theme. So our whole family finds that it makes gift shopping easier, less stressful, and more fun… which is why we haven’t done a single year without a theme ever since!
20 Holiday Gift Exchange Theme Ideas
Here are two decades worth of Christmas gift themes that my family has used – including some examples of how the idea was interpreted. Some of the trickier ones ended up being the most fun (#19 for example). Feel free to use or adapt any of them that you think would be a hit with your family.
Say Cheese: Photo or cheese-related gifts were the main focus – we got a state-shaped cheese board for our cousins who live in Wisconsin. Many other things like frames, polaroid cameras – and even mouth related stuff like novelty gum (saying cheese = smiling) was in the mix.
Travel Junk: Items or souvenirs that people picked up while on trips or vacations that year was the subject of this theme – so many people got fun mugs, ornaments, or other keepsakes (a box full of postcards from every state, etc).
The Year of Granny: To honor my great grandmother’s 90th birthday, we chose gifts that reminded us of her, like an the automatic card shuffler that she owned. Lots of her favorite snack, or items in her favorite colors were exchanged.
Hey Hot Stuff: Hot or spicy foods, fire-related items (candles, firepit supplies), or things to keep your warm (socks, blankets, etc). This was fun because it had a wide interpretation.
The Great Outdoors: Activities or games to use outside or items related to spending time in nature (trail mix for hiking, National Parks books, and headlamps for the kids – who got a giant kick out of them).
Back In The Day: Old school items like a retro-style board game or a nod to family history & traditions were items that ended up being exchanged this year. This was a fun one.
On The Road: Gifts that were good for road trips or travel, like car activity books for kids, favorite car snacks, a cool atlas or book of trail hikes someone could road trip to, etc.
Out of This World: Space, alien, or sky-related gifts (we sent a sampling of freeze-dried candy and other “astronaut food” to our cousins).
Be A Good Sport: Sports-related gifts like memorabilia from a favorite team or actual games to play together, tickets to a local event, etc.
Feeling Green: Eco-related gifts, or things that were literally the color green. This was a surprisingly wide category that we all enjoyed.
Peace & Quiet: Gifts around relaxation & calm (candles, books, sleep masks, spa gift cards) or even things to keep kids busy to give parents a spare moment or two.
Across State Lines: Local gifts from the town of the gifter. This was fun because you could send something your area was known for, or some local treat or item.
Outside The Box: Things that are unusual, any item that you take out of a box to complete (like puzzles, board games, etc), and items that are too big to fit in a box at all – like “adopting” a wild animal.
Book It: Literal books, reading related items, or things related to “booking” a ticket, trip, etc.
What’s That Smell? Gifts with distinctive scents (candles, soaps, foods, scented markers, etc) or gag gifts like a fart machine.
Small Business Finds: Items or gift cards that support a small business in your town, the town of the recipient, or a favorite small business online.
Trivial Pursuit: Anything falling under the traditional categories in Trivia Pursuit (Geography, Entertainment, History, etc.)
G.O.A.T.: Things you think are the “greatest of all time” in their category, or that can be explained by other interpretations of the G.O.A.T. acronynm (like: Go Out And Travel). There were also some gifts featuring the actual animal, like the hilarious “screaming goat” we included in ours.
Safe & Sound: Items related to safety (we got this light up collar for my cousin with a new dog) or that make noise (someone rounded out their gift with some Pop Rocks candy). Someone gifted us a Worst Cast Scenario survival book, which was pretty entertaining to read on our next road trip.
How We Pick Our Gift Themes
There’s no art or science to picking our themes – someone just pitches one in person or via email – and then we vote or casually agree on a favorite as a family. These days we usually just go with the first idea because by now we all know what makes a good theme for our group, and can think in a wide way to make a lot of things fit into any category we land on.
What makes a theme good? Something that has multiple potential interpretations – including unexpected ones! This is why we try to use a clever name or phrase, not just a descriptive category – like choosing “Feeling Green” over a theme like “Eco-Friendly.” This small spin encourages, but doesn’t require, people to be creative when shopping. “Feeling Green” still covers eco-friendly gifts, but also things that are green in color or even things that will have your stomach churning (like those gross out Beanboozled jelly beans).
So if you’re coming up with a new theme, I’d suggest thinking of simple category – colorful things, food & drink, things related to history – and then giving it a fun title. For example, give your colorful things theme a name like “Over The Rainbow.” This opens the door to ideas related to The Wizard of Oz/Wicked, things found in the sky or space, or maybe even things at the end of a rainbow (gold-colored gifts, “lucky” charm bracelets, etc).
Here are some more examples:
“Food & drink” could lead you to “What’s Cookin’ Good Lookin’?”
“History-related” could lead you to “Time Travel”
“Music” could lead you to “Loud & Clear”
“Travel” could lead you to “Pack Your Bags!”
“Toys & Games” could lead you to “Press Play”
More Holiday Gift Ideas
We’ve definitely been guilty of shoehorning a great gift idea into a theme some years! So if you need a few general gift ideas to get you started, be sure to check all of our holiday gift guides:
*This post contains affiliate links, so we may earn a small commission when you make a purchase through links on our site at no additional cost to you.