If you’ve ever wished your home could feel modern and full of history at the same time, you’re going to love this one. The Modern Heirloom Apartment (a design by Simple Interiors) is exactly that kind of space. It’s clean and curated, but still feels layered. Like every piece was chosen with intention, not just to look pretty, but to belong.
Right away, you notice the mood. There’s that rich burgundy moment, then the warmth comes in through the wood tones, soft upholstery, plus all those quiet, sculptural curves, and just when it could’ve felt too minimal, the brass details bring a subtle glow to elevate the interior- a perfect mix of old-soul character and fresh design.
Let’s take a deeper look inside.
Kitchen
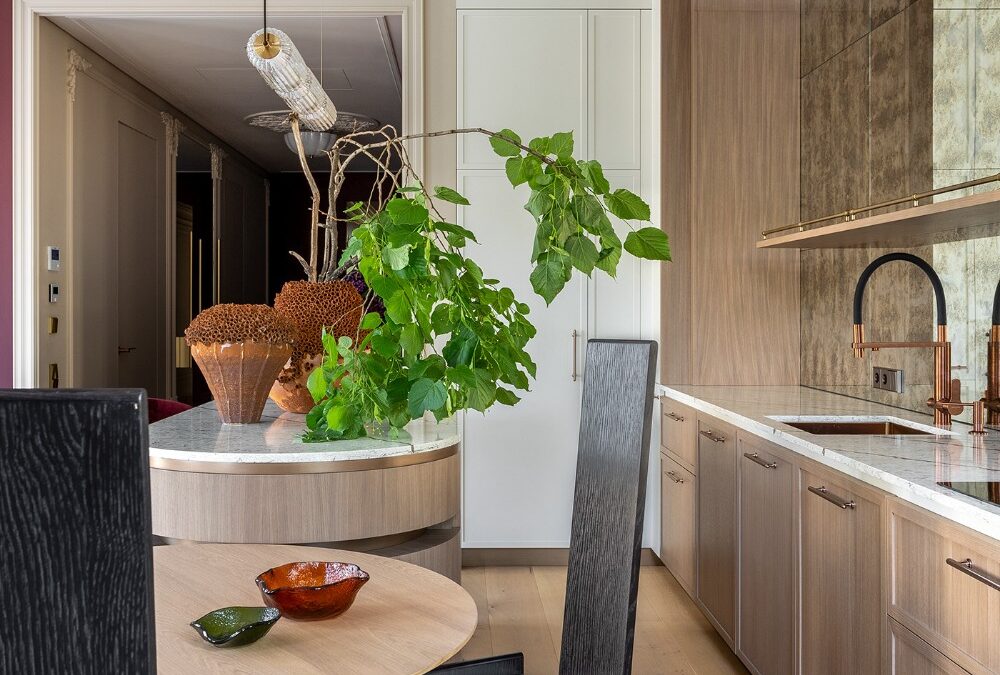
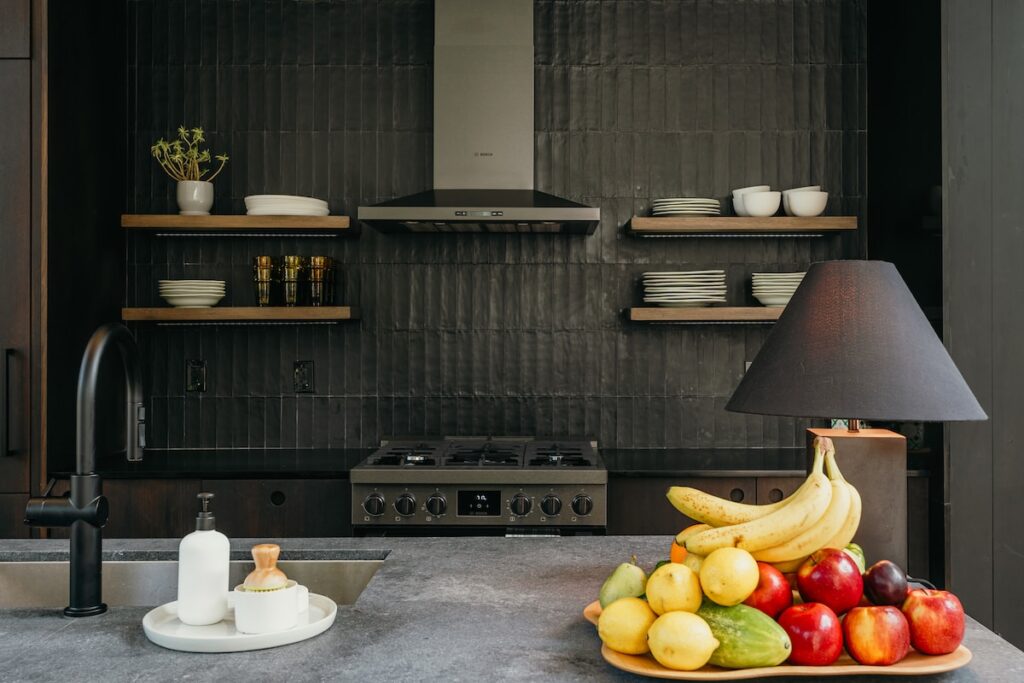
The kitchen is where the Modern Heirloom Apartment really shows off its architecture. Everything feels truly intentional.
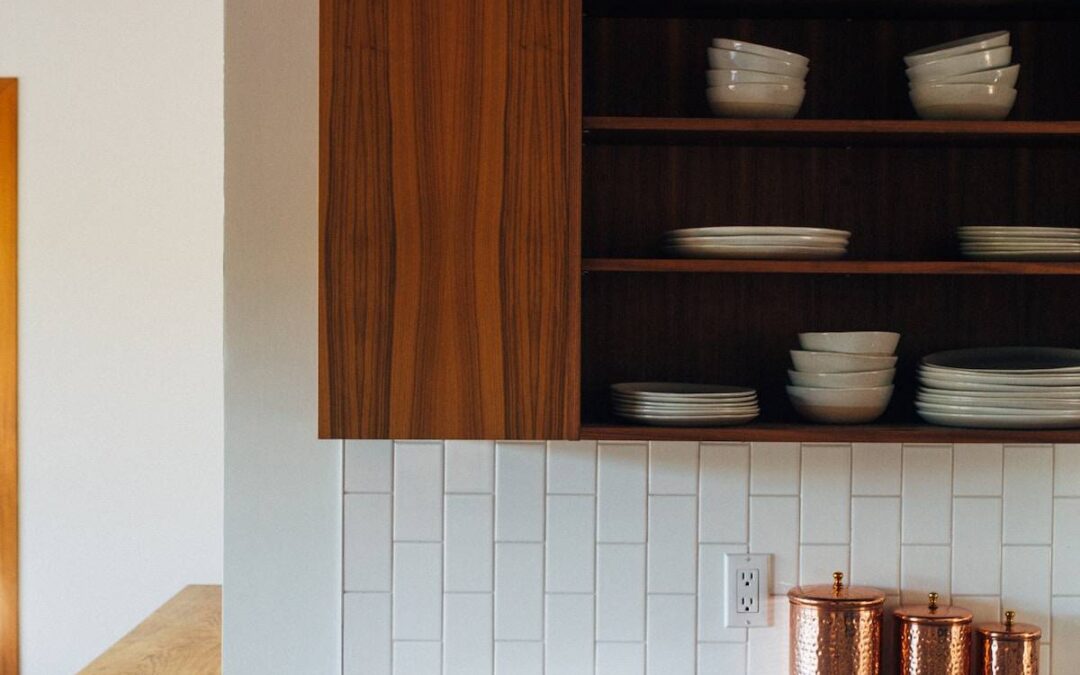
Curved and sculptural, the island becomes the star, rounding the layout to transform this utilitarian zone into a natural gathering point. The oak cabinetry keeps everything calm- full-height, seamless, and super tailored. No visual clutter. Just warm wood and clean lines doing the work.
And the best detail? That arched wood frame around the backsplash zone, a striking element that gives the kitchen wall an architectural feature (not just a place for cabinets).
Minimal, yes. But it still feels designed.
Bedroom
A private little world.
Walking in, the whole room feels calm on purpose… soft light, warm oak floors, and that quiet mix of modern lines with old-soul details.
The bed stays grounded with textured upholstery and rich bedding tones. Then there’s the wall behind it… and wow. The mural turns the headboard wall into a full scene, adding hand-drawn softness + depth, all without extra decor.
Small details finish it off: a slim brass reading sconce, the sculptural side table, and the arched built-in shelving.
Bathroom
A bathroom that feels like a suite, not a side room.
The ceiling is the first flex, that warm ochre tone, framed with dark trim. Totally graphic and soft.
Everything underneath stays crisp. Large wall panels keep the lines clean, and the brass fixtures add warmth. The floating vanity is another smart move that adds to the open, airy feel. For that “heirloom” richness, the designer has used warm wood grain. Even the drawer pulls feel like jewelry ✨
Next to it, the freestanding tub sits like a sculpture. Minimal shape, maximum impact. And that little brass martini table? Perfect. Candle, book, drink… done!
We independently select these products—if you buy from one of our links, we may earn a commission. All prices were accurate at the time of publishing.
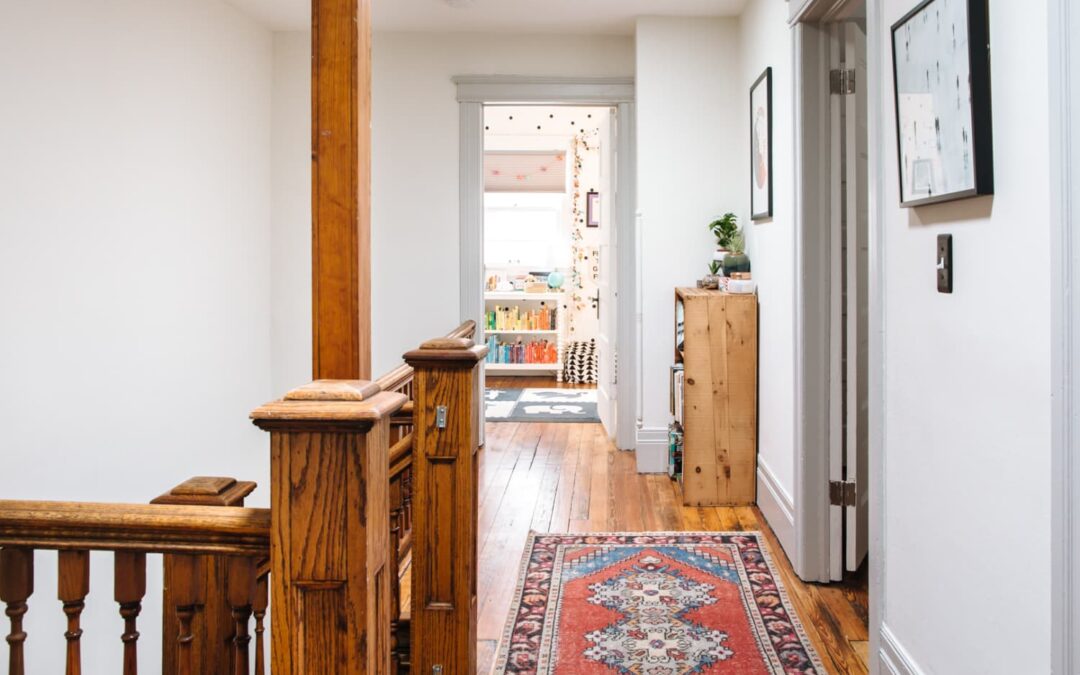
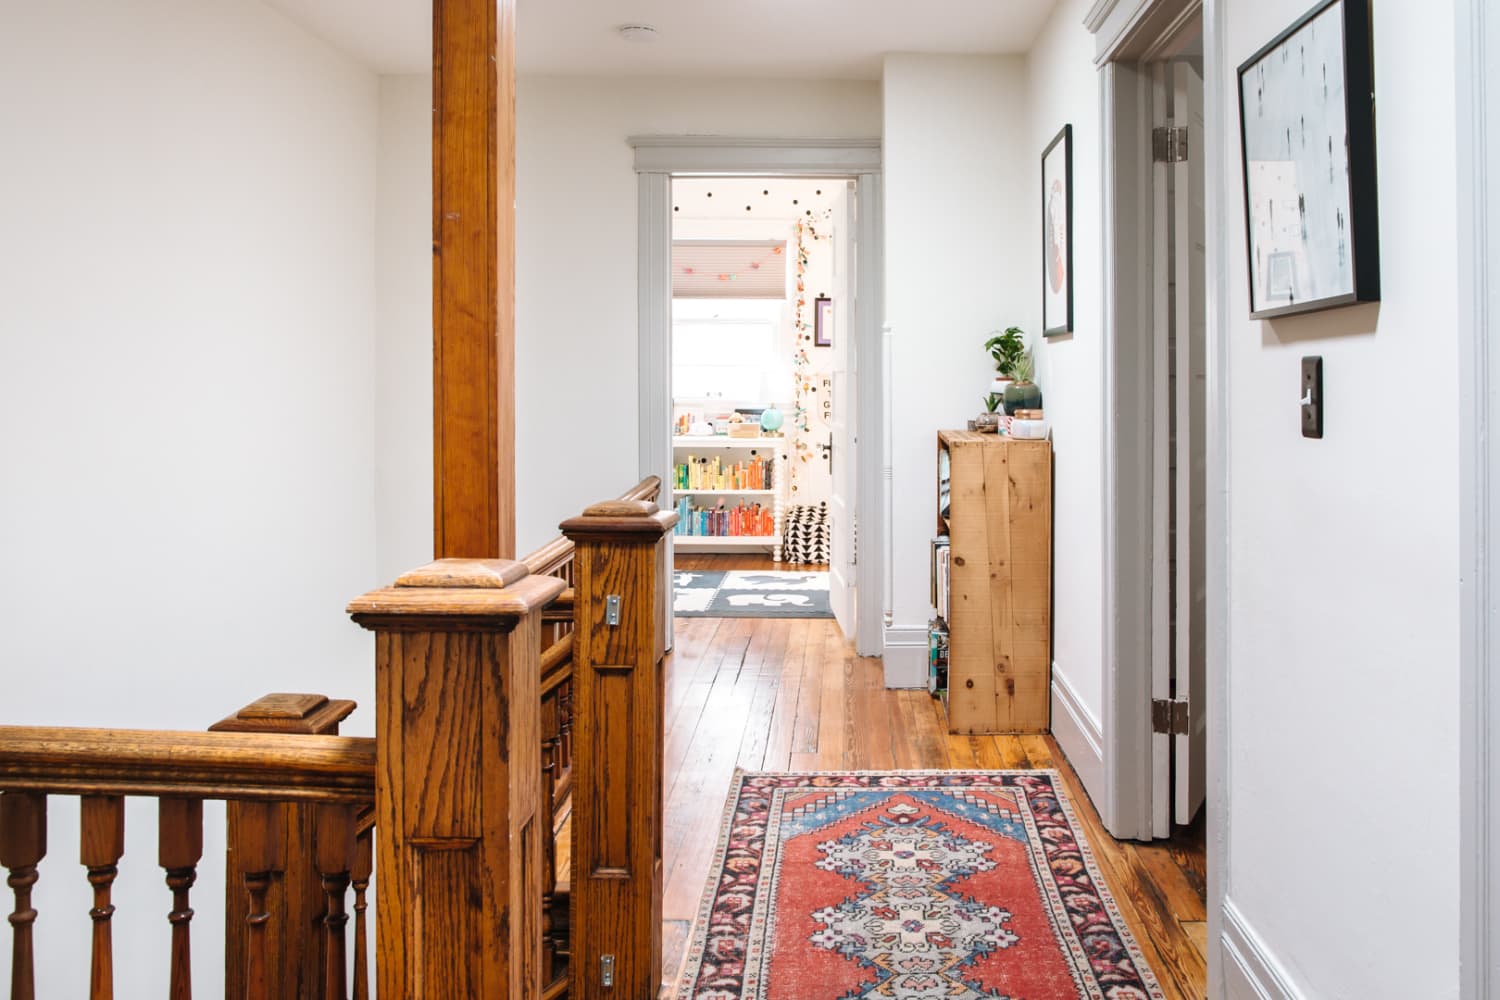
When I pore over home decor images online, the most beautiful spaces, no matter their aesthetic, often have a finishing touch in common: an interesting door with great hardware.
My husband and I have put a lot of time and energy into upgrading our beach town apartment. Everything from the kitchen counter to the bathroom mirrors were low-cost builder grade and lacked personality when we first moved in. At this point, we’re finished with all the big renovations (bathroom, kitchen, patio, and laundry room).
And seeing how nice those spaces are now, the cheap builder doors looked out of place and extra-dated. They were hollow core, plain white doors that were painted and repainted many times over. They were pretty thin and would rattle with the slightest breeze, and the noise really bothered me. Having just finished the kitchen renovation, I had some left over budget (and energy, surprisingly) to tackle replacing the interior doors.
I did a fair bit of research on what style I wanted and how it would fit with the laid back vibe of the beach style we created through the rest of the spaces. I narrowed it down to a shaker style with its simple, yet classic design.
Up next was working the replacement of six doors into the leftover budget. To plan this out, I had to decide what kind of replacing I could do. With interior doors, there are a couple options.
There are pros and cons to both, but I ended up going with a slab replacement for budget reasons and because some of our door frames were really thin and cornered up next to each other. It would have ended up being a lot more work to get everything to fit just right in these types of corners. Buying a slab door was much cheaper than the pre-hung door, and I could comfortably fit the six doors in the budget — plus the unlacquered brass door handles I had my eyes on.
Here’s how I upgraded my doors using the pre-existing frames:
First, I made sure I had the right materials.
I had to make sure all of my materials were the right size and came in on time. When researching how to replace doors, I landed on a super helpful YouTube video that took me specifically through replacing slab doors. It involved trimming down the door with a circular saw, routing the spaces for the hinges, and drilling the holes for the handles. I already had a circular saw, a router, and a set of drill bits.
Once everything was installed, it was time to paint. Since the new slab doors came primed already, I didn’t have to do that part, and I just chose the color I painted my walls, Valspar’s Swiss Coffee white in eggshell. I used almost exactly 1 gallon at $75. After two coats of paint, everything was done!
All in all, this project took me about one full weekend and cost $2,114. Although it was a bit of a shock to look at the price tag all together, it came out to about $230 per room and boosted the style of every room. Not to mention, they’re much sturdier than the old doors. The unlacquered brass door knobs tie in with the brass I used in the laundry and kitchen renovations as well.
I’m a fairly skilled DIYer (see: my kitchen renovation, laundry renovation, and back patio), and my project took one day for the total install and one day for painting. But this is also a project that you could outsource.
Personally, I plan on holding onto our townhouse and not selling, so it was easy to make the upgrade choice based on my personal preference, but replacing your doors is also something you might consider if you’re selling.
Doors are so noticeable because it’s the first thing a visitor (or buyer) will see walking down a hallway or up to a room. Solid wood doors are something you can also immediately feel when you open them. It is an upgrade that could make a big impact in the sellability of your home. It sounds so simple, but installing new doors gave a new and fresh look to the whole inside.
As a homeowner, it’s only natural to want to improve, update, and personalise your space. From small fixes to bigger upgrades, there’s a real sense of satisfaction that comes from rolling up your sleeves and getting stuck in. But not every project is suited to a DIY approach – and knowing when to call in an expert can save you time, money, and a lot of unnecessary stress.
While there are plenty of home jobs you can confidently tackle yourself, some improvements require specialist skills, experience, and an understanding of safety regulations. In the sections below, we’ll look at the types of home projects that are best left to professionals, and why getting expert help is often the smartest decision you can make.
Pest Control
When it comes to keeping human intruders at bay, you are more than capable of completing a simple CCTV installation. When critters infest the property, though, expert pest control services are the answer. Aside from getting rid of the pests themselves, they will identify the source of entry. This allows this to block off access points to reduce the risk of repeat episodes. Their work also includes removing droppings and fur, which is vital.
You could try the DIY approach, but it’s better to know that all pests have been successfully eradicated and normality has been restored.
Significant Backyard Upgrades
Beautifying the backyard with a little gardening is well within your remit. However, backyard luxuries often demand professional support. Swimming pool installations and garden room erections are key examples. It’s not just about the quality of work that’s required, either.
If you take on the job yourself, you may overlook aspects of compliance. With this in mind, it is essential that you work with an expert. Besides, an inferior result could lead to a very expensive repair or replacement job.
Plumbing Upgrades
Credit: https://depositphotos.com/
OK, so you are capable of fixing a dripping tap. However, the installation of new plumbing lines is best left to a pro. More importantly, boiler upgrade installations must be handled by certified experts. It’s a matter of safety as much as it is one of compliance and demanding better outcomes. If yours is outdated, it is essential that you take charge of the situation ASAP. It’ll remove safety issues and boost efficiency.
Only small plumbing issues like clogged toilets should be handled by you.
External Repairs
Keeping the building in great health is a priority for all homeowners. Not least because structural elements protect everything inside the home too. The roof, walls, windows, and foundation are too important to ignore. A professional roofer can assess the roof to determine the best course of action while also completing it to the highest standards.
A DIY approach is never wise, especially if you are short of time. The last thing you need is to be left with a half finished job that leaves your home exposed.
Extensions & Conversions
If you want to repurpose a room, you are more than capable of decorating. However, extensions and significant conversions need an expert. Planning permission may be needed for the former while it also takes on major structural changes. Attic, garage, and basement conversions can require a lot of work too.
While not as problematic as extensions, it’s best to call a pro unless you want to face a potential headache. They can help build the vision before bringing it to life.
Electrical Work
Changing a light fitting or replacing a socket faceplate can often be handled safely by a confident homeowner. Anything beyond that, however, should be left to a qualified electrician. Rewiring, installing new circuits, upgrading consumer units, or adding outdoor electrics all carry serious safety risks if done incorrectly. Poor electrical work doesn’t just lead to nuisance faults – it can increase the risk of fire or electric shock.
A professional electrician will also ensure all work complies with current regulations and is properly certified. This is particularly important if you plan to sell your home in the future, as uncertified electrical work can cause delays or even derail a sale entirely.
Structural Changes and Load-Bearing Walls
Knocking through rooms to create open-plan living spaces is hugely popular, but this is one area where DIY enthusiasm can quickly turn dangerous. Removing or altering load-bearing walls without proper assessment can compromise the structural integrity of your home. What looks like a simple wall could be supporting floors, ceilings, or even the roof above.
A structural engineer or experienced builder will calculate what’s needed and specify appropriate supports, such as steel beams. It’s not just about safety on day one – it’s about ensuring your home remains sound for decades to come.
Asbestos Removal
In older homes, asbestos can still be present in areas such as ceilings, insulation, floor tiles, or garage roofs. While it may not always be dangerous if left undisturbed, removing or damaging asbestos without specialist training can release harmful fibres into the air.
This is one task that should never be tackled as a DIY project. Licensed professionals have the equipment, training, and disposal methods needed to handle asbestos safely and legally, protecting both your household and the wider environment.
Heating and Cooling Systems
Beyond boilers, whole-home heating and cooling systems – such as underfloor heating or air conditioning – require specialist design and installation. These systems need to be carefully planned to work efficiently with your home’s layout and insulation levels.
A professional installer can ensure the system performs as intended, runs efficiently, and doesn’t cause future maintenance headaches.
The Final Word
Calling in a professional can feel like a big step, especially when you’re trying to keep costs under control. But in many cases, it’s a sensible investment rather than an unnecessary expense. Expert workmanship reduces the risk of mistakes, ensures your home meets safety and legal standards, and often delivers a better, longer-lasting result.
More importantly, taking on a project that’s beyond your skill level can quickly drain the enjoyment from your home. Instead of feeling proud of the space you’re creating, you may find yourself stressed, overwhelmed, or facing costly fixes later on. Knowing when to step back and ask for help is part of being a confident homeowner – and it protects your time, your budget, and your peace of mind.
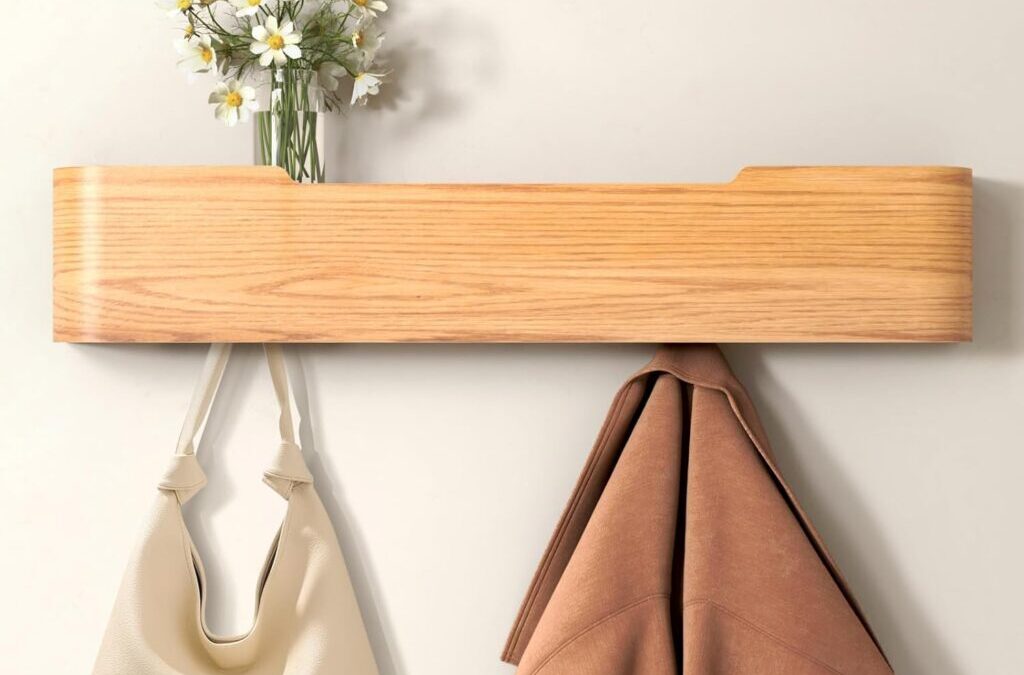
Your entryway is the first impression your home makes. It deserves to be a moment, one that feels totally like you, right? The good thing is, you don’t need a full makeover to get that “designer entry” look. Just a couple of well-chosen pieces will do.
Here are our favorite first impression pieces under $100 that are just as pretty as they are practical 🤍
The kind of piece that makes your entryway 10x more functional. It gives you a dedicated spot for coats, bags, and daily grab-and-go items, so nothing ends up on chairs or piled on the floor. The clean wood look keeps things minimal, but still adds warmth to the wall.
If your keys, rings, lip balm, and earbuds constantly disappear, this is the fix. A valet tray is one of those tiny upgrades that make your home feel expensive. It creates a “home base” for the little things that usually cause chaos. And since it’s a 2-pack, you can place one in the entryway and keep the second on your nightstand or dresser.
This is your instant “boutique entryway” moment. A gold clothing rack makes even a small space look elevated, and it’s perfect if you don’t have a coat closet. It’s also great for styling because it lets you hang a few everyday essentials without making the area feel messy.
“It Feels So Good to Be Home” Wall Art (Black Frame)
Our personal favorite, and such a sweet finishing touch. The postcard-style design creates an intentional feel, like something you’d see in a designer hallway setup. Plus, it adds so much personality, without being too loud.
You see? These cute first impression pieces under $100 proved our point: you don’t need a big budget for a gorgeous entryway 😉
Whether you already have them in your home or will be installing them and are preparing for their proper care, this guide on how to clean quartz countertops will cover all your bases.
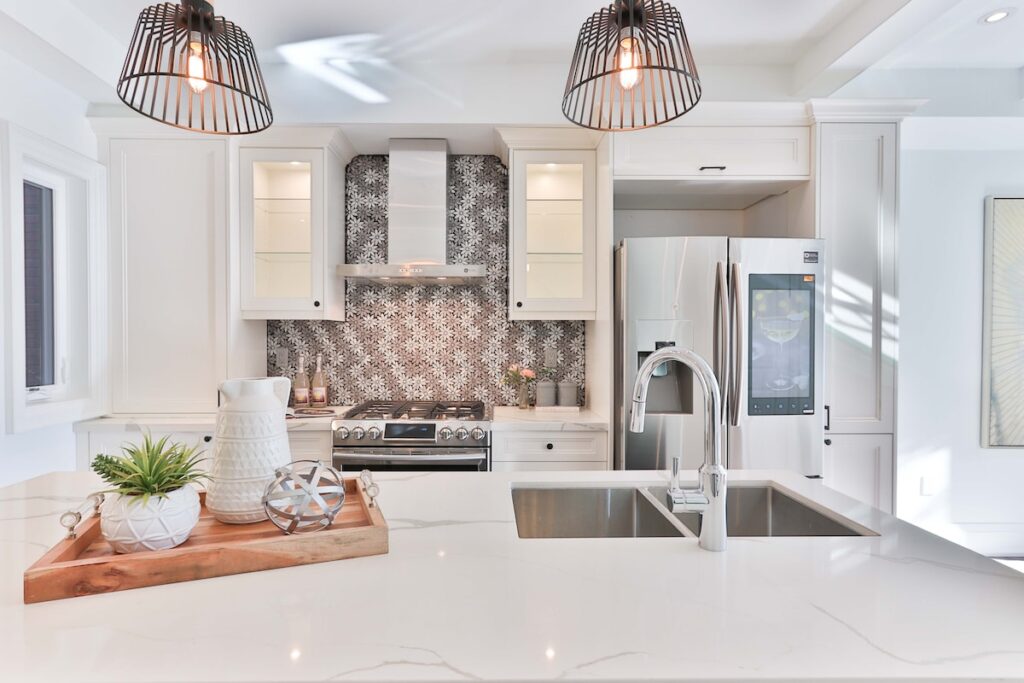
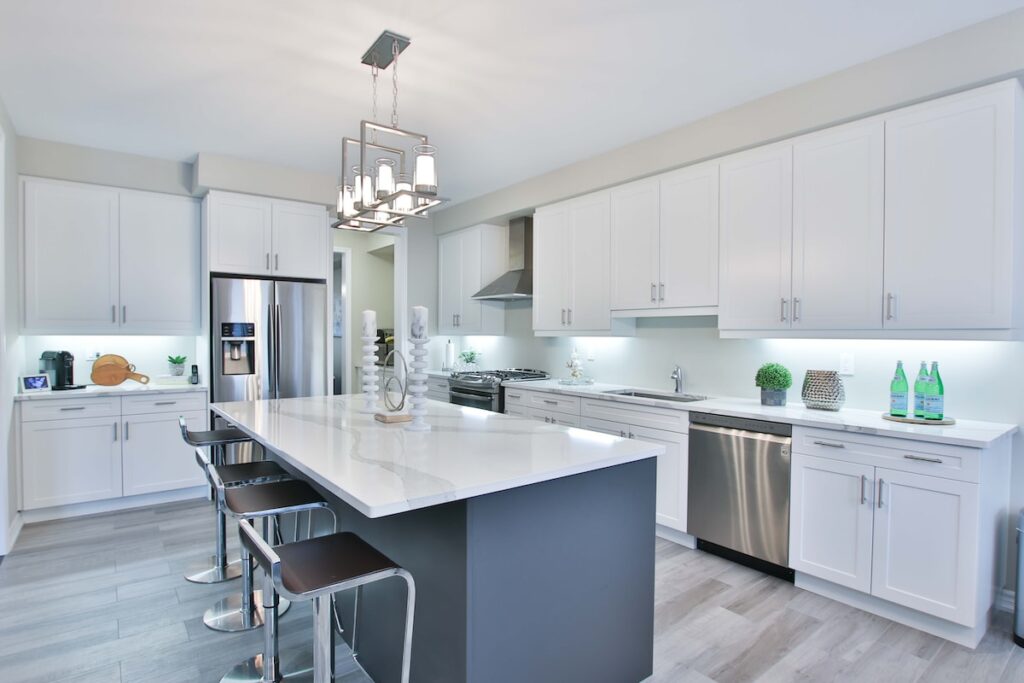
When it comes to adding an elegant touch to your kitchen or bathroom, nothing quite beats quartz countertops. Made mostly of natural quartz crystals bonded with engineered resin, they’re cut into slabs and often used as kitchen counter surfaces. Compared to granite or marble, quartz is low-maintenance because it’s non-porous, meaning liquids are less likely to seep through and cause staining.
.tasty-pins-banner-container{display:block;margin-bottom:20px;position:relative;width:-moz-fit-content;width:fit-content}.tasty-pins-banner-container a{cursor:pointer;display:flex;font-size:14px;font-weight:700;letter-spacing:1px;line-height:1.8em;text-transform:uppercase}.tasty-pins-banner-container a:hover{opacity:1}.tasty-pins-banner-container .tasty-pins-banner{align-items:center;bottom:0;cursor:pointer;display:flex;justify-content:center;left:0;padding-bottom:1em;padding-top:1em;position:absolute;right:0}.tasty-pins-banner-container .tasty-pins-banner svg{margin-right:4px;width:32px}.tasty-pins-banner-container .tasty-pins-banner span{margin-top:4px}.tasty-pins-banner-container a.tasty-pins-banner{text-decoration:none}.tasty-pins-banner-container a.tasty-pins-banner:hover{opacity:.8}.tasty-pins-banner-container a.tasty-pins-banner-image-link{flex-direction:column}.tasty-pins-banner-container a img{margin-bottom:0}.entry-content .wp-block-image .tasty-pins-banner-container img{margin-bottom:0;padding-bottom:0}#et-boc .et-l div .et_pb_image_wrap .tasty-pins-banner-container .tasty-pins-banner{padding-bottom:1em!important;padding-top:1em;text-decoration:none}#et-boc .et-l div .et_pb_image_wrap .tasty-pins-banner-container a.tasty-pins-banner{cursor:pointer;display:flex;font-size:14px;font-weight:700;line-height:1.8em;text-transform:uppercase}#et-boc .et-l div .et_pb_image_wrap .tasty-pins-banner-container a.tasty-pins-banner span{letter-spacing:2px;margin-top:4px}.et-db #et-boc .et-l .et_pb_module .tasty-pins-banner-container a:not(.wc-forward){padding-bottom:0}
Maybe you’re looking to add a quartz countertop to your home for your next remodel (or this surface is already featured in your space), but you aren’t sure how to maintain its appearance…you’re in luck.
After years of keeping my own quartz surfaces gleaming, I’ve learned what works (and what definitely doesn’t!).
Understanding Your Quartz Countertops
Before diving into cleaning techniques, it’s helpful to understand what makes quartz countertops unique. Unlike natural stone countertops such as granite or marble, quartz is an engineered stone, typically composed of about 90-95% ground natural quartz crystals, polymer resins, and pigments.
This manufacturing process creates a non-porous surface that’s highly stain-resistant and doesn’t require sealing like natural stone does.
The non-porous nature of quartz means bacteria and viruses have nowhere to hide, making these countertops exceptionally hygienic for food preparation.
However, the resin binders that make quartz so durable can be sensitive to certain harsh chemicals and high heat, which is why knowing the right cleaning methods is so important.
Daily Cleaning for a Fresh Start
The secret to keeping quartz countertops looking their best? Consistency. A quick daily wipe-down prevents buildup and keeps your surfaces sparkling with minimal effort. Here’s my go-to routine that takes just a few minutes:
Gather your supplies: a soft cloth or non-abrasive sponge, warm water, and mild dish soap. I keep a designated spray bottle under my sink filled with a gentle cleaning solution, it makes daily maintenance so much easier!
Mix equal parts warm water and soap to create your cleaning solution. If you prefer a spray bottle, use about two tablespoons of mild soap (dish soap works) per 16 ounces of water. This mild mixture is all you need for everyday cleaning and won’t damage the resin in your quartz counters.
Spray or dampen your cloth with the soapy water and wipe down your countertop, paying special attention to high-traffic areas around the sink, stove, and food prep zones. I like to work in sections, especially on larger kitchen islands, to ensure I don’t miss any spots.
Rinse your sponge or cloth with clean water, then wipe the surface again to remove any soap residue. This step is crucial, as soap film can dull the finish over time, so don’t skip it!
Finally, dry the countertop with a clean, dry microfiber cloth. This prevents water spots and streaks while giving you that gorgeous, streak-free shine. I find that microfiber cloths work better than paper towels for achieving that showroom finish.
The Best Cleaning Products for Quartz
While dish soap and water work beautifully for daily cleaning, you might want specialized cleaners for your quartz countertops. Look for pH-balanced, non-abrasive cleaners specifically formulated for quartz or stone surfaces. Many manufacturers recommend their own branded cleaners, but any gentle, stone-safe cleaner will work.
Some of my favorite store-bought options include Weiman Quartz Cleaner, Method Daily Granite Cleaner (which works great on quartz too), and Simple Green Stone Polish. These products are designed to clean effectively while enhancing the natural shine of quartz without leaving residue.
For a natural DIY approach, you can create an effective spray cleaner using water, a small amount of dish soap, and rubbing alcohol. The alcohol helps the solution dry quickly without streaks. Mix one cup of water, one tablespoon of dish soap, and one tablespoon of rubbing alcohol in a spray bottle for an economical cleaning solution.
What to Avoid: Products That Damage Quartz
Just as important as knowing what to use is understanding what to avoid. The resin in quartz countertops can be damaged by harsh chemicals, abrasive materials, and certain acidic substances. Here’s what should never touch your quartz surfaces:
Avoid bleach, ammonia, or any cleaners containing these ingredients. While quartz is stain-resistant, these harsh chemicals can break down the resins binding the quartz crystals together, leading to discoloration and dullness over time. If you accidentally use these products, rinse the area immediately with plenty of water.
Stay away from abrasive scrubbing pads, steel wool, or scouring powders. These can scratch the surface, creating tiny grooves where dirt and bacteria can accumulate. Even “soft scrub” type cleaners often contain mild abrasives that can damage quartz over time.
Skip acidic cleaners like vinegar, lemon juice, or lime-based products for regular cleaning. While quartz is more acid-resistant than natural stone, prolonged or repeated exposure to acidic substances can etch or dull the surface. If acidic foods or drinks spill on your counters, wipe them up promptly.
Avoid oil-based or wax cleaners, furniture polish, and cleaners with dyes. These can leave a film on your quartz that builds up over time, making your countertops look dull rather than shiny. The non-porous surface of quartz doesn’t need these products and won’t absorb them properly.
Never use oven cleaners, drain cleaners, turpentine, or any highly alkaline or highly acidic chemicals near your quartz countertops. If these products accidentally contact your surface, rinse immediately and thoroughly with water.
Tackling Stains and Stubborn Marks
Although quartz countertops are highly stain-resistant, they’re not stain-proof. Knowing how to address different types of stains quickly is key to keeping your surfaces pristine. Here’s how I handle the most common culprits:
Everyday Food and Beverage Stains
For most food and beverage spills, think coffee, tea, wine, or juice, the warm water and mild dish soap mixture works perfectly. The key is addressing these stains quickly. If you catch a spill within a few hours, it typically wipes away effortlessly.
For dried or set-in food stains, let your cleaning solution sit on the stain for a few minutes to break it down before wiping. Use a soft cloth or non-abrasive sponge and gentle circular motions. Rinse thoroughly with clean water and dry with a microfiber cloth.
Grease and Oil Stains
Kitchen oils and greasy splatters can leave stubborn marks on quartz if not cleaned promptly. For these, I use a slightly stronger approach: mix warm water with a bit more dish soap than usual to create a concentrated degreasing solution.
Apply the solution to the greasy area and let it sit for 5-10 minutes. The dish soap will break down the oil, making it easier to remove. Gently scrub with a soft cloth, rinse with clean water, and dry thoroughly. For particularly stubborn grease, you might need to repeat this process.
Dried or Stuck-On Messes
For gum, wax, hardened food, or other stuck-on substances, reach for a plastic putty knife or a credit card rather than a metal scraper. Gently scrape off the material, being careful not to scratch the surface. Work at an angle and use light pressure.
Once you’ve removed the bulk of the material, clean the area with your regular soap and water solution. If any residue remains, a small amount of rubbing alcohol on a cloth can help dissolve sticky remnants.
Tough Stains That Need Extra Help
For stubborn stains that resist regular cleaning, create a gentle paste using baking soda and water. Mix equal parts of each to form a thick paste with a consistency similar to toothpaste. Apply this paste directly to the stain and gently rub in circular motions using a soft cloth.
Let the paste sit for 10-15 minutes, then rinse thoroughly with water and dry. The mild abrasiveness of baking soda is usually safe for quartz, but always use gentle pressure and test in an inconspicuous area first if you’re concerned.
For stains from nail polish, ink, or permanent markers, dampen a cloth with isopropyl rubbing alcohol and gently dab the stained area. Don’t scrub aggressively—let the alcohol do the work. Rinse the area with clean water and dry completely.
Restoring Shine to Dull Quartz Countertops
Over time, even well-maintained quartz countertops can lose some of their luster due to soap buildup, hard water deposits, or general wear. If your once-gleaming counters look dull or hazy, don’t worry—you can restore that showroom shine!
Start by thoroughly cleaning the entire surface with your regular soap and water solution, then rinse extremely well to remove all soap residue. Sometimes dullness is simply caused by soap film buildup.
For a deeper clean, create a solution of equal parts water and rubbing alcohol. Spray or wipe this mixture over the entire countertop, then immediately buff dry with a clean microfiber cloth. The alcohol cuts through any remaining residue and evaporates quickly, leaving behind a brilliant shine.
If you have hard water in your area, mineral deposits might be causing dullness. Mix equal parts water and white vinegar, apply to the affected areas, and let sit for just one minute (no longer!). Rinse immediately and thoroughly with water, then dry completely. While we generally avoid acidic cleaners on quartz, this quick treatment can remove mineral buildup without causing damage.
For ongoing shine maintenance, consider using a quartz-specific polish or cleaner once a week. These products are specially formulated to enhance the natural luster of quartz without leaving harmful residue. Follow the manufacturer’s instructions carefully for best results.
Preventing Damage and Maintaining Beauty
Keeping your quartz countertops shiny and clean goes beyond just cleaning—it’s about protecting them from potential damage in the first place. Here are my essential prevention tips:
Always Use Cutting Boards
While quartz is extremely durable and scratch-resistant, it’s not scratch-proof. Always use cutting boards when preparing food. Cutting directly on quartz countertops can leave marks over time, especially from serrated knives or when applying significant pressure.
Protect from Heat
This is crucial: although quartz is heat-resistant, it’s not heatproof. The resin binders can be damaged by extreme temperatures. Always use trivets, hot pads, or heat-resistant mats under hot pots, pans, and dishes straight from the oven or stove.
I learned this lesson the hard way when I set a hot baking dish directly on my counter—it left a permanent mark that no amount of cleaning could remove. Prolonged exposure to temperatures above 300°F can cause discoloration, scorching, or even cracking. It’s simply not worth the risk!
Clean Spills Immediately
The beauty of quartz is that it’s non-porous, which means most spills won’t absorb if you wipe them up promptly. Make it a habit to address regular daily spills as soon as they happen, especially pigmented liquids like red wine, coffee, beet juice, or tomato sauce.
Even though quartz resists staining better than natural stone, allowing spills to sit for extended periods gives them more opportunity to adhere to the surface or affect the resin. A quick wipe prevents potential problems entirely.
Use Coasters and Placemats
Protect your countertops from potential ring marks and moisture by using coasters under glasses and mugs. While quartz won’t stain from water rings like wood furniture, acidic beverages can potentially affect the surface if left sitting for hours.
Common Mistakes to Avoid
Through my years of maintaining quartz countertops, I’ve learned that certain habits can actually harm rather than help. Here are the most common mistakes to avoid:
Don’t use excessive force when cleaning. Quartz is durable, but aggressive scrubbing with rough materials can cause surface damage. Let your cleaning products do the work—if something won’t come off with gentle pressure, it needs a different cleaning approach, not harder scrubbing.
Avoid letting cleaning products sit on the surface for extended periods. While a few minutes is fine for tough stains, leaving cleaners on quartz for hours can potentially cause discoloration or dull the finish. Always rinse thoroughly after cleaning.
Don’t assume all “stone cleaners” are safe for quartz. Some products designed for natural stone contain sealers or waxes that aren’t appropriate for engineered quartz. Always check that products are specifically labeled as safe for quartz.
Never place extremely cold items directly on quartz countertop surfaces either. While we often think about heat damage, extreme cold can also cause thermal shock. Let frozen items sit for a moment before placing them on counters, or use a trivet or towel.
Creating a Proper Maintenance Schedule
Consistency is the secret to effortlessly maintaining beautiful quartz countertops. Here’s the schedule I follow:
Daily: Quick wipe-down with soap and water, especially after meal prep and cooking. Dry thoroughly to prevent water spots.
Weekly: Deeper clean with a quartz-specific cleaner or polish to maintain shine. Address any spots or marks that regular cleaning might have missed.
Monthly: Inspect your countertops for any developing issues—minor scratches, dull areas, or persistent stains. Address problems early before they become harder to fix.
As Needed: Deep clean with baking soda paste for stubborn stains, or restore shine with alcohol and water solution if surfaces look dull.
This routine keeps my countertops looking pristine without requiring hours of work. The daily maintenance truly takes just minutes, and that consistency prevents bigger problems from developing.
When to Call a Professional
While most quartz countertop care is absolutely DIY-friendly, there are times when professional help is warranted. If you notice deep scratches, chips, cracks, or significant discoloration that doesn’t respond to cleaning, contact a stone restoration professional. They have specialized tools and products that can repair damage without replacing your countertops.
Similarly, if you’re unsure whether a particular stain or issue will respond to home treatment, consult the manufacturer or a professional before attempting potentially risky cleaning methods. It’s always better to ask first than to accidentally cause irreversible damage.
The Joy of Beautiful Countertops
You did it—you now have all the knowledge you need to keep your quartz countertops looking absolutely stunning! By following a regular cleaning routine, using the right products, and taking simple preventative measures, your countertops will maintain their elegance and durability for years to come.
The beauty of quartz is that it doesn’t demand complicated maintenance rituals or expensive specialty products. A little daily attention and some basic precautions are really all it takes to keep these surfaces looking their best. And there’s something so satisfying about that gleaming, clean countertop when you walk into your kitchen each morning—it just makes the whole space feel more welcoming and put-together.
Whether you’re cooking up a storm, hosting friends, or simply enjoying your morning coffee, those sparkling quartz countertops will continue to be a beautiful, functional feature of your home. Let those counters shine on!