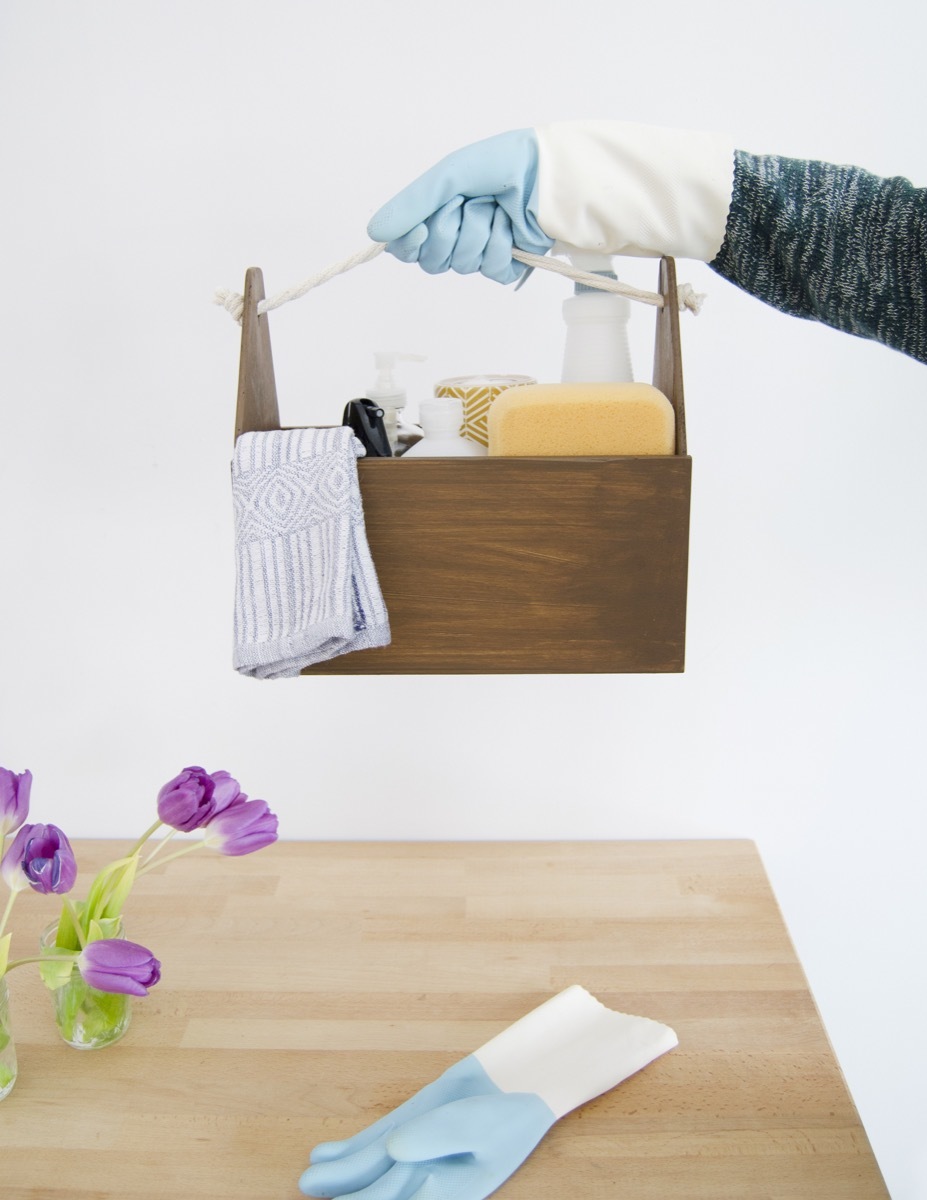
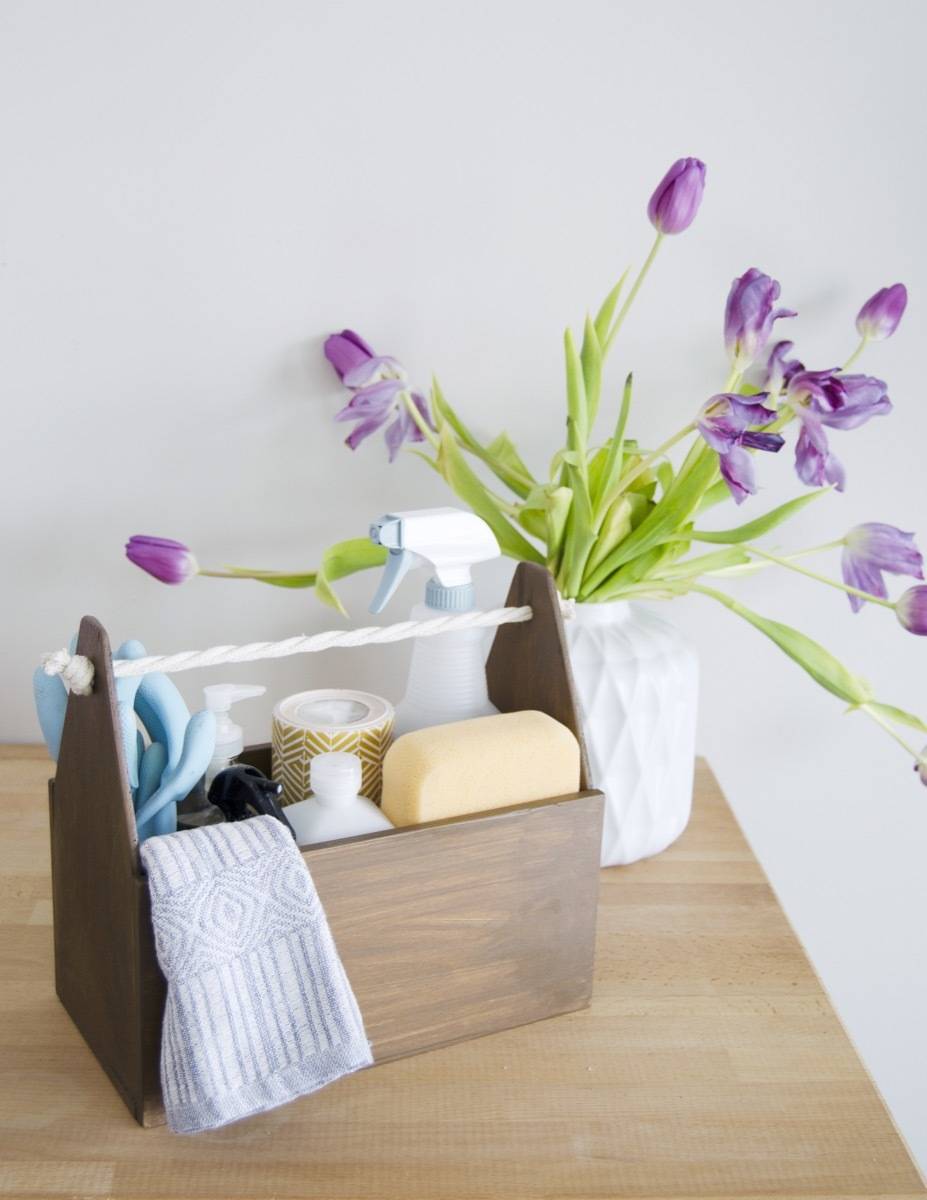
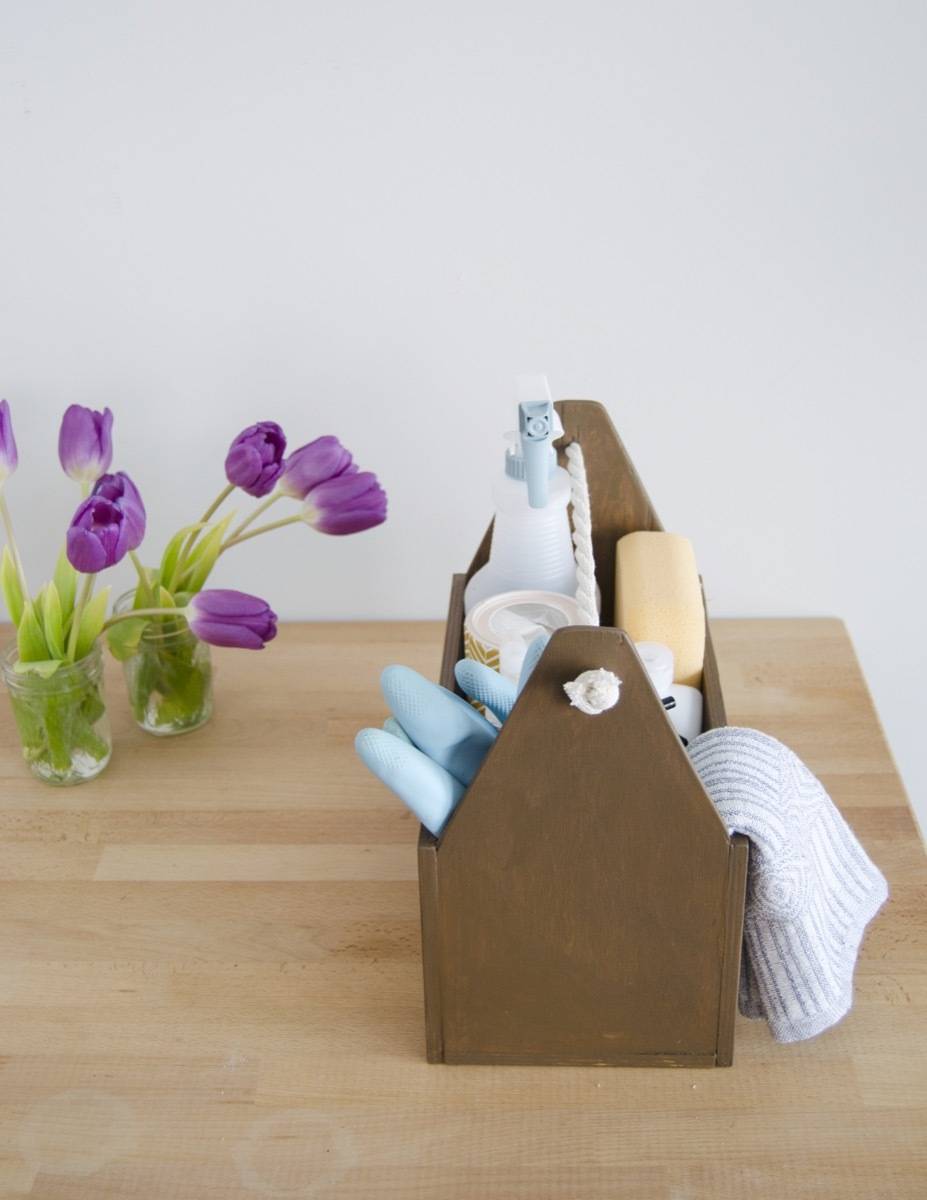
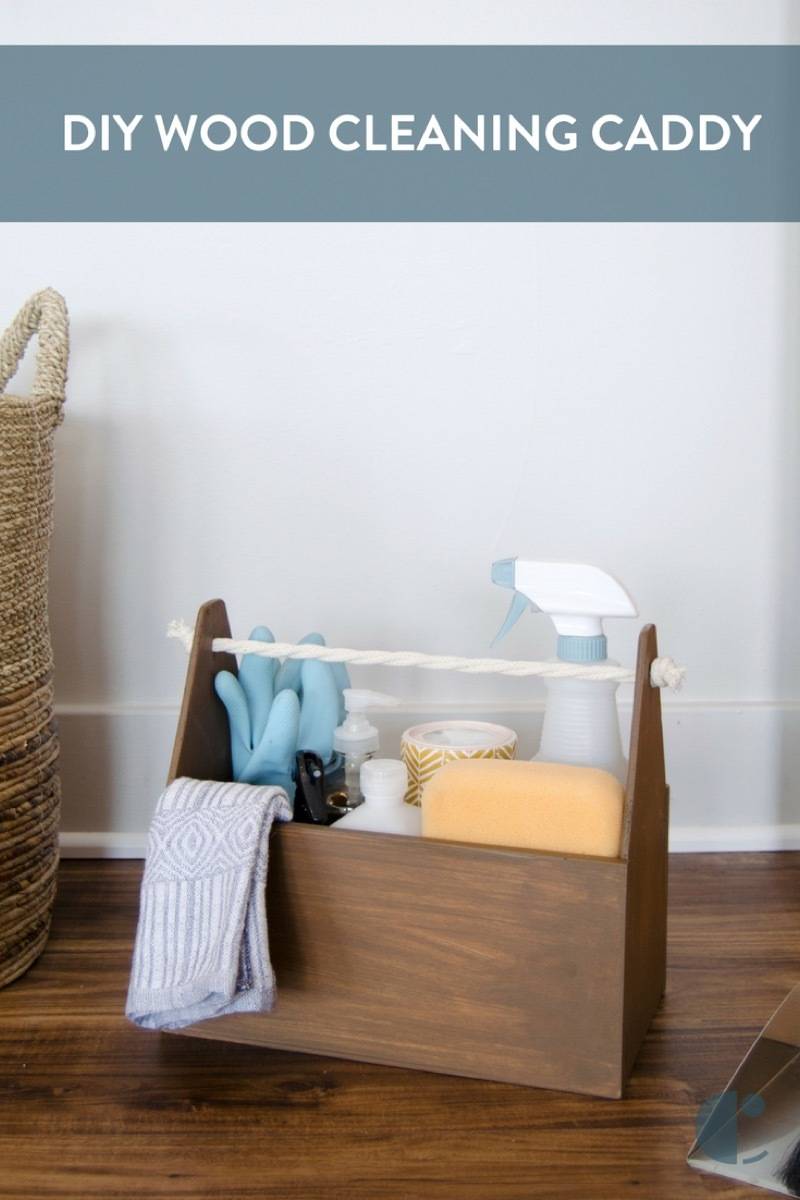
There are a couple rules-of-thumb when it comes to successfully keeping your home clean. One of those rules is that you should always keep your cleaning supplies in one place, and you should always put them back when you’re done using them. A cleaning caddy meets both those criteria, and – bonus – makes carrying household cleaners from room to room super easy! I’ve been wanting to incorporate a carrier into my cleaning routine for a while now, and rather than purchase a cheap-looking plastic one that will surely break over time, I opted to make one instead.
The plus side to making rather than buying a cleaning caddy is I could build it a little smaller than the store-standard sizes. Living in a smaller apartment, I’m always looking for ways to save on storage space!
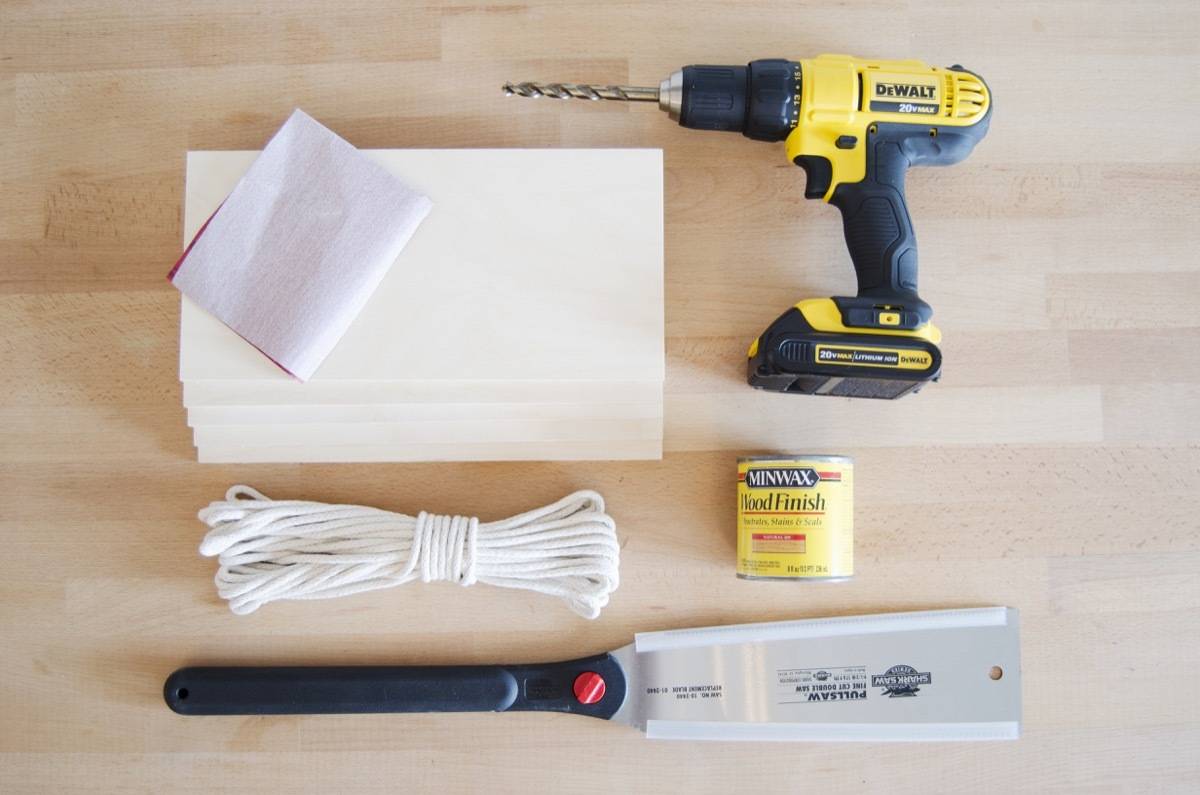
Materials
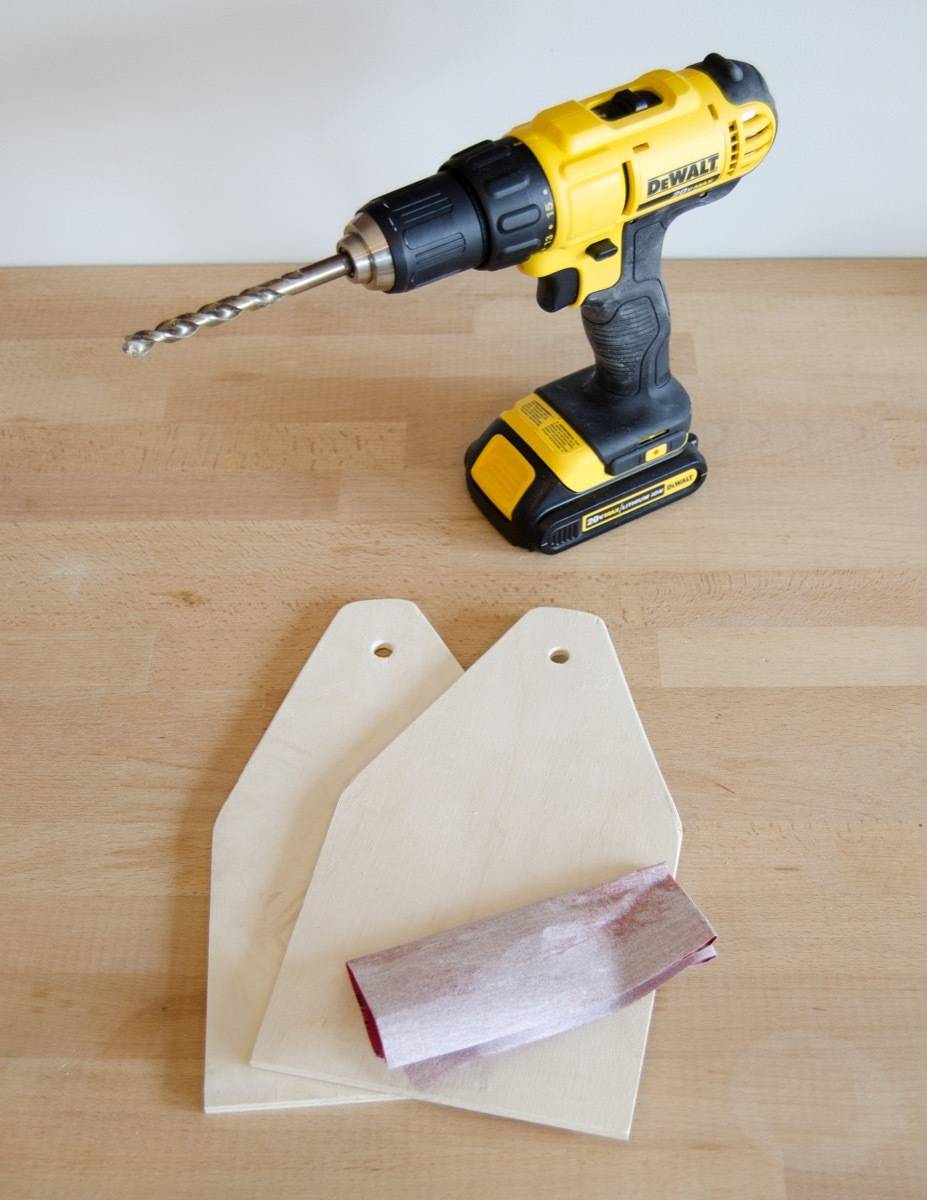
5 pieces of wood, measuring 6 by 12 inches each, with a 3/8 inch width
Cordless drill with drill bit (available at Home Depot)
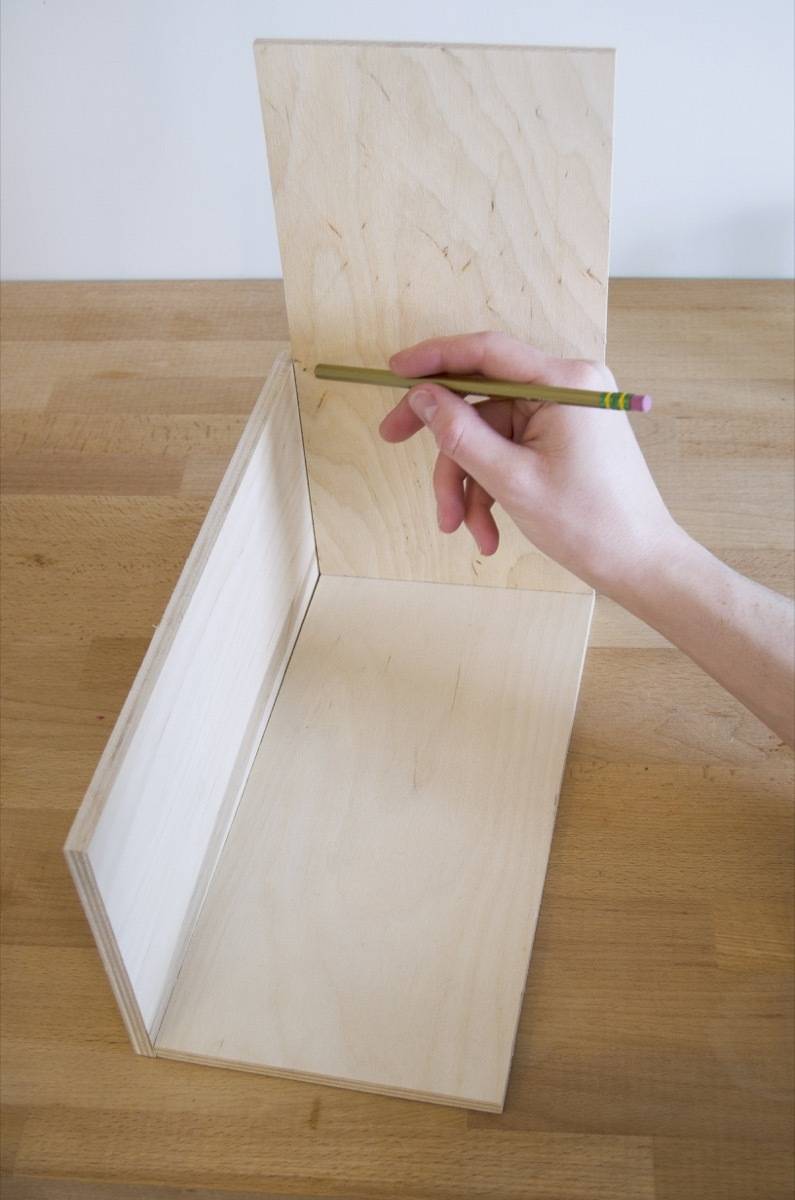
Begin by lining up the pieces of wood. Lay the first board on the bottom, and the second standing on its side flush with the edge of the bottom piece. Line a third board on top of the bottom board, and make a mark where it reaches the second board. This mark will lie about 5 1/2 inches from the edge of the board.
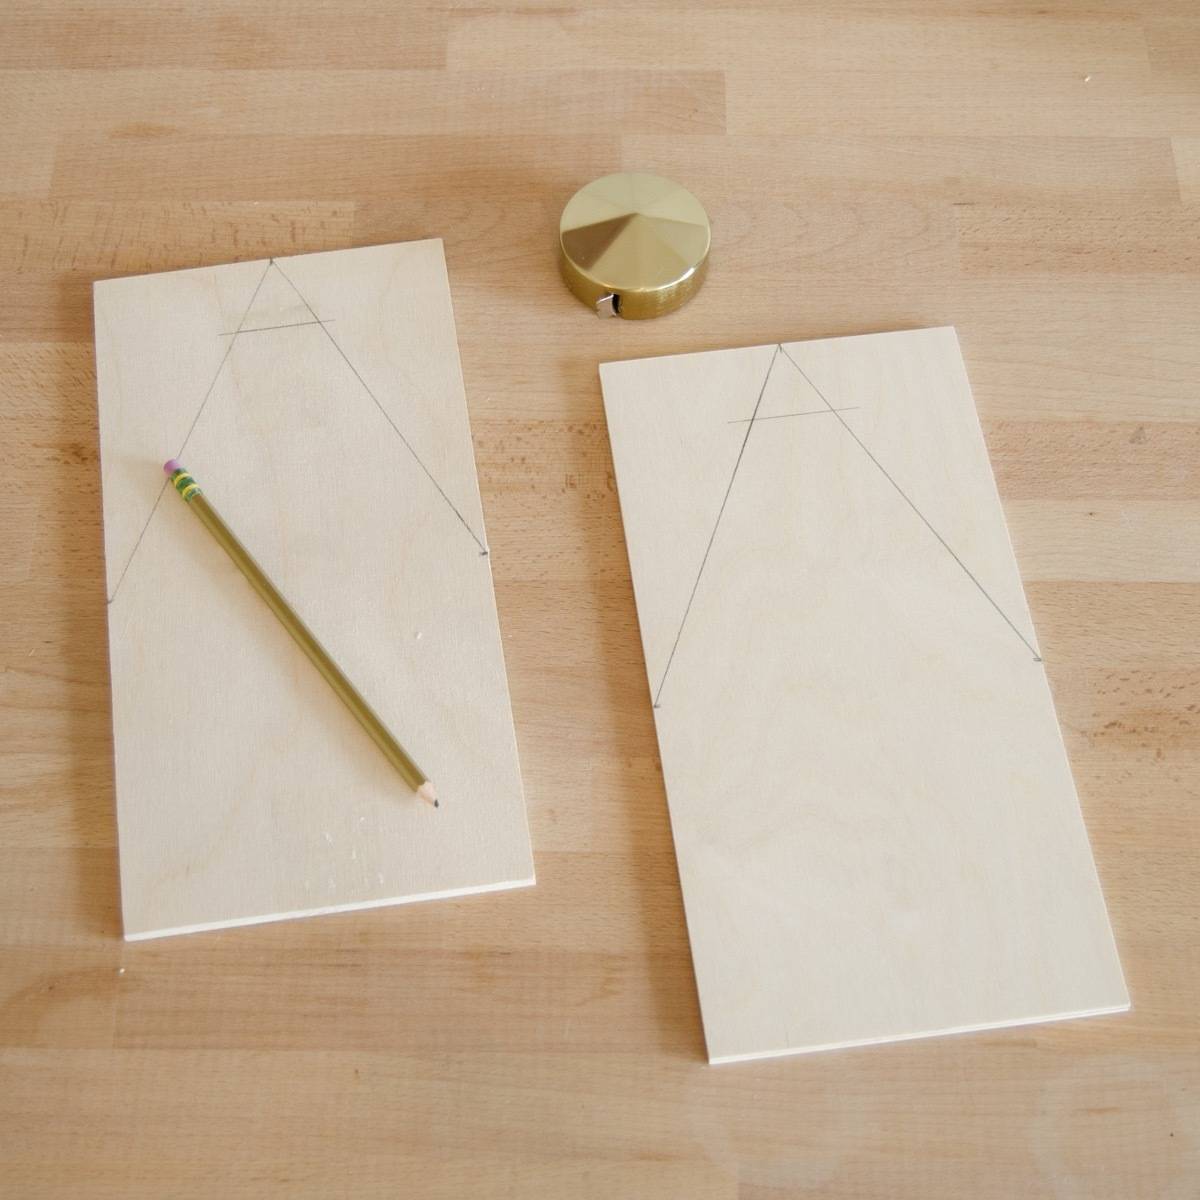
Step
Make this mark on the opposite side of the board. Do the same for a fourth board. Next, make a mark in the middle of each board, and draw a line from the first marks to the middle point. About 1 1/2 inches down from the top, draw another line. This marks out what wood will be cut in the next step.
Step
Cut along the drawn lines using a hand saw or a table saw. About 1 1/2 inch down from the pointed top of the cut boards, drill a 1/4 inch hole using a power drill. Sand all rough edges.
Step
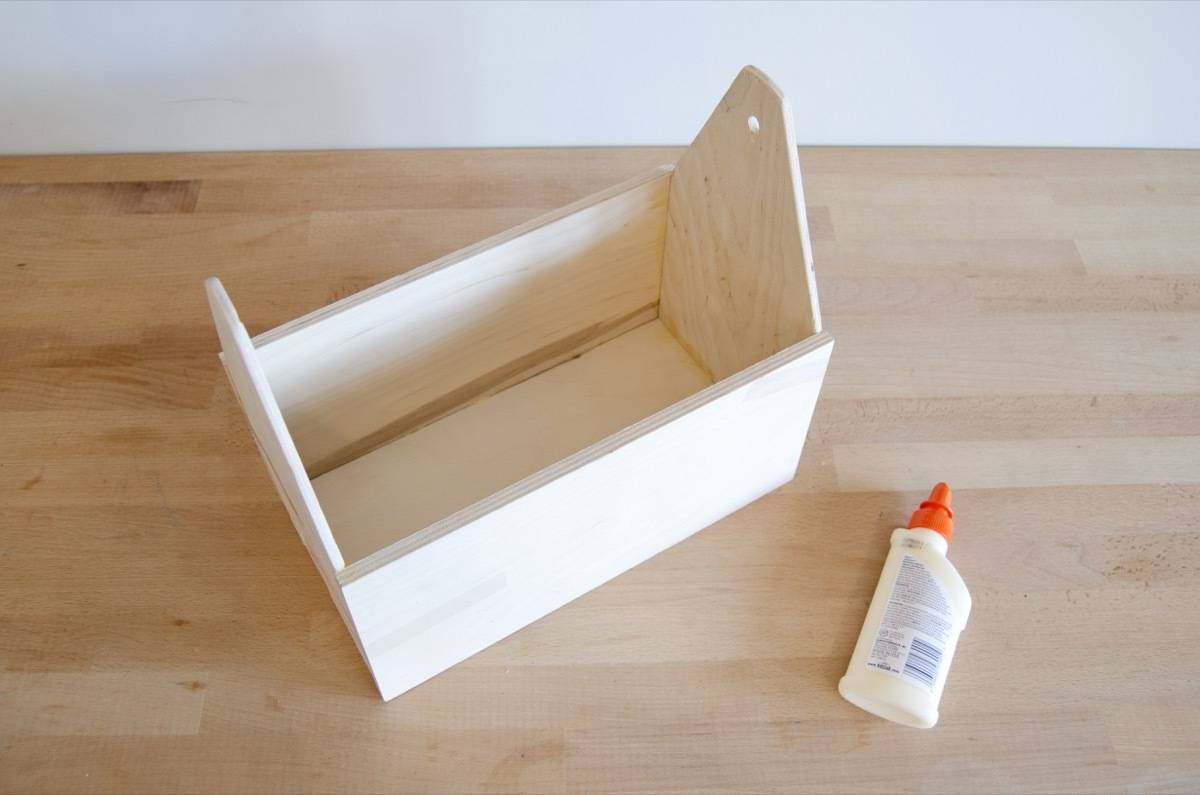
Assemble the caddy using wood glue. Use masking tape to hold the pieces in place as they dry. Wipe up any excess glue with a damp paper towel before the glue dries.
Step
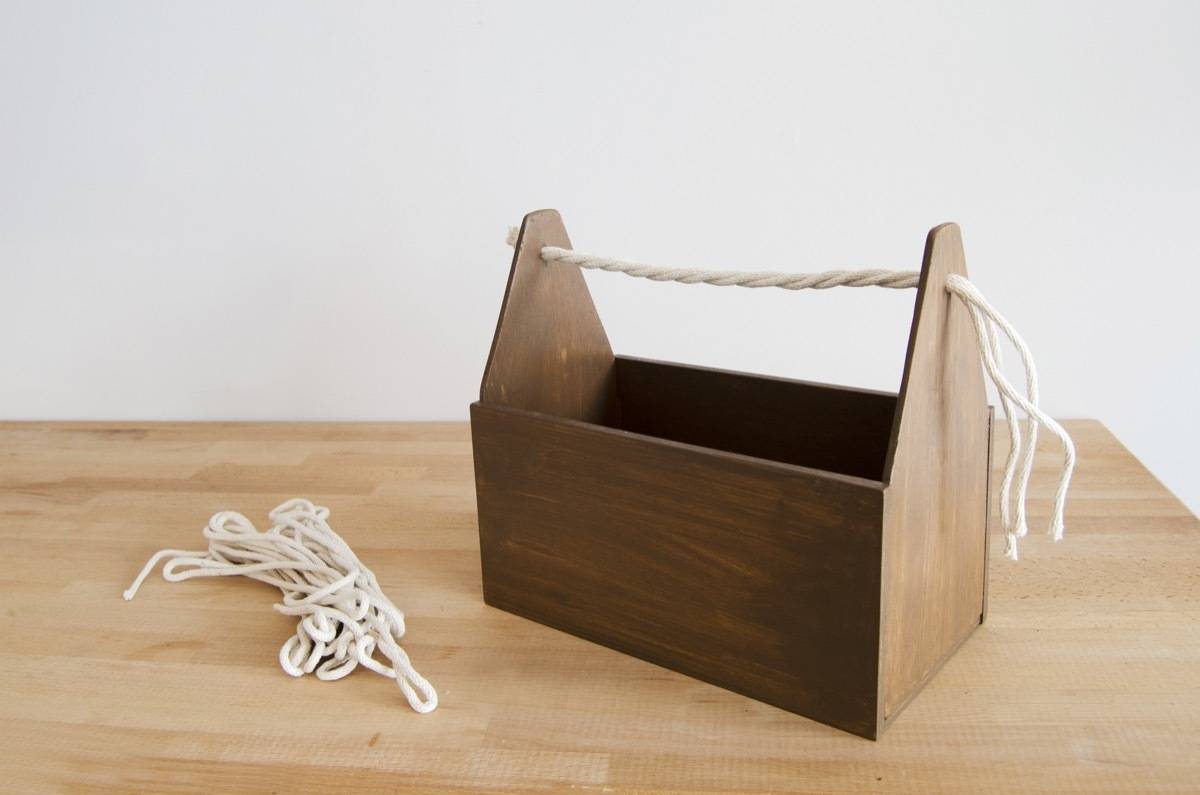
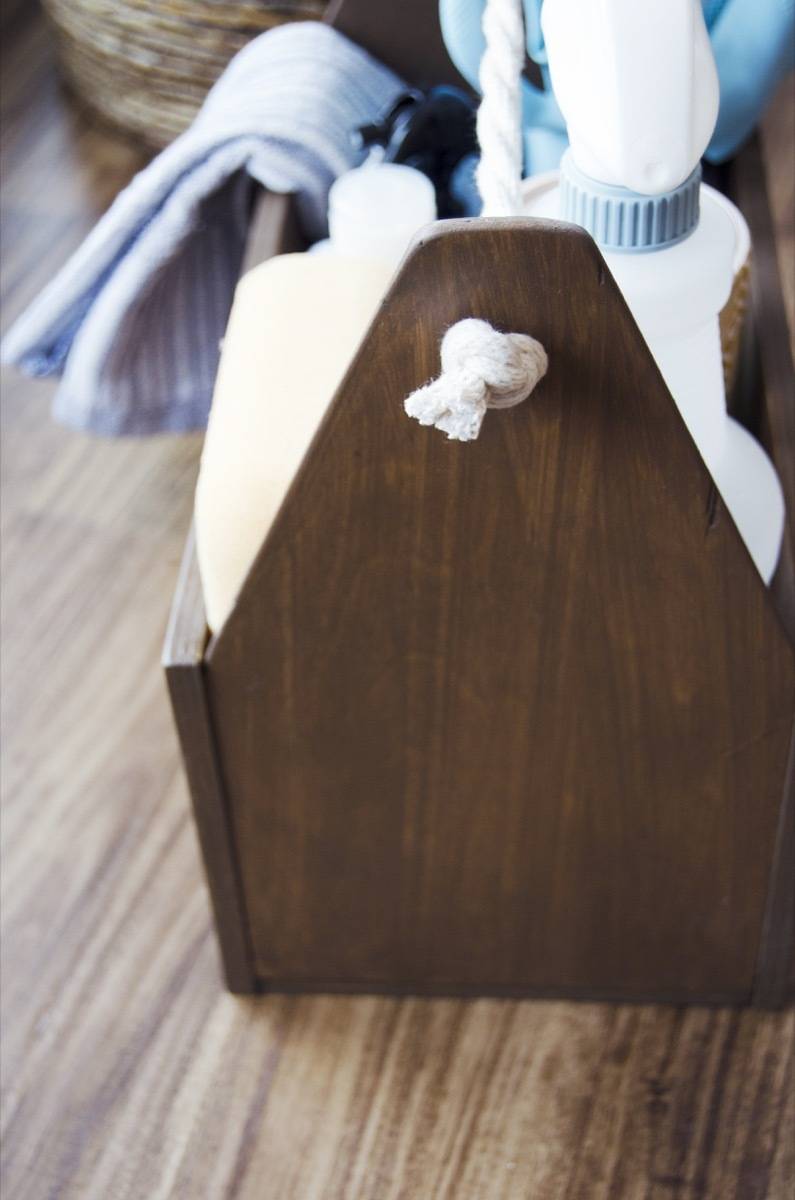
Apply a layer of wood stain to the entire caddy. Wipe the wood with a dry paper towel once it has reached the desired darkness of stain, then let dry completely.
Step
Feed rope or twine through the drilled holes the cleaning caddy. Knot the rope on each end. Done!
Share this DIY on Pinterest!
I’m really hoping that having such a cute cleaning caddy will encourage me to clean more around my apartment. Fingers crossed!
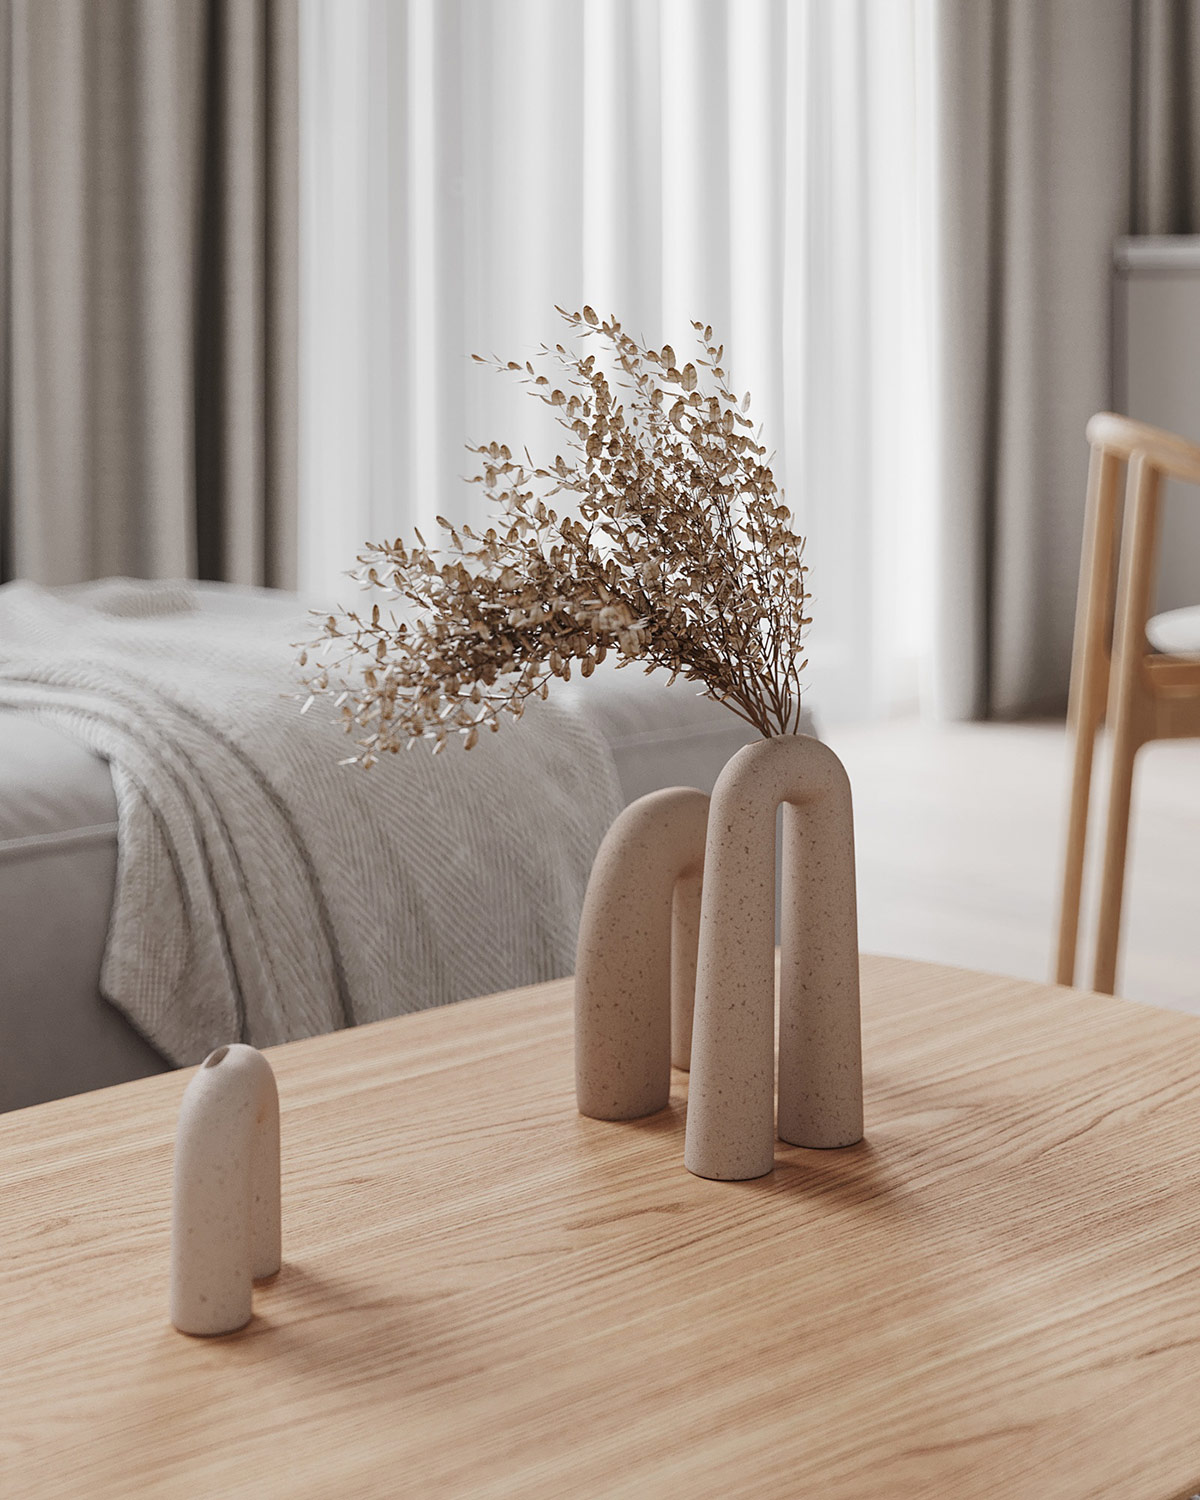
Fresh, clean, airy and spacious, a white decor scheme achieves all of these desirable aesthetics but can sometimes project a cold and sterile environment. With that said, there are plenty of ways in which to offset the coolness of the clean white colour palette, and these two inspirational home interiors demonstrate one of the most subtle approaches to the task. In order to gently warm the look without compromising the minimalist mood, these white interior designs incorporate areas of light wood tone and a delicate blend of beige accents. Dainty black anchor points weight the breezy white decor palette in tiny doses, just enough to sharpen and define.
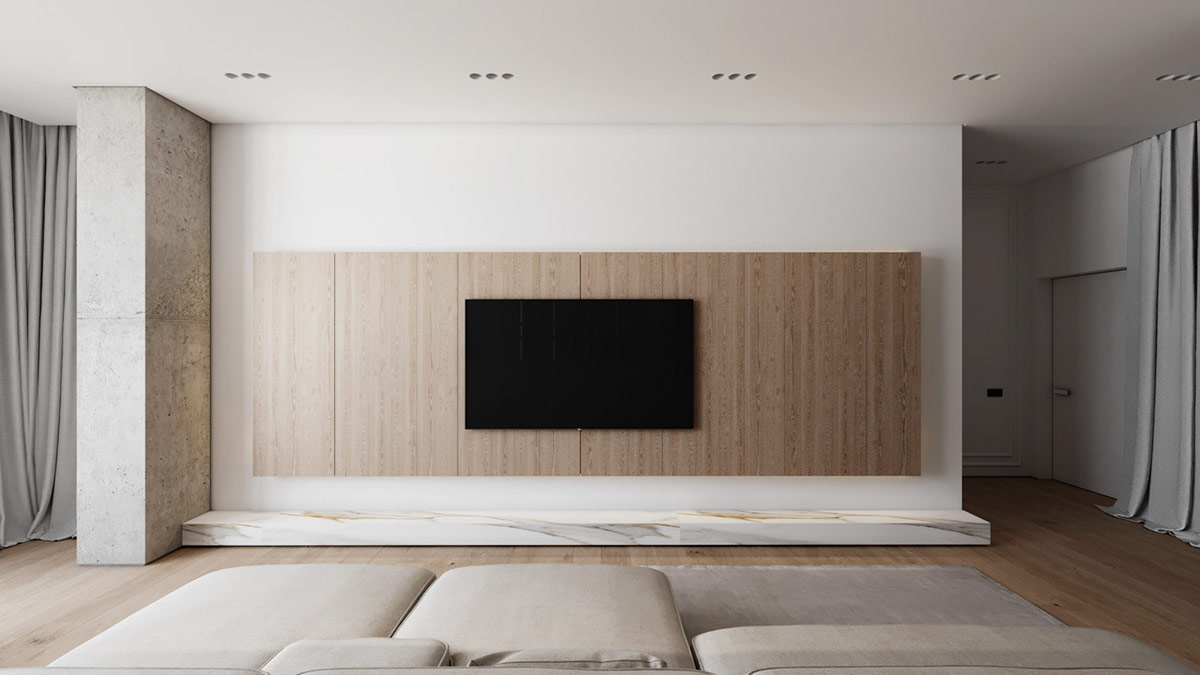
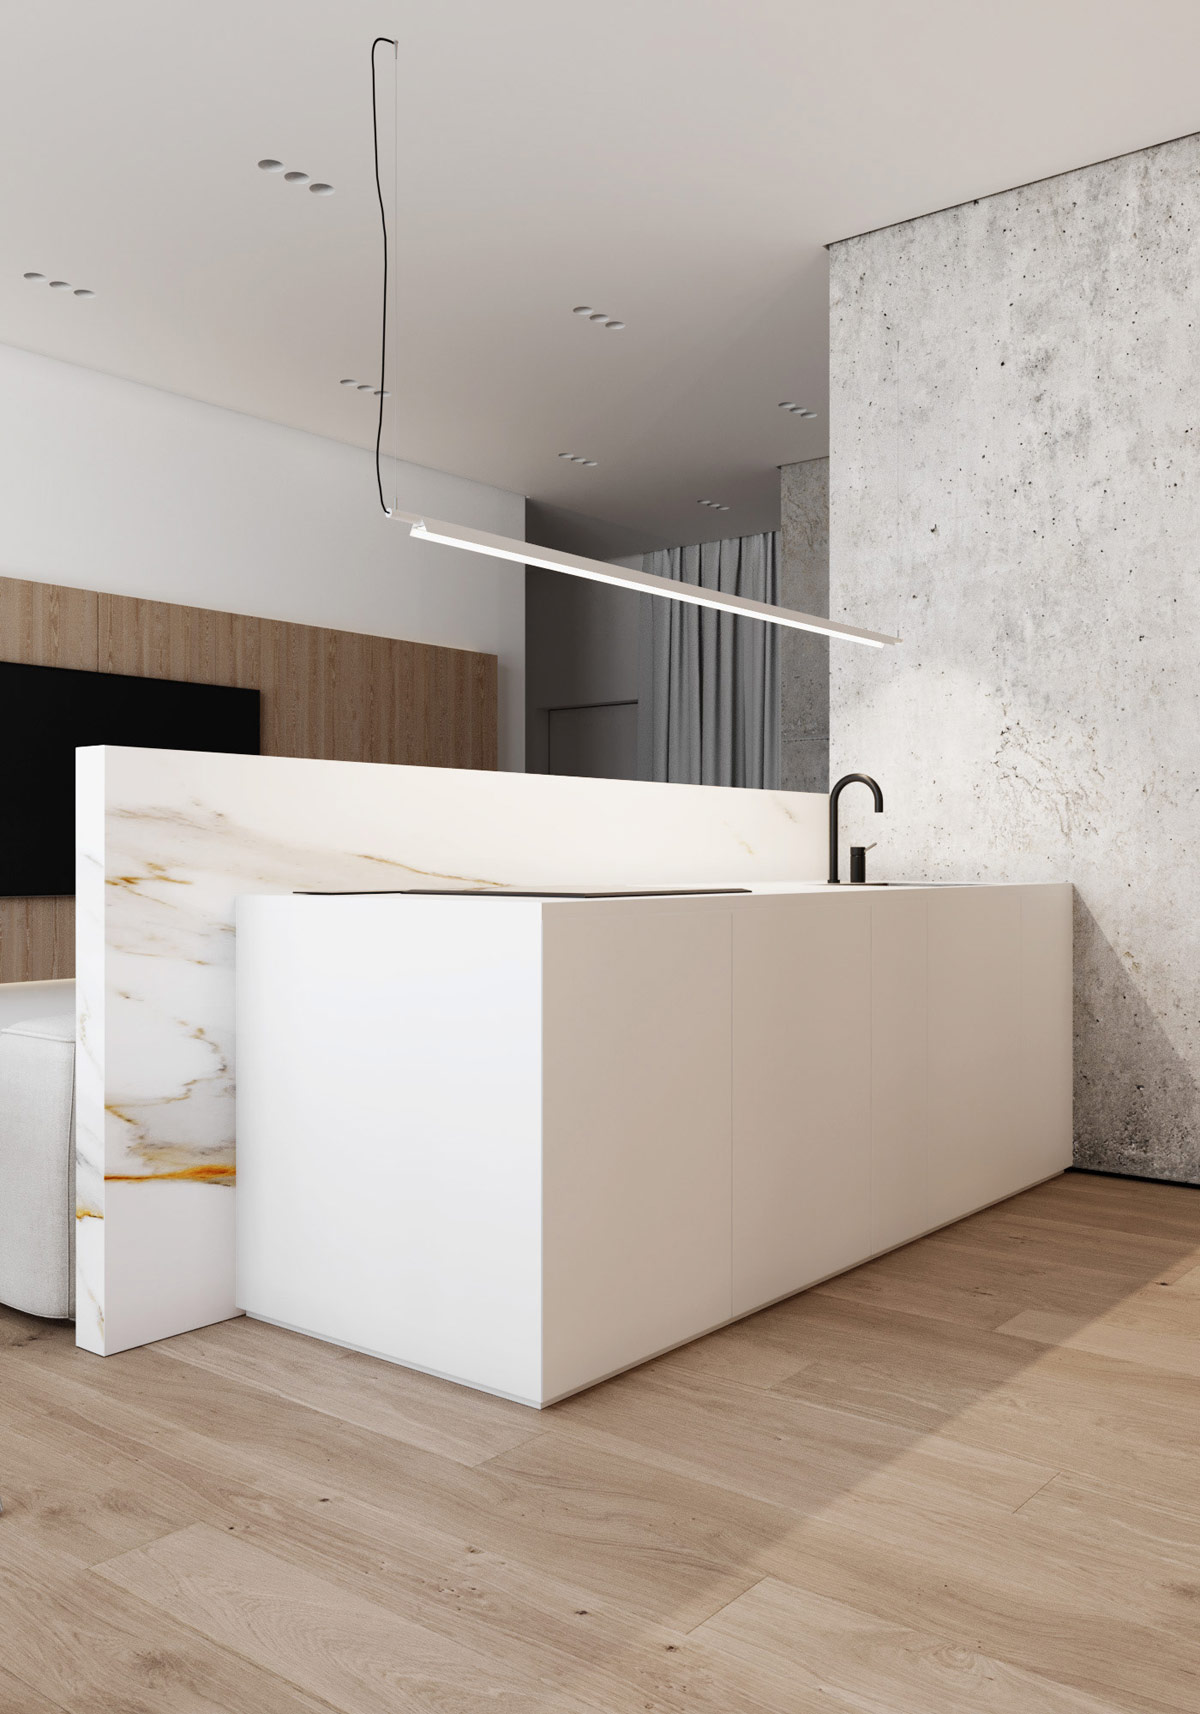
Measuring 140 square metres, this modern apartment in Chisinau, Moldova, features a white interior with industrial-style concrete statement walls. A modular sofa threads a warming beige accent through the centre of the open plan living space. Wood effect kitchen cabinets match the mellow hue.
Opposite the modern sofa, a TV wall is clad with attractive wood grain panelling to increase the visual temperature, and to neatly conceal media storage.
Advertisement
A luxurious white marble backsplash builds a half-height room divider between the living room sofa and a kitchen peninsula. A linear suspension light draws an even line of illumination along the kitchen countertop and provides reading light to the couch at the same time.
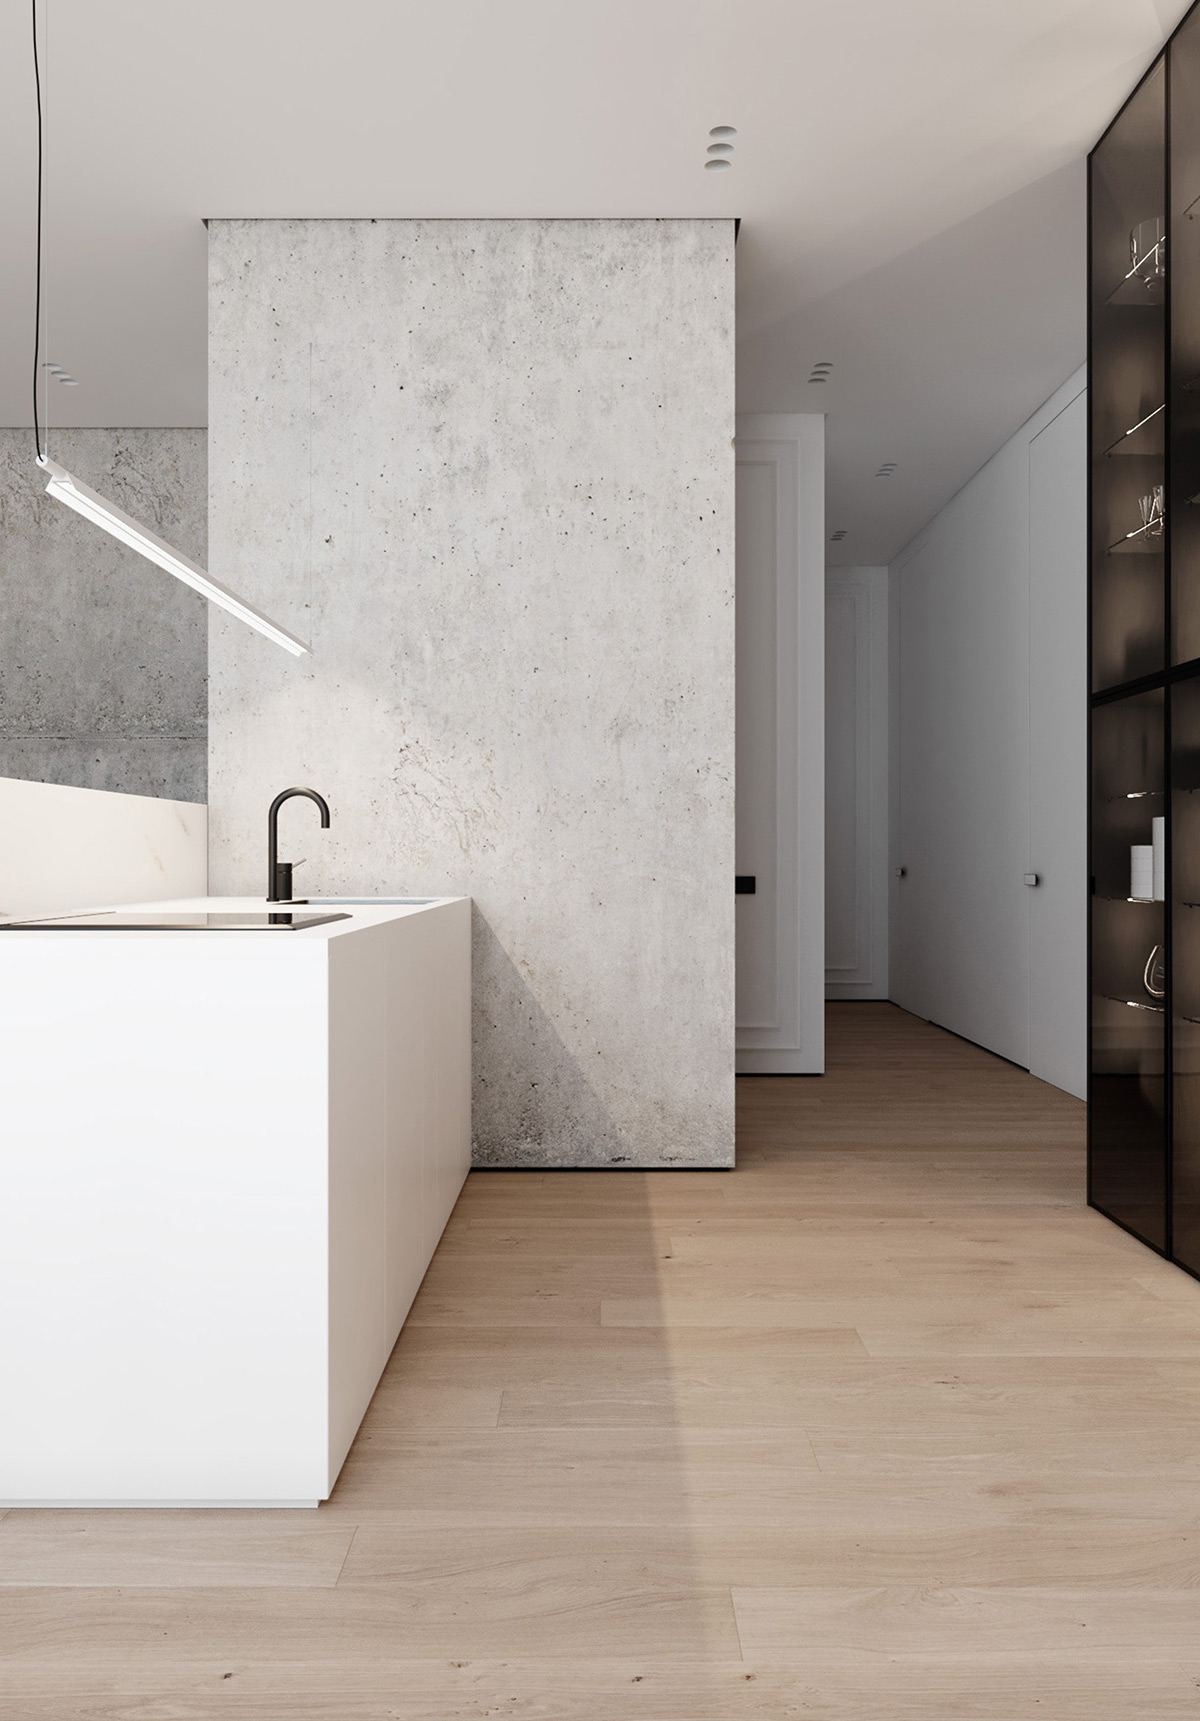
The pure white kitchen comes to an abrupt stop at a bold, raw concrete statement wall. A black shelving unit and black appliances add visual weight to the spacious white room.
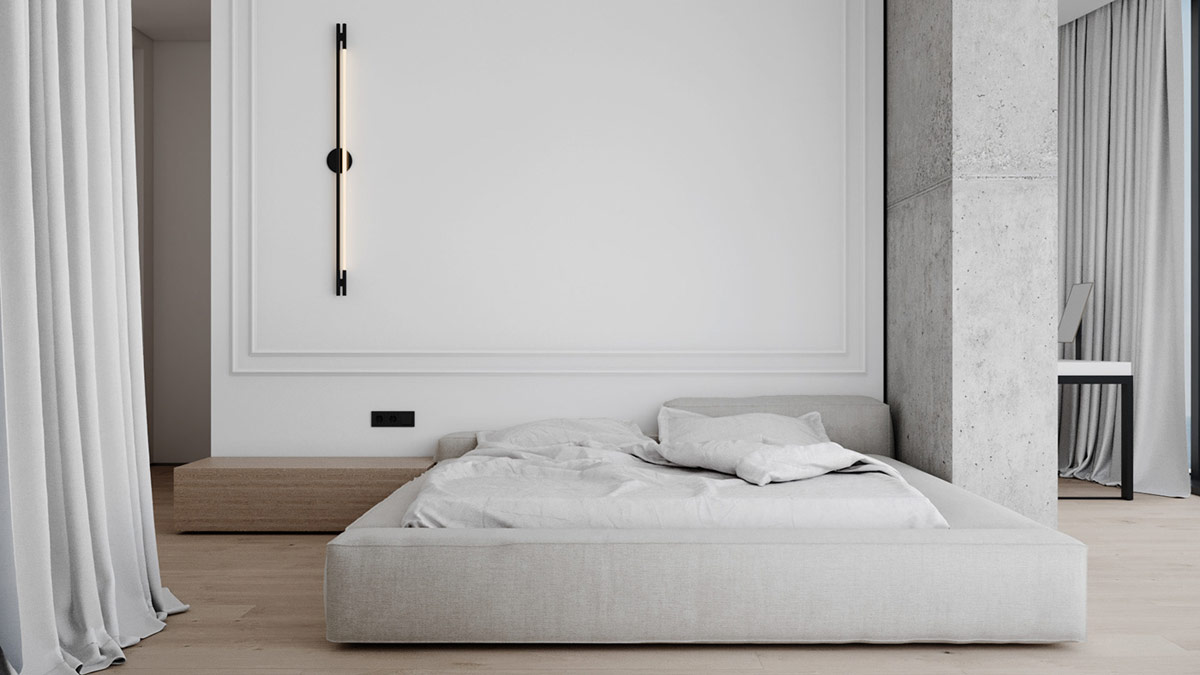
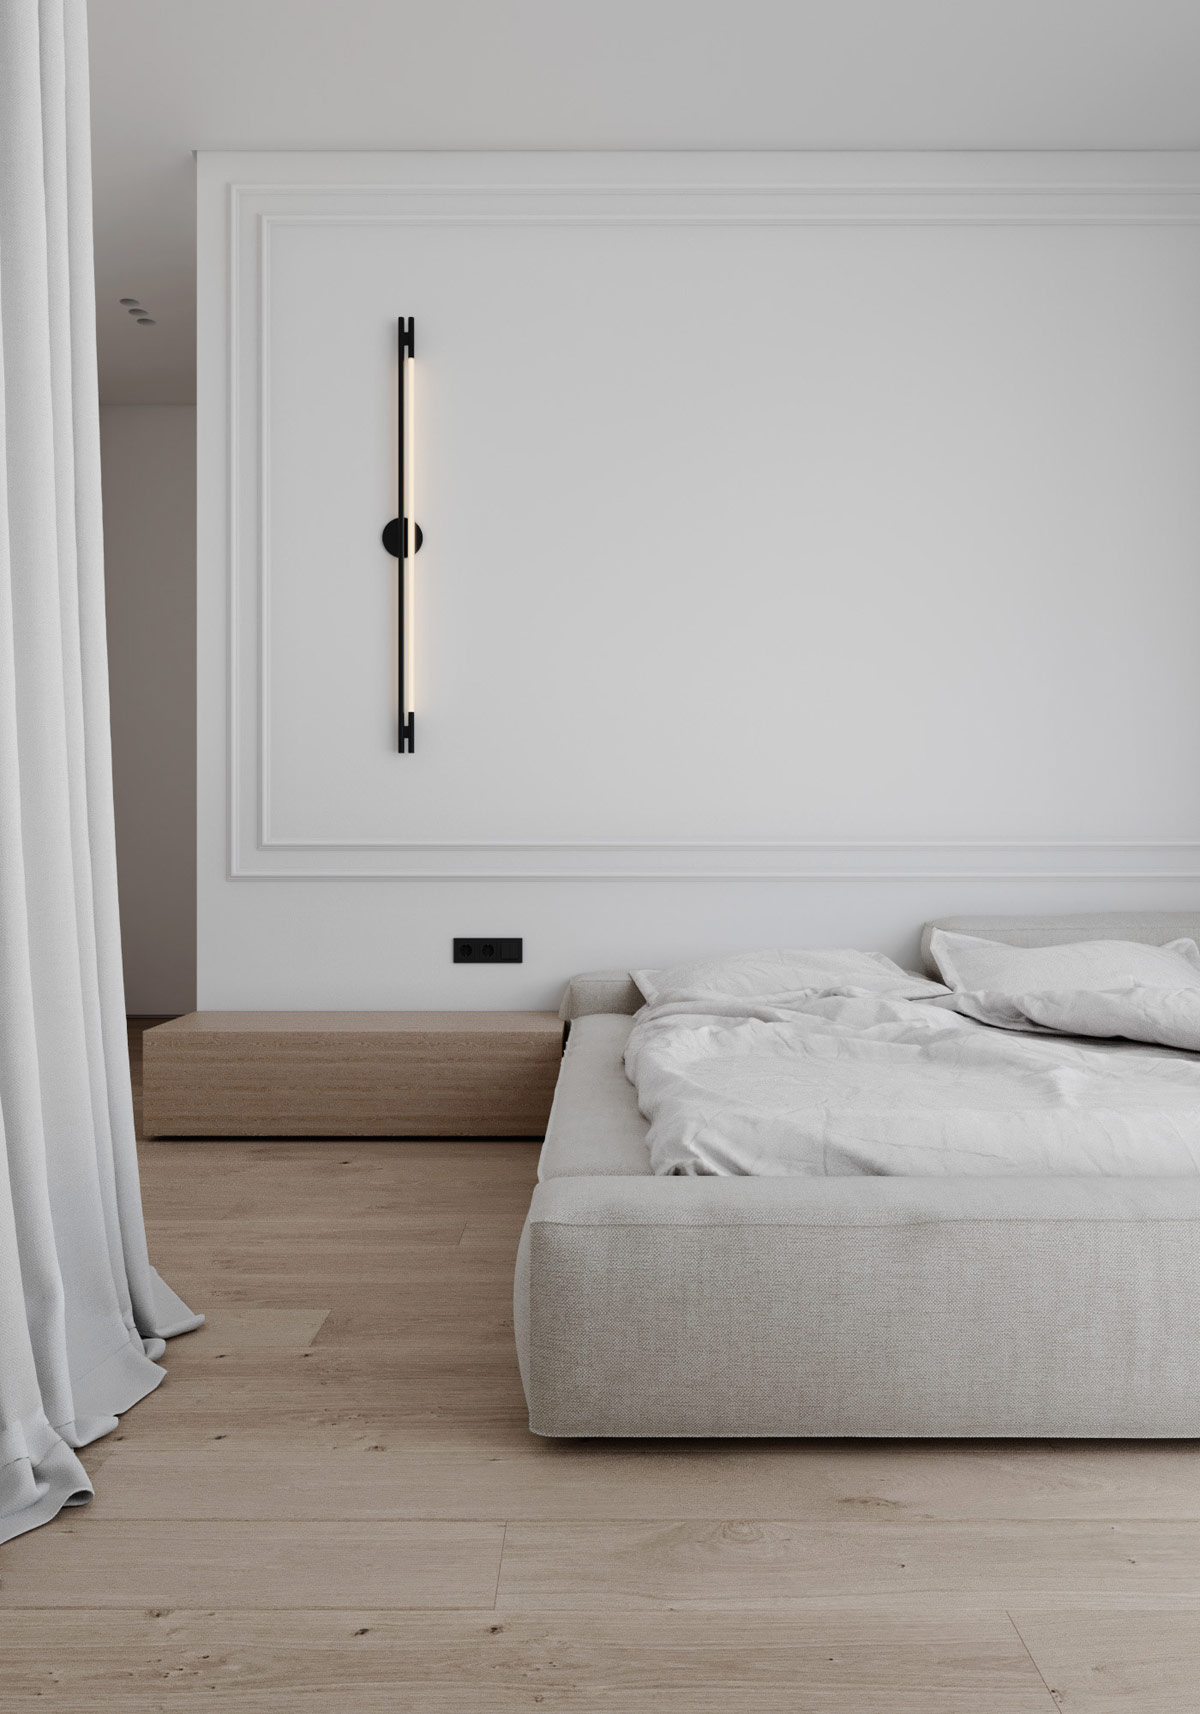
The layout flows openly into the first bedroom.
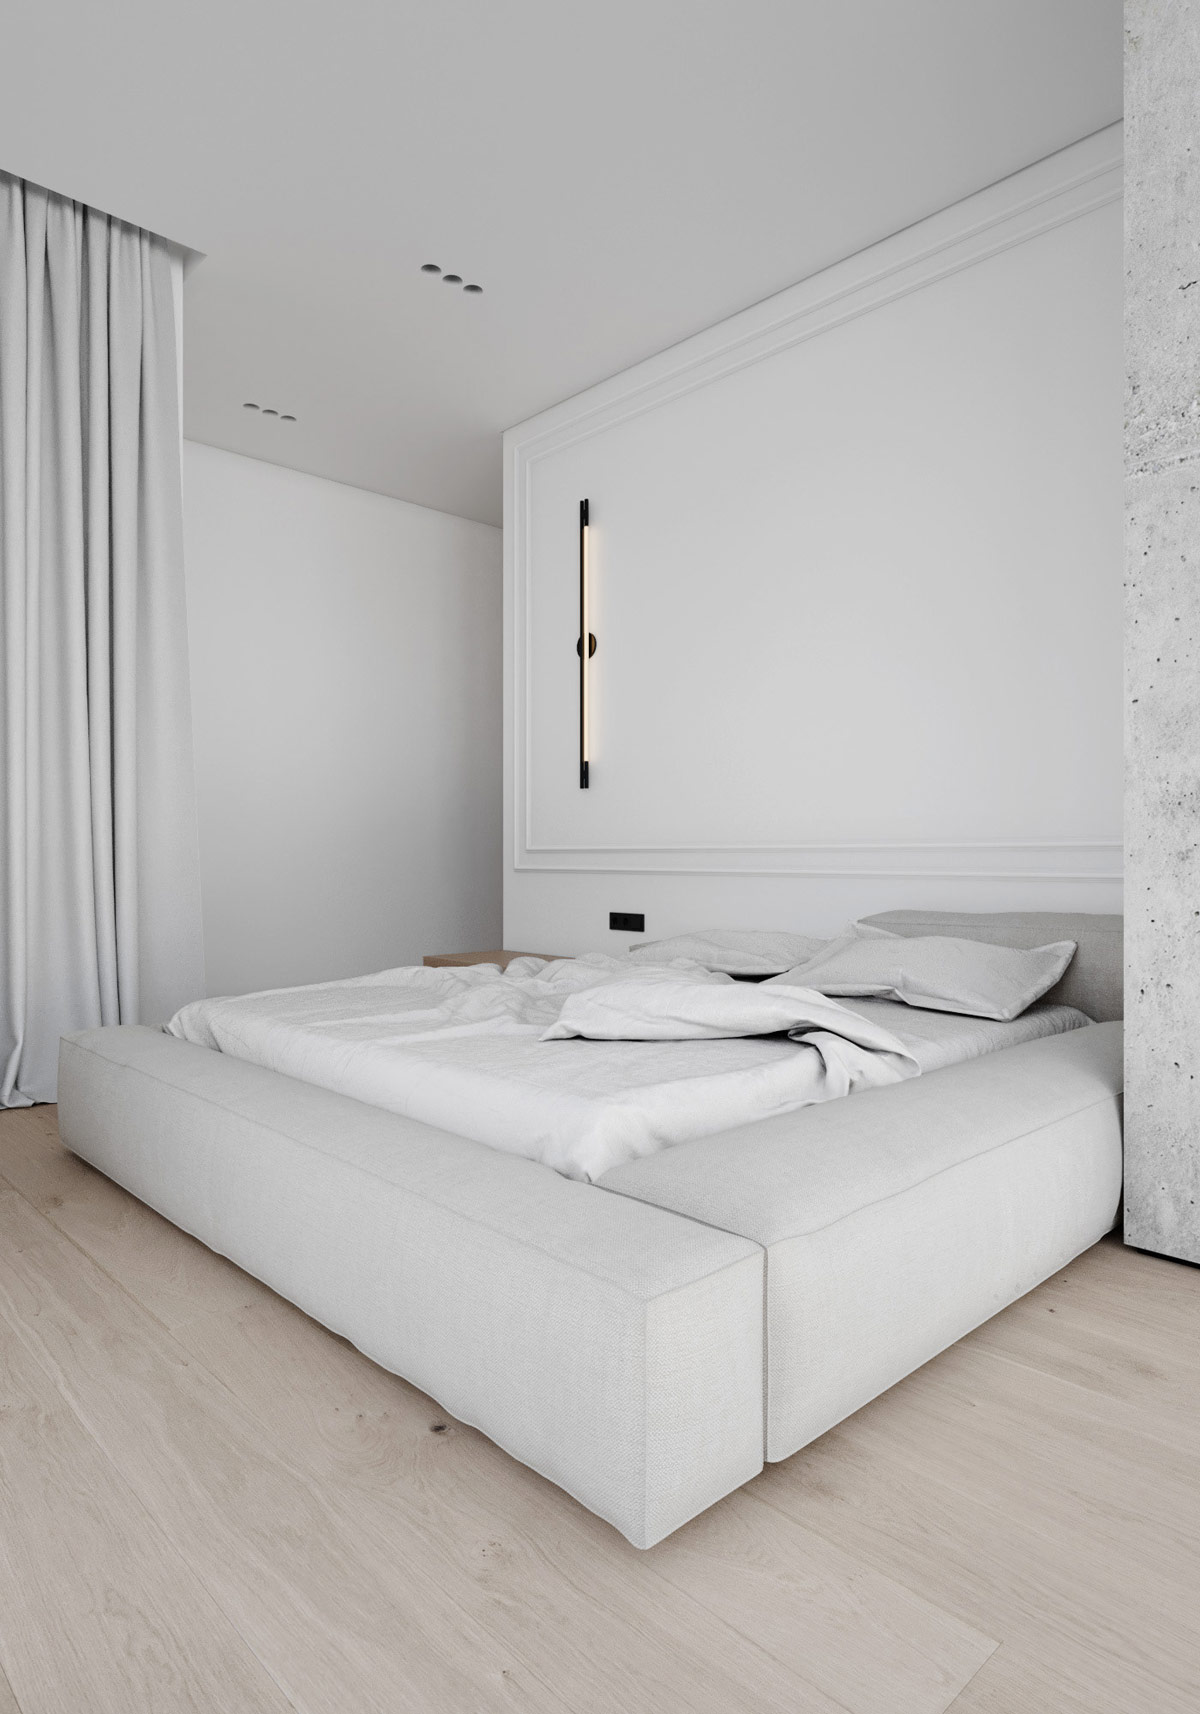
A whisper of grey plays across the upholstered bed, which draws a colour connection with the raw concrete wall treatment. A modern wall light strikes a strong black line against a white headboard wall framed with traditional panel beading.
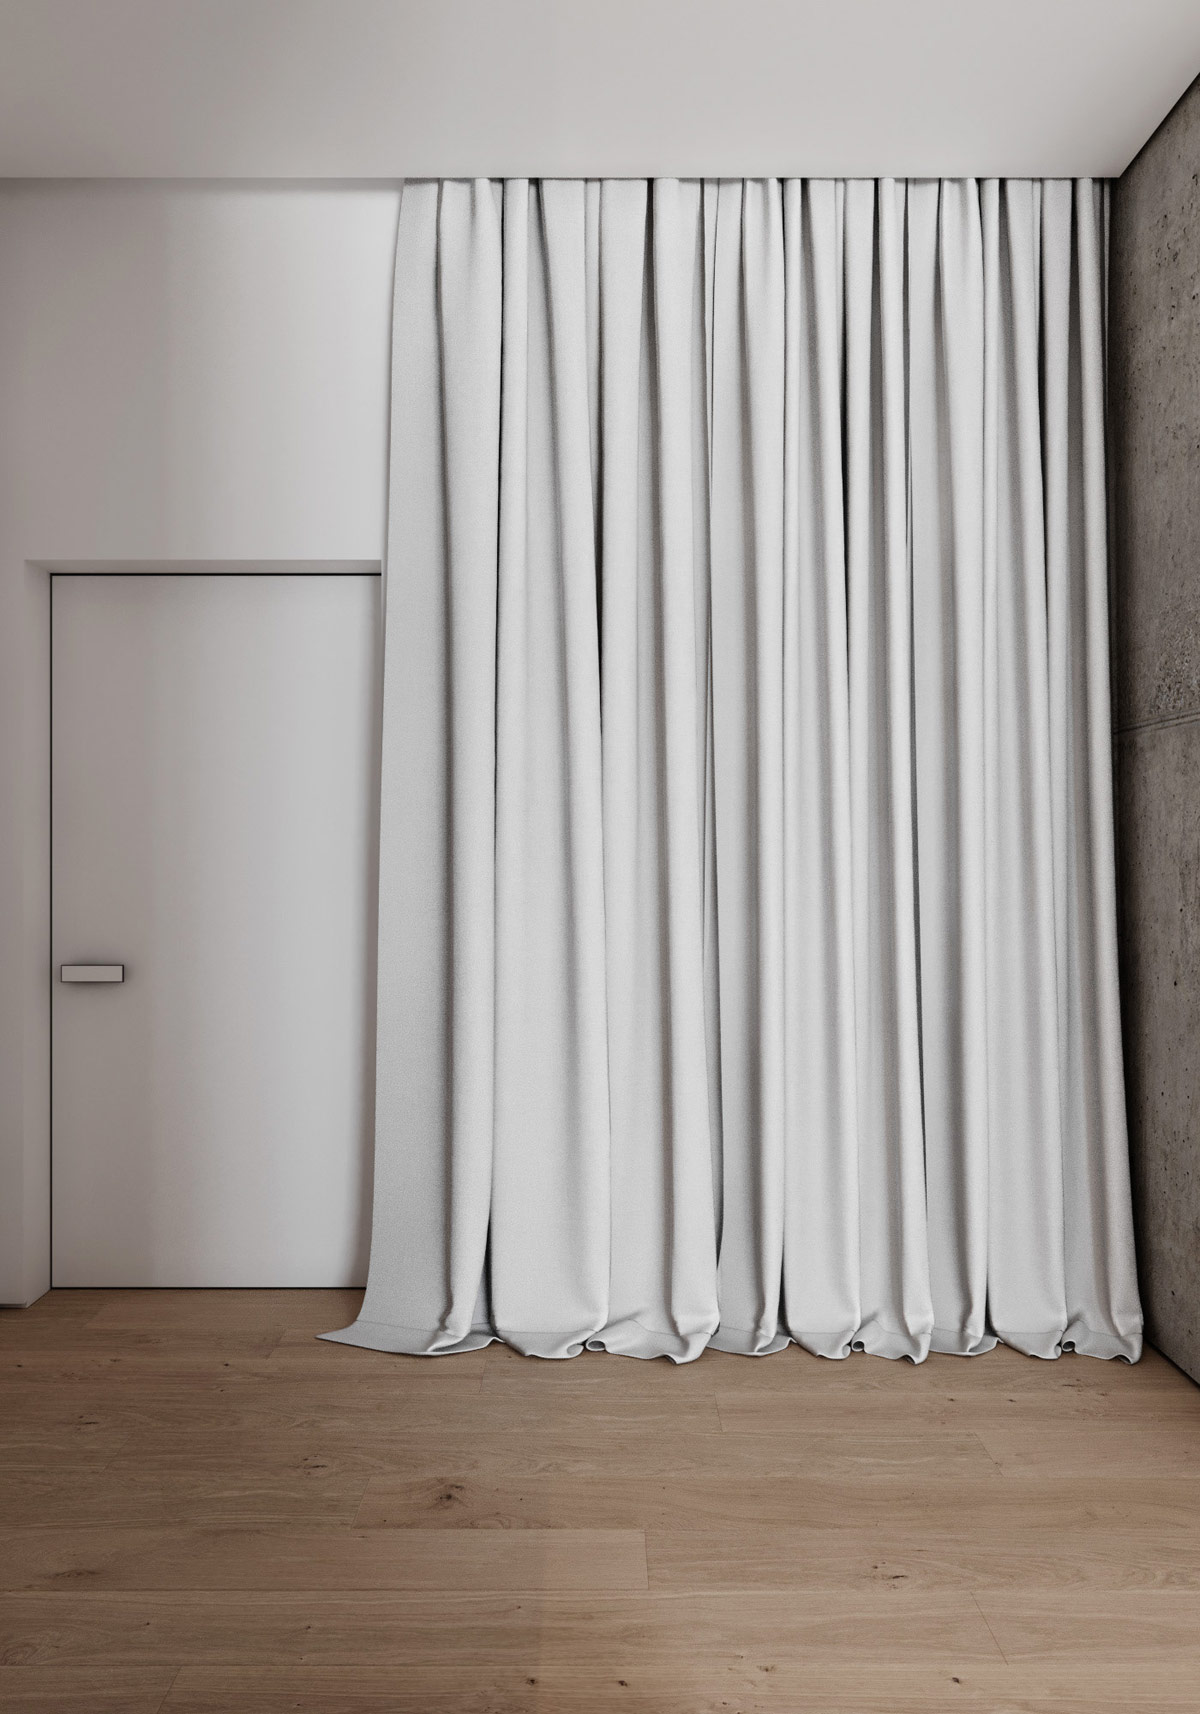
There is a portiere to give privacy to the bedroom when desired.
Advertisement
A low, linear bedside table lays subtly upon the oak floor boards.
Heavy drapes add an exaggerated sense of comfort into the cool bedroom design scheme.
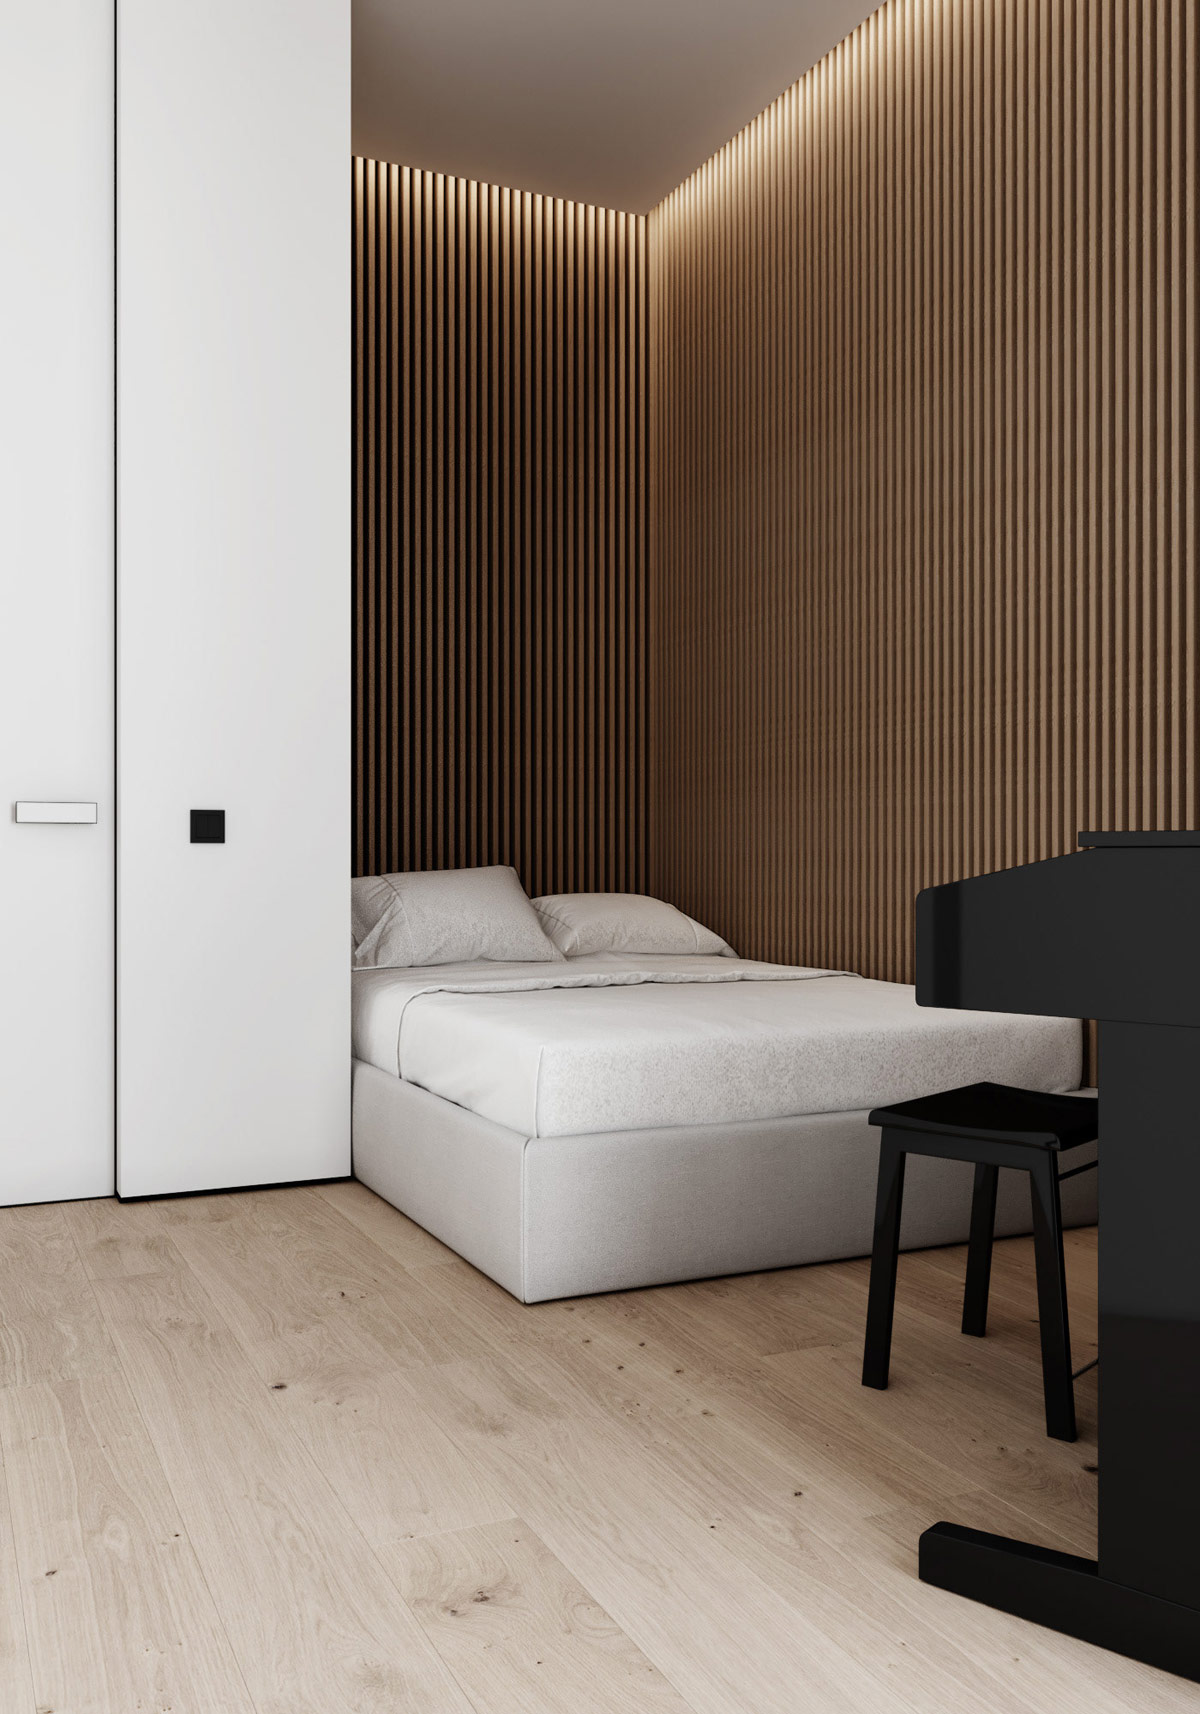
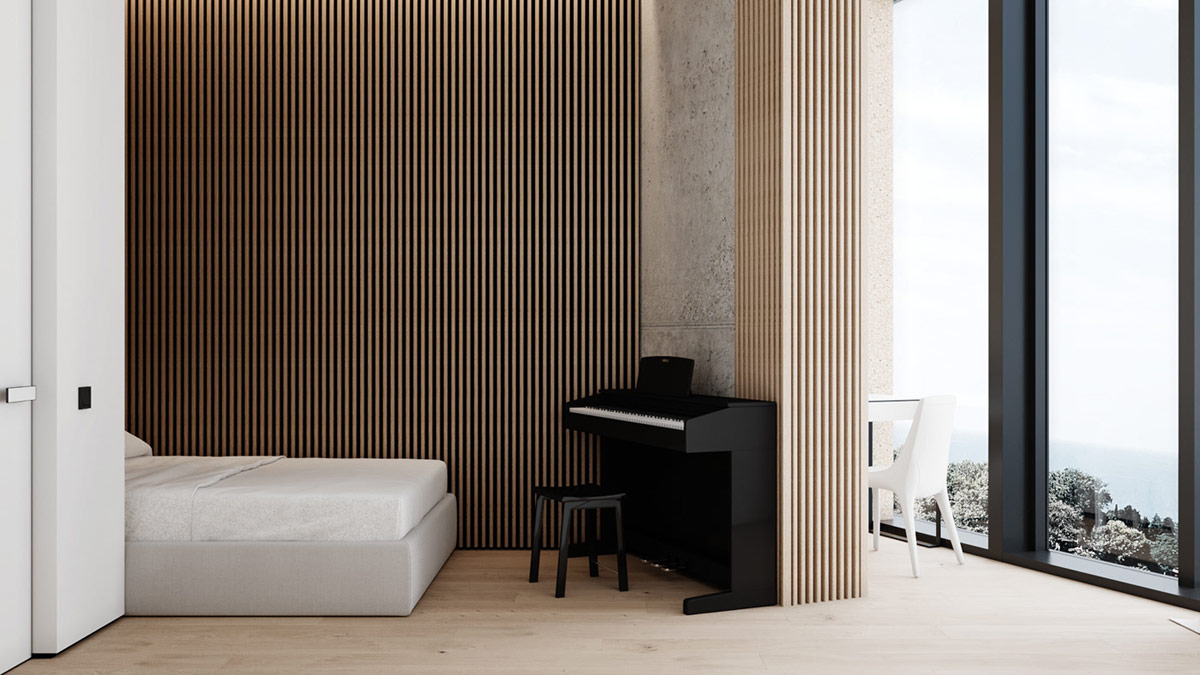
The second bedroom in the apartment is lined with beautiful wood slatted wall panels.
The textured wall panels also provide a practical function, in that they provide acoustic value in the bedroom’s second role as a piano room.
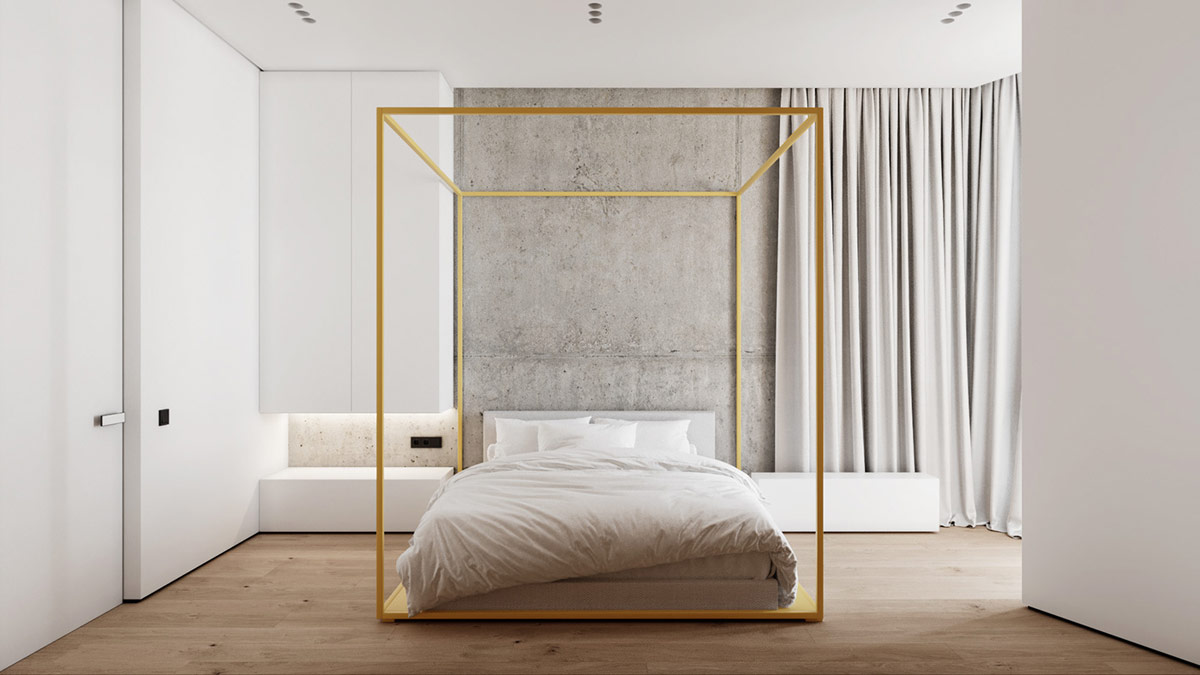
In the third double bedroom, a yellow 4 poster bed hits like a beam of sunshine into the surrounding white and grey decor scheme.
Bespoke storage cabinets float above the bedside unit in a clean white finish.
Smooth grey wet walls in the shower area provide peaceful contrast with modern matt white shower fixtures.
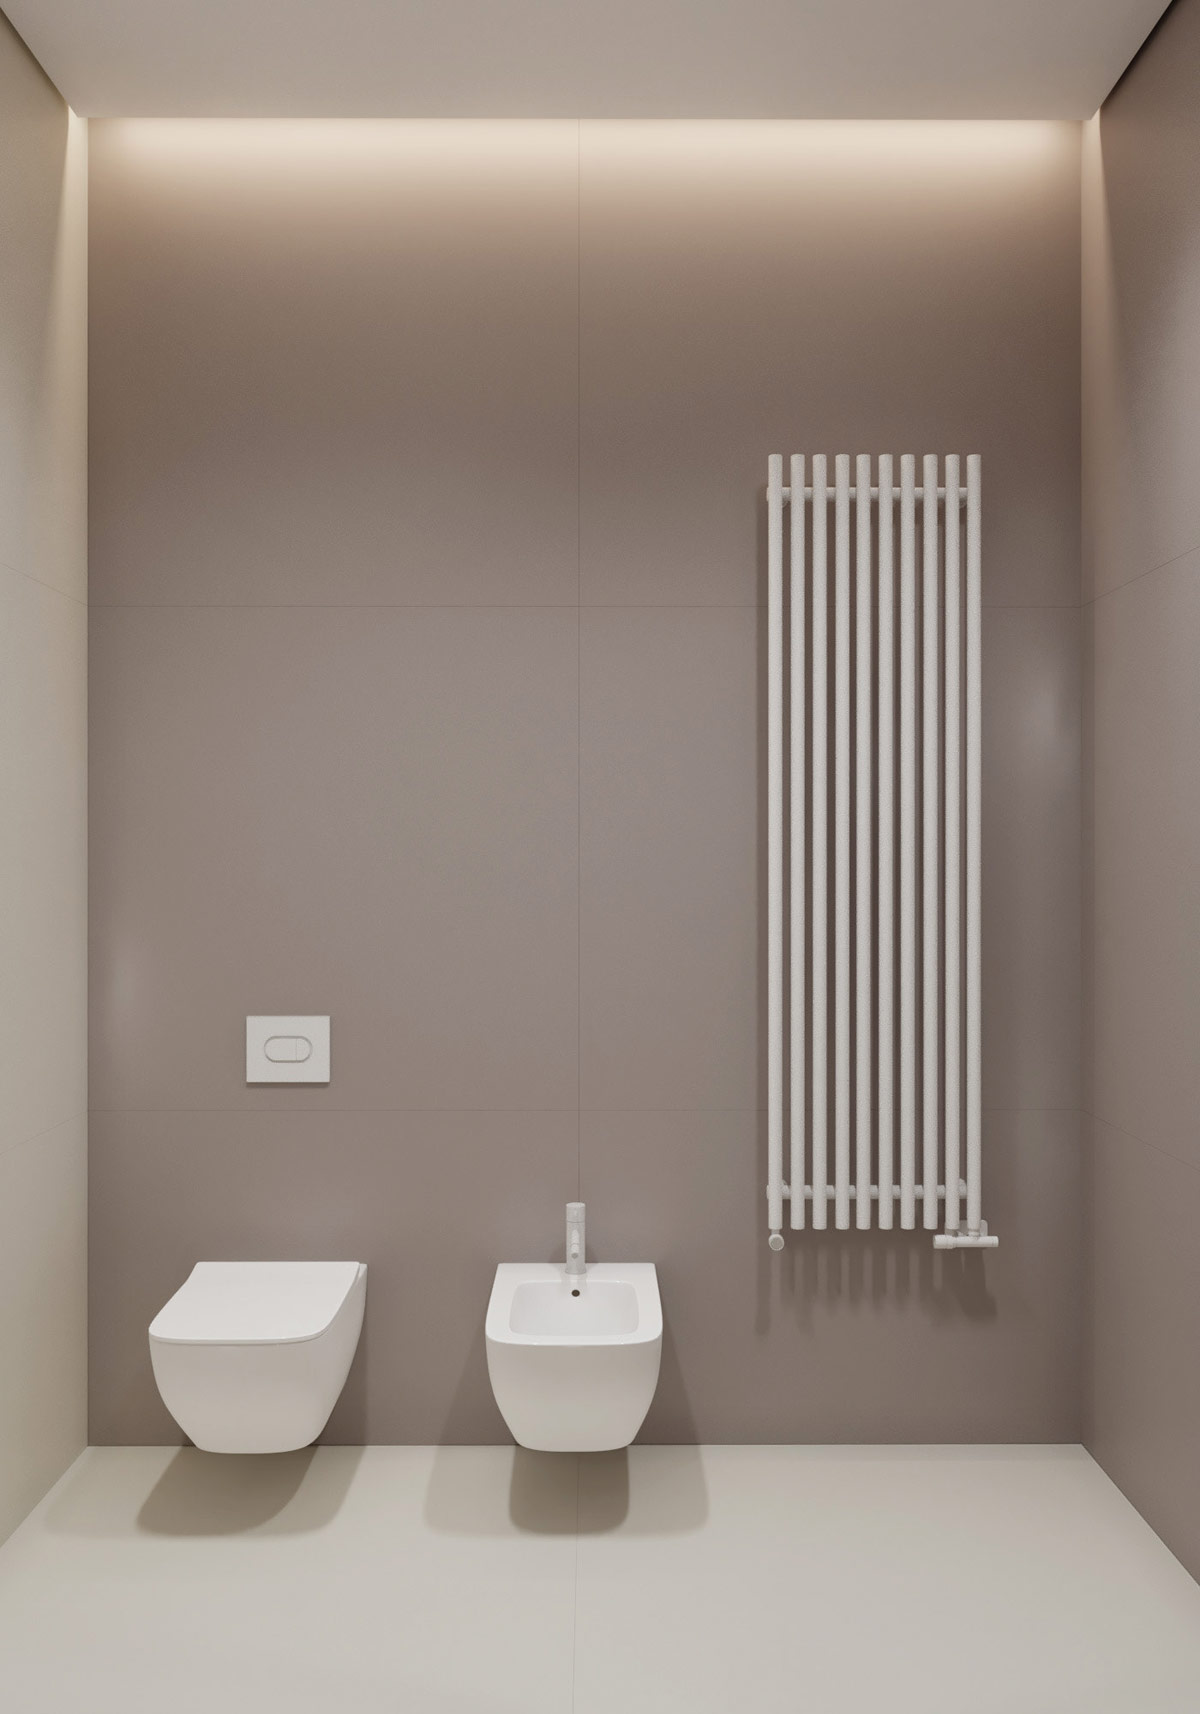
The grey wall treatment flows around onto the adjacent wall, where a simple white wall hung toilet and bidet set are coordinated with a white vertical radiator
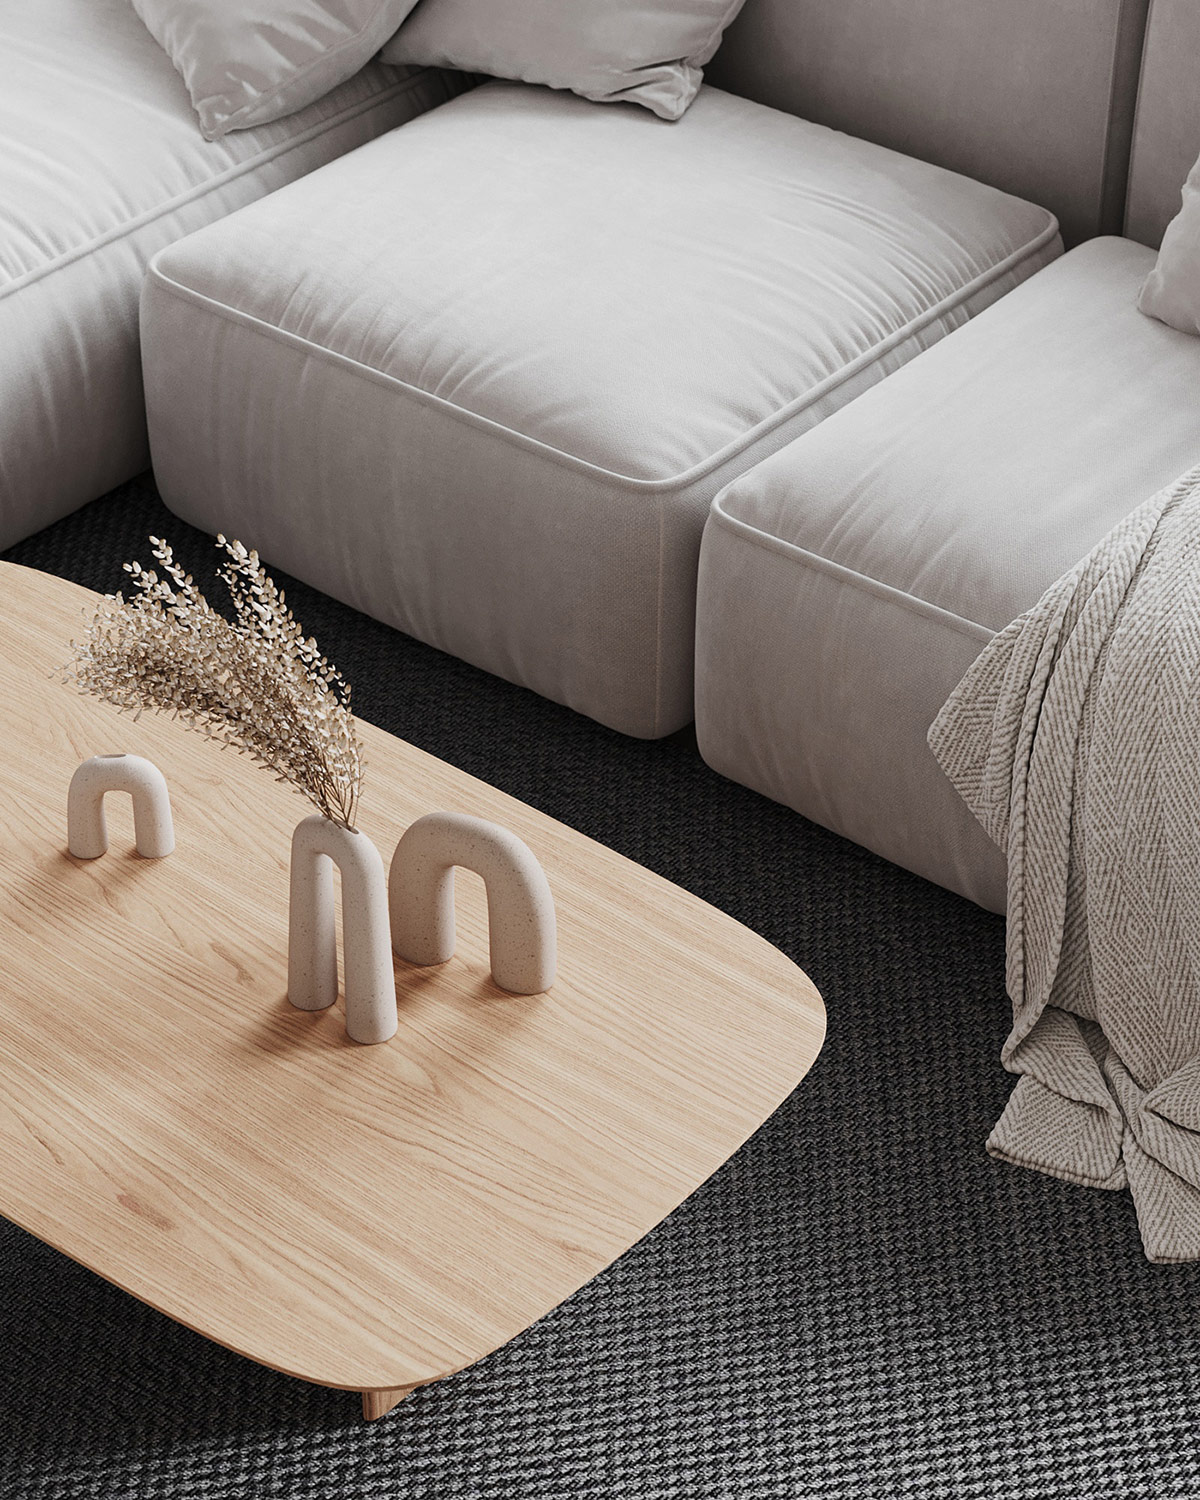
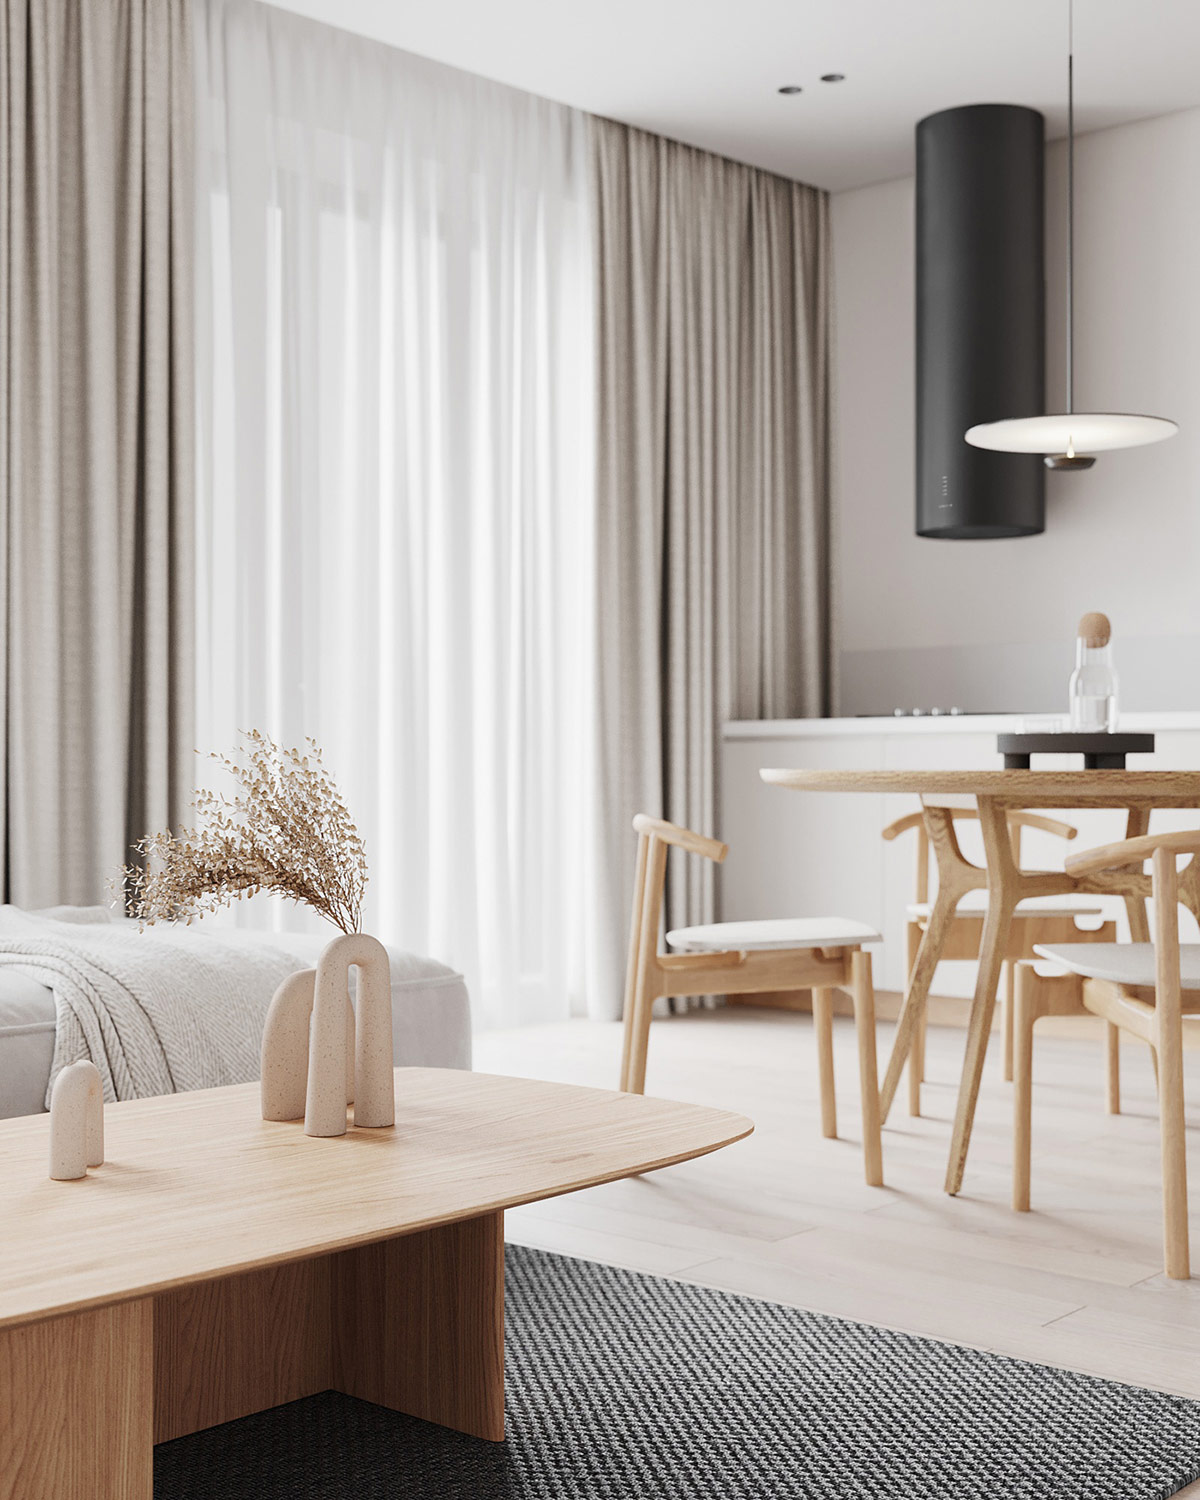
In the second of our two white interior designs, a wooden coffee table provides pleasing visual warmth.
A black and white woven area rug adds visual weight underneath the wood table.
Across the room, a modern media unit stripes a moment of wood tone across the TV wall. The contemporary little lamp on the console is the Waretable lamp by MSDS Studio for New Works.
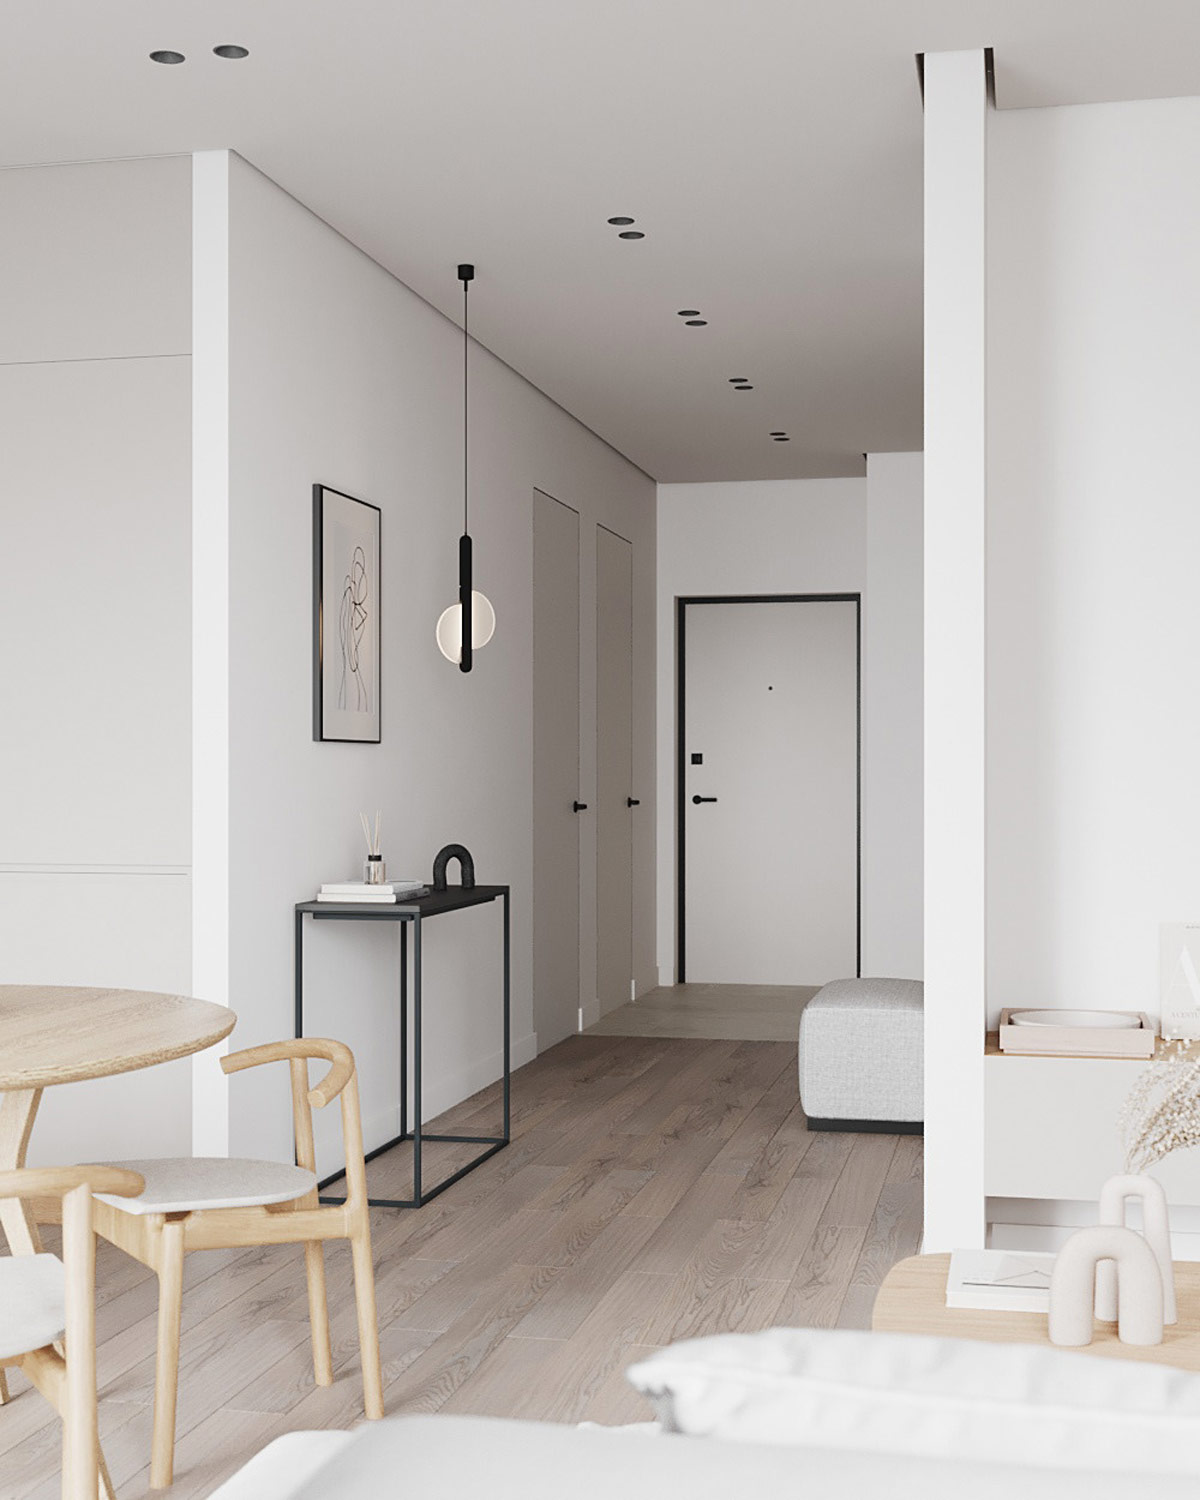
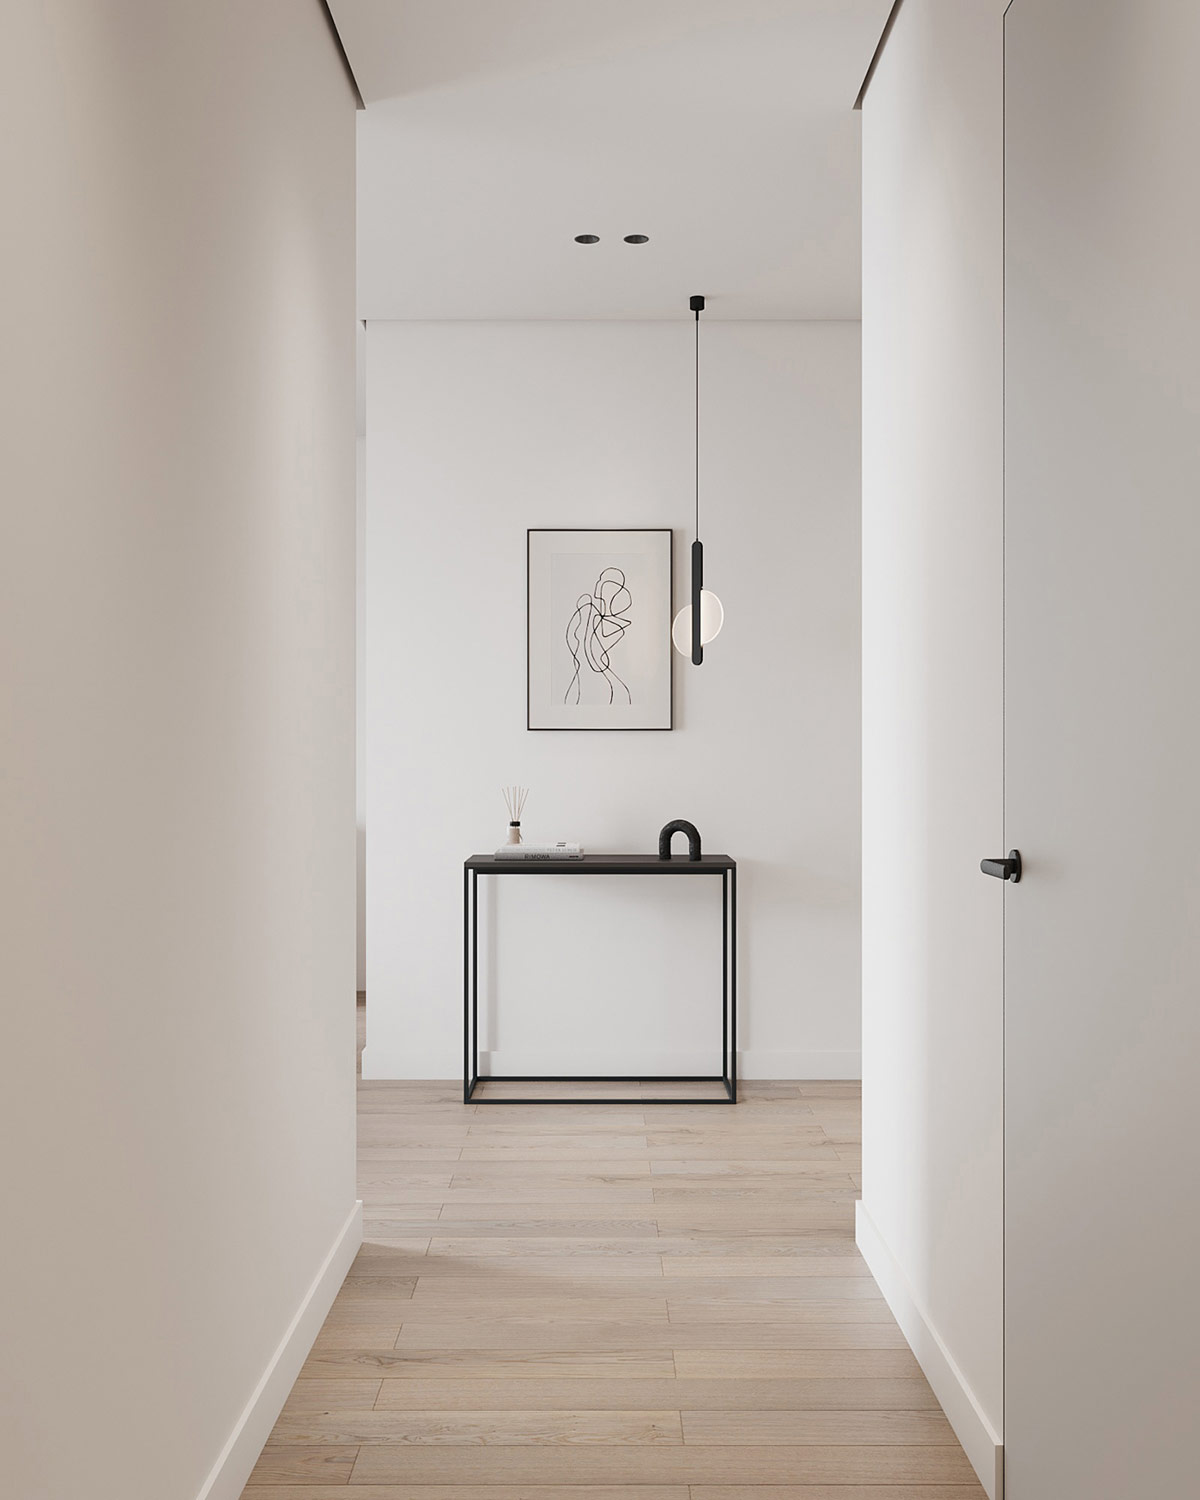
The living space flows directly into a wide hallway that leads to the home entryway.
Built-in units stow away coats and bags
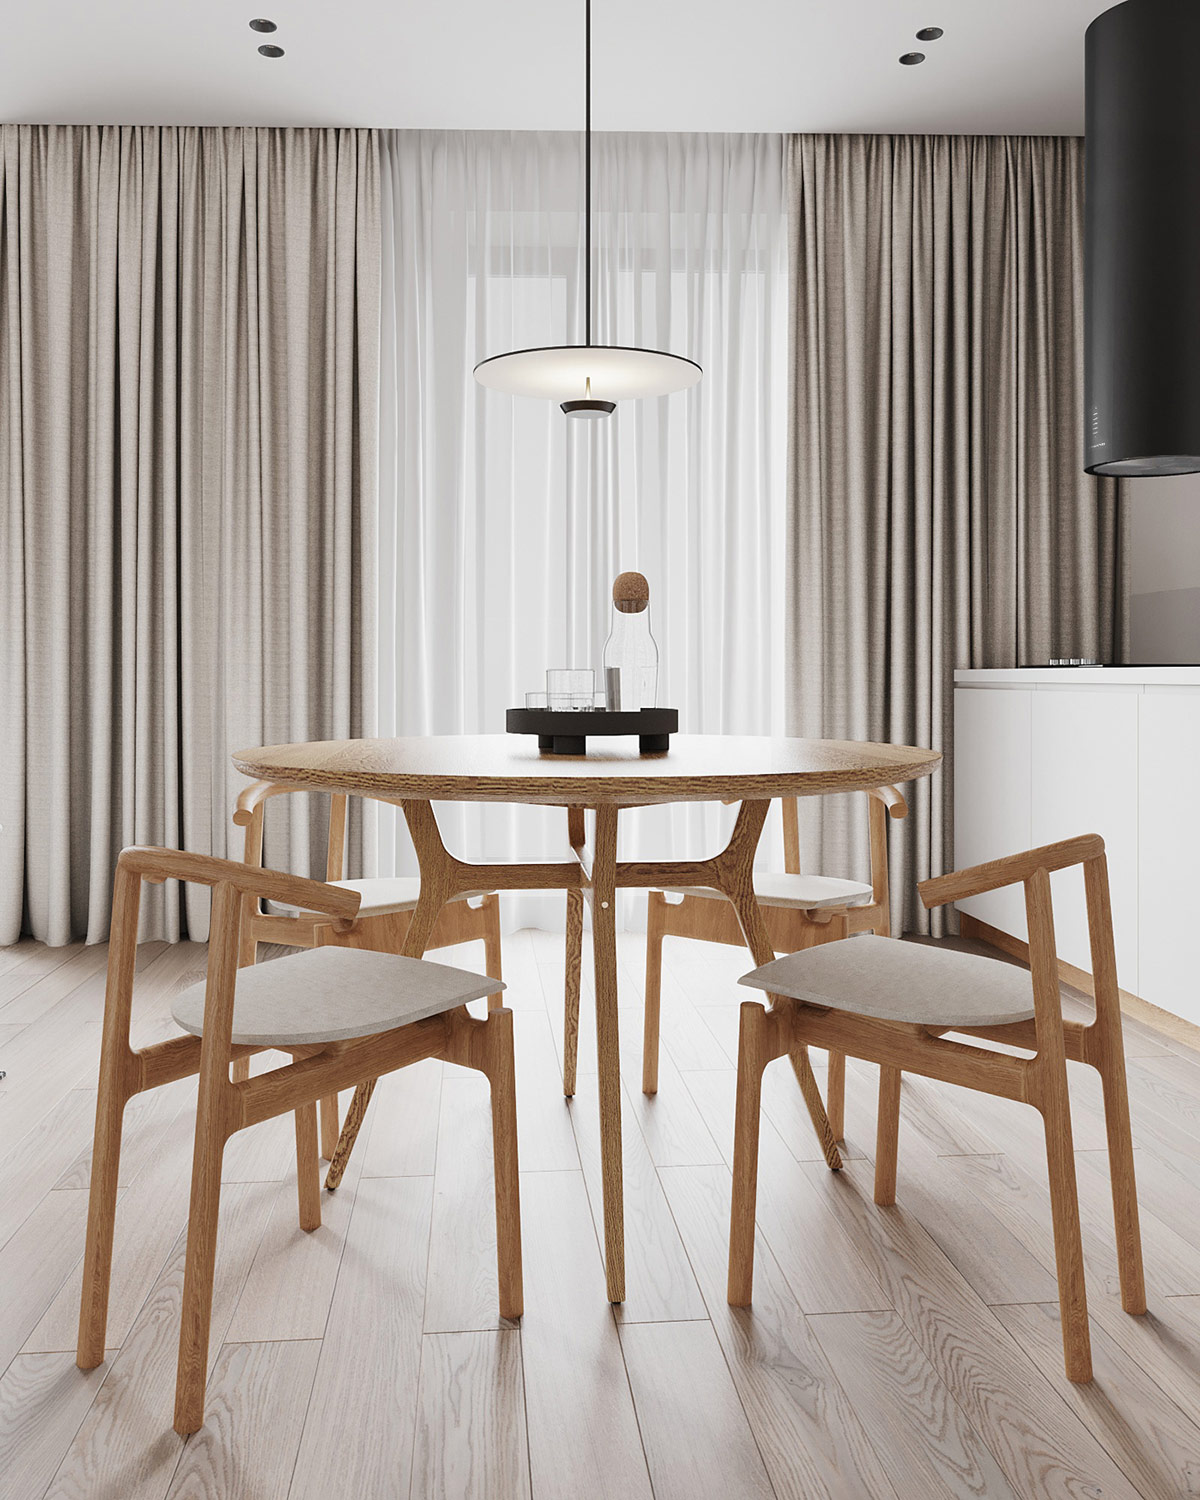
Beige drapes fall in luxurious folds at the dining room window.
A black console table, unique pendant light, and monochrome artwork fashion a smart vignette against a clean white entryway wall.
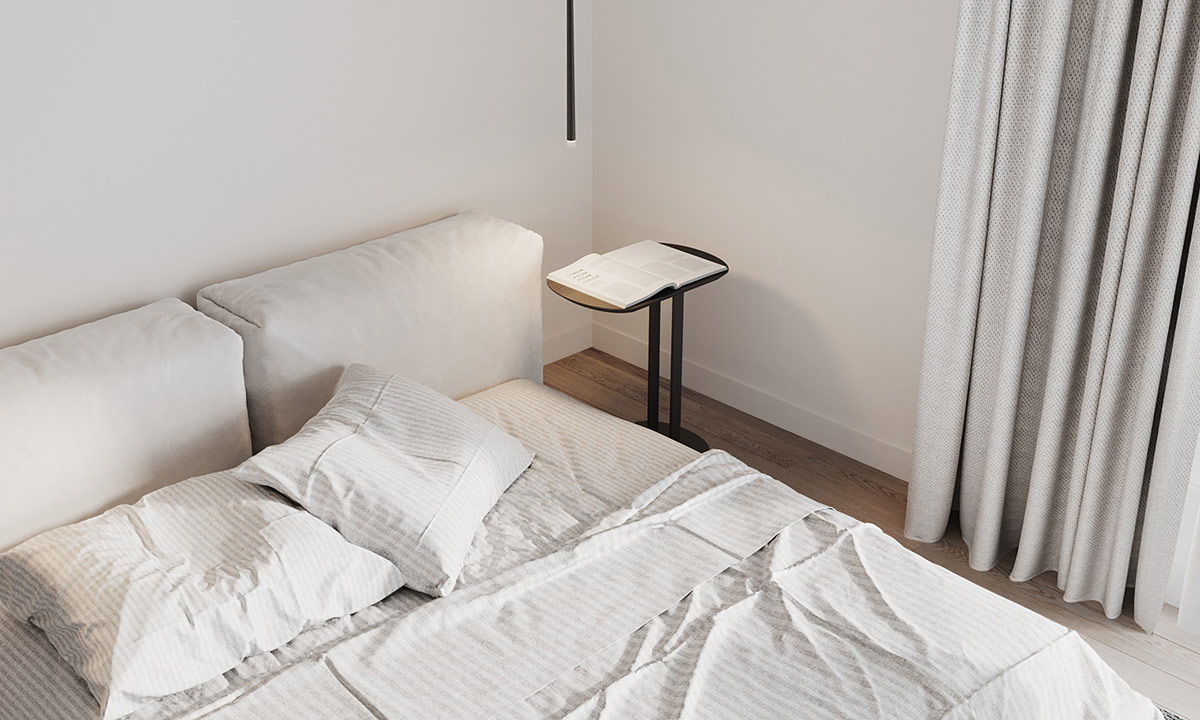
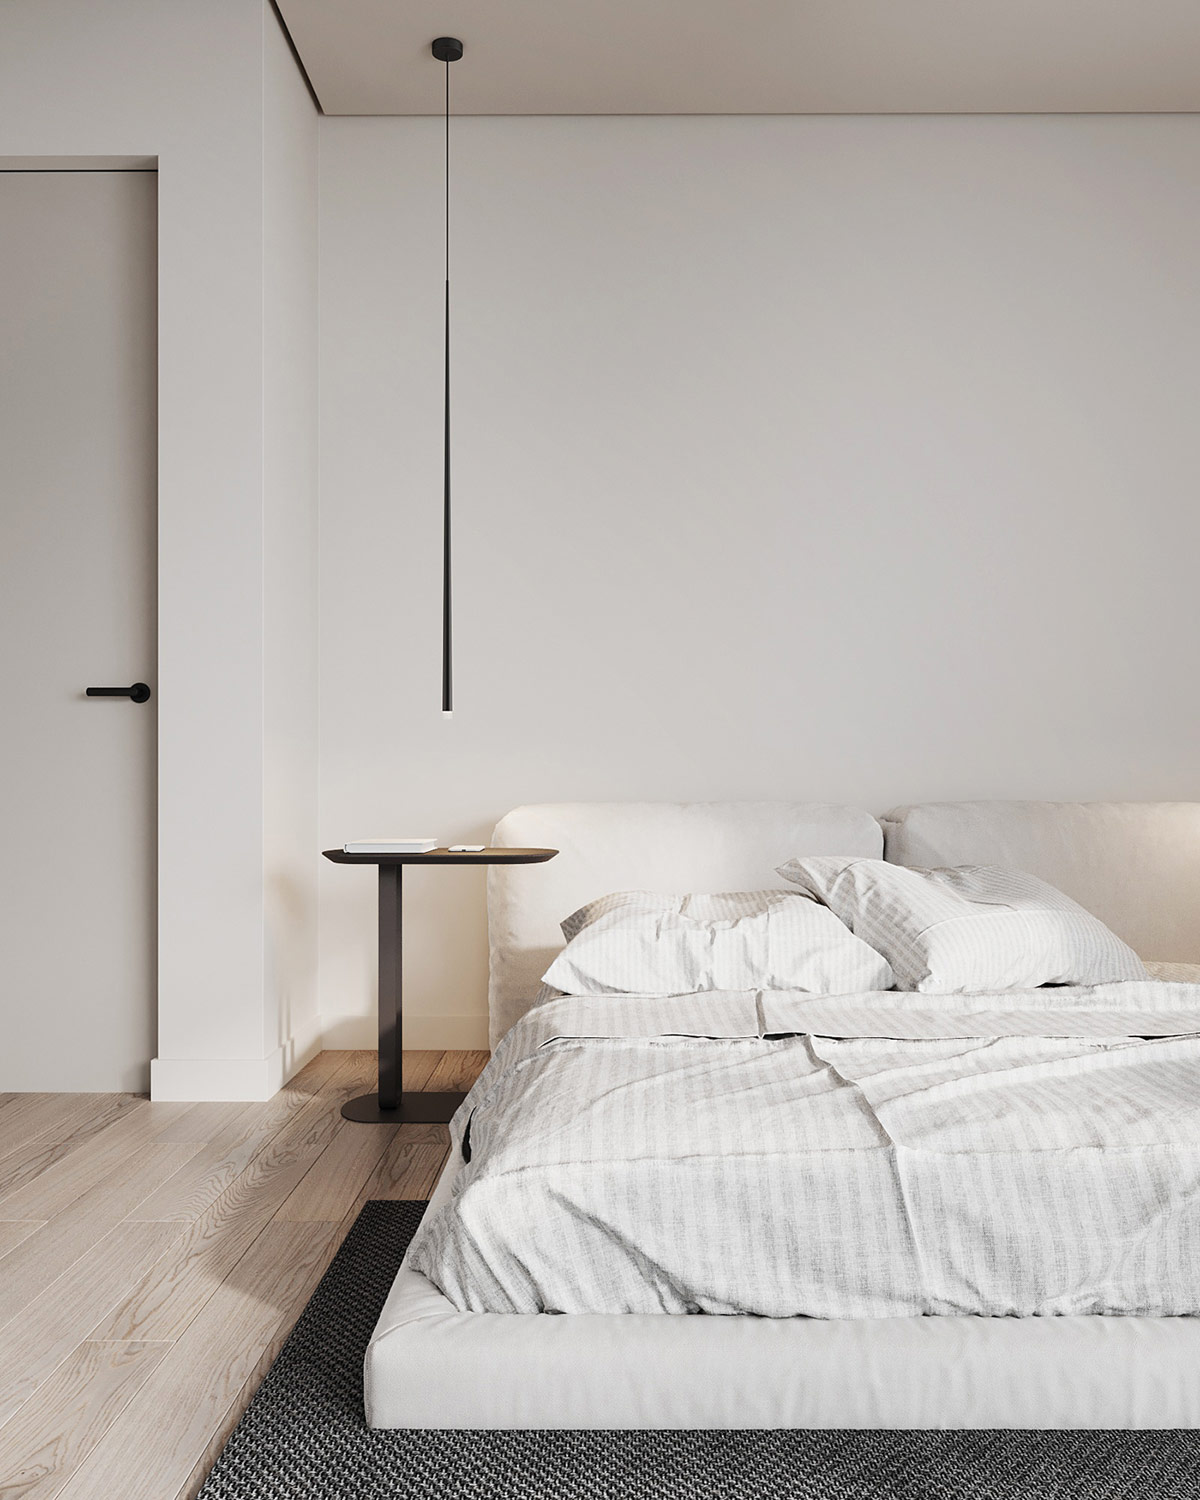
The slender light stems drip brief contrast around a white upholstered bed and a plain white headboard wall.
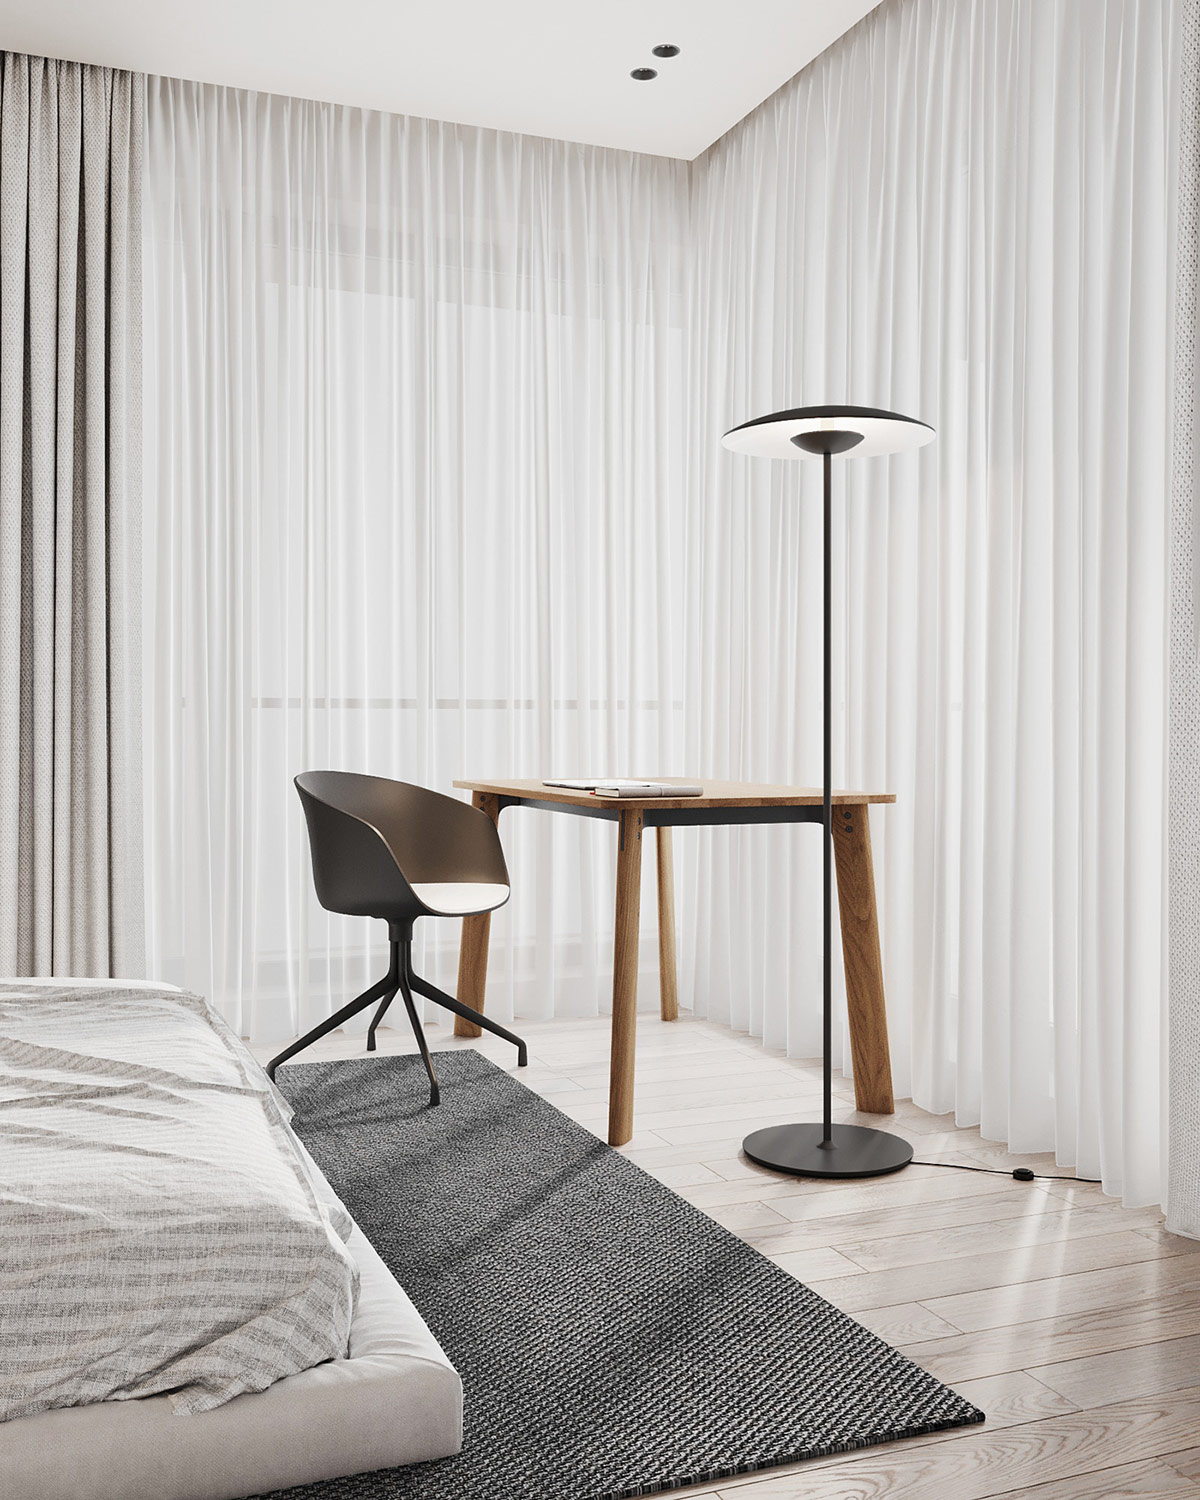
A floor lamp matches with the stark black finish of the bedside pendant lights, and provides task light over a home workspace.
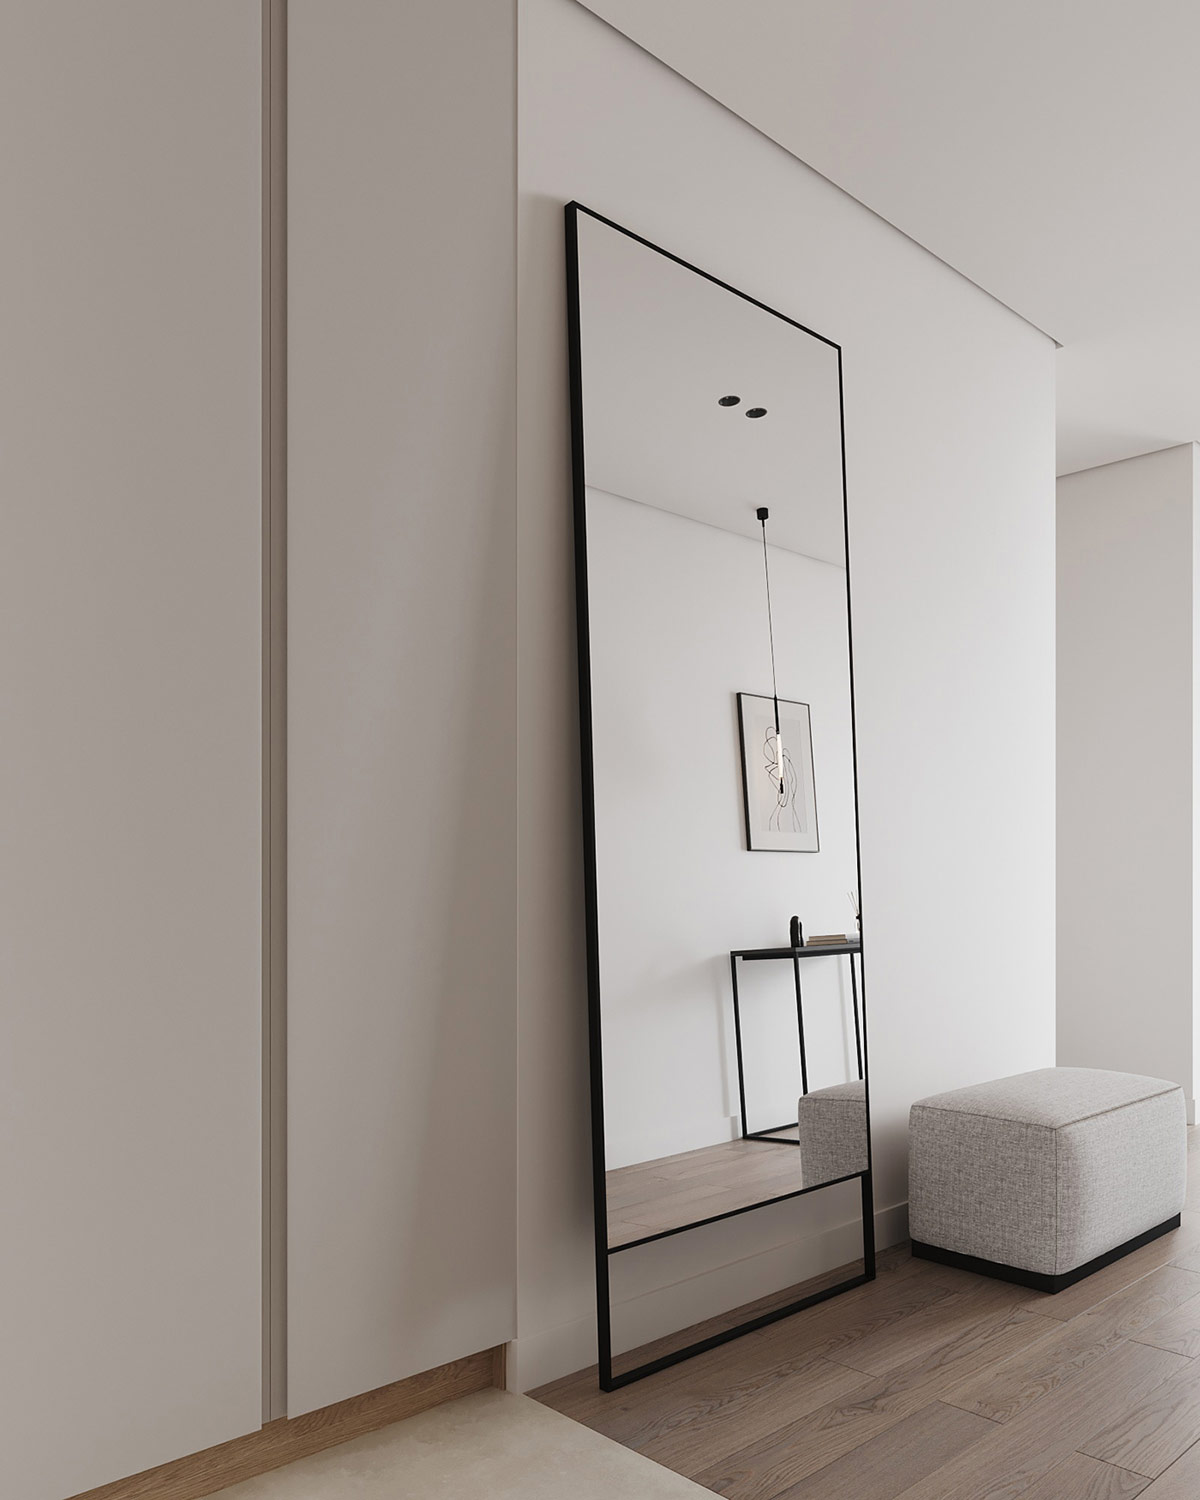
In the bedroom entryway, a full length mirror increases the sense of space
A black bedside table stands at each side of the room, complemented by a black and white area rug beneath the bed.
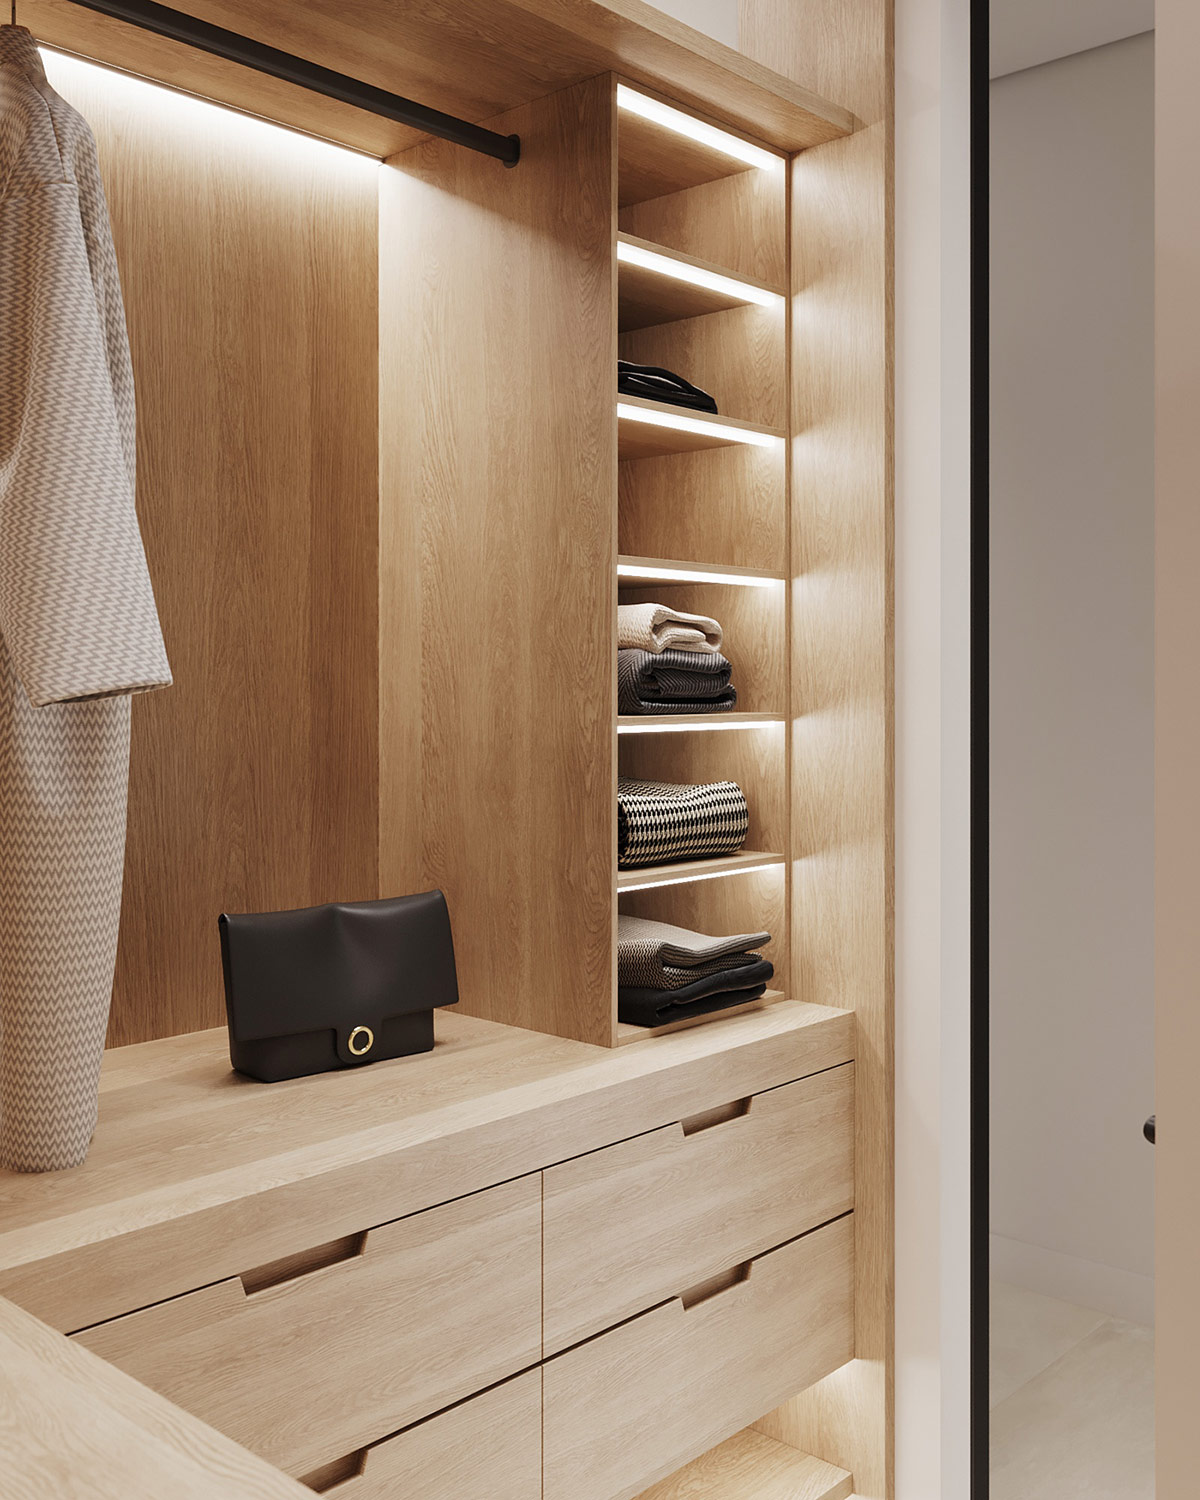
The walk-in wardrobe is a cosy cocoon of wooden closet units.
Wood slatted panels texture the bathroom vanity area, adding a honey coloured hue behind a clean white basin and a black bathroom mirror.
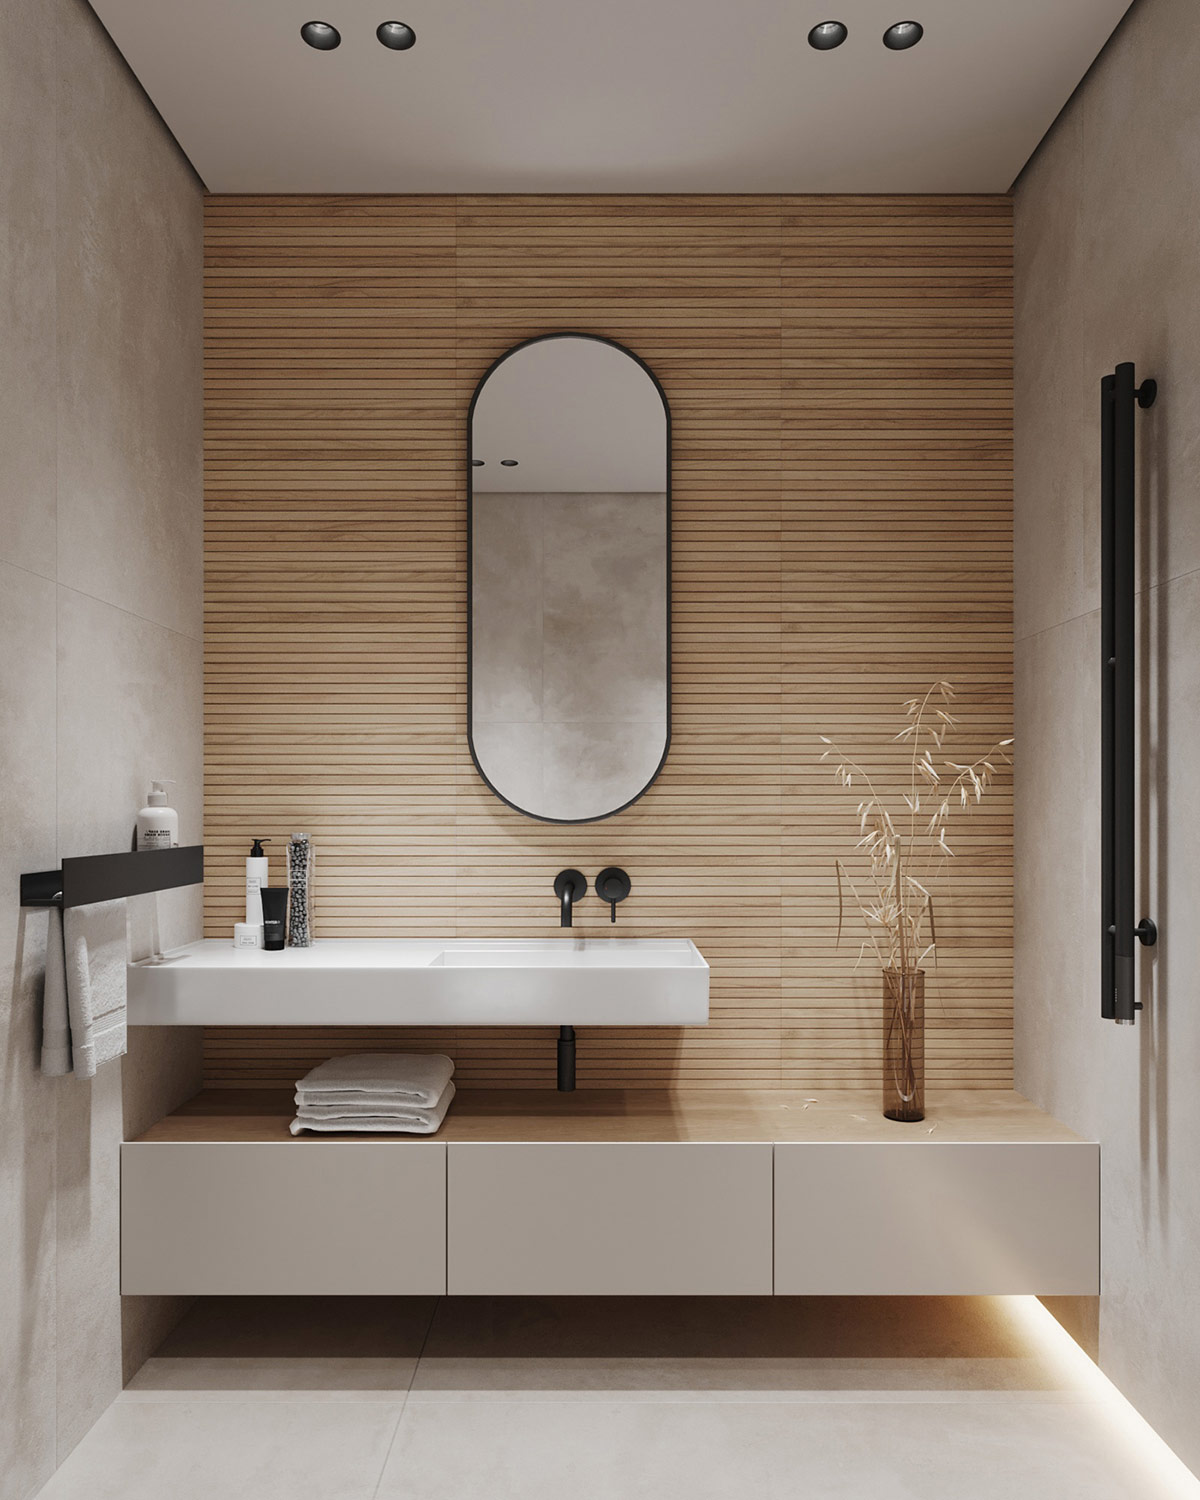
The wood slatted wall treatment returns in the shower room, behind another racetrack-shaped vanity mirror and a unique pedestal sink.
Concrete tiles subtly contrast the white wall hung toilet, and provide a cool industrial-style base for a contemporary black-framed shower enclosure.
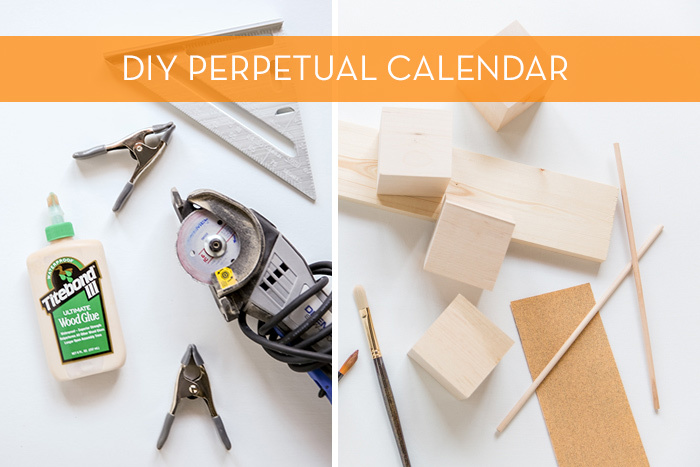
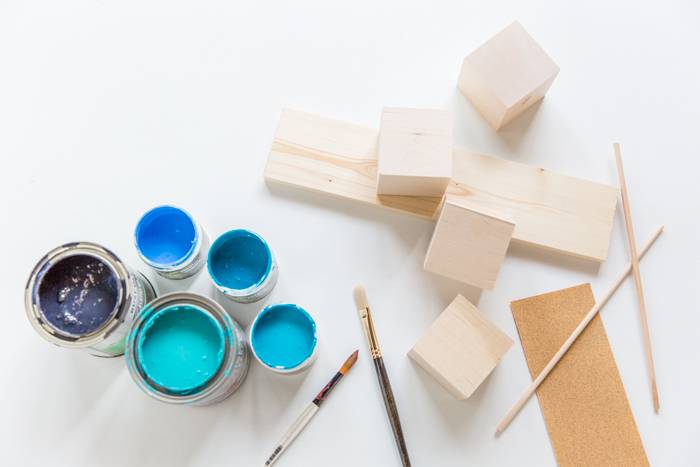
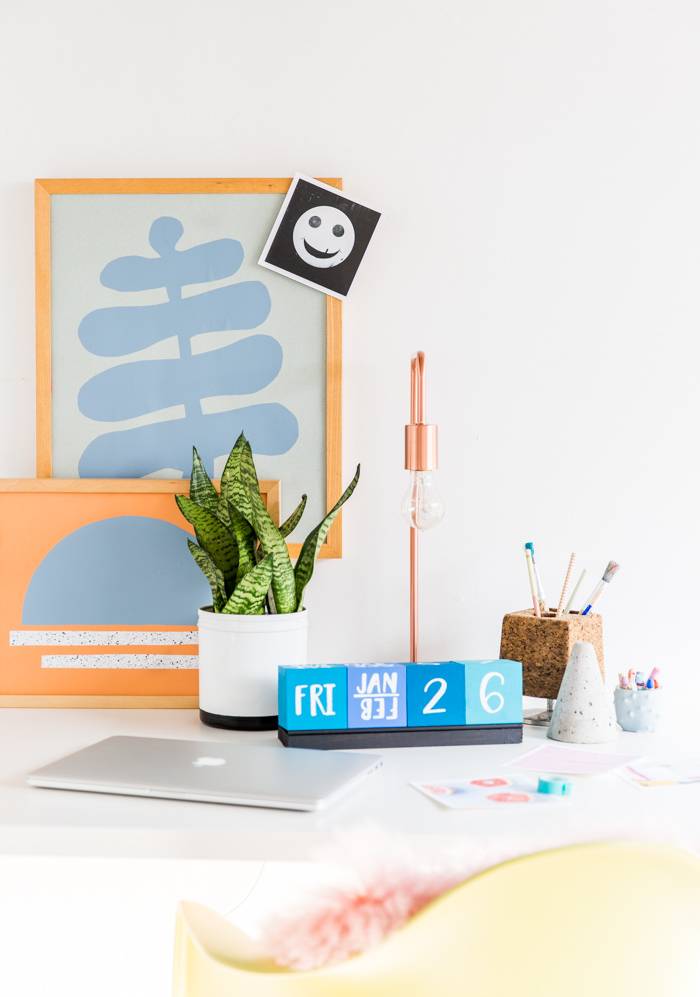
In an effort to get organized early in the new year, I’ve been making myself little desk accessories to get excited about computer work. And I’m happy to say, it’s actually working. So, I thought I would share one of the projects that I recently made, for a jumbo wood block perpetual calendar. The larger size makes this calendar a statment piece and adds a fun playfulness to the typically bland work station. Click through for the step by step tutorial.
saw (if you don’t have a piece of wood that is exactly 12 inches)
clamps
Instructions:
1. Start by painting each of the 4 wood blocks a difefrent color. You’ll want to paint all sides of each block. And come back with a second coat if necessary. Tip: Be sure to use a paint and primer in one to save yourself the extra step of having to prime the blocks first.
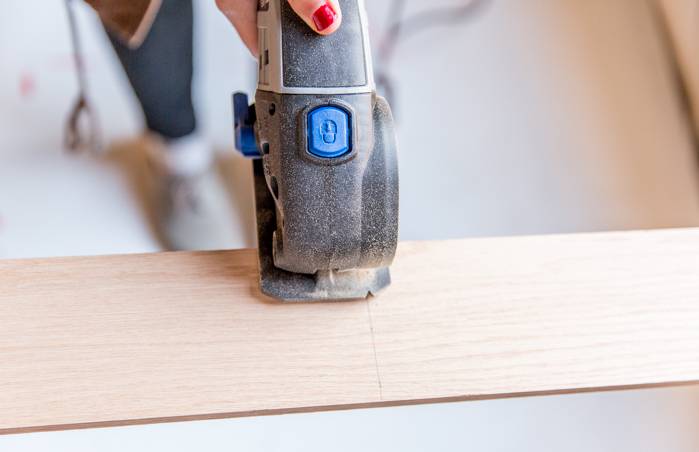
2. While the blocks are drying, cut a piece of 1×4 scrap wood down to 12 inches in length. This will keep the base length lined up with the dowel rods. *If you already have a piece of scrap wood that is 12 inches in length, you can skip this step.
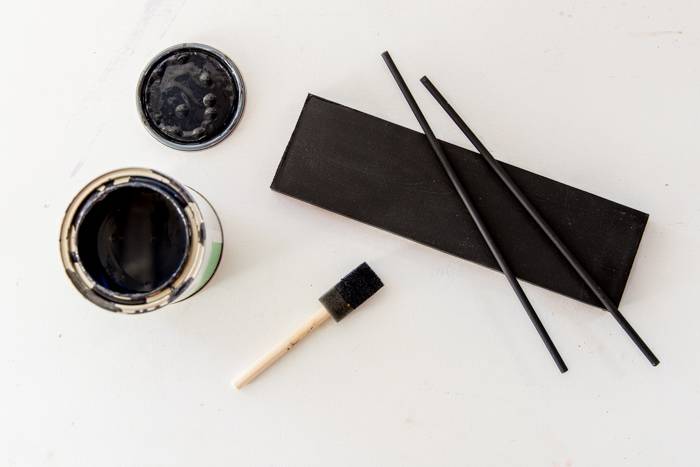
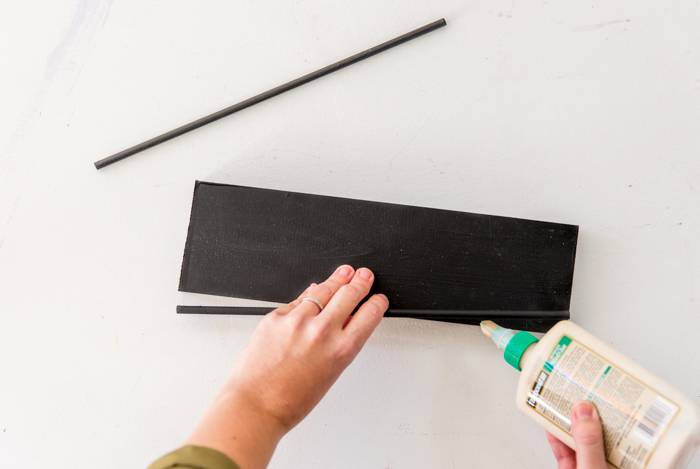
3. Next, paint the pieces that you’ll be using as the base all one color (wood dowels and 1×4 wood from step 2). I went with black for mine, if you’re looking for suggestions. Set aside and wait for the paint to dry completely before adding another coat (if necessary).
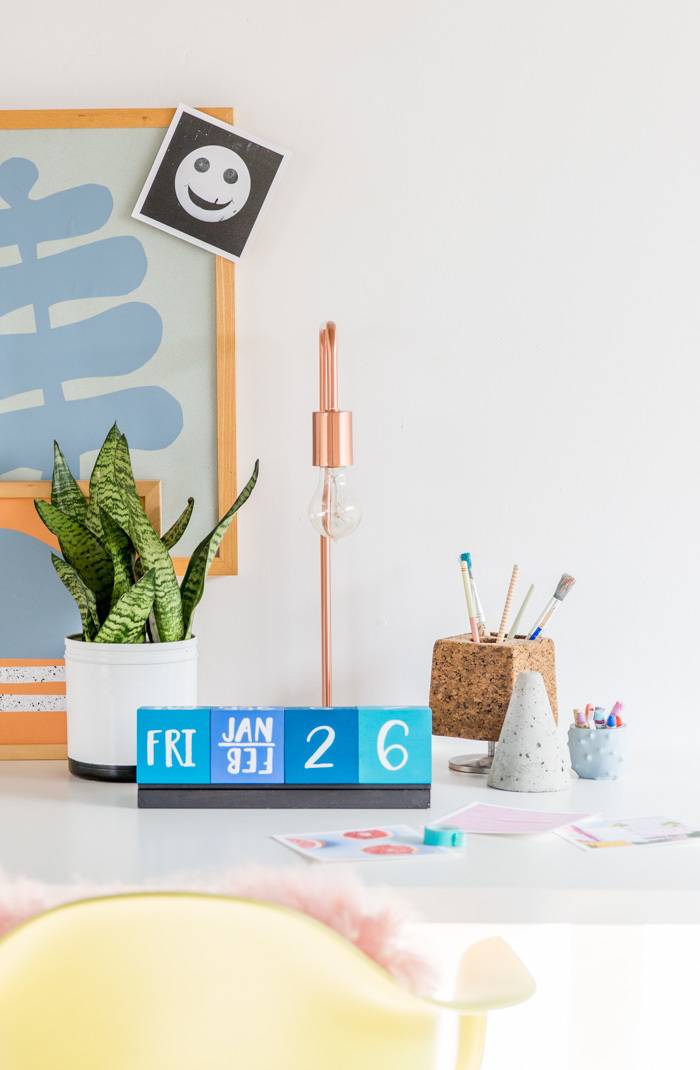
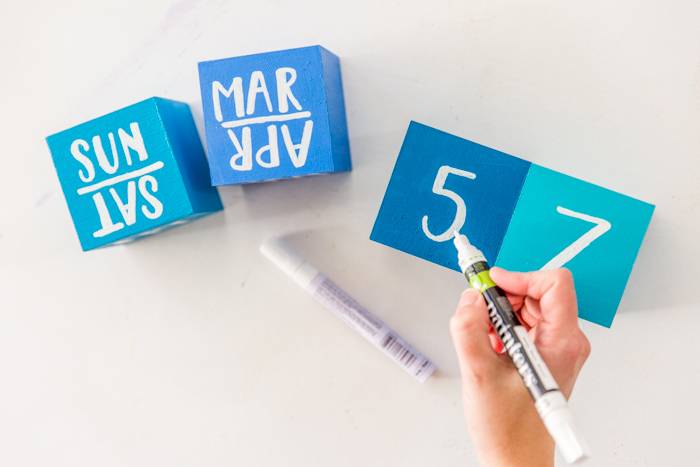
4. Once the wood blocks from step 1 are completely dry, it’s time to start the lettering process with a paint pen. If you don’t have great handwriting, find a friend! That’s what I did.…Lettering for this project was done by Rachel Brewer.
Knowing exactly what numbers, days, etc to put on each block can be a little tricky. So, I’ve included exactly what you’ll need to write on each block to take out the guess work…
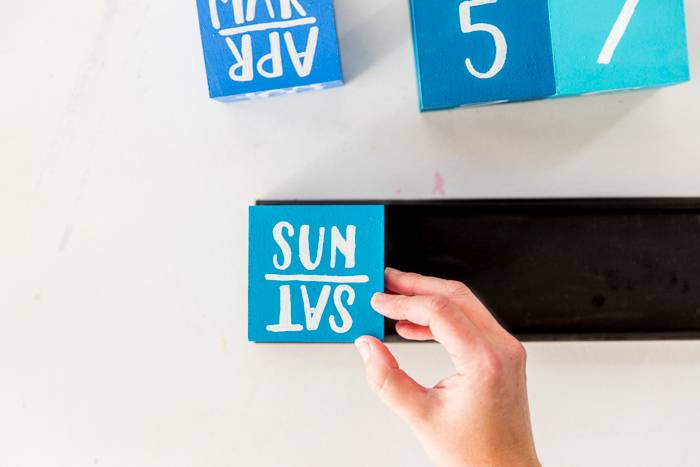
Day Block: Write Sat / Sun together on one side of the first block. Then Monday, Tuesday, Wednesday, Thursday, and Friday each on their own sides.
Month Block: Write these month combinations each on their own side of block two: Jan / Feb, Mar / Apr, May / Jun, Jul / Aug, Sep / Oct, Nov / Dec. And be sure to write the second month in each combination upside down from the first. This will make more sense if you refernce the photos.
Number Block One: On the first number block, write the following numbers (each number on it’s own side of the block): 0, 1, 2, 3, 4, 5.
Number Block Two: On the second number block, write the following numbers (each number on it’s own side of the block): 0, 1, 2, 6, 7, 8 (an upside 6 will make a 9).
5. Once the blocks are finished, set them aside. Then, using wood glue, glue the painted dowels to the painted wood. And clamp the rods to the wood for at least 30 minutes to insure proper adhesion. *One dowel will be on the edge of each long side of the wood. This will keep the wood blocks resting comfortably inside the lip, instead of just sticking on a regular block of wood.
Note: If after the glue has dried, the blocks don’t perfectly fit inside the rails, no worries. The blocks can also rest on top of the front rail (dowel rod), for an elevated look.
6. Lastly, now that the blocks and base have been completed, place the blocks into the base and place on your desk. And each day, you can switch out the proper date, day, etc.
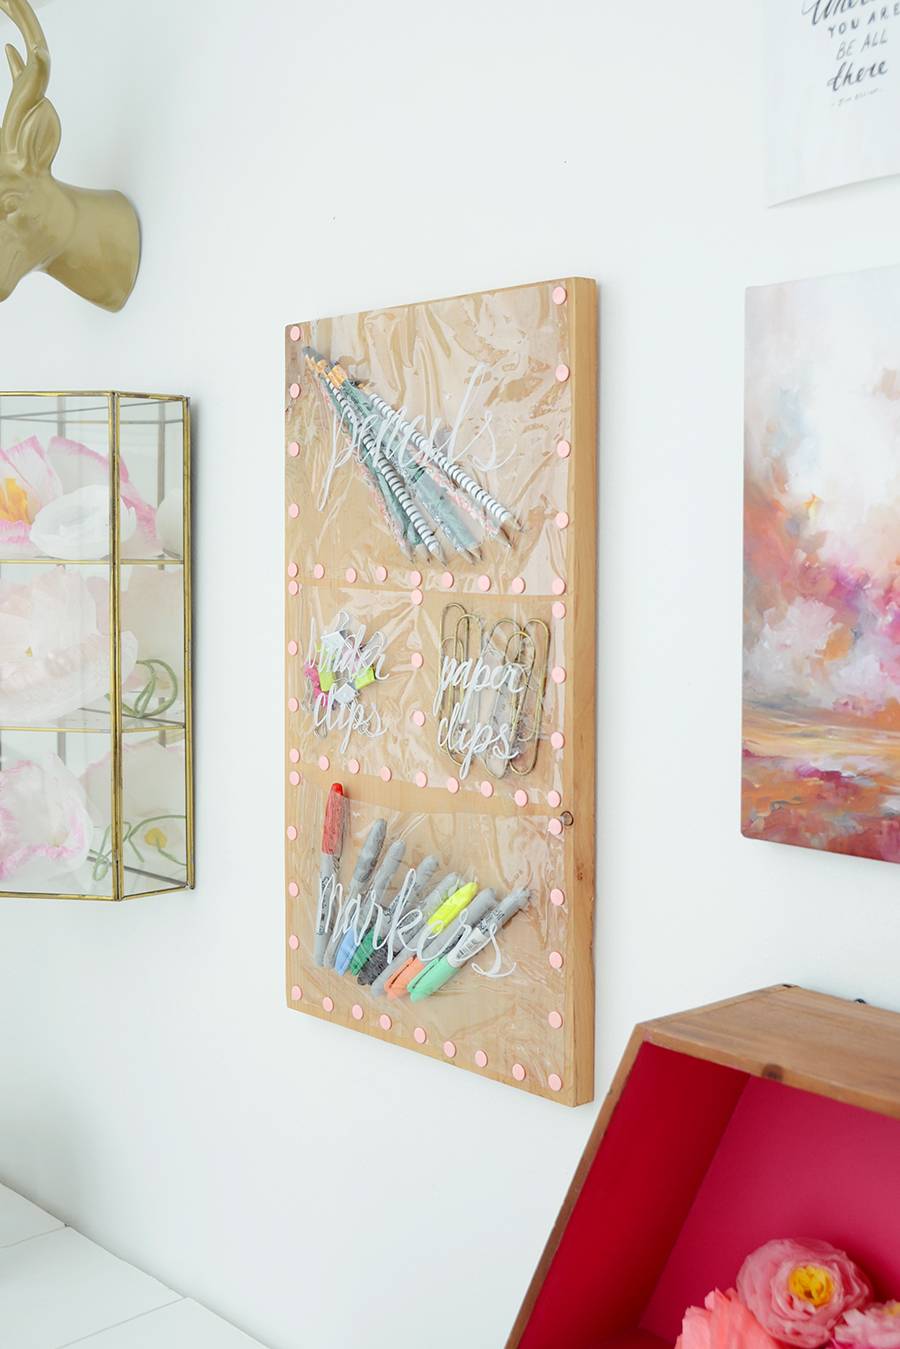
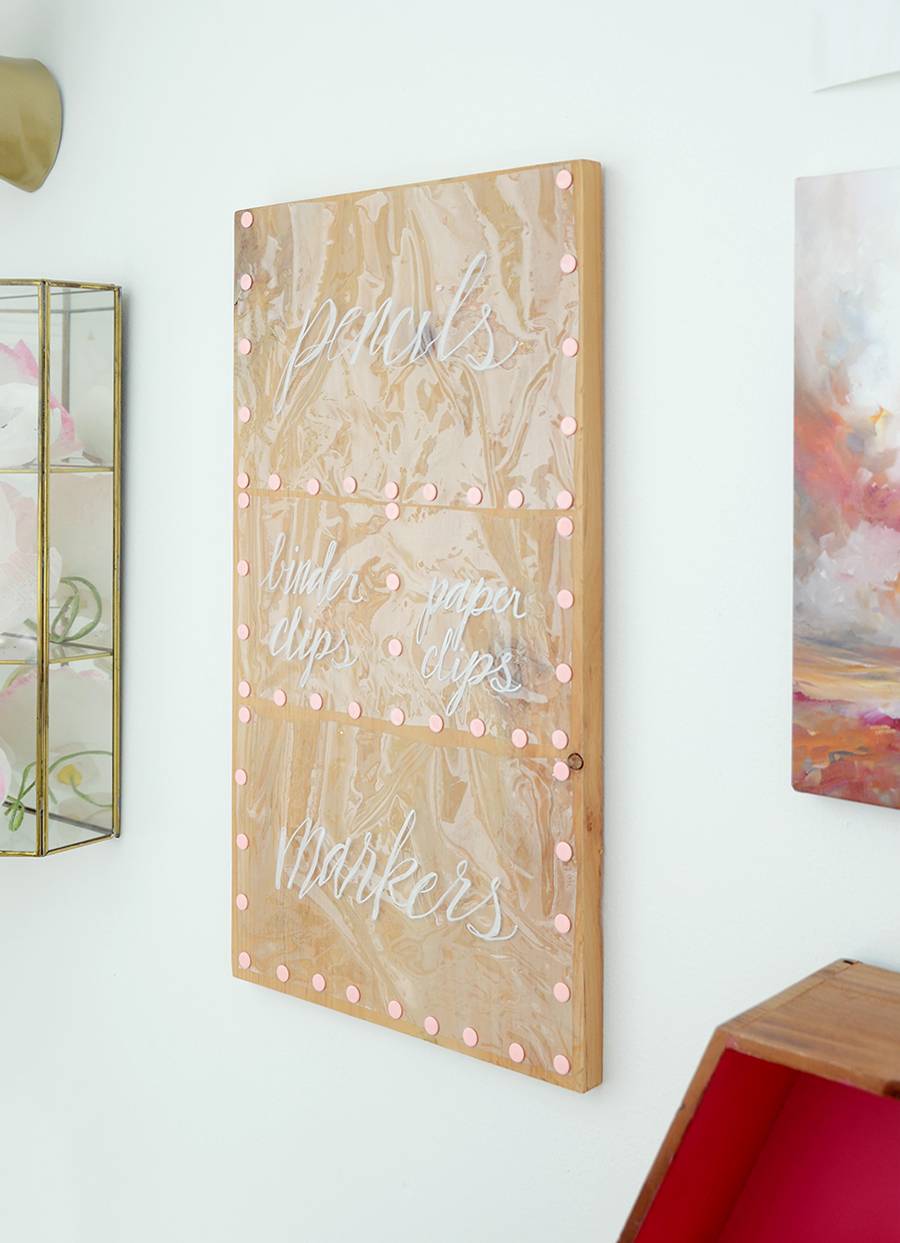
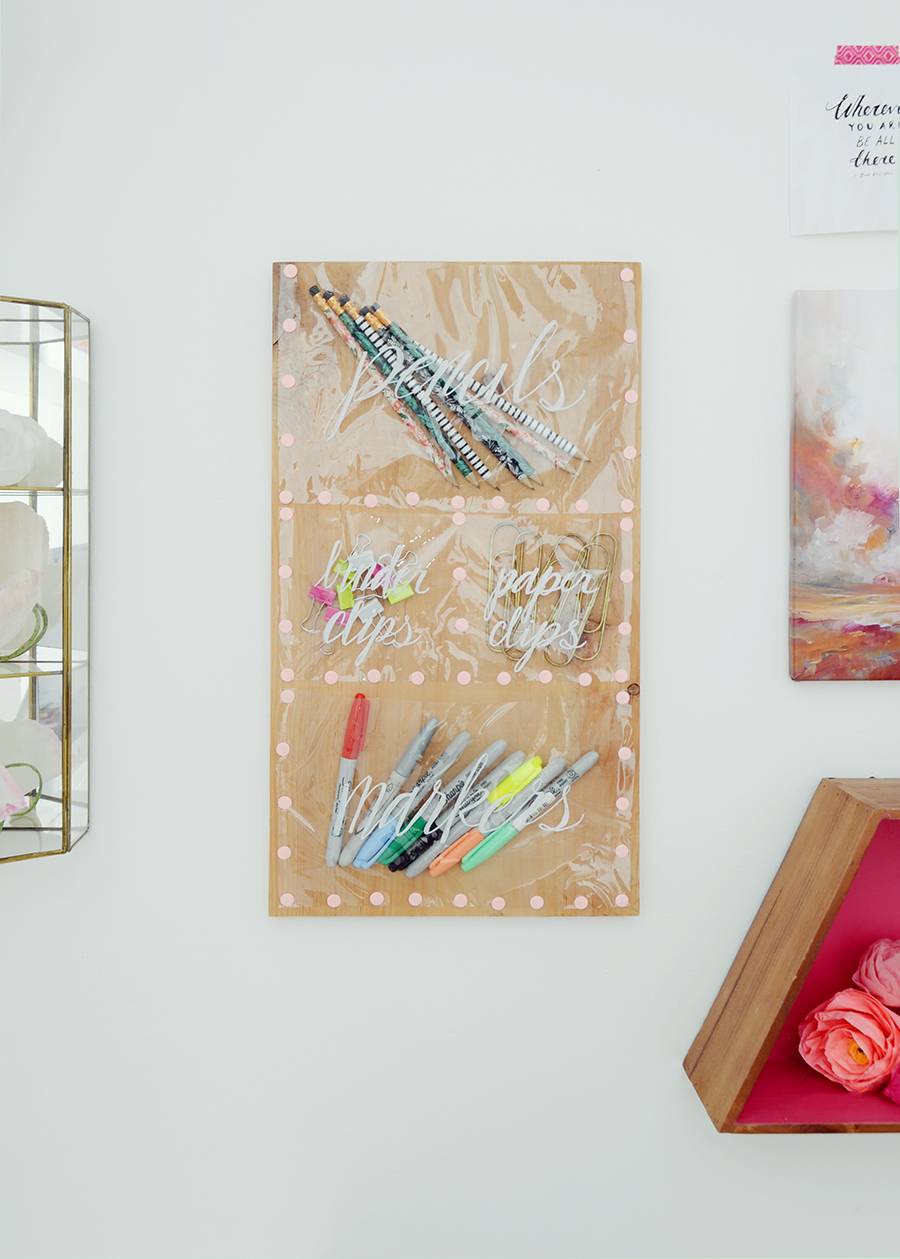
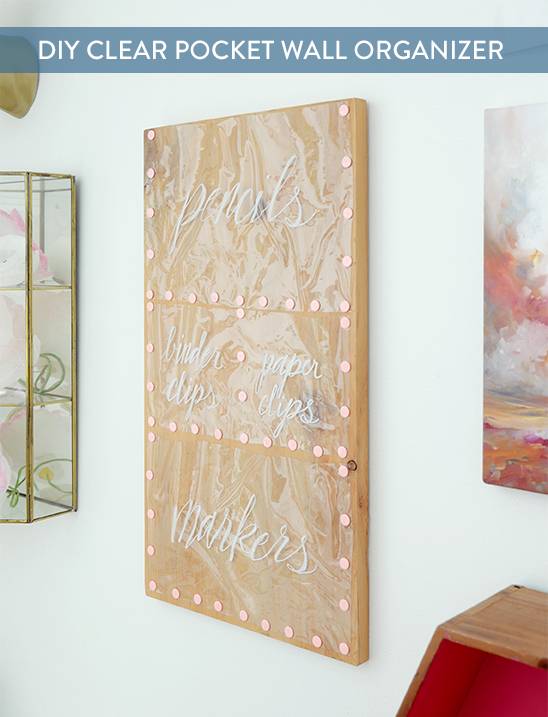
Everyone I know is on an organizing kick, myself included, now that the new year has rolled around. And one of the places that I have the hardest time keeping clean is my home office and craft space. So I thought it would be fun to create a wall-mounted organizer for my office supplies and share it with you guys. Keep reading to check it out.
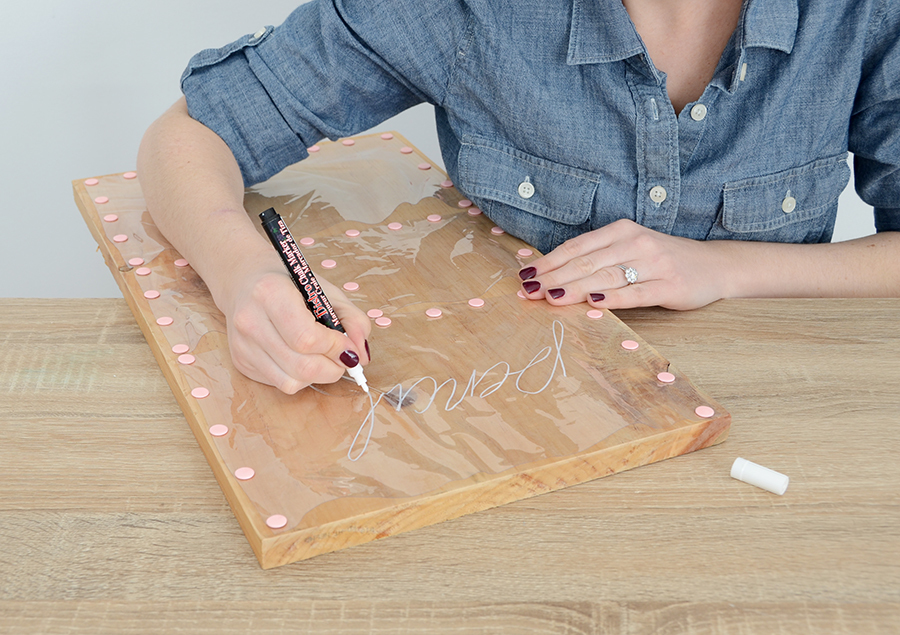
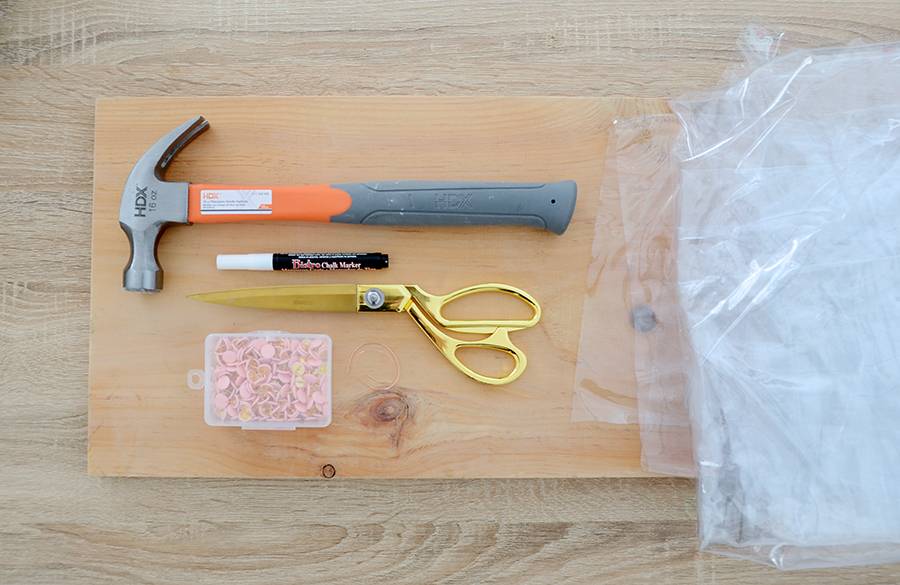
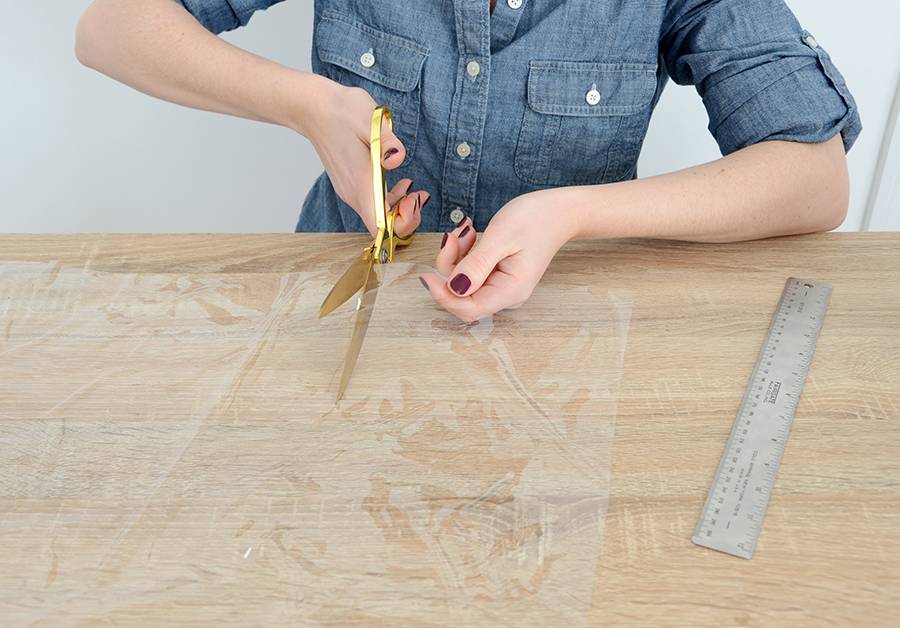
Begin by cutting a piece of vinyl that is 12 x 9 inches. Mark the measurements with the chalk pen. It wipes off easily with a paper towel if it’s still wet. Once it has dried, use a damp paper towel to remove the marks.
You can buy vinyl at many fabric stores, but you can also cut up a vinyl shower curtain liner if you’re having trouble finding it by the yard.
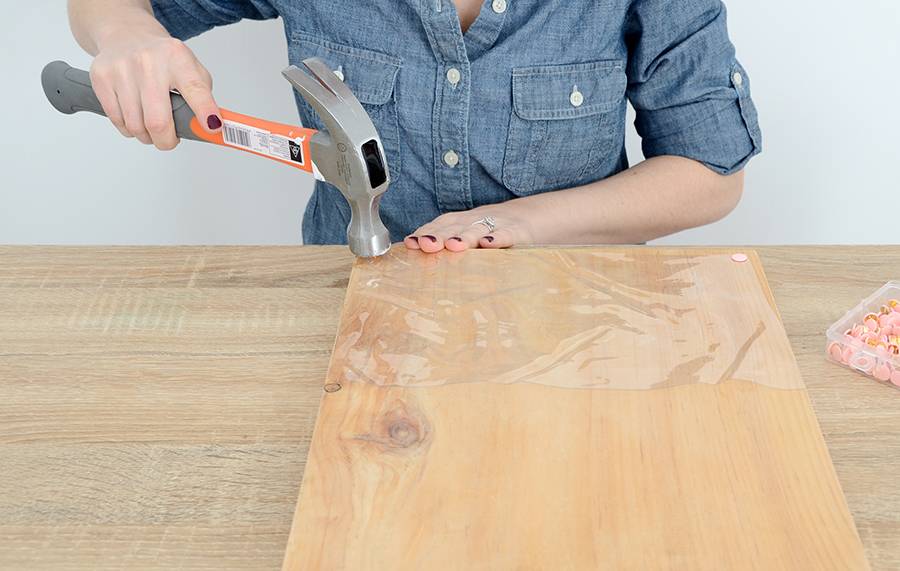
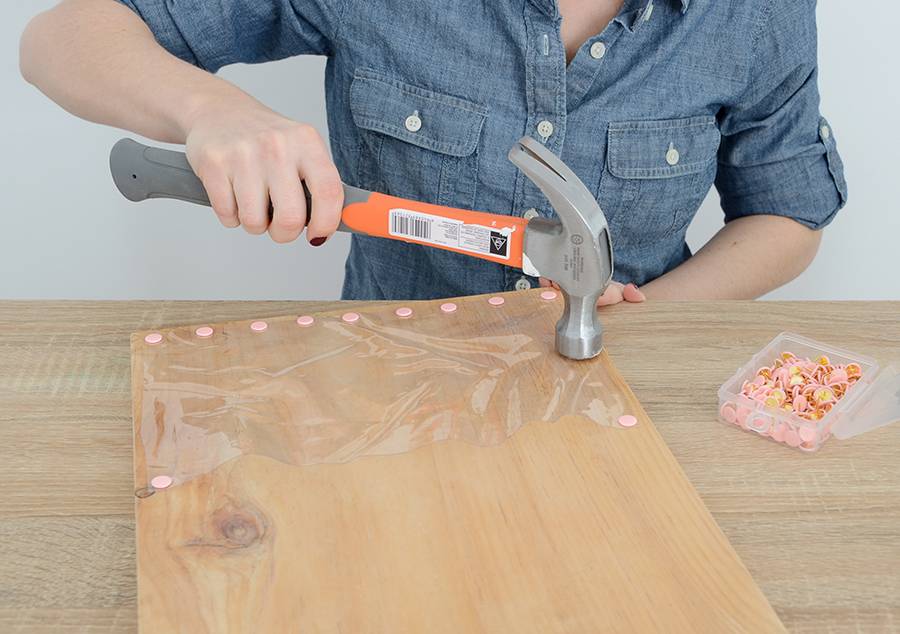
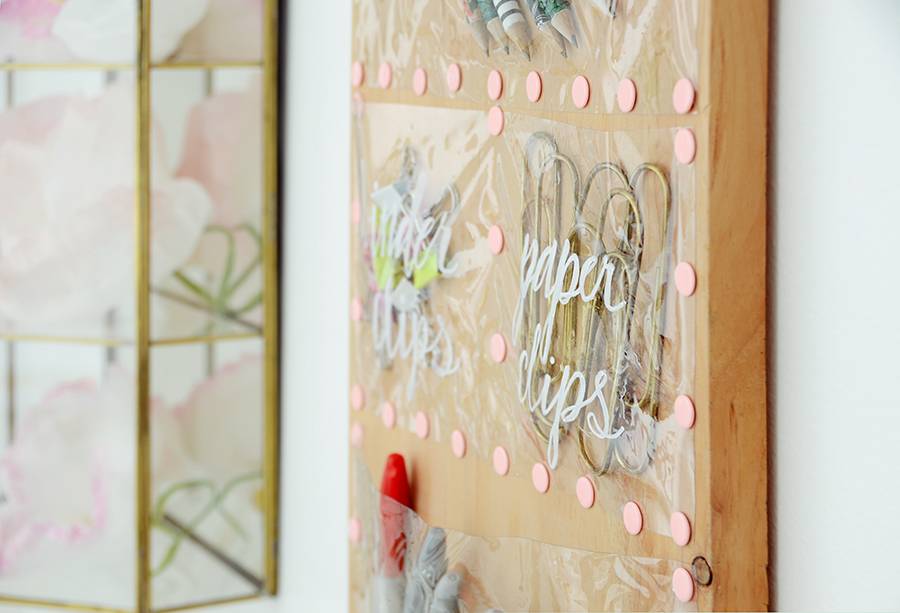
Lay the vinyl on the bottom section of the wood. You’ll want to trim the edges so that it forms a slight trapezoid – begin cutting 1/2 inch from the side up to the top corner on each side. This will give you a bit of extra vinyl at the top so you can fit items into the pocket. Gently hammer in a pushpin on each corner.
Next, cut a piece of vinyl that is 12 x 5 inches and trim it so that the bottom edge is a bit narrower than the top, just like you did before. Repeat the process of adding pushpins, this time putting a row up the middle to form two pockets.
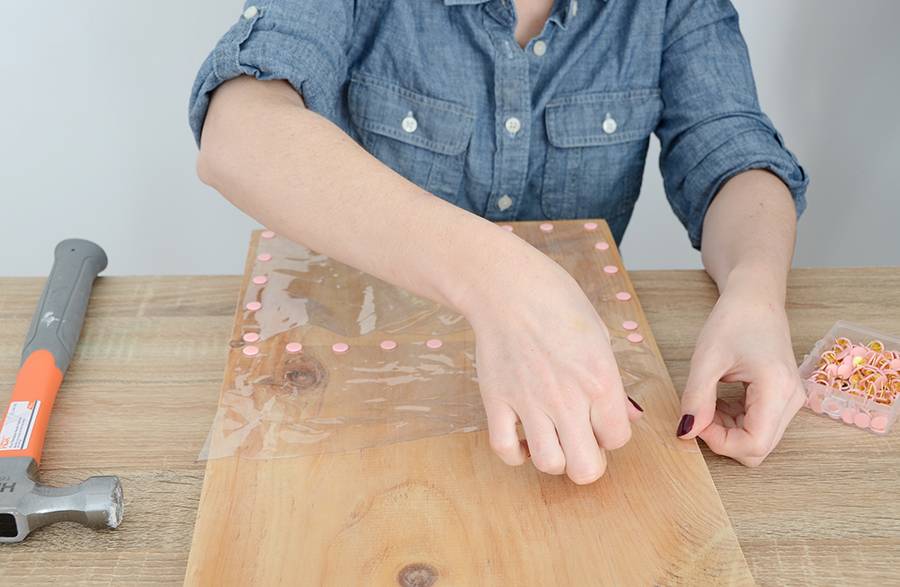
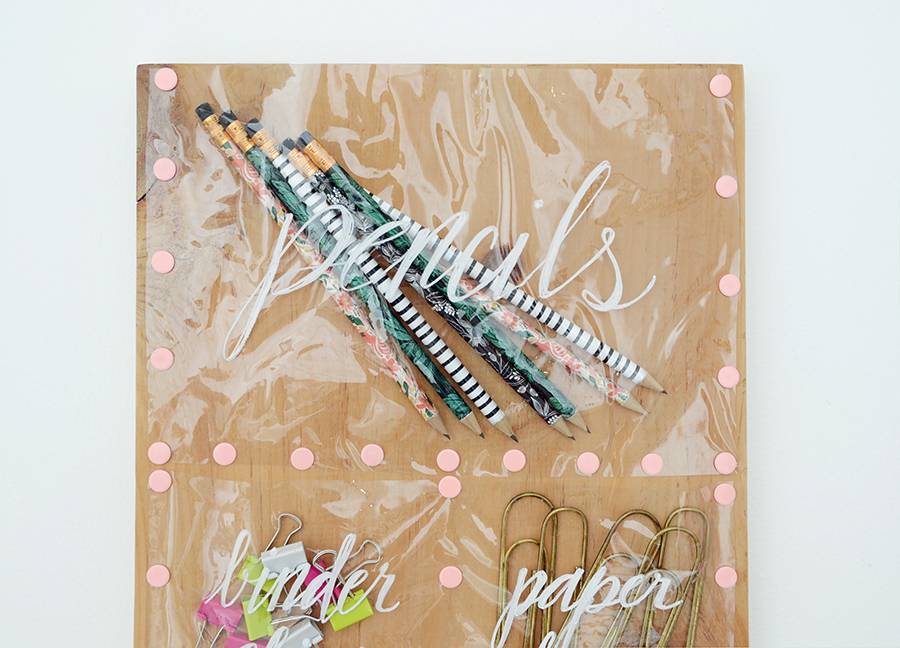
Create a third pocket for the top with the same instructions as the first pocket, size 12 x 9. You can write on the pockets using a chalk marker – just let it dry before you touch it. If you want to remove the text later, just dampen a paper towel and wipe it clean.
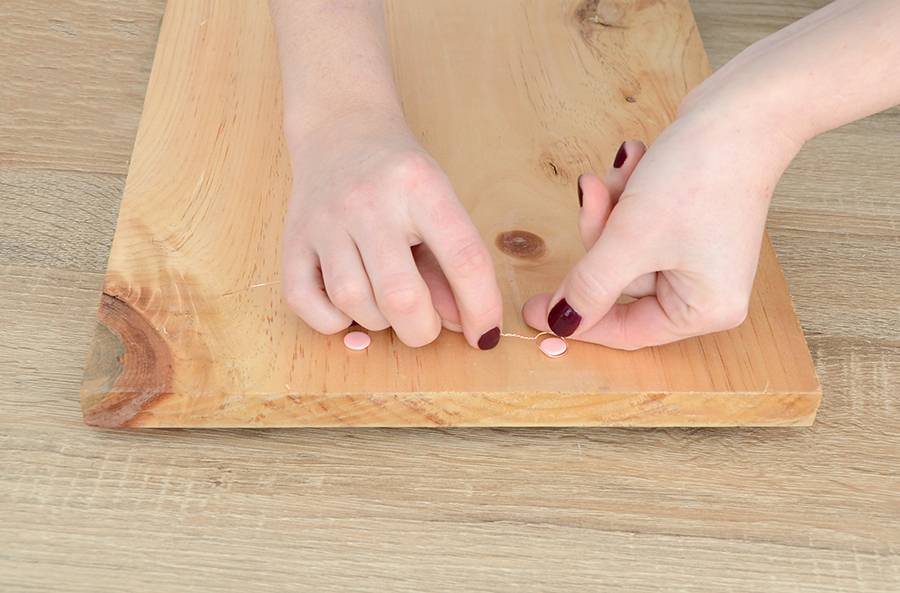
The last step is to create a hanger on the back. Place two pushpins on the back at the top, but don’t push them in fully. Form a loop at one end of the wire and hook it around one pushpin, pulling it tight. Make a loop on the other side, wrap it around the other pushpin and pull it taut. Hammer the pins in fully.
Hang it on a nail on the wall, and you’re ready to get organized! Fill it up with all of the office supplies that normally litter your desk and your workspace will be nice and tidy for the new year.
You can customize this project in lots of different ways – paint the wood, choose different pushpin colors, or you might even choose to write a quote on the vinyl.
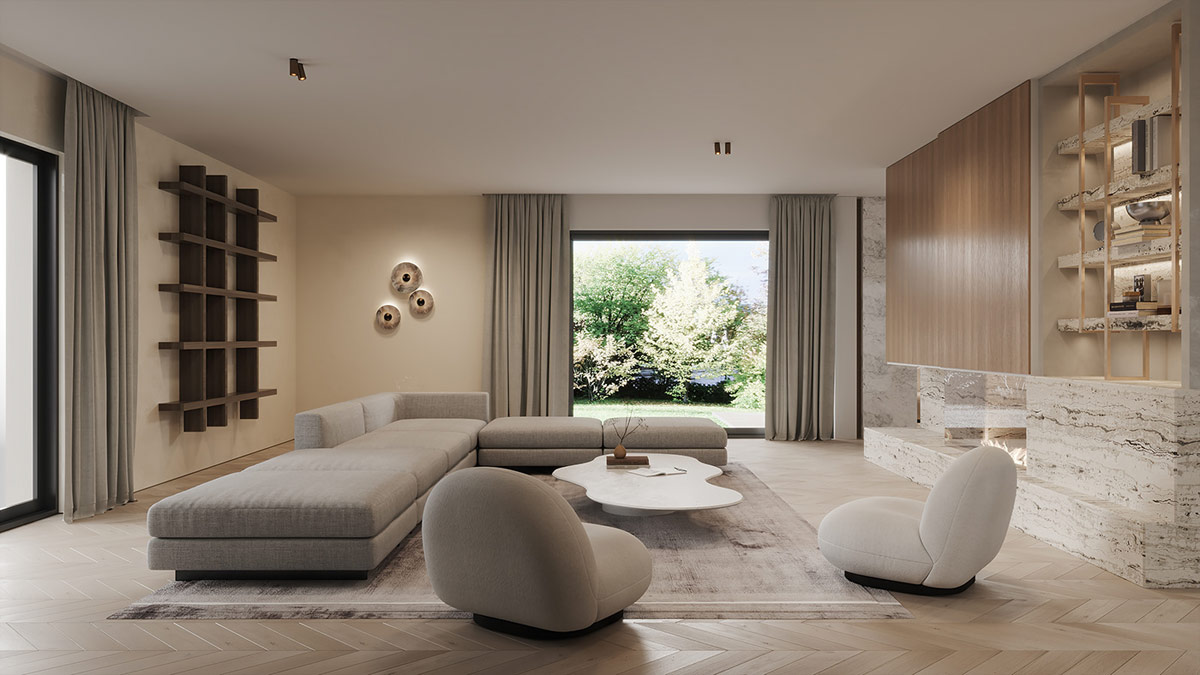
Luxurious stone decor elements and attractive wood tone come together to create these three special home designs that ooze sophisticated style. The first of these three restful interior designs is a creamy decor scheme that is uplifted by green garden views. Curved furniture silhouettes smooth the home layout, whilst black accents boldly disrupt its peaceful colour palette. The next home we tour is filled with impressive white marble moments and bespoke wood storage units that also serve as chic wall panelling. Lastly, we tour an atmospheric abode that was designed for a large family and their servants. Cosy living spaces welcome the family to enjoy quality time with one another.
1 |
Visualizer: Kut Victor & Ivan Petechel
We enter our first home tour in a luxurious living room. The wall colour is creamy, restful and light, and melds beautifully with the light wood chevron flooring.
An L-shaped sectional sofa arrangement embraces two sides of the lounge layout, which is directed toward a wonderful white marble fireplace design.
Advertisement
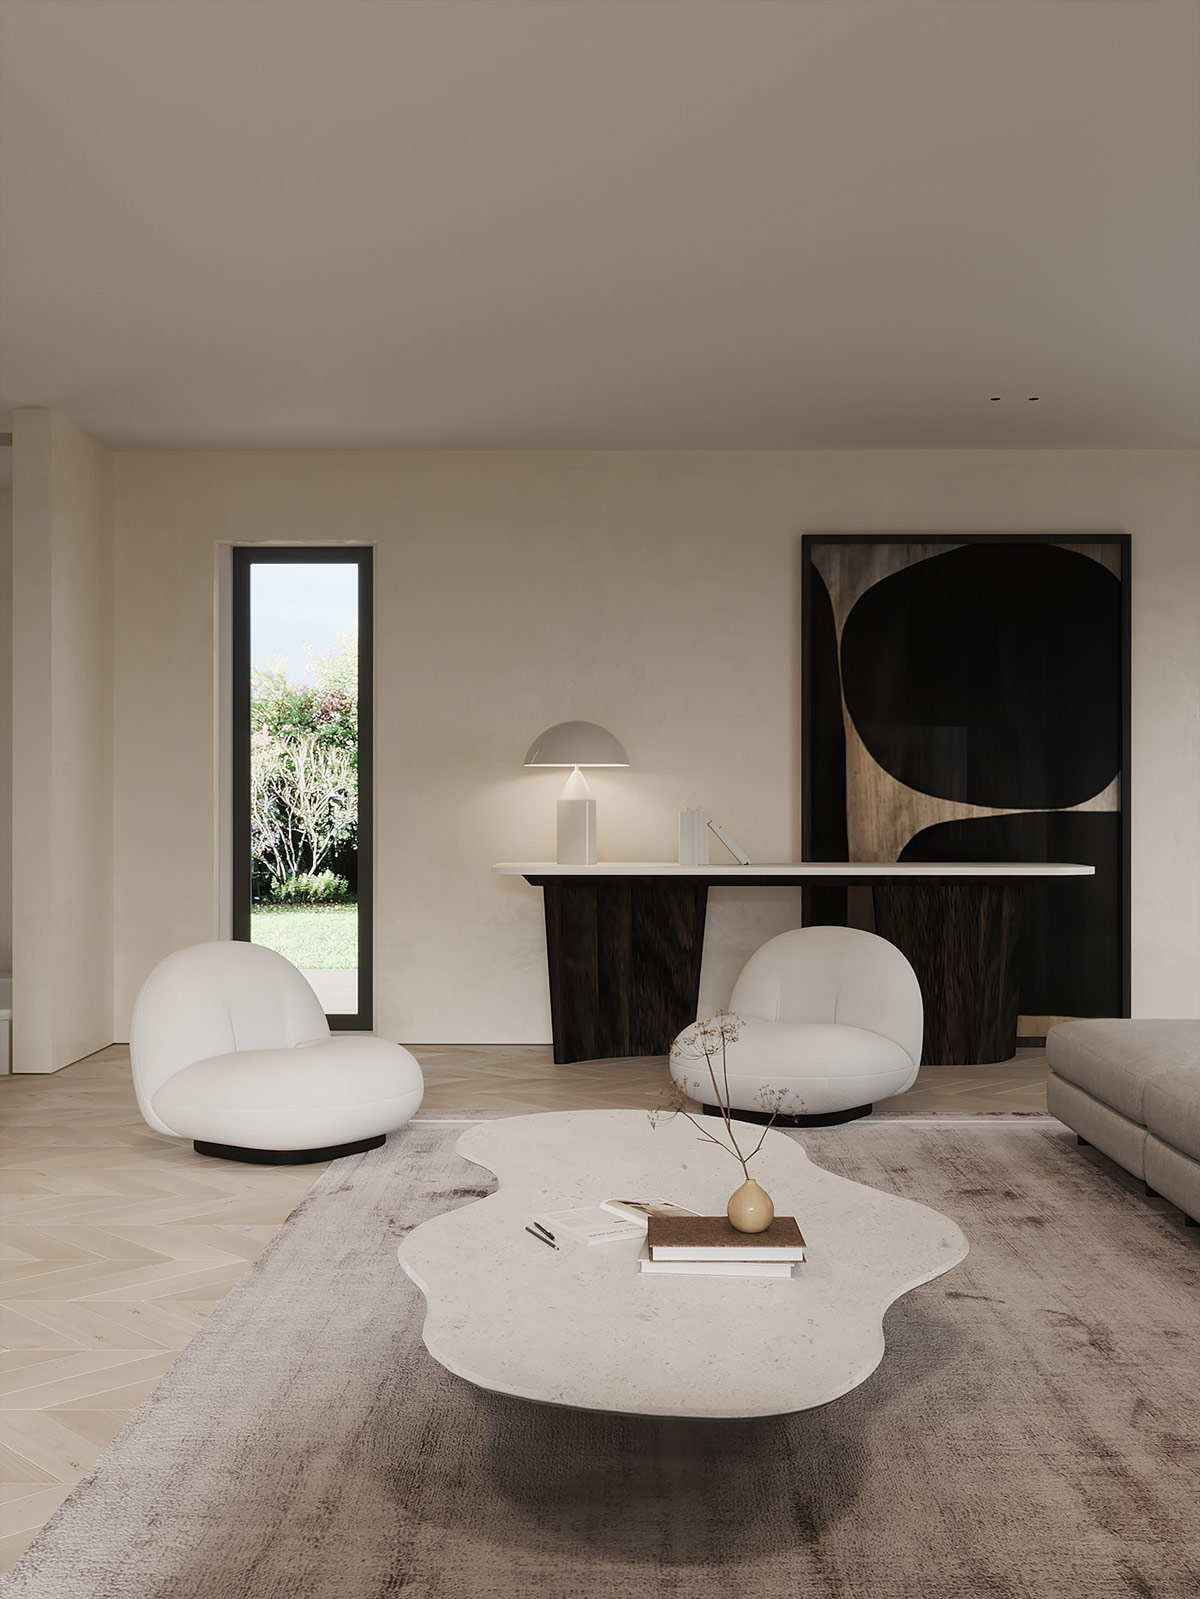
The two matching white chairs on the opposite side of the lounge furniture layout are a href=”https://fave.co/3z7A6zs” target=”_blank”>Pacha lounge chairs designed by Pierre Paulin for Gubi. A freeform white stone coffee table complements the lounge chairs’ curved silhouettes.
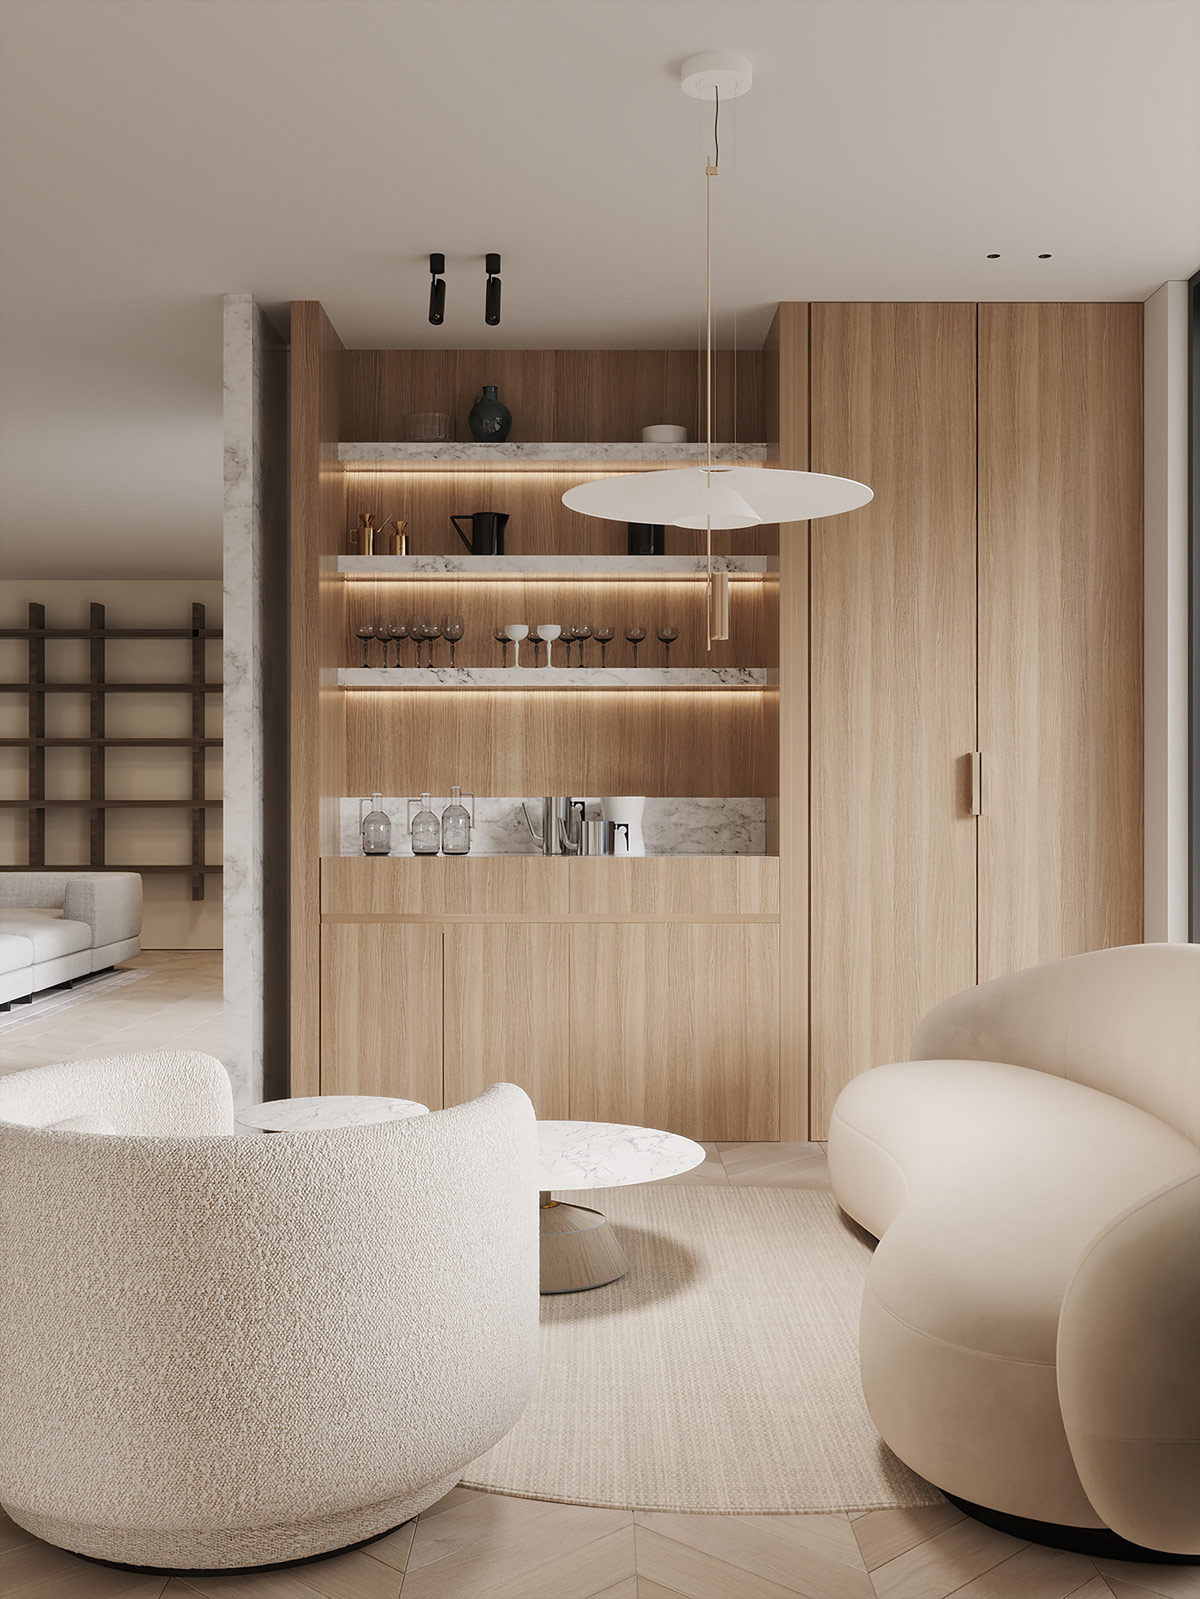
A series of marble shelves and wooden units house a selection of wine glasses, carafes, a coffee pot, and a teapot. LED ribbons brightly illuminate the vessels.
The small drinks lounge features a large picture window, which enriches the compact space with an expansive view of the garden.
Advertisement
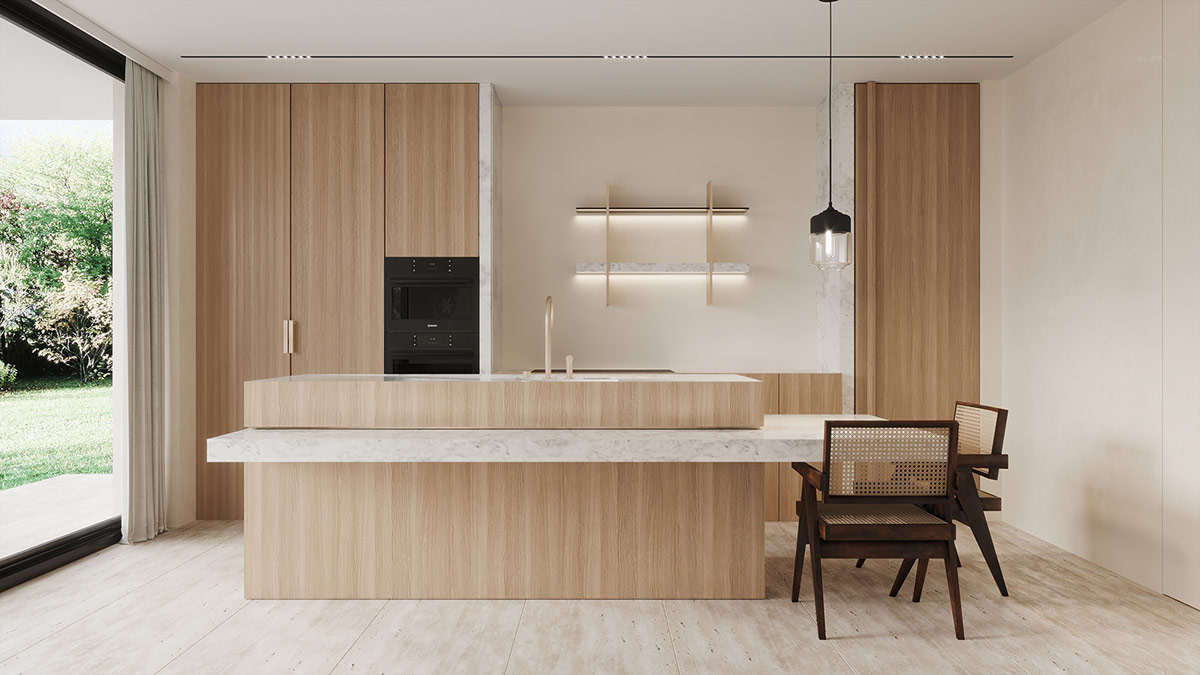
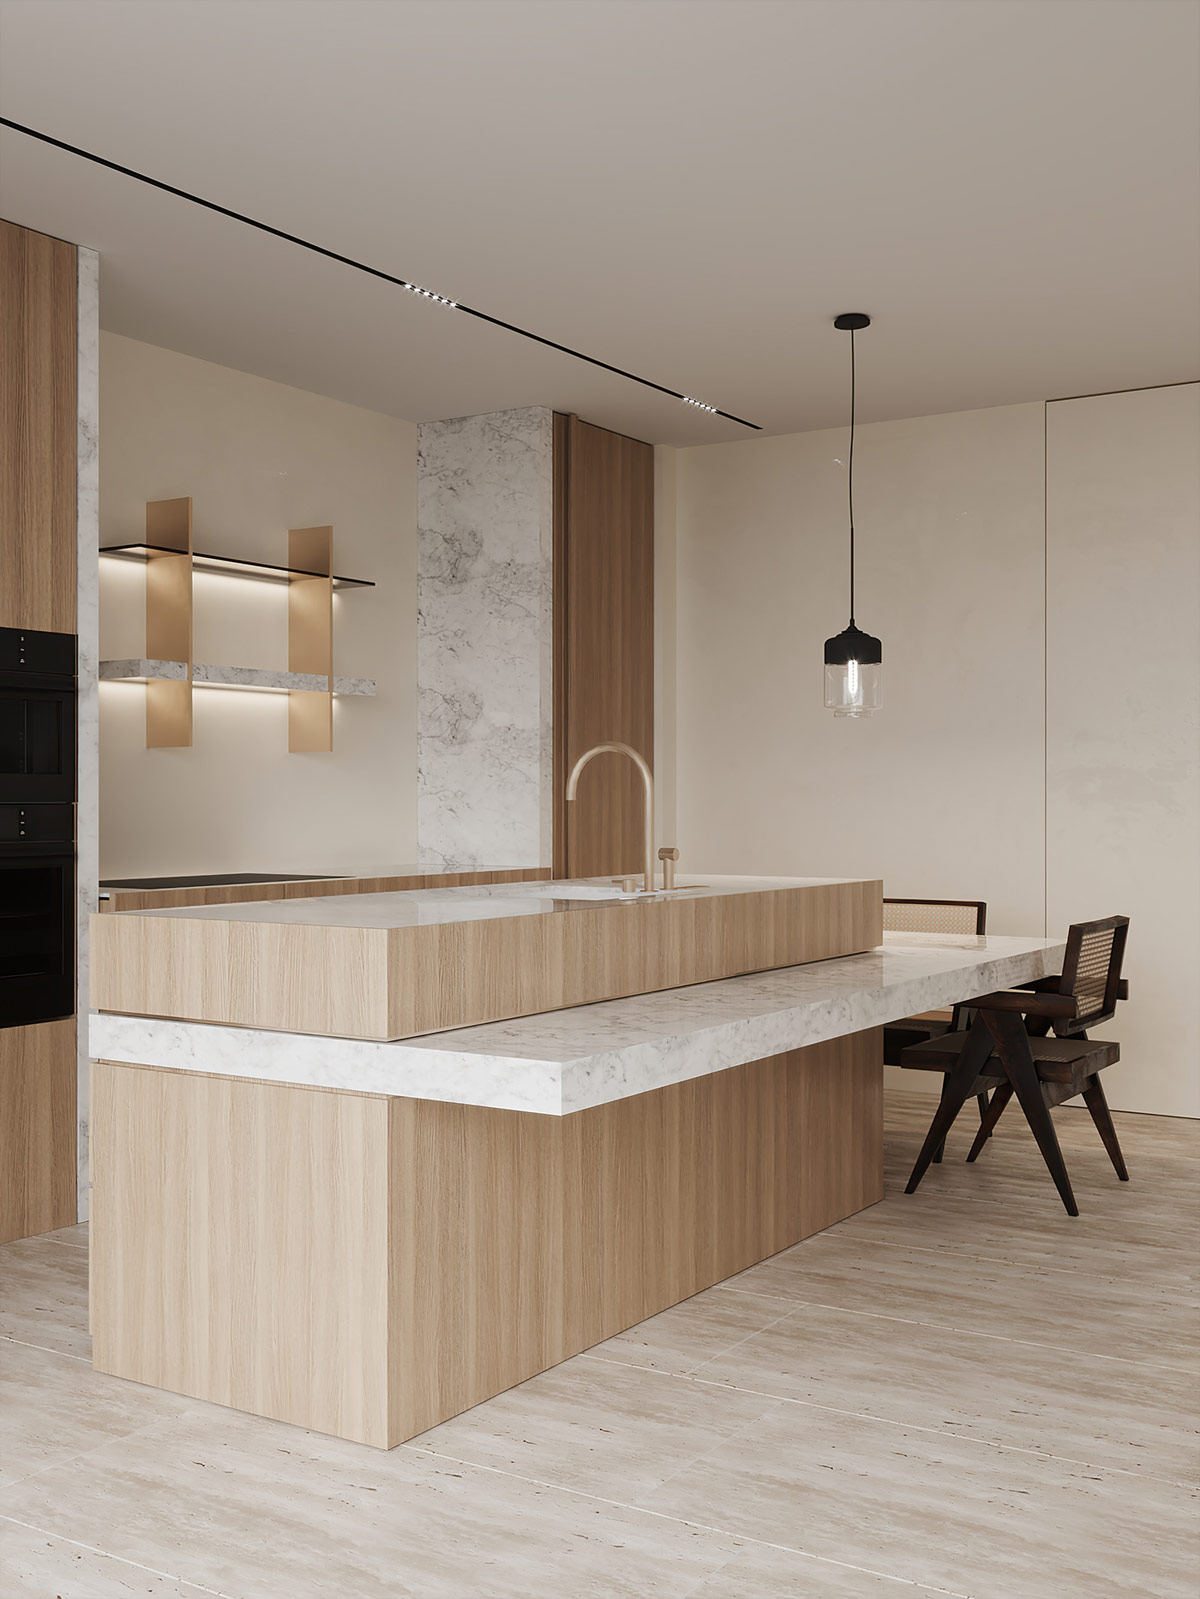
Behind the formal dining area, a central kitchen island doubles as a casual dining spot that’s ideal for breakfast time or just a quick coffee.
A single black pendant light illuminates the breakfast table at the end of the kitchen island. Two dining chairs and a black integrated oven provide additional dark moments to disrupt the light wood and cream coloured kitchen decor.
A champagne gold kitchen tap gleams luxuriously upon the polished white marble countertop.
The dining chairs at the kitchen island are the Easy chair designed by Pierre Jeanneret.
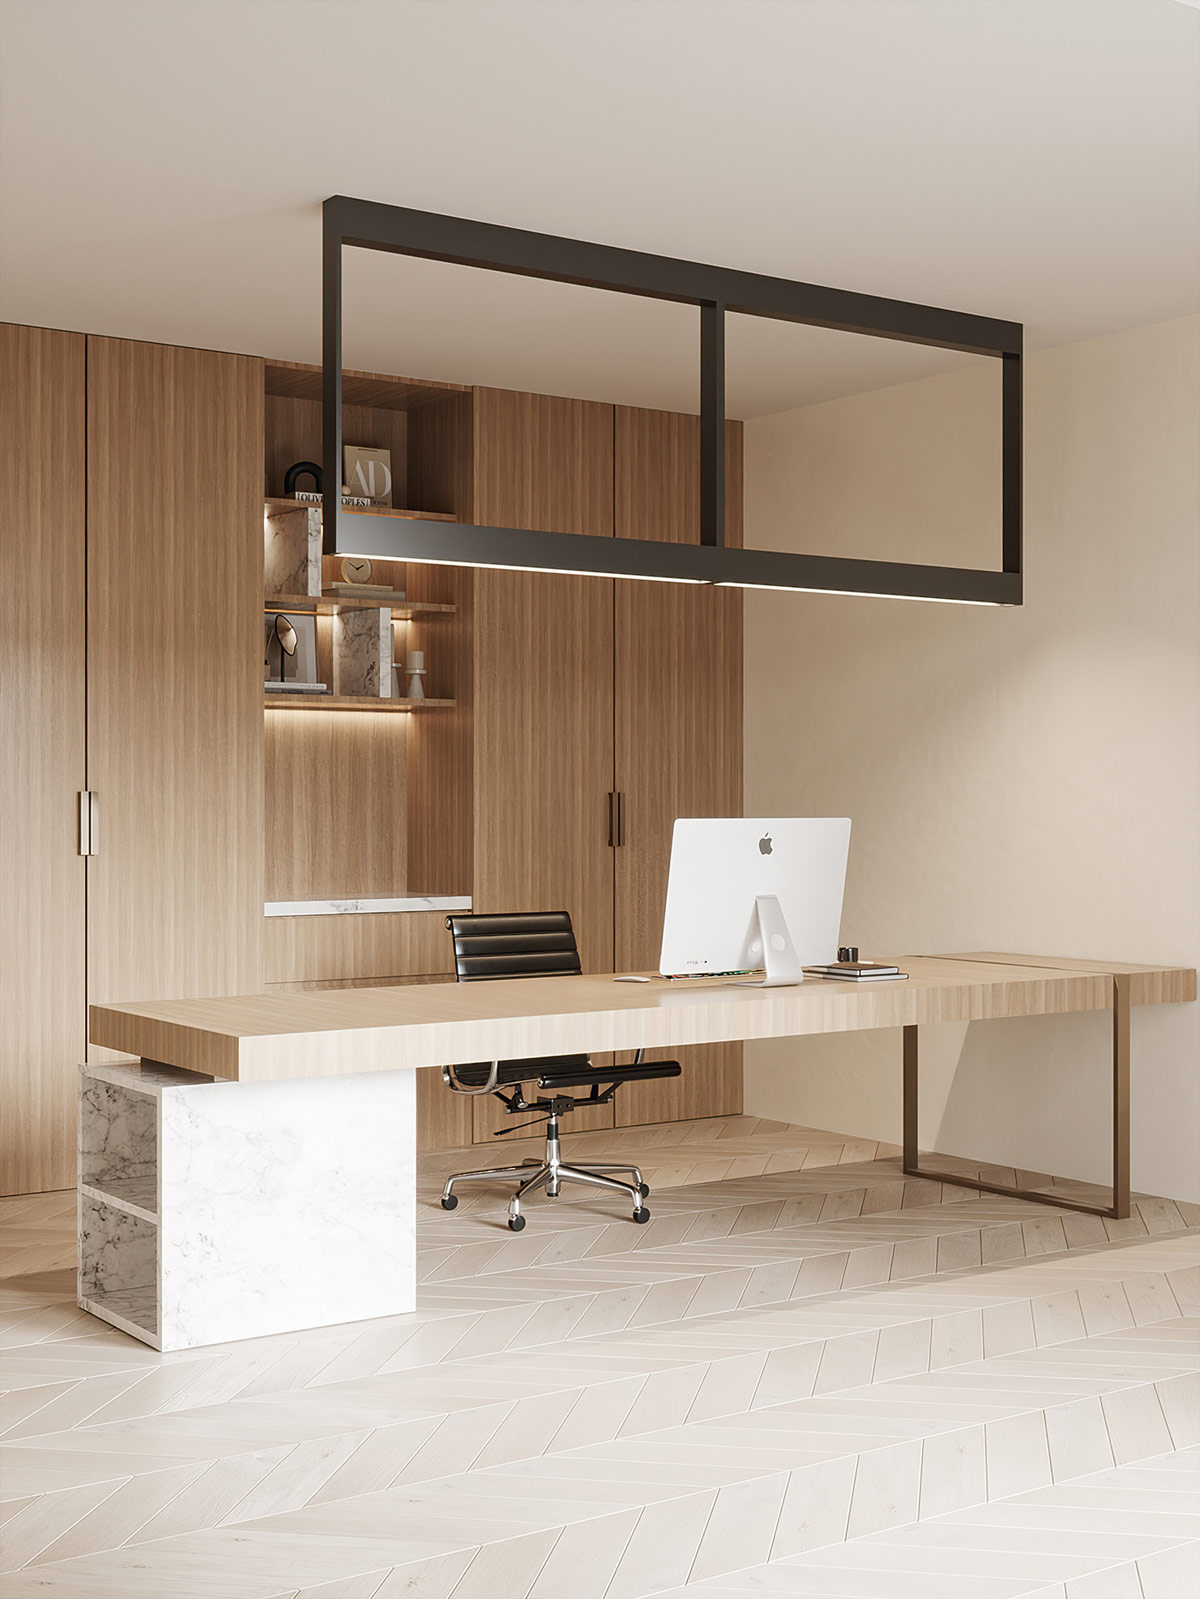
The home office is a large and luxurious space with a linear modern desk.
A black swivel chair coordinates with the unique linear light installation.
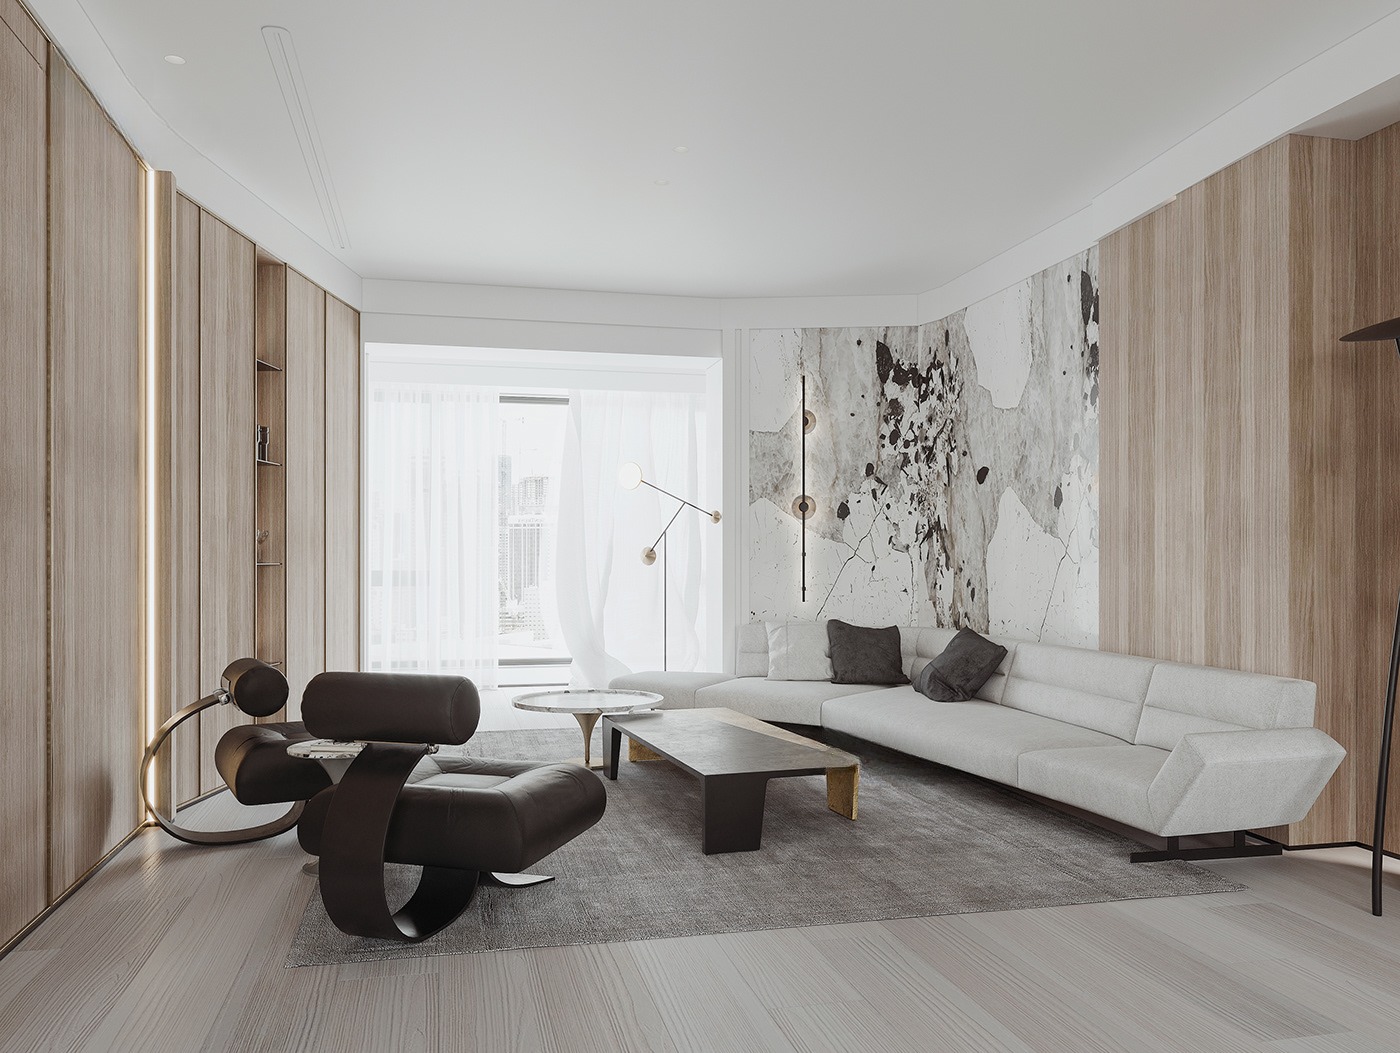
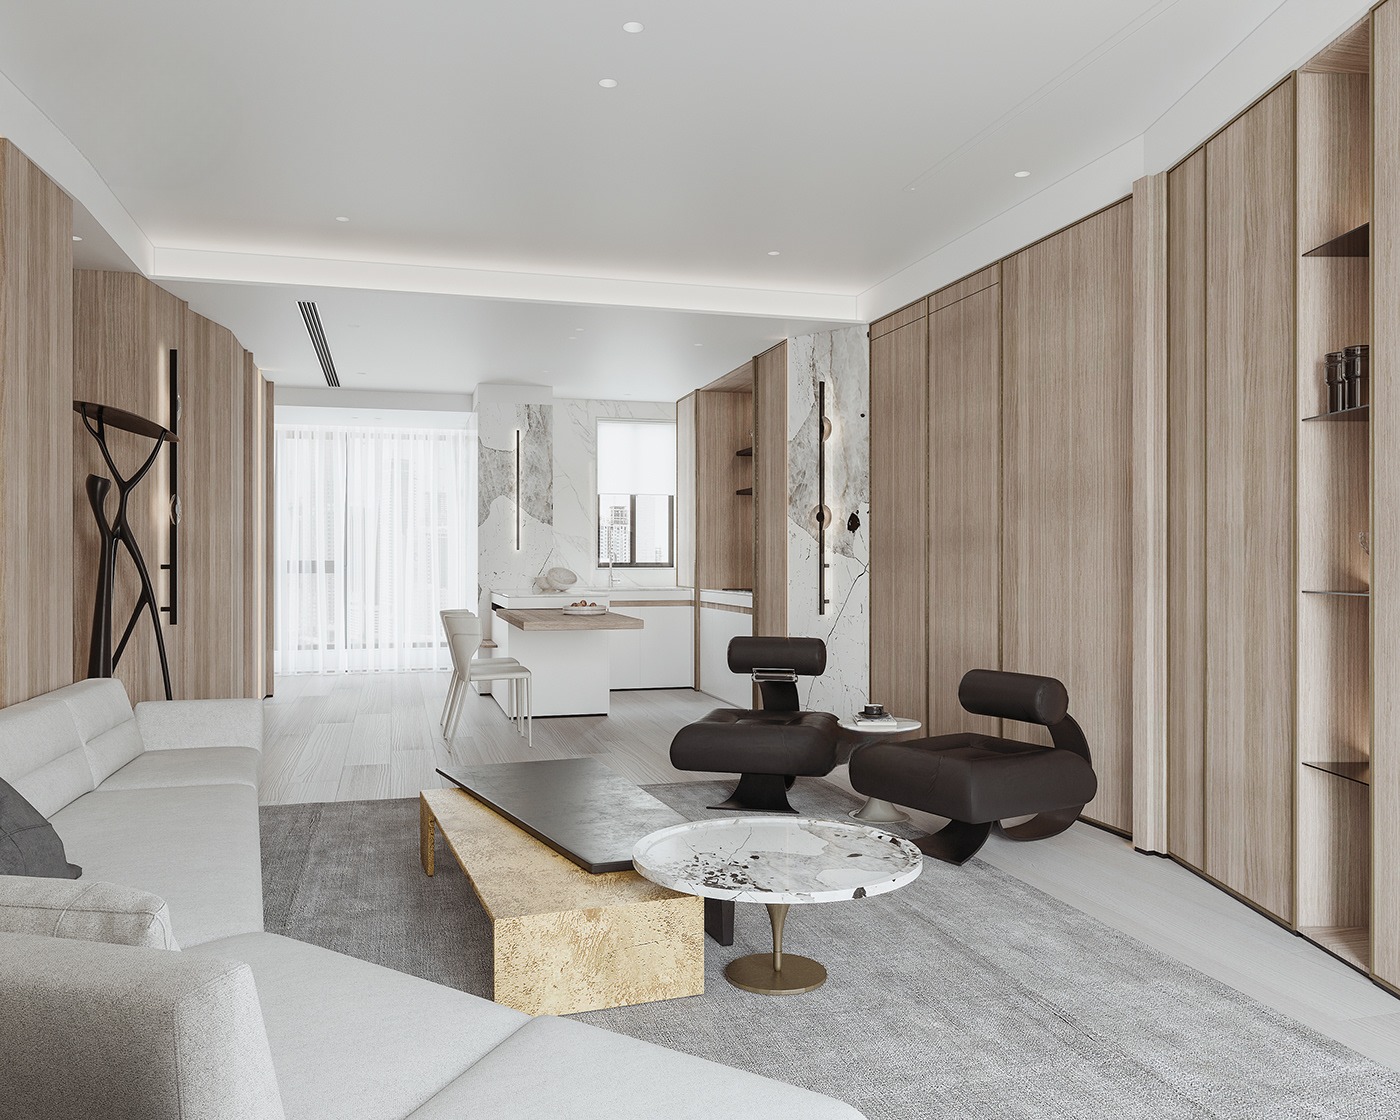
The second of our three home tours begins in a wood and white marble encased lounge space. Unique lounge chairs curve bold black lines into the peaceful decor scheme.
A large area rug lays down a soft grey island for the black lounge chairs and a white leather sofa.
A round white marble coffee table nests with a unique geometric counterpart.
The wood panelled walls conceal generous storage spaces. A slender built-in bookcase breaks the run, along with a sliver of atmospheric LED light.
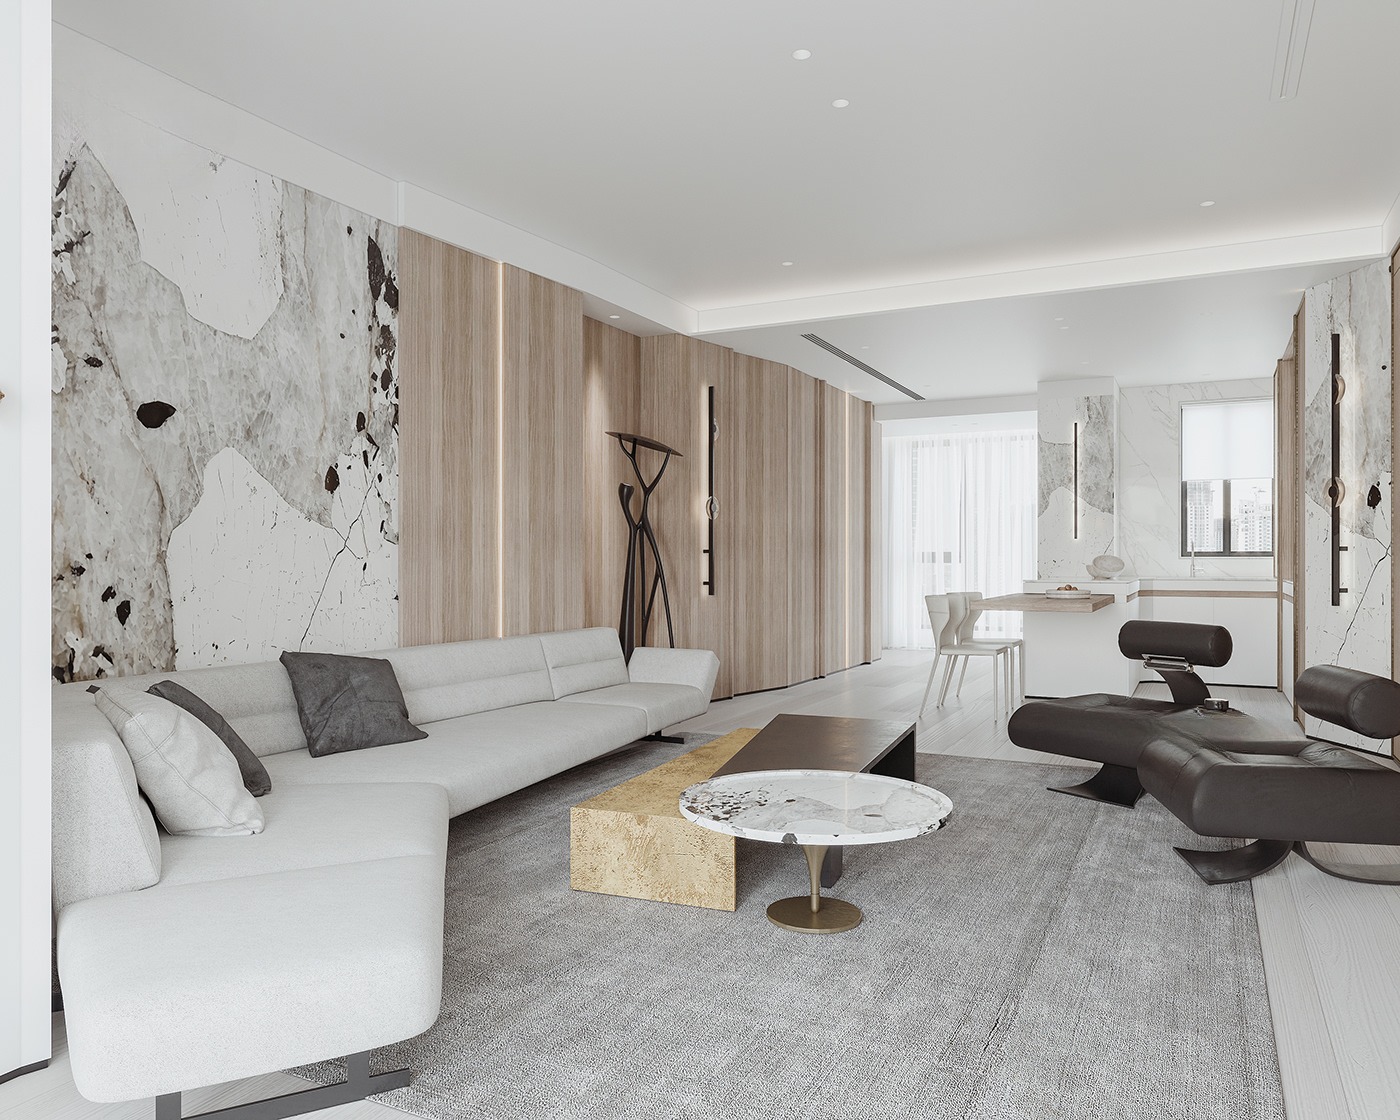
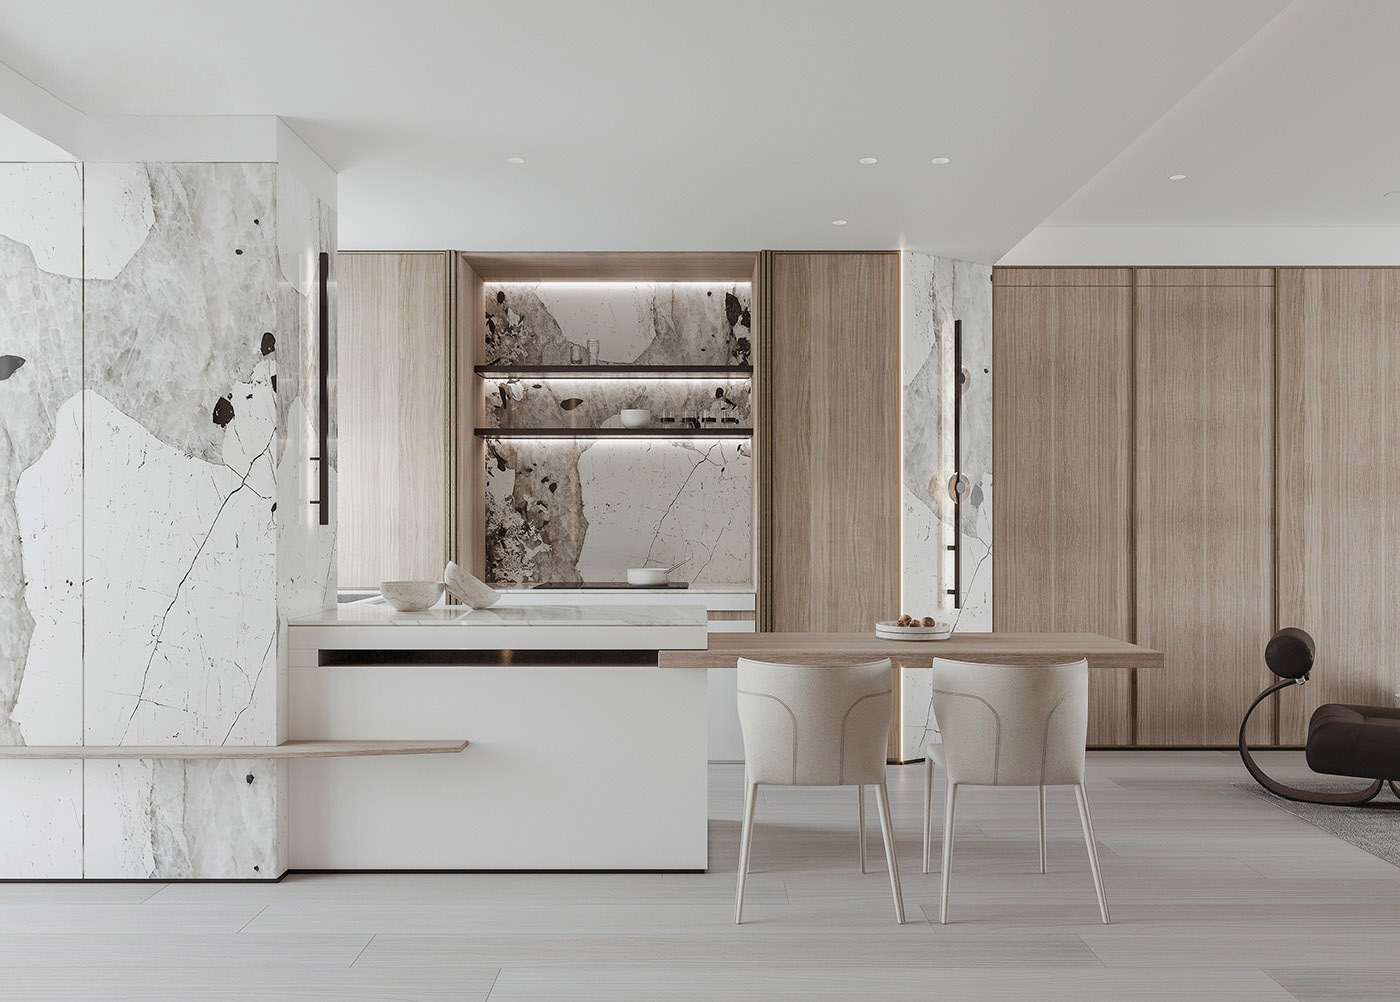
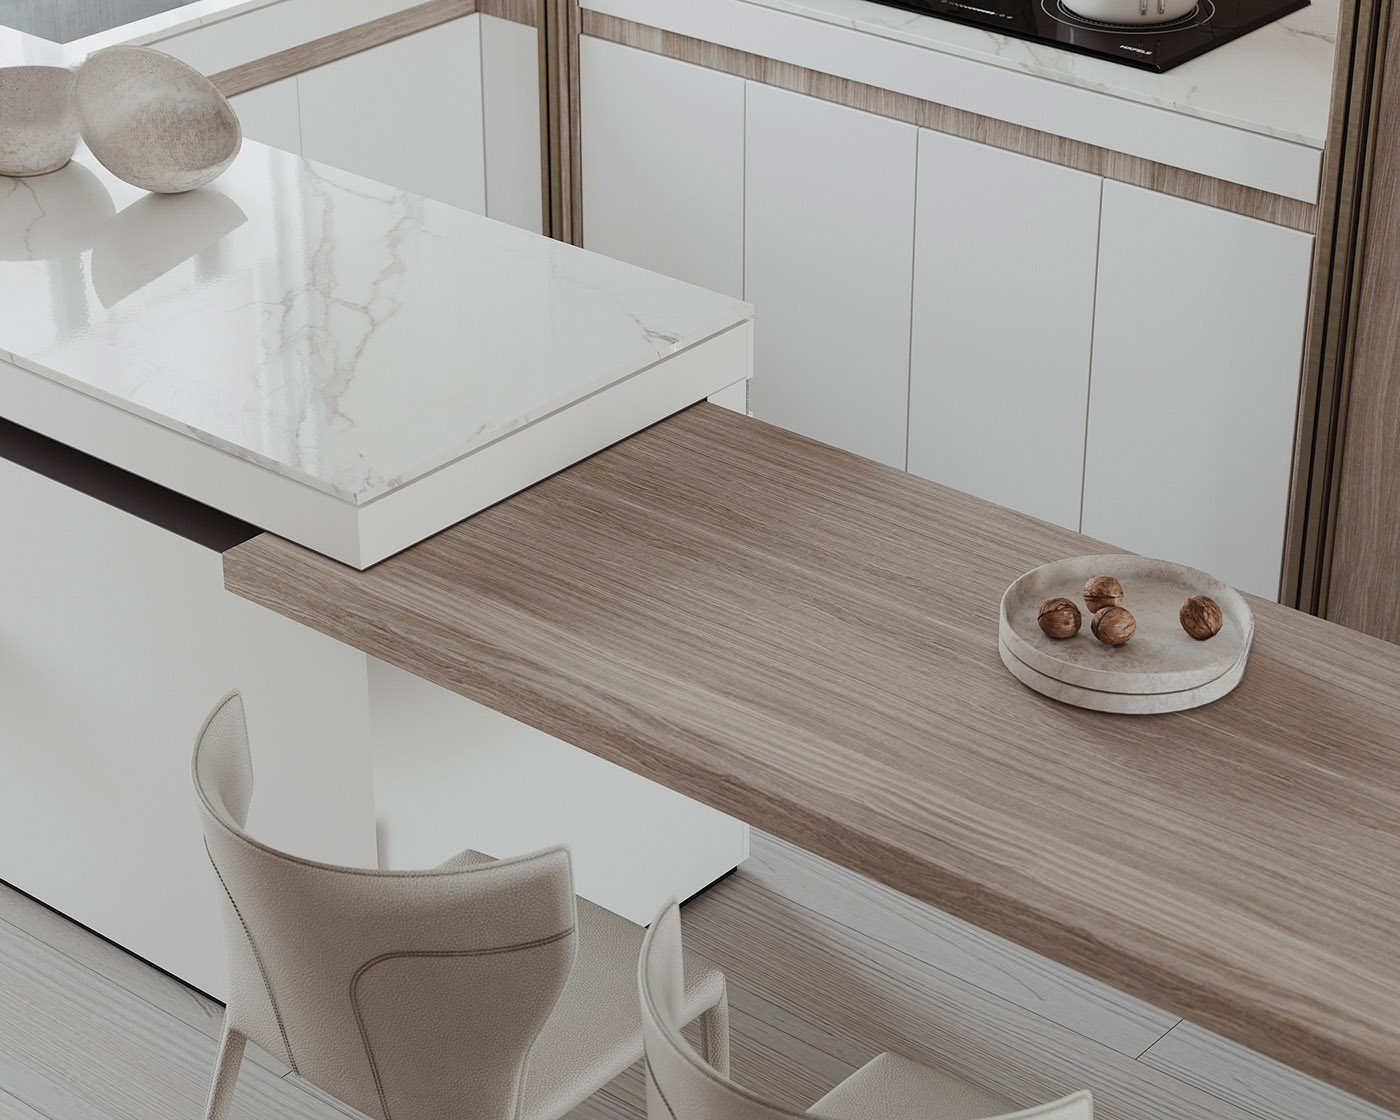
The luxurious kitchen is cocooned within fabulous white marble slabs with dramatic grey and black vein.
Modern fruit bowls make centrepieces across the kitchen peninsula and adjoining dining table.
Decorative vases and books fill a bespoke shelving unit.
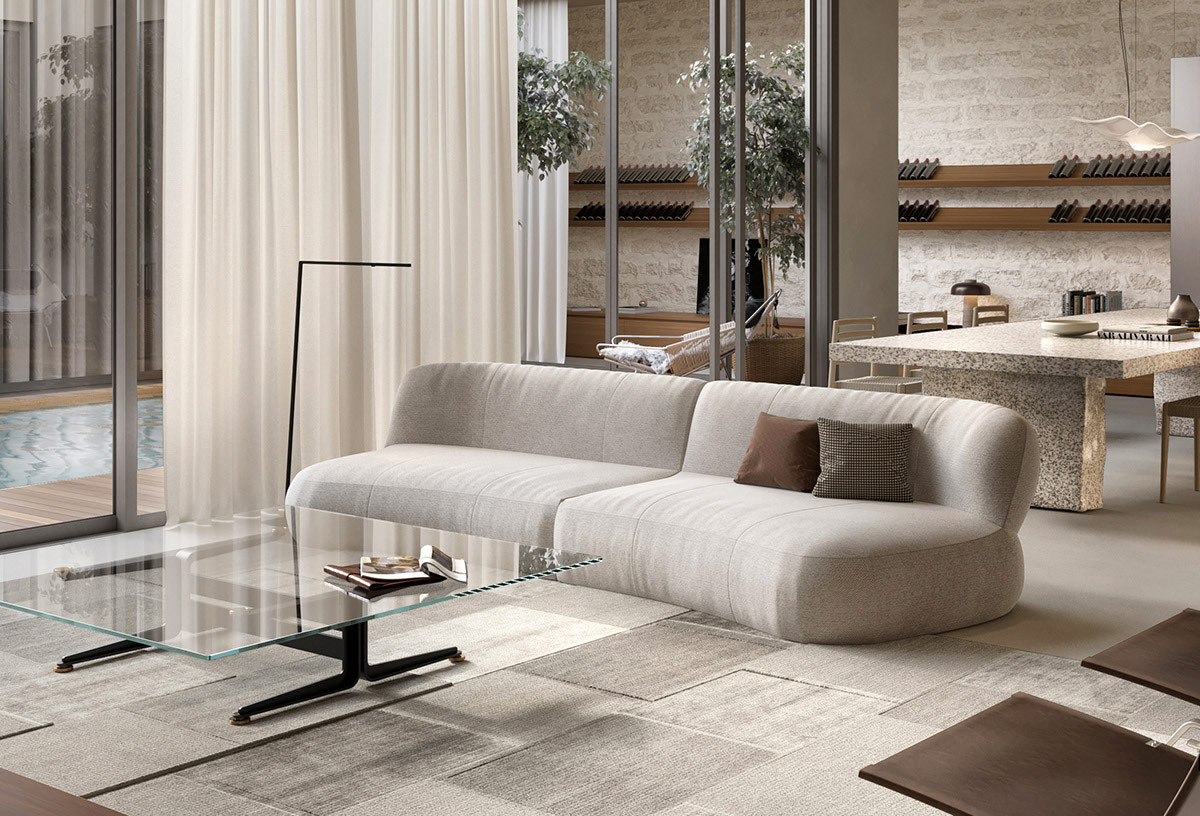
Our final home design is located in Saudi Arabia. This 415 square metre interior design was created for a private residence that would house a large family and their servants.
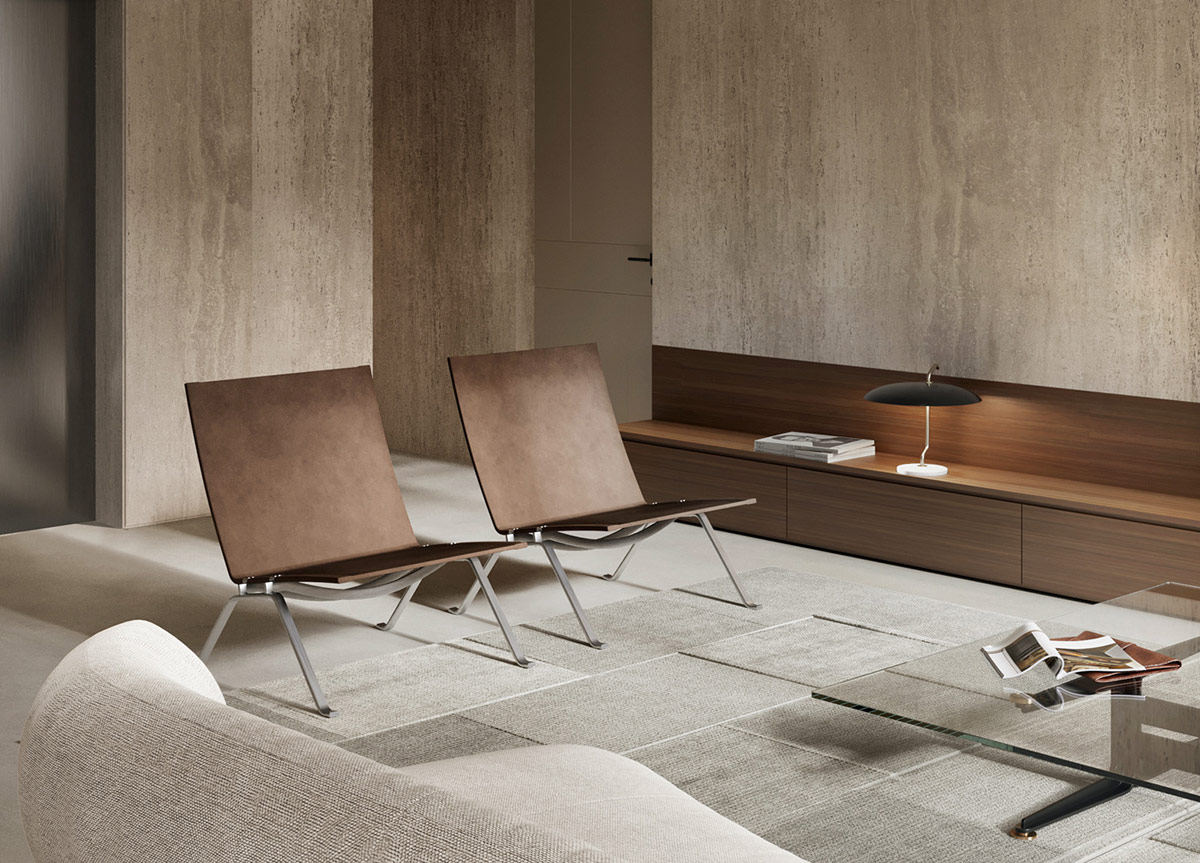
The lounge features a laconic yet atmospheric design scheme of light stone and rich wood tone. Earthy brown living room chairs complement the modern wood media unit.
A clear glass coffee table provides a large surface area without visually disrupting the lounge layout.
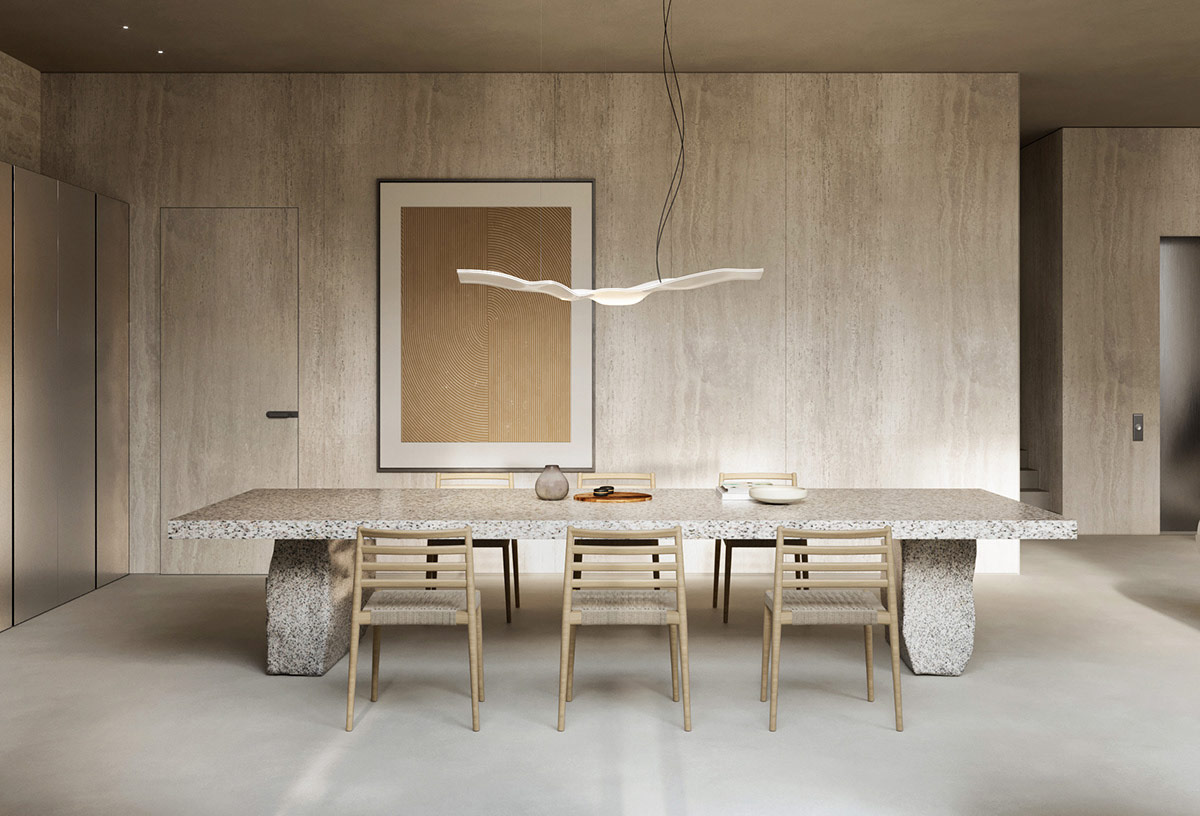
In the formal dining area, a long dining table seats six to eight people.
Wall art adds a rich brown accent to the dining room. Wine storage shelves stretch across an exposed brick feature wall.
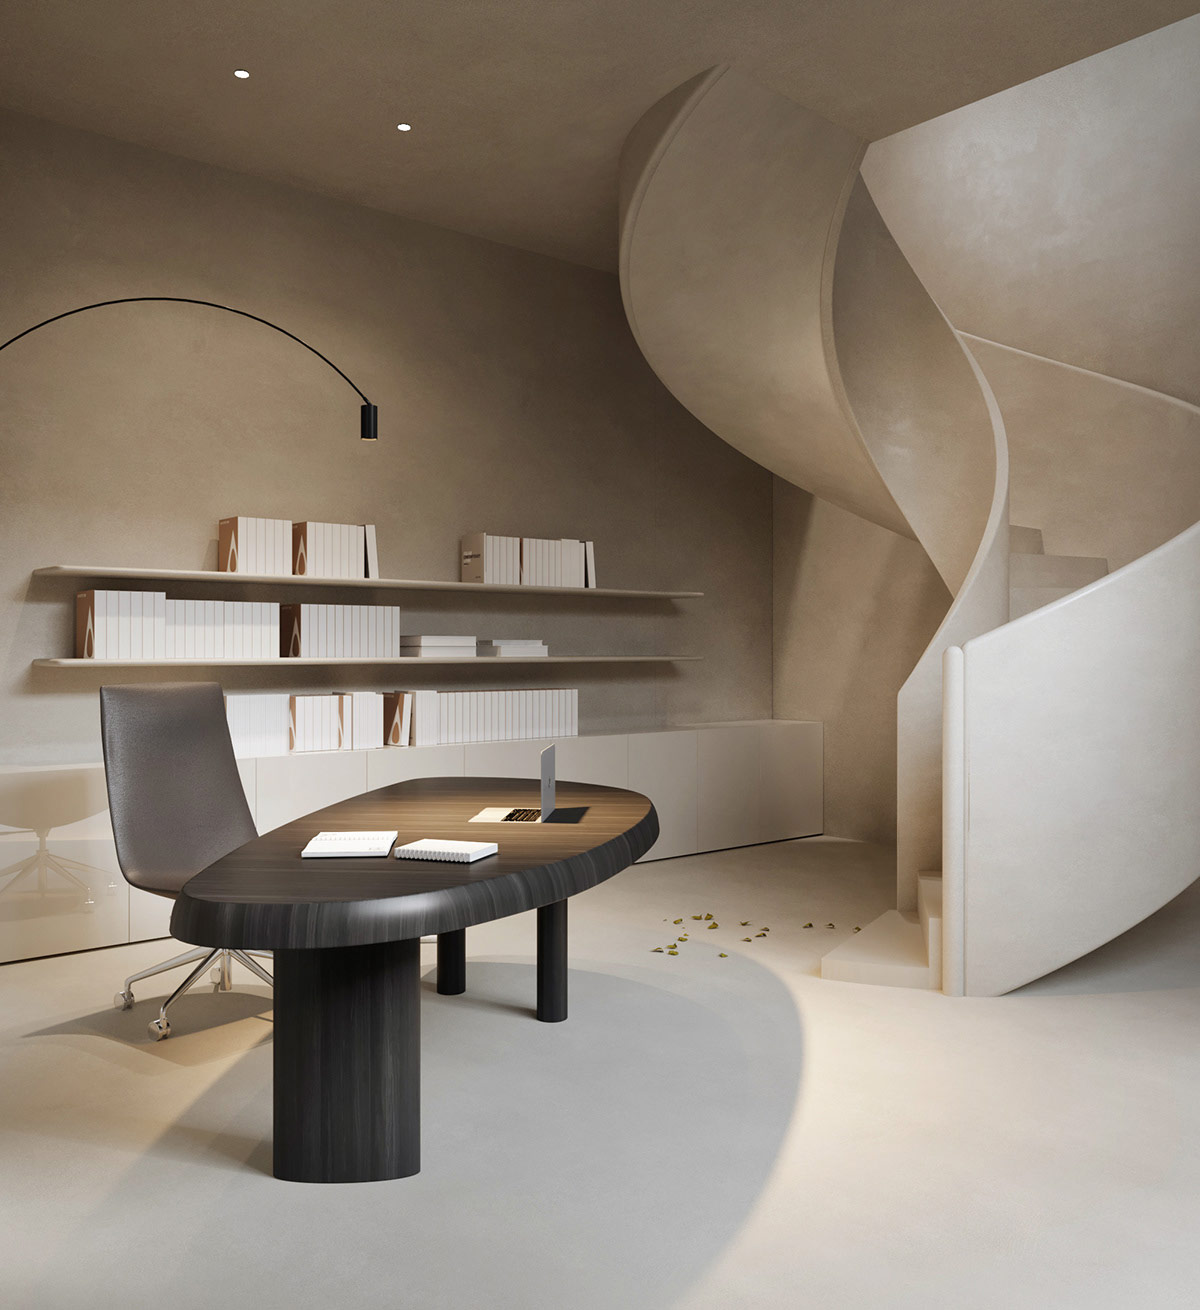
Floating bookshelves fill the wall behind the unique desk. A spiral staircase ascends to the second floor.
The large home also has an elevator for older family members.
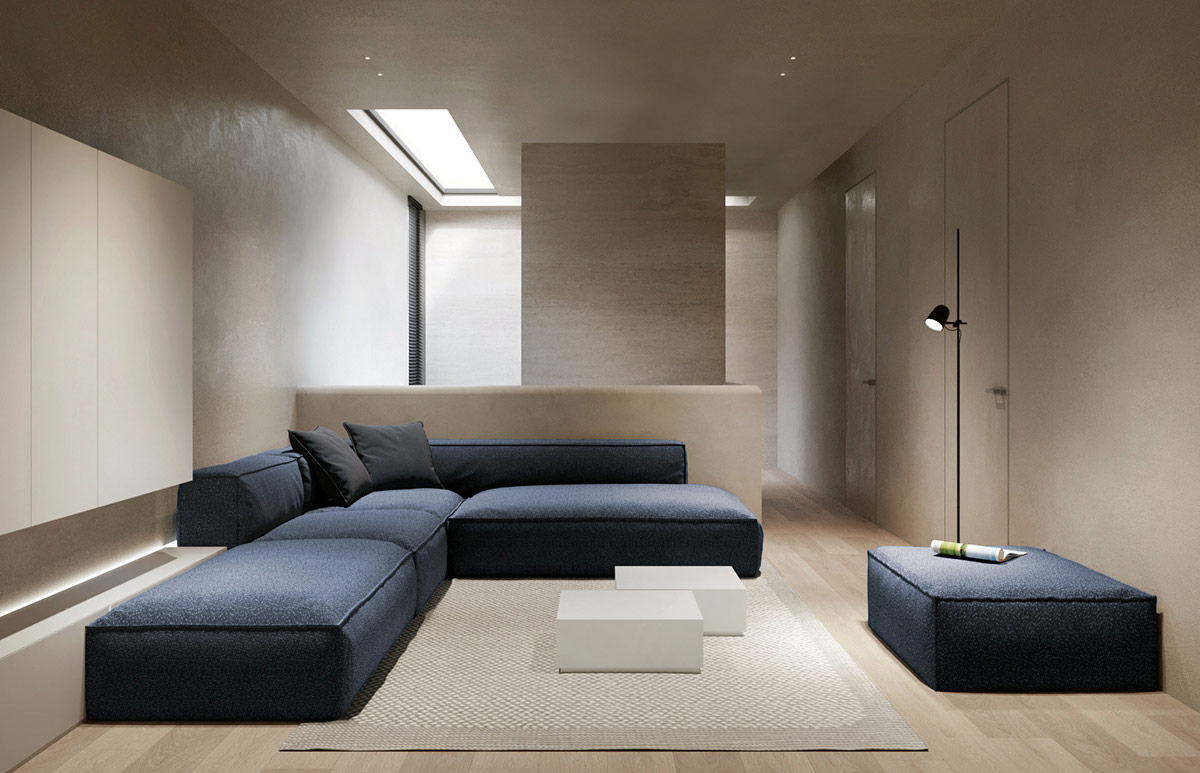
The upper floor lounge space gains a little colour from a deep blue modern sofa. An L-shaped skylight illuminates the stairwell below it.
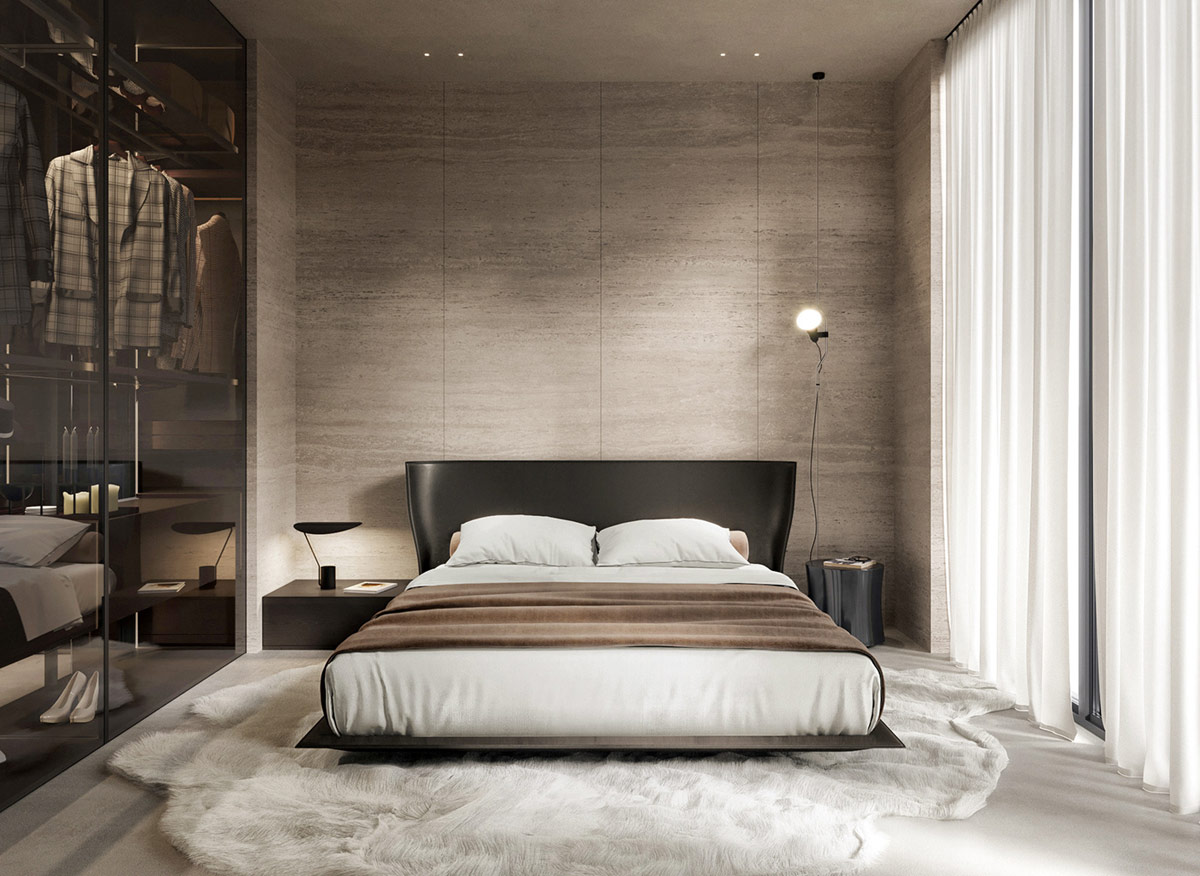
Inside the master suite, a modern winged bed design sinks cosily into an uber plush faux fur bedroom rug. Glass closets put a designer clothing collection on display.
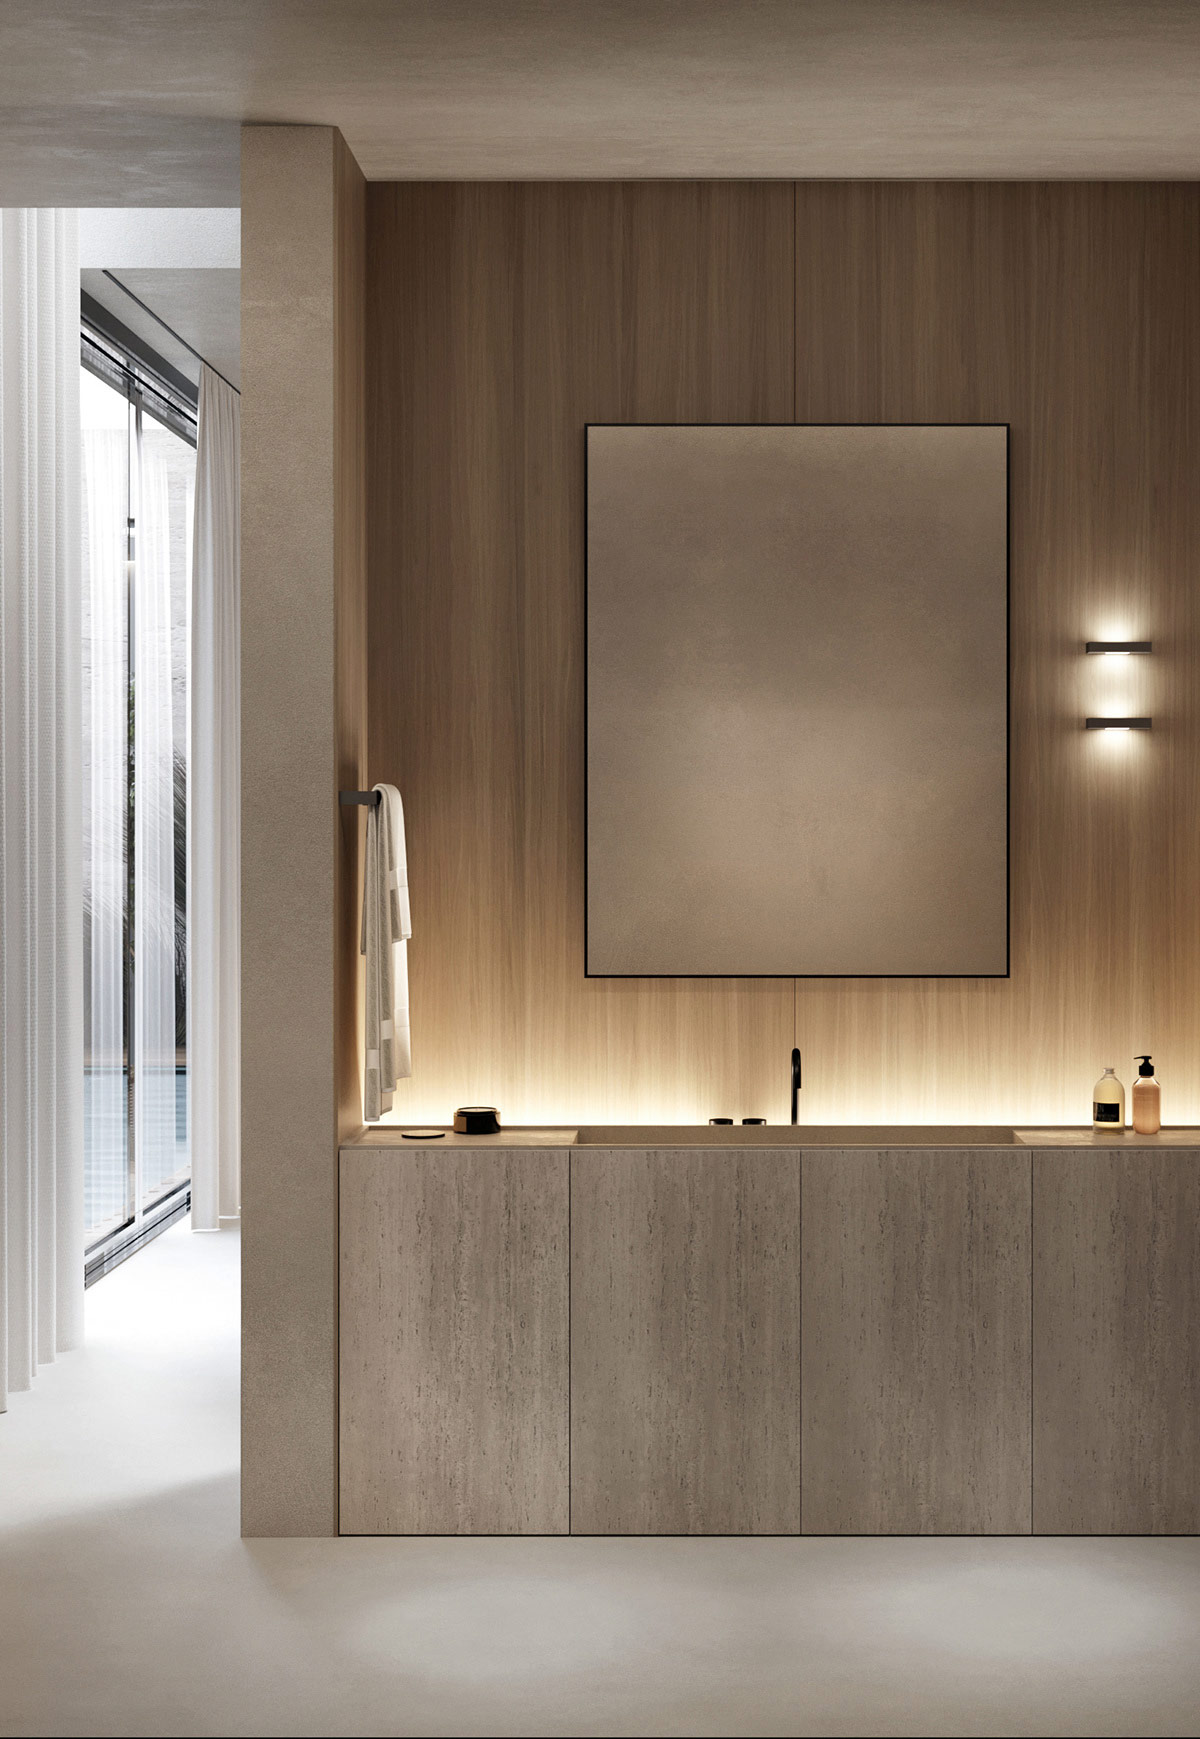
The ensuite comes alive under golden mood lighting, which glows across the countertop of the vanity unit. Modern wall lights burn brightly by the bathroom mirror.
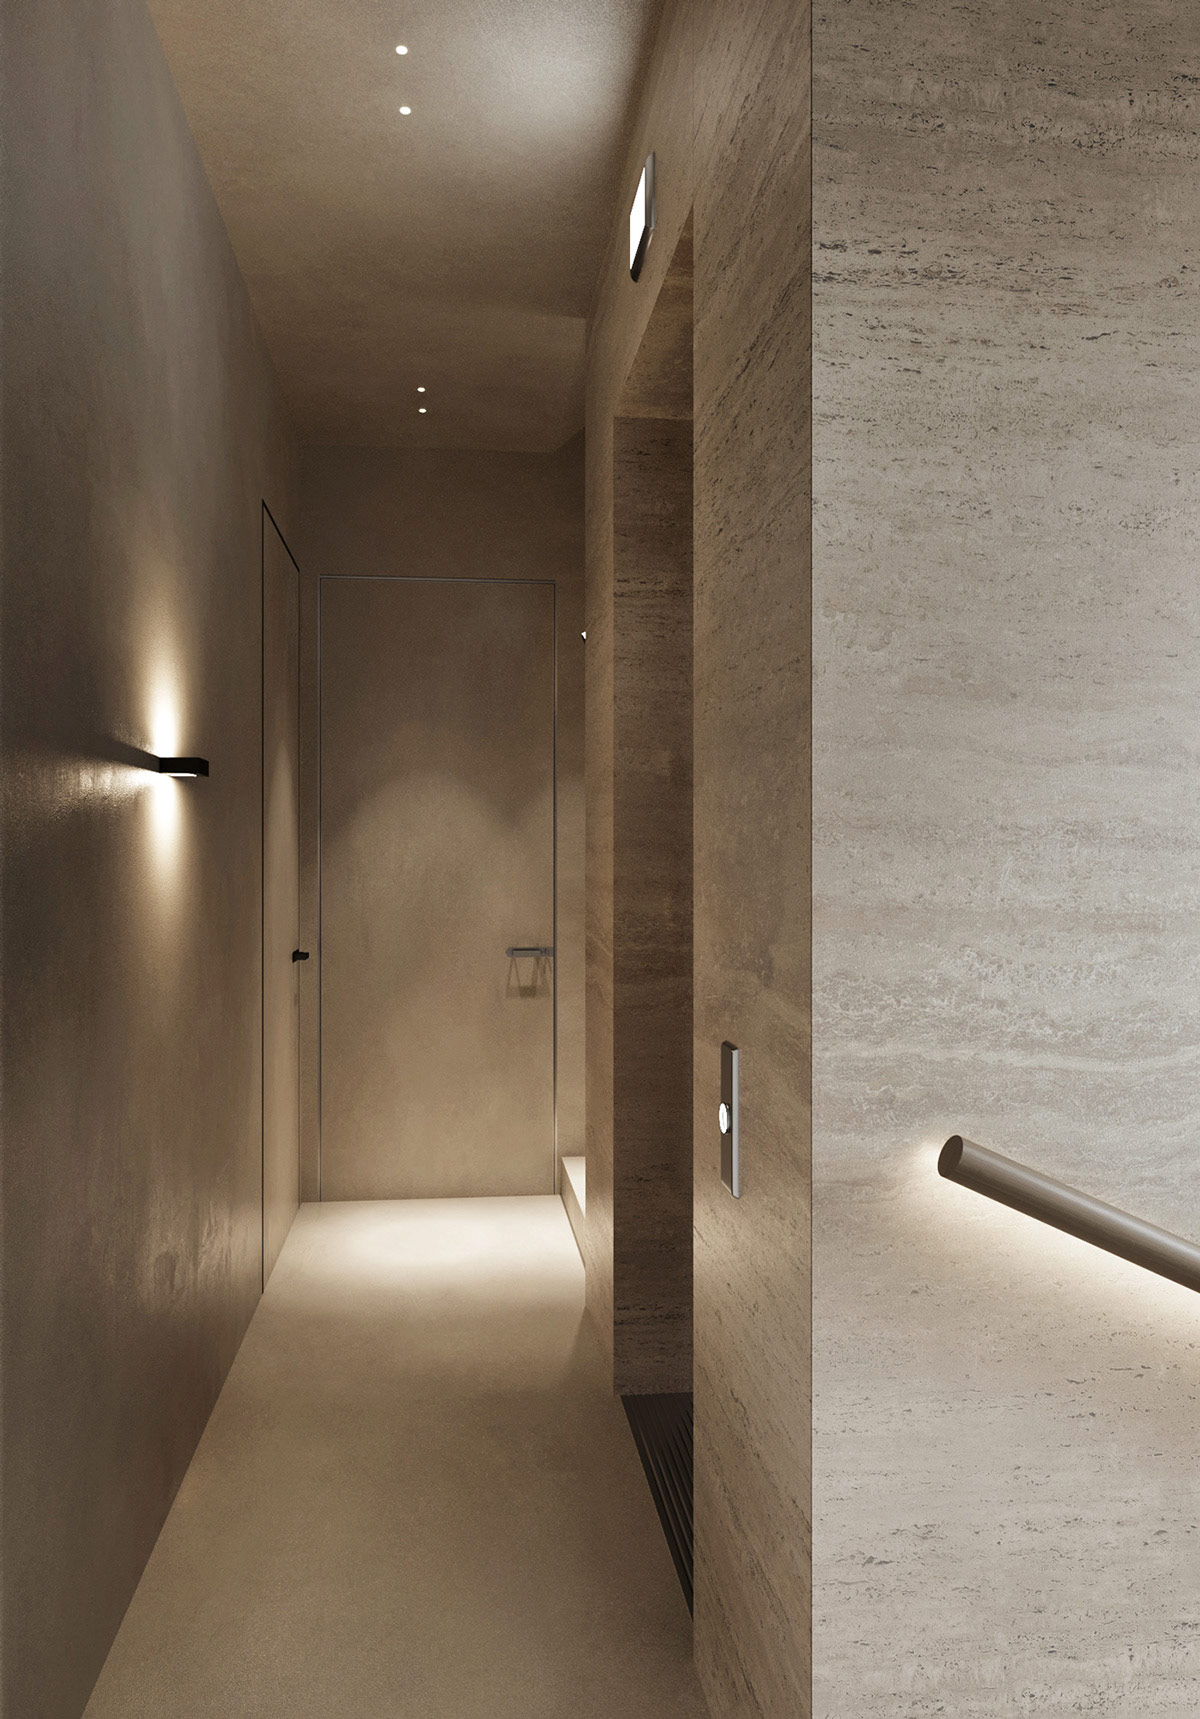
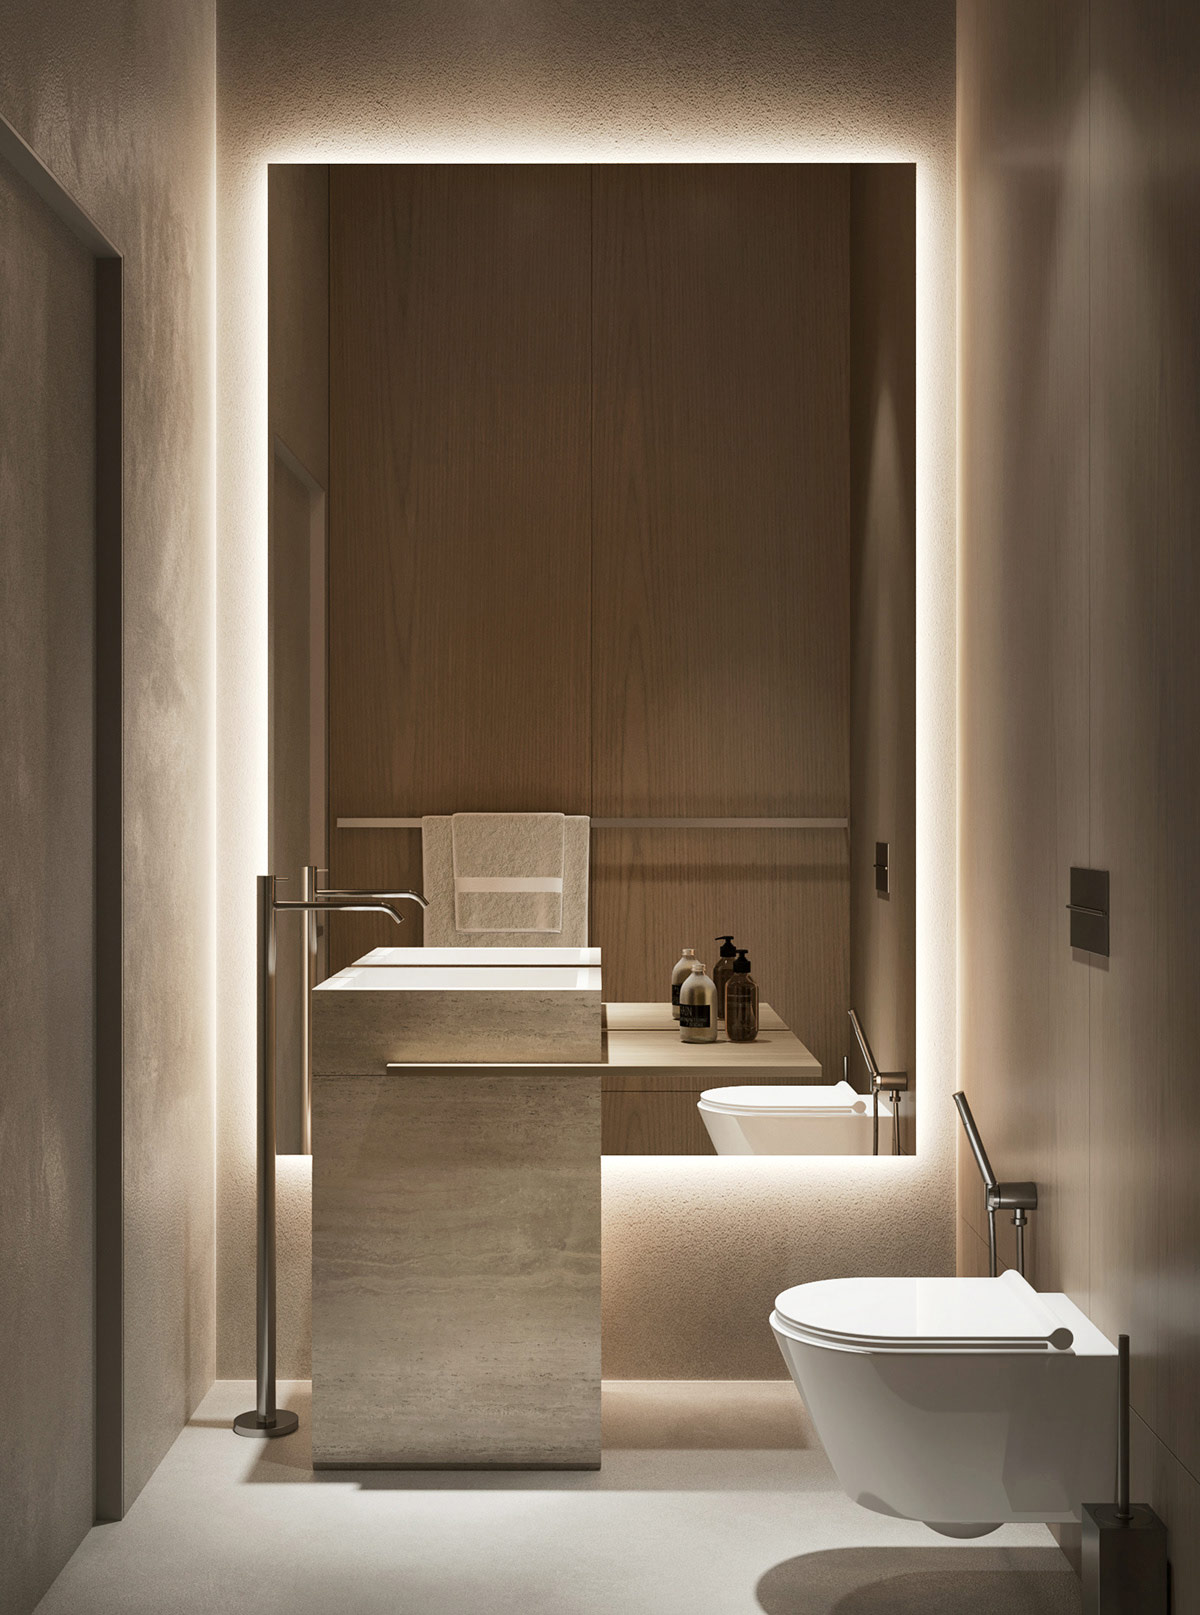
A similarly atmospheric lighting scheme enlivens the small powder room. A large backlit mirror fills the wall behind a modern pedestal sink to increase the sense of space. A wall hung toilet visually opens up the floor area.
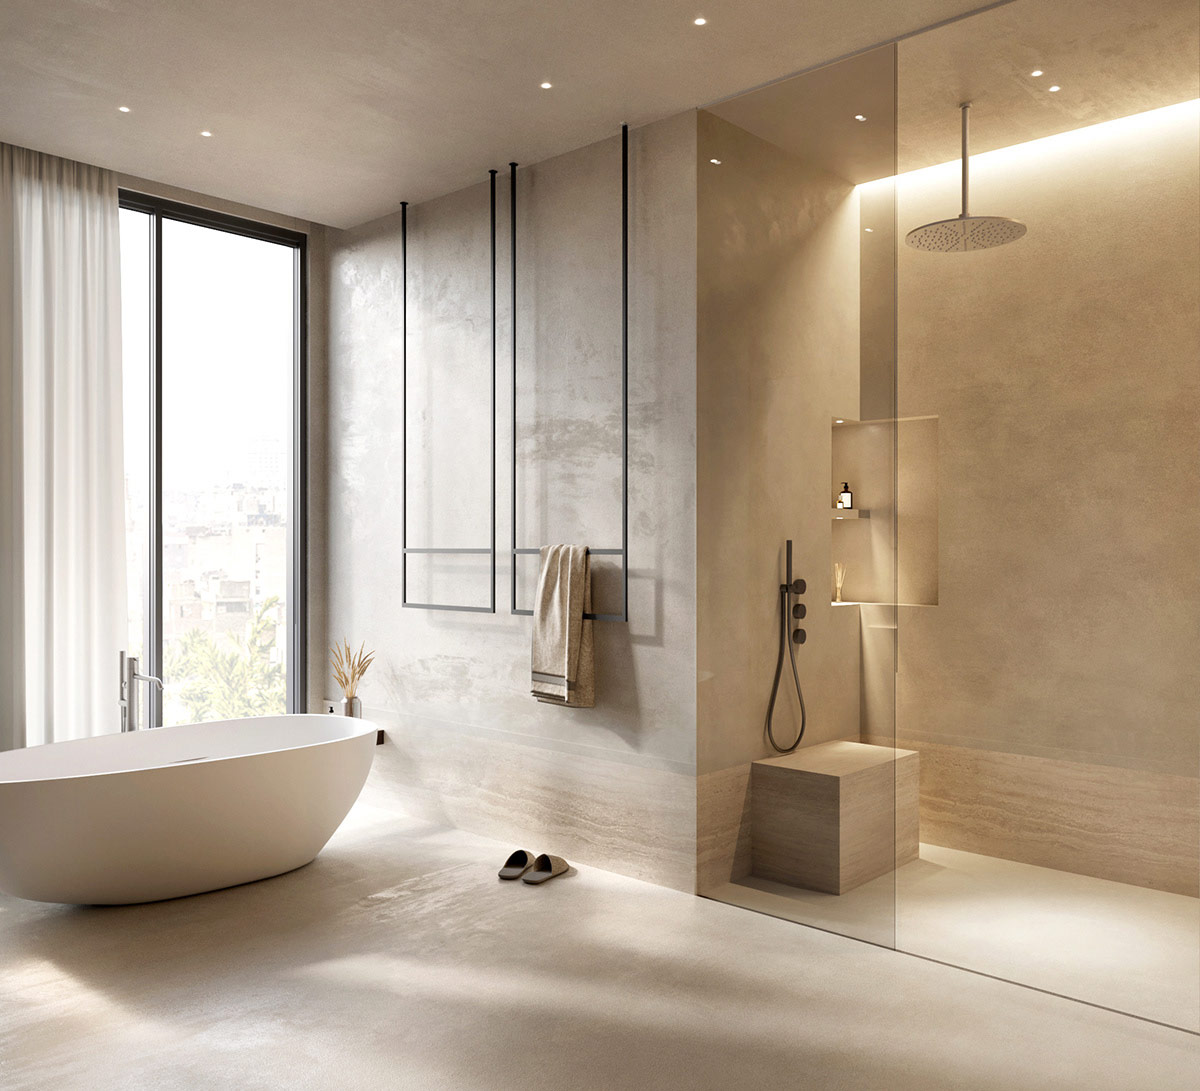
Ceiling mounted towel rails descend inside the main bathroom to serve a freestanding bathtub by the window. A walk-in shower area is warmly illuminated around its inner edge by a recessed LED strip.