Settle in. This post is a DEEP DIVE. One of those long detailed dissection/reflection posts that feels like the blogging days of yore. So if you love those & wanna grab a cup of coffee and go on a little journey with us – today’s the day. We’re about to dive into:
Tips and insights we gleaned about downsizing over the last few years
What items from our larger home came with us & worked
WHY we think that is
What we learned in hindsight about packing for a move
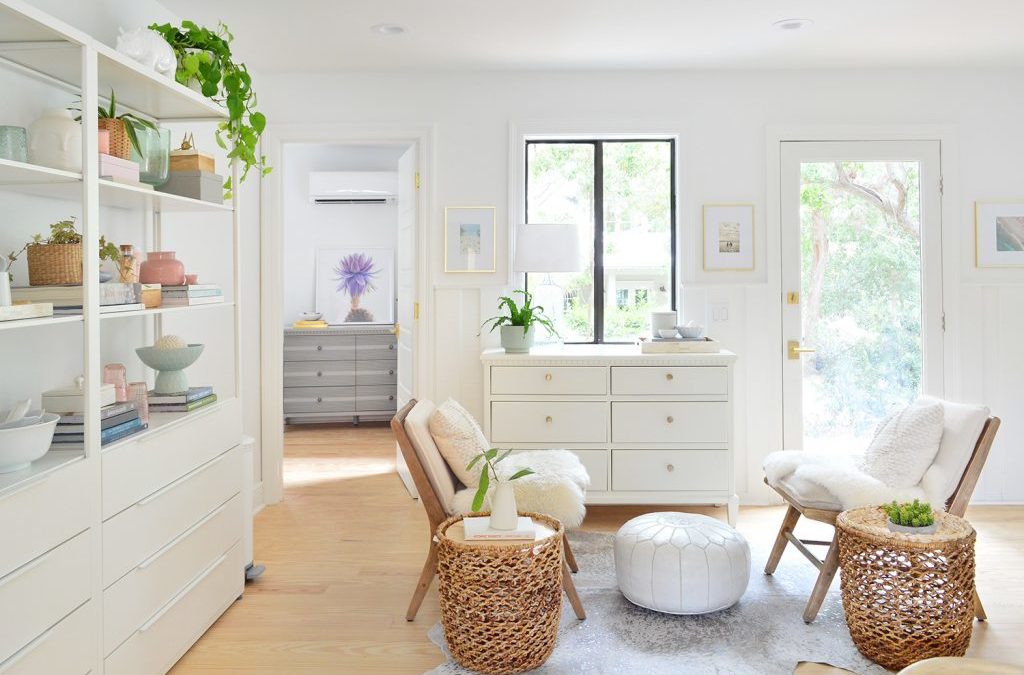
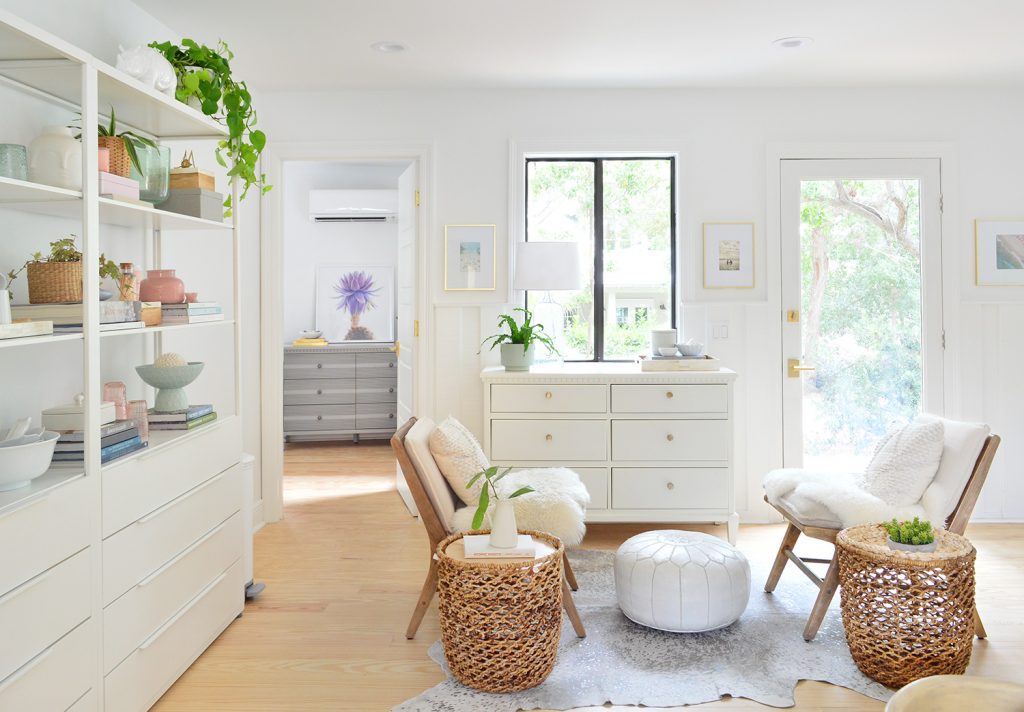
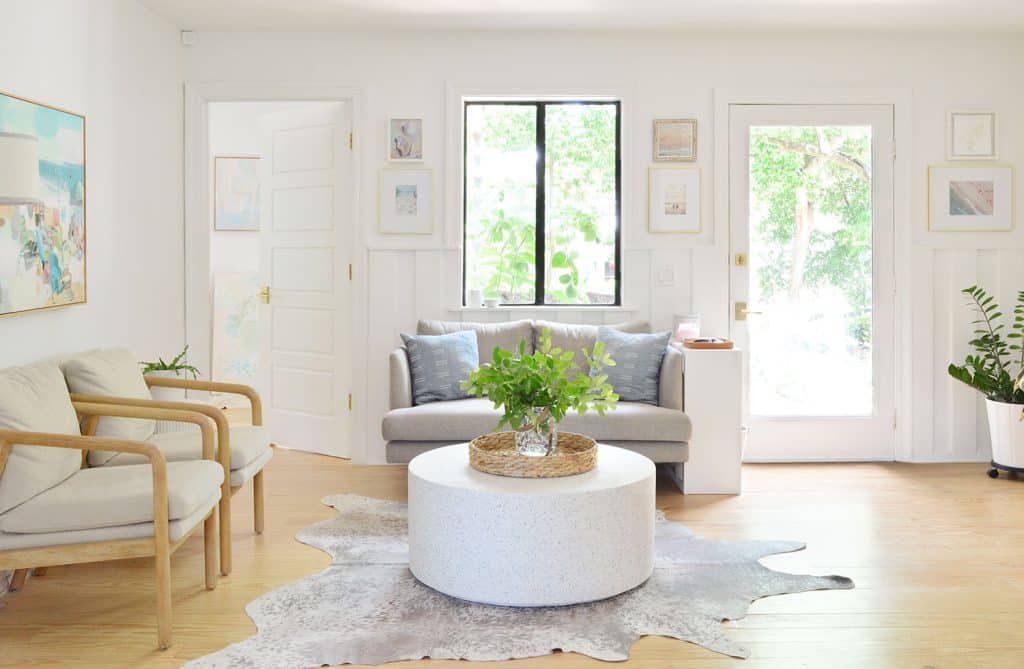
This whole post idea came to us when we were in our downstairs sitting area recently and we realized that a lot of the furniture hadn’t moved with us from our previous house in Richmond. The loveseat, the chairs, and the coffee table were all purchased after we moved here to fit precisely into this new smaller sitting area that we slowly figured out over time.
Conversely, things like the rug, the tray, the vase, the planter, all of the art, and a nearby bookcase were from our last home. So it made us wonder: how much of our old furniture & decor still exists in year three of our downsized house? What do we still love so much – a lot of which we’ve had for over a decade? And why did some things have a better shot at staying forever in our smaller home while others didn’t serve us as well as we hoped?
We wish we could have put only what would fit perfectly in our new house into that 16′ pod that we moved all of our worldly possessions in – but downsizing doesn’t come with a crystal ball. We certainly had measurements of rooms and did some pre-planning but nothing really compares to landing in a new space and trying a few layouts to see what feels best in person.
There’s also nothing inherently wrong with getting new things that fit the size or shape or needs of a new house – especially if you’re sizing way down and need to squeeze in as much function as you can (we went from 3150 square feet & 14 rooms to 1400 square feet and 6 rooms (only 1 of which is a bathroom). That’s exactly why we sold half of our last house’s furniture with the house – because we knew it all wouldn’t fit, so we made our best guesses about what might move with us and work when we landed (even if some items landed and worked for a bit and then were craigslisted or donated for “the actual long-term solution”).
This is our last house’s bonus room, almost all of which was purchased by the new owners (except for the pedestal table, which we tried as an eat-in kitchen table for a while at our new house). You can see a full tour of what items we sold to the new owners, including side-by-side photos of rooms before and after we packed them up.
Downsizing feels like a mix of surrounding yourself with things that make you *THE MOST* happy and work *AS WELL AS THEY CAN* for you (and gleefully getting rid of all the rest!) – but the result is definitely going to look different for everyone.
We made our own “this is coming with us” selections based on:
Measurements (some things just plain wouldn’t fit)
Previous experience (did we use it in our last house? if not- bye!)
Educated guesses (again, there’s no crystal ball)
Functional considerations (would this rug trap 6 pounds of sand in a beach house?)
Good old-fashioned gut feelings (“I feel like I won’t miss this” or “I’ll regret not having this”).
Emotional attachment to sentimental items (we treasure meaningful things, even in a smaller home)
There isn’t an easy A + B = C equation I can share, but that’s how we evaluated things going into the big blue pod outside. And looking back on what lasted through this big transition a few years later has been pretty illuminating (let’s just say a lot of lessons are “very visible” in hindsight – so we’ll share those with you after sharing what stayed.
I’ll kick this off with one more tidbit of advice that works for literally any homeowner, whether you’re moving into a mansion or a one-room studio: be open to letting your new home evolve. Just like all of the houses we chronicled before it, our downsized home definitely took shape over time. Trail and error, and seeing how you actually use a space, definitely leads to the very best outcome in our experience. I mean, this is what our sitting area looked like when we first landed. It was absolutely bananas.
That picture makes us laugh so hard in hindsight, but man, we were just trying things and using what we had while we learned how we’d actually use this space and inched towards something that might work better… which I’m pleased to say eventually happened.
So yes, items came in, and they did the hokey pokey, and they moved all around. Like the bookcases that you see in the bananas photo above this one, which went upstairs where they fit like they were made for that wall (*insert the angels singing sound and praise hands here*).
Some things found a better spot for the long haul. And some moved listlessly from room to room until we faced the music that they weren’t serving us as well as some other items in a better size or shape could (so they got donated or Facebook Marketplaced).
Like the white and gray 6-drawer dressers you also see in that bananas photo that we’re revisiting above. We realized the only dressers we kept are all narrower 3-drawer ones. Go figure that they fit better and make the most of the space in a smaller house (and can double as a nightstand, like the dressers in our daughter’s room below).
What we’ve definitely found to be true is that new spaces – especially smaller ones – may require specific types or sizes of furniture that may not have worked in your old home. The loveseat in our sitting room is a great example.
We never needed one before (our last house easily fit two generously sized sofas), so we left the biggest one behind knowing it wouldn’t fit in our new downstairs hangout area – and the other one came with us and lives on upstairs in the family room. Speaking of which…
The Upstairs Family Room
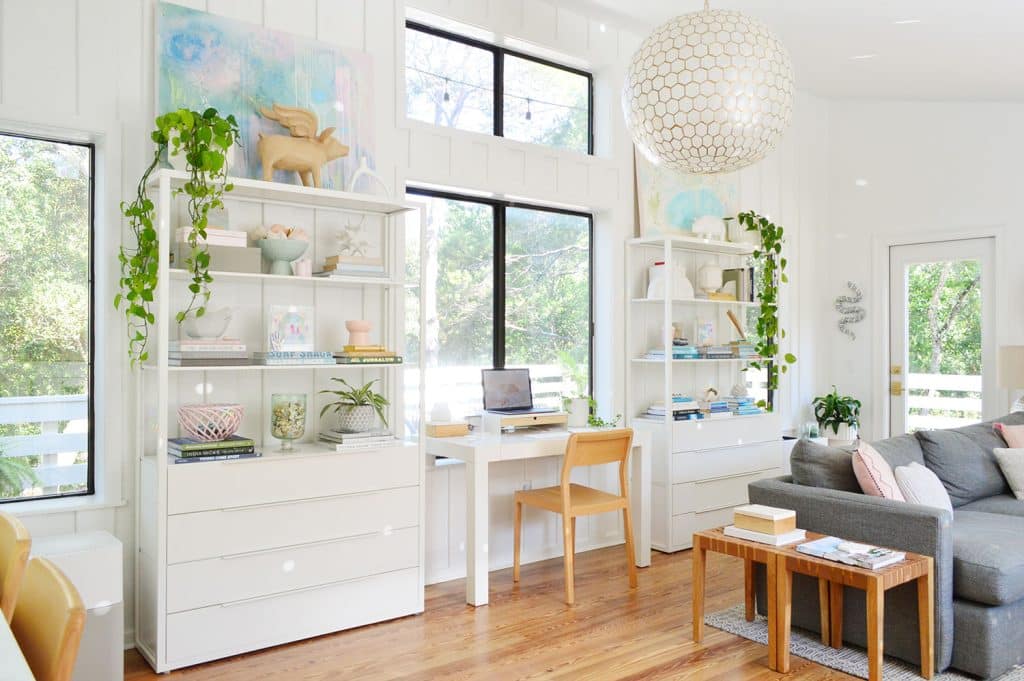
Had we been sitting upstairs instead on the day we had the “our kitchen sure has a lot of new furniture” feeling, we would have had the absolute opposite reaction, because our family room is FILLED with stuff from our last home. Literally almost every single furniture item in here is from our last house.
But upon further reflection, we realized maybe that shouldn’t have surprised us as much as it did. Our upstairs family room is the largest living space in this house – so, naturally, it can fit more items from our larger home. No wonder it was a lot less of a challenge than our small sitting area downstairs, which needed some customized things over time to “come together” (psst: that’s normal, don’t let anyone tell you that upon moving into a new place you have to have it all figured out in the first month or even the first year).
The funny part is that this room basically absorbed the function of THREE separate rooms in our old house, and serves us SO WELL because of how multifunctional it has become. Let’s look at those three rooms from our old house…
Our Previous Home’s Office:
Perhaps the most familiar-looking zone that was absorbed into our big room upstairs is our old office area. We no longer have a dedicated room like we did in our last house (seen below) but we still recreated the set-up of our Parsons desk flanked by two Ikea Fjalkinge shelves. It’s a definite upgrade to have three windows along that wall now (our desk view = 100).
That Parsons deskis actually one of the items that we’ve had the very longest of any piece of furniture we have ever owned. It was a wedding gift to us in 2007 and it has definitely stood the test of time. I mean, it’s 15 years old and counting! Still looks new, which definitely helps an item have longevity, along with a classic design that doesn’t ever feel dated. Totally makes sense to me why we still have it.
When we slid it in front of that middle window, we realized we could remove the two back legs so the back of the desktop sits on the window ledge (thereby recessing about 5 more inches toward the wall, making it easier to pass behind it on your way out to the deck). Of course, we kept those back legs (who knows how things will evolve down the line), but that tweak alone made this desk even more flexible & functional than we thought.
If you scroll back up to that photo of our previous office, you’ll notice the metallic cowhide rug in there now sits in our downstairs sitting room. As for why this made the move and got to stay, it’s gloriously neutral, isn’t huge, and works so well to ground the sitting area without a rectangular border for the front door to get caught on. Honestly, I think a rug like this could slip into any number of places – for example, it could also work in our son’s room, and even upstairs by the art desk. It’s the LBD of rugs.
Our Previous Home’s Family Room
At first glance, our current upstairs TV area feels pretty different from our last family room (seen below). But some of the same anchor pieces are there, like our Crate & Barrel Lounge II sofa that we’ve had for 5 years now. And upon closer inspection of the picture below, we realized that even little things like the lamps and pink pillows are direct transfers from our old living space.
We also pulled in a lot of stuff from other areas of our last home to round out this new family room. The leather stools came from our beach house, the woven mirror came from our old office (scroll up to see it over the Parsons desk), and the side table under the mirror is actually two of our daughter’s old bedside tables wedged back-to-back to make it look like one extra deep side table for our old lamp & some books.
The rug upstairs is actually from our son’s old bedroom (seen below). It’s a HomeGoods find we’ve had since it was his nursery, over 8 years now (here’s something similar). It’s no mystery why this rug endures for us, because it’s neutral so it can slip into practically any room with any colored furnishings. We also really like the subtle yet interesting design, it’s comfortable and soft, and it was the right size for our new family room.
Our Previous Home’s Art Room
The last of the three zones that we squeezed into our new family room is our kids’ arts & crafts space, which is a reincarnation of the homework / art room we made in our old home’s guest room (seen below).
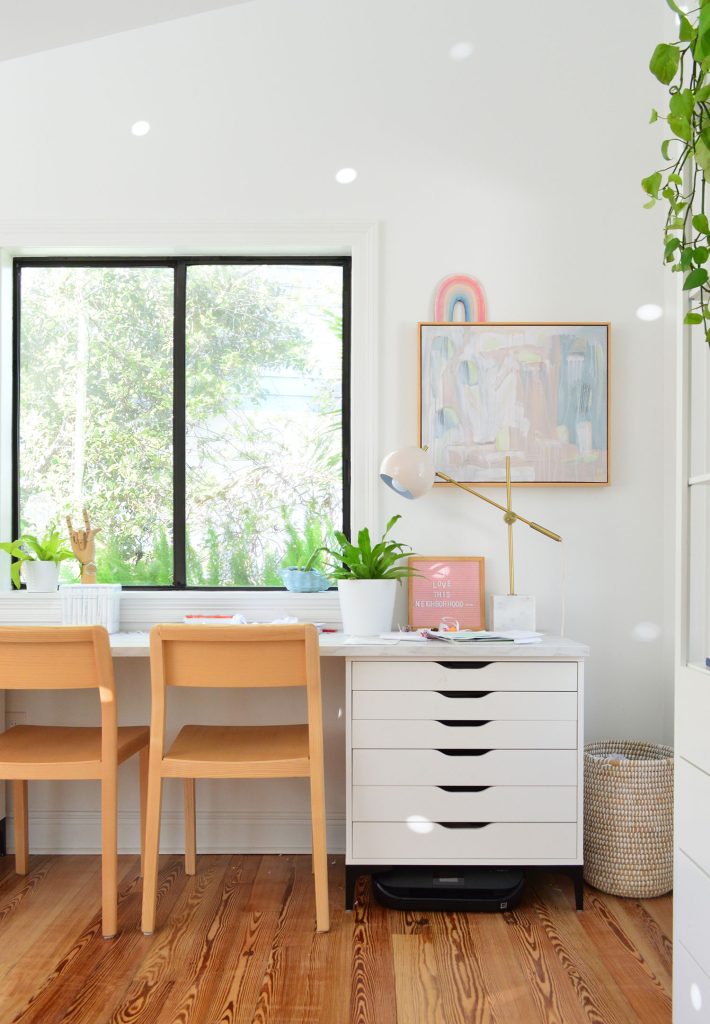
We had less wall space to work with in this new house, which we knew based on our measurements – so we donated 1 of the 3 drawer bases and swapped out the two 6ft counters for one 8ft counter (so technically it’s a new top, but we just reordered the same faux marble laminate again because it has worked SO WELL for a mess-friendly space like this).
We moved the old chairs with us, but eventually replaced them with slimmer armless ones that fit better next to each other and can also be pushed in all the way without scratching the top of the arms (which happened to the old ones over time).
Little things like the lamp (here’s a similar one), the pink letterboard, the gold picture frames, the basket (similar), and our printer (similar) were all things that survived the move and were easy to find a spot for. Generally, the smaller items that we truly loved and kept above all other less-loved decor-ish objects easily slipped into our smaller home. Just gotta get rid of the filler stuff you don’t really love as much or use (one example is don’t downsize with 12 vases, think about the 3-4 you always use and donate the rest).
Our Outside Spaces
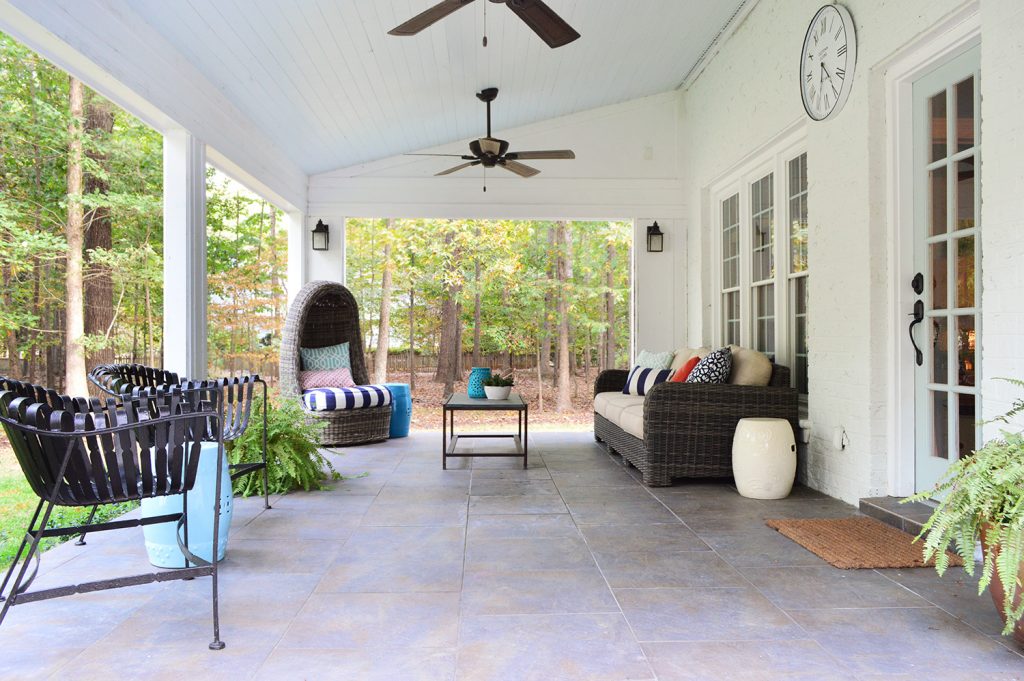
Our decks and porches are other places where we used some large furniture from our last house because, just like our large upstairs family room, they’re pretty spacious and can handle items that originally lived in a bigger home.
For example, our current front porch (above) still sports the woven egg chair that we got in 2014 and had on our old back porch (seen below). Forgive the old photo above, couldn’t resist a Burger cameo. We miss that sweet boy every day. Fun fact: the pile of dirt that you see beyond the hanging daybed is from the pool build! Memories.
The outdoor sofa and vintage black metal chairs seen above also made the move to Florida and now both live on our upstairs deck. That space is in a bit of a “transition” since we stole the dining table to try out in our twice-as-big pool area (if you missed my IG stories about pushing that fence back about 20′, we’re planning a big post about it once we’re further along and the fence is painted).
But here’s proof that those awesome vintage chairs and the outdoor sofa from Richmond are all alive and well here. I think we’ve had that blue drum stool for like 15 years too. Those can literally slip into almost any room or outdoor space!
Our Bedroom
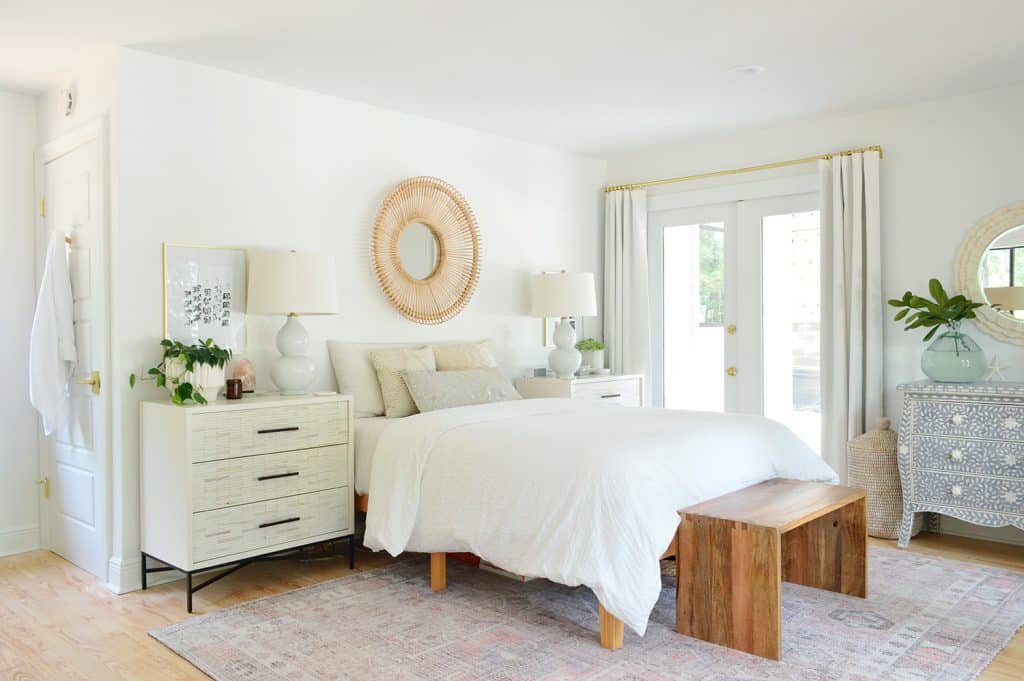
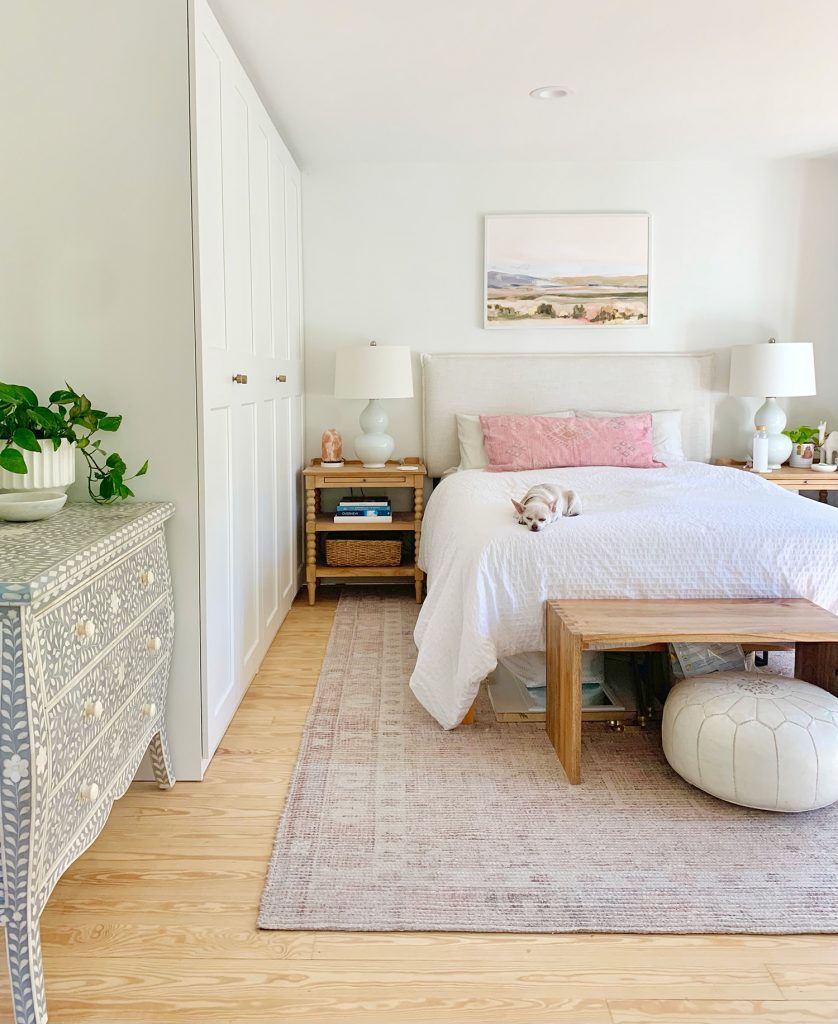
The largest item that made it to our new bedroom is this blue inlay dresser that had been in the front bedroom at our beach house (one of my favorite secondhand finds of all time!). We sold the beach house furnished but swapped out a few things we loved beforehand – and this definitely made the list.
It now occupies a corner of our bedroom that we’d once slated to become a second bathroom. Those plans are on indefinite hold because although we expected to want a second bathroom immediately upon arrival here – we’ve all been just fine sharing one for the past 2.5 years. Heck, with the kids back in school it feels even easier than ever (since the first year here = at-home learning so all 4 of us were in this house pretty much nonstop).
Our bathroom-on-hold decision feels sort of like the spirit of downsizing itself. Embarking on a big dusty reno to add a bathroom feels insane to undertake until you actually want one, right? If our bathroom plans ever move forward (we assume they might when the kids are older maybe?) we’ve talked about converting my beloved inlay dresser into a bathroom vanity with plumbing and everything inside and a sink on top. That’s how much I love it. Of course, who knows, it might end up in another spot before then.
This is where it lived in the beach house’s front bedroom after I bought it secondhand and worked hard to repair it. It feels so beachy and intricate – it’s something I treasure.
That’s what downsizing is about. We don’t have ten dressers. We have 3 in the entire house. But they’re our 3 favorites of allllll time (the other two are wood inlay on the front – so they all feel so special and unique). As previously mentioned, they also all have 3 drawers and aren’t of the wider 6-drawer variety, which makes the other two able to double as nightstands AND clothing storage in our daughter’s room. Hooray for anything that’s beautiful and can work double duty. More on that in a sec.
Oh and that large glass vase on the inlay dresser two photos up? Here it is living in our previous dining room. It has been with us over 15 years and counting! Sometimes I think it’s a miracle we haven’t broken it in all these years – it’s often full of water and quite heavy! (I hope I didn’t just jinx myself).
You may remember those baskets from our old foyer (seen below), where they were largely just decorative. Yes, they usually had nothing in them except for random things the kids would put in there. Now we use the large one as a laundry basket in our bedroom and the smaller one as a trash bin next to the kids’ art desk (scroll back up to see it).
And speaking of our foyer, you may recognize that mirror in 3… 2…1…
Our Bathroom
The large capiz mirror from our old foyer is now the over-the-vanity mirror in our bathroom. So not only did we hang on to it, it gets so much everyday use in our one and only bathroom (and definitely sees a lot more toothpaste splatters than it used to too). It’s still holding up perfectly, and once again the key to this item sticking around is that:
A) We had the perfect spot for it
B) We love it
It beat some other more basic mirrors out because it’s *special* – we love the subtle pattern and the cool shape of the top. Overall, so glad we bought this (about 10 years ago from Serena & Lily), and I hope we have it forever & ever, amen.
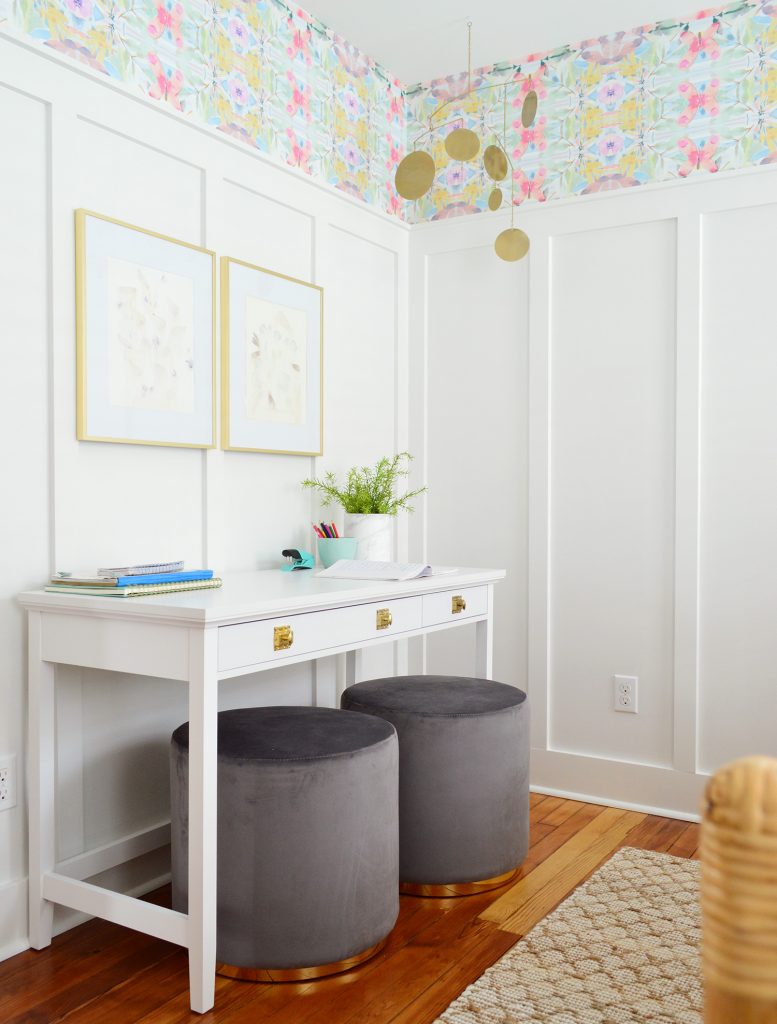
The bathroom also sports gold frames and artwork that used to hang in our last house, plus a brass mobile is something we hung in the middle bedroom at our beach house and I’ve loved it ever since. If you’re wondering: do I take a mobile? Is that too random if I’m trying to downsize? I’d say… it’s tiny. If you love it, take it and see how it goes. We also took a second mobile with us (a seagull mobile we had in the duplex and that hangs in this house too!). We have since bought 2 other mobiles for a total of 4 in our six-room house. No regrets. Take what you love – especially if it’s small. The mobile isn’t going to make or break the pod or the moving truck 😉
The Kids’ Rooms
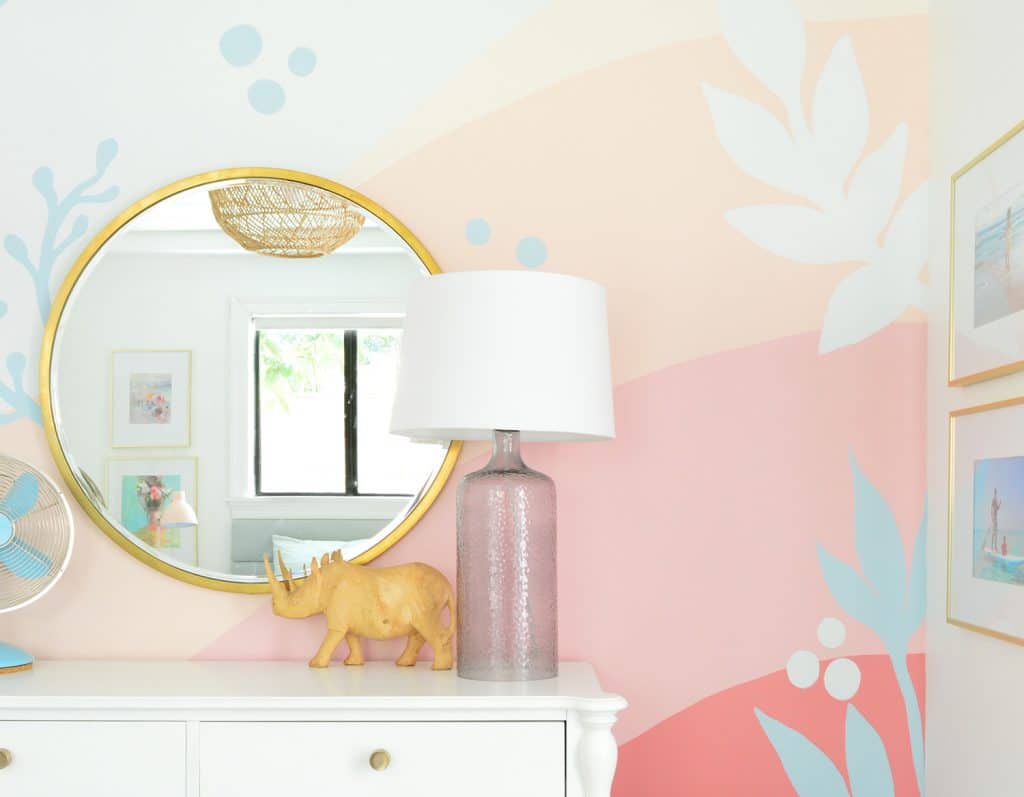
In addition to bringing things like our kids’ favorite books, toys, and stuffed animals, their rooms also have larger things from our last house like the big gold mirror in our daughter’s room below (it used to hang above the fireplace in our living room – scroll up to see it). It’s especially great above this desk because that whole area doubles as a vanity spot for her to get ready, but also multitasks as a desk for homework, laptop use, etc.
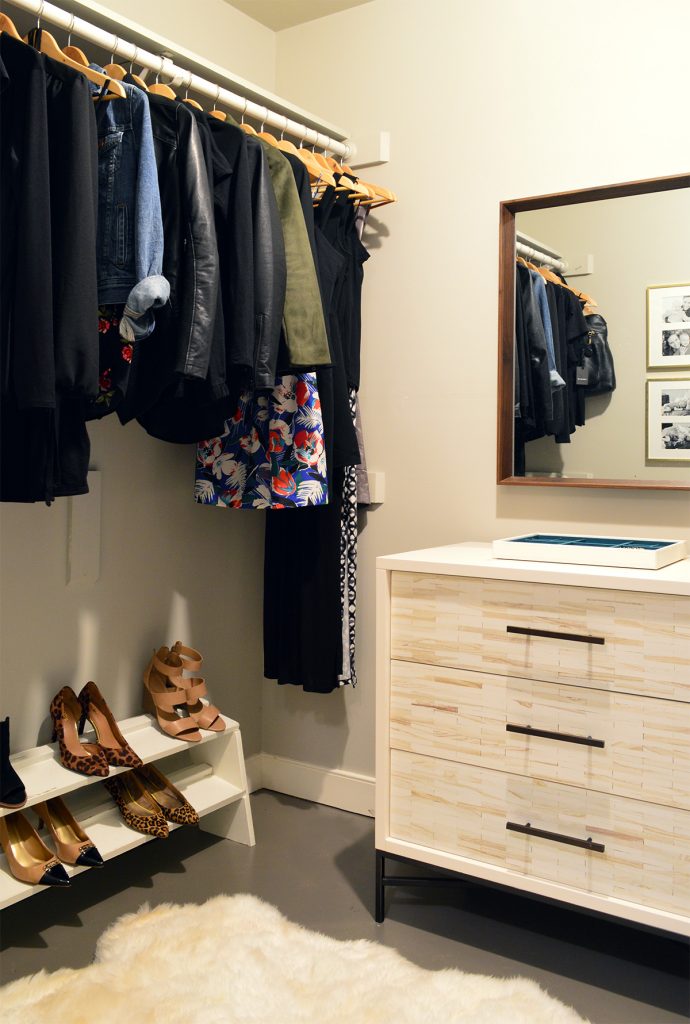
The inlay dresser you see reflected in the mirror above is also a holdover from our last house. We’ve had it awhile and it’s served various functions over the years, including about seven years spent being the only attractive thing about our walk-in closet before we made it over.
Not only did we bring that dresser from Richmond to Florida, we actually ordered another one shortly after moving because we love the idea of making them work double duty as bedside tables AND clothing storage. During this brief incarnation of our bedroom, they served as matching nightstands and worked as our only clothing storage in the room.
… we moved them both to flank our daughter’s bed – where they work as clothing storage for her as well as and bedside tables. We removed the black metal feet so they’re a nice height for her bed, but we’ve got the legs stored in our utility closet just in case. They’re hanging out in there with the back legs of the upstairs desk 😉
Our son’s room got a lot of built-in small space solutions – like a floating desk and bookshelf that we made ourselves (both of which you can see here), which feels kind of fitting since we built a lot of stuff into his last bedroom too. His rug is actually from our kids’ old art room, which you can scroll back up to see, and a lot of his pillows, baskets, frames, & planters/plants are from our last house too.
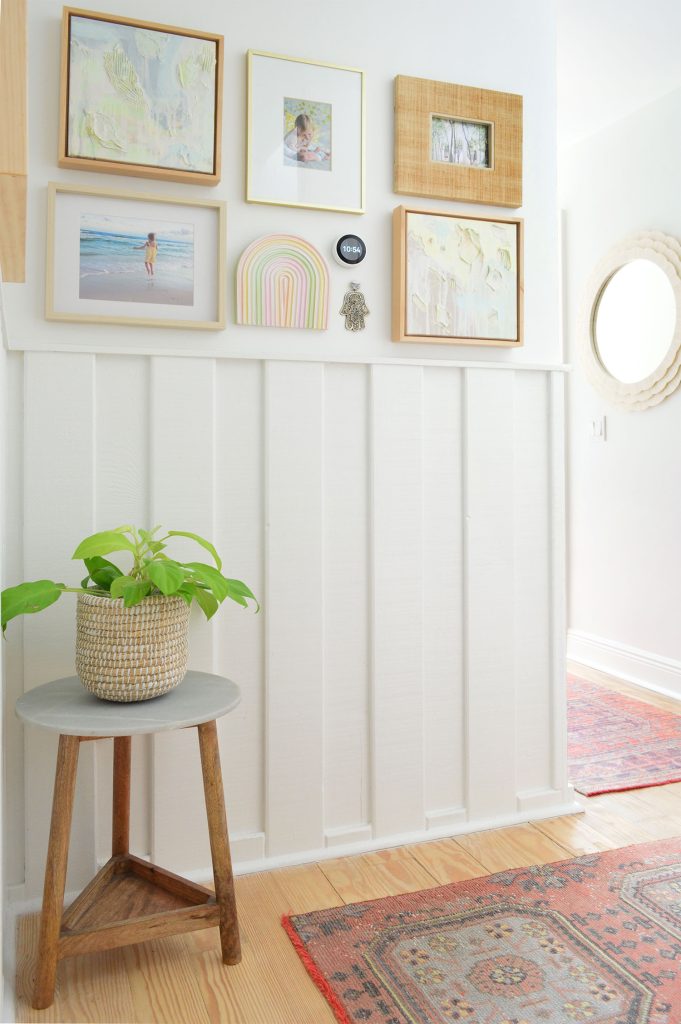
Of course, the majority of the small functional items we have are the same ones that we had in Richmond (like our silverware, plates, pots, pans, toaster, tools, etc) and the photos and rundown above pretty much cover the furniture/decor in the main spaces. There are a bunch of other items in random places like hallways – like themarble table below and pink rug that came from our old closet, but I don’t want to bore you with the minutiae of every vase or picture frame. Instead, let’s attempt to break down what this exercise made us realize about the downsizing process itself.
What We Learned About Packing For A Move / Downsizing
1. Know The Big Spaces That Need Big Pieces
In retrospect, we wasted some space in our pod on a few big items that we didn’t end up having big spaces for in our new house (like those two aforementioned 6-drawer dressers). They were useful to us in the short term right after moving, but we’ve since sold/donated them. Looking back, I wish we had made more room the pod for extra outdoor furniture (maybe even some from the beach house backyard, shown below) because we have an abundance of porches & patios we’ve had to furnish here.
2. Hang Onto The Little Things You Love
If you have limited moving space, like we did with our pod, you might be tempted to foresake the little things like art, lamps, decorative objects, etc in favor of adding more big objects that could theoretically be more expensive to replace. But we’re glad we stuffed every last corner of the pod with the “small stuff” that had meaning or sentimental value (including the living plants we literally wedged between our kids’ car seats for the drive down). Favorite framed photos, lamps, and potted plants were easy for us to work into our new home, and they were a nice fast way to make the new house feel like “us” right away.
In the end, if it’s small and it’ll fit, just bring it along with you and donate or sell it at the new place instead of wishing you didn’t let go of that sweet art or mobile or lamp you loved. Note: this does not mean you should bring a single small item you feel meh about – this just applies to things you LOVE and items with sentimental value. Being discerning *before* you leave the old place makes landing and unpacking so much easier – so get rid of the excess “filler stuff” before you pack for sure!
3. Stay Flexible & Embrace The Evolution
As you can tell, we haven’t been rigid about things going in a certain room (or serving a certain function) just because they were used in a specific way in our previous house. For example, the white shelf below was a decorative shelf in our beach house living room, and now it’s functional kitchen storage for us here. Had we been stricter about where things went or what purposes we thought they had to serve, I think far less stuff would’ve survived the move and we would’ve had to purchase a lot more.
4. It Pays To Think Cohesively
I think most people tend to do this naturally, but keeping a similar style or “vibe” in mind for your house makes that flexibility thing much easier. You’ll have more options for where to put furniture and decor if a certain piece or room isn’t an aesthetic curveball compared to the rest of your house. That’s how we’ve been able to move dressers, rugs, mirrors, artwork, etc. around this house until we’ve found the right spot. Basically everything we have “goes” with everything else in our house.
One way we helped that happen was back when we packed the pod, we made sure the items we wanted to keep felt like they worked together. We made a decision to leave all of our huge, thick, deep-colored rugs behind, not only because they wouldn’t fit physically in many of our rooms, but they didn’t fit into what we envisioned for our light & airy place by the beach (or seem particularly sand friendly). Same with dark wood furnishings/decor – many things we loved the most were:
light wood
white
neutral
inlay
capiz
brass
marble
soft pink
light blue
pastel art
a buttload of plants
Look for a pattern & lean into bringing things that work well together! Note: don’t bring a single thing that works with everything else but is something you’re lukewarm about or never use. Trust me. Downsizing = being ruthless and leaving all that “filler stuff” behind (if it’s not your favorite you’ll end up storing it all the time & then it’s just completely unused cabinet clutter).
5. Be Patient!
Downsizing is definitely a journey and not a destination. It has taken years for our current house to come together, just like every other house we’ve ever owned. And for a LONG time, it looked kinda nutty as we figured out what worked where and what wasn’t working at all – just like every other house we’ve ever owned. Are you sensing a theme? Don’t beat yourself up about taking your time to find the optimal arrangement or the right pieces to make your house work best for your family. It’s often the only way to get the very best result.
I’m thankful that overall, we don’t really have any major regrets about things we brought or chose not to bring – likely because we really tried to rely on taking *only* the thing things that we love most and use a lot (and pretty ruthlessly cutting out the rest). It really can be that simple. It takes a lot of physical time to sort through it all – but that line of thinking is what we kept asking ourselves over and over again. And we’re glad we gave ourselves the time to figure things out when we landed in our smaller place and didn’t stress when, for instance, our bedroom looked like this for a few months. Ha!
Oh, and one MVP of the move has turned out to be the most random thing: our white Ikea planters (you can see one in the picture above and another in the shot below). They’ve been such good staples over the years and we’ve had many of them since our first house. Yes, that makes them 15 years old! Again, it’s a miracle we haven’t broken them yet! (*knocks on wood immediately*)
I’ll leave you with one last thought. I think people who face the idea of downsizing are tormented by the idea of “what if I downsize this thing and then I really want it later” – especially as it pertains to something like a kitchen gadget. For example: “I never use the crockpot now… but what if later I get into it and have to buy one again?” Honestly, we had an old cobweb-covered crockpot that we never used so we donated it before this move and it has been 2.5 years and we DO NOT MISS IT. If you do, you can always buy something like that. But imagine how much more space you’ll have in your cabinets if you just have things you use in them.
Our actual experience is that we really can’t even remember, let alone list, a lot of things that we downsized and donated. If we didn’t use them presently in life at the time of our downsizing, that was the answer. Donate/sell pile. Heck, that works for if you aren’t moving too, and just want some wiggle room in an overstuffed drawer or cabinet.
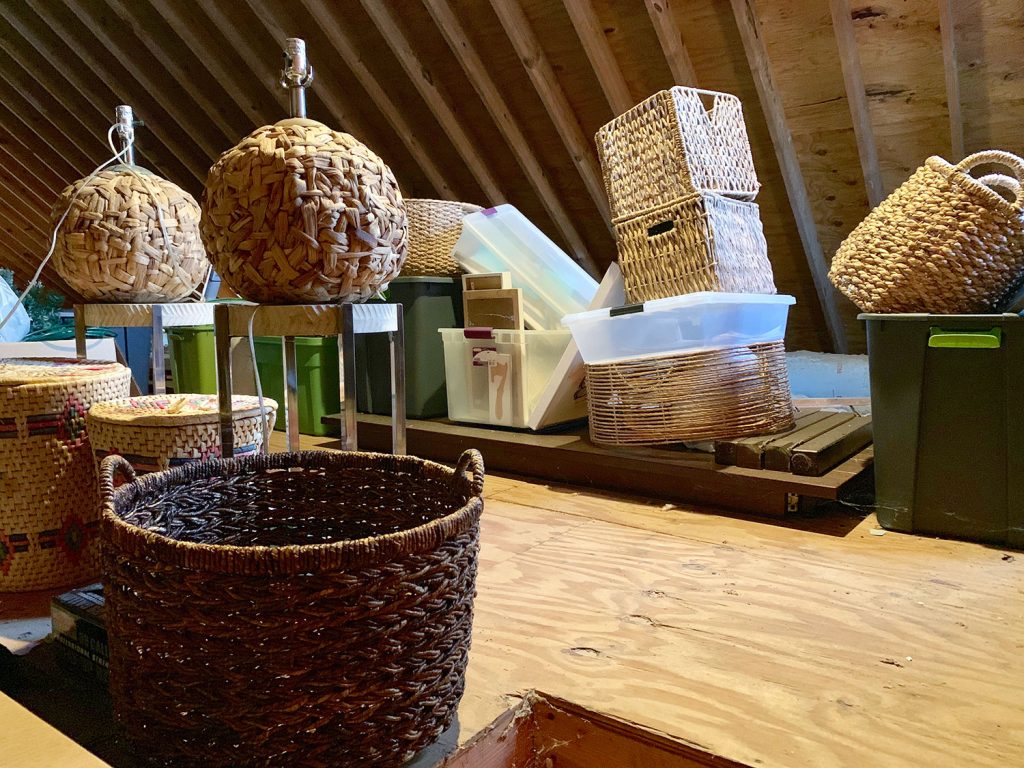
I bet 10 out of 10 people who have majorly downsized will tell you the same thing. We don’t even remember what used to fill up our garage (don’t have one now!) or our giant walk-up attic. Ok, I know there were a lot of baskets up there – which was a sure sign that I wasn’t using them – but I never miss having a huge space to fill with stuff I’ll forget about for years on end!
I hope this big brain dump of a post is helpful or at least just fun to read and reminisce with us. We definitely loved looking back on everything that has made this big journey with us, and are so grateful for where we are in this moment – in a smaller house with plenty of beach & pool time (oh the perks of no yard to mow, no garage to organize, and only 5 rooms and 1 bathroom to clean!).
If you’d like to read more about our entire downsizing journey…
*This post contains affiliate links, so we may earn a small commission when you make a purchase through links on our site at no additional cost to you.
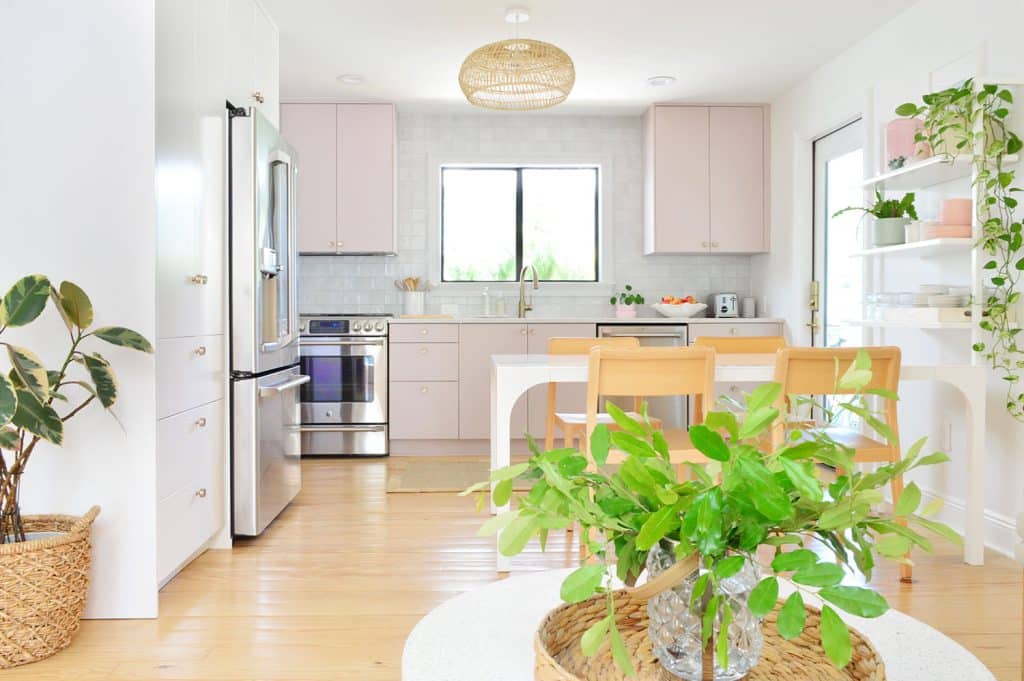
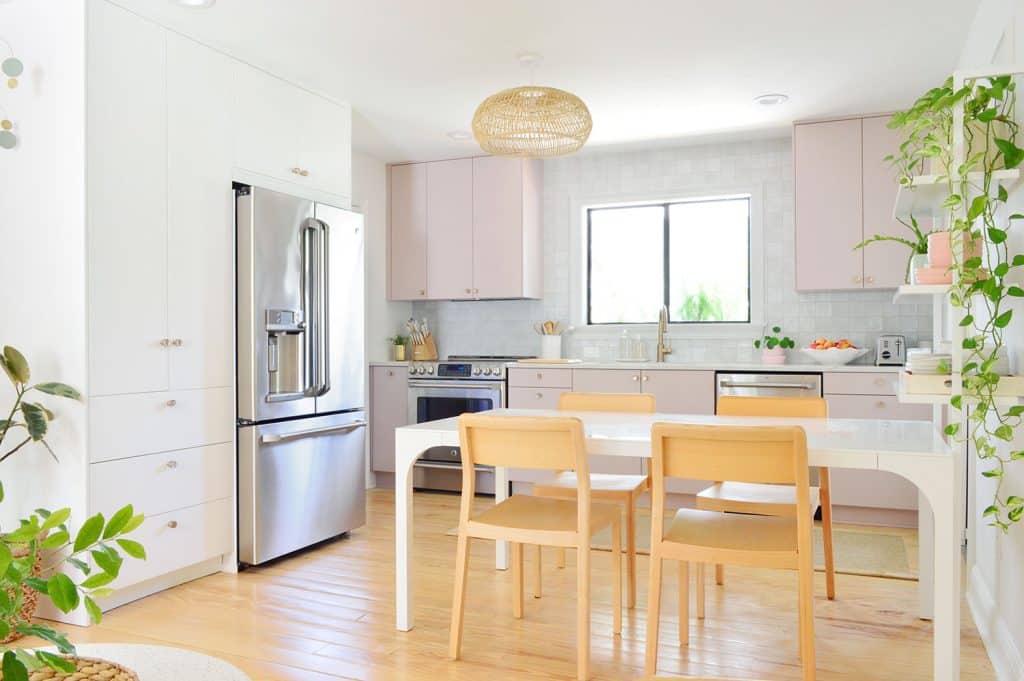
It may go down as our most gradual kitchen renovation ever, but almost exactly two years into living here (we hit that milestone last Saturday!), our kitchen is officially DONE! New cabinets? Check. Tiled backsplash to the ceiling? Yup. Quartz countertops and a sink that’s 3X deeper than the overmount sink of yore? Affirmative.
New hidden range hood? You betcha. More functional storage in the form of additional drawers, new upper cabinets, and a generously sized pantry cabinet? Yessir. Tons of before & after photos? That’s what this post is for! Plus we’ve got a full budget breakdown for you. So in the illustrious words of Tiesto, let’s get down to business.
To us (and maybe to you as well) this has felt like a very gradual transformation because we just sort of tweaked and adjusted things over the last two years in many small phases, rather than going through one mega-gut-renovation like our last house’s kitchen. And the good news is that no matter how slowly you peel the potato (is that a saying? If not, let’s make it one), the change still feels pretty dramatic when we look back at the day we bought it.
Not only is it a relief that it’s finally complete, we’re also so grateful for how functional it has turned out to be. I’d be lying if I didn’t say we weren’t a little skeptical of this space when we first laid eyes on it (ok, I was skeptical – Sherry’s one of those perenially optimistic people who truly believed in this room).
So imagine my elation that it has turned out to be one of the most efficient and easy-to-cook-in kitchens that we’ve ever had. After coming off of such a large kitchen in our last house, that was the biggest surprise. The work triangle in here is so direct and easy, it takes fewer steps to grab things and assemble meals (whether it’s a quick lunch or a deep and involved dinner). And we actually have a larger pantry cabinet than we did in our big Richmond kitchen!
I’ve said it before and I’ll say it again: one huge pro to renovating a space in different stages over a period of time is that you really get to live with things, identify issues, and test out solutions before landing on the final design. So that definitely helped us in here.
Speaking of which, this video not only captures the finished kitchen as it looks right now, it starts with a flashback to what it looked like when we first laid eyes on it. In many ways it fills in more blanks than the entire rest of this post because a video is easily worth 1,000 pictures. So if you do nothing else, make sure you watch this video:
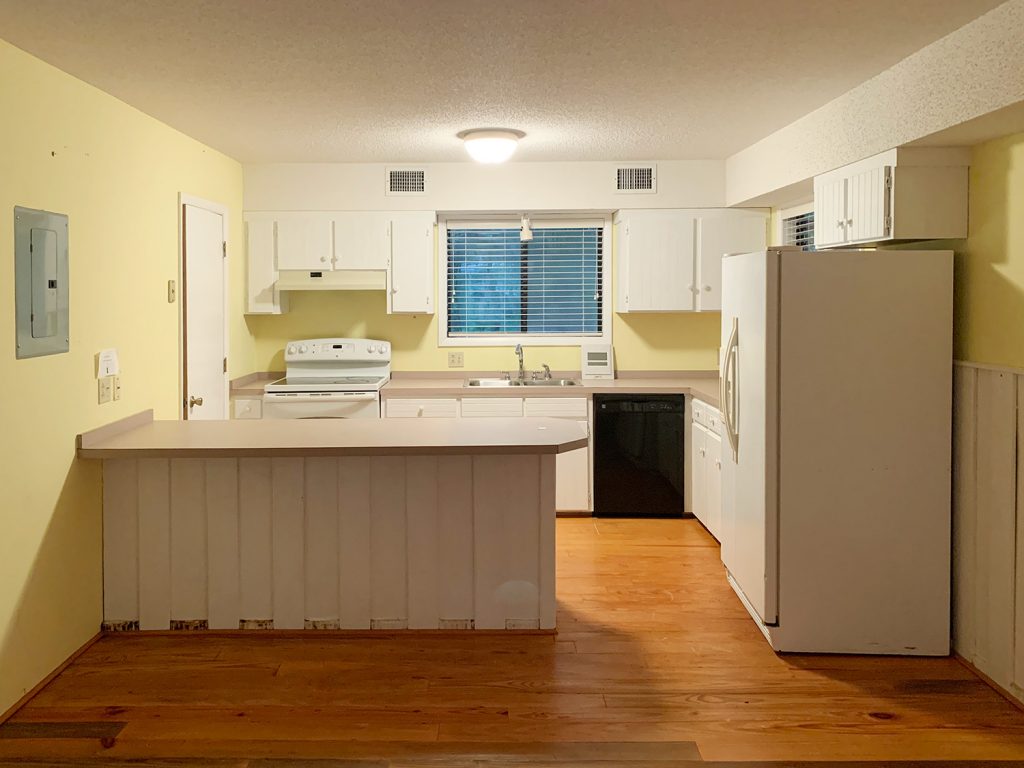
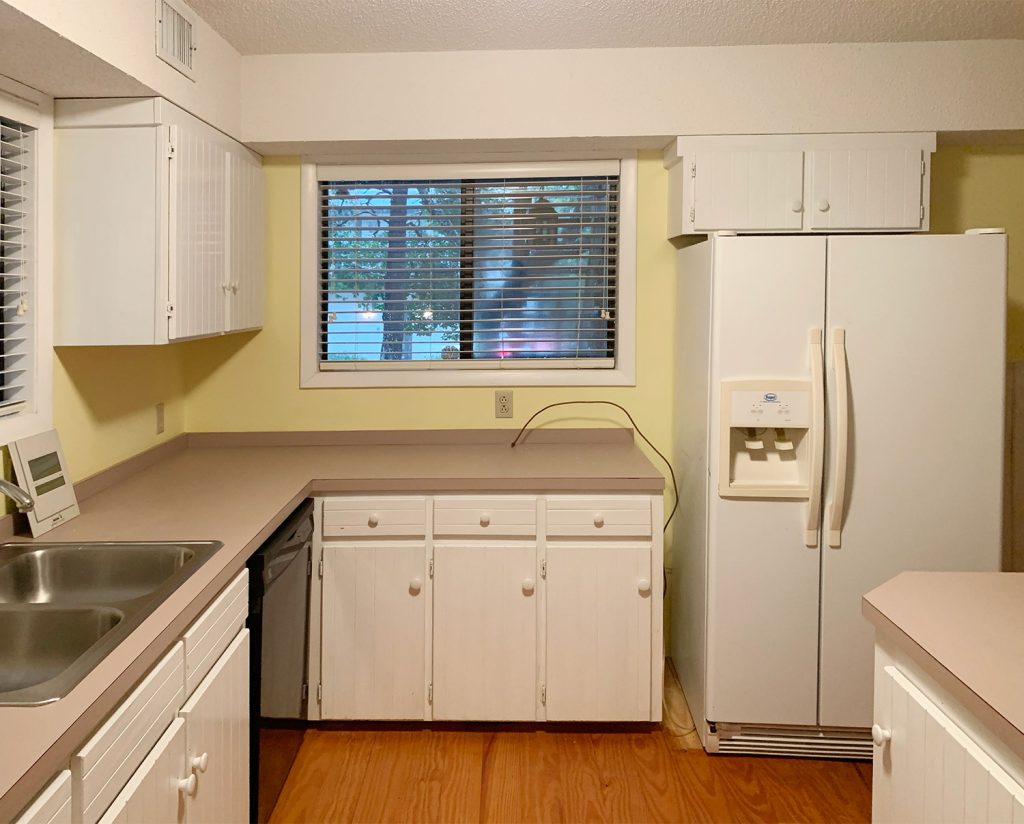
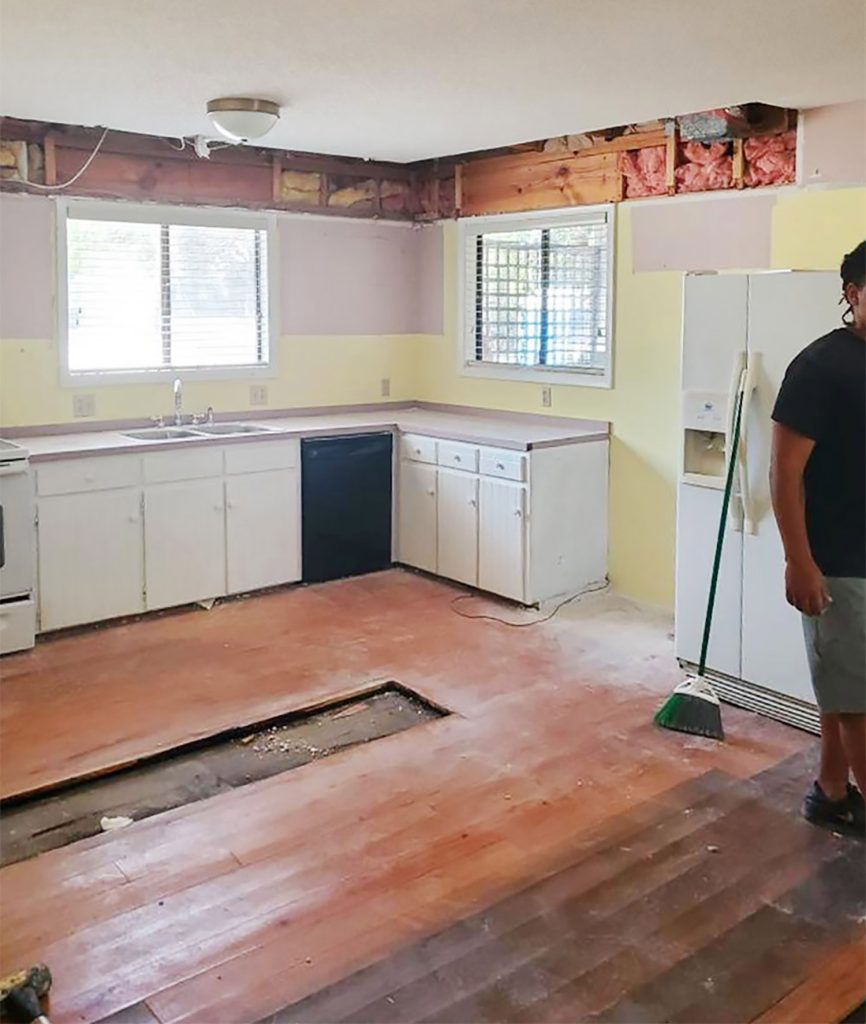
Again, this is the kitchen we laid eyes on when we bought the house (it’s one of many “befores” that we documented in this post). Between the soffit that ran across two walls of the room, the popcorn ceiling, and the mismatched appliances – there was a lot that we hoped to upgrade. And let’s not forget the boob light shining brightly on the ceiling.
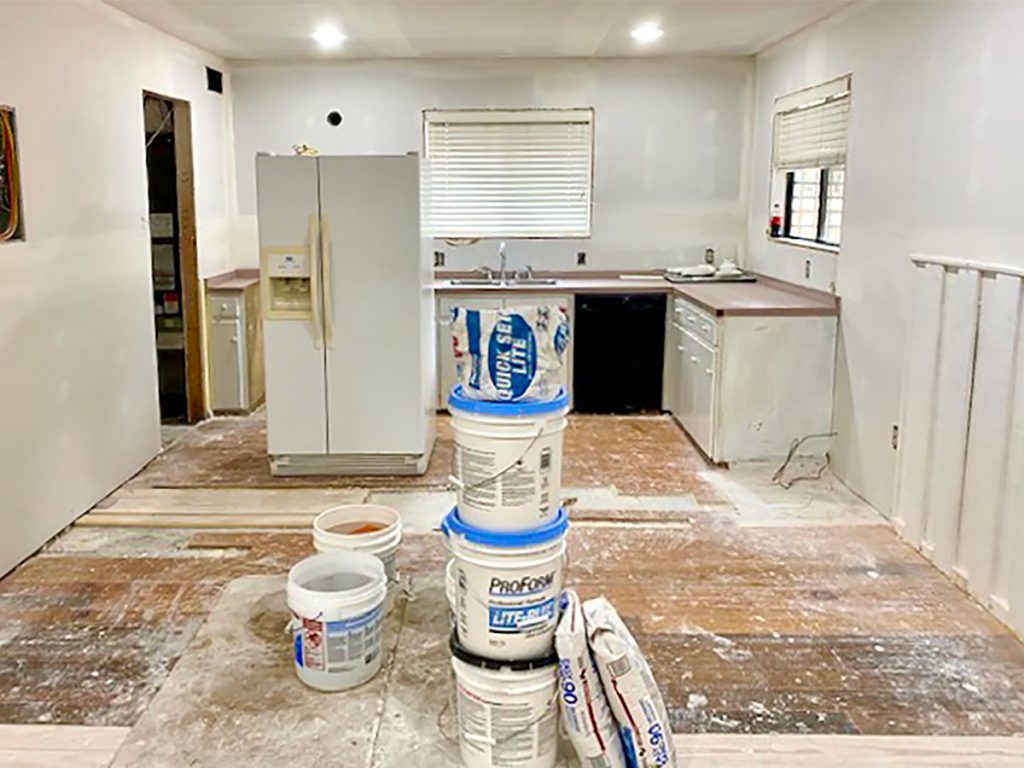
As part of our pre-move-in renovations, our contractor made some big improvements while we were still in Richmond – removing the soffit & uppers, taking out the peninsula, patching the floors, and re-drywalling (we had to redo the entire first floor’s drywall and patch the flooring throughout due to moisture issues) as well as adding some can lights. But much to their surprise, we left most of the kitchen intact.
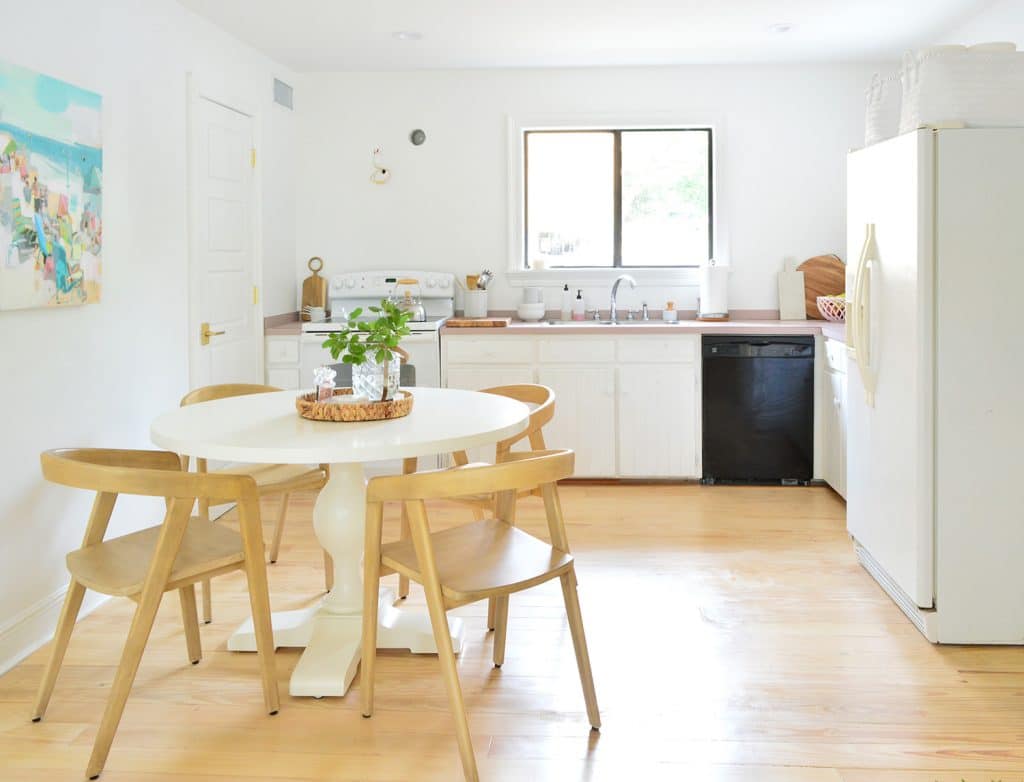
By the time we moved in, this is how we first lived with the space. Mind you, this was May of 2020 when we were still pretty much cooking and eating every meal at home, so it was a bit of an adjustment. But it worked!
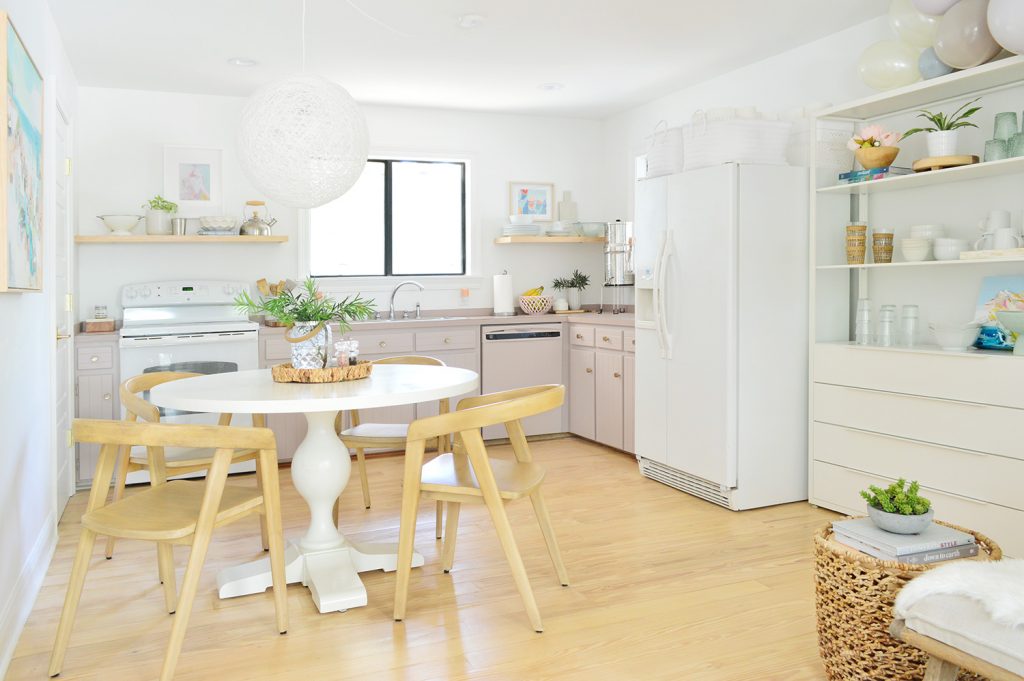
Those first few weeks gave us confidence that we could live with this kitchen “as is” for a while, which gave us permission to make improvements slowly – and that’s largely what you saw us do over the last two years. We hung shelves. We installed a pendant light that we swagged over the table. We painted the cabinets mauve to match the laminate counters.
Then, about a year ago, we had a clearer vision of what we wanted from the finished space. We moved the fridge and built a large pantry cabinet around it for extra storage. We got a larger table that seats more people. We added a door where a window had been (which leads out to our grill & s’mores pit). We hung more shelves. Sherry cut the pendant light in half. You know, the usual tweaks.
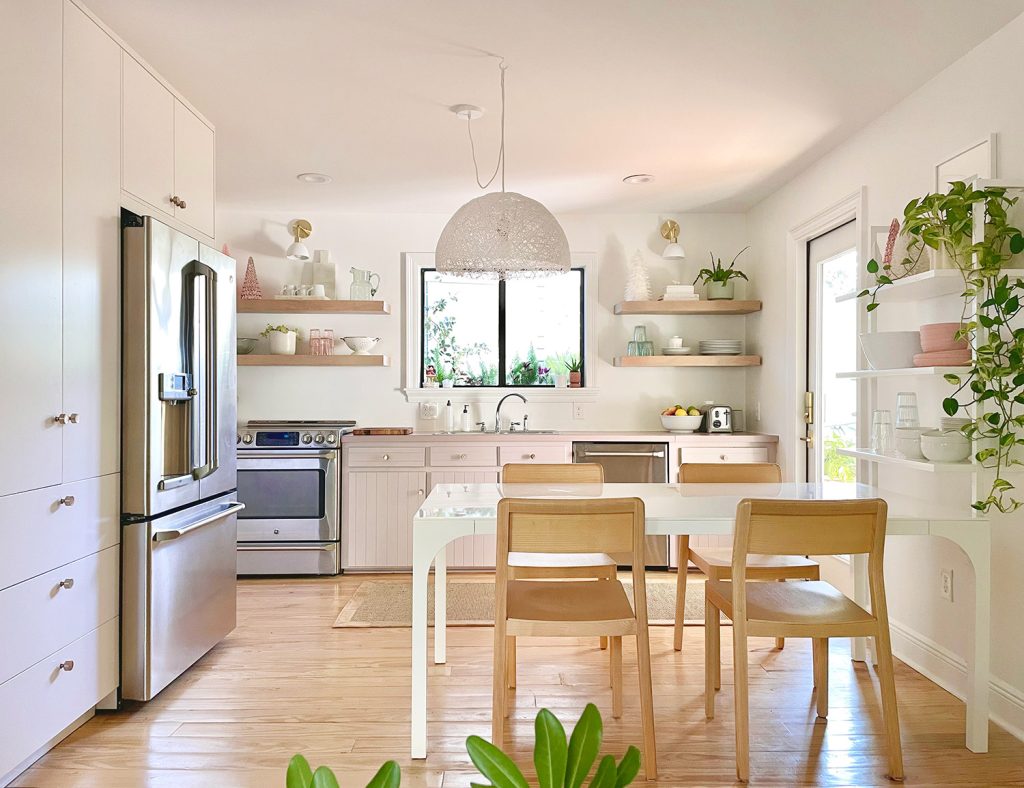
And then finally this spring, we replaced the original cabinets with better-functioning Ikea cabinets (and painted them the same mauve color), got new counters, and – as you’re seeing for the first time in this post – added upper cabinets and tiled the backsplash! We also hung a new woven pendant light as a semi-flush-mount, rather than swagging it over the table like we used to do, which feels airy and simple. And the substantial brass faucet below it feels balanced and ties into the brass hardware.
From the subtle backsplash (Sherry describes it as: “a pearly-blue color that feels perfect for the beach – like the inside of an oyster shell”) to the classic marble-like quartz counters and the mauve color that we brought over to the new cabinets (which has always been in this room and feels meant to stay) – we really like where we ended up. The cabinet color is Artsy Pink by Sherwin Williams by the way.
So let’s talk about those new additions for a second…
Our New Tile Backsplash
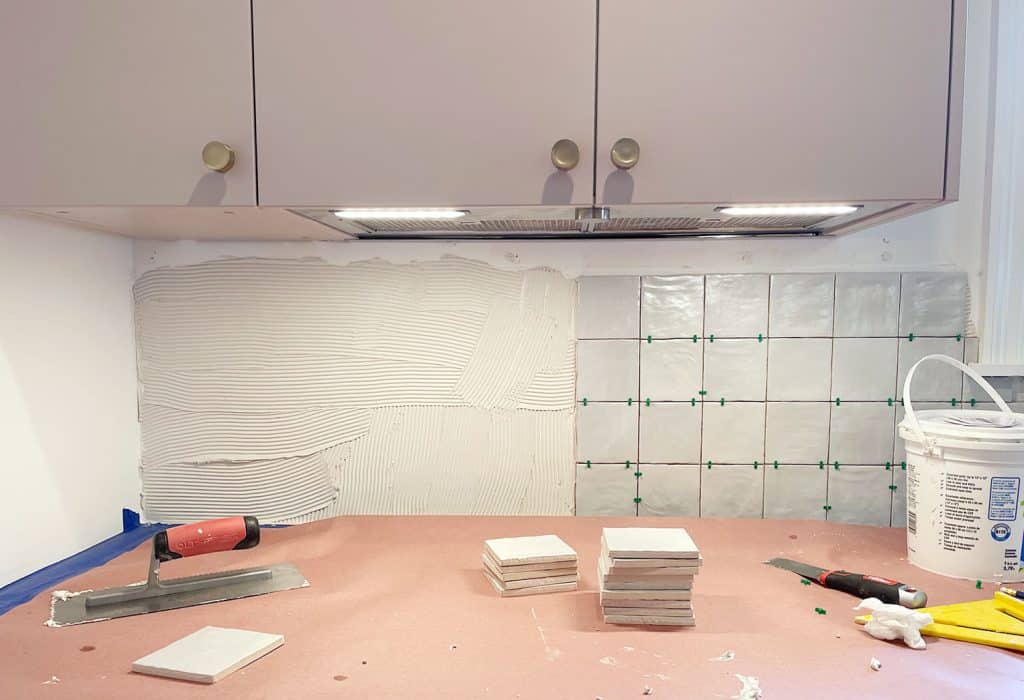
This backsplash is actually what kicked off this last phase of the renovation. It was one of those “If you give a mouse a cookie” scenarios. We wanted to add a backsplash, but we knew it only made sense to do AFTER we replaced the counter. And it only made sense to replace the counter AFTER we replaced the cabinets. Those were things we intended to do eventually, but the desire for a backsplash is what made us finally pull the ripcord and go after all three. Also, our old sink was so shallow you could see a small cup protruding over the top edge. So that situation has greatly improved. Now we can hide all the dirty dishes. Long live the deep sink!
But back to the backsplash. Our initial goal was to add some texture and shine, but not a ton of bold pattern or color like we’ve done before. We just wanted it to feel light, relaxed, and beachy – and since it shares space with a sitting area and can be seen from the front door, we didn’t want anything too busy or bold that we might tire of over time. We quickly zeroed in on this affordable 4×4″ zellige-style tile in the “Blue” colorway. It’s extremely hard to capture in photos, but it’s truly a very soft blue-gray tone with lots of sheen.
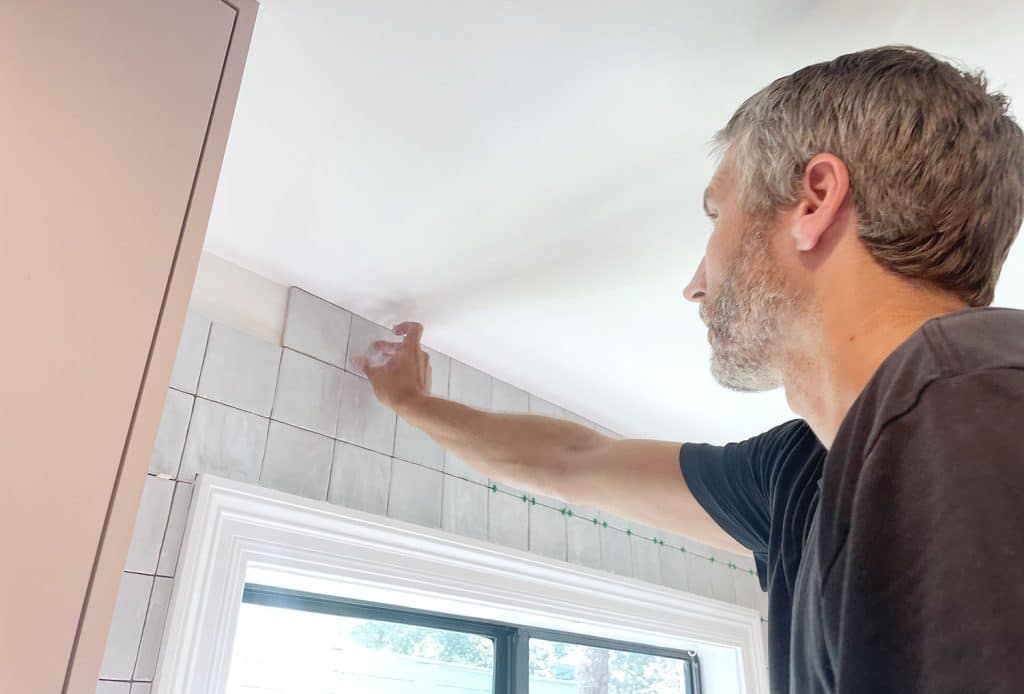
The whole wall only cost us about $325 to do and we knocked it out in about 2.5 days, including grout. I won’t bore you with the step-by-step details, since we’ve talked extensively about tiling before (here’s our backsplash tutorial, including a video!) but it came together pretty quickly and immediately gave us that shine and subtle texture we were hoping for. It really is like the inside of an oyster shell.
The only thing about tiling a kitchen backsplash that I’ll reiterate is the point I illustrate in this post about LAYOUT PLANNING. Please, please, pleeeeease take time to plan your tile layout before you begin. You’ll probably want to minimize the need for small slivers of tile around any edges (like the ceiling or against the cabinets) so measure and/or dry fit your tiles to see how things look first. You can always make adjustments – like cutting your bottom row slightly or shifting your centerline to be on a grout line, rather than the center of a tile (or vice versa).
It actually took us a few tries of dry fitting (no mastic, we just leaned things up against the wall to visualize a few options) to make sure we chose a layout that looked even & symmetrical around the window AND against the side walls, especially since the window isn’t centered on that back wall.
My only other tip for installing zellige or zellige-inspired tiles is to sort them ahead of time, paying close attention to the different sheens and/or “directions” of the tile. Some of ours were more matte than others. Some had vertical or horizontal movement, others had a more circular feeling in their unique handmade-looking shapes (these don’t have exact square edges and the fronts vary in their peaks and valleys and shapes too). You can kind of see what I mean here:
So to achieve a nice randomized look, we actually had to be quite deliberate about placing differing tiles next to one another, often rotating them if two with vertical movement were about to be next to each other.
You can also see below that we painted that window trim the same tone as the tiles. It was feeling weirdly bright and white while everything else was intentionally tonal on that back wall, so it felt so much better as soon as we painted it to recede with the tile. We purposely picked a more gray-toned quartz counter to go with the blue-gray backsplash tile and our softly toned cabinets, because we were hoping for a soft layered effect and the result is so calming and subtle in real life. Be sure to watch the video for a better view of it – no picture can really capture it as well.
The Upper Cabinets & Hidden Hood
You can also see that we made the leap from open shelves to closed upper cabinets in this last phase of the renovation. It was something we went back and forth on, but ultimately were swayed by two things:
Adding more hidden storage, which feels less busy (we have open shelves by the table, so two walls of it was a lot)
Gaining a hidden range hood (a hood wasn’t required by code, but we always hoped to eventually add one)
Plus, we also think in the end that the kitchen feels bigger and taller in person thanks to these upper cabinets that go all the way to the ceiling. Two different friends have come over and been like “how weird is it that adding those big cabinets actually makes the back wall feel further back and higher?!”
We’ll share more about what’s IN all of these cabinets and how they’re organized in a future post, but I did want to show you the hidden range hood cabinet over the stove (although it’s arguably the least organized in the whole room).
This is a trick you may remember from our duplex kitchens, but it’s just the Ikea OMSINNAD range hood which is designed to fit inside an upper cabinet. It’s not the cheapest range hood in the world, but we were determined to keep that back wall looking as symmetrical & balanced as possible, so hiding the hood inside this cabinet was the perfect solution.
After not having a range hood for almost years, we’ve really appreciated owning one again (they help improve indoor air quality, cut down on airborne grease, and – bonus! – basically gave us under cabinet lighting on one side of the kitchen). Hashtag fancypants.
Also a deep stainless single bowl sink is forever our favorite choice for a kitchen (we’ve had a double bowl and even a white cast iron sink, but this is just ALWAYS our favorite). So that, along with a pull-down faucet that can be controlled with one hand is the jackpot for us (the whole controlled by one hand with one single toggle bar = why we’ve never gone for a bridge faucet).
It has been so great having the hood and upper cabinets that it makes us feel silly that we ever debated them in the first place. They helped this become, as I said at the start, one of the most efficient and easy-to-cook in kitchens that we’ve ever had…
… probably only rivaled by our first house’s kitchen, which had a similarly hardworking work triangle, but much less pantry storage than we have here.
So…. winner winner chicken dinner. That ranking definitely has a lot to do with this kitchen’s compact size and the fact that everything is never more than a few steps away. And let’s not forget how much more functional and fun this entire space became with the addition of this door that leads out to our new kitchen porch, complete with a grill that’s no more than five steps away.
This is a before of the very same angle. Pretty unbelievable, right? Notice how much taller the ceiling feels just by removing the soffit to allow for taller cabinets and elongating that window into a door.
Never before have we had an outdoor grill this close and easily accessible from the kitchen. It really is just a few steps away, which makes it ridiculously efficient and is definitely one of the reasons that we grill out so much more now. We also have an outdoor cabinet on order that will basically elongate our current kitchen counter and essentially connect it to the grill outside. So our grill tools can be stored out there and we’ll gain additional outdoor counter space.
Thanks to our new kitchen porch, we also have the choice of sitting outside to eat, and what can I say… we like options. If friends come over, the kids might end up inside at the table while we’re out here (or vice versa). Plus we have a big table on the upper deck that seats 8 more if we have a bigger gathering or want to head up there for a game tournament after dinner!
We also have a door on the other side of the kitchen that mirrors the door that leads out to the deck, which is a utility closet that runs under the stairs. We recently redid it all to gain a LOT more functional storage in there, so we can’t wait to show you how that closet has evolved. It houses our HVAC system, and also had our water heater, so it used to basically be blocked up and full of just that stuff…
… but we made the switch to a tankless water heater, so now there’s SO MUCH BONUS SPACE in this closet! It’ll never be a true pantry or anything since the HVAC system has to stay in there – but we added some handy storage and even a worktop surface – plus it’s where we keep our vacuum and broom and all that stuff. We’ll photograph and share all that we did in there in a future post.
Speaking of extra functions, another thing that makes this one of our favorite kitchens is the fact that this space is not JUST a kitchen. It also has a lounging/entertaining/hanging out area right nearby.
And compared to this picture taken during the initial renovation, the view has improved quite a bit.
The Kitchen Sitting Area
About half of this room is the kitchen zone, and the other half is a sitting area that is SO USEFUL to us. We all spend hours in here every day, and after two years of having it, we can’t imagine this house without it.
It’s an area that we definitely didn’t anticipate using or enjoying as much as we do – we just thought we’d try it out and see if we used it, and if not we’d put the dining table here and add an island to the kitchen or something. But boy do we use it.
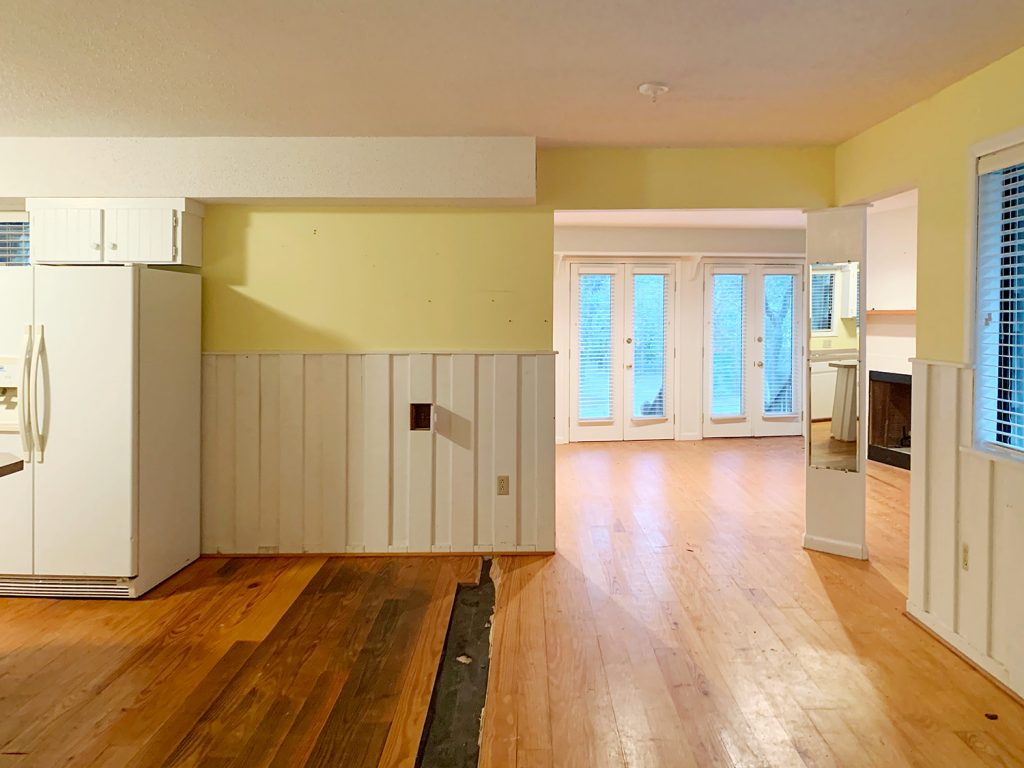
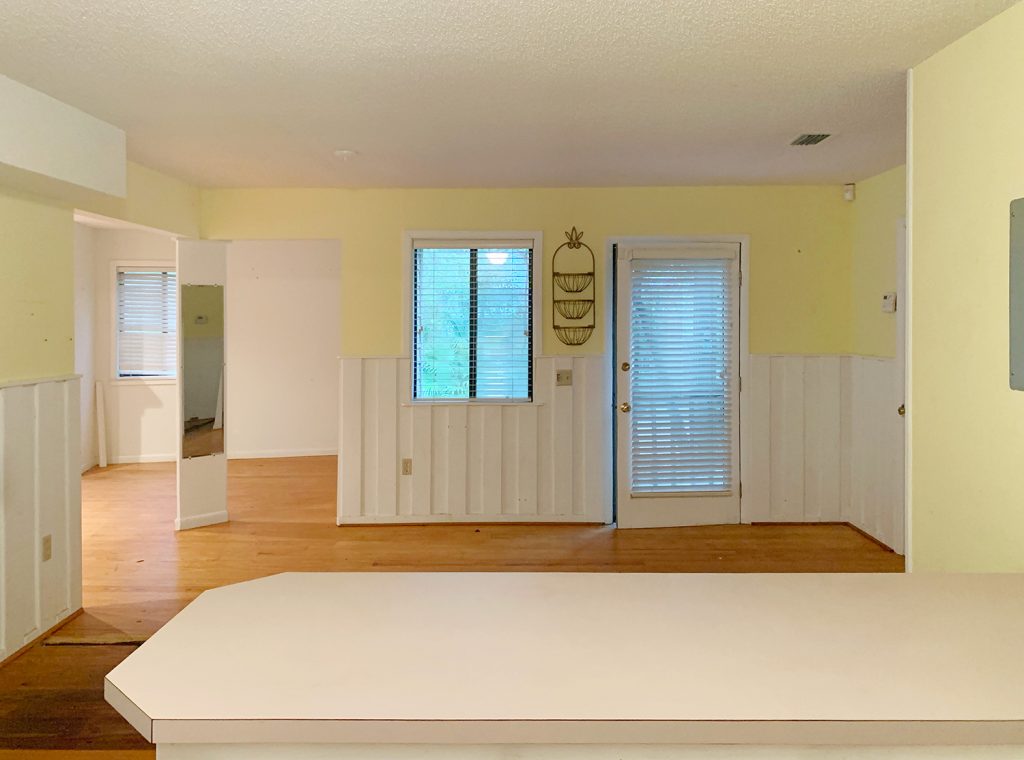
This is what it looked like when we bought the house and, as part of our initial renovations, we closed off part of that opening to create our bedroom. Our guess is that the previous owners had a dining table here maybe?
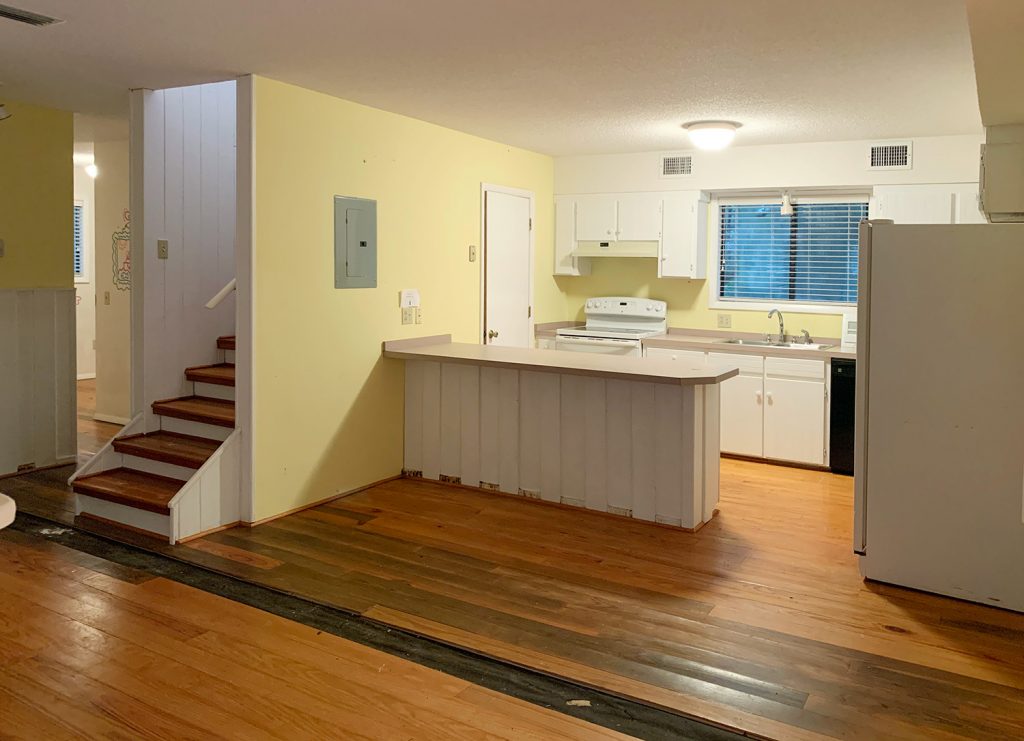
Here’s another view of what it looked like before. That’s the old kitchen peninsula in the foreground and that door is our front door. So maybe it was some dining room / foyer situation for the previous owners?
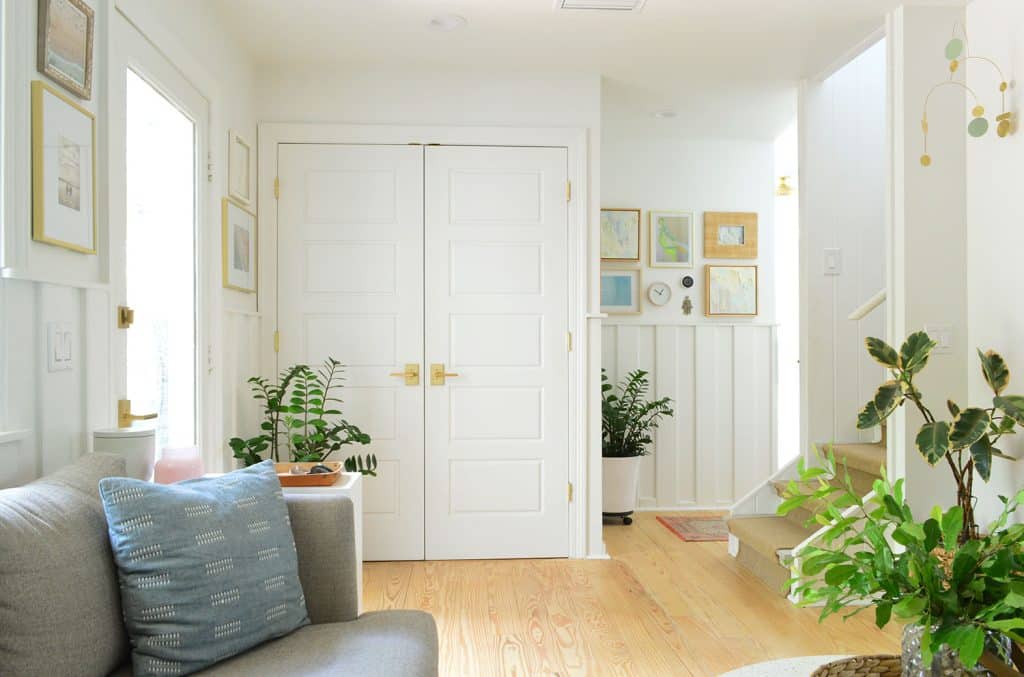
For us it has become the perfect small sitting area downstairs – for reading or hanging out with friends who stop by while their kids run off to play outside or upstairs. It’s also where our kids hang out while we’re making meals (in the morning before school we’re all in there – and in the evening around dinnertime too). Making this area work with two doors kind of in the middle of it took some strategic furniture buying. Like the cozy loveseat and our new round terrazzo coffee table – but it came together better than we could’ve imagined.
In a smaller house there’s a certain luxury to having a hangout area downstairs as well as a cozy TV/movie room upstairs (once again, we can have friends over and sit and chat here while the kids are upstairs crafting or watching a movie). It really helps the house “live large” because we don’t feel like we’re all on top of each other.
Here’s a shot with some people and a certain smiling dog for a better sense of scale. I’d say this is a pretty typical scene, although I’d probably be playing Wordle and Sherry would be whispering sweet nothings to Penny like she is below (perhaps while also attempting to beat me at Wordle and talking smack like only a lady from New Jersey can).
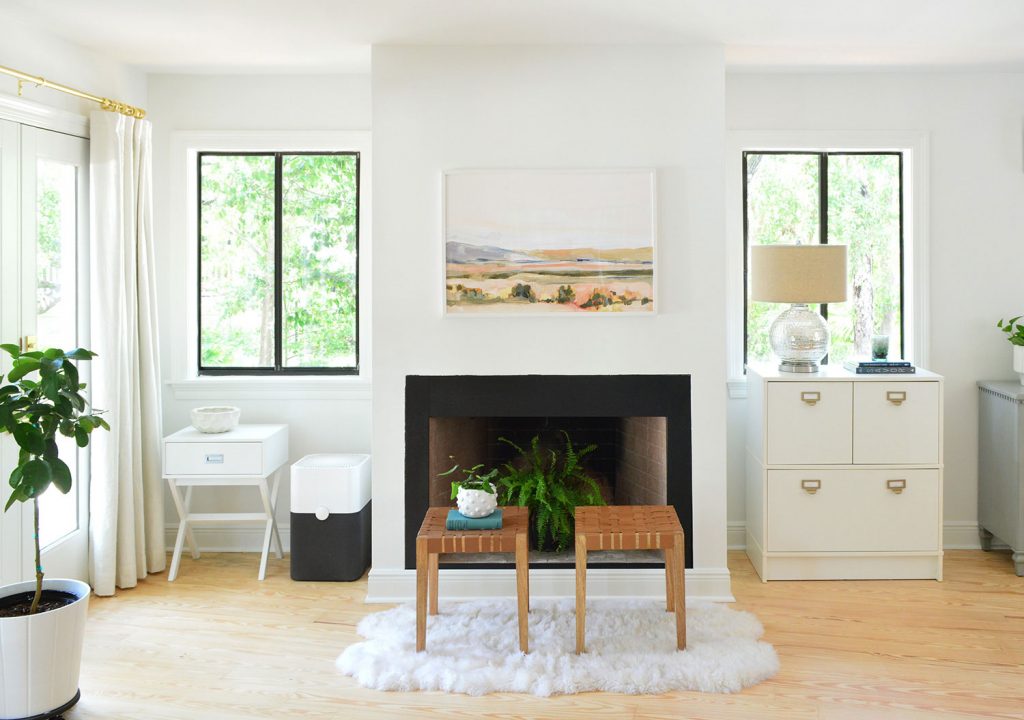
As much as we loved our old storage coffee table, we knew something round would give the room better flow. And slowly over time as we lived here, we were able to add more built-in storage (like our bedroom wardrobes, the cabinets flanking our fireplace, the media cabinet upstairs – and even more recently optimized the utility closet in the kitchen) which meant that we had lots of alternate spots for the items that we used to store in the old coffee table. Sherry has loved this terrazzo table from CB2 for a long time, so it was an easy choice once we eliminated the need for a coffee table with storage.
Even though it’s pretty substantial looking since it’s made of stone, the light color helps this side of the room feel more open and airy than it did with the other table. Plus the terrazzo texture plays nicely with the durable metallic rug we’ve had forever.
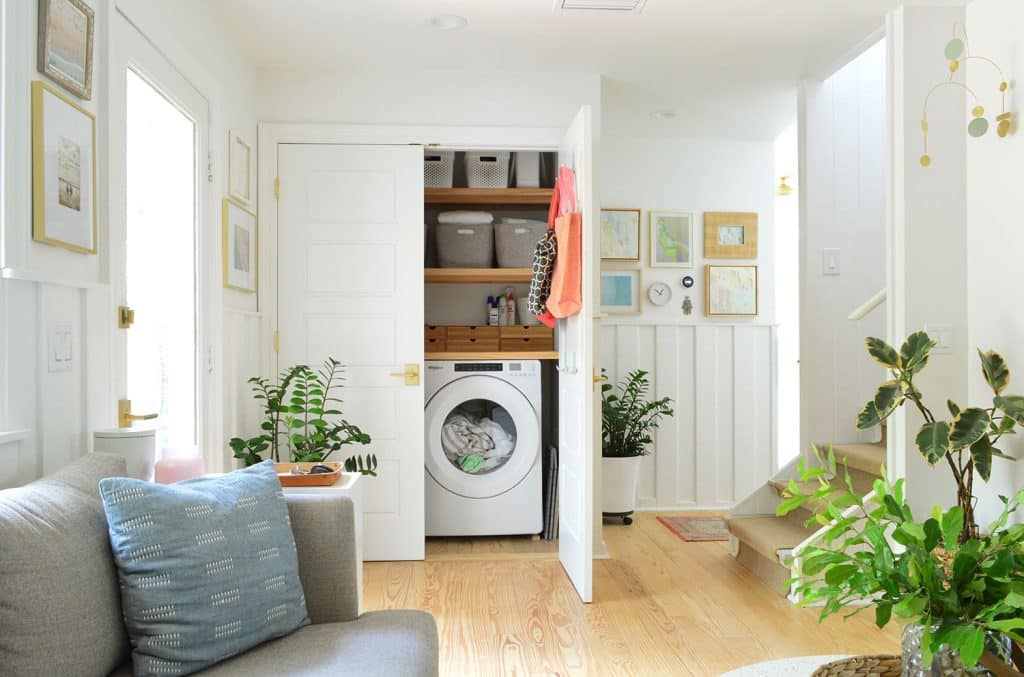
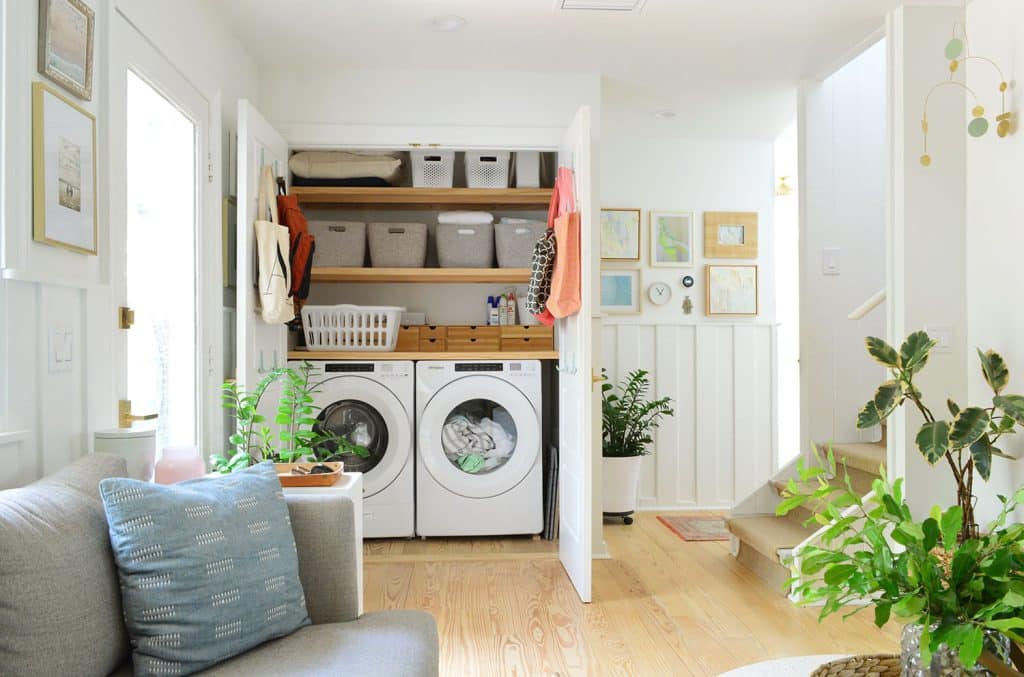
Speaking of a room that works extra hard for us, we might as well swing over to the other zone in this room… the laundry closet. Yup, behind those two doors = an entire laundry station. I’m telling you, this room works so hard for our family.
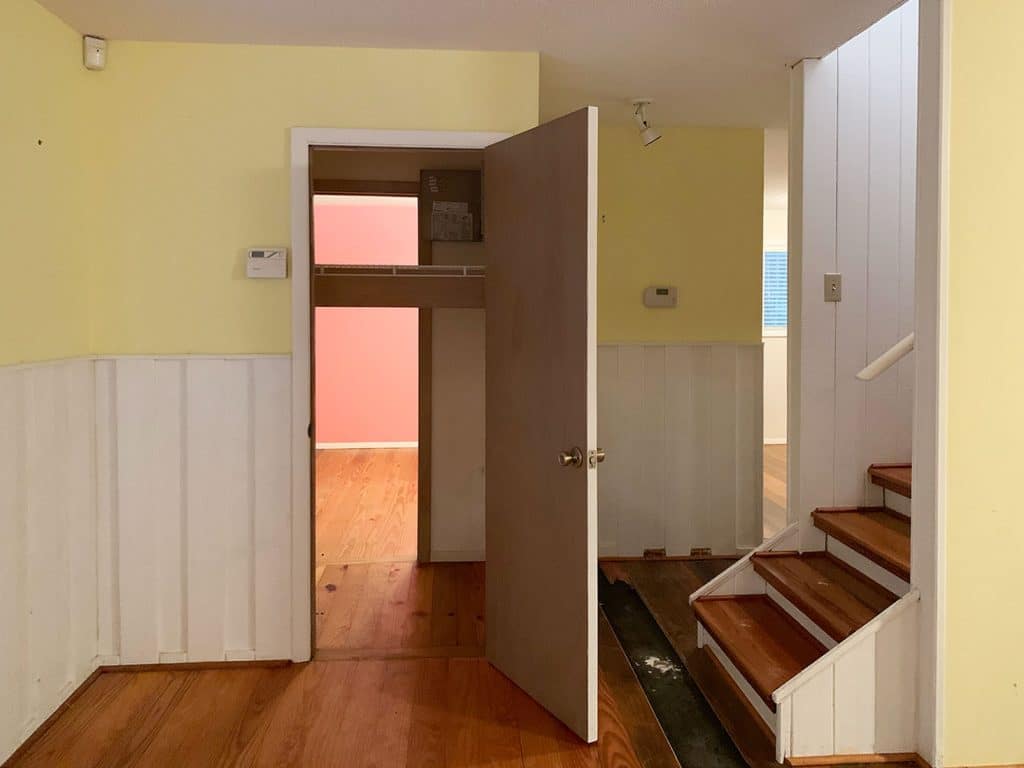
Let’s flash back to a before shot from the same angle, just for fun. it used to be less wide (just one door) and it inexplicably led into one of the bedrooms (which also had a normal door for entry, so we closed the back of the laundry closet off real quick).
It feels really good to have the kitchen feeling more functional and streamlined along with a settled-feeling sitting area and a super-efficient laundry zone. We tried all sorts of insane layout ideas for the sitting area before landing on something that worked, btw, so don’t get discouraged if a tricky space feels like it’s evading you. Just keep trying new things and rearranging stuff, and two years later you might just be like… “this is IT!”
Before I break out some math on you in the form of a budget breakdown (you know I love a spreadsheet) let’s take one last look at the real star of this room, curled up in one of her go-to spots. Penny seems to love this loveseat just as much as her brother did.
The Kitchen Renovation Budget
This was one of my harder budgets to piece together because it was spread over so many months, but I did my best to hit all the major renovation elements you see in the finished kitchen (the pendant, new faucet, cabinets, counters, sink, disposal, tile, paint, appliances, hardware, etc). It’s strictly a kitchen reno/material budget so I didn’t add the fruit bowl, toaster, table, chairs, etc – since that stuff isn’t attached to the actual house/reno and I felt like it would just get insane to try to tabulate every bowl & plant pot.
I also didn’t include contractor costs from the initial house update before we moved in, because we left the kitchen intact for the most part (the old cabinets/counters/sink remained) and I can’t break out *just the kitchen prices* from our original renovation (line items were more like: “whole house new drywall”, “whole house floors patched”). So this budget is from the point of starting with a room that has drywall and doesn’t have holes in the floor, which seems like a pretty common starting place.
We did all of the other work ourselves (cabinet installation, painting the cabinets, tiling the backsplash, etc) so that’s why you don’t see any line items for that. The counter pros did install the counters, but that’s included in the price below:
*Our stove, dishwasher, and refrigerator were bought second-hand for $500, which was the deal of our lives, thanks to Facebook Marketplace and our realtor(the appliance total is $930 above because it also includes the Ikea hood).
Note: Changing the kitchen window to a door was part of a larger contractor price for redoing our entire kitchen porch. We’d guess it was about $1,270 for that part of the job (around $900 for labor + $370 for the door), although the cost will likely vary based on your situation & the door you choose.
And while we’re on the kitchen budget subject, you can check out how much the duplex kitchens cost right here and see another amazing kitchen renovation that was done on a budget that we featured a while ago right here.
Ok. We did it. One giant photo-filled post about our finished kitchen with lots of before & after photos, as well as a video (truly, the video gives you so much of a better feeling for the space than any series of photos can, so watch that whenever you can).
Thanks for following along as we shared the most gradual kitchen renovation we’ve ever done. There were lots of small victories along the way, like finally having a pantry or finally getting a range hood – and man it feels good to stick a fork in it (*insert bad dad-joke about forks belongingin kitchens here*).
And if you’d like to look back on all the other kitchens we’ve renovated over the years, we’ve got you covered:
That makes this kitchen our seventh one (!!!) and we wouldn’t mind if it was our last. Lucky seven feels like a good place to stop. Although Sherry helped a neighbor update her kitchen (while keeping her wood-toned cabinets!) so we hope to get that up on the blog eventually.
*This post contains affiliate links, so we may earn a small commission when you make a purchase through links on our site at no additional cost to you.
When we thought about all the functions that would be helpful to have in our son’s bedroom, which can definitely be described as “cozy” when it comes to the size (real talk: this room is small), he needed:
a bed to sleep in
clothing storage
book and toy storage out in the open
some concealed storage for papers and other toys/games
added bonus: a hangout-y lounge spot for reading or playing with his sister or a friend who comes over
he also requested his own desk for drawing/homework/playing with magnets (yes, we have a current magnet obsession going strong right now)
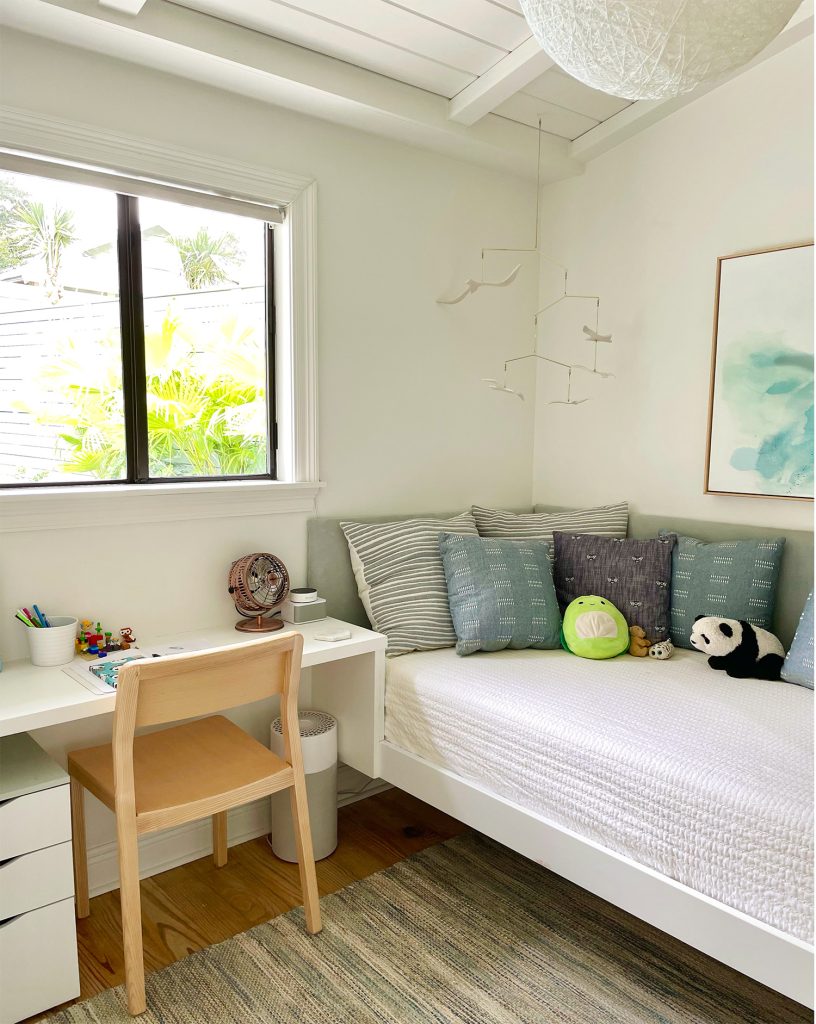
We definitely could have pulled the “your room is really small for a desk, not sure we can do that” card – but we thought it was worth a try thanks to the idea of customizing a built-in desk right next to the bed that could double as a nightstand. And low and behold, it worked like a charm. So yes, this small room has everything on that list we shared. A bookshelf, a desk (that also works as a nightstand), a big cozy couch-like bed that both of our kids hang out on, along with ample clothing storage and toy storage in a whole bunch of out-in-the-open and concealed spots in the room.
This is a very belated sharing of these projects (we completed these custom closet shelves a year ago in January of 2021 (I can’t believe it has been a year – I had to look at the date on my phone pics). So we’re happy to report that not only do they look nice, they’ve worked really well for an entire year.
Thanks to the modest size of this space, we definitely had to be intentional about working all of that stuff in. Our kids love a cozy room, so we didn’t worry that our son wouldn’t like or use this space (both of our kids hang out in here far more than in our daughter’s larger room – go figure). But a small room isn’t always easy when it comes to squeezing in all the functions. Sometimes you just have to pick & choose and get creative about what you store outside of that room – which we thought we might have to resort to with this space.
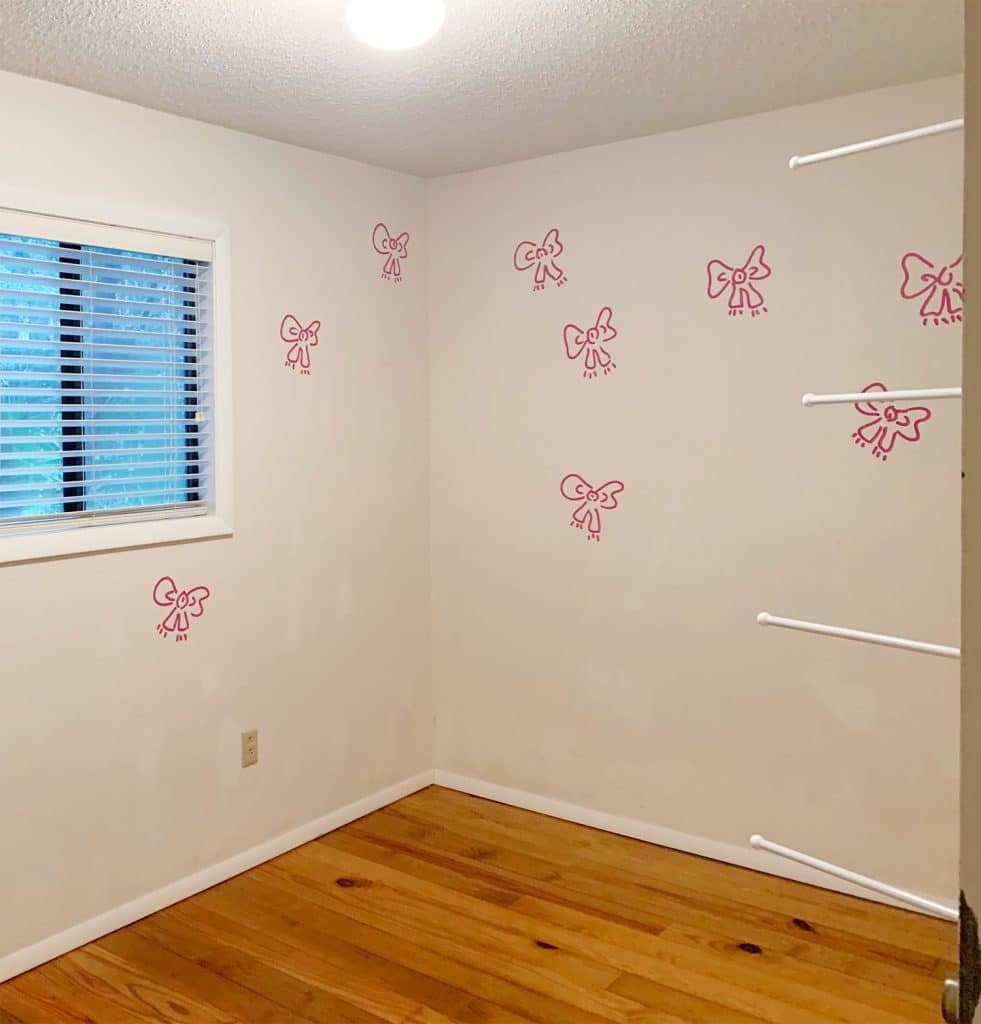
But long story long, we’re thrilled with how much we got out of this room thanks to a few simple DIY projects. Getting to check off everything on our list – including a few “nice to haves” on top of the necessities feels really good. And it sure has come a long way in here. The photo below is from our first walk-through of this house. Vaulting the ceilings made SUCH A DIFFERENCE in how much less cramped this small room feels (more on that here). The picture below is essentially the same view as the one above. Three cheers for turning a small box into a vaulted box with all the built-ins.
The photo below is another angle of the room as it looked when we bought the house:
And here we are with an after shot from a similar angle:
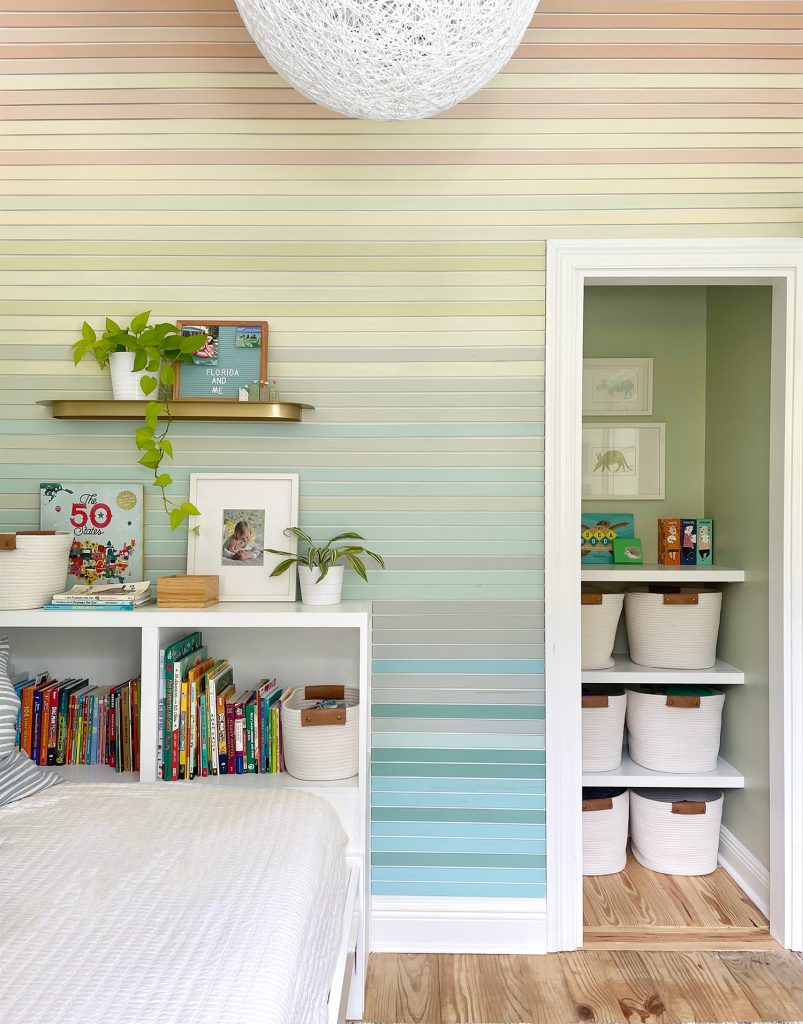
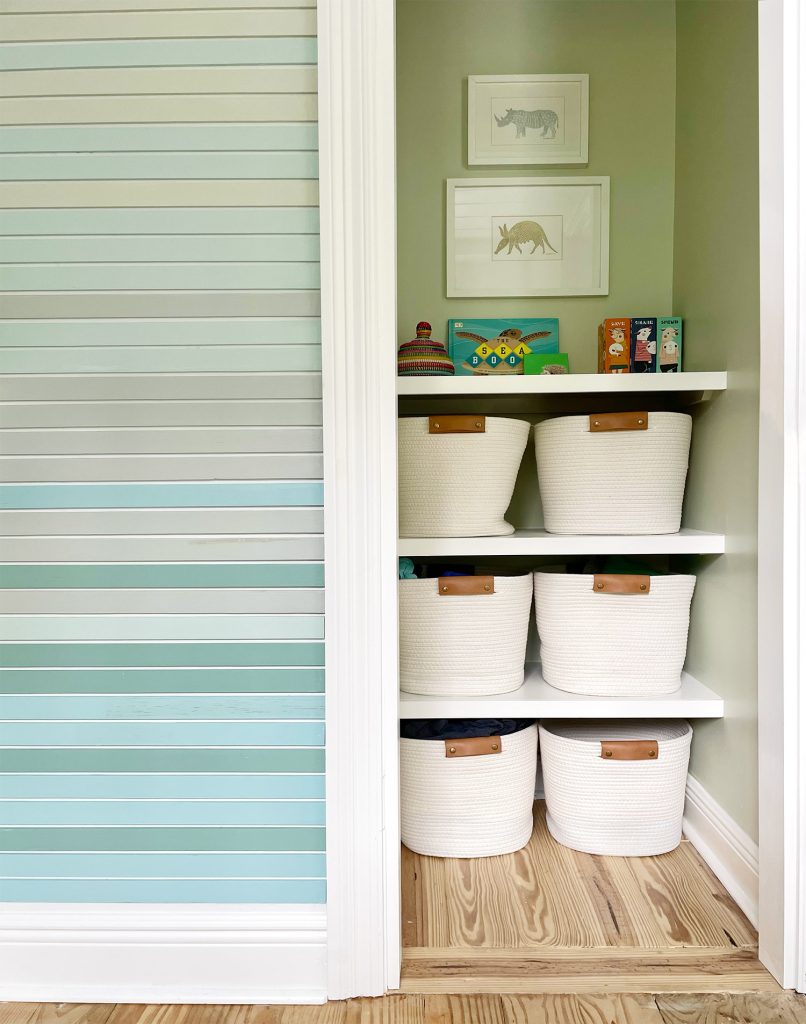
We debated everything from adding a bookshelf inside of the closet – or even a small desk in there, but realized that clothing storage in that nook felt the best for keeping the room functional long-term (a hanging bar can always be added up top whenever that need arises, and we can always add a door back on, although now it’s super functional without one since it fought with the main door to the room). So after deciding the closet worked best for clothing storage, we considered everything from shoving a tallboy dresser in there to hanging some fancy Elfa storage bins with pullouts for clothing storage, and eventually landed on shelves with large fabric baskets. Super easy to use. Super flexible. And something our son has used before when it comes to clothing storage…
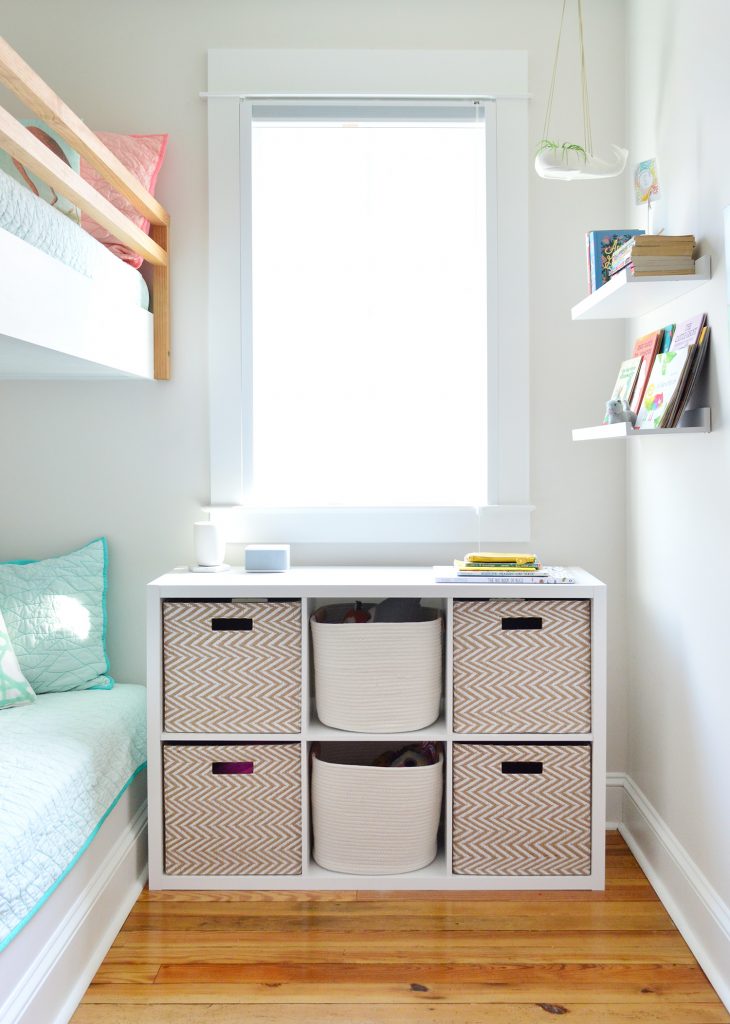
… see, both of our kids actually stored their clothes/pjs/swimsuits in baskets on shelves at the pink house for the entire summer when they shared that tiny bunk-room! (Soft theory: that’s also where they developed their love of squeezing into small cozy spaces together).
Thanks to the pink house and a year of using this setup here, our son really likes how simple it is. He puts all of his clothes away himself when they’re fresh out of the laundry, and it also makes it easy for him to see if he’s running low on socks or bathing suits so we can hurry up and do a load to remedy that (nothing can really hide in these baskets like it can in the back of a larger drawer).
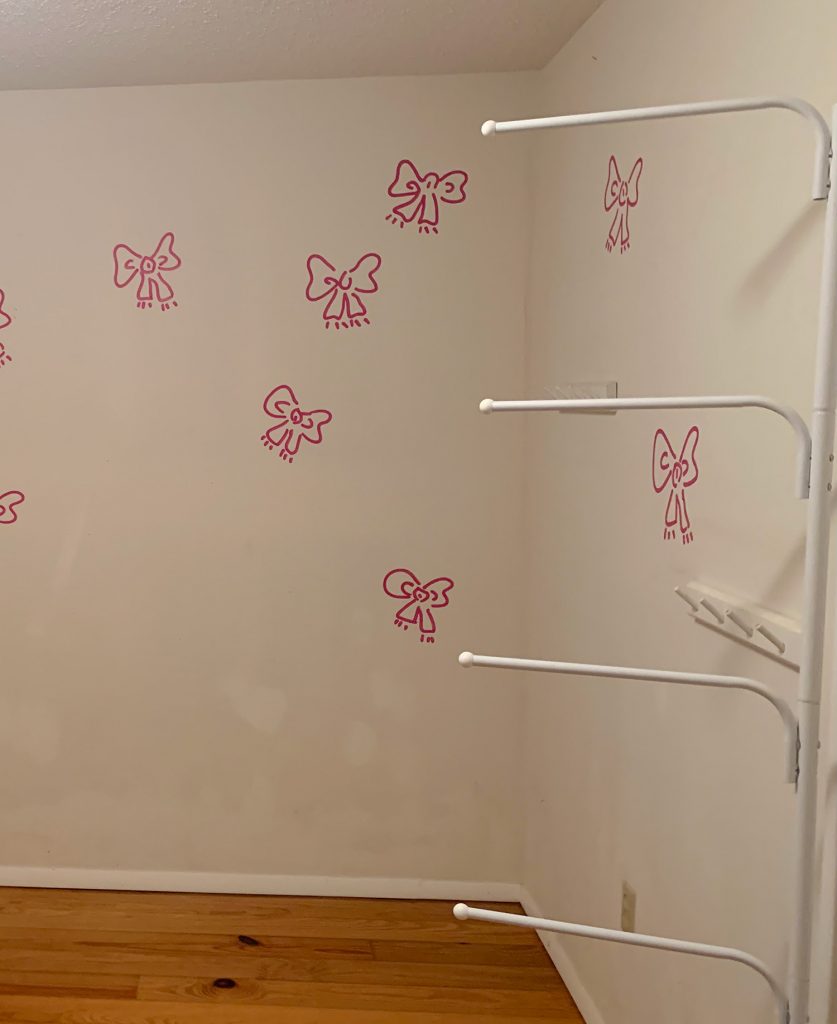
Does it mean we won’t add a door, a hanging bar, or a built-in dresser down the line if that feels like it would be more functional during that older stage of life for him? We certainly might. We’re all about evaluating exactly what works for the life stage you’re in – so it’ll be interesting to see where we end up when he’s older and he actually has items of clothing that have to be hung up (his current count of that = zero). Fun fact: this closet used to have a hanging bar but it was full of our clothes because the first 10 months we lived here, we didn’t have a closet in our room. Thank goodness we changed that.
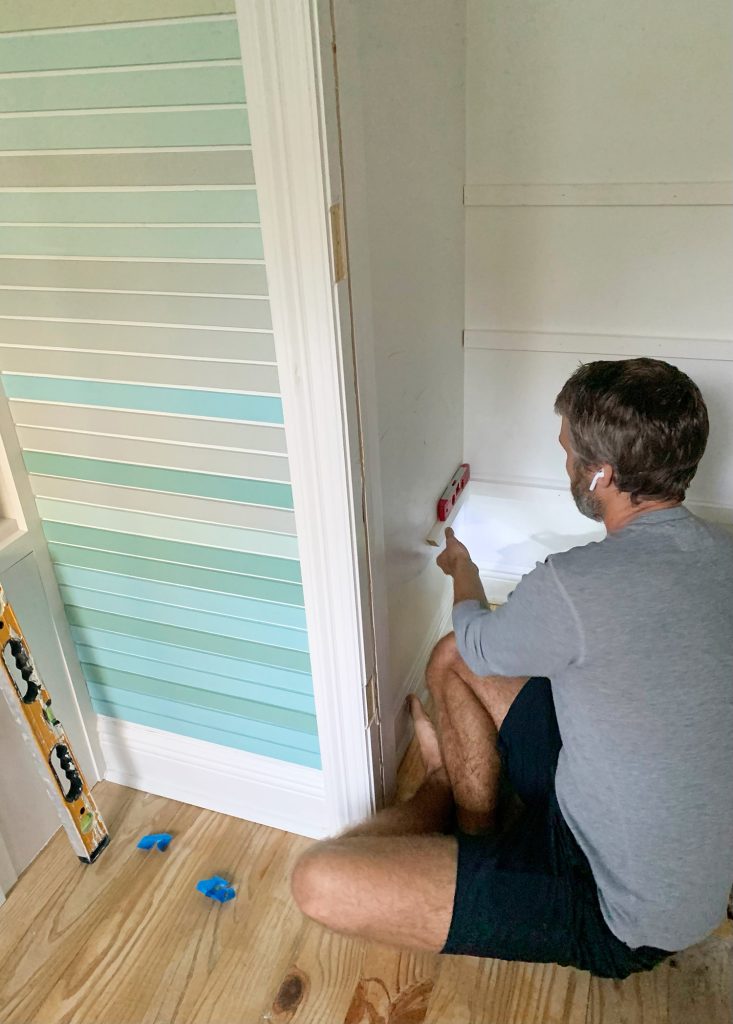
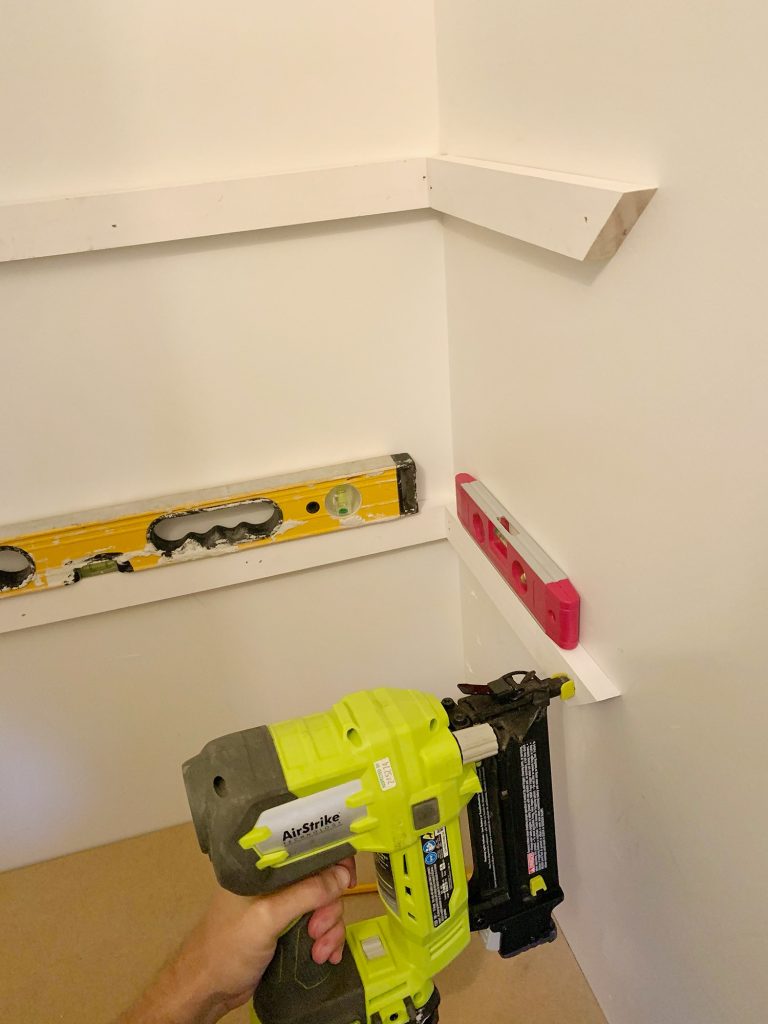
As for how we added these simple closet shelves, we basically followed the same method that we used to create our built-in pantry in the pink house so you can see that step-by-step tutorial here. A quick summary of our method = nailing and screwing in brace pieces of wood that you level on the sides and back of the closet, so that MDF shelves can rest on top of them and be nailed into place.
These are those brace pieces that support the MDF shelves, which we made with 1×2″ pine boards (we got the pre-primed ones for easy painting) from Home Depot.
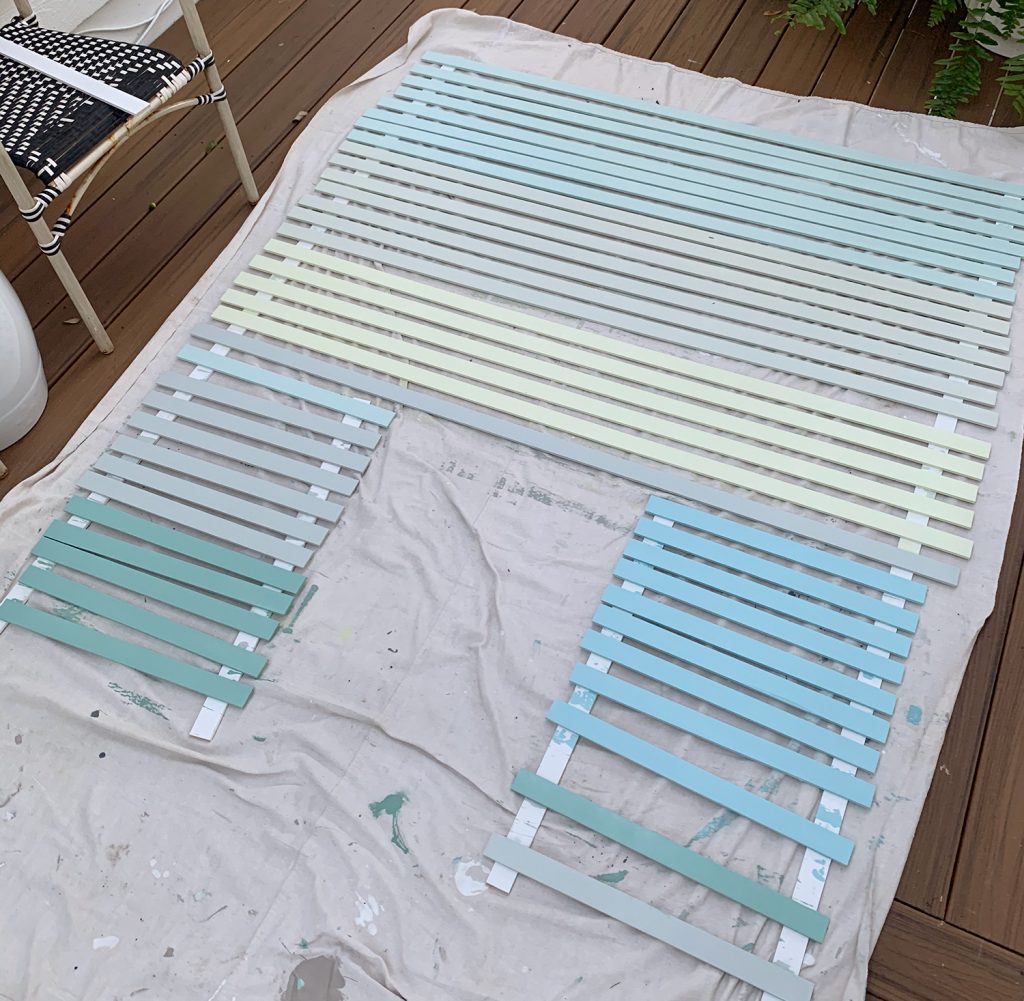
We used the same 1×2″ board to make the shelves appear chunkier (just add one along the front of the shelf to heft them up). That part of the tutorial is also much better explained here in this pantry shelf building post if you need more details and visuals. Oh and we painted the walls of the closet nook one of the colors in the wood slats that we used for that accent wall, so it fits right in. The color is Livable Green by Sherwin Williams.
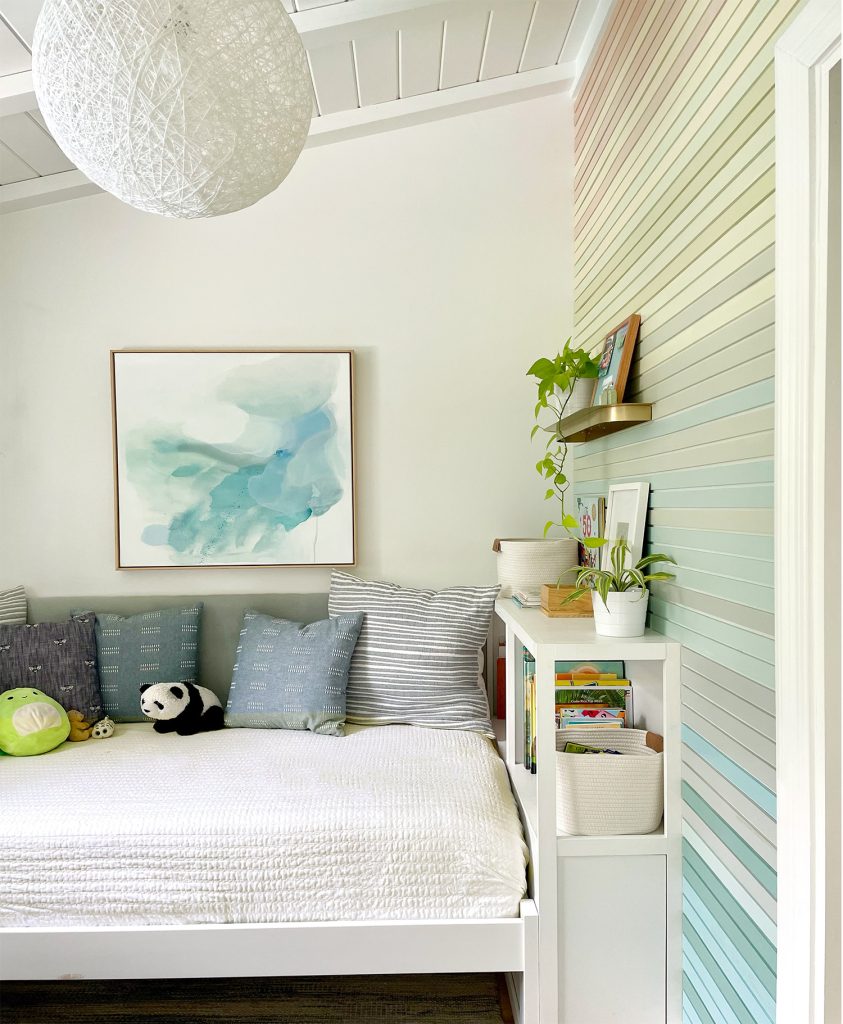
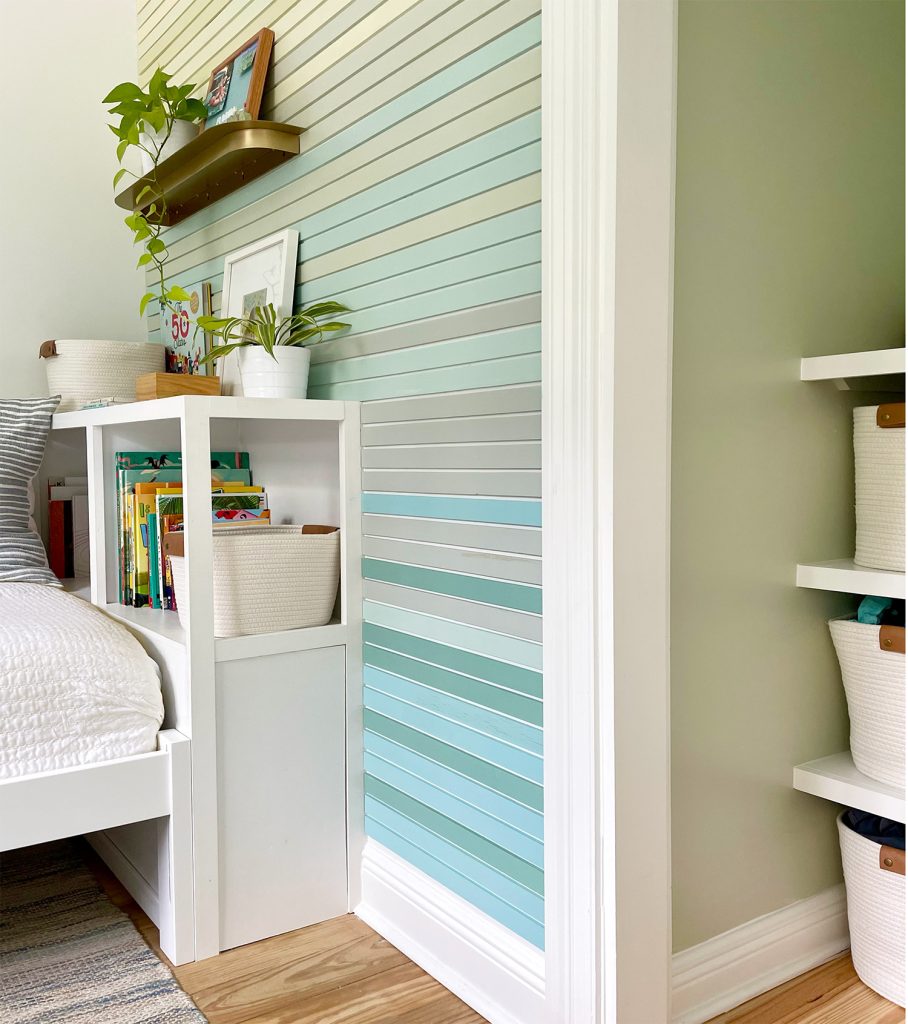
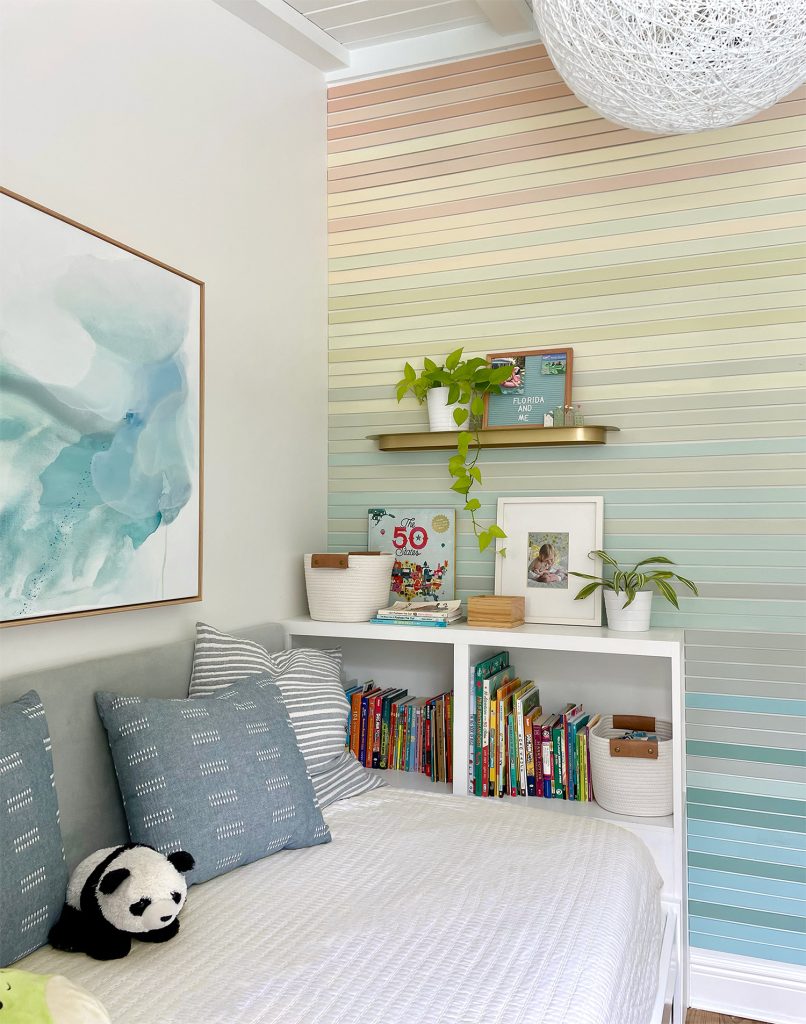
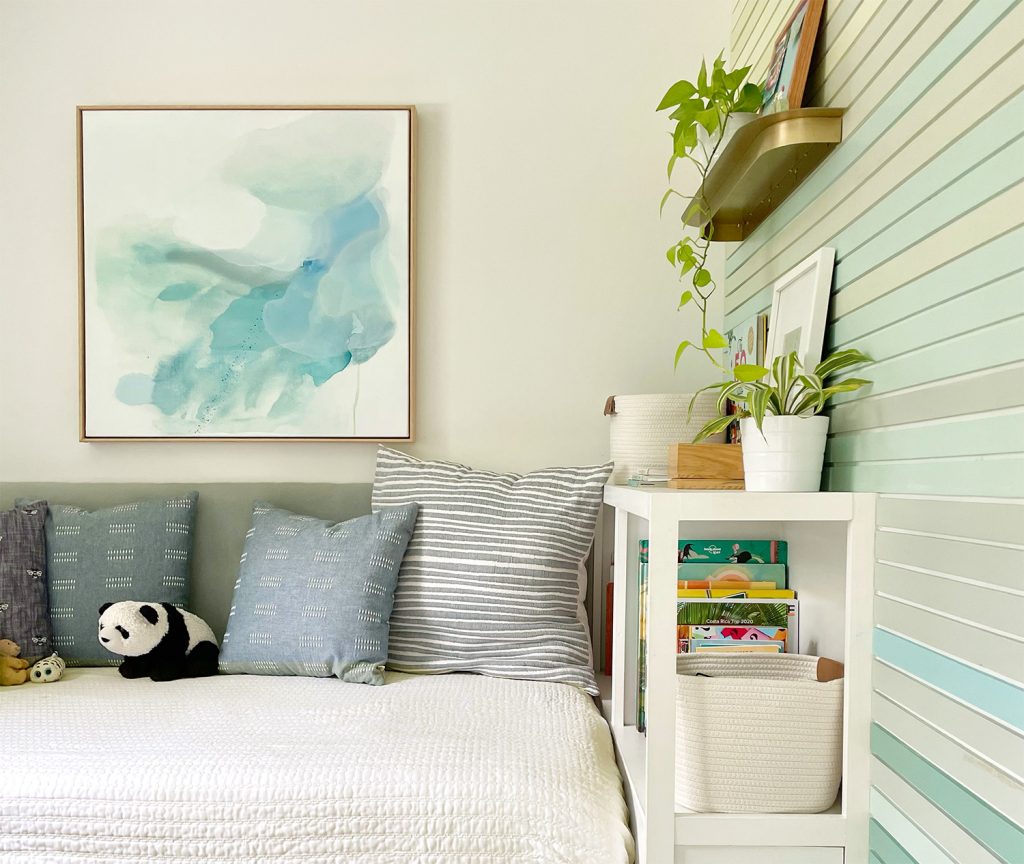
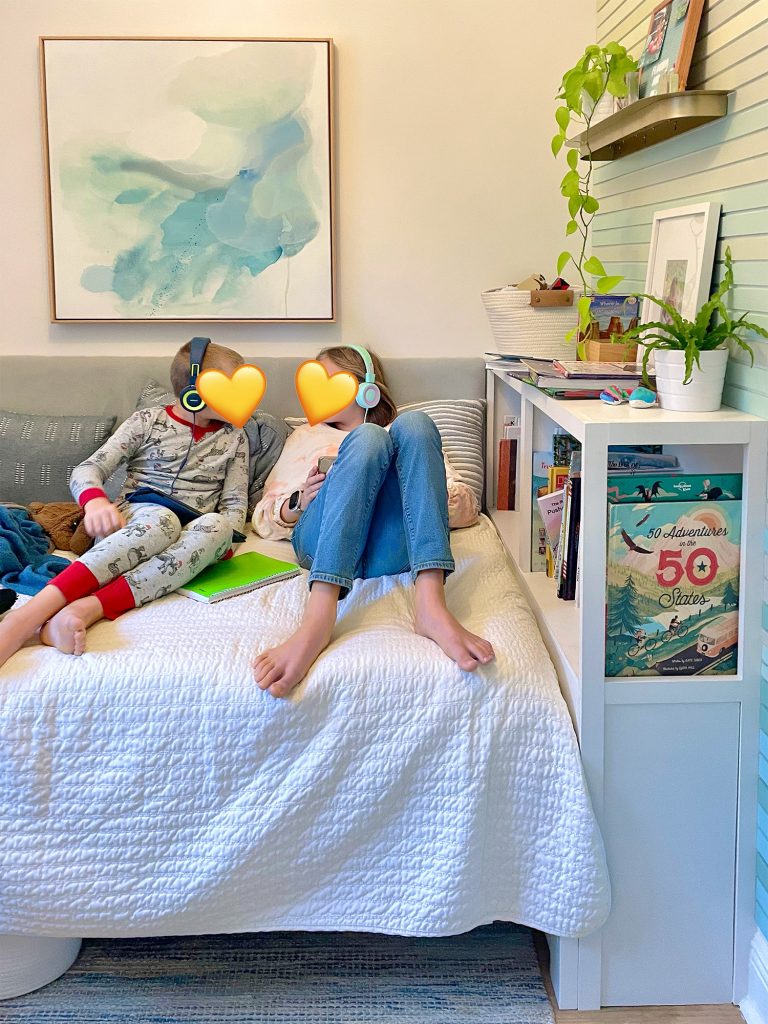
You might remember that we added the built-in bookshelf back in 2020, which is still going strong – along with that colorful planked wood wall (more onhow we did that here). One newer addition is that brass shelf that we hung above the bookcase, just for some more vertical interest on that extra tall wall (it’s the vaulted side of the room, so it’s nice to have something to draw the eye up and use more of that wall).
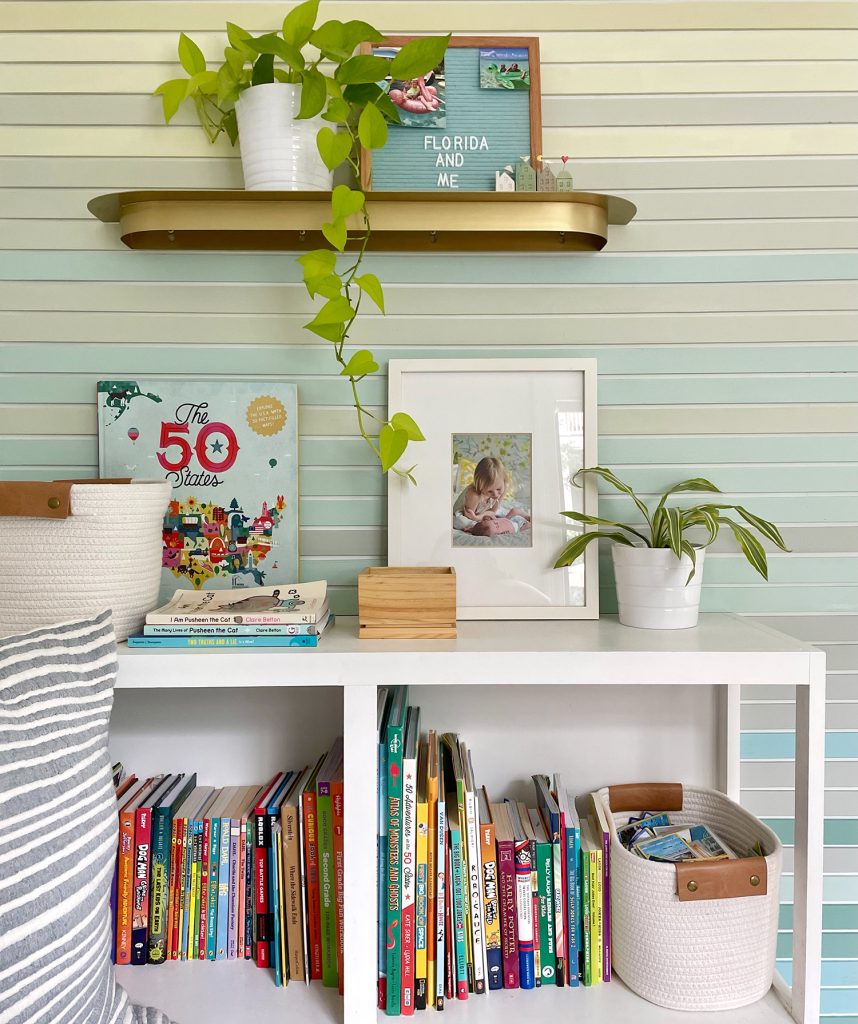
If you’re sitting there thinking “Ok, where are all of his trinkets and books and pokemon cards and gadgets and snap bracelets and other small items?!” – a ton of books can be stored here on this built-in bookshelf, and those two cloth baskets are full of pokemon cards and other smaller trinkets & toys. That wood box also has more collections of things (rocks, lots of rocks) and I got him the cutest four-drawer cubby after taking the photos for this post (of course!), but you might have seen that on my Instagram stories. There are also three desk drawers and many more baskets full of toys/games/more rocks/etc under the bed, so literally everything he wants in his room has a place.
And yes, he put “Florida and Me” on his little blue-green letterboard. Makes me laugh so hard. This is a better shot of that brass shelf we added. I really like the rounded edges and the fact that it’s exactly the same width as the wood slats, so we just lined it up with one of them when we hung it. Talk about a happy accident.
One really nice thing about this room’s setup is that it’s so easy to grab a book to read or a basket of cards to play with on the bed right from bed. Sometimes smaller spaces = even more efficient in that way. Small can literally mean easy access to lots of things right at your fingertips.
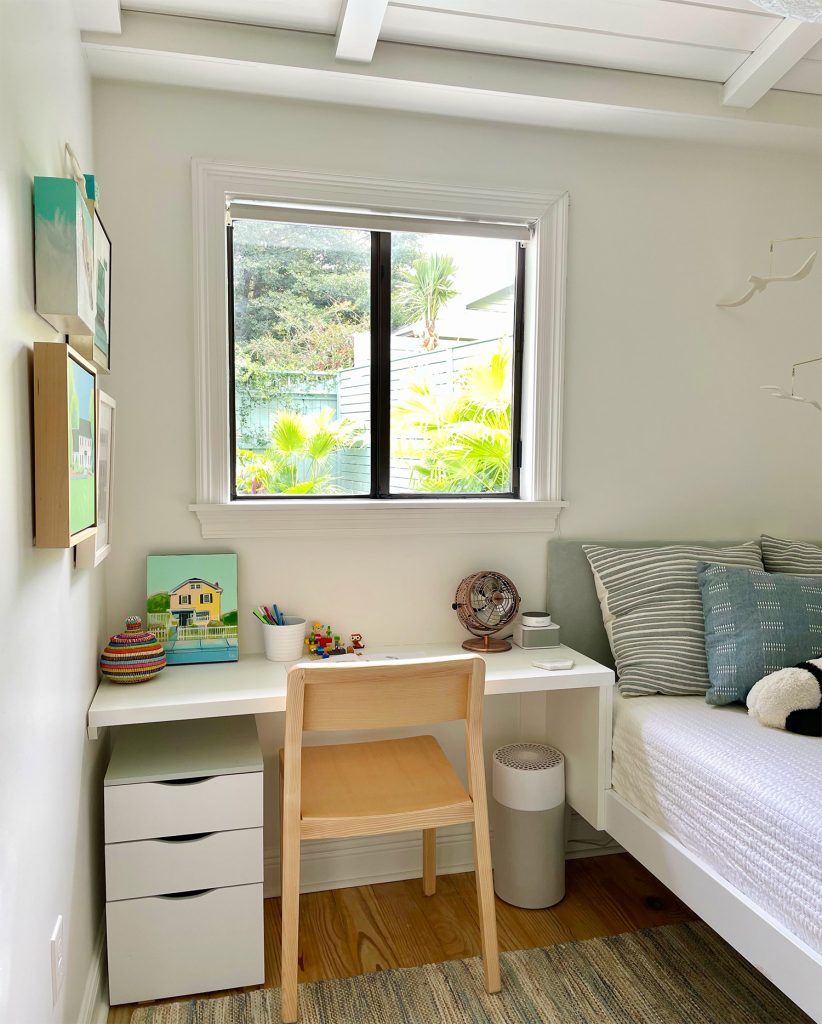
Swinging around to the other side of the room, here is the little floating desk concept that we came up with. By keeping it attached to the bed (the opposite side attaches to the wall) it really feels lighter and less crowded in here. And the best part of the desk coming right up to the side of the bed is that it doubles as a night table, with his sound machine and fan right there, along with a coaster for his nightly drink of water.
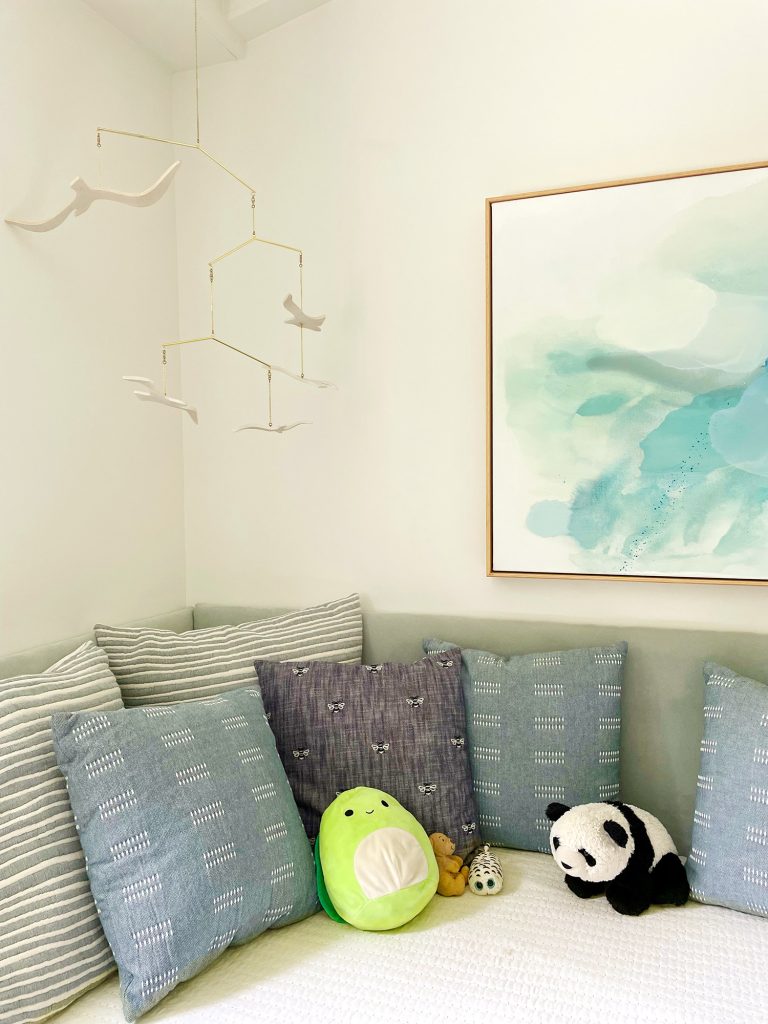
I think another smart choice we made in here was pushing the bed against the wall and creating not one but two upholstered panels to go behind it (one for the side and one for the back) so it has a really inviting loungey daybed/sofa vibe. This spot = where both of our kids hang out a ton (along with other neighborhood friends who stop by to play) thanks to that couch-like feeling. And the upholstered panels were so easy to make. Here’s a post with all the steps for you to create your own. Tossing a bunch of comfy pillows like theseand these finished it off (yes, our son has a special way he likes to nestle himself among all of those pillows and stuffed animals every night).
As for how we built the desk, it’s made from MDF, and we once again usedthat pantry shelf-building method to help hold it up. We used 1×2″ boards along the back wall and that left side wall, so the MDF top rested on them. As for the right side, we used some of the same MDF to support it against the bed. You can see how it’s just two pieces of MDF, and one rests on top of the bed rail while one goes to the left of the bed, sort of “hugging” it. We secured them by screwing into them from under the bed (so you don’t see the screws but it’s doubled up and very securely held in place).
Adding the three drawered cabinet under the desk makes for even more concealed storage (a Rainbow Loom kit and an Aquabeads set hide in there along with his new Christmas microscope and lots of papers and notebooks that he uses at his desk). You first saw a glimpse of it that little three-door cabinet in this post, which details seven of our favorite storage pieces that make the most of our smaller home.
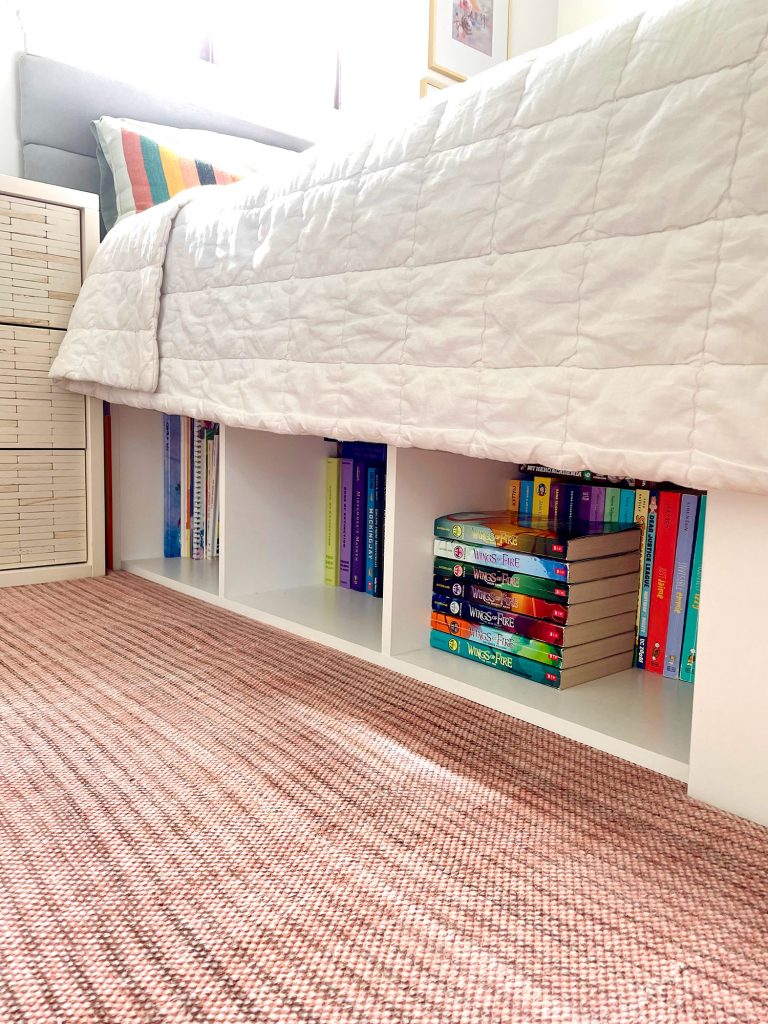
And the best thing ever is that we also have tons of under-bed storage in our son’s room. There are various baskets of other toys & games & stuffed animals down there, and they can tuck deep enough under the bed that they don’t look cluttered (see how you can’t see any in the photo below)…
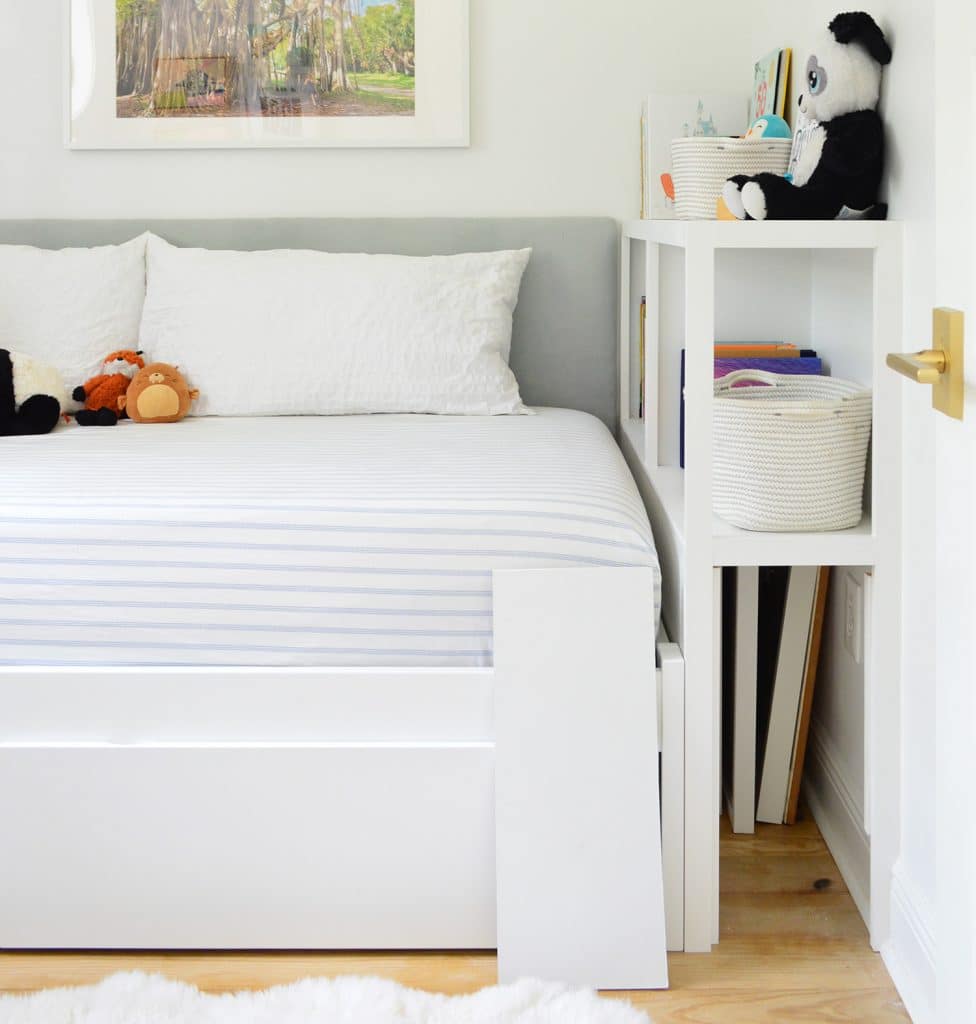
… but they can easily be pulled forward to gram something and play with it, like the basket you see peeking out from under the bed in the photo below. We actually initially bought him this bed because it had two large wood drawers that pull out from under it, which seemed very storage smart indeed. But we learned after living with them a while that smaller cloth baskets that can slide in and out made more sense than having to move two bigger and heavier drawers every time he wanted something. Plus individual baskets work better for the specific items he stores (like collectible cards, more rocks, did I mention there are lots of rocks?). Live & learn. (Am I the only one who says “and get Luvvs” in my head every time I hear or say that?).
We are SO HAPPY with how this room has evolved, not only for our son, but for our whole family. No joke, if we’re looking for the kids, 9 out of 10 times they’re either outside on one of the swings or hanging out in our son’s room together (in this case, listening to the Encanto soundtrack on repeat). WE DON’T TALK ABOUT BRUNO-NO-NO… but we love to talk about storage 😉
Also, see that rectangle of wood under his built-in bookcase? That’s ADDITIONAL secret storage because we don’t like for a single square foot to go to waste. This is an old photo below, just to show you what we mean:
That panel pops off if we press it in the right corner, and it currently houses some spare picture frames because our son doesn’t have any need for that additional storage. But as he grows if he does have a need for it, we’re happy to hand it over for whatever he needs. We could even add a handle to pop the door off a little more easily anytime he wants to access things down there.
And here’s a post we wrote about seven of the hardest working items of furniture in our house that help us store everything we need with room to spare! If you’re looking to optimize your house’s efficiency in the New Year, it can definitely help.
We need to write an updated post about our daughter’s room because we added a desk a while back (and swapped out her nightstands for the ones we used to have in our room, which you can see peeking into frame in the photo above). We do love a good switcheroo. Also, how interesting is it that one storage bed has worked out so so well without much change (our daughters, which you can see above – and read more about here). But our son’s storage bed’s big selling feature – those two large wood drawers – just didn’t pan out for us. Again, ya live and ya learn. And ya get Luvvs.
*This post contains affiliate links, so we may earn a small commission when you make a purchase through links on our site at no additional cost to you.
We independently select these products—if you buy from one of our links, we may earn a commission.
Last call to save big… and save space! With Amazon Prime Day wrapping up later tonight, now’s the time to pounce on the best last-minute deals for your home (and life in general). There’s no shortage of big ticket finds, from seating to rugs, but you can also find plenty of discounted picks on the opposite end of the shopping spectrum. That’s right: If you’re short on room, Amazon has you covered with small-space-friendly furniture and storage solutions. Think: stylish ottomans, tiny cabinetry, narrow tables, and the like. Act fast before they’re gone, Prime shoppers!