The Rooms We Don’t Miss After Downsizing (And The Ones We Do)

The Rooms We Don’t Miss After Downsizing (And The Ones We Do)

Sherry’s post a few months ago about what furniture & decor we still own after downsizing was the first time I’d looked back at photos of our previous house in a while. It was a fun walk down memory lane (how has it been 2.5 years since we moved?!). It also jogged my memory about how much “extra house” we used to have. As in, full rooms that were so under-utilized that I’d almost forgotten about them!

Painted White Brick Traditional Colonial Home In Richmond VA

Don’t get me wrong: we loved that house. But, as you know, it was a much bigger house than we realized we needed (spending an entire summer in our smaller pink beach house really clarified that for us – more on that here), and we were excited & relieved to downsize to our current home in Florida. We went from 3,150 square feet in Virginia to 1,400 square feet here – which is less than half the space, for the math nerds out there.

House With White Siding And Tropical Plantings

Some rooms here are just smaller than their Virginia counterparts, but we also have full rooms that are just totally missing (we went from 3 bathrooms to 1, and no longer have things like a garage, a home office, a dining room, etc). And over the past 2.5 years of living here in our smaller home (through a global pandemic, which resulted in an entire year of at-home learning in our smaller space!) we’ve definitely put having fewer rooms to the test. And since it has been a few years, and we’ve gotten along so well without them, I thought it’d be interesting to see which ones we don’t miss (and the ones that we do miss).

6 Rooms Versus 14 Rooms

Simply put, our current home has six rooms. A multifunctional room downstairs that has a kitchen on one side and a sitting area on the other, three bedrooms, a bathroom, and a multi-functional family room upstairs that serves as a TV room/office/crafting area/playspace. Here they are:

Collage Of Six Rooms In Beachy Florida Small Home

If you want to read more about those rooms and see more photos of each one, I’ve linked them below for you:

  1. The Kitchen/Sitting Area
  2. Our Bedroom
  3. The Bathroom
  4. Our Daughter’s Bedroom
  5. Our Son’s Bedroom
  6. The Upstairs Family Room

We’re lucky to also have a large upstairs deck, two porches, a pool area, and other outdoor spaces that give us a lot more room to spread out (and thanks to it being nice outside nearly year-round here, they get a lot of use!). But as for conditioned indoor rooms, those six spaces are it! We do have a laundry closet in the kitchen and a small hallway that joins some of the rooms, but those don’t count as actual rooms by any standard I’ve ever heard of.

Hallway With Traditional Rug Leading To Pool

Note: a grand hallway with actual furniture in it – like an entry foyer, can definitely count as a room (for example, our last house’s foyer had an entry table, a chandelier, and two of its own closets within that approximately 12′ x 12′ room – so the real estate listing for that house listed it as a room and included its measurements).

Speaking of our last house, let’s compare the FOURTEEN rooms we had there:

Collage Of Four Rooms In Previous Home In Richmond Virginia
  1. The Kitchen
  2. The Family Room
  3. The Dining Room
  4. The Office
  5. The Downstairs Bathroom
  6. The Foyer
  7. Our Bedroom
  8. Our Bathroom / Walk-In Closet
  9. Our Daughter’s Room
  10. Our Son’s Room
  11. The Hall Bathroom
  12. The Art / Homework Room
  13. The Laundry Room
  14. The Bonus Room

That’s a difference of 8 rooms – not including unconditioned spaces – so there’s definitely a noticeable difference between the two houses. A funny side note is that our Richmond house also had a GIANT walk-up attic (as large as the entire first floor of the house), a two-car garage, and a large outdoor shed, which are 3 other spaces that we don’t have in our current house.

Large Unfinished Attic In Richmond Home

Those three spots could hold a ton of stuff, so along with going down by 8 rooms, we also downsized those extra storage spaces! That’s actually something I’m really proud that we could accomplish. We used to have SO MUCH CRAP in the attic and the garage felt like we constantly needed to clean it out.

The Rooms We *Don’t* Missing Having

First, a quick disclaimer: different people obviously have different needs and wants from their homes. People often ask us about “our downsizing journey” (please say that with drama and emotion like every person on Love Island says “our relationship journey”) and we’re happy to talk about how things have gone for us, but we’re the first to admit that every human on earth will have different experiences, opinions, and outcomes.

The point of this list is just to share our thought process, which might help you determine what your “must have” spaces are if you’re house hunting, renovating, or maybe just rethinking the function of a spare room in your house. And if you’re thinking about downsizing, this might give you some hope that you’ll be fine without a [insert room you’ve always had here].

Also, we’re not writing this to suggest that you demolish a certain room or feel bad about having it. Lots of these rooms are vital in certain homes and households and, even if not, there’s nothing wrong with a room simply being “nice to have” either. Heck, we lived in our too-big-for-us house for 7 years before we made the move here! So maybe your spare bedroom is good for resale, that extra powder room was fun to decorate, or that basement gym is great for storing fifty-two boxes of holiday decorations. We definitely filled our attic TO THE GILLS. We have been there and we get it.

When we finally got to the place where we were excited (and then extremely relieved) to downsize, we also knew it would involve some sacrifices and compromises compared to our previous home. Honestly what this list showed us upon further reflection is how many of them haven’t felt like sacrifices in the long run! That really was the surprise from this hindsight analysis.

Don’t Miss: A Foyer

Bright Foyer In Richmond Home With Capiz Light And Stairs

Longtime followers might be surprised by this because we sometimes bemoaned the lack of a foyer in our first two homes. Both were small brick ranches where the front door opened right into the living room. So having a proper entryway in our last house had felt like we’d FINALLY MADE IT. We were fancy people with a foyer!

Bright Foyer In Richmond Home With Capiz Light And Blue Painted Door

But looking back on it, that room feels like wasted square footage because we basically never used the front door (we always came through the garage) so the foyer was just extra space to pass through on our way to other rooms. And even though we’re back to that door-swings-right-into-living-area scenario here, it honestly hasn’t bothered us. It’s like you always long for something, finally get it, and realize it’s fine but not a deal-breaker if it went away again.

View Of Seating Area And Front Door With Laundry Closet In Background

It definitely took some time to figure out a furniture layout that works around the front door, but we’re really happy with how it’s turned out. We even have some nice functional storage for coats and backpacks right when you walk in, thanks to the adjacent laundry closet (the kids were at school when we took this photo, but their backpacks hang on those lower hooks on the laundry closet door).

One Door Open In Open Laundry Closet Behind Seating Area In Kitchen

Ultimately, while we still see the value of a foyer in some homes – even just for the “fancy factor” of having one for a nice dramatic first impression – we’ve learned that we’d personally prioritize a functional entryway with storage. For example, if given the choice between a grand open foyer or a basic front door with room for a small mudroom closet or backpack dropzone behind a door, we’d choose the latter. In our case, we chose a super hardworking laundry closet and a nice open feeling in the living area instead of boxing out a formal foyer.

Don’t Miss: A Laundry Room

Again, this might come as a surprise considering we worked very hard to create a laundry room from scratch in our last house (we stole space from our unfinished attic). We even went all out with a marble backsplash and under-cabinet lighting to make it the most tricked-out laundry space we’ve ever owned.

White Laundry Room With Marble Tile Backsplash

In retrospect, it was definitely more laundry space than we needed. Going into it, we pictured LOVING the option to throw haphazard piles of to-be-washed items on the floor, shut the door, and let it be our little dirty secret. Or maybe enjoying some peace-and-quiet while we folded or ironed clothes in here.

Detail Of White Marble Backsplash In Laundry Room

But none of that ever really happened. Clothes never made a pit stop in here, apart from time spent in the actual washer or dryer (they were in our hampers before – and folded on the bed in our room after). Maybe if we had more kids, busier sports schedules, or bigger wardrobes (you know Sherry loves a minimal closet) we’d have found ourselves needing this spacious secluded laundry zone at the end of a long upstairs hallway. But for our family, having the laundry so out-of-sight actually ended up being a sticking point. We were constantly forgetting we had any laundry running because it was at the very end of this long hallway tucked behind a door (in both former houses it was a lot closer to more bustling areas of our home like the kitchen and we rarely forgot laundry thanks to that proximity).

Long Traditional Hallway With DIY Wainscoting

In many ways, our new laundry setup is ideal for our habits. It’s right in the middle of the house in a closet within our kitchen/downstairs living area, which makes it extremely convenient to everyone’s bedrooms and it greatly cuts down on forgotten loads. But it’s still roomy enough that we have a counter for pre-treating stains, a basket for wrangling too-be-washed items that might be on deck for the next load, and floor space for standing without being totally in the way.

Laundry Closet With Blonde Wood DIY Storage Shelving

And because it’s still behind closed doors, it doesn’t have to be kept pristine AND it cuts down on the laundry noise remarkably well. It’s funny also to realize that in our first two houses, we only ever had laundry closets or nooks with a stackable washer/dryer – and never really had a big dedicated room with cabinetry and tile and all that jazz like we had in our last house. But once again, I think it was a case of “eh, we had it and it was nice, but we’re just fine without it.” Basically when you downsize you choose your priorities and your house can’t have everything because then it would just be huge.

Don’t Miss: The Dining Room

This probably comes as no surprise to most people, considering how much “formal” dining rooms have fallen out of favor with many families. We also spoke often about how rarely we used this room. We usually ate family dinners at our kitchen island, so this was mostly just a dumping ground for packages and to-be-dealt-with boxes that we occasionally cleaned up if guests were coming over.

Bright Dining Room With Capiz Chandelier And Traditional Furniture

Now we only have one indoor dining spot: the table in our kitchen (which can seat as many as 8 people if we pull it out, which we’ve done quite a few times). As a family, we have learned that we MUCH prefer eating at a table facing each other, so this is a big improvement from sitting on higher stools all staring out in a line at our old kitchen island.

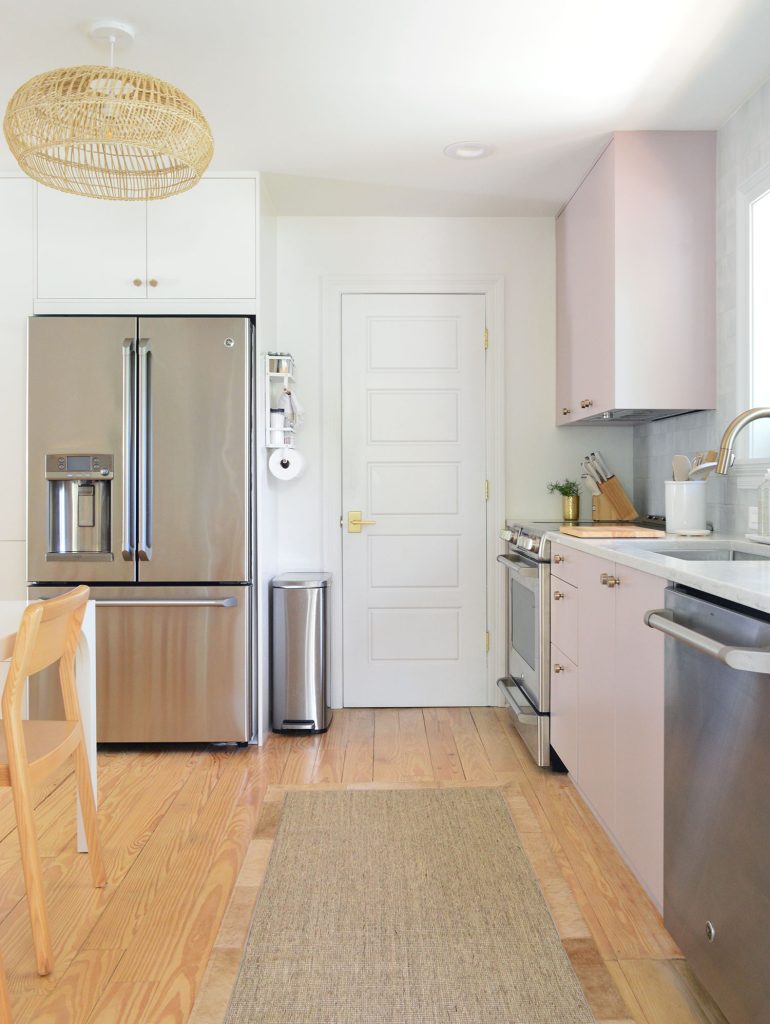
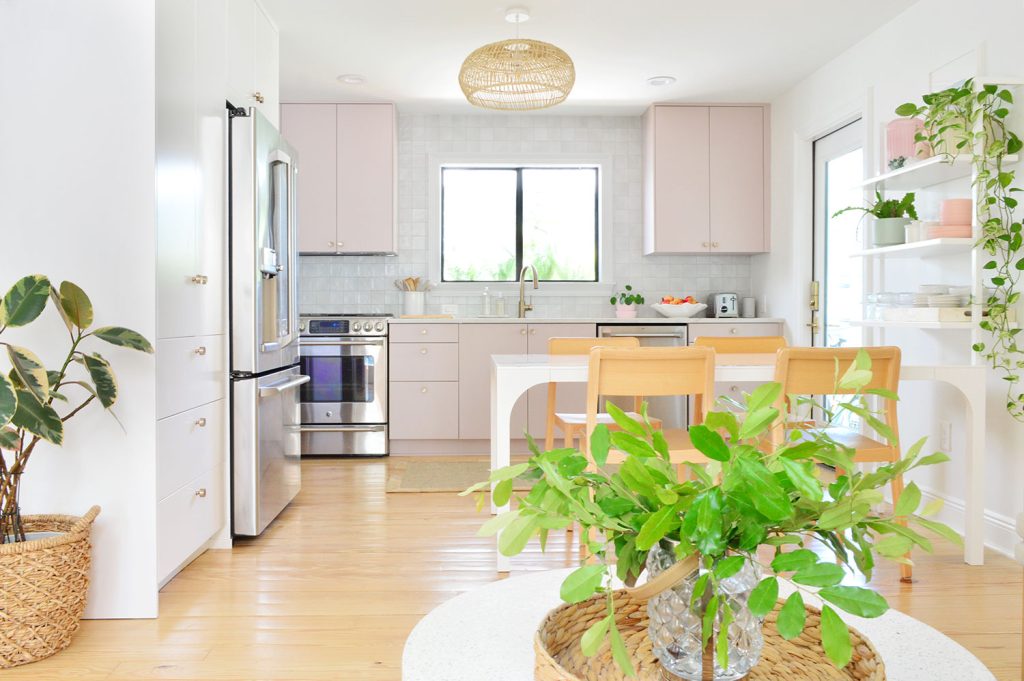
Side View Of Ikea Kitchen With White And Mauve Cabinets And Long Table

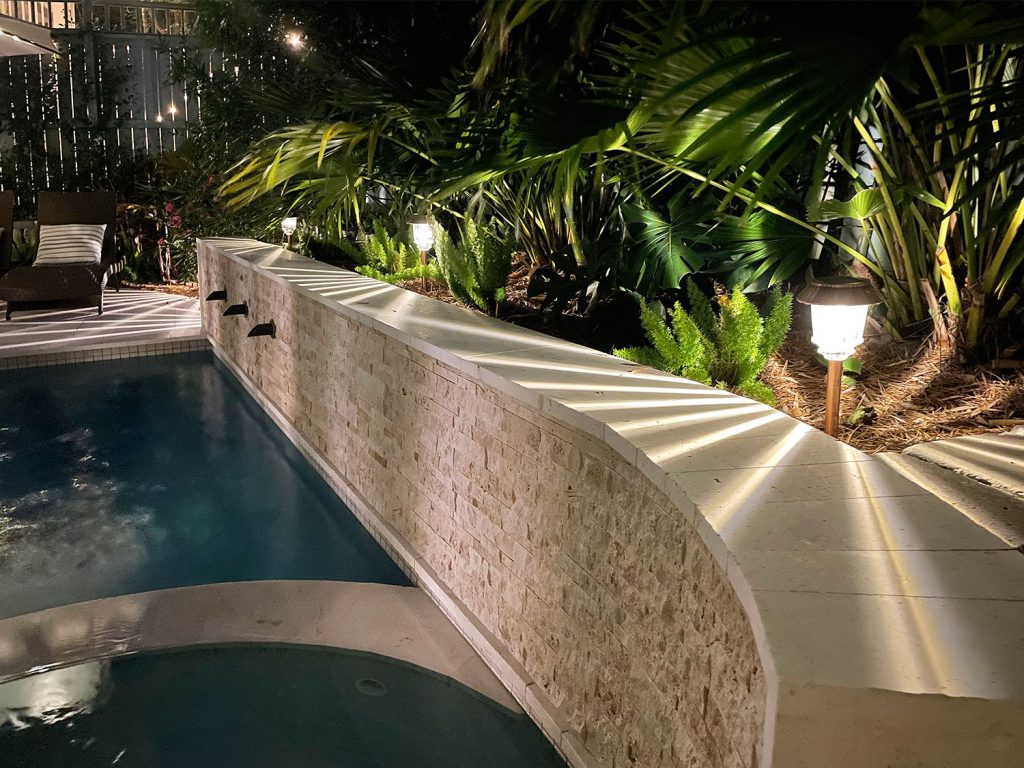
One obvious downside to this is that it’s a far cry from a “formal” setup, so if you love hosting dinner parties, this might not suffice. We’ve never been big formal entertainers (we like a casual set-out-the-chips-and-salsa game night or an order-pizza-or-BBQ-burgers dinner party), so it wasn’t a concern to ditch our dining room. These days if we have people over, we tend to gather outside anyways. We often eat out by the pool, where we have a nice big table with an umbrella that also seats 8.

Pool-Area-With-New-Dining-Table-Vertical

Don’t Miss: The Bonus Room

As the name implies, this room was “extra” space in our last house that we created by finishing the attic over our garage. After our kitchen, it was the biggest room in the house and it acted as a movie/TV room + playroom + crafting space. So it’s funny to think such a multifunctional room falls into the “don’t miss” category. But wait – there is a clear reason why we don’t miss it that we’ll get to in a second.

Bonus Room With Large Couch And Drawing Table With Ornate Blue Chairs

Converting this unfinished space on our second floor into conditioned usable square footage was partly because it just made sense for the house (it already had HVAC set up, so all it really needed was drywall to be a functional room – plus we still had a full unfinished walk-up attic on the 3rd floor for storage). And making this a bonus room appealed to us because we thought a secondary living space that was designed with the kids in mind would be nice. You know, a fun space to corral everyone’s kids when we had people over, a room that could be messy upstairs but you just ignore it downstairs, and a spot for cozy family movie nights.

Long Chaise Sofa Facing TV In Bonus Room

Funnily enough, the reasons we liked that bonus room are the very same reasons we love our family room in this smaller house! It’s an upstairs secondary living space that’s designed with our kids in mind, so they can leave it messy, hang out with their friends while the adults hang out downstairs, and we can all pile in for a family movie night. Note: we count our small downstairs sitting area & kitchen as our primary living space because we all spend even more time in that eating/cooking/hangout zone downstairs than we do up here, but it’s pretty close. Six rooms = you use them all, a lot.

Family Living Room With Crate Barrel Loft Sofa and Woven accents

Layout tip: in a small house, having two large living spaces that aren’t right next to each other is really what makes this house feel like it lives LARGE. We routinely have a ton of kids up here hanging out and all of the adults downstairs relaxing in the kitchen/sitting area, and thanks to one being an entire floor above the other, the kids don’t hear every convo we have downstairs, and we don’t hear whatever movie they’re watching or game they’re playing. It is great.

Just like our last house’s bonus room, our upstairs family room here has a TV, an art desk, and open floor space for games & crafts. Things have changed a bit now that our kids are older (we added that bonus room 6 years ago), so we don’t experience blocks and stuffed animals all over the floor like before. But this room still sees its fair share of messes in the form of crafting explosions or board game marathons – all of which end up on the floor – which is another reason we’re glad it’s upstairs and out of sight. Just like our former bonus room!

Bright Family Room Craft Space With Desk And Floor Covered With Craft And Art Supplies

So in the end, the reason we don’t miss the “bonus room” room is that we still sort of have it, just by another name. And ours works even harder here because it also has an office space tucked into it. Speaking of which…

Missed It At First: The Office

As two people who work from home, one concern when buying this house was not having a dedicated room for a home office. In our last house we had converted the formal living room into a large workspace for both of us, so we knew that downsizing to a room without a dedicated home office was going to be a big change.

Modern office with Ikea Fjalkinge shelves and two desks with Edgecomb Gray walls

The difference felt especially challenging right after we moved, thanks to COVID throwing virtual learning onto our plates. For an entire year, all four of us ate almost every meal at home, worked & did school five days a week from this house, etc. I mean: nothing puts a house to the test like that. And I’m happy to report that we made it work, but it definitely wasn’t the most productive time of our lives (I’m sure lots of people would say the same thing). This was the setup right after we moved. It was… not ideal.

Kids Working At Art Desk With John At Office Desk

The funny thing is that it wasn’t all that different from what we had going on in our last house’s home office (those two tiny chairs were the kids desk and the floating desk about four feet away was Sherry’s).

Office space with a kids desk with windows and a wall sized cork board above the kids desk

… but with kids at home all day long trying to do school while we attempted to work. Yeah, you guys know what that’s like. Thankfully, that wasn’t the setup for long – and many days actually looked like me in the bedroom on a work call with the kids upstairs doing school (or one/both of them in their own rooms so they could focus a little more on something), and Sherry working down at the kitchen table or locked in our bedroom for a differently timed zoom meeting or conference call.

Things got much better as the room evolved and the kids went back to school, and the desk space we carved out is hands down my favorite “home office” I’ve ever worked from (I’m typing from here right now and I have the whole room to myself!). You just can’t beat all that natural light and the view out of that big window.

Light filled upstairs family room with Ikea fjalkinge shleves and west elm Parsons desk

I’ve also switched back to a laptop so I can work outside on the upstairs deck (which I do often) or even on the kitchen porch, like you see below.

View Of Kitchen Porch With Outdoor Grill And Table With Laptop On It

Meanwhile, Sherry typically works downstairs at the kitchen table or even outside by the pool with her laptop, so in 2.5 years we definitely have figured out what works for us and love having such a flexible setup. It is occasionally inconvenient not having a dedicated, quiet space for work (like during the summer when the kids are home), but we never had a door on our old office, so we’re no strangers to being interrupted by kids or visitors. And just like we did in our last house – if we need a fully quiet space we just take the laptop into our bedroom and close the door. We even have a table in there by the fireplace, so it’s not a bad setup.

Full View Of Fireplace Flanked With Ikea Besta Built Ins

Do Not Miss: The Garage

Sherry and I debated where to put the garage on this list because every once in a while I think of a garage fondly, just due to how convenient it was, but I’ll explain why we ultimately both voted: don’t miss. Sherry has an actual hatred for our last garage and is so glad we don’t have one anymore just due to how much time we spent cleaning it out and dealing with it being full of crap all the time, so it wasn’t a surprise that she voted that way. But my feelings were a bit more layered.

Unfinished Two Car Garage

We’re generally very tidy, organized people. But for some reason, garages, sheds, attics, etc have always been our Kryptonite. Our Monica’s Closet, if you will. Every single time we spent days cleaning and organizing it and promised ourselves we wouldn’t let it get that bad again… it did. So the reason we don’t miss a garage is just that we’re extremely grateful we are no longer in that super frustrating loop of not keeping our promise to ourselves and spending yet another weekend cleaning the freaking garage.

Garage Filled With Junk Like Bikes And Yard Equipment

Not having a garage or a garage-like space has actually forced us into much better habits. We deal with boxes and to-be-donated stuff right away (out to the car it goes). We don’t collect secondhand furniture with as much abandon (Sherry’s still a fan of the curbside find, but only if we immediately have a need/spot for it). And not having a garage has spared us from having to dedicate weekends to big garage clean-outs and, more importantly, the general shame we constantly felt about the state of our garage. It was an everyday sticking point that we never solved. And now, we’ve solved it by not having one.

Garage Filled With Junk Like Yard Equipment Boxes And Extra Furniture

The simple reason I very occasionally look back on a garage fondly is that it’s nice to have a covered enclosed space to store things like bikes and our car. Here I really just would like it for bike storage. Our car is out in the open and it’s completely fine, but we use bikes here much more than we did in Virginia, and having a wet seat from them sitting out isn’t amazing (weirdly, it’s how basically everyone stores their bikes here: all lined up outside). It would be simple enough to make a covered little alcove for our bikes somewhere in the yard with a big piece of tin on posts or something. Even easier, I just discovered these bike seat covers – and our seats aren’t wet anymore. So I think Sherry is 100% right. We cannot be trusted not to fill a garage with crap. We have unlocked entire weekends spent at the beach & our pool that otherwise would have been spent cleaning a garage if we had one. So I’m certain that in the long run it’s a win for us not to have one.

But lest you think we’re fully cured… we DO have a small shed on the side of our house that we use for tools, yard equipment, and other miscellaneous stuff. It’s about the size of a port-o-potty, so we can’t really stuff tons of things inside… but I’m only showing you the outside of it because – TRUE TO FORM! – it’s currently a mess inside.

Small Shed Built On Side Of House With Towel Hooks

Sometimes Miss: Our Ensuite Bathroom

This may come as a surprise since we’ve put our plans to add a second bathroom to this house on indefinite hold (we just don’t feel squeezed for one at all yet – and embarking on an expensive reno when the current setup has worked fine for years now just doesn’t feel like the best use of money or time). So while we actually don’t miss having an ensuite bathroom, we just sometimes miss THIS specific bathroom from our last house.

Marble Traditional Bathroom With Herringbone Walk In Tile Shower

And I think that’s mostly because we didn’t have much time to enjoy the finished product before we moved. We gleefully finished the bathroom and only got to enjoy it for about 3 months before we had a Florida zip code.

Large Walk In Closet Next To Marble Tiled Bathroom

The timing certainly wasn’t perfect, but it was a small casualty for making the more rewarding lifestyle change of downsizing to a warmer and more walkable home near the beach. Looking back at those photos, I think we just wish we had renovated the bathroom MUCH SOONER (we lived in this house for 7 years, almost all of which were spent with the unrenovated bathroom that you see in the before photos here).

Detail Of Marble Bathroom With Intricate Herringbone Pattern

The Trade-Offs Of Downsizing

Missing that grand bathroom of yore is a prime example of reminding ourselves that we made intentional trade-offs by downsizing. Yes, we no longer have a big fancy marble bathroom. Instead, we have this beautiful space to take an open-air shower in the sunlight (and an actual indoor shower too). True story: we all shower outside around 90% of the year – it’s our favorite spot with the sun streaming down and a whole lotta plants.

Wood Slatted Outdoor Shower With Cascading Hanging Plants

Actually, a ton of downsizing is just trading something for something else. We live a few blocks from the beach (we can walk there in 3 minutes!) but we all share a bathroom. We don’t have a garage, but we have a big second-floor deck up in the trees. Our kitchen is about 1/3 the size of the one at our last house, but there’s a grocery store, restaurants, and ice cream shops within walking distance. Our internet isn’t always reliable (seriously it’s sloth-slow sometimes) but we have a pool that we can swim in year-round and a firepit for s’mores. We have a lot less square footage than we used to, but it’s easier to clean and more affordable to heat & cool. You can read more about the entire process of downsizing (it wasn’t all roses!) and that whole tradeoff concept here on our about page.

And if you’d like to read other posts we’ve shared about downsizing over the last 2.5 years, these are packed with info:

Also, if you have any questions about wall colors or where we got certain items in the photos within this post, this post has all the source info for our current house, and this post has all the source info about our last house.

Creating Custom Storage With Ikea Bestas

Creating Custom Storage With Ikea Bestas

Want to turn simple store-bought cabinets into custom built-ins? “Hacking” something that’s already made is so much easier than building something from scratch, and it can look really custom in the end. Built-in storage is universally helpful (especially in a smaller home – but really, anywhere), and things like the floor-to-ceiling closets in our bedroom, the desk & bookcase we added to our son’s room, and the wall-to-wall media cabinet in our family room have made such a difference. But one built-in that we’ve barely mentioned since we added and upgraded them are the Ikea Bestas flanking our fireplace:

The good news is that it took just a few fairly easy steps to make them look a lot more custom than they look on the showroom floor in Ikea. So let’s get into the details.

Why Did We Choose Ikea Bestas?

The photo you see above is the view directly across from our bed. You may recall it from inspiring photos like the one below, taken right after we moved in and were still in the thick of unpacking. Like, quite literally THE THICK.

Messy bedroom right after move in with boxes and junk everywhere

Once we were fully unpacked, it became clear that this area was begging for some matching storage on either side of the fireplace. We knew some sort of cabinetry would nicely flank the fireplace, sit right under those matching windows, and wouldn’t take up much floor space while adding a lot more concealed storage. Because let’s face it, what we had on hand wasn’t going to cut it for the long haul:

Bedroom Fireplace After Moving In With Random Objects On Either Side

Lucky for us, Ikea’s Besta system sold a 47″ wide cabinet that just about perfectly fit in that 50″ space on the left side (we added some filler pieces for a wall-to-wall look – but more on that in a second). Paired with some basic legs, the height of a Besta also fit perfectly under each window. So it was basically a no-brainer to start with those and then add custom details to them for a built-in look. We actually bought them way back in fall 2020, which is why you might’ve noticed them in the background of our holiday decor post that year. This is a photo from back then, minus the actual holiday decor:

Bedroom fireplace view with two chairs and Ikea Besta cabinets sitting on either side of fireplace

At this point, they weren’t really “built-in” – they were just sitting there. But we were so grateful to have earned more concealed storage that we didn’t rush into the rest of the makeover. But I’m glad we have these photos because it shows how much more upgraded the same basic cabinets can look with a little extra work.

White modern fireplace with Ikea Besta storage cabinets sitting on either side

Over the next year, we got them looking a lot more custom. And now we can’t really even picture them looking like the two photos above.

It’s worth noting that the reason the right one doesn’t terminate into a wall is that we haven’t added a wall there yet – but someday down the line we plan to make a bathroom right at the end of that built-in, so it’ll terminate into a wall and look completely balanced from the bedroom.

Wide View Of Fireplace Flanked With Ikea Besta Built Ins

How We Customized Our Bestas

There are lots of ways you can “hack” Ikea pieces to make them your own – paint, add trim, install hardware, wallpaper them, etc. But for these, we really just did three simple things to make them look more built-in:

  1. Added baseboard
  2. Added filler trim on the sides
  3. Added a butcher block counter

Adding Filler Trim & Baseboards

We’ve covered how to add filler trim and baseboard to Ikea pieces a few times for other built-in projects. So check out our son’s nursery built-ins or our walk-in Ikea closet for a more specific step-by-step on that process (I fully walk you through the entire process – I promise you can do it).

Side By Side Of Adding Filler Pieces To Ikea Furniture

The main thing to remember – which I labeled below when doing our last closet – is that you may need to account for TWO LAYERS of filler trim. A bottom layer will be secured into the side of the cabinet box, while the top layer will sit on top of it, looking flush with your door.

Labeled Image of filler trim with one flush with door and other flush with box

That way when the doors are closed, it should look something like this – with the filler piece flush with the front of our door.

Close up detail of trim added to side of Ikea Besta cabinets to look flush with doors

To add the baseboard, we just used the same baseboard and quarter-round trim that we have around the rest of room and literally nailed it into the basic square legs that came with the Bestas. It was that easy!

After the filler pieces and baseboard were attached, we caulked all of the seams and nail holes, then painted everything to match. We’ve had decent luck color matching “Ikea white” paint (although not even Ikea uses the same white on every piece). For these we realized that our wall color (SW Pure White) was a close enough match, so we just used that.

Adding Butcher Block Counters

You’ve now seen us use this butcher block countertop material for 2 other projects – our utility closet makeover and our DIY wood nightstands – but these Bestas were actually the place we first used it! We love how chunky it is and how the color works so nicely with our floors, so we thought it’d be a great way to make these cabinets look more custom.

Ikea Besta Built In Storage On Left Side Of Fireplace

We used our circular saw to cut it to size and then sealed it with a coat of cutting board oil, both to protect it and to bring out the color a bit. It dries much lighter than it looks below, so don’t panic.

Butcher block counter being coated with cutting board oil sealant

To attach it we simply screwed up through the top of the Besta right into the wood (just make sure to use screws that aren’t long enough to poke through the top!). Sherry sits on it and I screw up from below (yes, I am aware of how that sentence sounds and I’m waiting for Michael Scott himself to say his well known Office catchphrase). It’s pretty heavy so it stayed in place well on its own, but the screws make sure it won’t drift over time.

Close Up Of Butcher Block Counter On Ikea Besta

The other thing we did was drill holes for various cords so things like our tabletop lamps could go through the top and be plugged in below. Both Bestas have a wall outlet behind them (we’ll show you how we maneuvered them to be exposed behind the cabinet in a second), but adding these access points for plugs in the countertop was a really great upgrade. We had to buy a special 2″ drill bit to make the hole (it took some patience to get all of the way through the butcher block AND the top of the Besta). Once it was done, we capped it off with these brass desk grommets to make it look tidy and professional. They go in with the light tap of a rubber mallet.

Detail Of Electrical Cord Hole Cover Drilled Into Butcher Block Counter

The cords just snake into the Besta and sit unceremoniously on one of the shelves. You can also see how we cut out a hole in the back of the Besta to access the outlet. It’s not very pretty, but who cares? It’s hidden inside the cabinet and you have to crouch down about 10″ from the floor to see it even when the door’s open.

Detail of Plugs And Wires Within Ikea Besta Storage Unit

Speaking of the inside of our cabinets…

What We Store In Our Customized Bestas

Adding these cabinets was a game changer for our storage in this room. It turned the dead space on either side of our fireplace into super functional spot to conceal a ton of stuff that woud otherwise look a lot more cluttered. Sherry actually filmed a quick video to give you a closer look at how they look all upgraded in our space & to show you what’s inside (including more about how we wired up the lamps):

Note: You can also watch this video on YouTube.

For those who can’t watch the video, here’s a quick photo tour. The cabinet on the right side stores a bunch of miscellaneous stuff like spare paint (as you can see above in the outlet photo), camera & podcast equipment, and some random journals and stuff. There’s even a fair amount of extra space that we can expand into when and if we need it (watch the video to see what we mean about that).

Ikea Besta Storage Unit Door Open To Show Camera Equipment

The cabinet on the left side is a bit more hardworking. It contains a bunch of overflow books, gift bags & tissue paper, plus some overflow candles, vases, and other knick-knacks that Sherry likes to rotate in and out. We’ve definitely cut down on our excess “decor stuff” since moving, but it’s nice to have a spot for this smaller grouping of items that we kept and still use on occasion.

Ikea Besta Unit Open To Show Book And Decor Stroage

And I know from the photos it looks like it’s really tough to access this cabinet, what with the table and the chairs in front of them. But don’t worry, it’s definitely fully accessible in real life. That table is heavy, so I certainly wouldn’t want to have to move it every time we needed to wrap a gift! You can see Sherry easily walk in there and open the cabinets to show you what’s inside on the video in this post.

And here’s a photo of Sherry grabbing a candle from in there (but definitely watch the video for a more real-life-usage POV).

Sherry Getting Candle Out Of Ikea Besta Storage Unit In Bedroom

Overall, we’re so happy with how they turned out, especially considering how simple our “hacks” were to make them feel like custom built-ins.

Other Ikea Hack Projects

Wanna see some other Ikea hacks? Here are some of our other favorite Ikea furniture customizations:

Side by side of built in book case Ikea Hack and brass spray painted glass shelf

*This post contains affiliate links, so we may earn a small commission when you make a purchase through links on our site at no additional cost to you.

Adding Outdoor Storage To Our Kitchen Porch

Adding Outdoor Storage To Our Kitchen Porch

I’ll start this post with a confession: I resented our kitchen porch when we finished it last fall. Resent is a strong and, admittedly, strange word to use for a porch. But I’ll explain it later on in this post. The good news is that I no longer harbor any ill will toward it. In fact, it has become one of the spaces I’m most grateful to have in our smaller home. Especially after some functional additions that we’ve made to it over the last year since you saw it.

I love this space so much, that I’m actually writing this post from it right now. Call it Method Blogging. I’m fully immersed in my character.

A Kitchen Porch Renovation Recap

You can read a full post of this porch’s previous updates, but the quick version is: this used to be a porch off of our bedroom, which had 8 glass doors leading outside (yes, eight whole doors in one room). We closed off two of the doors that led to this porch, which you see in the photo below (which also created a wall for our bed). Then we swapped that black window for a door that connects this porch to our kitchen.

Before photo of kitchen porch area with brown siding

Taking this from “unused bedroom porch to “heavily used kitchen porch” has been a complete game changer. We love that this update created a quick path from our driveway to the kitchen, which makes bringing in groceries a whole lot easier.

You can see below how we park our car just outside the gate beyond this porch. There are still parking spots for guests in the front yard (they get to walk up our pretty front porch and enter into the sitting area, which feels nice for people visiting), but this little side yard parking spot has been so great for us. It’s a much more direct route into the house, and the porch is covered, so it’s a dry spot to run under if we’re coming home in a downpour.

Open Fence Gate Showing Car Parking Access To Kitchen Porch

We also love the easy access to our outdoor grill that’s just steps away from our kitchen’s cooking area.

By comparison, this is what we had going on when we bought the house:

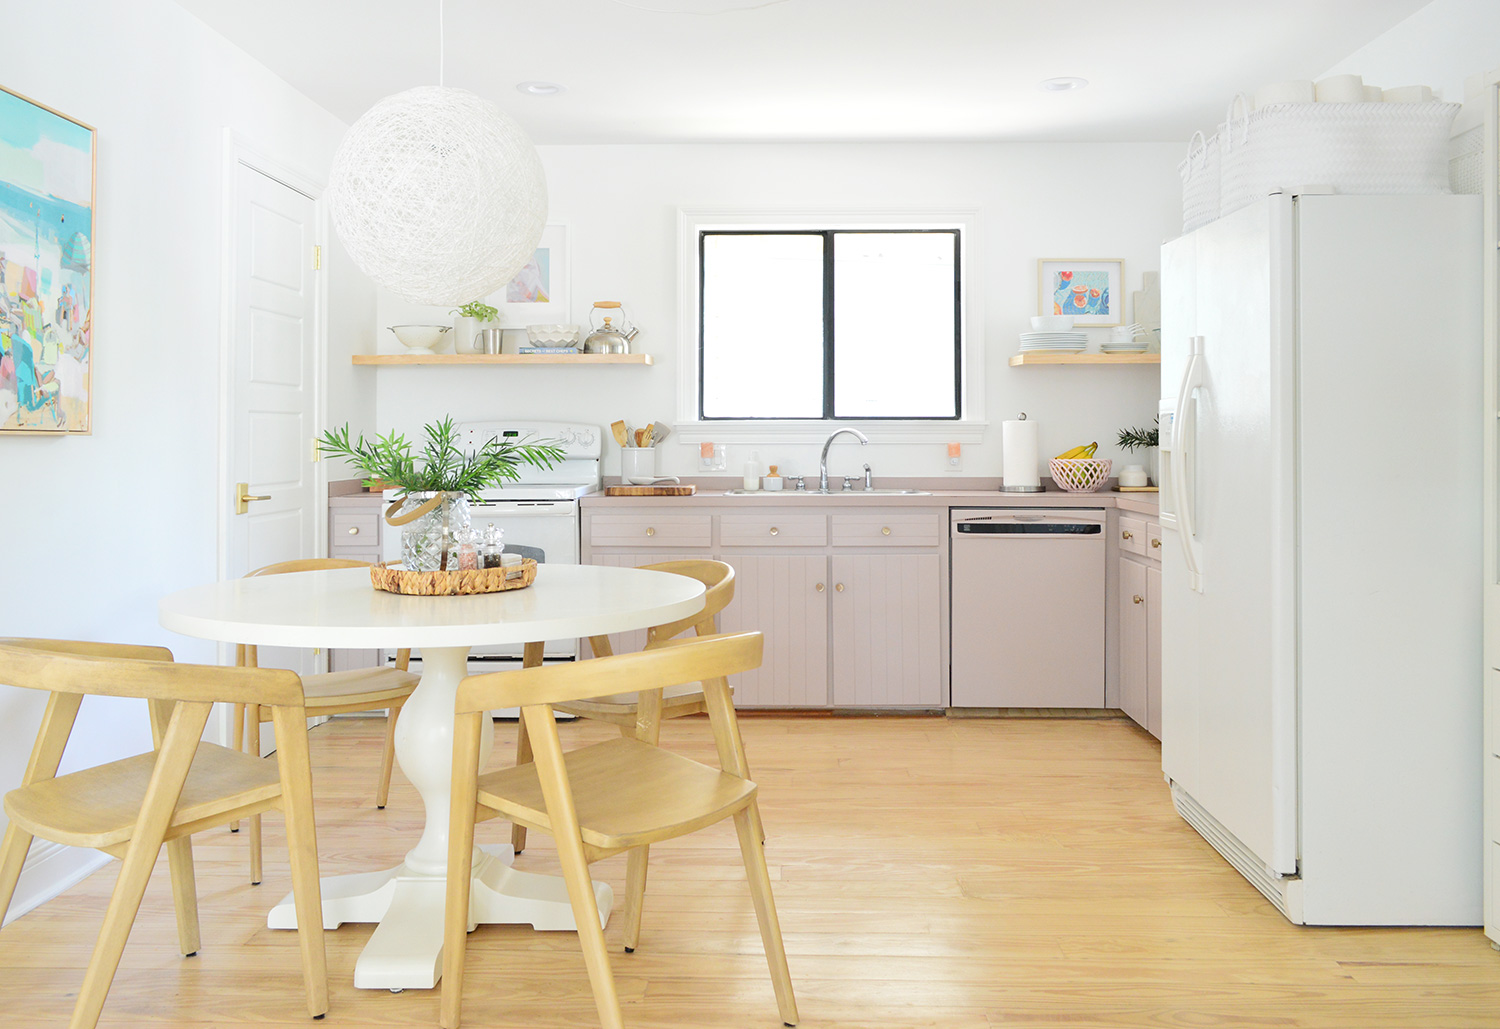
Kitchen Before Photo With Pink Counters And Yellow Walls

It’s hard to articulate how much convenience this setup has added to our lives, but again, game-changer is the word that keeps coming to mind.

So How Did We Improve It?

To see the changes we’ve made over the last year, and to get a sense of how functional this has become for us, you can watch this quick video tour Sherry filmed (keep an eye out for my cameo). It’ll give you a better sense of the flow and you can see some of the added function in action:

Note: You can also watch this video on YouTube.

Adding Outdoor Cabinets For Shoe Storage

As you saw in the video, the biggest improvement we’ve made since you last saw it was the addition of these two cabinets. They’re specifically made to be outdoors and they slip perfectly into the space, in a spot that used to be taken up by a wicker console table that Sherry found on the curb, which was pretty but offered us about 89% less function (zero concealed storage and a woven rickety top).

The #1 thing these outdoor cabinets do is provide convenient outdoor shoe storage. Since we don’t have a mudroom or a foyer, having not one but two places where we can keep our shoes has been really helpful (we have a cube cabinet next to the front door with baskets where we also store shoes).

I know keeping them outside may seem like a recipe for disaster, but it has been several months (some of the hottest/most humid) and we’ve had zero issues with bugs/smells/moisture. Sherry jokes that the bugs would rather be in our lush plant-filled yard, and our shoes get some nice ventilation through the tiny cabinet slivers that are built in for airflow (again, these are made to be outside, so that bit of moving air is likely why they don’t swell/warp/fall apart). You can see more about that if you watch the video tour Sherry made that I shared earlier in the post, which is also where you can see Sherry open the other cabinet to show you what’s in that one.

The nice thing is that this is BONUS shoe space thanks to also having that indoor storage in our cubby by the front door. Plus, keeping our shoes outside helps minimize the amount of sand and dirt that gets tracked in.

The cabinets also create bonus counter space, which has been especially useful as a prep area whenever we’re grilling (you may have noticed my case of grill tools stored above the shoes). And the wood-framed concrete counter has proven to be very durable and weatherproof so far.

Beyond their function, they just fit so nicely in this space and we love that they look like an outdoor extension of the cabinets inside. It’s like our kitchen counter got lengthened by five and a half feet (and since the porch is covered, it’s usable year-round).

Adding A Water Feature

Maybe “water feature” is a bit of an oversell, but we’ve grown to appreciate the running water sound by our pool so much that we wanted to try to incorporate something that sounds nice on this side of the house too.

So we bought this water fountain as a self-contained, all-in-one kit (you literally just put the ball on top, fill it with water, and turn it on). Super easy. We especially like that the green patina ties into our copper rain chains and the sound is really nice (you can hear it in the video).

We’re considering moving it down into the yard at some point, we just have to figure out the electrical situation first. But for now, it’s just plugged into the outlet up here.

Creating A Hammock Zone

Sherry mentioned on Instagram that we doubled our backyard pool area by shifting the fence back (we’ll write a post about that as soon as it’s more settled). And as soon as we earned that much bigger pool yard, we moved our firepit over there, which means we can do more entertaining all in one spot. Think kids swimming while adults enjoy a fire, which we often do at our friends’ houses so we knew we’d like it.

Moving the firepit left an unused zone in our side yard – which is just beyond the kitchen porch. The kids have been excited to have a hammock, so we bought one and it fit perfectly right in the old firepit spot.

Actually, we bought two hammocks. The fabric one we ordered first turned out to be really uncomfortable (IMO, at least – your back can’t arch very much so you feel like you’re splayed out and kind of flat) so we returned it and got a much-cheaper-yet-superior traditional rope hammock instead. It has quickly become a favorite reading spot for all of us (and a stellar napping spot for me). The only downside is that I feel like I’m cheating on our outdoor daybed, which used to be my go-to spot for such leisurely activities.

John Laying In Side Yard Hammock Amongst Tropical Plantings

It has been especially great these last several weeks thanks to the fall weather around here. There’s like no humidity, but it still gets into the 70s and 80s each day. But even when it’s on the hot side, the hammock gets some great shade!

View From Hammock Up To Oak Trees

I know it sounds like I’m gushing (bragging?) but again, we’ve just been really happy with how this whole side of the house has come together. Next on our list is to get some more permanent walkways and then just continue to turn it into a plant-filled haven (as you can imagine, Sherry is ON IT every time we go anywhere near a plant store).

So Why Did I Resent This Porch At First?

Okay, back to my confession about having mixed feelings about this space at first. It really had nothing to do with the space itself, just the timing of… things. Part of the reason we embarked on updating this zone – fencing the side yard, adding the new door, redoing the porch, etc – was for our 15-year-old dog, Burger. We wanted to create a fenced area where he could easily go to be outside, sleep in the sun, go to the bathroom, etc. Up until then, he’d been using the front door for those “activities” and, since that yard wasn’t fenced and was right by the street – it always required supervision. And, in the case of bad weather, also an umbrella.

Burger Dog Peeing In Front Yard With John Holding Umbrella

Yes, I was the Fonzworth Bentley to Burger’s P Diddy. Or should I say his Pee Diddy?

Anyway, renovating this porch was definitely for us human Petersiks too, but it was also specifically for Burger. Sadly, he died less than a week after we finished it. We’re grateful he got to use it for a few days (look how happy he is in the photo below) but somewhere in the grief of his passing, I felt like I hated this porch sometimes. I don’t know if I was mad at us for not renovating it sooner, or at the universe for the cruel timing of it all. I’m fully aware that the feelings were misdirected, but that’s the best way I can explain how it felt at the time.

It’s been over a year now and thankfully my feelings have sorted themselves out. We still love and miss Burger every day, but it’s easy to fully appreciate how vital this space has become for our family every time we walk out there – the convenient door, the added storage, the extra counterspace, the grill near the kitchen, the closer path to the car, etc. We also find a lot of comfort in how much our dog Penny enjoys the space. It has been great seeing her use it in all of the ways we had hoped Burger would. Especially when they hang out “together” (note the little metal chihuahua we put in the corner in Burger’s honor).

Penny The Chorkie Dog Sleeping At The Base Of Tree In Side Yard

I hope that’s not a bummer way to end this post (about a simple porch, no less!) but it feels nice to be able to appreciate how hard this area works for our family, and to reflect on how much we all enjoy it now (even if it took me some time). This whole side of our house was pretty useless when we moved in, so we’re proud of how it has come along. Now if you’ll excuse me, I have a nap to finish in the hammock.

*This post contains affiliate links, so we may earn a small commission when you make a purchase through links on our site at no additional cost to you.

How We Built Modern Wood Nightstands From Butcher Block

How We Built Modern Wood Nightstands From Butcher Block

For the first time in our lives, after four decades of living on this planet, we’ve upgraded to a king sized bed! We’ll get more into whys and hows in an upcoming post (it’s both bigger and significantly lower) and we see the obvious irony of owning a bigger bed in our smaller house – but let’s just summarize it as: “the things we do for our dog.”

You’ve also probably heard this before, but sometimes the way to feel like you’re living large in a smaller space is with fewer larger furniture pieces (as opposed to a bunch of small dollhouse-scaled furnishings). There’s such a luxury to having a nice long 90″ sofa upstairs, a big 72″ table that seats up to 8 people in the kitchen, and truly, it has been glorious to have such a giant bed. Like, two people who never cared about a king bed now actively wax poetic about it every day, and our entire family regularly piles in to read or hang out on lazy weekends.

The upgrade did come with one tradeout. Upgrading to a larger bed meant we had to swap our larger side tables out for smaller ones that *perfectly* fit the space.

Thankfully we don’t really store very much in our side tables (as long as there’s room for a lamp, some books, and a glass of water we’re good). So yeah, maximizing the size of the thing you actively relax on and sleep on was a fair trade for minimizing our side tables.

And today, we’re sharing how we whipped up these custom nightstands (you can make them any size you’d like to fit your room like a glove!) with a somewhat unusual material. Nope, it’s not scrap wood or two-by-fours (or pallets – remember all those furniture tutorials?). We actually used a butcher block countertop to make these two chunky solid wood side tables.

Why Build Custom Nightstands?

By now you know that our old bedside tables no longer fit along the wall with our new king sized bed in place, but why not just buy something already made? We realized that in order to maximize the room with a bigger bed, it would be smart to shift it slightly off-center on this wall. It’s only by a couple of inches (and not super noticeable – especially due to a secret about our bedroom that we reveal in the video below this picture), but that slight shift makes it much easier to access our closets which are both located on this side of the bed.

Shifting the bed a few inches off-center meant that my side could accommodate a slightly larger nightstand than Sherry’s. And before I sound like the bad husband for claiming the “bigger” side, Sherry’s side actually has more walking space due to that aforementioned secret that’s revealed in the video below. So yeah, watch that and let us know if you ever noticed that our room does that – because we hear that most people who have followed along for years had no idea!

A Quick Bedroom Tour On Video

Not to spoil the ending or anything, but a lot of this will make more sense if you watch this short video Sherry shot of the finished nightstands. In it you’ll see:

  • Why we needed two differently-sized nightstands
  • How we maintained room for the closets to open
  • What the wall of the bedroom does on Sherry’s side of the bed
  • What we store behind the closet door that’s fully blocked by the nightstand
  • One side table modification we considered (if you want a lot more storage, we have a quick tip for you in this video)

Plus you’ll get a sneak peek of how that whole back wall of our bedroom is shaping up with the new bed!

Note: You can also watch this video on YouTube.

Weighing Our Options (& Saving Money)

Long story long: this slightly asymmetrical situation left us with a few options for getting new nightstands:

  1. Finding matching nightstands that (miraculously) came in two slightly different sizes
  2. Embracing that non-matching nightstand look
  3. Getting two smaller nightstands, and leaving a little gap on my side
  4. Build our own!

All of the options had potential (except for maybe #1) and since our desired measurements were pretty specific, we decided to make our own.

Plus, like many DIY options, we realized we could save ourselves quite a bit of money compared to some of the nightstands we were finding online. We knew we wanted something with clean lines and a modern chunky wood look – and many of the storebought options were surprisingly pricey… especially if we had to buy two!

The good news is that our final cost for BOTH nightstands was just $310 – which was the cost of the butcher block counter we bought and the oil we used to seal it. That means each one breaks down to about $155 for a super substantial solid wood nightstand. Not bad!

Materials & Tools Needed

We knew this butcher block material would be great for recreating the look we wanted. We’ve used it elsewhere in our house, most recently in our utility closet as well as to top some Ikea cabinets in our bedroom (post coming soon) and we love it because the thickness can really elevate a store-bought cubby or an Ikea cabinet. Plus we already knew the color looks great with our floors. But if you’d rather use something other than butcher block, you can still follow the same technique with any wood of your choice.

Step 1: Plan Your Build

Even though the butcher block slabs are cheaper than those store-bought nightstands (the island size, 72″ x 39″, is $300) it’s still pricey, so we really wanted to get TWO nightstands out of ONE piece of wood. So Sherry and I sketched out a few options, crunched some measurements, and came up with a design that 1) we were excited about and 2) didn’t waste wood.

Sketches Of DIY Nightstand Ideas On Notebook Paper With Dimensions

You can see from my rough drawings above that we debated a blocky “8” design with three horizontal surfaces (more on that in the video we shared above) but we ultimately scrapped the bottom shelf (leaving it more like a blocky “A” instead) because it would keep the nightstands lighter and it honestly didn’t feel necessary (we didn’t need space for a basket or a folded blanket or something that would fill that larger cubby it would have created). Bonus, it’s easier to clean under for Eufy to clean under!

Step 2: Cut Your Butcher Block To Size

The careful planning and measuring gave us a clear plan for the size of each piece that we needed to cut. So first, using a circular saw, we cut the butcher block island twice down the center area to give us two 18″ wide slabs. Each slab would become one, 18″ deep nightstand. Alternatively, you could cut it exactly in half, one time (which would leave you with two 19.5″ slabs) but that would’ve made our nightstands too deep because it would have blocked access to my closet door.

John Cutting Butcher Block Island Counter Top In Half With Circular Saw

I realize my front porch “workshop” leaves something to be desired, but it gets the job done. Also: wear safety goggles. I got them on right after that shot above (see the picture below). And as for working on our front porch, it’s actually a nice flat surface that I can spread out on. And don’t worry, I make sure that we never cut the top of the actual decking. We spin the piece around to finish our cuts so the blade is always hanging over the step (like you see below).

Once I cut my two 18″ slabs, I measured carefully and cut each into the 4 pieces needed for each nightstand: 1 top, 2 sides/legs, and 1 shelf. Although, actually, I waited to make my final shelf cuts until the other 3 pieces were assembled. That way I could double-check my measurement one last time for a tight fit.

John Cutting Butcher Block Using Circular Saw On Porch

You’ll also notice we use painters tape on each of our circular saw cuts. This not only gives me a surface to draw a straight line on (without marking up the actual wood) but it also can help you make a smoother cut with less chipping and splintering. Also, I’ve tried a couple of circular saw guides (like this one) and find that I do better free-handing my cuts – but they’re an option for you if you want to give them a try.

Step 2: Mark Your Pieces

After my cuts were made, we roughly balanced the tops on each set of legs to check our progress. We also used this step to decide which parts we wanted to show – like what side of each piece of butcher block looked the best, had the fewest knots, etc.

DIY Nightstands Roughly Assembled From Butcher Block

Once we determined our layout, we used painter’s tape to loosely mark the orientation of each piece. The long pieces along the inside of each side piece were especially helpful to remind us once we proceeded to the next step: drilling our pocket holes.

Pieces of Butcher Block Nightstand Laied Out And Marked With Tape

Step 3: Drill Pocket Holes In The Legs

To attach the side pieces to the top piece, we wanted to screw up from the inside of each leg into the top – that way we wouldn’t have any visible holes on the top of the nightstand. To do this, we used our Kreg Jig to drill three pocket holes on the inside of each leg (this is where our tape markings helped remind us where to drill). Here’s where you can learn more about how to use a Kreg Jig. It’s an MVP tool we’ve had for over 12 years!

Drilling Pocket Hole Into Butcher Block Using Kreg Jig

I drilled all of the pocket holes for the legs in one step since it saved me from switching out my drillbit back and forth for the next step.

Step 4: Clamp & Screw The Legs To The Top

With our pocket holes drilled into each leg, we turned the top piece upside down and clamped one leg in place using this clamp designed specifically for pocket holes. This helps keep it precisely in place while you drill, so you don’t have any last-minute shifting.

Kreg Pocket Hole Clamp Holding Butcher Block Nightstands Together During Construction

With one end securely clamped, we carefully screwed through the other open holes using 2″ pocket hole screws. Once those were secured, we removed the clamp and screwed through the last pocket hole.

Attaching Nightstand Leg Using Pocket Hole Screw From Inside

Then we just repeated the process on the other leg, and then again for both legs of the second nightstand.

Assembling DIY Butcher Block Nightstand With Pocket Hole Screw

Step 5: Repeat This Process For The Shelves

With the top and sides attached, we measured the precise length for each shelf and made our final cuts using our circular saw. Then, we broke out our Kreg Jig again to create three sets of pocket holes on BOTH ends of each shelf piece (being sure to drill them on the underside).

Drilling Pocket Holes Into Nightstand Shelf Using Kreg Pocket Jig

Next, to attach each shelf, we laid each nightstand on its back and set the shelves in place (we had cut them to be such a tight fit they basically held themselves upright). Finally, we screwed them together just like we had done before.

Attaching Shelf Inside Butcher Block Nightstand DIY Build

We chose a 5″ gap for our shelf, but it’s really up to you. We had tried something a little bigger at first but it almost looked like we had mismeasured the halfway mark when standing above it and looking down (beware of those perspective-related optical-illusions!). So the smaller 5″ spacing made the shelf look more intentionally placed towards the top of the table, which we really liked about the shape of table #4 below:

Plus, it’s turned out to be super functional for us! Look how many books it can still hold!

Step 6: Sand The Edges

To make sure all of the edges, especially the cut ones, weren’t too sharp – we gave all of the exposed corners and edges a quick sanding with some medium- and then high-grit sandpaper, just to round them off ever so slightly. That way if we bump against these or reach over haphazardly in the night, we’re not gonna slice ourselves open on some raw edge of wood.

Sanding DIY Butcher Block Nightstands With Mouse Sander

Just be sure to thoroughly wipe down or blow off any sanding dust before proceeding to the next step.

Step 7: Seal The Butcher Block With Oil

We’ve found our favorite way to finish off this butcher block is with a single coat of Cutting Board Oil. It darkens the wood a bit and brings out the grain nicely, while also sealing it. It’s extremely easy to apply.

Cutting Board Oil Bottle Before Applying To DIY Butcher Block Nightstands

We typically pour a small puddle directly on the butcher block and then wipe it around with a rag or paper towel until it has all soaked in. It definitely lightens up a little bit as it dries, so don’t be too alarmed if it feels much darker than the wood you’d just been staring at moments before.

Applying Cutting Board Oil To Seal Butcher Block Bedside Table

And of course, if you’d like a more specific color you can always apply stain or sealer instead.

Step 8: Let Dry & You’re Done!

We gave our nightstands about a day to dry before putting them in place, and we’re really happy with how they turned out!

They fit perfectly on each side of our bed, just as we had planned, while also giving us more function than we originally thought we’d get. This is because at one point Sherry had planned on just using a garden stool as her side table, so having an entire cubby for books and the sound machine is a real coup. Yes, that’s how into a king bed we have now become. She was willing to use a garden stool as her nightstand without hesitation.

We’ve considered storing things underneath – like a basket or something we can slide in and out – but every time we’ve put anything down there it just looks unnecessarily cluttered and we don’t need the space. So unless we actually need to store something there down the line, we’re happy to leave it empty. Plus, it really is a sight to see our robot vacuum happily spinning around to get each corner in there.

My nightstand is 22″ wide, so it has given me plenty of surface space for books, chargers, a lamp, our Alexa, and even a plant. In fact, it usually has more on here (like a water bottle, baseball cap, or a rogue Skittles wrapper) but I tried to be less of an animal for these pictures.

Sherry’s is definitely a bit narrower at just 19″, but she found this small woven storage basket that wrangles all of her bedside stuff – contact lenses, chapstick, nail clippers, and what I assume is a large collection of poems professing her love for me. (What?! They’re her blue light glasses? OK fine.)

Sherry’s side may look cramped in these photos, but if you watch the video you’ll see that she’s got plenty of space to move around thanks to that *special* wall in our bedroom.

We’re planning a larger bedroom update post that’ll have more info about why we decided to upgrade our bed, along with some extra closet space we’re about to earn (just waiting until that’s complete to take photos & share how the whole room has shaped up). Also if you thought to yourself “that bed wall might be nice with some more color or texture on it” – we’ve had the same thought, so stay tuned…

More DIY Building Projects

Here are some other DIY furniture projects and easy builds you might be interested in – especially if you’re looking to add some extra wood storage.

Grid of Four DIY Building Projects | Bedside Bookcase | Plywood Shelves | Modern Fireplace Mantle | Rustic Floating Shelves

*This post contains affiliate links, so we may earn a small commission when you make a purchase through links on our site at no additional cost to you.

What We Still Have 2.5 Years After Downsizing

What We Still Have 2.5 Years After Downsizing

Settle in. This post is a DEEP DIVE. One of those long detailed dissection/reflection posts that feels like the blogging days of yore. So if you love those & wanna grab a cup of coffee and go on a little journey with us – today’s the day. We’re about to dive into:

  • Tips and insights we gleaned about downsizing over the last few years
  • What items from our larger home came with us & worked
  • WHY we think that is
  • What we learned in hindsight about packing for a move

This whole post idea came to us when we were in our downstairs sitting area recently and we realized that a lot of the furniture hadn’t moved with us from our previous house in Richmond. The loveseat, the chairs, and the coffee table were all purchased after we moved here to fit precisely into this new smaller sitting area that we slowly figured out over time.

Conversely, things like the rug, the tray, the vase, the planter, all of the art, and a nearby bookcase were from our last home. So it made us wonder: how much of our old furniture & decor still exists in year three of our downsized house? What do we still love so much – a lot of which we’ve had for over a decade? And why did some things have a better shot at staying forever in our smaller home while others didn’t serve us as well as we hoped?

We wish we could have put only what would fit perfectly in our new house into that 16′ pod that we moved all of our worldly possessions in – but downsizing doesn’t come with a crystal ball. We certainly had measurements of rooms and did some pre-planning but nothing really compares to landing in a new space and trying a few layouts to see what feels best in person.

There’s also nothing inherently wrong with getting new things that fit the size or shape or needs of a new house – especially if you’re sizing way down and need to squeeze in as much function as you can (we went from 3150 square feet & 14 rooms to 1400 square feet and 6 rooms (only 1 of which is a bathroom). That’s exactly why we sold half of our last house’s furniture with the house – because we knew it all wouldn’t fit, so we made our best guesses about what might move with us and work when we landed (even if some items landed and worked for a bit and then were craigslisted or donated for “the actual long-term solution”).

This is our last house’s bonus room, almost all of which was purchased by the new owners (except for the pedestal table, which we tried as an eat-in kitchen table for a while at our new house). You can see a full tour of what items we sold to the new owners, including side-by-side photos of rooms before and after we packed them up.

Downsizing feels like a mix of surrounding yourself with things that make you *THE MOST* happy and work *AS WELL AS THEY CAN* for you (and gleefully getting rid of all the rest!) – but the result is definitely going to look different for everyone.

We made our own “this is coming with us” selections based on:

  • Measurements (some things just plain wouldn’t fit)
  • Previous experience (did we use it in our last house? if not- bye!)
  • Educated guesses (again, there’s no crystal ball)
  • Functional considerations (would this rug trap 6 pounds of sand in a beach house?)
  • Good old-fashioned gut feelings (“I feel like I won’t miss this” or “I’ll regret not having this”).
  • Emotional attachment to sentimental items (we treasure meaningful things, even in a smaller home)

There isn’t an easy A + B = C equation I can share, but that’s how we evaluated things going into the big blue pod outside. And looking back on what lasted through this big transition a few years later has been pretty illuminating (let’s just say a lot of lessons are “very visible” in hindsight – so we’ll share those with you after sharing what stayed.

I’ll kick this off with one more tidbit of advice that works for literally any homeowner, whether you’re moving into a mansion or a one-room studio: be open to letting your new home evolve. Just like all of the houses we chronicled before it, our downsized home definitely took shape over time. Trail and error, and seeing how you actually use a space, definitely leads to the very best outcome in our experience. I mean, this is what our sitting area looked like when we first landed. It was absolutely bananas.

Beachy sitting room with white shelves and large dressers with floating chairs and baskets
rug / chairs / similar dresser / bookshelves / pouf ottoman / similar basket table

That picture makes us laugh so hard in hindsight, but man, we were just trying things and using what we had while we learned how we’d actually use this space and inched towards something that might work better… which I’m pleased to say eventually happened.

View Of Beachy Seating Area Looking Towards Front Door
coffee table | chairs | loveseat | similar storage cube cabinet | rug | similar tray

So yes, items came in, and they did the hokey pokey, and they moved all around. Like the bookcases that you see in the bananas photo above this one, which went upstairs where they fit like they were made for that wall (*insert the angels singing sound and praise hands here*).

Light filled upstairs family room with Ikea fjalkinge shleves and west elm Parsons desk

Some things found a better spot for the long haul. And some moved listlessly from room to room until we faced the music that they weren’t serving us as well as some other items in a better size or shape could (so they got donated or Facebook Marketplaced).

Like the white and gray 6-drawer dressers you also see in that bananas photo that we’re revisiting above. We realized the only dressers we kept are all narrower 3-drawer ones. Go figure that they fit better and make the most of the space in a smaller house (and can double as a nightstand, like the dressers in our daughter’s room below).

What we’ve definitely found to be true is that new spaces – especially smaller ones – may require specific types or sizes of furniture that may not have worked in your old home. The loveseat in our sitting room is a great example.

View Of Beachy Seating Area Looking Towards Front Door
coffee table | chairs | loveseat | similar storage cube cabinet | rug | similar tray

We never needed one before (our last house easily fit two generously sized sofas), so we left the biggest one behind knowing it wouldn’t fit in our new downstairs hangout area – and the other one came with us and lives on upstairs in the family room. Speaking of which…

The Upstairs Family Room

Had we been sitting upstairs instead on the day we had the “our kitchen sure has a lot of new furniture” feeling, we would have had the absolute opposite reaction, because our family room is FILLED with stuff from our last home. Literally almost every single furniture item in here is from our last house.

But upon further reflection, we realized maybe that shouldn’t have surprised us as much as it did. Our upstairs family room is the largest living space in this house – so, naturally, it can fit more items from our larger home. No wonder it was a lot less of a challenge than our small sitting area downstairs, which needed some customized things over time to “come together” (psst: that’s normal, don’t let anyone tell you that upon moving into a new place you have to have it all figured out in the first month or even the first year).

The funny part is that this room basically absorbed the function of THREE separate rooms in our old house, and serves us SO WELL because of how multifunctional it has become. Let’s look at those three rooms from our old house…

Our Previous Home’s Office:

Perhaps the most familiar-looking zone that was absorbed into our big room upstairs is our old office area. We no longer have a dedicated room like we did in our last house (seen below) but we still recreated the set-up of our Parsons desk flanked by two Ikea Fjalkinge shelves. It’s a definite upgrade to have three windows along that wall now (our desk view = 100).

That Parsons desk is actually one of the items that we’ve had the very longest of any piece of furniture we have ever owned. It was a wedding gift to us in 2007 and it has definitely stood the test of time. I mean, it’s 15 years old and counting! Still looks new, which definitely helps an item have longevity, along with a classic design that doesn’t ever feel dated. Totally makes sense to me why we still have it.

When we slid it in front of that middle window, we realized we could remove the two back legs so the back of the desktop sits on the window ledge (thereby recessing about 5 more inches toward the wall, making it easier to pass behind it on your way out to the deck). Of course, we kept those back legs (who knows how things will evolve down the line), but that tweak alone made this desk even more flexible & functional than we thought.

If you scroll back up to that photo of our previous office, you’ll notice the metallic cowhide rug in there now sits in our downstairs sitting room. As for why this made the move and got to stay, it’s gloriously neutral, isn’t huge, and works so well to ground the sitting area without a rectangular border for the front door to get caught on. Honestly, I think a rug like this could slip into any number of places – for example, it could also work in our son’s room, and even upstairs by the art desk. It’s the LBD of rugs.

Our Previous Home’s Family Room

At first glance, our current upstairs TV area feels pretty different from our last family room (seen below). But some of the same anchor pieces are there, like our Crate & Barrel Lounge II sofa that we’ve had for 5 years now. And upon closer inspection of the picture below, we realized that even little things like the lamps and pink pillows are direct transfers from our old living space.

We also pulled in a lot of stuff from other areas of our last home to round out this new family room. The leather stools came from our beach house, the woven mirror came from our old office (scroll up to see it over the Parsons desk), and the side table under the mirror is actually two of our daughter’s old bedside tables wedged back-to-back to make it look like one extra deep side table for our old lamp & some books.

The rug upstairs is actually from our son’s old bedroom (seen below). It’s a HomeGoods find we’ve had since it was his nursery, over 8 years now (here’s something similar). It’s no mystery why this rug endures for us, because it’s neutral so it can slip into practically any room with any colored furnishings. We also really like the subtle yet interesting design, it’s comfortable and soft, and it was the right size for our new family room.

Our Previous Home’s Art Room

The last of the three zones that we squeezed into our new family room is our kids’ arts & crafts space, which is a reincarnation of the homework / art room we made in our old home’s guest room (seen below).

We had less wall space to work with in this new house, which we knew based on our measurements – so we donated 1 of the 3 drawer bases and swapped out the two 6ft counters for one 8ft counter (so technically it’s a new top, but we just reordered the same faux marble laminate again because it has worked SO WELL for a mess-friendly space like this).

We moved the old chairs with us, but eventually replaced them with slimmer armless ones that fit better next to each other and can also be pushed in all the way without scratching the top of the arms (which happened to the old ones over time).

Little things like the lamp (here’s a similar one), the pink letterboard, the gold picture frames, the basket (similar), and our printer (similar) were all things that survived the move and were easy to find a spot for. Generally, the smaller items that we truly loved and kept above all other less-loved decor-ish objects easily slipped into our smaller home. Just gotta get rid of the filler stuff you don’t really love as much or use (one example is don’t downsize with 12 vases, think about the 3-4 you always use and donate the rest).

Kids art desk made from Ikea dressers and laminate marble countertop with wood chairs

Our Outside Spaces

Our decks and porches are other places where we used some large furniture from our last house because, just like our large upstairs family room, they’re pretty spacious and can handle items that originally lived in a bigger home.

For example, our current front porch (above) still sports the woven egg chair that we got in 2014 and had on our old back porch (seen below). Forgive the old photo above, couldn’t resist a Burger cameo. We miss that sweet boy every day. Fun fact: the pile of dirt that you see beyond the hanging daybed is from the pool build! Memories.

Cover sunroom patio with tile floor and vaulted blue ceiling

The outdoor sofa and vintage black metal chairs seen above also made the move to Florida and now both live on our upstairs deck. That space is in a bit of a “transition” since we stole the dining table to try out in our twice-as-big pool area (if you missed my IG stories about pushing that fence back about 20′, we’re planning a big post about it once we’re further along and the fence is painted).

But here’s proof that those awesome vintage chairs and the outdoor sofa from Richmond are all alive and well here. I think we’ve had that blue drum stool for like 15 years too. Those can literally slip into almost any room or outdoor space!

Our Bedroom

The largest item that made it to our new bedroom is this blue inlay dresser that had been in the front bedroom at our beach house (one of my favorite secondhand finds of all time!). We sold the beach house furnished but swapped out a few things we loved beforehand – and this definitely made the list.

It now occupies a corner of our bedroom that we’d once slated to become a second bathroom. Those plans are on indefinite hold because although we expected to want a second bathroom immediately upon arrival here – we’ve all been just fine sharing one for the past 2.5 years. Heck, with the kids back in school it feels even easier than ever (since the first year here = at-home learning so all 4 of us were in this house pretty much nonstop).

Our bathroom-on-hold decision feels sort of like the spirit of downsizing itself. Embarking on a big dusty reno to add a bathroom feels insane to undertake until you actually want one, right? If our bathroom plans ever move forward (we assume they might when the kids are older maybe?) we’ve talked about converting my beloved inlay dresser into a bathroom vanity with plumbing and everything inside and a sink on top. That’s how much I love it. Of course, who knows, it might end up in another spot before then.

This is where it lived in the beach house’s front bedroom after I bought it secondhand and worked hard to repair it. It feels so beachy and intricate – it’s something I treasure.

That’s what downsizing is about. We don’t have ten dressers. We have 3 in the entire house. But they’re our 3 favorites of allllll time (the other two are wood inlay on the front – so they all feel so special and unique). As previously mentioned, they also all have 3 drawers and aren’t of the wider 6-drawer variety, which makes the other two able to double as nightstands AND clothing storage in our daughter’s room. Hooray for anything that’s beautiful and can work double duty. More on that in a sec.

Oh and that large glass vase on the inlay dresser two photos up? Here it is living in our previous dining room. It has been with us over 15 years and counting! Sometimes I think it’s a miracle we haven’t broken it in all these years – it’s often full of water and quite heavy! (I hope I didn’t just jinx myself).

Other Richmond holdovers in our room are smaller items – like the lamps (here are some similar ones), the gold frames, the pouf, and the woven belly basket in the corner (a HomeGoods find from ages ago – but here’s something similar).

You may remember those baskets from our old foyer (seen below), where they were largely just decorative. Yes, they usually had nothing in them except for random things the kids would put in there. Now we use the large one as a laundry basket in our bedroom and the smaller one as a trash bin next to the kids’ art desk (scroll back up to see it).

And speaking of our foyer, you may recognize that mirror in 3… 2…1…

Our Bathroom

The large capiz mirror from our old foyer is now the over-the-vanity mirror in our bathroom. So not only did we hang on to it, it gets so much everyday use in our one and only bathroom (and definitely sees a lot more toothpaste splatters than it used to too). It’s still holding up perfectly, and once again the key to this item sticking around is that:

  • A) We had the perfect spot for it
  • B) We love it

It beat some other more basic mirrors out because it’s *special* – we love the subtle pattern and the cool shape of the top. Overall, so glad we bought this (about 10 years ago from Serena & Lily), and I hope we have it forever & ever, amen.

The bathroom also sports gold frames and artwork that used to hang in our last house, plus a brass mobile is something we hung in the middle bedroom at our beach house and I’ve loved it ever since. If you’re wondering: do I take a mobile? Is that too random if I’m trying to downsize? I’d say… it’s tiny. If you love it, take it and see how it goes. We also took a second mobile with us (a seagull mobile we had in the duplex and that hangs in this house too!). We have since bought 2 other mobiles for a total of 4 in our six-room house. No regrets. Take what you love – especially if it’s small. The mobile isn’t going to make or break the pod or the moving truck 😉

White Writing Desk Against White Board And Batten With Pouf Ottoman Seats

The Kids’ Rooms

In addition to bringing things like our kids’ favorite books, toys, and stuffed animals, their rooms also have larger things from our last house like the big gold mirror in our daughter’s room below (it used to hang above the fireplace in our living room – scroll up to see it). It’s especially great above this desk because that whole area doubles as a vanity spot for her to get ready, but also multitasks as a desk for homework, laptop use, etc.

The inlay dresser you see reflected in the mirror above is also a holdover from our last house. We’ve had it awhile and it’s served various functions over the years, including about seven years spent being the only attractive thing about our walk-in closet before we made it over.

Walk in closet before renovation with dresser and hanging clothes bar

Not only did we bring that dresser from Richmond to Florida, we actually ordered another one shortly after moving because we love the idea of making them work double duty as bedside tables AND clothing storage. During this brief incarnation of our bedroom, they served as matching nightstands and worked as our only clothing storage in the room.

Florida bedroom with white walls and bedding with woven accents and traditional rug

Once we finally added closets to our room (this is an old pic but you get the idea)…

White beachy bedroom with ikea pax wardrobe closets along one wall

… we moved them both to flank our daughter’s bed – where they work as clothing storage for her as well as and bedside tables. We removed the black metal feet so they’re a nice height for her bed, but we’ve got the legs stored in our utility closet just in case. They’re hanging out in there with the back legs of the upstairs desk 😉

Our son’s room got a lot of built-in small space solutions – like a floating desk and bookshelf that we made ourselves (both of which you can see here), which feels kind of fitting since we built a lot of stuff into his last bedroom too. His rug is actually from our kids’ old art room, which you can scroll back up to see, and a lot of his pillows, baskets, frames, & planters/plants are from our last house too.

Of course, the majority of the small functional items we have are the same ones that we had in Richmond (like our silverware, plates, pots, pans, toaster, tools, etc) and the photos and rundown above pretty much cover the furniture/decor in the main spaces. There are a bunch of other items in random places like hallways – like the marble table below and pink rug that came from our old closet, but I don’t want to bore you with the minutiae of every vase or picture frame. Instead, let’s attempt to break down what this exercise made us realize about the downsizing process itself.

White hallway with wainscoting and picture frame collage and turkish runner rugs

What We Learned About Packing For A Move / Downsizing

1. Know The Big Spaces That Need Big Pieces

In retrospect, we wasted some space in our pod on a few big items that we didn’t end up having big spaces for in our new house (like those two aforementioned 6-drawer dressers). They were useful to us in the short term right after moving, but we’ve since sold/donated them. Looking back, I wish we had made more room the pod for extra outdoor furniture (maybe even some from the beach house backyard, shown below) because we have an abundance of porches & patios we’ve had to furnish here.

2. Hang Onto The Little Things You Love

If you have limited moving space, like we did with our pod, you might be tempted to foresake the little things like art, lamps, decorative objects, etc in favor of adding more big objects that could theoretically be more expensive to replace. But we’re glad we stuffed every last corner of the pod with the “small stuff” that had meaning or sentimental value (including the living plants we literally wedged between our kids’ car seats for the drive down). Favorite framed photos, lamps, and potted plants were easy for us to work into our new home, and they were a nice fast way to make the new house feel like “us” right away.

PODS Storage cube packed to edge with furniture and accessories

In the end, if it’s small and it’ll fit, just bring it along with you and donate or sell it at the new place instead of wishing you didn’t let go of that sweet art or mobile or lamp you loved. Note: this does not mean you should bring a single small item you feel meh about – this just applies to things you LOVE and items with sentimental value. Being discerning *before* you leave the old place makes landing and unpacking so much easier – so get rid of the excess “filler stuff” before you pack for sure!

3. Stay Flexible & Embrace The Evolution

As you can tell, we haven’t been rigid about things going in a certain room (or serving a certain function) just because they were used in a specific way in our previous house. For example, the white shelf below was a decorative shelf in our beach house living room, and now it’s functional kitchen storage for us here. Had we been stricter about where things went or what purposes we thought they had to serve, I think far less stuff would’ve survived the move and we would’ve had to purchase a lot more.

4. It Pays To Think Cohesively

I think most people tend to do this naturally, but keeping a similar style or “vibe” in mind for your house makes that flexibility thing much easier. You’ll have more options for where to put furniture and decor if a certain piece or room isn’t an aesthetic curveball compared to the rest of your house. That’s how we’ve been able to move dressers, rugs, mirrors, artwork, etc. around this house until we’ve found the right spot. Basically everything we have “goes” with everything else in our house.

One way we helped that happen was back when we packed the pod, we made sure the items we wanted to keep felt like they worked together. We made a decision to leave all of our huge, thick, deep-colored rugs behind, not only because they wouldn’t fit physically in many of our rooms, but they didn’t fit into what we envisioned for our light & airy place by the beach (or seem particularly sand friendly). Same with dark wood furnishings/decor – many things we loved the most were:

  • light wood
  • white
  • neutral
  • inlay
  • capiz
  • brass
  • marble
  • soft pink
  • light blue
  • pastel art
  • a buttload of plants

Look for a pattern & lean into bringing things that work well together! Note: don’t bring a single thing that works with everything else but is something you’re lukewarm about or never use. Trust me. Downsizing = being ruthless and leaving all that “filler stuff” behind (if it’s not your favorite you’ll end up storing it all the time & then it’s just completely unused cabinet clutter).

5. Be Patient!

Downsizing is definitely a journey and not a destination. It has taken years for our current house to come together, just like every other house we’ve ever owned. And for a LONG time, it looked kinda nutty as we figured out what worked where and what wasn’t working at all – just like every other house we’ve ever owned. Are you sensing a theme? Don’t beat yourself up about taking your time to find the optimal arrangement or the right pieces to make your house work best for your family. It’s often the only way to get the very best result.

I’m thankful that overall, we don’t really have any major regrets about things we brought or chose not to bring – likely because we really tried to rely on taking *only* the thing things that we love most and use a lot (and pretty ruthlessly cutting out the rest). It really can be that simple. It takes a lot of physical time to sort through it all – but that line of thinking is what we kept asking ourselves over and over again. And we’re glad we gave ourselves the time to figure things out when we landed in our smaller place and didn’t stress when, for instance, our bedroom looked like this for a few months. Ha!

Bedroom fireplace shortly after moving with random furniture along the wall

Oh, and one MVP of the move has turned out to be the most random thing: our white Ikea planters (you can see one in the picture above and another in the shot below). They’ve been such good staples over the years and we’ve had many of them since our first house. Yes, that makes them 15 years old! Again, it’s a miracle we haven’t broken them yet! (*knocks on wood immediately*)

I’ll leave you with one last thought. I think people who face the idea of downsizing are tormented by the idea of “what if I downsize this thing and then I really want it later” – especially as it pertains to something like a kitchen gadget. For example: “I never use the crockpot now… but what if later I get into it and have to buy one again?” Honestly, we had an old cobweb-covered crockpot that we never used so we donated it before this move and it has been 2.5 years and we DO NOT MISS IT. If you do, you can always buy something like that. But imagine how much more space you’ll have in your cabinets if you just have things you use in them.

Our actual experience is that we really can’t even remember, let alone list, a lot of things that we downsized and donated. If we didn’t use them presently in life at the time of our downsizing, that was the answer. Donate/sell pile. Heck, that works for if you aren’t moving too, and just want some wiggle room in an overstuffed drawer or cabinet.

I bet 10 out of 10 people who have majorly downsized will tell you the same thing. We don’t even remember what used to fill up our garage (don’t have one now!) or our giant walk-up attic. Ok, I know there were a lot of baskets up there – which was a sure sign that I wasn’t using them – but I never miss having a huge space to fill with stuff I’ll forget about for years on end!

Unfinished attic filled with wicker baskets and tupperware bins

I hope this big brain dump of a post is helpful or at least just fun to read and reminisce with us. We definitely loved looking back on everything that has made this big journey with us, and are so grateful for where we are in this moment – in a smaller house with plenty of beach & pool time (oh the perks of no yard to mow, no garage to organize, and only 5 rooms and 1 bathroom to clean!).

If you’d like to read more about our entire downsizing journey…

*This post contains affiliate links, so we may earn a small commission when you make a purchase through links on our site at no additional cost to you.