In our work as residential remodeling contractors over the past couple of decades, we have learned a few of the “hot spots” that consumers have when it comes to remodeling their homes.
More and larger closets, lots of windows, spacious rooms and more electrical outlets always seem to top the “dream list”.
While we believe that all of these are reasonable requests, it is our opinion that electrical should be the number one item. Aside from the convenience that a few extra lights, switches or outlets offer, the electrical system has a great deal to do with the safety of the home.
Elements of Home Electrical Systems
There are two primary elements of a home’s electrical system that relate to safety; the size of the electrical service and the condition of the system (wiring, breakers, fuses, outlets, etc.)
Most modern homes have an electrical main service rated for 100 amps. Many older homes have a main electrical service rated for 60 amps. The smaller service simply is not large enough to handle the electrical demand of the modern home.
Additionally, many of these older systems have knob and tube wiring, fuses and ungrounded wiring that aren’t considered safe by today’s standards.
Upgrading Electric Main Service
We believe that upgrading an electrical main service and rewiring a substandard electrical system is one of the best and smartest investments that a homeowner can make. No amount of money can compensate for the loss of life or irreplaceable personal property from a house fire caused by a faulty electrical system.
We don’t consider upgrading the main service or rewiring a house an average do-it-yourself project. Therefore, consult a professional electrician.
Your main service and wiring may be in good shape and all you want to do is add an outlet or two, or a switch and fixture box for a light or ceiling fan. The good news: A do-it-yourselfer can tackle this project.
The bad news: it can be a major undertaking, especially for homes built on a concrete slab or with no attic. Adding just one plug can mean cutting out wallboard, drilling holes in framing and “fishing” wires to new locations.
If this isn’t your idea of fun on a Saturday afternoon, you may want to consider the alternative; surface wiring.
About Surface Wiring
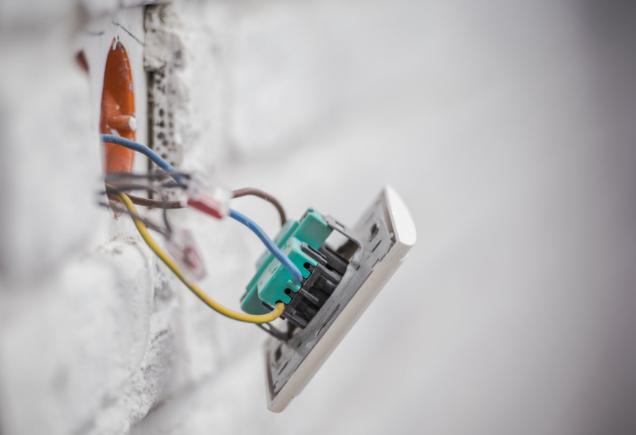
Surface wiring is a system of wires that simply run across the surface of a wall or ceiling but are concealed and protected by a decorative cover or channel. You can install surface wiring with little or no disruption to existing finishes. This can be a real plus especially when wallpaper or paneling is involved.
The disadvantage (and the objection that most folks have to this system): Surface wiring is difficult to conceal and “sticks out like a sore thumb.” However, with block, concrete or other material walls that make wire-fishing impossible, surface wiring might be the only practical choice. But note, this type of surface wiring system is not designed for exterior use. There are other surface wiring systems approved for exterior use.
Surface wiring systems consist of metal or heavy plastic components and can be purchased at most home centers. They come with an assortment of fittings to make installation as simple as possible. You can cut the material with a hacksaw, therefore eliminating the need for any power tools. However, a cordless driver/drill can make the job a lot easier. The only other tool required is a combination wire cutter/stripper.
Installing Surface Wiring
The electrical system must be in good shape before installing surface wiring. Do not overload an existing circuit by using too many appliances or devices simultaneously. However, adding a few new outlets to a circuit is seldom a problem. When in doubt, consult a professional electrician.
The installation process is simple. Begin by creating a diagram that outlines where the new outlet, switch or fixture is to be located in relation to existing electrical. Choose an existing outlet that will serve as the power source for the addition. Turn off the power to the outlet in question and remove the cover plate and the outlet to expose just the wiring. Attach a starter box to the existing outlet box and run the surface wiring system to the desired location. The new starter box has a dual purpose. It serves as both a junction box for the wire connections and also as an outlet. Turn the electrical back on after you make all connections.
Remember to consult with local building officials to determine if you need a permit and to ensure that the work complies with local codes.
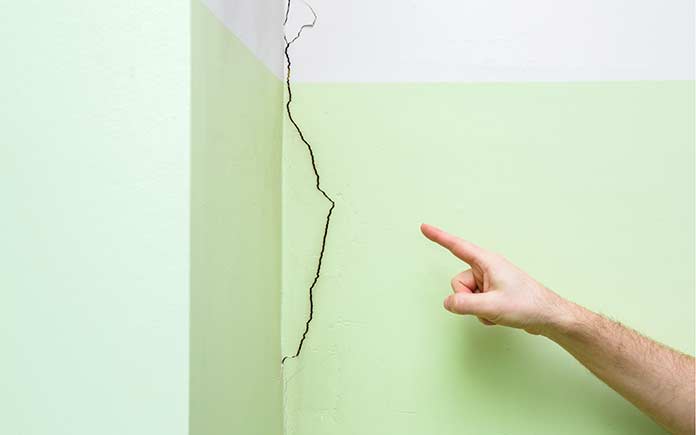
Shifting soil causes cracks in your walls and could be a sign of structural issues in your home.
Question
I bought a 10-year-old home in the spring of this year. The entire interior had been freshly painted. By late summer, two cracks developed on top of the kitchen door, one crack on one corner of a window and one horizontal crack in the hallway upstairs, about two feet off the floor. I recently discovered these hairline cracks. Is this normal? What steps do I have to consider to solve this?
Scott
Answer
The type of cracks that you describe and their location typically result from minor shifting of the home. This may surprise you, but your home is constantly moving on the soil on which it sits. Two factors determine to what extent and how often it moves. These include the type of soil, the topography of the ground that surrounds your home, the drainage systems that are designed to carry water away from the house, and, to some extent, the change of seasons.
Large amounts of water under and directly around the foundation of the house can cause the house to shift, and often cause cracking just as you have described.
Your cracks probably have recently appeared now because warm weather has dried the soil and the composition of the soil caused movement of the home. You can avoid this problem by taking the following steps:
Install rain gutters and downspouts around the house.
Grade all soil at the perimeter of the house so that it directs water away from the house. This goes for concrete patios and walkways — they should be poured so that water runs away from the house.
Don’t flood landscaping adjacent to and surrounding the house.
If the lots surrounding yours are higher, or drain onto your property, an extensive drainage system may be in order.
And, last but not least, make sure that there is proper ventilation under the house to reduce moisture or dampness. The most common method of crawl space ventilation is to use of vents at the perimeter of the foundation.
Ever struggled to loosen a bolt or a nut only to find you were turning it the wrong way?
Today you’ll learn how to tell which way is which, and when to reverse and switch.
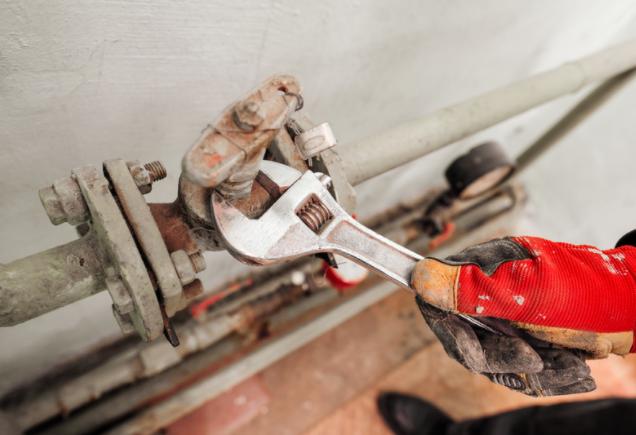
The easiest way to remember which direction tightens and which one loosens is the old axiom, Righty-Tighty and Lefty-Loosey. This means that turning most threaded things right, or clockwise, tightens them (Righty-Tighty), and turning them to the left, or counterclockwise, loosens them (Lefty-Loosey).
However, there are exceptions to this rule, like left-handed threads on things that are used to secure things that also turn clockwise (like the blade on a table saw).
So, if you run into a nut that just won’t give, before muscling it anymore, try switching direction.
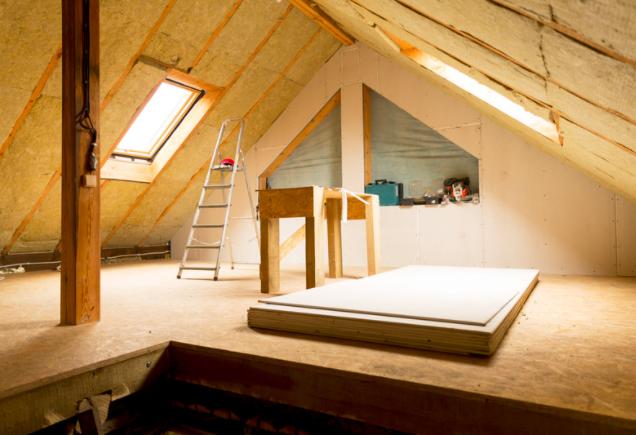
Picking the right face is essential with fiberglass insulation that has a vapor barrier facing.
The facing contains a thin layer of asphalt, which acts as a vapor barrier to block moisture. It can also be made with Kraft paper or foil attached on one side.
Properly insulated homes not only keep your family comfortable but also help with your home’s energy efficiency. Adding insulation, especially in your attic, can save up to $200 per year on your home’s annual energy bills!
Best Side Forward
It should always face the warm-in-winter side. use faced insulation with the paper facing toward the heated living space. Thus, in cold climates, it should face the interior; in hot humid climates, it should face the exterior.
Also, be sure to cut the insulation batts to fit in the space between the ceiling joists.
Problems with Wrong Side
If insulation with a vapor barrier is installed on the wrong side, moisture will be trapped inside wall cavities causing condensation to accumulate.
This results in a musty smell, and eventually will cause wood to rot; it could even promote a serious mold problem.
The Fix
Have you already installed installation wrong side up? Remove it immediately, and inspect the subsurface for moisture or mold before reinstalling or replacing it.
Whether you are remodeling and putting in new screen doors or repairing your current doors, there are so many mesh options on the market today — it can be overwhelming trying to determine the best material for your project.
Where do I start?
The good news is, by asking that question, you’ve already started. Here’s a handy checklist to assist you in your decision-making process
How important is maintaining aesthetics and your view of the outside?
What safety concerns do you have?
What size mesh will you need?
Consider your geographical location
Common species of insects in your area
What type, quality and color of mesh material will you need?
Aesthetics and View
In settings where screen doors are installed, consider not only keeping insects out but also creating, enhancing and/or preserving the view to the outside. In most cases, especially in peoples’ homes, choosing a mesh that is as invisible as possible is the first priority.
Then there is the ventilation factor. In locations where conventional swinging screen doors are an aesthetic challenge, such as the main entry, Retractable Screen Doors (RSDs) are a serious option for homeowners to consider. The rapid growth in popularity of RSDs is directly related to the increase in energy-efficient homes where natural ventilation is at a premium.
Often, the main entry door is frequently the only source of fresh air on a particular side of a home; so the only way to get good cross ventilation is to open the front door. RSDs are an affordable, practical and high-curb-appeal alternative to swinging screen doors.
Safety concerns
Screen doors, by design, keep bugs from getting inside, but they can only perform that function if the screen material is 100% intact.
Most of us don’t give any thought to the safety aspect of our screen doors until there’s a specific need to. That said, screen door accidents are an extremely common occurrence. People and pets walk into and through screen doors all the time. If you need proof, just Google “screen door accidents” or “people walking through screen doors” to see for yourself.
There is one screen mesh product that has addressed these safety concerns in a very unique and innovative way. It’s called VISISCREEN®. It has a patented density marker designed and woven into the screen door mesh that remains invisible at safe distances but becomes visible as you approach it, thus preventing common screen door accidents such as walk-throughs.
It’s manufactured by Seattle-based Aedes Technologies, aptly named for the Aedes Aegypti mosquito, which is responsible for the spread of the Zika Virus, Malaria, Yellow Fever and other diseases.
Interestingly, Genius Retractable Screens Systems, a leading retractable screen door manufacturer, is introducing a version of its Milano series that comes with the VISISCREEN mesh installed. You can learn more about it at visiscreendoors.com.
Mesh size
Screen mesh size is determined by the number of openings per square inch of mesh. For example, a number 4 mesh will have 4 openings per square inch; a number 16 mesh will have 16 openings per square inch. For screen doors, standard 18 x 16 mesh with a .011 diameter (wire thickness) is typically recommended to keep out common insects.
In areas such as Florida, known for no-see-ums and other tiny insects, 20 x 20 mesh with a .013 diameter is more effective at keeping bugs out, but doesn’t perform as well as standard mesh when it comes to light transmission and ventilation.
Material considerations
Vinyl-coated fiberglass mesh is the preferred industry standard for screen doors (and windows). It’s easy to install, durable and affordable. Your color options are charcoal and gray.
Another material option is aluminum wire. Apples to apples, aluminum wire is slightly more durable than fiberglass mesh and is available in charcoal, black and silver. Otherwise, there’s nothing substantially different between the two.
In fact, vinyl-coated fiberglass mesh outsells aluminum 3 to 1, as it’s about half the cost. There are additional specialty material options including Bettervue, UltraVue, Super Screen and Pet Screen.
Choosing the right screen mesh for your screen door project can be a challenging journey. Hopefully, this information has helped you navigate that road so you can enjoy many worry-free outdoor seasons in the safety and comfort of your home.
By Richard Grossman – Brand Engagement Maestro, VISISICREEN®
If you don’t use your dishwasher frequently, it could lose its functionality. Learn to protect so it will last a long while!
The first dishwasher was invented in 1892. Weary of servants breaking her dishes, Josephine Cochrane rigged a copper pot with stiff brushes and a motor. It worked so well she showed it at the 1893 Chicago World’s Fair and won first place.
Today, most homes have a dishwasher but unlike other appliances, the less you use it, the more likely it is to break down.
Why? Water that remains in the bottom is there for a reason. It keeps seals moist, preventing leaks and protecting the motor.
But, when the dishwasher is not used for long periods of time the water evaporates, seals dry out and leaks and motor problems become likely.
To prevent this, pour in a half-cup of liquid bleach. This will prevent bacterial buildup. Then add three tablespoons of mineral oil. This coats the surface of the water and prevents evaporation.